

Page 1

Get to Know
Your Phone
SONY
®
XPERIA® Z3 D6708
Page 2

Welcome to Verizon Wireless. You’re now
part of a growing movement that’s about
speed, signal and strength. This guide will
show you how to set up and use your phone,
access special features, and find help.
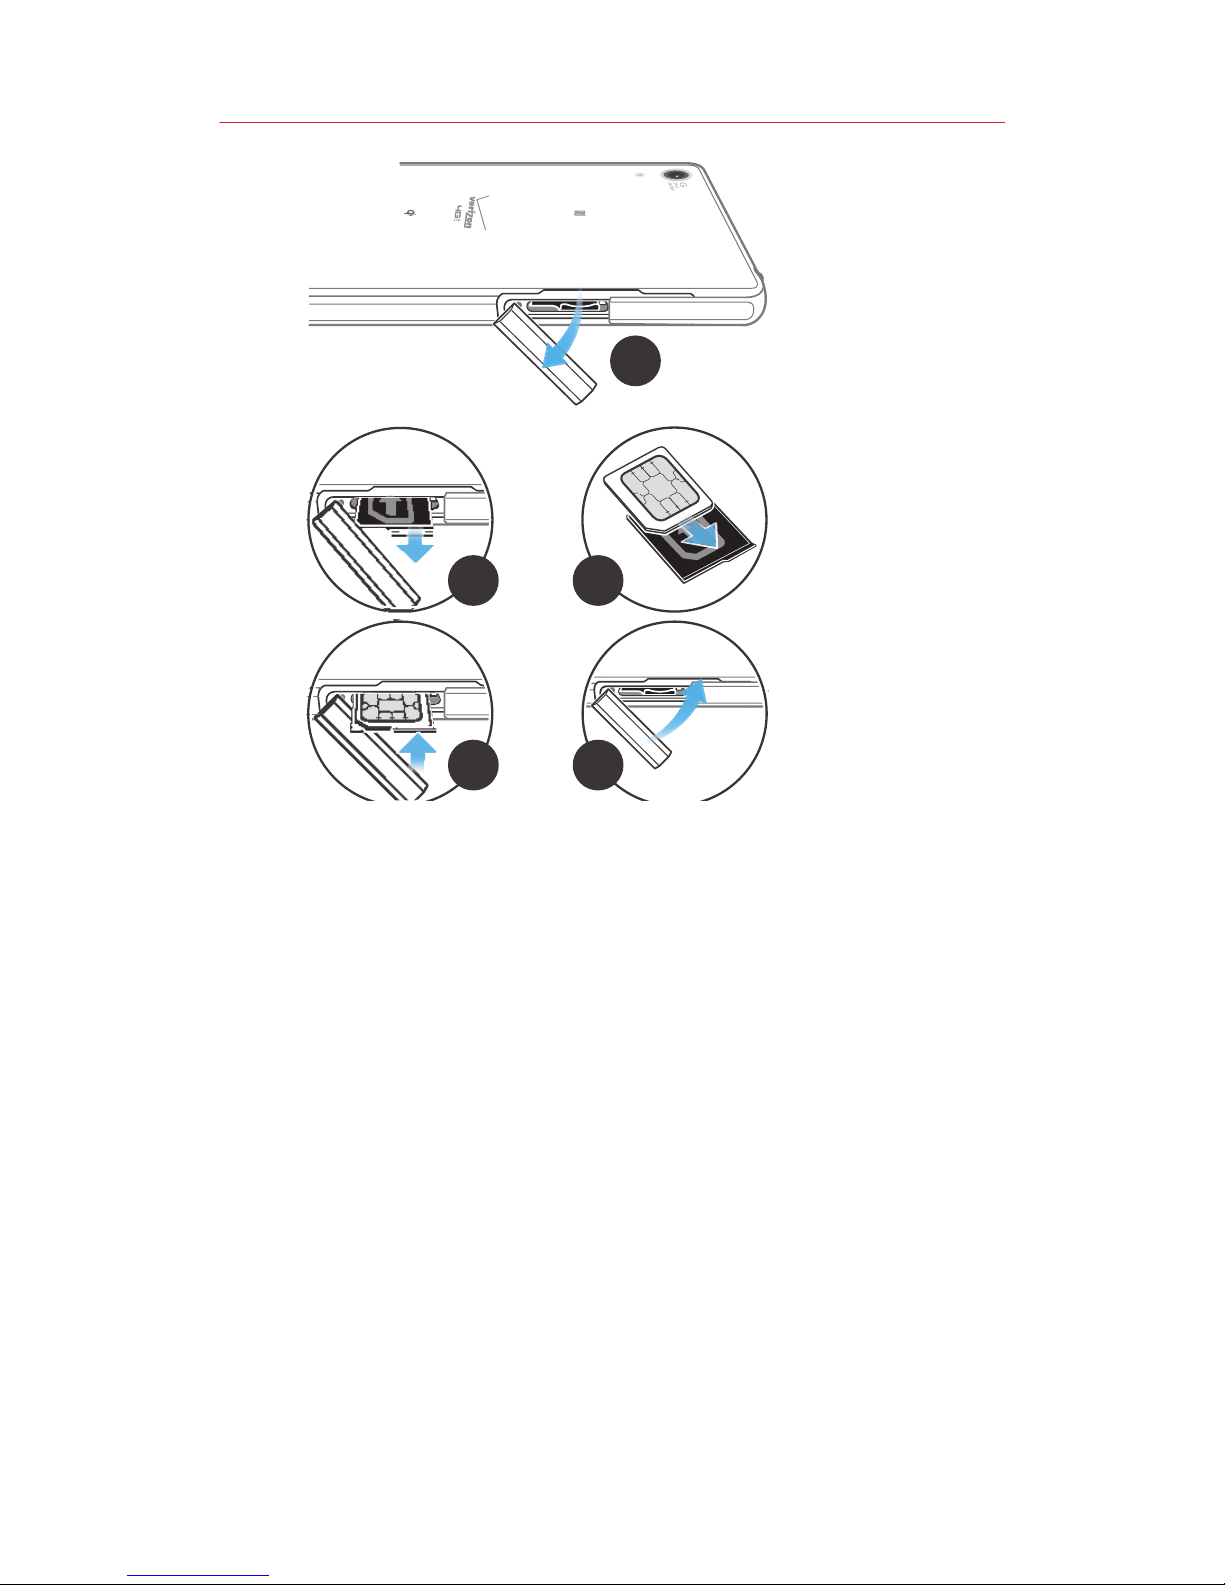
Insert the SIM Card
NOTE: If not already inserted, follow the instructions below
to insert your 4G LTE SIM card.
To insert the SIM card:
1. Open the SIM card slot cover.
2. Using a fingernail, pull out the SIM card
holder.
3. Carefully insert the 4G LTE SIM card into
the SIM card holder with the Verizon logo
facing down.
4. Push the SIM card holder back into place.
5. Close the SIM card slot cover.
Setting Up Your Phone
Page 3
1
2
3
4
5
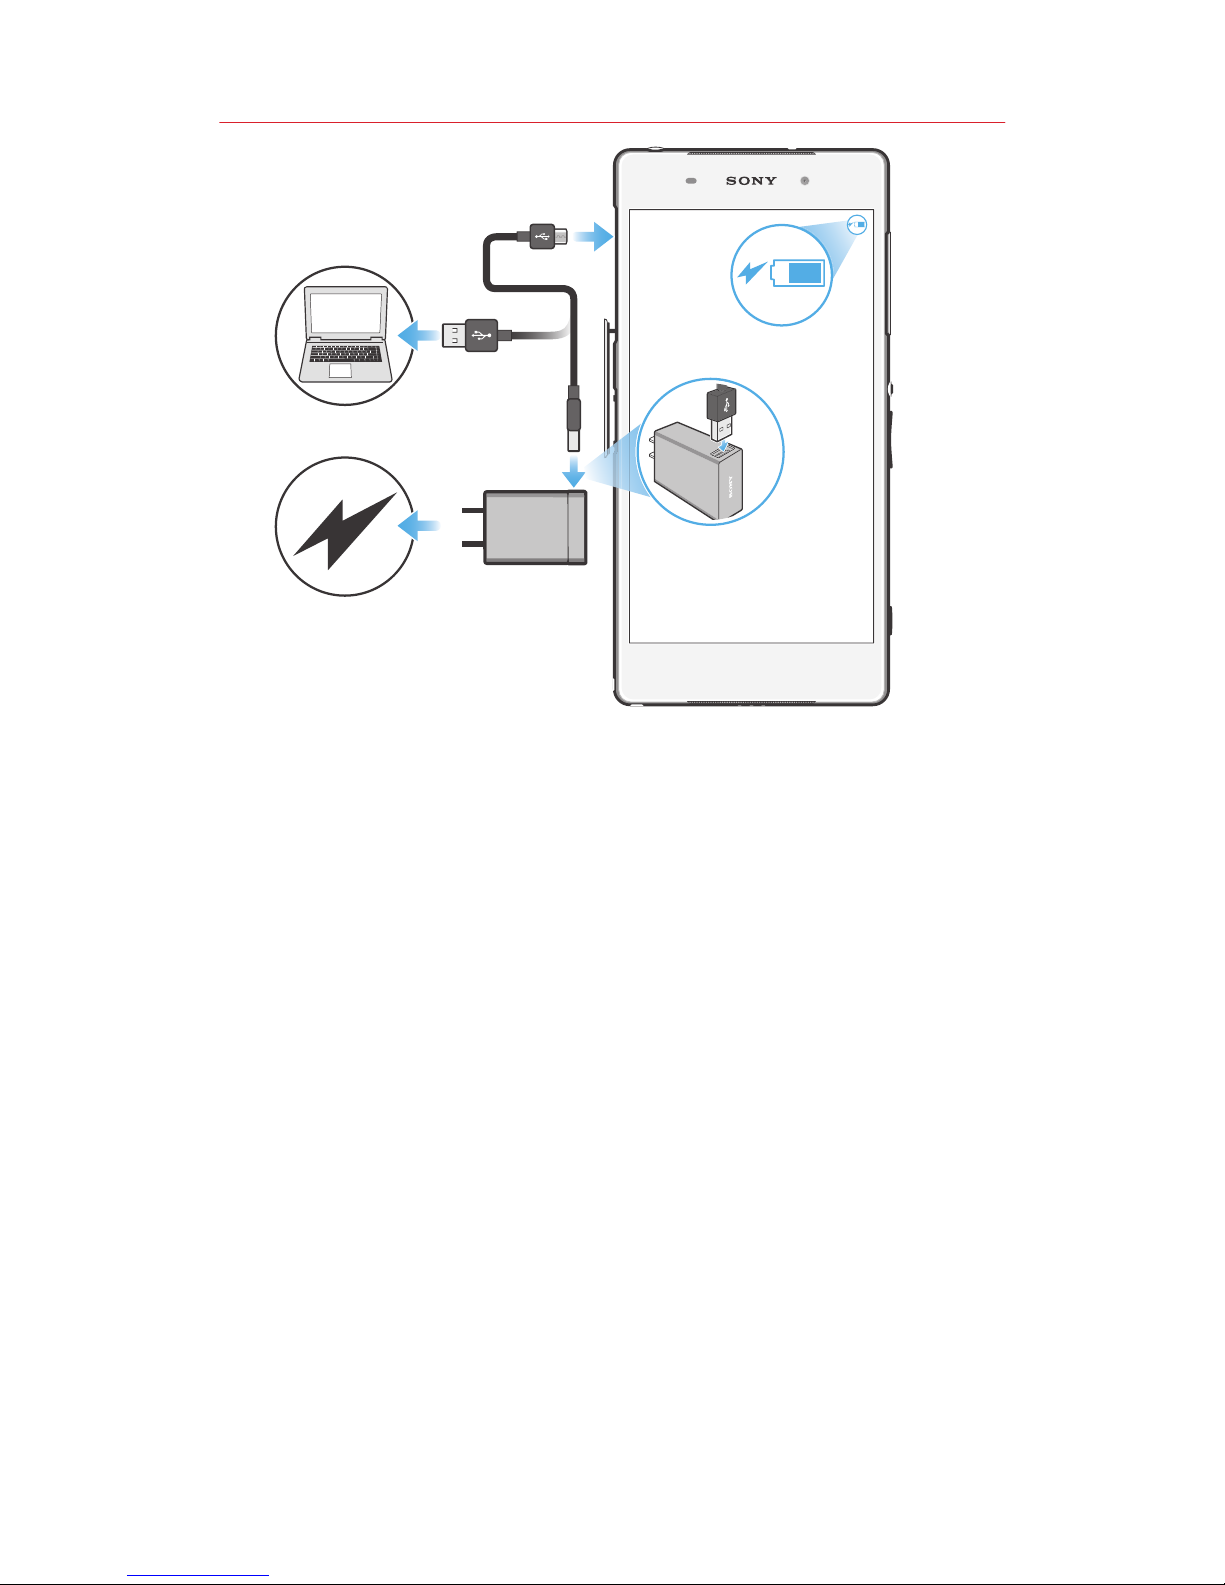
Charge the Phone
Before turning on your phone, charge it fully
1. Connect the USB cable to the charger.
2. Insert the other end of the USB cable
into the charger port on the left side of the
phone.
3. Plug the charger into a compatible
electrical outlet.
WARNING! Please use only an approved charging accessory
to charge your phone. Improper handling of the charging
port, as well as the use of an incompatible charger, may
cause damage to your device and void the warranty.
Page 4
Optional: Insert the microSD Card
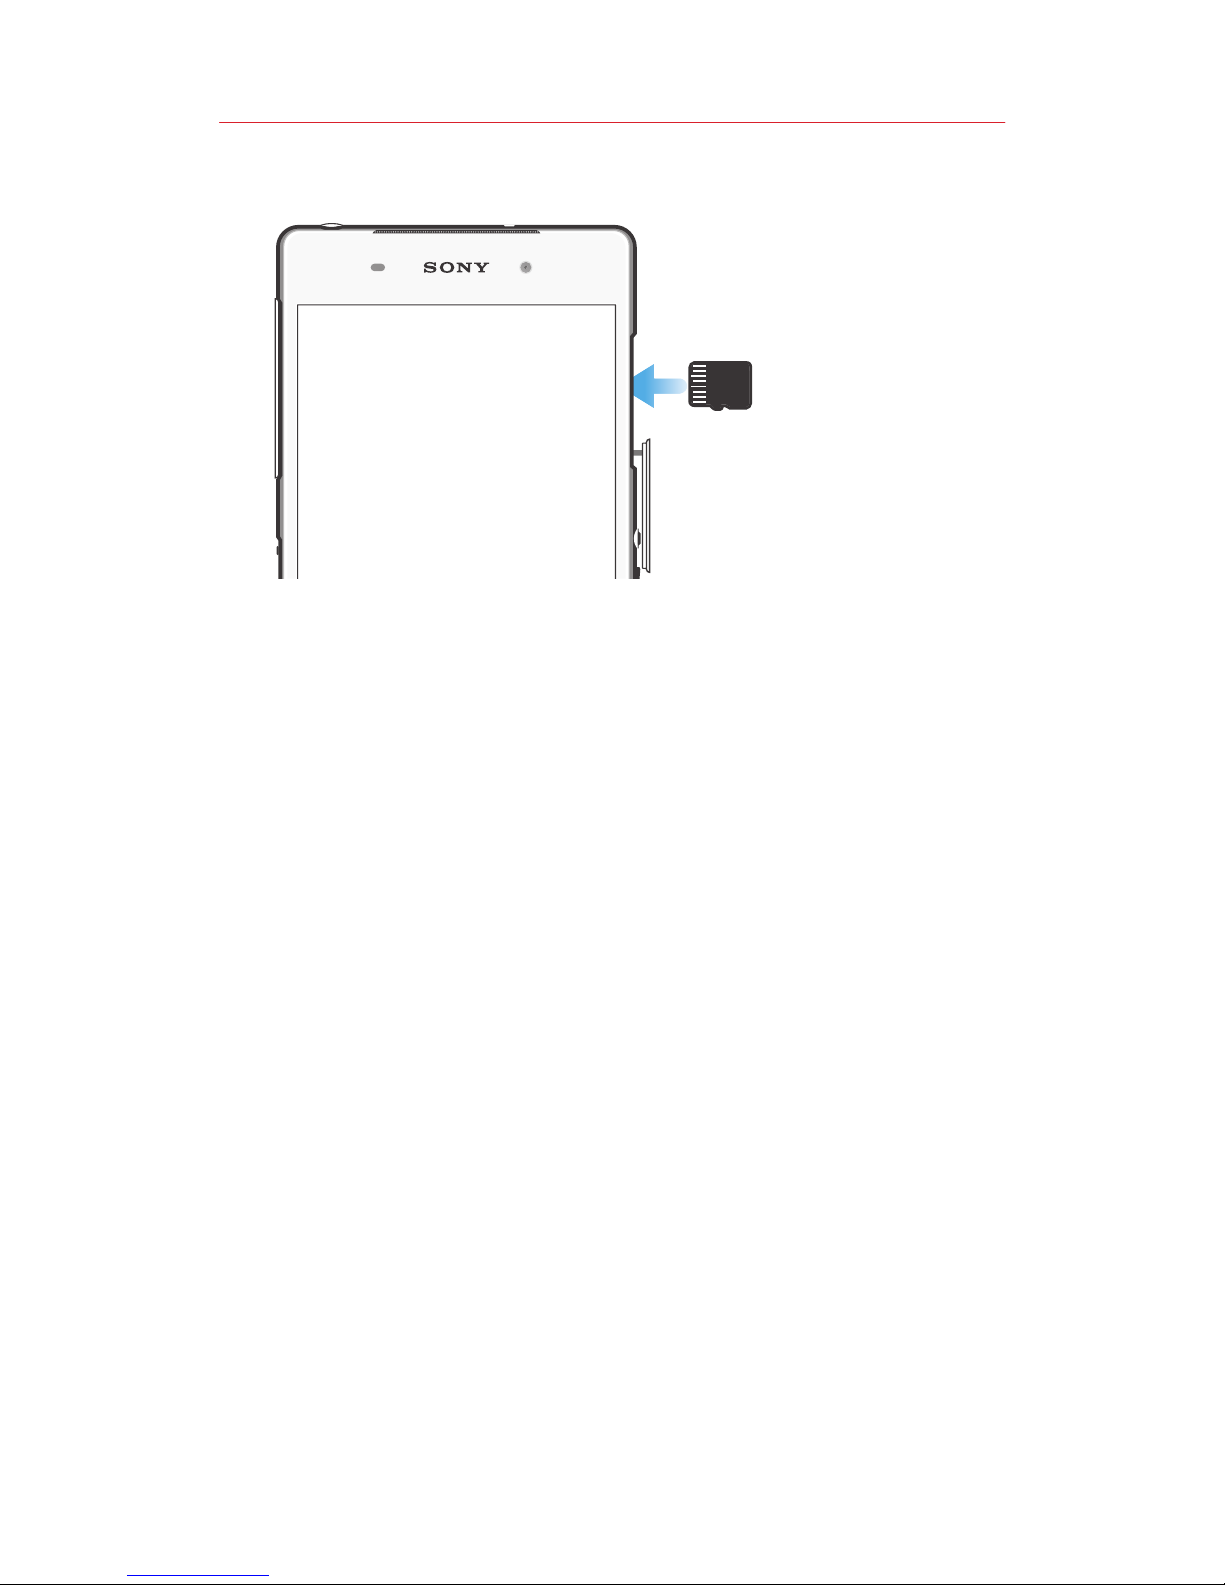
If you have a microSD card, slide the
microSD card into the microSD card slot
To insert the microSD card:
1. Open the microSD card slot cover.
2. Carefully slide the microSD card into the
microSD slot with the gold contacts facing
up.
3. Close the microSD slot cover.
(To remove the microSD card, carefully
push the card inward to release it from
the slot.)
Page 5
NOTE: The microSD card is sold separately.
Page 6
Front
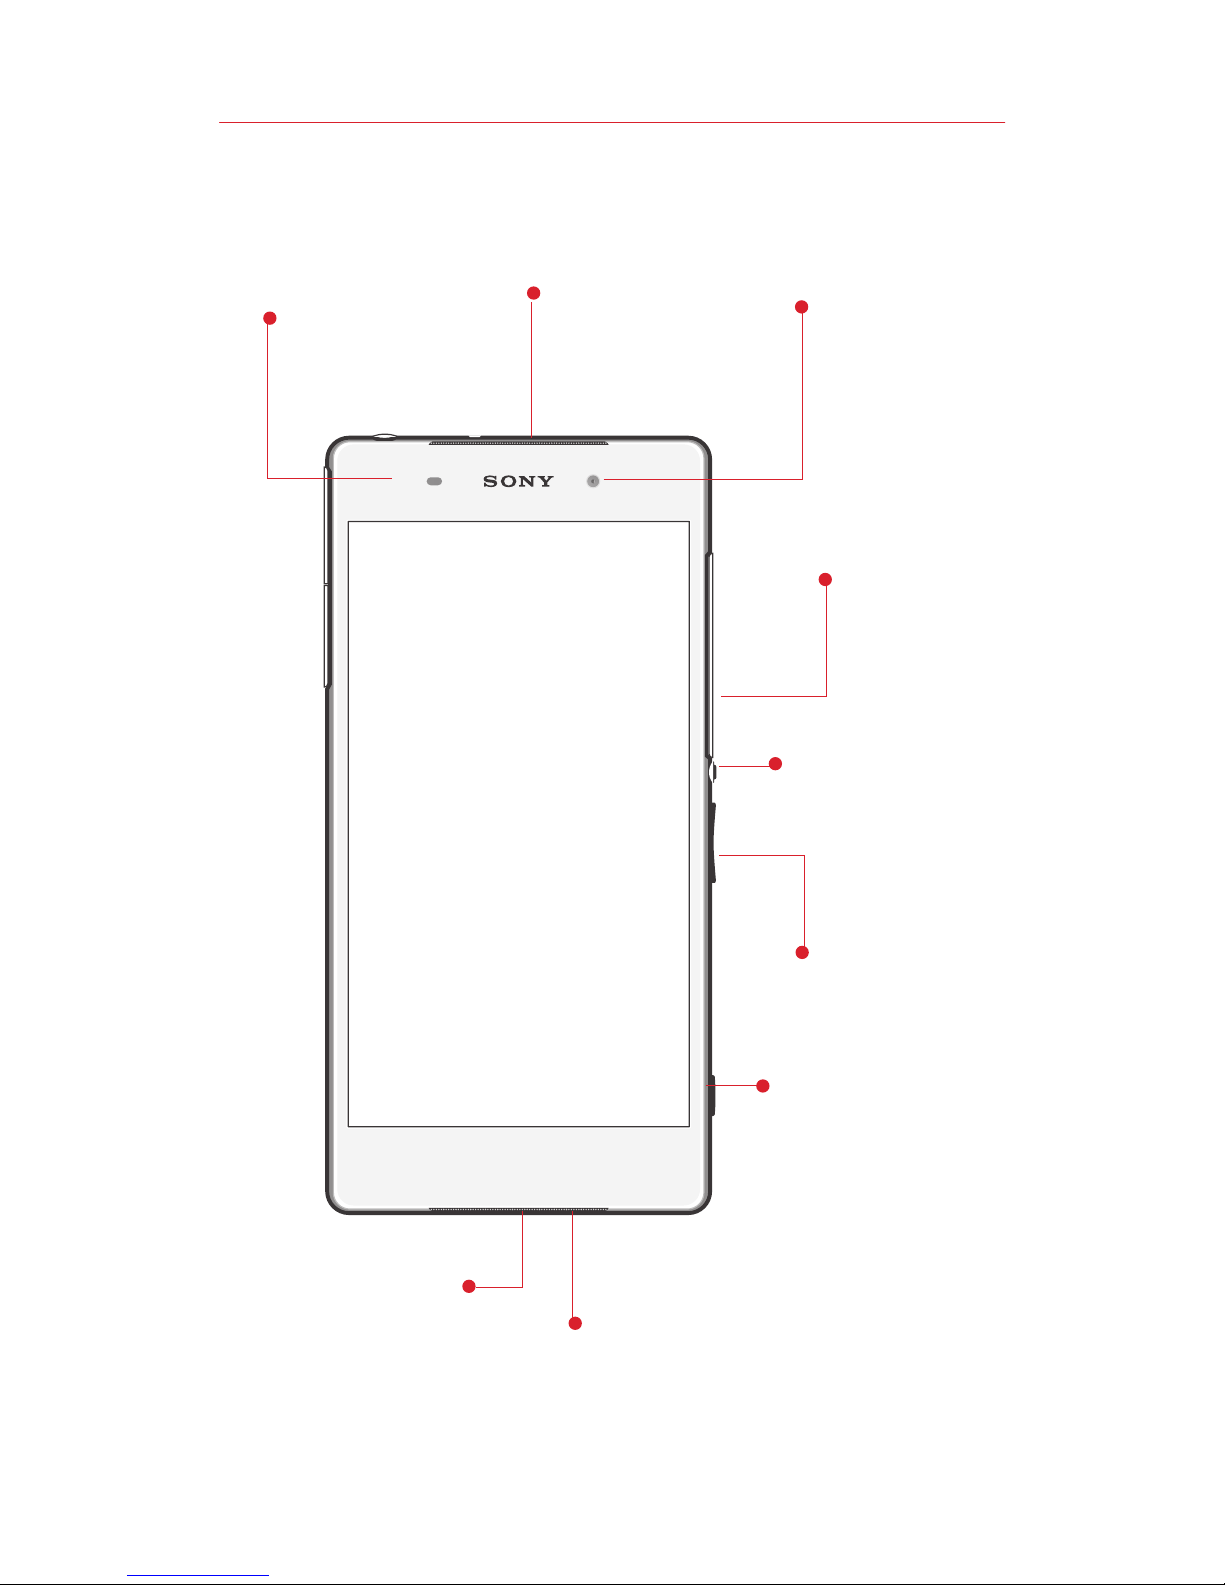
Camera
MicroSD
slot
Volume/
Zoom key
Microphone
Camera
key
Speaker
NOTE: Devices and software are constantly evolving—the
screen images and icons you see here are for reference
only.
Proximity/
Light sensor
Speaker/
Charging/
Notification light
Powey/Lock
Button
Page 7
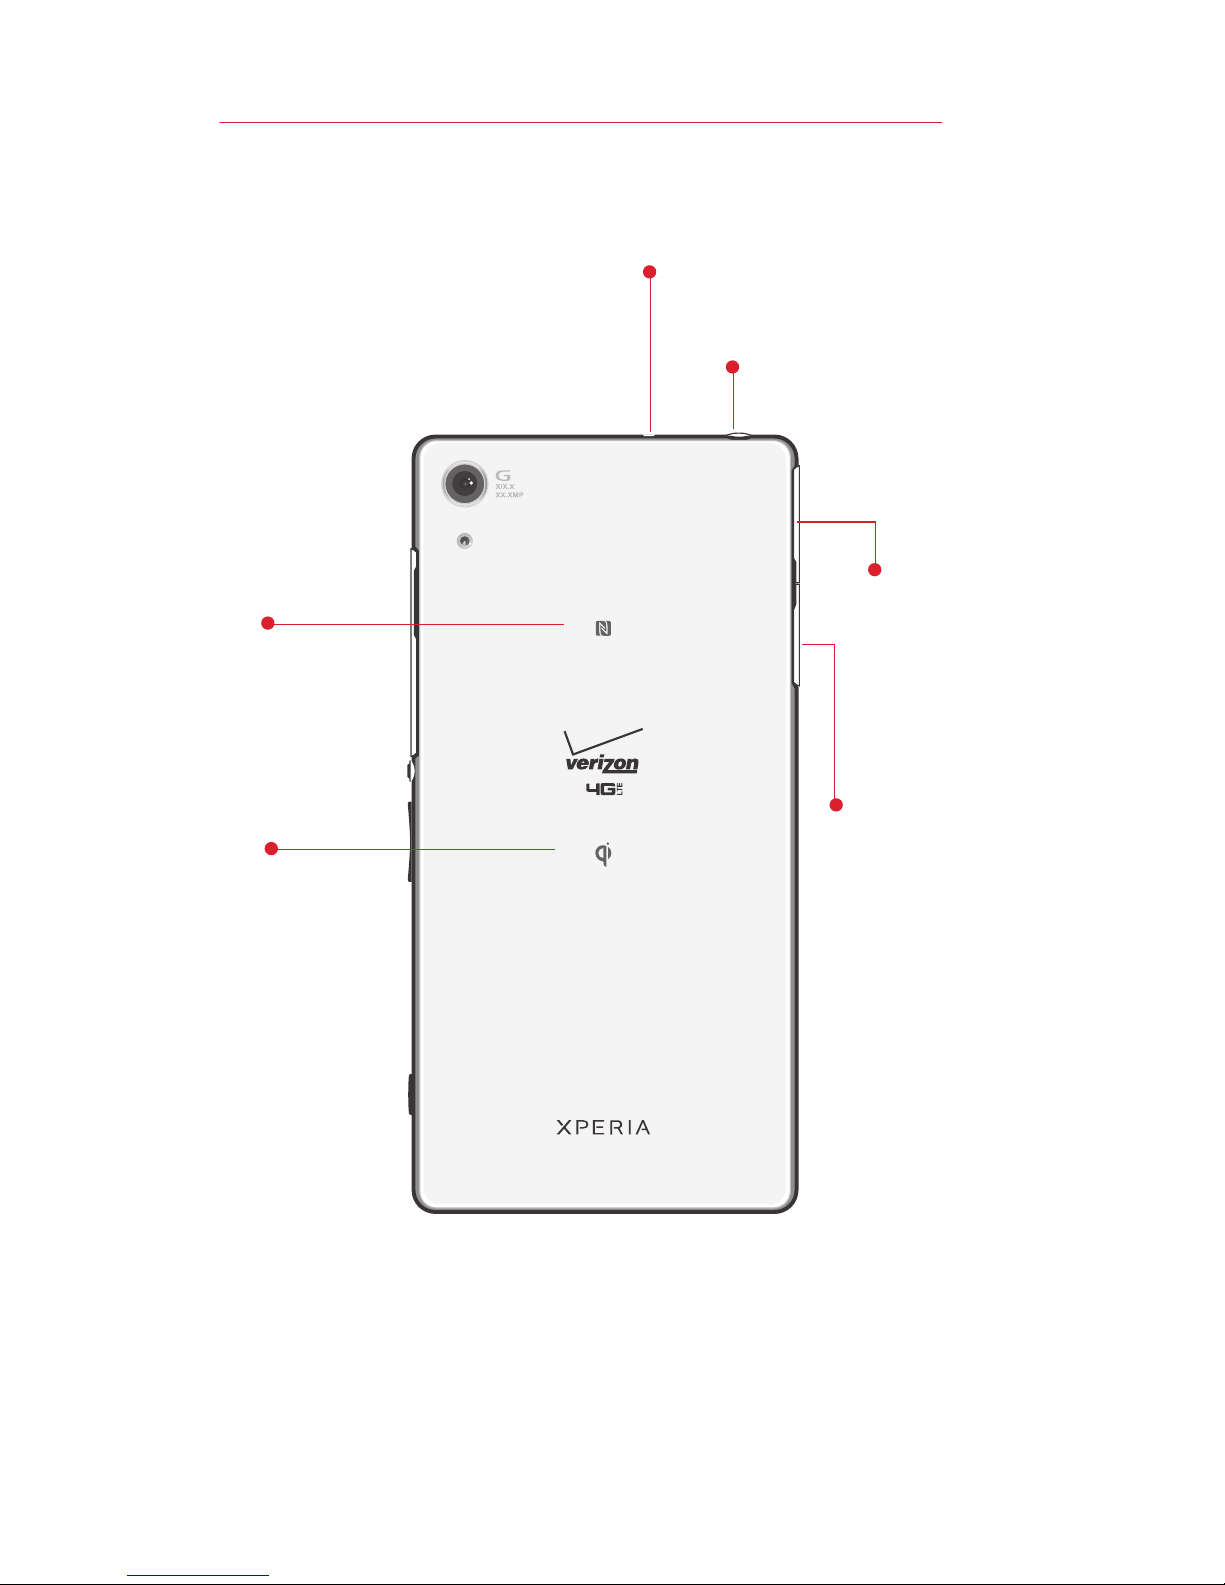
Second
Microphone
Nano
SIM slot
NFC
Detection
Area
Charger/
USB Port
Headset
Jack
Wireless
charge
Detection
Area
Page 8
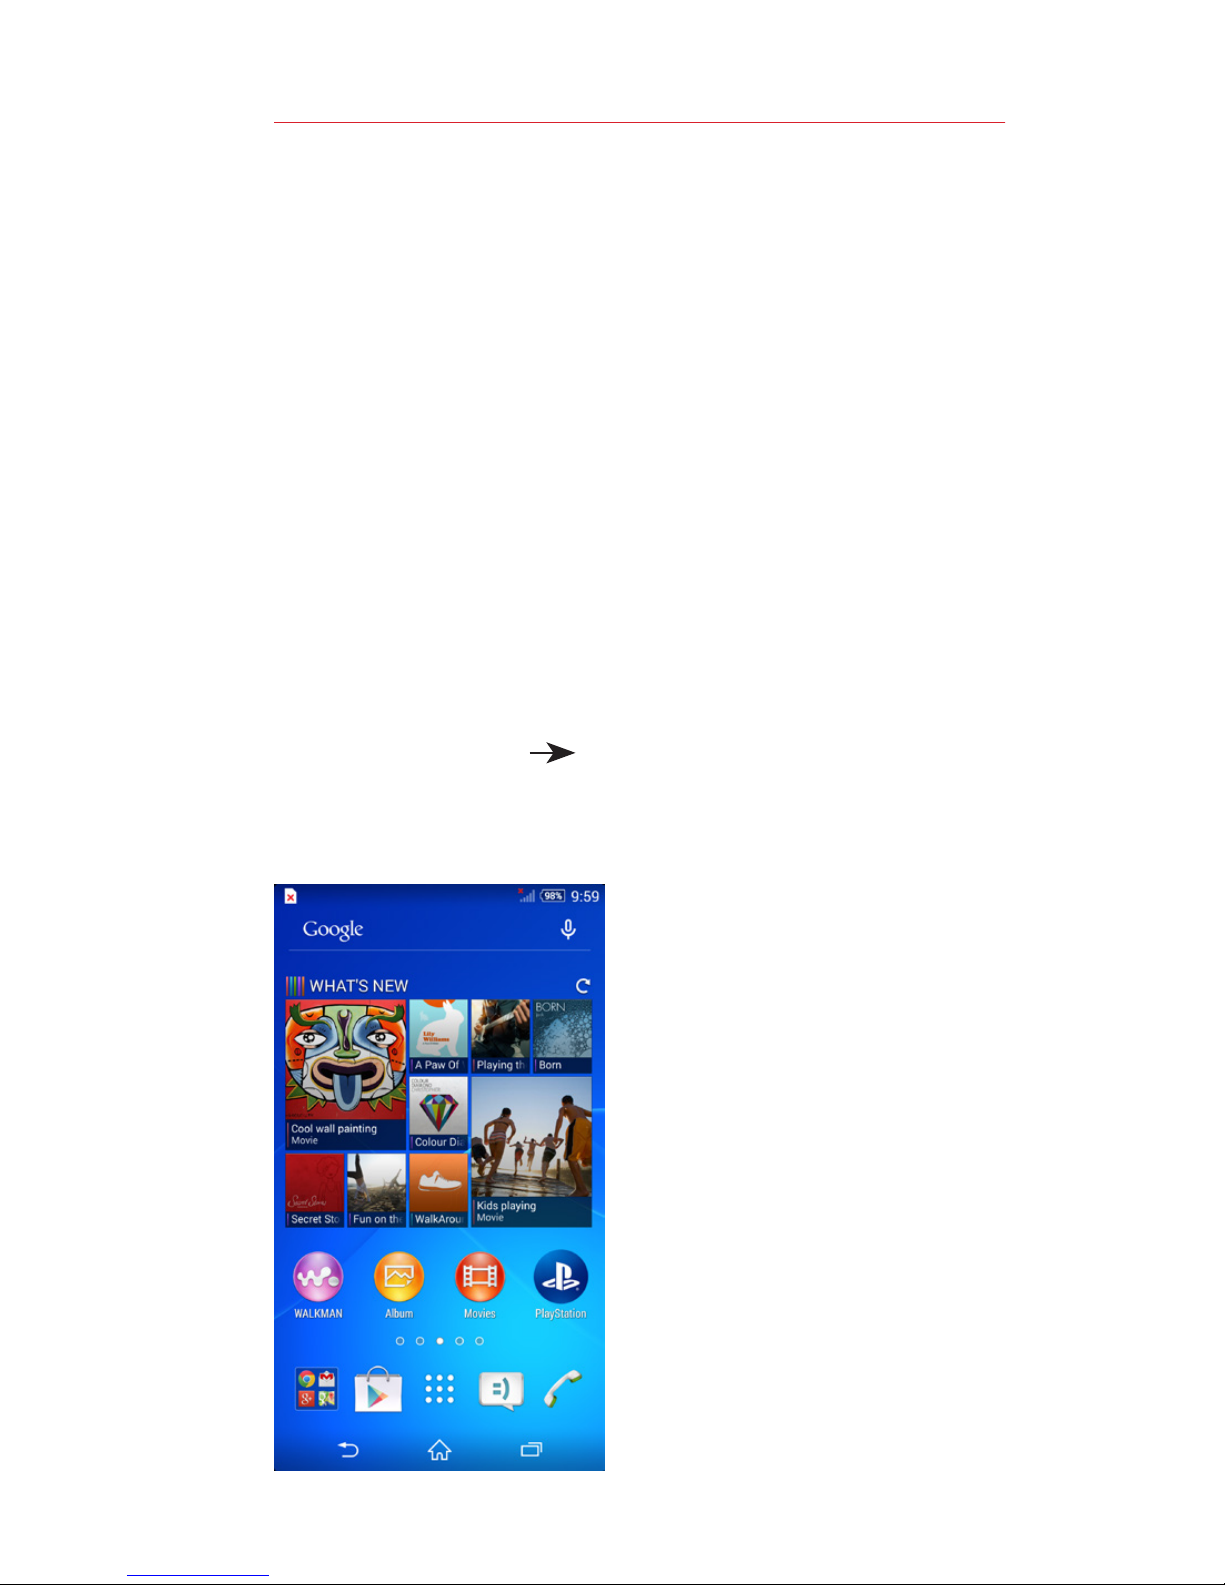
Using Your Phone
Turning Your Phone On/Off
It’s important to fully charge the battery
before turning on your phone.
To turn on your phone:
• Press and hold the Power/Lock button on
the right side of your phone.
To turn off your phone:
1. Press and hold the Power/Lock button
until the Device options screen appears.
2. Tap Power off OK.
Home Screen
Page 9

Setup Wizard
Follow the onscreen instructions to quickly
set up your phone and email accounts.
Locking and Unlocking Your Phone
Prevent accidental key presses by locking
your phone.
To lock your phone:
• Press the Power/Lock button.
To unlock your phone:
• Press the Power/Lock button to wake the
display and then drag your finger across the
screen in any direction.
Using the Touch Screen
Use touch gestures to move around the
screen, open menus, select items, zoom in
or out on web pages, and more.
Swipe—Swipe by quickly sliding your finger
in any direction.
Drag—Drag by touching an item and sliding
it to a new position.
Double-Tap—Tap two times rapidly to
zoom in or out on a web page or picture.
Page 10

©2014 Verizon Wireless. All Rights Reserved.
Page 11

Multi Touch—Pinch or spread your thumb
and index finger to zoom in or out.
Making a Call
1. Tap the phone icon on the Home
screen.
2. Enter the number you want to call.
3. Tap Send to place the call.
Receiving a Call
Tap Answer and slide to the right to answer
an incoming call.
Setting Up Voice Mail
1. Tap the phone icon on the Home
screen.
2. Dial *86 and tap Send.
3. When you hear a greeting, tap # to
interrupt.
4. Follow the setup tutorial.
Checking Voice Mail
From your phone, dial *86 and press Send.
From other phones, enter your wireless
number.
1. When you hear a greeting, tap # to
interrupt.
2. Follow the prompts.
Page 12

NOTE: Voice mailboxes not set up within 45 days will be
canceled. Your voice mailbox is not password protected
until you create a password by following the setup tutorial.
Page 13
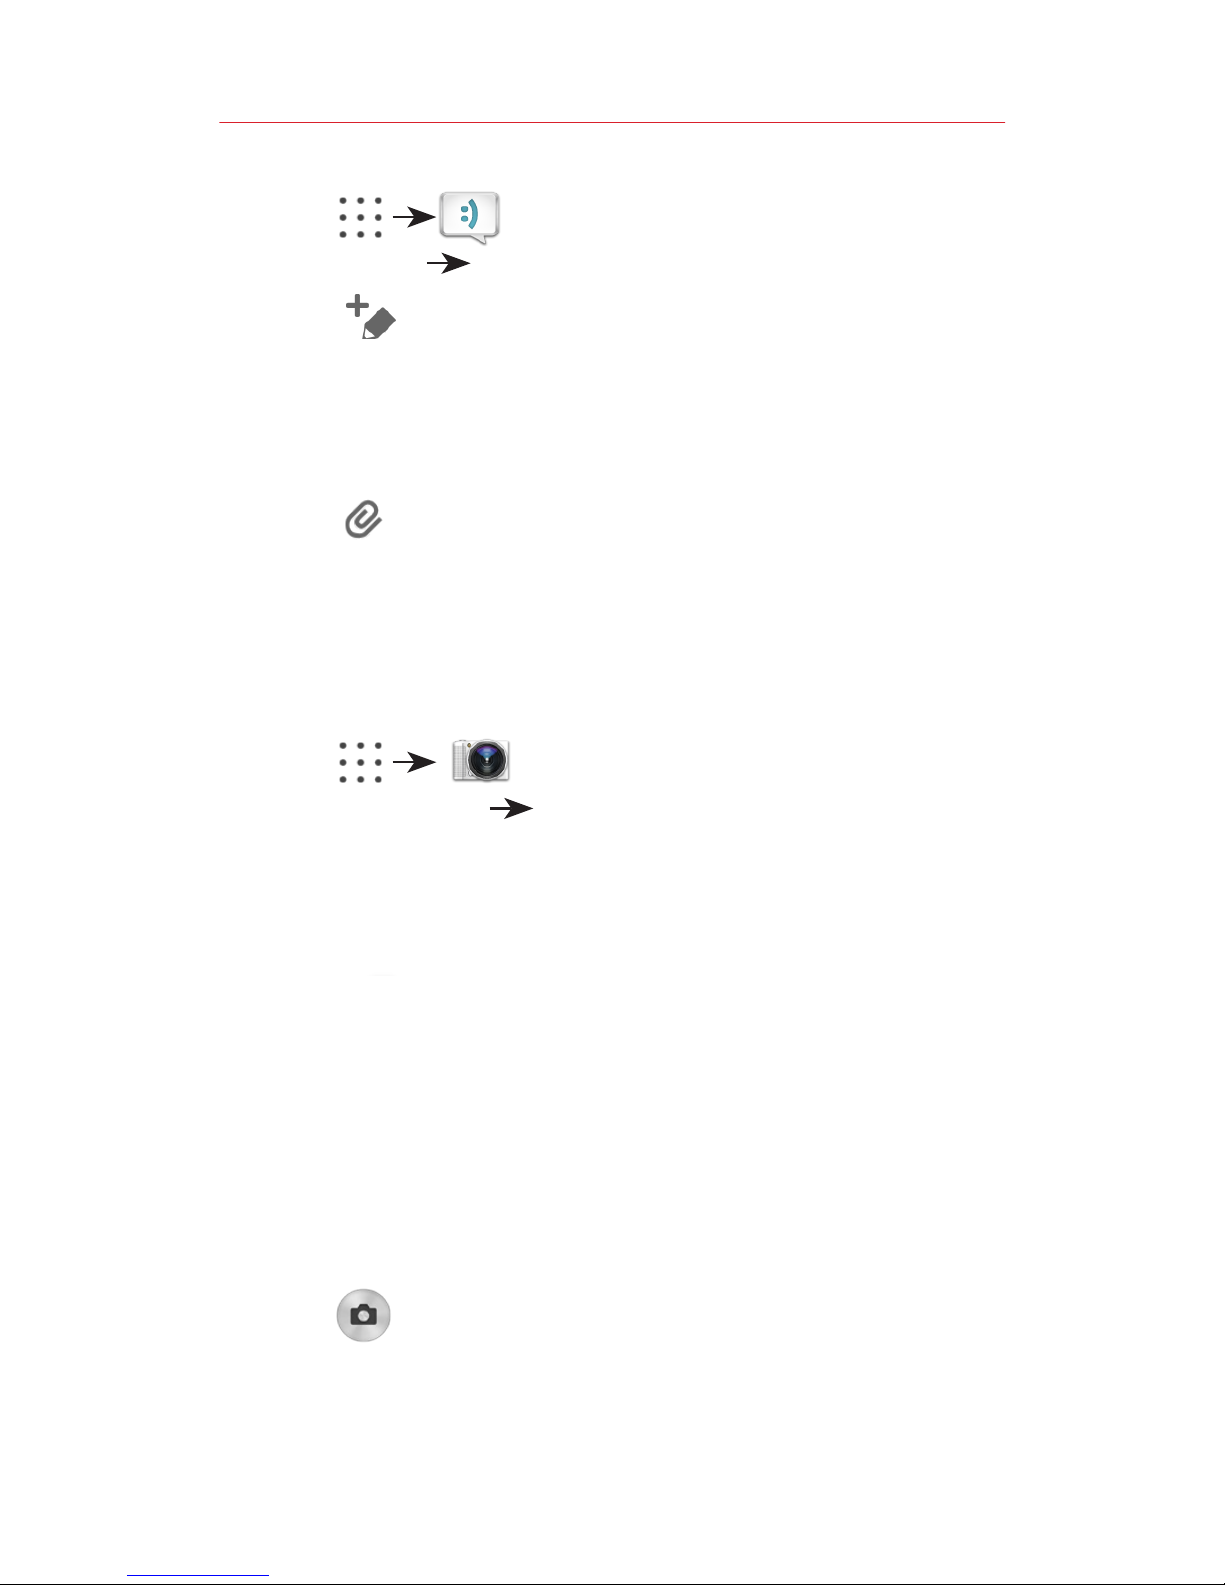
Sending a Text
1. From the Home screen, tap
Apps Messaging.
2. Tap the Add icon to create a new
conversation.
3. Enter the contact information and
your message text.
4. You can also tap onscreen icon to
add an attachment.
5. Tap Send.
Taking Photos
1. From the Home screen,
tap Apps Camera.
2. Use the phone’s screen as a
viewfinder to set up your shot.
3. Pinch the screen to zoom out or pinch
open to zoom in.
4. You can tap onscreen icons to choose
various camera options and settings.
5. You can also tap the screen to
move the focus to a desired area of
interest.
6. Tap the Camera icon (the
shutter will sound). The picture is
automatically stored
in your selected storage location.
Page 14

Setting Up Email
1. From the Home screen,
tap Apps Email.
2. Enter your email address in the “Email
address” field.
3. Enter your password in the Password
field and tap Next.
4. At the “Account setup” screen, name
the account and enter a screen name
to identify yourself on this account.
5. Tap Next to save the new account.
Play Store
From the Home screen:
Tap the Google Play Store icon.
Page 15

Viewing Apps
To view your apps, from the Home
screen, tap the Apps icon.
Installing Apps
Thousands of apps are available to
download from the Google Play™ Store.
From the Home screen, tap the Play
Store icon.
Uninstalling Apps
1. From the Home screen, tap the Apps
icon.
2. Swipe in from the left edge of the
screen and choose Uninstall.
3. Tap the red X of the app you want to
uninstall.
Isis Mobile Wallet™
Now you can pay with your phone.
Isis® lets you pay for purchases and
often save on them too. Learn more at
verizonwireless.com/isis.
Page 16
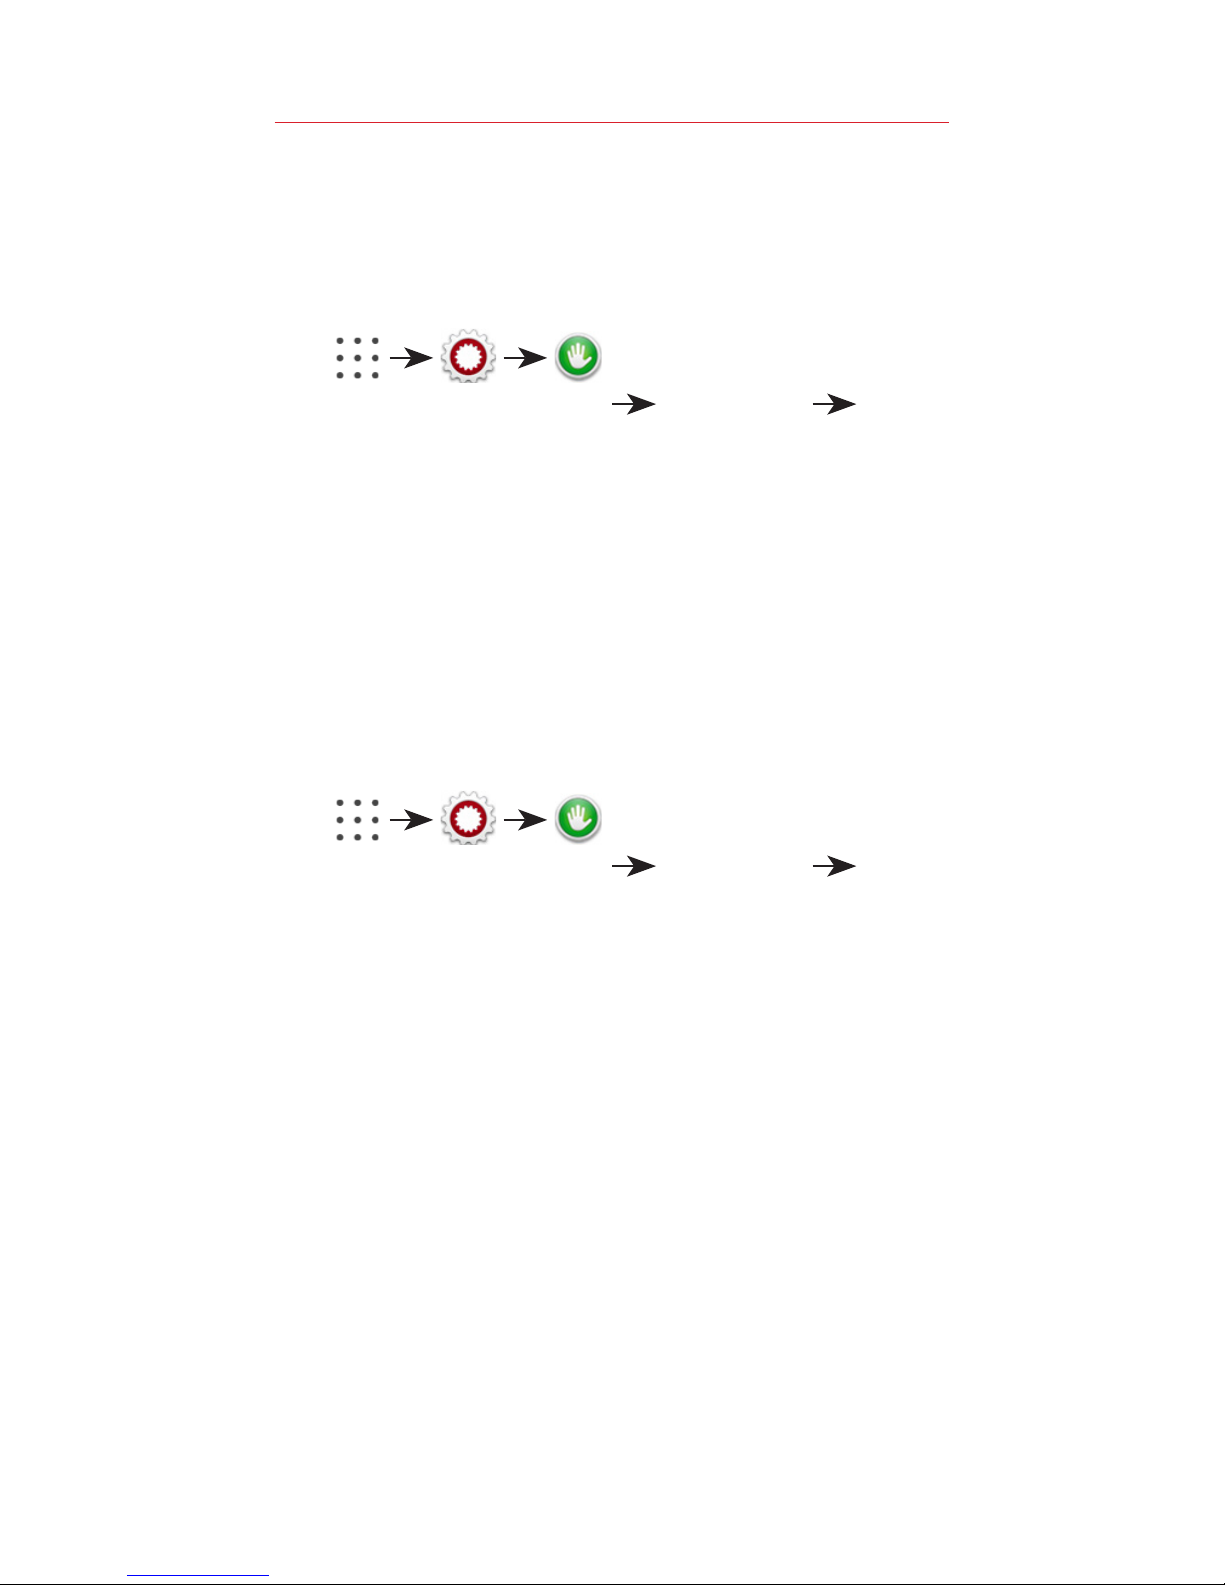
Improving Accessibility
Adjust accessibility settings to assist
users who have impaired vision or hearing,
or reduced dexterity.
1. From the Home
screen, tap Apps Settings
Accessibility.
2. Tap a category and set the desired
options to improve accessibility.
Using TalkBack
TalkBack provides screen reading to
assist people with impaired vision.
1. From the Home
screen, tap Apps Settings
Accessibility.
2. Tap TalkBack. Then tap the
TalkBack switch to turn it on.
3. Tap Settings at the top of the
screen to adjust the TalkBack
settings.
NOTE: When TalkBack is on, double-tap when you hear the
item you want. (You can change to single-tap in Settings.)
Page 17
My Verizon App
Manage your account, track your
usage, edit account information,
pay your bill and more.
Get Help Using Your Phone
Use your Help app to get
assistance at your fingertips, right
from your phone.
From your computer, visit
verizonwireless.com/support.
Customer Service
Call 1-800-922-0204.
Follow us @VZWSupport.
More Information
To download a User Guide, go to
VerizonWireless.com/support
and find your device.
Support & More
User Guide
Page 18

Your Wireless Device and Third Party Services
Verizon Wireless is the mobile carrier associated with this
wireless device, but many services and features offered
through this wireless device are provided by or in conjunction
with third parties. Verizon Wireless is not responsible for
your use of this wireless device or any non-Verizon Wireless
applications, services and products including any personal
information you choose to use, submit or share with others.
Specific third party terms and conditions, terms of use,
and privacy policies shall apply. Please review carefully all
applicable terms and conditions and policies prior to using
this wireless device and any associated application, product
or service.
Hearing Aid Compatibility Information
This phone has been tested and rated for use with hearing
aids for some of the wireless technologies that it uses.
However, there may be some newer wireless technologies
used in this phone that have not been tested yet for use with
hearing aids. It is important to try the different features of
this phone thoroughly and in different locations, using your
hearing aid or cochlear implant, to determine if you hear
any interfering noise. Consult your service provider or the
manufacturer of this phone for information on hearing aid
compatibility. If you have questions about return or exchange
policies, consult your service provider or phone retailer.
Customer Information
 Loading...