

Page 1
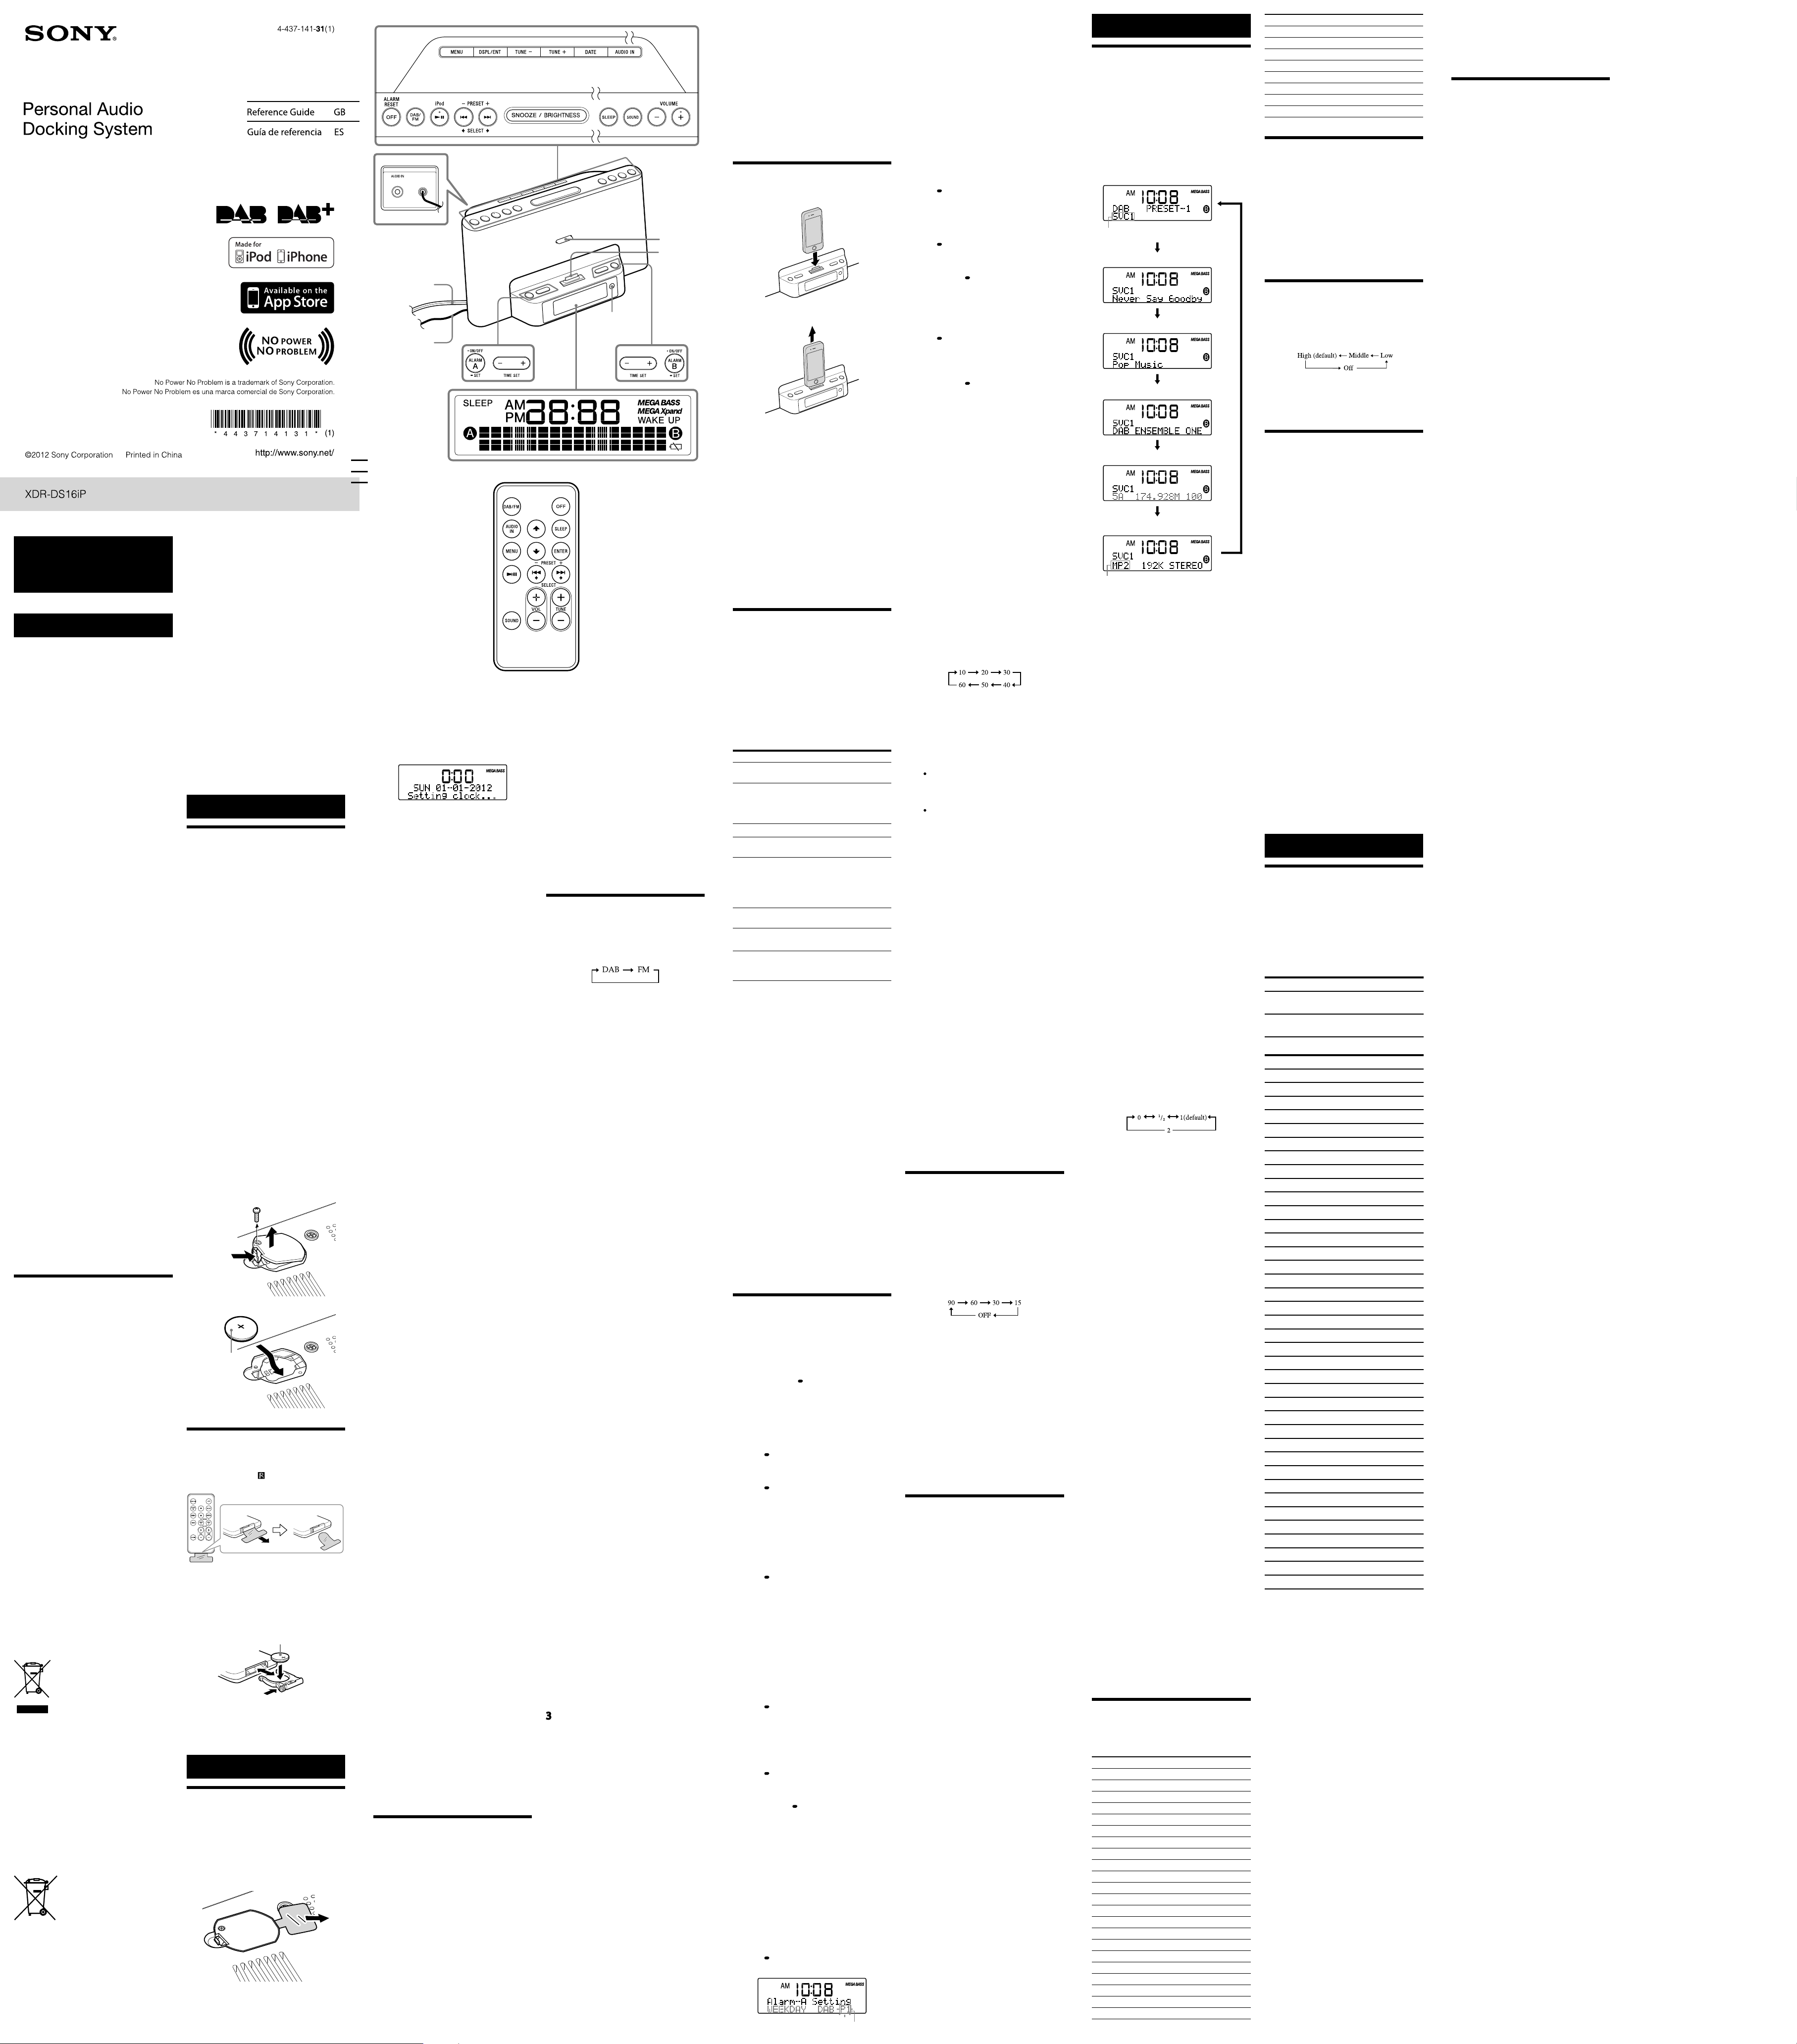
English
WARNING
To reduce the risk of fire or electric shock, do
not expose this apparatus to rain or
moisture.
To reduce the risk of fire, do not cover the
ventilation of the apparatus with newspapers,
tablecloths, curtains, etc. And do not place lighted
candles on the apparatus.
To reduce the risk of fire or electric shock, do not
expose this apparatus to dripping or splashing,
and do not place objects filled with liquids, such
as vases, on the apparatus.
Do not install the appliance in a confined space,
such as a bookcase or built-in cabinet.
Do not expose the batteries (battery pack or
batteries installed) to excessive heat such as
sunshine, fire or the like for a long time.
As the main plug is used to disconnect the unit
from the mains, connect the unit to an easily
accessible AC outlet. Should you notice an
abnormality in the unit, disconnect the main plug
from the AC outlet immediately.
The unit is not disconnected from the AC power
source (mains) as long as it is connected to the
wall outlet, even if the unit itself has been turned
off.
The nameplate and important information
concerning safety are located on the bottom
exterior.
CAUTION
Danger of explosion if battery is incorrectly
replaced. Replace only with the same type.
Notice for customers: the following
information is only applicable to equipment
sold in countries applying EU directives
The manufacturer of this product is Sony
Corporation, 1-7-1 Konan, Minato-ku, Tokyo,
108-0075 Japan. The Authorized Representative
for EMC and product safety is Sony Deutschland
GmbH, Hedelfinger Strasse 61, 70327 Stuttgart,
Germany. For any service or guarantee matters,
please refer to the addresses given in separate
service or guarantee documents.
On copyrights
iPhone, iPod, iPod classic, iPod nano, and iPod
touch are trademarks of Apple Inc., registered in
the U.S. and other countries.
“Made for iPod,” and “Made for iPhone” mean
that an electronic accessory has been designed to
connect specifically to iPod or iPhone,
respectively, and has been certified by the
developer to meet Apple performance standards.
Apple is not responsible for the operation of this
device or its compliance with safety and
regulatory standards. Please note that the use of
this accessory with iPod or iPhone may affect
wireless performance.
Note
This unit is not specified for use with an iPad,
and malfunction may result if used with one.
Precautions
To disconnect AC power, grasp the plug itself,
not the cord.
Since a strong magnet is used for the speaker,
keep credit cards using magnetic coding or
spring-wound watches, CRT-based TVs, or
projectors, etc., away from the unit to prevent
possible damage from the magnet.
Do not leave the unit in a location near a heat
source such as a radiator or airduct, or in a
place subject to direct sunlight, excessive dust,
mechanical vibration, or shock.
Allow
adequate air circulation to prevent internal
heat build-up. Do not place the unit on a surface
(a rug, a blanket, etc.) or near materials (a
curtain) which might block the ventilation holes.
Should
NOTES ON LITHIUM BATTERY
Note
This symbol on the product or on its packaging
indicates that this product shall not be treated as
household waste. Instead it shall be handed over
to the applicable collection point for the recycling
of electrical and electronic equipment. By
ensuring this product is disposed of correctly, you
will help prevent potential negative consequences
for the environment and human health, which
could otherwise be caused by inappropriate waste
handling of this product. The recycling of
materials will help to conserve natural resources.
For more detailed information about recycling of
this product, please contact your local Civic
Office, your household waste disposal service or
the shop where you purchased the product.
Applicable accessory: Remote control.
This symbol on the battery or on the packaging
indicates that the battery provided with this
product shall not be treated as household waste.
On certain batteries this symbol might be used in
combination with a chemical symbol. The
chemical symbols for mercury (Hg) or lead (Pb)
are added if the battery contains more than
0.0005% mercury or 0.004% lead.
By ensuring these batteries are disposed of
correctly, you will help prevent potentially
negative consequences for the environment and
any solid object or liquid fall into the
unit, unplug the unit and have it checked by
qualified personnel before operating it any
further.
During a thunderstorm, do not touch the
antenna (aerial) and plug.
Do not touch the unit with wet hands.
Do not place the unit anywhere near water.
Wipe the battery with a dry cloth to assure a
good contact.
Be sure to observe the correct polarity when
installing the battery.
Do not hold the battery with metallic tweezers,
otherwise a short-circuit may occur.
In the Reference Guide, “iPod” is used as a
general reference to functions on an iPod or
iPhone, unless otherwise specified by the text
or illustrations.
Disposal of Old Electrical &
Electronic Equipment
(Applicable in the European
Union and other European
countries with separate
collection systems)
Disposal of waste batteries
(applicable in the European
Union and other European
countries with separate
collection systems)
human health which could otherwise be caused
by inappropriate waste handling of the battery.
The recycling of the materials will help to
conserve natural resources.
In case of products that for safety, performance or
data integrity reasons require a permanent
connection with an incorporated battery, this
battery should be replaced by qualified service
staff only.
To ensure that the battery will be treated properly,
hand over the product at end-of-life to the
applicable collection point for the recycling of
electrical and electronic equipment.
For all other batteries, please view the section on
how to remove the battery from the product
safely. Hand the battery over to the applicable
collection point for the recycling of waste
batteries.
For more detailed information about recycling of
this product or battery, please contact your local
Civic Office, your household waste disposal
service or the shop where you purchased the
product.
If you have any questions or problems concerning
your unit, please consult your nearest Sony dealer.
Preparations
Power source
This unit contains a CR2032 battery as a backup
power source to keep the alarm operating during
a power interruption (No Power No Problem
system).
When to replace the battery
When the battery becomes weak, “” appears in
the display.
If a power interruption occurs while the battery is
weak, the current time will be erased.
Replace the battery with a Sony CR2032 lithium
battery. Use of another battery may cause a fire or
explosion.
To replace the battery
1 Keep the AC plug connected to the AC
outlet, remove the screw of the battery
compartment on the bottom of the unit,
and open the lid (see Fig. ).
2 Remove the old battery and insert a new
one in the battery compartment with the
side facing up (see Fig. ).
3 Replace the battery compartment lid and
tighten the screw.
4 Press , DAB/FM, AUDIO IN or
SNOOZE/BRIGHTNESS to turn “” off
in the display.
Note
When you replace the battery, do not
disconnect the plug from the AC outlet.
Otherwise, the current date and current time
will be erased.
CR2032
Remote control
Before using the supplied remote for the first
time, remove the insulation film.
Aim the remote at the (Remote sensor) of the
unit.
When to replace the battery
With normal use, the battery (CR2025) should
last for about 6 months. When the remote can no
longer operate the unit, replace the battery with a
new one.
side facing up
Note
If you are not going to use the remote for a long
time, remove the battery to avoid any damage
that may be caused by leakage or corrosion.
Operations
Setting the clock
To set the clock for the first
time
When you first purchase the unit, do the
following.
1 Remove the insulation film of the backup
battery on the bottom of the unit.
2 Extend the wire aerial fully.
Power cord
Wire aerial
VOLUME + (VOL + on the remote control) and buttons have a tactile dot.
3 Plug in the unit.
“Setting clock...” appears in the display, and
the time is set based on the received DAB
data. When finished, the current time appears
in the display.
Notes
Do not operate the unit before “Setting clock...”
disappears from the display.
If the clock cannot be set as a result of no DAB
signal being received, “0:00,” year and date flash
in the display. The clock cannot be set. In this
case, set Time synchronization to “iPod” or
“None” (for details, see “Time
synchronization”).
Time synchronization
You can synchronize time from DAB broadcasts
and iPod in clock mode.
1 Press MENU and SELECT or to
select “Synced Time By,” then press
DSPL/ENT (ENTER on the remote).
2 Press SELECT or to select “DAB,”
“iPod” or “None,” then press DSPL/ENT
(ENTER on the remote).
Select “DAB” to synchronize time by DAB
(default).
Select “iPod” to synchronize time by iPod.
Select “None” if time synchronization is not
needed.
3 Perform one of the following operations
according to your selection above:
If “DAB” is selected, set the radio band to
DAB.
If “iPod” is selected, connect an iPod to the
unit.
If “None” is selected, perform steps 2 to 4 in
“To set the clock manually.”
To set the clock manually
Do the following if you wish to set the clock
manually, instead of synchronizing time by DAB
or iPod.
1 Plug in the unit.
2 Press MENU and SELECT or to
select “Date & Time,” then press DSPL/
ENT (ENTER on the remote).
The year flashes in the display.
3 Press SELECT or to set the year, then
press DSPL/ENT (ENTER on the remote).
4 Repeat step 3 to set the month, day, hour
and minute.
The seconds start incrementing from zero.
Notes
The clock setting is available in clock state only.
(When using radio, iPod or Audio-in, press
OFF before setting the clock.)
When “iPod” or “DAB” is selected in Time
synchronization, the clock will be overwritten
via iPod or DAB time automatically. Select
“None” in step 2 to deactivate time
synchronization via iPod or DAB.
When the clock is set via DAB, daylight saving
time (summer time) will be adjusted
automatically. Otherwise, set daylight saving
time manually or via iPod.
When the clock is set via DAB, the clock will be
reset via DAB after a power interruption. The
clock will not be reset if it has been set
manually or via iPod.
If you do not press any button for about
1 minute while setting the clock, the clock
setting will be cancelled.
An 88-year calendar (2012-2099) is installed in
the unit. When the date is set, the day of the
week is automatically displayed.
MON = Monday, TUE = Tuesday,
WED = Wednesday, THU = Thursday,
FRI = Friday, SAT = Saturday, SUN = Sunday
To change the time format
You can choose a time format between 24-hour
system (default) and 12-hour system.
1 Press
2 Press
To change the date format
1 Press
2 Press
To display the year and date when using
the radio
Press DATE.
After a few seconds, the display will change back
to the current service or station automatically.
MENU
and
SELECT
or to
select “Time Format,” then press DSPL/
ENT (ENTER on the remote).
SELECT
or to select the desired
time format, then press DSPL/ENT
(ENTER on the remote).
The time format toggles between 12-hour
system (“AM 12:00” = midnight) and 24-hour
system (“0:00” = midnight).
MENU
and
SELECT
or to
select “Date Format,” then press DSPL/
ENT (ENTER on the remote).
SELECT
or to select the desired
date format, then press DSPL/ENT
(ENTER on the remote).
Improving the reception
DAB Band-III/FM
Extend the wire aerial fully to increase reception
sensitivity.
Keep the wire aerial away from the power cord.
Do not bundle the wire aerial and power cord
together.
For DAB reception, press DSPL/ENT to show the
signal strength in order to adjust the aerial for
optimum reception.
Supporter
Dock
Connector
Remote sensor
Notes on radio reception
Keep digital music players or mobile phones
away from the aerial, as this may lead to
reception interference.
When you are listening to the radio with an
iPhone connected to the unit, interference with
radio reception may occur.
When you are listening to the radio while
charging an iPod, interference with radio
reception may occur.
Tip
If an FM broadcast is noisy, press MENU and
SELECT or to select “Mode,” then press
DSPL/ENT (ENTER on the remote). Press
SELECT or to select “MONO” instead of
“AUTO STEREO,” then press DSPL/ENT
(ENTER on the remote) again. To resume stereo
reception, perform the above steps again.
Operating the radio
The unit can receive DAB service and FM stations.
1 Press DAB/FM repeatedly to select the
desired band.
Each press changes the band as follows:
If a list of receivable DAB broadcasts has not
been created when you select DAB,
“Scanning…” will appear in the display, and
the unit starts scanning automatically.
2 Press TUNE + or – to tune to the desired
service or station.
If a selected DAB service has finished
broadcasting, sound stops and “NO
SERVICE” appears. In this case, press
TUNE + or – to select another service.
3 Adjust the volume using VOLUME + or –
(VOL + or – on the remote).
To turn off the radio, press OFF.
Note on FM usage
The frequency step is set to 0.05 MHz on FM.
Notes on DAB usage
“NO SERVICE” appears when the selected
service cannot be received.
DAB broadcasts with poor quality reception
may not be selected when Auto scan is
performed. In this case, perform Manual tune,
which may improve reception.
About the SC (Secondary Component)
If the selected primary component has a
secondary component, “>>” lights up in the
display.
Press TUNE + to receive the desired secondary
component. “<<” lights up while the secondary
component is being received.
Note
When the selected secondary component ends,
the unit returns automatically to the primary
component.
Preset tuning
You can preset up to 20 services in DAB and 20
stations in FM.
To preset a service or station
1 Follow steps 1 to 2 in “Operating the
radio” and manually tune in to the
station you want to preset.
2 Press MENU and SELECT or to
select “Manual Preset,” then press DSPL/
ENT (ENTER on the remote).
3 Press PRESET + or – to select the desired
preset number, and press DSPL/ENT
(ENTER on the remote).
The service or station is stored.
Notes
To preset another service or station, repeat
these steps.
To go back to the previous status, press MENU
instead of DSPL/ENT (ENTER on the remote)
in step 2.
To change a preset service or station, tune in to
the desired service or station, then repeat steps
1 to 3. The new service or station will replace
the previous service or station.
To tune in to a preset service or station
1 Press DAB/FM repeatedly to select the
desired band.
2 Press PRESET + or – to select the desired
preset number.
When the service or station is not registered,
“PRESET BLANK” appears in the display.
The preset service or station can also be
selected by PRESET + or –.
Adjust the volume using VOLUME + or –
(VOL + or – on the remote).
Notes
If there are no preset stations, “PRESET
BLANK” will appear when you press PRESET +
or –.
If there is only one preset station, its preset
number will flash each time you press PRESET
+ or –.
Auto preset tuning (FM only)
1 Press DAB/FM repeatedly to select the
FM band.
2 Press MENU and SELECT or to
select “Auto Preset,” then press DSPL/
ENT (ENTER on the remote).
3
Press SELECT or to select “Yes,” then
press DSPL/ENT (ENTER on the remote).
The unit automatically presets the available
channels for FM in order.
Tip
To stop auto preset tuning, press OFF.
Scan tuning (FM only)
The unit automatically scans FM stations.
1 Press DAB/FM repeatedly to select the
FM band.
2 Press and hold TUNE + or –.
+ : scans up through the frequency bands.
–
:
scans down through the frequency bands.
Scanning starts from the currently-tuned
frequency. When a station is received,
scanning stops.
3 Adjust the volume using VOLUME + or –
(VOL + or – on the remote).
How to handle an iPod
To set an iPod
To remove an iPod
Notes
An iPod in a case or cover can be set on this
unit. However, if the case or cover interferes
with the connection, remove the case or cover
before setting the iPod on the Dock Connector.
Set the iPod onto the Dock Connector firmly.
When placing or removing the iPod, hold it at
the same angle as the Dock Connector on the
unit. Do not pull the iPod forward too far.
When placing or removing the iPod, hold the
unit securely.
Do not twist or bend the iPod, as this may
result in connector damage.
Remove the iPod when transporting it;
otherwise, a malfunction may result.
If the iPod does not reach the supporter on the
front of the unit, attach the supplied cushion
below the supporter.
Operating an iPod
1 Set the iPod on the Dock Connector.
The Dock Connector can be tilted slightly.
For details, see “How to handle an iPod.”
2 Press .
The iPod begins to play back.
If the iPod does not start playing back, operate
directly on the iPod.
You can operate the connected iPod via this
unit or the iPod itself.
3 Adjust the volume using VOLUME + or –
(VOL + or – on the remote).
To Press
Turn off the iPod
Pause playback
Go to the next track
Go back to the previous
track
Locate a point while
listening to the sound
Go back to the previous
menu
Select a menu item or a
track for playback
Execute the selected menu
or begin playback
During playback, this operation returns you to
*
the beginning of the current track. To go back
to the previous track, press twice.
Notes
If a pop-up message appears in the display of
the iPod touch or iPhone, see “About App.”
Some operations may differ or may not be
available on some models of iPod.
If the iPod is already playing when set onto the
unit, the sound from the iPod will be output
from the unit speakers, even if the unit was
playing sound from another function.
If the battery of the iPod is extremely low,
charge it for a while before operation.
Sony cannot accept responsibility in the event
that data recorded to an iPod is lost or damaged
when using the iPod connected to this unit.
For details of environmental conditions for
operating an iPod, check the website of Apple
Inc.
OFF, or press and
hold
To resume
playback, press it
again.
(forward)
(backward)*
(forward) or
(backward)
while playing and
hold it until you
find the point.
MENU
(up)/ (down)
on the remote
DSPL/ENT
(ENTER on the
remote)
To remove the iPod
For details, see “How to handle an iPod.”
To charge an iPod
You can use the unit as a battery charger for an
iPod.
Charging begins when the iPod is connected to
the unit. The charging status appears in the
display of the iPod. For details, refer to the user’s
guide of the iPod.
Setting the alarm
This unit is equipped with 3 alarm modes—iPod,
radio and buzzer. The clock needs to be set before
the alarm can be set (see “To set the clock for the
first time”).
To set the alarm
1 Press and hold ALARM SET A or B.
“Alarm–A Setting” or “Alarm–B Setting”
appears and the hour flashes in the display.
2 Press TIME SET + or – repeatedly until
the desired hour appears.
To cycle the hour rapidly, press and hold TIME
SET + or –.
3 Press ALARM SET A or B.
The minute flashes.
4 Repeat step 2 to set the minute.
5 Press ALARM SET A or B.
The days of the week flash.
6 Repeat step 2 to set the days of the week.
You can select the day from the following
three options by pressing TIME SET + or – :
EVERYDAY: MON TUE WED THU FRI SAT
SUN
WEEKDAY: MON TUE WED THU FRI
WEEKEND: SAT SUN
7 Press ALARM SET A or B.
The alarm mode setting is entered.
8 Press TIME SET + or – repeatedly until
the desired alarm mode flashes.
You can choose one of 4 settings: “iPod,”
“DAB,” “FM” or “BUZZER.”
Set the alarm mode as follows:
– iPod: see “ To set the alarm as iPod.”
– DAB or FM: see “
– BUZZER: see “ To set the buzzer alarm.”
To set the alarm as iPod
1
Perform steps 1 to 8 in “To set the alarm.”
2 Press ALARM SET A or B to select
alarm mode for “iPod.”
“ALARM VOLUME:” and the volume level
indication flash in the display.
3 Press TIME SET + or – to adjust the
volume.
4 Press ALARM SET A or B.
The setting is entered.
5 If “A” or “B” does not appear in the
display, press ALARM SET A or B
again.
The iPod will sound at the set time.
When using an iPod touch/iPhone
To wake up to music stored in an iPod touch/
iPhone, connect the iPod touch/iPhone to the
unit first, follow the steps above to set alarm
time, then select the music function.
Even if the alarm setting for iPod is complete, if
you turn the iPod touch/iPhone power off after
inserting the iPod touch/iPhone into the unit,
the alarm will be the buzzer.
To set the radio alarm
1
Perform steps 1 to 8 in “To set the alarm.”
2 Press ALARM SET A or B to select the
radio band (“DAB” or “FM”).
To set the radio alarm.”
Preset number
The preset number or “--” flashes in the
display.
3 Press TIME SET + or – to set a preset
number or “--” as the station to be used
as the alarm sound.
“DAB --” or “FM --” indicates the last station
received.
Tips
If the selected preset number is not set,
“PRESET BLANK” flashes twice, then
“ALARM VOLUME:” and the volume level
indication flash in the display. Then jump to
the step 5.
If there is no last station, “NO LAST
STATION” flashes twice, then “ALARM
VOLUME:” and the volume level indication
flash in the display. Then jump to the step 5.
4 Press ALARM SET A or B.
“ALARM VOLUME:” and the volume level
indication flash in the display.
5 Press TIME SET + or – to adjust the
volume.
6 Press ALARM SET A or B.
The setting is entered.
7 If “A” or “B” does not appear in the
display, press ALARM SET A or B
again.
The radio will turn on at the set time.
To set the buzzer alarm
1
Perform steps 1 to 8 in “To set the alarm.”
2 Press ALARM SET A or B to select
“BUZZER” alarm mode.
The setting is entered.
3 If “A” or “B” does not appear in the
display, press ALARM SET A or B
again.
The buzzer will sound at the set time.
Note
The volume of the buzzer is not adjustable.
To confirm an alarm time setting
Press TIME SET + or –. The setting will be
displayed for about 4 seconds.
To change an alarm setting
Press and hold TIME SET + for at least 2 seconds
to move the alarm time forwards. Press and hold
TIME SET – for at least 2 seconds to move the
alarm time back.
When you release the button, the changed time
will flash for about 2 seconds. To change the
alarm time again, press TIME SET + or – within
these 2 seconds, otherwise the setting change will
be fixed as displayed.
To doze for a few more minutes
Press SNOOZE/BRIGHTNESS.
The sound turns off but will automatically come
on again after about 10 minutes.
You can change the snooze time by pressing
SNOOZE/BRIGHTNESS repeatedly within 4
seconds.
The maximum length of the snooze time is 60
minutes.
To stop the snooze timer, press OFF.
To stop the alarm
Press OFF to stop the alarm.
The alarm will sound again at the same time the
next day.
To deactivate the alarm
Press ALARM ON/OFF A or B to turn off the
alarm A or B indicator in the display.
To activate the alarm
Press ALARM ON/OFF A or B to turn on the
alarm A or B indicator in the display.
Notes
When the alarm is set as iPod, only the buzzer
alarm will sound if there is no iPod on the Dock
Connector, music is not stored in the iPod, or
the iPod touch/iPhone is turned off.
If the selected preset number is not set, or there
is no last station, the buzzer will sound when
alarm time is met. If you want to change the
buzzer alarm, set a preset station or tune to a
radio station (see “Operating the radio”).
If the same alarm time is set for both alarm A
and B, alarm A takes priority.
If no operation is performed while the alarm is
occurring, the alarm will stop after about
60 minutes.
Note on the alarm in the event of a power
interruption
In the event of a power interruption, the buzzer
alarm will last about 5 minutes if the battery is not
weak.
However, certain functions will be affected as
follows:
The backlight will not light up.
If the alarm mode is set to iPod or radio, it will
change to buzzer automatically.
If OFF/ALARM RESET is not pressed, the alarm
will sound for about 5 minutes.
If “” appears in the display, the alarm will not
sound in the event of a power interruption.
Replace the battery if “” appears.
The snooze function cannot be set during a
power interruption.
During a power interruption, each alarm will
sound at the set time only once.
Setting the sleep timer
You can fall asleep to music, etc., using the sleep
timer. The unit stops playback or the radio
automatically after a preset duration.
1 Press SLEEP while the unit is turned on.
“SLEEP:” and the sleep time flash in the
display.
2 Press SLEEP to set the sleep timer
duration.
Each time you press SLEEP, the duration (in
minutes) changes as follows:
The display returns to clock mode for about
4 seconds after you have finished the duration
setting and released SLEEP, then the sleep
timer starts.
The unit plays for the duration you set, then
stops.
To turn off the unit before the preset
time
Press OFF.
To change the sleep timer setting
You can press SLEEP repeatedly to select the
desired sleep timer setting, even after the sleep
timer has been activated.
To deactivate the sleep timer
Press SLEEP repeatedly to set the sleep timer to
“OFF” in step 2.
Connecting optional
component
To listen to sound
You can enjoy the sound from an optional
component, such as a portable digital music player,
through the speakers of this unit. Be sure to turn
off the power of each component before making
any connections.
1 Firmly connect the line output jack of the
portable digital music player (or other
component) to the AUDIO IN jack on the
back of the unit, using a suitable audio
connecting cable (not supplied).
2 Press AUDIO IN to activate the Audio-in
function.
“AUDIO IN” appears in the display.
3 Turn the connected component on.
4
Play the connected component.
The sound from the connected component is
output from the speakers of this unit.
5 Adjust the volume using VOLUME + or –
(VOL + or – on the remote).
To return to the radio
Press DAB/FM.
To return to the iPod
Press .
To stop listening
Press OFF and stop playback on the connected unit.
Notes
The MENU cannot be operated while Audio-in
is used.
The necessary type of audio connecting cable
depends on the optional component. Be sure to
use the correct type of cable.
If the volume level is low, adjust the volume of
the unit first. If the volume is still too low, adjust
the volume of the connected component.
Disconnect the audio connecting cable from the
unit when it is not in use.
When you listen to the radio with an optional
component connected, turn off the connected
component to prevent noise. If noise occurs,
even when the component is turned off,
disconnect and place the optional component
away from the unit.
Other useful functions
Other useful functions
for DAB
To change the display
To change the display mode, press DSPL/ENT
during DAB reception. The selected display mode
remains even if you turn the unit off and on
again, or change the band.
The display can be up to 16 characters. A dynamic
label can be up to 128 characters.
Each time you press DSPL/ENT, the display
changes as follows:
Function and Preset number
Component Label
Dynamic
PTY (Programme Type)
Ensemble
Channel/Frequency/Signal Strength
Broadcasting type/Bit/Mode
DAB broadcasting: MP2
DAB+ broadcasting: AAC
Notes
If there is no dynamic label, the lower line of
the display is blank.
Depending on the broadcasting station, the
characters in the dynamic label may not be
displayed properly.
Manual tune
This function allows you to tune and add various
DAB Band-III channels to your station list.
This function can be used to assist the positioning
of the aerial or the unit to obtain the optimum
reception for a specific channel/frequency.
1 Press DAB/FM repeatedly to select the
DAB band.
2 Press MENU and SELECT or to
select “Manual Tune,” then press DSPL/
ENT (ENTER on the remote).
3 Press SELECT or to select the desired
DAB channel, then press DSPL/ENT
(ENTER on the remote).
The signal strength bars move left and right as
you adjust reception.
4 Press DSPL/ENT (ENTER on the
remote).
Notes
If the signal of the selected DAB service cannot
be received, no signal strength bars will be
displayed. In this case, press MENU to select
another channel.
The larger signal strength bar indicates the
audio quality threshold. If the signal strength
drops below this threshold, the audio quality
will deteriorate.
A station name is saved to the station list when
the station name starts scrolling in step 3.
DRC value (DYNAMIC RANGE CONTROL)
DRC can make quieter sounds easier to hear
when the unit is used in a noisy environment.
For DAB broadcasts with dynamic range
compression, you can adjust the dynamic range.
1 Press DAB/FM repeatedly to select the
DAB band.
2 Press MENU and SELECT or to
select “DRC Value,” then press DSPL/
ENT (ENTER on the remote).
3 Press SELECT or to select the DRC
level.
The DRC level changes as follows:
4 Press DSPL/ENT (ENTER on the
remote).
Notes
DRC is effective only for broadcasts with
dynamic range compression.
When you adjust the DRC level, sounds can be
heard more clearly.
Auto scan
This function allows you to automatically scan
and create a list of receivable DAB broadcasts.
1 Press DAB/FM repeatedly to select the
DAB band.
2 Press MENU and SELECT or to
select “Auto Scan,” then press DSPL/ENT
(ENTER on the remote).
3 Press SELECT or to select “Yes,” then
press DSPL/ENT (ENTER on the remote).
“Scanning...” appears in the display.
Auto scan takes about 30 - 90 seconds,
depending on the signal strength and station
number. When finished, the unit creates a list in
alphabetical order.
Tip
To cancel Auto scan, press MENU while
processing.
Note
When Auto scan is performed, the existing list
will be updated and the preset services will be
cleared. In this case, preset your favourite
services again.
Trim stations
You can delete the stations that are not currently
being received.
1 Press DAB/FM repeatedly to select the
DAB band.
2 Press MENU and SELECT or to
select “Prune,” then press DSPL/ENT
(ENTER on the remote).
When finished, “FINISH!” appears for about
1 second, then changes to the current station
automatically.
Select station
Another service can be selected while listening to
a broadcast.
1 Press MENU and SELECT or to
select “Select Station,” then press DSPL/
ENT (ENTER on the remote).
2 Press SELECT or to select a desired
service, then press DSPL/ENT (ENTER
on the remote).
PTY (Programme Type)
This function indicates services in programme
type, such as NEWS, SPORTS of the PTY list,
transmitted in a DAB broadcast.
Programme type Display
No programme type None
News News
Current Affairs Current Affairs
Information Information
Sport Sport
Education Education
Drama Drama
Culture Arts
Science Science
Varied
Pop Music
Rock Music Rock Music
Easy Listening Music Easy Listening
Light Classical Light Classical
Serious Classical Classical Music
Other Music Other Music
Weather/meteorology Weather
Finance/Business Finance
Children’s programmes Children’s
Social Affairs Factual
Religion Religion
Phone In Phone In
Talk
Pop Music
Programme type Display
Travel Travel
Leisure Leisure
Jazz Music Jazz and Blues
Country Music Country Music
National Music National Music
Oldies Music Oldies Music
Folk Music Folk Music
Documentary Documentary
Enjoying the bass or
expansion sound effect
Bass and expansion sound effects can be selected
as desired by pressing SOUND.
Each time you press the button, the sound effect
changes as follows:
“MEGA BASS”: Provides high quality bass sound.
“MEGA BASS” and “MEGA Xpand”: Enables
both effects.
“MEGA Xpand”: Expands the sound field width.
To return to standard sound, press the button
until the display of the sound effect disappears.
Setting the brightness
of the display
Four levels of brightness are available by pressing
SNOOZE/BRIGHTNESS. Each time you press the
button, the brightness changes as follows:
Even if brightness level is set to off, it will change
to Low while the alarm is occurring.
Press and hold SNOOZE/BRIGHTNESS to set the
brightness to off directly.
About App
A dedicated Dock App for iPod touch/iPhone
available at Apple App Store.
Search for “D-Sappli” and download the free App
to find out more about the functions.
Features
D-Sappli includes various timer functions:
Music Play Timer and Sleep Timer.
Music Play Timer allows you to play/pause
desired music at a desired time. Sleep Timer
allows you to specify a time at which to stop
music playback.
Music Play Timer and Sleep Timer are available
only when D-Sappli is activated.
D-Sappli can display a list of Radio Preset
Stations programmed in this unit.
You can rename the FM Radio Preset Stations,
and change their preset numbers on the
D-Sappli. Preset numbers and order will also be
changed accordingly in the unit.
D-Sappli also includes a clock display enlarge
feature.
Notes
If the App to link with this unit is not
downloaded to the iPod touch/iPhone, a popup message prompting you to download DSappli may appear repeatedly.
Deactivate the App’s link function to stop the
pop-up message.
To deactivate the App’s link function: Remove
the iPod touch/iPhone from the Dock
Connector. Press (to enter the function for
iPod). Press MENU, then press DSPL/ENT
(ENTER on the remote). Press or to select
“OFF,” then press DSPL/ENT (ENTER on the
remote).
To re-activate the App’s link function, repeat the
above steps and select “ON” instead of “OFF” in
the last step.
General information
Specifications
Time display
Switching between 24-hour system (default) and
12-hour system
iPod
DC out: 5V
MAX: 1A
Radio
Frequency range
Band Frequency
DAB
(Band-III)
FM 87.5 MHz -
DAB (Band-III) frequency table (MHz)
No. Channel Frequency
1 5A 174.928
2 5B 176.640
3 5C 178.352
4 5D 180.064
5 6A 181.936
6 6B 183.648
7 6C 185.360
8 6D 187.072
9 7A 188.928
10 7B 190.640
11 7C 192.352
12 7D 194.064
13 8A 195.936
14 8B 197.648
15 8C 199.360
16 8D 201.072
17 9A 202.928
18 9B 204.640
19 9C 206.352
20 9D 208.064
21 10A 209.936
22 10B 211.648
23 10C 213.360
24 10D 215.072
25 11A 216.928
26 11B 218.640
27 11C 220.352
28 11D 222.064
29 12A 223.936
30 12B 225.648
31 12C 227.360
32 12D 229.072
33 13A 230.784
34 13B 232.496
35 13C 234.208
36 13D 235.776
37 13E 237.488
38 13F 239.200
174.928 MHz -
239.200 MHz
108 MHz
General
Speaker
Approx. 57 mm dia. 6 Ω (2)
Input
AUDIO IN jack (ø 3.5 mm stereo minijack)
Power output
3.5 W + 3.5 W (at 10% harmonic distortion)
Power source
230 V AC, 50 Hz
For clock back up: 3V DC, CR2032 battery (1)
Dimensions
Approx. 290 mm × 165 mm × 145 mm (w/h/d)
including projecting parts and controls
Mass
Approx. 1.65 kg including power supply unit
Supplied accessories
Remote control (with a lithium battery) (1)
Startup Guide (1)
Reference Guide (this document) (1)
Cushion for small-size iPod (1)
Compatible iPod/iPhone
models
The compatible iPod/iPhone models are as
follows.
Update the software of the iPod/iPhone to the
latest version before using it with this unit.
iPod touch (4th generation)
iPod touch (3rd generation)
iPod touch (2nd generation)
iPod nano (6th generation)*
iPod nano (5th generation)
iPod nano (4th generation)
iPod nano (3rd generation)
iPod classic
iPhone 4S
iPhone 4
iPhone 3GS
iPhone 3G
Frequency step
0.05 MHz
The iPod nano (6th generation) cannot be
*
controlled by the remote when the command of
“MENU,” “,” “,” and “ENTER” is pressed.
Design and specifications are subject to change
without notice.
Troubleshooting
Should any problem persist after you have made
the following checks, consult your nearest Sony
dealer.
The clock flashes “AM 12:00” or “0:00” due to
a power interruption.
The battery is low. Replace the battery. Remove
the old battery and install a new one.
Be sure to remove the insulation film of the
backup battery before use.
The alarm of the radio, iPod or buzzer does
not sound at the preset alarm time.
Check that alarm “A” or alarm “B” is properly
displayed.
The alarm of the radio or iPod is activated
but no sound comes on at the preset alarm
time.
Check the alarm volume setting.
There is no sound from the iPod.
Make sure the iPod is securely connected.
Adjust the VOLUME + or – (VOL + or – on the
remote).
The iPod cannot be operated with this unit.
Make sure the iPod is securely connected.
Check that the iPod is compatible with this unit
(see “Compatible iPod/iPhone models”).
The iPod cannot be charged.
Make sure the iPod is securely connected.
Check that the iPod is compatible with this unit
(see “Compatible iPod/iPhone models”).
Page 2
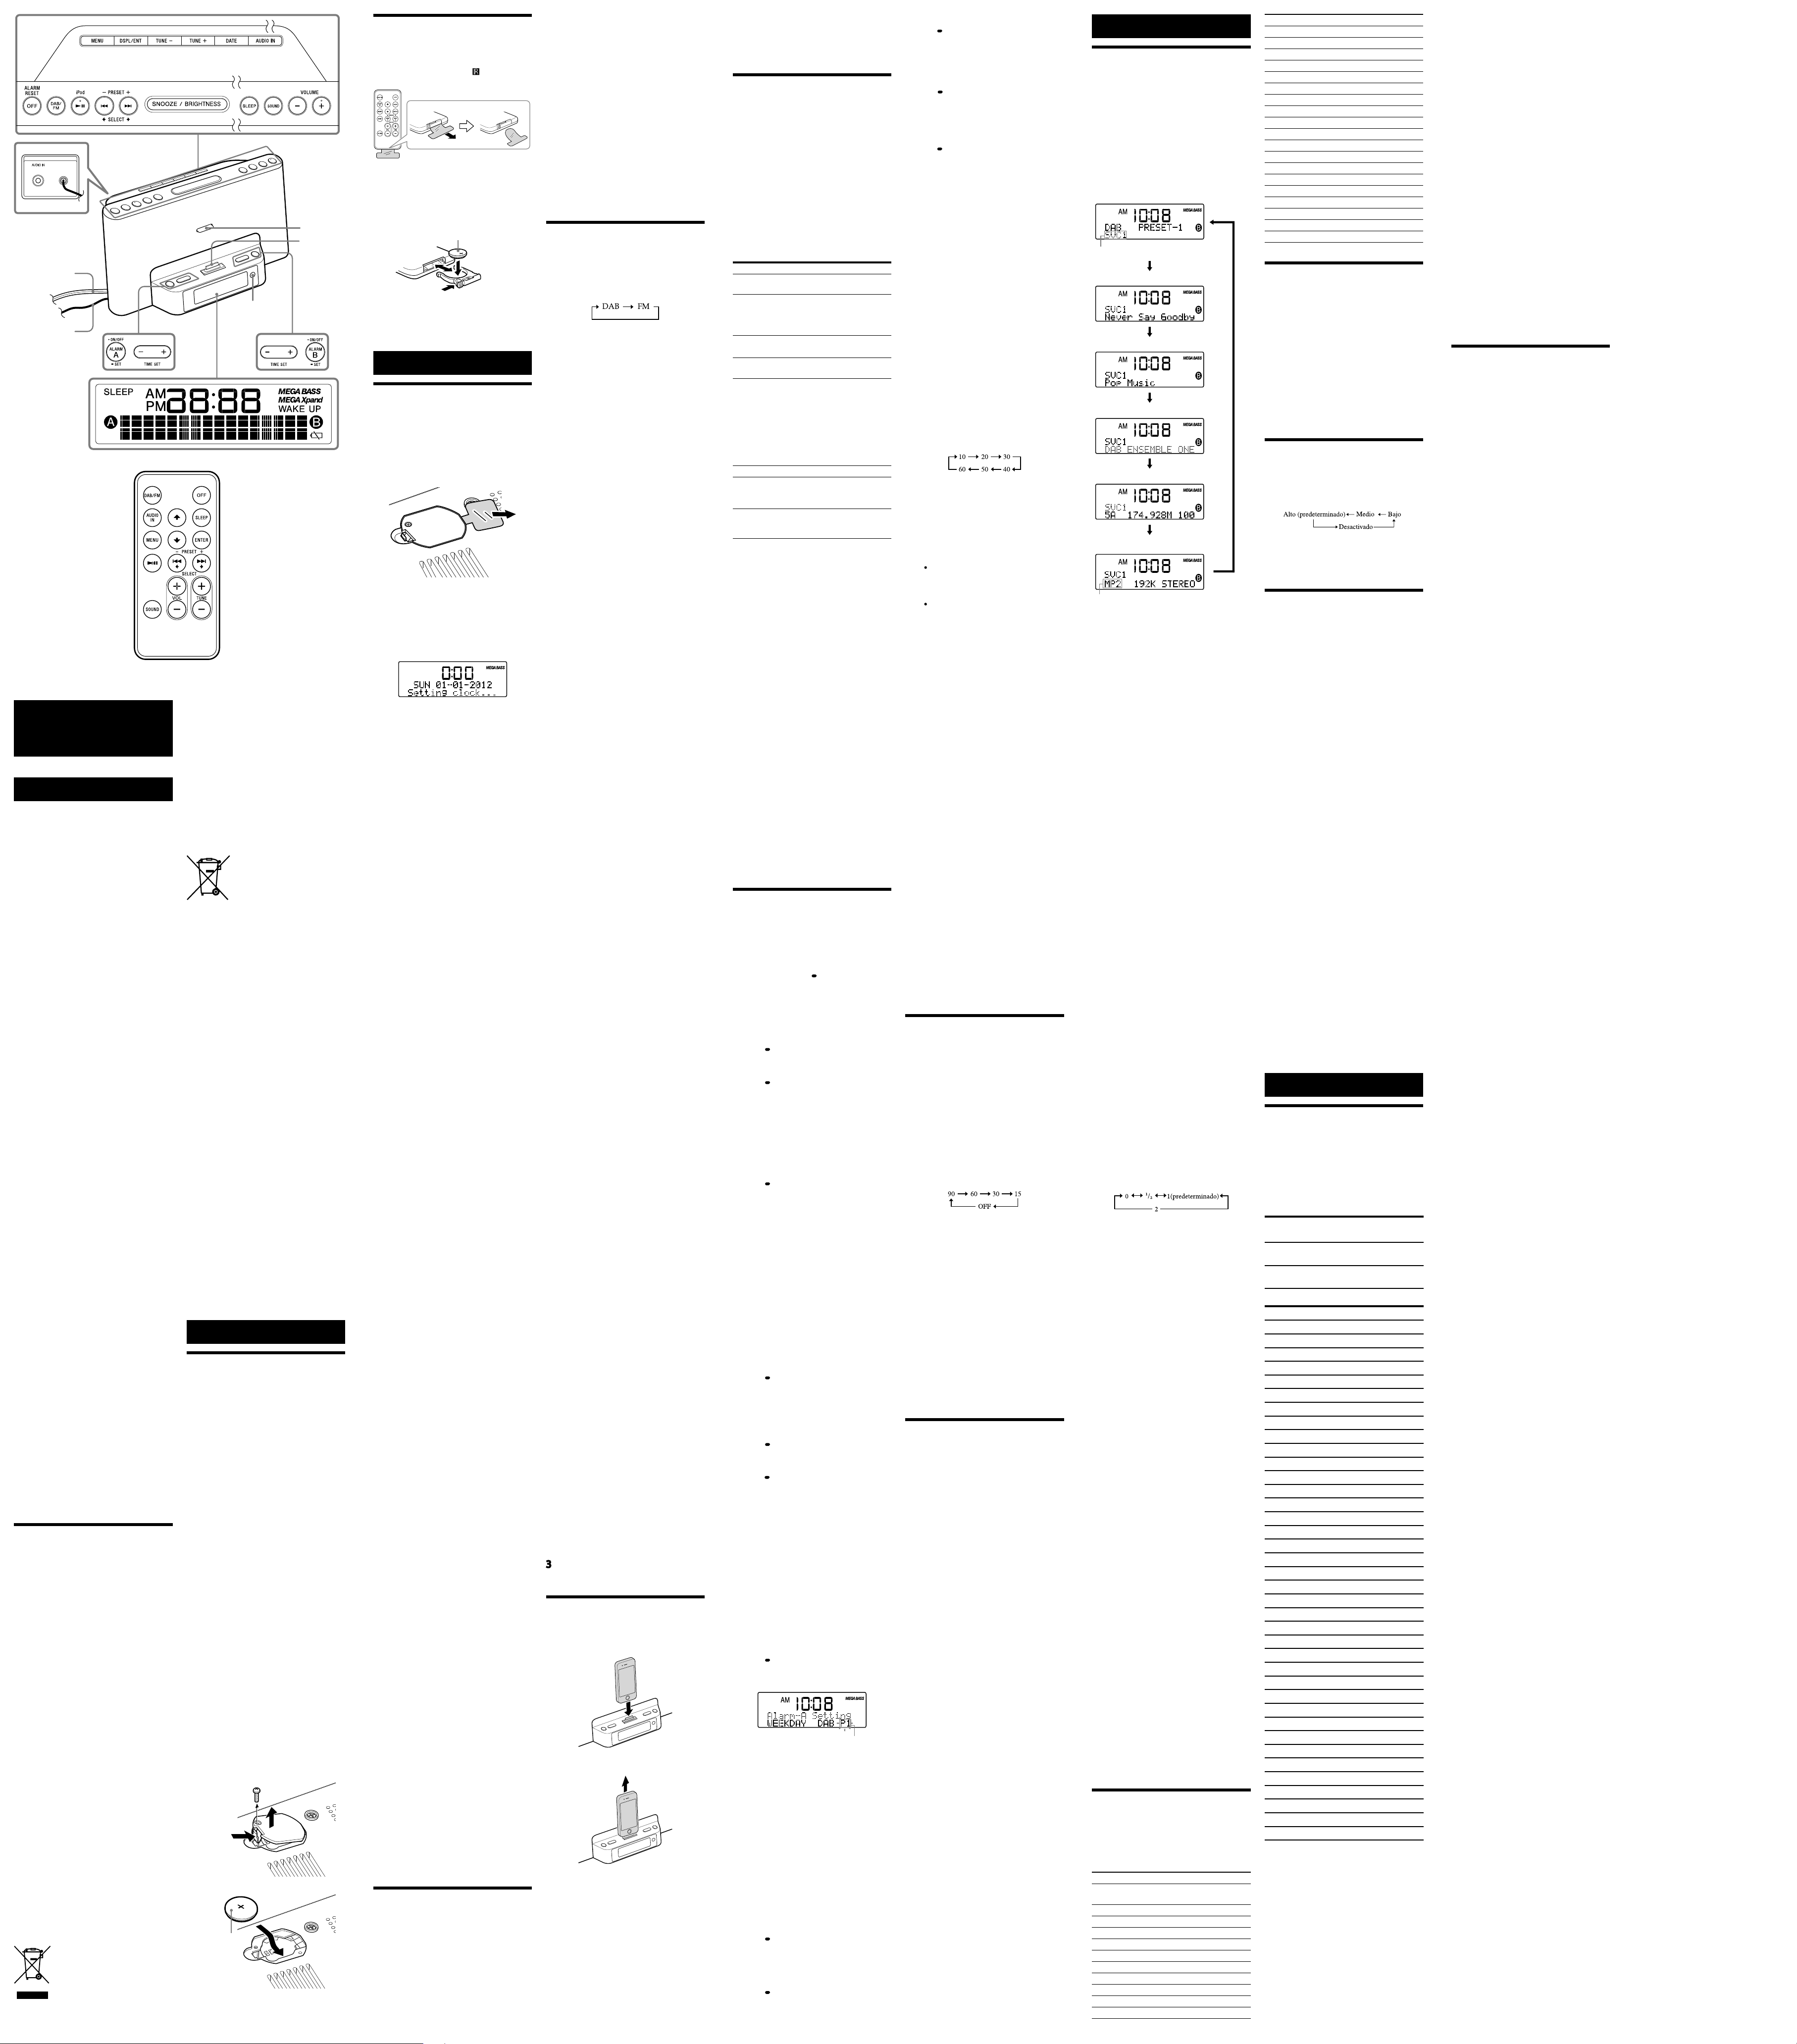
Cable de
alimentación
Sensor remoto
Cable de la
antena
Los botones VOLUME + (VOL + en el mando a distancia) y tienen un punto táctil.
como residuos doméstico normal. Debe
entregarse en el correspondiente punto de
recogida de equipos eléctricos y electrónicos. Al
asegurarse de que este producto se desecha
Español
ADVERTENCIA
Para reducir el riesgo de incendios o
electrocución, no exponga el aparato a la
lluvia ni a la humedad.
Para reducir el riesgo de incendios, no cubra las
aberturas de ventilación del aparato con
periódicos, manteles, cortinas, etc. ni coloque
velas encendidas encima de este.
Para reducir el riesgo de incendios o
electrocución, no exponga el aparato a goteos o
salpicaduras ni coloque objetos que contengan
líquidos como, por ejemplo, jarrones encima de
este.
No sitúe el aparato en un espacio cerrado, como
una estantería o un armario empotrado.
No exponga las pilas (baterías o pilas instaladas) a
fuentes de calor excesivo como la luz solar directa,
el fuego o similares durante un período de tiempo
prolongado.
Debido a que el enchufe del cable de alimentación
se utiliza para desconectar la unidad de la
corriente, conecte la unidad a una toma de
corriente de CA de fácil acceso. Si detecta alguna
anomalía en la unidad, desconecte el enchufe del
cable de alimentación de la toma de corriente de
ca inmediatamente.
La unidad no estará desconectada de la fuente de
alimentación de ca (corriente) mientras esté
conectada a la toma de pared, aunque se haya
apagado el reproductor.
La placa de características y otros datos
importantes relacionados con la seguridad se
encuentran en la parte inferior externa.
PRECAUCIÓN
Si sustituye la pila incorrectamente, existe riesgo
de explosión. Sustitúyala únicamente por otra del
mismo tipo.
Aviso para los clientes: la información
siguiente resulta de aplicación solo a los
equipos comercializados en países afectados
por las directivas de la UE
El fabricante de este producto es Sony
Corporation, 1-7-1 Konan Minato-ku Tokyo,
108-0075 Japón. El representante autorizado para
EMC y seguridad en el producto es Sony
Deutschland GmbH, Hedelfinger Strasse 61,
70327 Stuttgart, Alemania. Para cualquier asunto
relacionado con servicio o garantía por favor
diríjase a la dirección indicada en los documentos
de servicio o garantía adjuntados con el producto.
Acerca de los derechos de autor
iPhone, iPod, iPod classic, iPod nano y iPod touch
son marcas registradas de Apple Inc., registradas
en Estados Unidos y otros países.
“Made for iPod” y “Made for iPhone” significa
que un accesorio electrónico ha sido diseñado
específicamente para conectarse con iPod y
iPhone. Respectivamente, ha sido certificado por
el desarrollador para cumplir con los estándares
de rendimiento de Apple. En ningún caso Apple
se hace responsable de la operación de este
dispositivo o de su cumplimiento con los
estándares de regulación y seguridad. Por favor,
tenga en cuenta que el uso de este accesorio con el
iPod o iPhone puede afectar al rendimiento del
wireless.
Nota
Esta unidad no está diseñada para su uso con
un iPad; si lo hace, podría provocar una avería.
correctamente, usted ayuda a prevenir las
consecuencias potencialmente negativas para el
medio ambiente y la salud humana que podrían
derivarse de la incorrecta manipulación en el
momento de deshacerse de este producto. El
reciclaje de materiales ayuda a conservar los
recursos naturales. Para recibir información
detallada sobre el reciclaje de este producto,
póngase en contacto con el ayuntamiento, el
punto de recogida más cercano o el
establecimiento donde ha adquirido el producto.
Accesorio necesario: mando a distancia.
Tratamiento de las baterías al
final de su vida útil (aplicable
en la Unión Europea y en
países europeos con sistemas
de tratamiento selectivo de
residuos)
Este símbolo en la batería o en el embalaje indica
que la batería proporcionada con este producto
no puede ser tratada como un residuo doméstico
normal.
En algunas baterías este símbolo puede utilizarse
en combinación con un símbolo químico. El
símbolo químico del mercurio (Hg) o del plomo
(Pb) se añadirá si la batería contiene más del
0,0005% de mercurio o del 0,004% de plomo.
Al asegurarse de que estas baterías se desechan
correctamente, usted ayuda a prevenir las
consecuencias potencialmente negativas para el
medio ambiente y la salud humana que podrían
derivarse de la incorrecta manipulación en el
momento de deshacerse de la batería. El reciclaje
de materiales ayuda a conservar los recursos
naturales.
En el caso de productos que por razones de
seguridad, rendimiento o mantenimiento de datos
sea necesaria una conexión permanente con la
batería incorporada, esta batería solo deberá ser
reemplazada por personal técnico cualificado
para ello.
Para asegurarse de que la batería será tratada
correctamente, entregue el producto al final de su
vida útil en un punto de recogida para el reciclado
de aparatos eléctricos y electrónicos.
Para las demás baterías, consulte la sección donde
se indica cómo extraer la batería del producto de
forma segura. Deposite la batería en el
correspondiente punto de recogida para el
reciclado de baterías.
Para recibir información detallada sobre el
reciclaje de este producto o de la batería, póngase
en contacto con el ayuntamiento, el punto de
recogida más cercano o el establecimiento donde
ha adquirido el producto.
Si desea realizar alguna consulta o solucionar
algún problema relacionado con la unidad,
póngase en contacto con el distribuidor Sony más
cercano.
Preparativos
Fuente de alimentación
Esta unidad contiene una pila CR2032 como
fuente de alimentación de reserva para mantener
el funcionamiento de la alarma durante un corte
en el suministro eléctrico (Sistema “No Power No
Problem”).
Cuándo reemplazar la pila
Cuando la pila se está agotando, “” aparece en
la pantalla.
Si se produce un corte en el suministro eléctrico
cuando la pila se está agotando, se borrarán los
ajustes de la hora actual.
Sustituya la pila por una pila de litio Sony
CR2032. La utilización de otra pila podría
provocar un incendio o una explosión.
Cómo reemplazar la pila
Precauciones
Para desconectar el suministro de CA, tire del
enchufe, no del cable.
Debido a que el altavoz utiliza un imán potente,
mantenga las tarjetas de crédito que utilizan
codificación magnética, los relojes de cuerda,
televisores CRT o proyectores alejados de la
unidad para evitar posibles daños causados por
el imán.
No deje la unidad en un lugar cerca de una
fuente de calor, como un radiador o conducto
de aire, ni en un lugar expuesto a la luz solar
directa, polvo excesivo, vibraciones mecánicas o
golpes.
Permita una circulación de aire adecuada para
impedir la acumulación de calor interno. No
coloque la unidad sobre una superficie
(alfombra, manta, etc.) ni cerca de materiales
que puedan bloquear los orificios de ventilación
(como una cortina).
Si cae algún objeto sólido o líquido en la
unidad, desenchúfela y haga que la revise un
técnico especializado antes de volver a
utilizarla.
Durante una tormenta eléctrica no toque la
antena ni el enchufe.
No toque la unidad con las manos húmedas.
No ponga la unidad cerca de agua.
NOTAS SOBRE LA PILA DE LITIO
Limpie la pila con un paño seco para garantizar
un contacto óptimo.
Asegúrese de observar la polaridad correcta al
instalar la pila.
No sujete la pila con pinzas metálicas, ya que
podría producirse un cortocircuito.
Nota
En esta Guía de referencia, el término “iPod” se
utiliza como referencia general a las funciones
de un iPod o un iPhone, salvo que el texto o las
ilustraciones indiquen lo contrario.
Tratamiento de los equipos
eléctricos y electrónicos al final
de su vida útil (aplicable en la
Unión Europea y en países
europeos con sistemas de
tratamiento selectivo de
Este símbolo en el equipo o en su embalaje indica
que el presente producto no puede ser tratado
residuos)
1 Mantenga el enchufe de CA conectado a
la toma de corriente de CA, extraiga el
tornillo del compartimento de la pila en
la parte inferior de la unidad y abra la
tapa (consulte la figura ).
2 Quite la pila usada e inserte una nueva
en el compartimento de la pila con el
lado orientado hacia arriba (consulte
la figura ).
3 Vuelva a colocar la tapa del
compartimento de la batería y apriete el
tornillo.
4 Pulse , DAB/FM, AUDIO IN o
SNOOZE/BRIGHTNESS para apagar
“” en la pantalla.
Nota
Cuando sustituya la pila, no desconecte el
enchufe de CA de la toma de corriente de CA.
De lo contrario, se borrarán la fecha y la hora
actuales.
CR2032
Soporte
Base de
acoplamiento
Mando a distancia
Antes de utilizar el mando a distancia
suministrado por primera vez, retire la película de
aislamiento.
Apunte el mando a distancia al (sensor remoto)
de la unidad.
Cuándo reemplazar la pila
En condiciones normales de uso, la pila (CR2025)
tiene una duración aproximada de 6 meses.
Cuando la unidad ya no funcione con el mando,
sustituya la pila por una nueva.
Cara hacia arriba
Nota
Si no va a utilizar el mando durante un período
de tiempo prolongado, retire la pila para evitar
que se produzcan daños por fugas o corrosión.
Operaciones
Ajuste del reloj
Para ajustar el reloj por
primera vez
Justo después de comprar la unidad, haga lo
siguiente.
1 Retire la película aislante de la pila de
reserva en la parte inferior de la unidad.
2 Despliegue el cable de la antena por
completo.
3 Conecte la unidad.
“Setting clock...” aparece en la pantalla y se
ajusta la hora en función de los datos DAB
recibidos. Una vez terminada la operación,
aparecerá la hora actual en la pantalla.
Notas
No utilice la unidad hasta que “Setting clock...”
desaparezca de la pantalla.
Si no es posible ajustar el reloj porque no se
recibe ninguna señal DAB, “0:00”, el año y la
fecha parpadean en la pantalla. No es posible
ajustar el reloj. En este caso, ajuste
Sincronización de hora en “iPod” o “None”
(consulte “Sincronización de hora”).
Sincronización de hora
Tiene la opción de sincronizar la hora de las
emisiones DAB y el iPod en el modo del reloj.
1 Pulse MENU y SELECT o para
seleccionar “Synced Time By” y, a
continuación, pulse DSPL/ENT (ENTER
en el mando).
2 Pulse SELECT o para seleccionar
“DAB”, “iPod” o “None” y, a
continuación, pulse DSPL/ENT (ENTER
en el mando).
Seleccione “DAB” para sincronizar la hora con
DAB (predeterminado).
Seleccione “iPod” para sincronizar la hora con
el iPod.
Seleccione “None” si no desea realizar la
sincronización de hora.
3 En función de la selección anterior,
realice una de las operaciones siguientes:
Si ha seleccionado “DAB”, ajuste la banda de
radio en DAB.
Si ha seleccionado “iPod”, conecte un iPod a la
unidad.
Si ha seleccionado “None”, realice los pasos de
2 a 4 de “Para ajustar manualmente el reloj”.
Para ajustar manualmente el
reloj
Haga lo siguiente si desea ajustar el reloj
manualmente en lugar de sincronizar la hora con
DAB o el iPod.
1 Conecte la unidad.
2 Pulse MENU y SELECT o para
seleccionar “Date & Time” y,
seguidamente, pulse DSPL/ENT (ENTER
en el mando).
El año parpadea en la pantalla.
3 Pulse SELECT o para ajustar el año y,
a continuación, pulse DSPL/ENT
(ENTER en el mando).
4 Repita el paso 3 para ajustar el mes, el
día, la hora y los minutos.
Los segundos comienzan a contar a partir de
cero.
Notas
El ajuste del reloj solo está disponible en modo
reloj. (Cuando utilice la radio, un iPod o una
entrada de audio, pulse OFF antes de ajustar el
reloj.)
Si selecciona “iPod” o “DAB” en Sincronización
de hora, se sobrescribirá la hora del reloj
automáticamente con la hora del iPod o DAB.
Seleccione “None” en el paso 2 para desactivar
la sincronización de la hora a través del iPod o
DAB.
Si se ajusta el reloj a través de DAB, el horario
de verano se ajustará automáticamente. De lo
contrario, ajuste el horario de verano
manualmente o a través del iPod.
Si se ajusta el reloj a través de DAB, el reloj se
reiniciará a través de DAB después de un corte
de la electricidad. El reloj no se reiniciará si se
ha ajustado manualmente o a través del iPod.
Si no pulsa ningún botón durante 1 minuto
aproximadamente, se cancelará el proceso de
ajuste.
La unidad lleva instalado un calendario de 88
años (2012 - 2099). Cuando se ajusta la fecha, se
muestra automáticamente un día de la semana.
MON = lunes, TUE = martes,
WED = miércoles, THU = jueves,
FRI = viernes, SAT = sábado, SUN = domingo
Para cambiar el formato de la hora
Puede elegir entre dos formatos de hora: sistema
de 24 horas (predeterminado) y sistema de 12
horas.
1 Pulse
2 Pulse
Para cambiar el formato de la fecha
1 Pulse
2 Pulse
Para ver el año y la fecha cuando se
utiliza la radio
Pulse DATE.
Transcurridos unos segundos, la pantalla vuelve a
mostrar el servicio actual o la emisora
automáticamente.
Mejora de la recepción
DAB Band-III/FM
Extienda completamente el cable de la antena
para aumentar la sensibilidad de recepción.
Mantenga el cable de la antena alejado del cable
de alimentación.
No ate el cable de la antena y el cable de
alimentación.
Para la recepción DAB, pulse DSPL/ENT para ver
la intensidad de la señal y poder ajustar la antena
para mejorar la recepción.
MENU y SELECT
o para
seleccionar “Time Format” y, a
continuación, pulse DSPL/ENT (ENTER
en el mando).
SELECT
o para seleccionar el
formato de hora que desee y, a
continuación, pulse DSPL/ENT (ENTER
en el mando).
EL formato de hora alterna entre el sistema de
12 horas (“AM 12:00” = doce de la noche) y el
sistema de 24 horas (“0:00” = doce de la
noche).
MENU y SELECT
o para
seleccionar “Date Format” y, a
continuación, pulse DSPL/ENT (ENTER
en el mando).
SELECT
o para seleccionar el
formato de fecha que desee y, a
continuación, pulse DSPL/ENT (ENTER
en el mando).
Notas sobre la recepción de radio
Mantenga los reproductores de música digitales
y los teléfonos móviles alejados de la antena, ya
que podrían producir interferencias en la
recepción.
Al escuchar la radio con el iPhone conectado a
la unidad, es posible que se produzcan
interferencias en la recepción de radio.
Al escuchar la radio mientras se carga el iPod,
es posible que se produzcan interferencias en la
recepción de radio.
Sugerencia
Si una emisión FM presenta ruido, pulse MENU
y SELECT o para seleccionar “Mode” y, a
continuación, pulse DSPL/ENT (ENTER en el
mando). Pulse SELECT o para seleccionar
“MONO” en lugar de “AUTO STEREO” y,
seguidamente, pulse DSPL/ENT (ENTER en el
mando) de nuevo. Para reanudar la recepción
estéreo, repita los pasos anteriores.
Radiorrecepción
La unidad puede recibir DAB y emisoras FM.
1 Pulse DAB/FM varias veces para
seleccionar la banda que desee.
Con cada pulsación, la banda cambia de la
forma siguiente:
Si no se ha creado una lista de emisoras DAB
recibidas al seleccionar DAB, aparecerá
“Scanning…” (Buscando) en la pantalla y la
unidad comenzará a buscar automáticamente.
2 Pulse TUNE + o – para sintonizar el
servicio o la emisora que desee.
Si un servicio DAB seleccionado ha finalizado
la emisión, el sonido se detiene y aparece “NO
SERVICE” (Sin servicio). En este caso, pulse
TUNE + o – para seleccionar otro servicio.
3 Ajuste el volumen utilizando VOLUME +
o – (VOL + o – en el mando).
Para apagar la radio, pulse OFF.
Nota acerca del uso de FM
Los pasos de frecuencia se establecen en
0,05 MHz en FM.
Notas acerca del uso de DAB
“NO SERVICE” (Sin servicio) aparece cuando
no se puede recibir el servicio seleccionado.
Las emisiones DAB con una mala calidad de
recepción no pueden seleccionarse al utilizar la
opción Búsqueda automática. En este caso,
realice una Sintonización manual, que puede
servir para mejorar la recepción.
Acerca del CS (Componente secundario)
Si el componente principal seleccionado tiene un
componente secundario, “>>” se ilumina en la
pantalla.
Pulse TUNE + para recibir el componente
secundario que desee. “<<” se ilumina mientras se
recibe el componente secundario.
Nota
Cuando finalice el componente secundario, la
unidad volverá automáticamente al
componente principal.
Presintonización
Puede presintonizar hasta 20 servicios en DAB y
hasta 20 emisoras FM.
Cómo presintonizar un servicio o una
emisora
1 Siga los pasos 1 al 2 de
“Radiorrecepción” y sintonice
manualmente la emisora que quiera
presintonizar.
2 Pulse MENU y SELECT o para
seleccionar “Manual Preset” y,
seguidamente, pulse DSPL/ENT (ENTER
en el mando).
3 Pulse PRESET + o – para seleccionar el
número de presintonía que desee y,
seguidamente, pulse DSPL/ENT (ENTER
en el mando).
Esto significa que el servicio o la emisora se ha
guardado.
Notas
Para presintonizar otra emisora o servicio,
repita estos pasos.
Para volver al estado anterior, pulse MENU en
lugar de DSPL/ENT (ENTER en el mando) en el
paso 2.
Para cambiar el servicio o emisora
presintonizado, sintonice el servicio o emisora
que desee y repita los pasos de 1 a 3. El nuevo
servicio o emisora reemplazará al anterior.
Cómo sintonizar un servicio o emisora
memorizado
1 Pulse DAB/FM varias veces para
seleccionar la banda que desee.
2 Pulse PRESET + o – para seleccionar el
número de presintonía que desee.
Si el servicio o emisora no está registrado,
aparecerá “PRESET BLANK” en la pantalla.
También puede seleccionar el servicio o la
emisora memorizado con PRESET + o –.
3 Ajuste el volumen utilizando VOLUME +
o – (VOL + o – en el mando).
Notas
Si no hay emisoras presintonizadas, “PRESET
BLANK” aparecerá al pulsar PRESET + o –.
Si solo hay una emisora presintonizada, su
número de presintonía parpadeará cada vez que
pulse PRESET + o –.
Presintonización automática
(solo FM)
1 Pulse DAB/FM varias veces para
seleccionar la banda de FM.
2 Pulse MENU y SELECT o para
seleccionar “Auto Preset” y, a
continuación, pulse DSPL/ENT (ENTER
en el mando).
3
Pulse SELECT o para seleccionar
“Yes” y, a continuación, pulse DSPL/ENT
(ENTER en el mando).
La unidad presintoniza automáticamente los
canales disponibles en FM ordenados.
Sugerencia
Para detener la sintonización de presintonías
automática, pulse OFF.
Búsqueda de sintonización
(solo FM)
La unidad busca automáticamente emisoras FM.
1 Pulse DAB/FM varias veces para
seleccionar la banda FM.
2 Mantenga pulsado TUNE + o –.
+: realiza una búsqueda ascendente por las
bandas de frecuencia.
–: realiza una búsqueda descendente por las
bandas de frecuencia.
La búsqueda comienza a partir de la
frecuencia sintonizada actualmente. Cuando
se recibe una emisora, la búsqueda se detiene.
Ajuste el volumen utilizando VOLUME +
o – (VOL + o – en el mando).
Cómo manipular un
iPod
Para colocar un iPod
Para extraer un iPod
Notas
Es posible colocar un iPod con funda o carcasa
en esta unidad. No obstante, si la funda o la
carcasa impide la conexión, quite la funda o la
carcasa antes de colocar el iPod en el conector
de la base de acoplamiento.
Coloque el iPod en la base de acoplamiento con
fuerza.
Cuando coloque o extraiga el iPod, sujételo en
el mismo ángulo que el del conector de la base
de acoplamiento de la unidad. No tire del iPod
hacia delante demasiado.
Al colocar o extraer el iPod, sujete la unidad
con fuerza.
No gire ni doble el iPod, ya que podría averiar
el conector.
Extraiga el iPod cuando quiera transportarlo;
en caso contrario, podría averiarlo.
Si el iPod no llega al soporte situado en la parte
frontal de la unidad, coloque el adaptador
suministrado debajo del soporte.
Reproducción de un
iPod
1 Coloque el iPod en la base de
acoplamiento.
La base de acoplamiento puede inclinarse
ligeramente.
Para obtener más información, consulte
“Cómo manipular un iPod”.
2 Pulse .
El iPod empezará a reproducir.
Si el iPod no empieza a reproducir, manipule
directamente el iPod.
Puede manipular el iPod conectado a través de
esta unidad o a través del iPod.
3 Ajuste el volumen utilizando VOLUME +
o – (VOL + o – en el mando).
Para Pulse
Apagar el iPod
Insertar una pausa en la
reproducción
Ir a la pista siguiente
Retroceder a la pista
anterior
Localizar un punto
mientras escucha el sonido
Volver al menú anterior
Seleccionar un elemento de
menú o una pista para
reproducir
Activar el menú
seleccionado o iniciar la
reproducción
Durante la reproducción, esta operación vuelve
*
al principio de la pista actual. Para volver a la
pista anterior, púlselo dos veces.
Notas
Si aparece un mensaje emergente en la pantalla
del iPod touch o el iPhone, consulte “Acerca de
las aplicaciones”.
Algunas operaciones pueden no coincidir o
puede que no estén disponibles en algunos
modelos de iPod.
Si el iPod ya está reproduciendo al colocarlo en
la unidad, el sonido del iPod se emitirá a través
de los altavoces de la unidad, aunque la unidad
estuviera reproduciendo sonido de otra
función.
Si la carga de la batería del iPod es muy baja,
cargue el dispositivo antes de utilizarlo.
Sony declina toda responsabilidad en el caso de
la pérdida o corrupción de datos grabados en
un iPod al utilizarlo conectado a esta unidad.
Para obtener información detallada acerca de
las condiciones ambientales para utilizar el
iPod, consulte el sitio web de Apple Inc.
OFF, o mantenga
pulsado
Para reanudar la
reproducción,
púlselo otra vez.
(hacia
delante)
(hacia atrás)*
(hacia
delante) o
(hacia atrás)
durante la
reproducción y
manténgalo
pulsado hasta que
encuentre el
punto.
MENU
(arriba)/
(abajo) en el
mando
DSPL/ENT
(ENTER en el
mando)
Para extraer un iPod
Para obtener más información, consulte “Cómo
manipular un iPod”.
Para cargar un iPod
Puede utilizar la unidad como un cargador de
baterías del iPod.
La carga empieza al conectar el iPod a la unidad.
El estado de la carga aparece en la pantalla del
iPod. Para obtener más información, consulte el
manual del usuario del iPod.
Ajuste de la alarma
Esta unidad está equipada con 3 modos de
alarma: iPod, radio y pitido. Es necesario ajustar
el reloj antes de poder ajustar la alarma (consulte
“Para ajustar el reloj por primera vez”).
Para ajustar la alarma
1 Mantenga pulsado ALARM SET A o B.
“Alarm–A Setting” o “Alarm–B Setting”
aparece y la hora parpadea en la pantalla.
2 Pulse TIME SET + o – varias veces hasta
que aparezca la hora deseada.
Para pasar las horas rápidamente, mantenga
pulsado TIME SET + o –.
3 Pulse ALARM SET A o B.
Los minutos parpadean.
4 Repita el paso 2 para ajustar los minutos.
5 Pulse ALARM SET A o B.
Los días de la semana parpadean.
6 Repita el paso 2 para ajustar los días de la
semana.
Puede seleccionar el día a partir de las tres
opciones siguientes pulsando TIME SET + o – :
EVERYDAY: MON TUE WED THU FRI SAT
SUN
WEEKDAY: MON TUE WED THU FRI
WEEKEND: SAT SUN
7 Pulse ALARM SET A o B.
Se introduce el ajuste de modo de alarma.
8 Pulse TIME SET + o – varias veces hasta
que parpadee el modo de alarma
deseado.
Puede seleccionar uno de los 4 ajustes
siguientes: “iPod”, “DAB”, “FM” o “BUZZER”.
Ajuste el modo de alarma como se indica a
continuación:
– iPod: consulte “
iPod”.
– DAB o FM: consulte “
de radio”.
– BUZZER: consulte “
de pitido”.
Ajuste de la alarma de iPod
1
Realice los pasos 1 a 8 de “Para ajustar la
alarma”.
2 Pulse ALARM SET A o B para
seleccionar el modo de alarma “iPod”.
“ALARM VOLUME:” y la indicación del nivel
de volumen parpadean en la pantalla.
3 Pulse TIME SET + o – para ajustar el
volumen.
4 Pulse ALARM SET A o B.
El ajuste se confirma.
5 Si “A” o “B” no se muestran en la pantalla,
pulse ALARM SET A o B de nuevo.
Se iniciará la reproducción en el iPod a la hora
establecida.
Si utiliza un iPod touch o un iPhone
Para despertarse con la música almacenada en
un iPod touch o un iPhone, conecte primero el
iPod touch o el iPhone a la unidad, siga los
pasos anteriores para ajustar la hora de alarma
y, a continuación, seleccione la función de
música.
Incluso si el ajuste de alarma definido para iPod
está completo, si apaga el iPod touch/iPhone
tras insertar el iPod touch/iPhone en la unidad,
la alarma será el pitido.
Ajuste de la alarma de radio
1
Realice los pasos 1 a 8 de “Para ajustar la
alarma”.
2 Pulse ALARM SET A o B para
seleccionar la banda de radio (“DAB” o
“FM”
).
El número de presintonía o “--” parpadea en
la pantalla.
3 Pulse TIME SET + o – para definir un
número de presintonía o “--” como
emisora utilizada al sonar la alarma.
“DAB --” o “FM --” indican la última emisora
recibida.
Sugerencia
Si el número de presintonía seleccionado no
está ajustado, “PRESET BLANK” parpadea
dos veces y “ALARM VOLUME:” y la
indicación del nivel de volumen parpadean
en la pantalla. Vaya directamente al paso 5.
Si no hay ninguna última emisora, “NO
LAST STATION” parpadea dos veces y
“ALARM VOLUME:” y la indicación del
nivel de volumen parpadean en la pantalla.
Vaya directamente al paso 5.
4 Pulse ALARM SET A o B.
“ALARM VOLUME:” y la indicación del nivel
de volumen parpadean en la pantalla.
5 Pulse TIME SET + o – para ajustar el
volumen.
6 Pulse ALARM SET A o B.
El ajuste se confirma.
Ajuste de la alarma de
Ajuste de la alarma
Ajuste de la alarma
Número de presintonía
7 Si “A” o “B” no se muestran en la pantalla,
pulse ALARM SET A o B de nuevo.
La radio se encenderá a la hora ajustada.
Ajuste de la alarma de pitido
1
Realice los pasos 1 a 8 de “Para ajustar la
alarma”.
2 Pulse ALARM SET A o B para
seleccionar el modo de alarma
“BUZZER”.
El ajuste se confirma.
3 Si “A” o “B” no se muestran en la pantalla,
pulse ALARM SET A o B de nuevo.
El pitido sonará a la hora ajustada.
Nota
El volumen del pitido no puede ajustarse.
Para confirmar un ajuste de hora de
alarma
Pulse TIME SET + o –. Se mostrará el ajuste
durante 4 segundos aproximadamente.
Para cambiar el ajuste de la alarma
Mantenga pulsado TIME SET + durante 2
segundos como mínimo para avanzar la hora de
la alarma. Mantenga pulsado TIME SET – durante
2 segundos como mínimo para hacer retroceder
la hora de la alarma.
Cuando suelte el botón, la hora cambiada
parpadeará durante 2 segundos
aproximadamente. Para cambiar de nuevo la hora
de la alarma, pulse TIME SET + o – durante estos
2 segundos; en caso contrario, el cambio del ajuste
se establecerá tal y como se muestra.
Para dormir algunos minutos más
Pulse SNOOZE/BRIGHTNESS.
El sonido se desactiva, pero vuelve a activarse
automáticamente transcurridos unos 10 minutos.
Puede cambiar la hora de repetición si pulsa
SNOOZE/BRIGHTNESS varias veces antes de que
transcurran 4 segundos.
El tiempo máximo de la repetición de la alarma es
de 60 minutos.
Para detener el temporizador con repetición,
pulse OFF.
Para detener la alarma
Pulse OFF para detener la alarma.
La alarma sonará de nuevo a la misma hora el día
siguiente.
Para desactivar la alarma
Pulse ALARM ON/OFF A o B para apagar el
indicador de alarma A o B de la pantalla.
Para activar la alarma
Pulse ALARM ON/OFF A o B para activar el
indicador de alarma A o B de la pantalla.
Notas
Si la alarma está ajustada en el iPod, solo sonará
el pitido si no hay ningún iPod colocado en la
base de acoplamiento, si no hay música
guardada en el iPod o si el iPod touch/iPhone
está apagado.
Si el número de presintonía seleccionado no
está ajustado, o no hay ninguna última emisora,
el pitido sonará cuando llegue la hora
programada. Si quiere cambiar la alarma de
pitido, ajuste una emisora presintonizada o
sintonice una emisora de radio (consulte
“Radiorrecepción”).
Si se establece la misma hora de alarma para la
alarma A y B, la alarma A tendrá prioridad.
Si no se realiza ninguna operación mientras se
activa la alarma, ésta se detendrá transcurridos
unos 60 minutos.
Nota acerca de la alarma en caso de
producirse un corte en el suministro eléctrico
En caso de producirse un corte en el suministro
eléctrico, la alarma de pitido durará unos
5 minutos si queda carga en la pila.
No obstante, determinadas funciones se verán
afectadas como se indica a continuación:
La luz de fondo no se encenderá.
Si el modo de alarma está ajustado en iPod o
radio, cambiará automáticamente al pitido.
Si no pulsa OFF/ALARM RESET, la alarma
sonará durante unos 5 minutos.
Si aparece “” en la pantalla, la alarma no
sonará en el caso de producirse un corte del
suministro eléctrico. Sustituya la pila si aparece
“”.
La función de repetición no puede fijarse
durante un corte en el suministro eléctrico.
Durante un corte en el suministro eléctrico, la
alarma sonará a la hora establecida solamente
una vez.
Ajuste del
temporizador de
desconexión
Puede dormirse con música, etc., si utiliza el
temporizador de desconexión. La unidad
detendrá la reproducción o apagará la radio
automáticamente después de la duración
programada.
1 Pulse SLEEP con la unidad encendida.
En la pantalla aparece “SLEEP:” y la hora de
desconexión parpadea.
2 Pulse SLEEP para ajustar la duración del
temporizador de desconexión.
Cada vez que pulse SLEEP, la duración (en
minutos) cambiará de la siguiente forma:
La pantalla vuelve al modo de reloj durante
unos 4 segundos después de haber finalizado
el ajuste de la duración y de soltar SLEEP, se
activa el temporizador de desconexión.
La unidad reproduce el tiempo programado y,
a continuación, se apaga.
Para apagar la unidad antes de la hora
establecida
Pulse OFF.
Para cambiar el ajuste del temporizador
de desconexión
Pulse SLEEP varias veces para seleccionar el ajuste
deseado del temporizador de desconexión aunque
ya se encuentre activado.
Para desactivar el temporizador de
desconexión
Pulse SLEEP varias veces para ajustar el
temporizador de desconexión en “OFF” en el paso
2.
Conexión de
componentes
opcionales
Para escuchar el sonido
Es posible disfrutar del sonido de un componente
opcional, como un reproductor de música digital
portátil, a través de los altavoces de la unidad.
Asegúrese de apagar todos los componentes antes
de realizar las conexiones.
1 Conecte con firmeza la toma de salida de
línea de un reproductor de música digital
portátil (u otro componente) a la toma
AUDIO IN de la parte trasera de la
unidad mediante un cable de conexión
de audio adecuado (no suministrado).
2 Pulse AUDIO IN para activar la función
de entrada de audio.
“AUDIO IN” aparece en la pantalla.
3 Encienda el componente conectado.
4
Reproduzca el componente conectado.
El sonido del componente conectado sale a
través de los altavoces de esta unidad.
5
Ajuste el volumen utilizando
o – (
VOL +
o – en el mando).
Para volver al modo de radio
Pulse DAB/FM.
Para volver al modo de iPod
Pulse .
Para detener la escucha
Pulse OFF y detenga la reproducción en la unidad
conectada.
Notas
No es posible utilizar el MENU mientras se
utiliza una entrada de audio.
El tipo necesario de cable de conexión de audio
depende del componente opcional. Es muy
importante usar el tipo adecuado de cable.
Si el nivel del volumen es bajo, ajuste primero el
volumen de la unidad. Si el volumen sigue
siendo demasiado bajo, ajuste el volumen del
componente conectado.
Desconecte el cable de conexión de audio de la
unidad cuando no la utilice.
Cuando escuche la radio con un componente
opcional, apague el componente conectado para
evitar que se produzca ruido. Si se produce
ruido, incluso después de apagar el componente,
desconecte el componente opcional y aléjelo de
la unidad.
VOLUME +
Otras funciones útiles
Otras funciones útiles
para DAB
Para cambiar la visualización
Para cambiar el modo de visualización, pulse
DSPL/ENT durante la recepción DAB. El modo
de visualización seleccionado se conservará
incluso si apaga y vuelve a encender la unidad o si
cambia de banda.
La visualización puede tener hasta 16 caracteres.
Una etiqueta dinámica puede tener hasta 128
caracteres.
Cada vez que pulse DSPL/ENT, la pantalla
cambiará de la siguiente forma:
Función y número de presintonía
Etiqueta del componente
Dinámico
PTY (Tipo de programa)
Conjunto
Canal/Frecuencia/Intensidad de la señal
Tipo de emisión/bits/modo
Emisión DAB: MP2
Emisión DAB+: AAC
Notas
Si no hay etiqueta dinámica, la línea inferior de
la pantalla está vacía.
En función de la emisora sintonizada, es posible
que los caracteres de la etiqueta dinámica no se
visualicen correctamente.
Sintonización manual
Esta función permite sintonizar y añadir distintos
canales DAB Band-III a su lista de emisoras.
La función se puede utilizar para mejorar la
posición del cable de la antena o de la unidad y
obtener así una recepción óptima de canales/
frecuencias concretos.
1 Pulse DAB/FM varias veces para
seleccionar la banda DAB.
2 Pulse MENU y SELECT o para
seleccionar “Manual Tune” y, a
continuación, pulse DSPL/ENT (ENTER
en el mando).
3 Pulse SELECT o para seleccionar el
canal DAB que desee y, a continuación,
pulse DSPL/ENT (ENTER en el mando).
Las barras de intensidad de la señal se mueven
a izquierda y derecha mientras ajusta la
recepción.
4 Pulse DSPL/ENT (ENTER en el mando).
Notas
Si no se recibe la señal del servicio DAB
seleccionado, no aparecerán barras de
intensidad de la señal. En este caso, pulse
MENU para seleccionar otro canal.
La barra de intensidad de la señal más grande
indica el nivel máximo de calidad de audio. Si la
señal se sitúa por debajo de este nivel, es posible
que la calidad del audio empeore.
Se guarda un nombre de emisora en la lista de
emisoras cuando el nombre de la emisora
empieza a moverse en el paso 3.
Valor de DRC (CONTROL DEL RANGO
DINÁMICO)
La función DRC mejora la percepción de sonidos
más bajos cuando la unidad se encuentra en un
entorno ruidoso.
En emisiones DAB con compresión del rango
dinámico, es posible ajustar el rango dinámico.
1 Pulse DAB/FM varias veces para
seleccionar la banda DAB.
2 Pulse MENU y SELECT o para
seleccionar “DRC Value” y, a
continuación, pulse DSPL/ENT (ENTER
en el mando).
3 Pulse SELECT o para seleccionar el
nivel de DRC.
El nivel de DRC cambia del modo siguiente:
4 Pulse DSPL/ENT (ENTER en el mando).
Notas
La función DRC es eficaz únicamente en
emisiones con compresión del rango dinámico.
Al ajustar el nivel de DRC, los sonidos se
escucharán más claramente.
Búsqueda automática
Estas funciones permiten buscar emisoras
automáticamente y crear una lista de las emisoras
DAB recibidas.
1 Pulse DAB/FM varias veces para
seleccionar la banda DAB.
2 Pulse MENU y SELECT o para
seleccionar “Auto Scan” y, a continuación,
pulse DSPL/ENT (ENTER en el mando).
3 Pulse SELECT o para seleccionar
“Yes” y, a continuación, pulse DSPL/ENT
(ENTER en el mando).
“Scanning...” aparece en la pantalla.
La búsqueda automática tarda entre 30 y 90
segundos, en función de la intensidad de la señal
y del número de emisora. Al terminar, la unidad
crea una lista en orden alfabético.
Sugerencia
Para cancelar la búsqueda automática, pulse
MENU durante la operación.
Nota
Cuando se lleva a cabo la búsqueda automática,
la lista existente se actualiza y se borran los
servicios presintonizados. En este caso, vuelva a
presintonizar sus servicios favoritos.
Emisoras descartadas
Puede borrar emisoras que no se estén recibiendo.
1 Pulse DAB/FM varias veces para
seleccionar la banda DAB.
2 Pulse MENU y SELECT o para
seleccionar “Prune” y, a continuación,
pulse DSPL/ENT (ENTER en el mando).
Cuando haya finalizado, “FINISH!” aparecerá
aproximadamente 1 segundo y se cambiará a
la estación actual automáticamente.
Selección de una emisora
Se puede seleccionar otro servicio mientras se
escucha una emisora.
1 Pulse MENU y SELECT o para
seleccionar “Select Station” y, a
continuación, pulse DSPL/ENT (ENTER
en el mando).
2 Pulse SELECT o para seleccionar el
servicio que desee y, a continuación,
pulse DSPL/ENT (ENTER en el mando).
PTY (Tipo de
programa)
Esta función indica los servicios disponibles en
cada tipo de programa transmitido en el servicio
DAB, por ejemplo, NOTICIAS o DEPORTES de
la lista PTY.
Tipo de programa Pantalla
No se indica el tipo
programa
Noticias News
Magazin Current Affairs
Información Information
Deportes Sport
Educación Education
Drama Drama
Cultura Arts
Ciencia Science
Varios Talk
Música Pop Pop Music
None
Tipo de programa Pantalla
Música Rock Rock Music
Grand éxitos Easy Listening
Música Ligera Light Classical
Música Clásica Classical Music
Otra Música Other Music
Información Metereológica Weather
Economia Finance
Infancia Children’s
Sociedad Factual
Religión Religion
Opinión Phone In
Viajes Travel
Ocio Leisure
Música Jazz Jazz and Blues
Música Country Country Music
Música Nacional National Music
Música de ayer Oldies Music
Música Folk Folk Music
Documental Documentary
Utilización de los
efectos de graves y
sonido ampliado
Los efectos de graves y sonido ampliado pueden
seleccionarse pulsando SOUND.
Cada vez que pulse el botón, el efecto del sonido
cambia en la siguiente secuencia:
“MEGA BASS”: sonido de graves de alta calidad.
“MEGA BASS” y “MEGA Xpand”: activación de
los dos efectos.
“MEGA Xpand”: ampliación de la anchura del
campo de sonido.
Para volver al sonido normal, pulse el botón hasta
que desaparezca la pantalla de los efectos de
sonido.
Ajuste del brillo de la
pantalla
Hay cuatro niveles de brillo disponibles al pulsar
SNOOZE/BRIGHTNESS. Cada vez que pulse el
botón, el brillo cambia en la siguiente secuencia:
Incluso si el nivel de brillo está apagado, cambiará
a Bajo mientras esté sonando la alarma.
Mantenga pulsado SNOOZE/BRIGHTNESS para
desactivar el brillo directamente.
Acerca de las
aplicaciones
En el App Store de Apple encontrará una
aplicación específica para la base de acoplamiento
del iPod touch/ iPhone.
Busque “D-Sappli” y descargue la aplicación
gratuita para obtener más información acerca de
las funciones.
Características
D-Sappli incluye diferentes funciones de
temporización: Music Play Timer y Sleep
Timer.
La función Music Play Timer permite
reproducir o poner en pausa la música a una
hora concreta. La función Sleep Timer permite
especificar a qué hora desea detener la
reproducción de música.
Las funciones Music Play Timer y Sleep Timer
funcionan solo si D-Sappli está activado.
D-Sappli puede mostrar una lista con las
emisoras de radio presintonizadas programadas
en esta unidad.
Puede cambiar el nombre de las emisoras de
radio presintonizadas FM y también modificar
los números de presintonía en el D-Sappli. Los
números de presintonía y su orden también se
modificarán en la unidad.
D-Sappli también ofrece una función para
ampliar la vista del reloj.
Notas
Si la aplicación para conectar con esta unidad
no se descarga al iPod touch/iPhone, es posible
que aparezca un mensaje emergente para que
descargue D-Sappli.
Desactive la función de conexión de la
aplicación para evitar que aparezca el mensaje.
Para desactivar la función de conexión de la
aplicación: desconecte el iPod touch/iPhone de
la base de acoplamiento. Pulse (para entrar
en la función del iPod). Pulse MENU y, a
continuación, pulse DSPL/ENT (ENTER en el
mando). Pulse o para seleccionar “OFF” y
pulse DSPL/ENT (ENTER en el mando).
Para volver a activar la función de conexión de
la aplicación: repita los pasos anteriores y
seleccione “ON” en lugar de “OFF” en el último
paso.
Información general
Especificaciones
Visualización de la hora
Posibilidad de sistema de 24 horas
(predeterminado) y sistema de 12 horas
iPod
Salida de CC: 5 V
MÁX.: 1 A
Radio
Gama de frecuencias
Banda Frecuencia
DAB
(Band-III)
FM 87,5 MHz -
Tabla de frecuencias DAB (Band-III) (MHz)
N.º Canal Frecuencia
1 5A 174,928
2 5B 176,640
3 5C 178,352
4 5D 180,064
5 6A 181,936
6 6B 183,648
7 6C 185,360
8 6D 187,072
9 7A 188,928
10 7B 190,640
11 7C 192,352
12 7D 194,064
13 8A 195,936
14 8B 197,648
15 8C 199,360
16 8D 201,072
17 9A 202,928
18 9B 204,640
19 9C 206,352
20 9D 208,064
21 10A 209,936
22 10B 211,648
23 10C 213,360
24 10D 215,072
25 11A 216,928
26 11B 218,640
27 11C 220,352
28 11D 222,064
29 12A 223,936
30 12B 225,648
31 12C 227,360
32 12D 229,072
33 13A 230,784
34 13B 232,496
35 13C 234,208
36 13D 235,776
37 13E 237,488
38 13F 239,200
174,928 MHz 239,200 MHz
108 MHz
Generales
Altavoz
Aprox. 57 mm diám. 6 Ω (2)
Entrada
Toma AUDIO IN (minitoma estéreo ø 3,5 mm)
Salida de potencia
3,5 W+ 3,5 W (con un 10% de distorsión
armónica)
Fuente de alimentación
230 V CA, 50 Hz
Para la alimentación de reserva del reloj: pila
CR2032 de 3 V CC (1)
Dimensiones
Aprox. 290 mm × 165 mm × 145 mm (an/al/pr)
incluidos salientes y mandos
Incrementos
de frecuencia
0,05 MHz
Peso
Aprox. 1,65 kg incluida la fuente de alimentación
Accesorios suministrados
Mando a distancia (con una pila de litio) (1)
Guía de inicio rápido (1)
Guía de referencia (este documento) (1)
Almohadilla para iPod pequeño (1)
Modelos de iPod/iPhone
compatibles
A continuación se indican los modelos de iPod/
iPhone compatibles.
Actualice el software del iPod/iPhone a la última
versión antes de utilizar esta unidad.
iPod touch (4ª generación)
iPod touch (3ª generación)
iPod touch (2ª generación)
iPod nano (6ª generación)*
iPod nano (5ª generación)
iPod nano (4ª generación)
iPod nano (3ª generación)
iPod classic
iPhone 4S
iPhone 4
iPhone 3GS
iPhone 3G
El iPod nano de (6ª generación) no puede
*
controlarse utilizando el mando a distancia si se
pulsa el comando “MENU”, “”, “”, o “ENTER”.
El diseño y las especificaciones están sujetos a
cambios sin previo aviso.
Solución de problemas
Si persiste algún problema tras realizar las
siguientes comprobaciones, póngase en contacto
con el distribuidor Sony más cercano.
“AM 12:00” o “0:00” parpadea en el reloj
debido a un corte en el suministro eléctrico.
La pila dispone de poca energía. Sustituya la
pila. Extraiga la pila antigua e instale la nueva.
Asegúrese de quitar la película aislante de la
batería de reserva antes de usarla.
La alarma de radio, iPod o pitido no se activa
a la hora de alarma preestablecida.
Compruebe que la indicación de alarma “A” o
alarma “B” se muestre correctamente.
La alarma de la radio o de iPod se activa,
pero no se oye ningún sonido a la hora de
alarma preestablecida.
Compruebe el ajuste del volumen de la alarma.
No se oye ningún sonido a través del iPod.
Asegúrese de que el iPod se encuentra
correctamente conectado.
Ajuste VOLUME + o – (VOL + o – en el
mando).
No se puede utilizar el iPod con esta unidad.
Asegúrese de que el iPod se encuentra
correctamente conectado.
Compruebe que el iPod es compatible con esta
unidad (consulte “Modelos de iPod/iPhone
compatibles”).
No se puede cargar el iPod.
Asegúrese de que el iPod se encuentra
correctamente conectado.
Compruebe que el iPod es compatible con esta
unidad (consulte “Modelos de iPod/iPhone
compatibles”).
 Loading...