How it Works
Log In / Sign Up
Buy Points
How it Works
FAQ
Contact Us
Questions and Suggestions
Users
Sony
Loading...
W
WHCH710NB
WHCH710NL
WHCH710NW
WHG-SLK1I
6
WHG-SLK2i
4
WHH800
2
WHH910NB
WHH910NG
WHH910NL
WHH910NR
WHRF400
WHXB700
7
WHXB900N
11
WI-1000X
3
WI1000XM2
3
WI1000XM2B
WI1000XM2S
WI-1000X-NM
WI-C200
2
WIC300
4
WIC300B
WI-C300-BZ
WI-C300L
WI-C300-LZ
WIC310
4
WI-C400
5
WI-C400-BZ
WI-C600N
7
WI-C600NB
WI-H700
3
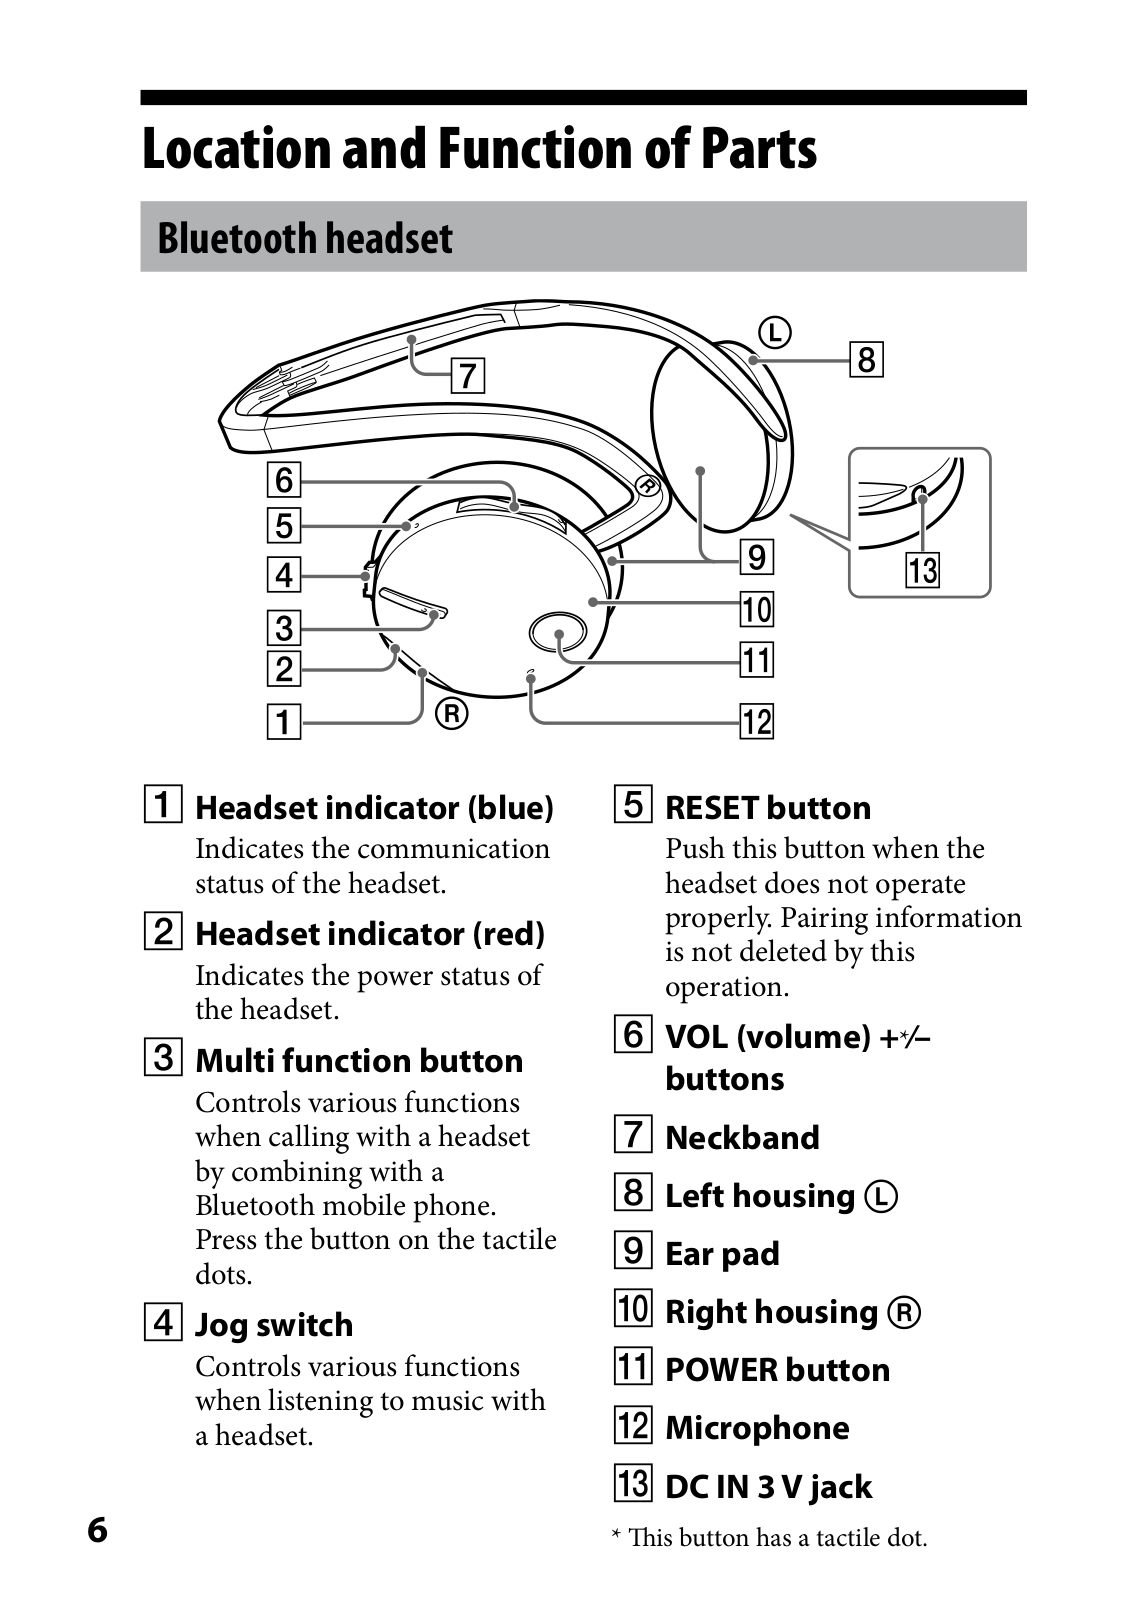
Wireless Noise Canceling Stereo Headset
WI-SP500
5
WISP500B
WISP500P
WI-SP500-PQ
WISP500W
WISP500W.E
WI-SP500-WQ
WISP500Y
WI-SP510
WISP510B
WISP510W
WI-SP600
WI-SP600N
4
Wistron Tucana MBX-238
WI-XB400
3
WI-XB400B
2
WIXB400L
WK1-MBX175
WLA-NWB1
4
WLA-NWB1K
4
WLL-CA50
3
WLL-CA55
2
WLL-RX50
WLL-RX55
WM-100 Mk2
WM-102
wm-109
WM-190
WM-2011
WM-2013
WM-2051
2
WM-2055
WM-2091
2
WM-29
WM-3
WM-3060
WM-3300
WM-3500
WM-507
WM-509
WM-600
WM-607
WM-701C
2
WM-805
WM-A12
2
WM-A26
WM-A602
2
WM-AF23
2
WM-AF48
WM-AF54
WM-AF56
WM-AF58
WM-AF59
2
WM-AF604
2
WM-AF605
2
WM-AF62
2
WM-D3
4
WM-D6C
7
WM-DD9
2
WM-DD II
WM-DDT1
3
WM-E40ST
2
WM-EC1
4
WM-EQ3
WM-EQ5
WM-EQ7
WM EX422
5
WM FX131
WM SR10
4
Loading...
Loading...
Nothing found
WLA-NWB1K
User Manual [it]
72 pgs
809.66 Kb
0
Operating Manual
36 pgs
491.8 Kb
0
User Manual
72 pgs
797.68 Kb
0
User Manual [ja]
44 pgs
1.13 Mb
0
Table of contents
Loading...
Sony WLA-NWB1K Operating Manual
...
Sony Operating Manual
Download
Specifications and Main Features
Frequently Asked Questions
User Manual
Download
Loading...
+
25
hidden pages
Unhide
You need points to download manuals.
1 point = 1 manual.
You can buy points or you can get point for every manual you upload.
Buy points
Upload your manuals
 Loading...