

Page 1

© 2006 Sony Corporation Printed in China
2-696-733-11 (1)
Quick Start Guide
NW-A605 / A607 / A608
Page 2
3
Owner’s Record
The model and serial numbers are located on the back of the player. Record them in the
space provided below. Refer to these numbers in the spaces whenever you call upon your
Sony dealer regarding this product.
Model No. __________________________
Serial No. __________________________
Table of Contents
Introduction ............................................................8
Getting Started .................................................... 10
Supplied Items ...................................................................... 10
Installing SonicStage ............................................................ 11
Importing Music ................................................... 14
Transferring Music .............................................. 16
Playing Music .......................................................18
Basic Operation – Parts and Controls .................................................... 18
FM Tuner ............................................................... 22
Listening to FM Radio ........................................................... 22
The use of the player is described in this “Quick Start Guide,” in the “Operation Guide”
(available as a PDF file), and in the SonicStage Help (accessible from within SonicStage
software).
– Quick Start Guide: Explains basic operation of the player, including importing,
transferring, and playing music tracks.
– Operation Guide: Explains advanced features of the player and offers troubleshooting
information.
– SonicStage Help: Explains details of using the SonicStage software.
If you have any questions about or issue with this product, visit the following web sites.
For customers in the USA: http://www.sony.com/walkmansupport/
For customers in Canada: http://www.sony.ca/ElectronicsSupport/
For customers in Europe: http://www.sonydigital-link.com/DNA/
For customers in China: http://service.sony.com.cn/KB/
For customers in Taiwan: http://www.twsupport.css.ap.sony.com/
For customers in Korea: http://scs.sony.co.kr/walkman/
For customers in other countries or areas: http://www.css.ap.sony.com/
To learn about advanced features of the player
• For information about advanced features of the player and about troubleshooting
technical issues, refer to the Operation Guide (PDF file). To view the Operation Guide
(PDF file), click “Start” – “All Programs”– “SonicStage” –“NW-A600 Series Operation
Guide.”
• You need Adobe Acrobat Reader 5.0 or later, or Adobe Reader software in your
computer.
Adobe Reader can be downloaded from the Internet for free.
Page 3
4
5
WARNING
To reduce the risk of fire or electric shock, do not expose this
apparatus to rain or moisture.
Do not install the appliance in a confined space, such as a bookcase or built-in cabinet.
To reduce the risk of fire, do not cover the ventilation of the apparatus with news papers, tablecloths,
curtains, etc. And don’t place lighted candles on the apparatus.
To reduce the risk of fire or electric shock, do not place objects filled with liquids, such as vases, on the
apparatus.
For Customers in the USA
INFORMATION:
This equipment has been tested and found to comply with the limits for a Class B digital device,
pursuant to Part 15 of the FCC Rules. These limits are designed to provide reasonable protection against
harmful interference in a residential installation. This equipment generates, uses, and can radiate radio
frequency energy and, if not installed and used in accordance with the instructions, may cause harmful
interference to radio communications. However, there is no guarantee that interference will not occur
in a particular installation. If this equipment does cause harmful interference to radio or television
reception, which can be determined by turning the equipment off and on, the user is encouraged to try
to correct the interference by one or more of the following measures:
– Reorient or relocate the receiving antenna.
– Increase the separation between the equipment and receiver.
– Connect the equipment into an outlet on a circuit different from that to which the receiver is
connected.
– Consult the dealer or an experienced radio/TV technician for help.
You are cautioned that any changes or modifications not expressly approved in this manual could void
your authority to operate this equipment.
If you have any questions about this product:
Visit:
www.sony.com/walkmansupport
Contact:
Sony Customer Information Service Center at 1-(866)-456-7669
Write:
Sony Customer Information Services Center
12451 Gateway Blvd.,
Fort Myers, FL 33913
Model NW-A605/A607/A608
Declaration of Conformity
Trade Name: SONY
Model No.: NW-A605/A607/A608
Responsible Party: Sony Electronics Inc.
Address: 16530 Via Esprillo,
San Diego, CA 92127, U.S.A.
Telephone Number: 858-942-2230
This device complies with Part 15 of the FCC Rules. Operation is subject to the
following two conditions: (1) This device may not cause harmful interference, and
(2) this device must accept any interference received, including interference that
may cause undesired operation.
For Customers in Russia
Page 4

6
7
Notice for users
• The recorded music is limited to private use only. Use of the music beyond this limit requires
permission of the copyright holders.
• Sony is not responsible for incomplete recording/downloading or damaged data due to problems of
the player or computer.
• Depending on the types of the text and characters, the text shown on the player may not be displayed
properly on device. This is due to:
– The capacity of the connected player.
– The player is not functioning normally.
– The ID3 TAG information for the track is written in the language or the character that is not
supported by the player.
On sample audio data
The player is pre-installed with sample audio data so that you can try it out right away. The pre-installed
sample audio data is for the purpose of trial listening only, therefore, you cannot transfer it to your
computer. To delete this audio data, delete it using SonicStage.
Depending on your region, sample audio data may not be pre-installed in the player.
• SonicStage and the SonicStage logo are trademarks or registered trademarks of Sony Corporation.
• OpenMG, ATRAC, ATRAC3, ATRAC3plus, and their logos are trademarks of Sony Corporation.
• “WALKMAN” and “WALKMAN” logo are registered trademark of Sony Corporation.
• Microsoft, Windows, Windows NT, and Windows Media are trademarks or registered trademarks of
Microsoft Corporation in the United States and/or other countries.
• Adobe and Adobe Reader are trademarks or registered trademarks of Adobe Systems Incorporated in
the United States and/or other countries.
• MPEG Layer-3 audio coding technology and patents licensed from Fraunhofer IIS and Thomson.
• CD and music-related data from Gracenote, Inc., copyright © 2000-2004 Gracenote.
Gracenote CDDB® Client Software, copyright 2000-2004 Gracenote. This product and service may
practice one or more of the following U.S. Patents: #5,987,525; #6,061,680; #6,154,773, #6,161,132,
#6,230,192, #6,230,207, #6,240,459, #6,330,593, and other patents issued or pending. Services
supplied and/or device manufactured under license for following Open Globe,Inc. United States
Patent 6,304,523. Gracenote and CDDB are registered trademarks of Gracenote. The Gracenote logo
and logotype, and the “Powered by Gracenote” logo are trademarks of Gracenote.
• IBM and PC/AT are registered trademarks of International Business Machines Corporation.
• Macintosh is a trademark of Apple Computer, Inc..
• Pentium is a trademark or a registered trademark of Intel Corporation.
• All other trademarks and registered trademarks are trademarks or registered trademarks of their
respective holders. In this manual, TM and ® marks are not specified.
Program ©2006 Sony Corporation
Documentation ©2006 Sony Corporation
Page 5
8
9
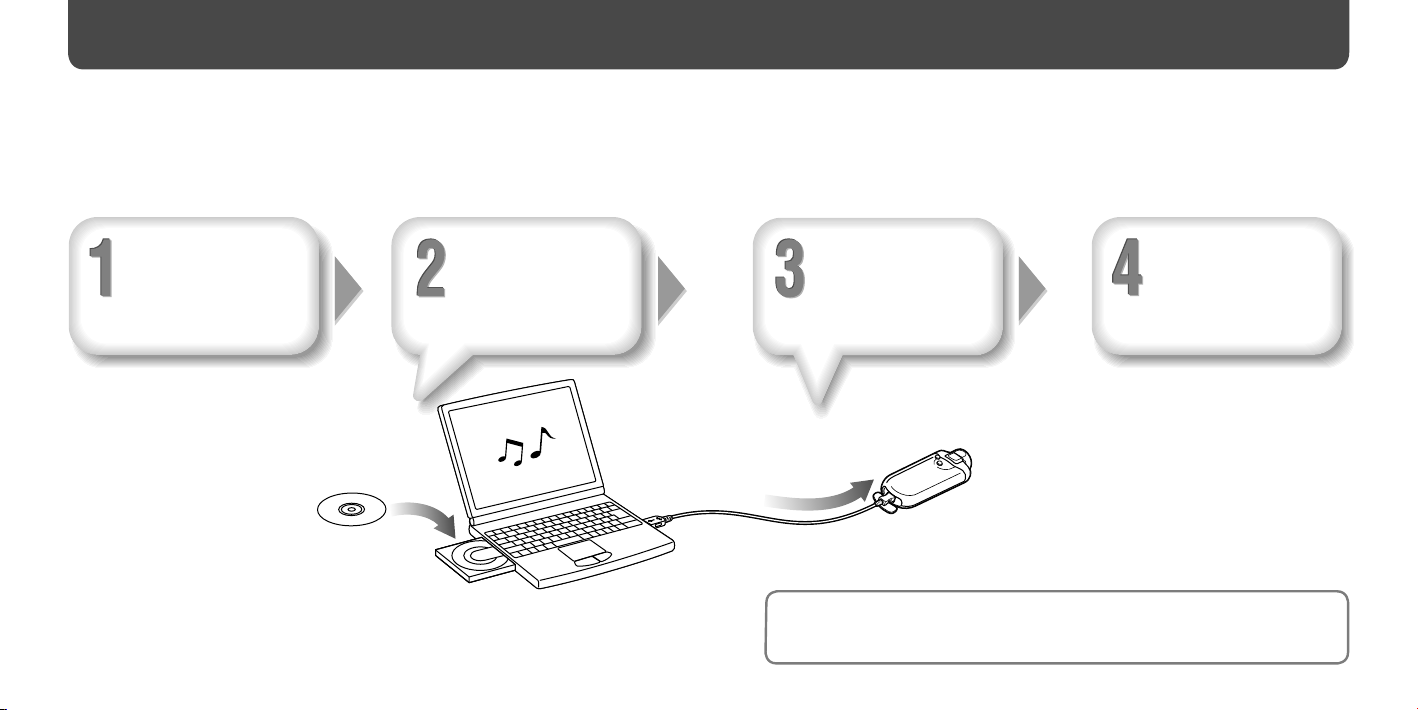
You can charge the player’s battery by connecting the player to your computer with the
supplied USB cable.
For details on charging times, see the Operation Guide (PDF file).
Getting
Started
(See page 10)
Importing
Music
(See page 14)
Transferring
Music
(See page 16)
Playing
Music
(See page 18)
Introduction
Thank you for purchasing the NW-A605/A607/A608.
To begin using the player, first import music tracks into your computer using the
SonicStage software, and then transfer them to the player.
After transferring the music tracks to the player, you can enjoy them wherever you go.
Page 6
10
11
Getting Started
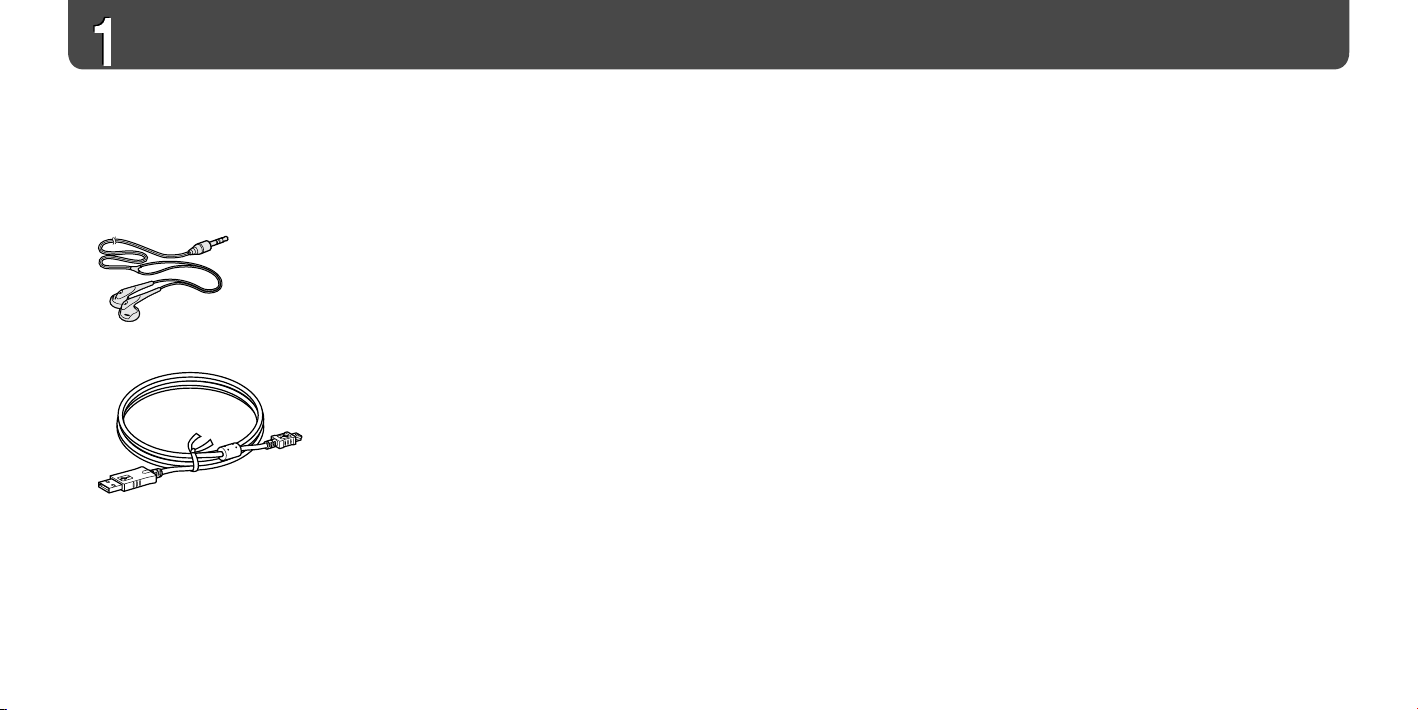
Supplied Items
Check the following items.
Headphones (1) Headphone extension cord (1)
Neck strap (China model only) (1)
Carrying pouch (1)
Clip (1)
This is used to clip onto your cloths
when carrying the player.
CD-ROM* (1)
– SonicStage software
– Operation Guide (PDF file)
* Do not attempt to play this CD-ROM
in an audio CD player.
Quick Start Guide (this manual) (1)
USB cable (1)
Installing SonicStage
Install SonicStage according to the following instructions.
If SonicStage is already installed, it will be overwritten. All functions and audio data from
the previous installation will be preserved on the new installation.
Notes on before installing
• Do not format the built-in flash memory using Windows Explorer.
• Necessary computer system environment for using the player:
Computer: IBM PC/AT or compatible computer preinstalled with the following Windows
operating systems.
– Windows 98 Second Edition
– Windows Millennium Edition
– Windows 2000 Professional (Service Pack 3 or later)
– Windows XP Home Edition/Windows XP Professional/Windows XP Media Center
Edition/Windows XP Media Center Edition 2004/Windows XP Media Center Edition
2005
Windows 95, Windows 98 Gold Edition, Windows NT, other versions (Server, etc.) of
Windows2000 may not be guaranteed.
– CPU: Pentium III 450 MHz or higher
– RAM: 128 MB or more
– Hard Disk Drive: 200 MB or more of available space (1.5 GB or more is
recommended). More space may be required depending on the version of the operating
system. Additional space is required for storing music data.
– Display:
Screen Resolution: 800 × 600 pixels (or higher) (recommended 1024 × 768 or higher)
Colors: High Color (16 bit) (or higher) (SonicStage may not operate properly at color
settings at or below 256 colors.)
Page 7

12
13
– CD-ROM drive (supporting Digital Music CD playback capabilities using WDM)
To create original CDs or to back up audio CDs, a CD-R/RW drive is required.
– Sound board
– USB port (Hi speed USB is recommended)
• Internet connection is required to use the CD Data Base (CDDB).
• To use Electronic Music Distribution (EMD), you need Internet connection, and Internet
Explorer 5.5 or later needs to be installed.
• This software is not supported by the following environments:
– OSs other than those indicated above
– Personally constructed PCs or operating systems
– An environment that is an upgrade of the original manufacturer-installed operating
system
– Multi-boot environment
– Multi-monitor environment
– Macintosh
We do not guarantee operation for all computers even if they meet the above System
Requirements.
1
Turn on the computer and start Windows.
Log on as an administrator.
2
Quit all activated software programs on your computer.
Be sure to quit any anti-virus software as it may strain the CPU.
3
Insert the supplied CD-ROM into your computer.
The install wizard will start automatically and the Main Menu appears.
4
Install SonicStage and Operation Guide (PDF).
Click “Install SonicStage” from the Main Menu, and follow the on-screen
instructions.
Installation may take 20 to 30 minutes depending on your computer. If prompted,
restart the computer after installing.
To install the Operation Guide (PDF file)
Click “Install Hardware Operation Guide (PDF)”, and then follow the on-screen
instructions.
When installation is not successful
Visit the following web sites:
For customers in the USA: http://www.sony.com/walkmansupport/
For customers in Canada: http://www.sony.ca/ElectronicsSupport/
For customers in Europe: http://www.sonydigital-link.com/DNA/
For customers in China: http://service.sony.com.cn/KB/
For customers in Taiwan: http://www.twsupport.css.ap.sony.com/
For customers in Korea: http://scs.sony.co.kr/walkman/
For customers in other countries or areas: http://www.css.ap.sony.com/
If the issue persists:
Consult your nearest Sony dealer.
Getting Started (continued)
Page 8
14
15
1
Double-click icon on the desktop.
SonicStage starts up.
2
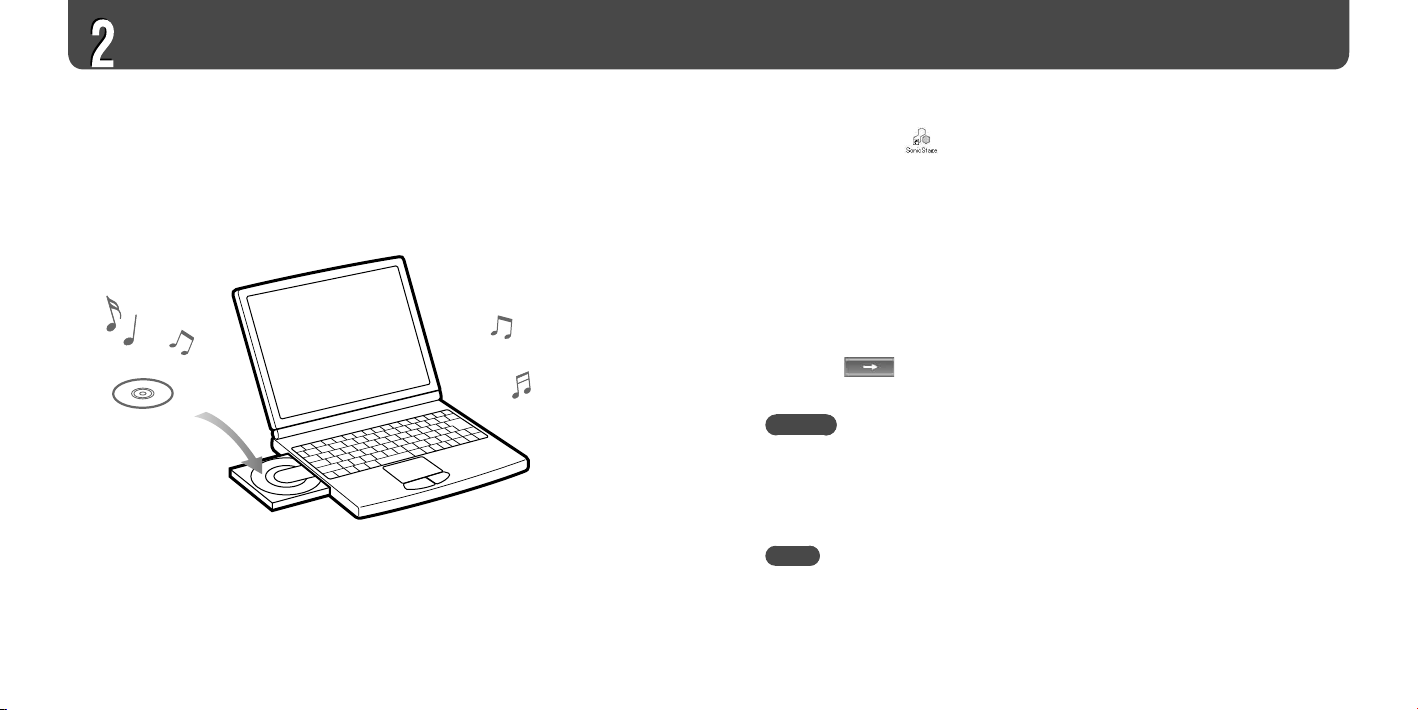
Insert the audio CD that you want to import to hard drive of your
computer.
You can obtain CD information (song name or artist name, etc.) while connected to
the Internet.
3
Place the pointer over [Music Source] at the top of the screen and
click [Import a CD].
The screen for importing is displayed, and the song list of the CD appears.
4
Click at the right of the screen.
Importing audio data starts.
Hint
• SonicStage also offers the following additional features. For details, refer to SonicStage Help.
– Importing audio files downloaded from the Internet and audio files stored on your computer,
such as MP3 or ATRAC format audio files.
– Importing only selected audio files from a CD.
– Changing the audio formats and bit rates of audio tracks.
Note
• When you use the SonicStage with the CD drive for the first time, a CD drive check will be
performed. Follow the on-screen instructions.
Importing Music
Import audio data to your computer using the SonicStage.
The methods of importing tracks of CD are described here.
Page 9
16
17
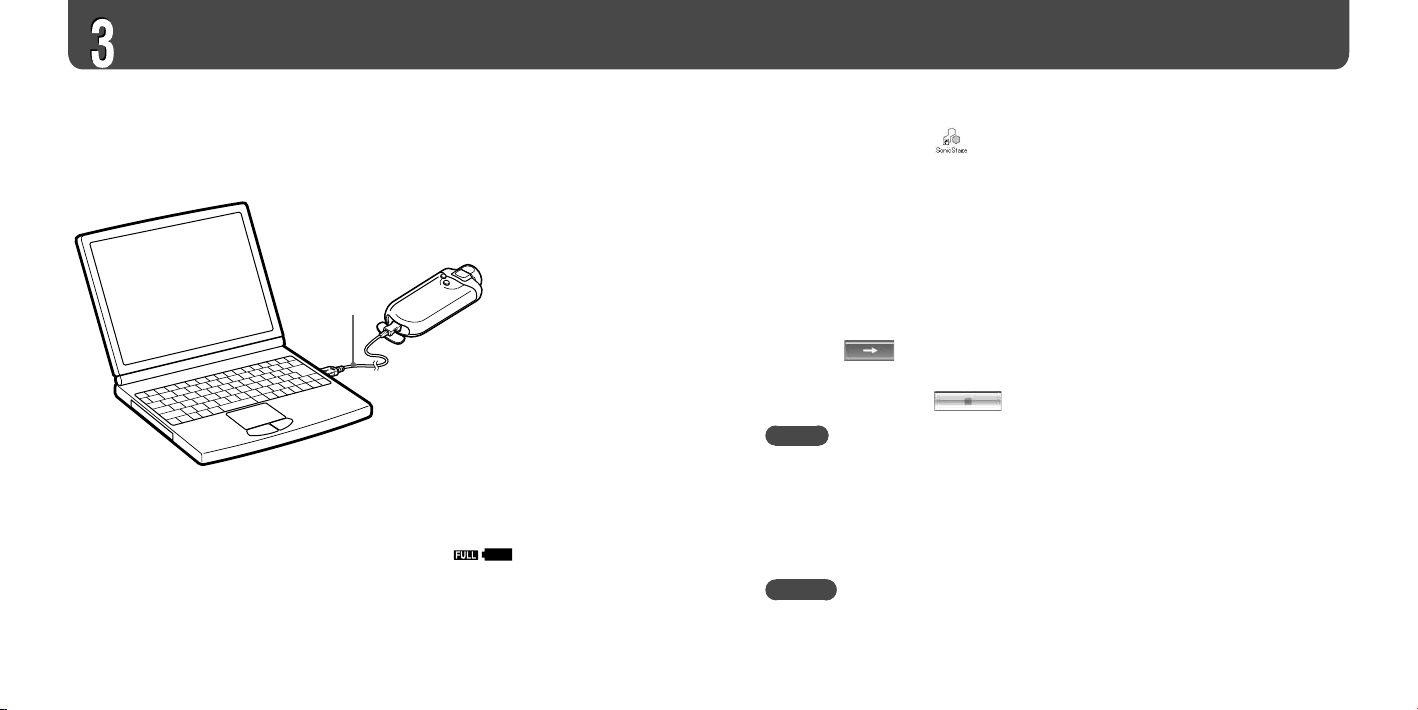
USB cable
(supplied)
The player’s battery is recharged while connected to a computer.
When the remaining battery indication of the display shows , charging is
complete.
When you use the player for the first time, or if you have not used the player for a long
time, recharge it fully, and then transfer the data to the player.
For information on recharging time, see the Operation Guide (PDF).
1
Double-click the icon on the desktop.
SonicStage starts up.
2
Connect the USB connector of the player to your computer.
3
Place the pointer over [Transfer] and select [ATRAC Audio Device]
from the transfer destination list.
4
Select an audio file(s) or album you want to transfer.
5
Click to start transferring.
To stop transferring, click .
Notes
• Before transferring tracks or using the player for the first time, fully charge the battery.
• Do not disconnect the USB cable while data is being transferred.
• If the computer enters a power saving mode such as system suspend, sleep, or hibernation
while the player is connected with the USB cable, the player’s battery will begin discharging.
• Do not leave the player connected for extended periods to a laptop computer that is not
connected to AC power, because the player may discharge the computer’s battery.
Hint
You can create and transfer playlists that group your favorite songs into a list. For details, refer to
SonicStage Help.
Transferring Music
Connect the player to your computer and transfer the audio data to the player.
Page 10
18
19
Playing Music
Basic Operation –
Parts and Controls
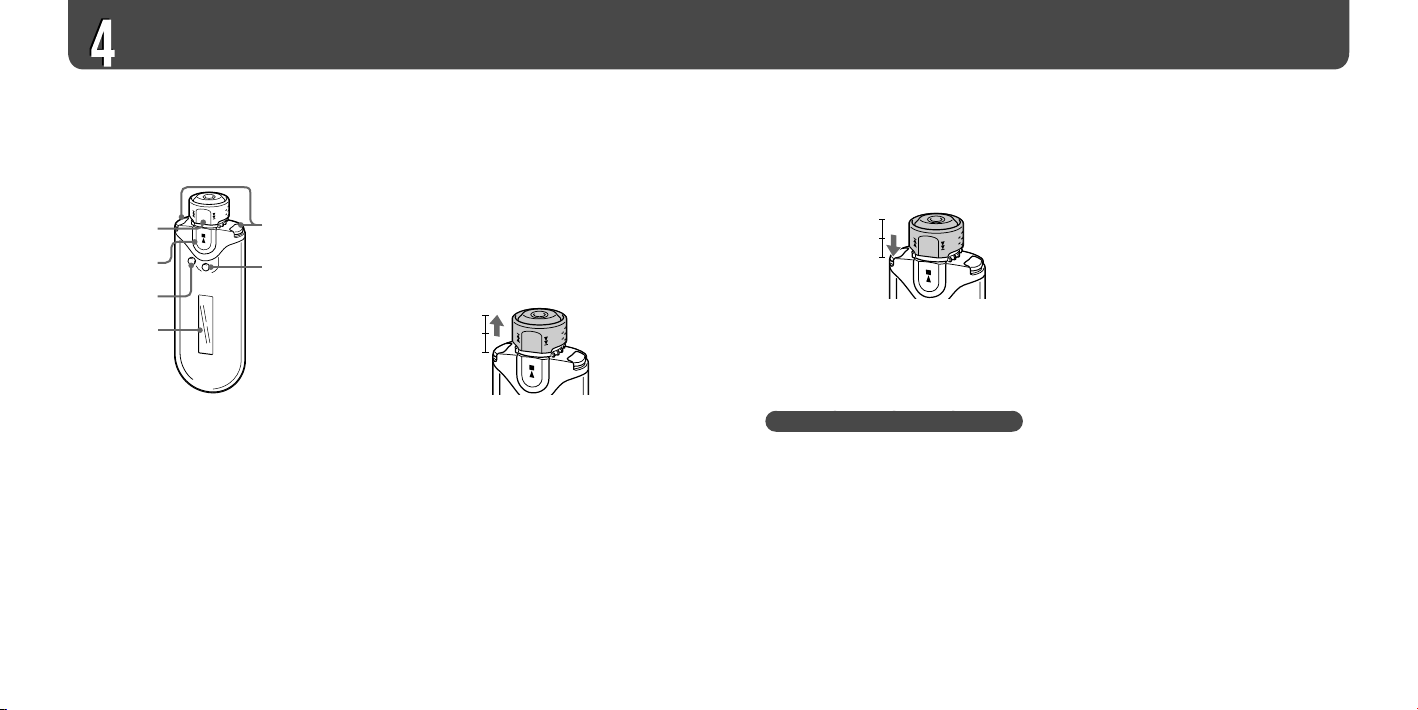
Front
Shuttle switch
Rotate the Shuttle switch in the direction of
or to select a track or menu item.
You can also skip to the beginning of the
track, fast-forward or fast-rewind as
follows.
• Rotating the Shuttle switch to (or
): Skips to the beginning of the next (or
the current) track.
• Rotating the Shuttle switch to (or
), hold it and release at the desired
point: Fast-forwards (or fast-rewinds) the
current track. The fast-forward and fastrewind speed becomes gradually faster.
• Rotating and holding the Shuttle switch to
(or ) while in stop mode: Skips
to the beginning of the next (or the current)
track, and if held longer, continues to skip
through the next (or previous) track(s).
Album control mode
You can use Album control mode by setting
the Shuttle switch to the ALBUM position.
ALBUM
Normal
HOLD
You can skip to the beginning of the album
within the Play Range in Album control
mode as follows.
• Rotating the Shuttle switch to (or
): Skips to the beginning of the next (or
the current) album of the Play Range.
• Rotating and holding the Shuttle switch
to (or ) while in stop mode:
Skips to the beginning of the next (or the
current) album of the Play Range, and if held
longer, continues to skip through the next (or
previous) album(s).
HOLD function
You can protect the player against
accidental operation by using the HOLD
function when carrying it.
ALBUM
Normal
HOLD
By pushing the Shuttle switch to the HOLD
position, all operation buttons are disabled.
If you press buttons while the HOLD
function is activated, “HOLD” appears in
the display.
To release the HOLD function
Set the Shuttle switch to the center (normal)
position.
button
Starts track playback. When starting
playback, appears at the bottom left of
the display, and if the button is
pressed again, playback stops.
When a menu appears on the display, use
this button to confirm the selected menu
item.
SEARCH/MENU button
When using Music Library for track
playback (or in stop mode), the Search
menu appears for you to select a search
method.
When using Intelligent Shuffle for track
playback (or in stop mode), the Intelligent
Shuffle mode menu appears for you to
select a shuffle mode.
Press and hold this button to display the
Setting menu.
Display
For details on the display and icons, see
page 21.
VOL +/– button
Adjusts the volume.
DISP/FUNC button
Switches the display mode. Press and hold
this button to display the Function menu
(Intelligent Shuffle/Music Library/FM (FM
Tuner)).
Page 11
20
21
Playing Music (continued)
Rear
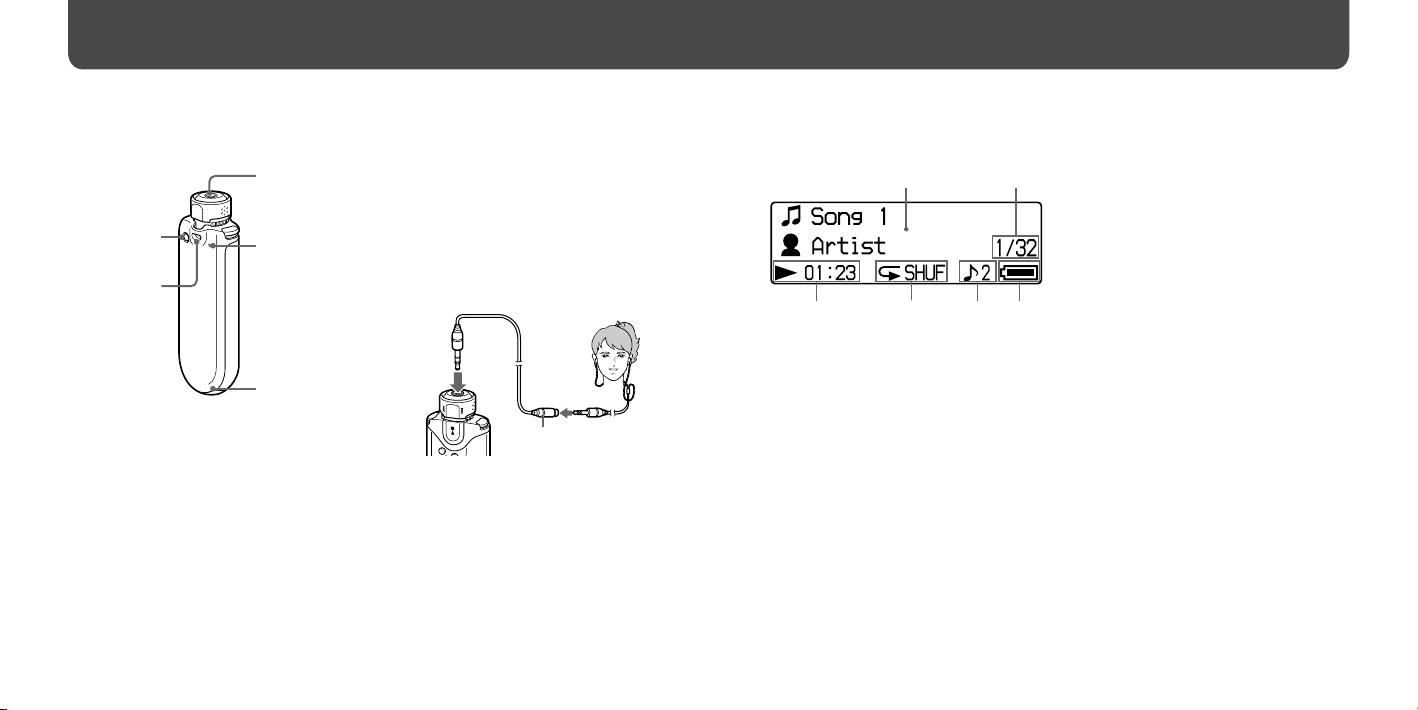
REPEAT/SOUND button
Switches the Track Repeat mode. Press and
hold this button to change the Sound quality
setting.
Strap hole
This is used to attach a neck strap.
Headphone jack
For connecting the headphones.
To use the headphone extension cord
Connect until it clicks into place.
If the headphones or headphone extension
cord does not connect properly, it may not
sound right.
to
headphone
jack
Headphone
extension cord
Reset button
Resets the player.
For details, refer to Operation Guide.
USB jack
Connects to the small connector of the
supplied USB cable.
Playing status indication
Displays the current playback mode (:
playback, : stop) and elapsed time.
Repeat mode indication
Displays the current repeat mode if one is set.
Digital sound preset indication
Displays the current digital sound preset if
one is set.
Remaining battery indication
Displays the remaining battery power.
Display
Text/graphic information
display
Displays album title, artist name, track
name, current date and time, messages and
menu. To switch the display mode, press the
DISP/FUNC button. Switch the display to
Power Save mode when you do not operate
the unit for a while.
Current track number/total
number of tracks of the Play
Range
Displays the track number currently
selected or being played back and the total
number of tracks of the current Play Range.
Page 12
22
23
FM Tuner
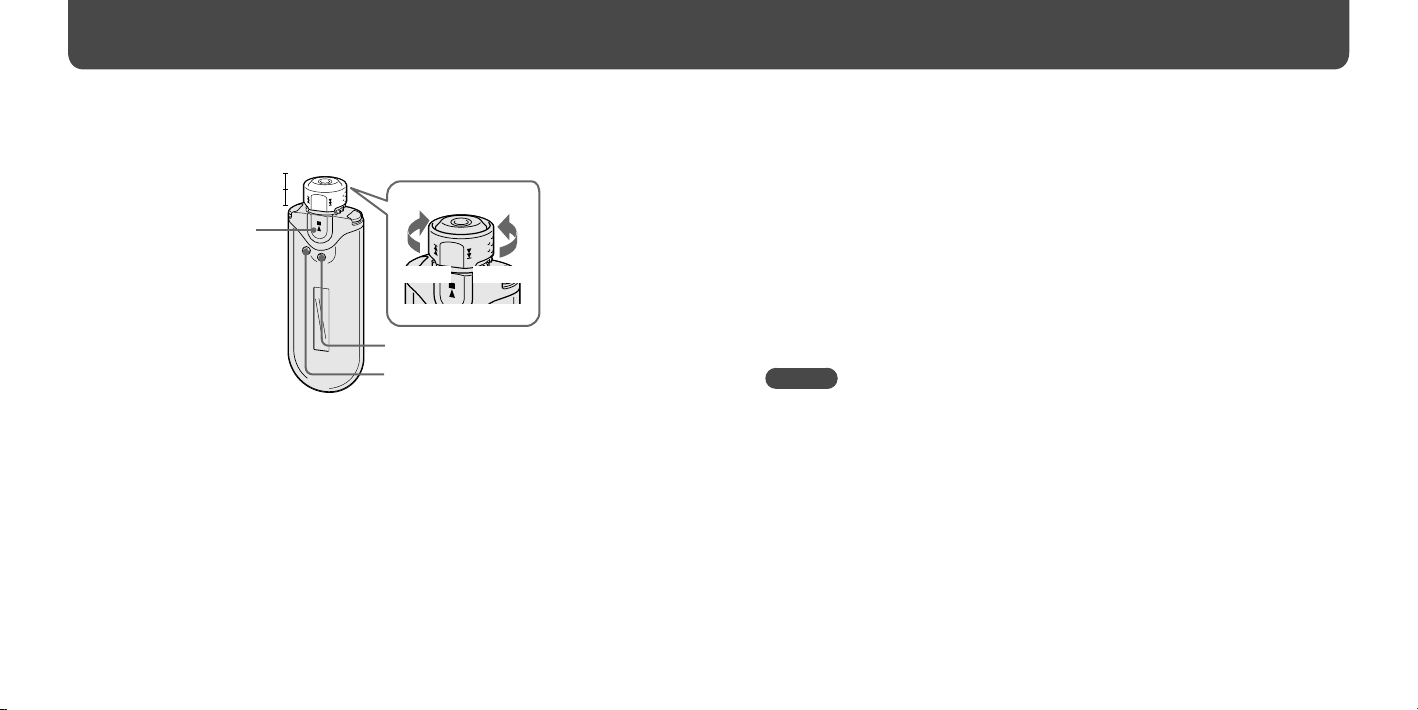
Listening to FM Radio
ALBUM(Manual)
Preset
HOLD
button
DISP/FUNC button
SEARCH/MENU button
to to
1
Press and hold the DISP/FUNC button until the Function menu
(Intelligent Shuffle/Music Library/FM (FM Tuner)) appears.
2
Rotate the Shuttle switch to select “FM” and press the button
to confirm.
The FM tuner screen appears.
3
Selecting broadcast stations.
Manual Tuning
Set the Shuttle switch to the ALBUM (Manual) position.
Select the next (or previous) frequency by rotating the Shuttle switch to (or
).
Preset Tuning
(see “ Hint” below)
Set the Shuttle switch to the center (Preset) position.
Select the next (or previous) preset number by rotating the Shuttle switch to
(or ).
Hint
In Preset Tuning, you cannot select broadcast stations if no preset stations are entered. Preset
receivable broadcast stations in your area automatically by selecting “FM Auto Preset” in the
Setting menu. This is convenient when you use the FM tuner for the first time or when you
change to a new area.
Press and hold the SEARCH/MENU button until the Setting menu appears.
Rotate the Shuttle switch to select “FM Auto Preset>” and press the button to confirm.
Rotate the Shuttle switch to select “OK” and press the button to confirm.
For details on Preset Tuning, refer to the Operation Guide.
Shuttle switch
 Loading...