

Sony WalkMan MZ-NH700 Operating Instructions Manual
_
_
Portable MiniDisc Recorder MZ-NH700
3-266-457-73(1)
Portable
MiniDisc Recorder
Operating Instructions
Recorder Operation _____________________________
Software Operation _____________________________
page 10
page 100
“WALKMAN” is a registered trademark of Sony Corporation to
represent Headphone Stereo products. is a
trademark of Sony Corporation.
MZ-NH700
© 2004 Sony Corporation

WARNING
To prevent fire or shock hazard, do
not expose the unit to rain or
moisture.
Do not install the appliance in a
confined space, such as a bookcase or
built-in cabinet.
To prevent fire, do not cover the
ventilation of the apparatus with news
papers, table clot hs, curtains, etc. And
don’t place lighted candles on the
apparatus.
To prevent fire or shock hazard, do not
place objects filled with liquids, such as
vases, on the apparatus.
Certain countries may regulate disposal of
the battery used to power t his product.
Please consult with your local authority.
Caution
The use of optical instruments with this
product will incre as e eye hazard.
Information
IN NO EVENT SHALL SELLER BE
LIABLE FOR ANY DIRECT,
INCIDENTAL OR
CONSEQUENTIAL DAMAGES OF
ANY NATURE, OR LOSSES OR
EXPENSES RESULTING FROM
ANY DEFECTIVE PRODUCT OR
THE USE OF ANY PRODUCT.
The validity of the CE marking is
restricted to only th ose countries where i t
is legally enforced, mainly in the
countries EEA (European Economic
Area).
CAUTION
RADIATION WHEN OPEN
AVOID EXPOSURE TO BEAM
CAUTION — CLASS 1M INVISIBLE
LASER RADIA TION WHEN OPEN
DO NOT VIEW DIRECTLY WITH
OPTICAL INSTRUMENTS
— INVISIBLE LASER
2

Notice for users
On the supplied software
• Copyright laws prohibit reproducing the
software or the manual accompanying it
in whole or in part, or renting the
software without the permission of the
copyright holder.
• In no event will SONY be liable for any
financial damage, or loss of profits,
including claims made by third parties,
arising out of the use of the software
supplied with this recorder.
• In the event a problem occurs with this
software as a result of defective
manufacturing, SONY will replace it.
However, SONY bears no other
responsibility.
• The software provided with this
recorder cannot be used with equipment
other than that which is so designated.
• Please note that, due to continued efforts
to improve quality, the software
specifications may be changed without
notice.
• Operation of this recorder with soft ware
other than that provided is not covered
by the warranty.
• The ability to display the languages on
the software will depend on the installed
OS on your PC. For be tter res ults, please
ensure that the installed OS is
compatible with the desired language
you want to display.
— We do not guarantee all the
languages will be abl e to be
displayed properly on the software.
— User-created characters and some
special char ac t ers may not be
displayed.
• Depending on the t ype of the text and
characters, the text shown on the
software may not be displayed properly
on the device. This is due to:
— The capability of the connected
device.
— The device is not functio ni ng
normally.
• SonicStage and So ni cStage logo are
trademarks or regist ered trademarks of
Sony Corporation.
• MD Simple Burner, OpenMG, “Magic
Gate
”, “MagicGate Memory Stick”,
“Memory Stick”, Hi-MD, Net MD,
ATRAC, ATRAC3, ATRAC3plus and
their logos are trademarks of Sony
Corporation.
• Microsoft, Windows, Windows NT and
Windows Media are trademarks or
registered trademarks of Microsoft
Corporation in the United States and /or
other countries.
• IBM and PC/AT are registered
trademarks of In ternational Bus in ess
Machines Corpo ra ti on.
• Macintosh is a tr ademark of Apple
Computer, Inc. in the United States and/
or other count ries.
• Pentium is a trade m ark or regist ered
trademark of Intel Corporation.
• All other trade m ar ks and registered
trademarks are tra demarks or registered
trademarks of their respective holders.
• ™ and ® marks are omitted in this
manual.
• CD and music-rela te d data from
Gracenote, Inc., copyright © 2000-2003
Gracenote. Gracenote CDDB
R
Client
Software, copyright 200 0- 2003
Gracenote. This product and service
may practice one or more of the
following U.S. Patents: #5,987,525;
#6,061,680; #6,154,773, #6,161,132,
#6,230,192, #6,230,207, #6,240,459,
#6,330,593 and othe r pat ents issued or
pending.
Gracenote an d CDDB ar e registered
trademarks of Gracenote. The
Gracenote logo and l ogotype, the
Gracenote CDDB logo, and the
“Powered by Gracenote ” logo are
trademarks of Gracenote.
Program © 2001, 2002, 2003, 2004 Sony
Corporation
Documentatio n © 2004 Sony Corporation
3

Table of contents
About available functions and supp lie d
manuals .............................................................8
Recorder Operation
Looking at controls .............................................11
Getting started ....................................................15
Recording a disc right away! ..............................19
Playing a disc right away! ...................................23
Using menus ........................................................25
How to use the menu items ......................... ..................... .... .... ...................25
List of menus ......................... ... .... .... ..................... .... .... ..................... .... .... .27
Various ways of recording .................................. 30
Before recording .........................................................................................30
Viewing various information ......................................................................31
Recording from a microphone ....................................................................33
Recording from a TV or radio (Analog Recording) ................................... 35
Selecting the recording mode ......................................................................35
Adjusting the recording leve l manu a lly ................................... ...................36
Adding track marks while recording ...........................................................37
Using the group function when recording ..................................................38
To start/stop recording in sync with the sound source
(Synchro-recording) ...............................................................................40
Various ways of playback ...................................41
Viewing various information ......................................................................41
Selecting the play mode ..............................................................................43
Searching for a track (Search) ................................... .... ... .... ...................... .49
Selecting the sound quality (6-Ba n d Equ a lizer) ........................................ .50
4

Editing recorded tracks ......................... .............53
Before editing ..............................................................................................53
Adding titles (Title) .....................................................................................53
Assigning tracks or groups as a new group (G rou p Set) ..................... ........58
Releasing a group setting (Group Release) .................................................59
Moving recorded tracks or groups (Move) .................................................60
Erasing tracks and the entire disc (Erase) ...................................................63
Dividing a track (Divide) ............................................................................65
Combining tracks (Combine) ..................................... ...................... ... .... ....6 6
Formatting the disc (Format) .......................................................................67
Other operations .................................................68
Changing the displayed menu items (Menu Mode) ....................................68
Protecting your hearing (AVLS) .................................................................68
Turning off the beep sound .........................................................................69
Turning on/off the backlight .......................................................................69
Storing the settings for individual discs (Disc Memory) ............................70
Starting the playback quickly (Quick Mode) ..............................................71
Selecting the disc mode (Disc Mode) .........................................................71
Adjusting the contrast of the display window (Contrast Adjustment) ........72
Changing the operational directio n of t he display ......................................73
Using the recorder with a computer ..................74
What you can do through connection with a computer ...............................74
Connecting the recorder to your computer ..................................................74
Storing non-audio data to a disc ..................................................................76
Additional information ........................................78
Precautions ..................................................................................................78
Specifications ..............................................................................................80
Troubleshooting and explanations .....................82
Troubleshooting ..........................................................................................82
Messages .....................................................................................................90
Explanations ................................................................................................94
5

Software Operation
What you can do with MD Simple Burner/
SonicStage .....................................................100
Installing ...........................................................102
Providing the required system environment .............................................102
Installing the software onto your computer ..............................................103
Using MD Simple Burner ...................................105
Before using MD Simple Burner ..............................................................105
Recording using MD Walkman operations (Simple mode) ......................106
Recording by computer operations (Standard mode) ...............................107
Using SonicStage ..............................................109
Importing audio data .................... .... ... ...................... .... ... ...................... ...109
Transferring audio data from your computer to the MD Walkman ..........111
Transferring back audio data from the MD Walkman to your computer .113
Using SonicStage Help .............................................................................116
Referring to SonicStage Help ...................................................................118
Other information ...................................... .... ....120
Uninstalling SonicStage/MD Sim pl e Burne r ........................... .................120
On copyright protection ................................................... .... .... .................121
Troubleshooting ........................................................................................122
Index .........................................................................................................125
6

7
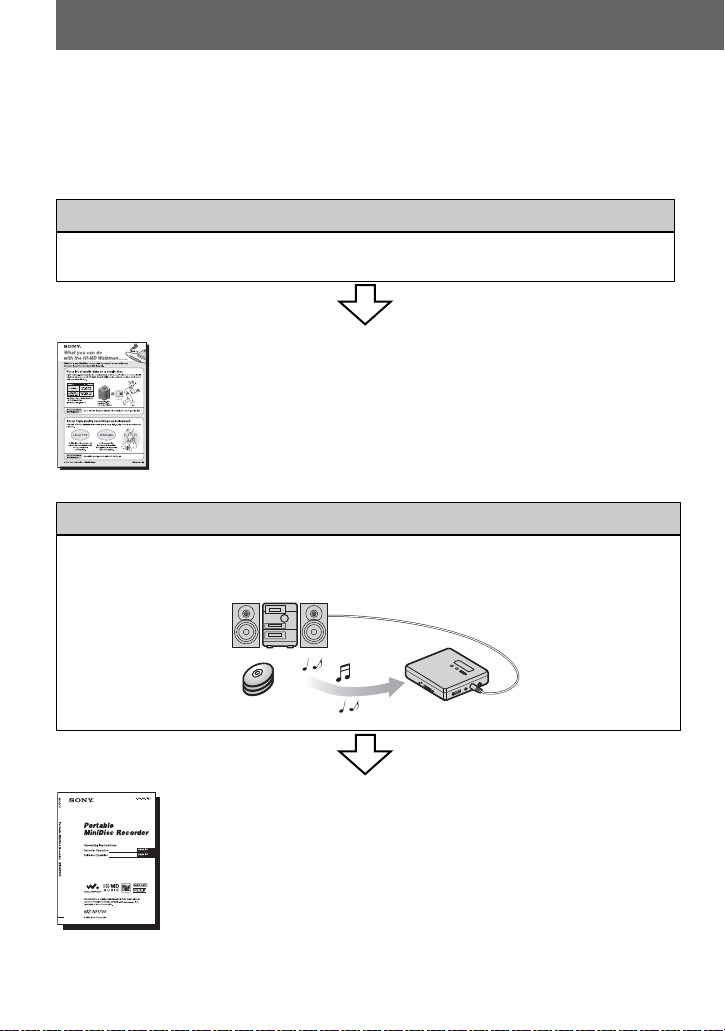
About available functions and supplied manuals
This section explains the functions of this portable MiniDisc recorder and the manuals that
have been supplied with it. Pl ease refer to the manual that applies to each use of the
recorder.
Learning more about Hi-MD
“Hi-MD” is a new MiniDisc format with advanced capabilities over the standard MD
format.
The “What you can do with the Hi-MD Walkman”
Using the recorder
Yo u can enjoy recording from a CD player or a microphone, then enjoy listening to the
recordings that you made.
flyer
This flyer explains th e m ajor features of Hi- MD Walkman and how it
differs with standard MD Walkman.
Recorder Operation (pages 10 to 98)
This section explains all of the recorder functions. It also gives details
on the problem s you may encounter while using the recorder and how
to solve them, and about what to do when a message appears in the
display.
, When you encounter any problems or need more
explanation
Refer to “Troubleshooting and explanations” (page 82).
8
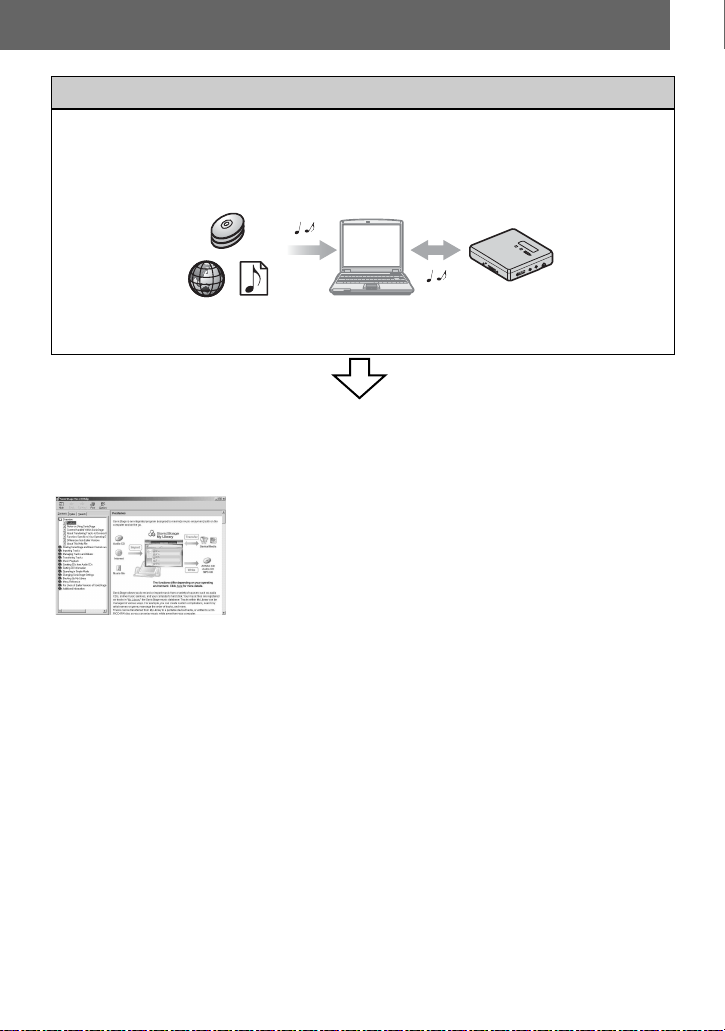
Using the recorder while it is connected to a computer
The supplied So ni cStage software allows y ou t o t ransfer audio data be tween the recorder
and the computer.
The supplied MD Simple Burner software allows you to record audio data to the recorder.
Audio CDs
Internet
Music files
Software Operation (pages 100 to 124)
This section explains the installation and basic operations of the supplied SonicStage/MD
Simple Burner software.
SonicStage Help
This is an online help tha t yo u can view on your computer
screen.
Online help explains the detailed operations and information
about SonicStage software. You can also refer to online help
if you encount er any problems while using th e SonicStage.
Notes on the “Software Operation” section
•
In Software Operations sect ion, “Net MD” re fers to th e reco rder with a standar d dis c insert ed and “HiMD” refers to the recorder with a Hi-MD disc or a standard disc in Hi-MD mode inserted.
•The displayed item s in th e il lustrations that appear in th is section may diff er f ro m the actual items
displayed by the software.
•Explanations in this section assume familiarity with basic Windows operations. For details on the use
of your computer and the operating syste m, ple a se refer to the r es pe ct ive manuals.
•Explanations in this section cover general Hi-MD /Ne t MD products. For this reason, some
explanations (and some illustration s) ma y not be applicable to your Hi-MD/Net MD. Please refe r to
the operating instructions of your Hi-M D/Ne t MD a s well.
9
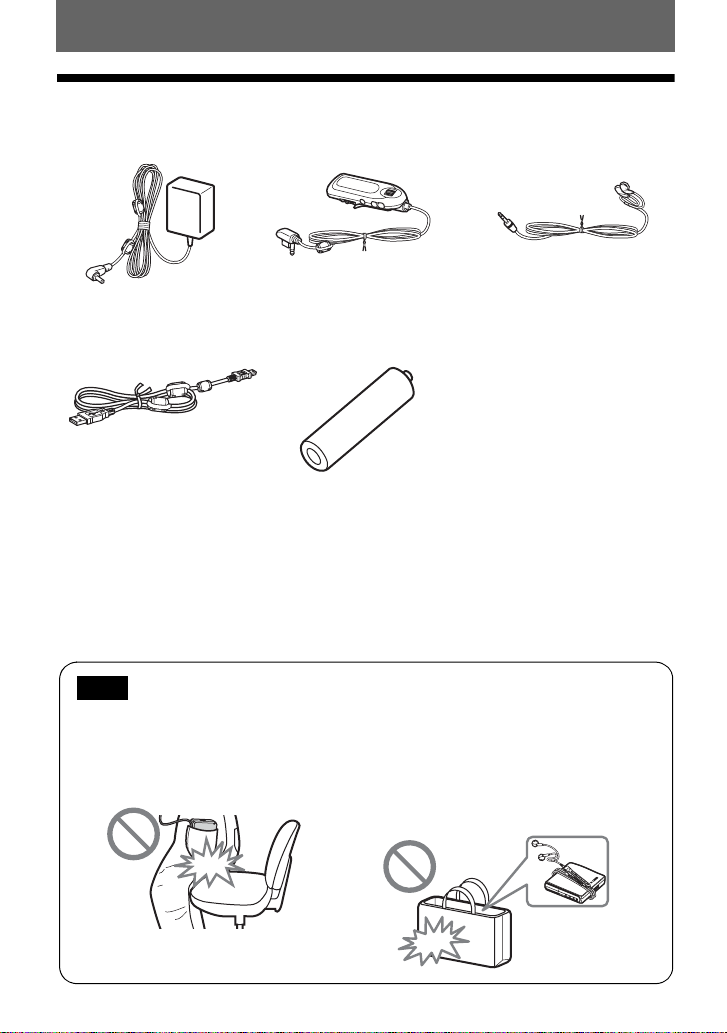
Checking the supplied accessories
AC po we r ad aptor (1)
Remote control (1)
Headphones/earphones (1)
Dedicated USB cable (1) NH-7WMAA Nickel
metal hydride
rechargeable batter y ( 1)
Optical cabl e (1 )
Clamp filters (2)
For details on the use of the clamp filters, refer to “How to use the supplied cla mp filters” supplied
with this unit.
CD-ROM (SonicStage/MD Simple Burner) (1)*
Battery carrying case (1)
Carrying pouch (1)
* Do not play a CD-ROM on an audio CD player.
Note
When using this unit, remember to follow the precautions below in order to avoid warping the
cabinet or causing the unit to malfunction.
•Make sure not to sit down with the unit
in your back pocket.
•Make sure not to put the unit into a bag with the
remote control or the headphones/earphones cord
wrapped around it and then subject the bag to
strong impact.
10

Looking at controls
1
The recorder
2
3
4
5
6
7
8
9
q;
qs
qd
qf
qg
qa
Recorder Operation
A Display window
B T MARK/REC (+N) button
C Jog dial
D 5-way control key
Operation Function
1)
Press NENT
Press towards . find the beginning
play, enter
of the previous
track, rewind
Operation Function
Press towards > find the beginning
Press towards
1)
VOL +
or
VOL –.
1)
There are tactil e dots beside the NENT
and
VOL + buttons.
of the next track,
fast forward
volume
E DC IN 3V jack
F X (pause) button
G x (stop) • CANCEL/CHG button
H OPEN switch
I GROUP button
J •NAVI/ MENU button
Press lightly to go to the NAVI
(navigation) settin g mode (page46).
Press for 2 seconds or more to go to
MENU setting mode (page 25).
K USB cable connect ing jack
11
L LINE IN (OPT) jack
123456
78 9
M MIC (PLUG IN POWER) jack
There is a tactile dot beside the MIC
(PLUG IN POWER) jack.
N HOLD switch
Slide the switch in the direction of the
arrow to disable the buttons on the
recorder. To prevent the buttons from
being accide nt al ly oper at ed when you
carry the recorder, use this function.
O i (headphones/ea rphones) jack
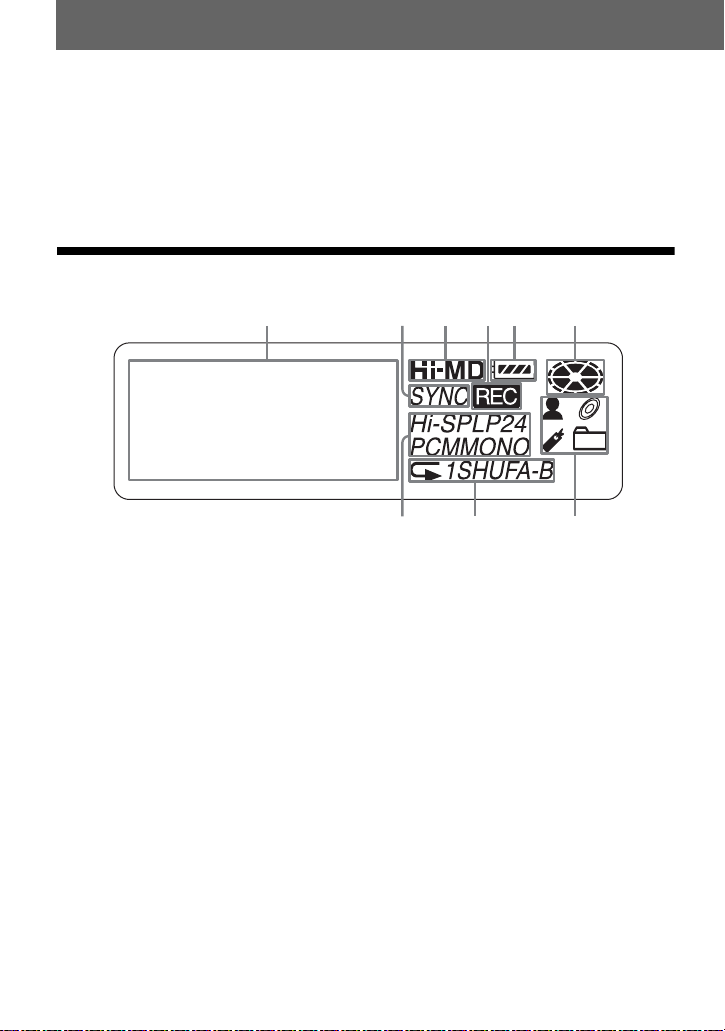
The display window of the recorder
A Character information display
Displays the disc and track names,
date, error messages, track numbers,
etc.
B SYNC (synch ro-r ec ordi ng ) i ndi cat ion
C Hi-MD/MD indication
“Hi-MD” lights up when the
operation mode of the recorder is in
Hi-MD mode and “MD” lights up
when the operation mode is in MD
mode.
D REC indication
Lights up during recording or file
transfers from the computer. When
flashing, the recorder is in record
standby mode.
12
E Battery indication
Shows the approximate remaining
battery power. If the battery is weak,
the indication bec omes empty and
starts flashing.
F Disc indication
Shows that the disc is rotating for
recording or playing.
G Track mode (PCM, Hi-SP, Hi-LP, SP,
LP2, LP4, MONO ) i ndi cation
H Sub play mode/Repeat play
indications
Shows the selected Sub play mode
(single-track play, shuffle play, etc.) or
Repeat play.
I Main play mode indications
Shows the selected main play mode
(group play, bookmark play, etc.).
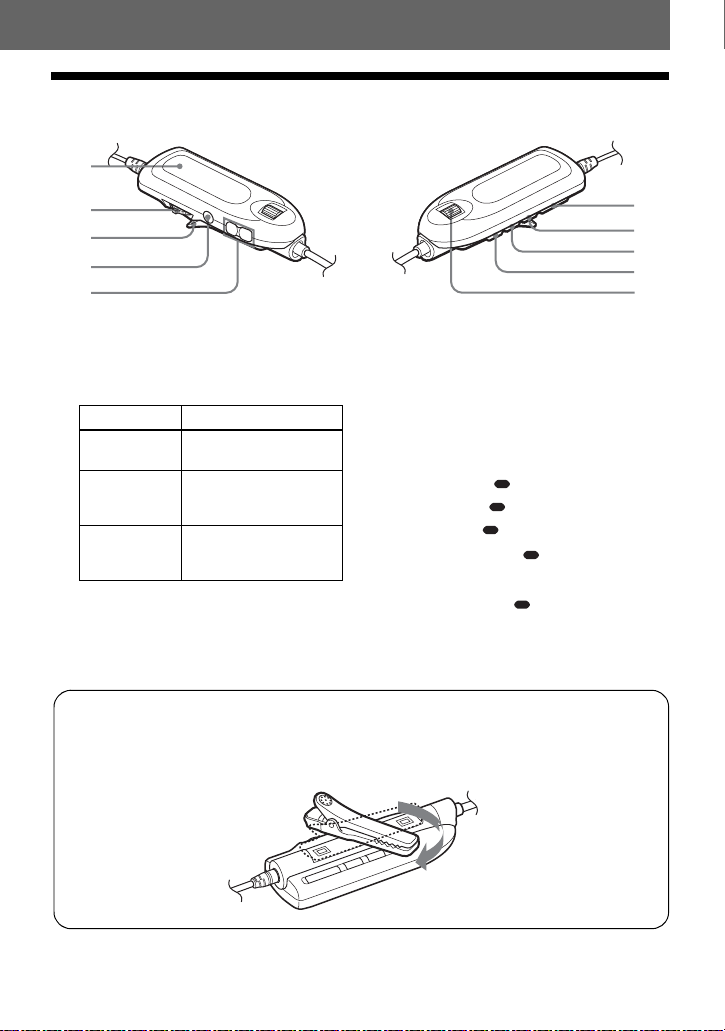
The headphones/earphones with a remote control
1
2
3
4
5
A Display window
B Jog lever (NX • ENTER, .,
>)
Operation Function
Press
NX •
ENTER
Press towards
.
Press towards
>
play, pause, enter
find the beginning of
the previous track,
rewind
find the beginning of
the next track, fast
forward
C Clip
D x (stop) • CANCEL button
E VOL +, – buttons
Using the clip for the remote control
It may be hard for you to read the indications in the display if the remote control is attached upside
down with the clip in its current position. In this case, turn the clip in the opposite direction until it
attaches firmly, as shown below.
F HOLD switch
Slide the switch in the directio n of the
arrow (a yellow mark appears) to
disable the buttons o n th e remote
control. To prevent the buttons from
being accidentally operated when you
carry the recorder, use this function.
G •DISPLAY, BACKLIGHT button
H •P-MODE, REPEAT button
I •SOUND, SOUND SET button
J Jog dial (•NAVI/ MENU/ENTER)
* • indicate s a func tion that requires a slight
press of the button. indicates a function
that requires pressing the button for 2 seconds
or more.
6
7
8
9
0
*
*
*
*
13

The display window of the remote control
123
4
A Character information display
B Battery level indication
C Disc indication
D SND (sound) indica tion
14
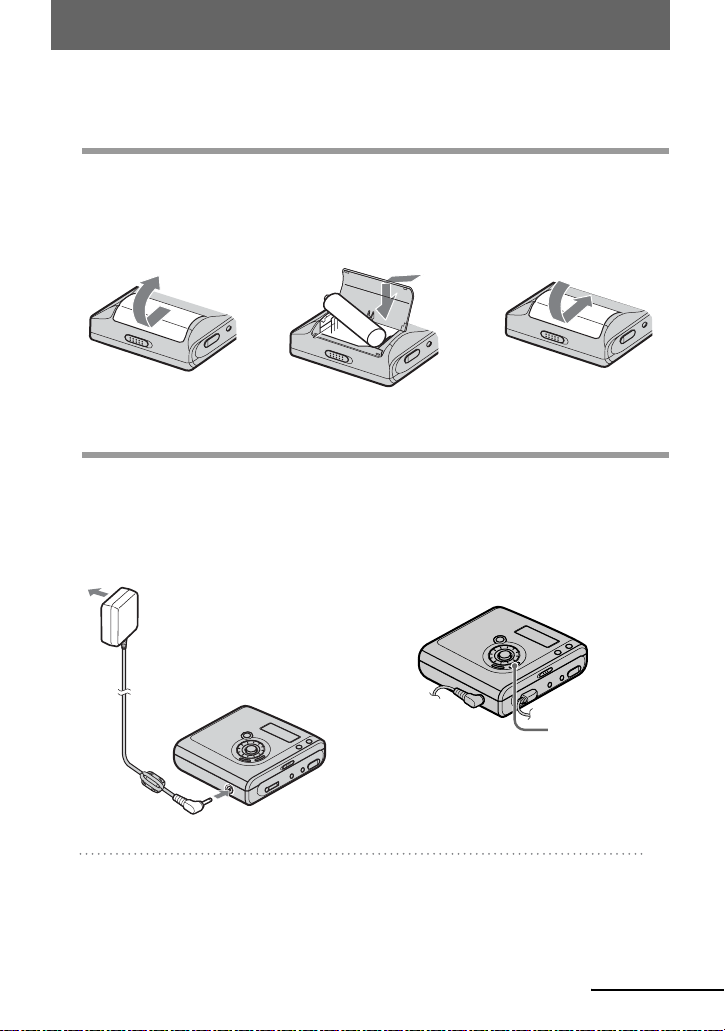
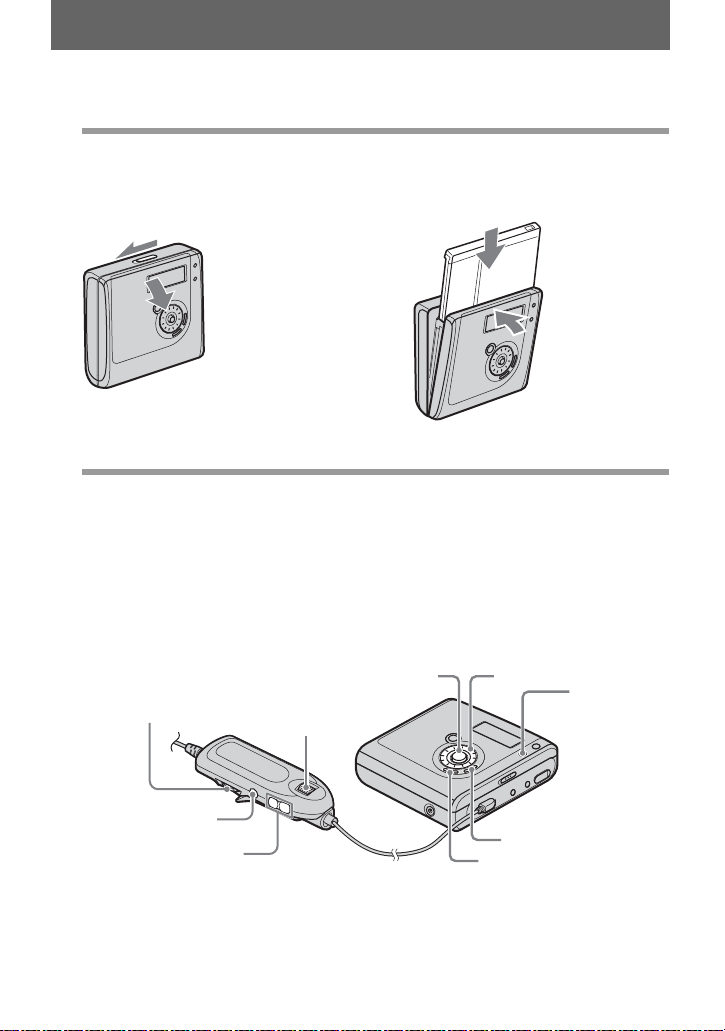
Getting started
Charge the rechargeable battery before using.
1
Insert the rechargeable battery.
2Insert the NH- 7WMAA
battery compartment lid.
2
Charging the rechargeable battery.
1Connect the AC power adaptor to DC IN
3V on the recorder and the AC power
adaptor to a wall outlet.
To a wall outlet
AC power
adaptor
rechargeable battery E
end first.
e
E
2Press x • CANCEL/CHG.
3 Close the lid.1Slide OPEN to open the
“Charging” flashes, e appears in the
display, and charging starts . When
charging is completed, the battery
indication disappears.
To DC IN 3V
3After the charging has fi ni shed,
disconnect the AC power adaptor.
x • CANCEL/CHG
continued
15
z
Full charging of a completely discharged
rechargeable battery takes about 2 hours.
Charging time may vary depending on the
battery condition.
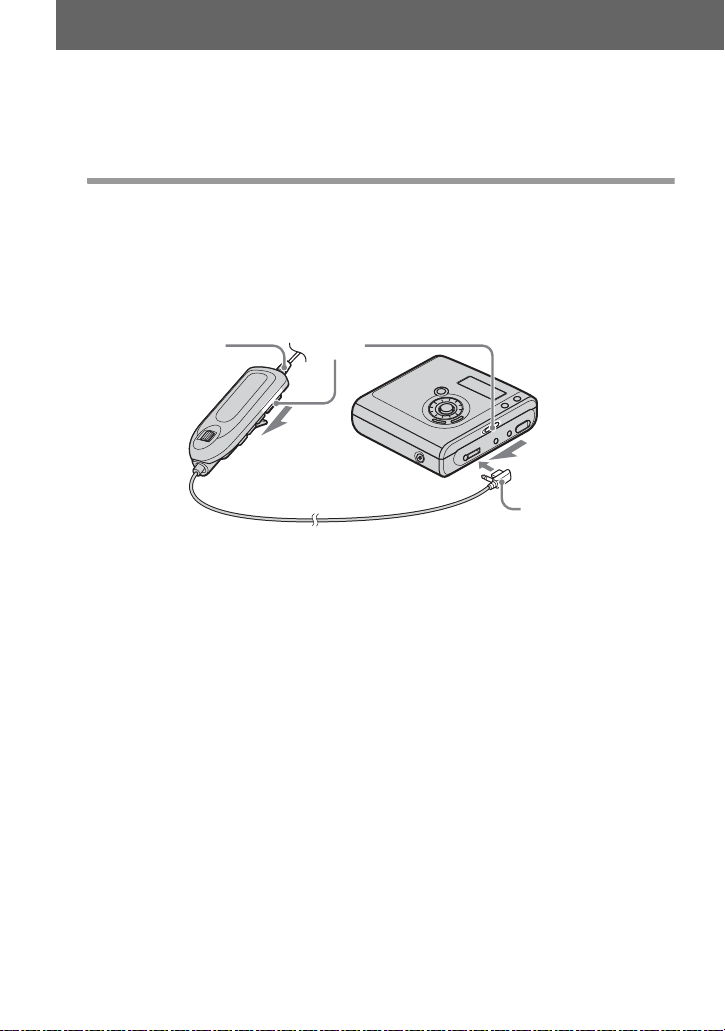
3
Make connections and unlock the controls.
1Connect the headphones/earphones
with the remote control to i.
2Slide HOLD to the opposite direction of
the arrow (.) on the recorder or the
remote control to unlock the controls.
Connect firmly
HOLD
To i
Connect firmly
16
For models supplied with the
AC plug adaptor
If the AC power adaptor does not fit the
wall outlet, use the AC plug adaptor.
When using the dry battery
Insert one LR6 (size AA) alka line dry
battery (not supplied) instead of the
rechargeable batter y.
Notes
•Make sure not to operate the recorder while
changing the rechargeable battery even if the
recorder is connected to AC power adaptor.
The operation may stop.
•“Charging” and e may not appear in the
display immediately after you connect the AC
power adaptor and press x • CANCEL/CHG.
The indication will, however, begin flashing
after a few minutes and charging will begin.
•Because of the battery’s characteristics, the
capacity of the rechar g eable battery may be
smaller than normal when it is used for the
first time or after a long period of disuse. In
this case, charge and discharge the battery
several times. The normal battery life will be
restored.
•Charge the rechargeable battery at a
temperature of +5°C ( + 4 1°F) to +35°C
(+95°F). The charging time may vary
according to the surrounding tem pe rature.
•It is preferable to use the recorder on house
current when recording or editing. When
powering the recorder with a battery, make
sure to use a fully charged rechargeable
battery or a new dry battery.
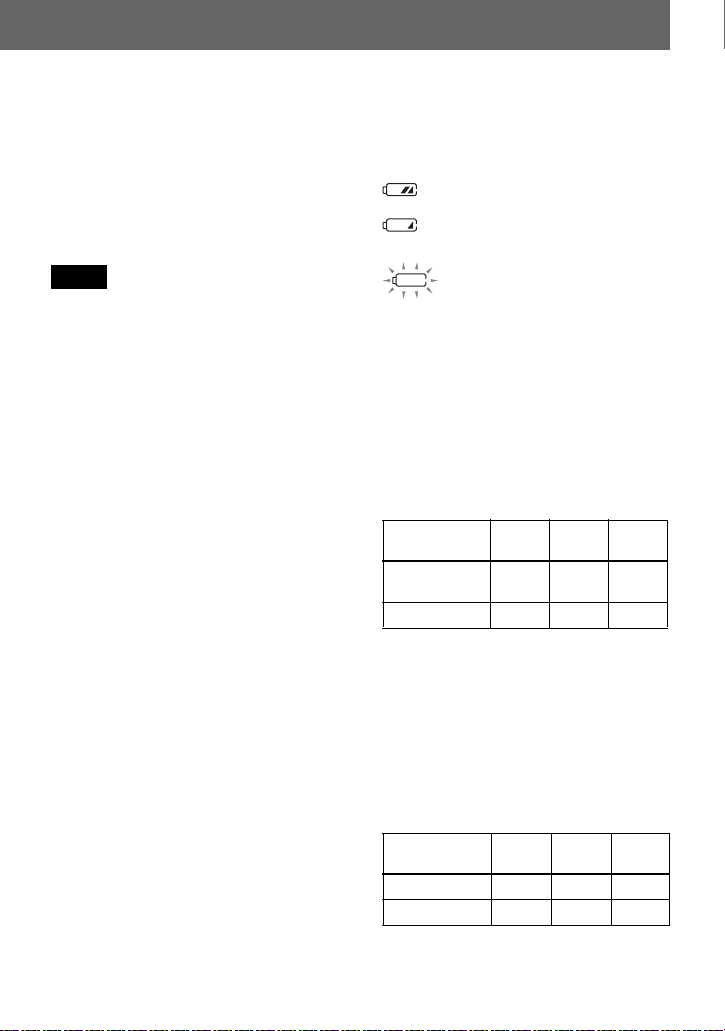
When to charge the
rechargeable battery or
replace the dry battery
You can check the battery condition on the
display window of the recorder.
Battery power decreasing
m
m
Weak battery
The battery is drained.
“LOW BATTERY” flashes in the
display, and the power goes off.
The battery level indicator is approxim at e. It
may be more or less than the indic at ion
depending on the operating condition or the
operating environment.
Battery life
When recording cont inuously
Hi-MD mode (When using a 1GB Hi-
MD disc)
(Unit: approx.hours)(JEITA1))
Batteries Linear
Hi-SP Hi-LP
PCM
NH-7WMAA
2)
3)
LR6
1)
Measured in accordance with the JEITA
(Japan Electronics and Information
Technology Industries Association) standard.
2)
When using a 100% fully charged nickel
metal hydride rechar ge able battery
3)
When using a Sony LR6 (size AA)
“STAMINA” alkaline dry battery (produced
in Japan)
34.55
2.5 3.5 4.5
Hi-MD mode (When using a 60/74/80minute standard disc)
(Unit: approx.hours)(JEITA)
Batteries Linear
Hi-SP Hi-LP
PCM
NH-7WMAA 2.5 4.5 5.5
LR6
589.5
17

MD mode
Batteries
NH-7WMAA
LR6
When playing continuously
Hi-MD mode (When using a 1GB Hi-
MD disc)
Batteries Linear
NH-7WMAA
LR6
Hi-MD mode (When using a 60/74/80 minute standard disc)
Batteries Linear
(Unit: approx.hours)(JEITA)
SP
LP2
Stereo
4.5 6 6.5
7.5 9.5 11
(Unit: approx.hours)(JEITA)
PCM
4.5 7.5 9
11 18.5 21.5
(Unit: approx.hours)(JEITA)
Hi-SP Hi-LP
PCM
LP4
Stereo
Stereo
Hi-SP Hi-LP
NH-7WMAA 47.59
LR6
MD mode
Batteries SP
NH-7WMAA
LR6
9.5 17 20
(Unit: approx.hours)(JEITA)
LP2
Stereo
LP4
Stereo
Stereo
7.5 9 10
20.5 24 26
Notes
•Stop the recorder before replacing the battery.
•When using a 1GB Hi-MD disc, the
continuous recording time may be shortened if
you repeatedly make short record ings.
18
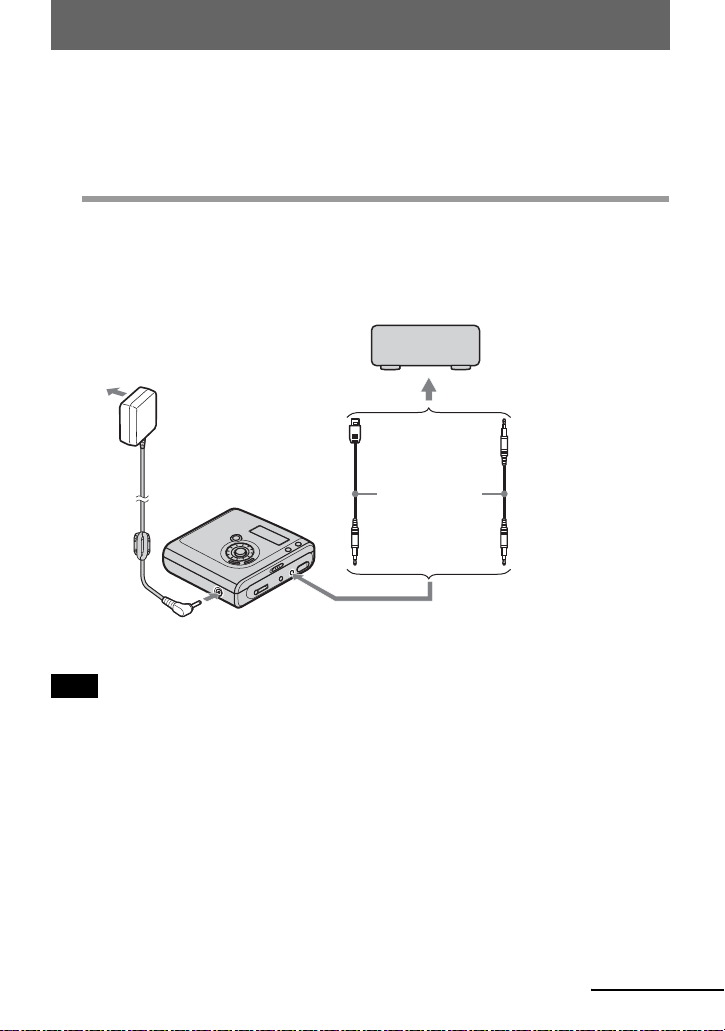
Recording a disc right away!
This section explai ns the basic procedure for maki ng di gi tal reco rdi n gs us ing
an optical cable connected to a CD player, Digital TV or other digital
equipment. Make sure to use the optical cable.
1
Make connections.
the appropriate jacks.)
1Connect the AC power adaptor to the
recorder and a house cu rrent.
To a wall
outlet
To a digital (optical) out jack
(Insert the cables firmly and completely into
2Connect the optical cable to the
recorder and an external component.
CD player, MD player,
DVD video player, etc.
Optical plug Optical mini-
AC power
adaptor
To LINE IN
To DC IN 3V
Note
Make sure to disconnect the dedica te d US B c abl e befor e reco rd ing.
(OPT)
Optical cable*
plug
∗ See “Optional accessories”
(page 81).
continued
19
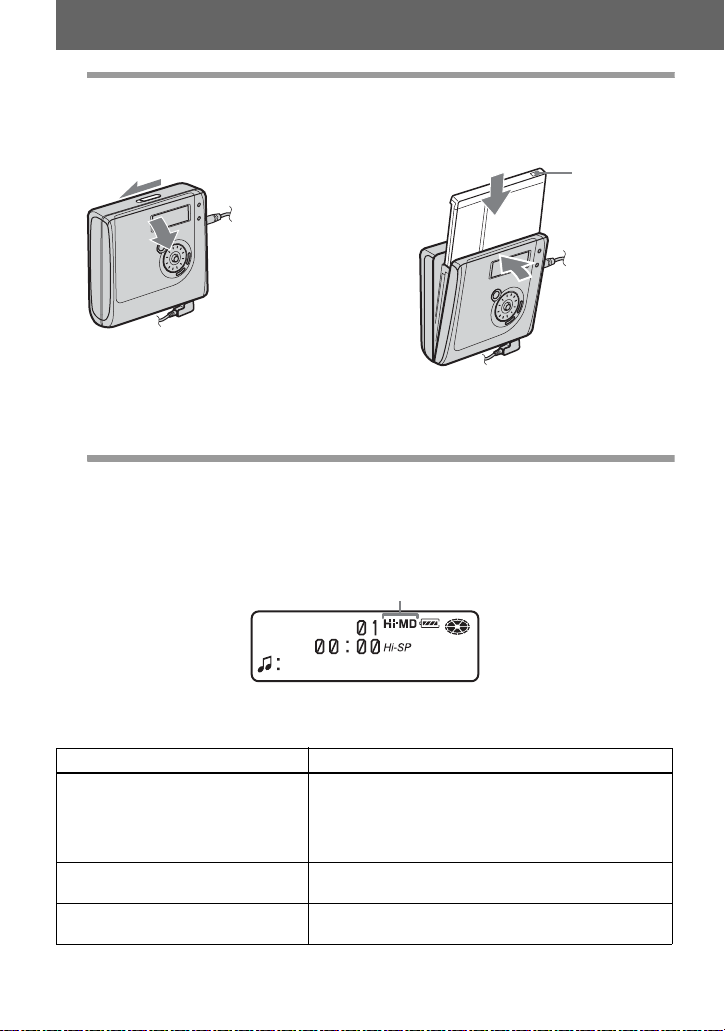
2
Insert a recordable disc.
1Slide OPEN to open the lid. 2Insert a disc with the label si de f acing
front, and press the lid down to close.
Make sure to
check the
record-protect
tab is closed.
3
Confirm the operation mode.
This recorder has two operation modes, “Hi-MD mode” and “MD mode”. The operation
mode is automatically recognized whenever the disc is inserted. After you insert a disc,
check the operation mode on the disp l ay window of the record er.
“Hi-MD” lights up when the operation mode is Hi-MD and
“MD” lights up when the operation mode is MD.
• When using a 1GB Hi-MD disc, the operation mode will only be Hi-MD.
• When using a standard disc (60/74/80 minutes), the operation mode can be set as follows.
Disc condition Operation mode
Blank disc The mode set for “Disc Mode” i n the menu.
The disc contains material
recorded in
The disc contains material
recorded in
1)
Refer to “Selecting the disc mode (Disc Mode)” (page 71) for the “Disc Mode” setting.
Hi-MD mode
MD mode
The “Disc Mode” is fac to ry set to “Hi-MD”.
If you want to use the disc on another c omponent that
does not support Hi-MD, set the “Disc Mode” to “MD”
to use the disc in MD mode.
Hi-MD
MD
20
1)
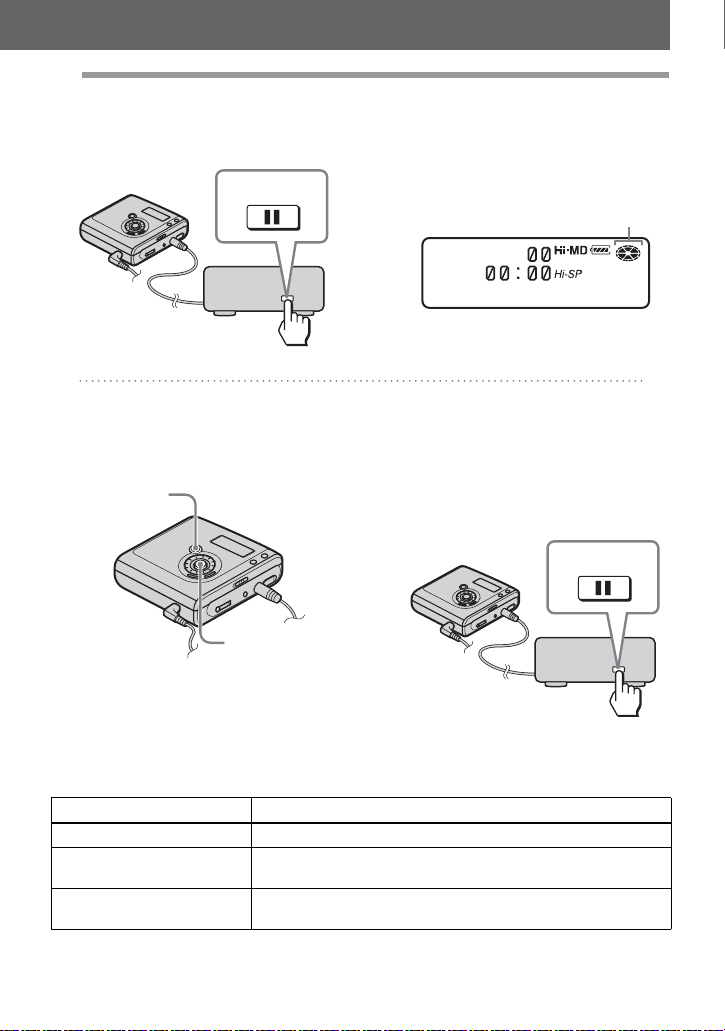
4
Record a disc.
1Select and pause the sound source to
be recorded.
PAUSE
Connected component
2Make sure that disc indication has
stopped rotating in the di splay window
on the recorder.
Make sure that disc
indication has stopped.
3While the recorder is stop ped, press
and hold T MARK/REC and pre ss
NENT on the recorder.
“REC” lights up and re cording starts.
T MARK/REC
NENT
To Press
Stop Press x.
1)
Pause Press X
Remove the disc Press x and open the lid. (The lid does not open while
1)
A track mark is added at the point where you press X again to resume recording while pausing; thus
the remainder of the track will be counted as a new track.
Press X again to resume recording.
“SYSTEM FILE WRITING ” flashing in the display.)
.
4Play the sourc e yo u want to record.
If you insert a previously recorded disc,
the record ing starts afte r th e existing
contents.
Track marks are automatical ly a dded at
the same point as the sound source , a nd
the contents are recorded together as a
group.
PAUSE
Connected component
21

If the recording does not start
•Make sure t h e recorder is n o t locked (pag es
12, 16).
•Make sure the disc is not record-protected
(pages 20, 79).
•Premastered discs cannot be recor de d over.
Notes
•When you record on a 1GB Hi-MD disc,
connect the AC po wer adap tor to the recorder,
charge the recharg eab l e bat t ery f ull y (battery
level indication shows ), or use a new
alkaline dry battery (battery level indication
shows ). When you attempt to start
recording on a 1GB Hi-MD disc,
“NotENOUGH POWER TO REC” may
appear and recording cannot be done even if
the battery level indi cation sho w s sufficient
remaining power while the recorder is stopped
or playing. This is because of a mechanism
that disables recording when the remaining
battery power is estimated by the recorder to
be insufficient due to the high power
consumption required for 1GB Hi-MD disc
recording.
•Make sure to place the recorder at a stable,
vibration-free place during record i n g.
•If you start recording when the disc indication
is still rotating in the display, the first few
seconds of the material may not be rec or de d.
Make sure that the disc indication has stopped
rotating before you start recording.
•Do not change the rechargeable battery during
operation even if the recorder is connected to
AC power adaptor. The operation may stop.
•Do not move or jog the recorder or disconnect
the power source while recordi n g, or whil e
“DATA SAVE” or “SYSTEM FILE
WRITING” is flashi ng in the display. If you
do, the data recorded up to that point may not
be recorded to the disc, or data on the disc
may be damaged.
•Recording cannot be done when the disc does
not have enough space for recording.
•If the power supply is disrupted (i.e. the
battery is removed or becomes exhausted or
the AC power adaptor is disconnected) during
a recording or editing operatio n , or while
“DATA SAVE” or “SYSTEM FILE
WRITING” appea rs in the di sp lay, then it will
not be possible to open the lid until power is
restored.
•Note the following when recording from a
portable CD player:
—Some portable CD players may not be
capable of digital out when the AC power
adaptor is disconnected. If this is the case,
connect the AC power adaptor to the
portable CD player and use it on AC power
as the power source.
—On some portable CD players, optical
output may not be possible when using an
anti-skip function (e.g., ESP* or
G-PROTECTION). If this is th e c ase, turn
off the anti-skip function.
∗ Electr onic Sh oc k Prote c tion
z
•The recorder is factory set to make a new
group whenever recording is done. If you do
not want to make a group, se t “ : REC” to
“ :REC Off” (page 39).
•To start recording from a specific point on the
disc, pause the recorder at the desired point,
and then start recording from that point.
•You can monitor the sound during rec or ding.
Connect the headphones/ea rp hone s with
remote control to i and adjust the volume by
pressing VOL + or – on the remote control
(pressing the 5-way control key towards VOL
+ or – on the recorder). This does not affect
the recording level.
22
Playing a disc right away!
1
Insert a recorded disc.
1Slide OPEN to open the lid. 2 Insert a disc with the label side facing
front, and press the lid down to close.
2
Play a disc.
1Press the 5-way control key (NENT)
on the recorder.
Press the jog lever (NX • ENTER) on
the remote control.
A short beep sounds in the headphones/
earphones when you operate.
5-way control key
(NENT, ., >,
Jog lever (NX •
ENTER, ., >)
VOL +, –)
Jog dial
2Press the 5-way control key towards
VOL + or – to adjust the volume on th e
recorder.
Press VOL + or – on the remote cont rol.
The volume will be shown in the
display.
Jog dial
GROUP
x
VOL +, –
To stop play, press x.
A long beep sounds in the headphones/earphones when you operate. Playback starts from the point
you last stopped playing.
10 seconds (when using batteries) or about 3 minutes (when using an AC power adaptor).
After you stop the recorder, the recorder will automatically turn off in about
x
X
23
To Operation on the recorder Operation on the remote
control
Stop Press x. Press x.
Pause Press X. Press X again to
Select a track directly
viewing track number or
name
Find the beginning of
the current track
Find the beginning of
the next track
Go backwards or
forward while playing
Search for a point in a
track while viewing the
elapsed time (Time
search)
Search for a specific
track while viewing
track numbers (Index
search)
Cue to the next or
previous group while
playing a tra ck in a
group (Group skip)
Start with the first track
of the disc
resume play.
Turn the jog dial to select a
track, and then press NENT to
enter.
Press the 5-way control key
towards .. Press the 5-way
control key towards .
repeatedly until you reach the
beginning of the desired track.
Press the 5-way control key
towards >.
Press and hold the 5-way
control key towards . or
>.
While pausing, press and hold
the 5-way control key towards
. or >.
While the recorder is stopped,
press and hold the 5-way
control key towards . or
>.
Press GROUP, and then press
the 5-way control key towards
. or >.
1)
While the recorder is stopped,
press NENT for 2 seconds or
more.
Remove the disc Press x and open the lid.
1)
Cues to the beginning of every 10th tr a ck du ring playback of the disc with no group settings.
2)
Once you open the lid, the point to start pl ay will c ha nge to the beg inni ng of the fi rst tr ack.
Press the jog lever (NX •
ENTER).
Press the jog lever again to
resume play.
Turn the jog dial to select a tra ck,
and then press the dial to enter.
Slide the jog lever towards ..
Slide the jog lever towards .
repeatedly until you reach the
beginning of the desired track.
Slide the jog lever towards >.
Slide and hold the jog lever
towards . or >.
While pausing, slide and hold the
jog lever towards . or >.
While the recorder is st op p ed,
slide and hold the jog lever
towards . or >.
—
While the recorder is st op p ed,
press the jog lever (
ENTER
) for 2 seconds or more.
2)
Press x and open the lid.
NX •
2)
If the play does not start
Make sure the recorder i s not lo cked (pages 12,
16).
24
Note
The playback sound may skip if:
•the recorder is subject to strong, repeated
shocks.
•a dirty or scratched disc is played.
When using a disc in Hi-MD mode, sound may
drop out for a maximum of about 12 seconds.
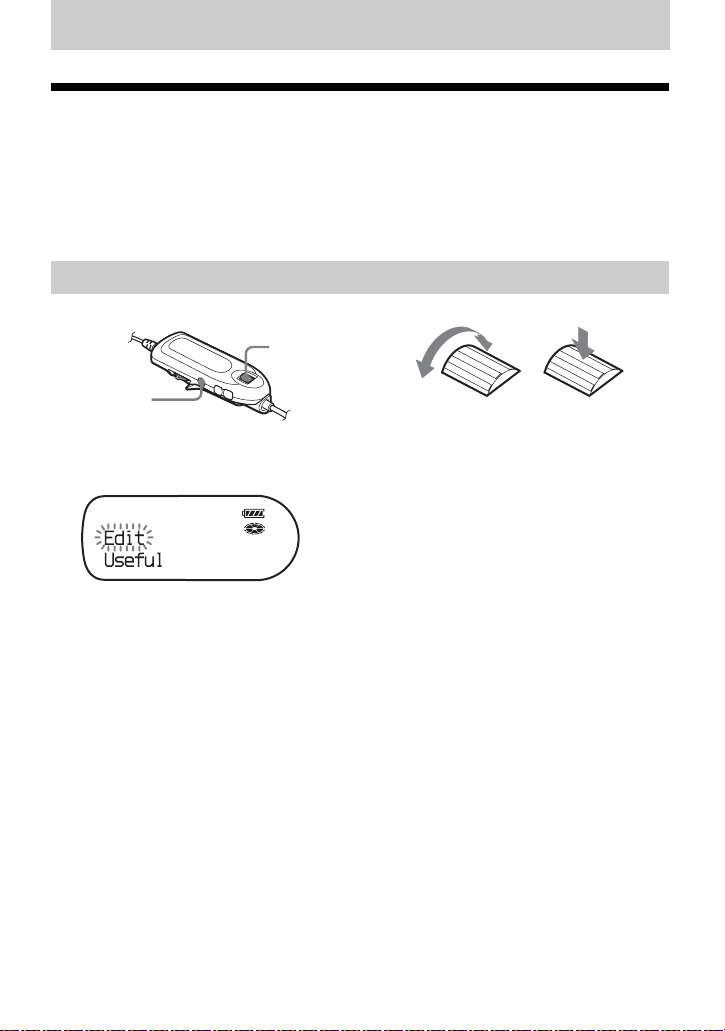
Using menus
How to use the menu items
The recorder ha s m any menus with usefu l f unctions for recording, playback, ed it i ng, et c.
To set the menu items, do the following procedure.
If you are doing a menu operation fo r the first time after pu rchasing the recorder, “Menu
Mode” flashes in the display. Before the menu operation, you can set “Menu Mode” to
“Simple” (only basic menu items appea r) or “Ad vanced” (all menu items appear). Refer to
“Changing the displayed menu items (Menu Mode)” (page 68) for menu mode setting.
On the remote control
Jog dial
x
Turn to select Press to enter
1 Press the jog dial (NAVI/MENU/ENTER) for 2 seconds or more to enter the menu.
2 Turn the jog dial to select the item.
3 Press the jog dial to enter the selection.
4 Repeat steps 2 and 3.
The setting will be entered when you press the jog dial at the last.
To return the preceding setting
Press x.
To cancel the operation while setting
Press x for 2 seconds or more.
25
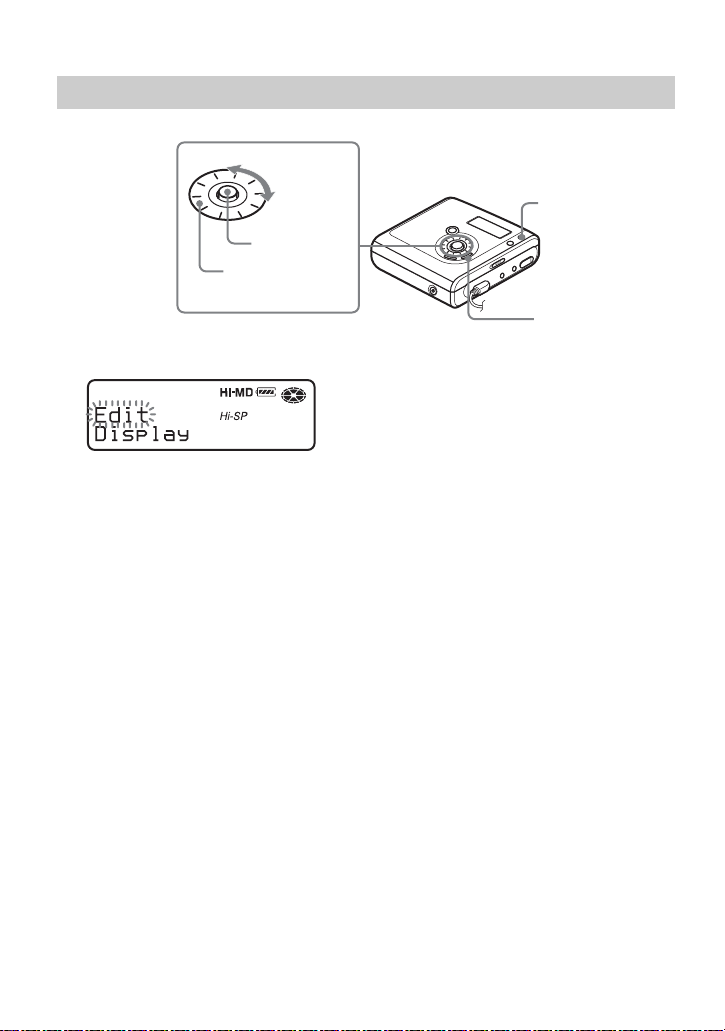
On the recorder
NAVI/MENU
5-way control
key (NENT)
Jog dial
x
1 Press and hold NAVI/MENU for 2 seconds or more to enter the menu.
2 Turn the jog dia l to select the item.
3 Press the 5-way cont rol key (NENT) to enter the selection.
4 Repeat steps 2 and 3.
The setting will be entered when you press the 5-way control key (NENT) at the last.
To return the preceding setting
Press x.
To cancel the operation while setting
Press x for 2 seconds or more.
26
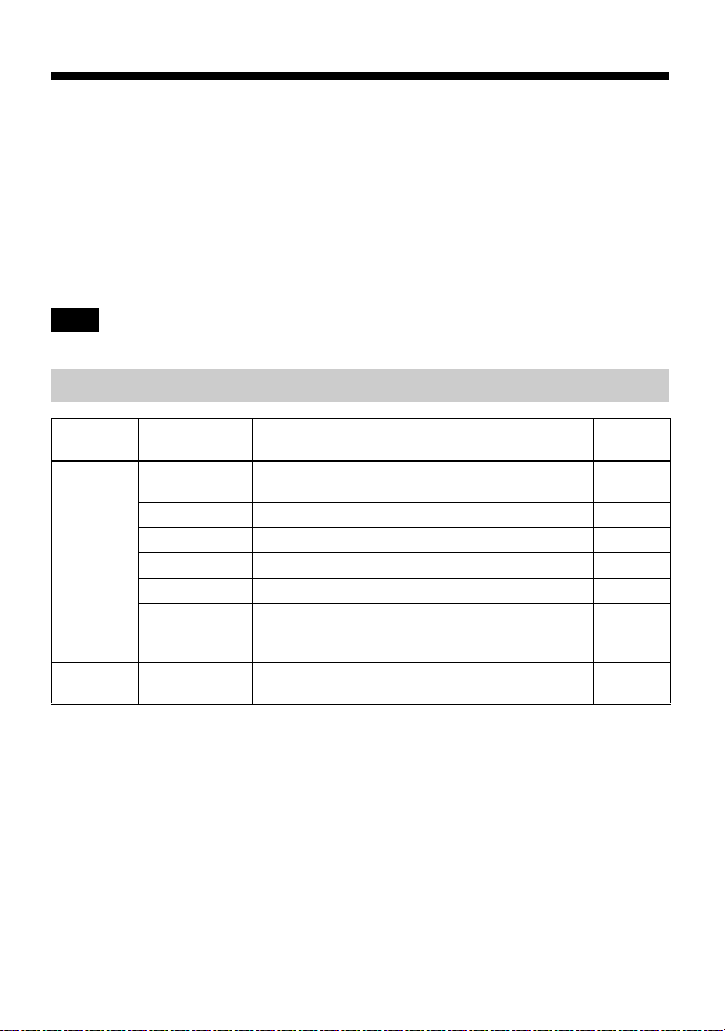
List of menus
The following table shows the menu items that you can select. Menu items can be set with
both the recorder and the remot e control, an d some can be set wi th either the recorder or the
remote control.
Items listed under “Menu 1” are the sel ectable items which ap pear when you enter t he
menu, and items list ed under “Menu 2” ar e th e selectable items which appear when you
select an item in Men u 1.
It is possible to display all menu items only when “Menu Mode” is set to “Advanced”.
Menu items with an asterisk (*) are not displayed when “Menu Mode” is set to “Simple”.
For details, see “Changing the displayed menu items (Menu Mode)” (page 68).
Note
Different indication may be displayed depending on the operating conditions and disc settings.
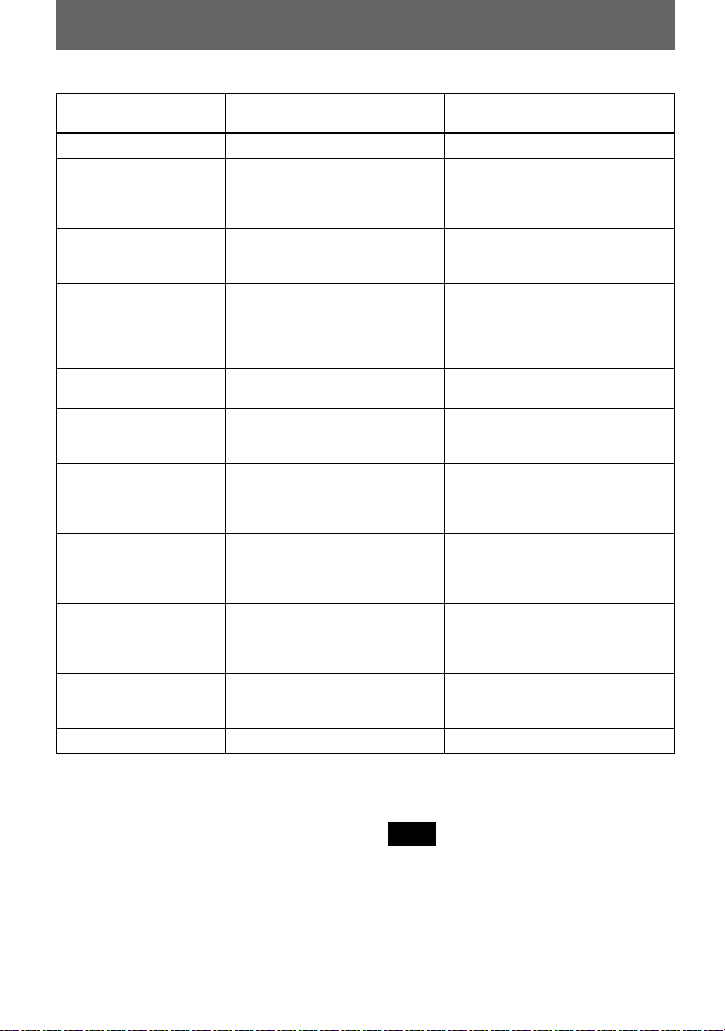
Menus of the remote control
Menu 1 Menu 2 Function Site
Edit Title Input* Adding a track name, artist name, album name,
group name, or disc name.
Group Set* Assigns recorded t rac ks or groups to a new group. page 58
GroupRelease* Releases group settings. page 59
Move* Changes the order of tracks or group s. page 60
Erase Erases tracks, groups, or the entire disc contents. page 63
Format* Formats the disc and restores it to the condi tion it
was in at the time of purchase (in Hi-MD m ode
only).
Useful* Search* Searches for tracks by track name, group name,
artist name, or album name.
page
page 53
page 67
page 49
27
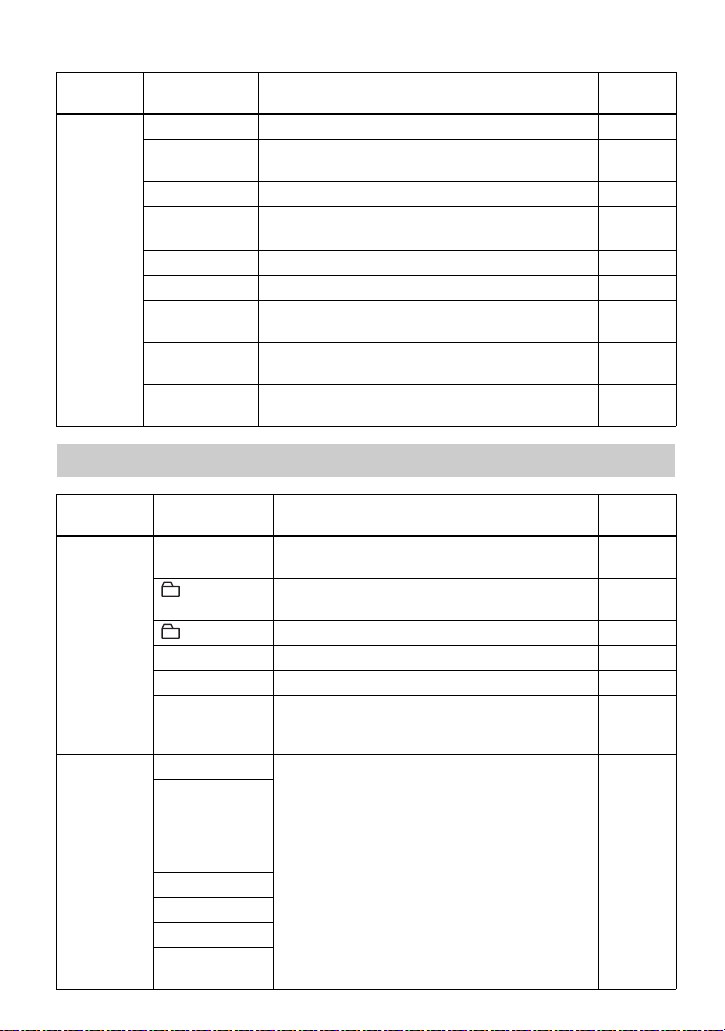
Menu 1 Menu 2 Function Site
Option Menu Mode Changes the menu items that are displayed. page 68
AVLS* Sets a limit on the maximum volume to protect
Beep* Turns the beep sound on or off. page 69
Backlight
your hearing.
Selects the status of the backli ght in the display
page
page 68
page 69
window on the remote control.
Disc Memory* Stores the recorder settings. page 70
Quick Mode* Sets the recorder to start playback quickly
Disc Mode Selects MD mode or Hi-MD mode when a blank
disc is inserted.
Contrast* Adjusts the c o ntrast of the display window on the
remote control.
Jog Dial* Changes the operational direction on the display
when turning the jog dial.
. page 71
page 71
page 72
page 73
On the recorder
Menu 1 Menu 2 Function Site
Edit Title* Adding a track name, artist name, album name,
: Set* Assigns recorded tracks or groups to a new
: Release* Releases group set ti ngs. page 59
Move* Changes the order of tracks or groups. page 62
Erase Erases tracks, groups, or the en ti re di sc contents. page 64
Format* Formats the disc and r estores it to the condit ion it
Display Lap Time Displays various information such as the
RecRemain
(while recording
and stopped)/
1 Remain (while
playing)
AllRemain
Title1/Title2
Sound*
Codec/
TrackMode*
group name, or disc name.
group.
was in at the time of purchase (in Hi-MD mode
only).
recorder status, et c. in the display wind ow.
28
page
page 56
page 59
page 67
page 32,
page 42
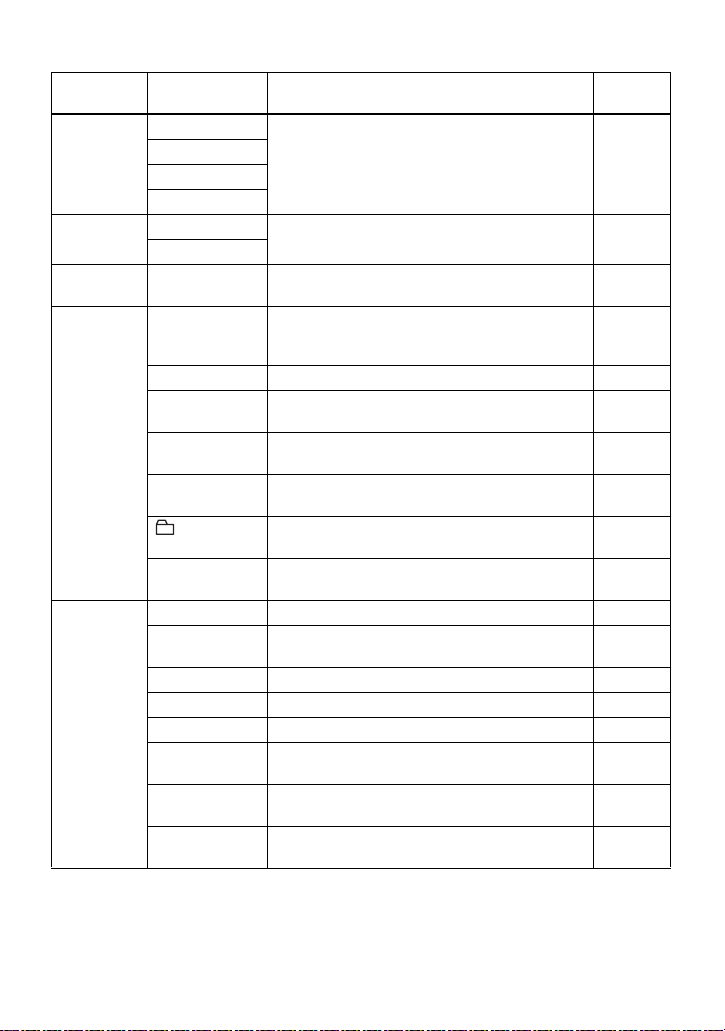
Menu 1 Menu 2 Function Site
SubPMode Norm al Selects the typ e o f pl ay, such as single-tr ack pl ay
1 Track
Shuffle
A-BRepeat*
Sound Normal Customizes th e equalizer mode settings. page 52
Sound EQ
Useful* S ea rch* Searche s for t racks by track name, group name,
REC Set REC Mode Selects the recording mode (PCM, Hi-S P, or Hi-
RECVolume* Manually adjusts the recordi ng level. page 36
MIC AGC* Sets the microphone recordi ng level adjust m ent
MIC Sens* Sets the microphone sensitivity to suit the source
Time Mark* Adds track marks automatically in a specific
:REC* Sets the recorder to create a new group with each
SYNC REC* Simplifies operations during digital recording
Option Menu Mode Changes the displayed menu items. page 68
AVLS* Sets a limit on the maximum volume to protect
Beep* Turns the beep sound on or off. page 69
Disc Mem* Stores the recorder settings (Disc Memory). page 70
QuickMode* Sets the reco rder to start playback quickly. page 71
Disc Mode Selects from MD mode or Hi- M D mo de wh en a
Contrast* Adjusts the contras t of the display window on
Jog Dial* Changes the operational direc t ion on the display
or shuffle play.
artist name, or album name.
LP for Hi-MD mode/SP, LP2, LP4, or m ona ural
for MD mode).
mode.
sound.
time interval .
recording operatio n (Group Recording).
(Synchro-Recording).
your hearing.
blank disc is inserted.
the recorder.
when turning the jog dial.
page
page 48
page 50
page 35
page 34
page 33
page 37
page 38
page 40
page 68
page 72
page 72
page 73
29
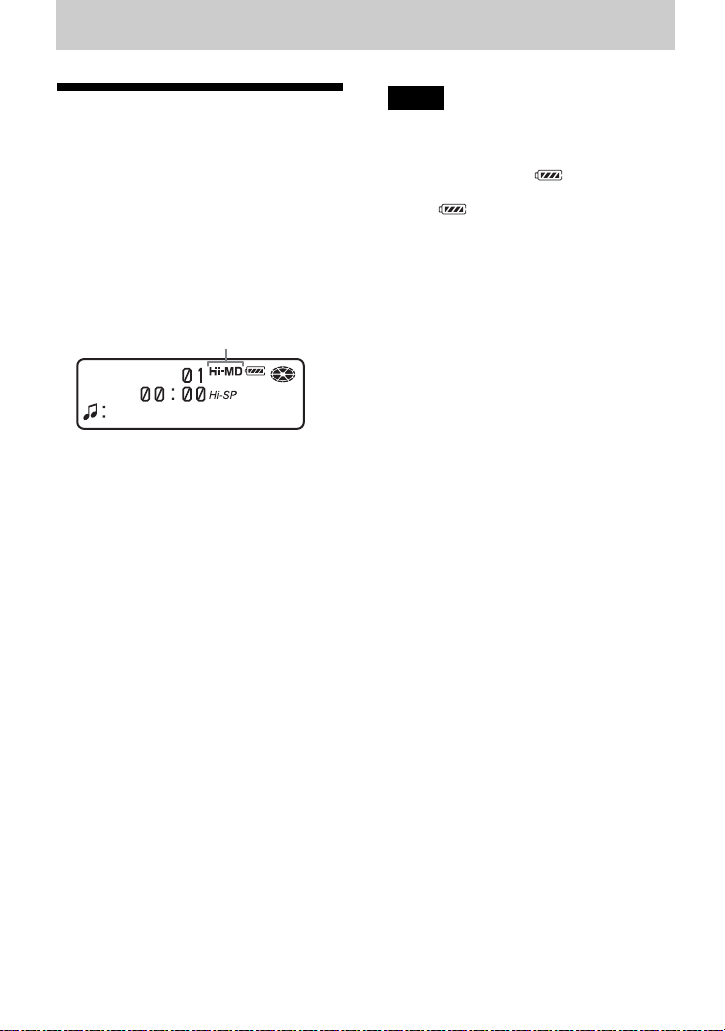
Various ways of recording
Before recording
Selecting the operation mode
This recorder has two operation modes,
“Hi-MD mode” a nd “ MD mode”. The
operation mode is automatically
recognized whenever the disc is inserted.
After you insert a d is c, check the
operation mode on the di splay window of
the recorder.
“Hi-MD” lights up when the operation
mode is Hi-MD and “MD” lights up
when the operation mode is MD.
When you insert a standard disc (b lank)
into the recorde r, you can use th e D isc
Mode function to specify use of the disc
in Hi-MD mode or MD mode.
If you want to use the di sc recorded on
this unit on another component that does
not support Hi-MD, record the disc with
“Disc Mode” in the menu set to “MD”.
Refer to “S el ecting the disc mode (Disc
Mode)” (page 71) for details.
Selecting the Menu Mode
If the “Simple” menu mode is selected,
some menu items will not be displaye d. If
you cannot find certain menu items while
operating the recorder, make sure that the
menu mode is set to “A dvanced”.
For details on selecting the menu mode,
see “Changing the di s p l ayed menu items
(Menu Mode) ” (page 68).
Notes
•When you record on a 1GB Hi-MD disc,
connect the AC po wer adap tor to the recorder,
charge the rechargeable battery fully (battery
level indication shows ), or use a new
alkaline dry battery (battery level indication
shows ). When you attempt to star t
recording on a 1GB Hi-MD disc,
“NotENOUGH POWER TO REC” may
appear and recording cannot be done even if
the battery level indication sho w s su fficient
remaining power while the rec order is st opped
or playing. This is because of a mechanism
that disables recording when the remaining
battery power is estimated by the recorder to
be insufficient due to the high power
consumption required for 1GB Hi-MD disc
recording.
•Recording may not occur if the ded ic a te d
USB cable is connected to the record er. Make
sure to disconnect the dedicated USB cabl e
before recording.
•If you start recording when the disc indication
is still rotating in th e display, the first few
seconds of the material will not be rec orded.
Make sure that the disc indication has stopped
rotating before you start recording.
•Do not move or jog the recorder or disconnect
the power source while recording, or while
“DATA SAVE” or “SYSTEM FILE
WRITING” is flashing in the displa y. If you
do, the data recorded up to that poi nt may not
be recorded to the disc, or data on th e di sc
may be damaged.
30
 Loading...