

Page 1

VX-F20D V1U
COLOR TELEVISION
TELEVISOR EN COLOR
TELEVISEUR COULEUR
OPERATING INSTRUCTIONS
INSTRUCCIONES DE MANEJO
MODE D’EMPLOI
ENGLISH
For Assistance And Information
Call Toll Free 1-800-BUY-AIWA
(United States and Puerto Rico)
ESPAÑOL
FRANÇAIS
Page 2
ENGLISH
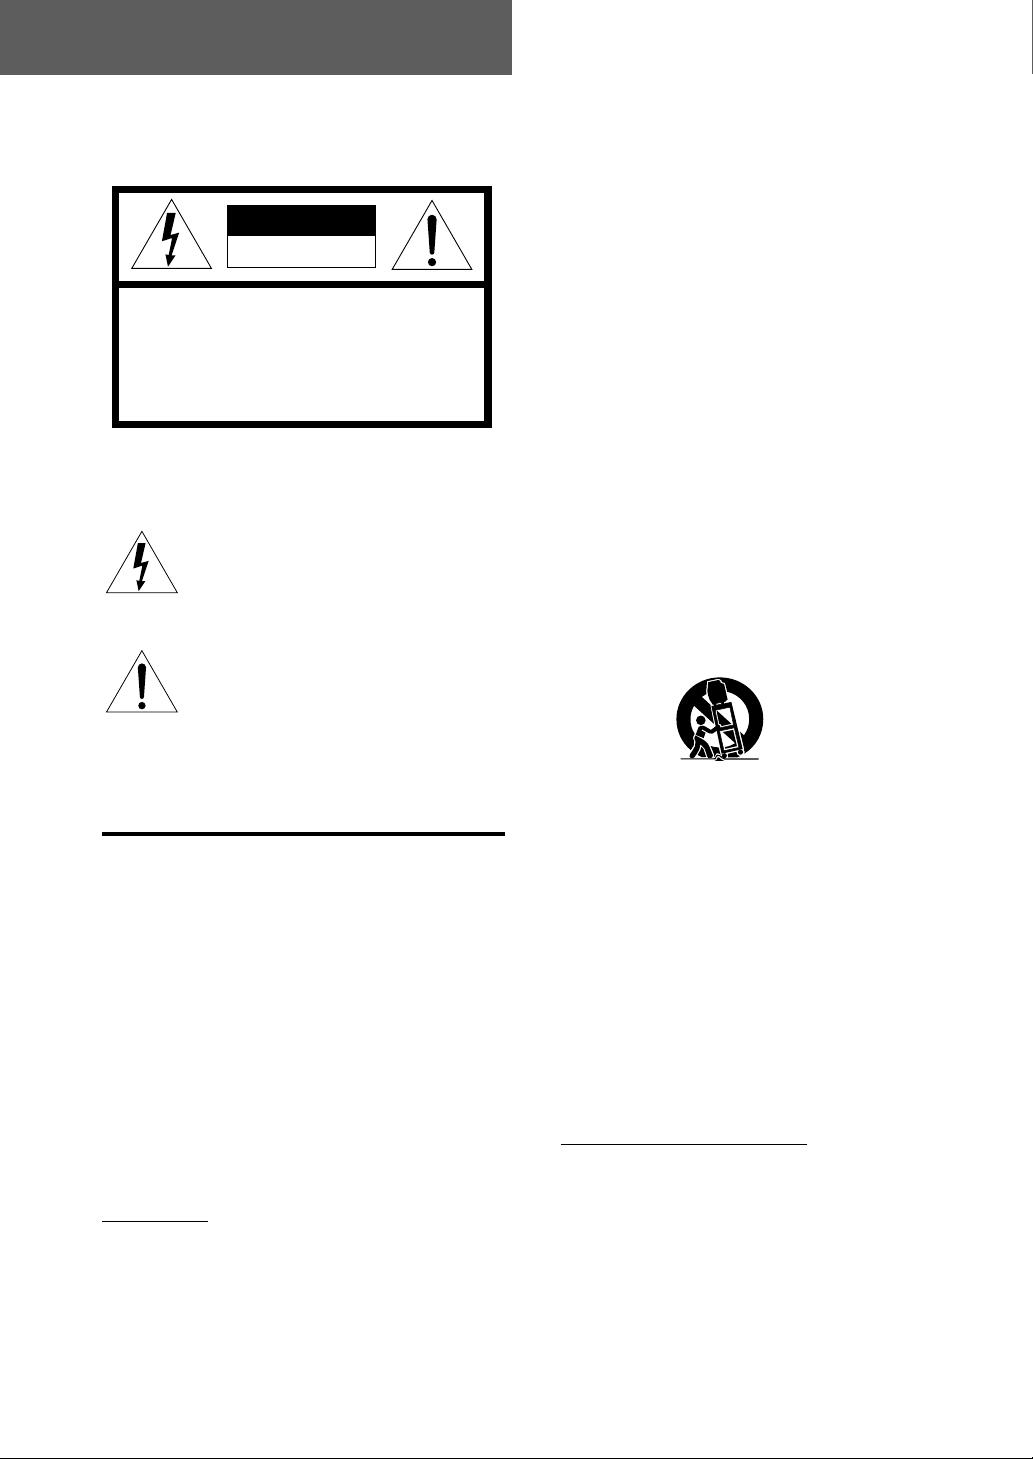
Warning
To reduce the r isk of fire or electric shock, do
not expose this appliance to rain or moisture.
CAUTION
RISK OF ELECTRIC SHOCK
DO NOT OPEN
“CAUTION:TO REDUCE THE RISK OF
DO NOT REMOVE COVER (OR BACK).
NO USER-SERVICEABLE PARTS INSIDE.
ELECTRIC SHOCK,
REFER SERVICING TO QUALIFIED
SERVICE PERSONNEL.”
Explanation of Graphical Symbols
The lightning flash with arrowhead symbol
within an equilateral triangle, is intended to
alert the user to the presence of uninsulated
“dangerous voltage” within the products
enclosure that may be of sufficient
magnitude to constitute a risk of electric
shock to a person.
The exclamation point within an equilateral
triangle is intended to alert the user to the
presence of important operating and
maintenance (servicing) instructions in the
literature accompanying the appliance.
IMPORTANT SAFETY
INSTRUCTIONS
Read the operating instructions carefully and
completely before operating the unit. Be sure to
keep the operating instructions for future ref erence.
All warnings and cautions in the operating
instructions and on the unit should be strictly
followed, as well as the safety suggestions below.
Warning
T o pre vent electric shoc k or other injuries, follow all
the safety instructions when installing, operating
and servicing the unit.
Installation
Attachments - Do not use attachments that have
not been recommended by the manufacturer
because doing so may result in the risk of fire,
electric shock or other injuries.
2
ENGLISH
Water and Moisture - Do not use this unit near
water - for example, near a bathtub, washbowl,
kitchen sink, or laundry tub, in a wet basement, or
near a swimming pool, and the like.
Heat - Do not use this unit near sources of heat,
including heating vents, stov es, or other appliances
that generate heat. It also should not be placed in
temperatures less than 5˚C (41˚F) or greater than
35˚C (95˚F ).
Mounting surface - Place the unit on a flat, even
surface.
Accessories - Do not place the unit on an unstable
cart, stand, tripod, bracket, or table. The unit may
fall causing serious injury to persons and serious
damage to the appliance. Use only with a cart,
stand, tripod, bracket, or table recommended by the
manufacture, or sold with the unit. When mounting
the appliance, follow the manuf acturer’s instructions.
When mounting the unit, use accessories
recommended by the manufacturer.
Portable cart - An appliance and cart combination
should be moved with care. Quick stops , excessiv e
force, and uneven surfaces may cause the
appliance and cart combination to overturn.
PORTABLE CART WARNING
S3126A
Ventilation - The unit should be situated with
adequate space around it so that proper heat
ventilation is assured. Allow 10 cm clearance from
the rear and the top of the unit, and 5 cm from the
each side.
Slots and openings in the cabinet and the back or
bottom are provided for ventilation, and to ensure
reliable operation of the unit and to protect it from
overheating, these openings must not be blocked
or covered. The openings should ne ver be blocked
by placing the unit on a bed, sofa, rug or other
similar surface. (This unit should never be placed
near or over a radiator or heat register.) This unit
should not be placed in a built-in installation such
as a bookcase unless proper ventilation is provided.
Weight and heavy objects
The unit should be moved with care by tw o or more
people as the weight balance is not even. Do not
place heavy objects on the unit.
Object and Liquid Entry - Never push objects of
any kind into the unit through the cabinet slots
because they may come into contact with
dangerous voltage points or short-circuit parts and
cause fire or electric shock. Ne ver spill liquid of an y
kind on the unit. Do not put a vase or the like with
water inside on this unit.
Page 3

Electric Power
Power Sources - This unit should be operated only
from the type of power source indicated on the
marking label. If you are not sure of the type of po wer
supply to your home, consult your appliance dealer
or local power company. To operate this unit on
battery power, or other sources, refer to the
operating instructions.
Grounding or Polarization - This unit is provided
with a polarized alternating-current line plug (a plug
having one blade wider than the other). This plug
will fit into the power outlet only one way. This is a
safety feature. If you are unable to insert the plug
fully into the outlet, try reversing the plug. If the plug
should still fail to fit, contact your electrician to
replace your obsolete outlet. Do not defeat the safety
purpose of the polarized plug.
Overloading - Do not allow anything to rest on the
power cord. Do not overload wall outlets and
extension cords because this can result in fire or
electric shock. Do not place the unit in an area where
people will walk on the cord.
Outdoor Antenna
Power lines - An outside antenna system should
not be located in the vicinity of overhead power lines
or other electric light or power circuits, or where it
can fall onto such power lines or circuits. When
installing an outside antenna system, extreme care
should be taken to avoid touching power lines or
circuits because contact with them may be fatal.
Outdoor Antenna Grounding - If an outside
antenna or cable system is connected to the unit,
be sure the antenna or cable system is grounded
so as to provide some protection against voltage
surges and built-up static charges. Section 810 of
the National Electrical Code, ANSI/NFPA No.70,
provides information with regard to proper grounding
of the mast and supporting structure, grounding of
the lead-in wire to an antenna discharge unit, size
of grounding conductors, location of antennadischarge unit, connection to grounding electrodes,
and requirements for the grounding electrode. See
the figure.
Antenna Grounding According to the National Electrical Cord
ANTENNA LEAD IN WIRE
Lightning
For added protection during a lightning storm, or
when left unattended and unused for long periods
of time, unplug the unit from the wall outlet and
disconnect the antenna or cable system. This will
prevent damage to the unit due to lightning and
powerline surges.
Maintenance
Cleaning - Unplug the unit from the wall outlet
before cleaning. Do not use liquid cleaners or
aerosol cleaners. Use a damp cloth for cleaning.
Damage Requiring Service
Unplug the unit from the wall outlet and refer for
servicing to qualified service personnel under the
following conditions:
1) When the power cord or plug is damaged or
frayed.
2) If liquid has been spilled into the unit.
3) If the unit has been exposed to rain or water.
4) If the unit does not operate normally when
following the operating instructions. Adjust
only those controls that are covered by the
operating instructions because improper
adjustment of other controls may result in
damage to the unit and will often require
extensive work by a qualified technician to
restore the unit to normal operation.
5) If the unit has been dropped or the cabinet
has been damaged.
6) When the unit exhibits a distinct change in
performance - this indicates a need for service.
Do not attempt to service the unit yourself because
opening or removing covers ma y expose you to high
voltage or other hazards. Refer all servicing to
qualified service personnel.
Replacement Parts - When replacement parts are
required, be sure the service technician has used
replacement parts specified by the manufacturer
or having the same characteristics as the original
part. Unauthorized substitutions may result in fire,
electric shock or other hazards.
Safety Check - After completion of any service or
repairs to the unit, ask the service technician to
perform a safety check to ensure that the unit is in
proper operating condition.
GROUND CLAMP
ELECTRIC
SERVICE
EQUIPMENT
NEC-NATIONAL ELECTRICAL CODE
ANTENNA DISCHARGE
UNIT
(NEC SECTION 810-20)
GROUNDING
CONDUCTORS
(NEC SECTION 810-21)
GROUND CLAMPS
POWER SERVICE GROUNDING
ELECTRODE SYSTEM
(NEC ART 250 PART H)
ENGLISH
3
Page 4

Note to CATV system installer:
This reminder is provided to call the CATV system
installer’s attention to Article 820-40 of the NEC that
provides guidelines for proper grounding and, in
particular, specifies that the cable ground should
be connected to the grounding system of the
building, as close to the point of cable entry as
practical.
NOTE
This equipment has been tested and found to
comply with the limits for a Class B digital device,
pursuant to Part 15 of the FCC Rules. These limits
are designed to provide reasonable protection
against harmful interference in a residential
installation.
This equipment generates, uses, and can radiate
radio frequency energy and, if not installed and used
in accordance with the instructions, may cause
harmful interference to radio communications.
However, there is no guarantee that interference
will not occur in a particular installation. If this
equipment does cause harmful interference to radio
or television reception, which can be determined
by turning the equipment off and on, the user is
encouraged to try to correct the interference by one
or more of the following measures:
- Reorient or relocate the receiving antenna.
- Increase the separation betw een the equipment
and receiver.
- Connect the equipment into an outlet on a circuit
different from that to which the receiver is
connected.
- Consult the dealer or an experienced radio/TV
technician for help.
CAUTION
Modifications or adjustments to this product, which
are not expressly approved by the manufacturer,
may void the user’s right or authority to operate this
product.
Main features of this unit
TV section
V-chip
An age limitation can be set to prevent children
from viewing or listening to violent scenes or
programs with adult content. This unit
corresponds to “TV-RATING” and “MPAA
RATING.”
Video Enhancer
This unit provides 4 modes as the multi video
enhancer: NORMAL, CINEMA, GAME, and
DIMMER.
Sound Enhancer
This unit provides 3 modes as the sound
enhancer: SUPER BASS, Q SURROUND and
BBE.
MTS (Multichannel TV Sound)
broadcast
You can receive the stereo and bilingual TV
programs which are broadcasted in the United
States.
Closed Caption
The subtitles can be displayed on the screen
when a broadcast corresponding to closed
caption is received.
DVD Section
Built in 3 DVD Changer
This unit provides a completely new dimension
in video entertainment.
Multi-language function*
You can select an audio soundtrack in up to 8
languages, and subtitles in up to 32 languages.
Multi-angle function*
You can select a viewing angle of scenes shot
from multiple camera angles and recorded on
the disc.
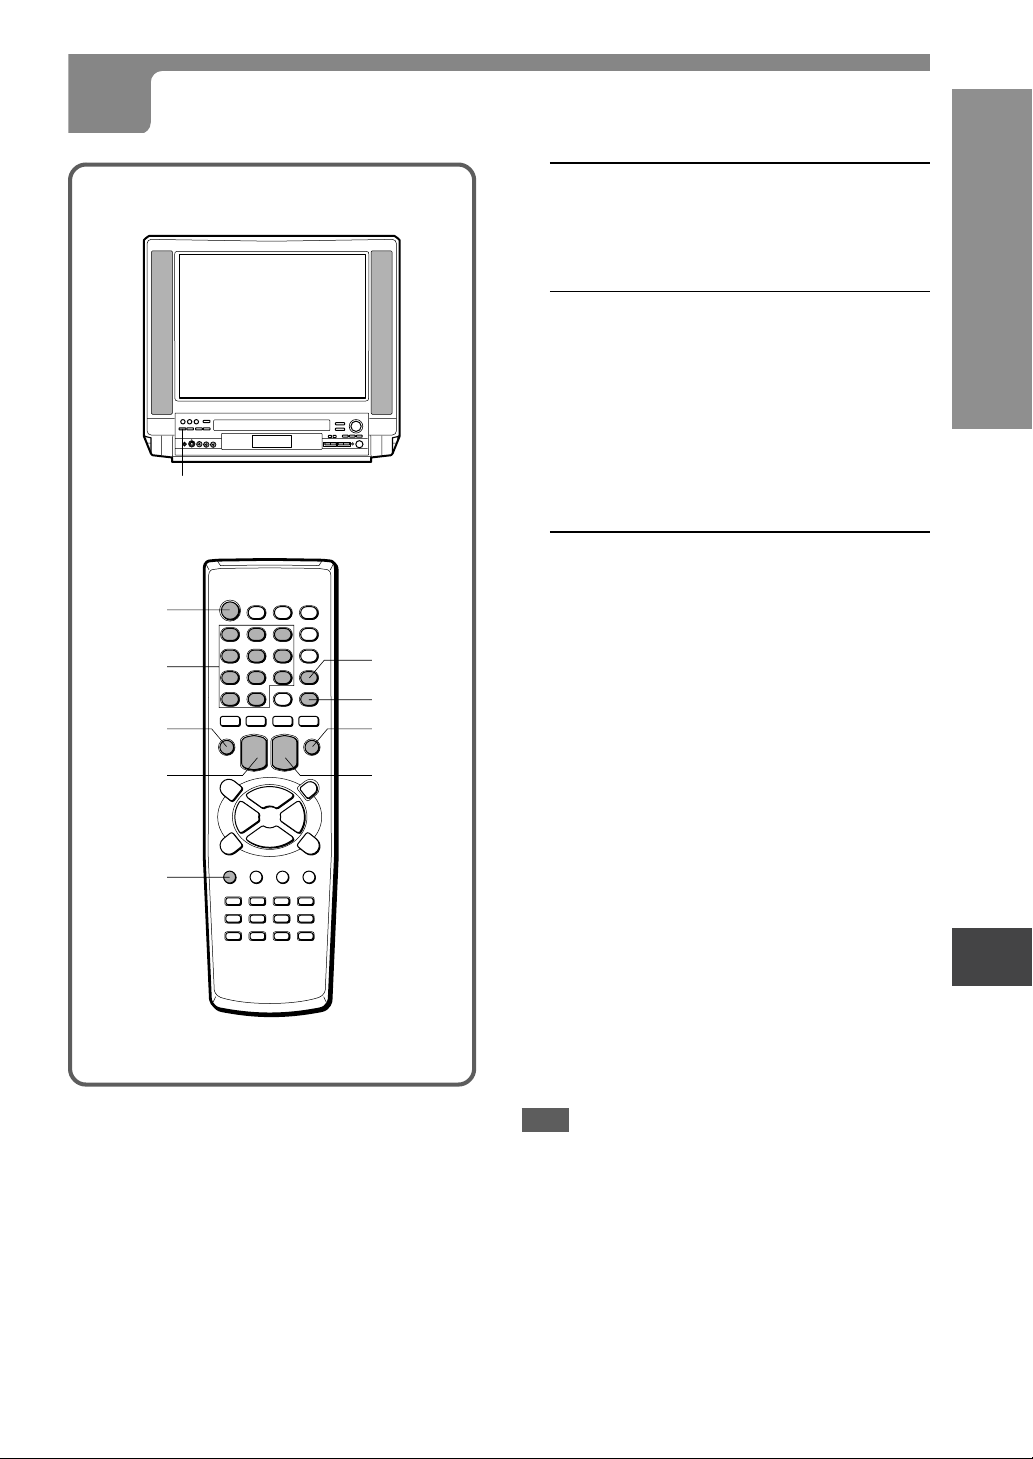
OWNER’S RECORD
For your convenience, record the model number
and serial number (you will find them on the rear of
your set) in the space provided below . Please refer
to them when you contact your AIW A dealer in case
of difficulty.
Model No.
Serial No.
4
ENGLISH
Parental lock function*
You can prevent playback of specified discs
unsuitable for certain audiences.
(* All these functions are dependent on the DVD
software.)
Compatible with video CDs and audio CDs as
well as DVDs
Page 5

TABLE OF CONTENTS
Preparations
Connecting the antenna ..........................................6
Connecting a CATV .................................................7
Connecting a VCR ...................................................8
Connecting a video camera or game machine ........9
Optional audio connections ...................................10
Basic connections ........................................................ 10
Connecting to a Dolby Pro Logic Surround system...... 11
Connecting to a decoder with a Dolby Digital (AC-3) or
DTS processing............................................................ 12
Before operation ....................................................13
Inserting the batteries................................................... 13
Using the remote control .............................................. 13
To turn the power on .................................................... 13
Volume ......................................................................... 13
Using the Headphones................................................. 13
TV Operations
Selecting the language ..........................................14
Setting the channels ..............................................15
Adding or erasing the channels manually .................... 16
Watching a TV program.........................................17
Selecting the MTS mode .......................................18
Selecting the closed captions mode ......................19
Selecting the AV mode ..........................................20
Adjusting the picture ..............................................21
Adjusting the sound ...............................................22
Enjoying special sound effects ..................................... 23
Setting the V-chip ..................................................24
Registering the password............................................. 24
Setting the V-chip ......................................................... 25
Changing the password................................................ 27
Registering a broadcasting station name ..............28
On screen display......................................................... 29
Watching a video or other equipment ....................30
Setting the sleep timer ...........................................31
Disc Operations
Before use ............................................................. 32
Basic operations ....................................................34
Repeat playback ....................................................39
Programmed/random playback .............................41
Changing the display information ..........................43
Marking and searching ..........................................46
Special DVD features ............................................49
Selecting Karaoke audio........................................52
Customizing DVD Setup
Overview of the setup menu ..................................53
Basic operations ....................................................54
On-screen menu ....................................................54
Disc languages ......................................................55
Audio output setting ...............................................57
TV aspect ..............................................................59
Ratings ..................................................................60
PBC .......................................................................61
Disc resume...........................................................61
Country codes .......................................................62
Language codes ....................................................64
General
Care and maintenance ..........................................65
Troubleshooting guide ...........................................66
Specifications ........................................................67
Parts and controls..................................................68
ENGLISH
5
Page 6

CONNECTING THE ANTENNA
75-ohm
coaxial cable
(not supplied)
1
To ANTENNA connector
AC cord
1
Connect the antenna cable to the ANTENNA connector on this unit.
If the cable is a round-type 75-ohm coaxial cable, connect it directly to the ANTENNA connector.
If the cable is a flat-type 300-ohm twin-lead cable, connect it to the antenna adaptor (supplied), and connect the
adaptor to the ANTENNA connector.
2
Connect the AC cord to the AC wall outlet.
2
To AC outlet
300-ohm twin-lead
cable
(not supplied)
Antenna adaptor
(supplied)
To prevent the unit from falling during earthquakes, etc.,
Fix the unit even to a wall or pillar with the security hook located on the rear using strong twine or wire.
Strong twine
or wire
(not supplied)
AC cord
6
Security hook
ENGLISH
Page 7
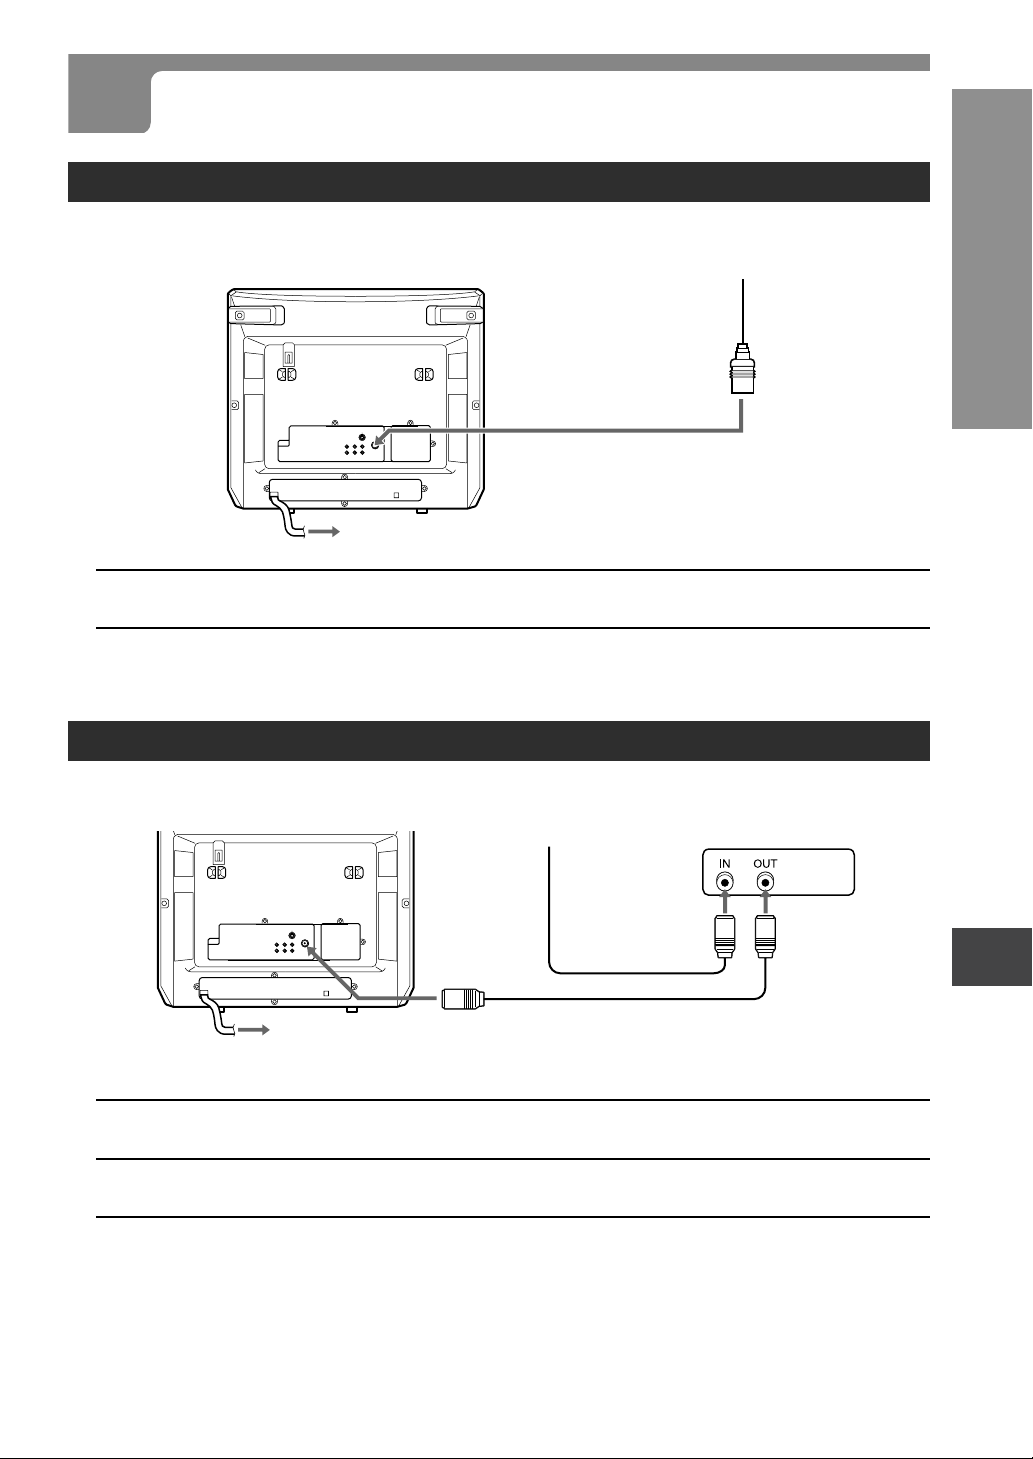
CONNECTING A CATV
To connect a CATV system without using a CATV converter
CATV system
75-ohm coaxial cable
(not supplied)
1
To ANTENNA connector
To AC outlet
2
1
Connect the cable from the CATV system to the ANTENNA connector on this unit.
2
Connect the AC cord to the AC wall outlet.
PREPARATIONS
To connect a CATV system using a CATV converter
CATV system
75-ohm
coaxial cable
(not supplied)
1
CATV converter
(not supplied)
2
To AC outlet
3
1
Connect the cable from the CA TV system to the input connector on the CATV converter.
2
Connect the output connector on the converter to the ANTENNA connector on this unit.
3
Connect the AC cord to the AC wall outlet.
To ANTENNA
connector
75-ohm coaxial cable
(not supplied)
ENGLISH
7
Page 8
CONNECTING A VCR
To ANTENNA
connector
1
To antenna output
connector
To antenna input
connector
2
75-ohm coaxial cable
Yellow
To VIDEO 1 INPUT A UDIO
L (MONO)/R jacks
Red
1
Remove the antenna cable from this unit and connect it to the antenna input connector
White
To VIDEO 1 INPUT
VIDEO jack
(not supplied)
Audio/video cable
(not supplied)
on the VCR.
2
Connect the ANTENNA connector on this unit to the antenna output connector on the
VCR with an optional cable.
You can connect this unit to the VCR with the optional audio/video cable.
For details on how to connect the VCR to the unit, consult the owner’s manual for the VCR.
3
Connect the AC cord to the AC wall outlet.
To audio/video
output jacks
To watch a video
Refer to “Watching a video or other equipment” on page 30.
Tips
•If the VCR is a monaural type, connect one of the audio plugs only to the AUDIO L (MONO) jack.
•If the VCR has an S-video output jack, you can connect the optional S-video cable to the S-video output jack on
the VCR and to the VIDEO 1 INPUT S-VIDEO jac k on this unit. In this case, you do not need to connect the cable
to the VIDEO jack.
Note
This unit features the copy protection function developed by Macrovision.
• Copy protection signals are included in some DVD and VCD discs. If you record such discs on a VCR, picture
noise will appear during recording and playback.
• When connecting a video projector or AV amplifier to this unit, connect the OUTPUT VIDEO jack on this unit to
them directly.
8
ENGLISH
Page 9
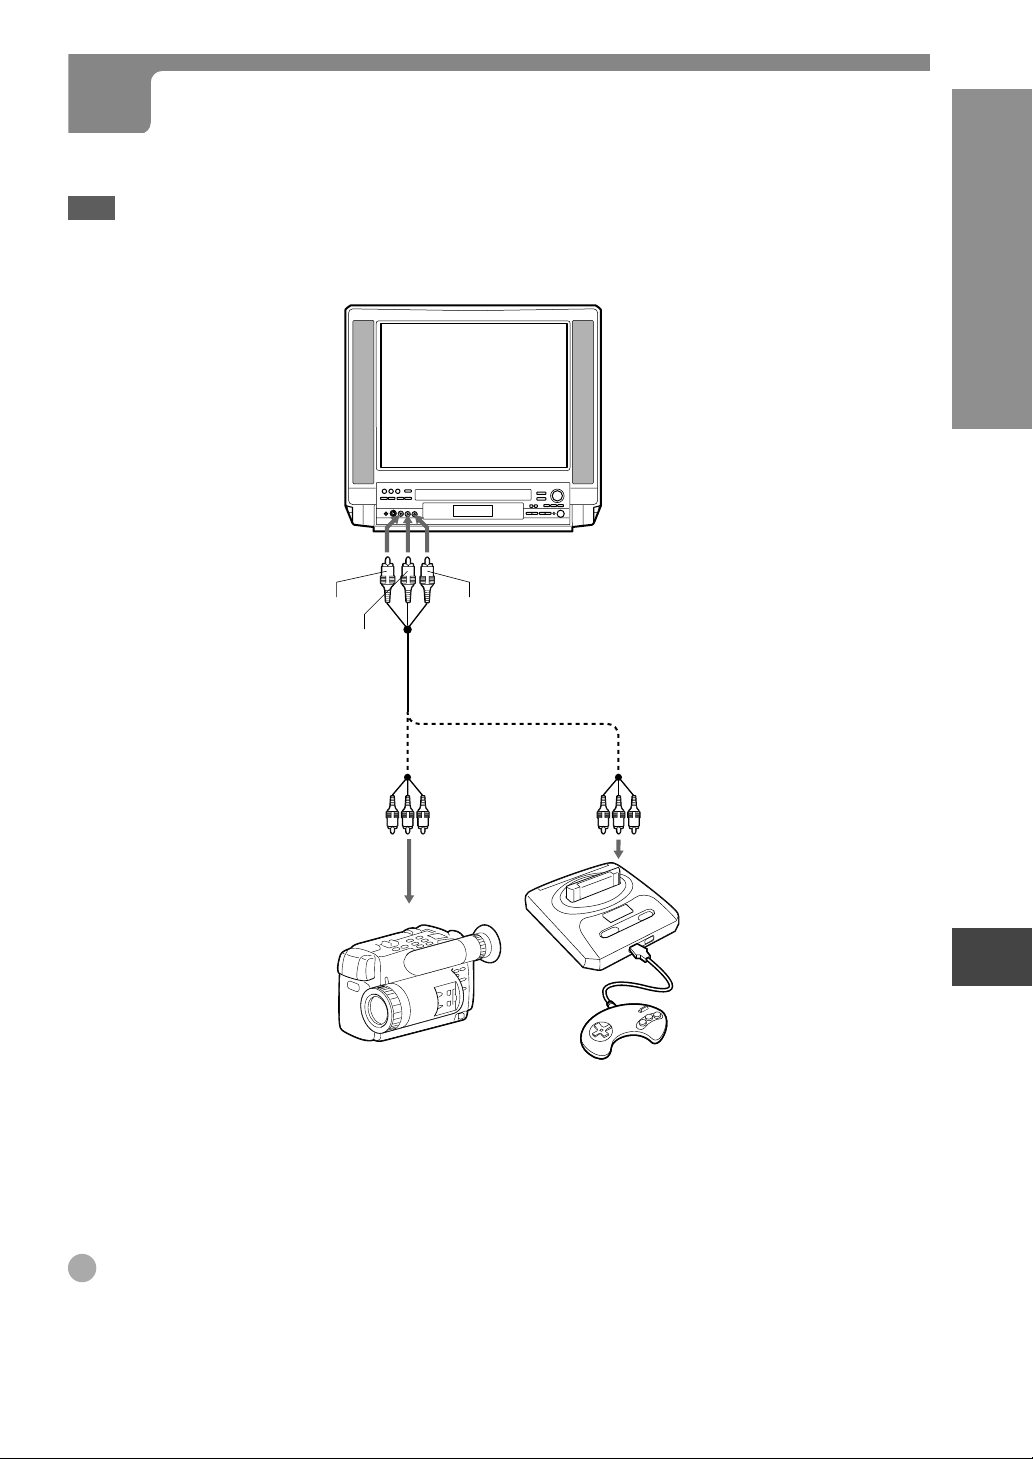
CONNECTING A VIDEO CAMERA OR A GAME MACHINE
It is convenient to use VIDEO 2 IN AUDIO IN L (MONO)/R/VIDEO jacks on the front.
Note
Turn off the Video camera or game machine before you connect or disconnect it’s power cord.
PREPARATIONS
To VIDEO 2 IN
VIDEO jack
Yellow
White
Audio/video cable
(not supplied)
Video camera (Player)
To VIDEO 2 IN AUDIO IN
L(MONO)/R jacks
Red
To audio/video
output jacks
or
Game machine
To watch a video camera or game machine
Refer to “Watching a video or other equipment” on page 30.
Tip
If other equipment has an S-video output jack, you can connect the optional S-video cable to the S-video output
jack on it and to the VIDEO 2 IN S-VIDEO jac k on this unit. In this case, you do not need to connect the cable to the
VIDEO jack.
ENGLISH
9
Page 10

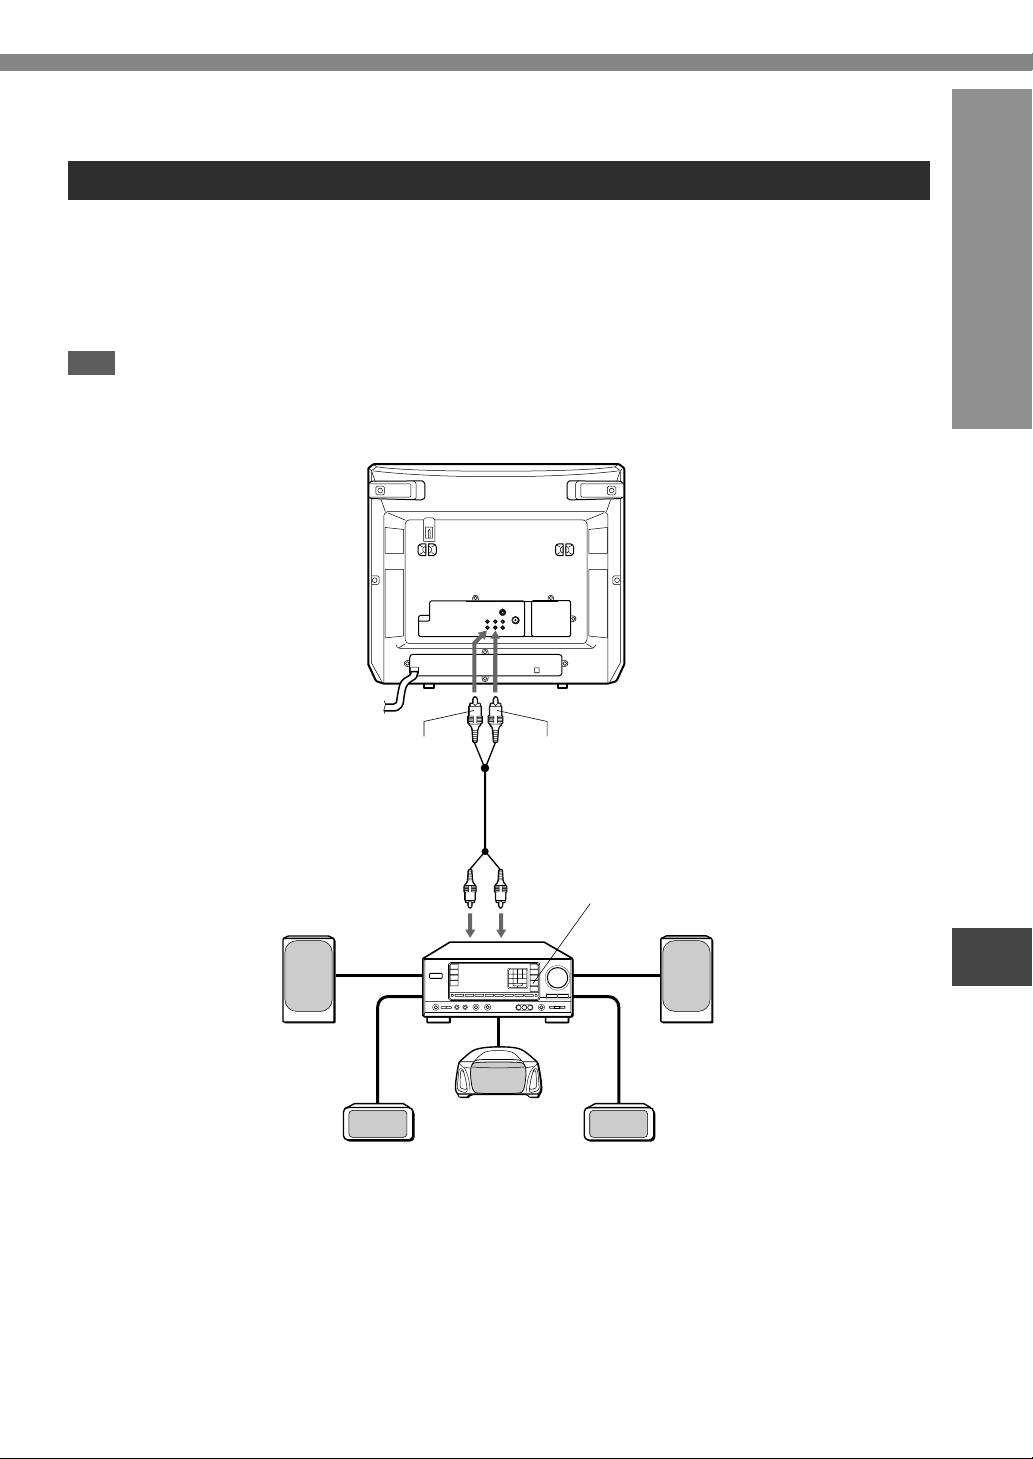
OPTIONAL AUDIO CONNECTIONS
Basic connections
This connection improves the sound quality.
Note
When you connect this unit to other equipment, be sure to turn off the power and unplug all of the equipment from
the wall outlet before making any connections.
Connect the OUTPUT R-AUDIO-L jacks on this unit to the audio input jacks on the stereo system with the
optional audio cable.
Refer to the owner's manual of your stereo system as well.
To OUTPUT R-AUDIO-L
jacks
Red
White
Audio cable
(not supplied)
To audio input jacks
Stereo system
10
ENGLISH
Page 11
Connecting to a Dolby Pro Logic Surround system
You can enjoy the excitement of Surround Sound when playing back D VDs , by connecting to an AV receiver that is
equipped with a Dolby Pro Logic decoder.
Connect the OUTPUT R-AUDIO-L jacks on this unit to the audio input jacks on the AV receiver with the
optional audio cable.
Refer to the owner's manual of your AV receiver as well. (Some AV receivers need to change the settings.)
Note
When you connect this unit to other equipment, be sure to turn off the power and unplug all of the equipment from
the wall outlet before making any connections.
To OUTPUT RAUDIO-L jacks
Red White
PREPARATIONS
To audio
input jacks
Front speaker (left)
Rear speaker
(left surround)
Center speaker
Set the setup menu correctly after connecting.
Set the "Audio Output Setting" of the setup menu
correctly referring to the following below.
See "Customizing DVD Setup" in detail (page 53).
Audio cable (not supplied)
Receiver equipped with Dolby
Pro Logic Surround
Front speaker (right)
Rear speaker
(right surround)
Audio Output Setting
Digital Stream: Downmix PCM
dts Output: OFF
Downmix Type: Surround Mode
ENGLISH
11
Page 12

OPTIONAL AUDIO CONNECTIONS (CONTINUED)
Connecting to a decoder with a Dolby Digital(AC-3) or DTS processing
You can enjoy theater-quality realistic audio sound when playing back DVDs recorded in Dolby Digital Surround
or DTS Surround, by connecting to an AV receiver that is equipped with a Dolby Digital(AC-3) or DTS decoder.
Connect the DIGITAL AUDIO OUT (OPTICAL) terminal on this unit to the digital input on the AV receiver
with the optional optical cable. Refer to the owner's manual of your AV receiver as well.
Notes
When you connect this unit to other equipment, be sure to turn off the power and unplug all of the equipment from
the wall outlet before making any connections.
Remove the dust cap,
then keep it.
To AC outlet
Receiver equipped with a DTS or
Dolby Digital (AC-3) decoder
Front speaker (left) Front speaker (right)
Center speaker
Rear speaker (left)
Set the setup menu correctly after connecting.
Set the "Audio Output Setting" of the setup menu
correctly referring to the following below.
See "Customizing DVD Setup" in detail (page 53).
Audio Output Setting for Dolby Digital(AC-3)
Digital Stream: DOLBY DIGITAL
dts Output: OFF
Downmix Type: Surround Mode
Audio Output Setting for DTS
Digital Stream: Downmix PCM
dts Output: ON
Downmix T ype: Surround Mode
To DIGITAL AUDIO OUT (OPTICAL)
Optical cable (not supplied)
Sub woofer
To digital
audio input
Rear speaker (right)
CAUTION
If the AV receiver is not equipped with a DOLBY
DIGITAL or DTS decoder, do not select “DOLBY
DIGITAL” or "DTS" in the “Audio Output Setting” when
connecting the AV receiv er with an optical cable. Merely
attempting to play a DVD may cause a high level of
noise which could be harmful to your ears and damage
the speakers. In such a case, be sure to select
“Downmix PCM”.
12
ENGLISH
Page 13
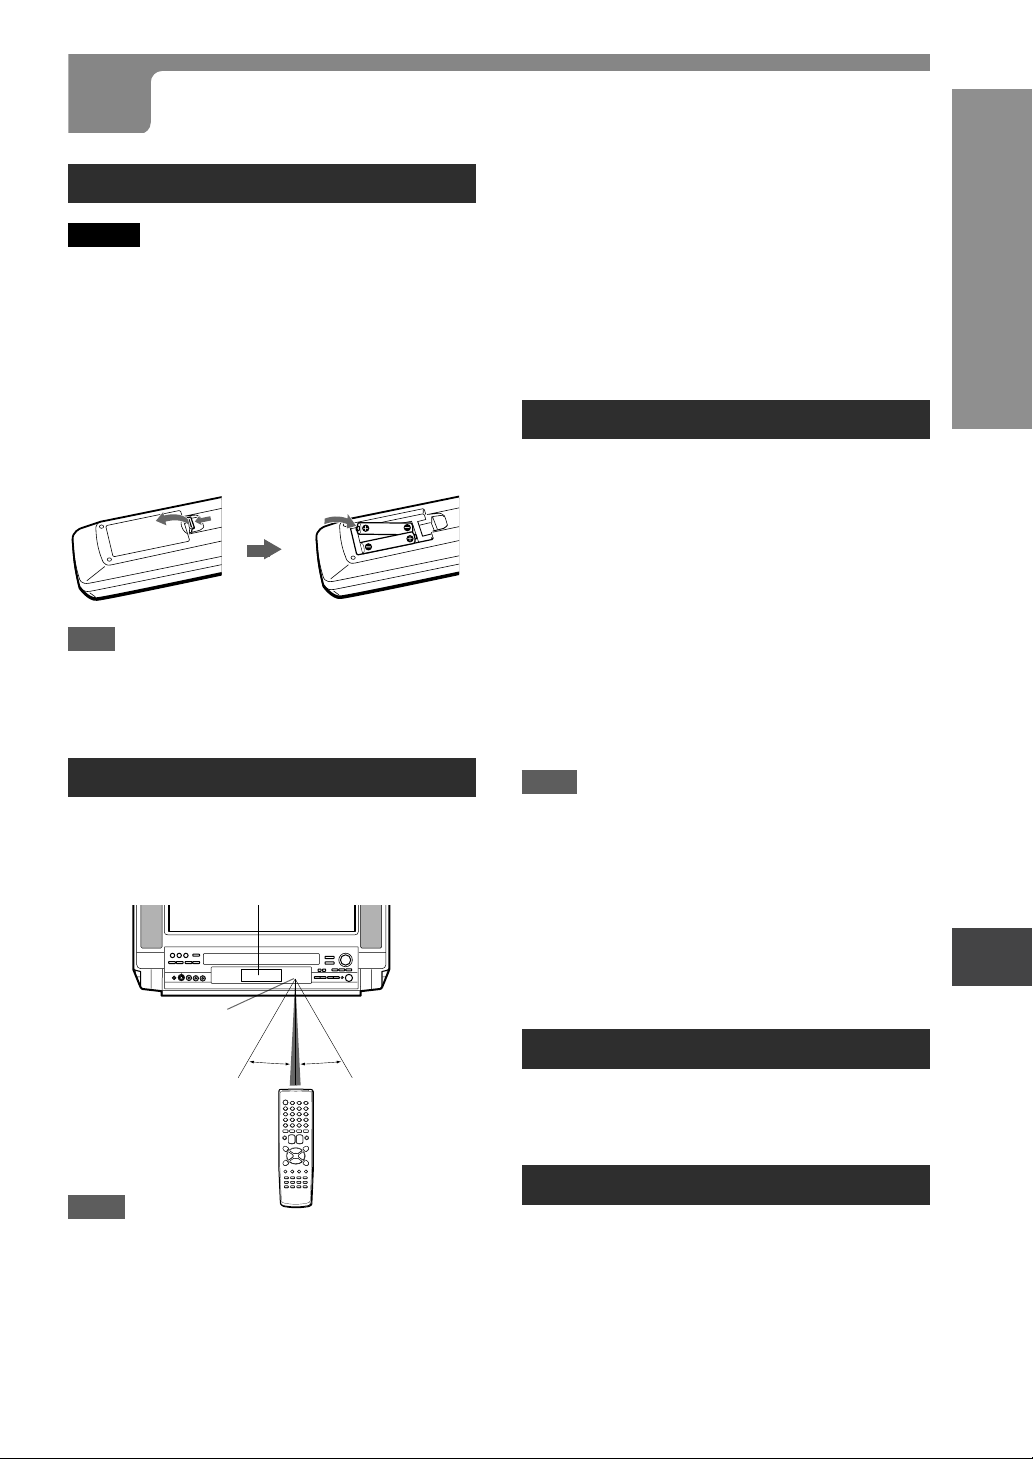
BEFORE OPERATION
Inserting the batteries
Caution
To prevent damage from leakage or explosion, follow
the descriptions below.
•Insert the two supplied R03 (size AAA) batteries with
the 0 and 9 marks correctly as illustrated.
•Do not mix old batteries with new ones or different
types of batteries.
•Do not throw the batteries into a fire, apply heat to
them or take them apart.
•Do not carry the batteries with keys or other metallic
objects.
Note
Remove the batteries when they hav e no more po wer,
or when you do not use the remote control for a long
period of time.
•Using a TV with the same type of infrared remote
control facing the same direction may cause incorrect
operation.
•The maximum distance for effective control between
the remote control and the remote sensor is 7 meters
(23 feet).
•Although you can use the remote control within an
angle of up to 30 degrees in any direction from directly
in front of the remote sensor, we recommend a
narrower angle for stable operation.
To turn the power on
1 Press POWER on this unit, the first time you
connect the AC cord to the AC wall outlet.
The 6STANDBY indicator lights.
2 Press POWER on the remote control to turn on
this unit.
The 6STANDBY indicator tur ns off and the TV
function begins. In the display window, "TV" is
displayed.
To turn the power off
Press POWER on the remote control. The 6STANDBY
indicator lights.
If you press POWER on this unit, the main po wer turns
off and the remote control cannot be operated.
PREPARATIONS
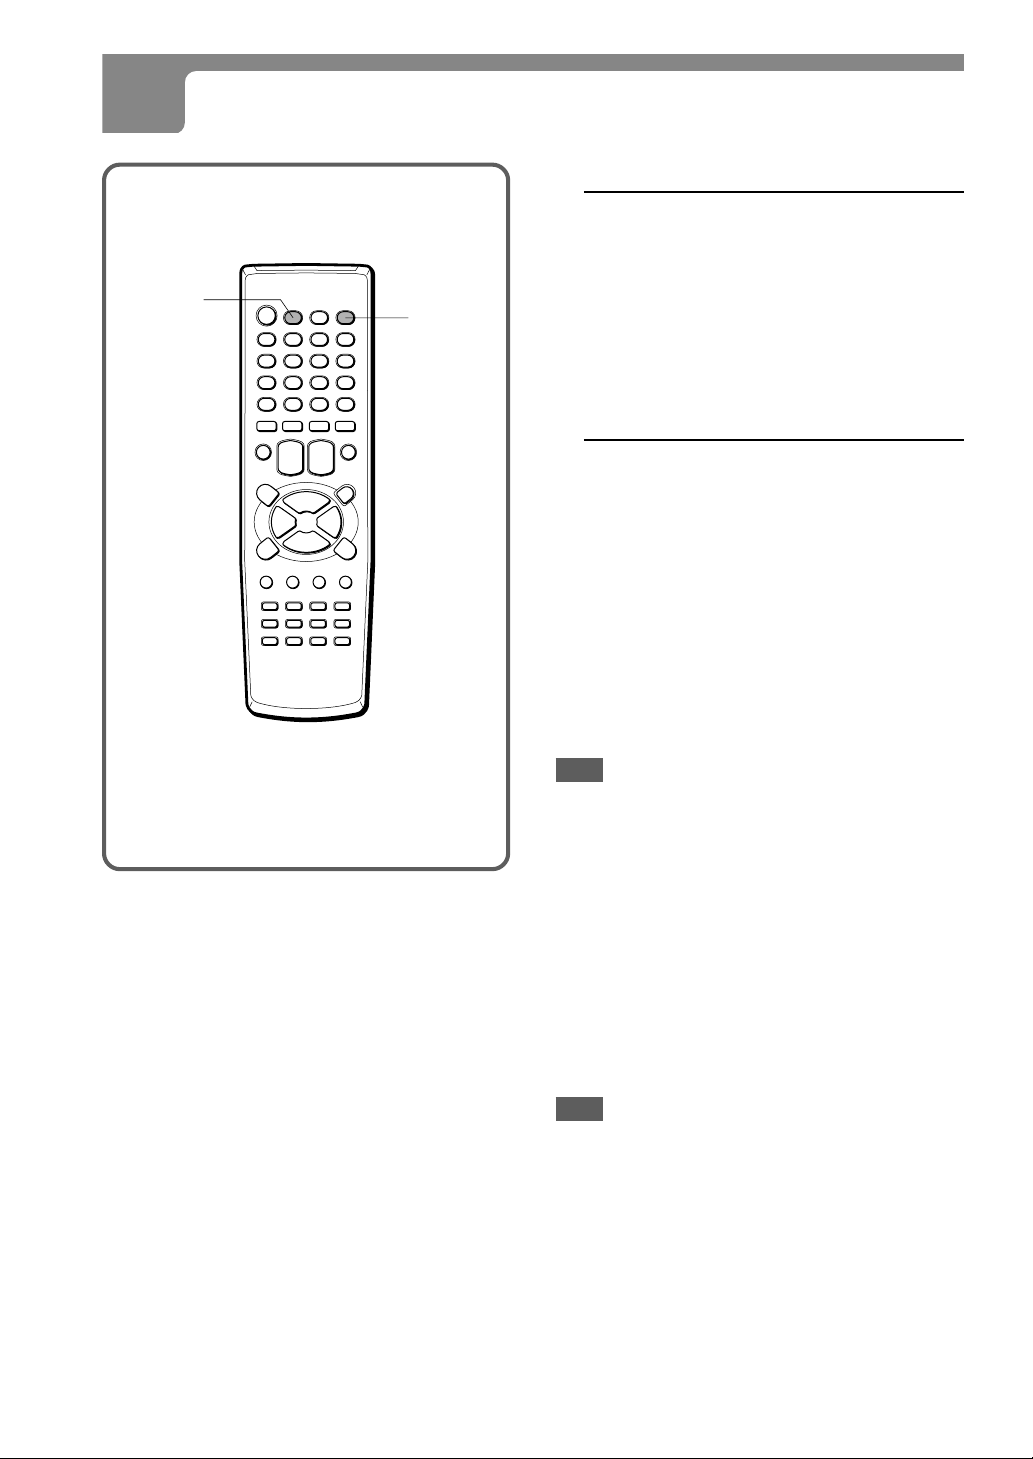
Using the remote control
Point the remote control toward the remote sensor.
Display window
Remote sensor
Notes
•The remote control may not operate when there is an
obstruction between the remote control and the
remote sensor.
•Strong ambient light sources such as a fluorescent
lamp or direct sunlight may cause unreliable operation.
7m
(23 feet)
30˚ 30˚
NOTE
When you press POWER to turn off the power from
the DISC operations, it may take up to 10 seconds
before the power actually turns off.
Direct Play Function
Press one of the function buttons (e.g. PLAY,
CHANNEL) while the 6ST ANDBY indicator lights (this
unit is turned off.)
Playback of the inserted DVD or Video CD begins, or
the previously tuned TV station is received.
Volume
Press VOLUME + or – on the remote control or on
the unit. The volume level is displayed as a number
from 0 to MAX(63) on the screen and display window.
Using the HEADPHONES
Connect headphones to the PHONES\ jack with a
stereo mini plug.
No sound is output from the speakers while the
headphones are plugged in.
ENGLISH
13
Page 14
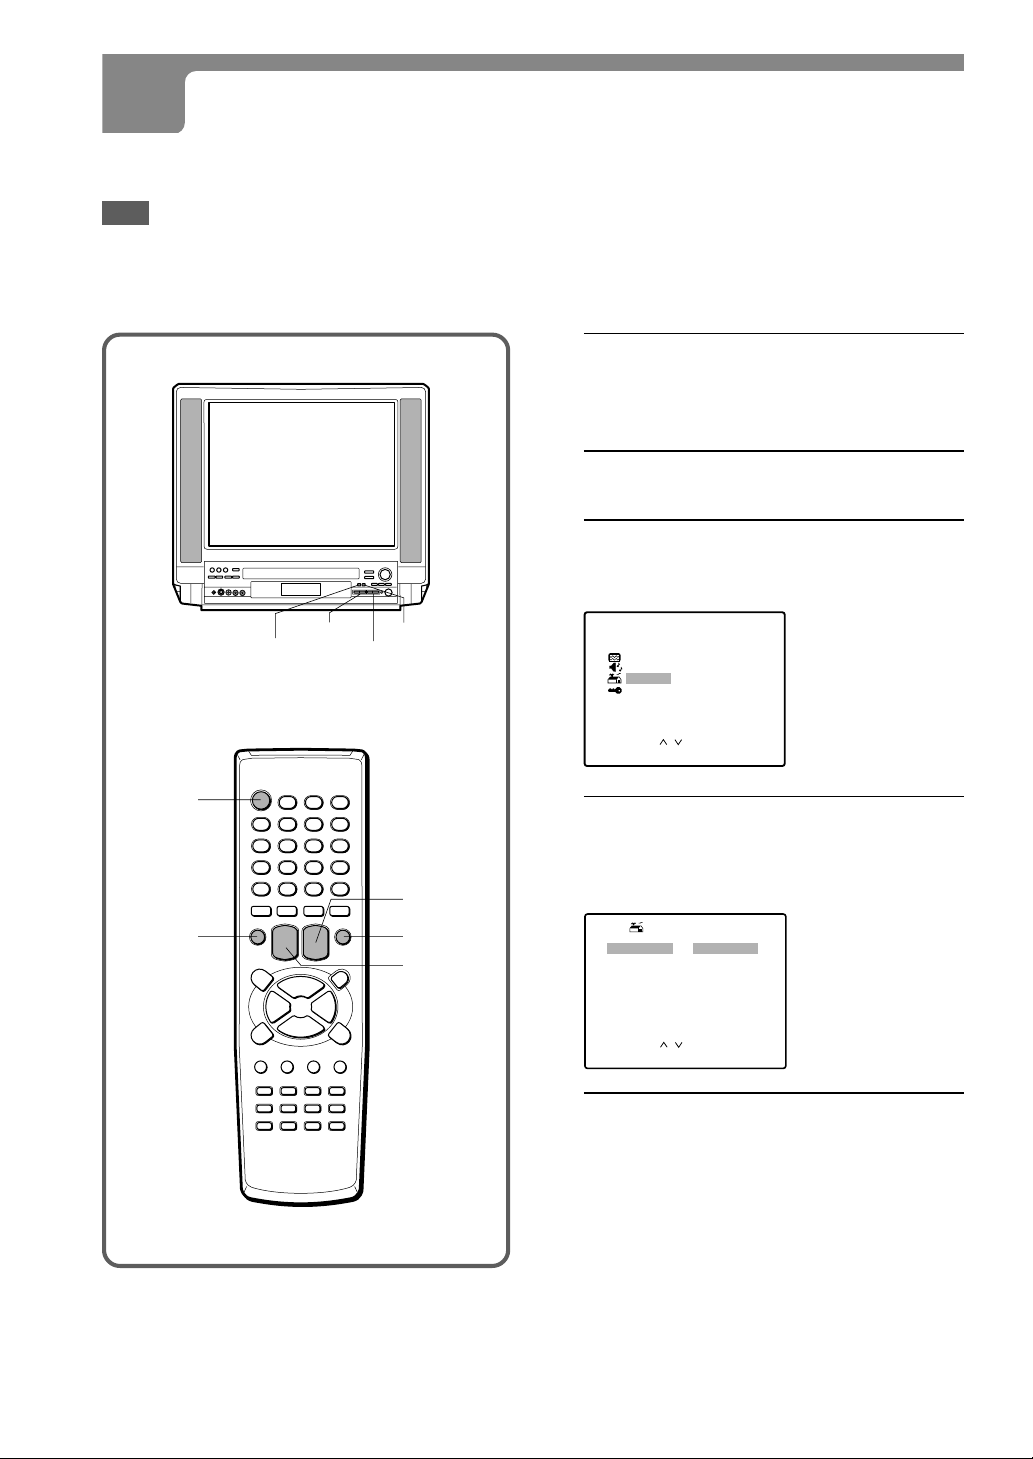
SELECTING THE LANGUAGE
The On screen menu can display three languages: English, Spanish and French.
Note
This On screen menu effects on TV operations only. While watching DVDs (VCDs) or listening to CDs, the On
screen menu can be displayed in English only.
1
Press POWER on the remote control to
turn on this unit.
You can also turn on this unit with CHANNEL N
or M.
2
Press TV MENU.
3
Press CHANNEL N or M to select
SETUP, then press TV ENTER.
The selected item is displayed in red.
MENU
P CTURE
I
SOUND
SETUP
V CHI P
TV MENU
CHANNEL
M/N
TV ENTER
VOLUME –/+
POWER
TV MENU
CHANNEL
N/M
TV ENTER
VOLUME +/–
/
OK : ENTERSELECT:
EX T : MENUI
4
Press VOLUME + or – to display the
desired language.
Each time you press the button, the on-screen
display language changes.
SETUP
/
: ENGL I SH
: CABLE
EX T : MENUI
LANGUAGE
ANTENNA
AUTO SEARCH
ADD/ ERASE
CH CAPTI ON
SELECT:
CHANGE: –/+
5
Press TV MENU to return to the normal
screen.
14
ENGLISH
Page 15
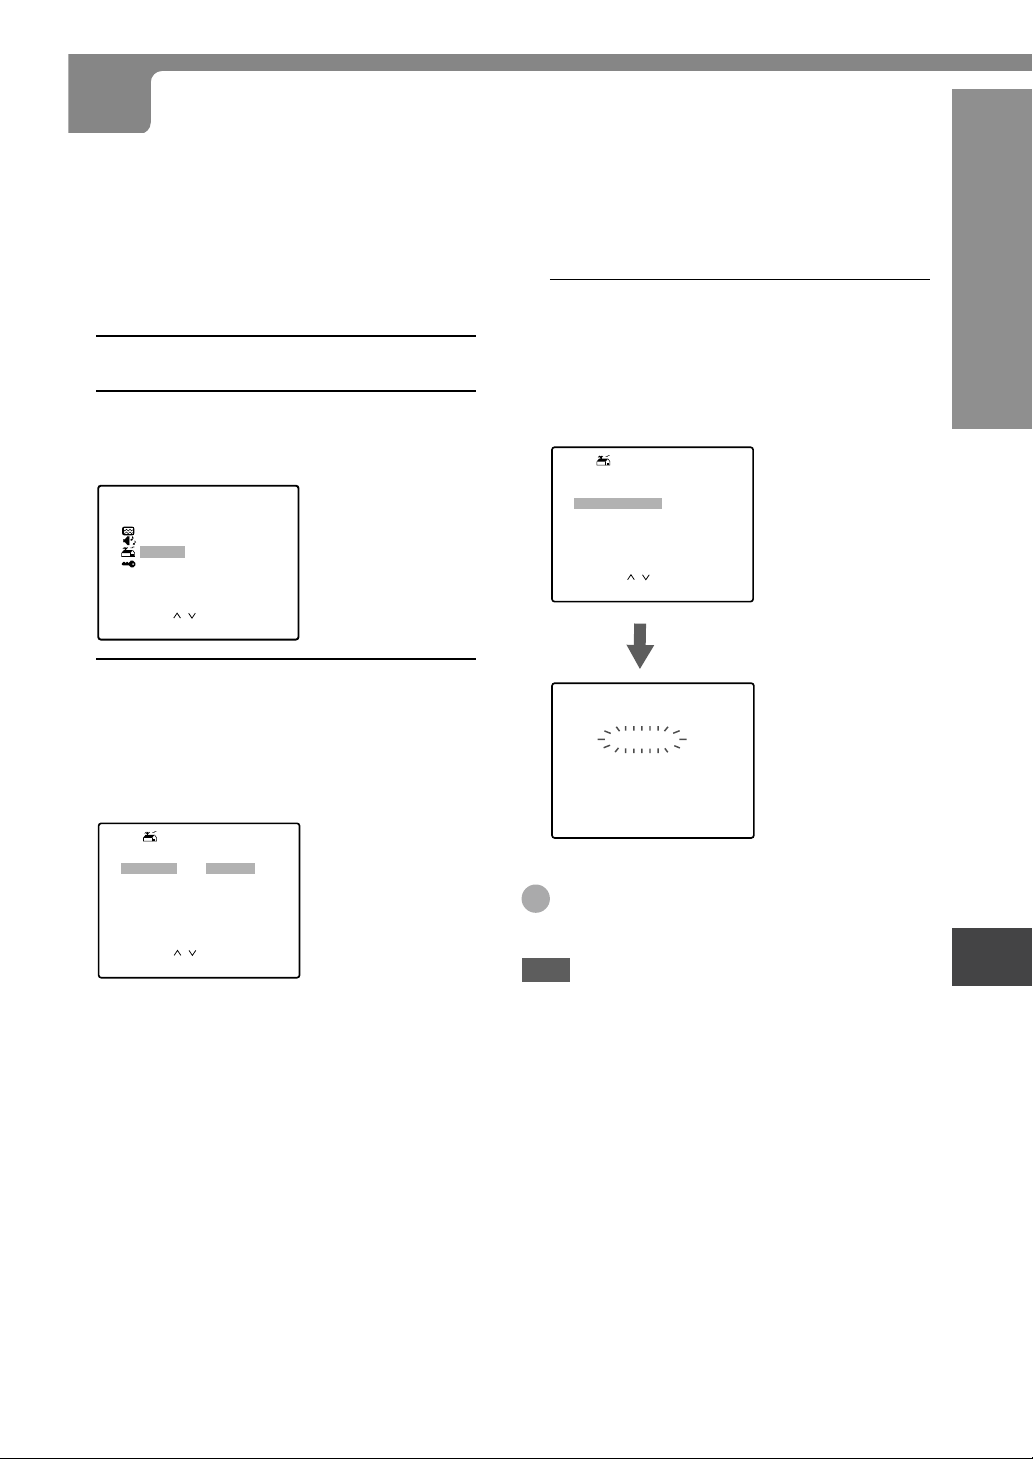
SETTING THE CHANNELS
Before Auto Search, this unit can receive all channels in your area by pressing CHANNEL N/M repeatedly.
After Auto Search, you can skip the channels which are not preset with CHANNEL N/M.
Before starting
Make sure this unit is in TV mode. “TV” is displayed in
the display window when the unit is in TV mode.
1
Press TV MENU.
2
Press CHANNEL N or M to select
SETUP, then press TV ENTER.
The selected item is displayed in red.
MENU
P CTURE
I
SOUND
SETUP
V CHI P
/
OK : ENTERSELECT:
EX T : MENUI
3
Press CHANNEL N or M to select
ANTENNA, then press VOLUME + or – to
select CABLE or TV.
CABLE :
TV : the program from VHF/UHF antenna
the CATV according to the connections to
the ANTENNA connector
SETUP
LANGUAGE
ANTENNA
AUTO SEARCH
ADD/ ERASE
CH CAPTI ON
SELECT:
CHANGE : – /+
/
: ENGL I SH
: CABLE
EX T : MENUI
4
Press CHANNEL N or M to select
AUTO SEARCH, then press TV ENTER.
All available channels in y our area are scanned and
stored in the memory of this unit.
After scanning, the first located channel appears
on the screen.
SETUP
LANGUAGE
ANTENNA
AUTO SEARCH
ADD/ ERASE
CH CAPTI ON
AUTO SEARCH
Tip
To interrupt the Auto Search, press TV MENU.
Note
Once Auto Search has been executed, the previous
settings will be canceled.
: ENGL I SH
: CABLE
/
OK : ENTERSELECT:
EX T : MENUI
SEARCH I NG
CABLE1 2 5
EX T : MENUI
TV OPERATIONS
ENGLISH
15
Page 16

SETTING THE CHANNELS (CONTINUED)
Adding or erasing the channels manually
If the Auto Search does not set the channels correctly, add them manually for watching TV programs. Also, y ou can
erase the unnecessary channels.
6
1
Select the channel number to be erased
or added using the numbered buttons on
the remote control.
Press the buttons as follows:
Example
To select the channel 7, press 0 then 7.
To select the channel 77, press 7 then 7.
To select the channel 107, press +100, 0 then 7.
2
Press TV MENU.
3
Press CHANNEL N or M to select
SETUP, then press TV ENTER.
4
Press CHANNEL N or M to select
ADD/ERASE, then press TV ENTER.
SETUP
LANGUAGE
ANTENNA
AUTO SEARCH
ADD/ ERASE
CH CAPTI ON
: ENGL I SH
: CABLE
If you want to erase or add another
channel, press CHANNEL N or M
to select CABLE (or TV,) then press
VOLUME + or – to select the channel
number to be erased or added. And
press CHANNEL N or M to select
ADD/ERASE, then press VOLUME + or –
to erase or add.
7
Press TV MENU to return to the normal
screen.
/
OK : ENTERSELECT:
EX T : MENUI
5
Press VOLUME + or – to erase or add a
selected channel.
• When the selected channel is already set, ADD
appears. When it is not set, ERASE appears.
• When you add or er ase channels, the picture does
not change until you change the channel on the
normal screen.
ADD/ ERASE
CABLE125
: ADD
/
EX T : MENUI
16
ADD/ ERASE
SELECT:
CHANGE : – /+
ENGLISH
Page 17
SCREEN OFF
POWER
WATCHING A TV PROGRAM
1
Press POWER on the remote control to
turn on this unit.
If the POWER on this unit is not pressed, the remote
control does not work.
2
Press CHANNEL
N or M
repeatedly
or the numbered buttons to select the
channel number.
When you use the numbered buttons, press the
button as follows:
Example
To select the channel 7, press 0 then 7.
To select the channel 77, press 7 then 7.
To select the channel 107, press +100, 0 then 7.
3
Press VOLUME + or – to adjust the
volume.
TV OPERATIONS
Numbered
buttons
TV MENU
VOLUME +/–
SCREEN
PREV. CH
MUTE
TV ENTER
CHANNEL
N/M
To mute the sound
Press MUTE. “MUTE” appears for a few seconds.
To restore the volume, press MUTE or VOLUME + or –.
To black out the TV screen
Press SCREEN or SCREEN OFF to black out the TV
screen. The SCREEN OFF lights in green on the main
unit.
To return to the normal screen, press SCREEN or
SCREEN OFF again.
To black out the display window
Hold down SCREEN OFF (about 5 seconds) on the
main unit until the display window is blacked out.
T o return to the normal, hold down SCREEN OFF until
the display window returns to the normal.
To recall a previous channel
Press PREV. CH to switch back and forth between the
current channel and the previous one.
Note
This unit automatically returns to the standby mode
approximately 15 minutes after a television station has
stopped broadcasting.
ENGLISH
17
Page 18
SELECTING THE MTS MODE
MONO/SAP
CAPTION AUDIO
SELECT
This unit is equipped with the MTS (Multi-channel TV
Sound) system which will greatly enhance TV viewing
by bringing you programs with high fidelity stereo sound.
MTS also provides for an extra channel called SAP
(Second Audio Program) which broadcasters can use
to transmit a second language for bilingual
transmissions or some other sound track.
When the channel is changed, one of the following
messages is displayed at the top of the right side of
the screen according to the type of broadcast.
Stereo broadcast: STEREO is displayed in
yellow.
Stereo/SAP broadcast: STEREO/SAP is displayed in
yellow and red.
SAP broadcast: SAP is displayed in red.
Monaural broadcast: Nothing is displayed.
Press AUDIO SELECT repeatedly to select
the MTS mode.
18
The display changes as follows:
MONO STEREO SAP MONO/SAP
Note
When AUDIO SELECT is pressed, selectable items are
displayed in green and unselectab le ones are displayed
in red according to the type of broadcast.
ENGLISH
Page 19

SELECTING THE CLOSED CAPTIONS MODE
This unit can decode and display closed captioned
television programs.
Press CAPTION repeatedly to select the
caption mode.
CAPTION 1
The display changes as follows:
CAPTION OFF
TEXT 1 CAPTION 2TEXT 2
Captions:
This closed caption mode displays text on the screen
in English or another language. Generally, closed
captions in English are transmitted on CAPTION 1 and
closed captions in other languages are transmitted on
CAPTION 2.
Full Screen Text:
The text closed caption mode TEXT 1, TEXT2 will
usually fill the screen with a programming schedule or
other information.
CAPTION 1
Notes
•After selecting a closed caption mode, it will stay in
effect until it is changed, even if the channel is
changed.
•If the captions signal is lost due to a commercial or a
break in the signal, the captions will reappear when
the signal is received again.
•When selecting closed captions, the captioning might
be delayed momentarily.
•If the channels are changed, the captions might be
delayed momentarily.
•If using an indoor antenna or if TV reception is very
poor, the closed caption decoder te xt may not appear .
In this case, adjust the antenna for better reception or
use an outdoor antenna.
•When activating the closed captioned decoder, there will
be a short delay before the closed captioned text appears
on the screen.
•The captions will appear in places on the screen where
they will least interfere with the picture, usually on the
bottom of the screen. News programs will usually show
three-line closed captions which scroll onto the screen.
•
Most other shows provide two or three lined captions
placed near the character who is speaking so the
viewer can follow the dialogue.
•If no caption signal is received, no captions will appear,
but the television will remain in the caption mode.
•Misspellings or unusual characters may occasionally
appear during closed captioning. This is normal with
closed captioning, entered live. These transmissions
do not allow time for editing.
•Some cable systems and copy protection systems
may interfere with the closed captioned signal.
•Words in italics or underlined describe titles, words in
foreign languages or words requiring emphasis. W ords
that are sung usually appear enclosed by musical
notes.
•For television programs broadcasting with closed
captions, look in your TV guide for the closed captions
symbol (CC).
TV OPERATIONS
ENGLISH
19
Page 20
AV MODE
NORMAL
SELECTING THE AV MODE
This unit provides 4 modes as the multi video enhancer .
NORMAL: Normal setting
CINEMA: Setting for watching films
GAME: Setting where it causes less eye strain
DIMMER: Setting where the surrounding is darker
TV MENU TV ENTER
VOLUME
+/–
CHANNEL
N/M
Press AV MODE repeatedly to select the A V
mode.
The display changes as follows:
The
NORMAL CINEMA GAME DIMMER
Note
Even if you change the AV mode, the sound quality
does not change.
20
ENGLISH
Page 21
ADJUSTING THE PICTURE
You can adjust the picture settings for each AV mode.
1
Press TV MENU.
5
Press VOLUME + or – to adjust the
setting.
2
Press CHANNEL N or M to select
PICTURE, then press TV ENTER.
MENU
P CTURE
I
SOUND
SETUP
V CHI P
/
OK : ENTERSELECT:
EX T : MENUI
3
Press CHANNEL N or M to select
the top line, then press VOLUME + or –
to select the AV mode to adjust.
D MMER
I
BR GHT
I
CONTRAST
SHARP
COLOR
T NT
I
RESET
SELECT:
CHANGE : – /+
4
Press CHANNEL N or M to select
/
EX T : MENUI
the item to adjust.
D MMER
I
BR GHT
I
CONTRAST
SHARP
COLOR
T NT
I
RESET
Item
Decreasing the
bars
BRIGHT
makes the picture
darker
CONTRAST
lowers the
contrast
SHARP
makes the picture
softer
COLOR
l
owers the intensity
and brilliance of
the color
Item
Movement to
the left
TINT
makes lighter
colors redder
ADJUST
BR I GHT
– +
CHANGE : –/
+
EXIT : MENU
Increasing the
bars
makes the picture
brighter
enhances the
contrast
makes the picture
clearer
enhances the
intensity and
brilliance of the color
Movement to
the right
makes lighter
colors greener
2 seconds after releasing the button, the display
returns to step 4.
TV OPERATIONS
SELECT:
CHANGE : – /+
/
EX T : MENUI
Tip
To reset all the items of the selected AV mode to
their initial settings, select RESET in step 4, then
press TV ENTER.
6
T o adjust the other item, complete steps
3 through 5.
7
Press TV MENU to return to the normal
screen.
ENGLISH
21
Page 22
ADJUSTING THE SOUND
Y ou can adjust the settings f or treble sound, bass sound
and the balance (Left/Right) of the sound.
1
Press SOUND EFFECT.
2
Press CHANNEL N or M to select
the item to adjust.
TV MENU
VOLUME
+/–
SOUND
EFFECT
TV ENTER
CHANNEL
N/M
TREBLE
BASS
BALANCE
SUPER BASS
Q SURROUND : OFF
BBE
RESET
SELECT:
CHANGE : – /+
3
Press VOLUME + or – to adjust the
: OFF
: OFF
/
EX T : MENUI
setting.
Item
TREBLE
BASS
Item
BALANCE
Decreasing the bars
makes the treble
sound weaker
makes the bass
sound weaker
Movement to L
makes the output
level of right speaker
lower
ADJUST
Increasing the bars
makes the treble
sound stronger
makes the bass sound
stronger
Movement to R
makes the output level
of left speaker lower
22
BASS
– +
CHANGE:-/+ EXIT : MENU
A few seconds after releasing the b utton, the display
returns to step 2.
ENGLISH
Page 23
4
T o adjust the other item, complete steps
2 and 3.
5
Press TV MENU to return to the normal
screen.
Tip
To reset all the items to their initial settings, select
RESET in step 2, then press TV ENTER.
Note
Due to the combinations among TREBLE, BASS,
SUPER BASS or BBE, the sound may be distorted. In
this case, turn down the levels of sound adjustment
functions above.
Enjoying special sound effect
This unit provides 3 modes of sound enhancer :
SUPER BASS, Q SURROUND, and BBE.
SUPER BASS enhances the bass sound. You can
enjoy powerful sound with this unit during playbac k
discs. In addition, the settings can be changed to
have a better effect on the Q SURROUND when
playing back discs. See "A udio output setting" (page
57).
Q SURROUND uses only two speakers at the left
and right to create an atmosphere that sounds as
if you are surrounded by two front speakers and
two rear speakers.
BBE system enhances the clarity of high-frequency
sound.
To operate on the SOUND menu
Press SOUND EFFECT. Then, press CHANNEL
N or M to select SUPER BASS, Q SURR OUND
or BBE, and press VOLUME + or – to display ON.
TREBLE
BASS
BALANCE
SUPER BASS
Q SURROUND
BBE :OFF
RESET
SELECT:
CHANGE : – /+
:ON
:OFF
/
EX T : MENUI
TV OPERATIONS
Notes
•The BALANCE effect becomes weaker when the
SUPER BASS is turned on.
•The Q SURROUND system does not work for
monaural sources.
•Turning Q SURROUND on may cause sound
distortion.
•Turning on both BBE and SUPER BASS may
cause a sound noise. In this case, turn off either
BBE or SUPER BASS.
ENGLISH
23
Page 24

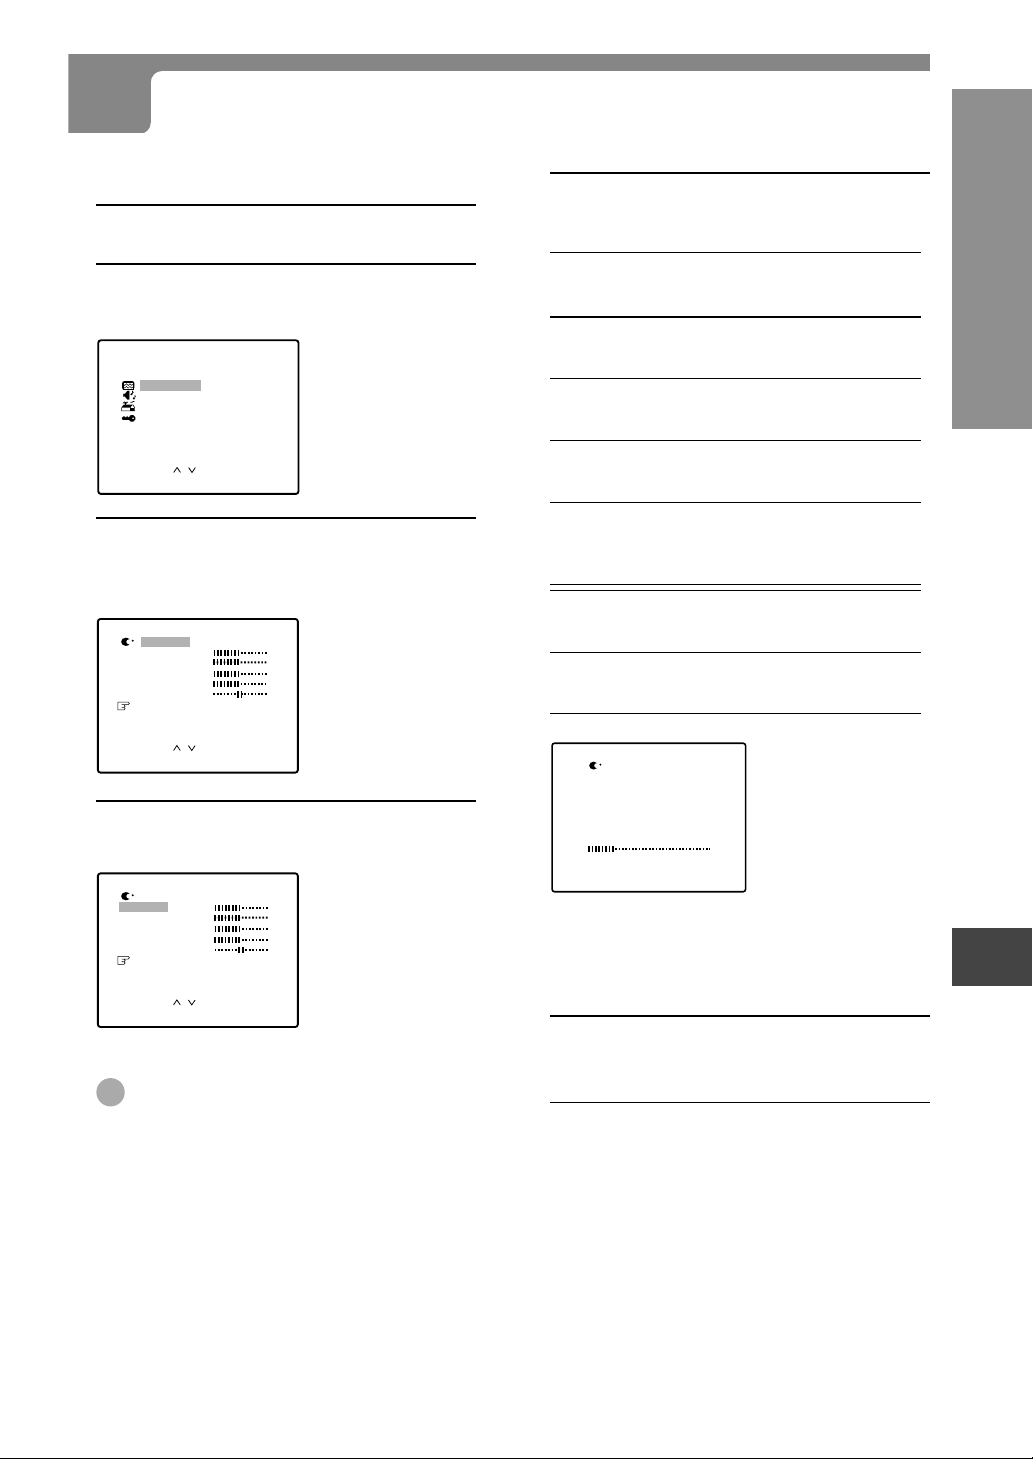
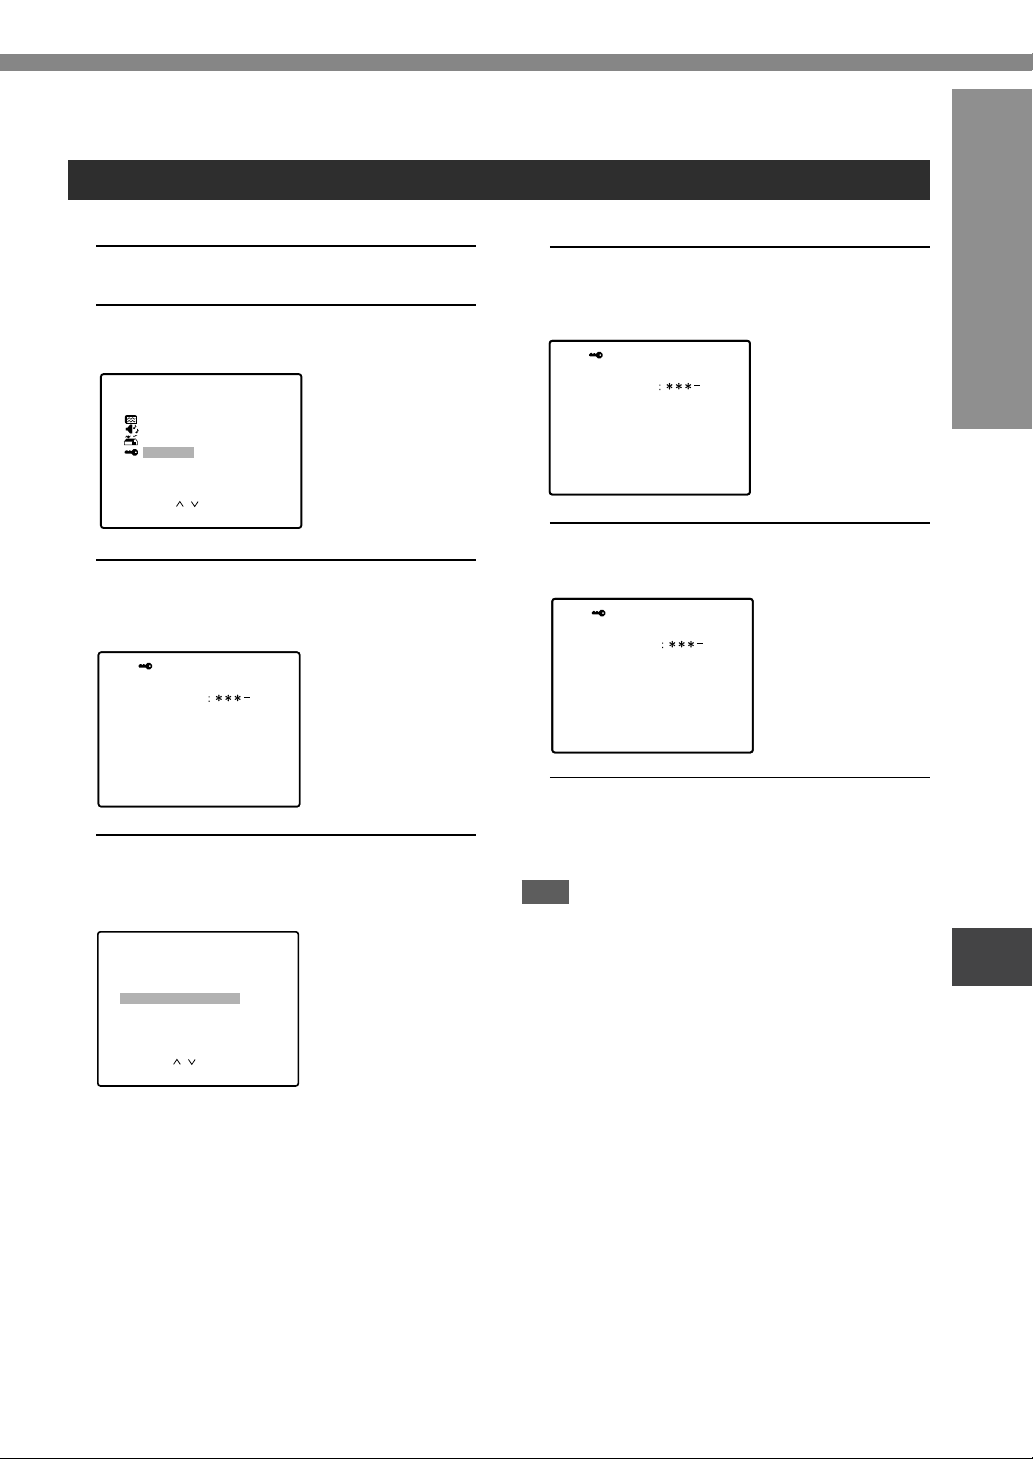
SETTING THE V-CHIP
An age limitation can be set to prevent children from viewing or listening to violent scenes or programs with adult
content. This unit corresponds to “TV-RATING” and “MPAA RATING.”
To use the V-chip function, register a password first.
Registering the Passoword
Important
You cannot set the V-chip if y ou forget the password. We recommend you write down the passw ord and keep it in a
safe place in case you forget it.
1
Press TV MENU.
2
Press CHANNEL N or M to select V
CHIP, then press TV ENTER.
Numbered
buttons
TV MENU
VOLUME
+/–
TV ENTER
CHANNEL
N/M
MENU
P CTURE
I
SOUND
SETUP
V CHI P
/
OK : ENTERSELECT:
EX T : MENUI
3
Enter the password (4 digits) using the
number buttons (0-9).
“*” appears instead of the number.
V CHI P
NEW
PASSWORD
INPUT : 0–9
4
Enter the same password again for the
EXIT : MENU
safety.
V CHI P
CONFIRM
PASSWORD
24
ENGLISH
INPUT : 0–9
EXIT : MENU
The V chip menu appears.
Page 25
Setting the V-chip
V CHIP
TV RATING
VI OLENCE
: OFF
: TV-PG
: ON
: ON
: ON
SEXUAL SITUATIONS
ADULT LANGUAGE
SEXUAL DIALOG
: ON
MPAA RATING
CHANGE PASSWORD
: OFF
EX T : MENUI
SELECT:
CHANGE : – /+
/
V CHIP
TV RATING
VI OLENCE
: OFF
: TV-MA
: ON
: ON
SEXUAL SITUATIONS
ADULT LANGUAGE
: ON
MPAA RATING
CHANGE PASSWORD
: OFF
EX T : MENUI
SELECT:
CHANGE : – /+
/
1
In the V-chip menu, press CHANNEL
N or M to select TV RATING, then
press VOLUME + or – to display the
desired setting.
• When the f ollo wing prog r ams are received, they
are protected from display according to the
selected setting.
OFF: TV RATING is not set.
TV-Y: Suitable for children of all ages
TV-Y7: Suitable for children 7 and older
TV-G: All audiences
TV-PG: Parental guidance suggested
TV-14: Inappropriate for children under 14
TV-MA: Mature audiences
• TV RATING sub menu may appear according to
the selected setting. If the sub menu appears,
go to step 2. If not, go to step 3.
V CHIP
TV RATING
MPAA RATING
CHANGE PASSWORD
SELECT:
CHANGE : – /+
2
Press CHANNEL N or M to select
: OFF
: OFF
: OFF
/
EX T : MENUI
the sub menu item, then press VOLUME
+ or – to display ON or OFF.
• When TV -Y7 is selected, the items below appear .
V CHIP
TV RATING
FANTASY VIOLENCE
MPAA RATING
CHANGE PASSWORD
: OFF
: TV-Y7
: OFF
: ON
• When TV -PG or TV -14 is selected, the items below
appear.
• When TV -MA is selected, the items below appear .
3
Press CHANNEL N or M to select
MPAA RA TING, then press VOLUME + or
– to display the desired setting.
When the following movies are received, they are
protected from display according to the selected
setting.
OFF: MPAA RATING is not set.
G: No age limitation
PG: Movies not suitable for children
PG-13: Movies not suitable f or children of 13 years
old and younger
R: Movies that can be seen by children under
17 years old with their parents
NC-17: Movies forbidden to children under 17
years old
X: Movies for adults
TV OPERATIONS
/
SELECT:
CHANGE : – /+
EX T : MENUI
V CHIP
TV RATING
MPAA RATING
CHANGE PASSWORD
SELECT:
CHANGE : – /+
: OFF
: TV-Y
: PG-13
/
EX T : MENUI
ENGLISH
25
Page 26

SETTING THE V-CHIP (CONTINUED)
4
Press CHANNEL N or M to select V
CHIP, then press VOLUME + or – to
display ON.
Numbered
buttons
TV MENU
VOLUME
+/–
TV ENTER
CHANNEL
N/M
V CHIP
TV RATING
MPAA RATING
CHANGE PASSWORD
SELECT:
CHANGE : – /+
5
Press TV MENU to return to the normal
: ON
: TV-Y
: PG-13
/
EX T : MENUI
screen.
Note
If no button is pressed for 15 seconds, the setting
screen returns to the normal screen.
To use the TV after the TV is protected
When a program selected under the V-chip setting is
received, “PROTECT BY V CHIP” is displayed.
<PROTECT BY V CHIP>
IF YOU CANCEL PROTECT,
INPUT PASSWORD.
PASSWORD
INPUT : 0–9
CABLE125
TV-PG
The rating of the
received program
26
Enter the password. When the password is right,
the protect function will be canceled.
ENGLISH
Page 27
Changing the password
1
Press TV MENU.
2
Press CHANNEL N or M to select V
CHIP, then press TV ENTER.
MENU
P CTURE
I
SOUND
SETUP
V CHI P
/
OK : ENTERSELECT:
EX T : MENUI
3
Enter the password using the numbered
buttons (0-9).
“*” appears instead of the number.
V CHI P
PASSWORD
5
Enter the new password using the
numbered buttons (0-9).
“*” appears instead of the number.
V CHI P
NEW
PASSWORD
INPUT : 0~9
6
Enter the same password again for the
EXIT : MENU
safety.
V CHI P
CONFIRM
PASSWORD
TV OPERATIONS
INPUT : 0~9
4
Press CHANNEL N or M to select
EXIT : MENU
CHANGE PASSWORD, then press TV
ENTER.
V CHIP
TV RATING
MPAA RATING
CHANGE PASSWORD
: ON
: TV-Y
: PG-13
/
OK : ENTERSELECT:
EX T : MENUI
INPUT : 0~9
7
Press TV MENU to return to the normal
EXIT : MENU
screen.
Note
If no button is pressed for 15 seconds, the setting
screen returns to the normal screen.
ENGLISH
27
Page 28

CH CAPTION
CABLE125
RESET
– – – –
EX T : MENUI
SELECT:
CHANGE : – /+
/
CH CAPTION
CABLE125
RESET
– – – –
EX T : MENUI
SELECT:
CHANGE : – /+
/
TV MENU
VOLUME
+/–
REGISTERING A BROADCASTING STATION NAME
You can register a broadcasting station name for each
channel.
1
Press TV MENU.
2
Press CHANNEL N or M to select
DISPLAY
TV ENTER
CHANNEL
N/M
SETUP, then press TV ENTER.
MENU
P CTURE
I
SOUND
SETUP
V CHI P
/
OK : ENTERSELECT:
EX T : MENUI
3
Press CHANNEL N or M to select
CH CAPTION, then press TV ENTER.
SETUP
LANGUAGE
ANTENNA
AUTO SEARCH
ADD/ ERASE
CH CAPTI ON
: ENGL I SH
: CABLE
/
OK : ENTERSELECT:
EX T : MENUI
4
Press VOLUME + or – to select the
channel number you want to register a
name.
5
Press CHANNEL M to select the bar
display.
28
ENGLISH
Page 29
6
CABLE125NBC
STEREO/SAP
Press VOLUME + to display the desired
letter, then press CHANNEL M.
Each press of VOLUME+ changes the display as
follows:
.....
A
9
Press VOLUME – to change the display in re verse
order.
CH CAPTION
CABLE125
N
– – –
RESET
SELECT:
CHANGE : – /+
7
Repeat steps 5 and 6 to enter a
/
Z&/ –
.....
EX T : MENUI
0 (space)
broadcasting station name.
You can enter up to 4 letters.
8
To enter another broadcasting station
name, press CHANNEL M to select
the channel number, then repeat steps
4 through 7.
You can enter up to 30 stations. When 30 stations
are already registered, “FULL” appears instead of
“----.”
On screen display
To change the On screen function display
Press DISPLAY. Each press turns the display on/off.
Broadcasting
station name
TV OPERATIONS
Channel number/
VIdeo input
Type of the
broadcasting
Notes
•If no button is pressed for 8 seconds, the On screen
display automatically turns off.
•The broadcasting station name appears only when
the station name is registered.
•The type of the broadcasting does not appear when
the unit is in VIDEO1 and VIDEO2 mode.
9
Press TV MENU to return to the normal
screen.
Tip
To cancel all letters in steps 6 and 7, press CHANNEL
N or M to select RESET, then press TV ENTER.
ENGLISH
29
Page 30
TV/VIDEO
WATCHING A VIDEO OR OTHER EQUIPMENT
1
Press TV/VIDEO on the remote control
or TV/VIDEO on this unit to display
“VIDEO 1” or “VIDEO 2” for a few
seconds.
GAME
VIDEO 1: input from the VIDEO 1 INPUT A UDIO/
VIDEO jacks on the rear
VIDEO 2: input from the VIDEO 2 IN AUDIO/
VIDEO jacks on the front
2
Set the VCR or other equipment to
playback.
To switch to the GAME position directly
Press GAME to select the AV mode to GAME. The TV
input mode changes to VIDEO 2 automatically. The
screen becomes an adequate size for games.
To return to the TV program
Press TV/VIDEO on the remote control or TV/VIDEO
on the unit repeatedly until the TV program appears.
Also, you can return to the TV program by selecting
the channel number directly with the numbered buttons.
Note
The unit does not return to the TV program during disc
operations, if the numbered button is pressed.
When connecting to an AIWA VCR with
ONE-TOUCH PLAYBACK
When ONE-TOUCH PLAYBACK or OTPB on the
remote control of the VCR is pressed, this unit
automatically turns on and is in the VIDEO 1 mode.
Howev er, this function does not oper ate in the following
cases:
•ONE-TOUCH PLAYBACK on the VCR is pressed.
The TV and VCR are not placed where they can receive
•
the signal from the remote control simultaneously.
Note
For details on how to use the VCR, consult the owner’s
manual for the VCR.
30
ENGLISH
Page 31

SLEEP 30
SETTING THE SLEEP TIMER
Press SLEEP repeatedly to select the
number of minutes after which to turn off.
The minutes change up to 120 minutes as follows.
OFF 15 30 60 90 120
SLEEP
TV OPERATIONS
After the set amount of time has elapsed, the unit turns
to the standby mode.
To check the remaining sleep time
Press SLEEP once. The remaining time appears on
the screen.
To cancel the sleep timer
Press SLEEP repeatedly until “SLEEP OFF” appears.
Note
The remaining time appears automatically 5 minutes
and 1 minute before the unit turns off.
For example, 5 minutes before turning off, “SLEEP 5”
appears.
ENGLISH
31
Page 32

BEFORE USE
Please read the following before operating this unit.
Supported disc formats
This unit can play discs with the following logos.
DVDs
(8 cm disc/12 cm disc)
Video CDs (VCDs)
(8 cm disc/12 cm disc)
Audio CDs
(8 cm disc/12 cm disc)
•The unit may not play a CD-R/RW disc that is recorded
on personal computers or some kinds of CD-R/RW
recorders because of differences in recording
platforms.
• Do not attach any seal or label to either side (the
recordable side or the labeled side) of a CD-R/RW
disc. It may cause malfunction.
•This unit cannot play other types of discs such as CDIs, CD-ROMs, PHOTO CDs or DVD-ROMs.
• Do not use irregular shaped CDs such as heartshaped or octagonal discs. It may damage both the
unit and the disc.
Types of video CDs
There are two types of video CDs.
Video CDs equipped with PBC (Ver sion 2.0)
PBC (playback control) allows you to interact with the
system via menus, search functions or other typical
computer-like operations. Moreov er, still pictures of high
resolution can be played, if they are included in the
disc.
Color system for DVDs and VCDs
This unit is designed for the NTSC color systems only.
DVD discs and the video CDs are recorded either in
the PAL or the NTSC color system.
Select only D VDs and video CDs recorded in the NTSC
color system.
Software dependent features of
DVDs and VCDs
Some playback operations of D VDs and video CDs ma y
be intentionally fixed by software man ufacturers. As this
unit plays DVDs and video CDs according to disc
contents designed by the software manufacturer , some
playback features of this player may not be available,
while other functions may be added.
Refer to the instructions supplied with the DVDs and
video CDs.
Some DVDs made for business purposes may not be
played on this player.
Region code of the disc player and
DVDs
The DVD player of this unit is designed and
manufactured for playback of region “1” encoded D VD
software. Region code labels appear on the labels of
some DVD discs to indicate which type of player can
play those discs. Unless “1” or “ALL” appears on the
DVD disc label, a disc cannot be pla y ed on this pla y er.
If you try to play such a disc, the message “REGIONAL
CODE VIOLATION” will appear on the TV screen.
Some DVD discs may not have a region code label
even though their pla yback is prohibited b y area limits.
Video CDs not equipped with PBC (Ver sion
1.1)
Operated in the same way as audio CDs, these discs
allow playback of video pictures as well as sound, but
PBC (V ersion 1.1) does not allo ws you to interact with
the system via menus.
In some cases, you may want to play back VCDs
equipped with PBC, with the PBC feature off. This is
because some disc playback features can only be used
for VCDs without PBC. See “Playing a VCD without
Using PlayBack Control”, page 37.
32
ENGLISH
Page 33

Copyright protection
Disc-related terms
It is forbidden by law to copy, broadcast, show,
broadcast via cable, play in public, or rent copyright
material without permission.
This unit features the copy protection function
developed by Macro vision. Copy protection signals are
included in some DVD and VCD discs. If you record
such discs on a VCR, picture noise will appear during
recording and playback.
This product incorporates copyright protection
technology that is protected by method claims of certain
U.S. patents and other intellectual property rights
owned by Macrovision Corporation and other rights
owners. Use of this copyright protection technology
must be authorized by Macrovision Corporation, and
is intended for home and other limited viewing uses
only unless otherwise authorized by Macrovision
Corporation. Reverse engineering or disassembly is
prohibited.
Note on Playing back DTS-encoded
discs
T o enjo y DTS Digital SurroundTM playback, an e xternal
5.1 channel DTS Digital Surround
must be connected to the digital output of the unit.
When playing audio CDs that are DTS-encoded,
excessive noise will be exhibited from the speakers
connected to the unit. To avoid possible damage to the
audio system, the consumer should turn down the
volume before playing back such discs, adjust the
volume gradually, and keep the volume level low.
TM
decoder system
Title (DVD only)
A title is the longest section of a picture or a musical
piece on a DVD; a movie for a picture piece on video
software, or an album for a musical piece on audio
software.
Each title is assigned a title number enabling you to
locate the title you want.
Chapter (DVD only)
Chapters are sections of a picture or a musical piece
that are smaller than titles.
A title is composed of several chapters. Each chapter
is assigned a chapter number, enabling you to locate
the chapter you want. Depending on the disc, there
may be no chapters recorded.
Track (audio CD and VCD only)
Tracks are sections of a picture or a musical piece on
a video CD or an audio CD.
Each track is assigned a track number , enabling y ou to
locate the track you want.
Scene
On a video CD with PBC (PlayBack Control) functions,
moving pictures and still pictures are divided into
sections called “Scenes”. Each scene is displayed in
the menu screen and assigned a scene number,
enabling you to locate the scene you want.
A scene is composed of one or several tracks.
DISC OPERATIONS
ENGLISH
33
Page 34

BASIC OPERATIONS
Loading discs
1
Press zOPEN/CLOSE to open the disc
compartment.
2
Load disc(s) with the label side up.
To play one or two discs, place the discs on tray
1 and/or 2.
To play three discs, press DISC CHANGE to
rotate the tray after placing two discs. Place the
third disc on tray 3.
DISC DIRECT
PLAY
Numbered
buttons
DISC CHANGE
OPEN/CLOSE zsa
c(PLAY)
DISC
ac
s
1
Tray 1
3
Press zOPEN/CLOSE to close the disc
compartment.
When a DVD or a VCD with the PBC function is
loaded, playback starts automatically.
Notes
•Some DVDs or VCDs may automatically display the
menu screen after first loading the disc. See “Using
the Software Specific Menu”, page 37.
•When loading an 8-cm (3-inch) disc, put it onto the
inner circle of the tray.
•Do not place more than one disc on one disc tray.
•Do not tilt the unit with discs loaded. Doing so may
cause malfunctions.
•Do not use irregular shaped CDs such as heartshaped or octagonal discs. It may damage both the
unit and the disc.
34
If 15 minutes have elapsed without performing
any operations
This unit automatically returns to the standby
mode, when stopped without performing any
operations for 15 minutes.
ENGLISH
Page 35

Playing discs
Stopping and Pausing
1
Load the disc(s).
2
Press c.
Playback begins with the disc on tray 1.
For a DVD or a VCD with the PBC function, you
do not need to press c . Playback starts
automatically when the disc is loaded.
• When playing back DVDs or VCDs that support
PBC, the unit plays only one disc on tray 1.
• When playing back audio CDs, the unit plays all
discs in the disc compartment.
DVD:
Tray number of the
current disc
Video CD with PBC:
Video CD without PBC:
Audio CD:
Type of disc: DVD
To play just one disc
Press the DISC DIRECT PLA Y buttons (1 to 3) for your
desired disc. These buttons (1 to 3) correspond to the
three discs trays (1 to 3).
Or press DISC on the remote control, then press
numbered buttons (1-3) to select a disc.
Press the disc number within 3 seconds after pressing
DISC. The selected disc is played once. If you press
the same DISC DIRECT PLAY button (1 to 3) during
an audio CD playback, the unit returns to all disc
playback mode.
To stop playback
Press s.
Playback stops. The unit remembers the point at which
playback stopped.
T o resume playbac k from the point where it
stopped
Press c.
“RESUME” appears on the TV screen and playback
starts where it last stopped (Resume function).
To clear the point to be resumed
Press s again during stop.
“RESUME OFF” appears on the TV screen. The resume
memory is cleared, and playback starts at the beginning
of the disc when c is pressed.
To pause playback
Press a.
To resume playback, press c.
About the Disc Resume
This function is very useful to switch back and forth
between the TV mode and DISC mode.
Even if you change to a TV progr am during playing bac k
a DVD b y pressing
the DVD from the point where it stopped before.
Additionally, this unit maintains the resume data of up
to 5 DVDs and up to a total of 10 VCDs and CDs, e ven
if the unit is turned off.
The default setting of disc resume is OFF. Under the
default setting, the point to be resumed is cleared when
the disc tray is opened, the current disc is switched, the
power is turned off, or the function is switched. To turn
on the disc resume, See "DISC RESUME" (page 61).
Notes
•The resume function is not available for VCD pla yback
when the PBC function is turned on. To turn off PBC,
see "Playing a VCD without using playback control"
(page 37).
•When the 6th DVD or the 11th VCD or CD is inserted,
the resume data for the oldest disc is overwritten by
the disc information of the new disc, even when disc
resume is set to OFF.
s
and TV/VIDEO , you can pla ybac k
DISC OPERATIONS
ENGLISH
35
Page 36

DISC DIRECT
PLAY
BASIC OPERATIONS (CONTINUED)
OPEN/CLOSEz
SCREEN
OFF
PBC
DISC CHANGE
Switching the current disc
On the main unit:
Press the DISC DIRECT PLAY button (1 to
3) for your desired disc.
On the remote control:
Press DISC, then press a numbered button
(1 to 3) to select a disc.
Press the disc number within 3 seconds
after pressing DISC.
Playback switches to the selected disc.
Removing discs
Numbered
buttons
c
SCREEN
DISC
MENU
DISC
+10
i/k/j/l
DISC
ENTER
RETURNv
TITLE/PBC
Press zOPEN/CLOSE.
The disc tray slides out. The pow er turns on if pressed
when power is off.
To rotate the tray
Press DISC CHANGE.
To replace discs during play
While a disc is playing, other discs can be replaced
without interrupting current playback.
1 Press DISC CHANGE.
2 Replace the disc(s).
3 Press zOPEN/CLOSE to close the disc
compartment.
To black out the TV screen
"aiwa DVD VIDEO" screen is displayed continually
during playing back CDs. To black out the TV screen,
press SCREEN or SCREEN OFF.
The SCREEN OFF lights in green on the main unit.
To return to the normal, press SCREEN or SCREEN
OFF again.
To black out the display window
Hold down SCREEN OFF (about 5 seconds) on the
main unit until the display window is blacked out.
To return to the normal, hold down SCREEN OFF until
the display window returns to the normal.
36
ENGLISH
Page 37

Using the software specific menu
(DVD/VCD ONLY)
Playing a VCD without using
PlayBack Control (PBC)
This unit supports menu interfaces that are contained
in some DVD or VCD software . For DVDs or VCDs with
such menus, the menu screen may automatically be
displayed on the TV screen after first loading the disc.
DVDs
1
Press ikjl to select your desired
program.
2
Press DISC ENTER to begin playback.
To display the menu
Press TITLE/PBC or DISC MENU.
VCDs with the PBC function
1
Press the numbered buttons to select
your desired program.
To display the menu
Press RETURNv.
Note
The contents and operation of the software specific
menu vary with the disc. F ollow the instructions on the
disc and on the menu screen.
With PBC (PlayBack Control), playback of VCDs is
controlled from the menu display on the TV screen,
and the menu display appears automatically after
playback of each selection. You can, however, choose
to set PBC off, and play the entire VCD without returning
to the menu display, just like audio CDs.
This, for example, allows you to use Repeat and
Programmed Playback for VCDs with PBC.
For more on PBC, see “Types of Video CDs”, page 32.
1
Load the VCD.
2
Press TITLE/PBC or press PBC on the
unit (during playback or stop).
“PBC” disappears from the display panel, and the
menu playback feature is disabled.
Notes
•If TITLE/PBC is pressed during playback, playback
stops before the PBC mode changes.
•You can set the unit to play VCDs with PBC or not.
See “PBC”, page 61.
Directly selecting a track with the
remote control (VCD/CD Only)
A track can be selected directly by entering the track
number on the remote control, either during playback
or stop. To use this feature with VCDs that support PBC,
turn off PBC first .
DISC OPERATIONS
1
Press DISC, then press a numbered
button (1-3) to select a disc.
Press the disc number within 3 seconds after
pressing DISC.
2
Press the numbered buttons for the
desired track.
Example:
To play track 12, press +10, 2.
To play track 20, press +10, +10, 0.
Playback begins at the beginning of the selected
track and continues to the end of the disc.
ENGLISH
37
Page 38

BASIC OPERATIONS (CONTINUED)
Fast forward/Reverse playback
Hold down r/f or g/t during
playback.
“fx 2” or “gx 2” is displa y ed on the TV screen for
DVDs, and “fx 5” or “gx 5” for VCDs and CDs.
The disc is played back forward (when holding down
g/t) or in reverse (when holding do wn r/f)
at high speed.
To change playback speed
Hold down r/f or g/t repeatedly.
For DVDs, the playback speed changes twice , 8 times
and 32 times. For VCDs and CDs, the playback speed
alternates between 5 times and 16 times.
To return to normal playback
Press c.
Notes
•There is no audio during fast DVD or Video CD
playback.
•The fast playback speed is the value for a disc with
an average bit rate. The actual speed ma y be different
for some discs.
Frame advance (DVD/VCD ONLY)
1
Press a to pause the disc.
2
Press a repeatedly to advance frames.
Each time you press the button, playbac k advances
one frame.
To return to normal playback
Press c.
Note
There is no audio during Frame Advance.
Slow playback (DVD/VCD ONLY)
1
Press a to pause the disc.
2
Hold down r/f or g/t.
The track is played back slowly.
T o change the slow forwar d playback speed
Each time g/t is held down, the playback speed
changes as follows:
1/30 1/15 1/5 1/2
Skipping
Press r/f or g/t.
With each press of g/t, the disc position skips to
the succeeding chapter or track.
When r/f is pressed once, the disc position skips
back to the beginning of the current chapter or track.
When r/f is pressed twice or more, the disc
position skips back to the previous chapter or track(s).
About the symbol display
• The symbol will be displayed on the screen if
you press a button which cannot be used or enter
an incorrect number.
• Some DVD discs may have places where they
do not allow the pressing of STOP, SKIP, or other
buttons. The
screen if you press a button that is not allowed
in such a place.
38
ENGLISH
mark will be displayed on the
T o change the slow reverse pla yback speed
For DVDs, the playback speed alternates between 1/
15 and 1/2 speed each time r/f is held down.
Only 1/15 speed is available for VCDs.
To return to normal playback
Press c.
Note
There is no audio during slow playback.
Page 39

REPEAT PLAYBACK
CHAPTER
TITLE
OFF
Repeat playback (DVD)
Press REPEAT repeatedly on the remote control during
playback. “P” is displa yed in the displa y window during
the Repeat playback.
With each press, the Repeat playback mode changes:
REPEAT
CHAPTER: Repeats the current chapter.
TV screen:
TITLE: Repeats the current title.
OFF: Cancel repeat mode. (Normal pla yback)
DISC OPERATIONS
To cancel repeat playback
Press REPEAT on the remote control again until the
repeat indicator disappears from the display window.
The unit returns to normal playback.
Note
This function only works on one disc.
ENGLISH
39
Page 40

ALL
OFF
REPEAT PLAYBACK (CONTINUED)
TRACK
DISC
Repeat playback (VCD/CD)
To use this feature with VCDs that support PBC, turn
off PBC first (see "Playing a VCD without Using
PlayBack Control", page 37).
Numbered
buttons
c
r/f
REPEAT
PROGRAM/
RANDOM
DISPLAY
+10
g/t
s
Press REPEAT repeatedly on the remote
control.
“P” is displayed in the display window during the
Repeat playback. With each press, the Repeat playbac k
mode changes:
ALL: Repeats all tracks on the current disc.
TV screen:
TRACK: Repeats the current track.
OFF: Cancel repeat mode. (Normal pla yback)
40
To cancel repeat playback
Press REPEAT on the remote control again until the
repeat indicator disappears from the display window.
The unit returns to normal playback.
To repeat playback of selected track(s)
Program the track(s) with the programmed playback
function, and then press REPEAT to repeat playback
of the programmed tracks (see “Programmed
Playback”).
Note
This function only works on one disc.
ENGLISH
Page 41

PROGRAMMED/RANDOM PLAYBACK
Programmed playback (VCD/CD only)
Y ou can prog ram up to 30 selected tracks from a single
disc to be played back in your desired order.
To use this feature with VCDs that support PBC, turn
off PBC first (see "Playing a VCD without Using
PlayBack Control", page 37).
1
Press DISPLAY and press PROGRAM/
RANDOM once in stop mode.
TV screen:
D1 T0
TOTAL
0 : 00 : 00
General playback
status
Display window:
2
Press DISC and within 3 seconds press
1, 2 or 3 to select a disc.
Go to the next step then the tray stops rotating.
TV screen:
D3 T1
Display window:
OFF
PROGRAM
OFF
Selected disc
(tray) number
Selected tray
number
TV screen:
D3 T12
TOTAL
0 : 04 : 20
Display window:
Selected track
number Program number
4
Repeat steps 2 and 3 to program other
Total number of
selected tracks
Total playing time
of the selected
tracks
(After 5 seconds)
tracks.
5
Press c to start playback.
The programmed tracks are played back in the
order of entry. The number of the track currently
playing flashes and all the remaining track numbers
are lit in the display window.
When programmed playback is complete or when
s is pressed to stop playback, the playback
program reappears.
To turn off the general playback status on
TV screen
Press DISPLAY again.
DISC OPERATIONS
3
Press the numbered button(s) to select
the track to be played first.
Using the numbered buttons:
To select track 12, press +10, 2.
To select track 20, press +10, +10,0.
To cancel programmed playback
Press PROGRAM/RANDOM twice.
“OFF” is displayed on the TV screen. Programmed
playback is canceled, and the unit continues to play
back the current and all succeeding track on the disc.
To stop programmed playback
Press s.
Note
The disc resume function does not work during
programmed playback.
ENGLISH
41
Page 42

PROGRAMMED/RANDOM PLAYBACK (CONTINUED)
To clear the program
Press s twice after stopping programmed playback.
All the programmed contents are cleared.
Note
The program is also cleared when the disc tray is
opened, the function is changed or the power is turned
off.
To check the program
Press r/f or g/t during stop.
With each press, the program number and the track
number are shown progressively in the displa y window .
To add a track to the program
Repeat step 2 and 3 in stop mode. The track will be
programmed after the last track.
To play the programmed tracks repeatedly
1 Follow all the steps of “Programmed Playback” above
to program tracks.
2 Press REPEAT .
The programmed tracks are played repeatedly.
To skip tracks
Press r/f or g/t repeatedly.
Playback skips to the previous or the succeeding
track(s) within the program.
Note
You cannot program more than 30 tracks.
Random playback (VCD/CD only)
All the tracks on the selected disc or all the discs can
be played randomly.
To use this feature with VCDs that support PBC, set to
“PBC OFF” on the setup menu (see page 61).
1
Press PROGRAM/RANDOM repeatedly
on the remote control to show the
random playback indicator in the
display window.
Press once if during playback, twice if during stop.
“RANDOM” appears on the TV screen and the
random playback indicator appears in the display
window.
Note
Pressing PROGRAM/RANDOM once during stop
will bring up the programmed playback setting.
2
To play all discs, press
To play a single disc, press DISC and within 3
seconds press 1, 2 or 3 to start play.
To cancel random playback
Press PROGRAM/RANDOM once on the remote
control.
“OFF” appears on the TV screen and the random
playback indicator disappears in the display window.
The unit goes back to normal playback.
cc
c to start play.
cc
42
Notes
•During random playback you cannot skip back to the
previously played track with r/f.
•Random playback does not work with repeat playbac k
while the unit is in all disc playback mode.
ENGLISH
Page 43

CHANGING THE DISPLAY INFORMATION
T10 C20
OFF
1 2 3 4 5
0 : 03 : 10
TITLE
T10 C20
0 : 03 : 10
1/8
1/2 hD
JA 3/2.1
32 / 32 OFF
JP
TITLE
T10 C20
T 1 : 26 : 03
A–B
OFF
1 2 3 4 5
Displaying playback status on the
TV screen
Numbered
buttons
r/f
SCREEN
REPEAT
SETUP/TM
PROGRAM/
RANDOM
c
DISC
DISPLAY
i/k/j/l
g/t
s
General playback status can be displayed on the TV
screen.
When playing back a DVD
DISC OPERATIONS
Press DISPLAY repeatedly during playback.
With each press, the display on the TV screen changes
as follows:
1
2
3
4
5
1
2
6
7
1 shows the title number and the chapter
number, or “MENU” during menu display.
2 shows the elapsed playing time or
remaining time during playback, or the time
of the resume point when stopped.
3 shows the audio information. See “Signal
type information”, page 51.
4 shows the angle information.
5 shows the subtitle information.
Cancel (Normal display)
6 shows the repeat mode.
7 shows the memorized mark points
information.
ENGLISH
43
Page 44

CHANGING THE DISPLAY INFORMATION (CONTINUED)
TRACK
0 : 03 : 10
OFF
OFF
D1 T1
T10 C20
T 1 : 26 : 03
A–B
OFF
1 2 3 4 5
When playing back a VCD
Press DISPLAY repeatedly during playback.
With each press, the display on the TV screen
alternates between on and off:
1
2
3
4
5
Cancel (Normal display)
D1 T1
DISC
0 : 03 : 10
OFF
OFF
OFF
T10 C20
T 1 : 26 : 03
OFF
A–B
1 2 3 4 5
When playing a CD
Press DISPLAY repeatedly during playback.
With each press, the display on the TV screen
alternates between on and off:
1
2
3
4
Cancel (Normal display)
1 shows the disc number and the track
number. Those information disappear when
PBC is on.
2 shows the elapsed playing time during
playback and the total playing time or the
playback resume point during stop.
Those information disappear when PBC is
on.
3 shows the repeat mode.
4 shows the playback mode (PROGRAM,
RANDOM or OFF).
5 shows if PBC is on or off.
44
ENGLISH
1 shows the disc number and the track
number.
2 shows the elapsed playing time during
playback and the total playing time or the
playback resume point during stop.
3 shows the repeat mode.
4 shows the playback mode (PROGRAM,
RANDOM or OFF).
Page 45

Changing the playback time
information in the display window
Playback time information in the display window can
be changed when the TV screen has been blac ked out.
To black out the TV screen, press SCREEN.
VCDs/CDs
Elapsed time of current track
Press SETUP/TM repeatedly on the remote
control during playback.
With each press, the display changes as follows:
DVDs
Elapsed time of current title
Remaining time of current title
Elapsed time of current chapter
Remaining time of current chapter
To return to the normal screen, press SCREEN again.
DISC OPERATIONS
Remaining time of current track
Elapsed time of the current disc
Remaining time of the current disc
To return to the normal screen, press SCREEN again.
Notes
•When PBC is on, the playback time information for
VCDs does not change as described above.
•During programmed playback and random playback,
the elapsed time of current track and current disc for
VCDs and CDs are only displayed in the display
window.
•The playback time information cannot be display ed in
the display window, when a total programmed
playback time is over 99:59.
ENGLISH
45
Page 46

*****
1
***
Numbered
buttons
c
MARK
T-SEARCH
MARKING AND SEARCHING
+10
i/k/j/l
DISC
ENTER
C
Marking (DVD ONLY)
You can mar k any point in a DVD and start playback
from there.
You can mar k up to 5 discs, each with up to 5 points.
1
Play back the disc and locate the desired
point to mark.
You can use functions such as “Fast forward/
Reverse”, “Skipping” or “Search” to locate your
desired point.
2
Press MARK.
“ ” appears on the TV screen and the unit enters
the Mark mode. The current Mark memory number
is highlighted by the cursor.
3
Press DISC ENTER.
The current location is marked in the Mark memory.
4
Press MARK again to exit the Mark
mode.
To mark other points
1 Follow steps 1 and 2 of “Marking”, above.
2 Press j, l to move the cursor to the desired Mark
memory number.
3 Follow steps 3 and 4 of “Marking”, above.
46
ENGLISH
Page 47

To play back from a marked point
1 Press MARK dur ing playback.
” appears on the TV screen and the unit enters
“
the Mark mode.
2 Press j , l to move the cursor, or press a
corresponding number button (1 - 5), to select the
desired Mark memory number.
3 Press DISC ENTER or c.
Playback starts from the marked point.
To clear a marked point
1 Press MARK dur ing playback.
“
” appears on the TV screen and the unit enters
the Mark mode.
2 Press j , l to move the cursor or press a
corresponding number button (1 - 5) to select the
desired Mark memory number.
3 Press C.
The Mark memory is cleared.
Note
When the 6th DVD disc is inserted, the mark data for
the oldest disc is overwritten by the disc information of
the new disc and deleted, even when a new point is
not memorized.
Title search (DVD only)
You can specify the playback location of a DVD by the
title number.
This operation can be performed during playback.
1
Press T -SEARCH.
T1
2
Press the numbered buttons to enter the
desired title number.
T2
DISC OPERATIONS
Example:
To play title number 2, press 2.
To play title number 10, press +10,0.
You can also use i and k to change the selected
track number on the TV screen.
If you entered a wrong number
Press C to remove the number you entered. Then
enter the correct number.
3
Press DISC ENTER or c.
Playback begins at the specified title.
Note
If you specify a title number which does not exist on
the disc, the
from step 1 with a valid title number.
symbol is displayed. In this case, repeat
ENGLISH
47
Page 48

MARKING AND SEARCHING (CONTINUED)
Chapter search (DVD only)
You can specify the playback location of a DVD by the
chapter number.
This operation can be performed during playback.
1
Press T-SEARCH twice.
T2 C1
2
Press the numbered buttons to enter the
desired chapter number.
T2 C
17
Time search (DVD only)
With DVDs that support display of elapsed time, you
can locate a point in the disc by specifying the time
from the beginning of this disc.
This operation can be performed during playback.
1
Press T-SEARCH 3 times.
00:00:00
2
Press the numbered buttons to enter the
time of the desired location.
01:17: 30
Example:
To play chapter number 17, press +10, 7.
You can also use i and k to change the selected
track number on the TV screen.
If you entered a wrong number
Press C to remove the number you entered. Then
enter the correct number.
3
Press DISC ENTER or c.
Playback begins at the specified chapter.
Note
If you specify a chapter number which does not exist
on the disc, the
repeat from step 1 with a valid chapter number.
symbol is displayed. In this case,
Example:
T o specify 1:17:30 (1 hour 17 minutes 30 seconds),
press 1, 1, 7, 3 and 0.
To specify 0:08:07 (8 minutes 7 seconds), press 8,
0 and 7.
If you entered the wrong numbers
Press C repeatedly to remove the numbers you
entered. Then enter the correct numbers.
3
Press DISC ENTER or c.
Playback begins at the specified location.
Notes
•If you specify a time greater than the length of the
disc, the
from step 1 with a valid time.
•Time search may not work with some discs even if
they support display of elapsed time.
symbol is displayed. In this case, repeat
48
ENGLISH
Page 49

Numbered
buttons
SPECIAL DVD FEATURES
DISPLAY
+10
AUDIO
SELECT
Changing the angle (DVD only)
When playing back DVDs shot with multi-angles, you
can select the angle to view the scene.
Press ANGLE repeatedly to select a viewing
angle.
With each press, the angle will change.
1st out of 4 available angles
for the scene.
DISC OPERATIONS
c
T-SEARCH
C
i/k/j/l
DISC
ENTER
ZOOM
SUBTITLE
ON/OFF
SUBTITLE
SELECT
ANGLE
Special features for playing back DVDs are described
here.
Zoom function (DVD only)
1/4
4/4 3/4
Note
2/4
If you press ANGLE when playing back a scene or a
disc without multiple viewing angles, the
symbol is
displayed.
Press ZOOM on the remote control during
playback.
The picture around the center of the screen is enlarged
to approximately 4 times.
To move the enlarged picture
Press ikjl.
To return to the center of the picture, press C.
To cancel zoom
Press ZOOM again.
ENGLISH
49
Page 50

SPECIAL DVD FEATURES (CONTINUED)
He’s having a great run today, Jim.
EN
1/3 ON
He’s having a great run today, Jim.
EN
1/3 ON
Subtitles (DVD only)
Y ou can displa y the subtitles on the screen when playing
DVDs which contain them. You can also change the
subtitle language if more than one is available.
Press SUBTITLE ON/OFF during playback.
The subtitles will be displayed.
1/3 OFF
To turn off the subtitles
Press SUBTITLE ON/OFF again.
Notes
•If you press SUBTITLE ON/OFF when playing a disc
without subtitles, the
•Some discs have subtitles on by default. With such
discs, SUBTITLE ON/OFF may not allow you to
remove the subtitle display.
symbol is displayed.
Notes
•The subtitle language can be changed only if the disc
contains more than one subtitle language. The number
of available subtitle languages varies with the disc.
•The subtitle language first displayed is specified by
the subtitle setting and can be changed (see
“SUBTITLE LANGUAGE”, page 56). If the preferred
subtitle language is not available on the disc, the disc
will determine which subtitles are shown.
•It may take some discs a fe w moments after you press
SUBTITLE SELECT until the new subtitles are
displayed.
To change the subtitle language
Press SUBTITLE SELECT to select the desired subtitle
language.
1st out of 3 available
subtitle languages
2/3 ON
FR
3/3 ON
ES
50
ENGLISH
Page 51

Changing audio tracks (DVD only)
Signal type information
Some DVDs have more than one audio track, such as
soundtracks in different languages. You can change the
audio track when playing such discs.
Press AUDIO SELECT during playback.
Each time you press the button, the audio track will
change.
1/2hD
JA
2/2hD
EN
Notes
•The audio track can be changed only if the disc
contains multiple audio tracks. The number of av ailable
audio tracks varies with the disc.
•The audio track language first played is specified by
the audio language setting and can be changed (see
“Audio Language”, page 55). If the preferred audio
track language is not available on the disc, the disc
will determine which audio track language is played.
Signal type
information
One of the following will be displayed by pressing
DISPLAY.
•hD: Dolby Digital signal.
The numbers below indicate the number of front and
rear audio channels. For example,
“2/0” = [Conventional stereo] two front channels (left
and right) and no rear channel
“3/2.1” [5.1-channel surround] = three front channels
(left, right and center), two rear channels (left rear
and right rear) and LFE (Low Frequency Effects).
•dts: DTS signal.
•LPCM: Linear PCM signal. The sampling frequency and
the D/A conversion bits are displayed below, such as
“48k 16bit”.
•KARAOKE: Karaoke signal. The currently active vocal
track is displayed below, such as “VOCAL 1 + 2”.
•MPEG: MPEG audio signal.
DISC OPERATIONS
ENGLISH
51
Page 52

SELECTING KARAOKE AUDIO
DVD karaoke
Press AUDIO SELECT during playback.
The audio playback will change each time you press
the button.
Example: A disc has 2 audio tracks (track 1 and track
2), and track 1 has 2 vocal channels.
1/2 KARAOKE
1/2 KARAOKE
VOCAL1
1/2 KARAOKE
VOCAL2
1/2 KARAOKE
VOCAL1+2
2/2 h
Note
Refer to the instructions with the karaoke disc f or more
information.
The type of audio playback is different between each
DVD disc. Operate it by referring to the instruction of
the discs.
Also refer to the instructions with the karaoke disc for
more information.
52
ENGLISH
Page 53

CUSTOMIZING DVD SETUP
3 Audio Output Setting (page 57)
Adjusts the type of signal output from the DIGITAL
AUDIO OUT (OPTICAL) terminal.
4 TV Aspect (page 59)
Sets the aspect ratio of the video signal for
connecting to other video equipment.
i/k/j/l
DISC
SETUP/TM
Various default settings related to the disc player and
the TV monitor can be changed as needed or preferred.
ENTER
RETURNv
Overview of the setup menu
There are 7 major menu items that can be adjusted.
Their functions are as follows:
1 On-screen Menu (page 54)
• Sets the on-screen guide display on or off.
• Selects a background color for the TV screen.
• Selects the language in which this setup menu.
5 Ratings (page 60)
Sets the rating limit of DVDs able to playback on
this unit when playing discs with restriction level
encoding.
With discs that include scenes with excessive
violence, for example, this setting can be used
either to automatically cut such scenes or to
disable playback altogether, depending on the
disc.
6 PBC (page 61)
Sets your preferred setting to turn the PBC
(PlayBack Control) function for video CDs on or
off.
7 Disc Resume (page 61)
Sets whether the disc resume memory is retained
after power off, opening of the disc tray, switching
of the current disc or switching of the function.
The “Audio Output Setting” and the “TV Aspect”
setting need to be set specifically to match the
configuration of your connected equipment.
• Changing the default “Audio Output Setting” maybe
only if you are connecting an external decoder
needed
or you want to have a better eff ect on Q SURROUND
of this unit.
If not, do not change its default setting.
• The default “TV Aspect” setting has to be changed
your video equipment such as a video projector is a
wide screen set
Any other setting can be changed or kept as is,
according to your preferences.
.
CUSTOMIZING DVD SETUP
if
2 Disc Languages (page 55)
Selects the preferred audio soundtrack language,
subtitle language and menu screen language for
DVD playback.
ENGLISH
53
Page 54

CUSTOMIZING DVD SETUP (CONTINUED)
Basic operations
The setup menu can be operated only from the remote
control.
1
Press SETUP/TM while the player is
stopped.
The setup menu is displayed.
SETUP MENU
Choose The Item ik
1
On-screen Menu
2
Disc Languages
3
Audio Output Setting
4
TV Aspect
5
Ratings
6
P B C
7
Disc Resume
ENTER : Choose item SETUP : Completion
2
Use ik to move the cursor (the
yellow-highlighted area) to the setting
to be changed.
3
Press DISC ENTER.
The menu screen for the item you selected will be
displayed.
4
Use ik to move the cursor to the
desired setting.
5
Press DISC ENTER to enter your
selection.
The selected setting will be saved, and the display
returns to the main setup screen of step 1.
For some settings, however, the screen will
display a more detailed menu. Follow the
directions shown on the screen.
6
Press SETUP/TM to exit the setup
menu.
To return to the previous screen
Press RETURNv.
4 : 3 LB
Level 8
O N
O F F
Notes
•If you pressed RETURNv or SETUP/TM before
pressing DISC ENTER to enter your selection, you
return to the previous screen or exit the setup menu,
respectively, without saving your selection. Any
selection you entered by pressing DISC ENTER will
be saved. If you are uncertain of your present setup,
follow “To confirm your setting”, above.
•While the setup screen is displayed, you will not be
able to load or unload a disc or perform other
operations. Press SETUP/TM again to exit the setup
menu first.
On-screen menu
There are 3 items you can set.
On-screen Menu
Choose The Item ik
1
Guide Message
2
Background
3
Menu Language English
ENTER : Choose item
SETUP : Completion
GUIDE MESSAGE
Sets whether or not to show the on-screen guide display
at the upper right side of the TV screen.
The default setting is “ON”.
1 Select “On-screen Menu” in the setup
menu. Then press DISC ENTER.
2 Select “Guide Message” and press DISC
ENTER.
3 Select the desired setting and press DISC
ENTER.
Guide Message
Choose The Item ik
12Guide Message
Guide Message
O N
RETURN : Previous menu
O N
O F F
To exit the setup menu
Press SETUP/TM.
To confirm your setting
1 Follow steps 1 to 4 above to display the setting you
want to confirm.
2 Press SETUP/TM to exit the setup menu without
making changes.
54
ENGLISH
ENTER : Choose item
SETUP : Completion
RETURN : Previous menu
4 Press RETURNv to return to the previous
screen or press SETUP/TM to exit the setup
menu.
Page 55

BACKGROUND
Sets the background color of the TV screen while
stopped. The default setting is “Wallpaper”.
1 Select “On-screen Menu” in the setup
menu. Then press DISC ENTER.
2 Select “Background” and press DISC
ENTER.
3 Select the desired setting and press DISC
ENTER.
Background
Choose The Item ik
1
Wall Paper
2
Black
3
Blue
4
Green
5
Yellow
6
Orange
7
Magenta
ENTER : Choose item
SETUP : Completion
RETURN : Previous menu
4 Press RETURNv to return to the previous
screen or press SETUP/TM to exit the setup
menu.
MENU LANGUAGE
Selects the language in which this setup menu and the
on-screen guide messages are displayed. (The def ault
setting is “English”.)
1 Select “On-screen Menu” in the SETUP
MENU” and press DISC ENTER.
2 Select “Menu Language” and press DISC
ENTER.
3 Select the desired language and press DISC
ENTER.
Menu Language
Choose The Item ik
1
English
2
French
3
Spanish
Disc languages
Selects the preferred audio sound track language,
subtitle language and menu screen language for DVD
playback.
Disc Languages
Choose The Item ik
1
Audio Language
2
Subtitle Language
3
Disc Menu
ENTER : Choose item
SETUP : Completion
AUDIO LANGUAGE
The default setting is “Original”.
1 Select “Disc Languages” in the setup menu.
Then press DISC ENTER.
2 Select “Audio language” and press DISC
ENTER.
3 Select the desired setting and press DISC
ENTER.
Audio Languages
Choose The Item ik
1
Original
2
English
3
French
4
Spanish
5
Others
ENTER : Choose item
SETUP : Completion
“Original”:
Plays discs in the language specified as the
default on the disc.
“English”, “French”, “Spanish”:
Plays discs in the selected language.
“Others”:
Language code setting screen appears.
step 4.
Original
Auto
English
RETURN : Previous menu
RETURN : Previous menu
Go to step 5.
Go to step 5
Go to
CUSTOMIZING DVD SETUP
.
ENTER : Choose item
SETUP : Completion
RETURN : Previous menu
4 Press RETURNv to return to the previous
screen or press SETUP/TM to exit the setup
menu.
ENGLISH
55
Page 56

CUSTOMIZING DVD SETUP (CONTINUED)
Choose The Item ik
ENTER : Choose item
SETUP : Completion
RETURN : Previous menu
1
2
3
4
English
French
Spanish
Others
Disc Menu
4 When “Others” is selected in step 3, enter a
four-digit language code by using i, k and
numbered buttons, and press DISC ENTER.
Refer to the list of language codes on page 64.
Others
Input Language Code
Language Code
Number UP/DOWN
ik
jl
Move the digit cursor
0 ~ 9 Code input
ENTER : Confirm
SETUP : Completion
– – – –
RETURN : Previous menu
To move the cursor, use j or l.
5 Press RETURNv to return to the previous
screen or press SETUP/TM to exit the setup
menu.
If your preferred language does not exist on the disc,
the disc’s default language will be used.
SUBTITLE LANGUAGE
The default setting is “Auto”.
1 Select “Disc Languages” in the setup menu.
Then press DISC ENTER.
2 Select “Subtitle Language” and press DISC
ENTER.
3 Select the desired language and press DISC
ENTER.
Subtitle Languages
Choose The Item ik
1
Auto
2
English
3
French
4
Spanish
5
Others
• If the default audio language does not exist on
the disc, then subtitles will be displayed in the
default audio language as selected in the
“Audio Language” setting.
Example:
• English is set as the default audio language
selected by the “Audio Language” setting.
• When playing an English audio track, no
subtitles will be displayed.
• If there is no English audio track on the disc,
English subtitles will be displayed.
“English”, “French”, “Spanish”:
Shows subtitles in the selected language.
“Others”:
Language code setting screen appears. The
procedure for setting the language code is the
same as for “Audio Language” setting. Refer to
the step 4 of “Audio Language” setting.
5 Press RETURNv to return to the previous
screen or press SETUP/TM to exit the setup
menu.
If your preferred language does not exist on the disc,
the disc’s default language will be used.
DISC MENU
The default setting is “English”.
1 Select “Disc Languages” in the setup menu.
Then press DISC ENTER.
2 Select “Disc Menu” and press DISC ENTER.
3 Select the desired language and press DISC
ENTER.
ENTER : Choose item
SETUP : Completion
RETURN : Previous menu
“Auto”:
Subtitles will automatically be selected in the
same language set for “Audio Language”.
• Subtitles will not be displayed when the played
back language is the one given priority.
56
ENGLISH
Page 57

“English”, “French”, “Spanish”:
Shows the Disc menu in the selected language.
“Others”:
Language code setting screen appears. The
procedure for setting the language code is the
same as for “Audio Language” setting. Refer to
step 4 of “Audio Language” setting.
4 Press RETURNv to return to the previous
screen or press SETUP/TM to exit the setup
menu.
If your preferred language does not exist on the disc,
the disc’s default language will be used.
1 Select “Audio Output Setting” in the setup
menu. Then press DISC ENTER.
2 Select “Digital Stream” and press DISC
ENTER.
3 Select the setting suited to your
configuration and press DISC ENTER.
Digital Stream
Choose The Item ik
12Downmix PCM
DOLBY DIGITAL
ENTER : Choose item
SETUP : Completion
RETURN : Previous menu
CUSTOMIZING DVD SETUP
Audio output setting
Adjusts the type of signal output from the DIGITAL
AUDIO OUT (OPTICAL) t minal.
Changing the default “Audio Output Setting” may be
needed
only if you are connecting an external decoder
or you want to have a better eff ect on Q SURROUND
of this unit.
If so, set up according to the type of connected
equipment. If not, do not change its default setting.
Audio Output Setting
Choose The Item ik
1
Digital Stream DOLBY DIGITAL
2
dts Output OFF
3
Downmix Type Stereo
ENTER : Choose item
SETUP : Completion
DIGITAL STREAM
CAUTION
If the AV amplifier is not equipped with a
DOLBY DIGITAL decoder, do not select
“DOLBY DIGIT AL” in the “Audio Output Setting”
when connecting the AV amplifier with an
optical connecting cord.
Merely attempting to play a D VD may cause a high
level of noise which could be harmful to your ears
and damage the speakers. In such a case, be sure
to select “Downmix PCM”.
RETURN : Previous menu
“Downmix PCM”
Select this option if the unit is connected via a
fiber optical cable to
a digital amplifier without a
built-in Dolby Digital decoder.
Selecting this option, however, downmixes the
signal output from the OUTPUT R-AUDIO-L jacks
to a conventional two channel (left and right)
stereo signal if no surround effect is set on the
signal (e.g. Dolby Surround Mode is set to “OFF”).
“DOLBY DIGITAL”
Select this option if the unit is connected to
a
Dolby Digital decoder, or to an amplifier with a
built-in Dolby Digital decoder, with a digital fiber
optical cable. Selecting this option does not affect
the signal output from the OUTPUT R-AUDIO-L
jacks.
4 Press RETURNv to return to the previous
screen or press SETUP/TM to exit the setup
menu.
Set the digital output to be output from the optical digital
audio output connector of the DVD player.
The default setting is “DOLBY DIGITAL”.
ENGLISH
57
Page 58

CUSTOMIZING DVD SETUP (CONTINUED)
Choose The Item ik
ENTER : Choose item
SETUP : Completion
RETURN : Previous menu
12Stereo Mode
Surround Mode
Downmix Type
DTS OUTPUT
CAUTION
If the AV amplifier is not equipped with a DTS
decoder, do not select “dts” in the “Audio
Output Setting” when connecting the AV
amplifier with an optical connecting cord.
Merely attempting to play a D VD may cause a high
level of noise which could be harmful to your ears
and damage the speakers. In such a case, be sure
to select “Downmix PCM”.
Sets the dts output according to whether the connected
amplifier contains a DTS decoder or not.
The default setting is “dts OFF”.
1 Select “Audio Output Setting” in the setup
menu. Then press DISC ENTER.
2 Select “dts Output” and press DISC ENTER.
3 Select the setting suited to your
configuration and press DISC ENTER.
dts Output
Choose The Item ik
12dts
dts
ENTER : Choose item
SETUP : Completion
“dts ON”
Select this option if the unit is connected to
amplifier with a DTS decoder.
“dts OFF”
Select this option if the unit is connected to
amplifier without a DTS decoder.
4 Press RETURNv to return to the previous
screen or press SETUP/TM to exit the setup
menu.
ON
OFF
RETURN : Previous menu
an
an
DOWNMIX TYPE
Sets the downmix type of signals output from DIGITAL
AUDIO OUT (OPTICAL) terminal and the OUTPUT RAUDIO-L jacks. It functions basically
PCM” is selected in “Digital Stream”.
The default setting is “Stereo Mode”.
1 Select “Audio Output Setting” in the setup
menu and press DISC ENTER.
2 Select “Downmix Type” and press DISC
ENTER.
3 Select the setting and press DISC ENTER.
“Stereo Mode”
Downmixes to conventional two channel stereo.
"1" in the display window lights up.
“Surround Mode”
Downmixes to two channel stereo with Surround
effect. This option functions on the signals output
from the OUTPUT R-AUDIO-L jacks even if
“DOLBY DIGITAL” is selected in “Digital Stream”.
Selecting this option with Dolby Surround mode
“on” will enhance the Surround effect.
"1" in the display window flashes.
4 Press RETURNv to return to the previous
screen or press SETUP/TM to exit the setup
menu.
when “Downmix
58
ENGLISH
Page 59

TV aspect
There are 2 options for television aspect.
TV Aspect
Choose The Item ik
12NORMAL TV
WIDE TV
4 : 3
16 : 9
“PAN & SCAN”
Media recorded in wide (16:9) format will be
played at the full screen height, with the left and
right portions cut off, for media which contains
pan-scan encoding. Other media will be played in
“letterbox” style.
ENTER : Choose item
SETUP : Completion
RETURN : Previous menu
The default setting is “4:3 (NORMAL TV): LETTER
BOX”.
When connecting to a video equipment which has a
wide screen (16:9), such as a video projector, y ou need
to change the default setting. Refer to " WIDE TV ".
The TV screen of this unit also will be changed after
setting to " WIDE TV ".
NORMAL TV
1 Select “TV Aspect” in the setup menu. Then
press DISC ENTER.
2 Select “NORMAL TV 4:3” and press DISC
ENTER.
3 Select the desired setting and press DISC
ENTER.
TV Aspect 4 : 3
Choose The Item ik
12LETTER BOX
PAN & SCAN
Choose the TV Mode
ENTER : Choose item
SETUP : Completion
RETURN : Previous menu
CUSTOMIZING DVD SETUP
4 Press SETUP/TM to exit the setup menu.
WIDE TV
1 Select “TV Aspect” in the setup menu. Then
press DISC ENTER.
2 Select “WIDE TV 16:9” and press DISC
ENTER.
Your entry is saved.
3 Press SETUP/TM to exit the setup menu.
“LETTER BOX”
Media recorded in wide (16:9) format will be
played in “letterbox” style, with black bands at the
top and bottom of the screen.
ENGLISH
59
Page 60

The Player is Locked
Remember the Password
PASSWORD
Press ENTER button
1 2 3 4
Confirmation of the Password
CUSTOMIZING DVD SETUP (CONTINUED)
Enter the Password
ENTER : Confirm
SETUP : Completion
RETURN : Previous menu
PASSWORD
ik
Number UP/DOWN
jl
Move The digit cursor
0 ~ 9 Code input
– – – –
PASSWORD
Ratings
Sets the rating limit allowed to playback on this unit
when playing discs with restriction level encoding.
SETTING THE RA TING
The default setting is “Level 8”.
1 Select “Ratings” in the setup menu. Then
press DISC ENTER.
2 Select your desired level and press DISC
ENTER.
The smaller the number, the higher the level of
restriction. For instance, setting the rating level to
1 will restrict playback of all discs with a rating
level from 2 to 8, either by cutting certain scenes
or disabling playback altogether, depending on the
disc. Check your disc for details.
Rating Limit
Choose The Item ik
Level
8
7
6
5
4
3
2
1
(for Adult)
(for Family)
RETURN : Previous menu
RETURN : Previous menu
Level
Level
Level
Level
Level
Level
Level
ENTER : Choose item
SETUP : Completion
3 Select the country code for your country.
Country Code
Choose The Item ik
1
USA
2
CHINA
3
GERMANY
4
UNITED KINGDOM
5
JAPAN
6
Other Country
ENTER : Choose item
SETUP : Completion
The country code needs to be set correctly, since
the rating system differs with the country.
When “Other Country” is selected in the country
code, the display changes to accept 4-digit
numbers. Input a 4-digit country code shown on
page 62 in the same way as inputting the
language code (page 56).
4 Press DISC ENTER.
A password entry screen is displayed.
5 Use the numbered buttons and jl to enter
a four-digit password.
6 Press DISC ENTER.
Confirm your password.
Do not forget the password you set!
If you forget your password
Reset the unit to initial condition (see “To Reset
DVD Setup”, page 66) and set all the settings
again including the “Ratings” setting.
7 After confirming the password, press DISC
ENTER again.
Your entry is saved.
8 Press SETUP/TM to exit the setup menu.
CHANGING THE SETTINGS
Once the ratings settings have been set, y ou first need
to enter the password to change them.
1 Select “Ratings” in the setup menu. Then
press DISC ENTER.
2 Input four-digit password and press DISC
ENTER.
60
Note
The country code is different from the language
code stated before.
Example: country code for “United States” is “8583”.
ENGLISH
Page 61

3 Select the setting to be changed and press
DISC ENTER.
Ratings
Choose The Item ik
1
Unlock Player
2
Change Password
3
Change Level
4
Setting of the Country Code
ENTER : Choose item
SETUP : Completion
RETURN : Previous menu
“Unlock player” cancels the rating level, country
and password setting to default.
4 If you chose “Unlock player”, the message
“The player is unlocked” appears on the
display. Press DISC ENTER.
For other settings, change to your desired
setting and press DISC ENTER.
5 Press RETURNv to return to the previous
screen or press SETUP/TM to exit the setup
menu.
Disc resume
Selects whether or not the disc resume memory is
retained after power off, opening of the disc tray,
switching of the current disc or switching of the function
(ON) or not (OFF).
After these operations, playback starts either from the
previous stopped point (ON), or from the beginning of
the disc (OFF).
Note that setting Disc Resume to OFF does not turn
off the resume playback feature itself. For the resume
function, see “Stopping and Pausing”, page 35.
The default setting is “OFF”.
1 Select “Disc Resume” in the setup menu.
Then press DISC ENTER.
2 Select your desired setting and press DISC
ENTER.
Disc Resume
Choose The Item ik
12Disc Resume
Disc Resume
O N
O F F
CUSTOMIZING DVD SETUP
PBC
Sets your preferred setting to turn the PBC (PlayBack
Control) function for video CDs on or off.
The default setting is “ON”.
This has no effect on the setting, even if you turn on
and off by pressing PBC or TITLE/PBC button.
1 Select “PBC” in the setup menu. Then press
DISC ENTER.
2 Select your desired setting and press DISC
ENTER.
PBC
Choose The Item ik
12P B C
P B C
ENTER : Choose item
SETUP : Completion
3 Press SETUP/TM to exit the setup menu.
O N
O F F
RETURN : Previous menu
ENTER : Choose item
SETUP : Completion
RETURN : Previous menu
3 Press SETUP/TM to exit the setup menu.
When the Disc Resume is ON
When a disc is loaded, the unit checks whether it holds
the resume memory data for the disc. If so , “RESUME”
is displayed on the screen before the unit enters the
stop mode.
In this condition, playback starts from the previous
stopped point by pressing c.
T o start play from the beginning temporarily
during Disc Resume ON
Press s in stop mode and then press c to start
playback. “RESUME OFF” is displayed in this case.
Notes
•The unit maintains the resume data of up to 5 DVDs
and up to a total of 10 audio CDs and video CDs.
•When the 6th DVD disc or the 11th audio CD or video
CD is inserted, the resume data for the oldest disc is
overwritten by the disc information of the new disc
and deleted, even when Disc Resume is set to OFF.
ENGLISH
61
Page 62

CUSTOMIZING DVD SETUP (CONTINUED)
Country codes
Use these numbers to specify the country in the “Ratings” setting (page 60).
Code Country Code Country Code Country
6570 AFGHANISTAN 6776 CHILE 7176 GREENLAND
6576 ALBANIA 6778 CHINA 7168 GRENADA
6890 ALGERIA 6788 CHRISTMAS ISLAND 7180 GUADELOUPE
6583 AMERICAN SAMOA 6767 COCOS (KEELING) ISLAND 7185 GUAM
6568 ANDORRA 6779 COLOMBIA 7184 GUATEMALA
6579 ANGOLA 7577 COMOROS 7178 GUINEA
6573 ANGUILLA 6771 CONGO 7187 GUNEA-BISSAU
6581 ANTARCTICA 6775 COOK ISLANDS 7189 GUYANA
6571 ANTIGUA AND BARBUDA 6782 COSTA RICA 7284 HAITI
6582 ARGENTINA 6773 COTE D’IVOIRE 7277 HEARD ISLAND AND
MCDONALD ISLANDS
6577 ARMENIA 7282 CROATIA 7278 HONDURAS
6587 ARUBA 6785 CUBA 7275 HONG KONG
6585 AUSTRALIA 6789 CYPRUS 7285 HUNGARY
6584 AUSTRIA 6790 CZECH REPUBLIC 7383 ICELAND
6590 AZERBAIJAN 6875 DENMARK 7378 INDIA
6683 BAHAMAS 6874 DJIBOUTI 7368 INDONESIA
6672 BAHRAIN 6877 DOMINICA 7382
6668 BANGLADESH 6879 DOMINICAN REPUBLIC 7381 IRAQ
6666 BARBADOS 8480 EAST TIMOR 7369 IRELAND
6689 BELARUS 6967 ECUADOR 7376 ISRAEL
6669 BELGIUM 6971 EGYPT 7384 ITALY
6690 BELIZE 8386 EL SALVADOR 7477 JAMAICA
6674 BENIN 7181 EQUATORIAL GUINEA 7480 JAPAN
6677 BERMUDA 6982 ERITREA 7479 JORDAN
6684 BHUTAN 6969 ESTONIA 7590 KAZAKHSTAN
6679 BOLIVIA 6984 ETHIOPIA 7569 KENYA
6665
6687 BOTSWANA 7079 FAROE ISLANDS 7580
6686 BOUVET ISLAND 7074 FIJI 7582
6682 BRAZIL 7073 FINLAND 7587 KUWAIT
7379
6678 BRUNEI DARUSSALAM 7088 FRANCE, METROPOLITAN 7665
6671 BULGARIA 7170 FRENCH GUIANA 7686 LATVIA
6670 BURKINA FASO 8070 FRENCH POLYNESIA 7666 LEBANON
6673 BURUNDI 8470
7572 CAMBODIA 7165 GABON 7682 LIBERIA
6777 CAMEROON 7177 GAMBIA 7689 LIBYAN ARAB
6765 CANADA 7169 GEORGIA 7673 LIECHTENSTEIN
6786 CAPE VERDE 6869 GERMANY 7684 LITHUANIA
7589 CAYMAN ISLANDS 7172 GHANA 7685 LUXEMBOURG
6770
8468 CHAD 7182 GREECE 7771 MADAGASCAR
BOSNIA AND HERZEGOVINA
BRITISH INDIAN OCEAN TERRITORY
CENTRAL AFRICAN REPUBLIC
7075
7082 FRANCE 7571 KYRGYZSTAN
7173 GIBRALTAR 7779 MACAU
FALKLAND ISLANDS (MALVINAS)
FRENCH SOUTHERN TERRITORIES
7573 KIRIBATI
7683 LESOTHO
IRAN (ISLAMIC REPUBLIC OF)
KOREA,DEMOCRATIC
PEOPLE’S REPUBLIC OF
KOREA, REPUBLIC OF
LAO PEOPLE’S
DEMOCRATIC REPUBLIC
JAMAHIRIYA
62
ENGLISH
Page 63

Country codes
Code Country Code Country Code Country
7787 MALAWI 8076 POLAND 8479 TONGA
7789 MALAYSIA 8084 PORTUGAL 8484 TRINIDAD AND TOBAGO
7786 MALDIVES 8082 PUERTO RICO 8478 TUNISIA
7776 MALI 8165 QATAR 8482 TURKEY
7784 MALTA 8269 REUNION 8477 TURKMENISTAN
7772 MARSHALL ISLANDS 8279 ROMANIA 8467 TURKS AND CACOS
ISLANDS
7781 MARTINIQUE 8285 RUSSIAN FEDERATION 8486 TUVALU
7782 MAURITANIA 8287 RWANDA 8571 UGANDA
7785 MAURITIUS 8372 SAINT HELENA 8565 UKRAINE
8984 MAYOTTE 7578 SAINT KITTS AND NEVIS 6569 UNITED ARAB EMIRATES
7788 MEXICO 7667 SAINT LUCIA 7166 UNITED KINGDOM
7077 MICRONESIA 8077
(FEDERATED STATES OF)
7768 MOLDOVA, REPUBLIC OF 8667 SAINT VINCENT AND 8577 UNITED STATES MINOR
7767 MONACO 8783 SAMOA 8589 URUGUAY
7778 MONGOLIA 8377 SAN MARINO 8590 UZBEKISTAN
7783 MONTSERRAT 8384
7765 MOROCCO 8365 SAUDI ARABIA 8665
7790 MOZAMBIQUE 8378 SENEGAL 8669 VENEZUELA
7777 MYANMAR 8367 SEYCHELLIES 8678 VIET NAM
7865 NAMIBIA 8376 SIERRA LEONE 8671
7882 NAURU 8371 SINGAPORE 8673 VIRGIN ISLANDS (U.S.)
7880 NEPAL 8375 SLOVAKIA 8770
7876 NETHERLANDS 8373 SLOVENIA 6972 WESTERN SAHARA
6578 NETHERLANDS ANTILLES 8366 SOLOMON ISLANDS 8969 YEMEN
7867 NEW CALEDONIA 8379 SOMALIA 8985 YUGOSLAVIA
7890 NEW ZEALAND 9065 SOUTH AFRICA 9082 ZAIRE
7873 NICARAGUA 7183 SOUTH GEORGIA AND THE 9077 ZAMBIA
7869 NIGER 6983 SPAIN 9087 ZIMBABWE
7871 NIGERIA 7675 SRI LANKA
7885 NIUE 8368 SUDAN
7870 NORFOLK ISLAND 8382 SURINAME
7780
7879 NORWAY 8390 SWAZILAND
7977 OMAN 8369 SWEDEN
8075 PAKISTAN 6772 SWITZERLAND
8087 PALAU 8389 SYRIAN ARAB REPUBLIC
8065 PANAMA 8487
8071 PAPUA NEW GUINEA 8474 TAJIKISTAN
8089 PARAGUAY 8490
8069 PERU 8472 THAILAND
8072 PHILIPPINES 8471 TOGO
8078 PITCAIRN 8475 TOKELAU
NORTHERN MARIANA ISLANDS
8374
SAINT PIERRE AND MIQUELON
THE GRENADINES OUTLYING ISLANDS
SAO TOME AND PRINCIPE
SOUTH SANDWICH ISLANDS
SVALBARD AND J AN MEYEN
T AIWAN, PRO VINCE OF CHINA
TANZANIA, UNITED REPUBLIC OF
8583 UNITED STATES
8685 VANUATU
VATICAN CITY STATE (HOLY STATE)
VIRGIN ISLANDS (BRITISH
WALLIS AND FUTUNA ISLANDS
CUSTOMIZING DVD SETUP
)
ENGLISH
63
Page 64

CUSTOMIZING DVD SETUP (CONTINUED)
Language codes
Use these numbers to specify the language in the “Disc Languages” setting (page 55).
Code Language Code Language Code Language
3737 Afar 4457 Hungarian 5256 Portuguese
3738 Abkhazian 4461 Armenian 5357 Quechua
3742 Afrikaans 4537 Interlingua 5449 Rhaeto-Romance
3749 Amharic 4550 Indonesian 5451 Romanian
3754 Arabic 4555 Icelandic 5457 Russian
3755 Assamese 4556 Italian 5537 Sanskrit
3760 Aymara 4559 Hebrew 5540 Sindhi
3762 Azerbaijani 4637 Japanese 5544 Serbo-Croatian
3837 Bashkir 4645 Yiddish 5545 Singhalese
3841 Byelorussian 4659 Javanese 5547 Slovak
3843 Bulgarian 4737 Georgian 5548 Slovenian
3844 Bihari 4747 Kazakh 5549 Samoan
3850 Bengali; Bangla 4748 Greenlandic 5550 Shona
3851 Tibetan 4749 Cambodian 5551 Somali
3854 Breton 4750 Kannada 5553 Albanian
3937 Catalan 4751 Korean 5554 Serbian
3951 Corsican 4755 Kashmiri 5557 Sundanese
3955 Czech 4757 Kurdish 5558 Swedish
3961 Welsh 4761 Kirghiz 5559 Swahili
4037 Danish 4837 Latin 5637 Tamil
4041 German 4850 Lingala 5641 Telugu
4062 Bhutani 4851 Laothian 5643 Tajik
4148 Greek 4856 Lithuanian 5644 Thai
4150 English 4858 Latvian; Lettish 5645 Tigrinya
4151 Esperanto 4943 Malagasy 5647 Turkmen
4155 Spanish 4945 Maori 5648 Tagalog
4156 Estonian 4947 Macedonian 5651 Tonga
4157 Basque 4948 Malayalam 5654 Turkish
4237 Persian 4950 Mongolian 5656 Tatar
4845 Finnish 4951 Moldavian 5659 Twi
4246 Fiji 4954 Marathi 5747 Ukrainian
4251 Faroese 4955 Malay 5754 Urdu
4254 French 4956 Maltese 5762 Uzbek
4261 Frisian 4961 Burmese 5845 Vietnamese
4337 Irish 5037 Nauru 5851 Volapük
4340 Scots Gaelic 5041 Nepali 5951 Wolof
4348 Galician 5048 Dutch 6044 Xhosa
4350 Guarani 5051 Norwegian 6151 Yoruba
4357 Gujarati 5154 Oriya 6244 Chinese
4437 Hausa 5237 Punjabi 6257 Zulu
4445 Hindi 5248 Polish
4454 Croatian 5255 Pashto; Pushto
64
ENGLISH
Page 65

GENERAL
Care and maintenance
Occasional care and maintenance of the unit and the
software are needed to optimize the performance of
your unit.
The unit
Keeping the surface clean
Do not use volatile liquids, such as insecticide spray,
near the unit.
Do not leave rubber or plastic products in contact with
the disc compartment for a long period of time. They
will leave marks on the surface.
To obtain a clear picture
This DVD stereo system is a high-tech, precision de vice.
If the optical pick-up lens and disc drive parts are dirty
or worn down, the picture quality will be poor.
Regular inspection and maintenance are recommended
after ev e ry 1,000 hours of use.
(This depends on the operating environment.)
For details, please contact your Aiwa dealer.
To clean the cabinet
Wipe with a soft dry cloth.
If the surfaces are extremely dirty , use a soft cloth lightly
moistened with mild detergent solution. Do not use
strong solvents, such as alcohol, benzine or thinner as
these could damage the finish of the unit.
Discs
Handling discs
Do not touch the playback side of a disc. Hold discs b y
the edges so that fingerprints will not get on the surface.
Do not stick paper or tape on a disc.
Care of discs
•When a disc becomes dirty, wipe the disc from the
center out with a cleaning cloth.
•Do not use strong solvents such as alcohol, benzene,
thinner, commercially av ailable cleaners or anti-static
spray intended for analog records.
•After playing a disc, store the disc in its case. Do not
leave the disc in places that are hot or humid.
Storing discs
After playing, store the disc in its case.
Do not expose the disc to direct sunlight or sources of
heat, or leave it in a parked car exposed to direct
sunlight, as there may be a considerable temperature
increase inside the car.
GENERAL
Do not stick a seal or an adhesive label
Do not stick a seal or an adhesive label on the surface
for a long time. The finish of the unit may be damaged
or come off.
When noises are heard from the radio or other
audio/video equipment
Separate the equipment from this unit.
Braun tube
If the surface is dirty, wipe with a soft dry cloth.
When you touch the Braun tube, sometimes you feel
week electricity . This is the static electricity , and it does
not damage you.
Shipping the unit
The original shipping carton and packing materials
come in handy .
For maximum protection, re-pack the unit as it was
originally packed at the factory.
ENGLISH
65
Page 66

GENERAL (CONTINUED)
Troubleshooting guide
GENERAL
There is no picture.
•Is the AC cord connected properly? (page 6)
• Is the power turned on ? ( page 13)
• Is the video input selection set correctly ? (page 30)
• Was the SCREEN button pressed? (page 17, 36)
There is no sound.
• Is the power turned on ? ( page 13)
•Was an incorrect function button pressed?
•Is the volume set properly? Do you have headphones
plugged in?
• There will be no audio during the following DVD
playback modes: slow pla yback, F rame Advance, f ast
forward and fast reverse.
There is poor or no color.
• Adjust the color setting. (page 21)
• [DVD and VCD only] Is this unit connected directly to
the video projector ? Or is it connected through a video
deck or selector switch ?
The picture may be bad when used with some
projectors due to the DVD copy protection scheme.
The picture quality may also suffer if this unit is
connected through a selector with other video
equipment.
T ry turning off the power to the other video equipment.
The remote control does not work or works poorly.
• Are the remote control batteries installed correctly?
(page 13)
• Is the remote control too far from the main unit? Is
there something in the way?
• Are the remote control batteries getting weak?
• Is the main unit in sunlight or strong fluorescent light?
• [DVD only] Does the disc e xceed the specified r ating
level? (page 60)
•[DVD and VCD only] Is the disc recorded in the NTSC
color system?
Use a NTSC color system disc.
• [DVD only] The picture quality ma y be somewhat poor
when paused, during Frame Advance,
fast forward or fast reverse. This is normal.
The DVD does not play according to your
preferences.
• Check your settings. (page 53)
• Many D VD features, such as the menu, subtitles , multi-
audio, multi-angle, rating functions , are dependent on
the DVD softw are itself. Check the instructions for y our
disc.
No recording to a Mini Disc player
•There are some DVDs from which digital recordings
are prohibited.
Try to record through the analog audio out put jacks.
To reset DVD setup
If you forget your password for the DVD rating-level
setting, or if you want to reset the D VD setup setting to
default for any other reason, reset as follows.
Note
Remove the all of discs from the disc compartment
before initializing the DVD setup.
1 Press DISC and wait until the unit stops.
2 Press s while pressing DISC.
3 Press POWER to turn off the power.
4 Press POWER again to turn the power back on.
Clicking noise sound
• Unavoidable e xpansion or contraction of cabinet due
to temperature changes. This is not a problem.
DISC PLAYER SECTION
The disc does not play or plays poorly.
•Is the disc correctly placed? (page 34)
•Is your desired disc selected properly?
•Is the disc dirty? (page 65)
•Is the lens affected by condensation?
Wait approximately one hour and try again.
• Are you trying to use a disc that can’t be played, such
as a CD-ROM? (page 32)
66
ENGLISH
DVD has many capabilities
Some of these capabilities may differ based on the
disc being played. The following situations may be
caused by information on the disc itself.
• The audio or subtitles are not reproduced in the
specified default language.
• The audio track or subtitles cannot be changed.
• There are no subtitles.
• No DVD menu. The DVD menu does not display
in the language you want.
• The view angle cannot be changed.
• Everything on the disc is played back regardless
of the rating level you have set.
Page 67

Specifications
TV SECTION
Tuner System Frequency synthesized tuner
TV System NTSC-M
Channel Coverage VHF: 2 to 13
UHF: 14 to 69
CATV: 5A, A-1 to A-5, A to W,
W+1 to W+84
Program Memory 181
Antenna Input 75 ohms, unbalanced
Picture Tube 20 in.
Screen Size 406 (W) × 305 (H) mm
(16 × 12
508 mm (diagonal) (20 in.)
Video Input 1 Vp-p 75 ohms
Audio Input 0.5 Vrms., 33 k ohms more
Video output 1 Vp-p 75 ohms (sync negative)
Audio output 0.5 Vrms., 2.2k ohms
Digital Audio output Optical
Speaker 160 × 40 mm (6
DISC PLAYER SECTION
Laser Semiconductor laser
(λ=650/780 nm)
D/A converter 1 bit dual
Signal format NTSC
Supported discs DVD video discs
12 cm (single-sided single-layer ,
single-sided double-layer,
double-sided single-layer,
double-sided double-layer)
8 cm (single-sided single-layer,
single-sided double-layer,
double-sided single-layer,
double-sided double-layer)
Compact discs (CD-DA, videoCD)
12 cm and 8 cm discs
1/8 in.)
3/8 × 1 5/8 in.)
COPY RIGHT
Please check the laws on copyright relating to
recordings from discs, radio or external tape for the
country in which the machine is being used.
•Manufactured under license from Dolby Laboratories.
“Dolby” and the double-D symbol are trademarks of
Dolby Laboratories. Confidential unpublished works.
©1992-1997 Dolby Laboratories. All rights reserved.
•Manufactured under license from Digital Theater
Systems, Inc. US Pat. No. 5,451,942 and other
worldwide patents issued and pending. “DTS” and “DTS
Digital Surround” are trademarks of Digital Theater
Systems Inc. ©1996 Digital Theater system, Inc. All
rights reserved.
The word “BBE” and the “BBE symbol” are trademarks
of BBE Sound, Inc.
Under license from BBE Sound, Inc.
GENERAL
GENERAL
Operating Voltage 120 V AC, 60 Hz
Power consumption 125 W
Phones Jack Stereo-mini jack
Operating temperature 5˚C – 35˚C
Operating Humidity 35% – 80%
Dimensions 575 (W) × 504 (H) × 493 (D) mm
3/4 × 19
(22
Weight 30.0 kg (66 lbs.)
Accessories Remote control (1)
Batteries (R03/size AAA) (2)
Antenna adaptor (1)
Design and specifications are subject to change without
notice for the purpose of performance improvement.
7/8 × 19
1/2 in.)
ENGLISH
67
Page 68

GENERAL (CONTINUED)
Parts and controls
<Remote control>
Use for TV oper ation mainly
Use for Disc operation mainly
1
2
3
4
5
6
7
8
9
0
!
@
#
$
%
^
&
*
(
)
=
[
]
\
;
'
68
ENGLISH
Page 69

1 TV/VIDEO button
Press to select TV, Video1 and Video 2 mode.
2 POWER button
Press to turn on and off the main power.
3 Numbered buttons
Press to select a TV channel or a track directly.
4 CAPTION button
Press to select the Closed Captioned television
programs.
5 AV MODE button
Press to change the brightness and contrast to
match with the 4 kinds of mode.
6 TV MENU button
Press to display the TV menu screen.
7 VOLUME +/– button
Press to change the sound volume from the unit's
speakers.
8 c button
Press to begin a playback.
9 r/f button
Press to return to the beginning of the current track
or skip back to the previous track. Hold down to
play back a disc in reverse.
0 SCREEN button
Press to black out the TV screen.
! DISC MENU button
Press to display the menu programs on DVD or
Video CD.
@ DISC button
Press to change the disc operation mode.
# GAME button
Press to change the brightness and contrast of the
TV screen to match with playing a game.
$ SLEEP button
Press to set the sleep timer.
% DISPLAY button
Press to display the On Screen Display inf ormation.
^ PREV.CH button
Press to switch back and forth between the current
channel and previous one.
& MUTE button
Press to mute the TV sound.
* AUDIO SELECT button
Press to select the Multi-channel TV sound or sound
tracks on DVD or Video CD.
( SOUND EFFECT button
Press to display the setup menu screen for sound
quality.
) TV ENTER button
Press to select the item on the TV menu screen.
- CHANNELN/M button
Press to change the TV channels.
= a button
Press to pause a playback.
[ i/k/j/l buttons
Press to select a item during disc operations.
] g/t button
Press to skip the next track. Hold down to play
back a disc forward.
\ s button
Press to stop playing back a disc.
; DISC ENTER button
• Press to save the setting item in the DVD setup.
• Press to play back DVD or Video CD according
to the software specific menu itself.
' Utilizing the disc menu buttons
SETUP/TM button
• Press to display the DVD setup menu screen.
• Press to display the playback time on the display
window when the TV screen is blacked out.
REPEAT button
Press to execute the repeat playbacks.
TITLE/PBC button
• Press to displa y the DVD men u itself during a DVD
playback.
• Press to turn the playback control function on and
off when playing back a video CD.
RETURN v button
• Press to display the Video CD menu itself during
a Video CD playback.
• Press to return to the previous DVD setup menu
screen.
T-SEARCH button
Press to execute the Title, Chapter and Time search
playback.
MARK button
Press to mark any point in a DVD and start playback
from there.
ZOOM button
Press to enlarge the picture during a DVD pla yback.
SUBTITLE ON/OFF button
Press to display the subtitle.
PROGRAM/RANDOM button
Press to execute a programmed playback or
random playback.
C button
• Press to clear the MARK memory.
• Press to cancel the wrong track number when
programming tracks on the disc.
ANGLE button
Press to change the picture angle during a DVD
playback.
SUBTITLE SELECT button
Press to change the subtitle language during a DVD
playback.
GENERAL
ENGLISH
69
Page 70

GENERAL (CONTINUED)
<Front panel>
]
[
=
-
)
(
*
&
^
%
1 Disc compartment
Loading and removing discs.
2 Display window
Displays the information of unit's status.
3 TV MENU button
Press to display the TV menu screen.
4 TV ENTER button
Press to select the item on the TV menu screen.
5 OPEN/CLOSE z button
Press to open and close the disc compartment.
6 STOP s button
Press to stop playing back a disc.
7 PLAY c button
Press to begin a playback.
8 g/t button
Press to skip to the next track. Hold down to play
back a disc forward.
9 r/f button
Press to return to the beginning of the current track
or skip back to the previous track. Hold down to
play back a disc in reverse.
0 POWER button
Press to turn on and off the main power.
! 6STANBY indicator
Lights when the unit is in standby mode.
@ a button
Press to pause a playback.
# –VOLUME + button
Press to change the sound volume from the unit's
speakers.
1
2
3
4
5
6
7
8
9
0
!
@
#
$
$ M CHANNEL N button
Press to change the TV channels.
% VIDEO 2 IN AUDIO IN L(MONO)/R jacks
These jacks accept the analog audio signals from
a VCR or audio equipment.
^ VIDEO 2 IN VIDEO jack
This jack accepts the video signal from a VCR or
video equipment.
& VIDEO 2 IN S-VIDEO input connector
This connector accepts the s-video signals from a
video equipment.
* PHONES \ jack
Connect headphones with a stereo mini plug.
(
PBC button
Press to turn the Play Back Control function on and
off during a Video CD playback.
) SCREEN OFF button
Press to black out the TV screen. Hold do wn to black
out the display window.
- DISC DIRECT PLAY buttons
Press these buttons(1 to 3) to playback a disc.
These buttons correspond to the three disc tray.
=
TV/VIDEO button
Press to select the TV, VIDEO 1 and VIDEO 2 mode .
[ DISC button
Press to change the disc operation mode.
] DISC CHANGE button
Press to rotate the disc tray when changing a disc.
70
ENGLISH
Page 71

<Rear panel>
9
8
GENERAL
1
2
3
4
5
7
1 Security hook
Use to fix the unit. See page 6.
2 VIDEO 1 INPUT S-VIDEO connector
This connector accepts the s-video signals froma
video equipment.
3 ANTENNA connector
Connect to a TV antenna or CATV system.
4 OUTPUT VIDEO jack
This jack carries the video signal to a video
equipment.
5 OUTPUT R-AUDIO-L jacks
These jacks carry the analog audio signals to an
audio equipment.
6
6 DIGITAL AUDIO OUT(OPTICAL) terminal
This connector carries the digital audio signals
such as DTS or DOLBY DIGIT AL(A C-3) to an audio
equipment.
7 AC cord
Connect this plug to an AC outlet.
8 VIDEO 1 INPUT AUDIO L(MONO)/R jacks
These jacks accept the analog audio signals from
a VCR or audio equipment.
9 VIDEO 1 INPUT VIDEO jack
This jack accepts the video signal from a VCR or
video equipment.
ENGLISH
71
Page 72

For Assistance and Information,
8A-JD1-901-11
000830BMK-Y9
Call Toll Free 1-800-BUY-AIWA
(United States and Puerto Rico)
Printed in Malaysia
Page 73

FRANÇAIS
Avertissement
Pour réduire le risque d’incendie ou d’électrocution,
ne pas exposer cet appareil à la pluie ou à l’humidité.
CAUTION
RISK OF ELECTRIC SHOCK
DO NOT OPEN
“ATTENTION: POUR REDUIRE LE RISQUE
“CAUTION:TO REDUCE THE RISK OF
DE CHOC ELECTRIQUE, NE PAS ENLEVER
DO NOT REMOVE COVER (OR BACK).
CET APPAREIL NE CONTIENT PAS DE
NO USER-SERVICEABLE PARTS INSIDE.
PIECES REPARABLES PAR L’UTILISATEUR.
REFER SERVICING TO QUALIFIED
POUR TOUTE REPARATION, S’ADRESSER
ELECTRIC SHOCK,
LE COUVERCLE (NI LE DOS).
SERVICE PERSONNEL.”
A UNE PERSONNE QUALIFIEE.”
Explication des symboles graphiques :
Un éclair fléché inscrit dans un triangle
équilatéral est destiné à alerter l’utilisateur
de la présence à l’intérieur de l’appareil
d’une “tension dangereuse” non isolée
d’une puissance suffisante pour constituer
un risque d’électrocution pour les
personnes.
Un point d’exclamation inscrit dans un
triangle équilatéral est destiné à avertir
l’utilisateur de la présence d’instructions
d’utilisation (et d’entretien) importantes
dans la documentation fournie avec
l’appareil.
INSTRUCTIONS DE
SECURITE
IMPORTANTES
Veuillez lire attentivement le présent mode d’emploi
dans son intégralité avant de f aire fonctionner l’appareil.
Conservez-le ensuite soigneusement pour toute
référence ultérieure. Vous devez vous conformer
strictement à toutes les mises en garde et à tous les
avertissements figurant sur l’appareil et dans le mode
d’emploi ainsi qu’aux précautions de sécurité précisées
ci-dessous.
Avertissement
Pour prévenir toute décharge électrique ou autre
blessure, conformez-vous aux présentes instructions
de sécurité pendant l’installation, l’utilisation et
l’entretien de cet appareil.
Installation
Fixations - N’utilisez pas de fixations qui ne sont pas
recommandées par le fabricant de l’appareil, car cela
peut résulter en un risque d’incendie, de décharge
électrique ou de blessures.
Eau et humidité - Ne pas utiliser cet appareil près
d’une source d’eau, par exemple, une baignoire, une
cuvette, un évier ou une bassine, ni dans un sous-sol
humide, près d’une piscine, etc.
2
FRANÇAIS
Chaleur - N’utilisez pas cet appareil à proximité de
sources de chaleur et notamment de conduits d’air
chaud, de cuisinières ou de tout autre appareil
générant de la chaleur. Il ne peut pas non plus être
exposé à des températures inférieures à 5°C (41°F)
ou supérieures à 35°C (95°F).
Lieu d’installation - Placez l’appareil sur une surface
plane et de niveau.
Accessoires - Ne placez pas l’appareil sur un chariot,
un support, un trépied, un montant ou une table
instable. L’appareil risque de tomber et de causer de
graves b lessures, voire d’être gr avement endommagé.
Utilisez uniquement les modèles de chariot, de
support, de trépied, de montant ou de table préconisés
par le fabricant ou vendus av ec l’appareil. Le montage
de l’appareil doit être exécuté conformément aux
instructions du fabricant et aux moyens des
accessoires préconisés par celui-ci.
Chariot mobile - Lorsque l’appareil est placé ou
installé sur un support ou dans un chariot, déplacez
l’appareil avec précautions. Les arrêts brutaux, les
forces excessiv es et les surfaces irrégulières risquent
en effet de le faire basculer ou tomber.
AVERTISSEMENT POUR LES CHARIOTS MOBILES
S3126A
Ventilation - L’appareil doit être situé dans un
environnement approprié qui assure une ventilation
périphérique correcte. Laissez un espace dégagé
d’environ 10 cm à l’arrière et au-dessus de l’appareil et
de 5 cm sur les côtés.
Les fentes et les ouvertures pratiquées dans le châssis
ainsi qu’à l’arrière et sur le dessous servent à la
ventilation de l’appareil et à en garantir un
fonctionnement irréprochable en le protégeant contre
toute surchauffe interne. Veillez par conséquent à ne
pas obstruer ni à recouvrir ces ouvertures. Les
ouvertures ne peuvent en aucun cas être obstruées en
plaçant l’appareil sur un lit, un sofa, une couverture ou
sur toute autre surface similaire qui risquerait d’obstruer
les ouïes de ventilation. (Cet appareil ne peut jamais
être placé à côté ou sur un radiateur ou un appareil de
chauffage.) Cet appareil ne peut être installé dans un
meuble encastré comme une bibliothèque, à moins
qu’une bonne ventilation y soit assurée.
Poids et objets lourds
L’appareil doit être déplacé avec précaution par
plusieurs personnes car la répartition des masses en
son sein n’est pas régulière. Ne placez pas l’objets
lourds sur l’appareil.
Pénétration d’objets et de liquides - N’introduisez
aucun objet à l’intérieur de l’appareil par les ouïes de
ventilation parce qu’il risque d’entrer en contact avec
des composants sous haute tension et de courtcircuiter des composants, entraînant ainsi un incendie
ou une décharge électrique.
Ne jamais répandre de liquide sur l’appareil. Ne placez
pas un vase ou tout autre objet contenant de l’eau sur
l’appareil.
Page 74

N
O
S
O
Alimentation
Sources d’alimentation - Faites uniquement
fonctionner cet appareil sur l’une des sources
d’alimentation spécifiées sur l’étiquette signalétique. Si
vous n’êtes pas certain du type de la source
d’alimentation locale, consultez le revendeur de votre
appareil ou votre compagnie de distribution d’électricité.
Pour faire f onctionner l’appareil sur piles ou sur d’autres
sources d’alimentation, reportez-vous au mode
d’emploi.
Mise à la terre ou polarisation - Cet appareil est
équipé d’une fiche d’alimentation à courant alternatif
polarisée (dotée d’une lame plus large que l’autre).
Cette fiche ne peut être introduite que dans un sens
dans la prise murale (secteur). Il s’agit d’une mesure
de sécurité. S’il s’avère difficile d’introduire
complètement la fiche d’alimentation dans la prise
secteur, retournez la fiche et réessayez. Si vous ne
parvenez toujours pas à l’enficher correctement,
demandez à v otre électricien de remplacer votre prise
murale d’un modèle dépassé. Ne tentez pas de
contourner la sécurité de cette fiche polarisée.
Surcharge - Ne posez jamais aucun objet sur le
cordon d’alimentation. Evitez de surcharger les prises
murales et les prolongateurs, car vous risquez de
provoquer un incendie ou une décharge électrique.
Ne placez pas l’appareil dans un endroit où son cordon
risque d’être piétiné.
Antenne externe
Lignes électriques - Un système d’antenne e xtérieure
ne peut être installé à proximité de lignes à haute
tension, de luminaires électriques ou de circuits
d’alimentation, ou encore là où il risque de tomber sur
des lignes électriques ou des circuits d’alimentation.
Lorsque vous installez un système d’antenne
extérieure, veillez tout particulièrement à ne pas entrer
en contact avec de telles lignes électriques ou circuits
d’alimentation, ce qui présente un danger de mort.
Mise à la terre de l’antenne extérieure - Si un
système d’antenne ou un réseau câblé est raccordé à
l’appareil, veillez à ce que le système d’antenne soit
correctement mis à la terre de façon à éviter tout dégât
dû à une crête de tension imprévisible ou à
l’accumulation d’électricité statique. L’article 810 du
code national électrique, ANSI/NFP A n° 70, f ournit des
informations sur la mise à la terre adéquate du mât,
de la structure portante et du fil de terre vers une unité
de décharge de l’antenne, la section des conducteurs
de mise à la terre, l’emplacement de l’unité de
décharge de l’antenne, le raccordement aux
électrodes de mise à la terre et les spécifications des
bornes de mise à la terre. Reportez-vous également
à l’illustration.
Mise à la terre de l’antenne conformément au code national électrique
A
FIL D’ANTENNE
GROUND CLAMP
CONNEXIONS DE
MISE A LA TERRE
BOITIER DE
ELECTRIC
SERVICE
DISTRIBUTION
EQUIPMENT
ELECTRIQUE
ELECTRODES DE MISE A LA
TERRE (ART. 250, SECTION H
NEC)
CODE NATIONAL ELECTRIQUE (NEC)
UNITE DE DECHARGE
D’ANTENNE
(SECTION 810-20 NEC)
CONDUCTEURS DE
MISE A LA TERR
(SECTION 810-21 NEC)
CONNEXIONS DE
GR
MISE A LA TERRE
POWER
ELECTR
Foudre
Par mesure de sécurité supplémentaire, durant les
orages accompagnés de foudre ou lorsque vous
prévoyez de ne pas utiliser l’appareil pendant une
période prolongée, débranchez-le de la prise murale
et déconnectez l’antenne ou le câble de
télédistribution. L’appareil ne risquera pas d’être
endommagé par la foudre ou des pointes d’énergie.
Entretien
Nettoyage - Débranchez l’appareil de la prise murale
avant de procéder à son nettoyage. N’utilisez pas de
nettoyants liquides ou en aérosol. Utilisez un chiffon
légèrement humide.
En cas de panne
Débranchez l’appareil de la prise murale et faites-le
contrôler par un technicien d’entretien qualifié si:
1) Le cordon ou la fiche d’alimentation est
endommagé ou effiloché ;
2) Un liquide a été renversé sur l’appareil ;
3) L’appareil a été e xposé à la pluie ou à l’humidité ;
4) L’appareil semble ne pas fonctionner
normalement lorsque vous appliquez les
instructions d’utilisation. Ajustez uniquement les
commandes décrites dans le mode d’emploi, car
un réglage incorrect d’autres commandes peut
causer des dommages à l’appareil qui
nécessiteront généralement une intervention en
profondeur d’un technicien d’entretien qualifié
pour restaurer ses conditions de fonctionnement
normales ;
5) L’appareil est tombé ou si châssis a été
endommagé ;
6) Les performances de l’appareil se sont
sensiblement modifiées- indiquant par là la
nécessité d’un entretien.
Ne tentez pas de réparer l’appareil vous-même, car
une ouverture du châssis ou la dépose des couvercles
risque de vous exposer à des tensions élevées ou à
d’autres risques. Pour toute réparation faites appel à
un professionnel.
FRANÇAIS
3
Page 75

Pièces de rechange - Lorsque des pièces de
rechange sont indispensables, assurez-vous que le
technicien utilise effectivement les pièces de rechange
spécifiées par le fabricant ou présentant les mêmes
spécifications que les pièces d’origine. Toute
substitution non autorisée peut entraîner un risque
d’incendie, de décharge électrique ou tout autre
danger.
Contrôle de sécurité - A l’issue de toute intervention
d’entretien ou de réparation de l’appareil, demandez
au technicien d’exécuter les contrôles de sécurité pour
déterminer si l’appareil présente les conditions
d’utilisation prescrites.
Remarque pour l’installateur du système CATV:
La présente remarque est destinée à attirer l’attention
des installateurs des systèmes CA TV sur l’article 82040 du NEC qui stipule les instructions relatives à une
mise à la terre adéquate. Il prévoit plus
particulièrement que le câble de mise à la terre doit
être raccordé au circuit de terre du bâtiment aussi près
que possible de l’entrée du câble.
REMARQUE
Cet appareil a été testé et jugé conforme aux normes
des appareils numériques de Classe B, conformément
au chapitre 15 du règlement FCC. Ces normes sont
conçues pour assurer une protection raisonnable
contre les interférences radioélectriques lorsque
l’appareil est utilisé dans un environnement résidentiel.
Cet appareil génère, utilise et peut émettre des
radiofréquences et, s’il n’est pas installé et utilisé
conformément au mode d’emploi, il peut provoquer
des interférences dans les communications radio. Il
n’est cependant pas possible de garantir que des
interférences ne se produiront pas dans une
installation privée. Si cet appareil génère des
interférences néfastes dans la réception des ondes
radio ou télévisées, ce que l’on peut facilement
contrôler en mettant l’appareil successivement sous
et hors tension, l’utilisateur est invité à tenter de
remédier aux interférences en appliquant l’une des
mesures suivantes:
-Réorientez ou installez l’antenne de réception à
un autre endroit.
- Eloignez davantage l’appareil du récepteur.
- Branchez l’appareil sur une prise secteur
raccordée à un circuit d’alimentation différent de
la prise sur laquelle le récepteur est branché.
- Consultez votre revendeur ou faites appel à un
technicien radio/TV.
ATTENTION
T oute modification ou tout réglage de cet appareil non
expressément approuvé par le fabricant peut invalider
le droit de l’utilisateur à employer cet appareil.
REFERENCES UTILISATEUR
Pour votre facilité, inscrivez la désignation du
modèle et le numéro de série de cet appareil (qui
se trouvent à l’arrière) dans les cases ci-dessous.
Signalez ces références lorsque vous prenez
contact avec votre revendeur Aiwa en cas de
problème.
Numéro du modèle
Principales
caractéristiques de ce
téléviseur
Puce V
V ous pouvez programmer une limite d’âge afin
d’éviter que des enfants ne regardent ou
n’entendent des scènes de violence et des
programmes pour adultes. Cet appareil est
conforme aux classifications “TV-RATING”
(CLASS. PROG. TV) et “MPAA RATING”
(CLASS. FILM.).
Amélioration vidéo
Cet appareil offre 4 modes d’amélioration de
la vidéo: NORMAL, CINEMA, GAME et
SOMBRE.
Amélioration du son
Cet appareil offre 3 modes d’amélioration du
son: SUPER BASS, Q SURROUND et BBE.
Diffusion MTS (son télévisé
multi-canal)
V ous pouvez rece voir les émissions télévisées
en stéréo et bilingues diffusées aux États-Unis.
Sous-titres
Les sous-titres peuvent être affichés sur l’écran
lorsque vous captez une émission compatible.
DVD
Échangeur DVD intégré
Cet appareil fournit une toute nouvelle
dimension en matière de programmes vidéo.
Fonction multilingue*
V ous a vez le choix entre 8 langues différentes
pour la bande sonore et entre 32 langues
différentes pour les sous-titres.
Fonction multi-angle*
Vous avez le choix entre différentes prises de
vues pour des scènes tournées à partir de
plusieurs angles différents et enregistrées sur
le disque.
Fonction de contrôle parental*
Vous pouvez empêcher la lecture de certains
disques spécifiques ne convenant pas à un
certain public.
(* Toutes ces fonctions sont liées au logiciel du
DVD.)
Compatibilité avec des CD audio, vidéo et des
DVD.
Numéro de série
4
FRANÇAIS
Page 76

TABLE DES MATIÈRES
Préparation
Raccordement de l’antenne.....................................6
Raccordement d’un CATV .......................................7
Raccordement d’un magnétoscope .........................8
Raccordement d’une caméra vidéo ou d’une console
de jeux ..................................................................9
Raccordements audio facultatifs ...........................10
Raccordements de base .............................................. 10
Raccordement à un système Dolby Pro Logic
Surround ................................................................... 11
Raccordement à un décodeur bénéficiant d’un traitement
Dolby Digital (AC-3) ou DTS..................................... 12
Avant de procéder .................................................13
Installation des piles ..................................................... 13
Utilisation de la télécommande .................................... 13
Mise sous tension......................................................... 13
Volume ......................................................................... 13
Utilisation des casques................................................. 13
Fonctionnement du téléviseur
Sélection de la langue ...........................................14
Réglage des chaînes .............................................15
Ajout ou retrait manuel de chaînes............................... 16
Regarder une émission télévisee ..........................17
Sélection du mode MTS ........................................18
Sélection du mode de sous-titres ..........................19
Sélection du mode AV ...........................................20
Réglage de l’image ................................................21
Réglage du son .....................................................22
Effets sonores spéciaux ............................................... 23
Réglage de la puce V ............................................24
Enregistrement du mot de passe ................................. 24
Réglage de V chip ........................................................ 25
Modification du mot de passe....................................... 27
Enregistrement d’un nom de chaîne......................28
Affichage à l’écran........................................................ 29
Regarder un film vidéo ou autre ............................30
Réglage du programmateur de veille ....................31
Fonctionnement des disques
Avant d’utiliser cet appareil....................................32
Fonctionnement de base .......................................34
Lecture répétée .....................................................39
Lecture programmée /aléatoire .............................41
Modification des informations d’affichage..............43
Marquage et recherche .........................................46
Fonctions DVD spéciales ......................................49
Sélection du Karaoke ............................................52
Personnalisation des réglages DVD
Présentation du menu Setup .................................53
Opérations de base ...............................................54
Menu sur écran......................................................54
Langue du Disque .................................................55
Réglage Sortie Audio.............................................57
Format TV..............................................................59
Classification .........................................................60
PBC .......................................................................61
Reprise du Disque .................................................61
Codes internationaux.............................................62
Codes de langue ...................................................64
Informations d’ordre général
Entretien ................................................................65
Dépannage ............................................................66
Spécifications ........................................................67
Composants et commandes ..................................68
FRANÇAIS
5
Page 77

RACCORDEMENT DE L’ANTENNE
Câble coaxial
de 75-ohm
(non fourni)
1
Vers le connecteur ANTENNA
Cordon
d’alimentation
secteur
1
Raccordez le câble d’antenne au connecteur ANTENNA téléviseur.
Si le câble est un câble coaxial rond de 75 ohms, raccordez-le directement au connecteur ANTENNA.
S’il s’agit d’un câble bifilaire plat de 300 ohms, raccordez-le à l’adaptateur d’antenne fourni et branchez
l’adaptateur sur le connecteur ANTENNA.
2
Raccordez le cordon d’alimentation secteur à une prise murale.
Pour éviter que l’appareil ne tombe, notamment en cas de tremblement de terre, etc.,
Fixez-le sur un mur ou une colonne à l’aide du crochet de sécurité situé sur le panneau arrière, en utilisant un câble
ou un fil métallique extrêmement solide.
Vers une prise
2
murale (secteur)
Câble bifilaire de
300-ohm
(non fourni)
Adaptateur
d’antenne (fourni)
Cordon
d’alimentation
secteur
6
FRANÇAIS
Crochet de
sécurité
Câble ou fil
métallique
solide
(non fourni)
Page 78

RACCORDEMENT D’UN CATV
Pour raccorder un système CATV sans utiliser de convertisseur CATV
Système CA TV
Câble coaxial de
75-ohm
1
Vers le connecteur
ANTENNA
Vers une prise
2
murale (secteur)
1
Raccordez le câble du système CATV au connecteur ANTENNA du téléviseur.
2
Raccordez le cordon d’alimentation secteur à une prise murale.
(non fourni)
PRÉPARATION
Pour raccorder un système CATV avec un convertisseur CATV
Système CATV
Câble coaxial
de 75-ohm
(non fourni)
1
Convertisseur CATV
(non fourni)
2
Vers une
3
prise murale
(secteur)
1
Raccordez le câble du système CATV au connecteur d’entré du convertisseur CATV.
2
Raccordez le connecteur de sortie du convertisseur au connecteur ANTENNA du téléviseur.
3
Raccordez le cordon d’alimentation secteur à une prise murale.
Vers le connecteur
ANTENNA
Câble coaxial de 75-ohm
(non fourni)
FRANÇAIS
7
Page 79

RACCORDEMENT D’UN MAGNÉTOSCOPE
Vers le connecteur
ANTENNA
Vers le connecteur
de sortie
d’antenne
1
Vers le connecteur
d’entrée d’antenne
2
Câble coaxial de 75-ohm
Jaune
Vers les prises VIDEO
1 INPUT AUDIO L
(MONO)/R
1
Déconnectez le câble d’antenne du téléviseur et branchez-le sur le connecteur d’entrée
Rouge
Blanc
Vers la prise VIDEO 1
INPUT VIDEO
(non fourni)
Câble audio/vidéo
(non fourni)
d’antenne du magnétoscope.
2
Raccordez le connecteur ANTENNA de cet appareil au connecteur de sortie d’antenne
du magnétoscope à l’aide du câble en option.
Vous pouvez raccorder cet appareil au magnétoscope avec le câble audio/vidéo en option.
Pour obtenir plus de détails sur le raccordement du magnétoscope à l’appareil, consultez le mode d’emploi du
magnétoscope.
Vers les prises de
sortie audio/vidéo
3
Raccordez le cordon d’alimentation secteur à une prise murale.
Pour regarder des films vidéo
Reportez-vous à la section “Regarder un film vidéo ou autre”, page 30.
Suggestions
•Si le magnétoscope est de type monophonique, connectez uniquement l’une des fiches audio à la prise AUDIO L
(MONO).
•Si le magnétoscope est doté d’une prise de sortie S-video, vous pouv ez r accorder le câble S-video en option à la
prise S-video du magnétoscope et à la prise VIDEO 1 INPUT S-VIDEO du téléviseur. Dans ce cas, il n’est pas
nécessaire que vous connectiez le câble sur la prise VIDEO.
Remarque
Ce téléviseur dispose de la fonction de protection anti-copie développée par Macrovision.
•Des signaux de protection anti-copie sont inclus sur certains disques DVD ou VCD. Si vous enregistrez de tels
disques sur un magnétoscope, des parasites visuels apparaîtront lors de l’enregistrement ou de la lecture.
•Si vous raccordez un projecteur vidéo ou un amplificateur A V à cet appareil, connectez-les directement à la prise
OUTPUT VIDEO de cet appareil.
8
FRANÇAIS
Page 80

RACCORDEMENT D’UNE CAMÉRA VIDÉO OU D’UNE CONSOLE DE JEUX
Il est pratique d’utiliser les prises VIDEO 2 IN AUDIO IN L (MONO)/R/VIDEO situées à l’avant du téléviseur.
Remarque
Mettez la caméra ou la console hors tension avant de brancher ou de débrancher leur cordon d’alimentation.
PRÉPARATION
Vers la prise
VIDEO 2 IN
VIDEO
Jaune
Blanc
Câble audio/vidéo
(non fourni)
Caméra vidéo (lecteur)
Vers les prises VIDEO 2
IN AUDIO IN L (MONO)/R
Rouge
Vers les prises
de sortie audio/
vidéo
ou
console de jeux
Pour regarder un film provenant d’une caméra vidéo ou d’une console de jeux
Reportez-vous à la section “Regarder un film vidéo ou autre”, page 30.
Suggestion
Si un autre appareil est doté d’une prise de sor tie S-video, vous pouvez raccorder le câble S-video en option à la
prise S-video et à la prise VIDEO 2 IN S-VIDEO de cet appareil. Dans ce cas, il n’est pas nécessaire que vous
connectiez le câble sur la prise VIDEO.
FRANÇAIS
9
Page 81

RACCORDEMENTS AUDIO FACULTATIFS
Raccordements de base
Cette connexion améliore la qualité de l’image et du son.
Remarque
Lorsque vous raccordez ce téléviseur à un autre équipement, veillez à bien mettre ce dernier hors tension et à
débrancher tous ses câbles de la prise secteur avant d’effectuer les raccordements.
Raccordez les prises OUTPUT R-AUDIO-L du téléviseur aux prises d’entrée audio de la chaîne stéréo au
moyen du câble audio en option.
Veuillez également vous reporter au mode d’emploi de votre chaîne stéréo.
Vers les prises
OUTPUT R-AUDIO-L
Rouge
Blanc
Câble audio
(non fourni)
Vers les prises d’entrée audio
Chaîne stéréo
10
FRANÇAIS
Page 82

Raccordement à un système Dolby Pro Logic Surround
Lors de la lecture de disques DVD, v ous pouvez profiter des a vantages d’un son d’ambiance en v ous connectant à
un récepteur AV doté d’un décodeur Dolby Pro Logic.
Raccordez les prises OUTPUT R-AUDIO-L du téléviseur aux prises d’entrée audio du récepteur au moyen
du câble audio en option.
Veuillez également vous reporter au mode d’emploi de votre récepteur A V. (Certains récepteurs AV doivent
changer les réglages)
Remarque
Lorsque vous raccordez ce téléviseur à un autre équipement, veillez à bien mettre ce dernier hors tension et à
débrancher tous ses câbles de la prise secteur avant d’effectuer les raccordements.
Vers les prises
OUTPUT R-AUDIO-L
BlancRouge
PRÉPARATION
Vers les prises
d’entrée audio
Haut-parleur avant (gauche)
Haut-parleur arrière
(son d’ambiance de gauche)
Haut-parleur central
Procédez aux réglages nécessaires une fois les
raccordements effectués.
Réglez le paramètre de sortie audio “Réglage Sor tie
Audio” du menu Setup comme il convient, en vous
reportant aux informations suivantes.
Lisez attentivement la section “Personnalisation des
réglages DVD” (page 53).
Câble audio (non fourni)
Récepteur équipé de Dolby Pro
Logic Surround
Haut-parleur avant (droit)
Haut-parleur arrière
(son d’ambiance de droite)
Réglage Sortie Audio
Sortie numérique: MIC mixage aval
Sortie DTS: ARRET
Type de Mixage aval: Mode Surround
FRANÇAIS
11
Page 83

RACCORDEMENTS AUDIO FACULTATIFS (SUITE)
Raccordement à un décodeur bénéficiant d’un traitement Dolby Digital(AC-3) ou DTS
V ous pouvez bénéficier d’un son réaliste de qualité tridimensionnelle lors de la lecture de disques DVD enregistrés
en mode Dolby Digital Surround ou DTS Surround, en vous connectant à un récepteur AV doté d’un décodeur
Dolby Digital(AC-3) ou DTS.
Raccordez le terminal de sortie audio numérique DIGITAL AUDIO OUT (OPTICAL) de cet appareil à l’entrée
numérique du récepteur AV au moyen du câble optique en option.Veuillez également vous reporter au mode
d’emploi de votre récepteur AV.
Remarque
Lorsque vous raccordez ce téléviseur à un autre équipement, veillez à bien mettre l’appareil hors tension et à
débrancher tous les câbles de la prise secteur avant d’effectuer les raccordements.
Retirez le capuchon anti-poussières,
puis gardez-le
Vers une prise murale
(secteur)
Ampli-tuner doté d’un décodeur
DTS ou Dolby Digital (AC-3)
Haut-parleur avant (gauche)
Haut-parleur central
Haut-parleur arrière (gauche)
Procédez aux réglages nécessaires une fois les
raccordements effectués.
Réglez le paramètre de sortie audio “Réglage Sortie
Audio” du menu Setup comme il convient, en vous
reportant aux informations suivantes.
Lisez attentivement la section “Personnalisation des
réglages DVD” (page 53).
Réglage Sortie Audio pour le mode Dolby Digital
(AC-3)
Sortie numérique: DOLBY DIGITAL
Sortie DTS: ARRET
Type de Mixage aval: Mode Surround
12
FRANÇAIS
Vers DIGITAL AUDIO OUT (OPTICAL)
Câble optique (non fourni)
Haut-parleur de graves
Vers l’entrée
audio
numérique
Haut-parleur avant (droit)
Haut-parleur arrière (droit)
Réglage Sortie Audio pour le mode DTS
Sortie numérique: MIC mixage aval
Sortie DTS: MARCHE
Type de Mixage aval: Mode Surround
ATTENTION
Si le récepteur AV n’est pas doté d’un décodeur DOLBY
DIGITAL ou DTS, ne sélectionnez pas l’option “DOLBY
DIGITAL” ou “DTS” pour le réglage “Réglage Sortie
” lorsque vous raccordez le récepteur AV au
Audio
moyen d’un câble optique. Le simple fait d’essayer de
lire un disque DVD risque d’engendrer un volume élevé,
susceptible d’irriter vos tympans et d’endommager les
haut-parleurs. Dans ce cas, veillez à bien sélectionner
l’option “MIC mixage aval”.
Page 84

AVANT DE PROCÉDER
Installation des piles
Attention
Pour éviter tout dommage résultant d’une fuite des piles
ou d’une explosion, conformez-vous aux instructions
suivantes.
•Introduisez les deux piles R03 (AAA) fournies en
faisant correspondre les pôles 0 et 9 comme illustré.
•Ne mélangez pas une pile neuve et une pile usagée
ou des piles de types différents.
•Ne jetez pas les piles au feu, ne les soumettez pas à
de fortes chaleurs et ne les démontez pas.
•Ne transportez pas les piles avec des clés ou d’autres
objets métalliques.
Remarque
Retirez les piles lorsqu’elles sont épuisées ou si vous
prévoyez de ne pas utiliser la télécommande pendant
une période prolongée.
Utilisation de la télécommande
Dirigez la télécommande vers le capteur de
télécommande.
Fenêtre d’affichage
•L’utilisation d’un téléviseur employant le même type
de télécommande infrarouge et orienté dans la même
direction peut entraîner un fonctionnement incorrect.
•La portée de commande efficace maximale entre la
télécommande et le capteur de télécommande est de
7 mètres.
•Bien que vous puissiez utiliser la télécommande dans
un angle de 30 degrés dans quelque direction que ce
soit de l’avant du capteur de télécommande, nous
conseillons un angle plus réduit de manière à assurer
un fonctionnement plus efficace.
Mise sous tension
1 Appuyez sur la touche POWER de cet appareil
lorsque vous raccordez le cordon d’alimentation
à la prise secteur pour la première fois.
L’indicateur 6STANDBY s’allume.
2 Appuyez sur la touche POWER de la télécom-
mande pour mettre le téléviseur sous tension.
L’indicateur 6STANDBY s’éteint et la fonction du
téléviseur fonctionne au début. Dans la fenêtre
d’affichage, la mention “TV” apparaît.
Pour mettre l’appareil hors tension
Appuyez sur la touche POWER de la télécommande.
L’indicateur 6STANDBY s’allume.
Si vous appuyez sur la touche POWER du téléviseur,
l’alimentation principale est mise hors tension et la
télécommande ne peut plus fonctionner.
Remarque
Si vous appuyez sur la touche POWER pour mettre
l’alimentation hors tension à partir du mode DISC, 10
secondes peuvent s’écouler avant que cette action
prenne effet.
PRÉPARATION
Capteur de
télécommande
Remarques
•Il se peut que la télécommande soit inopérante
lorsqu’il y a un obstacle entre la télécommande et le
capteur de télécommande.
•De puissantes sources lumineuses comme une lampe
fluorescente ou le rayonnement direct du soleil
peuvent perturber le bon fonctionnement de la
télécommande.
7m
30˚ 30˚
(23 pieds)
Fonction de lecture directe
Appuyez sur l’une des touches de fonction (ex.PLAY,
CHANNEL) lorsque l’indicateur 6STANDBY s’allume
(le téléviseur est hors tension).
La lecture du disque inséré commence ou vous recev ez
la chaîne de télévision préalablement réglée.
VOLUME
Appuyez sur la touche VOLUME + ou – de la
télécommande ou du téléviseur. Le niveau du volume
s’affiche sous la forme d’un chiffre compris entre 0 et
MAX (63) à l’écran et dans la fenêtre d’affichage.
Utilisation des casques
Raccordez les casques à la prise PHONES\ au moyen
d’une minifiche stéréo.
Aucun son ne provient des haut-parleurs lorsque le
casque est branché.
FRANÇAIS
13
Page 85

SÉLECTION DE LA LANGUE
REGLAGE
LANGUE
ANTENNE
RECHERCHE AUTOMAT IQUE
AJOUTE/E F F ACE
NOM DU CA N A L
: FRANÇAIS
: CABLE
CHANGER : –/
+
CH O I S I R :
F I N : MENU
Les écrans de menu peuvent être affichés dans l’une des trois langues suivantes : Anglais, Espagnol ou F rançais.
Remarque
Cet écran de menu n’agit que sur le fonctionnement du téléviseur . Lorsque vous regardez des DVD (VCDs) ou que
vous écoutez des CD, l’écran de menu ne peut être affiché qu’en anglais.
1
Appuyez sur la touche POWER de la
télécommande pour mettre le téléviseur
sous tension.
Vous pouvez également mettre cet appareil sous
tension en utilisant la touche CHANNEL N ou
M.
2
Appuyez sur TV MENU.
3
Appuyez sur CHANNEL N ou M pour
sélectionner SETUP, puis appuyez sur TV
ENTER.
L’option sélectionnée est affichée en rouge.
MENU
P CTURE
I
SOUND
SETUP
V CHI P
/
OK : ENTERSELECT:
EX T : MENUI
POWER
TV MENU
CHANNEL
M/N
TV ENTER
VOLUME –/+
TV MENU
14
FRANÇAIS
CHANNEL
N/M
TV ENTER
VOLUME +/–
4
Appuyez sur VOLUME + ou – pour
afficher la langue voulue.
Chaque fois que vous appuyez sur cette touche , la
langue d’affichage change.
5
Appuyez sur TV MENU pour revenir à
l’écran normal.
Page 86

RÉGLAGE DES CHAÎNES
Avant la recherche automatique, ce magnétoscope peut recevoir l’ensemble des chaînes disponibles dans votre
zone géographique en appuyant plusieurs fois de suite sur la touche CHANNEL N/M. Une fois la recherche
automatique effectuée, vous pouvez ignorer les chaînes qui ne sont pas présélectionnées à l’aide des touches
CHANNEL N/M.
Avant de commencer
Assurez-vous que cet appareil est en mode TV. “TV”
apparaît dans la fenêtre d’affichage lorsque l’appareil
est en mode TV.
1
Appuyez sur TV MENU.
2
Appuyez sur CHANNEL N ou M pour
sélectionner REGLAGE, puis appuyez
sur TV ENTER.
L’option sélectionnée est affichée en rouge.
MENU
MAGE
I
SON
REGLAGE
V CH I P
CHO I SIR :
3
Appuyez sur CHANNEL N ou M pour
OK : ENTER
F I N : MENU
sélectionner ANTENNE, puis appuyez
sur VOLUME + ou – pour sélectionner
CABLE ou TV.
CABLE : système CATV en fonction des
connexions au connecteur ANTENNA
TV : le programme transmis par l’antenne
VHF/UHF.
4
Appuyez sur CHANNEL N ou M
pour sélectionner RECHERCHE
AUTOMATIQUE, puis appuyez sur TV
ENTER.
Toutes les chaînes disponibles dans votre région
sont numérisées et stockées dans la mémoire du
téléviseur.
Après numérisation, la première chaîne trouvée
s’affiche à l’écran.
REGLAGE
LANGUE
ANTENNE
RECHERCHE AUTOMAT IQUE
AJOUTE/E F F ACE
NOM DU CA N AL
CH O I S I R :
RECHERCHE AUTOMATIQUE
: FRANÇAIS
: CABLE
OK : ENTER
FIN : MENU
RECHERCHE
CABLE1 2 5
F I N : MENU
FONCTIONNEMENT DU TÉLÉVISEUR
REGLAGE
LANGUE
ANTENNE
RECHERCHE AUTOMAT IQUE
AJOUTE/E F F ACE
NOM DU CA N AL
CH O I S I R :
CHANGER : –/
: FRANÇAIS
: CABLE
+
FIN : MENU
Suggestion
Pour interrompre la recherche automatique, appuyez
sur la touche TV MENU.
Remarque
Une fois que vous lancez la fonction de recherche
automatique, les réglages précédents sont effacés.
FRANÇAIS
15
Page 87

RÉGLAGE DES CHAÎNES (SUITE)
AJOUTE/EFFACE
CABLE125
AJOUTE/EFFACE
: AJOUTE
CHANGER : –/
+
CHOI S I R :
F I N : MENU
Ajout ou retrait manuel de chaînes
Si la recherche automatique ne règle pas correctement les chaînes, ajoutez-les manuellement afin de pouvoir
regarder des émissions télévisées. V ous pouvez également supprimer les chaînes superflues.
5
1
Sélectionnez le numéro de la chaîne à
effacer ou à ajouter grâce aux touches
numériques de la télécommande.
Appuyez sur les touches comme indiqué ci-dessous :
Exemple
Pour sélectionner la chaîne 7, appuyez sur 0 puis
sur 7.
Pour la chaîne 77, appuyez sur 7 puis sur 7.
Pour la chaîne 107, appuyez sur +100, sur 0 puis
sur 7.
2
Appuyez sur TV MENU.
3
Appuyez sur CHANNEL N ou M pour
sélectionner REGLAGE, puis appuyez
sur TV ENTER.
4
Appuyez sur CHANNEL N ou M pour
sélectionner AJOUTE/EFFACE puis
appuyez sur TV ENTER.
REGLAGE
LANGUE
ANTENNE
RECHERCHE AUTOMAT IQUE
AJOUTE/E F F ACE
NOM DU CA N AL
CHOISIR :
: FRANÇAIS
: CABLE
OK : ENTER
F I N : MENU
Appuyez sur VOLUME + ou – pour
supprimer ou ajouter la chaîne
sélectionnée.
• Lorsque le canal sélectionné est déjà réglé,
AJOUTE apparaît. S’il n’est pas réglé, EFFEACE
apparaît.
• Lors de l’ajout ou de la suppression de chaînes,
l’image ne change pas tant que vous n’avez pas
changé de chaîne à l’écran.
6
Si vous souhaitez supprimer ou ajouter
une autre chaîne, appuyez sur la touche
CHANNEL N ou M pour sélectionner
CABLE (ou TV) puis appuyez sur
VOLUME + ou – pour sélectionner le
numéro de la chaîne à supprimer ou
ajouter. Appuyez sur CHANNEL N ou
M pour sélectionner AJOUTE/EFFACE,
puis appuyez sur VOLUME + or – pour
procéder à la suppression ou à l’ajout.
16
FRANÇAIS
7
Appuyez sur TV MENU pour revenir à
l’écran normal.
Page 88

POWER
Touches
numériques
TV MENU
VOLUME +/–
REGARDER UNE ÉMISSION TÉLÉVISEE
1
Appuyez sur la touche POWER de la
télécommande pour mettre le téléviseur
sous tension.
Si le bouton POWER de cet appareil n’est pas
enclenché, la télécommande ne fonctionne pas.
2
Appuyez plusieurs fois sur CHANNEL
N ou M ou sur les touches
numériques pour sélectionner le
numéro de chaîne approprié.
Si vous utilisez les touches numériques, appuyez
SCREEN OFF
PREV. CH
MUTE
TV ENTER
CHANNEL
N/M
dessus comme indiqué ci-dessous :
Exemple
Pour la chaîne 7, appuyez sur 0 puis sur 7.
Pour la chaîne 77, appuyez sur 7 puis sur 7.
Pour la chaîne 107, appuyez sur +100, sur 0 puis
sur 7.
3
Appuyez sur VOLUME + ou – pour régler
le volume.
Pour couper le son
Appuyez sur MUTE. La mention “MUTE” s’affiche
pendant quelques secondes.
Pour rétablir le volume, appuyez sur MUTE ou sur
VOLUME + ou –.
FONCTIONNEMENT DU TÉLÉVISEUR
SCREEN
Pour éteindre l’écran du téléviseur
Appuyez sur SCREEN ou SCREEN OFF pour éteindre
l’écran du téléviseur. SCREEN OFF s’allume en vert
sur l’unité principale.
Pour revenir à l’écran normal, appuyez à nouveau sur
SCREEN ou SCREEN OFF.
Pour noircir la fenêtre d’affichage
Maintenez la touche SCREEN OFF enfoncée (environ
5 secondes) sur l’unité principale jusqu’à ce que la
fenêtre d’affichage devienne noire.
Pour revenir en mode normal, maintenez la touche
SCREEN OFF enfoncée jusqu’à ce que la fenêtre
d’affichage redevienne normale.
Pour revenir à une chaîne précédente
Appuyez sur PREV. CH pour passer de la chaîne en
cours à la chaîne précédente.
Remarque
Le téléviseur passe automatiquement en mode de veille
environ 15 minutes après qu’une chaîne de télévision
a cessé de diffuser des émissions.
FRANÇAIS
17
Page 89

SÉLECTION DU MODE MTS
MONO/SAP
CAPTION AUDIO
SELECT
Ce téléviseur est équipé du système MTS (Multichannel TV Sound : son télévisé multi-canal) qui permet
d’améliorer sensiblement ses performances en vous
offrant des émissions offrant un son en stéréo de haute
fidélité. Le mode MTS offre également une chaîne
supplémentaire appelée SAP (Second Audio Program
: émission audio secondaire) pouvant être utilisée pour
transmettre une deuxième langue pour des émissions
bilingues ou pour d’autres bandes sonores.
Lorsque vous changez de chaîne, l’un des messages
suivants s’affiche dans l’angle supérieur droit de l’écran,
selon le type d’émission concerné.
Émission en stéréo: la mention STEREO
s’affiche en jaune.
Émission en stéréo/SAP: la mention STEREO/
SAP s’affiche en jaune et
rouge.
Émission SAP: la mention SAP s’affiche
en rouge.
Émission monophonique : Aucune mention ne
s’affiche.
Appuyez plusieurs fois sur AUDIO SELECT
pour sélectionner le mode MTS.
L’affichage change de la façon suivante:
MONO STEREO SAP MONO/SAP
Remarque
Lorsque vous appuyez sur A UDIO SELECT, les options
pouvant être sélectionnées s’affichent en vert et celles
ne pouvant pas l’être s’affichent en rouge en fonction
du type de diffusion sélectionné.
18
FRANÇAIS
Page 90

SÉLECTION DU MODE DE SOUS-TITRES
Ce téléviseur peut décoder et afficher les sous-titres
d’émissions télévisées.
Appuyez plusieurs fois sur CAPTION pour
sélectionner le mode de sous-titre.
CAPTION 1
L’affichage change de la façon suivante:
CAPTION NON
TEXT 1 CAPTION 2TEXT 2
Sous-titres:
Ce mode de sous-titres affiche à l’écran un texte en
Anglais ou dans une autre langue. En général les
sous-titres en Anglais sont transmis via le mode
CAPTION 1 et les sous-titres dans une autre langue
via CAPTION 2.
Texte plein écran:
Le mode de sous-titre de texte TEXT 1 ou TEXT 2
remplit en général l’écran avec un menu de
programmation ou d’autres informations.
CAPTION 1
Remarques
•Une fois sélectionné, le mode de sous-titres reste
activé jusqu’à ce qu’il soit modifié, même si vous
changez de chaîne.
•Si le signal de sous-titres est perdu à cause d’une
publicité ou d’une interruption du signal, les sous-titres
réapparaîtront dès que le signal est rétabli.
•Lorsque vous sélectionnez les sous-titres, il peut
arriver que leur affichage soit brièvement décalé dans
le temps.
•Si vous changez de chaîne, l’affichage des sous-titres
pourra être brièvement décalé dans le temps.
•Si vous utilisez une antenne intérieure ou si la
réception télévisée est de qualité médiocre, il se peut
que le texte du décodeur de sous-titre n’apparaisse
pas. Dans ce cas , ajustez l’antenne pour optimiser la
qualité de la réception ou utilisez une antenne
extérieure.
•
Lorsque vous activez le décodeur de sous-titres, un
léger décalage se produira avant que les sous-titres
apparaissent à l’écran.
•
Les sous-titres apparaissent à l’écran là où ils
interfèrent le moins avec l’image, généralement au
bas de l’écran. Les émissions d’inf ormations affichent
généralement trois lignes de sous-titres qui défilent à
l’écran.
•
La plupart des autres émissions affichent deux ou trois
lignes de sous-titres situées à proximité de la
personne en train de parler afin que le téléspectateur
puisse suivre la conversation.
•Si aucun signal de sous-titres n’est reçu, aucun soustitre n’apparaît mais le téléviseur reste malgré tout en
mode de sous-titres.
•Des fautes de frappe ou des caractères anormaux
peuvent occasionnellement apparaître dans les soustitres. Ceci est normal dans le cas des sous-titres
tapés en direct car ces transmissions ne laissent pas
suffisamment de temps pour les corrections.
•Certains systèmes de télédistribution ou de protection
anti-copie peuvent interférer avec le signal de soustitres.
•Les mots en italique ou soulignés indiquent des titres,
des mots en langue étrangère ou encore des mots
requérant une certaine emphase. Le texte chanté
apparaît généralement accompagné de notes de
musique.
•Les émissions de télévision diffusées avec des soustitres sont signalées par le symbole CC dans votre
guide des programmes télévisés.
FONCTIONNEMENT DU TÉLÉVISEUR
FRANÇAIS
19
Page 91

SÉLECTION DU MODE AV
NORMAL
AV MODE
TV MENU TV ENTER
Cet appareil offre 4 modes d’amélioration de la vidéo.
NORMAL:Réglage habituel.
CINEMA:Réglage conseillé pour les films.
GAME:Réglage permettant de réduire la fatigue
des yeux.
SOMBRE:Réglage permettant d’assombrir le décor.
VOLUME
+/–
CHANNEL
N/M
Appuyez plusieurs fois de suite sur AV
MODE pour sélectionner le mode AV.
L’affichage change de la façon suivante:
NORMAL CINEMA GAME SOMBRE
Remarque
Même si vous modifiez le mode AV, la qualité du son
reste la même.
20
FRANÇAIS
Page 92

RÉGLAGE DE L’IMAGE
Vous pouvez ajuster les réglages de l’image pour
chaque mode AV.
1
Appuyez sur TV MENU.
2
Appuyez sur CHANNEL N ou M pour
sélectionner IMAGE puis appuyez sur TV
ENTER.
MENU
MAGEI
SON
REGLAGE
V CH I P
CHOI SIR :
3
Appuyez sur CHANNEL N ou M pour
sélectionner la première ligne puis
appuyez sur VOLUME + ou – pour
sélectionner le mode AV à régler.
SOMBRE
CLA R
I
CONTRASTE
NET
COUL E U R
TE INTE
RE I N I T IA L I S E R
CHOISIR :
CHANGER : –/
OK : ENTER
F I N : MENU
+
F I N : MENU
5
Appuyez sur VOLUME + ou – pour régler
le paramètre sélectionné.
Paramètre
CLAIR
CONTRASTE
NET
COULEUR
Paramètre
TEINTE
ADJUSTER
Une
diminution du
réglage
assombrit
l’image
atténue le
contraste
rend l’image
plus douce
réduit l’intensité
et l’éclat des
couleurs
Un
déplacement
vers la gauche
rend les
couleurs claires
plus rouges
Une
augmentation
du réglage
rend l’image
plus lumineuse
renforce le
contraste
rend l’image
plus claire
renforce
l’intensité et
l’éclat des
couleurs
Un
déplacement
vers la droite
rend les
couleurs claires
plus vertes
FONCTIONNEMENT DU TÉLÉVISEUR
4
Appuyez sur CHANNEL N ou M pour
sélectionner le paramètre à régler.
SOMBRE
CLA R
I
CONTRASTE
NET
COUL E U R
TE INTE
RE I N I T IA L I S E R
CHOISIR :
CHANGER : –/
Suggestion
Pour restaurer tous les paramètres du mode AV
sélectionné sur leurs valeurs de réglage par défaut,
sélectionnez REINITIALISER à l’étape 4 puis appuyez
sur TV ENTER.
+
F I N : MENU
CLAIR
– +
CHANGER : –/
+
F I N : MENU
2 secondes après le relâchement de la touche,
l’affichage revient à l’étape 4.
6
Pour régler un autre paramètre, suivez
les étapes 3 à 5.
7
Appuyez sur TV MENU pour revenir à
l’écran normal.
FRANÇAIS
21
Page 93

RÉGLAGE DU SON
V ous pouvez ajuster les gra ves, les aigus et la balance
(droite/gauche) du son.
1
Appuyez sur SOUND EFFECT.
2
Appuyez sur CHANNEL N ou M pour
sélectionner le paramètre à régler.
TV MENU
VOLUME
+/–
SOUND
EFFECT
TV ENTER
CHANNEL
N/M
A I GU
GRAVE
BALANCE
SUPER BASS
Q SURROUND : NON
BBE
RE I N I T I AL I SER
CHO I S I R:
CHANGER : – /+
3
Appuyez sur VOLUME + ou – pour régler
/
F I N : MENU
: NON
: NON
le paramètre sélectionné.
Paramètre
AIGU
GRAVE
Paramètre
BALANCE
Une diminution du
réglage
atténue les aigus
atténue les graves
Un déplacement
vers la gauche
diminue le niveau de
sortie du haut-parleur
droit
Une augmentation
du réglage
renforce les aigus
renforce les graves
Un déplacement
vers la droite
diminue le niveau de
sortie du hautparleur gauche
22
ADJUSTER
GRAVE
– +
CHANGER:-/+ F I N : MENU
Quelques secondes après le relâchement de la
touche, l’affichage revient à l’étape 2.
FRANÇAIS
Page 94

4
Pour régler un autre paramètre, suivez
les étapes 2 et 3.
5
Appuyez sur TV MENU pour revenir à
l’écran normal.
Suggestion
Pour restaurer tous les paramètres sur leurs valeurs
de réglage par défaut, sélectionnez REINITIALISER à
l’étape 2 puis appuyez sur TV ENTER.
Remarque
Le son risque d’être déformé par la combinaison des
paramètres AIGU, GRAVE, SUPER BASS ou BBE.
Dans ce cas, baissez le niveau des fonctions de réglage
du son décrites ci-dessus.
Effets sonores spéciaux
Cet appareil offre 3 modes d’amélioration du son :
SUPER BASS, Q SURROUND et BBE.
SUPER BASS permet d’améliorer les graves. Cet
appareil vous permet de profiter d’un son puissant
lors de la lecture de disques. En outre, les
paramètres peuvent être modifiés pour un meilleur
effet Q SURROUND lors de la lecture de disques.
Voir “Réglage Sortie Audio” (page 57).
Q SURROUND utilise deux haut-parleurs
uniquement pour créer un son d’ambiance
semblant provenir de deux haut-parleurs situés
devant vous et de deux haut-parleurs situés derrière
vous.
Le système BBE permet d’améliorer la clarté des
sons à haute fréquence.
Pour agir sur le menu SON
Appuyez sur SOUND EFFECT. Appuyez ensuite
sur CHANNEL N ou M pour sélectionner
SUPER BASS, Q SURROUND ou BBE et appuyez
sur VOLUME + ou – pour afficher la mention OUI.
FONCTIONNEMENT DU TÉLÉVISEUR
A I GU
GRAVE
BALANCE
SUPER BASS
Q SURROUND
BBE :NON
RE I N I T I AL I SER
CHO I S I R:
CHANGER : – /+
Remarques
•L’effet de BALANCE est faible lorsque la fonction
SUPER BASS est activée.
•Le système Q SURROUND ne fonctionne pas
avec des sources monophoniques.
•L’activation de l’option Q SURROUND peut
entraîner une déformation du son.
•L’activ ation simultanée des options BBE et SUPER
BASS peut provoquer un bruit sourd. Dans ce cas,
désactivez la fonction BBE ou SUPER BASS.
/
:OU I
:NON
F I N : MENU
FRANÇAIS
23
Page 95

RÉGLAGE DE LA PUCE V
Vous pouvez programmer une limite d’âge afin d’éviter que des enfants ne regardent ou n’entendent des scènes
de violence et des programmes pour adultes. Ce téléviseur est conforme aux classifications “CLASS. PR OG. TV” et
“CLASS. FILM”.
Pour utiliser la fonction de puce V, vous devez d’abord enregistrer un mot de passe.
Enregistrement du mot de passe
Important
Vous ne pouvez pas activer la puce V si vous oubliez votre mot de passe. Nous vous conseillons vivement de le
noter et de le conserver dans un endroit sûr au cas où vous l’oublieriez.
1
Appuyez sur TV MENU.
2
Appuyez sur CHANNEL N ou M pour
sélectionner V CHIP (puce V) puis
appuyez sur TV ENTER.
Touches
numériques
TV MENU
VOLUME
+/–
TV ENTER
CHANNEL
N/M
MENU
MAGEI
SON
REGLAGE
V CH I P
CHOI SIR :
OK : ENTER
F I N : MENU
3
Introduisez le mot de passe à 4 chiffres
à l’aide des touches numériques (de 0
à 9).
“*” apparaît au lieu des chiffres.
V CHIP
NOUVEAU
MOT DE PASSE
0–9
FIN : MENU
ENTRER :
4
Entrez à nouveau le même mot de passe
pour confirmation.
V CHIP
CONFIRMER
MOT DE PASSE
0–9
FIN : MENU
ENTRER :
Le menu V CHIP apparaît.
24
FRANÇAIS
Page 96

Réglage de V CHIP
1
Dans le menu V CHIP, appuyez sur
CHANNEL N ou M pour sélectionner
CLASS. PROG. TV puis appuyez sur
VOLUME + ou – pour afficher le réglage
désiré.
• Lorsque les émissions suivantes sont reçues,
elles sont protégées contre l’affichage en fonction
du réglage sélectionné.
NON: CLASS. PROG. TV non activé.
TV-Y: Convient aux enfants de n’importe
quel âge.
TV-Y7: Convient aux enfants de 7 ans et
plus.
TV-G: Tous publics.
TV-PG: Surveillance parentale conseillée.
TV-14:
TV-MA: Pour adultes uniquement.
• Le sous-menu CLASS. PROG. TV peut apparaître
selon le réglage sélectionné. S’il apparaît, passez
à l’étape 2, sinon passez directement à l’étape
3.
2
Appuyez sur CHANNEL N ou M pour
Ne convient pas au moins de 14 ans.
sélectionner l’option de sous-menu
puis appuyez sur VOLUME + ou – pour
sélectionner OUI ou NON.
• Si TV-Y7 est sélectionné, les options suivantes
apparaissent.
• Si TV-PG ou TV-14 est sélectionné, les options
suivantes apparaissent.
• Si TV-MA est sélectionné, les options suivantes
apparaissent.
3
Appuyez sur CHANNEL N ou M pour
sélectionner CLASS. FILM, puis appuyez
sur VOLUME + ou – pour afficher le
réglage désiré.
Lorsque les films suivants sont captés, ils sont
protégés contre l’affichage en fonction du réglage
sélectionné.
NON: CLASS. FILM non activé.
G: Tout âge
PG: Films inadaptés aux enfants.
PG-13: Films inadaptés aux enfants de moins de
13 ans.
R: Films adaptés aux enfants de moins de
17 ans accompagnés de leurs parents.
NC-17: Films interdits aux enfants de moins de
17 ans.
X: Films réser vés aux adultes.
FONCTIONNEMENT DU TÉLÉVISEUR
FRANÇAIS
25
Page 97

Touches
numériques
RÉGLAGE DE LA PUCE V (SUITE)
4
Appuyez sur CHANNEL N ou M pour
sélectionner V CHIP puis appuyez sur
VOLUME + ou – pour afficher OUI.
TV MENU
VOLUME
+/–
TV ENTER
CHANNEL
N/M
5
Appuyez sur TV MENU pour revenir à
l’écran normal.
Remarque
Si vous n’appuyez sur aucune touche pendant plus de
15 secondes, l’écran normal réapparaît.
Pour utiliser le téléviseur après av oir activé
la protection
Lors de la réception d’une émission protégée à l’aide
de la fonction de puce V, le message “PROTECTIONPUCE V” apparaît.
CABLE125
<PROTECTION-PUCE V>
SI VOUS ANNULER
LA PROTECTION ENTRER
MOT DE PASSE.
MOT DE PASSE :
ENTRER : 0 – 9
TV-PG
Entrez votre mot de passe. S’il est correct, la protection
est désactivée.
Ecran de classe-ment
des émissions de
télédiffusion
26
FRANÇAIS
Page 98

Modification du mot de passe
1
Appuyez sur TV MENU.
2
Appuyez sur CHANNEL N ou M pour
sélectionner V CHIP puis appuyez sur TV
ENTER.
MENU
MAGEI
SON
REGLAGE
V CH I P
5
Introduisez le nouveau mot de passe à
l’aide des touches numériques (de 0 à
9).
“*” apparaît au lieu des chiffres.
FONCTIONNEMENT DU TÉLÉVISEUR
CHOI SIR :
3
Introduisez le mot de passe à l’aide des
OK : ENTER
F I N : MENU
touches numériques (de 0 à 9).
“*” apparaît au lieu des chiffres.
4
Appuyez sur CHANNEL N ou M pour
sélectionner CHANGE.MOT DE PASSE,
puis appuyez sur TV ENTER.
6
Entrez à nouveau le même mot de passe
pour confirmation.
V CHIP
CONFIRMER
MOT DE PASSE
0–9
FIN : MENU
ENTRER :
7
Appuyez sur TV MENU pour revenir à
l’écran normal.
Remarque
Si vous n’appuyez sur aucune touche pendant plus de
15 secondes, l’écran normal réapparaît.
FRANÇAIS
27
Page 99

ENREGISTREMENT D’UN NOM DE CHAÎNE
MENU
MAGEI
REGLAGE
OK : ENTER
CHOI SIR :
F I N : MENU
V CH I P
SON
REGLAGE
LANGUE
ANTENNE
RECHERCHE AUTOMAT IQUE
AJOUTE/E F F ACE
NOM DU CA N A L
FRANÇAIS
: CABLE
CHOISIR :
F I N : MENU
OK : ENTER
NOM DU CANAL
CABLE125
REI NIT I ALISER
– – – –
CH ANGER : –/
+
CHOI SIR:
F I N : MENU
V ous pouvez enregistrer un nom de station de télévision
pour chaque chaîne.
1
Appuyez sur TV MENU.
2
Appuyez sur CHANNEL N ou M pour
DISPLAY
sélectionner REGLAGE, puis appuyez
sur TV ENTER.
TV MENU
VOLUME
+/–
TV ENTER
CHANNEL
N/M
3
Appuyez sur CHANNEL N ou M pour
sélectionner NOM DU CANAL, puis
appuyez sur TV ENTER.
4
Appuyez sur VOLUME + ou – pour
sélectionner le numéro de la chaîne
pour laquelle vous souhaitez enregistrer
un nom.
28
FRANÇAIS
5
Appuyez sur CHANNEL M pour
sélectionner la ligne en pointillés.
NOM DU CANAL
CABLE1 25
– – – –
REI NIT I ALISER
CHOI SIR :
CH ANGER : –/
+
F I N : MENU
Page 100

6
CABLE125NBC
STEREO/SAP
Appuyez sur VOLUME + pour afficher la
lettre désirée puis appuyez sur
CHANNEL M.
Chaque fois que vous appuyez sur VOLUME +,
l’écran change selon la séquence suivante:
9
.....
A
Z&/ –
.....
0(espace)
Affichage à l’écran
Pour modifier l’affichage de la fonction à
l’écran
Appuyez sur DISPLAY. À chaque f ois que vous appuyez
sur cette touche, l’affichage est mis sous/hors tension.
Nom de la station
de télévision
Appuyez sur VOLUME – pour modifier l’affichage
dans l’ordre inverse.
NOM DU CANAL
CABLE125
N – – –
REI NIT I ALISER
CHOI SIR :
CH ANGER : –/
7
Répétez les étapes 5 et 6 pour entrer un
+
F I N : MENU
nom de station de télévision.
Vous pouvez entrer jusqu’à 4 lettres.
8
Pour entrer un autre nom de station de
télévision, appuyez sur CHANNEL M
pour sélectionner le numéro de chaîne
puis suivez les étapes 4 à 7.
V ous pouvez entrer jusqu’à 30 stations différentes.
Lorsque vous avez déjà enregistré 30 stations, la
mention “PLEIN” apparaît au lieu de “----”.
9
Appuyez sur TV MENU pour revenir à
l’écran normal.
Numéro de chaîne/
Entrée vidéo
Type d’émission
Remarques
•Si vous n’appuyez sur aucune touche pendant plus
de 8 secondes, l’écran s’éteint automatiquement.
•Le nom de la station de télévision n’apparaît que si
un nom est enregistré pour cette station.
•Le type d’émission n’apparaît pas lorsque l’unité est
en mode VIDEO1 et VIDEO2.
FONCTIONNEMENT DU TÉLÉVISEUR
Suggestion
Pour annuler toutes les lettres sélectionnées aux étapes
6 et 7, appuyez sur CHANNEL N ou M pour
sélectionner REINITIALISER puis appuyez sur TV
ENTER.
FRANÇAIS
29
 Loading...