

Sony vgn-tx Service Manual

1.MS-1-D.1
Chapter 1. Disassembly & Assembly Guide
1-3. Disassembly & Assembly
- Main Section -
MS-1 Main Section Disassembly
Confidential
TX Series
1.MS-1-D.2
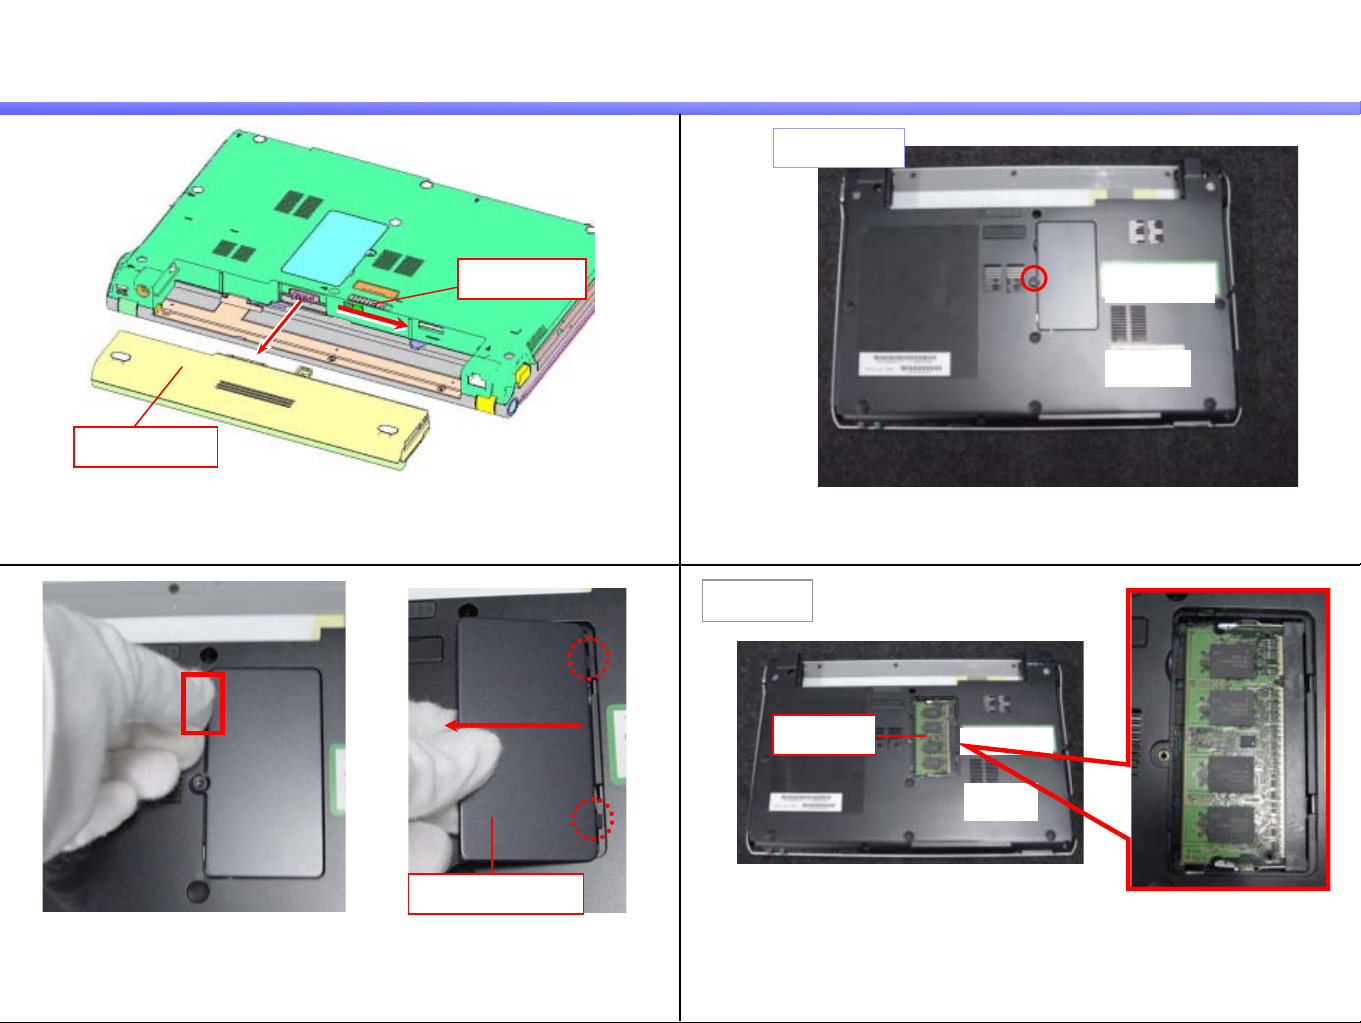
Battery Pack/Cover
Confidential
1)
Lock Lever
2
2
1
1
Battery Pack
Slide the lock lever in the direction of the arrow 1, and remove
the Battery Pack in the direction of the arrow 2.
3)
2)
Remark
Screw: B14
Remove the one screw.
A
Cover (Memory)
Hook a finger on the A portion, raise the Cover, and
remove it in the direction of the arrow.
Memory
The Memory on side B of the Mother Board can be removed.
TX Series
1.MS-1-D.3
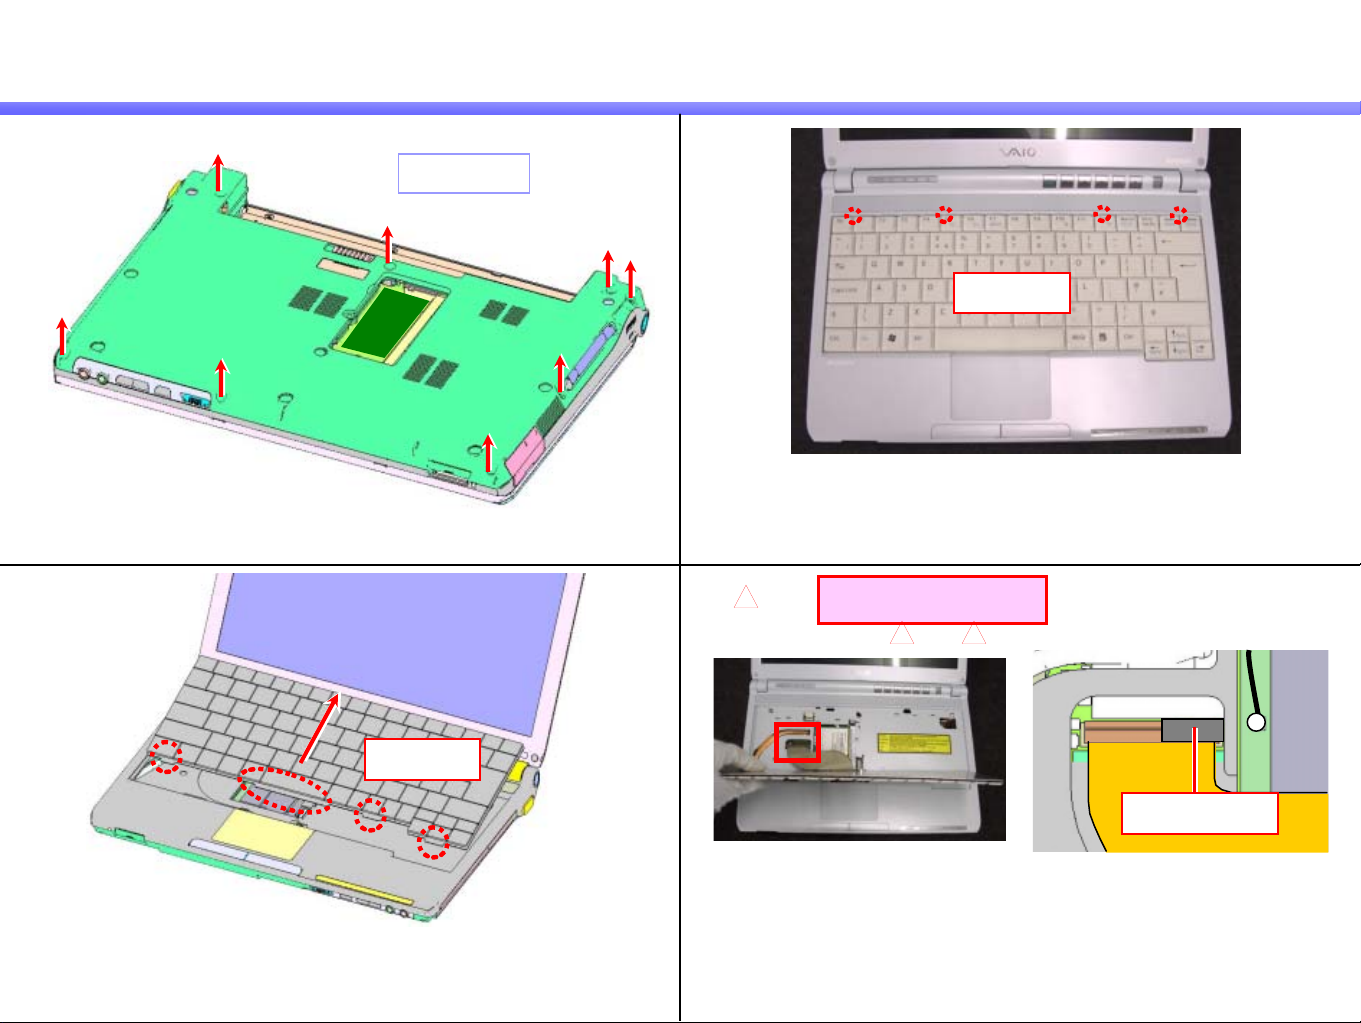
Keyboard-1
Confidential
1)
3)
Screw: B14
Remove the eight screws on the bottom.
2)
Keyboard
Disengage the detent (four places).
* Raising the Keyboard, disengage the detents.
* Detents are located between the [Esc and F1], [F4 and F5],
[Insert and Delete], and F12 Key.
4)
[ADD]
8
Except 1st Model
[MA]16[MA]
10
Keyboard
Slide the Keyboard in the direction of the arrow to release the
detent (four places) on the front.
* The FPC is connected on the backside of the Keyboard.
Cushion (GM)
Peel off the Cushion (one place).
TX Series
1.MS-1-D.3(a)
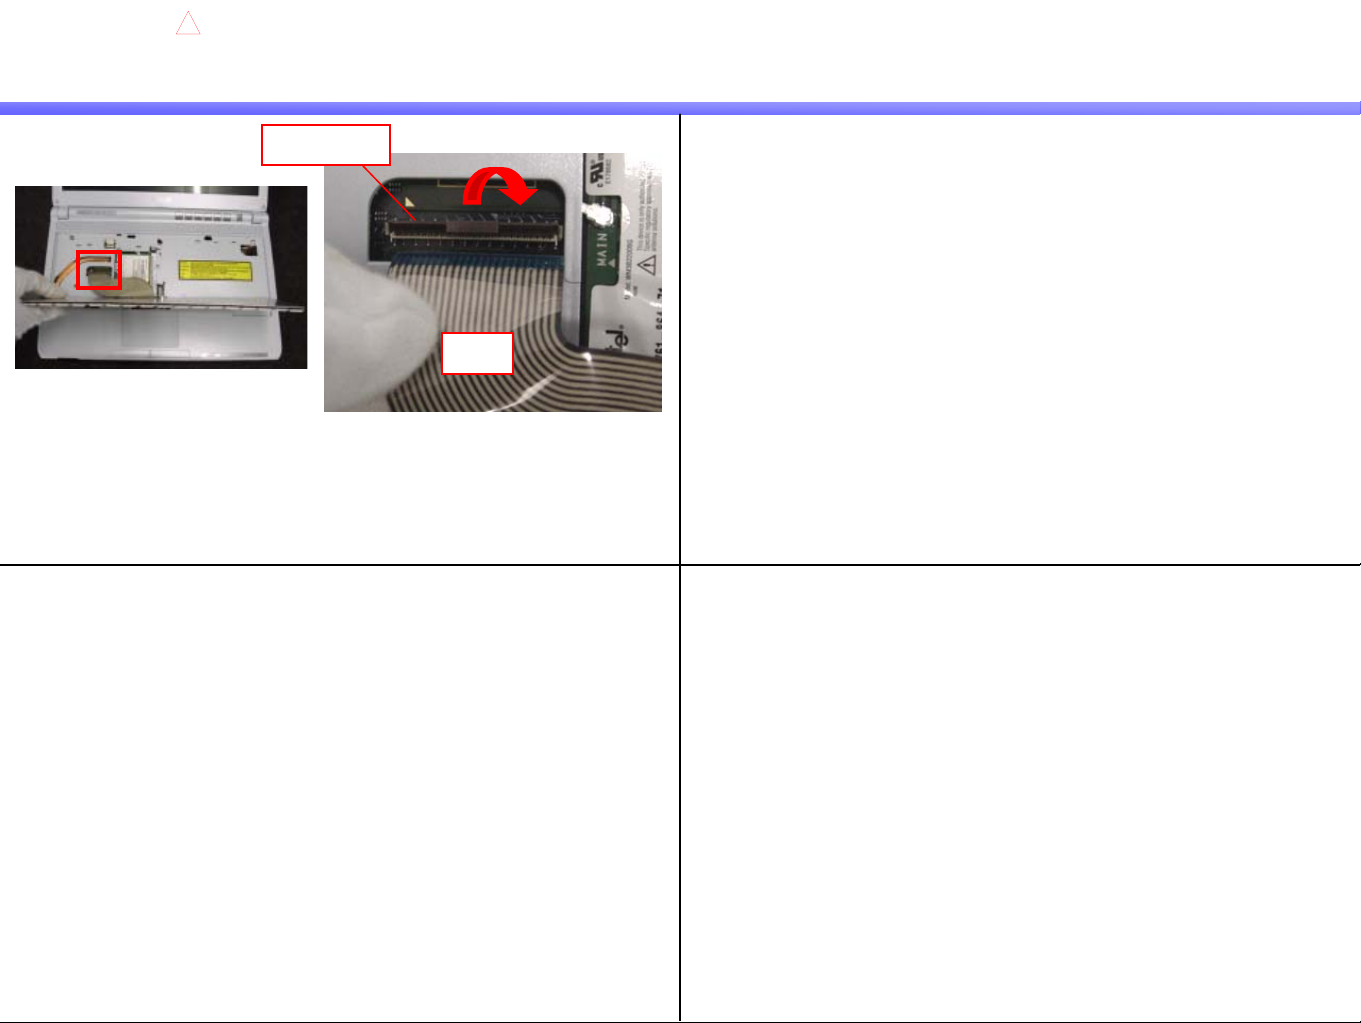
Keyboard-2
[ADD]
8
Confidential
5)
Release the lock, remove the FPC and remove the Keyboard.
* How to release the lock: Raise the lock lever toward the front.
Lock Lever
FPC
TX Series

1.MS-1-D.4
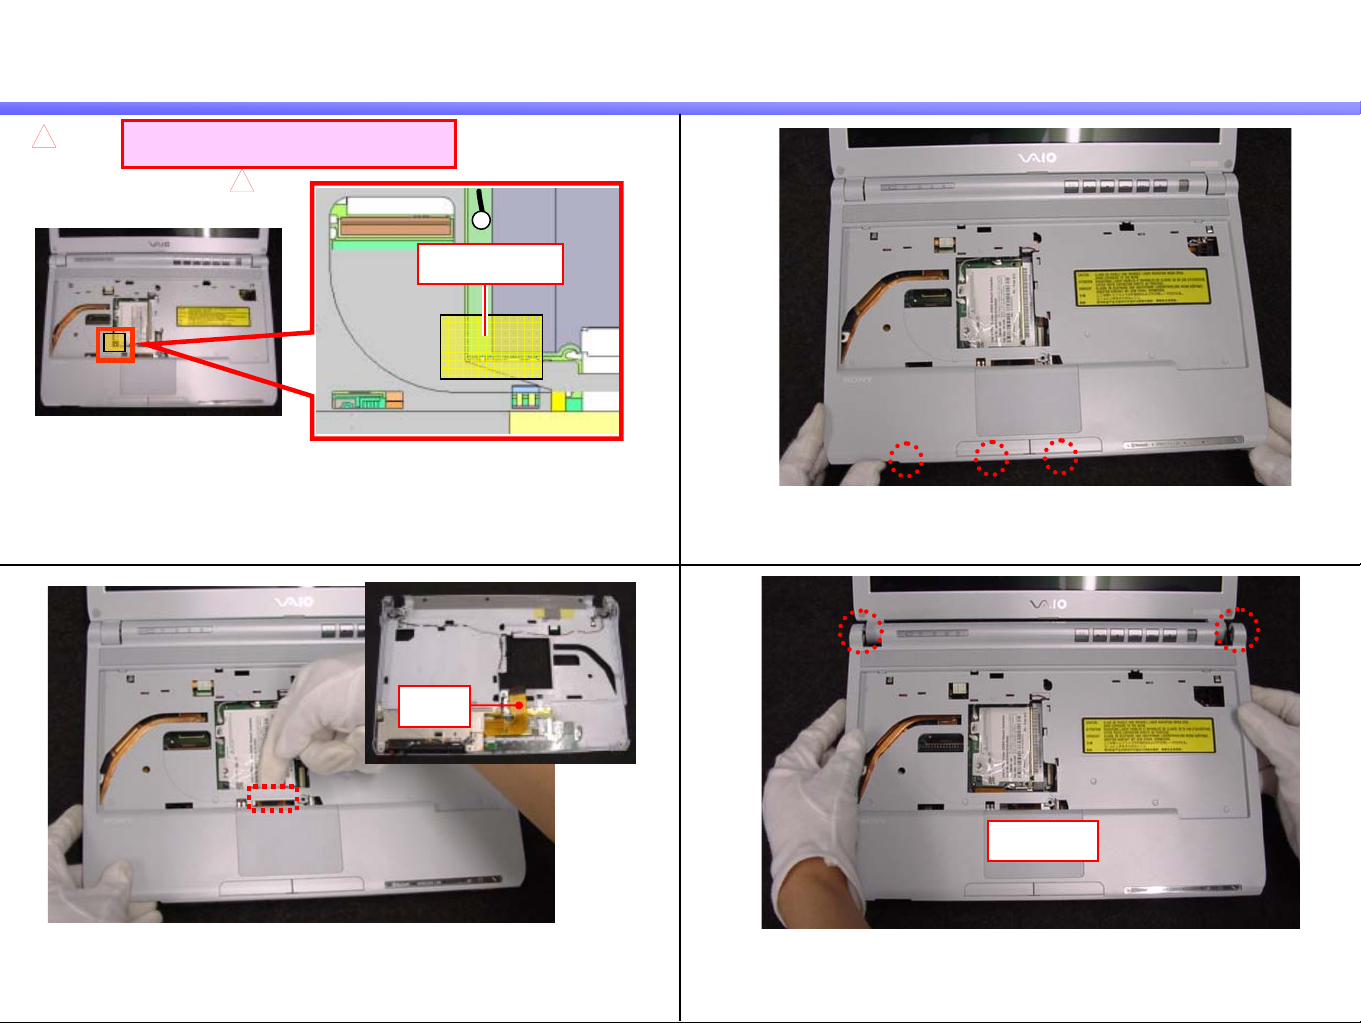
Palmrest-1
Confidential
1)
3)
5
[MA]
FFC
Pull out the FFC (one place) in the direction of the arrow.
TV Model
Coaxial Cable (Gray)
4)
2)
[MA]
2
Screw: B13
WAN Model
Coaxial Cable
Disconnect the Coaxial Cable vertically.
Coaxial Cable (Black)
Disconnect the coaxial cable (two places) vertically.
Remove the one screw.
TX Series
1.MS-1-D.5
Palmrest-2
Confidential
5)
7)
[ADD]
8
2nd, 3rd(Except FP) Model
[MA]
10
Peel off the Kapton Tape (one place).
FPC
6)
Kapton Tape
Disengage the detent (three places) at the front.
8)
Disconnect the FPC (one place) by raising it.
Palmrest
Remove the Palmrest disengaging the detent (two places).
TX Series
1.MS-1-D.6
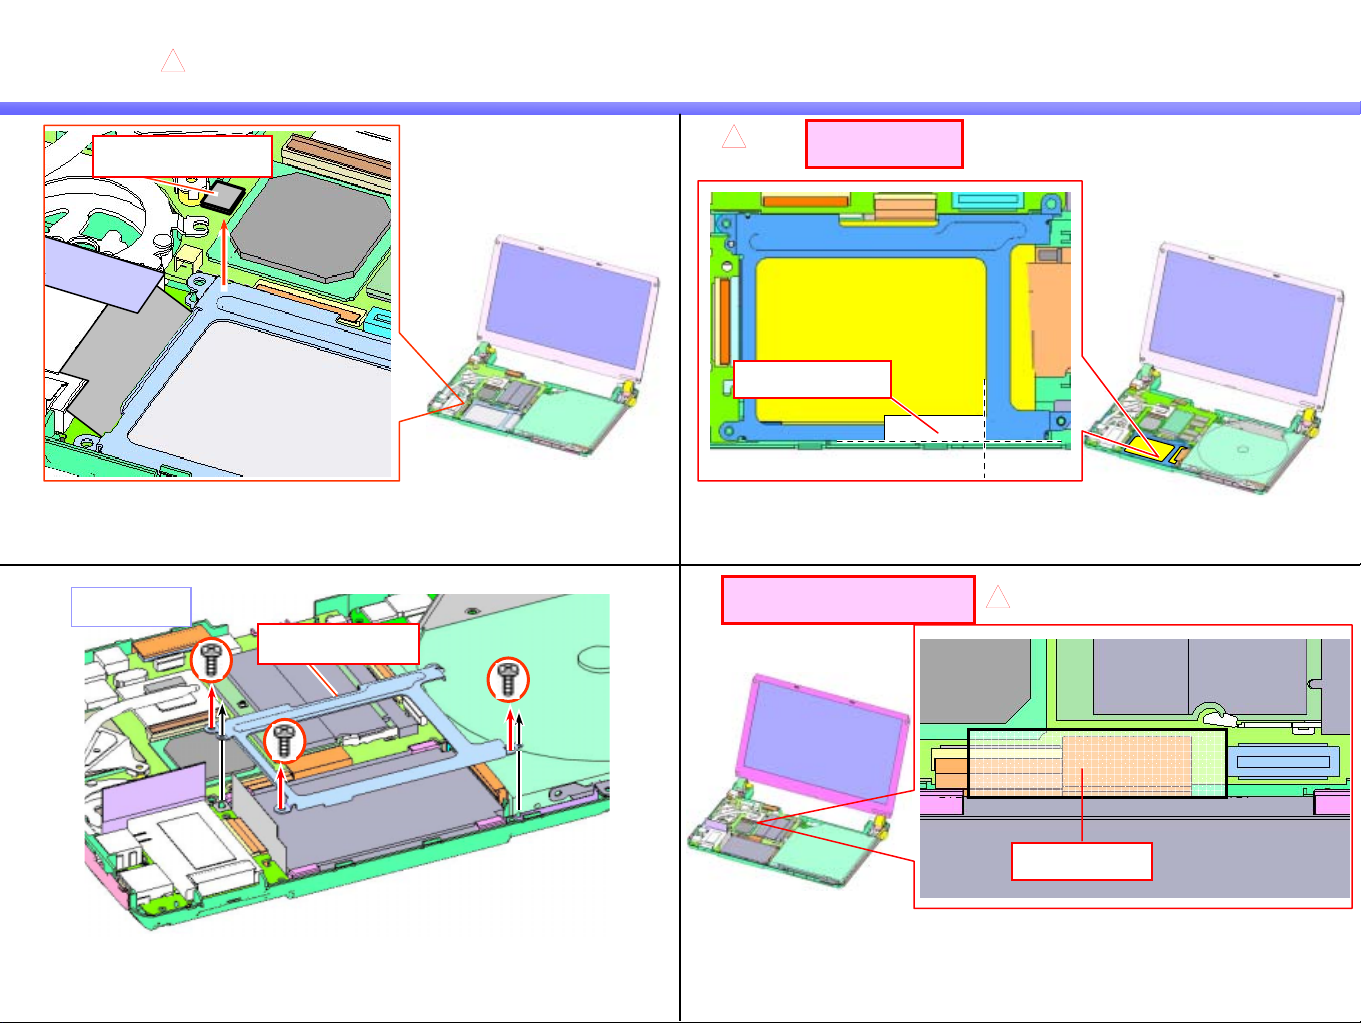
HDD-1
5
Confidential
[MA]
1)
3)
Cushion (Screw)
Screw: B2
Peel off the Cushion (Screw).
Bracket (HDD)
[MA]
2)
16
Spacer (BKHD)
4th Model
4)
1st, 2nd, 3rd Model
Peel off the Spacer.
[MA]
16
Remove the three screws, and then the Bracket.
Tape (40X15)
Peel off the Tape.
HDD
TX Series
1.MS-1-D.6(a)
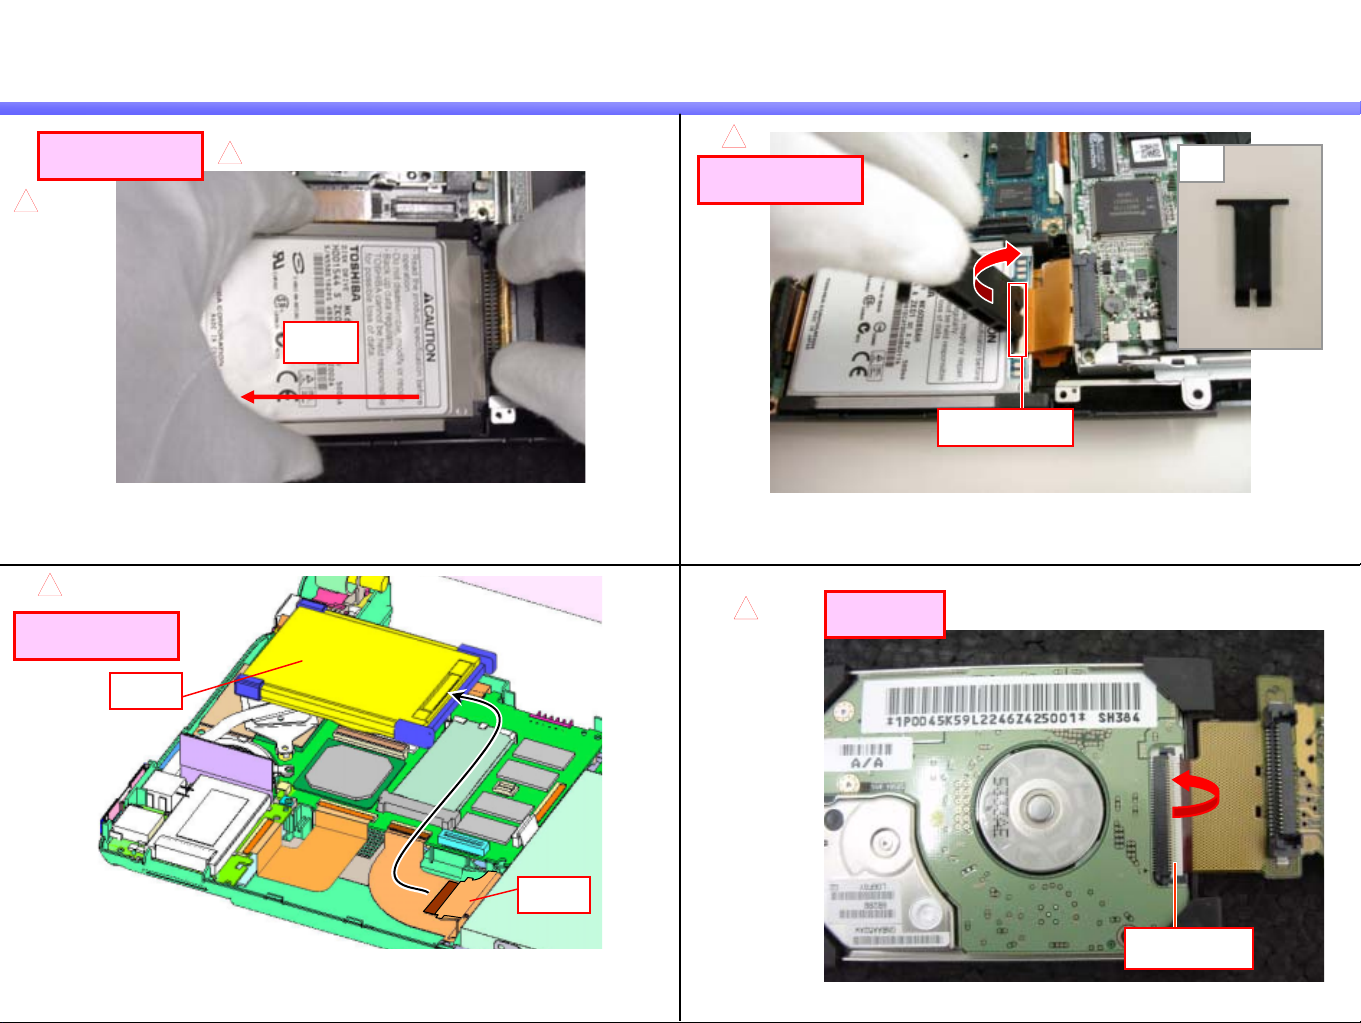
HDD-2
5)
To Type (A)
[MA]
16
5
[MA]
HDD
[MA]
6)
16
To Type (B)
Confidential
Jig
Lock Lever
Remove the HDD.
* Be careful not to bend the pins.
* Be sure to hold the HDD on the sides for handling.
[MA]
16
To Type (B)
HDD
While removing the FPC from the connector, remove the HDD.
FPC
Raise the lock lever and release the lock.
* Use the Jig.
8)7)
[MA]
5
Hi Type
Raise the lock lever to release the lock.
Lock Lever
TX Series
1.MS-1-D.6(b)
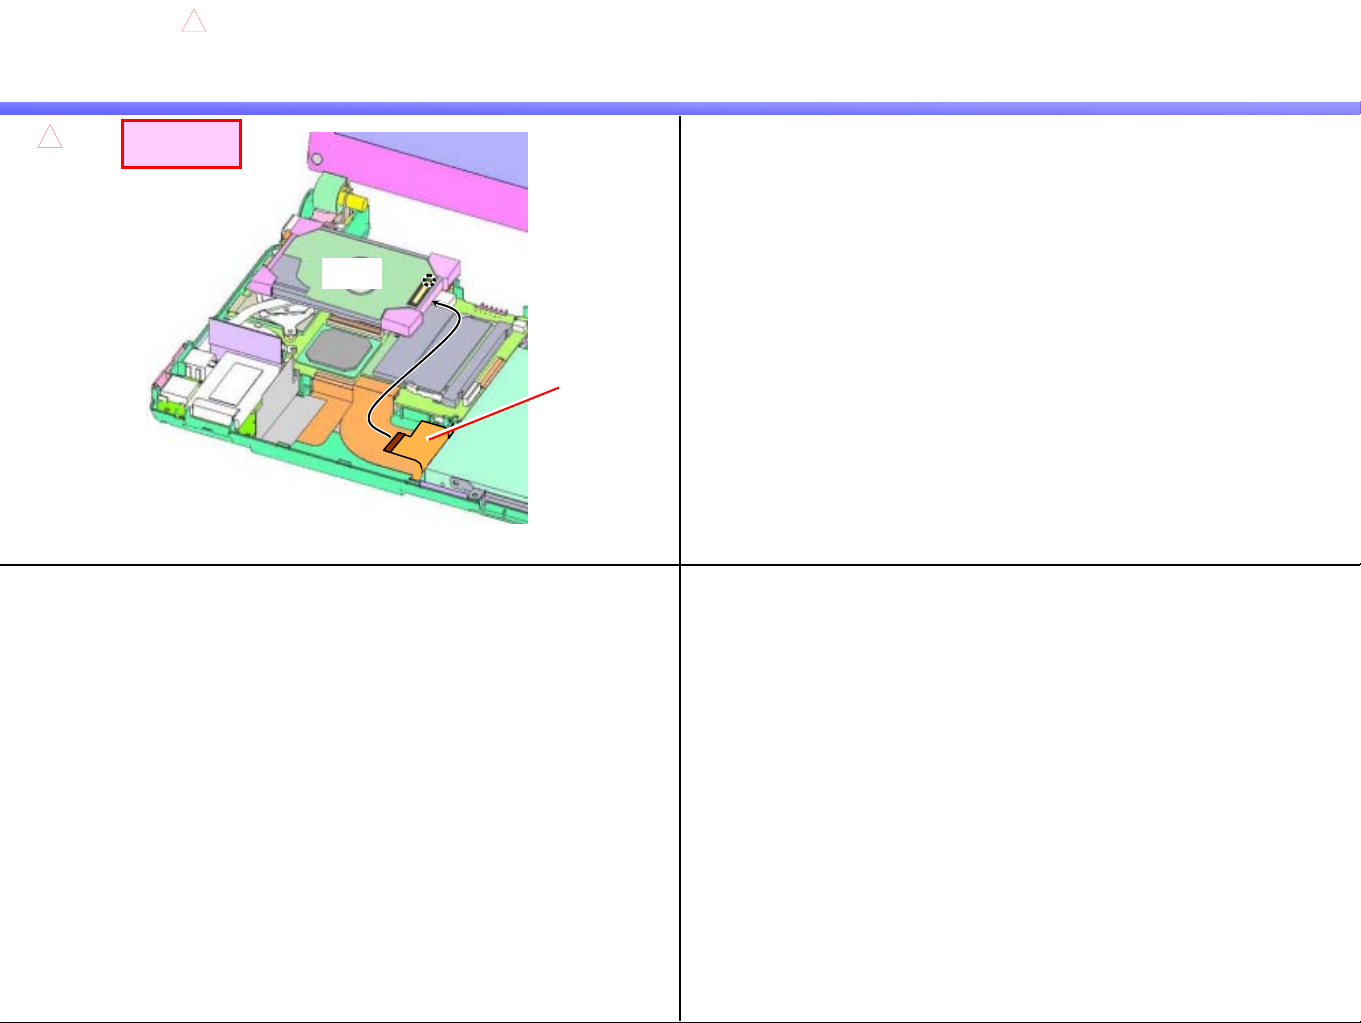
HDD-3
[MA]
9)
5
While removing the FPC from the connector, remove the HDD.
[MA]
16
Hi Type
Confidential
HDD
FPC
TX Series
1.MS-1-D.7
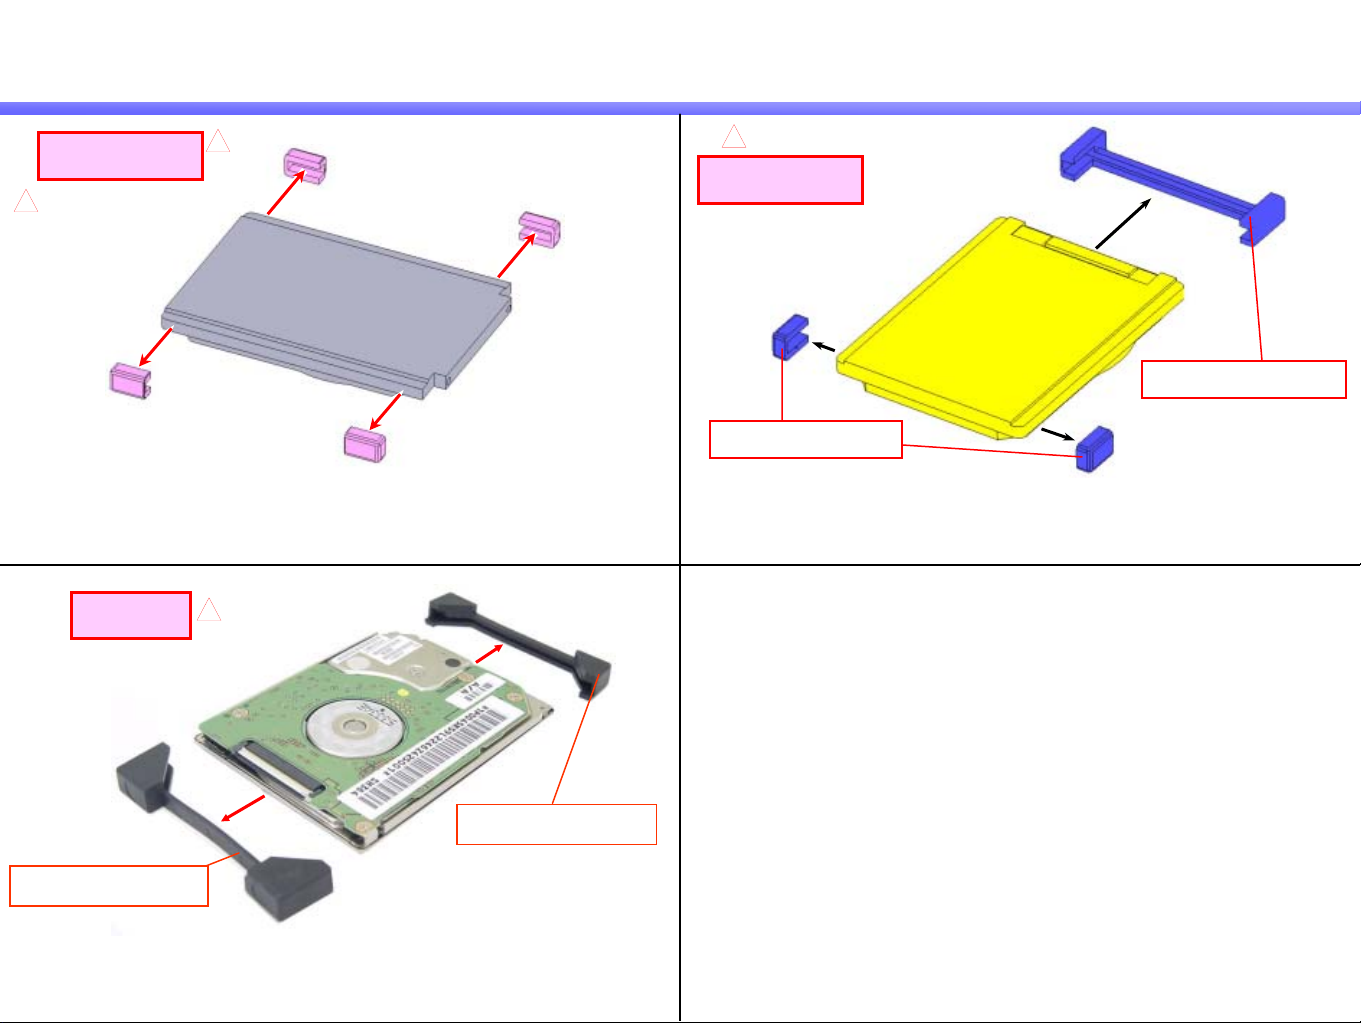
Parts of the HDD
1)
To Type (A)
[MA]
16
3)
Hi Type
5
Remove the Cushion (four places).
[MA]
5
[MA]
[MA]
2)
16
To Type (B)
Cushion (HDD TO)
Confidential
Cushion (HDD TOF)
Peel off the Cushion (three places).
Cushion (HDDHIF)
Cushion (HDDHIB)
Remove the Cushion (two places).
TX Series
 Loading...