

Sony vgn-s Service Manual

1.MS-1-D.1
Chapter 1. Disassembly & Assembly Guide
1-3. Disassembly & Assembly
- Main Section -
MS-1 Main Section Disassembly
Confidential
S Series
1.MS-1-D.2
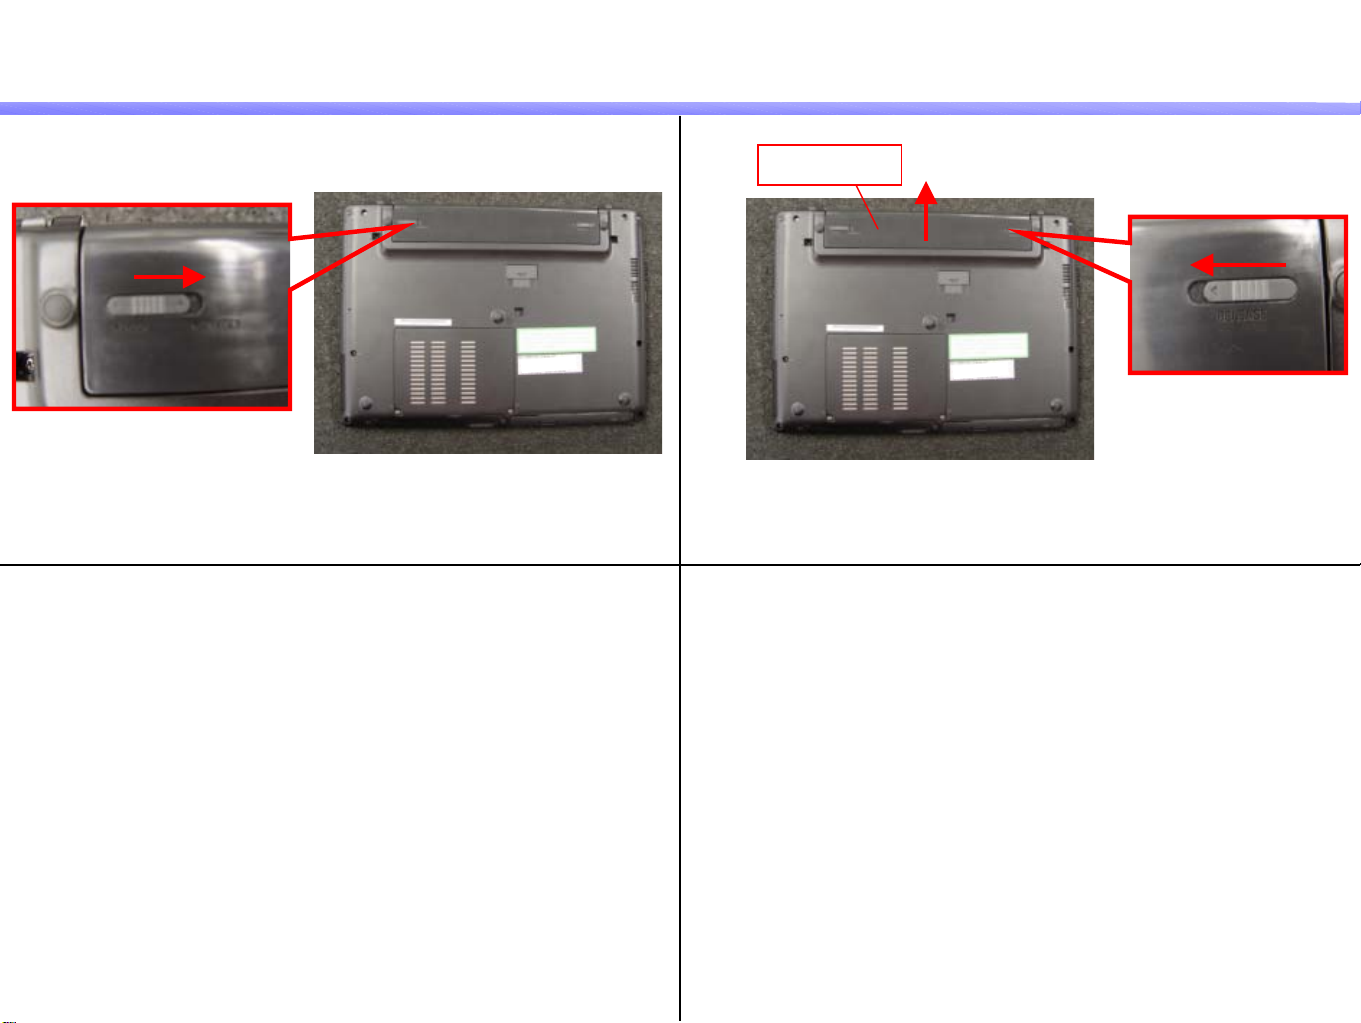
Battery Pack
Confidential
1)
Slide the Battery Lock (L) to the UNLOCK side.
2)
Battery Pack
With the Battery Lock (R) moved on the UNLOCK side,
remove the Battery Pack.
S Series
1.MS-1-D.3
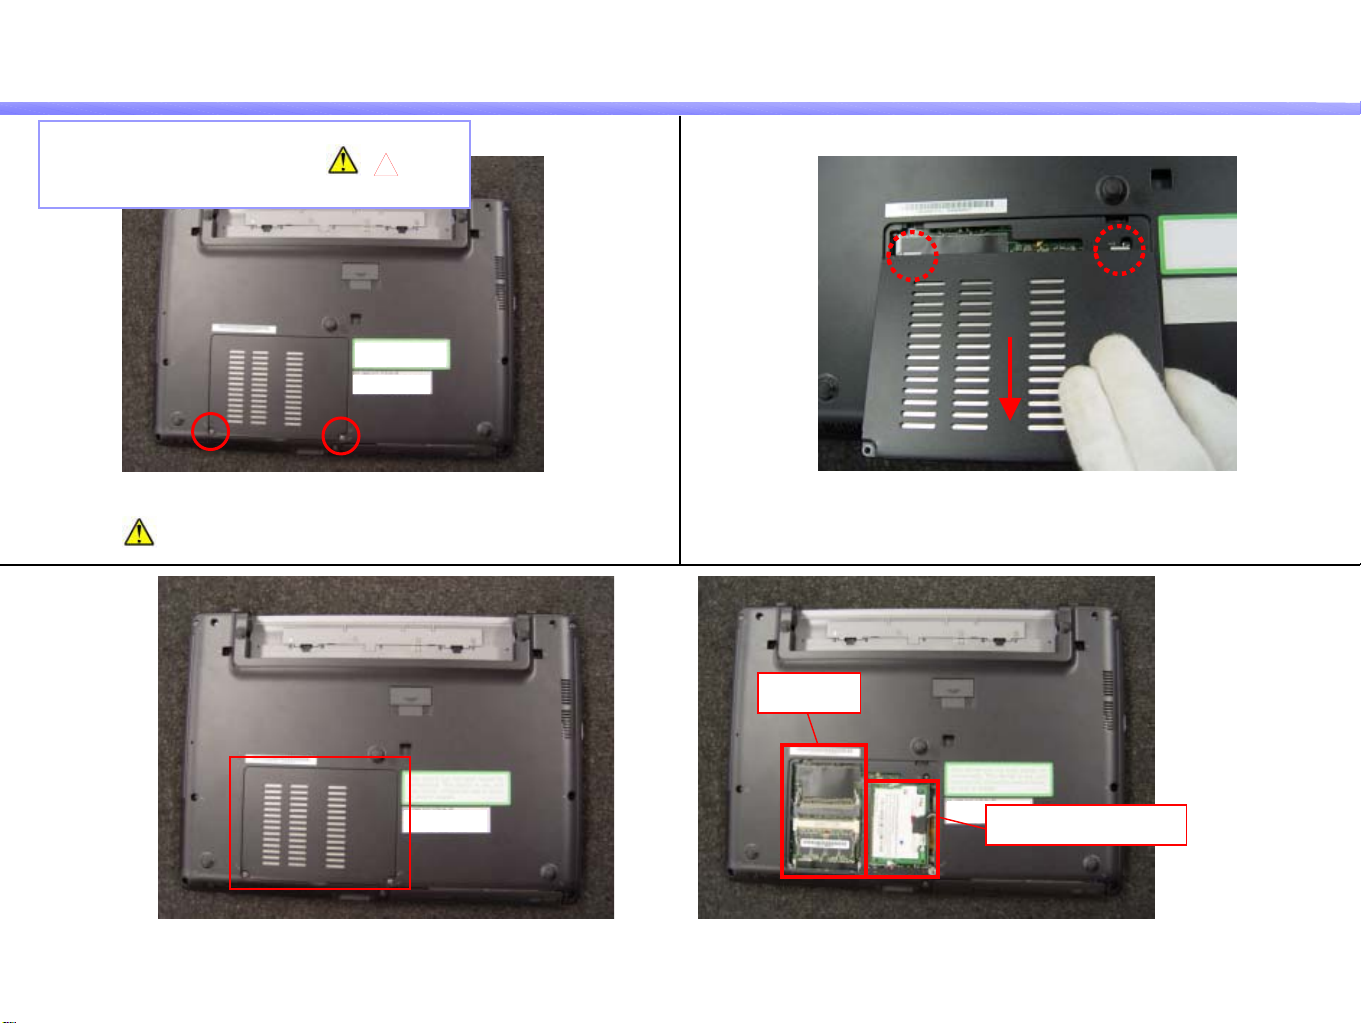
Cover (Memory)
1) 2)
Screw:
S240P - B11(Special Screw)
Other - B9
1
[MA]
Confidential
Remove the two screws.
*The type of screw differs by model.
A
The Memory and the Wireless LAN Card are located under the Cover in section A.
Slide the Cover (Memory) toward the front to remove.
*The two detents on the upper side are engaged with the Housing (Bottom).
Memory
Wireless LAN Card
S Series
1.MS-1-D.4
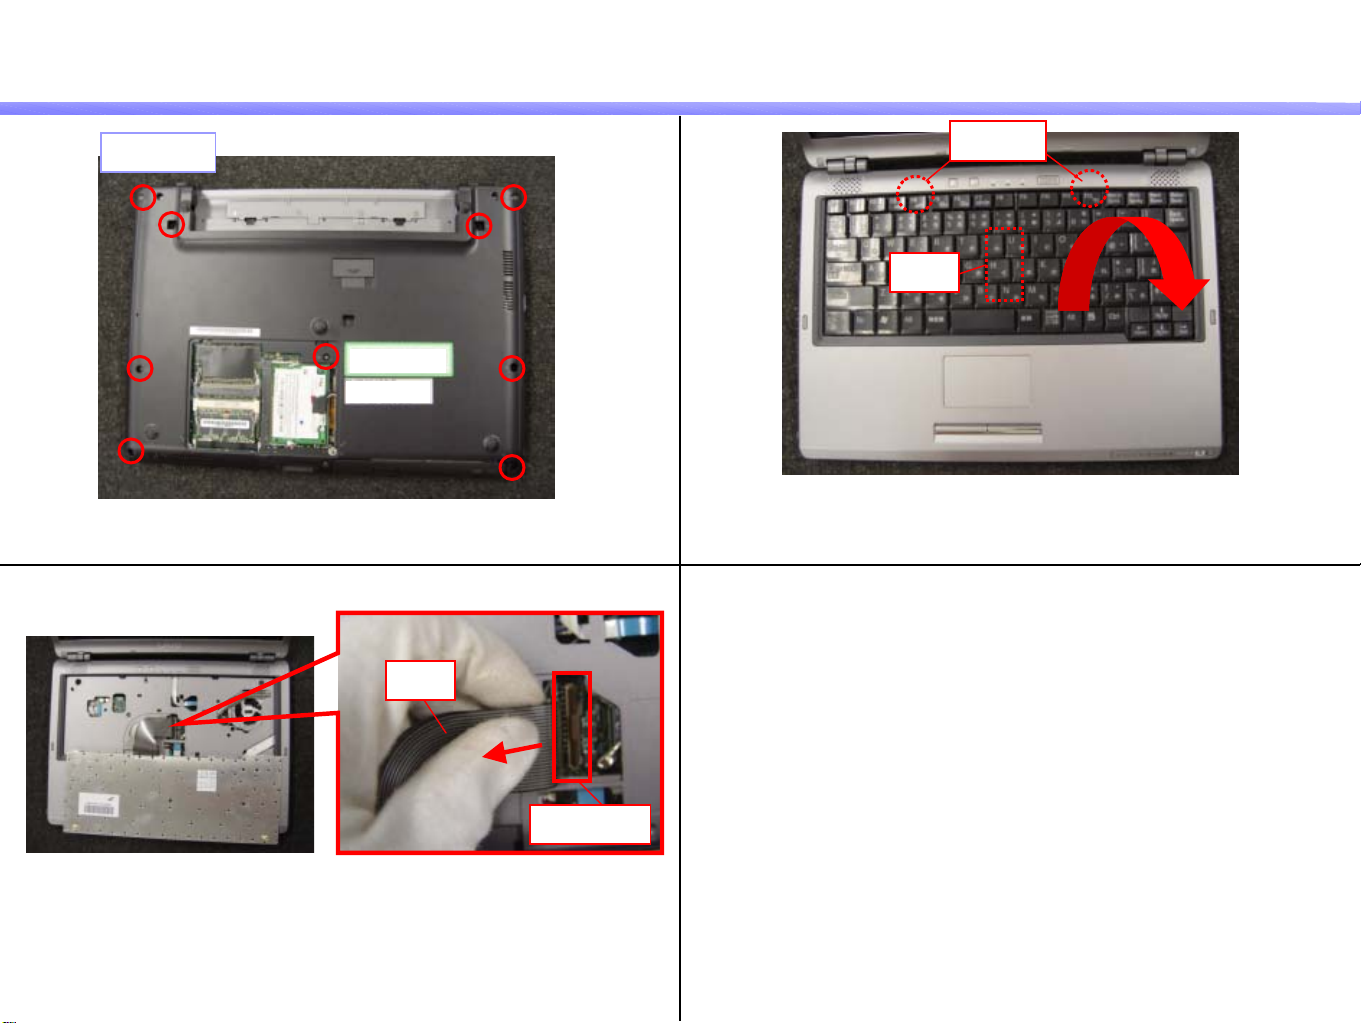
Keyboard
Confidential
1)
3)
Screw:B1
Remove the nine screws from the back.
FPC
2)
Detent
FPC
Disengage the two detents with a bamboo spatula, and turn
the Keyboard toward the front.
*The FPC is connected on the back.
*Push the detents toward the rear to disengage.
Disconnect the FPC.
*Raise the Connector to unlock.
Connector
S Series
1.MS-1-D.5
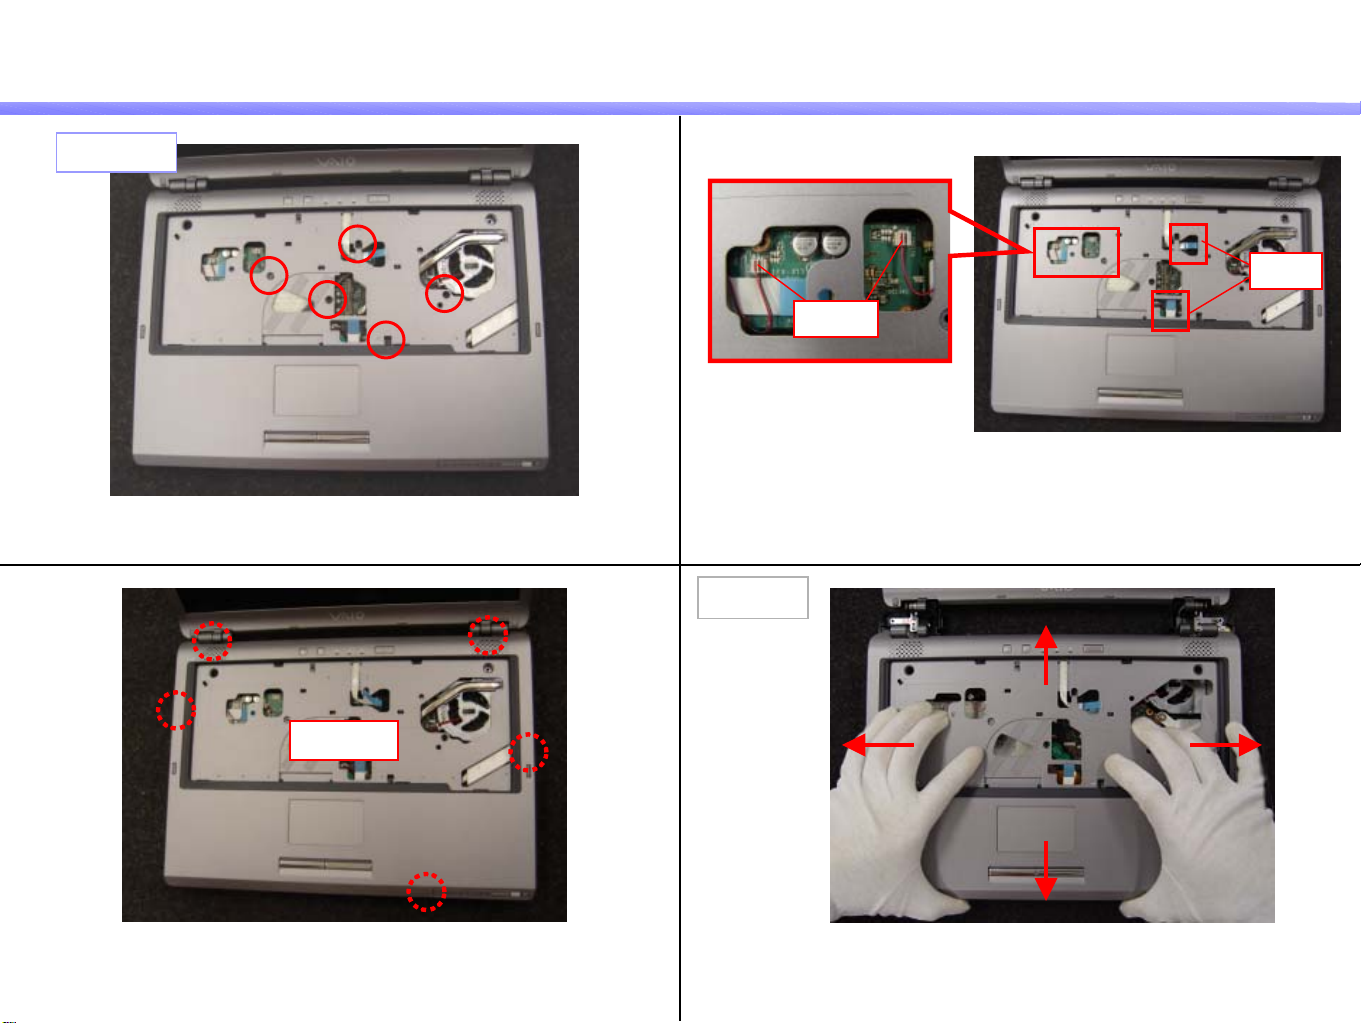
Palmrest
Confidential
1)
3)
Screw: B1
Remove the five screws.
2)
FFC
Harness
Disconnect the Harness (two places) and the FFC (two places).
*Pull off the Harness and the FFC upward.
Remark
4
Palmrest
Disengaging the five detents, remove the Palmrest.
*The detents are engaged toward the outside.
23
1
Raising the Palmrest while sliding it a little in the arrow direction in
the order of 1, 2, 3, 4, disengage the detents.
S Series
1.MS-1-D.6
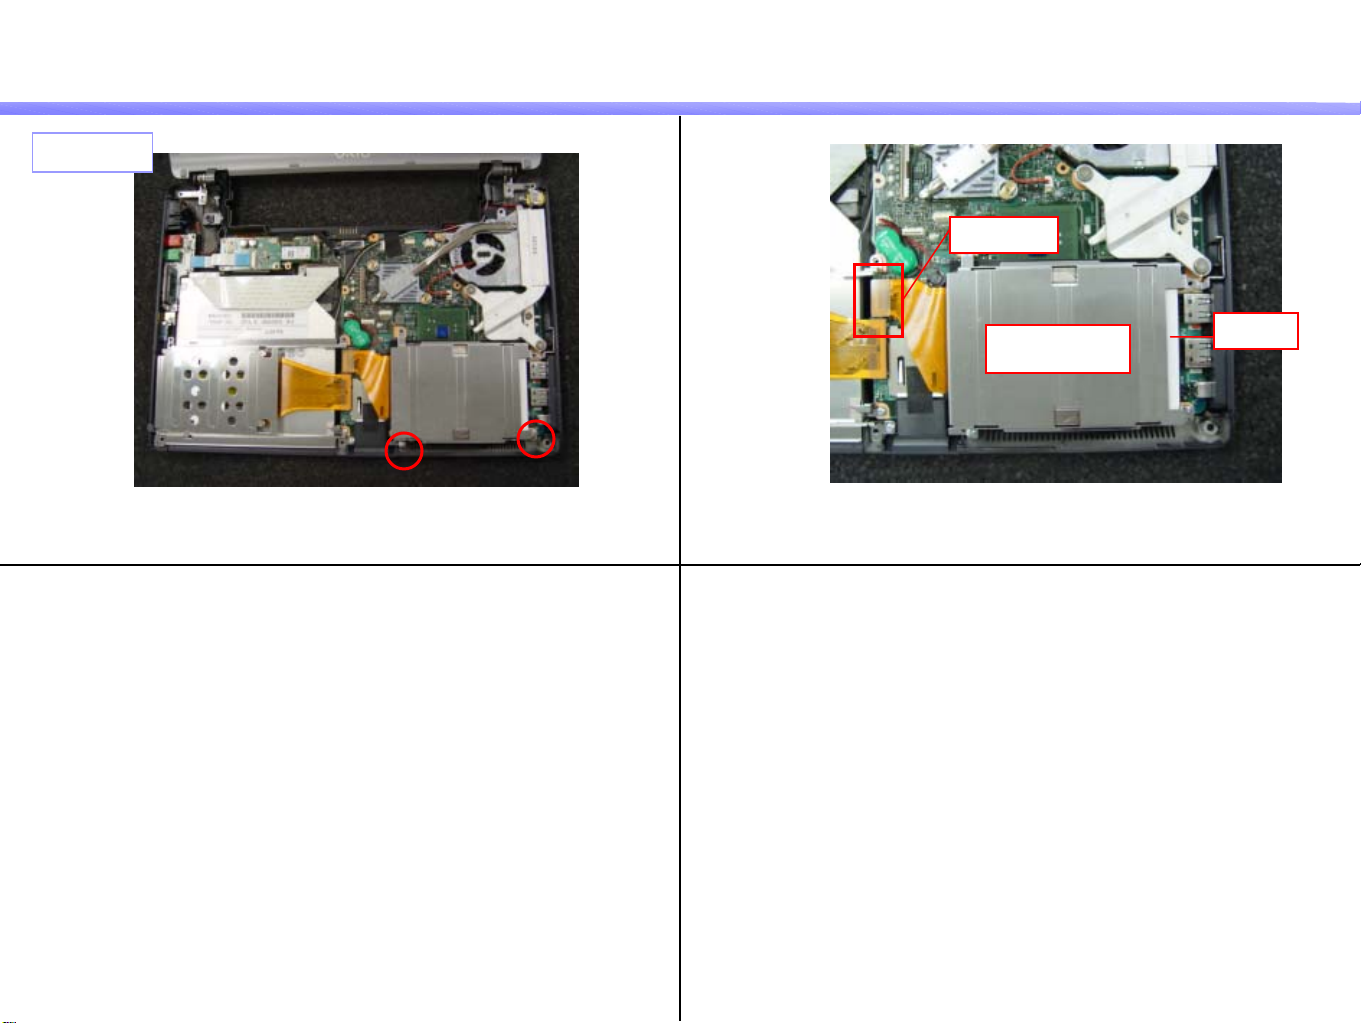
HDD
Confidential
1)
Screw: B4
Remove the two screws.
2)
Connector
HDD
Bracket (HDD)
Disconnect the Connector, and remove the HDD.
*The HDD is removed together with the Bracket (HDD).
S Series
 Loading...