

Sony VAIO PCV-W10 User Manual

VAIO® Computer er
User Guide
PCV-W10


Contents
Welcome.......................................................5
Configuring Your VAIO Computer .............7
About Your Hard Disk Drive Partition .......................8
i.LINK Compatibility ..................................................9
VAIO Action Setup...................................................10
Changing The Sony Software Window Design ........12
Using The Memory Stick Media Slot .......................13
Using The PC Card Slot ............................................16
System And Application
Recovery CD(s)D(s)..........................................19
Using The System Recovery CD(s) ..........................20
Using The Application Recovery CD(s) ...................23
Troubleshooting ........................................27
About VAIO Computer Functions ............................28
About Using The Optical Disc Drive........................31
About The Speakers ..................................................34
About The Modem ....................................................35
About Using A Microphone......................................37
About The Mouse And Keyboard .............................38
About Using Peripheral Devices ...............................40
3

VAIO Computer User Guide
Notes On Use.............................................43
About The Power Source.......................................... 44
About Disposing Of The Lithium Battery ................ 45
About Handling The Computer System.................... 46
About The LCD Screen (Built-in Display)............... 48
About DVD, CD, And Floppy Disk Media .............. 49
Support Options........................................51
Immediate Help And Support ................................... 52
Software Help And Support...................................... 54
Contacting Sony For Help And Support................... 57
Notice ..........................................................59
End-User License Agreement For Sony Software.... 68
Index...........................................................73
4

Welcome
Thank you for purchasing your Sony VAIO® computer! Your new
computer is a superb blend of high technology and easy-to-use
functionality. The information provided here is designed to help you to
become familiar with the hardware and software applications included
with your system.
5

VAIO Computer User Guide
6

Configuring Your VAIO Computer
This section provides basic information about managing your computer's
hard disk drive performance, using i.LINK devices, Memory Stick media,
PC Cards, and changing default settings.
7

VAIO Computer User Guide
About Your Hard Disk Drive Partition
To improve the performance of Sony audio and video software applications, the
hard disk drive on your computer has been formatted with two partitions, C and
D. Some Sony software applications save files to the D partition. This prevents
large video captures from consuming the available space on your C partition.
To maintain optimum system performance, you should defragment your
computer’s D partition regularly.
Defragmenting your hard disk drive
If you encounter frame dropping while recording digital video onto your hard
disk drive, defragmentation may be necessary.
1 Deactivate your screen saver and close other open applications, if applicable.
2 Click Start in the Windows taskbar and select All Programs.
3 Point to Accessories, point to System Tools, and then select Disk
Defragmenter.
The Disk Defragment dialog box appears.
4 Select Action from the menu bar and click Analyze.
✍ It may take a long time to complete the defragmenting process, depending on the data
capacity and current utilization of your computer’s hard disk drive(s).
8
i.LINK Compatibility
i.LINK Compatibility
Your VAIO computer has two 4-pin i.LINK ports available to connect your
digital devices. A 4-pin i.LINK port does not supply power to a connected
device.
The following i.LINK 400 Mbps cables are available and recommended for use
with your computer: VMC-IL4415, VMC-IL4435, VMC-IL4615, and
VMC-IL4635. Sony computer supplies, accessories, and peripherals can be
purchased from Sony VAIO Direct through the Web site at
http://vaio.sonystyle.com or the toll-free number, 1-888-315-7669.
✍ i.LINK is a trademark of Sony used only to designate that a product contains an
IEEE 1394 connection. The i.LINK connection may vary, depending on the software
applications, operating system and compatible i.LINK devices. All products with an
i.LINK connection may not communicate with each other.
Refer to the documentation that came with your compatible i.LINK device for
information on operating conditions and proper connection. Before connecting i.LINK
devices to your system, confirm the device’s operating system compatibility and
required operating conditions.
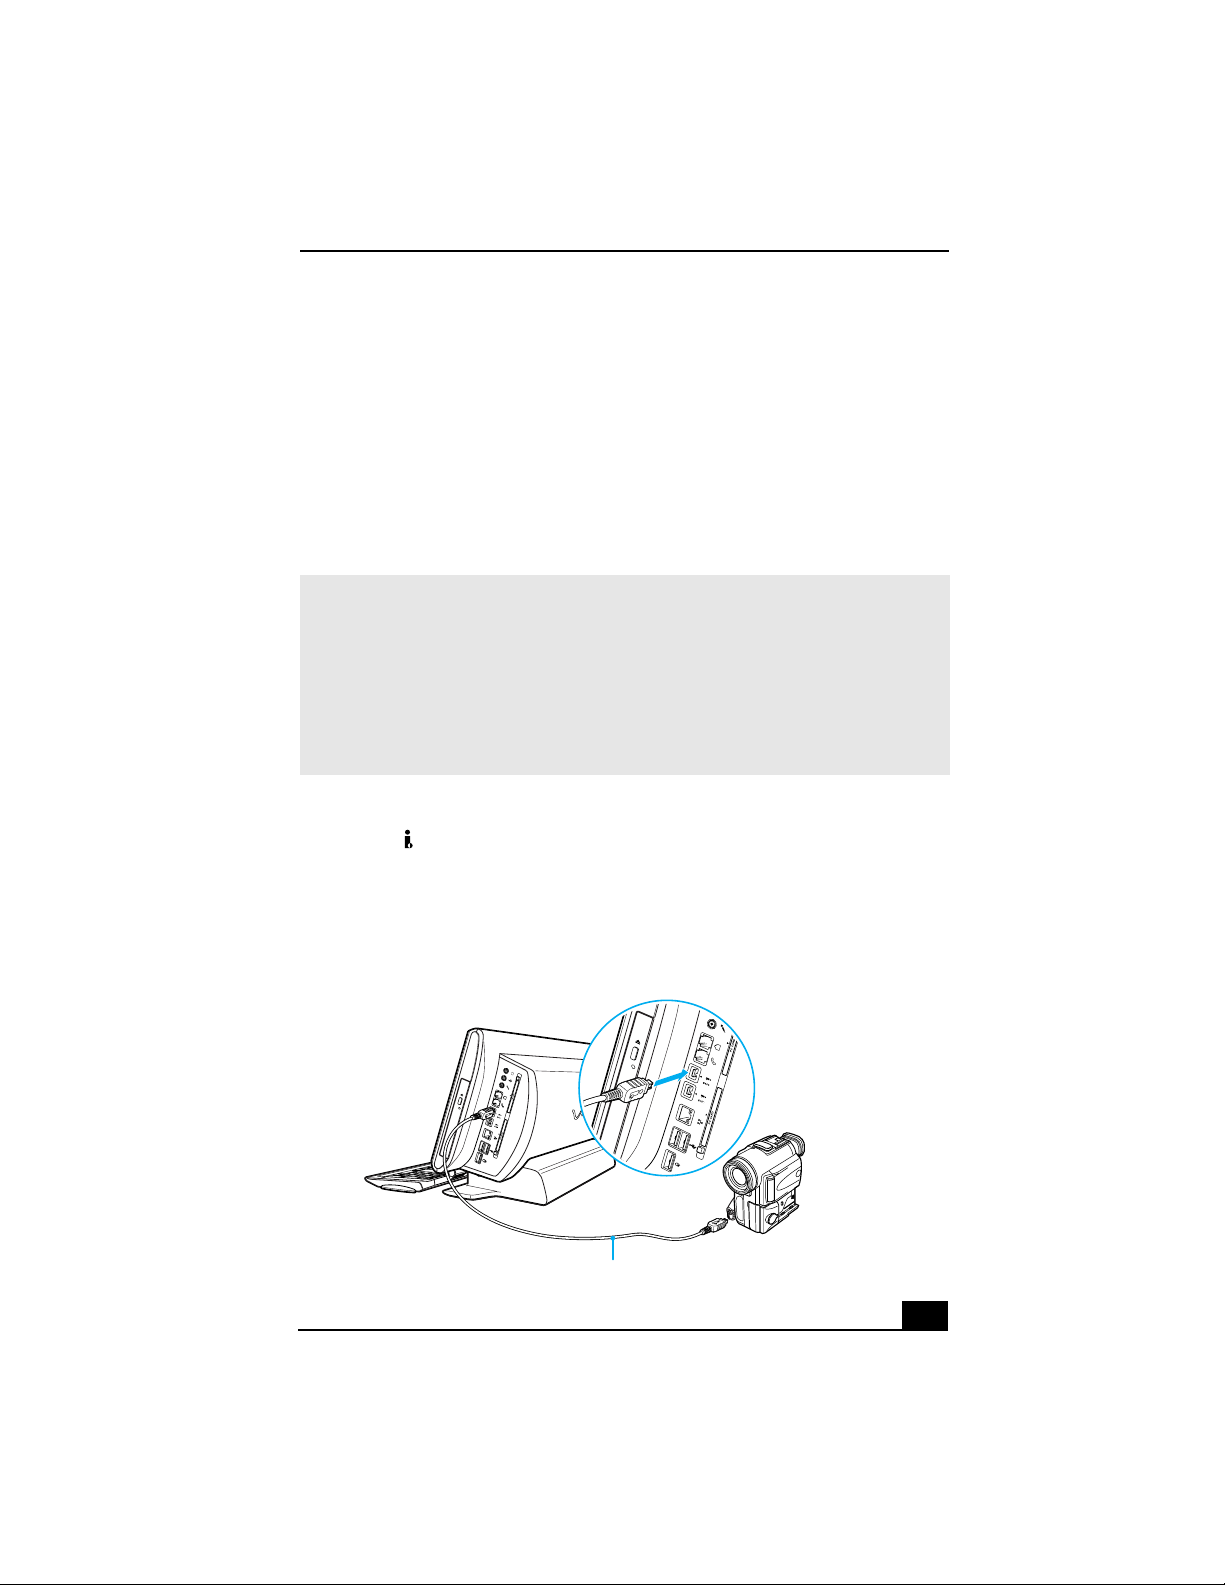
Connecting an i.LINK (IEEE 1394) device
1 Use the symbol to locate the i.LINK port on your compatible i.LINK
device and on your computer. Plug the i.LINK cable connector into this port.
2 Plug the other end of the cable into the corresponding 4-pin i.LINK port on
your computer.
To connect a 4-pin i.LINK device
i.LINK cable (optional)
9
VAIO Computer User Guide
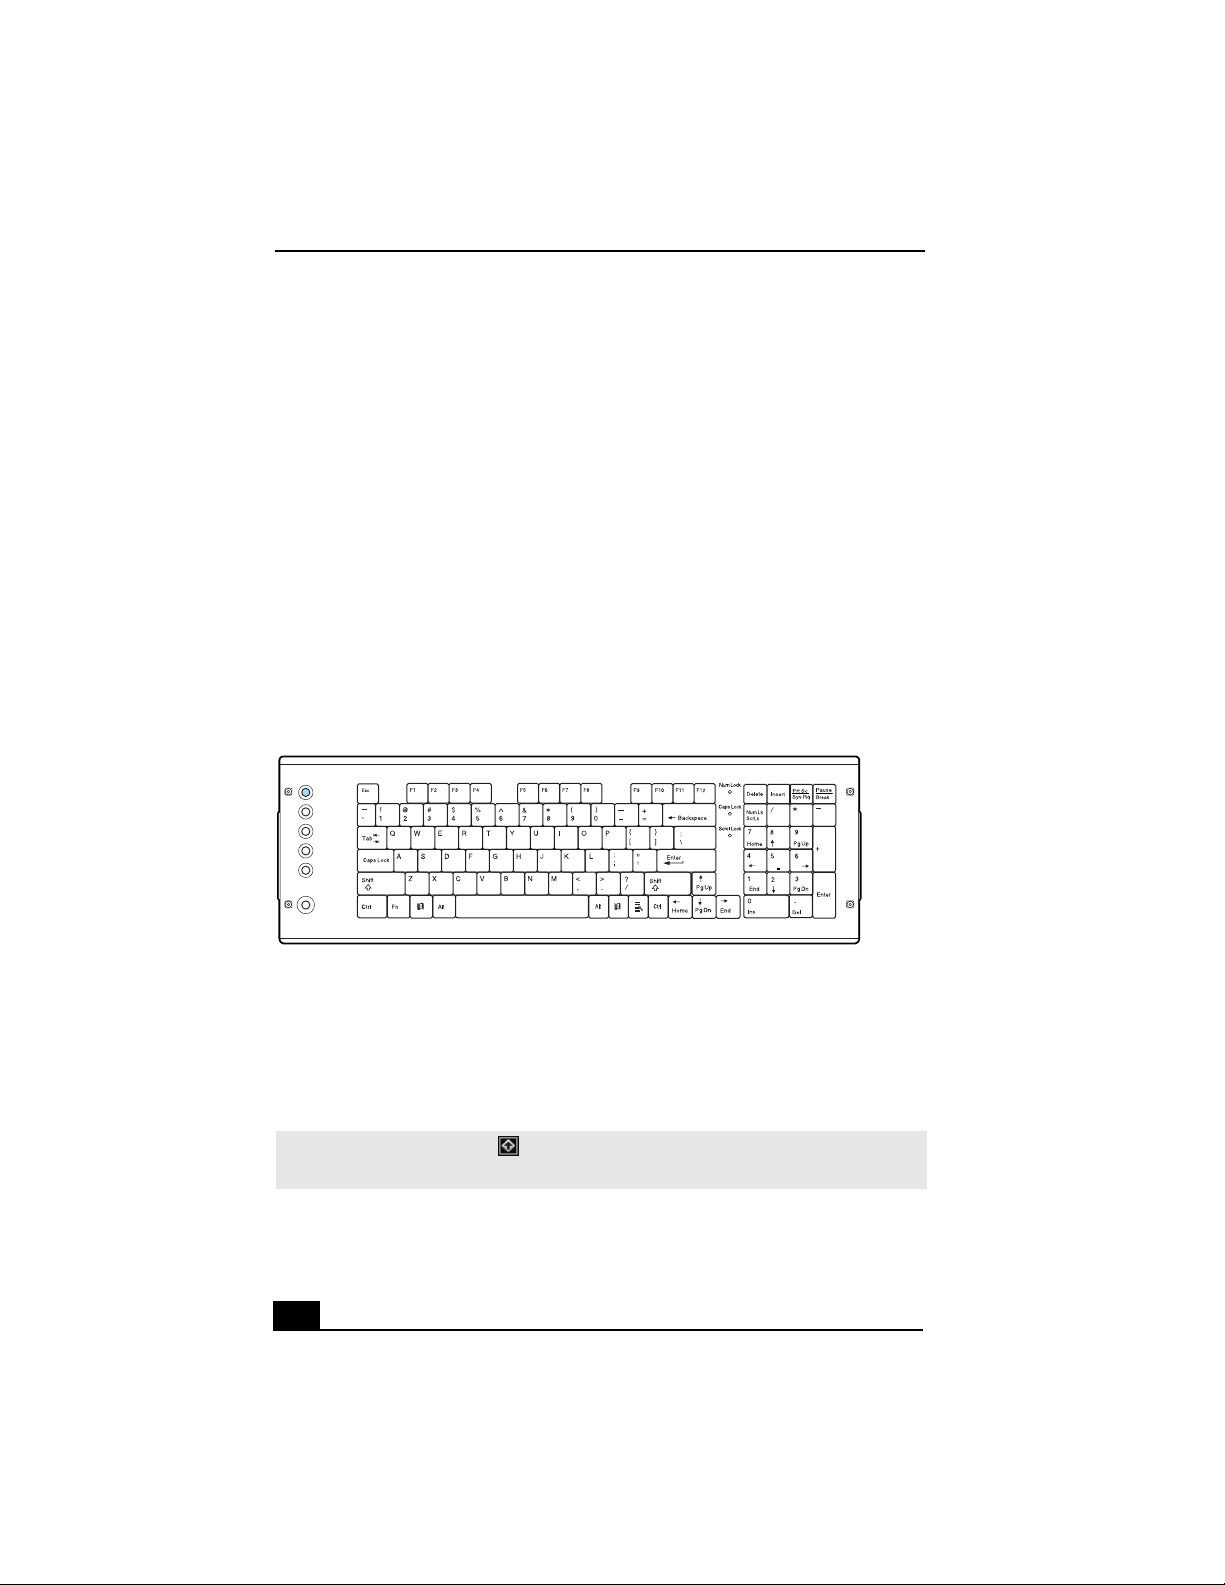
VAIO Action SetupO Action Setup
VAIO® Action Setup manages the settings for your computer’s Shortcut keys
(S Keys).
Shortcut keys
The programmable S Keys are set to launch the following applications:
❑ S1—Microsoft® Outlook® Express
❑ S2—Microsoft® Internet Explorer
❑ S3—SonicStage™
❑ S4—PictureGear Studio
❑ S5—PowerDVD
❑ S6—VAIO® Help and Support
PCV-W10 keyboard
S1
MAIL
S2
INTERNET
S3
MUSIC
S4
PICTURE
S5
DVD
S6
HELP
Changing the settings of the S keys
You can reprogram the S keys to launch other applications.
1 Click Start in the Windows taskbar and select All Programs.
2 Select VAIO Action Setup, then click VA I O A c t i o n S e t u p .
✍ You can also double-click the VAIO Action Setup icon, located in the Windows
taskbar, to launch VAIO Action Setup.
3 Click the S Key you want to change.
10

VAIO Action Setup
4 From the Select Application dialog box, click the option for the desired type
of function. The corresponding applications appear in the list box on the
right.
5 Select an application from the list. Click Next.
✍ You can drag an application to place it into the list box.
6 The Confirmation Application Name window appears. Click Next.
7 You may now type a new name and description, if desired. Then click
Finish.
11

VAIO Computer User Guide
Changing The Sony Software Window Design
You can select from different window designs for certain Sony software
applications and create your own personal computing environment.
Changing the window design
1 Click Start in the Windows taskbar and select the Control Panel.
2 Click Other Control Panel Options.
3 Click UI Design Selector.
4 Click << or >> and select the desired design.
5 Click Apply.
6 The “UI Design Selector” window design changes. The window design for
your Sony software will match the “UI Design Selector” window.
7 To try another selection, click << or >>, then click Apply.
8 When you have made your selection, click OK. The UI Design Selector
closes and the Sony software window design displays.
✍ You may only use this feature with compatible UI Design Selector software.
12

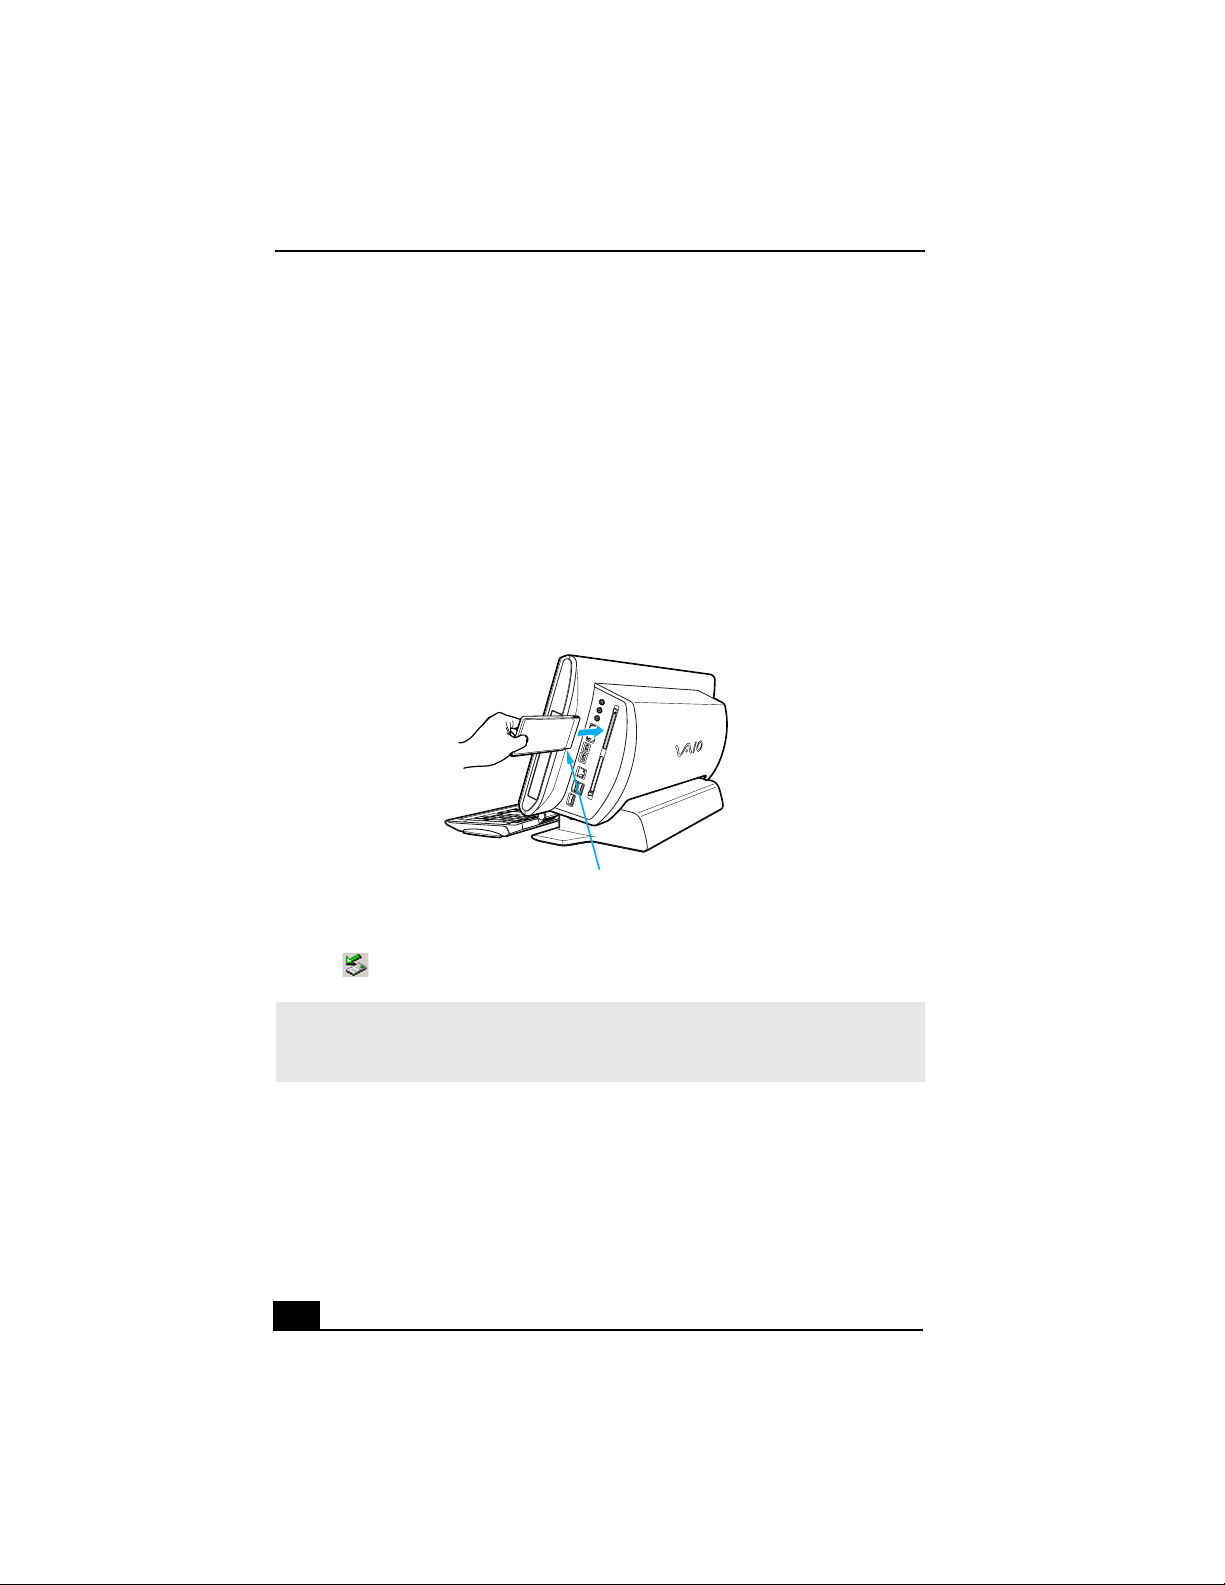
Using The Memory Stick Media Slot
Using The Memory Stick Media Slotk Media Slot
Your VAIO® computer is configured to support Memory Stick® media. A
Memory Stick media is a compact, portable, and versatile data storage media
designed for exchanging and sharing digital data with similarly equipped
devices.
To insert a Memory Stick media
1 Insert the Memory Stick media into the Memory Stick media slot, located on
the left panel.
Inserting a Memory Stick media
Insert a Memory Stick
media in this direction
2 If the media does not insert easily, remove it from the slot and verify that it is
not upside-down or backwards. Carefully reinsert the Memory Stick media,
but do not force it into the slot.
13
VAIO Computer User Guide
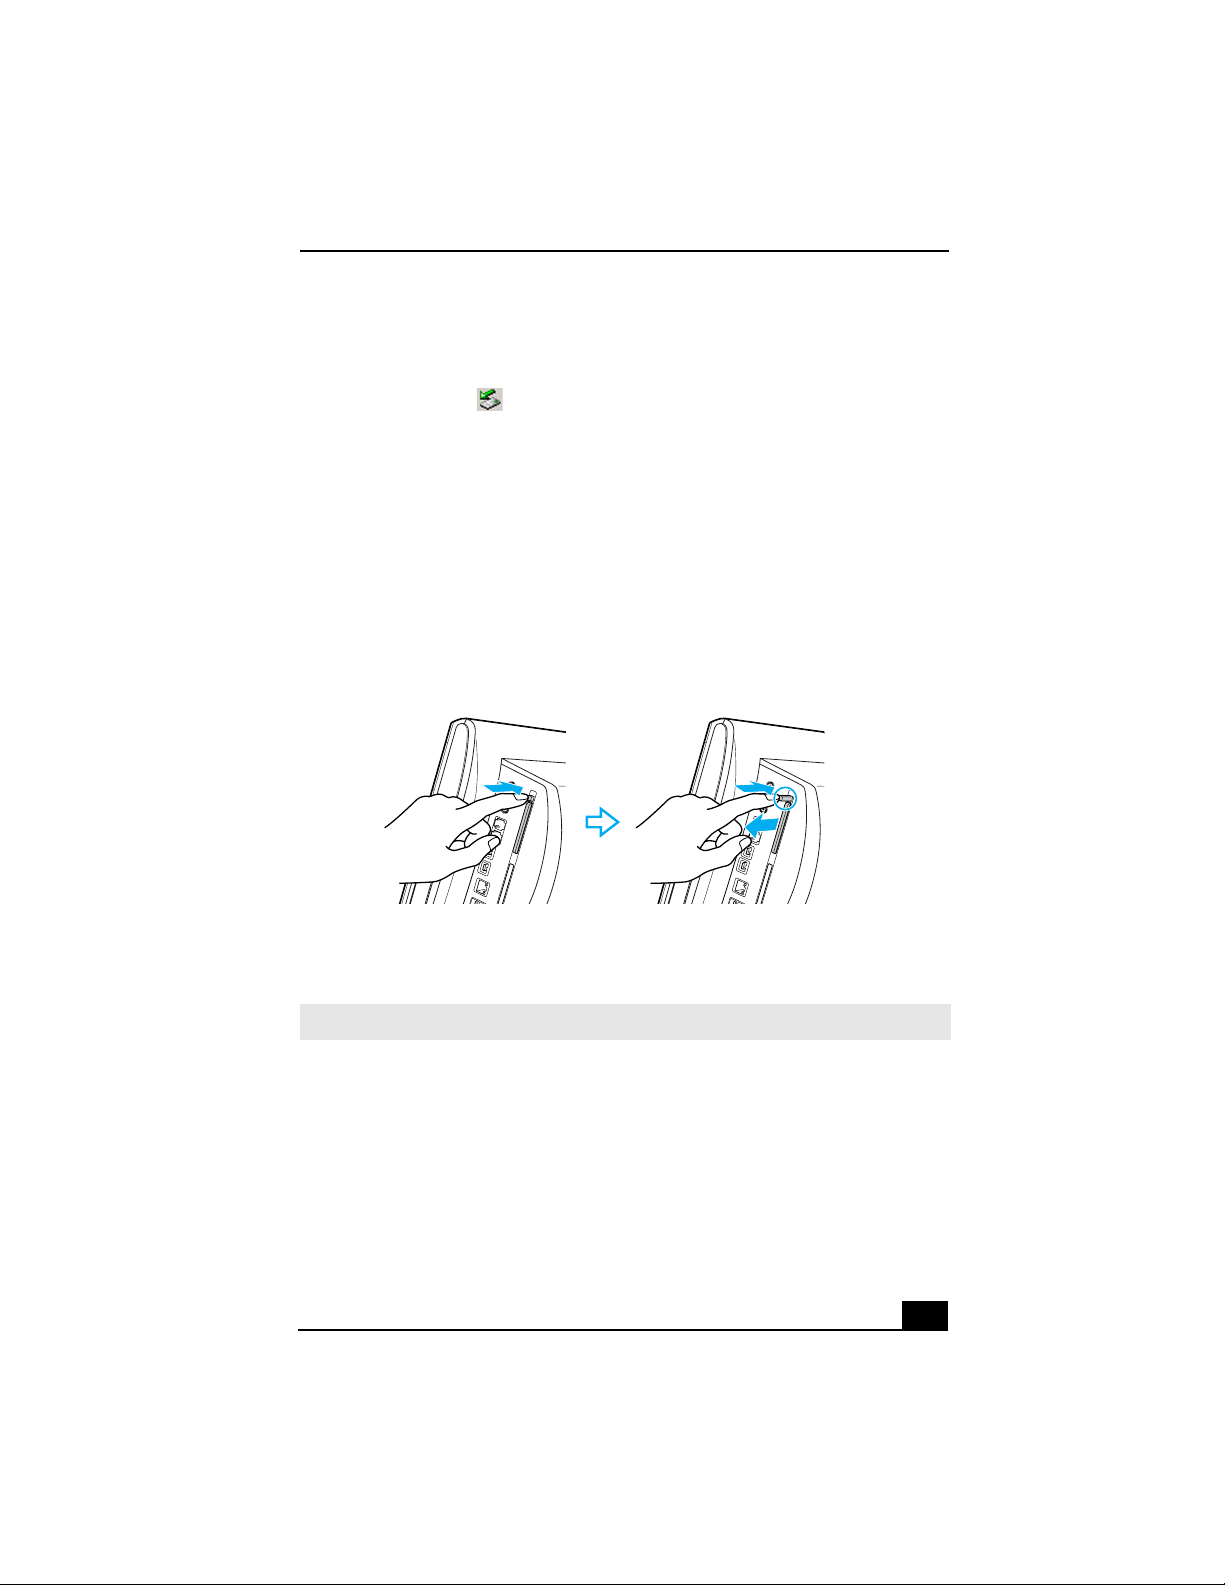
To remove a Memory Stick media
A small portion of the Memory Stick media remains extended when it is inserted
into the Memory Stick media slot.
1 Press the extended Memory Stick media to release it from the Memory Stick
slot. The media extends further, enabling you to grasp it.
2 Remove the Memory Stick media from the slot.
Removing a Memory Stick Media
Do not remove the Memory Stick media while the media access indicator light
is on. The media or its data may become damaged.
✍ Memory Stick media do not support AVI file playback. Copy the AVI file to your hard
disk drive before attempting to play back the file.
14
Using The Memory Stick Media Slot
LOCK
LOCK LOCK
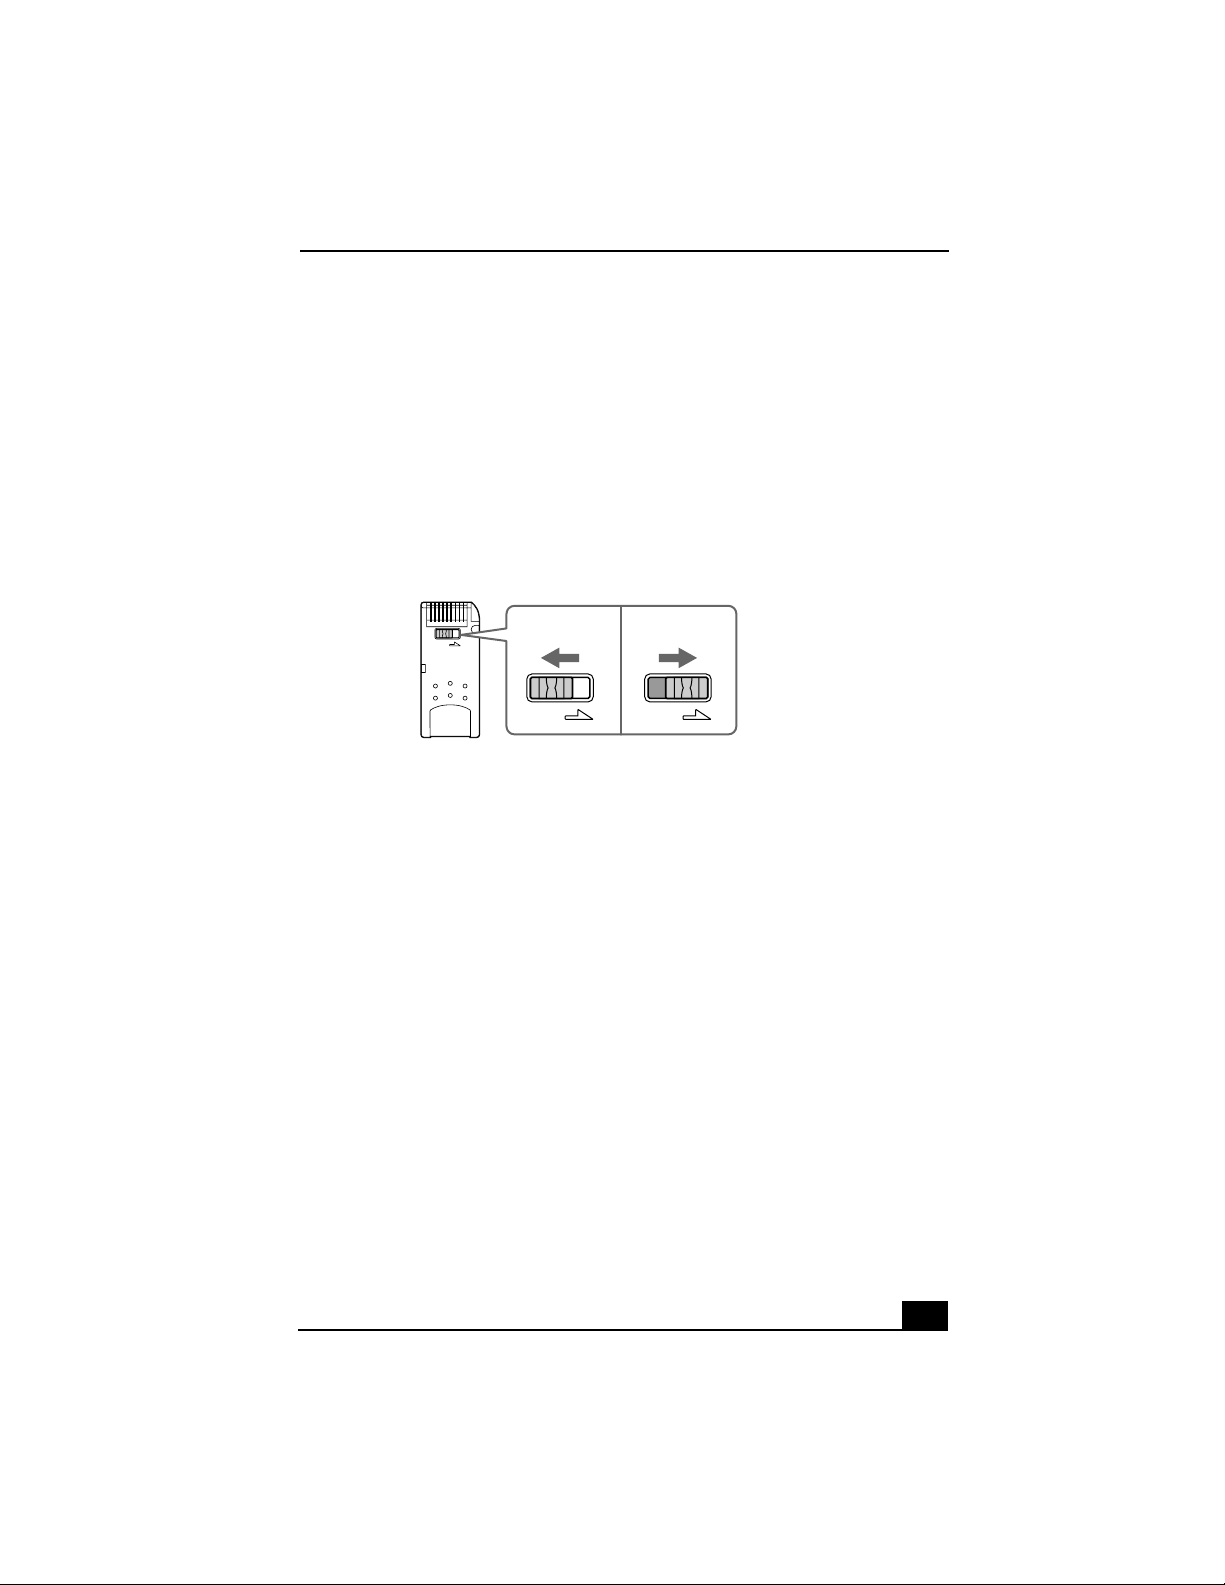
Protecting data on Memory Stick media from accidental changes
Memory Stick media contain a write-protect tab. The write-protect tab prevents
accidental changes to information recorded on your Memory Stick media. When
you slide the write-protect tab to the LOCK position, your Memory Stick media
is write-protected. You cannot delete, copy, or save information on the media
while the write-protect tab in the LOCK position. When you slide the tab to the
un-LOCK position, you can write to or modify your Memory Stick media’s
contents.
Locking the Memory Stick Media
To un l o c k
To l o c k
15
VAIO Computer User Guide
Using The PC Card Slot
Your computer has a card bus PC Card slot that supports Type I or Type II PC
(PCMCIA) cards. You do not need to shut down your computer when inserting a
PC Card. For more information, see the instructions supplied with your PC Card.
Inserting a PC Card
1 With the label facing up, insert the PC Card into the PC Card slot.
Inserting a PC Card
Insert a PC card in this direction
2 Push the PC Card gently into the slot. The card is automatically detected and
the Safely Remove Hardware icon appears in the Windows® taskbar.
✍ If the PC Card does not insert easily, remove it from the PC Card slot and verify that it
is not upside-down or backwards. Carefully reinsert the PC Card, but do not force it
into the slot.
16
Using The PC Card Slot
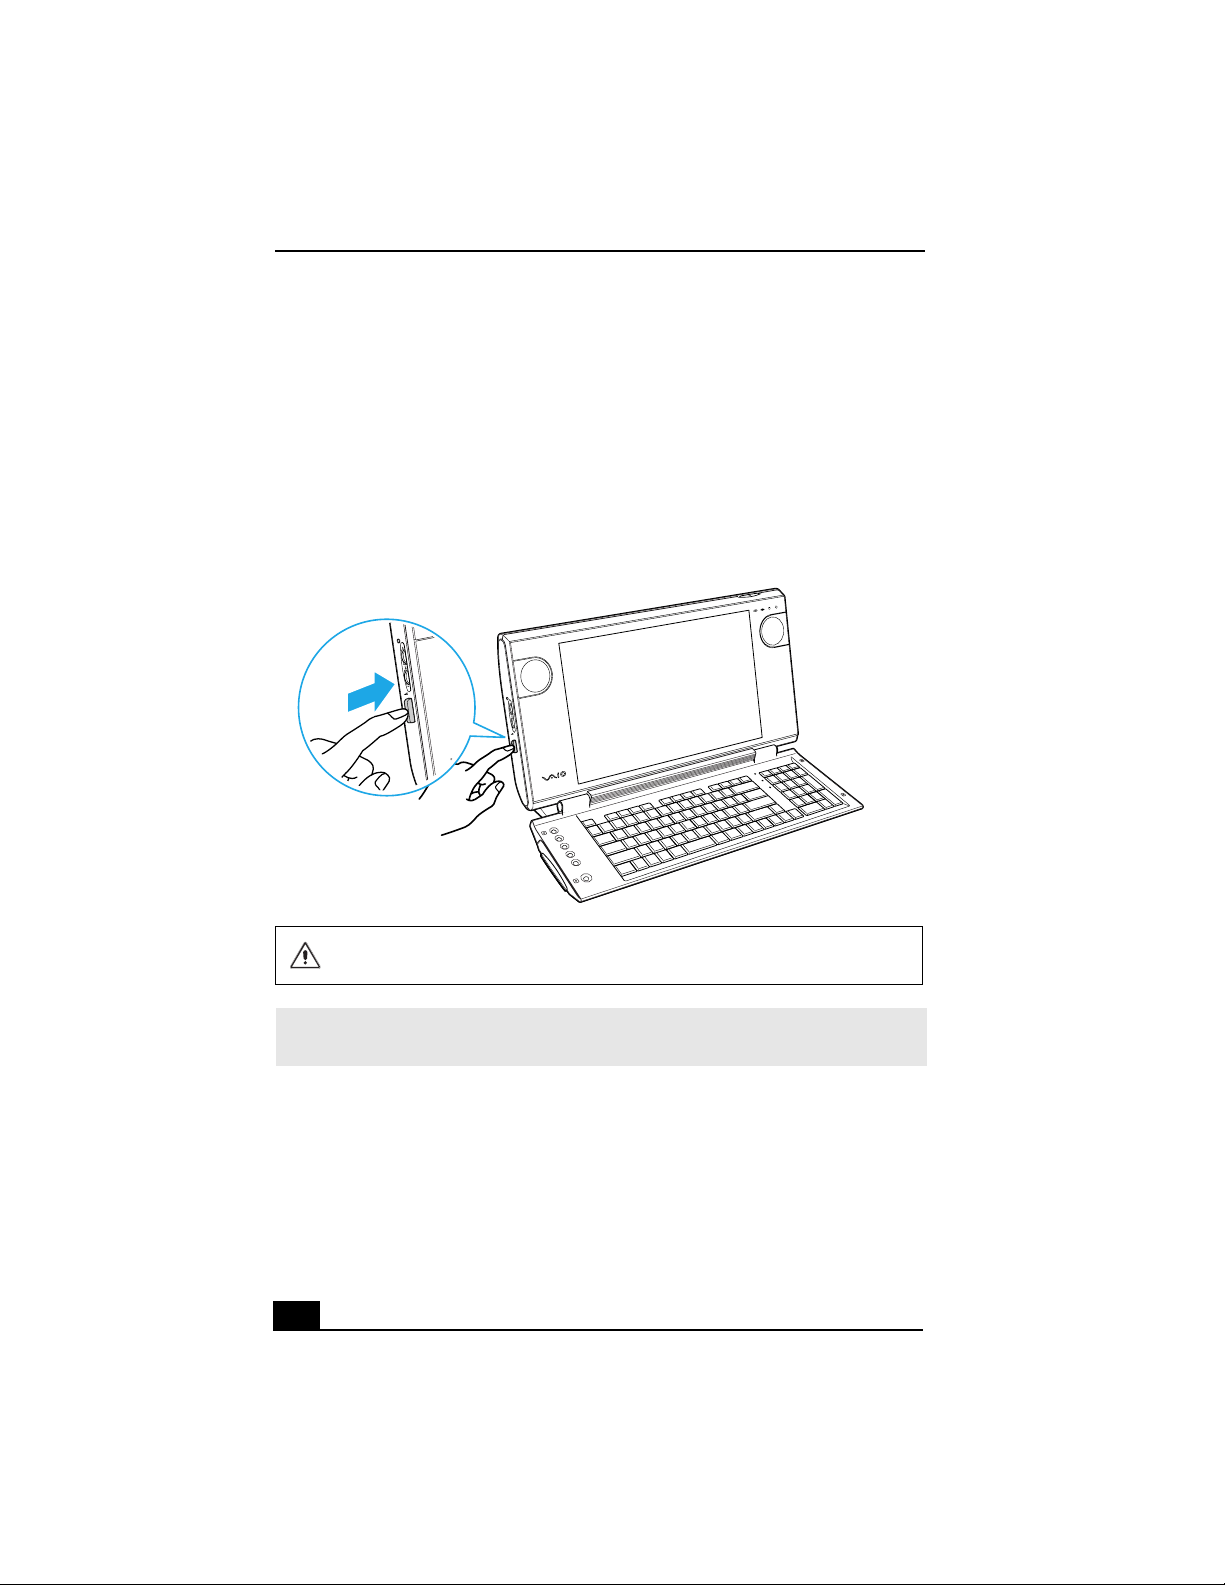
Removing a PC Card
1 Close all applications that may access the PC Card to avoid data loss.
2 Double-click the Safely Remove Hardware icon in the Windows®
taskbar.
3 Click to select the name of the card that you want to eject and click Stop.
The Stop a Hardware Device window appears. Click OK.
4 When the message “Safe to Remove Hardware” appears, push the PC Card
Eject button on the right panel of the system unit. You extend the Eject
button out from the computer before you can eject the card.
Removing a PC Card
5 When the PC Card ejects from the PC Card slot, remove it by holding the
edges and pulling it out carefully.
✍ If you eject the PC Card incorrectly, your computer may not work correctly.
17

VAIO Computer User Guide
18

System And Application
Recovery CD(s)
You can restore your system, individual software applications, or drivers,
using the Recovery CDs.
19
VAIO Computer User Guide
Using The System Recovery CD(s)
The System Recovery CD utility formats your hard disk drive and restores the
operating system and all the original, preinstalled software applications. If the
operating system or applications become corrupted or are erased, you can restore
your computer to the original factory settings. The System Recovery CD can
only be used to restore the hard disk drive of the Sony computer you purchased.
The System Recovery process removes all software that you may have
installed since you started using your computer. Reinstall any applications
that were not included with the computer when you purchased it.
If you experience a problem with your computer, reinstalling an individual
application or device driver may correct the problem. You may not need to
recover the entire contents of your hard drive.
✍ Use the Application Recovery CD(s) to reinstall individual applications.
When you successfully complete your system recovery, you are prompted to
complete the Windows registration process.
System recovery options
Default system drive recovery (recommended)
All data on Drive C is deleted. The factory default settings and software
applications are restored on this drive only.
Change partition size and recover
All partitions, custom installations, and changes are removed from the hard disk
drive. You can set the partition sizes for both the Drive C and Drive D. The
original, preinstalled operating system and software applications are restored.
Factory default settings recovery
All data and partitions are removed from the hard disk drive. All original factory
settings, operating system, and preinstalled software is restored.
The System Recovery utility does not back up your system's data. If you wish
to retain your system data, perform a back up to an external media.
20
Using The System Recovery CD(s)
Using the System Recovery CD(s)
Your system may take a few minutes to load necessary files. A blue screen
appears during the downloading process.
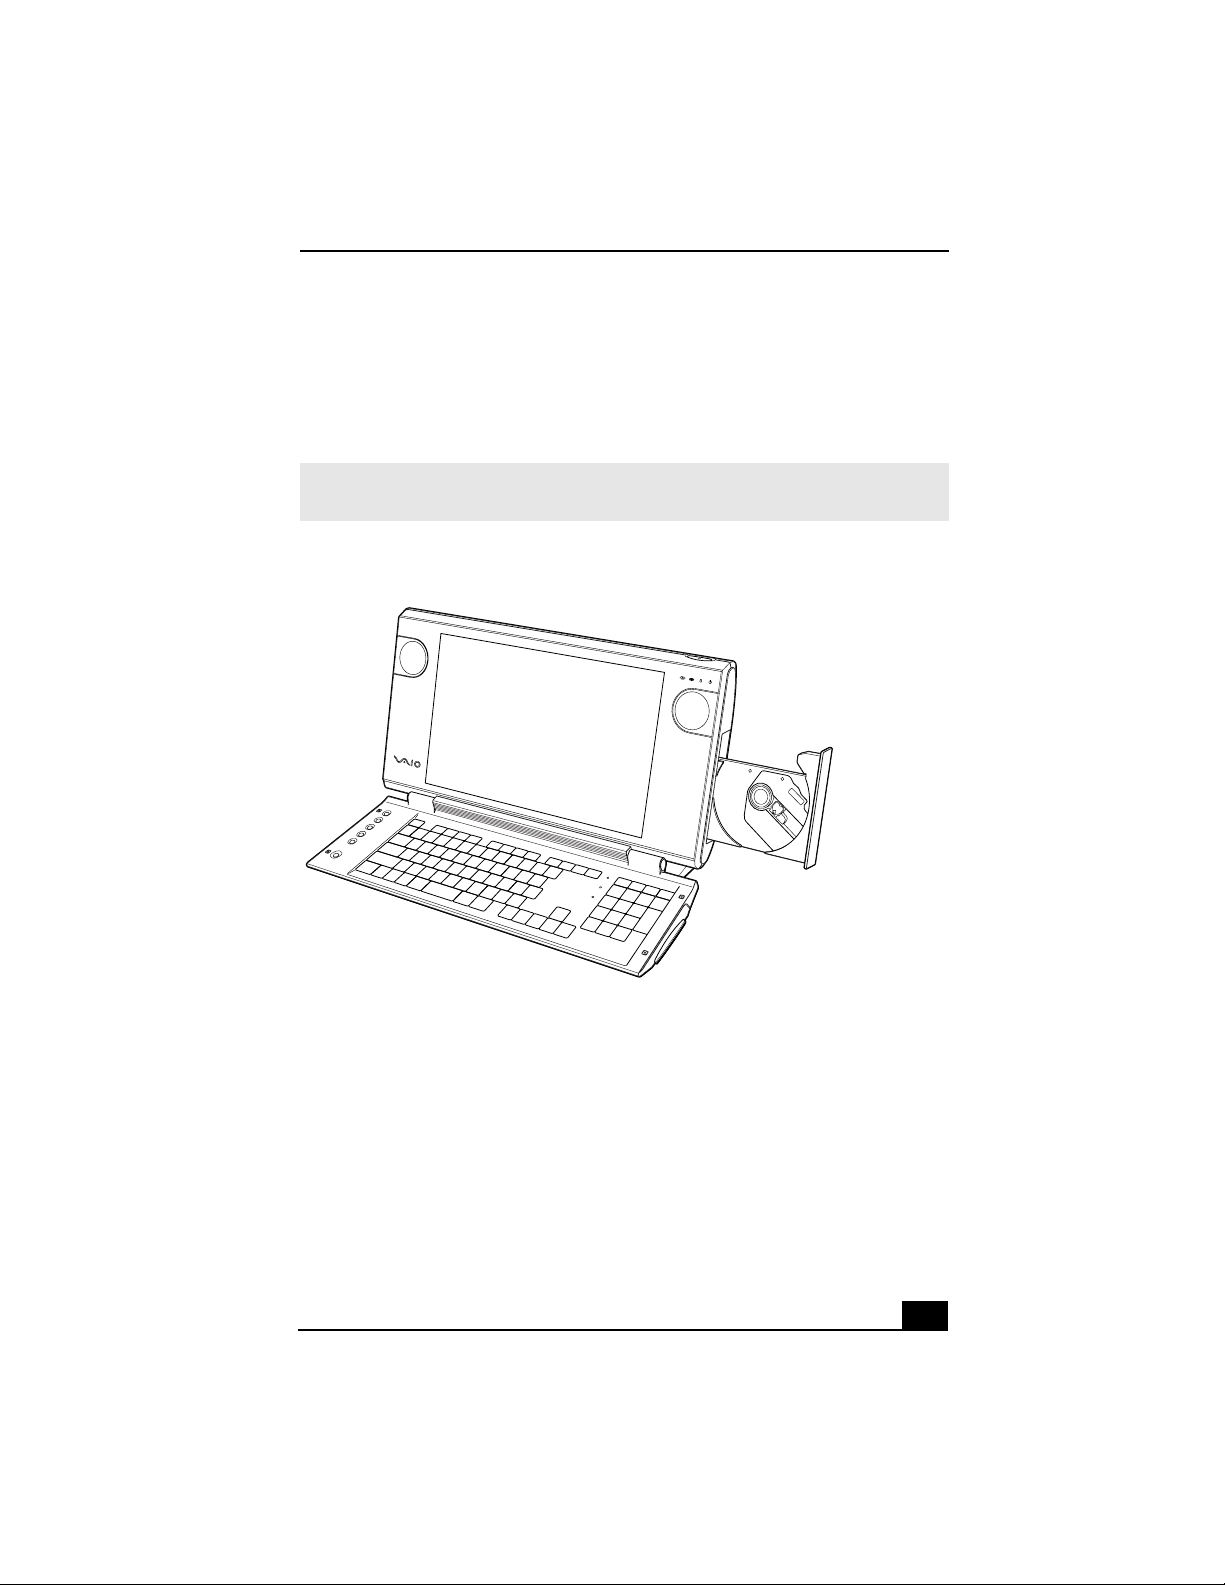
1 Insert the System Recovery CD in your computer’s optical drive.
✍ The System Recovery utility starts from the optical drive. The first CD must be in the
drive when you turn on your computer.
To insert the System Recovery CD
2 Turn off your computer.
3 Wait 30 seconds and turn on your computer. Your screen displays the
downloading progress, “Starting VAIO Recovery Utility.”
4 When the VAIO System Recovery Utility dialog box appears, click Next.
21

VAIO Computer User Guide
5 A Notes on Use window appears. Click Next.
6 On the Main Menu - Product Recovery window, select the appropriate
option to recover your system. Follow the on-screen instructions to complete
the recovery process.
✍ Your system may include one or more System Recovery CDs. If you have more than
one System Recovery CD, insert the first CD to run the System Recovery program.
You are prompted to insert the next CD(s) once the information from the first CD has
been installed.
The recovery process takes approximately 30 to 60 minutes to complete.
After recovering your system using the System Recovery CD(s), you may be prompted
to insert your Application Recovery CD(s) after restarting Windows. Use the
Application Recovery CD(s) to complete full restoration of your system.
22

Using The Application Recovery CD(s)
Using The Application Recovery CD(s)pplication Recovery CD(s)
The Application Recovery CD utility enables you to reinstall individual software
applications, individual drivers, and to repair software applications if they
become corrupted or are erased. You can reinstall a software application or driver
to correct a problem that you are experiencing with your computer, peripheral
hardware, or specific software application. You may not need to reinstall the
entire contents of your hard drive. You must be in Windows to run the
Application Recovery CD utility.
✍ To reinstall all of the software that shipped with your computer, use the System
Recovery CD(s).
Reinstalling software applications
1 Turn on your computer. If your computer is already on, save and close all
open applications.
2 Logon to go to the Windows® desktop.
3 Insert Application Recovery CD #1 into your computer’s optical drive. The
Application Recovery utility loads automatically.
4 Click OK in the VAIO welcome window. The Sony Application Recovery
Program window appears.
5 Double-click the Software folder. Icons representing preinstalled software
are displayed.
6 Double-click the application you want to reinstall. The software’s
installation wizard begins.
7 Follow the on-screen instructions to complete the application recovery
process.
If you have questions about using the Application Recovery CD(s), visit the Sony
Computing Web site at http://www.sony.com/pcsupport.
23
 Loading...