

Sony Vaio PCG-6J2L Installation Instructions Manual

Installing Sony Vaio PCG-6J2L Keyboard
Installing Sony Vaio PCG-6J2L Keyboard
Step 1 - Battery
Turn the computer upside down.
Locate the battery.
The battery should be easily identifiable and
located underneath the screen attachment.
Unlock the battery by shifting the 'lock' slide to the
'unlock' position on the underside and back of the
system.
Step 2
Hold the release on the right side and remove the
battery out carefully.
© 2010 iFixit — CC BY-NC-SA www.iFixit.com Page 1 of 3
Installing Sony Vaio PCG-6J2L Keyboard
Step 3 - Keyboard
Ignore the removal of the heat sink and
memory panels as depicted. They do not
need to be removed for the completion of
this guide.
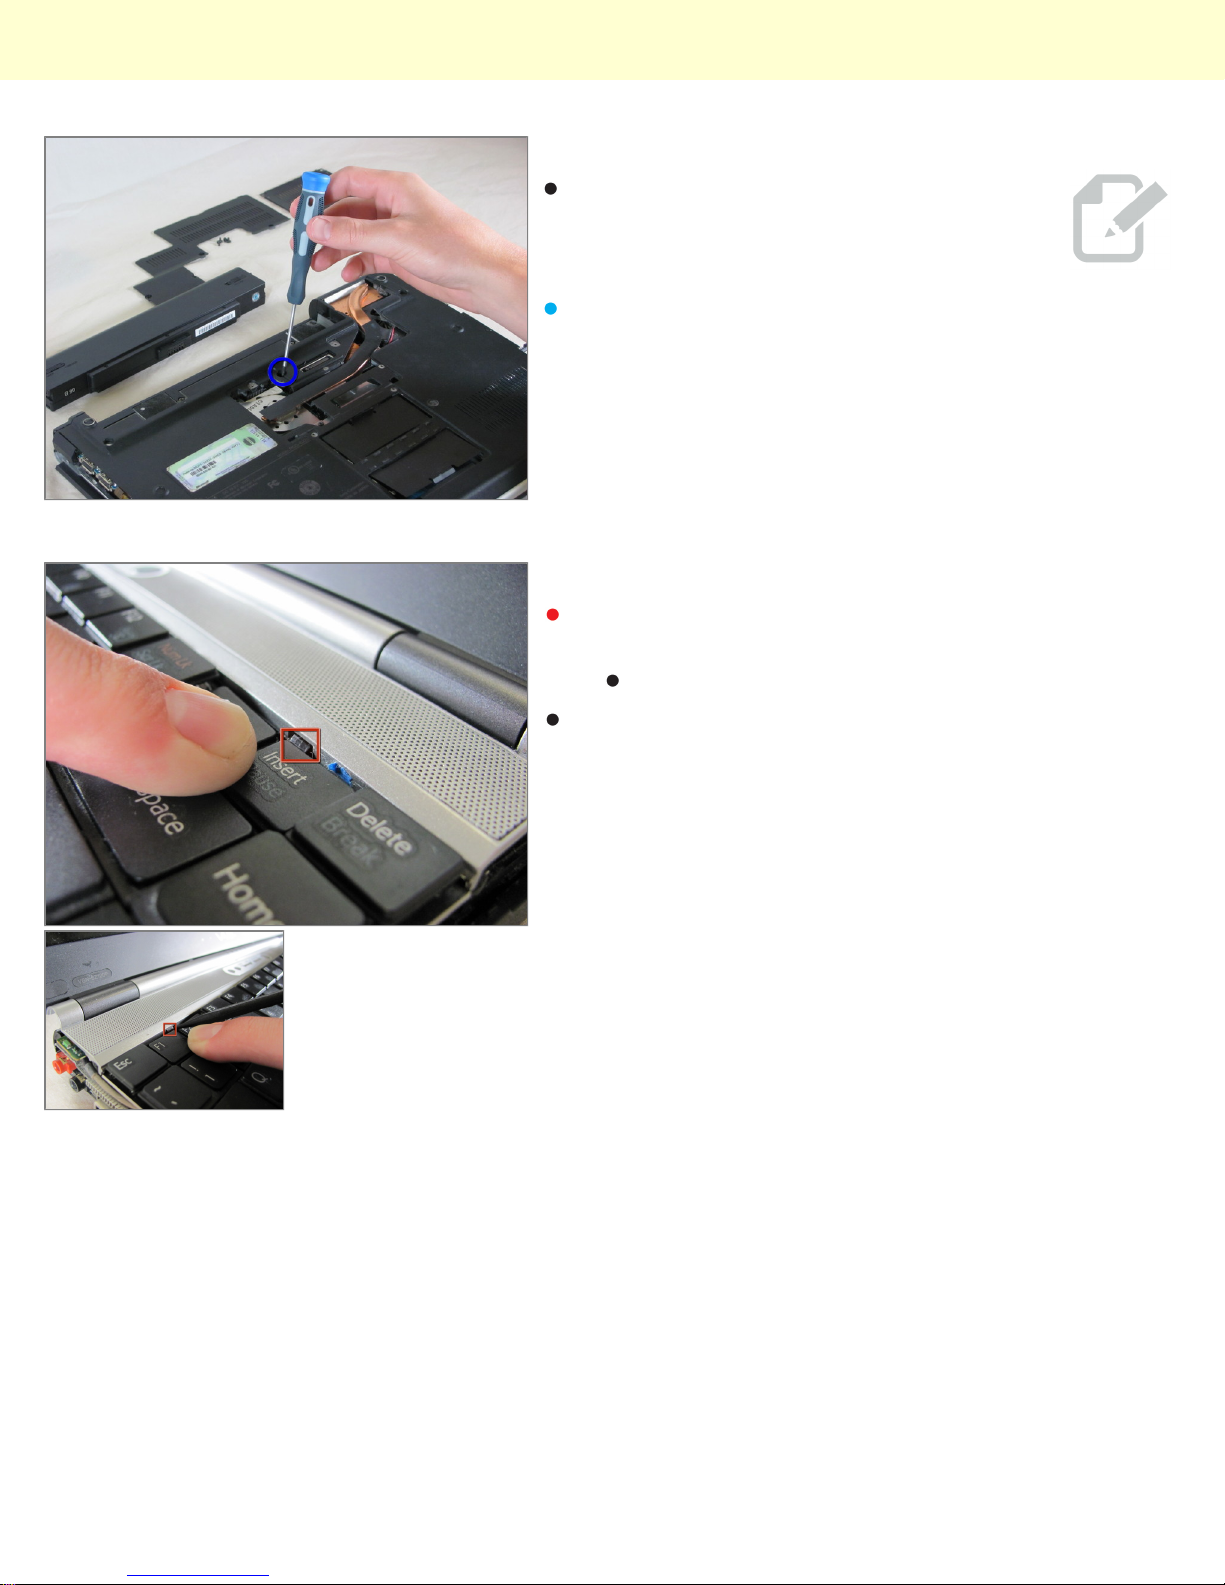
Locate the security screw on the back of the computer
and unscrew it.
Step 4
Push the tabs shown on both sides and the keyboard
will pop up.
Move the keyboard toward the mouse pad and gently
pull up.
A small flat-head might help you push the tabs.
© 2010 iFixit — CC BY-NC-SA www.iFixit.com Page 2 of 3
 Loading...