

Page 1
VAIO Notebook PC
y
#6
p
p
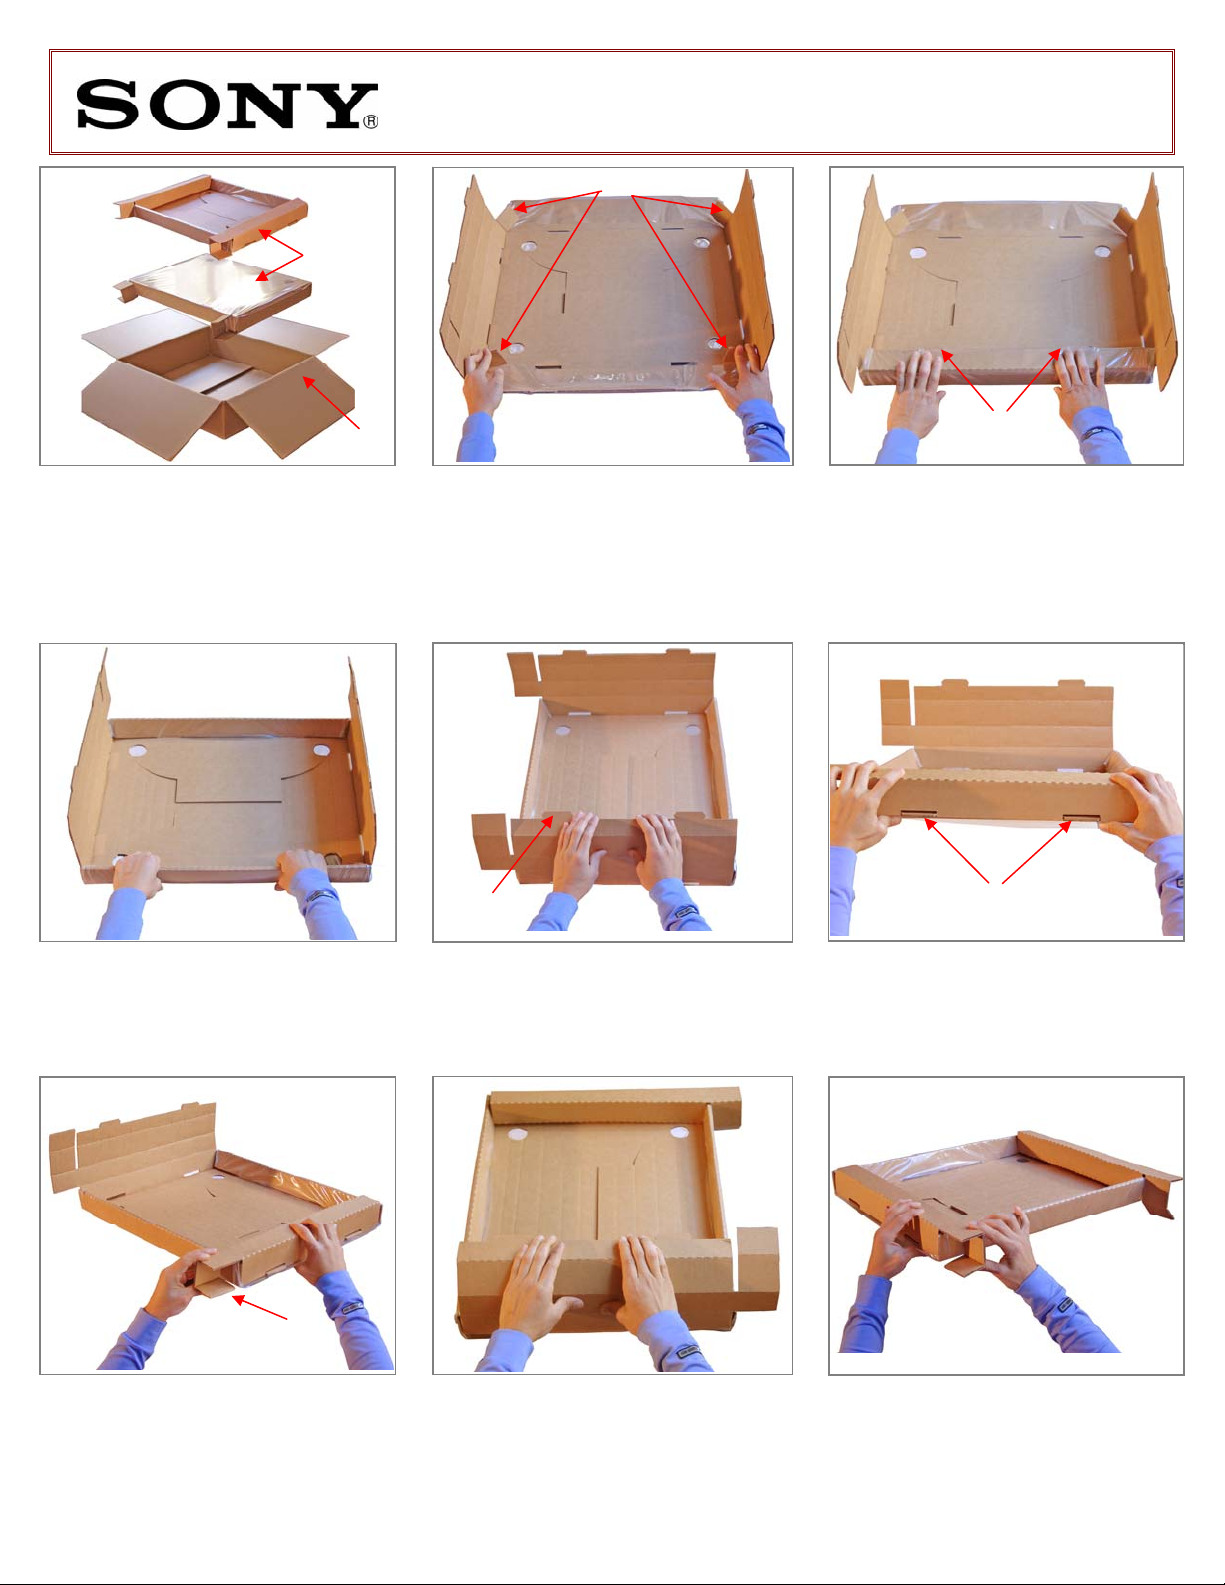
Packing Instructions
#1
#2
(2) Trays
with plastic
Fold flaps
In order to protect your PC during
transit, Sony Service Center has
provided you with packaging
material. Some assembly will be
required and after assembled the
packaging should look as shown on
photo#1.
(1) Box
IMPORTANT ! If plastic film is missing do not proceed with these instructio ns, call
customer support and request another box.
Place tray with the plastic film facing down. In a single move, fold and hold
small flaps in place (see photo #2) while rolling larger flap over small flaps (see
photo #3). Complete the folding of larger flap by locking the 2 tabs onto open
slot.
#4
#5
Tab
Rotate tray (see photo #4) and
repeat the folding process with
other side of the tra
.
Turn tray, pre-fold and roll side flap towards inside of the tray (see photo # 5),
ensure that both tabs are fully inserted on open slots as shown on photo #6.
#7
Fold and press down the end of tray
as shown on photo #7.
Fold end of
insert
Rotate tray (see photo #8) and
continue the folding process with
other side of tray.
Last Revised: April 2005 1/2
#8
#3
Insert tabs in
lace
Insert tabs in
lace
#9
Completed tray should look as shown
on photo #9. Assemble the 2nd tray
by following same steps (#2 thru
#8).
Page 2
VAIO Notebook PC
A
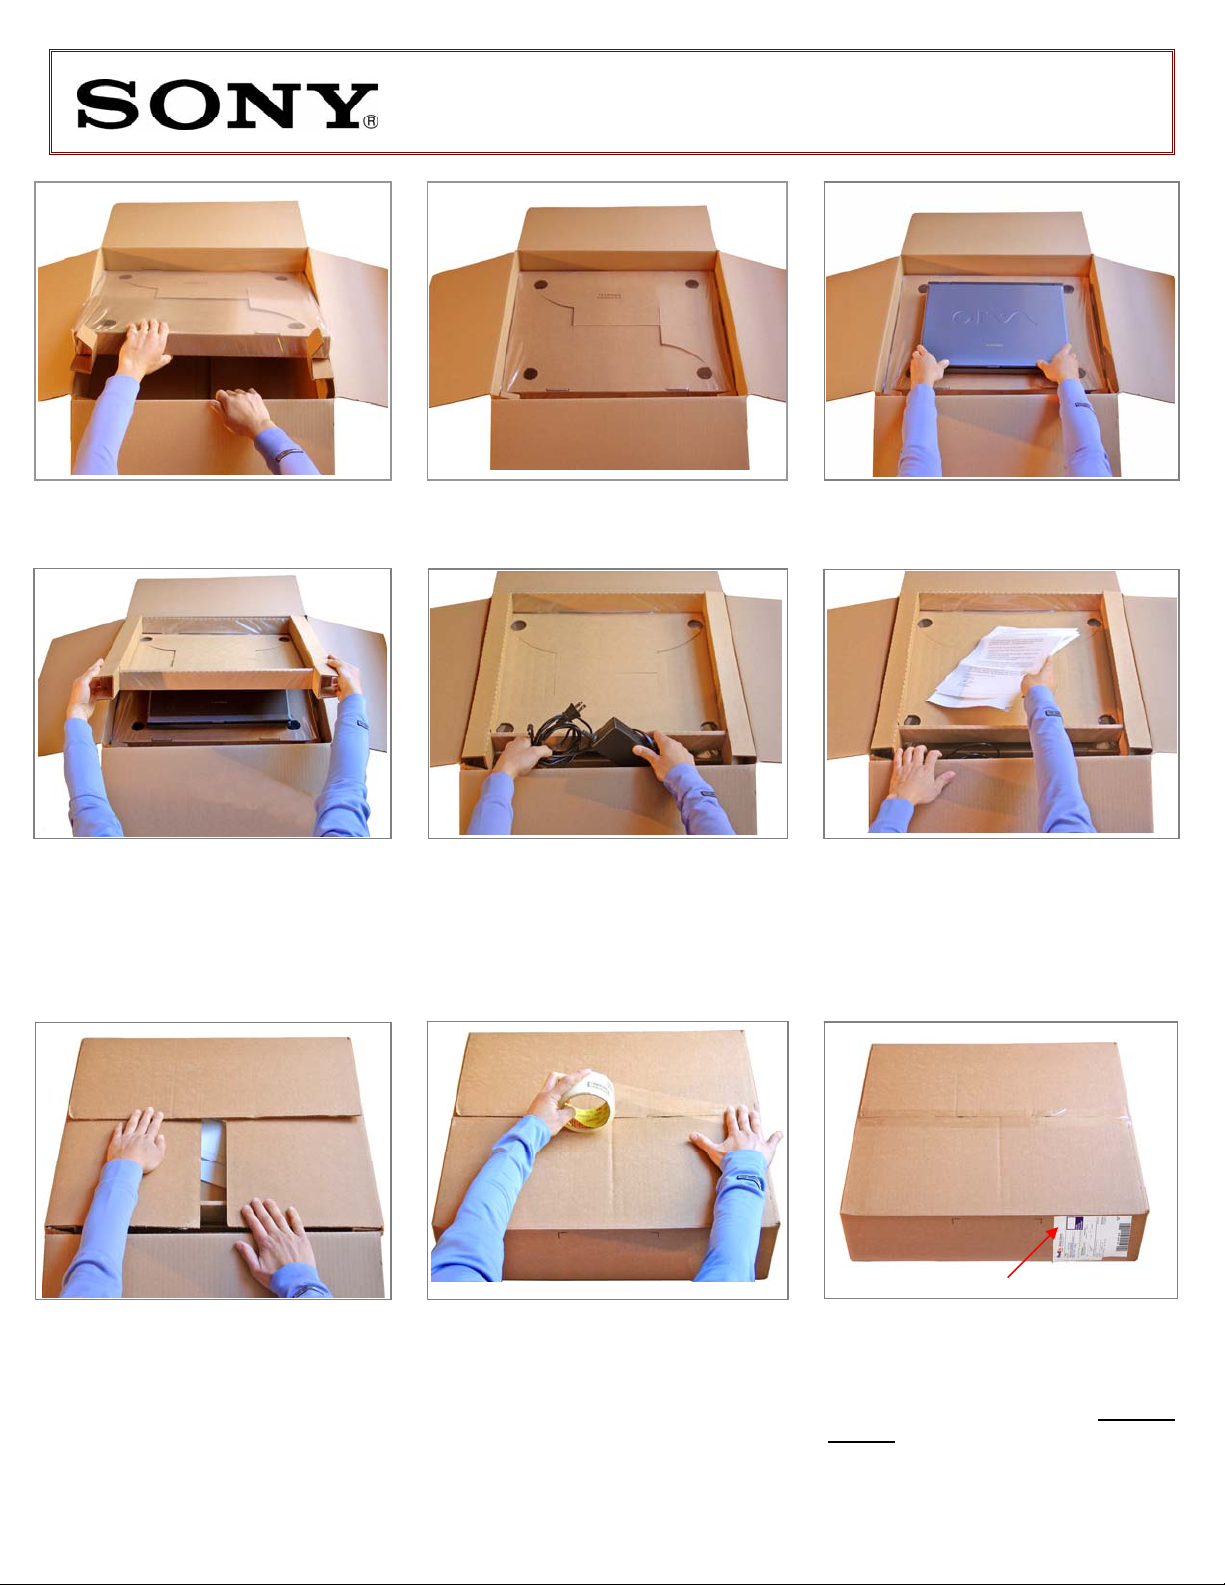
Packing Instructions
Assemble box and secure the bottom with clear packaging tape. Place one of the
trays inside the box with the film side up as shown on photo #10 and #11.
Place second tray on top of PC with
film side down (see photo #14).
IMPORTANT! The PC must be in
between the film side on both trays.
#10
#13
#16
Place accessories (if any) inside the
opening as shown on photo #13 add
newspaper/scratch-paper on the
sides to hold them in place.
IMPORTANT! Do not place any
accessories or loose items with your
PC.
#11
#14
#17
#12
Place your PC in the center of tray
as shown on photo #12.
#15
Place any pertinent documentation
related to the repair of your PC (i.e.
inventory sheet, copy of proof of
purchase, copy of warranty papers,
etc…) inside the box.
#18
Press down top tray applying pressure, some force may be required to suspend
the PC between the films. Fold small flaps first and then the larger flaps as
shown on photo #16. Ensure that there is no gap between the l arger flaps and
seal the box with clear packaging tape (see photo #17).
Last Revised: April 2005 2/2
ttach FedEx label on the side
Attach the FedEx return label to the
box. The sealed box should look as
shown in photo #18. Call FedEx toll
free at 1-800-GO-FEDEX (800-463-
3339) to request for a Prepaid
Pickup or drop off box at any
Kinko’s/FedEx location.
 Loading...