

Sony TRINITRON KV-27FA310, TRINITRON KV-29FA310, KV-27FS120, TRINITRON KV-29FS120, TRINITRON KV-27FS120 Service Manual
Page 1
HISTORY INFORMATION FOR THE FOLLOWING MANUAL:
SERVICE MANUAL
MODEL NAME REMOTE COMMANDER DESTINATION CHASSIS NO.
☛
KV-27FA310
KV-27FA310
☛
KV-27FS120
KV-27FS120
KV-29FA310
KV-29FA310
KV-29FS120
KV-29FS120
RM-Y180 US SCC-S61U-A
RM-Y180 CANADA SCC-S59Q-A
RM-Y195 US SCC-S61N-A
RM-Y195 CANADA SCC-S59J-A
RM-Y180 LATIN NORTH SCC-S60V-A
RM-Y180 LATIN SOUTH SCC-S60W-A
RM-Y195 LATIN NORTH SCC-S73D-A
RM-Y195 LATIN SOUTH SCC-S73E-A
BA-6
CHASSIS
ORIGINAL MANUAL ISSUE DATE: 3/2004
:UPDATED ITEM
☛
REVISION DATE SUBJECT
3/2004 No revisions or updates are applicable at this time.
8/2004 Reissue entire manual
Added KV-27FA310 model for US and Canada
9-965-960-02
TRINITRON® COLOR TELEVISION
Page 2

Self Diagnosis
Supported model
SERVICE MANUAL
MODEL NAME REMOTE COMMANDER DESTINATION CHASSIS NO.
☛
KV-27FA310
KV-27FA310
☛
KV-27FS120
KV-27FS120
KV-29FA310
KV-29FA310
KV-29FS120
KV-29FS120
RM-Y180 US SCC-S61U-A
RM-Y180 CANADA SCC-S59Q-A
RM-Y195 US SCC-S61N-A
RM-Y195 CANADA SCC-S59J-A
RM-Y180 LATIN NORTH SCC-S60V-A
RM-Y180 LATIN SOUTH SCC-S60W-A
RM-Y195 LATIN NORTH SCC-S73D-A
RM-Y195 LATIN SOUTH SCC-S73E-A
BA-6
CHASSIS
KV-27FS120 KV-29FA310
9-965-960-02
TRINITRON® COLOR TELEVISION
Page 3

KV-27FA310/27FS120/29FA310/29FS120
TABLE OF CONTENTS
SECTION TITLE PAGE
Specifi cations............................................................................................................................................................................. 4
Warnings and Cautions.............................................................................................................................................................. 5
Safety Check-Out....................................................................................................................................................................... 6
Self-Diagnostic Function............................................................................................................................................................. 7
SECTION 1: DISASSEMBLY............................................................................................................................................................. 9
1-1. Rear Cover Removal (All Except KV-27FA310/29FA310).................................................................................................. 9
1-2. Rear Cover Removal (KV-27FA310/29FA310 Only).......................................................................................................... 9
1-3. Chassis Assembly Removal (All Except KV-27FA310/29FA310)..................................................................................... 10
1-4. Chassis Assembly Removal (KV-27FA310/29FA310 Only) .............................................................................................10
1-5. Service Position (All Except KV-27FA310/29FA310)........................................................................................................11
1-6. Service Position (KV-27FA310/29FA310 Only).................................................................................................................11
1-7. Picture Tube Removal...................................................................................................................................................... 12
Anode Cap Removal Procedure....................................................................................................................................... 12
SECTION 2: SET-UP ADJUSTMENTS............................................................................................................................................ 13
2-1. Beam Landing.................................................................................................................................................................. 13
2-2. Convergence.................................................................................................................................................................... 14
2-3. Focus ...............................................................................................................................................................................15
2-4. Screen (G2)...................................................................................................................................................................... 16
2-5. Method of Setting the Service Adjustment Mode............................................................................................................. 16
2-6. White Balance Adjustments ............................................................................................................................................. 16
SECTION 3: SAFETY RELATED ADJUSTMENTS......................................................................................................................... 17
3-1.
X
R564 Confi rmation Method (HV Hold-Down Confi rmation) and Readjustments........................................................ 17
3-2. B+ Voltage Confi rmation and Adjustment........................................................................................................................ 17
SECTION 4: CIRCUIT ADJUSTMENTS.......................................................................................................................................... 19
4-1. Setting the Service Adjustment Mode.............................................................................................................................. 19
4-2. Memory Write Confi rmation Method ............................................................... .................................................................19
4-3. Remote Adjustment Buttons and Indicators..................................................................................................................... 19
4-4. Service Data Lists ............................................................................................................................................................20
4-5. ID Map Table.................................................................................................................................................................... 32
4-6. A Board Adjustments........................................................................................................................................................ 32
SECTION 5: DIAGRAMS................................................................................................................................................................. 35
5-1. Circuit Boards Location.................................................................................................................................................... 35
5-2. Printed Wiring Board and Schematic Diagram Information.............................................................................................. 35
5.3. Block Diagram and Schematics ....................................................................................................................................... 37
A Board Schematic Diagram ........................................................................................................................................... 38
CW Board Schematic Diagram ....................................................................................................................................... 40
D Board Schematic Diagram (All Except KV-27FA310/29FA310) ................................................................................... 41
HS Board Schematic Diagram(All Except KV-27FA310/29FA310).................................................................................. 42
V Board Schematic Diagram ........................................................................................................................................... 42
GD Board Schematic Diagram (KV-27FA310/29FA310 Only) ......................................................................................... 45
HR Board Schematic Diagram (KV-27FA310/29FA310 Only).......................................................................................... 48
HU Board Schematic Diagram (KV-27FA310/29FA310 Only).......................................................................................... 50
K Board Schematic Diagram (KV-27FA310/29FA310 Only) ........................................................................................... 53
5-4. Semiconductors ...............................................................................................................................................................54
SECTION 6: EXPLODED VIEWS.................................................................................................................................................... 55
6-1. Picture Tube (KV-27FS120/29FS120 Only)..................................................................................................................... 55
6-2. Chassis (KV-27FS120/29FS120 Only)............................................................................................................................. 56
6-3. Picture Tube (KV-27FA310/29FA310 Only)...................................................................................................................... 57
6-4. Chassis (KV-27FA310/29FA310 Only).............................................................................................................................58
SECTION 7: ELECTRICAL PARTS LIST....................................................................................................................................... 59
KV-27FA310/27FS120/29FA310/29FS120
3
Page 4

SPECIFICATIONS
)
r
KV-27FA310/27FS120/29FA310/29FS120
KV-27FS120
Power Requirements 220V, 50/60Hz 120V, 60Hz 220V, 50/60Hz
120V, 60Hz
KV-29FS120
(L. NORTH)
KV-29FS120
(L. SOUTH)
KV-27FA310 &
KV-29FA320
(L. NORTH)
KV-29FA320
(L. SOUTH)
Number of Inputs/Outputs
1)
Video
S Video
Y,PB, P
R
Audio
Speaker Output (W
Subwoofe
2)
3)
4)
3
1
1
2
10W x 2
N/A
3
1
1
2
7W x 3
20W
Power Consumption (W)
In Use (Max) 175W 220W 215W
In Standby (Max)
5)
180W
1W
1W 1W 1W
Dimensions (W x H x D)
mm
in
768 x 589 x 497 mm
30
1/4
x 23
1/4
x 19
5/8
in
784 x 678 x 520.5 mm
7/8
30
x 26 3/4 x 20
1/2
in
Mass
lbs
Television system
American TV standard, NTSC
Channel coverage
VHF: 2-13/ UHF: 14-69/ CATV: 1-125
kg
45.2 kg
99 lbs 10 oz
1)
1 Vp-p 75 ohms unbalanced, sync negative
2)
Y: 1 Vp-p 75 ohms unbalanced, sync negative
C: 0.286 Vp-p (Burst signal), 75 ohms
3) Y: 1.0 Vp-p, 75 ohms, sync negative; PB: 0.7 Vp-p, 75 ohms;
PR Vp-p, 75 ohms.
4)
500 mVrms (100% modulation), Impedance: 47 kilohms
5)
This specifi cation is the maximum wattage.
50 kg
110 lbs 4 oz
Picture tube
FD Trinitron® tube
Visible screen size
27-inch picture measured diagonally
Actual screen size
29-inch measured diagonally
Supplied Accessories
Remote Commander RM-Y195
(All Except KV-27FA310/29FA310 Only)
Remote Commander RM-Y180
(KV-27FA310/29FA310 Only)
Two Size AA (R6) Batteries
© 2004 Dolby Laboratories, Inc.
Dolby, Pro Logic, and the double-D symbol are registered
trademarks of Dolby Laboratories.
TruSurround
TruSurround is a trademark of SRS Labs, Inc. SRS and the SRS
symbol are registered trademarks of SRS Labs, Inc. in the United
States and in select foreign countries. SRS and TruSurround are
incorporated under license from SRS Labs, Inc. and are protected
under United States Patent Nos. 4,748,669 and 4,841,572 with
numerous additional issued and pending foreign patents. Purchase of this product does not convey the right to sell recordings
made with the TruSurround technology.
by SRS
™
®
SRS (SOUND RETRIEVAL SYSTEM)
The SRS (SOUND RETRIEVAL SYSTEM) is manufactured
by Sony Corporation under license from SRS Labs, Inc. It is
covered by U.S. Patent No. 4,748,669. Other U.S. and foreign
patents pending.
The word ‘SRS’ and the SRS symbol are registered trademarks of SRS Labs, Inc. BBE and BBE symbol are trademarks of
BBE Sound, Inc. and are licensed by BBE Sound, Inc. under U.S.
Patent No. 4,638,258 and 4,482,866.
KV-27FA310/27FS120/29FA310/29FS120
Design and specifi cations are subject to change without notice.
4
Page 5

KV-27FA310/27FS120/29FA310/29FS120
WARNINGS AND CAUTIONS
CAUTION
Short circuit the anode of the picture tube and the anode cap to the metal chassis, CRT shield, or carbon painted on the CRT, after
removing the anode.
WARNING!!
An isolation transformer should be used during any service to avoid possible shock hazard, because of live chassis. The chassis of
this receiver is directly connected to the AC power line.
! SAFETY-RELATED COMPONENT WARNING!!
Components identifi ed by shading and ! mark on the schematic diagrams, exploded views, and in the parts list are critical for safe
operation. Replace these components with Sony parts whose part numbers appear as shown in this manual or in supplements
published by Sony. Circuit adjustments that are critical for safe operation are identifi ed in this manual. Follow these procedures
whenever critical components are replaced or improper operation is suspected.
ATTENTION!!
Apres avoir deconnecte le cap de l’anode, court-circuiter l’anode du tube cathodique et celui de l’anode du cap au chassis metallique
de l’appareil, ou la couche de carbone peinte sur le tube cathodique ou au blindage du tube cathodique.
Afi n d’eviter tout risque d’electrocution provenant d’un chássis sous tension, un transformateur d’isolement doit etre utilisé lors de tout
dépannage. Le chássis de ce récepteur est directement raccordé à l’alimentation du secteur.
! ATTENTION AUX COMPOSANTS RELATIFS A LA SECURITE!!
Les composants identifi es par une trame et par une marque ! sur les schemas de principe, les vues explosees et les listes de pieces
sont d’une importance critique pour la securite du fonctionnement. Ne les remplacer que par des composants Sony dont le numero
de piece est indique dans le present manuel ou dans des supplements publies par Sony. Les reglages de circuit dont l’importance
est critique pour la securite du fonctionnement sont identifi es dans le present manuel. Suivre ces procedures lors de chaque
remplacement de composants critiques, ou lorsqu’un mauvais fonctionnement suspecte.
KV-27FA310/27FS120/29FA310/29FS120
5
Page 6
SAFETY CHECK-OUT
KV-27FA310/27FS120/29FA310/29FS120
After correcting the original service problem, perform the following
safety checks before releasing the set to the customer:
1. Check the area of your repair for unsoldered or poorly soldered
connections. Check the entire board surface for solder splashes and
bridges.
2. Check the interboard wiring to ensure that no wires are “pinched” or
touching high-wattage resistors.
3. Check that all control knobs, shields, covers, ground straps, and
mounting hardware have been replaced. Be absolutely certain that
you have replaced all the insulators.
4. Look for unauthorized replacement parts, particularly transistors,
that were installed during a previous repair. Point them out to the
customer and recommend their replacement.
5. Look for parts which, though functioning, show obvious signs of
deterioration. Point them out to the customer and recommend their
replacement.
6. Check the line cords for cracks and abrasion. Recommend the
replacement of any such line cord to the customer.
7. Check the B+ and HV to see if they are specifi ed values. Make sure
your instruments are accurate; be suspicious of your HV meter if sets
always have low HV.
8. Check the antenna terminals, metal trim, “metallized” knobs, screws,
and all other exposed metal parts for AC leakage. Check leakage as
described below.
Leakage Test
The AC leakage from any exposed metal part to earth ground and
from all exposed metal parts to any exposed metal part having a
return to chassis, must not exceed 0.5 mA (500 microamperes).
Leakage current can be measured by any one of three methods.
1. A commercial leakage tester, such as the Simpson 229 or RCA
WT-540A. Follow the manufacturers’ instructions to use these
instructions.
2. A battery-operated AC milliampmeter. The Data Precision 245
digital multimeter is suitable for this job.
3. Measuring the voltage drop across a resistor by means of a VOM
or battery-operated AC voltmeter. The “limit” indication is 0.75
V, so analog meters must have an accurate low voltage scale.
The Simpson’s 250 and Sanwa SH-63TRD are examples of
passive VOMs that are suitable. Nearly all battery-operated digital
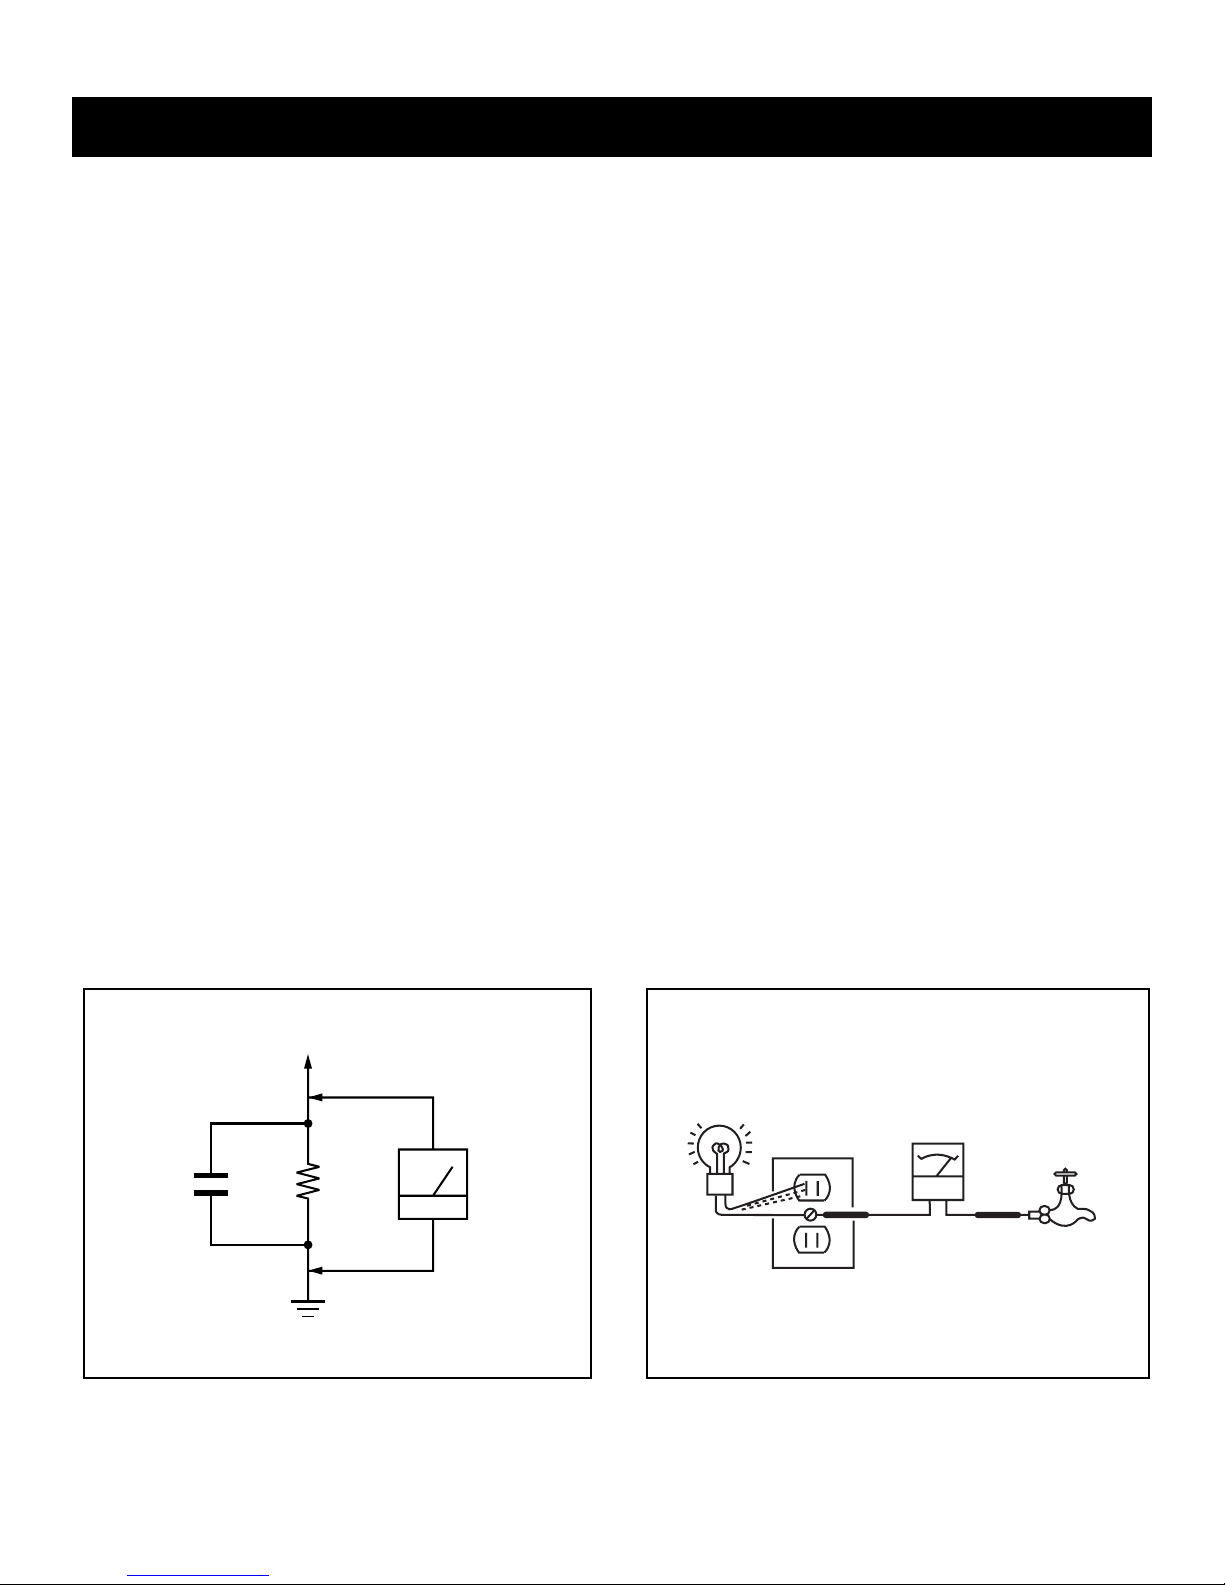
multimeters that have a 2 VAC range are suitable (see Figure A).
How to Find a Good Earth Ground
A cold-water pipe is a guaranteed earth ground; the cover-plate
retaining screw on most AC outlet boxes is also at earth ground. If the
retaining screw is to be used as your earth ground, verify that it is at
ground by measuring the resistance between it and a cold-water pipe
with an ohmmeter. The reading should be zero ohms.
If a cold-water pipe is not accessible, connect a 60- to 100-watt
trouble- light (not a neon lamp) between the hot side of the receptacle
and the retaining screw. Try both slots, if necessary, to locate the hot
side on the line; the lamp should light at normal brilliance if the screw
is at ground potential (see Figure B).
To Exposed Metal
Parts on Set
0.15 F
1.5 K Ω
Earth Ground
Figure A. Using an AC voltmeter to check AC leakage. Figure B. Checking for earth ground.
KV-27FA310/27FS120/29FA310/29FS120
AC
Voltmeter
(0.75 V)
Trouble Light
AC Outlet Box
Ohmmeter
Cold-water Pipe
6
Page 7

KV-27FA310/27FS120/29FA310/29FS120
SELF-DIAGNOSTIC FUNCTION
Self Diagnosis
Supported model
The units in this manual contain a self-diagnostic function. If an error occurs, the STANDBY/TIMER LED will automatically begin to fl ash. The number
of times the LED fl ashes translates to a probable source of the problem. A defi nition of the STANDBY/TIMER LED fl ash indicators is listed in the
instruction manual for the user’s knowledge and reference. If an error symptom cannot be reproduced, the Remote Commander can be used to review
the failure occurrence data stored in memory to reveal past problems and how often these problems occur.
Diagnostic Test Indicators
When an error occurs, the STANDBY/TIMER LED will fl ash a set number of times to indicate the possible cause of the problem. If there is more than
one error, the LED will identify the fi rst of the problem areas.
Results for all of the following diagnostic items are displayed on screen. No error has occurred if the screen displays a “0”.
Diagnostic Item
Description
Power does not turn on
+B overcurrent (OCP)*
I-Prot
IK (AKB)
STANDBY/ TIMER
No. of times
lamp fl ashes
Does not light
2 times
4 times
5 times
Self-Diagnositc
Display/
Diagnostic Result
2:0 or 2:1
4:0 or 4:1
5:0 or 5:1
Probable Cause Location
• Power cord is not plugged in.
• Fuse is burned out (F601). (A Board)
• H.OUT (Q505) is shorted. (A Board)
• IC2751 is shorted. (CW Board)
• +13V is not supplied. (A Board)
• IC545 is faulty. (A Board)
• IC001 is faulty. (A Board)
• Screen (G2) is improperly adjusted.**
Detected Symptoms
• Power does not come on.
• No power is supplied to the TV.
• AC Power supply is faulty.
• Power does not come on.
• Load on power line is shorted.
• Has entered standby state after horizontal raster.
• Vertical defl ection pulse is stopped.
• Power line is shorted or power supply is stopped.
• No raster is generated.
• CRT Cathode current detection reference pulse
output is small.
*If a +B overcurrent is detected, stoppage of the vertical defl ection is detected simultaneously. The symptom that is diagnosed fi rst by the
mircrocontroller is displayed on the screen.
**Refer to Screen (G2) Adjustments in Section 2-4. of this manual.
Display of Standby/Timer LED Flash Count
2 times
4 times
5 times
LED ON 0.3 sec.
LED OFF 0.3 sec.
LED OFF
3 sec.
Standby/Timer LED
Diagnostic Item Flash Count*
+B Overcurrent 2 times
I-Prot 4 times
IK (AKB) 5 times
*One fl ash count is not used for self-diagnostic.
Stopping the Standby/Timer LED Flash
Turn off the power switch on the TV main unit or unplug the power cord from the outlet to stop the STANDBY/TIMER LAMP from fl ashing.
KV-27FA310/27FS120/29FA310/29FS120
7
Page 8
KV-27FA310/27FS120/29FA310/29FS120
Self-Diagnostic Screen Display
For errors with symptoms such as “power sometimes shuts off” or “screen sometimes goes out” that cannot be confi rmed, it is possible to bring up past
occurrences of failure on the screen for confi rmation.
To Bring Up Screen Test
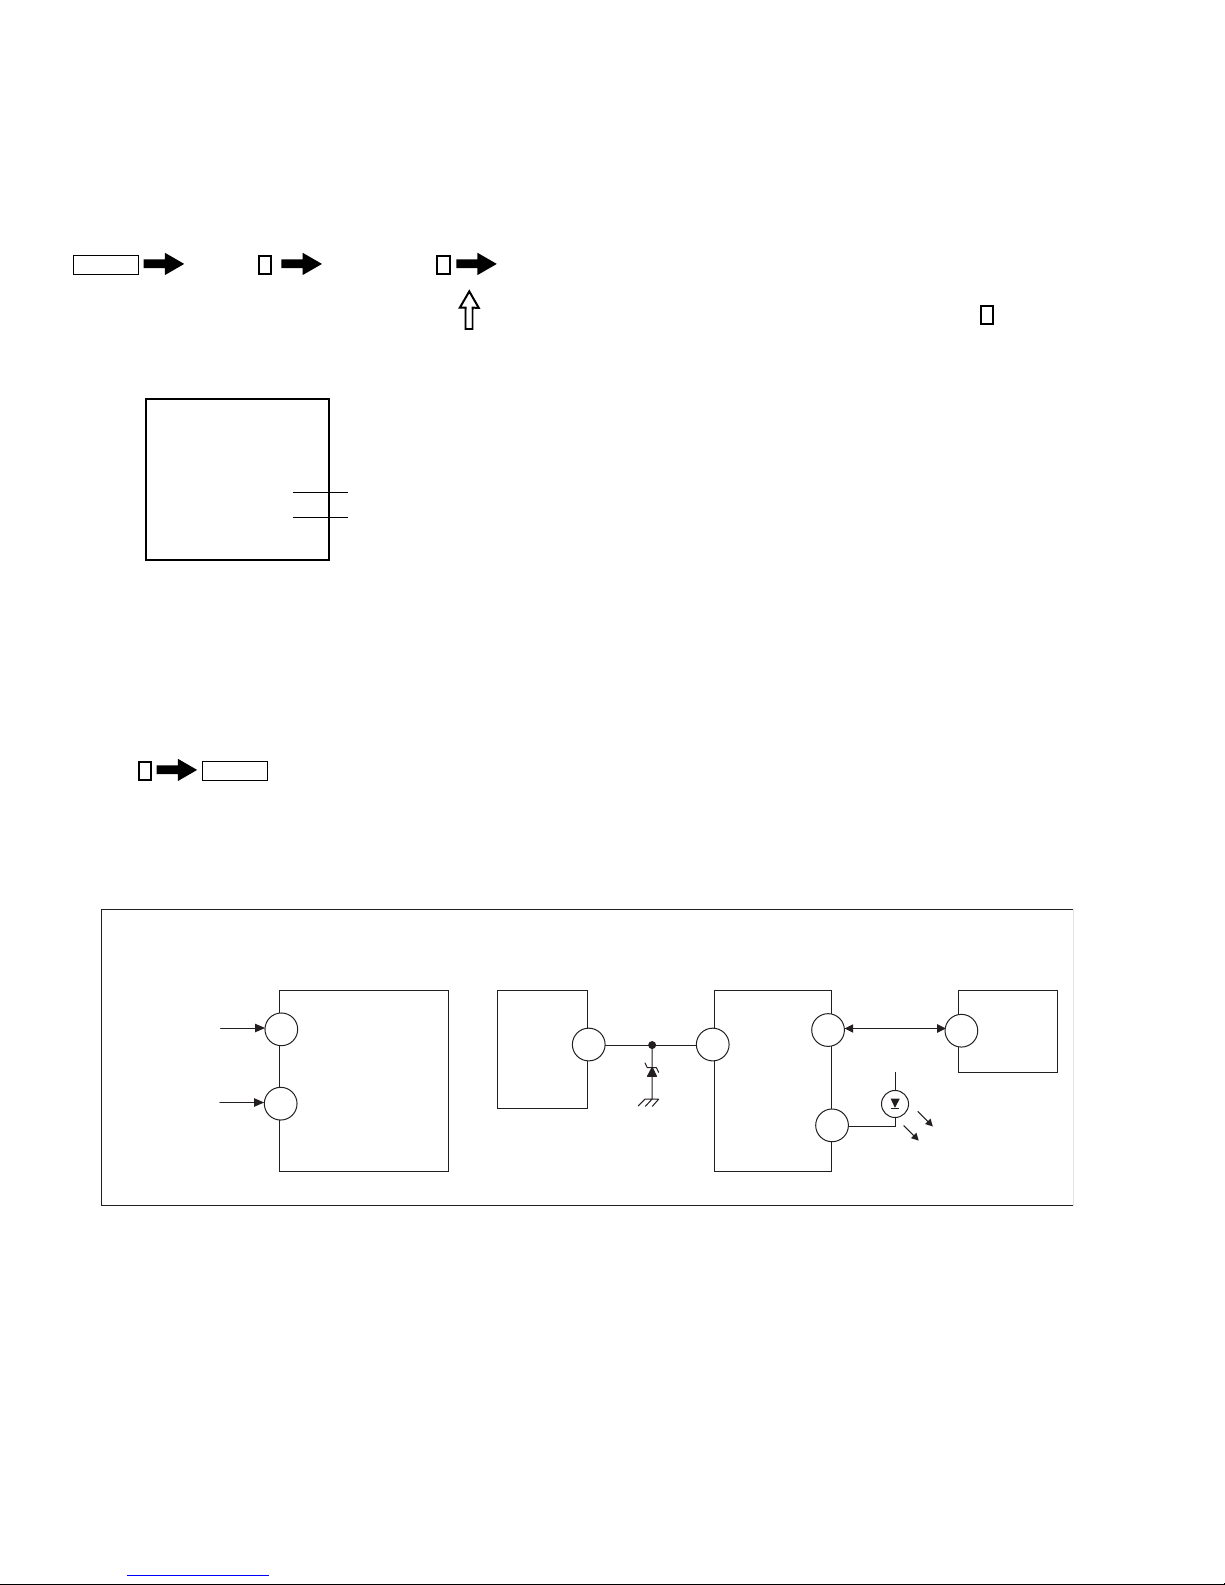
In standby mode, press buttons on the Remote Commander sequentially, in rapid succession, as shown below:
Display
Self-Diagnostic Screen Display
Handling of Self-Diagnostic Screen Display
Since the diagnostic results displayed on the screen are not automatically cleared, always check the self-diagnostic screen during repairs. When you
have completed the repairs, clear the result display to “0”.
Unless the result display is cleared to “0”, the self-diagnostic function will not be able to detect subsequent faults after completion of the repairs.
Clearing the Result Display
To clear the result display to “0”, press buttons on the Remote Commander sequentially when the diagnostic screen is displayed, as shown below:
Channel
Quitting the Self-Diagnostic Screen
To quit the entire self-diagnostic screen, turn off the power switch on the Remote Commander or the main unit.
Channel
SELF DIAGNOSTIC
2: +B OCP 0
3: +B OVP N/A
4: VSTOP 0
5: AKB 1
101: WDT N/A
8
ENTER
5
Sound Volume
Numeral “0” means that no fault was detected.
Numeral “1” means a fault was detected one time only.
-
Power ON
Note that this differs from entering the Service Mode (Sound Volume
+
).
Self-Diagnostic Circuit
FROM
CW BOARD
IC2751 PIN 5
A BOARD
IC001
Y/CHROMA JUNGLE
51
IK-AKBIN
A BOARD
IC545
V. OUT
REF
3
A BOARD
IC001
SYSTEM
IO-BDAT
78
I-Prot
53
A BOARD
IC002
MEMORY
5
BDA
FROM
72
A BOARD
IC561
PIN 7
+B overcurrent (OCP)
Occurs when an overcurrent on the +B (135V) line is detected by pin 72 of IC001 (A Board). If the voltage of pin 72 of IC001 (A Board) is less than 1V
when V.SYNC is more than seven verticals in a period, the unit will automatically turn off.
I-Prot
Occurs when an absence of the vertical defl ection pulse is detected by pin 78 of IC001 (A Board). Power supply will shut down when waveform interval
exceeds 2 seconds.
IK (AKB)
If the RGB levels* do not balance within 2 seconds after the power is turned on, this error will be detected by IC001 (A Board). TV will stay on, but
there will be no picture.
I-HLDWN
O-LED
79
DISPLAY
*(Refers to the RGB levels of the AKB detection Ref pulse that detects 1K).
KV-27FA310/27FS120/29FA310/29FS120
8
Page 9

SECTION 1: DISASSEMBLY
1-1. REAR COVER REMOVAL (ALL EXCEPT KV-27FA310/29FA310)
4
Screws +BVTP 4X16 TYPE2 TT(B)
Rear Cover
2
Screws +BVTP 4X16 TYPE2 TT(B)
KV-27FA310/27FS120/29FA310/29FS120
2
Screws +BVTP 4X16 TYPE2 TT(B)
5
Screws +BVTP 3X12 TYPE2 TT(B)
1-2. REAR COVER REMOVAL (KV-27FA310/29FA310 ONLY)
3
Screws +BVTP 4X16 TYPE2 IT3
Rear Cover
3
Screws +BVTP 4X16 TYPE2 IT3
2
Screws +BVTP 4X16 TYPE2 TT(B)
3
Screws +BVTP 4X16 TYPE2 IT3
KV-27FA310/27FS120/29FA310/29FS120
5
Screws +BVTP 3X10 TYPE2 IT3
6
Screws +BVTP 4X16 TYPE2 IT3
9
Page 10
KV-27FA310/27FS120/29FA310/29FS120
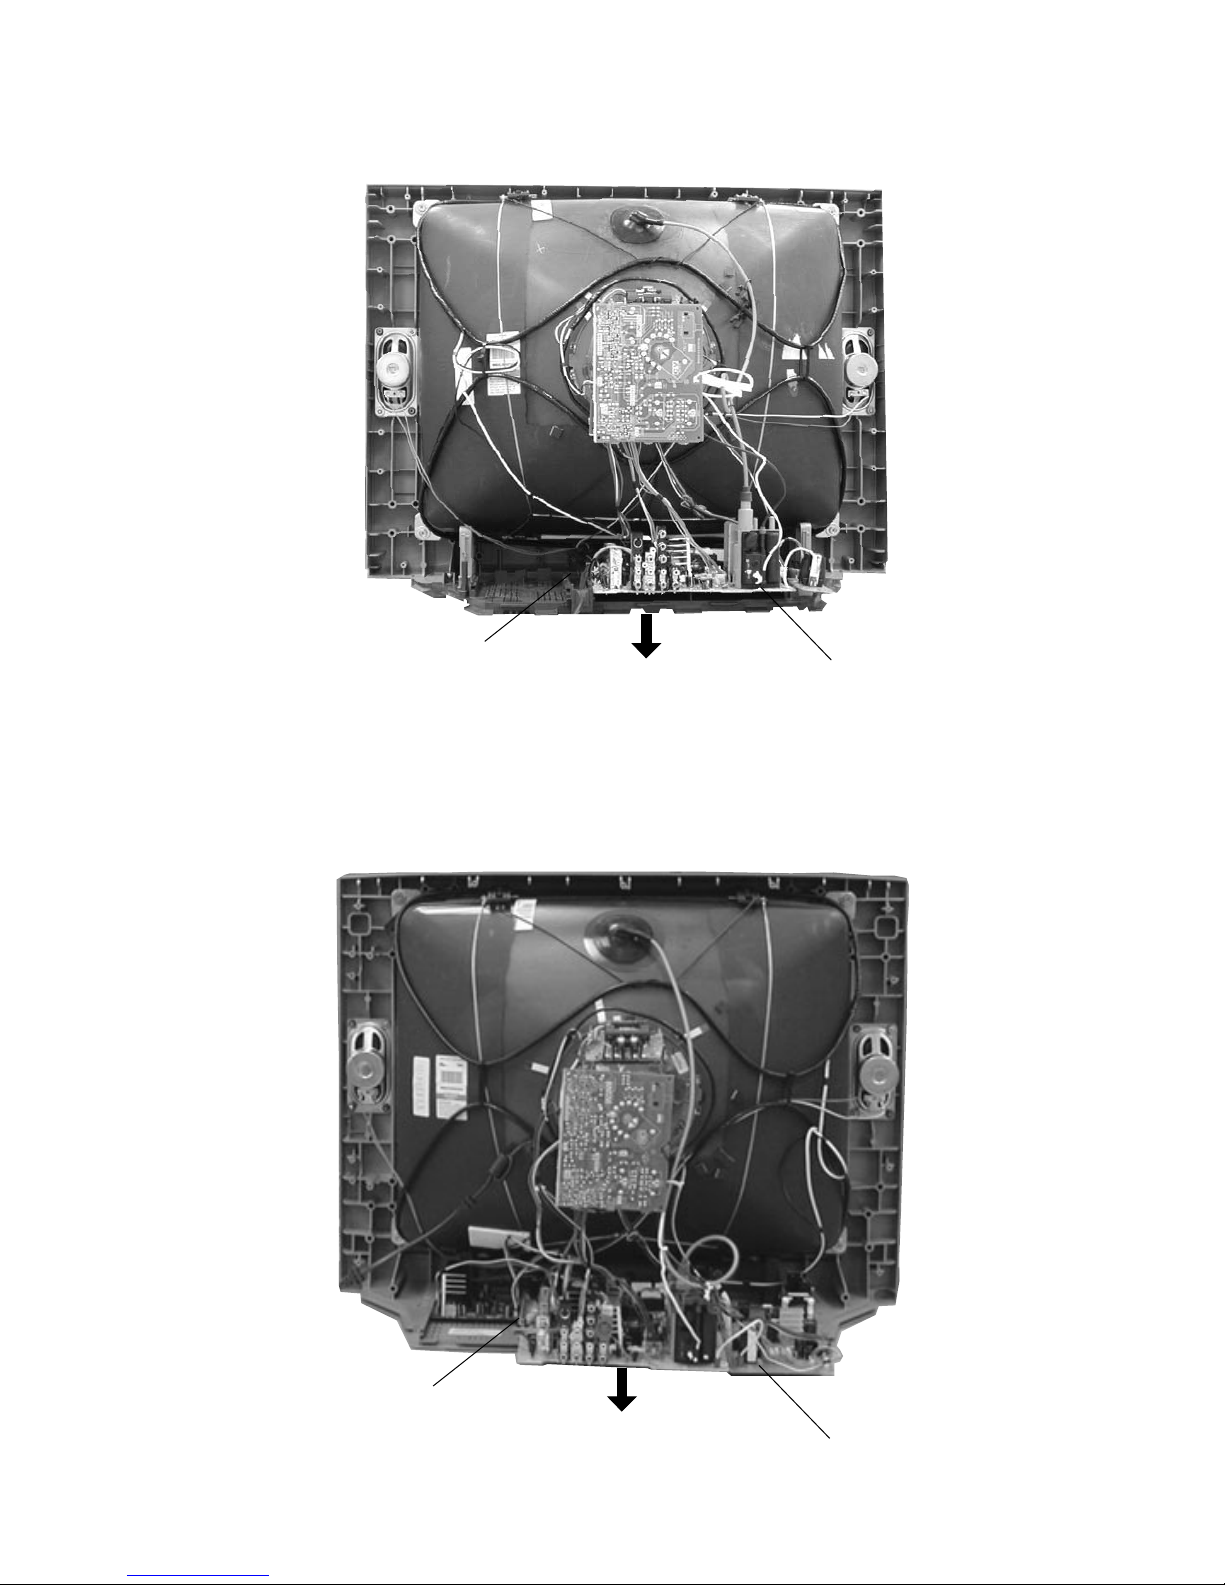
1-3. CHASSIS ASSEMBLY REMOVAL (ALL EXCEPT KV-27FA310/29FA310)
Claw
Chassis Assembly
1-4. CHASSIS ASSEMBLY REMOVAL (KV-27FA310/29FA310 ONLY)
Claw
KV-27FA310/27FS120/29FA310/29FS120
Chassis Assembly
10
Page 11
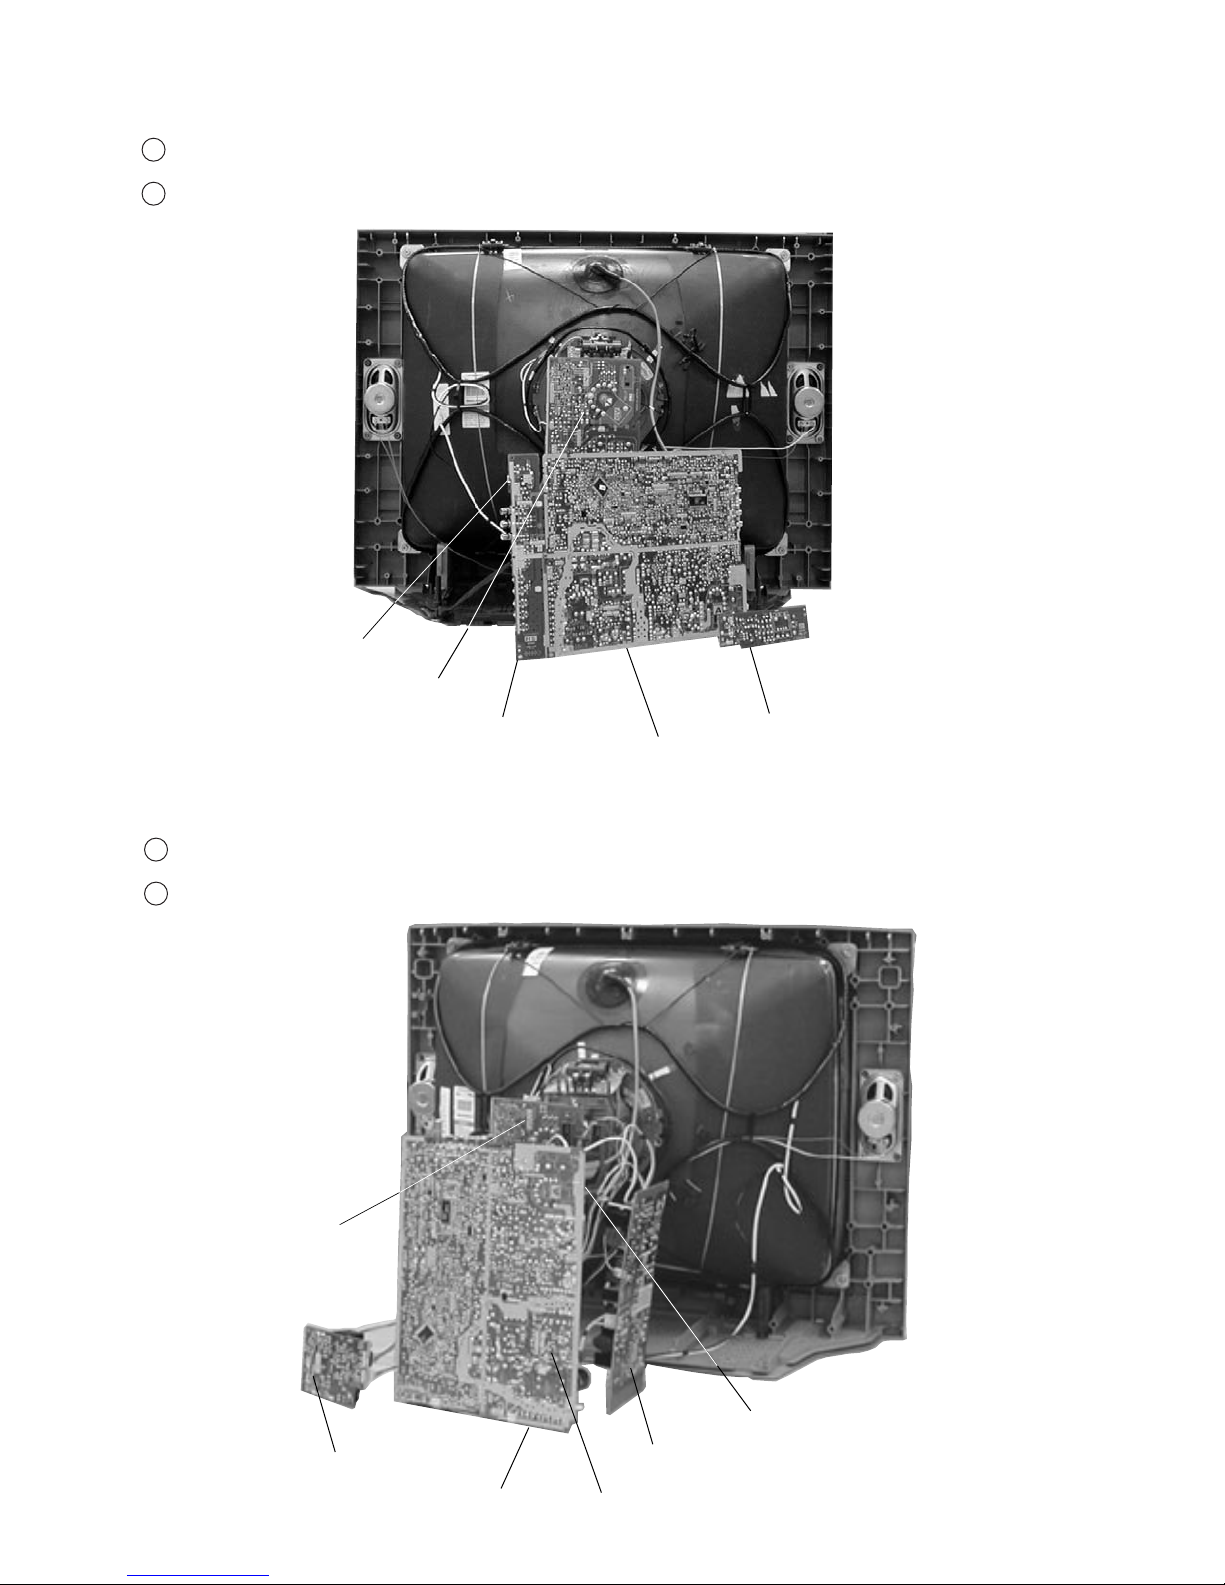
1-5. SERVICE POSITION (ALL EXCEPT KV-27FA310/29FA310)
1
Press on catch tab to release A Board.
2
Disconnect cables as needed to allow A Board to be removed.
KV-27FA310/27FS120/29FA310/29FS120
V Board
CW Board
HS Board
A Board
1-6. SERVICE POSITION (KV-27FA310/29FA310 ONLY)
1
Press on catch tab to release A Board.
2
Disconnect cables as needed to allow A Board to be removed.
D Board
CW Board
K Board
KV-27FA310/27FS120/29FA310/29FS120
HU Board
V Board
GD Board
A Board
11
Page 12
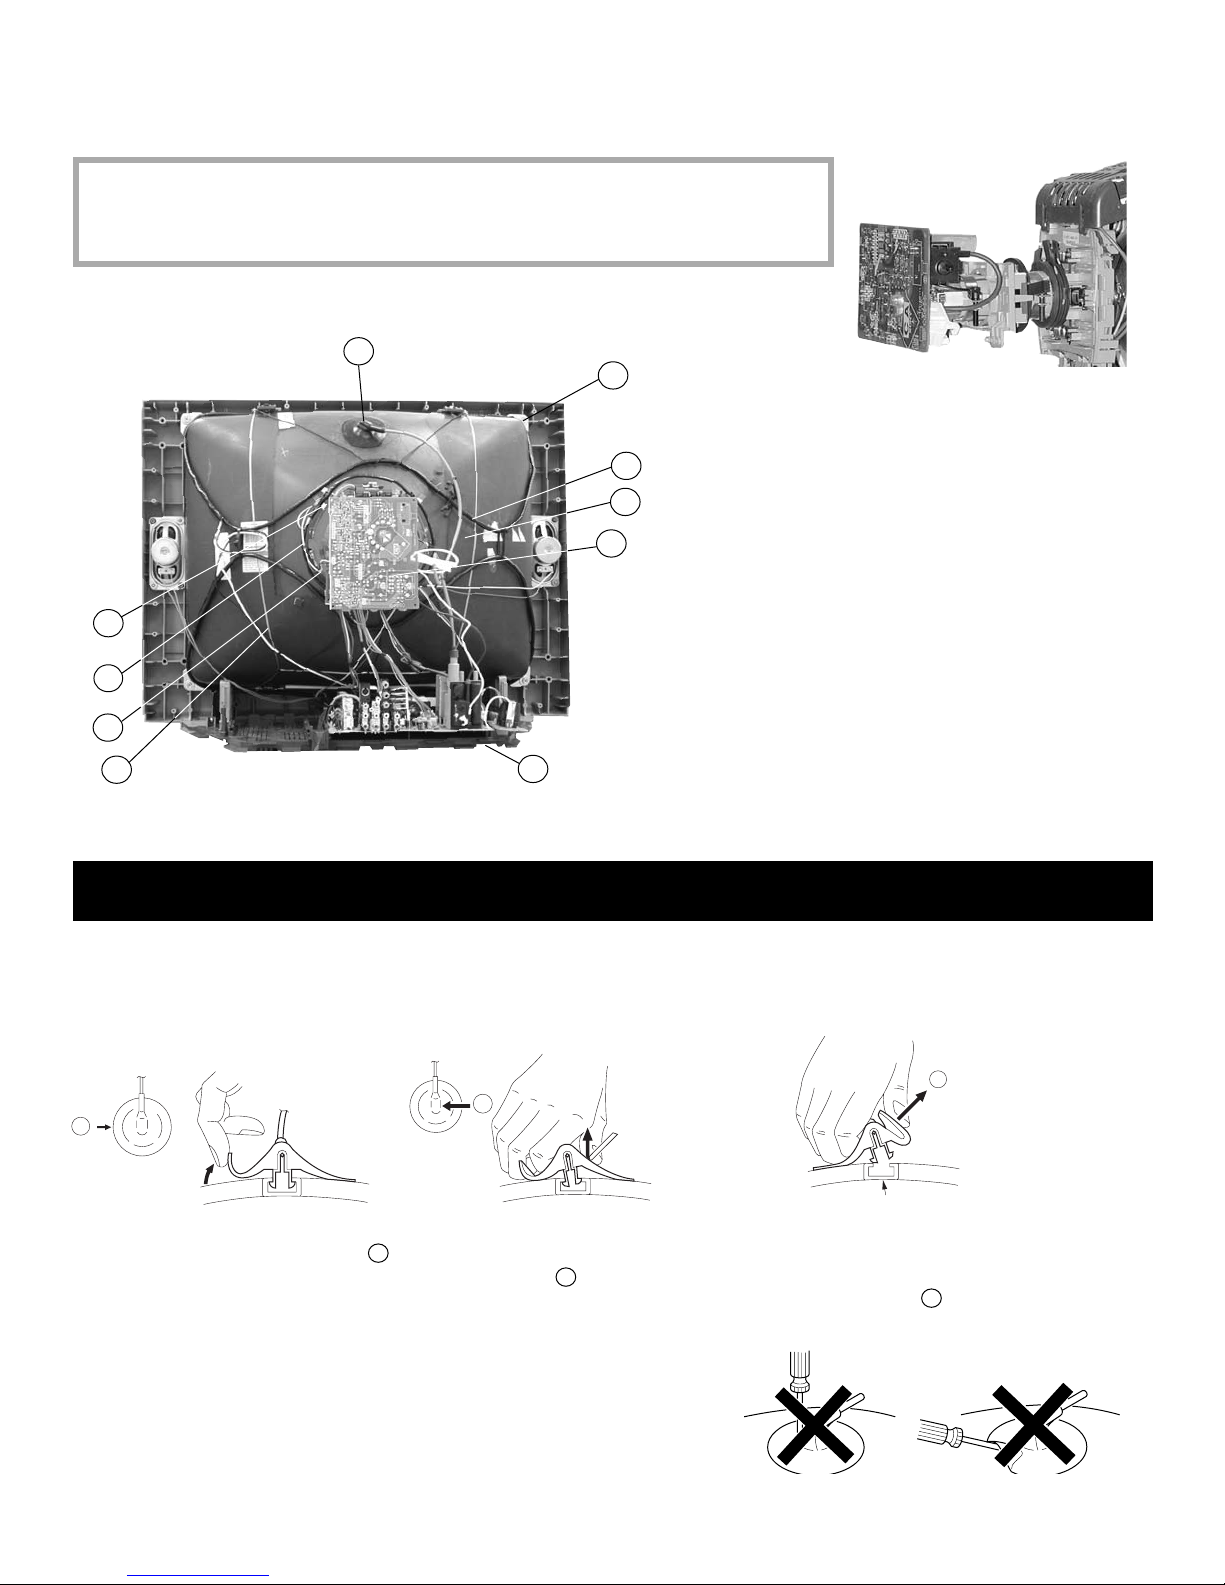
1-7. PICTURE TUBE REMOVAL
WARNING: BEFORE REMOVING THE ANODE CAP
High voltage remains in the CRT even after the power is disconnected. To avoid electric shock,
discharge CRT before attempting to remove the anode cap. Short between anode and CRT
coated earth ground strap.
1
10
1. Discharge the anode of the CRT and remove the anode cap.
2. Unplug all interconnecting leads from the defl ection yoke, neck
8
7
3
6
2
5
9
4
assembly, degaussing coils and CRT grounding strap.
3. Remove the CW Board from the CRT.
4. Remove the chassis assembly.
5. Loosen the neck assembly fi xing screw and remove.
6. Loosen the defl ection yoke fi xing screw and remove.
7. Place the set with the CRT face down on a cushion and remove
the degaussing coil holders.
8. Remove the degaussing coils.
9. Remove the CRT grounding strap and spring tension devices.
10. Unscrew the four CRT fi xing screws [located on each CRT
corner] and remove the CRT [Take care not to handle the CRT
by the neck].
KV-27FA310/27FS120/29FA310/29FS120
ANODE CAP REMOVAL PROCEDURE
WARNING: High voltage remains in the CRT even after the power is disconnected. To avoid electric shock, discharge CRT before attempting to
remove the anode cap. Short between anode and coated earth ground strap of CRT.
NOTE: After removing the anode cap, short circuit the anode of the picture tube and the anode cap to either the metal chassis, CRT shield, or carbon
painted on the CRT.
REMOVAL PROCEDURES
c
b
a
Anode Button
Turn up one side of the rubber cap in
the direction indicated by arrow
a
.
HOW TO HANDLE AN ANODE CAP
1. Do not use sharp objects which may cause damage to the surface of the anode
cap.
2. To avoid damaging the anode cap, do not squeeze the rubber covering too
hard. A material fi tting called a shatter-hook terminal is built into the rubber.
3. Do not force turn the foot of the rubber cover. This may cause the shatter-hook
terminal to protrude and damage the rubber.
Use your thumb to pull the rubber
cap fi rmly in the direction indicated
by arrow
.
b
When one side of the rubber cap separates from
the anode button, the anode cap can be removed
by turning the rubber cap and pulling it in the
direction of arrow
.
c
KV-27FA310/27FS120/29FA310/29FS120
12
Page 13
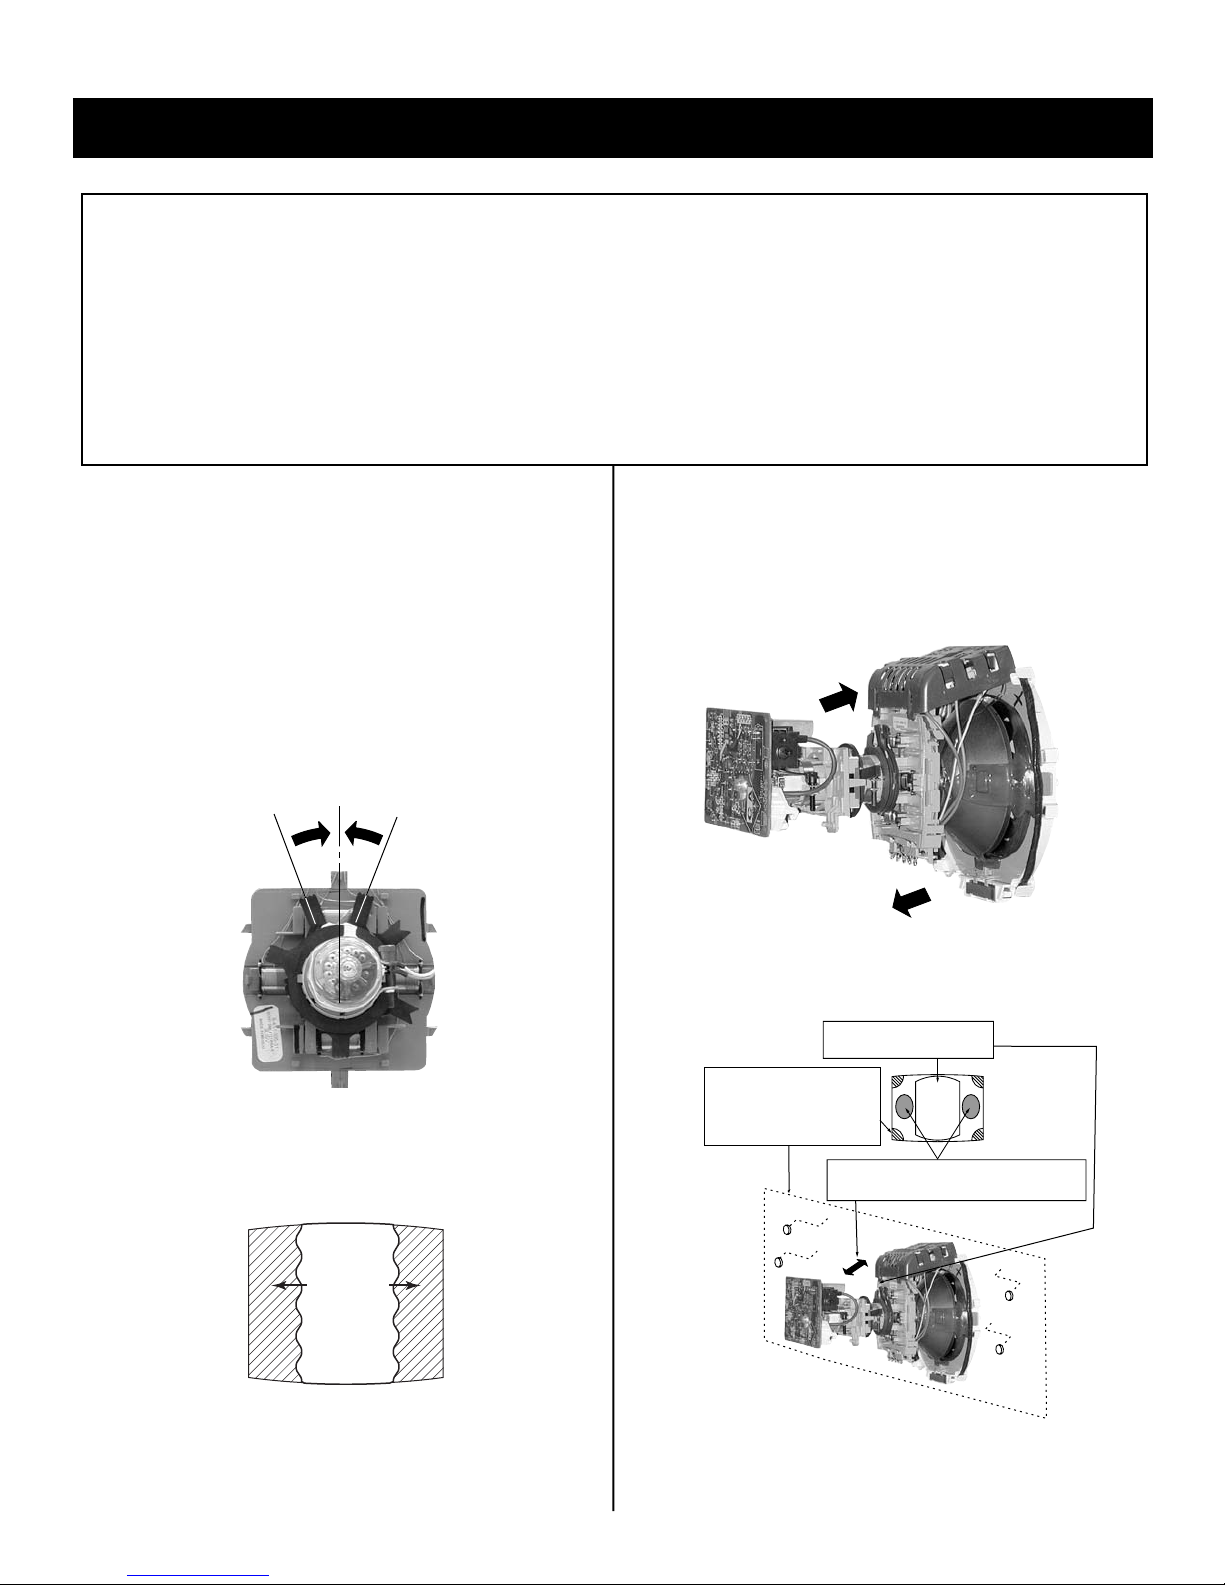
SECTION 2: SET-UP ADJUSTMENTS
KV-27FA310/27FS120/29FA310/29FS120
The following adjustments should be made when a complete
realignment is required or a new picture tube is installed.
These adjustments should be performed with rated power supply
voltage unless otherwise noted.
Set the controls as follows unless otherwise noted:
VIDEO MODE: Pro
PICTURE CONTROL: Normal
BRIGHTNESS CONTROL: Normal
2-1. BEAM LANDING
Before beginning adjustment procedure:
1. Feed in the white pattern signal.
Adjustment Procedure
1. Input a raster signal with the pattern generator.
2. Loosen the defl ection yoke mounting screw, and set the purity
control to the center as shown below:
Purity Control
Perform the adjustments in order as follows:
1. Beam Landing
2. Convergence
3. Focus
4. Screen (G2)
5. White Balance
Note Test Equipment Required:
1. Color Bar Pattern Generator
2. Degausser
3. DC Power Supply
4. Digital Multimeter
6. Switch over the raster signal to red and blue and confi rm the
condition.
7. When the position of the defl ection yoke is determined, tighten it with
the defl ection yoke mounting screw.
8. If landing at the corner is not right, adjust by using the disk magnets.
3. Turn the raster signal of the pattern generator to green.
4. Move the defl ection yoke backward, and adjust with the purity control
so that green is in the center and red and blue are even on both
sides.
Blue Red
Green
5. Move the defl ection yoke forward, and adjust so that the entire
screen becomes green.
KV-27FA310/27FS120/29FA310/29FS120
Purity control
corrects this area.
Disk magnets
or rotatable disk
magnets correct
these areas (a-d).
Deflection yoke positioning
b
d
a
b
cd
corrects these areas.
a
c
13
Page 14
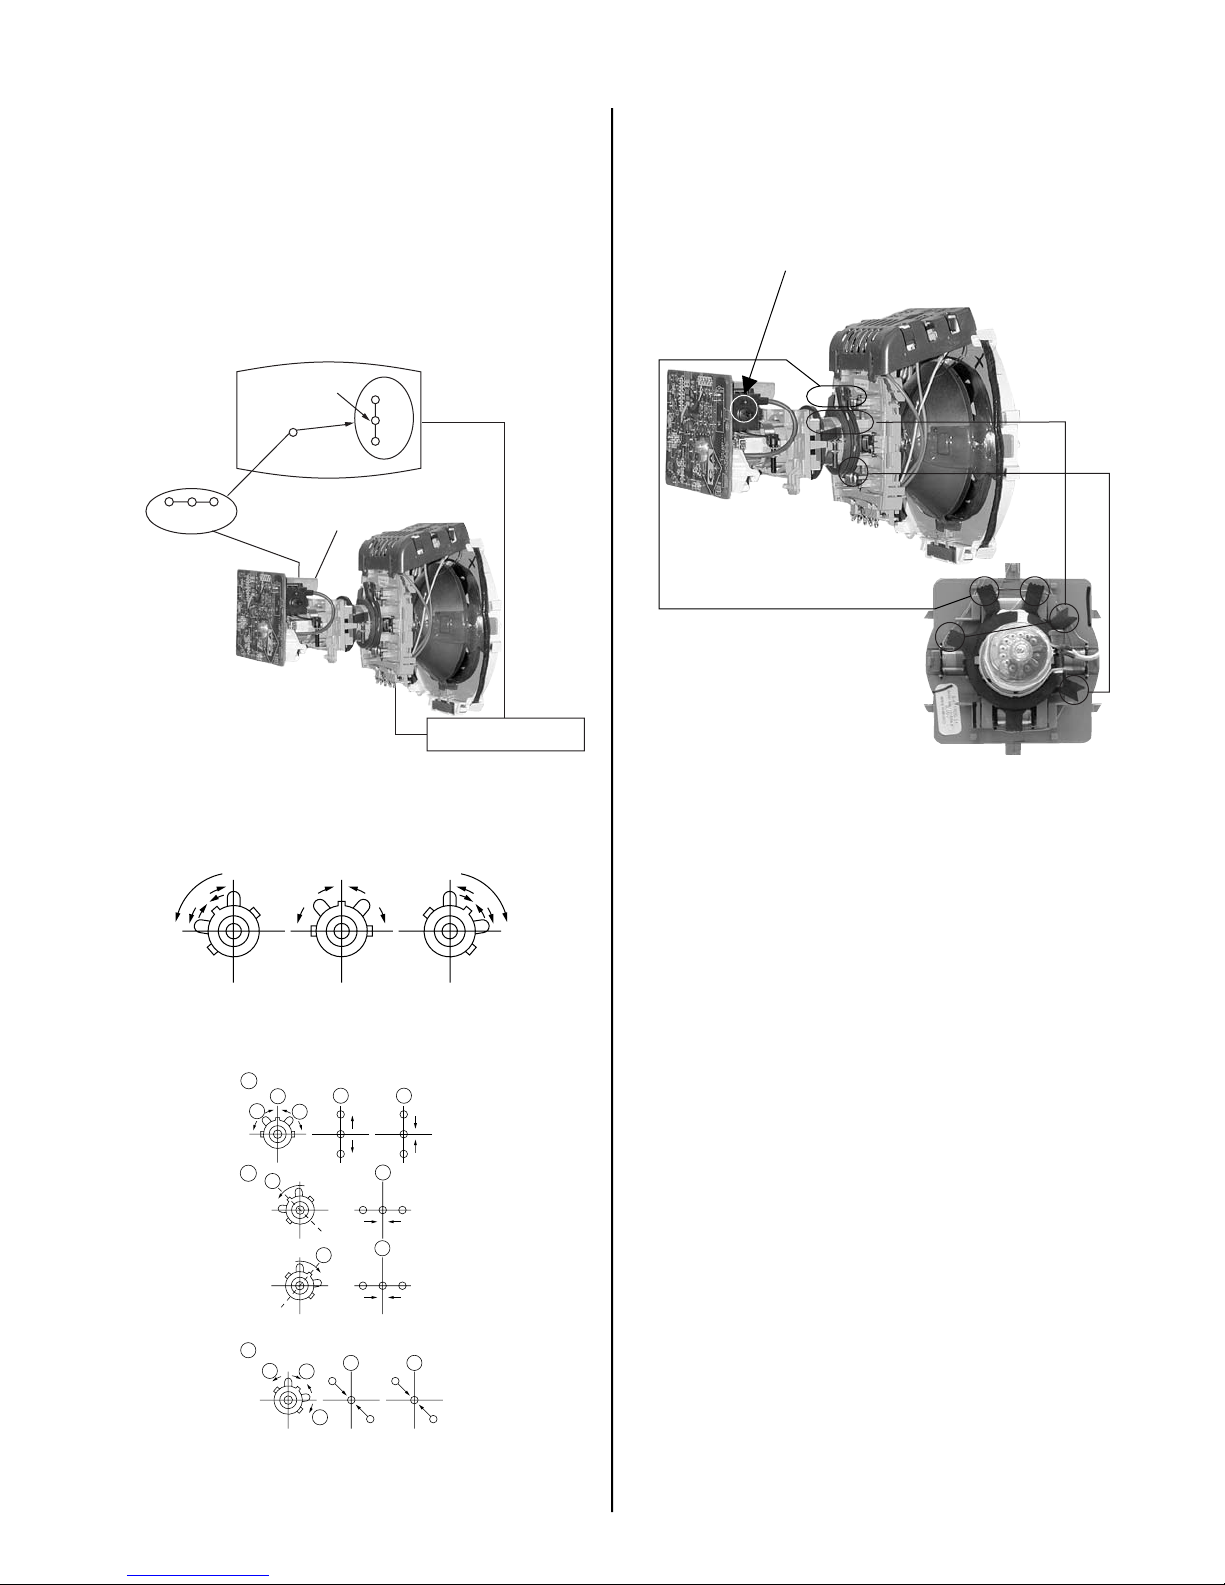
KV-27FA310/27FS120/29FA310/29FS120
2-2. CONVERGENCE
Before starting convergence adjustments:
1 Perform FOCUS, VLIN and VSIZE adjustments.
2. Set BRIGHTNESS control to minimum.
3. Feed in dot pattern.
Vertical Static Convergence
1. Adjust V. STAT magnet to converge red, green and blue dots in the
center of the screen.
Center dot
RV2750
R
B
G
H.STAT
R
G
B
Horizontal Static Convergence
If the blue dot does not converge with the red and green dots, perform
the following:
1. Move H STAT VR magnet (a) to correct insuffi cient H.Static
convergence.
H STAT VR
V.STAT
BMC MAGNET
PURITY
V.STAT magnet
2. Tilt the V. STAT magnet and adjust static convergence to open or
close the V. STAT magnet.
When the V. STAT magnet is moved in the direction of arrow a and b,
red, green, and blue dots move as shown below:
1
a
b
2
a
a
b
B
G
R
b
b
B
G
R
a
RGB
b
BGR
3
b
a
a
R
b
B
G
G
B
KV-27FA310/27FS120/29FA310/29FS120
b
R
14
Page 15
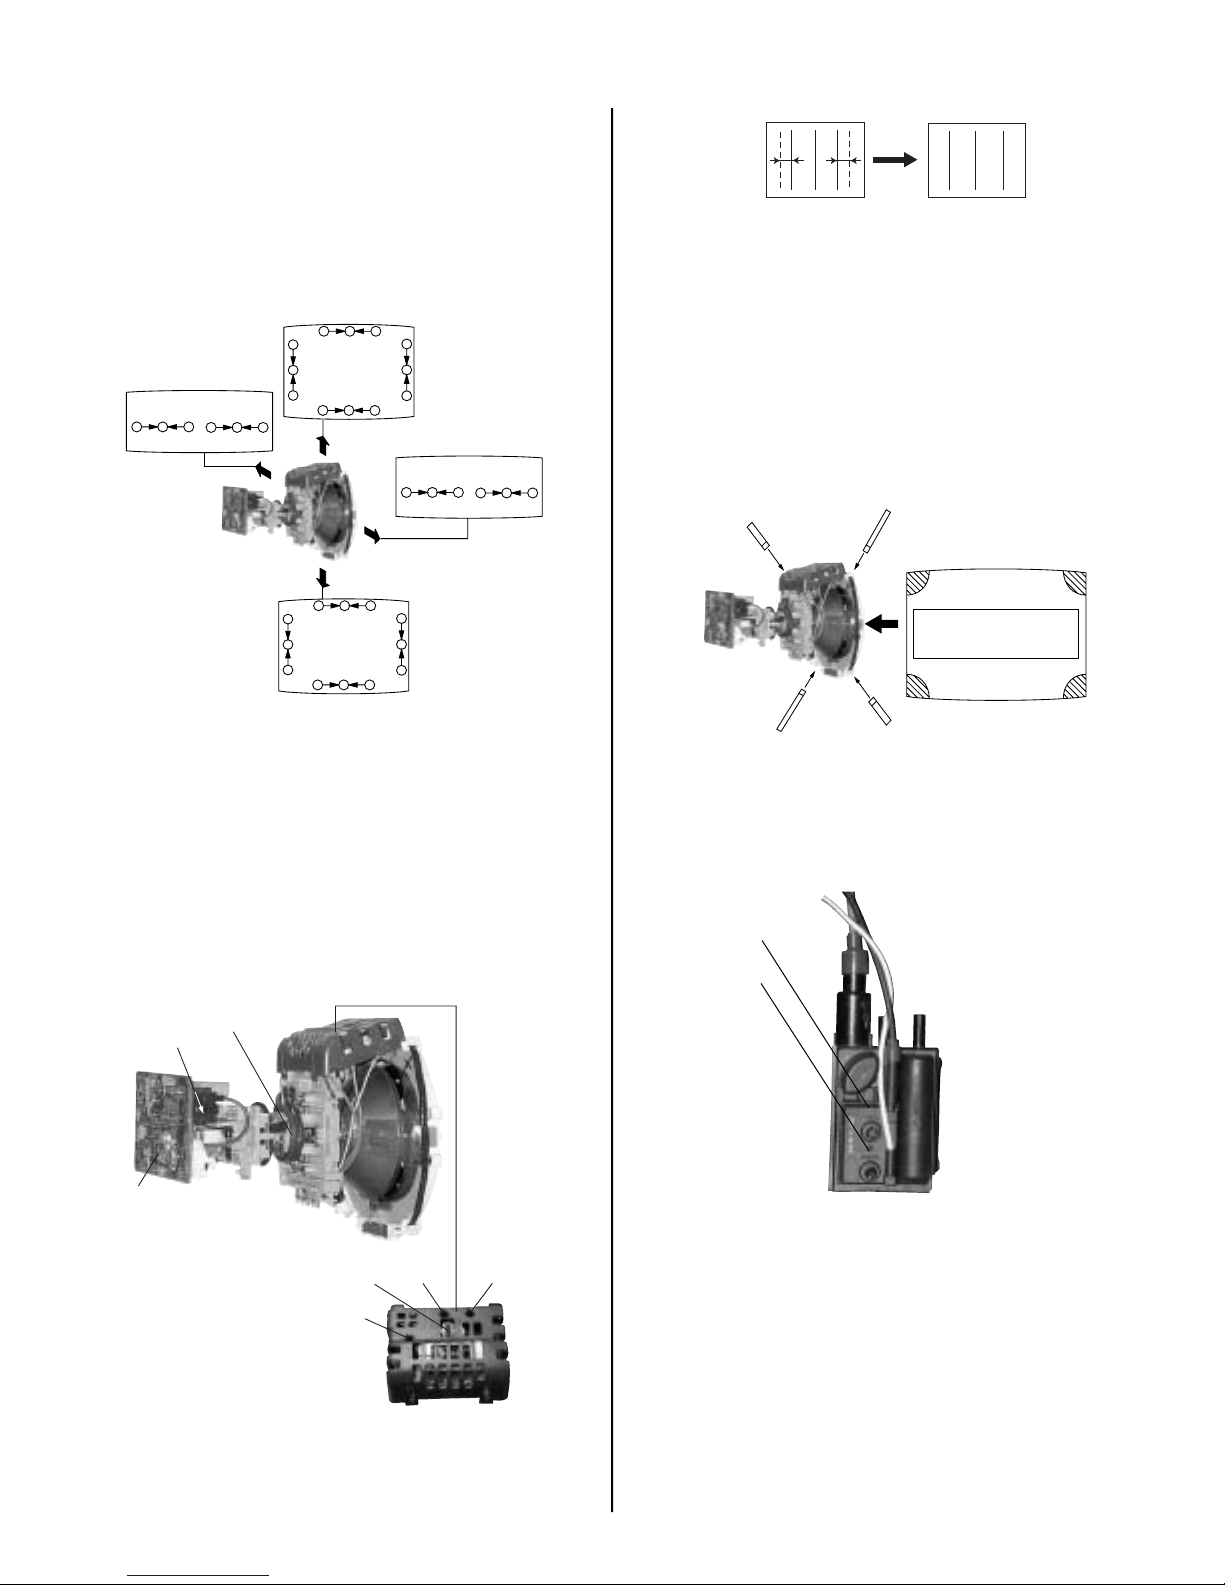
Dynamic Convergence Adjustment
Before performing this adjustment, perform Horizontal and Vertical Static
Convergence Adjustment.
1. Slightly loosen defl ection yoke screw.
2. Remove defl ection yoke spacers.
3. Move the defl ection yoke for best convergence as
shown below:
G
B
R
R
G
B
BGR
B
G
R
R
B
G
R
B
G
KV-27FA310/27FS120/29FA310/29FS120
B R R B
(R)(B) (B)(R)
4. Adjust XCV core to balance X axis.
5. Adjust YCH VR to balance Y axis.
6. Adjust vertical red and blue convergence with V.TILT (TLV VR.)
Note: Perform adjustment 3-6 while tracking items 1 and 2.
TLH+
TLH-
Screen-Corner Convergence
BGR
B
G
R
B
G
R
B
R
G
B
R
G
R
GB
4. Tighten the defl ection yoke screw.
5. Install the defl ection yoke spacers.
TLH Plate Adjustment
1. Input crosshatch pattern.
2. Adjust PICTURE QUALITY to standard, PICTURE and BRIGHTNESS
to 50%, and OTHER to standard.
3 Adjust the Horizontal Convergence of red and blue dots by tilting the
TLH plate on the defl ection yoke.
RV2750
V.STAT
TLH Plate
1. Affi x a permalloy assembly corresponding to the misconverged areas:
b
a
ba
a-d: screen-corner
misconvergence
c
d
c
d
2-3. FOCUS
1. Adjust FOCUS control for best pictures.
Focus (FV)
Screen (G2)
CW
Board
YCH
XCV
(TLV)
KV-27FA310/27FS120/29FA310/29FS120
TLV
15
Page 16
KV-27FA310/27FS120/29FA310/29FS120
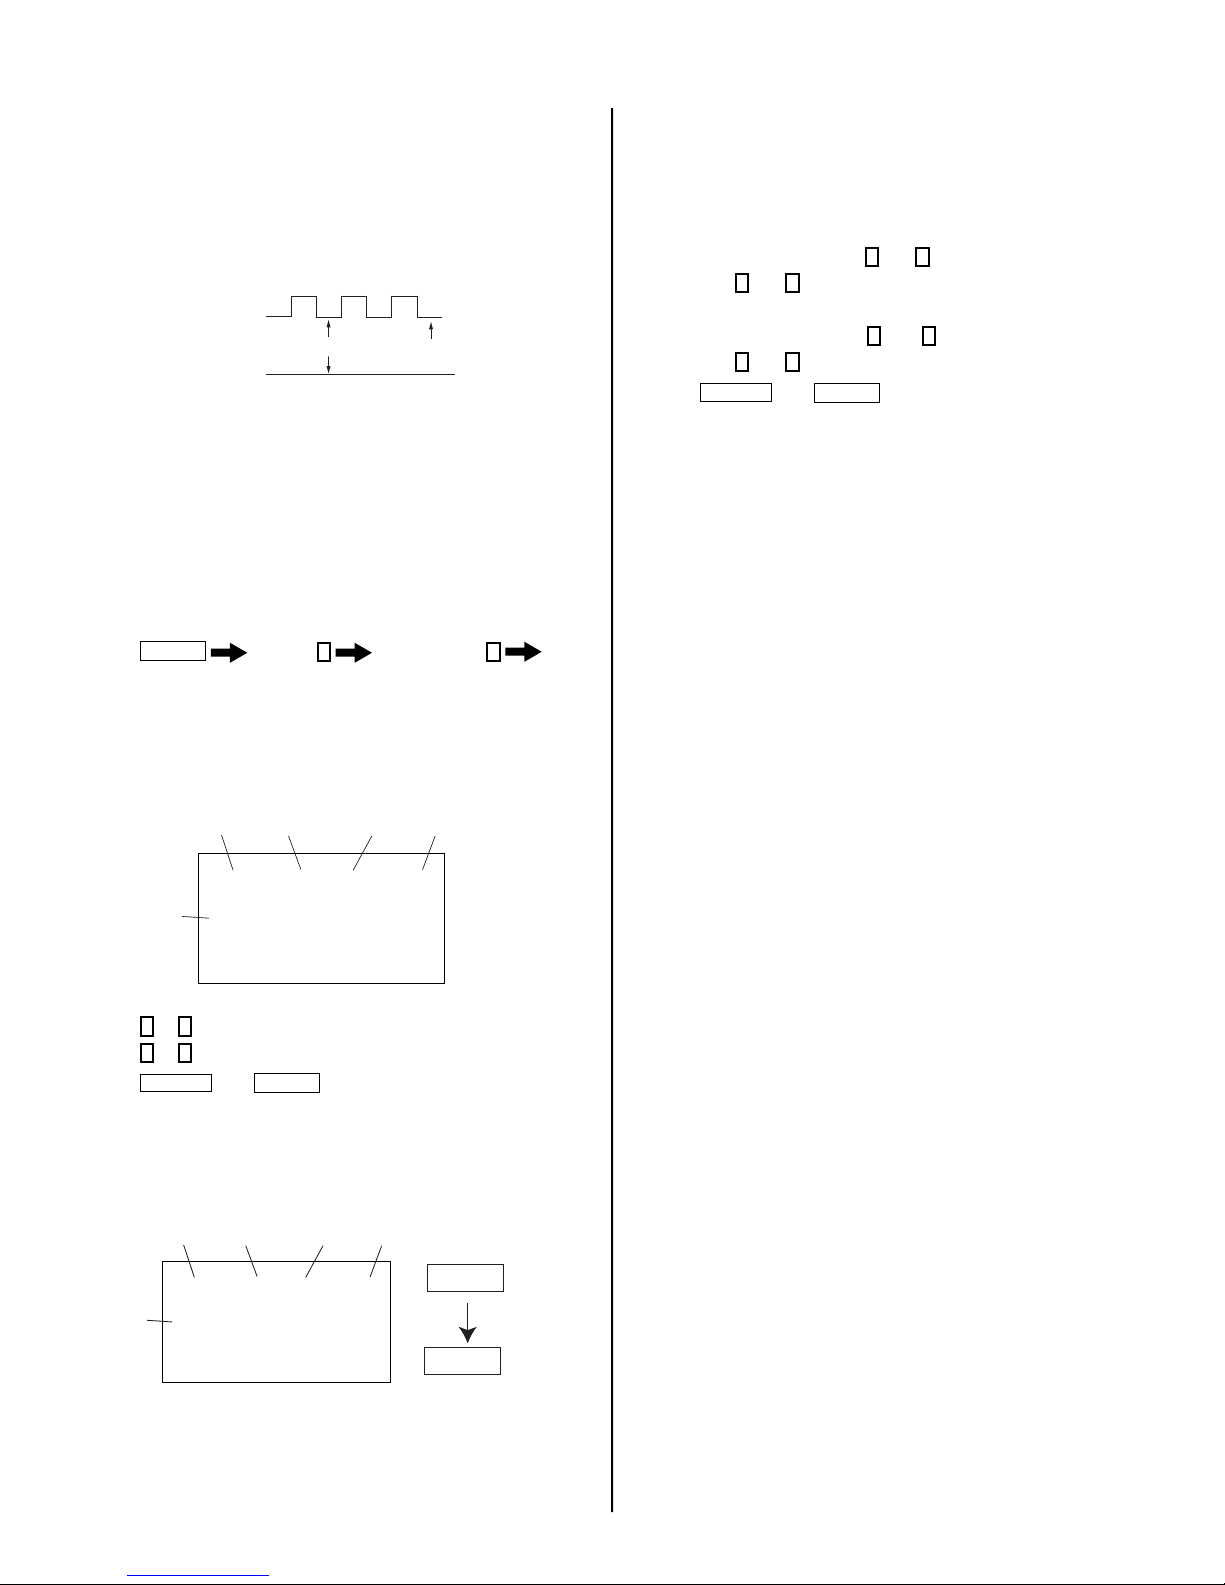
2-4. SCREEN (G2)
1. Input a dot pattern.
2. Set the PICTURE and BRIGHTNESS controls at minimum and
COLOR control at normal.
3. Adjust SBRT, GCUT, BCUT in service mode with an oscilloscope as
shown below so that voltages on the red, green, and blue cathodes
are 160 ± 2VDC.
±
160 – 2VDC
Pedestal
Ground
4. Observe the screen and adjust SCREEN (G2) VR in FBT to obtain
the faintly visible background of dot signal.
2-5. METHOD OF SETTING THE SERVICE
ADJUSTMENT MODE
Service Mode Procedure
1. Standby mode (power off).
2. Press
Display
Channel 5 Sound Volume
on the Remote Commander (press each button within a second).
Power
+
2-6. WHITE BALANCE ADJUSTMENTS
1. Input an entire white signal with burst.
2. Set to Service Adjustment Mode.
3. Set the PICTURE and BRIGHTNESS to minimum.
4. Adjust with SBRT if necessary.
ENTER
1
and 4 .
1
and 4.
to save into the memory.
5. Select GCUT and BCUT with
6. Adjust with
3
and 6 for the best white balance.
7. Set the PICTURE and BRIGHTNESS to maximum.
8. Select GDRV and BDRV with
9. Adjust with
10. Press
3
and 6 for the best white balance.
MUTING
then
Service Adjustment Mode On
1. The CRT displays the time being adjusted.
2. Press
3. Press
4. Press
Display
hsiz 16
to save into the memory.
service
ntsc
vchp
then
Category
defl
00000000
ENTER
Mode
Signal
Type
1
or 4 on the Remote Commander to select the time.
3
or 6 on the Remote Commander to change the data.
MUTING
Item
00000000
Display
Item
Service Adjustment Mode Memory
Turn the set off then on to exit Service Adjustment Mode.
Signal
Type
Category
Mode
service defl hsiz 16
ntsc
vchp 00000000 00000000
Display
Item
write
Item
Data
MUTING
ENTER
Green
Red
KV-27FA310/27FS120/29FA310/29FS120
16
Page 17
SECTION 3: SAFETY RELATED ADJUSTMENTS
KV-27FA310/27FS120/29FA310/29FS120
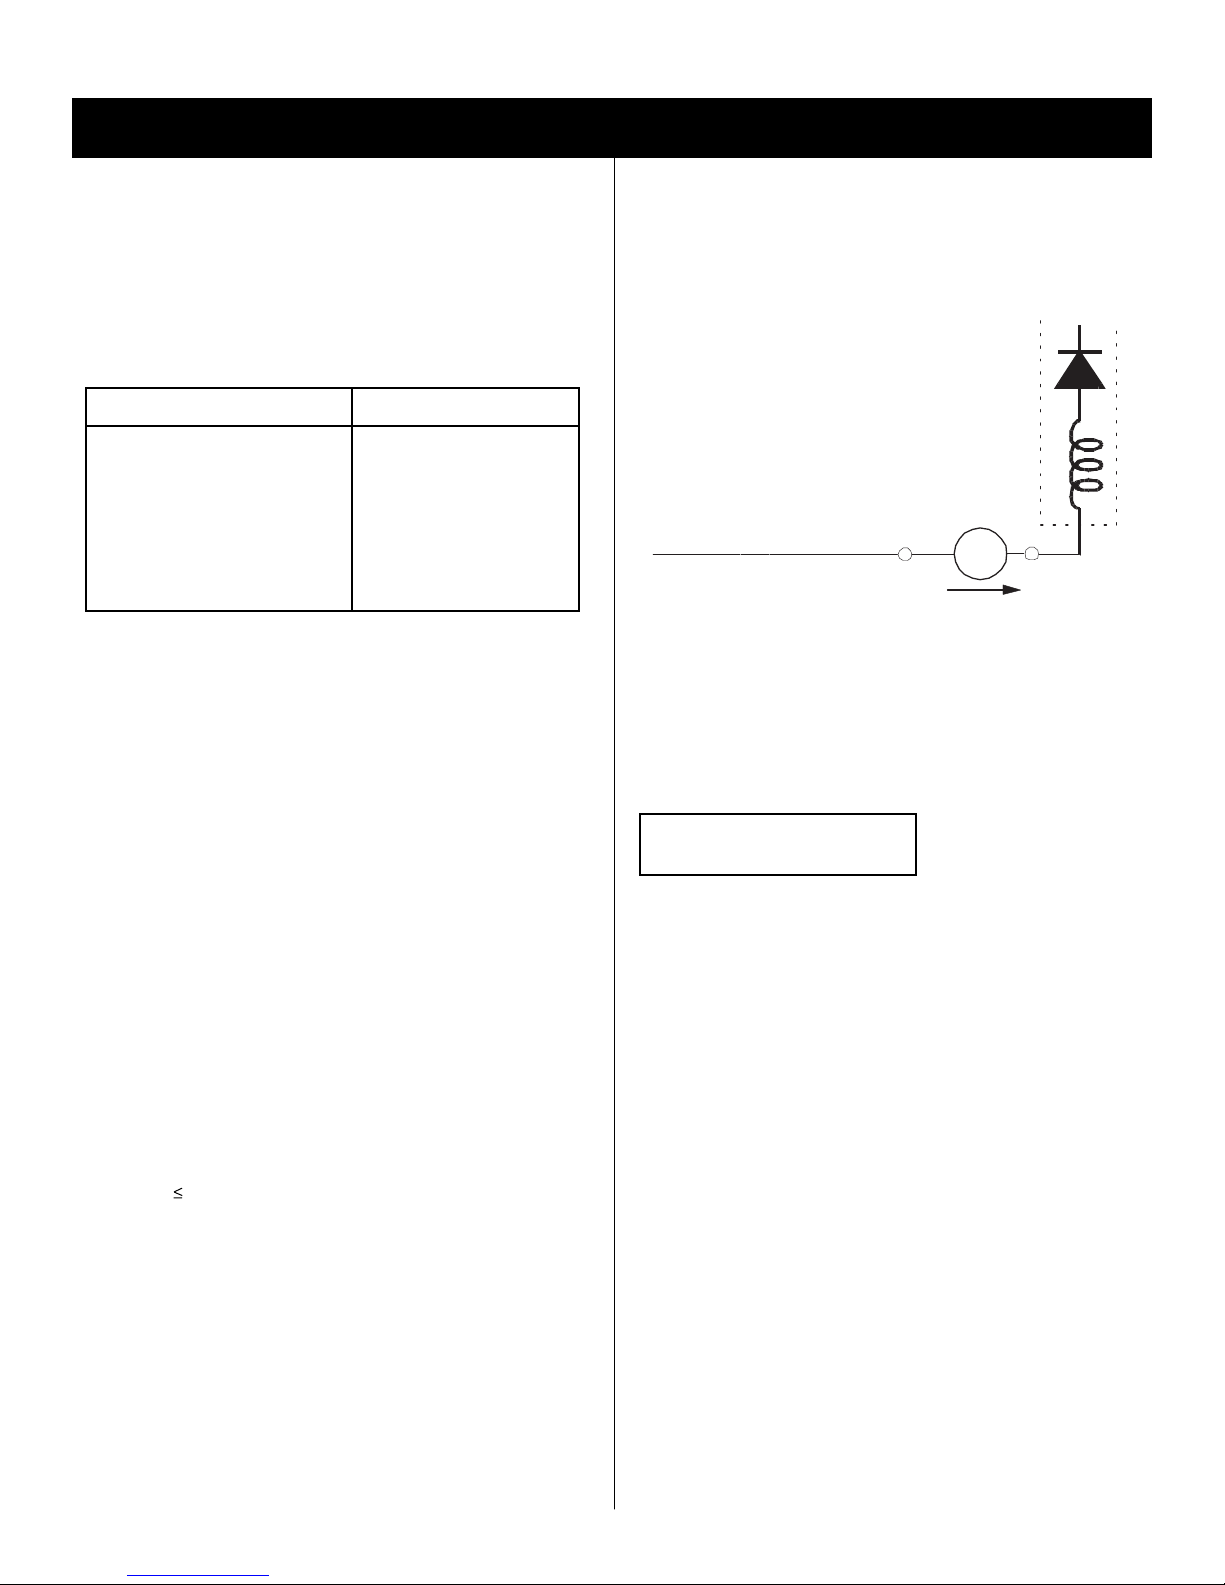
3-1. X R564 CONFIRMATION METHOD
(HV HOLD-DOWN CONFIRMATION) AND
READJUSTMENTS
The following adjustments should always be performed when replacing
the following components which are marked with
diagram:
Part Replaced (Y) Adjustment (X)
DY, T585, CRT, IC001, IC561,
IC600, IC604, C506, C507,
C508, C510, C511, C513,
C514, L588, D566, D567,
D568, PH602, R526, R564,
R565, R566, R851, T510,
T511……....A Board
HV HOLD-DOWN
R564
Y
on the schematic
Preparation Before Confi rmation
1. Using a Variac, apply AC input voltage: 120 ± 2 VAC.
2. Turn the POWER switch ON.
3. Input a white signal and set the PICTURE and BRIGHTNESS
controls to maximum.
4. Confi rm that the voltage between C566 (+) or TP30 and ground is
more than 99VDC.
Hold-Down Readjustment
If the setting indicated in Step 2 of Hold-Down Operation Confi rmation
cannot be met, readjustment should be performed by altering the
resistance value of R564 component marked with
X
.
T585
FBT
ammeter
3.0 mA DC
range
ABL
+
-
A
IABL
3-2. B+ VOLTAGE CONFIRMATION AND
ADJUSTMENT
Note: The following adjustments should always be performed when
replacing the following components, which are marked with
schematic diagram on the A Board:
A BOARD: Y IC604, PH602
Y
on the
Hold-Down Operation Confi rmation
1. Connect the current meter between Pin 11 of the FBT (T585) and the
PWB land where Pin 11 would normally attach (See Figure 1 on the
next page).
2. Input a dot signal and adjust the ABL current to follow with the
PICTURE and BRIGHTNESS control: IABL = 140 ± 100µA.
3. Confi rm the voltage of A Board TP-23 is 135.6 ± 1.0VDC.
4. Connect the digital voltmeter and the DC power supply via Diode
1SS119 to C566 (+) and ground (See Figure 1 on next page).
5. Increase the DC power voltage gradually until the picture blanks out.
6. Turn DC power source off immediately.
7. Read the digital voltmeter indication
(Standard
8. Input 100 IRE White Signal and adjust the ABL current to follow with
the PICTURE and BRIGHTNESS control: IABL = 1820µA ± 200µA.
9. Repeat steps 4 through 7.
114.6 +OVDC/-0.3DC).
1. Using a Variac, apply AC input voltage: 130 + 2.0 / - 0.0 VAC.
2. Input a DOT pattern at Q.C.
3. Set the PICTURE and the BRIGHTNESS controls to minimum.
4. Confi rm the voltage of A Board between TP-23 & Ground is =135.6
± 1VDC.
5. If step 4 is not satisfi ed, replace the components listed above, then
repeat steps 1 throught 3.
KV-27FA310/27FS120/29FA310/29FS120
17
Page 18
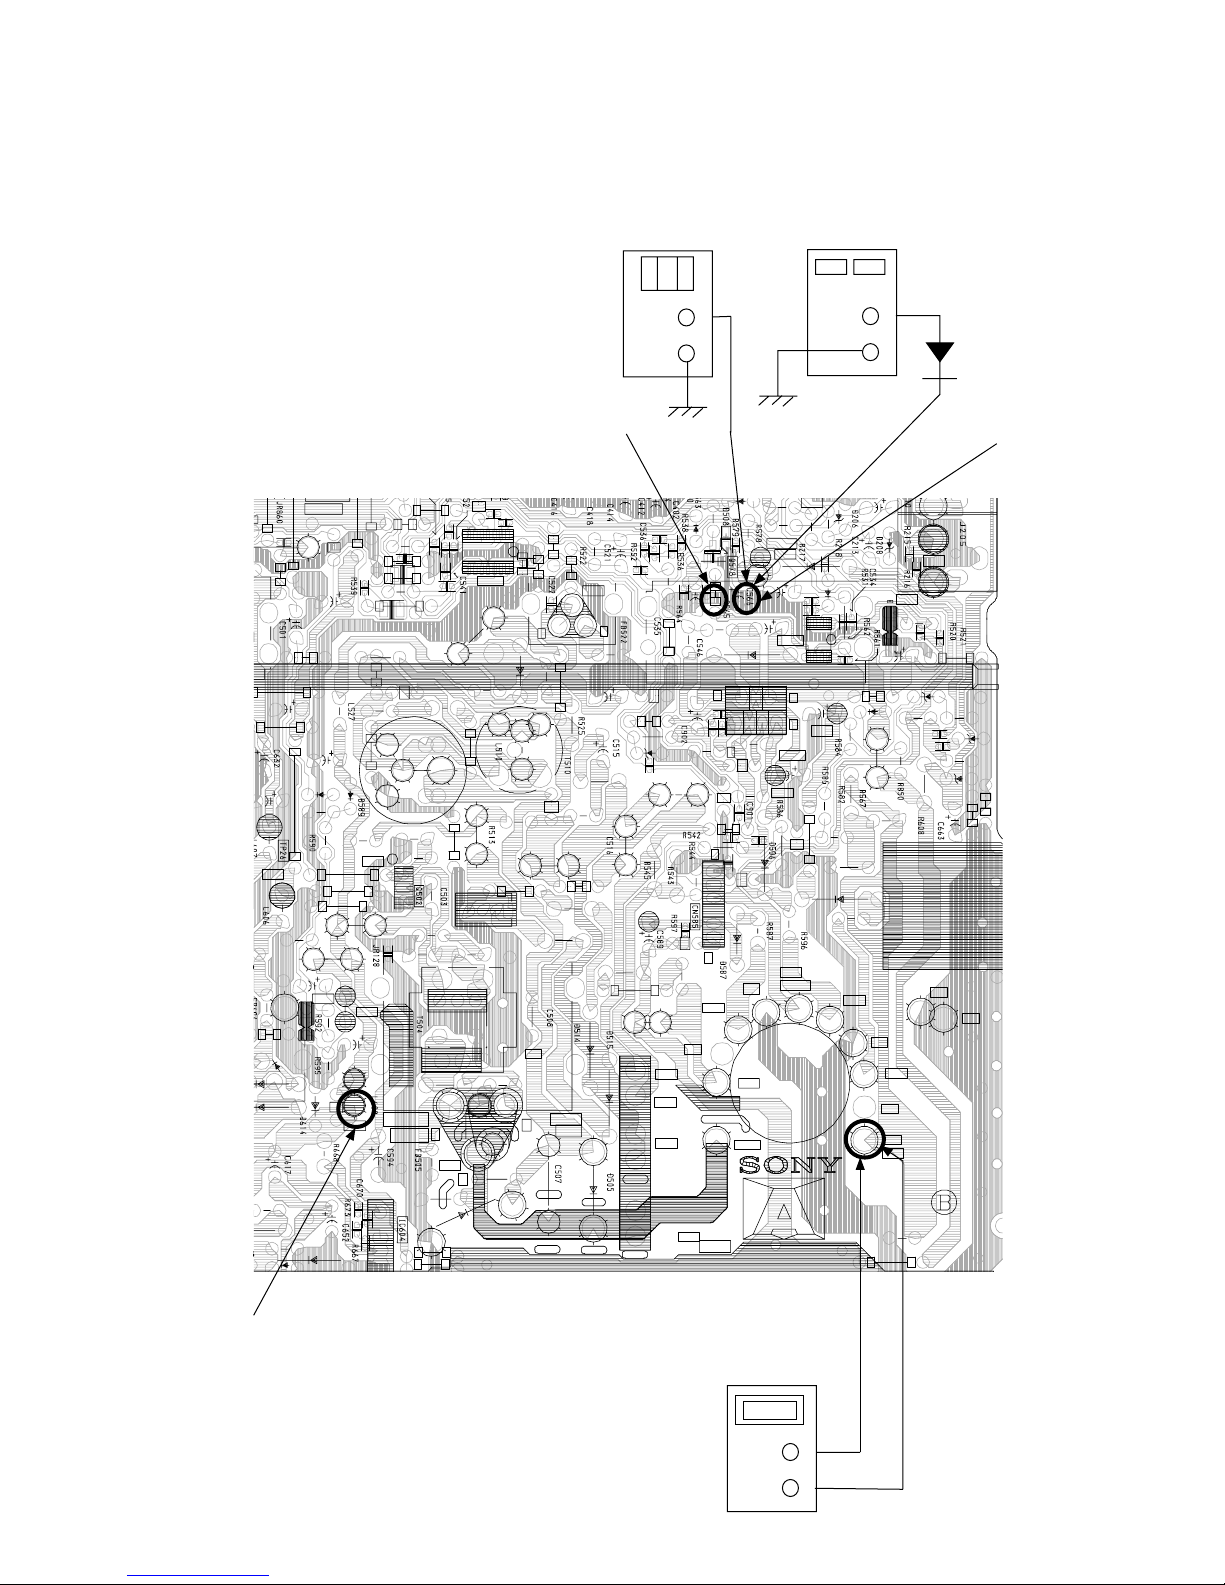
(
)
FIGURE 1
KV-27FA310/27FS120/29FA310/29FS120
DIGITAL
MULTIMETER
+
-
X
R564
R
5
3
1
0
4
S
P
R
5
1
1
J
R
1
R
4
3
7
0
6
R
C
4
5
1
C
5
D
5
6
5
2
R
5
8
9
T
2
P
4
2
9
L
3
7
0
1
5
6
C
1
5
T
2
8
6
2
R
5
3
2
L
3
7
1
1
1
5
C
R
2
1
5
C
1
1
5
L
1
C
5
3
1
5
L
0
2
B
2
P
5
T
R
5
0
4
R
5
3
3
C
5
4
0
5
S
5
6
5
C
I
C
5
3
0
6
2
5
D
5
2
5
L
5
1
0
6
2
5
C
1
5
C
4
1
5
C
2
H
5
Q
B
5
2
5
C
3
L
5
1
5
R
5
3
7
R
5
6
2
2
R
5
5
2
2
E
C
5
2
7
R
5
4
9
R
5
1
5
6
7
C
5
6
1
R
5
4
6
5
4
5
D
6
R
5
4
8
C
5
4
5
R
9
0
R
5
4
0
0
0
D
2
7
C
R
5
4
7
6
1
5
L
R
5
6
C
5
4
8
1
J
R
5
0
POWER
SUPPLY
+
1SS119
C566
Q
4
0
2
R
4
0
8
R
4
1
1
O
R
.
T
H
P
R
5
P
T
3
0
6
6
5
D
R
5
2
9
C
5
6
2
C
5
2
9
1
6
5
C
I
C
5
4
4
2
C
5
9
7
1
T
1
P
V
.
O
U
T
5
4
7
5
4
5
C
I
4
1
C
5
9
5
P
7
T
1
R
9
0
1
5
1
2
C
2
2
8
D
5
2
8
D
5
6
R
5
8
3
2
8
5
C
P
T
3
3
Q
5
2
1
5
7
5
R
C
5
7
1
R
5
6
8
D
5
6
8
6
7
R
5
7
0
D
5
6
R
5
R
2
8
5
L
9
2
6
R
5
6
5
9
7
4
D
6
3
0
6
0
1
2
0
6
C
6
1
0
0
2
4
TP23
8
9
5
E
R
5
0
R
5
9
3
C
5
9
0
E
C
C
6
3
0
5
R
1
9
5
R
B
0
9
5
Q
R
5
9
4
T
P
1
3
4
2
6
C
P
3
T
2
1
6
8
4
0
4
2
6
D
4
5
0
5
C
H
-
O
Q
5
C
5
0
4
1
6
5
0
5
R
U
T
E
0
5
6
0
5
C
6
0
5
D
3
4
R
5
0
6
C
5
1
T
2
P
2
0
C
4
1
5
R
2
1
5
R
H
D
T
5
0
5
T
H
B
5
8
8
R
8
5
L
T
U
O
6
0
5
Q
6
G
2
0
0
V
8
N
/
C
V
D
Y
+
P
T
2
1
V
D
Y
-
T
2
P
7
H
D
Y
-
P
T
2
8
H
D
Y
-
H
D
Y
+
T
P
H
D
Y
+
3
1
H
-
O
2
9
1
5
5
N
C
D
R
5
9
8
T
1
P
9
H
E
A
T
E
R
N
D
5
V
U
T
-
1
3
V
G
N
D
G
N
D
G
N
D
5
5
T
+
1
3
V
N
/
C
A
B
L
T
2
P
0
R
5
8
F
B
T
8
1
AMMETER
3mA dc range
A
+
-
KV-27FA310/27FS120/29FA310/29FS120
18
Page 19
KV-27FA310/27FS120/29FA310/29FS120
SECTION 4: CIRCUIT ADJUSTMENTS
Electrical AdjustmenTs by Remote Commander
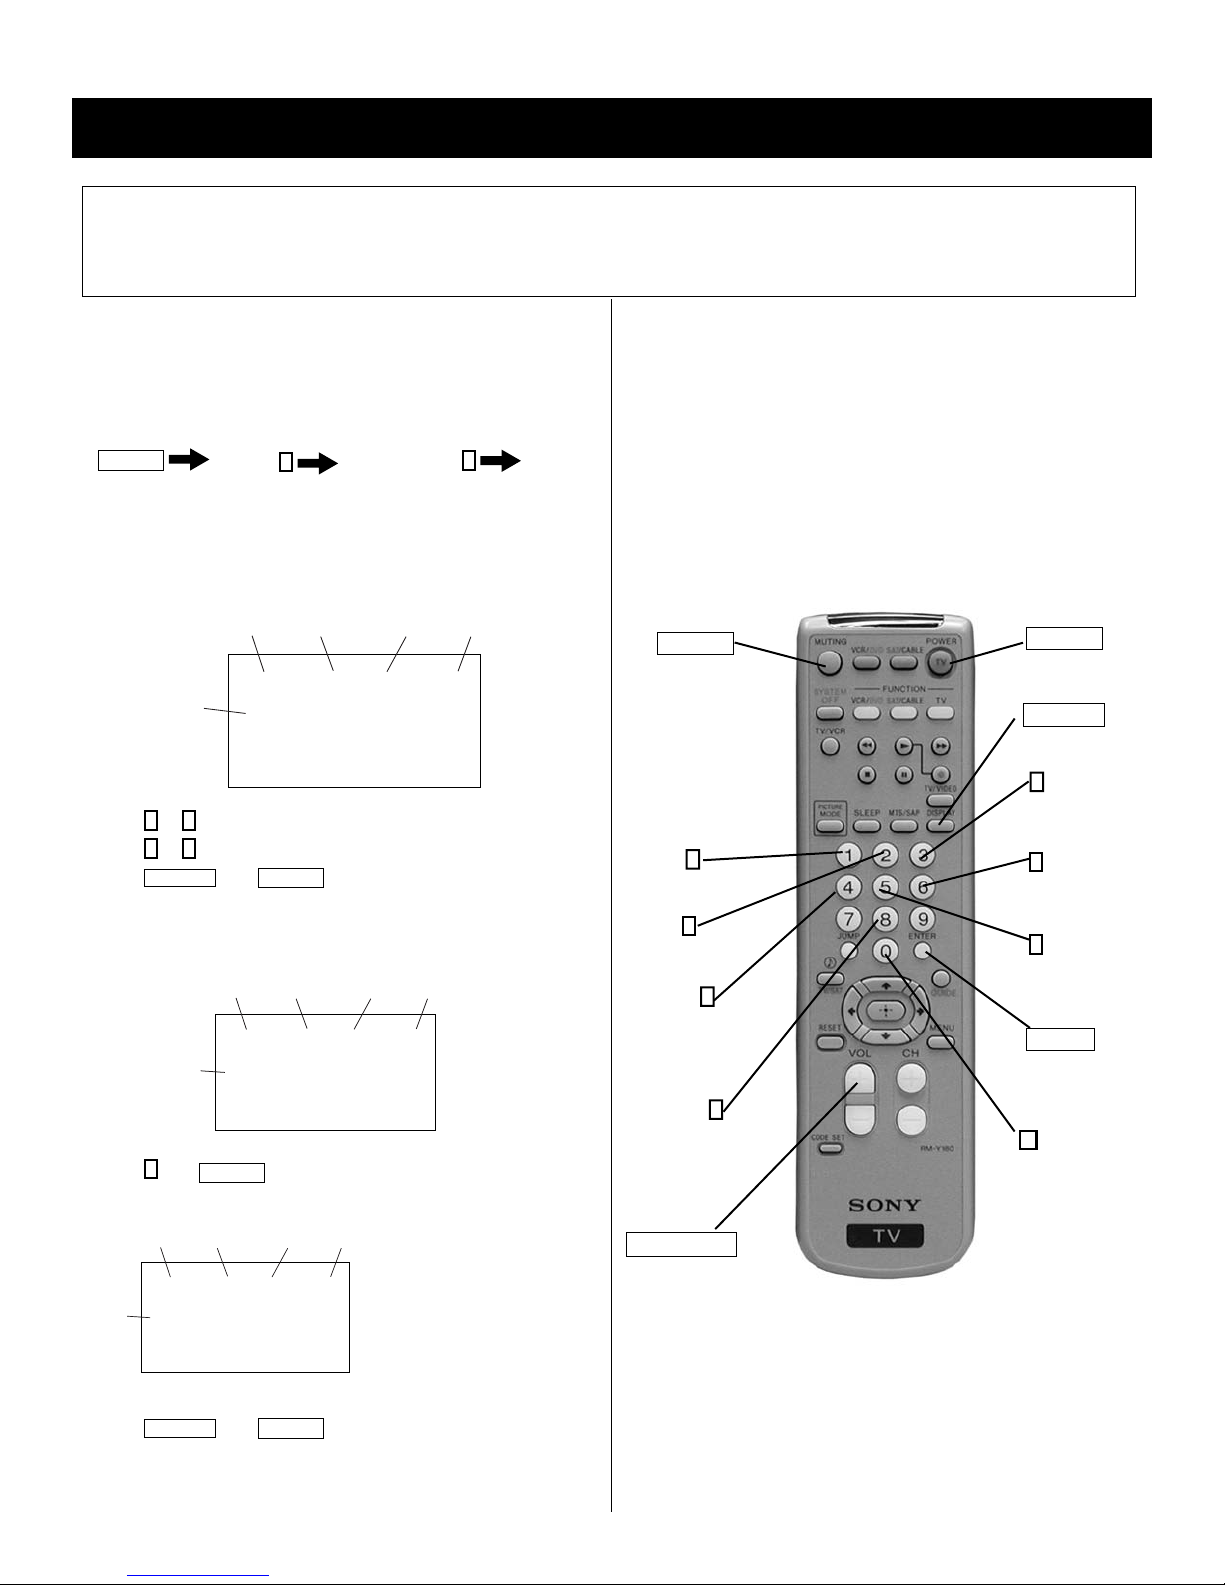
Use the Remote Commander (RM-Y180, RM-Y195) to perform the circuit adjustments in this section.
Test Equipment Required: 1. Pattern generator 2. Frequency counter 3. Digital multimeter 4. Audio oscillator
4-1. SETTING THE SERVICE ADJUSTMENT
MODE
1. Standby mode (Power off).
2. Press the following buttons on the remote commander within a
second of each other:
Display
Channel
5
Sound Volumne
Power
+
Service Adjustment Mode On
1. The CRT displays the item being adjusted.
Item
Data
41
2. Press
3. Press
4. Press
Signal
Category
Display
Item
1
or 4 on the Remote Commander to select the item.
3
or 6 on the Remote Commander to change the data.
MUTING
DEF NTSC 1 NVM OK
M65582AMF-101FPZ0
then
Type
H SIZE
ENTER
Display
Item #
to write into memory.
Service Adjustment Mode Memory
1. Press
Signal
Type
Category
Mode
service defl hsiz 16
Signal
Type
8
then
Mode
service defl hsiz 16
ntsc
vchp 00000000 00000000
ntsc
vchp 00000000 00000000
ENTER
Category
on the Remote Commander to initialize.
Display
Item
write
Display
Item
Data
Item
Item
Data
write
Carry out Step 1 when adjusting
IDs 0-7 and when replacing and
adjusting IC002
4-2. MEMORY WRITE CONFIRMATION
METHOD
1. After adjustment, pull out the plug from the AC outlet, then replace
the plug in the AC outlet again.
2. Turn the power switch ON and set to Service Mode.
3. Call the adjusted items again to confi rm they were adjusted.
4-3. REMOTE ADJUSTMENT BUTT ONS AND
INDICATORS
MUTING
(Enter into
memory)
1
Disp. (Item up)
2
(Device Item Up)
4
Disp. (Item down)
8
(Initialize)
VOLUME (+)
(Service Mode)
RM-Y180
POWER
(Service Mode)
DISPLAY
(Service Mode)
3
Item
(Data up)
6
Item
(Data down)
5
(Device item
down)
ENTER
(Enter into
memory)
0
(Remove from
memory)
2. Press
MUTING
then
ENTER
to write into memory.
3. Turn set off then on to exit Service Adjustment Mode.
KV-27FA310/27FS120/29FA310/29FS120
19
Page 20
20
KV-27FA310/27FS120/29FA310/29FS120
KV-27FA310/27FS120/29FA310/29FS120
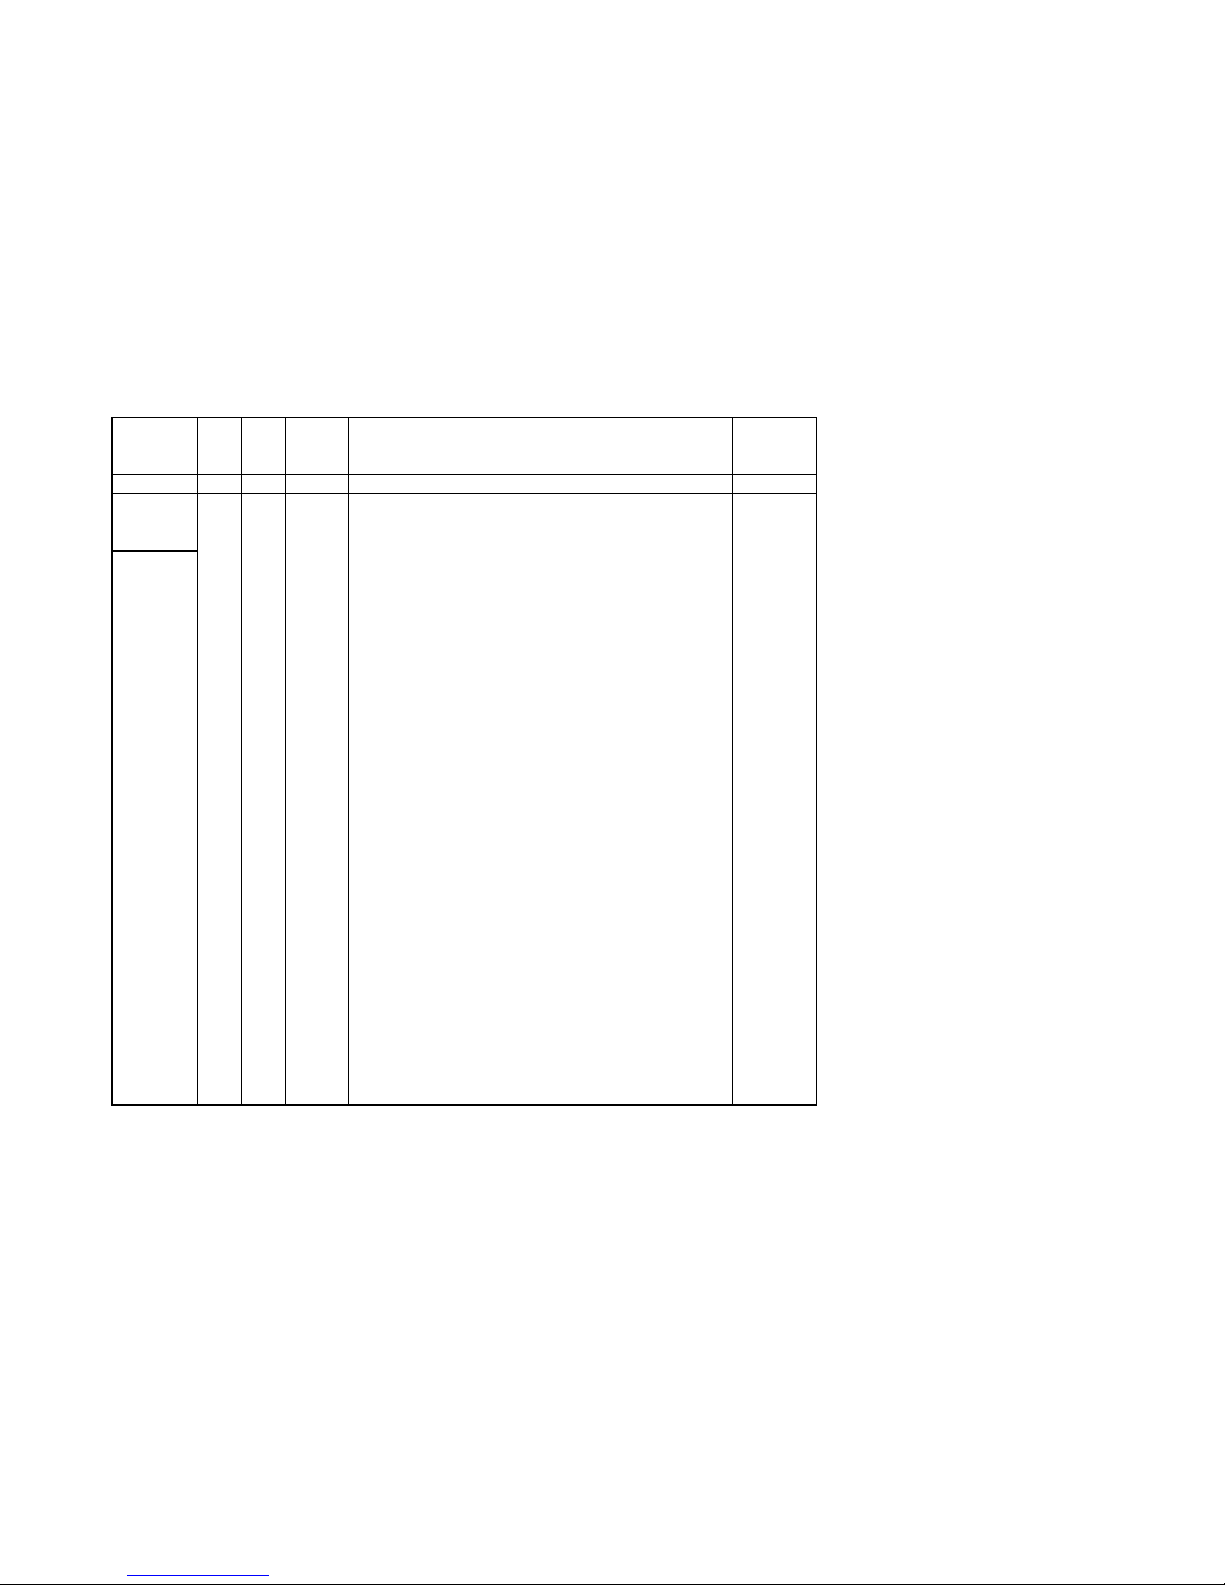
4-4. SERVICE DATA LISTS
NTSC
Init
Data
VERSION Fix 0 VER
Micro
p
rocessor version information
=
VAR
1HSIZ
H-SIZE ( EW DC : YUV OFFSET )
47
VAR
2HPOS
H POSITION: YUV OFFSET
36
VAR
3 VSIZ
V RAMP SIZE: YUV OFFSET
28
VAR 4 VPOS
V POSITION (RAMP DC) NOT USEFUL: YUV OFFSET
37
VAR
5VLIN
V LINEARITY
32
VAR
6SCOR
S CORRECTION
49
VAR
7 VBOW
BOW
31
VAR
8 VANG
ANGLE
37
VAR
9TRAP
EW TRAPESIUM
24
VAR
10 PAMP
PARABOLA ( EW PIN )
49
VAR
11 UPIN
UPPER CORNER ( UPPER PIN )
31
VAR
12 LPIN
LOWER CORNER ( LOWER PIN )
30
VAR
13 TROT
TROT
109
VAR
14 HBL
K
FBPBLK ( H BLK MODE SELECT )
0
VAR
15 RBL
K
HBLK R POS ( HBLK REAR TIMING: YUV OFFSET )
15
VAR
16 LBL
K
HBLK F POS ( HBLK FRONT TIMING: YUV OFFSET )
41
FIX
17 VBL
K
VBLK POS ( V BLK WIDTH )
0
FIX 18 HMSK
Macro OFF ( TOP VEND [ WHEN MACROVISION ] PREVENT
OFF )
0
FIX
19 HDW
IIC_HOUT_DUTY ( H PULSE WIDTH [ 25u/19u ]
1
FIX
20 AFC
H AFC Gain ( AFC GAIN )
0
FIX
21 AFC1
H Charge pump ( AFC1 TIME CONSTANT )
3
FIX
22 AFCW
AFC1 PULLIN ( AFC1 PULL IN WIDE )
0
FIX
23 CDMD
V CD MODE ( V DET WINDOW SW TIMING )
1
FIX
24 HSS
SYNC SLICE LVL(H) ( SYNC SLICE LEVEL [ H sepa ] )
0
FIX
25 VSS
SYNC SLICE LVL(L) ( SYNC SLICE LEVEL [ V sepa ] )
3
FIX
26 SLDN
AUTO SLICE DOWN ( AUTO SLICE LEVEL DOWN )
0
FIX
27 SLUP
AUTO SLICE UP ( AUTO SLICE LEVEL UP )
0
FIX
28 JPSW
VJPSW ( JUMP SW )
0
FIX 29 HOSC
H VCO FOR OFFSET ADJUST OFFSET
7
FIX
30 EHT
EHT
4
FIX
31 EHTG
EHT GAIN ( EHT MODE )
1
Service
Group
DEF
Fix/
Var
No. Name Description
Page 21

21
KV-27FA310/27FS120/29FA310/29FS120
KV-27FA310/27FS120/29FA310/29FS120
NTSC
Init
Data
VAR
1 VSIZ
V RAMP SIZE
48
VAR
2 VPOS
V POSITION ( RAMP DC )
40
VAR
3VLIN
V LINEARITY
26
VAR
4SCOR
S CORRECTION
24
VAR
5TRAP
EW TRAPESIUM
22
VAR
6 PAMP
PARABOLA ( EW PIN )
24
VAR
7UPIN
UPPER CORNER ( UPPER PIN )
31
VAR
8LPIN
LOWER CORNER ( LOWER PIN )
31
VAR
9 ABLG
ABL GAIN
15
VAR
10 SCON
SUB CONTRAST LEVEL
13
VAR
11 VPW
JUMP PULSE WIDTH
1
16 : 9
Service
Group
Item name & ( Description )Name
Fix/
Var
No.
Page 22
22
KV-27FA310/27FS120/29FA310/29FS120
KV-27FA310/27FS120/29FA310/29FS120
NTSC
Init Video YUV 16:09
Data
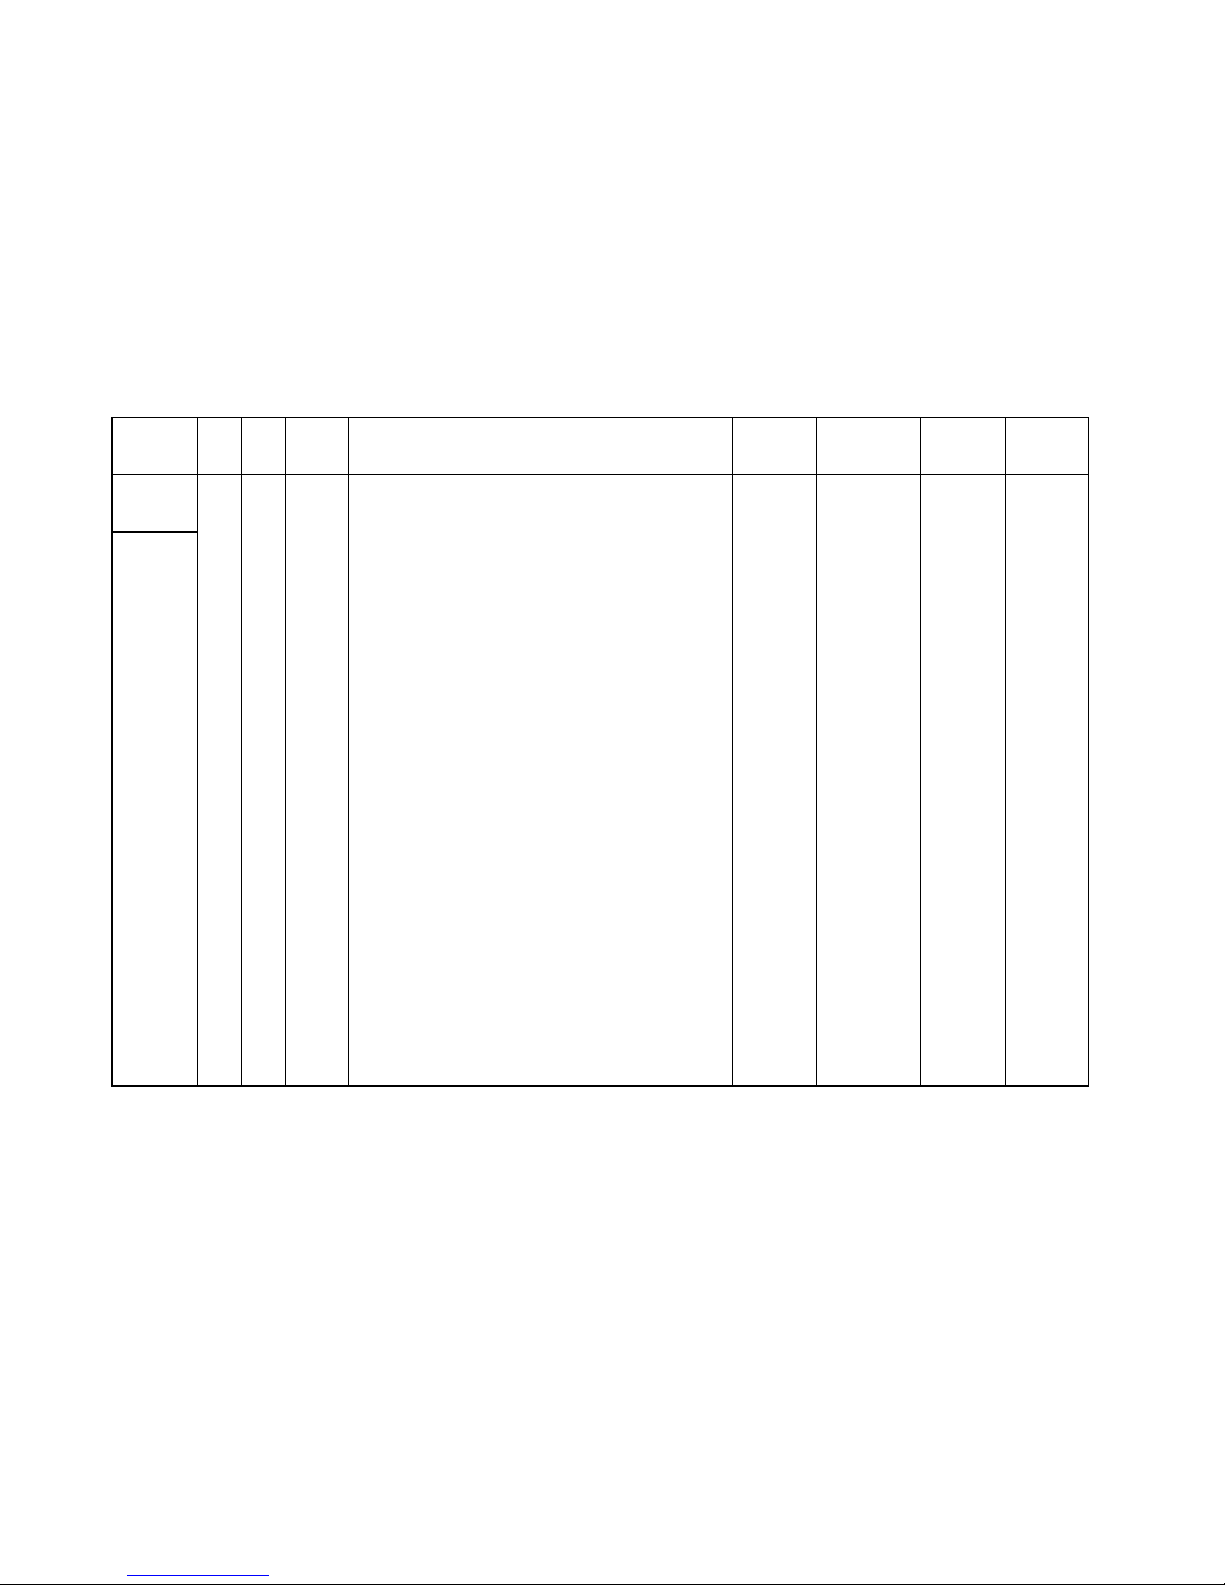
VAR
1 RDRV
R DRIVE
64
64 64 N/A
VAR 2 GDRV
G DRIVE: GDOF OFFSET ( only Color Temp. "Warm")
45 45 48 N/A
VAR 3 BDRV
B DRIVE: BDOF OFFSET ( only Color Temp. "Warm")
45 45 44 N/A
VAR
4 RCUT
HARDWARE AKB (R) CMP DATA
120
120 120 N/A
VAR 5 GCUT
HARDWARE AKB (G) CMP DATA
91 91 90 N/A
VAR 6 BCUT
HARDWARE AKB (B) CMP DATA
87 87 105 N/A
VAR
7SCON
SUB CONTRAST LEVEL
19
19 19 N/A
VAR
8 SHUE
SUB TINT (HUE)
777
N/A
VAR
9SCOL
SUB COLOR LEVEL
14 14 24
N/A
VAR
10 SBRT
SUB BRIGHTNESS
13 13 15
N/A
FIX 11 RON
R OUTPUT ON ( 0:R OUTPUT OFF 1:R OUTPUT ON )
1
FIX 12 GON
G OUTPUT ON ( 0:R OUTPUT OFF 1:R OUTPUT ON )
1
FIX 13 BON
B OUTPUT ON ( 0:R OUTPUT OFF 1:R OUTPUT ON )
1
FIX 14 BLLV
BLUE STRETCH ( 00:NO<->11:DEEP ) only Color Temp "Cool"
1
FIX
15 MTRX
MATRIX RATIO SELECT
0
FIX
16 AXIS
R-Y PHASE SELECT
52
VAR 17 SSHO
SUB SHARPNESS GAIN (OVER) RF/VIDEO
10 25 25 N/A
VAR 18 SSHP
SUB SHARPNESS GAIN (PRE) RF/VIDEO
15 30 30 N/A
VAR 19 SHPF
SHARPNESS FOR ( 00:2 CLK <-> 11:5 CLK )
100N/A
FIX 20 SHCL
SHARPNESS CORING LEVEL
0
FIX
21 SHMX
SHARPNESS LIMITER LEVEL
15
FIX
22 ACLV
ACL GAIN
0
FIX
23 AKBD
AKB SELF DIAGNOSTIC COUNTER (@1 SEC)
2
FIX
24 AKBS
AKB SWITCH ( 0:AKB OFF 1:H/W AKB ON )
1
FIX
25 REFP
AKB REFPLS TIMING
0
FIX
26 YNRC
YNR LIMITER LEVEL
15
FIX
27 BKON
BLACK STRETCH ON
1
FIX 28 BKAT
BLACK STRETCH DETECTOR TIME CONSTANT1
15
FIX 29 BKRC
BLACK STRETCH DETECTOR TIME CONSTANT2
4
FIX 30 BKDP
BLACK STRETCH DEPTH
soft cont'l
FIX
31 BKSP
BLKSTPNT BLACK STRETCH POINT
2
VP1
Service
Group
Fix/
Var
Name Item name & ( Description )No.
Page 23
23
KV-27FA310/27FS120/29FA310/29FS120
KV-27FA310/27FS120/29FA310/29FS120
NTSC
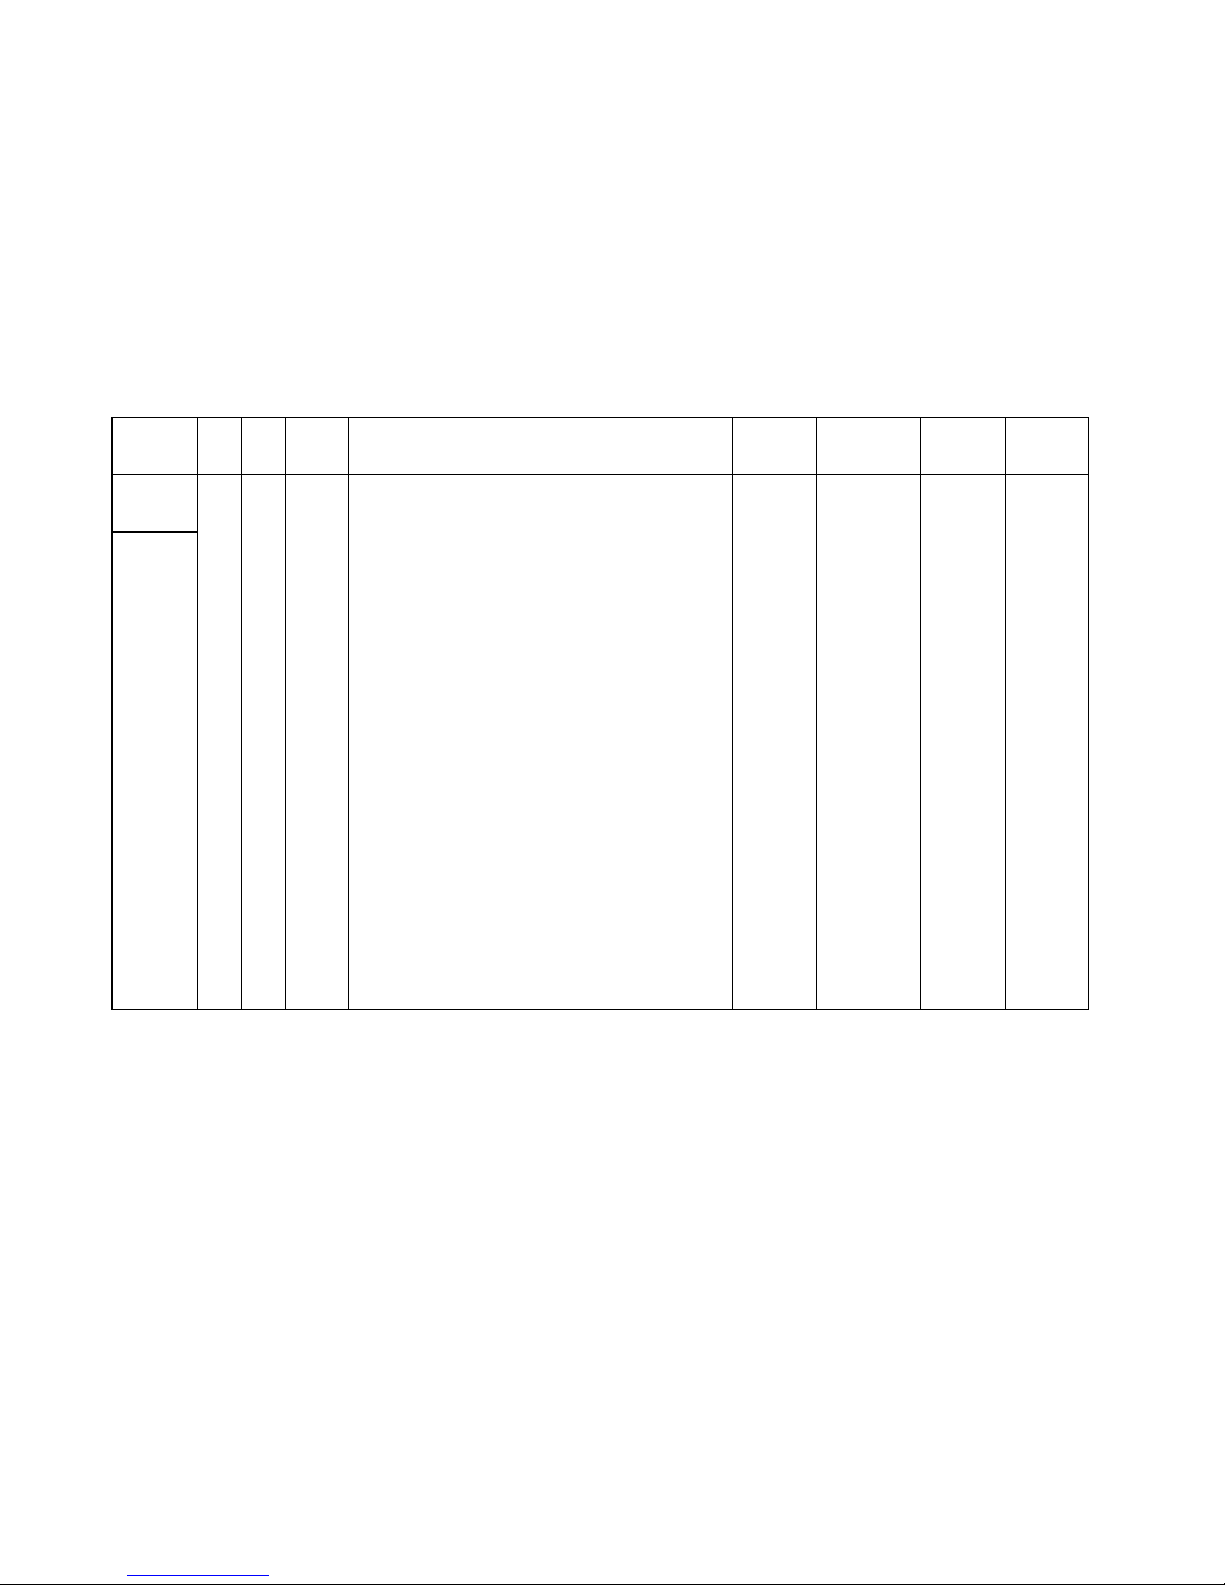
Init Video YUV 16:09
Data
FIX
1VMOF
VM GAIN(Off) ( VM LEVEL AT "OFF" SETTING ) 2
FIX
2VMLO
VM GAIN(Low) ( VM LEVEL AT "LOW" SETTING )
4
FIX
3VMHI
VM GAIN(High) ( VM LEVEL AT "HIGH"SETTING )
7
FIX
4VMDL
VM DELAY ( VM DELAY )
6
FIX
5VMPL
VM POL ( VM POLARITY )
0
FIX
6VMWD
VM WIDTH ( VM WIDTH )
0
FIX
7VMCL
VM CORING LEVEL ( VM CORING LEVEL )
0
FIX
8 VMMX
VM MAX ( VM LIMITER LEVEL )
15
FIX
9CKLV
KILLER LEVEL ( VM COLOR KILLER VTH )
1
10N/A
FIX
10 CKON
FORCE KILLER ( FORCE KILLER )
0
FIX
11 ALFA
ALFA ( ADAPTIVE DET SENSITIVITY )
2
FIX 12 YCMD
MANEXP ( YC SEPA FORCE SELECT [ 00:ADAPTIVE 01:H 10:V
11:HV ] )
0
FIX 13 VACL
V APERTURE CORING LV ( V APERTURE CORING LEVEL )
0
FIX
14 VAGA
V APERTURE GAIN ( V APERTURE GAIN LEVEL )
soft cont'l
FIX 15 VAMX
V APERTURE MAX GAIN (V APERTURE LIMITER LEVEL)
5
FIX
16 GAMM
GAMMA ( GAMMA [ 00:NO <-> 11:DEEP ] )
soft cont'l
FIX
17 YDLY
Y DELAY ( Y DELAY TIME )
1
13N/A
FIX
18 CDLY
C DELAY ( C DELAY TIME )
0
FIX
19 YOFF
Y Mute ( Y OUTPUT MUTE )
0
FIX
20 CBPF
SAW FILTER(7.2MHzBPF) ( C BPF FOR HI )
0
FIX
21 BGPP
BGP POS ( BGP [ FOR C DECODER ] TIMING )
9
928N/A
VAR
22 GDOF
G DRIVE OFFSET only Color Temp. "Warm"
9
VAR
23 BDOF
B DRIVE OFFSET only Color Temp. "Warm"
14
VAR
24 GCOF
G CUT CMP DATA OFFSET only Color Temp. "Warm"
11
VAR
25 BCOF
B CUT CMP DATA OFFSET only Color Temp. "Warm"
28
VAR
26 DCTV
DCTRAN VTH<6:0> ( DCTRANSFER VTH )
30
FIX
27 DCTG
DCTRAN GAIN<4:0> ( DCTRANFER GAIN )
soft cont'l
Service
Group
Fix/
Var
VP2
Name Item name & ( Description )No.
Page 24
24
KV-27FA310/27FS120/29FA310/29FS120
KV-27FA310/27FS120/29FA310/29FS120
NTSC
Init
Data
VAR
1SCOL
SUB COLOR LEVEL 14
VAR
2 SHCL
SHARPNESS CORING LEVEL
15
VAR
3SHMX
SHARPNESS LIMITER LEVEL
7
FIX
4 YNRC
YNR LIMITER LEVEL
7
FIX
5VMHI
VM LEVEL AT " HIGH " SETTING
10
FIX
6VMCL
VM CORING LEVEL
0
FIX
7 VMMX
VM LIMITER LEVEL
7
FIX
8 VAMX
V APERTURE LIMITER LEVEL
0
FIX
9GAMM
GAMMA ( 00: NO < - > 11:DEEP)
0
FIX
10 YNRS
YNR ON
1
FIX
11 WSTH
WEAK SIGNAL VTH
7
FIX
12 WSVA
WEAK SIGNAL VIDEO ATT
0
FIX
13 WSCA
WEAK SIGNAL CHROMA ATT
5
FIX
14 NRCH
THRNZV1( NOISE DET TIME CONSTANT )
0
FIX
15 NRCL
THRNZV2 ( NOISE DET TIME CONSTANT )
16
FIX
16 NRVL
THRNZH1 ( NOISE DET VTH )
2
FIX
17 NRVH
THRNZH2 ( NOISE DET VTH )
0
FIX
18 IPNC
DETNZ STATUS COUNTER
2
FIX
19 IPNV
DETECTION PERIOD
10
PALLET
= VIVID
PALLET
= STD
PALLET
= MOVIE
PALLET
= PRO
FIX
1 VPIC
PICTURE
63 50 37 31
FIX
2 VBRI
BRIGHTNESS
27 30 31 31
FIX
3VCOL
COLOR
37 32 31 31
FIX
4 VHUE
HUE
31 31 31 31
FIX
5 VSHA
SHARPNESS
31 32 31 21
FIX
6 VVM
VM
2100
FIX
7VTRI
COLOR TEMP
0121
FIX
8 VAPA
APERTURE G
5530
FIX
9VGMA
GAMMA
3100
FIX
10 VDCT
DCT LV
23 15 2 2
FIX 11 VBKP
BLACK STRETCH DEPTH ( VIDEO )
3347
FIX 12 TBKD
BLACK STRETCH DEPTH ( TUNER )
3347
NR
Service
Group
PALLET
Fix/
Var
No.
NTSC
BA6 DATA (DEC)
Name
Item name & ( Description )
Item name & ( Description )
Service
Group
Fix/
Var
No. Name
Page 25
25
KV-27FA310/27FS120/29FA310/29FS120
KV-27FA310/27FS120/29FA310/29FS120
NTSC
Init
Data
FIX 1 YNRS
YNR SW
(
YNR ON
)
0
FIX 2 YTHR
Y THR 2D
(
Y SIGNAL THROUGH 2DYCS
)
0
FIX 3 Y2D
Y2D Fix
(
Y SIGNAL GENERATE from 2DYCS
)
0
FIX 4 2DFX
C BPF Fix
(
C SIGNAL GENERATE from H/V BPF onl
y
1
FIX 5 CLPS
CLAMP CONTROL SW ( 0: CLAMP OFF. 1:
CLAMP AUTO. 2: CLAMP ON
]
1
FIX 6 VLPF
VIDEO LPF
(
Y_LPF [ ANALOG ] for adjust
)
3
FIX 7 CLPF
CHROMA LPF
(
C_LPF [ ANALOG ] for adjust
)
3
FIX 8 BPFB
YCS HBPF BACK
(
YCS HBPF SELECT [ BACK ]
)
1
FIX 9 BPFF
YCS HBPF FRONT
(
YCS HBPF SELECT [ FRONT ]
)
1
FIX 10 BKTS
BS T2 IFON
(
BLACK STRETCH RECOVER TIME OUT
0
FIX 11
VMG
2
VMGAIN2 ( MODULATOR FEEDBACK GAIN CONTROL
3
FIX 12 CLPT
CLAMP KEEP TIMER ( CLAMP AUTO ON KEEP TIMER COUNT [
@ 100 MS
])
15
A8
Init Video YUV 16:09
Data
FIX 1
A1FL
AMP OFF1 L ( ANALOG ACC hysteresis )
90
FIX 2
A1ON
AMP ON ( ANALOG ACC AMP ON LEVEL)
4
FIX 3
ACCS
ACC SW ( ACC ON/OFF )
0
01N/A
FIX 4 AASL
AVE SEL
(
C DECODER TIME CONSTANT [32, 16, 8, 1H ]
)
2
FIX 5
BASL
B2AVE SEL ( ACC TIME CONSTANT )
0
FIX 6
XFFR
FREE RUN ( VCXO FORCE FREERUN )
0
01N/A
FIX 7
A2ON
AMP2 ON Thresh ( ABL VTH )
4
FIX 8
A3ON
AMP3 ON Thresh ( ACL VTH )
4
FIX 9
A2FL
AMP2 OFF Thresh L ( AMP2 OFF LEVEL LOWER )
64
FIX 10
A3FL
AMP3 OFF Thresh L ( AMP3 OFF LEVEL LOWER )
64
FIX 11
AXTH
AXIS HYS ( AXS HYS )
30
FIX 12
ACTH
ROM HYS ( ROM HYS )
10
FIX 13
AVAV
AVE SEL AV (AVE SEL AV )
3
FIX 14
B2TH
B2COMP ( B2COMP )
0
FIX 15
ACCP
ACC COMP ( ACC COMP )
0
Y
Fix/
Var
Service
Group
Service
Group
C
Fix/
Var
No. Item name & ( Description )Name
Name Item name & ( Description )No.
Page 26
26
KV-27FA310/27FS120/29FA310/29FS120
KV-27FA310/27FS120/29FA310/29FS120
NTSC
Init Video YUV 16:09
Data
FIX
1AMUT
RGB POWER ON MUTE ( RGB POWER ON MUTE )
0
FIX
2PMUT
RGB Mute before OSD ( RGB MUTE [ EXCEPT OSD ]
1
FIX
3CORL
CUTOFF R L ( R CUTOFF LOWER )
212
FIX
4CORH
CUTOFF R H ( R CUTOFF UPPER )
0
FIX 5 COGL
CUTOFF G L ( G CUTOFF LOWER WHEN TEMP IS "COOL" AND
"NEUTRAL"
197
FIX 6 COGH
CUTOFF G H ( G CUTOFF LOWER WHEN TEMP IS "COOL" AND
"NEUTRAL"
0
FIX 7 COBL
CUTOFF B L ( B CUT OFF LOWER WHEN TEMP IS "COOL" AND
"NEUTRAL"
176
FIX 8 COBH
CUTOFF B H ( B CUT OFF LOWER WHEN TEMP IS "COOL" AND
"NEUTRAL"
0
FIX
9 ABLS
ABL SEL ( ABL SELECT )
0
FIX
10 ALSP
ACL SPEED ( ACL SPEED )
0
FIX
11 ALRS
ACL SPE ( ACL RECOVER SPEED )
2
FIX
12 ALAS
ACL ASPE ( ACL ATACK SPEED )
9
FIX
13 ABLG
ABL GAIN ( ABL GAIN )
5
FIX
14 ALS2
ACLASPE2 ( ACL ATACK SPEED [ 2 ] )
2
FIX
15 AKBM
AKB MODE ( AKB MODE )
0
FIX
16 AKBP
AKB P[5:0] ( AKB PULSE HEIGHT )
16
FIX
17 OSDL
OSD LIMIT ( OSD LIMMIT SELECT )
0
FIX
18 UVIN
Y/U/V UVINV ( U/V INVERT )
0
FIX
19 UVG
U/V GAIN ( U/V OFFSET CANCELER ON )
0
FIX 20 UOFS
U IN OFFSET
(
U IN OFF SET
)
15
FIX
21 VOFS
V IN OFFSET ( V IN OFFSET )
12
FIX
22 AALG
ANA ACL GAIN ( ANALOG ACL GAIN CONTROL )
0
FIX
23 AALS
ANA ACL ON ( ANALOG ACL ON/OFF CONTROL)
1
FIX
24 UVDE
UV_DITHER_EN ( UVIN DITHER ENABLE )
0
01N/A
FIX
25 UVDT
UV_DITHER_TEST ( UVIN DITHER TEST )
0
06N/A
Service
Group
Fix/
Var
No. Name Item name & ( Description )
RGB
Page 27

27
KV-27FA310/27FS120/29FA310/29FS120
KV-27FA310/27FS120/29FA310/29FS120
NTSC
Init Video YUV 16:09
Data
FIX
1 HFFR
AFC FREE RUN ( AFC1 FORCE FREE RUN )
0
FIX
2HFUP
HFREE UP ( H FREE RUN FREQUENCY UP [ 700 Hz ]
0
FIX
3JSWW
VJP WIDTH ( JUMP PULSE WIDTH )
0
FIX 4 EWCL V/EW DAC CLK CONTROL ( EW/VRAMP DA CLOCK SELECT ) 0 0 0 N/A
FIX
5XF0A
FREE RUN OFFSET ( VCXO FREE RUN ADJUST)
0
FIX
6BGST
BG START ( BGP [ FOR PLL ] TIMING )
16
16 1 N/A
FIX
7 XPHA
VCXO CTL ( VXCO PHASE ADJUST )
10
FIX
8 HRMP
Ramp Slew Rate ( AFC2 TIME CONSTANT )
3
FIX
9RPLU
Ref Charge pump ( REF PLL TIME CONSTANT )
3
FIX
10 RPLB
Ref VCO ( REF PLL TIME CONSTANT )
1
FIX
11 XF0B
VCXO FREE RUN ( VXCO Fo ADJUST )
0
FIX
12 RPLS
REF FB SW ( REF VCO FB LOOP SELECT )
0
FIX
13 SSM
Sync Sepa Mask ( SyncSepaMasking CONTROL )
0
FIX
14 VSAG
V-sag ( V-SAG prevent ON )
0
FIX
15 AFC2
AFC2 Gain ( AFC2 GAIN CONTROL )
3
FIX
16 VRFL
V RAMP FIL OFF ( V RAMP FILTER SWITCHING OFF )
1
FIX
17 SSLP
LPY SYNC ( LFP pre SYNC SEPA ON/OFF
1
FIX
18 XPLU
B PLL Change pump ( ACP TIME CONSTANT )
1
FIX
19 8FSC
8FSC SEL ( 8fsCLK Skew OFF )
1
10N/A
FIX
20 4FS2
4FSC SEL2 ( 4fsCLK Skew OFF )
1
10N/A
FIX
21 CDM2
V_CD_MODE2 ( V_LOGIC SW )
1
FIX
22 BGPC
Add. FTN BGP C ( BGP C )
0
FIX
23 MHDL
Add. FTN BGP SEL ( BBP SEL )
1
FIX
24 BFRE
V FREE ( FORCE V FREE RUN )
0
FIX 25 HRPP AFC2 RAMP POS ( FRAMP RRAMP H OUT CONTROL RANGE 8
FIX
26 DSC
K
CLOCK SEL ( DS DAC CLK SW 2 )
1
110
FIX
27 VBH
K
VBLK HALFKIL ( V BLK HALF KILL )
0
FIX
28 VPW
V PLS WIDTH ( V Pulse Wide )
1
FIX 29 DTH
D THRESHOLD LEVEL ( DITHER THRESHOLD LEVEL
CONTROL AT IIC AUTOD= ON
0
FIX
30 SLON
LPF SYNC ON ( LPF SYNC ON )
1
Fix/
Var
No.
Service
Group
DEFD
Name Item name & ( Description )
Page 28
28
KV-27FA310/27FS120/29FA310/29FS120
KV-27FA310/27FS120/29FA310/29FS120
NTSC
Init Video YUV 16:09
Data
FIX 31 VSSW
SYNC SLICE LVL(V)_W ( SYNC SLICE LEVEL [ V ] Wide Window
0
FIX
32 AF2S
AFC2_SEL ( ADC2 TIMING SW )
0
FIX
33 VSL2
V_SYNC_LPF_2 ( DIGITAL V_SINC_LPF [ Fall ] )
0
FIX
34 VSL1
V_SYNC_LPF_1 ( DIGITAL V_SINC_LPF [ Rise ] )
1
FIX
35 VYUV
YUV VSIZE OFFSET ( YUV V-SIZE OFFSET )
8
FIX
36 VYVP
YUV VPOS OFFSET ( YUV V-POSITION OFFSET )
8
FIX
37 VYHS
YUV HSIZE OFFSET ( YUV H-SIZE OFFSET )
8
FIX
38 VYHP
YUV HPOS OFFSET ( YUV H-POSITION OFFSET)
7
FIX
39 VSHE
V-SHRINK MODE ( V-SHRINK MODE for AV )
0
FIX
40 VYRB
YUV RBLK ( YUV RBLK OFFSET )
7
FIX
41 VYLB
YUV LBLK ( YUV LBLK OFFSET )
7
NTSC
Init Video YUV 16:09
Data
FIX 1 PCLP
pedestal CLAMP ON/OFF ( SYNC TIP/PEDESTAL CLAMP
SELECT )
0
FIX 2 VRT
VRT Voltage ( ADC REFERENCE [ 00:1.15Vpp 01:1.25 Vpp
10:1.35 Vpp 11:1.45 Vpp ] )
1
FIX
3 14HI
INV 14H CLK ( 4fsc [ Skew ] CLK POLARITY )
0
00N/A
FIX
4 14HD
14H CLK DLY ( 4fscCLK [ Skew ] CLK DELAY ADJUST )
0
00N/A
FIX
5DSI
INV DS CLK ( 8fscCLK POLARITY )
0
00N/A
FIX
6DSD
DS CLK DLY ( 8fscCLK DELAY ADJUST )
0
00N/A
FIX
7 ADCD
AD CLK DLY ( ADC CLK DELAY ADJUSTO )
0
01N/A
FIX
84FSC
4FSC SW ( AD/LOGIC CLK SWAP )
0
FIX
9WSTH
WEAK_SIG_VTH ( WEAK_SIGNAL VTH )
0
FIX
10 WSVA
WEAK SIG VIDEO ATT ( WEAK SIGNAL VIDEO ATT )
0
00N/A
FIX
11 WSCA
WEAK SIG CHROMA ATT (WEAK SIGNAL CHROMA ATT)
0
00N/A
FIX
12 VREF
VREF_SEL ( AD REFERENCE SELECT [ VZ ] )
0
NTSC
Init
Data
FIX 1
HT
HT ( HALF TONE LEVEL )
0
FIX 2
OSLR
OSD LVL R ( R OSD LEVEL )
25
FIX
3OSLG
OSD LVL G ( G OSD LEVEL )
25
FIX
4OSDC
OSD COMP ( OSD COMP )
0
FIX
5OSLB
OSD LVL B ( B OSD LEVEL )
25
DEFDOTHEROSD
Service
Group
Fix/
Var
No.
NameNo.
Service
Group
Fix/
Var
No.
Service
Group
Fix/
Var
Item name & ( Description )
Item name & ( Description )
Name
Name Item name & ( Description )
Page 29

29
KV-27FA310/27FS120/29FA310/29FS120
KV-27FA310/27FS120/29FA310/29FS120
NTSC
Init
Data
FIX
1 HRIL
H/W AKB R INI DATA L ( H/W AKB RED OUTPUT LOWER )
soft cont'l
FIX
2 HRIH
H/W AKB R INI DATA H ( H/W AKB RED OUTPUT UPPER )
soft cont'l
FIX 3 HGIL
H/W AKB G INI DATA L ( H/W AKB GREEN OUTPUT LOWER )
soft cont'l
FIX 4 HGIH
H/W AKB G INI DATA H ( H/W AKB GREEN OUTPUT UPPER )
soft cont'l
FIX
5HBIL
H/W AKB B INI DATA L (H/W AKB BLUE OUTPUT LOWER)
soft cont'l
FIX
6HBIH
H/W AKB B INI DATA H (H/W AKB BLUE OUTPUT UPPER)
soft cont'l
FIX
7HLM1
AKB_LIM1<7:0> ( H/W AKB LIM1 )
6
FIX
8HLM2
AKB_LIM2<7:0> ( H/W AKB LIM2 )
12
FIX
9HLM3
AKA_LIM3<7:0> ( H/W AKB LIM3 )
21
FIX
10 HAD1
AKB_ADD1<7:0> ( H/W AKB SPEED1 )
2
FIX
11 HAD2
AKB_ADD2<7:0> ( H/W AKB SPEED2 )
6
FIX
12 HAKE
AKB_EN ( H/W AKB MANUAL [ MCU ] / HARD
1
FIX 13 HASP
AKB_SPEED
(
H/W AKB SPEED
)
3
FIX 14 HERL
AKB_SWERR<7:0>
(
H/W AKB ERROR DET THRESH
)
40
FIX
15 HLMC
AKB_ERRC<7:0> ( H/W AKB ERROR DET TIME )
20
FIX
16 HPWL
AKBSWPON<7:0> ( H/W AKB POWER ON TRESH )
4
FIX
17 HPWC
AKB_PWERRC ( H/W AKB POWER ON TIME )
90
FIX 18 HFMT
H/W AKB2 HOLD TIMER ( H/W AKB2 HOLD TIMER (@
100 MSEC ) [ 0: No hold ]
20
FIX 19 SPMT
AKB POW ON MUTE EXIT ( AKB POWER ON MUTE EXIT
TIMMER )
120
H/W AKB
Service
Group
Fix/
Var
Item name & ( Description )No. Name
Page 30

30
KV-27FA310/27FS120/29FA310/29FS120
KV-27FA310/27FS120/29FA310/29FS120
29FA310 27/29FS120
VAR
1 SBAL
SBAL ( SUB BALANCE )
44
VAR
2 SBAS
SBAS ( SUB BASS )
00
VAR
3STRE
STRE ( SUB TREBLE )
60
VAR
4SRL
SRL ( SURROUND LEVEL )
00
VAR
5 BBOL
BBOL ( SURROUND OFF-BBE LOW )
86
VAR
6 BBOH
BBOH ( SURROUND OFF-BBE HIGH)
45
VAR
7 BBSL
BBSL ( SIMULATE BBE LOW )
24
VAR
8 BBSH
BBSH ( SIMULATE BBE HIGH )
44
VAR
9 BBGL
BBGL ( WOW GAME BBE LOW )
60
VAR
10 BBGH
BBGH ( WOW GAME BBE HIGH )
40
VAR
11 BBTL
BBTL ( SRS BBE LOW )
06
VAR
12 BBTH
BBTH ( SRS BBE HIGH )
04
VAR
13 BBDL
BBDL ( Audio Processor Prologic BBE Low for DOLBY )
60
VAR
14 BBDH
BBDH ( Audio Processor Prologic BBE High for DOLBY )
40
VAR
15 VFIX
VFIX ( AUDIO OUTPUT FIX DATA )
0 243
VAR
16 AGCL
AGCL ( AGC LEVEL )
22
VAR
17 VCOF
RF OFFSET DATA
99
29FA310 27/29FS120
VAR
1 BBEL
SUB AUDIO PROCESSOR PROLOGIC BBE LOW
90
VAR
2 BBEH
SUB AUDIO PROCESSOR PROLOGIC BBE HIGH
90
VAR
3 BBOL
SURROUND OFF-BBE LOW
90
VAR
4 BBSL
SIMULATE BBE LOW
50
VAR
5 BBGL
WOW GAME BBE LOW
10 0
VAR
6AGCL
SUB AUDIO PROCESSOR AGC LEVEL
20
VAR
7 DDOF
DOLBY OFFSET DATA
15 0
NTSC
NTSC
AUDIO
PROCE
SSOR
No. Name
AP2
Service
Group
Fix/
Var
Item name & ( Description )
Service
Group
Fix/
Var
No. Name Item name & ( Description )
Page 31
31
KV-27FA310/27FS120/29FA310/29FS120
KV-27FA310/27FS120/29FA310/29FS120
NTSC
Init
Data
FIX
1DISP
DISP ( OSD HORIZONTAL OFFSET ) 55
FIX
2 CCHP
CCHP ( FOR TILT DATA CALCULATION ) 80
FIX 3 HRLW
HRLW ( LOW LIMIT OF H-PULSE COUNTING WINDOW [ RF
]
16
FIX 4 HRHG
HRLG ( HIGH LIMIT OF H-PULSE COUNTING WINDOW [ RF
]
64
FIX
5HSDT
HSDTCT ( H-PULSE DETECTION [ S-VIDEO ]
8
FIX 6 STPI
STPI ( GRADUAL CONTRAST INCREASE STARTING LEVEL )
40
FIX 7 RAPI
RAPI (GRADUAL CONTRAST INCREASE Vsync COUNTER)
10
NTSC
Init
Data
VAR
ID0
Language related
81
VAR
ID1
Video related
31
VAR
ID2
Audio related
113
VAR
ID3
Miscellaneous
130
VAR
ID4
Miscellaneous
32
VAR
ID5
Miscellaneous
24
VAR
ID6
Miscellaneous
48
VAR
ID7
Miscellaneous
69
Feature
Service
Group
Fix/
Var
No.
Service
Group
Fix/
Var
No.
MICROPRO
CESSOR
Name
Item name & ( Description )Name
Item name & ( Description )
Page 32
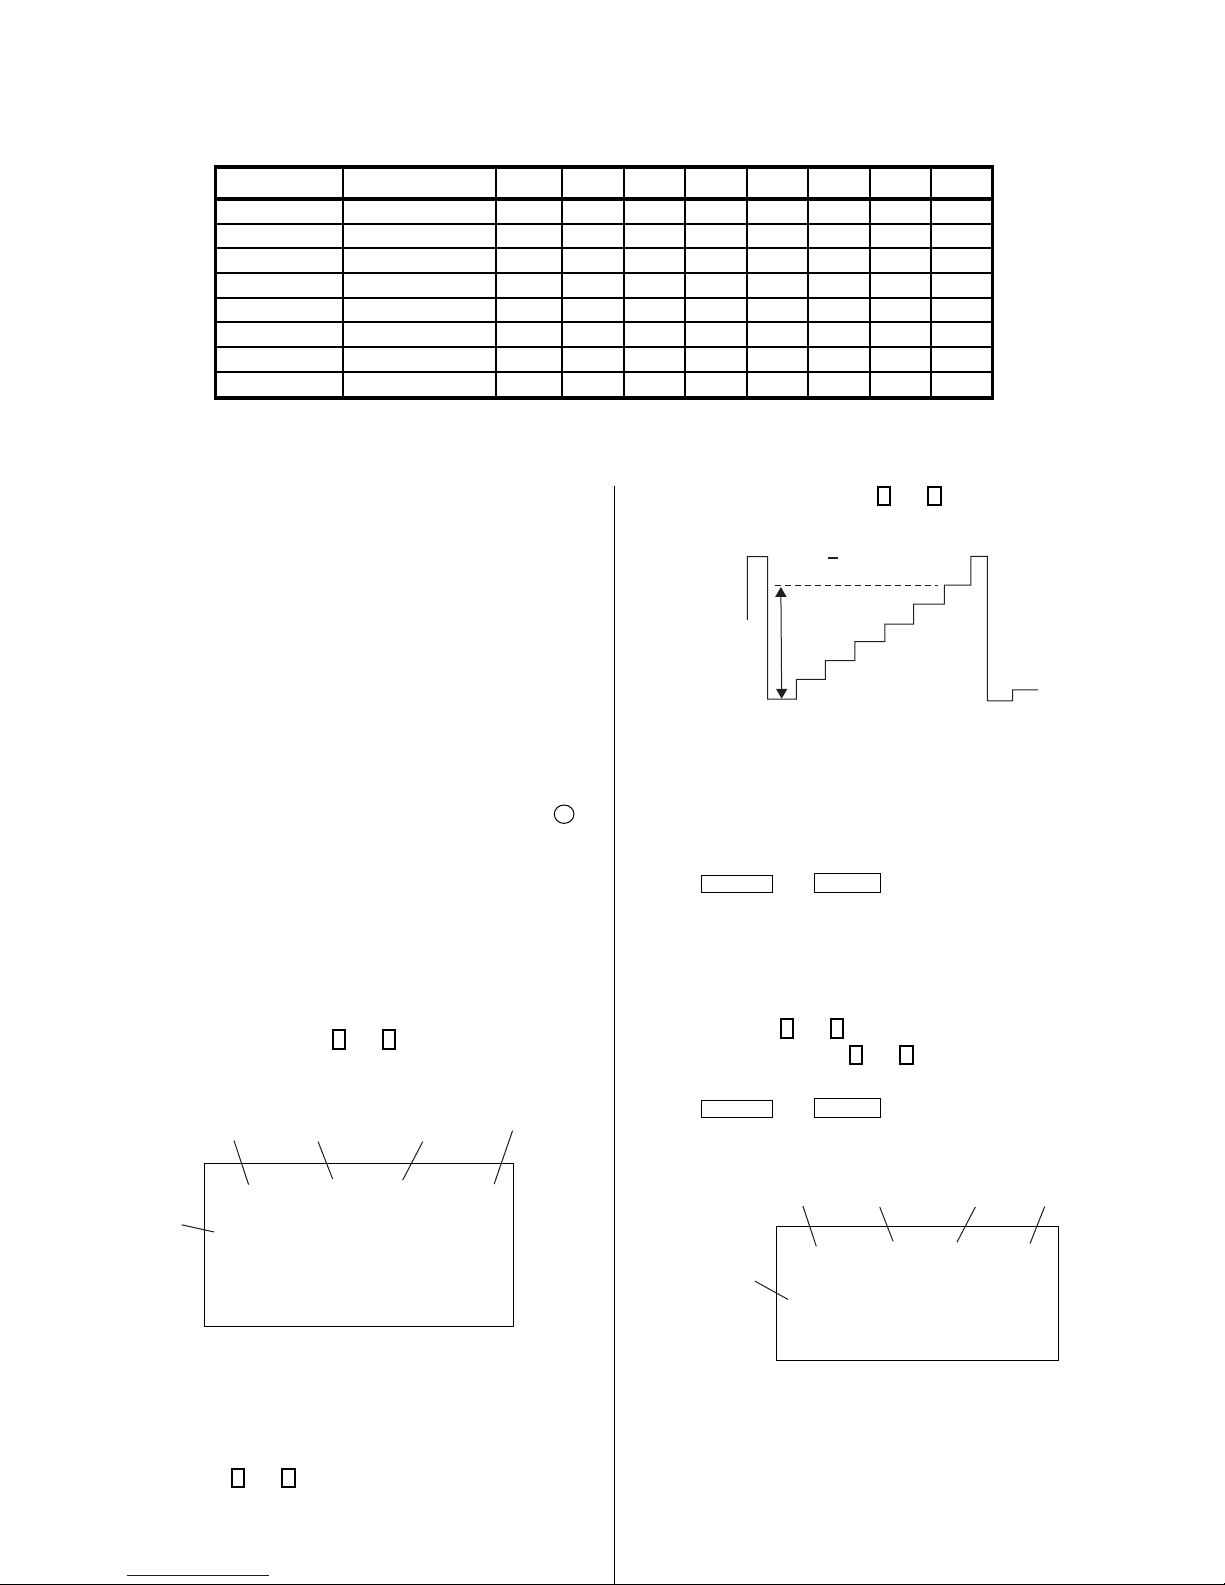
4-5. ID MAP TABLE
Model Destination ID-O ID-1 ID-2 ID-3 ID-4 ID-5 ID-6 ID-7
KV-27FA310 US 81 31 17 130 32 24 48 69
KV-27FA310 CND 81 31 17 130 32 24 48 69
KV-27FS120 US 89 31 17 34 0 24 0 5
KV-27FS120 CND 89 31 17 50 0 24 0 5
KV-29FS120
KV-29FS120
KV-29FA310
KV-29FA310
L NORTH
L SOUTH
L NORTH
L SOUTH
KV-27FA310/27FS120/29FA310/29FS120
81 31 17 130 32 24 48 69
81 31 17 130 32 24 48 69
81 31 113 130 32 24 48 69
81 31 113 130 32 24 48 69
4-6. A BOARD ADJUSTMENTS
H. Frequency (Free Run) Check
1. Input a TV mode (RF) with no signal.
2. Connect a frequency counter to base of Q502
(TP-25 H. DRIVE) on the A Board.
3. Check H. Frequency for 15735 ± 200 Hz.
V. Frequency (Free Run) Check
1. Select video 1 with no signal input.
2. Set the conditions for a standard setting.
3. Connect the frequency counter to TP-27 (V OUT) or CN515 pin
(V DY+) and ground on the A Board .
4. Check that V. Frequency shows 60 ± 4 Hz.
6
Drive (SCON)
1. Input a color-bar signal and set the level to 75%.
2. Set in Pro mode + PICTURE MAX.
3. Activate the Service Adjustment Mode.
3
4. Set GON and BON items. Using
values. Leave RON set to “1”.
Mode
Category
6
set each to the following
and
Display
Item
Item
Data
3
7. Adjust the value of SCON with
and 6 for 87 ± 2Vpp.
87 + 2Vpp
8. Reset GON and BON values to “1”.
R ON: ON (1)
G ON: ON (1)
B ON: ON (1)
9. Press
MUTING
then
ENTER
to save into the memory.
Display Position Adjustment (DISP)
1. Input a color-bar signal.
2. Set to Service Adjustment Mode.
3. Select DISP with
4. Adjust values of DISP with
center.
5. Press
6. Check to see if the text is displayed on the screen.
MUTING
1
and 4 .
then
3
and 6 to adjust characters to the
ENTER
to save into the memory.
Signal
Type
R ON: ON (1)
G ON: OFF (0)
B ON: OFF (0)
5. Connect an oscilloscope probe to CW Board, JW2704 (KR).
6. Select SCON with
service video rdrv
ntsc
vchp
1
and 4 .
00000000 00000000
KV-27FA310/27FS120/29FA310/29FS120
26
Signal
Type
Display
Mode
Category
Item
service micro disp 48
ntsc
vchp
00000000 00000000
Item
Data
32
Page 33
KV-27FA310/27FS120/29FA310/29FS120
Sub Bright Adjustment (SBRT)
1. Input a monoscope signal.
2. Activate the Service Adjustment Mode.
3. Set the PICTURE and BRIGHTNESS to minimum.
4. Select the SBRT item with
5. Adjust the values of SBRT with
IRE mark, after that increase +3 steps.
6. Press
MUTING
then
1
and 4 .
ENTER
3
and 6 to obtain a faintly visible 20
to save into the memory.
Sub Hue, Sub Color Adjustment
(SHUE, SCOL)
1. Input color-bar signal at 75%.
2. Activate the Service Adjustment Mode.
3. Set (PIC) to Max and (COL) to 50%.
4. Connect an oscilloscope probe to CW Board, JW7408 (Blue Out).
5. Select the SHUE and SCOL item with
6. While showing the SHUE item, adjust the waveform with
until the second and third bars show the same level
(V2 = V3 < 0.15Vp-p). Set Sub Hue -2 Step.
7. While showing the SCOL item, adjust the waveform with
until the fi rst and fourth bars show the same level
(V1 = V4 < 0.15Vp-p). Set Sub Col + 2 Step.
V2 V3
V1
1
and 4 .
V4
3
and 6
3
and 6
H. Center Adjustment (HPOS)
Perform this adjustment after performing H. Frequency
(Free Run) Check.
1. Input a crosshatch signal.
2. Activate the Service Adjustment Mode.
3. Select the HPOS item with
4. Adjust the value of HPOS with
5. Press
MUTING
then
1
and 4 .
ENTER
3
and 6 for the best horizontal center.
to save into the memory.
H. Size Adjustment (HSIZ)
1. Input a monoscope signal.
2. Activate the Service Adjustment Mode.
3. Select HSIZ with
4. Adjust with
5. Press
MUTING
1
and 4 .
3
and 6 for the best horizontal size.
ENTER
then
to save into the memory.
8. Press
MUTING
then
ENTER
to save into the memory.
V. Size Adjustment (VSIZ)
1. Input a crosshatch signal.
2. Activate the Service Adjustment Mode.
3. Select the VSIZ item with
4. Adjust value of VSIZ with
5. Press
MUTING
then
1
and 4.
3
and 6 for the best vertical size.
ENTER
to save into the memory.
V. Center Adjustment (VPOS)
Perform this adjustment after performing H. Frequency
(Free Run) Check.
1. Input a crosshatch signal.
2. Activate the Service Adjustment Mode.
3. Select the VPOS item with
4. Adjust value of VPOS with
5. Press
MUTING
then
1
and 4 .
3
and 6 for the best vertical center.
ENTER
to save into the memory.
V. Linearity (VLIN), V. Correction (SCOR), PIN
Amp (PAMP), and Horizontal Trapezoid
(HTRP) Adjustments
1. Input a crosshatch signal.
2. Activate the Service Adjustment Mode.
3. Select VLIN, SCOR, PAMP, and HTRP with with
4. Adjust with
5. Press
3
and 6 for the best horizontal size.
then
MUTING
V LINEARITY (VLIN)
V CORRECTION (SCOR)
PIN AMP (PAMP)
HORIZONTAL TRAPEZOID (HTRP)
ENTER
to save into the memory.
1
and 4.
KV-27FA310/27FS120/29FA310/29FS120
33
Page 34
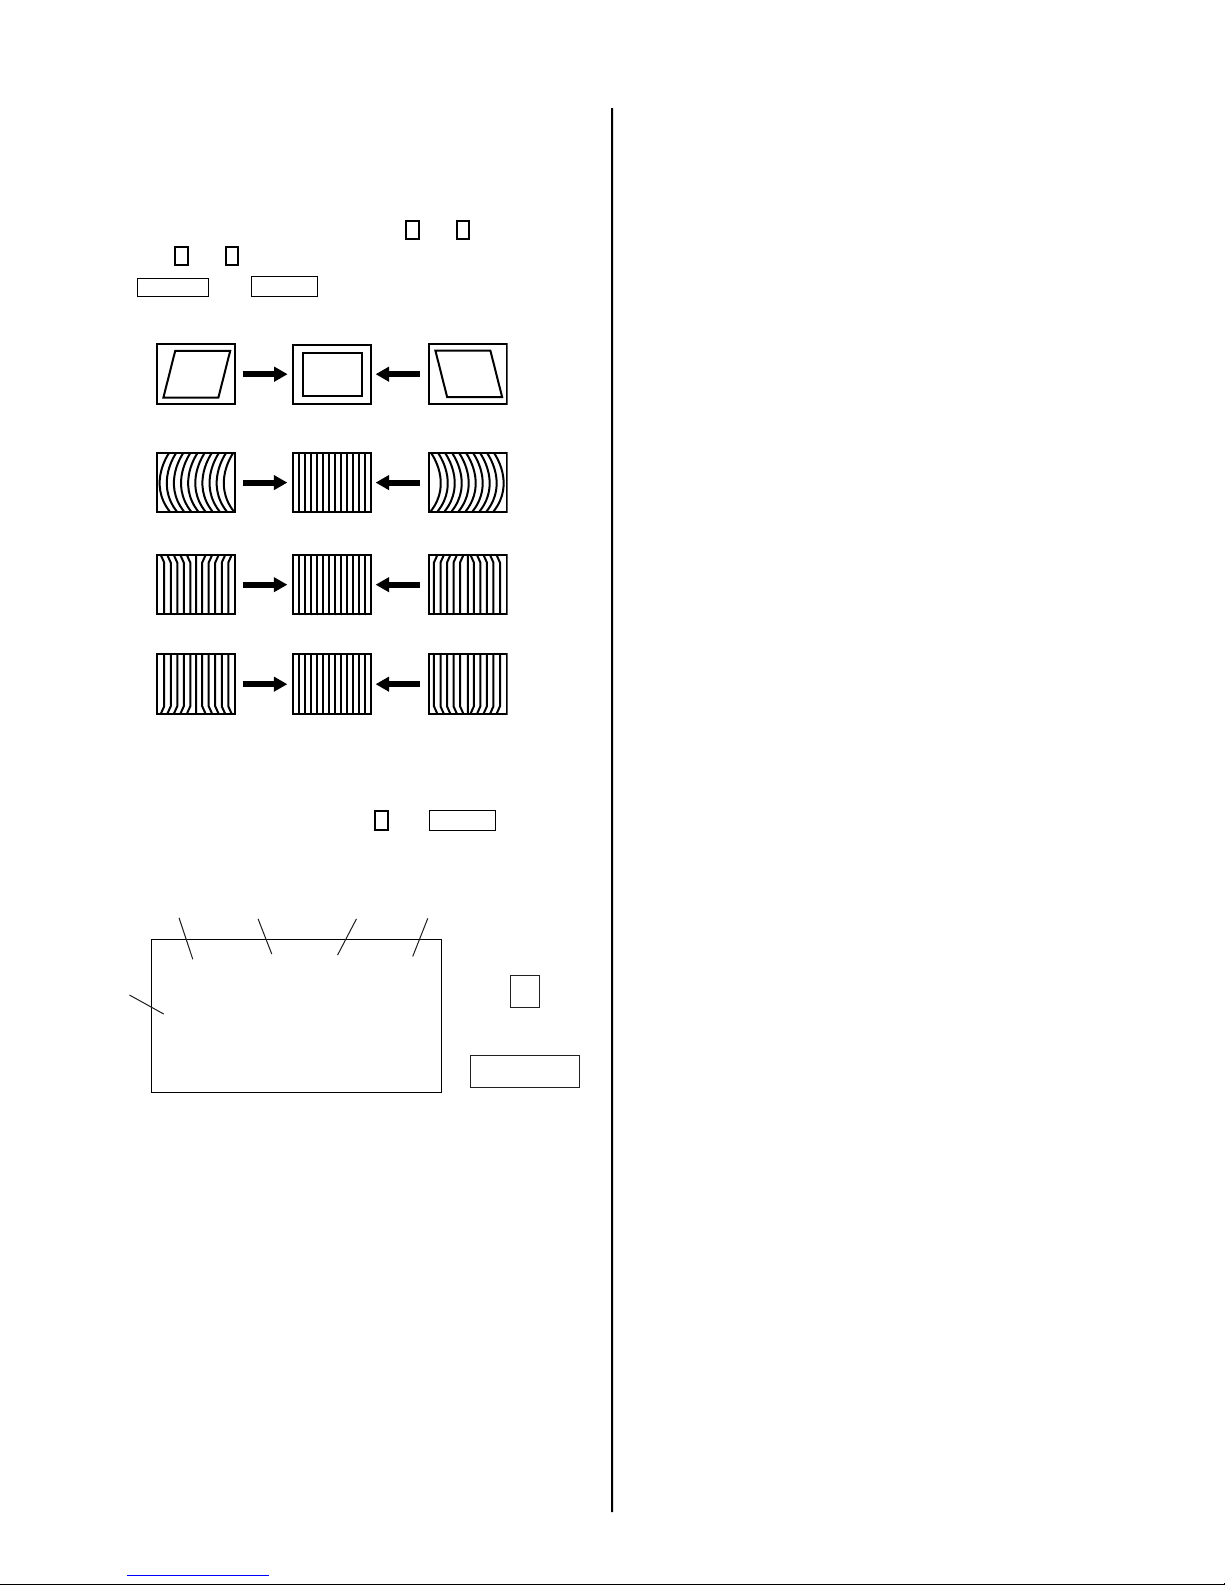
V. Angle (VANG), V. Bow (VBOW), Upper PIN
(UPIN) and Low PIN (LPIN) Adjustments
1. Input a crosshatch signal.
2. Activate the Service Adjustment Mode.
1
3. Select VANG, VBOW, UPIN, and LPIN with
4. Adjust with
5. Press
3
and 6 for the best picture.
ENTER
MUTING
then
V ANGLE (VANG)
V BOW (VBOW)
UPPER PIN (UPIN)
to save into the memory.
and 4.
KV-27FA310/27FS120/29FA310/29FS120
LOW PIN (LPIN)
Service Adjustment Mode Memory
ENTER
0
Item
then
Item
Data
7
1. After completing all adjustments, press
Read From Memory
Display
Mode
Category
service defl vbow
Signal
Type
ntsc
vchp
00000000 00000000
.
Green
0
Red
ENTER
KV-27FA310/27FS120/29FA310/29FS120
34
Page 35
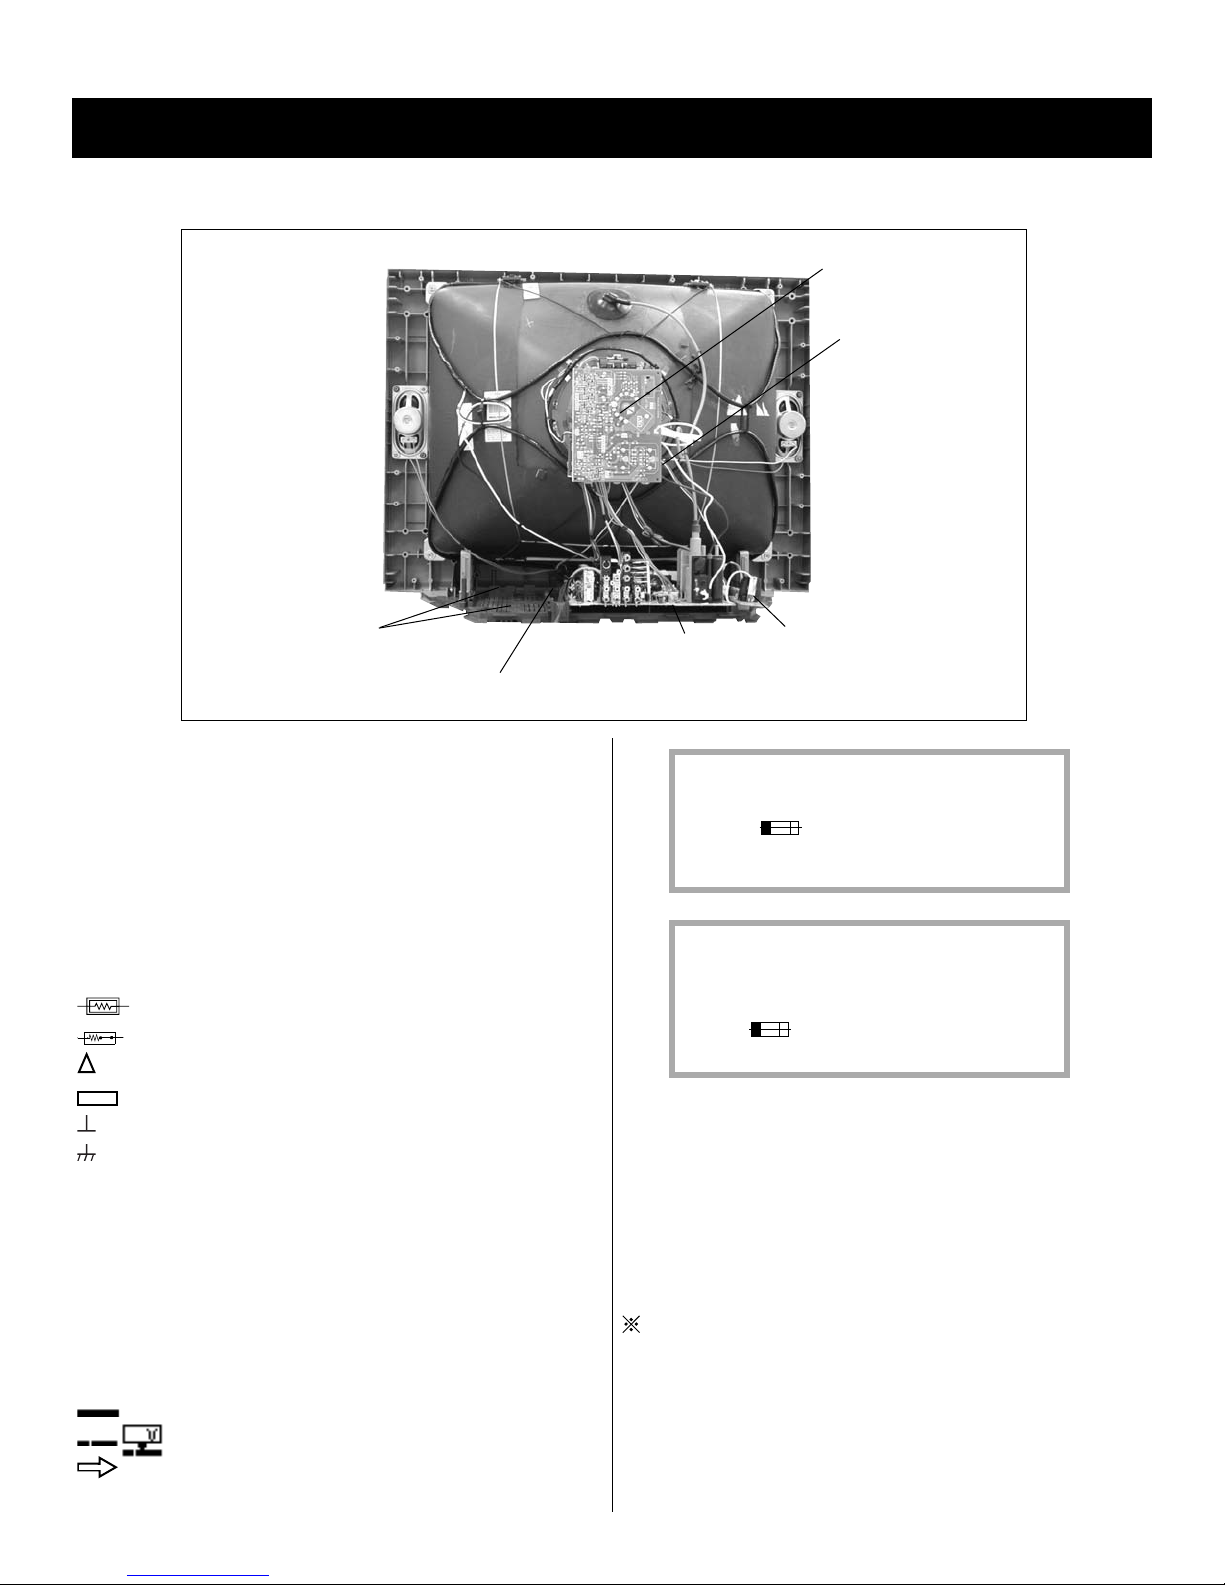
5-1. CIRCUIT BOARDS LOCATION
KV-27FA310/27FS120/29FA310/29FS120
SECTION 5: DIAGRAMS
KV-27FS120 Pictured
HR Board & K Board
(KV-27FA310/29FA310 Only)
HS Board (All Except KV-27FA310/29FA310)
HU Board (KV-27FA310/29FA310 Only)
5-2. PRINTED WIRING BOARD AND
SCHEMATIC DIAGRAM INFORMATION
All capacitors are in µF unless otherwise noted. pF : µµF 50WV or less
are not indicated except for electrolytics and tantalums.
All electrolytics are in 50V unless otherwise specifi ed.
All resistors are in ohms. k=1000, M=1000k
Indication of resistance, which does not have one for rating electrical
power, is as follows: Pitch : 5mm Rating electrical power :
1
/
W in resistance, 1/
4
: nonfl ammable resistor.
: fusible resistor.
: internal component.
: panel designation and adjustment for repair.
: earth ground
: earth-chassis
All variable and adjustable resistors have characteristic curve B, unless
otherwise noted.
Readings are taken with a color-bar signal input.
Readings are taken with a 10M digital multimeter.
Voltages are DC with respect to ground unless otherwise noted.
Voltage variations may be noted due to normal production tolerances.
All voltages are in V.
S : Measurement impossibillity.
: B+line.
: signal path. (RF)
Circled numbers are waveform references.
W and 1/
10
W in chip resistance.
8
: B-line. (Actual measured value may be different).
RESISTOR
: RN METAL FILM
: RC SOLID
: FPRD NONFLAMMABLE CARBON
: FUSE NONFLAMMABLE FUSIBLE
: RW NONFLAMMABLE WIREWOUND
: RS NONFLAMMABLE METAL OXIDE
: RB NONFLAMMABLE CEMENT
: ADJUSTMENT RESISTOR
COIL
: LF-8L MICRO INDUCTOR
CW Board
V Board
A Board
D Board
(All Except KV-27FA310/29FA310)
GD Board
(KV-27FA310/29FA310 Only)
The components identifi ed by shading and ! symbol are critical
for safety. Replace only with part number specifi ed.
The symbol indicates a fast operating fuse and is
displayed on the component side of the board. Replace only
with fuse of the same rating as marked.
Les composants identifi es per un trame et une marque ! sont
critiques pour la securite. Ne les remplacer que par une piece
portant le numero specifi e.
Le symbole indique une fusible a action rapide. Doit etre
remplace par une fusible de meme yaleur, comme maque.
REFERENCE INFORMATION
CAPACITOR
: TA TANTALUM
: PS STYROL
: PP POLYPROPYLENE
: PT MYLAR
: MPS METALIZED POLYESTER
: MPP METALIZED POLYPROPYLENE
: ALB BIPOLAR
: ALT HIGH TEMPERATURE
: ALR HIGH RIPPLE
KV-27FA310/27FS120/29FA310/29FS120
35
Page 36
The components identifi ed by X in this basic schematic diagram have
been carefully factory-selected for each set in order to satisfy regulations
regarding X-ray radiation. Should replacement be necessary, replace
only with the value originally used.
KV-27FA310/27FS120/29FA310/29FS120
When replacing components identifi ed by
adjustments as indicated. If the results do not meet the specifi ed value,
change the component identifi ed by
the specifi ed value is achieved.
(Refer to Section 3: Safety Related Adjustments on Page 17.)
When replacing the parts listed in the table below, it is important to
perform the related adjustments.
Part Replaced (Y) Adjustment (X)
DY, T585, CRT, IC001, IC561,
IC600, IC604, C506, C507,
C508, C510, C511, C513,
C514, L588, D566, D567,
D568, PH602, R526, R564,
R565, R566, R851, T510,
T511……....A Board
Y
, make the necessary
X
and repeat the adjustment until
HV HOLD-DOWN
R564
KV-27FA310/27FS120/29FA310/29FS120
36
Page 37
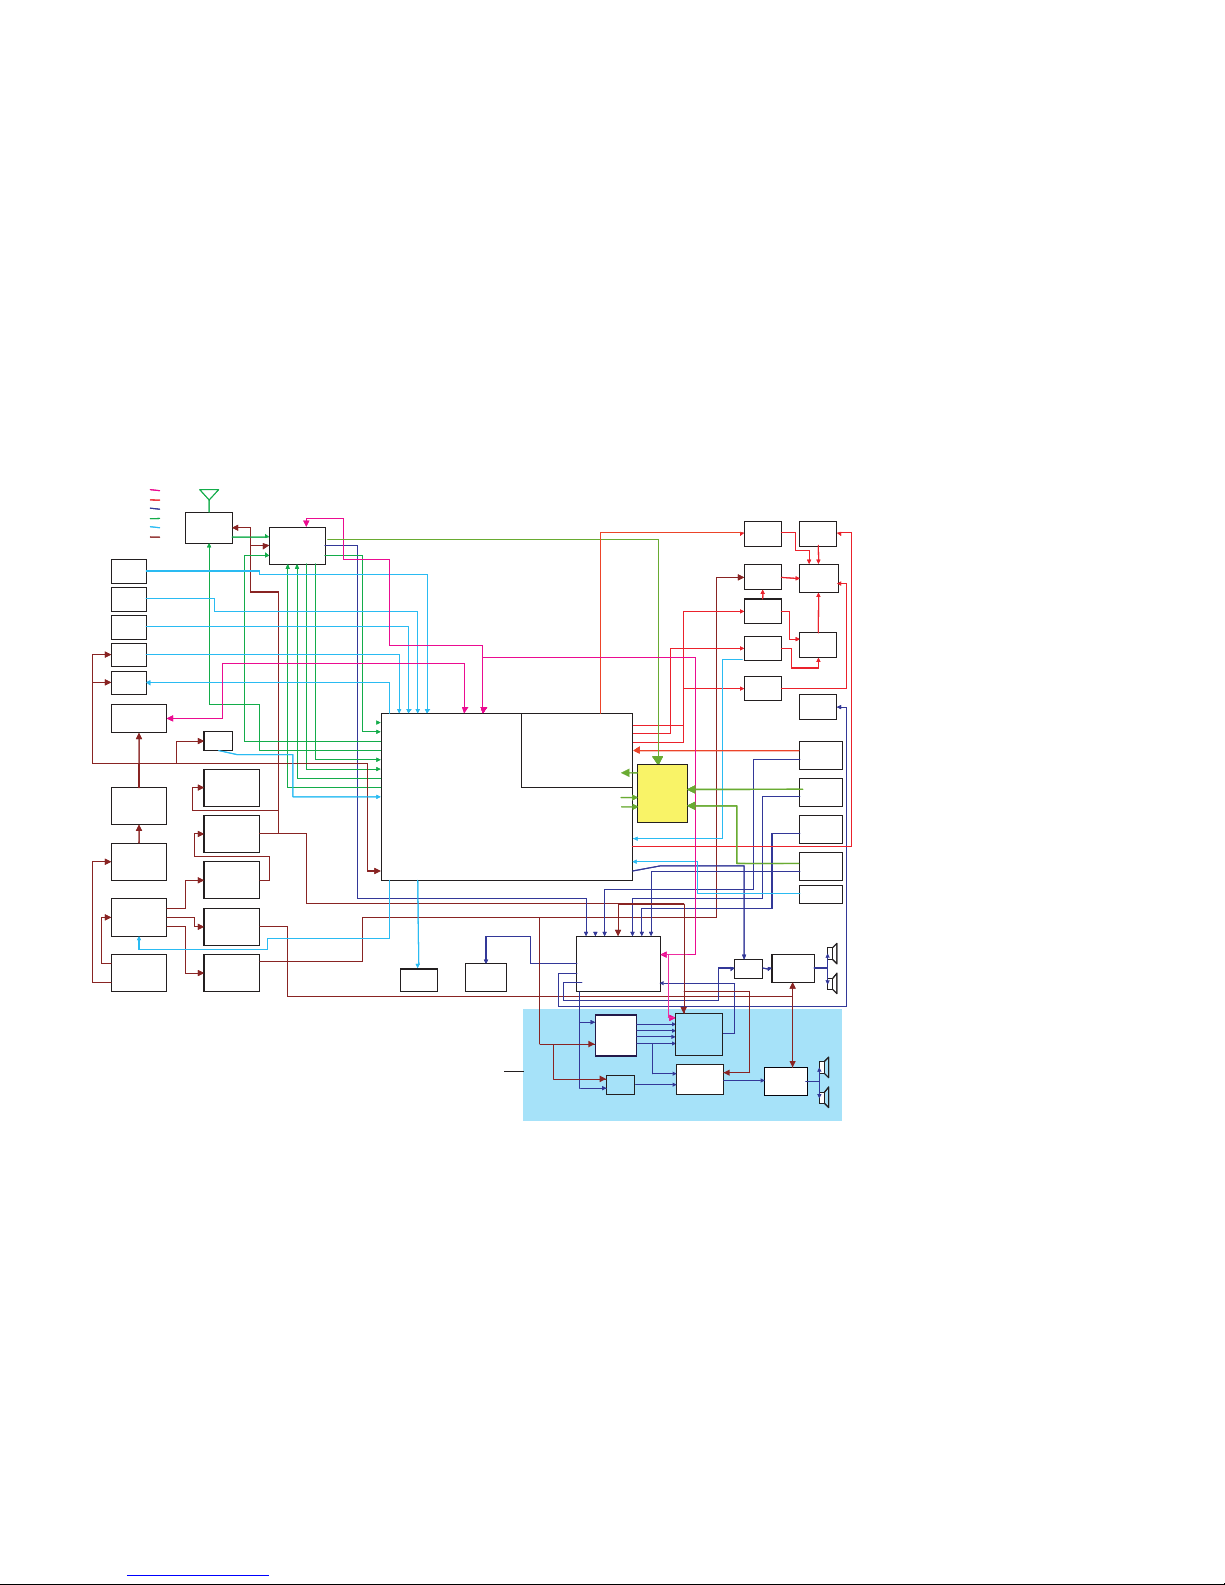
KV-27FA310/27FS120/29FA310/29FS120
37
KV-27FA310/27FS120/29FA310/29FS120
5.3. BLOCK DIAGRAM AND SCHEMATICS
MainTuner
($C0)
Antena
Switch
Micro
M65582MF-XXXFP
($60)
IR
Receiver
Menu
Keys
Front
Panel
Keys
Standby/
Timer
Led
M24C16
($A0,$A2,$A4,
$A6,$A8,$AA)
Reset
Degauss
SW
VideoProcessor/Comb Filter
($??)
Tilt
Rotation
CRT
VM
RGB
Amp
Audio Processor
NJM1134
($82)
Audio Amp.
TDA8580Q
Mute
ACLine
Main Power
Supply
EnergyStar
5V Stand-by
B+ Rectifier
115V
Low B
Rectifier
12.5V
Audio
Rectifier 14V
9V Regulator
5V Regulator
Video 1
Video 2
Video 3
Video 4
V-Out
H-Out
FBT
DY
Monitor
Out
Audio
Out
Power
Key
VCC O-MUTE
AudioInputs
AudioOutputs
O-ANTSW
I-AFT
I-AFT2
O-MONO
O-AGCMUTE
O-SAP
I-SAP
I-STEREN
O-NS
I-POWERN
I-KEY
I-MENU
I-RMCN
O-LED
Mechanical
S-Video
I-MECSVD
O-RELAYN
O-DGC
I-HLDWN
I-RESET
IO-BDAT
O-BCLKN
IO-SDAT
O-SCLKN
Communication
PictureSignal
Power
Sound Signal
Tuning Related
ControlLines
VideoSW
O-SEL0
O-SEL1
MainTuner
($C0)
Antenna
Switch
Micro
M65582MF-XXXFP
IR
Receiver
Menu
Keys
Front
Panel
Keys
Standby/
Timer
Led
M24C16
($A0,$A2,$A4,
$A6,$A8,$AA)
Reset
Degauss
SW
VideoProcessor/Comb Filter
Tilt
Rotation
CRT
VM
RGB
Amp
Audio Processor
NJM
xxxx
Mute
ACLine
Main Power
Supply
EnergyStar
5V Stand-by
B+ Rectifier
115V
Low B
Rectifier
12.5V
Audio
9V Regulator
5V Regulator
Video 1
Video 2
Video 3
Video 4
V-Out
H-Out
FBT
DY
Monitor
Out
Audio
Out
Power
Key
VCC O-MUTE
AudioInputs
AudioOutputs
O-ANTSW
I-AFT
I-AFT2
O-MONO
O-AGCMUTE
O-SAP
I-SAP
I-STEREN
O-NS
I-POWERN
I-KEY
I-MENU
I-RMCN
O-LED
Mechanical
S-Video
I-MECSVD
O-RELAYN
O-DGC
I-HLDWN
I-RESET
IO-BDAT
O-BCLKN
IO-SDAT
O-SCLKN
IIC
PictureSignal
Power
Sound Signal
Tuning Related
ControlLines
VideoSW
O-SEL0
O-SEL1
Dolby ProLogic
Cross
Over
Audio Amp
TDA8947J
Audio Amp
TDA8947J
TruSurround
NJM2180
Audio
Processor
NJW1164
21FM210=14V
all others=18V
for FA310 models
(THIS SECTION FOR KV-27FA310/29FA310 MODELS ONLY)
Page 38
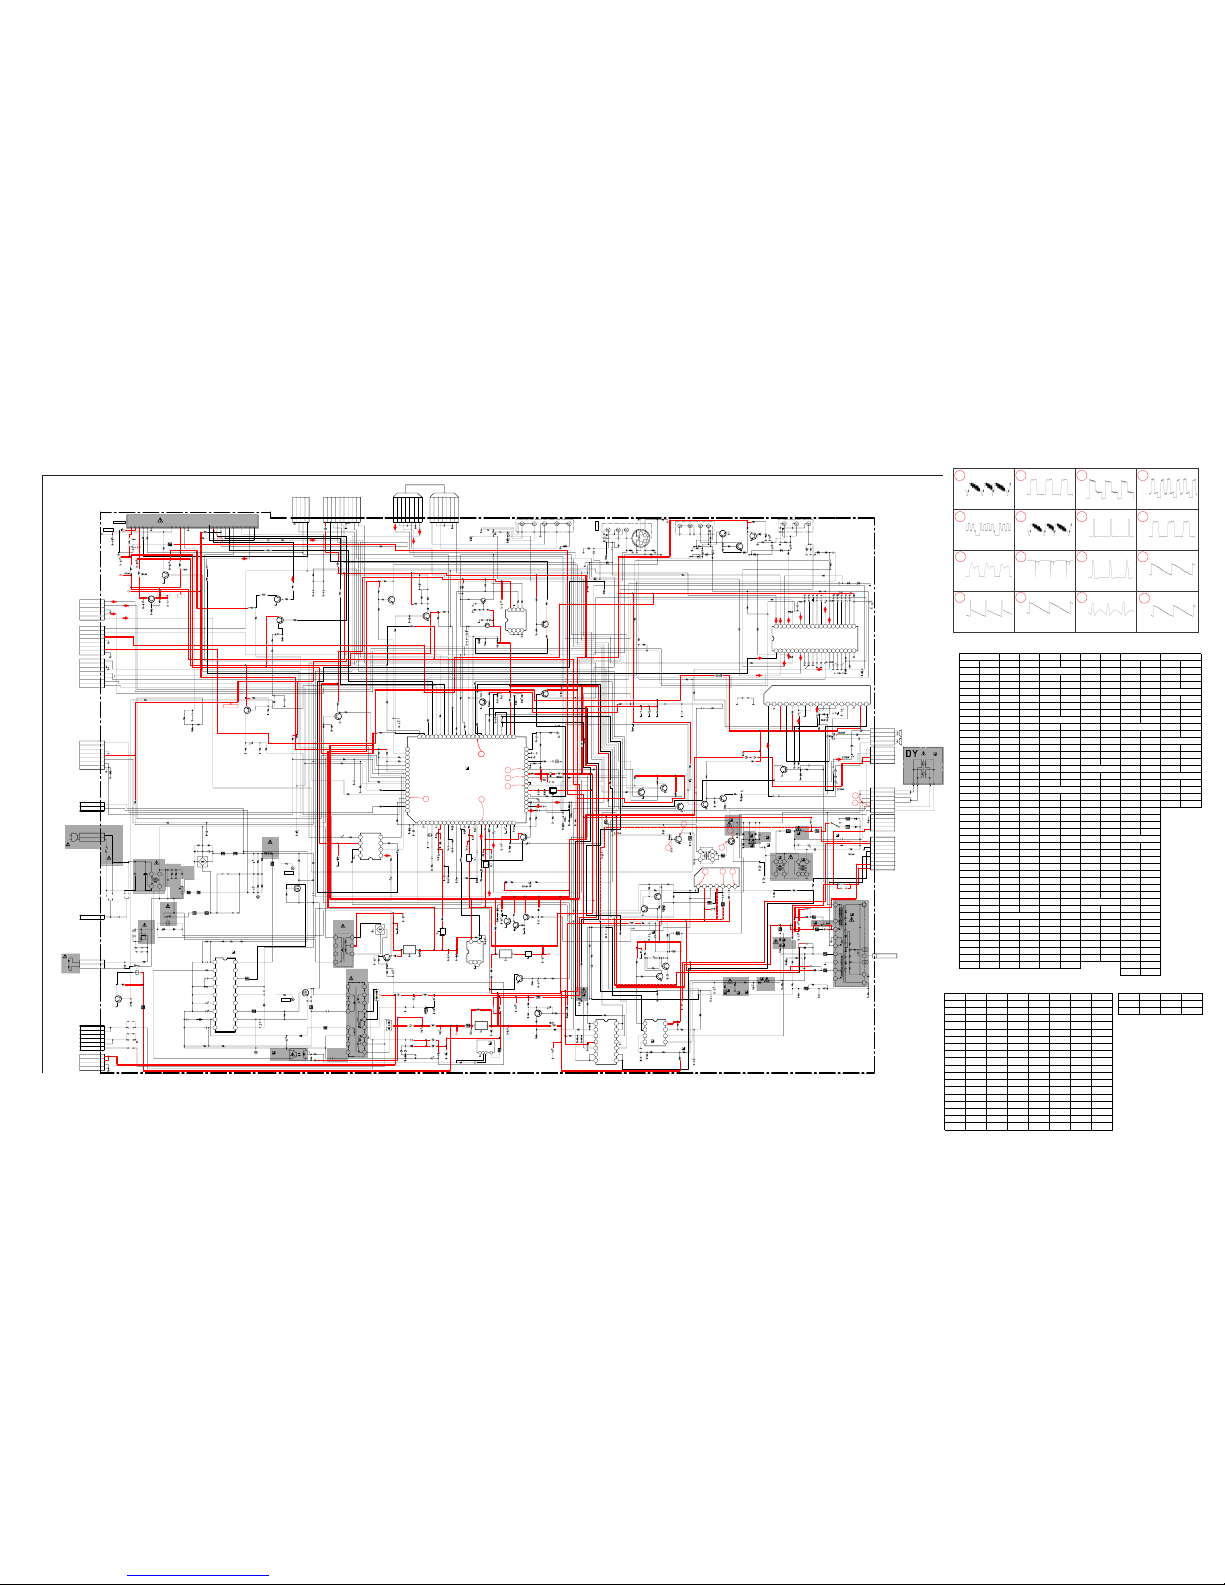
38
KV-27FA310/27FS120/29FA310/29FS120
KV-27FA310/27FS120/29FA310/29FS120
A BOARD SCHEMATIC DIAGRAM
6 8
10 12
1413 15
4
7
3
11
2
5
9
A BOARD WAVEFORMS
1
2.1 Vp-p (H)
3.2 Vp-p (H) 1.2 Vp-p (H) 0.9 Vp-p (H)
1.0 Vp-p (H) 1.0 Vp-p (V) 4.7 Vp-p (H)
2.4 Vp-p (H)
168.8 Vp-p (H) 28.7 Vp-p (H) 1.14K Vp-p (V) 1.0 Vp-p (H)
50.3 Vp-p (V) 0.7 Vp-p (H)
196.9 Vp-p (H)
16
1.9 Vp-p (V)
1 | 2 | 3 | 4 | 5 | 6 | 7 | 8 | 9 | 10 | 11 | 12 | 13 | 14 | 15 | 16 | 17 | 18 | 19 | 20 | 21 | 22 | 23 | 24 | 25
A
—
B
—
C
—
D
—
E
—
F
—
G
—
H
—
I
—
J
—
K
—
L
—
M
—
N
—
O
—
P
—
A BOARD IC VOLTAGE LIST
44 1.6 7 GND 25 3.9 IC561
PIN VOLT 45 1.6 8 5.0 26 0.6 PIN VOLT PIN VOLT
1 N/C 46 2.3 27 4.5 1 0.1 I 12.0
2 GND 47 1.0 PIN VOLT 28 4.5 2 3.4 G GND
3 2.2 48 N/C 1 N/C 29 4.5 3 2.3 O 9.0
4 2.2 49 0.5 2 GND 30 4.5 4 GND
5 GND 50 1.2 3 GND 31 4.5 5 9.2 PIN VOLT
6 5.0 51 2.0 4 5.0 32 4.5 6 10.2 1 133.7
7 0.0 52 1.5 5 5.0 33 4.5 7 0.1 2 N/C
8 2.0 53 4.8 34 N/C 8 13.5 3 2.5
9 0.3 54 4.8 PIN VOLT 35 N/C 4 11.3
10 2.1 55 4.8 1 4.5 36 N/C PIN VOLT 5GND
11 5.0 56 4.8 2 0.3 37 4.5 1 3.4
12 GND 57 N/C 3 4.5 38 4.5 2 3.4 PIN VOLT
13 3.3 58 5.2 4 0.4 39 4.5 3 2.1 I 11.0
14 3.1 59 0.0 5 4.5 40 4.5 4 9.0 O 5.0
15 1.0 60 0.0 6 9.0 5 1.0 G GND
16 1.5 61 0.0 7 4.4 PIN VOLT 61.0
17 3.3 62 0.0 8 GND 1 8.3 7 1.0 PIN VOLT
18 0.5 63 1.4 2 GND 8 1.6 I 9.0
19 1.1 64 4.9 PIN VOLT 3 19.6 9 1.6 G GND
20 GND 65 4.9 1 4.5 4 8.3 10 1.6 O 3.3
21 0.5 66 0.0 2 4.5 5 19.6 11 GND
22 1.7 67 0.1 3 4.5 6 3.2 12 1.6
23 0.5 68 0.1 4 4.5 7 0.0 13 1.6
24 0.5 69 2.4 5 N/C 8 0.0 14 1.6
25 0.5 70 5.0 6 N/C 9 3.2
26 0.0 71 5.0 7 N/C 10 9.1 PIN VOLT
27 0.0 72 0.1 8 4.5 11 9.7 1 2.5
28 2.1 73 0.0 9 4.5 12 3.2 2 1.8
29 2.7 74 5.0 10 4.5 13 3.3 3 2.2
30 3.3 75 5.0 11 4.5 14 8.3 4 2.5
31 2.9 76 5.0 12 4.5 15 GND 5 GND
32 GND 77 0.1 13 4.5 16 19.6 6 0.0
33 2.8 78 0.0 14 4.5 17 8.3 7 4.0
34 3.3 79 4.9 15 0.6 IC545 8 17.2
35 2.9 80 4.9 16 3.5 PIN VOLT 9GND
36 GND 17 3.5 1 0.7 10 10.4
37 1.8 PIN VOLT 18 4.8 2 13.5 11 0.0
38 0.0 1 GND 19 4.8 3 -12.2 12 4.6
39 0.1 2 GND 20 GND 4 -13.3 13 N/C
40 2.0 3 GND 21 9 5 0.2 14 163.6
41 1.6 4 GND 22 4.5 6 13.8 15 153.5
42 3.3 5 4.8 23 3.8 7 0.7 16 157.6
43 N/C 6 4.8 24 3.9 17 N/C
18 340.0
IC001
IC600
IC002
IC003
IC400
IC565
IC321
IC404
IC603
IC604
IC608
All voltages are in V.
IC633
A BOARD TRANSISTOR VOLTAGE LIST
BCE BCE
Q002 0.0 2.0 GND Q411 0.0 5.8 GND
Q004 3.8 9.0 4.4 Q412 0.1 0.1 GND
Q005 5.1 0.8 5.0 Q501 0.0 14.3 GND
Q006 0.0 0.0 GND Q502 0.0 74.1 GND
Q008 0.0 2.6 GND Q503 2.9 0.0 9.0
Q009 0.0 5.2 GND Q504 0.0 0.0 GND
Q300 1.8 9.0 2.4 Q505 0.0 131.8 0.0
Q301 3.6 2.1 3.6 Q521 0.0 3.8 GND
Q303 3.6 GND 2.8 Q522 0.1 -2.1 0.0
Q304 3.6 GND 2.9 Q531 0.0 0.0 GND
Q305 3.6 GND 3.0 Q533 1.5 GND 1.5
Q306 5.5 GND 4.9 Q572 0.0 2.6 GND
Q316 0.0 3.3 0.0 Q573 2.6 0.0 2.6
Q390 0.8 1.5 1.9 Q578 0.0 0.5 GND
Q391 0.6 3.3 1.5 Q590 133.7 0.0 134.2
Q400 0.0 0.1 GND Q604 30.6 11.6 30.2
Q401 0.0 0.1 GND Q608 0.0 6.7 GND
Q404 0.0 0.0 GND Q650 5.8 9.0 5.0
All voltages are in V.
DGS
Q600 313.0 160.0 156.0
Q601 155.0 4.9 0.0
HV
1
4
2
11
13
12
7
8
9
5
6
10
SC
F
1
2
34512
345
1
2
3
4
1
2
3
4
5
6
7
8
9
1
0
1
1
1
2
1
3
1
4
1
5
1
6
1
7
1
8
1 2 3 4 5 6 7 8 9
10 11 12 13 14 15 16 17 18 19 20 21 22 23 24
25
26
27
28
29
30
31
32
33
34
35
36
37
38
39
40
414243444546474849505152535455565758596061626364
65
66
67
68
69
70
71
72
73
74
75
76
77
78
79
80
1
2
3
4
7
8
9
1
3
4
2
S
W
V
L
R
1
2
IO
G
134
5
6
9
V
3
0
V
5
V
S
C
L
S
D
A
A
S
R
F
A
G
C
V
I
F
9
V
A
F
T
O
U
T
G
N
D
D
E
T
O
U
T
2
D
E
T
O
U
T
M
O
D
E
F
M
O
N
O
N
C
M
U
T
E
R
O
U
T
L
O
U
T
N
C
S
A
P
I
N
D
S
T
I
N
D
145 3
1
2
3
4
5
6
7
8
9
1
0
1
1
1
2
1
3
1
4
1
EMI
E
M
I
E
M
I
E
M
I
EMI
1 2 3 4 5 6 7 8 9
10 11 12 13 14 15 16 17
1
2
3
4
1
2
3
4
5
6
7
1
2
3
4
1
2
3
4
5
6
7
-2
-2 -2 -2
-2
EMI
1
2
3
4
-2
-2
1
2
3
4
5
6
7
-2
1
2
1
2
3
4
5
6
1
2
3
4
-2
-2
1
2
3
4
5
6
7
1
2
3
4
5
6
7
1
2
3
4
5
6
1 2 3 4 5 6 7
1
2
3
4
5
6
7
8
1 2 3 4 5 6 7 8 9
10 11 12 13 14 15 16 17 18 19 20
2122232425262728293031323334353637383940
1
2
124
3
1 2 3 4
5678
S
S
1
2
3
4
1 2 3
45
IO
G
1
2
3
4
5
6
7
8
9
1
1
2
3
4
5
6
7
8
1
2
3
4
5
6
7
8
IO
G
1
2
3
4
5
1
2
3
4
6
7
8
9
10
11
12
13
14
15
16
17
18
C006
C022
C041
C054
C074
C077
D
0
0
2
D526
D587
D650
L
0
0
7
R
0
2
8
X001
X301
R070
C003
C004
C005
C007
C008
C009
C010
C011
C012
C
0
1
4
C015
C019
C021
C023
C033
C047
C048
C049
C051
C052
C053
C056
C057
C064
C075
C076
C079
C080
C081
C090
C091
C
0
9
2
C094
C095
C096
C097
C098
C099
C100
C115
C116
C303
C304
C
3
1
3
C318
C319
C325
C326
C337
C351
C370
C390
C414
C416
C420
C421
C422
C423C451
C452
C501
C502
C503
C512
C520
C521
C525
C526C527
C529
C534
C537
C539
C542
C544
C545
C546
C549
C551
C
5
5
2
C553
C554
C558
C559
C560
C561
C562
C563
C566
C571
C582
C589
C590
C594
C595
C597
C600
C605
C609
C611
C612
C613
C615
C638
C660
C661
C665
C690
CN600
D003
D004
D005
D006
D052
D230
D232
D390
D
4
0
1
D412
D501
D505
D508
D514
D515
D525
D528
D545
D558
D559
D562
D566
D567
D
5
6
9
D
5
8
9
D620
D628
D629
FB505
FB506
FB522
J
R
4
4
JR315
L006
L008
L009
L010
L101
L513
PS401
Q390
Q391
Q521
Q522
R002
R003
R004
R006
R015
R031
R033
R035
R037
R038
R039
R040
R041
R042
R043
R044
R045
R047
R048
R049
R050
R052
R053
R054
R055
R056
R057
R058
R059
R061
R062
R063
R072
R076
R080
R081
R082
R083
R084
R085
R086
R087
R090
R091
R092
R093
R096
R102
R103
R110
R112
R115
R116
R218
R230
R311
R312
R313
R314
R315
R316
R317
R318
R319
R320
R321
R324
R335
R337
R338
R351
R352
R370
R371
R372
R390
R391
R392
R393
R394
R401
R403
R409
R421
R422
R427R429
R433
R502
R507
R514
R520
R521
R522
R524
R527
R539
R
5
5
0
R554
R555
R556
R557
R560
R561
R562
R566
R569
R572
R573
R574
R575
R578
R581
R583
R587
R588
R589
R590
R592
R593
R595
R596
R597
R598
R604
R605
R606
R607
R608
R614
R650
R680
R850
R851
R862
RY501
RY600
SW515
T601
D612
D613
F601
JW550
JW551
JW552
JW553
R603
R699
Q411
C680
JW305
L515
L609
R405
R410
R499
L005
L003
L002
L004
FL001
L011
C581
D644
R812
R813
Q531
D507
Q503
Q504
R526
R570
C450
R450
D007
D050
D051
L582
D513
C550
C436
R408
C509
Q404
R323
R325
R814
R893
R415
R418
R419
R420
C602
C603
C634
C647
C624
C650
C635
C625
C632
R640
R619
R625
R671
R615
R631
R626
R667
R660
R617
R616
R632
R630
R629
R627
C652
C620
C645
C643
C633
C636
C637
C642
R668
D631
D621
D618
C648
C672
L608
L607
JW630
CN601
JW620
JW625
JW624
CN002
C651
C616
R647
R670
D614
D615
JR402
JR403
C460
C461
D605
FB302
FB403
FB404
FB467
FB501
FB502
D603
R601
R602
R687
R611
R613
R641
T602
C673
R612
R628
R658
R659
L606
D611
D624
FB601
FB602
FB603
FB604
JW623
JW622
FB616
FB617
JR209
JR317
D351
C302
C301
C305
C306
C330
C328
C307
C200
C202
C203
C220
C401
D200
R200
R202
R203
R220
R221
R222
D201
CN403
CN402
THP501
C523
JW404
C640
D642
C462
JR216
C419
C424
D202
D203
C457
C458
C504
C505
R504
VDR600
D321
D645
FB401
FB402
R095
D046
D047
R620
FB606
R651
R652
R544
R609
C621
C629
C617
C618
R501
R553
L525
D604
D606
R563
J205
R051
IC404
Q578
IC400
IC604
IC603
I
C
5
6
5
IC321
Q006
Q005
Q004
IC600
Q601
PH602
Q501
Q306
Q600
IC608
IC003
IC633
Q608
Q590
Q604
Q316
Q303
Q304
Q305
Q502
Q301
IC002
Q008
Q002
Q533
Q573
Q572
Q009
Q650
C204
C205
C206
C207
C212
C213
C317
C400
C402
C403
C404
C405
C
4
0
6
C
4
0
8
C409
C
4
1
0
C411
C412
C418
C430 C431
C470
C506
C507
C508
C510
C511
C513
C514
C515
C516
C519
C522
C536
C543
C555
C585
C588
C601
C610
C631
C901
D204
D205
D206
D207
D208
D209
D231
D234
D235
D236
D237
D317
D405
D414
D430
D431
D500
D506
D510
D563
D568
D596
D598
D641
FB301
IC545
J200
J202
J203
JR401
JR586
JR585
L508
L516
L527
L588
Q300
Q400
Q401
Q412
Q505
R005
R007
R027
R029
R030
R032
R034
R060
R094
R098
R101
R105
R107
R108
R109
R111
R210
R211
R212
R213
R215
R216
R217
R227
R229
R303
R305
R308
R309
R310
R322
R326
R328
R330
R339
R363
R364
R382
R402
R404
R406
R407
R411
R430
R431
R434
R442
R478
R479
R503
R505
R508
R510
R511
R512
R513
R515
R517
R525
R528
R529
R530
R532
R533
R534
R535
R536
R537
R540
R542
R543
R545
R546
R547
R548 R549
R551
R564
R565
R567
R568
R582
R584
R585
R586
R591
R594
R618
R634
R801
R815
R802
R803
R852
R890
R901
T505
T510
T511
T585
JW401
JW402
JW606
JW605
I
C
5
6
1
IC001
TU101
C
4
0
7
C463
FB462
CN003
CN301
CN200
CN201
R208
R209
CN505
CN585
CN506
CN515
CN401
CN503
EY111
CN404
CN602
T603
C413C415
C655
CN501
FB605
R088
R250
R251
R400
R477
CN004
1000
25V
10
50V
10
50V
1
50V
10
50V
47
25V
M
T
Z
J
-
T
-
7
7
-
5
.
6
B
MTZJ-T-77-
5.6C
2
2
0
1
/
4
W
220
1/4W
22p
50V
CH
47p
50V
CH
0.0022
50V
B
470p
50V
CH
0.1
50V
220p
50V
CH
1
50V
0.001
50V
B
0.0047
50V
B
1
5
0
V
0.1
16V
B
0.1
50V
0.1
16V
B
470
16V
0.01
25V
B
470p 50V CH
100
25V
1
50V
10
50V
220p
50V
CH
0.047
16V
B
0.0022
50V
B
0.1
16V
B
0.047
16V
B
470
16V
100
25V
0.0047
50V
B
0.33
10V
B
0.01
25V
B
47
25V
4
7
2
5
V
0.01
25V
B
47 25V
0.01
25V
B
47
25V
0.01
25V
B
47
25V
0.1 50V
560p
50V
CH
0.1
16V
B
0.1
50V
0.1
50V
0
.
1
5
0
V
10mF
10mF
0.0033
50V
B
:CHIP
B
22p
50V
CH
470p
50V
CH
4700pF
0.01
25V
B
0.47
50V
330p
50V
B
0.047
200V
0.001
100V
22
50V
1
50V
2200p
500V
220p
500V
B
22
160V
0.0022
50V
CH
0.0022
50V
B
0.001 50V B
0.01
25V
B
0.0022
50V
B
47
50V
220
50V
0.47
50V
2200pF
1
50V
1
0
5
0
V
0.1 16V B
0.01
25V
B
1000pF
0
10K
4.7
50V
220
25V
0.01
25V
B
4.7
160V
100
25V
0.068
200V
22
100V
10 50V
33
160V
220
25V
220
25V
10
50V
1000pF
1000
25V
470mF
2.2mF
0.0047
250V
F
0.0047
250V
F
100
25V
47
25V
100
25V
100
25V
0.01
25V
B
2P
MTZJ-T-77-
10B
MTZJ-T-77-
10B
MTZJ-T-77-
10B
MTZJ-T-77-
5.1C
MTZJ-T-77-
5.6B
RD9.1EW-T1
RD9.1EW-T1
MA111-TX
M
T
Z
J
-
T
7
7
-
7
.
5
B
0
MA111-TX
BY228/A52A
/
MA111-TX
GP08DPKG23
GP08DPKG23
1SS133T-77
PG104R
1SS133T-77
GP08DPKG23
MA111-TX
MA111-TX
1SS133T-77
EGP20DPKG2
3
1SS133T-77
M
T
Z
J
-
T
-
7
7
-
5
.
1
C
PG104R
1
S
S
1
3
3
T
-
7
7
1SS119-25T
MA111-TX
MTZJ-T-77-
12B
1.1UH
1.1UH
1.1UH
0
0
10mH
IC LINK
2SD601A-QR
S-TX
2SD601A-QR
S-TX
KTC4370A
0
1k
1/10W
470
1/10W
4.7k
1/10W
10k
1/10W
220
1/10W
220
1/4W
100
1/10W
10k
1/10W
1k
1/10W
330
1/10W
4.7k
1/10W
4.7k
1/10W
220
1/10W
220
1/10W
4.7k
1/10W
4.7k
1/10W
220 1/4W
4.7k
1/10W
4.7k
1/10W
4.7k
1/4W
220
1/10W
22k 1/4W
22k
1/4W
4.7k
1/10W
10k
1/10W
1k 1/4W
10k 1/4W
1k 1/4W
10k
1/4W
470
1/4W
4.7k
1/10W
4.7k
1/4W
100
1/4W
10k
1/10W
47k
1/10W
1M
1/10W
150k 1/10W
680
1/10W
0
1k
1/10W
100
1/4W
22k
1/10W
47k
1/10W
2.2k
1/10W
47k
1/10W
4.7k
1/10W
22k
1/10W
10k
1/10W
220 1/4W
4.7k
1/4W
470
1/10W
470k
1/10W
220
75
:CHIP
220
1/10W
6.8k
1/10W
0
10k
1/10W
220
1/10W
2.2k
1/10W
220
1/10W
2.2k
1/10W
220
1/10W
2.2k
1/10W
100
1/4W
1k
220
:CHIP
22
1/10W
0
4.7k
470k
1/10W
2.2k
1/10W
220k
:CHIP
3.3k
1/10W
0
:CHIP
4.7k
1/10W
560
1/10W
2.2k
1/10W
10k
1/10W
100
100
0
0
10k
47k47k
100
:CHIP
4.7k
1/4W
10k
1/10W
68
3W
10k
1/10W
680
1/10W
330
1/4W
6.8k
1/10W
2.2k
1/10W
0
4
7
0
1
/
1
0
W
3.3k
10k
1/10W
2.2k
:CHIP
2.2k
1/10W
1k
1/10W
10k
1/10W
10k
1/4W
100k
1/4W
10k
1/4W
4.7k
1/10W
4.7k
1/10W
10k
1/10W
4.7
1/4W
10k
1/4W
100k
1/4W
0.47
1/4W
47
1/4W
22
2W
470k
1/4W
10k
1/4W
100k
1/4W
10k
1/4W
470k
1/4W
0.47
1/4W
220k
1/10W
0.47
1/4W
1k
1/10W
10k
10k
1M
15k
3W
2.2k
1/10W
680
1/4W
0
22k
1k
1/10W
220
1/10W
RELAY
LFT
2SD601A-QR
S-TX
0.33
10V
B
1000pF
5MM
10k
:CHIP
10k
:CHIP
100k
FILTER
FILTER
FILTER
FILTER
47000pF
10k
10k
1SS133
22k
10k
2200
25V
4.7k
:CHIP
D1NS4-TA2 2SD601A
2SD601A
2SC3311A-Q
RSTA
5mm
MA111
0.1mF
0
10
2S601A-QR
S-TX
560
0
68k
0
0.22
0.22
5MM
5MM
5MM
5MM
5MM
5MM
S1NB60-4062
0
0
MTZJ-T-77-3.3B
3.3B
0.1
0.1
0.1
0.1
0.01
0.01
0.1
0.47mF
0.47mF
0.47mF
0.47mF
22000p
220
100k
100k
220
220
220
1E3-TB
MTZJ-T-77-9.1B
MTZJ-T-77-9.1B
2SB709A
0.22mF
5MM
MTZJ-T-77-30D
MTZJ-T-77-9.1B
MTZJ-T-77-9.1B
470p
470p
4.7k
MTZJ-T-77-10B
MTZJ-T-77-5.6B
5MM
5MM
220
MTZJ-T-77-5.6B
MTZJ-T-77-5.6B
2.2
5MM
4.7
3.3
330
1k
10k
2.2mH
8mH
1k 1/4W
TDA8947J
AUDIO AMP
2SD601A-QR
SW
N
J
M
2
9
0
2
M
-
T
E
2
V
E
R
T
D
R
I
V
E
B
U
F
F
NJM2534M-TE2
VIDEO SW
2SD601A-QR
HP PROT
2SB709A-QRS-TX
SYNC SEP
2SD601A
BUFFER
2SC3311A-Q
DGC DRIVER
2SB709A-QR
BUFFER
BA05T
STBY 5V REG
PST9143NL
STBY 5V RESET
LF33CV(STM)
3.3V REG
2SD2144S-T
RELAY DRIVE
KTA1279
PROTECT
2SB709A-QRS-TX
12V REG
2SD601A-QRS-TX
BUFF
2SB709A-QR
BUFFER
2SB709A-QR
BUFFER
2SB709A-QR
BUFFER
2SC3209LK-
H-DRIVE
2SB709A-QR
IK-BUFF
IC BR24L16F-WE2
MEMORY
2SD601A-QR
BUFFER
2SD601A-QR
CONVERGENCE
2SB709A
ABL
2SB709A-QR
SW
2SD601A-QR
SW
2SD601A-QR
AGC
KSC2383-O
5V REG
0
0
4.7
4.7
4.7
4.7
10
0.33
0.0082
0.0033
0.0033
0.033
0
.
0
3
3
0
.
0
0
1
5
0.22
0
.
2
2
0.33
1
4.7
4.7 4.7
470
0.001
19000p
0.047
680p
0.68
0.047
0.82
2.2
0.24
0
220p
0.0047
0.0022
220
0.015
6.8K
HZS9.1NB2
HZS9.1NB2
PDZ9.1B-115
MA11-TX
HZS9.1NB2
MA111-TX
RD9.1EW
RD9.1EW
RD9.1EW
RD9.1EW
RD9.1EW
RD9.1EW
1SS133T-77
MTZJ-7.5
HZS9.1NB2
HZS9.1NB2
MA111-TX
RU4AM-T3
BY228/A52A/
5.0MM
MTZJ-7.5B
EGP20G
EGP20G
1SS133T-77
1.1UH
STV9379A
VOUT
3P
5P
0
0
0
5.0mm
2SD601A-Q
VM OUT
2SD601A-Q
2SD601A-Q
2SD601A-Q
2SD2645-YB
H-OUT
0UH
0UH
47k
220
220
220
7.5MM
220
0UH
33k
4.7k
0
0UH
0UH
4.7k
4.7k
100k
220
220
100k
470k
470k
220
75
75
3.3M
75
1k
10k
1k
470
0UH
0UH
75
220
75
75
3.3M
0
2.2k
220
220
10k
100k
100k
0
100
10k
1k
2.2k
5.5MM
7.5MM
1k
5.0MM
7.5MM
33
22
33k
47
390
15k
5.6k
5.0MM
6.8k
15k
5.6k
10k
680k
10k
10k
0.82
470
2.2
10k
15k 47k
4.7k
39k
10k
47k
120
7.5MM
18k
12k
2.2k
0.33
1.2k
5.0MM
10
10k
47k
8.2k
13k
56k
68k
8.2k
5.0MM
5.0MM
5.0MM
5.0MM
N
J
M
2
9
0
3
M
-
T
E
2
V
H
O
L
D
C
N
T
R
L
M65582AMF
MICRO/Y-C-J/COMB
BTF-WA421
0
.
0
0
1
5
5MM
4P
9P
7P
7P
5.0MM
5.0MM
8P
4P
6P
4P
4P
2P
1.1UH
0
1k
1k
4.7k
680
7P
TP602
9V
TP6035V
TP100
6.3V
TP604
3.3V
TP601
12V
5V
9V
*
*
*
*
*
*
*
*
*
*
*
*
*
*
*
*
*
*
*
*
*
*
*
*
*
*
*
*
*
*
*
*
*
*
*
*
*
*
*
*
*
*
*
*
*
*
*
*
*
***
*
*
*
*
*
*
*
*
*
*
*
*
*
*
*
*
*
*
*
*
*
*
*
*
*
*
*
*
*
*
*
*
*
*
*
*
*
*
*
*
*
*
*
*
*
*
*
*
*
*
*
*
*
*
AUDIO PROCESSOR
*
ERROR AMP
*
9V REG
*
SW REG CON
*
SW REG OUT
*
PHOTOCOUPLER
*
*
*
*
*
*
*
*
*
I
N
1
A
I
N
2
A
I
N
3
A
I
N
4
A
I
N
5
A
I
N
6
A
M
O
N
A
S
R
S
/
S
S
F
I
L
1
B
B
E
1
A
B
B
E
2
A
T
O
N
E
-
H
A
T
O
N
E
-
L
A
O
U
T
A
L
I
N
E
A
C
V
A
C
V
B
C
S
R
V
+
I
N
1
B
I
N
2
B
I
N
3
B
I
N
4
B
I
N
5
B
I
N
6
B
M
O
N
B
A
G
C
B
B
E
1
B
V
R
E
F
B
B
E
2
B
O
U
T
B
L
I
N
E
B
C
T
H
C
T
L
S
C
L
S
D
A
G
N
D
D
R
I
V
E
-
V
C
C
+
R
E
F
V
C
C
-
O
U
T
B
O
O
S
T
D
R
I
V
E
+
RF-AGC
TP102
Y1
D
A
T
C
L
K
5
V
I-PWR
I-AFT
I-MENU
I-KEY
I-HSYNC
I-PROT
O
-
N
S
O
-
V
O
L
O-SEL1
O-SEL0
I-HLDWN
O-HSYNC
R
E
S
E
T
O
-
S
C
L
K
O
-
B
C
L
K
I
O
-
B
D
A
T
X
-
I
N
X
-
O
U
T
I
-
B
I
N
T
I
-
S
T
E
R
E
O
I
-
S
A
P
O
-
M
U
T
E
O
-
D
G
C
V
C
C
-
5
V
O-AGCMUTE
O-MONO
O
-
S
A
P
V
S
S
-
M
C
U
V
S
S
-
D
I
G
V
C
C
-
3
.
3
V
M
O
N
I
T
O
R
-
V
I
D
E
O
-
O
U
T
M
A
I
N
-
T
V
-
I
N
V
C
C
-
3
.
3
V
Y
-
I
N
C
-
I
N
G
N
D
-
Y
C
Y-IN
U-IN
V-IN
VM-OUT
VCC-3.3V
R-OUT
GND-OUT
G-OUT
VCC-3.3V
B-OUT
XTAL-NTSC
XTAL-PAL-M
XTAL-PAL-N
GND-DEF
V
C
C
-
3
.
3
V
E
W
-
O
U
T
H
-
O
U
T
C
V
-
I
N
A
B
L
-
A
C
L
I
N
I
K
-
A
K
B
I
N
V
D
+
V
R
A
M
P
O-LED
V
-
R
A
M
P
C
H
L
F
V
H
O
L
D
D
C
T
_
F
I
L
T
E
R
V
R
T
VZOUT
APC
A
F
C
1
V
D
-
V
R
A
M
P
H
V
C
O
V
S
S
F
I
L
T
STBY_5V
IIC_CLK
IIC_DATA
STBY_5V
STBY-7.5V
S
Y
S
T
E
M
_
C
R
Y
S
T
A
L
S
V
A
S
P
K
L
+
G
N
D
S
P
K
L
-
S
P
K
R
+
200V
NC
HDY+
HDY+
HDY-
HDYVDY-
VDY+
HEATER
VD+
HEATER
S
V
I
D
C
B
S
S
R
S
F
I
L
2
T
O
N
E
H
B
T
O
N
E
L
B
AUDIO OUT VAR/FIX
AC IN
AC IN
H.D
VSENSE
F/B
CT
RT
GND
TIMER
VD
NC
VS
NC
+B
B+
HV
G2
FOC
US
A BOARD
DGC CONNECTOR
STEREO
G
N
D
9
V
L
I
N
E
I
K
N
/
S
B
G
R
V
M
TIMER LED
MPWR LED
GND
STBY 5V
POWER ON
SIRCS
SP R-
SP L-
SP L+
SP R+
N
C
V
I
D
E
O
1
-
I
N
V
I
D
E
O
2
-
I
N
V
R
B
E
W
-
C
F
B
P
-
I
N
I
O
-
S
D
A
T
O-RELAY
I-SIRCS
O-MAGABASS
VG(H)
VB
SS
VG(L)
VC1
OCP
VC2
P-GND
G
N
D
TO CN101 A BOARD
TO CN603 A BOARD
VIDEO 1
V
G
N
D
U
G
N
D
V
G
N
D
U
G
N
D
V PULSE
FBT
9V
9V
GND
N.C.
135V
DF
G
N
D
B
-
I
N
T
B
-
D
A
T
B
-
C
L
K
M
O
D
E
2
I
N
L
2
S
G
N
D
I
N
-
L
1
I
N
R
3
M
O
D
E
1
S
U
R
I
N
R
4
C
E
X
T
S
P
K
R
-
V
A
E
-15V
+15V
VIDEO2
GND
GND
AUDIO R2
MENU
KEY
GND
HS600
HS601
GND
G
N
D
LT
RT
GND
L
R
GND
SLC
SDA
AVCC
AC IN
AC IN
TO-CN1600-GD BOARD
+B
+B
NC
GND
GND
LOW-B
AUDIO-VCC
AUDIO-VCC
AUDIO GND
AUDIO GND
9V
HP
PGND
RL
V
L
R
VIDEO3/VIDEO4
L
Y
UV
R
Y
(
S
-
V
I
D
E
O
)
Y
(
Y
U
V
)
Y
(
S
-
V
I
D
E
O
)
Y
(
Y
U
V
)
AUDIO L2
G
N
D
G
N
D
H.DY H.DYV.DY V.DY
FOR JIG
AC
IN
DGC
DGC
DGC
DGC
TUNING CONTROL
Y/C/J
POWER SUPPLY
TUNER/IF
AUDIO
MTS
DEFLECTION
Y-IN
U-IN
V-IN
RT
LT
C-IN
Y-IN
U-IN
V-IN
Y-IN
SP L+
SPKR+
TO-CN2402 KBOARD
TO-CN2752 CWBOARD
CN1802
TO: D/GD BOARD
TO-CN2751 CWBOARD
TO-CN1800 D BOARD
TO-CN2901 V BOARD
TO-CN1402-GD BOARD
LIGHTENING
TO-CN1004 HS BOARD
OR
TO-CN3001 HR BOARD
TO-CN1005 HS BOARD
OR
TO-CN1002 HU BOARD
9-965-960-01<BA6S>A
TO-CN1601-GD BOARD
TO-CN2401 KBOARD
16
15
1
22
5
4
3
6
7
8
9
11
10
12
13
14
+5V
+9V
STBY 5V
T
V
L
V1-R
L
LINE B
L-IN
R-IN
YUV-R
YUV-L
TV-L
TV-R
TV-VID
LINE B
LINE A
TV-VID
T
V
-
V
I
D
V
2
L
V2-R
TV-R
R
RT
LT
Page 39
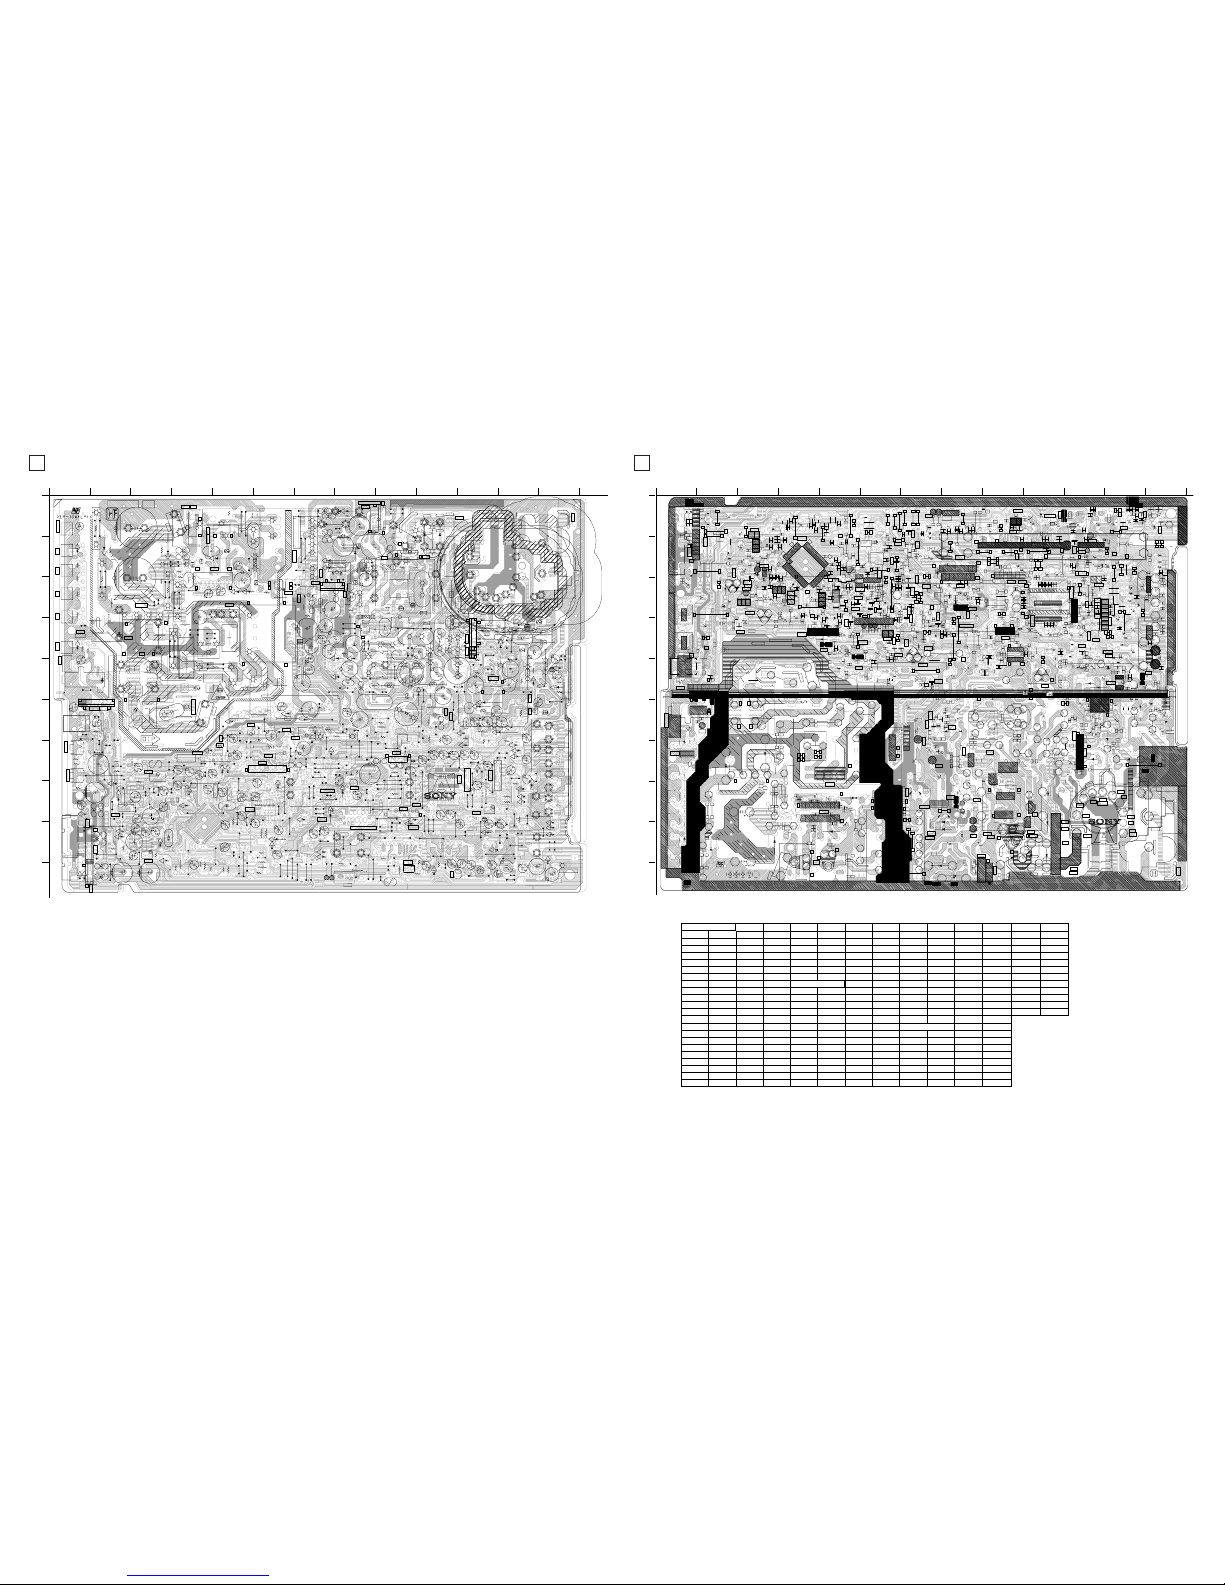
39
KV-27FA310/27FS120/29FA310/29FS120
KV-27FA310/27FS120/29FA310/29FS120
[TUNING CONTROL, Y/C/J, POWER SUPPLY, TUNER/IF, DEFLECTION, AUDIO, MTS]
A
D515
Q590
Q
5
0
5
C633
C
6
4
3
D
6
1
8
I
C
6
0
0
Q
6
0
0
Q601
R
6
0
3
E
Y
1
E
Y
2
E
Y
4
3
E
Y
4
4
E
Y
4
5
E
Y
4
6
E
Y
5
3
EY54
EY60
E
Y
6
3
EY67
E
Y
6
8
E
Y
7
7
E
Y
7
8
E
Y
7
9
E
Y
8
0
E
Y
8
1
E
Y
8
2
L
5
0
8
T504
D
6
2
1
Q
5
0
2
C
5
0
5
D
5
8
7
C
6
1
8
E
Y
5
0
0
C508
E
Y
4
9
E
Y
5
0
E
Y
5
2
E
Y
5
1
D505
EY509
EY510
Q
5
0
6
EY551
EY550
EY59
E
Y
6
7
3
E
Y
4
2
EY674
E
Y
6
7
5
F
B
5
0
5
E
Y
5
0
7
EY508
E
Y
5
2
6
C588
D
5
9
8
C
5
8
2
L
5
8
2
C526
L
5
1
0
EY538
EY539
E
Y
5
4
0
E
Y
5
3
7
C667
C
6
2
4
L
5
1
3
E
Y
5
2
5
E
Y
5
2
4
R
5
8
2
D596
EY570
E
Y
5
7
1
C
N
5
0
1
E
Y
9
9
E
Y
1
0
6
D
6
0
2
D
6
1
5
L608
E
Y
6
0
1
E
Y
8
5EY
8
8
E
Y
8
6
E
Y
8
7
E
Y
6
0
2
E
Y
6
0
3
EY604
E
Y
6
6
4
EY665
E
Y
5
4
3
E
Y
5
4
2
E
Y
5
4
1
E
Y
6
6
6
E
Y
6
6
7
R
5
1
3
C
5
1
3
E
Y
5
4
5
E
Y
1
1
E
Y
1
2
E
Y
6
1
E
Y
6
2
E
Y
6
5
C
5
1
2
C503
C
N
5
1
5
I
C
6
0
4
C672
D613
D612
R
6
9
9
S
W
5
1
5
C
N
6
0
0
R630
R
6
2
9
R
6
2
7
R
5
9
3
R595
R
5
9
2
R
5
0
6
R
5
4
7
R502
R590
R640
R658
R
6
5
9
R594
R
5
8
3
R
6
1
8
C
6
3
5
C
6
3
4
C
6
4
7
C451
C
6
6
3
J
W
1
3
2
J
W
1
3
6
J
W
1
4
9
JW637
J
W
1
4
2
J
W
1
4
1
JW520
D
5
6
8
D
6
3
0
D567
R540
D
5
8
9
C613
C
6
1
5
R612
R628
C
6
4
8
C649
C
6
4
0
C
6
1
0
F
B
6
0
4
F
B
6
0
2
FB601
FB603
F
B
6
1
6
F
B
6
1
7
C595
C545
C
5
4
7
R
5
8
7
C
5
8
9
FB606
R
5
0
4
C642
C
6
3
2
C
5
2
8
C
5
2
7
R581
R
5
1
4
R608
C502
D
6
0
1
FB605
D514
C
5
1
5
L515
R
5
1
0
L607
L606
R515
R588
R
5
1
2
J
W
1
3
5
R602
R601
R620
J
W
5
1
0
C611
JW630
C617
D
6
2
4
D
6
1
1
JW130
JW131
D
6
3
1
JW618
JW617
C
6
2
5
J
W
9
0
2
C
6
1
9
R
5
0
3
R591
C
5
9
0
C597
C614
C
6
1
6
R
5
9
8
R596
C510
C
5
9
4
R619
T505
E
Y
1
1
1
E
Y
6
8
1
E
Y
6
8
0
E
Y
6
8
2
EY683
JW528
J
W
1
3
4
JW529
E
Y
5
8
0
E
Y
5
8
1
FB506
R
5
0
5
R671
D
6
0
8
R611
JW612
R687
JW615
JW616
JW613
JW614 R613
C
6
0
5
C
6
3
1
R
6
2
5
C
6
8
0
E
Y
6
0
7
E
Y
6
0
8
EY609
E
Y
6
1
2
C516
E
Y
5
3
1
E
Y
5
3
2
C
5
1
4
E
Y
6
7
1
E
Y
6
7
2
E
Y
5
3
5
E
Y
5
3
6
CN585
C550
JW619
R
6
4
1
J
W
6
3
9
J
W
6
4
1
JW525
JW581
JW580
J
W
5
3
0
D
5
0
6
J
W
1
5
9
CN506
R
5
8
9
E
Y
5
1
1
E
Y
5
1
2
E
Y
5
1
3
E
Y
5
1
4
E
Y
5
1
5
E
Y
5
1
6
E
Y
5
1
7
E
Y
5
1
8
E
Y
5
1
9
E
Y
6
1
3
F
6
0
1
JW635
S
0
0
1
S
0
0
2
S
0
0
3
S
0
0
4
S
0
0
5
S
0
0
6
S
0
0
7
S
0
0
8
IC004
E
Y
1
0
2
E
Y
1
0
3
D526
C525
X
3
0
1
X001
E
Y
6
6
8
E
Y
6
7
0
E
Y
9
8
E
Y
9
7
EY96
EY95
R
Y
6
0
0
R
Y
5
0
1
E
Y
6
1
0
E
Y
6
1
1
Q608
C
N
0
0
1
R050
R112
R069
R071R067
R065
R
0
7
4
R
0
7
3
R
0
7
5
R062
R060
C
0
1
0
C
0
0
8
C
0
2
2
C
6
2
3
C
0
9
1
C
0
1
4
C
0
9
2
C
0
1
9
C303
C100
C095
C
0
9
7
C
0
9
9
C551
C552
C048
C
5
0
9
C
5
2
0
C
0
4
9
C054
C067
C
0
6
6
C
6
1
2
C
5
0
1
JW120
JW560
J
W
3
JW10
JW27
JW24
J
W
2
1
J
W
1
6
0
J
W
1
0
9
JW103
D002
D
3
0
4
D250
D351
D
5
0
9
R
0
3
4
R
0
3
0
R
0
7
7
R070
R028
D
6
2
0
D
6
2
9
R
5
3
2
R
5
1
1
D
2
3
0
D004
D003
C
6
3
8
C
6
0
0
C
6
5
1
Q
5
0
1
L
6
0
9
R
5
0
8
J
W
3
9
2
JW56
JW57
R450
JW15
JW19
JW251
JW116
J
W
7
0
JW29
J
W
6
0
8
JW282
D
0
4
5
D
0
4
4
JW283
JW515
J
W
1
1
1
J
W
1
1
4
C
3
0
2
C
3
0
1
I
C
5
4
5
JW117
JW32
JW303
JW25
R362
JW603
R
5
0
1
JW124
J
W
1
2
8
D234
P
S
4
0
1
D538
JW83
FB462
FB467
I
C
6
0
8
R059
R057
R058
JW22
JW07
JW13
R
1
1
0
JW151
JW23
J
W
4
3
R
0
5
4
R
0
4
7
JW38
JW37
J
W
4
0
0
E
Y
1
0
4
E
Y
1
0
5
C546
Q650
Q522
E
Y
2
0
0
E
Y
2
0
3
D
5
4
5
D
5
6
6
R562
E
Y
1
0
1
E
Y
2
0
2
R087
R321
R
2
1
7
R
5
4
6
R578
C
4
2
0
C422
C416
C
4
1
8
C
4
1
4
C
4
1
2
C
5
6
1
C
2
1
2
C
2
1
3
C
2
0
6
C207
C
5
7
1
J
W
5
0
1
J
W
1
7
2
D
2
3
1
D
2
3
7
D
2
3
5
D
2
0
8
D205
D
5
2
8
R
5
6
6
FB522
C
5
4
4
C566
C562
E
Y
1
0
0
E
Y
5
6
0
D414
C
5
3
5
J
W
1
4
8
R
5
7
5
Q521
E
Y
2
0
1
R522
D430
D
4
3
1
C
4
3
0
C
4
3
1
C
3
1
7
C318
C319
JW205
T
U
1
0
1
C
4
7
1
L
0
0
8
J
W
9
0
C
4
7
0
C051
C076
L
0
0
9
C
6
6
1
C
6
6
0
D650
C
0
7
7
R
3
2
3
C
0
7
4
J
W
2
6
0
R650
JW67
D317
C041
E
Y
1
1
0
E
Y
5
0
2
J
W
1
3
3
J
W
1
4
5
J
W
1
4
4
J
W
5
3
2
JW506
JW433
JW439
JW437
JW436
R651
R
6
5
2
J
W
5
0
4
J
W
6
C665
JW302
C
L
P
0
0
2
C304
J
W
1
1
R
0
7
6
J
W
8
J
W
1
2
D
0
5
0
D
0
5
2
C
0
0
6
CN401
C
0
4
6
R061
D
0
0
5
C
3
1
3
R051
R053
C
5
6
4
JW1501
JW41
JW46
JW50
J
W
2
5
4
C
4
9
9
R
6
3
4
C
0
2
3
C
6
0
9
J
W
5
5
3
J
W
5
5
2
J
W
5
5
1
J
W
5
5
0
JW61
JW127
C
L
P
0
0
1
JW62
R
0
2
9
JW53
JW171
C
4
1
5
J
W
7
8
C450
C452
C075
D
2
0
1
D
2
3
2
C
4
1
3
D
5
2
5
R
5
7
1
D
5
6
3
C522
JW115
JW106
R
6
0
9
J
W
6
0
1
R
6
3
9
JW14
FB403
FB404
F
B
5
0
1
F
B
5
0
2
F
B
3
0
1
JW30
EY568
E
Y
5
6
3
EY566
E
Y
5
6
7
C
5
5
8
C543
EY660
EY661
EY573
EY574
D510
R
5
2
5
R545
R567
E
Y
6
0
0
E
Y
6
4
0
EY641
EY642
E
Y
6
4
3
E
Y
6
4
4
C
5
8
5
J
W
2
J
W
9
2
J
W
4
7
0
JW415
JW414
JW416
JW95
JW94
J
W
1
0
2
R
2
0
9
R221
JW418
JW96
J
W
4
2
3
R
2
1
1
J
W
1
0
1
J
W
1
4
7
JW87
JW540
JW97
JW180
J
W
4
0
3
JW63
J
W
6
8
J
W
5
5
J
W
5
2
6
J
W
3
1
J
W
3
0
5
J
W
3
3
J
W
3
4
J
W
4
0
J
W
7
6
J
W
4
2
8
JW51
JW47
JW52
JW99
JW152
R543
R584
R585
C
5
5
5
J205
I
C
4
0
4
R
4
4
0
J
W
2
0
2
J
W
4
0
1
J
W
4
0
2
J
4
0
1
J
W
1
4
0
R
5
4
2
JW72
JW60
C423
J
W
2
0
1
JW521
J
W
5
1
9
C
N
0
0
2
J
W
4
2
4
E
Y
6
8
9
E
Y
5
2
1
E
Y
5
2
0
CN586
CN004
E
Y
5
2
7
JW138
EY528
F
L
0
0
1
L002
L
0
0
3
L004
L005
JW113
JW421
J
W
5
0
8
JW425
J
W
2
5
2
J
W
3
9
J
W
4
5
0
J
W
4
3
2
JW49
JW451
JW605
JW606
C
5
4
9
J
W
5
3
3
JW621
J
W
5
4
E
Y
2
0
4
E
Y
2
0
9
E
Y
2
0
8
JW137
E
Y
2
0
6
E
Y
2
0
7
T
5
1
1
D606
E
Y
4
0
EY41
D604
E
Y
4
7
E
Y
4
8
I
I
C
6
0
3
J
W
9
3
L511
L011
D
0
5
1
JW640
JW662
J
W
1
6
C
5
8
1
D
5
6
2
E
Y
2
1
1
D236
D
0
0
6
D402
R
4
4
1
C
6
5
0
J
W
1
5
8
E
Y
5
5
2
JW5
R
0
3
3
D614
R
6
6
8
E
Y
5
6
9
E
Y
5
6
5
E
Y
5
6
4
C
5
0
6
E
Y
5
0
1
C
6
0
2
L527
E
Y
2
1
3
E
Y
2
1
4
E
Y
2
1
6
E
Y
2
1
5
H
S
4
0
4
C
6
7
3
R
2
0
8
JW82
JW419
JW408
J
W
4
0
6
J
W
4
2
6
J
W
8
0
J
W
4
3
1
JW173
J
W
4
2
9
D405
D401
JW77
J
W
1
4
3
E
Y
2
1
2
C
N
4
0
4
HS615
J
W
5
0
7
J
W
6
2
0
E
Y
2
1
0
E
Y
2
0
5
R
2
2
2
R
2
1
2
D
0
0
7
D
2
0
4
D
2
0
0
J
2
0
0
J
2
0
2
J
2
0
3
T
5
8
5
J
W
6
2
2
JW623
JW624
P
H
6
0
2
T
6
0
2
T
6
0
3
H
S
6
0
0
HS601
C
6
0
3
C
6
0
1
VDR600
T
6
0
1
H
S
6
0
5
C
6
2
9
C
6
2
1
D
6
0
5
J
2
0
1
D
0
0
1
C
5
2
3
T
H
P
5
0
1
C
N
0
0
3
D
5
0
7
D641
D644
C
5
1
1
L
5
2
5
T510
L
5
1
6
HS522
I
C
6
3
3
JW442
J
W
4
4
4
J
W
4
4
5
J
W
4
4
6
J
W
4
4
7
J
W
4
4
8
J
W
4
5
3
JW452
JW454
JW457
JW455
J
W
4
4
9
J
W
4
5
6
C
4
6
0
L
5
8
8
CN505
JW527
J
W
4
0
4
E
Y
5
8
3
E
Y
5
8
2
J
W
1
D
6
4
2
JW17
R072
JW461
C
4
6
2
C
4
6
3
JW409
D
4
3
2
JW407
J
W
4
3
8
F
B
4
0
2
F
B
4
0
1
CN005
D
6
4
5
C
4
6
1
D640
R
6
1
5
J
W
6
2
7
H
S
6
0
3
J
W
6
1
0
J
W
6
2
5
EY592
EY591
EY593
EY590
C
5
0
4
C417
D
3
2
1
JW20
JW85
D
5
0
4
D202
D203
C
N
3
0
1
C
N
5
0
3
C521
C
5
1
7
J
W
4
4
3
CN602
C
N
4
0
3
CN402
J
W
4
3
4
JW509
R
8
0
4
D
0
4
6
D
0
4
7
JW410
C421
C
4
4
0
C441
E
Y
5
2
9
E
Y
5
3
0
J
W
5
0
2
J
W
3
0
4
JW435
J
W
4
1
1
EY546
EY547
EY548
EY549
JW522
R
5
6
9
R
5
6
8
D
5
6
9
R850
R544
JW511
C
N
6
0
1
E
Y
6
6
E
Y
6
9
EY64
C507
CN201
C
N
2
0
0
J
W
6
2
6
J
W
6
3
1
JW512
E
Y
5
6
2
EY605
EY606
C
N
7
0
2
C
N
7
0
1
C
N
7
0
3
C
N
7
0
4
C
N
1
0
2
CN101
C654
JW636
C655
E
B
G
U
I
D
E
P
R
E
S
S
H
O
R
I
Z
O
N
T
A
L
D
E
F
.
L
F
T
LIGHTENING
6
.
3
A
R
I
S
K
O
F
F
I
R
E
R
E
P
L
A
C
E
F
U
S
E
A
S
M
A
R
K
E
D
3
4
1
2
+
-
1
8
1
1
0
9
S G
G
S
3
4
1
2
E
B
C
B
E
1
9
4
7
1
4
H
O
T
1
4
1
3
5
V
N
.
C
.
G
N
D
G
N
D
E
B
TV/VIDEO
VOL- VOL+ CH- CH+ POWER
MENU/SEL
UP/DOWN
P
R
E
S
S
G
U
I
D
E
R
+
R
-
L
-
L
+
C
O
L
D
E
B
G
F
H
J
K
M
A
B
C
D
E
I
8
7
6
5
3
.
3
V
IK
N/SBG
GND
GNDRVM
GND
SIRCS
1
4
5V STBY
CLOCK
DATA
2
.
0
A
(
F
S
)
2
.
7
A
(
F
V
)
L
1
2
6
7
I
O
1
7
1
6
2
1
E
B
B
E
1
6
3
1
1
1
1
5
2
1
T
U
V
I
F
S
I
F
M
T
S
L
I
G
H
T
E
N
I
N
G
J
K
M
EB
L
9V LINE
1
4
GND
B-INT
B-DAT
B-CLK
STBY 5V
P
O
W
E
R
O
N
1
4
-
1
5
V
+
1
5
V
E
V
D
+
H
E
A
T
E
R
N
C
2
0
0
V
+
B
V
GNDUS-IN
GND
Y(YW)
V
G
N
D
U
S
-
I
N
G
N
D
Y
(
Y
W
)
9V9VFBT
V PULSE
VIDEO2
G
N
D
G
N
D
AUDIO L2
AUDIO R2
M
E
N
U
K
E
Y
1
6
8
1
7
G
N
D
1 7
I
O
I
O
GND
B-INT
B-DAT
B-CLK
16
HS545
F
B
T
B
A
6
-
S
1
1
J
W
2
0
-
F
B
6
0
9
1
7
1
5
1
4
1
9
12
GND
TIMER LED
MPWR LED
G
N
D
4
1
A
-
1
4
1
0
-
9
1
8
-
A
17
1
7
J
L
1
J
L
2
J
L
3
J
L
4
1
SIGNAL
GND
1
1
GND
SGN
1
SGN
GND
1
-
8
6
2
-
1
8
5
-
1
2
1
A
B
C
D
E
F
G
H
I
J
2345678910111213
[TUNING CONTROL, Y/C/J, POWER SUPPLY, TUNER/IF, DEFLECTION, AUDIO, MTS]
A
I
IC
6
0
4
Q
6
0
1
Q
6
0
0
C
N
6
0
0
C
N
5
1
5
Q
5
0
5
Q
5
0
6
CN585
F
6
0
1
I
I
C
5
6
5
IC545
CN001
Q002
IC004
Q
5
2
2
Q005
Q
3
0
6
Q400
Q
4
0
1
D
4
1
2
Q412
Q
5
7
8
Q
5
2
1
I
I
C
3
2
1
C
0
5
3
R
0
8
3
R080
C052
R082
R086
P
S
4
0
1
C
N
0
0
2
F
B
6
0
4
CN586
CN506
R
0
3
6
C
5
0
0
C
5
1
9
S
0
0
2
S
0
0
6
S
0
0
3
D004
R
0
6
5
R067
R069
S
0
0
4
S
0
0
5
R071
D003
S
0
0
1
R
6
0
3
R
6
9
9
R
0
5
0
R112
R
0
7
8
C
0
6
6
R
0
7
9
J
R
2
1
1
D
0
0
1
R
4
4
0
R
4
4
3
J401
S007
R
0
7
4
R
4
4
1
R
0
7
7
R
0
7
3
S008
R
0
7
6
R
0
7
5
R
2
2
6
R
3
0
4
C304
D
2
3
0
FB404
FB403
J201
C
2
0
4
C
2
0
5
R207
C
2
1
4
FB462
FB467
D
0
5
0
D
0
5
2
C006
C009
R
0
0
4
C
0
2
2
C
6
2
3
D
6
4
5
D640
C
6
6
5
F
L
0
0
1
R
6
3
9
R090
C067
R
0
9
1
R092
C
L
P
0
0
2
C602
V
D
R
6
0
0
T
6
0
1
D604
H
S
6
0
5
C619
C613
D606
C614
C605
R602
D612
C
6
2
1
R611
R628
D613
R
6
5
2
R
6
2
9
R630
C
6
2
9
R687
R
6
2
1
R
6
2
6
C
6
2
0
R613
D
6
0
7
C
6
3
4
R696
R
6
3
1
C
6
1
5
L508
T
H
P
5
0
1
R
6
4
1
C603
R601
C
6
0
1
D
0
5
1
R
3
6
3
C116
L003
R
1
1
6
C
0
9
0
C019
C303
L
0
0
4
C021
R301
C
3
0
1
C
3
0
5
R
3
1
9
D250
C
0
9
2
R381
R325
C012
R006
R115
C115
C270
C011
J
R
7
C014
R382
C095
L
0
0
5
C
0
9
4
R
0
0
7
C015
R
3
0
3
C
3
0
6
R308
D
2
3
6
C010
C008
C007
R003
C004
R
0
0
2
C
0
6
2
C065
R063
JR213
C003
C005
L002
D002
C
3
1
3
R062
C
0
6
0
C046
R
0
8
1
C061
C091
D
3
0
4
R005
R061
R059
C064
R
0
3
3
C054
R060
C058
R057
C059
R058
R053
C057
C050
C044
R
0
3
5
R
0
5
2
C
0
4
9
R337
C
3
9
9
C
3
3
7
R
5
5
0
R371
C325
R
3
2
4
JR44
R362
JR102
R
0
3
1
R372
R
3
2
8
C552
J
R
4
3
C098
C328
C330
X301
R326
L011
R
3
7
0
C097
L
0
0
6
C
1
0
0
R
3
0
9
C307
R599
R
3
2
0
R
3
1
0
C099
L007
R315
R317
J
R
2
1
2
JR301
D234
R364
C302
R
3
0
5
R604
C600
C251
R680
R
6
1
4
R
5
0
7
D501
D628
R
Y
6
0
0
R
Y
5
0
1
C523
T
6
0
2
D
6
3
1
C645
C637
C
6
3
6
C
6
3
5
R
6
4
7
R619
C
6
2
7
F
B
6
1
7
R640
R658
R
6
6
0
C
6
2
8
C
6
4
3
D
6
1
0
H
S
6
0
0
F
B
6
1
6
H
S
6
0
1
R651
C649
R
6
7
0
D
6
0
9
R
6
5
9
C
6
4
8
C672
C642
R
6
3
2
R671
D
6
1
8
C
6
4
7
D
6
1
7
P
H
6
0
2
R
6
2
5
C
6
3
1
D
6
2
9
C
5
6
4
R327
R558
R580
R318
R559
R316
R039
R038
C638
R
5
7
3
D558
R
6
3
4
C524
R617
D
6
2
1
C667
FB605
R620
R
6
1
8
C
6
1
6
L606
C451
D608
R892
R
8
1
5
R893D513
R814
JR504
R801
C
6
2
5
C
6
3
2
D
6
0
3
L607
D
5
0
7
R
8
0
3
C
6
8
0
C611
R
6
0
6
R
6
0
5
R607
C612
D
6
2
0
R
5
0
8
R563
C563
R096
C
6
9
0
H
S
6
0
3
C
6
0
9
R
5
0
1
R
0
5
6
R
5
7
2
L609
R302
R
3
7
4
R
3
7
5
C
3
7
2
D538
R
3
9
1
J
R
3
1
0
F
B
3
0
1
D559
R
8
5
1
R
4
2
2
R
5
7
7
R314
R351
C351
R527
D351
C
5
1
8
C554
C553
C538
R394
R
5
5
4
R
3
9
3
R
8
6
0
R
5
6
0
R
4
0
5
R
4
1
0
J
R
3
1
1
R
5
2
3
R556
D
4
0
5
D
5
0
9
R
8
6
2
C
5
5
6
C
5
3
7
R
5
0
9
R055
C509
J
R
3
0
6
D
0
0
6
C
5
5
7
R
0
3
7
R
5
5
5
C
0
4
7
R417
R499
D402
R070
R551
C371
R
0
4
3
R
0
4
2
R
0
3
4
R
0
9
5
R028
R524
C551
JR303
R
4
9
3
R
0
9
4
C370 C041
JR485
D
0
4
4
D
0
4
5
R
4
3
9
C499
R
0
4
7
R
0
5
4
R
1
1
0
C056
R051
R
0
2
7
C
5
2
0
R
4
0
4
R450
R411
D401
R427
R
3
9
2
R409
D390
C390
JR313
R
6
0
9
D
5
6
2
R
5
8
9
D
5
8
9
L
5
1
3
R590
C550
C
5
8
5
D
5
0
0
R890
R
5
9
2
FB606
R
5
9
3
C
5
9
0
C
6
5
0
R595
R594
D
6
0
2
D614
C617
R668
C
6
1
0
D
6
1
1
C618
R673
C652
C
6
4
0
R667
C670
C594
L608
F
B
5
0
6
C
6
2
4
R591
JR128
C504
R
5
0
3
R502
C502
C503
R
8
1
2
R
8
1
3
C
5
2
8
C
5
8
1
T511
L527
C
5
1
2
C
6
5
1
R539
L
3
7
1
C501
L
3
7
0
R
5
1
1
J
R
2
0
1
F
B
5
0
2
C450
R
2
5
1
R250
C452
C
4
5
8
C457
R
4
1
2
R
4
0
8
C
4
2
3
C043
C
0
4
2
R
0
3
0
C
N
0
0
3
J
R
4
8
6
R103
C080
C081
R032
JR484
R
1
1
1
R
0
2
9
R
4
1
4
C
2
2
0
C045
C436
R
2
2
0
R
4
2
1
R
4
2
9
C
5
0
6
D
5
0
6
FB505
C
5
1
0
R
5
0
5
T504
C508
R
5
0
4
C
5
0
5
R
5
1
2
R
5
1
3
L511
C
5
1
3
L510
L515
T510
C
5
1
4
R
5
1
0
L
5
2
5
D526
C
5
2
5
R
5
2
5
R852
R530
C
5
3
0
R
5
3
2
C541
C522
C540
R802
R540
R522
R535
C542
J
R
1
2
R
5
3
4
R
5
3
3
C
5
3
9
C422
C418
F
B
5
0
1
C420
R
2
0
8
C404
C
4
0
2
R
2
0
9
C400
R401
R403
C411
R
4
0
0
R322
C312
R105
L010
C071
D650
R321
R
1
0
9
R
1
0
4
J
R
2
0
9
C
L
P
0
0
1
R087
JR300
R
3
2
3
J
R
3
1
5
C077
R650
R108
R040
R
0
4
1
L
0
0
9
C661
R100
C
0
7
4
R101
C
0
7
0
R
0
9
8
R102
C660
R048
R049
C
0
7
9
R107
R339
C
3
1
7
R
3
3
8
JR402
C401
C405
C403
C318
C413
C409
C407
C415
R418
R
4
1
5
C430
R
4
0
6
R
4
0
7
C416
C414
R
4
2
0
C412
C406
C408
C410
D
5
2
5
R
5
3
7
FB522
R
5
5
7
R
5
3
6
R
5
5
2
C
5
3
6
R
5
7
1
D508
R578
C543
R
5
7
9
R
5
6
6
D
5
6
3
R
5
3
8
C535
R564
R565
H
S
5
2
2
C546
R
5
4
6
D
5
4
5
C566
C
5
2
7
C515
L
5
1
6
R549
R820
R586
C545
R
5
4
8
R
9
0
2
C
9
0
2
R
5
4
7
C
5
4
7
R
5
4
2
R515
C548
R901
C901
R541
C
5
4
9
C
5
5
8
C589
D
5
8
7
R
5
1
4
R588
D514
T
5
0
5
R
5
0
6
D515
C507
D510
D505
T
5
8
5
R596
R
5
8
7
D596
C595
R585
R
5
8
3
R584
C597
C
5
4
4
C
5
6
2
C
5
2
9
R
8
9
9
D
5
0
3
D
5
0
2
D
5
2
8
R531
C534
D
5
6
6
R529
R562
R561
R
5
2
8
D
2
0
8
R
2
1
7
D
2
3
5
C213
C
2
0
6
R
4
3
3
R
2
1
1
R
2
2
2
R
2
1
2
JR403
J
R
1
1
0
R
4
4
2
J
R
3
1
4
C
3
1
9
R335
D317
R336
R221
R340
R
4
0
2
L101
D
0
0
7
C076
L008
C075
C051
R
0
8
5
R
0
8
4
R477
R
4
7
8
C
4
7
0
D414
D
4
1
3
C
4
7
1
R
4
7
9
D
2
0
1
D
2
3
1
D
2
3
2
D
2
0
4
D
2
0
0
R229
R
2
3
0
R
2
0
3
C
2
0
3
J
R
4
0
1
R
2
1
3
R202
JR215
J202
R
3
3
0
D205
C207
C
2
0
2
D
2
3
7
R
2
1
0
J203
R
4
3
0
R
2
3
3
R
3
0
6
R
3
0
7
C431
D
4
3
1
R
4
3
1
J205
R
5
7
5
R521
R520
C
5
7
1
D567
D
5
6
8
R
5
2
6
R
5
7
4
R
5
7
0
C
6
7
3
D
6
3
0
R567
L
5
8
2
R608
C663
R
5
8
2
C
5
8
2
D
5
9
8
R581
IC608
Q
3
1
6
CN004
D
0
0
5
X001
I
I
C
0
0
1
JR6
I
I
C
0
0
3
R380
I
I
C
6
3
3
Q
0
0
8
D
6
0
5
JR317
I
i
C
0
0
2
Q
3
0
5
R312
C048
C560
R311
Q
3
0
3
Q300
Q
5
0
1
Q
6
0
8
C
N
5
0
1
I
IC
6
0
0
D
6
1
5
H
S
6
1
5
Q
5
9
0
C
N
4
0
4
D
6
0
1
Q502
Q531
Q
5
0
4
Q503
Q
6
0
4
I
I
C
6
0
3
Q
0
0
6
Q573
Q572
Q390
Q519
Q860
Q391
Q533
Q
4
1
1
R553
Q
4
0
4
I
I
C
4
0
4
C096
JR255
R
5
0
0
R
5
1
6
R
5
1
7
R045
R044
C559
R093
R576
JR2
Q
3
0
2
Q301
R
3
5
2
R
3
1
3
R616
D641
D644
Q403
R
1
0
6
C
2
0
0
R
2
0
0
Q009
C309
Q
0
0
4
C561
I
I
C
5
6
1
Q650
R227
J
R
4
1
1
H
S
4
0
4
C
4
6
1
C460
L588
CN505
IC400
IC401
C
4
1
7
J
R
5
8
5
D
6
4
2
R072
C
4
6
2
C
4
6
3
J
R
2
1
6
D
4
3
2
R
4
3
4
C
4
1
9
C
4
2
4
D
5
0
4
D207
D209
C
N
3
0
1
C
N
5
0
3
J
R
5
8
6
R597
CN602
R622
R623
FB601
FB603
F
B
6
0
2
D
6
2
4
R
6
1
5
R612
C633
R
6
2
7
R216
D
3
2
1
C101
C212
R863
R519
R
8
6
1
D203
D202
C
N
4
0
1
J
R
3
0
4
R206
CN005
JR1502
D430
J
R
3
0
2
C
3
0
8
C
5
6
7
C568
Q
3
0
4
C521
C517
F
B
4
0
2
F
B
4
0
1
J
R
3
0
5
C
N
4
0
3
CN402
D
0
4
6
D
0
4
7
R088
C326
D206
R
4
2
3
R
4
2
5
C421
R
4
2
4
D420
C
4
4
0
C
4
4
1
C033
C570
Q
4
2
1
Q420
R
8
0
4
J
R
3
1
2
J
R
2
1
4
R215
R218
R419
R
5
9
8
C555
R544
C526
R
5
6
9
R
5
6
8
D
5
6
9
R850
C023
R015
R416
R234
J
R
2
0
7
CN201
C
N
2
0
0
C
N
7
0
2
C
N
7
0
1
C
N
7
0
3
R
5
1
8
C
N
7
0
4
R543
R545
C516
C
N
1
0
2
CN101
C
N
6
0
1
C654
C655
E
B
H
D
Y
-
H
D
Y
-
H
D
Y
+
H
D
Y
+
V
D
Y
-
V
D
Y
+
H
-
O
U
T
2
0
0
V
G
N
D
H
E
A
T
E
R
-
1
3
V
G
N
D
+
1
3
V
N
/
C
A
B
L
H
D
T
V
.
O
U
T
-
+
D
G
C
H
-
O
U
T
H
-
O
U
T
1
3
5
V
T
P
2
1
T
P
2
8
T
P
2
9
T
P
2
7
T
P
1
9
T
P
2
0
T
P
2
5
E
T
P
2
3
T
P
3
1
C
E
B
G
S
G
S
2
1
4
3
3
1
4
6
4
3
2
1
1
7
9
1
4
B
E
G
N
D
5
V
L
I
N
E
M
I
C
R
O
+
Y
/
C
+
C
O
M
B
8
0
1
6
5
6
4
4
1
2
4
B
E
1
2
6
7
H
.
P
R
O
T
G
L
U
E
M
A
R
K
T
P
3
0
T
P
1
3
T
P
3
4
C
L
O
C
K
T
U
1
0
1
1
4
272
5
2
.
7
A
(
F
V
)
1
7
I
O
E
B
5
V
L
I
N
E
E
B
B
E
3
1
2
7
2
1
1
5
1
1
6
1
1
4
5
8
1
1
3
4
0
2
5
1
4
5
8
V
G
N
D
U
S
-
I
N
G
N
D
Y
(
Y
W
)
3
.
3
V
1
7
D
A
T
A
2
.
0
A
(
F
S
)
1
2
0
2
1
4
0
1
6
1
7
1
2
4
1
8
5
148
7
1
G
L
U
E
M
A
R
K
4
9
1
0
1
1
8
I
O
I
O
TP11
TP10
TP12
T
P
3
3
1
6
1
4
R390
A
U
D
I
O
P
R
O
C
E
S
S
O
R
T
P
0
1
T
P
0
2
R
+
R
-
L
-
L
+
T
P
3
2
T
P
2
4
TP26
T
P
0
8
TP24
TP15
T
P
1
4
T
P
3
0
H
.
P
R
O
T
B
A
6
-
S
1
1
2
1
9
1
1
6
15
7
1
8
1
4
G
N
D
17
1
7
-
1
5
V
+
1
5
V
E
V
D
+
H
E
A
T
E
R
N
C
2
0
0
V
B
+
A VCC
A VCC
A GND
A GND
V
GNDUGND
Y(YUV)
GND
Y(S)
GND
PWR ON
SIR
STBY
GND
MPWR
TMR
1
1
GND
SIGNAL
1
1
1
-
8
6
2
-
1
8
5
-
1
2
1
A
B
C
D
E
F
G
H
I
J
2345678910111213
COMPONENT SIDE CONDUCTOR SIDE
D230 C1 D507 F8 D603 F7 IC002 C5 Q303 C5 Q522 E10
D002 B3 D231 B13 D508 D11 D604 G3 IC003 B3 Q304 D6 Q531 F7
D003 G1 D232 B13 D510
I10 D605 G3 IC321 B11 Q305 C6 Q533 C7
D004 I1 D234 D5 D513 F7 D606 G3 IC400 C10 Q306 B9 Q572 D7
D005 A3 D235 D12 D514 H10 D611 J8 IC401 C10 Q316 C3 Q573 D6
D006 B6 D236 D5 D515 H10 D612 I2 IC404 B8 Q390 D7 Q578 D11
D007 B11 D237 C12 D525 D11 D613 I4 IC545 F11 Q391 C7 Q590 H8
D045 B7 D317 B11 D526 E10 D614 I8 IC561 E12 Q400 C11 Q600 I4
D046 B9 D321
B11 D615 I7 IC565 E9 Q401 D11 Q601 I5
D047 B9 D351 C6 D528 E12 D618 I5 IC600 H5 Q403 A7 Q604 E8
D050 B2 D390 D8 D545 E11 D620 E6 IC603 D7 Q404 C8 Q608 D5
D051 D4 D401 C8 D558 D6 D621 H7 IC604 I9 Q411 C7 Q650 A10
D052 B2 D405 B7 D559 C7 D624 J8 IC608 B2 Q412 A13 Q860 C7
D200 C12 D412 A13 D562 F8 D628 E5 IC633 C3 Q420 B7
D201 B13 D414 A13 D563 D11 D629 E5 Q421 B6
D202 A1 D420 B6 D566 E12 D631 H6 Q002 B6 Q501 E6
D203 A1 D430 D11 D567 F12 D641 D7 Q004 A12 Q502 G8
D204 B12 D431 D12 D568 F13 D642
C2 Q005 A12 Q503 F7
D205 C12 D432 D9 D569 F13 D644 D7 Q006 D7 Q504 F8
D206 C11 D500 G7 D587 G11 D645 C2 Q008 D3 Q505 I9
D207 A11 D501 E6 D589 F8 D650 B10 Q009 B11 Q506
I10
D208 D12 D505 I10 D596 G12 IC Q300 D5 Q519 C7
D209 A1 D506 I9 D598 G12 IC001 B4 Q301 C6 Q521 E12
TRANSISTORS
DIODE
DIODE
A BOARD LOCATOR LIST CONDUCTOR SIDE
Page 40
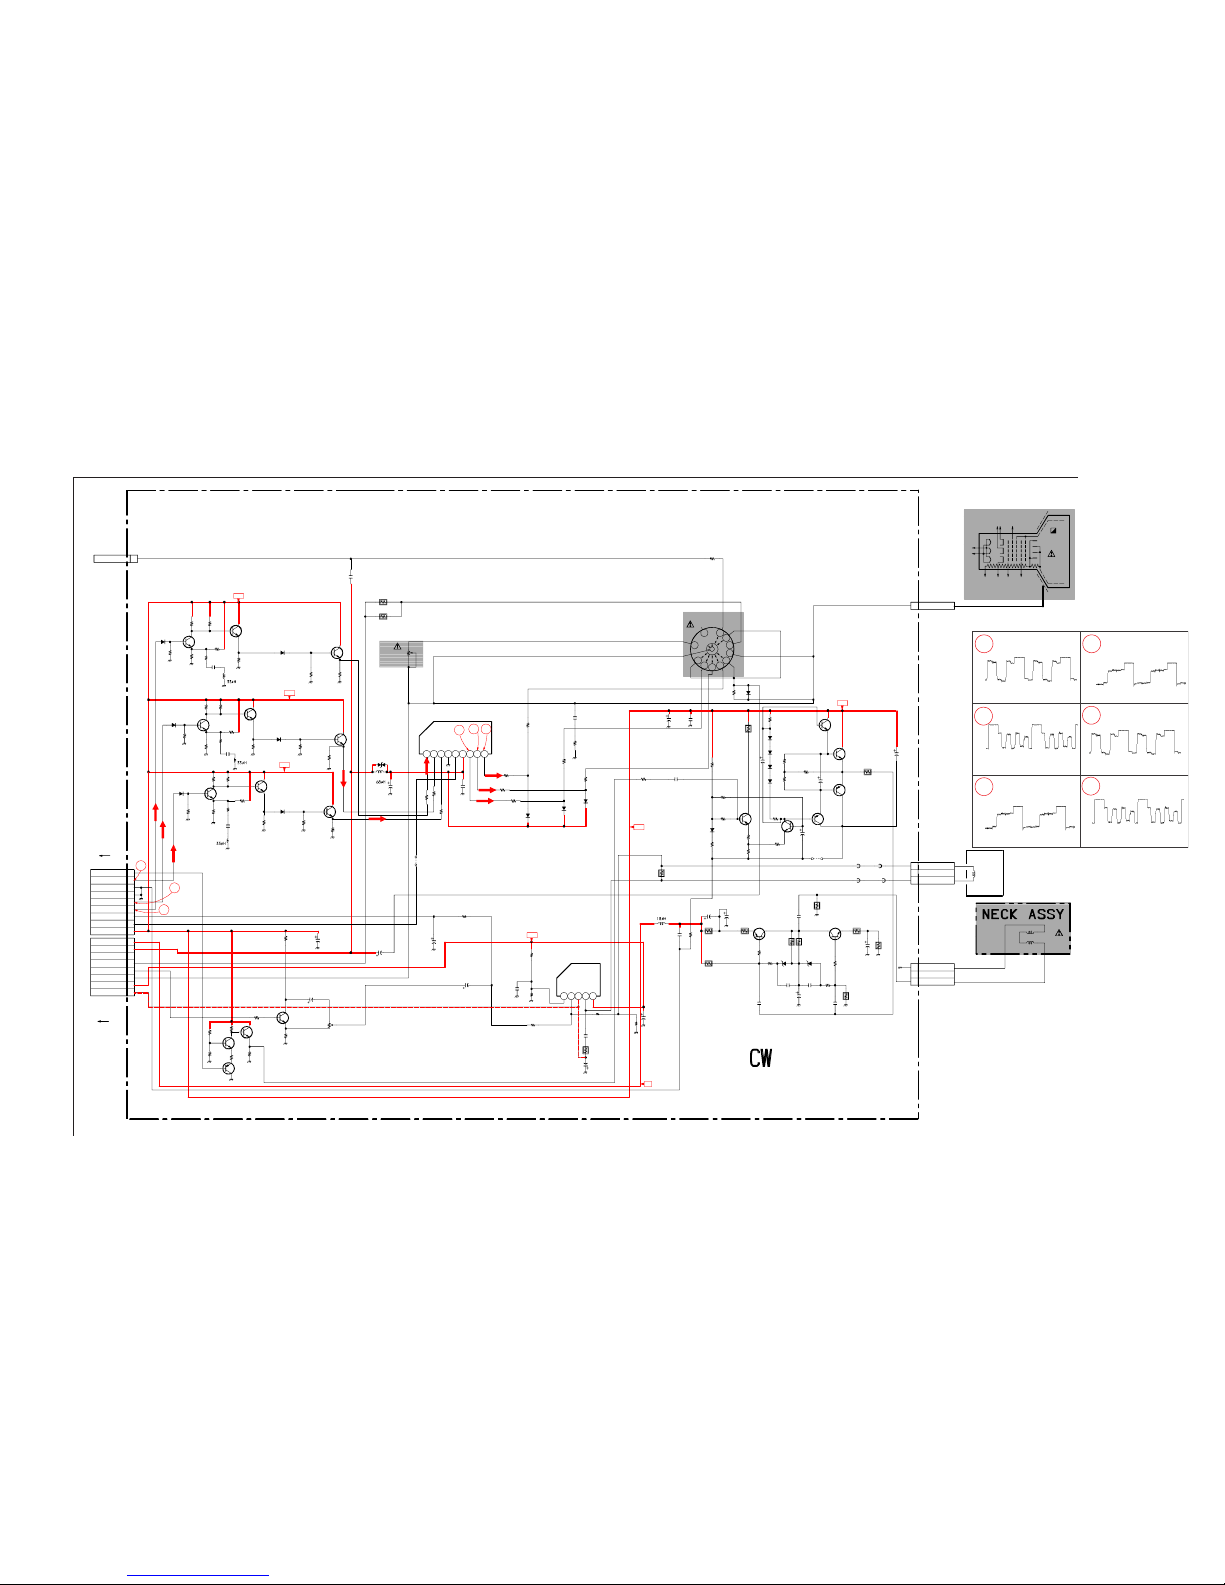
KV-27FA310/27FS120/29FA310/29FS120
40
KV-27FA310/27FS120/29FA310/29FS120
CW BOARD SCHEMATIC DIAGRAM
1 | 2 | 3 | 4 | 5 | 6 | 7 | 8 | 9 | 10 | 11 | 12 | 13 | 14 |
A
—
B
—
C
—
D
—
E
—
F
—
G
—
H
—
I
—
H
KG G2
CV KR G1 G4
HV
KB
1 2 3 4 5 6 7 8 9
1
1
2
3
1
2
3
4
5
6
7
8
1
2
3
1
1
3 5
6
7
8
9
101112
13
G2
G1-1
H1
H2
G1-2
KBKGKR
G1-3
G4
CV
1
2
3
4
5
6
7
8
9
1 2 3 4 5
C3701
C3702
C3703
C3708
R3702
R3701
IC3701
R3705
R3704
R3707
R3706
C2777
RV2701
C2778
R2784
L3712
C3780
R3780
D3783
R3784
R3779
R3785
R3786
R3782
Q3781
R3783
D3782
Q3782
R3787
R3788
L2751
C2751
R2766
R2768
R
2
7
6
7
C2753
R2765
R2764
R2763
D2756
D2754
D2755
R2757
R2756
R2758
C2754
C3912
C3915
R2770
D2758
R3935
R3917
R3932
C3931
D3905
D3906
D3907
D3908
R3919
R3918
R3921
Q3907
C3930
C3913
R3922
Q3908
C3911
JR3910
R3912
R3933
R3914
D3903
R3915
R3719
L3901
C3909
R3936
C3908
R3909
R3908
C3907
R3907
R3938
C3910
FB3700
FB3701
FB3702
FB3703
CN2707
R3910
R3902
R3901
C3903
R3930
R3903
C3902
R3904
C3901
C3905
C3904
C3906
R3906
D3901
R3905
R3931
D3902
R3923
C3914
J2751
R2760
C2752
R2761
R2762
RV2750
IC2751
R3778
R3777
D3772
R3776
L3711
C3781
Q3772
R3775
R3771
R3774
R3770
D3773
Q3771
R3772
R3773
R3768
R3767
D3762
R3766
L3710
C3782
R3765
R3769
R3764
R3760
D3763
R3762
R3763
C2755
C2775
CN2755
R3700
R3916
D2701
R3710
R3711
R3712
R3713
R3714
R3911
R3913
JW3791
Q3712
Q3711
Q3710
CN2753
CN3903
Q3761
Q3762
Q3906
Q3905
Q2772
Q3783
Q3773
Q3902
Q3901
Q3903
Q3904
C2774
CN2751
Q3763
R2785
R2788
R2789
CN2752
47
25V
0.1
47
25V
0.1
220
:CHIP
10k
:CHIP
LA6500-FA
10k
:CHIP
1.5k
1.5
1
4.7
50V
47
10MM
4.7k
1/10W
MA111-TX
270
1/16W
1k
:CHIP
2.2k
1/16W
3.3k
1/10W
1k
1/16W
15k
1/10W
MA111-TX
5.6k
1/10W
1k
1/10W
10mF
100
1/4W
100
1/4W
1
0
0
1
/
4
W
0.1
250V
100
1/4W
100
1/4W
100
1/4W
1SS83TD
1SS83TD
1SS83TD
1k
1/2W
1k
1/2W
1k
1/2W
0.001
50V
B
470
16V
0.01
25V
B
560k
1/2W
100
4.7k
1.5k
470mF
D1NS4-TR
MA111-TX
MA111-TX
MA111-TX
47
47
10k
1/10W
470mF
100mF
22
1/4W
2SB709A-QRS-TX
100
25V
0
150
0
820
1SS133T-77
4.7k
220
2W
0.1mF
5MM
470
16V
100
560
1/4W
33
160V
2.2
0
0.1
200V
1.1UH
1.1UH
1.1UH
1.1UH
3P
470
3W
2.2
100
470
16V
0
560
1/4W
0.01mF
18k
1/4W
2.2
160V
0.01mF
0.001
50V
0.001
50V
18k
1/4W
MTZJ-T-77-
39
2.2k
2.2k
MTZJ-T-77-
39
47
1/4W
0.047
50V
100
0.0047
2kV
E
3.3
3.3
2W
110M
TDA6108JF/
N1B
1k
1/10W
5.6k
1/10W
MA111-TX
3.3k
1/10W
2SD601A-QR
S-TX
2.2k
1/16W
1k
:CHIP
270
1/16W
4.7k
1/10W
MA111-TX
2SD601A-QR
S-TX
1k
1/16W
15k
1/10W
1k
1/10W
5.6k
1/10W
MA111-TX
3.3k
1/10W
2.2k
1/16W
1k
:CHIP270
1/16W
4.7k
1/10W
MA111-TX
1k
1/16W
15k
1/10W
4.7mF
470
16V
0P
22k
:CHIP
0
RD9.1EW-T1
1k
1k
820
1.8k
1k
180
56
2SD601A-QR
S-TX
2SD601A-QR
S-TX
82p
:CHIP
82p
:CHIP
82p
:CHIP
10MM
2SC2412K
2SD601A-QRS-TX
2SD601A-QRS-TX
2SB709A-QRS-TX
G2
3P
2SD601A-QR
BUFFER
2SD601A-QR
BUFFER
2SC2412K-T-146-Q
BUFFER
2SB709A-QR
BUFFER
2SD601A-QRS-TX
VERT DEFL
2SD601A-QR
BUFFER
2SD601A-QR
BUFFER
KTA1659A
VM.DRIVE.1
KTC4370A
VM.DRIVE.2
2SD601A-QR
AMP
2SD601A-QR
AMP
1
25V
8P
2SD601A-QR
BUFFER
33
2.2k
4.7k
9P
TO A BOARD
TO A BOARD
G
B
G2
TO A BOARD
CRT
B
I
N
G
I
N
R
I
N
G
N
D
I
K
R
O
U
T
G
O
U
T
B
O
U
T
27V: TIGER
CN301
E
V
D
D
E
200V
NC
E
N/S COIL
-
N/S COIL
+
VD+
HEATER
N/S
9V
E
NC
VM
E
VM
R
IK
B+
+15 V
-15 V
LA6500-FA
A/S
AMP
R.G.B. DRIVE
CRT DRIVE
VELOCITY MODULATION
N/S COIL
9-965-960-01<BA6S>CW
CN585
T585(FBT)
+9V
+9V
+9V
+9V
1
2
3
4
56
+9V
B+
+9V
R
G
B
B
G
R
B
G
R
CW BOARD WAVEFORMS
1
1.3V p-p (H)
2
1.2V p-p (H)
3
1.0V p-p (H)
145.3V p-p (H)
4
117.0V p-p (H)
5
120.3V p-p (H)
6
Page 41
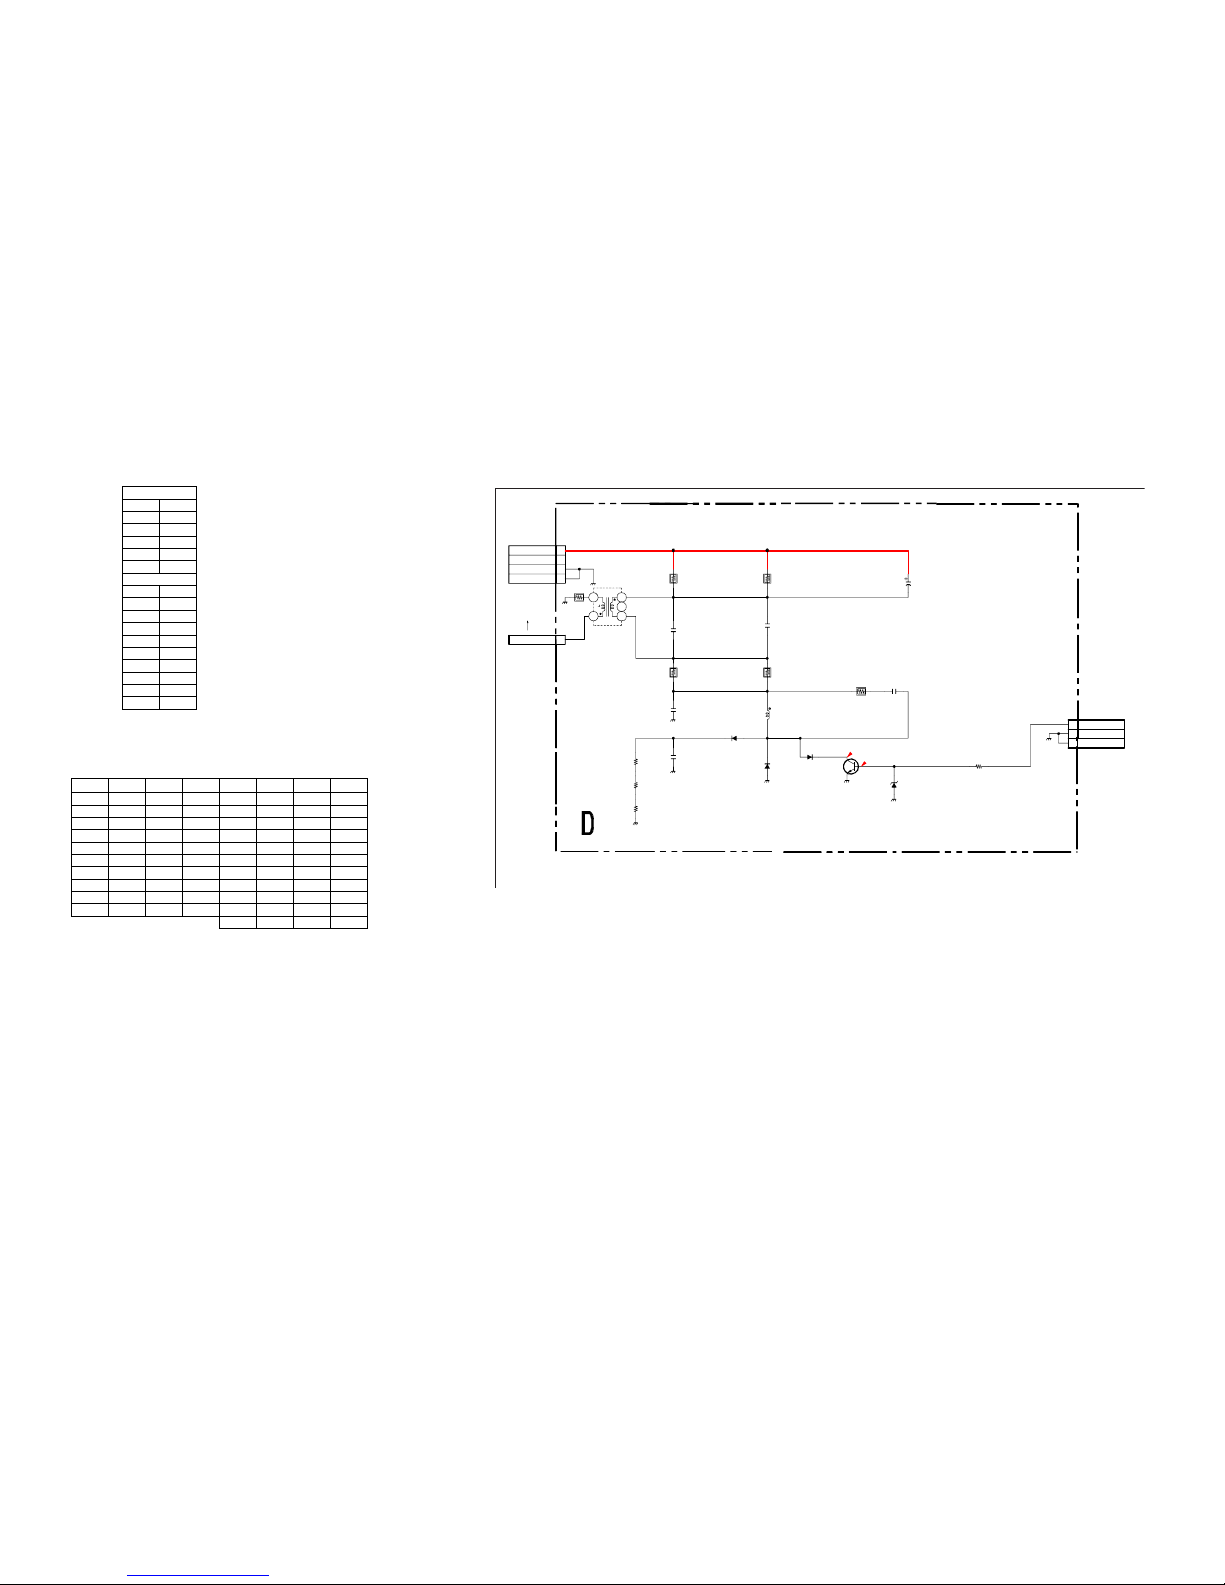
KV-27FA310/27FS120/29FA310/29FS120
41
KV-27FA310/27FS120/29FA310/29FS120
D BOARD SCHEMATIC DIAGRAM (ALL EXCEPT KV-27FA310/29FA310)
1 | 2 | 3 | 4 | 5 | 6 | 7 | 8 | 9 | 10 |
A
—
B
—
C
—
D
—
E
—
F
—
1
1
2
3
4
1
2
34
6
1
2
3
T1801
CN1802
C1817
R1847
C1815
L1805
D1812
D1810
R1846
R1845
D1811
R1848
C1816
C1820
D1809
C1818
R1849
R1850
R1851
R1852
C1819
CN1800
CN1801
Q1810
R1844
R1853
0P
0.0039
630V
100k
1/4W
0.022
630V
10mH
1N4937/23
ERA38-06TP
1
100k
1/4W
100k
1/4W
ERA38-06TP
1
2.2k
2W
220p
500V
B
0.47
160V
MTZJ-T-77-
15B
1000pF
10k
10k
6.8k
6.8k
220pF
4P
3P
2SC3840K
DF-DRV
JW
10.0MM
JW
5.0MM
GND01
135V
DF
NC
GND
TO A BOARD
(FOR DF)
DF-DRV
GND
GND
GND
TO:V BOARD
TO A BOARD
CN506
CN2903
DEFLECTION
59.7
0.0
9-965-960-01<BA6S>D
CW BOARD IC
VOLTAGE LIST
PIN VOLT
10.3
20.3
3 -15.0
40.5
5 15.0
PIN VOLT
12.0
22.0
32.4
4GND
53.7
6 200.0
7 136.0
8 142.0
9 140.0
IC3701
IC2751
All voltages are in V.
CW BOARD TRANSISTOR VOLTAGE LIST
BCE BCE
Q2772 1.5 7.1 0.9 Q3781 2.2 3.9 2.9
Q3710 1.8 0.0 2.5 Q3782 3.3 9.0 3.9
Q3711 5.0 5.6 4.4 Q3783 2.1 9.0 2.7
Q3712 0.0 0.0 0.0 Q3901 0.9 67.0 0.4
Q3761 2.2 3.8 2.9 Q3902 134.0 67.0 134.0
Q3762 3.1 9.0 3.8 Q3903 1.8 5.4 2.4
Q3763 2.0 9.0 2.6 Q3904 1.8 9.0 2.4
Q3771 2.2 3.8 2.9 Q3905 5.7 GND 5.4
Q3772 3.2 9.0 3.8 Q3906 5.7 9.0 6.1
Q3773 2.0 9.0 2.6 Q3907 5.3 9.1 5.9
Q3908 4.9 0.0 5.3
All voltages are in V.
Page 42
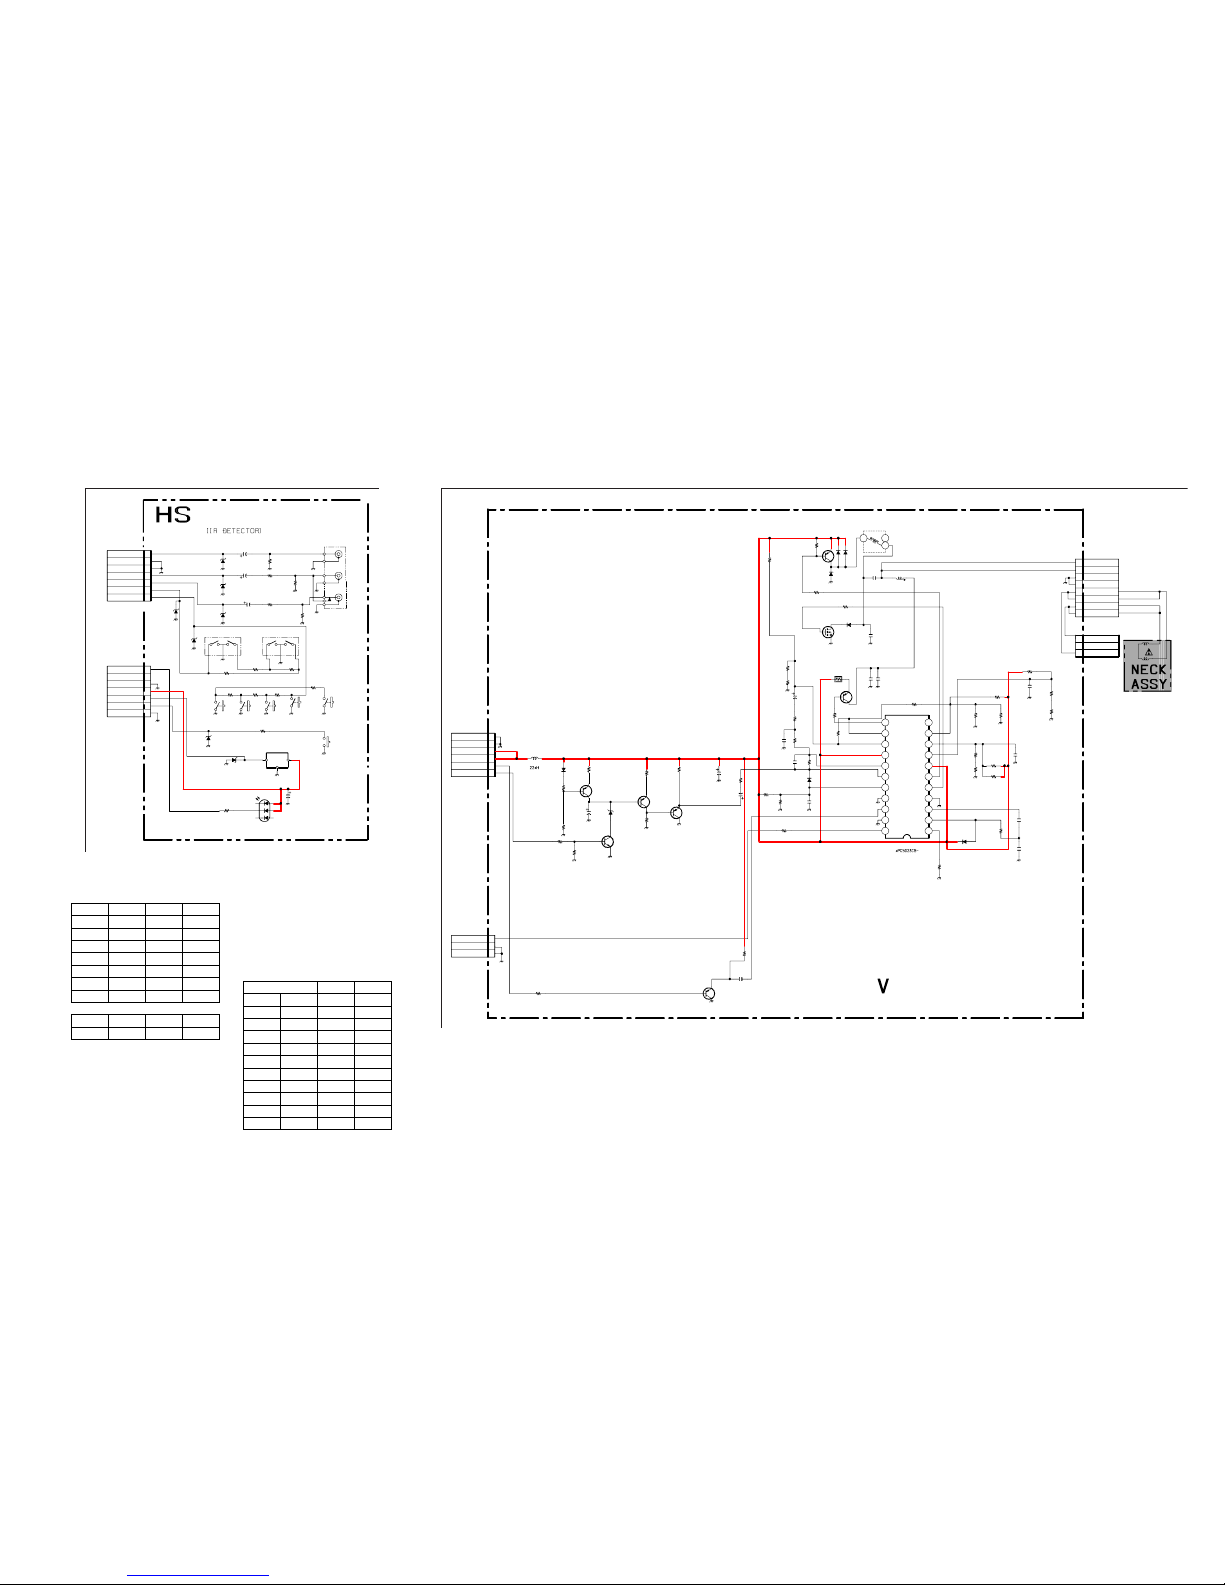
KV-27FA310/27FS120/29FA310/29FS120
42
KV-27FA310/27FS120/29FA310/29FS120
HS BOARD SCHEMATIC DIAGRAM
(ALL EXCEPT KV-27FA310/29FA310)
1 | 2 | 3 | 4 | 5
A
—
B
—
C
—
D
—
E
—
F
1
2
3
4
5
6
7
1
2
3
4
5
6
7
V
L
R
OUT VCC
GND
S1001
S1002
S1003
S1004
S1005
S1006
C1234
C1235
D1001
D1235
D1236
J1231
R1004
R1007
R1234
R1235 R1236
R1237
R1238
S1007
S1008
R1201
R1202R1203
R1008
R1009
R1010 R1011
C1001
D1233
C1238
D1003
D
1
0
0
4
D1005
IC1001
CN1004
CN1005
D1002
1
50V
1
50V
MTZJ-T-77
PROTECT
RD9.1EW-T1
RD9.1EW-T1
3P
1k
100
75
220
1/4W
100k
1/4W
220
1/4W
100k
1/4W
1.5k
2.2k6.8k
6.8k
2.2k 820
680
100mF
25V
RD9.1EW-T1
5mm
MTZJ-T-77-91B
M
T
Z
J
-
T
-
7
7
-
9
1
B
MTZJ-T-77-91B
SBX3081-71
SIRCS
7P
7P
LNK0120022G
GND01
VIDEO2
FRONT
TOP
TOP
M
UDS
LED-TMR
MPWR-LED
GND
5V-STBY
SIRCS
TO A BOARD
TO A BOARD
ONPOWER
VIDEO 2
GND
GND
AUDIO L2
AUDIO R2
MENU
KEY
CN002
VOL-
VOL +
CH-
CH + TV-V
GND
CN004
9-965-960-01<BA6S>HS
V BOARD SCHEMATIC DIAGRAM
1 | 2 | 3 | 4 | 5 | 6 | 7 | 8 | 9 | 10 | 11 | 12
A
—
B
—
C
—
D
—
E
—
F
—
G
—
H
—
V BOARD TRANSISTOR VOLTAGE LIST
BCE
Q2801 03.1GND
Q2802 0GND4.1
Q2803 6.6 0 7.2
Q2804 7.4 6.6 8.0
Q2805 3.5 1.8 4.2
Q2808 8.6 4.3 9.0
Q2812 1.3 GND 2.0
DGS
Q2807 9.5 6.3 GND
All voltages are in V.
S
1
2
3
4
5
6
1
2
3
4
5
6
7
8
1
2
3
4
5
6
7
8
9
1
0
1
1
1
2
1
3
1
4
1
5
1
6
1
7
1
8
1
9
2
0
2
1
2
2
1
3
4
1
2
3
1
2
3
C2801
C2802
C2803
C2804
C2805
C2810
C2811
C2813
C2823
C2862
D2801
D2802
D2804
D
2
8
0
5
D2806
D2807
D2808
D2813
L2801
L2802
L2803
R2876
R2826
R2818
R2819
R2815
R2820
R2821
R2827
C2809
R2828
R2829
R2824
R2809
R2825
C2808
R2830
R2817
R2811
R2805
Q2803
Q2802
R2803
Q2801
R2804
Q2804
R2808
R2807
R2800
R2802
R2801
R2866
C2826
R2870
R2893
R2864
C2824
R2834
R2833
R2837
C2812
R2841
R2842
C2821
R2856
R2860
R2857
CN2901
CN2903
CN2902
CN2904
Q2812
IC2801
Q2805
Q2808
Q2807
R2840
R2855
R2890
1
100V
10
50V
0.22
50V
0.22
50V
33000pF
400V
0.1
50V
0.082
400V
100
16V
0.0027
50V
10
50V
MTZJ-T-77-
5.6C
1SS133
RGP10GPKG2
3
1
S
S
1
3
3
T
-
7
7
1SS133T-77
ERA82-004T
P5
1SS133T-77
1SS133T-77
10mH
10mH
1k
1/10W
2.2k
1/4W
100 1/10W
47k
1/10W
68
1W
33k
8.2k
4.7k
1/10W
0.33
10V
B
33k
1/10W
470k
1/10W
100k
1/10W
22k
:CHIP
100k
1/10W
0.01
25V
B
7.5MM
68k
10
1/4W
4.7k
1/10W
2SB709A-QR
S-TX
2SB709A-QR
S-TX
22k
1/10W
2SD601A-QR
S-TX
10k
1/10W
2SB709A-QR
S-TX
10k
1/10W
3.3k
1/10W
22k
1/10W
10k
1/10W
47k
1/10W
56k
1/4W
100p
50V
CH
2.2k
1/10W
33k
1/10W
100
1/10W
0.047
16V
B
3.3k
5.6k
1/10W
10k
0.01
25V
B
3.9k
2.2k
1/10W
0.01
25V
B
10k
10k 1/10W
15k
4P
3P
8P
3P
2SA933AS
HP
CORRECTION
KTB764
QPVM
KTB764
OP OUT
IRF614
QP OUT
2.7k
3.9k
33k
Q.P.-
Q.P.+
Q.P.-
Q.P.+
N.C
DQPAA
DFPHA
DQPPHA
VCC2
9VD
DQPD
GND
HSAWIN
HSAW
ISEL
DQPVM
DQPVMA
DQPPOA
VCC1
OP60
OP6M
OP6P
GND
HPIN
GND
DFD
TO A BOARD
9V
9V
HP
VD+
DF-DRV
VM
N.C.
GND
GND
GND
VM
VM
GND
GND
GND
GND
CN1801
VELOCITY MODULATION
9-965-960-01<BA6S>V
TO D/GD BOARD
CN503
TO CW BOARD
CN2904
V BOARD IC VOLTAGE LIST
11 N/C
PIN VOLT 12 3..5
1 7.4 13 3.8
2 2.3 14 4.5
3 4.8 15 9.0
4 GND 16 4.6
5 6.3 17 4.6
6 4.5 18 4.5
79.019GND
8 5.8 20 4.8
94.621GND
10 4.8 22 0.3
All voltages are in V.
IC2801
Page 43
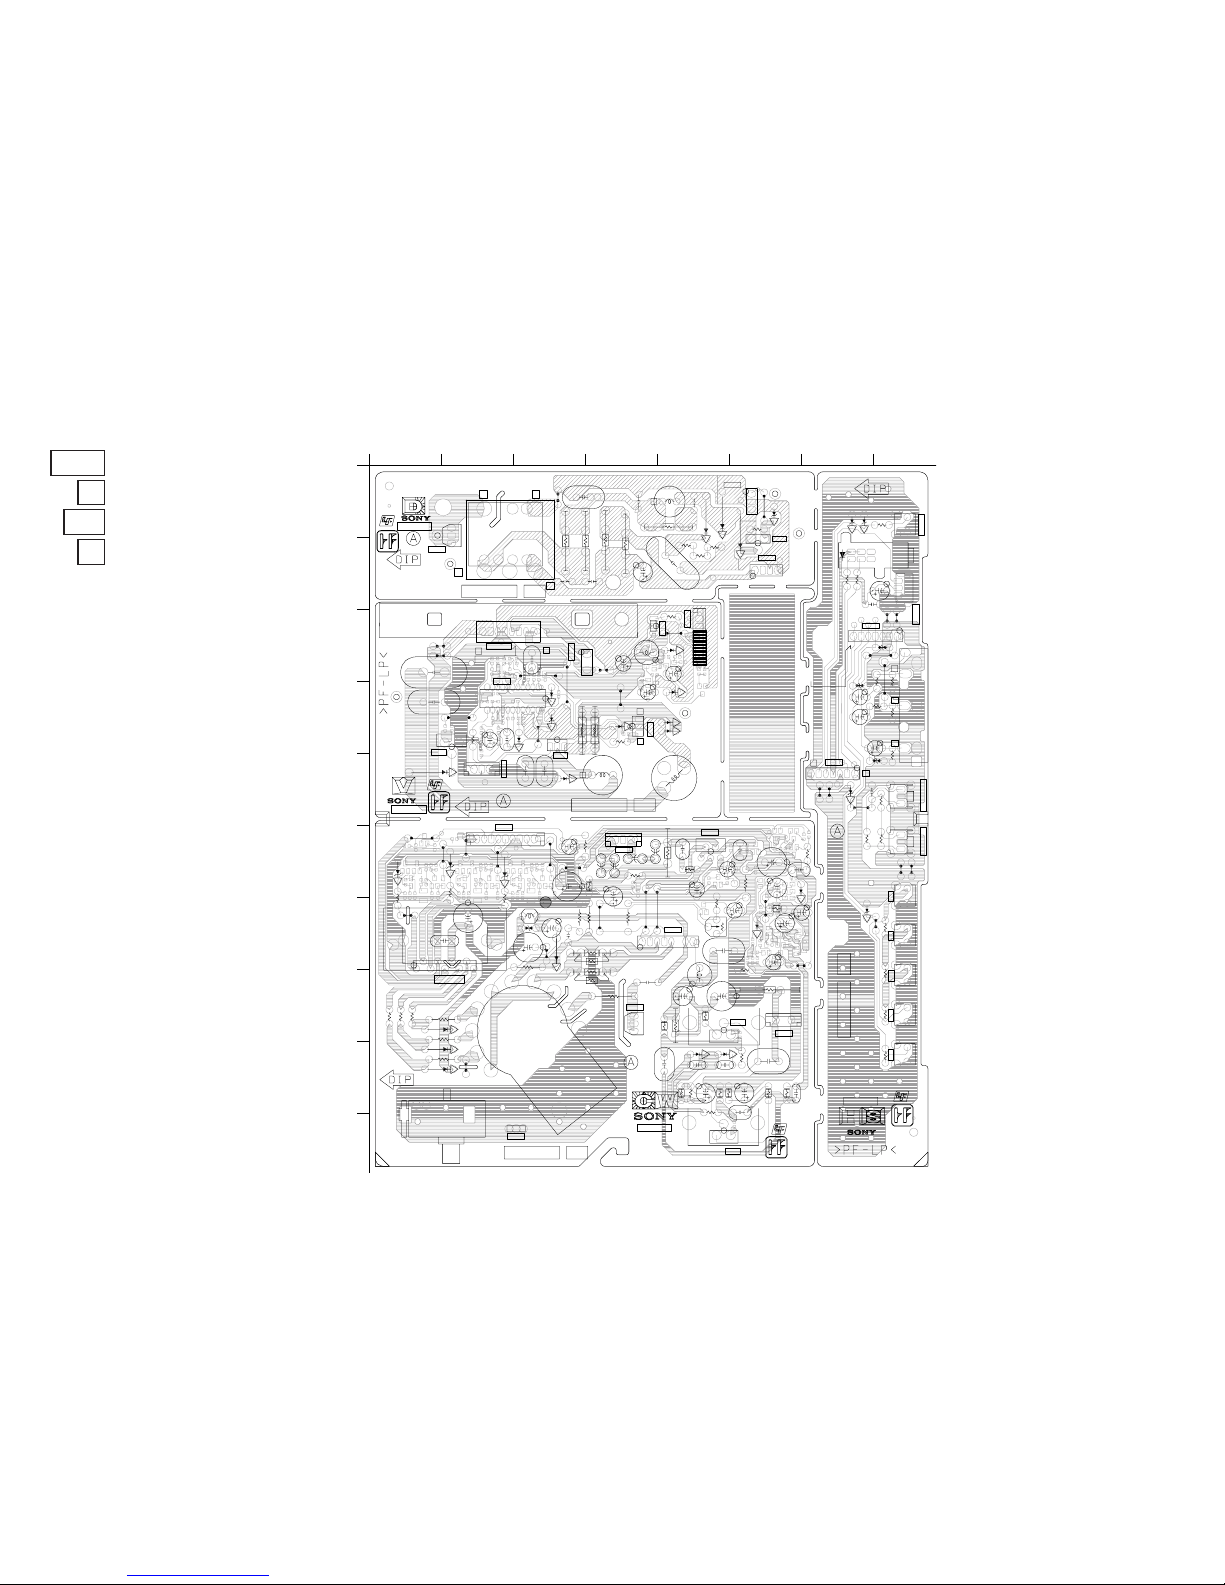
KV-27FA310/27FS120/29FA310/29FS120
43
KV-27FA310/27FS120/29FA310/29FS120
COMPONENT SIDE
T
1
8
0
1
I
C
1
0
0
1
R
3
9
0
2
R
3
9
0
3
R
3
9
0
4
R
3
9
0
5
R
3
9
0
6
R
3
9
0
7
R
3
9
0
8
R
3
9
0
9
R
3
9
1
0
R
3
9
3
1
R
3
9
3
5
R
3
9
2
2
R
3
9
2
3
C
3
9
0
2
C
3
9
0
3
C
3
9
0
4
C
3
9
0
6
C
3
9
1
0
C
3
9
0
7
C
3
9
0
8
C
3
9
0
5
C
3
9
1
2
C
3
9
1
3
C
3
9
3
0
C
3
9
3
1
C
3
9
1
4
D
3
9
0
1
D
3
9
0
2
D
3
9
0
3
D
3
9
0
5
R
3
7
0
7
R
3
7
0
4
F
B
3
7
0
0
F
B
3
7
0
1
F
B
3
7
0
2
F
B
3
7
0
3
R
3
7
0
0
J
W
3
7
0
1
J
W
3
7
0
7
J
W
3
7
0
3
C
3
7
0
2
C
3
7
0
8
R
2
7
6
0
R
2
7
6
1
R
2
7
6
2
R
2
7
6
3
R
2
7
6
4
R
2
7
6
5
R
2
7
5
6
R
2
7
5
7
R
2
7
5
8
D
2
7
5
4
D
2
7
5
5
D
2
7
5
6
C
2
7
5
3
C
2
7
5
0
C
2
7
5
1
C
2
7
5
4
C
2
7
5
5
J
W
3
7
0
0
J
W
3
7
0
2
J
W
3
7
0
6
J
W
2
7
0
4
J
W
2
7
0
8
R
2
7
6
6
D
2
7
5
9
D
2
7
6
1
R
3
7
1
9
J
W
3
7
1
0
J
W
3
7
1
1
R
2
7
5
9
R
2
7
8
4
J
W
2
7
0
1
R
3
7
0
6
D
2
7
5
8
R
2
7
7
0
C
2
7
5
2
C
2
7
7
4
C
2
7
7
5
C
2
7
7
7
R
V
2
7
0
1
R
2
7
8
8
C
3
9
3
2
C
3
9
0
1
C
3
7
0
1
C
3
7
0
3
C
3
9
1
1
J
W
3
9
1
2
J
W
3
9
1
3
R
3
9
3
6
R
V
2
7
5
0
R
3
9
0
1
R
2
7
8
9
I
C
3
7
0
1
C
N
2
7
0
7
C
N
2
7
5
3
C
N
2
7
5
5
D
2
7
0
1
L
2
7
5
1
R
2
7
6
7
C
N
2
7
5
2
D
2
8
0
5
D
2
8
0
6
C
L
P
8
0
1
D
2
8
0
1
C
2
8
0
2
J
W
2
8
0
6
D
2
8
0
7
R
2
8
2
6
C
2
8
0
1
D
2
8
0
2
C
2
8
1
3
J
W
2
8
5
5
J
W
2
8
0
5
R
2
8
1
5
R
2
8
1
4
D
2
8
1
3
R
2
8
6
6
J
W
2
8
0
7
C
2
8
2
3
R
2
8
3
0
D
2
8
0
8
C
2
8
1
0
C
2
8
6
2
J
W
2
8
0
1
R
2
8
1
1
D
2
8
0
3
C
2
8
0
3
C
2
8
0
4
D
2
8
0
4
C
2
8
0
5
C
L
P
8
0
2
J
W
2
8
0
2
J
W
2
8
0
3
C
2
8
1
1
I
C
2
8
0
1
Q
2
8
0
7
Q
2
8
0
5
Q
2
8
0
8
Q
2
8
1
2
C
N
2
9
0
1
C
L
P
8
1
0
C
1
8
1
8
C
1
8
1
9
C
1
8
2
0
R
1
8
4
8
C
1
8
3
0
C
1
8
1
7
L
1
8
0
5
C
1
8
1
6
R
1
8
4
5
R
1
8
4
6
R
1
8
4
7
D
1
8
1
2
D
1
8
1
1
D
1
8
1
0
C
L
P
8
1
2
D
1
8
0
9
C
L
P
8
1
1
R
1
8
4
3
R
1
8
4
4
Q
1
8
1
0
C
N
1
8
0
2
D
1
0
0
1
D
1
0
0
3
R
1
0
0
7
S
1
0
0
6
R
1
0
0
1
R
1
0
0
4
C
1
0
0
1
C
1
0
0
2
J
W
1
0
0
8
J
W
1
0
0
7
D
1
2
3
5
J
W
1
2
0
2
R
1
2
3
7
R
1
2
3
8
D
1
2
3
6
C
1
2
3
5
C
1
2
3
4
R
1
2
3
5
R
1
2
3
6
J
W
1
2
0
1
C
1
2
3
8
D
1
2
3
3
R
1
2
3
4
R
1
2
0
1
J
W
1
0
0
6
J
W
1
0
0
5
D
1
0
0
5
C
1
0
0
3
S
1
0
0
7
J
W
1
0
0
2
R
1
2
0
3
R
1
2
0
2
S
1
0
0
8
J
W
1
0
0
3
J
W
1
0
0
4
S
1
0
0
1
D
1
0
0
4
J
W
1
0
0
1
R
1
0
0
9
S
1
0
0
2
S
1
0
0
3
R
1
0
1
0
R
1
0
1
1
S
1
0
0
4
R
1
0
0
8
S
1
0
0
5
D
1
0
0
2
R
2
7
6
8
C
N
2
9
0
2
R
1
8
5
3
J
1
2
3
1
I
C
2
7
5
1
R
1
8
4
9
R
1
8
5
0
R
1
8
5
1
R
1
8
5
2
C
N
1
0
0
5
C
N
1
0
0
4
D
2
7
6
0
C
1
8
1
5
L
2
8
0
2
L
2
8
0
1
J
W
3
7
9
1
Q
3
9
0
2
Q
3
9
0
1
J
2
7
51
L
2
8
0
3
J
W
2
8
1
0
C
N
1
8
0
0
C
N
2
7
5
1
R
2
7
8
5
C
3
9
0
9
L
3
9
0
1
C
2
7
7
8
D
2
8
0
9
C
N
2
9
0
3
C
N
2
9
0
4
C
N
3
9
0
3
C
N
1
8
0
1
E
B
1
6
1
1
2
1
1
2
2
G
S
E
B
B
E
B
E
1
2
8
9
1
3
1
3
9
8
1
2
1
1
4
5
6
7
1
0
G
2
K
B
K
G
H
1
K
R
G
1
G
1
G
1
H
2
S
P
A
R
K
G
R
O
U
N
D
G
A
P
1
9
E
N
C
V
M
9
V
I
K
N
/
S
B
G
E
E
R
V
M
N
C
E
V
D
+
H
E
A
T
E
R
N
C
2
0
0
V
B
+
N
/
S
-
N
/
S
+
4
5
2
1
+
1
5
V
-
1
5
V
E
B
B
E
O
V
C
C
V
O
L
-
V
O
L
+
C
H
-
C
H
+
T
V
-
V
V
L
R
>
P
F
-
L
P
<
>
P
F
-
L
P
<
B
A
6
-
S
0
4
B
A
6
-
S
0
4
B
A
6
-
S
0
4
B
A
6
-
S
0
4
J
L
7
0
0
1
7
1
7
G
N
D
P
O
W
E
R
O
N
S
I
R
C
S
5
V
-
S
T
B
Y
G
N
D
M
P
W
R
-
L
E
D
L
E
D
-
T
M
R
G
N
D
8
1
D
F
-
D
R
V
G
N
D
G
N
D
1
3
5
V
N
C
G
N
D
G
N
D
D
F
1
4
5
6
2
3
3
1
4
6
G
N
D
G
N
D
G
N
D
G
N
D
Q
P
-
Q
P
-
Q
P
+
Q
P
+
V
M
V
M
G
N
D
G
N
D
G
N
D
A
U
D
I
O
L
2
A
U
D
I
O
R
2
M
E
N
U
K
E
Y
G
N
D
V
I
D
2
1
4
1
8
1
-
8
6
2
-
1
9
0
-
1
1
1
7
2
4
2
1
4
1
1
A
-
1
4
1
0
-
9
2
5
-
A
D
F
-
D
R
V
1
7
2
4
2
1
4
1
1
1
-
8
6
2
-
1
8
9
-
1
1
A
-
1
4
1
0
-
9
2
4
-
A
1
-
8
6
2
-
3
4
3
-
1
1
1
7
2
4
2
1
4
1
1
A
-
1
4
1
5
-
6
3
5
-
A
1
-
8
6
2
-
3
4
4
-
1
1
1
7
2
4
2
1
4
1
1
P
O
W
E
R
V
D
+
H
P
9
V
9
V
V
M
N
C
G
N
D
M
E
N
U
/
S
E
L
U
P
/
D
O
W
N
1
3
1
3
1
3
1
3
A
-
1
4
1
5
-
6
7
4
A
1
A
B
C
D
E
F
G
H
I
J
2345678
[RGB DRIVE, CRT DRIVE, VELOCITY MODULATION]
CW
[VELOCITY MODULATION]
V
[IR DETECTOR, FRONT VIDEO2] (ALL EXCEPT KV-27FA310/29FA310)
HS
[DEFLECTION] (ALL EXCEPT KV-27FA310/29FA310)
D
Page 44
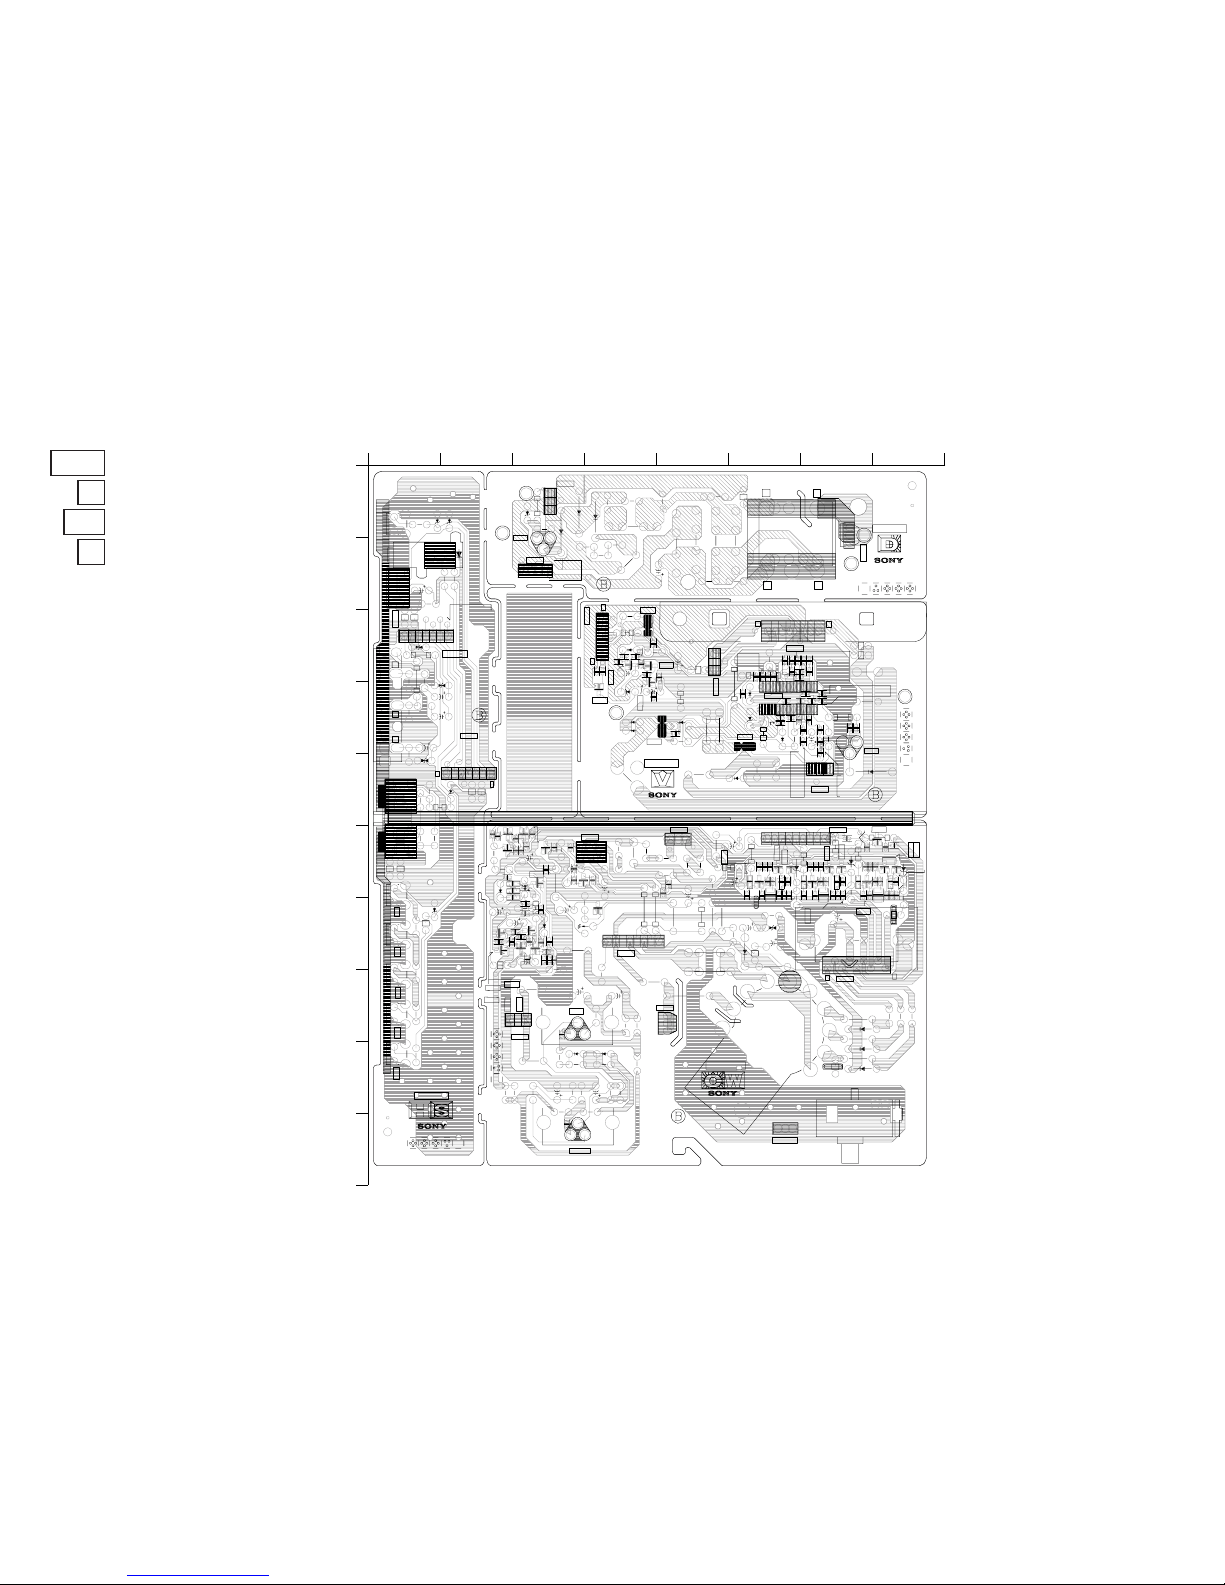
KV-27FA310/27FS120/29FA310/29FS120
44
KV-27FA310/27FS120/29FA310/29FS120
[RGB DRIVE, CRT DRIVE, VELOCITY MODULATION]
CW
[VELOCITY MODULATION]
V
[IR DETECTOR, FRONT VIDEO2] (ALL EXCEPT KV-27FA310/29FA310)
HS
[DEFLECTION] (ALL EXCEPT KV-27FA310/29FA310)
D
L
2
8
0
1
R
3
7
1
9
R
2
8
1
5
C
2
8
2
3
C
2
8
0
5
L
2
8
0
2
D
1
0
0
2
J
2
7
5
1
R
1
8
4
3
D
1
8
0
9
D
1
8
1
0
D
1
8
1
1
R
1
8
4
8
C
1
8
1
6
D
1
8
1
2
C
1
8
3
0
L
1
8
0
5
C
1
8
1
8
C
1
8
1
9
C
1
8
2
0
R
1
8
4
7
R
1
8
4
6
R
1
8
4
5
Q
1
8
1
0
C
N
1
8
0
2
T
1
8
0
1
R
1
8
5
2
R
1
8
5
1
R
1
8
5
0
R
1
8
4
9
C
1
8
1
5
C
1
8
1
7
C
N
1
0
0
5
C
N
1
0
0
4
R
1
2
0
2
R
1
2
0
3
S
1
0
0
7
R
1
2
0
1
C
1
0
0
3
D
1
0
0
5
C
1
2
3
8
R
1
2
3
4
D
1
2
3
3
D
1
2
3
6
C
1
2
3
5
C
1
2
3
4
R
1
2
3
5
R
1
2
3
6
D
1
2
3
5
R
1
2
3
8
R
1
2
3
7
I
C
1
0
0
1
C
1
0
0
2
C
1
0
0
1
R
1
0
0
4
R
1
0
0
1
S
1
0
0
6
R
1
0
0
7
D
1
0
0
3
D
1
0
0
1
J
1
2
3
1
S
1
0
0
8
S
1
0
0
1
D
1
0
0
4
R
1
0
0
9
S
1
0
0
2
S
1
0
0
3
R
1
0
1
0
S
1
0
0
4
R
1
0
1
1
S
1
0
0
5
R
1
0
0
8
R
3
9
3
1
C
3
9
0
1
R
3
9
0
3
R
3
9
0
1
C
3
9
0
3
R
3
9
0
4
C
3
9
0
2
R
3
9
3
0
R
3
9
0
2
R3922
C3932
C
3
9
0
5
D
3
9
0
1
D
3
9
0
2
R
3
9
0
6
R
3
9
0
5
J
R
3
9
1
0
R
3
9
1
8
R
3
9
1
9
R
3
9
3
6
R
3
9
1
4
C
3
9
1
1
R
3
9
1
2
R
3
9
2
4
Q
3
9
0
5
Q
3
9
0
3
R
3
9
0
8
C
3
9
0
8
R
3
9
0
9
R
3
9
0
7
C
3
9
0
7
R
3
9
3
8
C
3
9
1
0
J
R
3
9
1
1
R
3
9
1
0
Q
3
9
0
2
Q
3
9
0
8
R
2
7
8
8
Q
2
7
7
2
C
3
9
3
0
R
3
9
1
7
R
3
9
1
5
C
3
9
1
3
R
3
9
3
4
R
V
2
7
0
1
R
3
9
1
1
R
3
9
1
3
R
3
9
1
6
D
3
9
0
3
C
3
9
2
0
C
3
7
0
2
R
3
7
0
7
R
3
7
0
3
D
3
9
0
7
D
3
9
0
8
D
3
9
0
6
R
3
9
3
2
C
3
9
1
4
Q
3
7
1
2
C
3
9
1
2
C
3
9
3
1
R
2
7
8
9
C
3
7
0
3
J
R
3
7
1
0
Q
3
7
1
1
R
3
9
2
3
R
3
7
1
3
R
3
7
1
2
R
3
7
1
4
R
3
7
1
1
R
3
7
1
0
C
3
7
0
8
R
3
7
0
2
R
3
7
0
1
R
3
7
2
0
C
3
9
1
5
Q
3
9
0
4
I
C
3
7
0
1
C
3
7
0
1
Q
3
7
0
0
D
3
9
0
5
R
3
9
3
3
R
3
9
3
5
R
3
7
2
1
R
3
7
6
0
R
3
7
6
4
R
3
7
6
8
R
3
7
6
7
R
3
7
6
6
L
3
7
1
0
R
3
7
6
9
R
3
7
9
5
D
3
7
6
2
C
3
7
8
2
R
3
7
6
5
R
3
7
9
2
R
2
7
6
7
D
3
7
6
3
D
3
7
7
3
R
3
7
7
1
C
3
7
8
1
D
3
7
7
2
C
2
7
5
1
R
3
7
9
6
C
2
7
5
5
C
2
7
5
4
R
3
7
8
0
R
3
7
8
4
L
3
7
1
2
R
3
7
8
6
R
3
7
8
7
R
3
7
8
8
R
3
7
6
2
R
3
7
9
1
R
3
7
6
3
R
3
7
9
3
R
3
7
7
5
R
3
7
7
3
R
3
7
7
2
D
2
7
6
1
R
3
7
8
5
R
3
7
8
3
R
3
7
8
2
R
3
7
9
4
D
2
7
5
9
R
3
7
0
6
C
2
7
7
5
R
3
7
7
9
C
3
7
8
0
D
3
7
8
2
R
3
7
9
7
C
2
7
7
4
L
2
7
5
1
D
3
7
8
3
R
2
7
6
6
Q
3
7
6
1
Q
3
7
6
2
Q
3
7
9
1
Q
3
7
7
3
Q
3
7
7
2
Q
3
7
8
3
Q
3
7
8
2
Q
3
7
7
1
Q
3
7
8
1
D
2
7
6
0
C
2
7
5
3
R
2
7
7
0
C
2
7
5
0
L
3
7
1
1
R
3
7
7
4
R
3
7
7
6
R
3
7
7
7
R
3
7
7
8
R
3
7
7
0
D
2
7
0
1
D
2
7
5
8
C
2
7
5
2
R
2
7
6
8
R
2
7
6
5
R
2
7
6
4
R
2
7
6
3
R
2
7
5
8
D
2
7
5
6
R
2
7
5
7
D
2
7
5
5
R
2
7
5
6
D
2
7
5
4
C
N
2
7
5
3
R
2
7
6
1
I
C
2
7
5
1
R
2
7
6
0
C
N
2
7
5
5
R
V
2
7
5
0
C
N
2
7
5
2
R
3
7
0
0
F
B
3
7
0
1
F
B
3
7
0
0
C
N
2
7
0
7
Q
3
7
0
1
Q
3
7
1
0
R
3
9
2
0
Q
3
9
0
7
Q
3
9
0
6
R
3
9
2
1
C
3
9
0
6
C
3
9
0
4
F
B
3
7
0
3
R
3
7
0
4
R
3
7
0
5
C
3
7
0
0
C
2
7
7
7
R
2
7
8
4
D
2
8
0
1
D
2
8
0
6
D
2
8
0
5
Q
2
8
0
1
R
2
8
0
2
R
2
8
0
1
D
2
8
0
2
R
2
8
6
6
R
2
8
7
0
R
2
8
0
8
C
2
8
1
3
R
2
8
0
5
C
2
8
0
2
R
2
8
0
9
D
2
8
0
7
R
2
8
7
6
R
2
8
1
4
R
2
8
2
6
Q
2
8
0
8
Q
2
8
0
2
Q
2
8
1
2
R
2
8
0
7
R
2
8
0
0
C
2
8
0
1
Q
2
8
0
4
C
2
8
2
6
D
2
8
1
3
I
C
2
8
0
1
R
2
8
2
4
R
2
8
2
2
R
2
8
5
7
R
2
8
4
1
R
2
8
4
0
R
2
8
4
2
R2833
R
2
8
9
0
R
2
8
3
7
R
2
8
6
0
R
2
8
5
5
R
2
8
5
6
C
2
8
2
1
C
2
8
1
2
R
2
8
3
4
C
2
8
1
1
R
2
8
1
8
C
2
8
0
6
R
2
8
1
1
R
2
8
2
0
R
2
8
2
1
R
2
8
1
7
R
2
8
1
9
R
2
8
2
8
R
2
8
2
7
C
2
8
0
4
C
2
8
1
0
C
2
8
0
9
D
2
8
0
3
C
2
8
0
3
D
2
8
0
4
Q
2
8
0
7
Q
2
8
0
5
R
2
8
9
2
R
2
8
9
3
C
2
8
2
4
R
2
8
6
4
C
N
2
9
0
2
C
2
8
0
8
R
2
8
2
5
R
2
8
0
4
Q
2
8
0
3
C
N
2
9
0
1
D
2
8
0
8
Q
3
9
0
1
F
B
3
7
0
2
L
2
8
0
3
C
N
1
8
0
0
C
N
2
7
5
1
C
3
9
0
9
L
3
9
0
1
C
2
7
7
8
D
2
8
0
9
R
2
7
6
2
R
2
7
5
9
R
2
7
8
5
Q
3
7
6
3
C
2
8
6
2
C
N
2
9
0
3
C
N
2
9
0
4
C
N
3
9
0
3
C
N
1
8
0
1
1
1
2
1
1
2
2
G
S
B
E
E
B
E
B
8
1
E
V
M
E
E
9
V
9
V
H
P
V
D
+
N
.
C
.
E
B
B
E
B
E
1
3
1
9
E
N
/
S
+
N
/
S
-
1
2
4
5
R
V
L
V
O
L
-
V
O
L
+
C
H
-
C
H
+
T
V
V
B
A
6
-
S
0
4
B
A
6
-
S
0
4
B
A
6
-
S
0
4
1
7
1
7
G
N
D
P
O
W
E
R
O
N
S
I
R
C
S
5
V
S
T
B
Y
G
N
D
M
P
W
R
L
E
D
L
E
D
T
M
R
O
U
T
V
C
C
G
N
D
K
E
Y
M
E
N
U
A
U
D
I
O
R
2
A
U
D
I
O
L
2
G
N
D
G
N
D
V
I
D
E
O
2
G
R
O
U
N
D
G
A
P
S
P
A
R
K
N
C
V
M
H
E
A
T
E
R
N
C
2
0
0
V
B
+
9
V
I
K
N
/
S
B
G
E
E
R
V
M
J
L
7
0
0
8
7
T
P
7
0
1
V
D
+
E
+
1
5
1
5
1
2
1
1
1
0
5
4
G
1
G
1
K
R
K
B
G
2
K
G
9
6
G
1
H
2
H
1
H
E
A
T
E
R
1
3
E
9
1
6
1
R
8
0
3
EEV
M
V
M
Q
.
P
.
-
Q
.
P
.
-
Q
.
P
.
+
Q
.
P
.
+
R
8
2
9
B
A
6
-
S
0
4
1
2
3
4
5
6
3
1
6
4
1
4
1
8
1
7
2
4
2
1
4
1
1
1
-
8
6
2
-
1
9
0
-
1
1
1
7
2
4
2
1
4
1
1
1
-
8
6
2
-
1
8
9
-
1
1
1
-
8
6
2
-
3
4
3
-
1
1
1
7
2
4
2
1
4
1
1
1
7
2
4
2
1
4
1
1
1
-
8
6
2
-
3
4
4
-
1
1
G
N
D
G
N
D
D
F
D
R
V
G
N
D
G
N
D
D
F
-
D
R
V
135V
GND
GND
NC
U
P
/
D
O
W
N
M
E
N
U
/
S
E
L
1
3
1
3
1
3
1
3
1
A
B
C
D
E
F
G
H
I
J
2345678
CONDUCTOR SIDE
Page 45
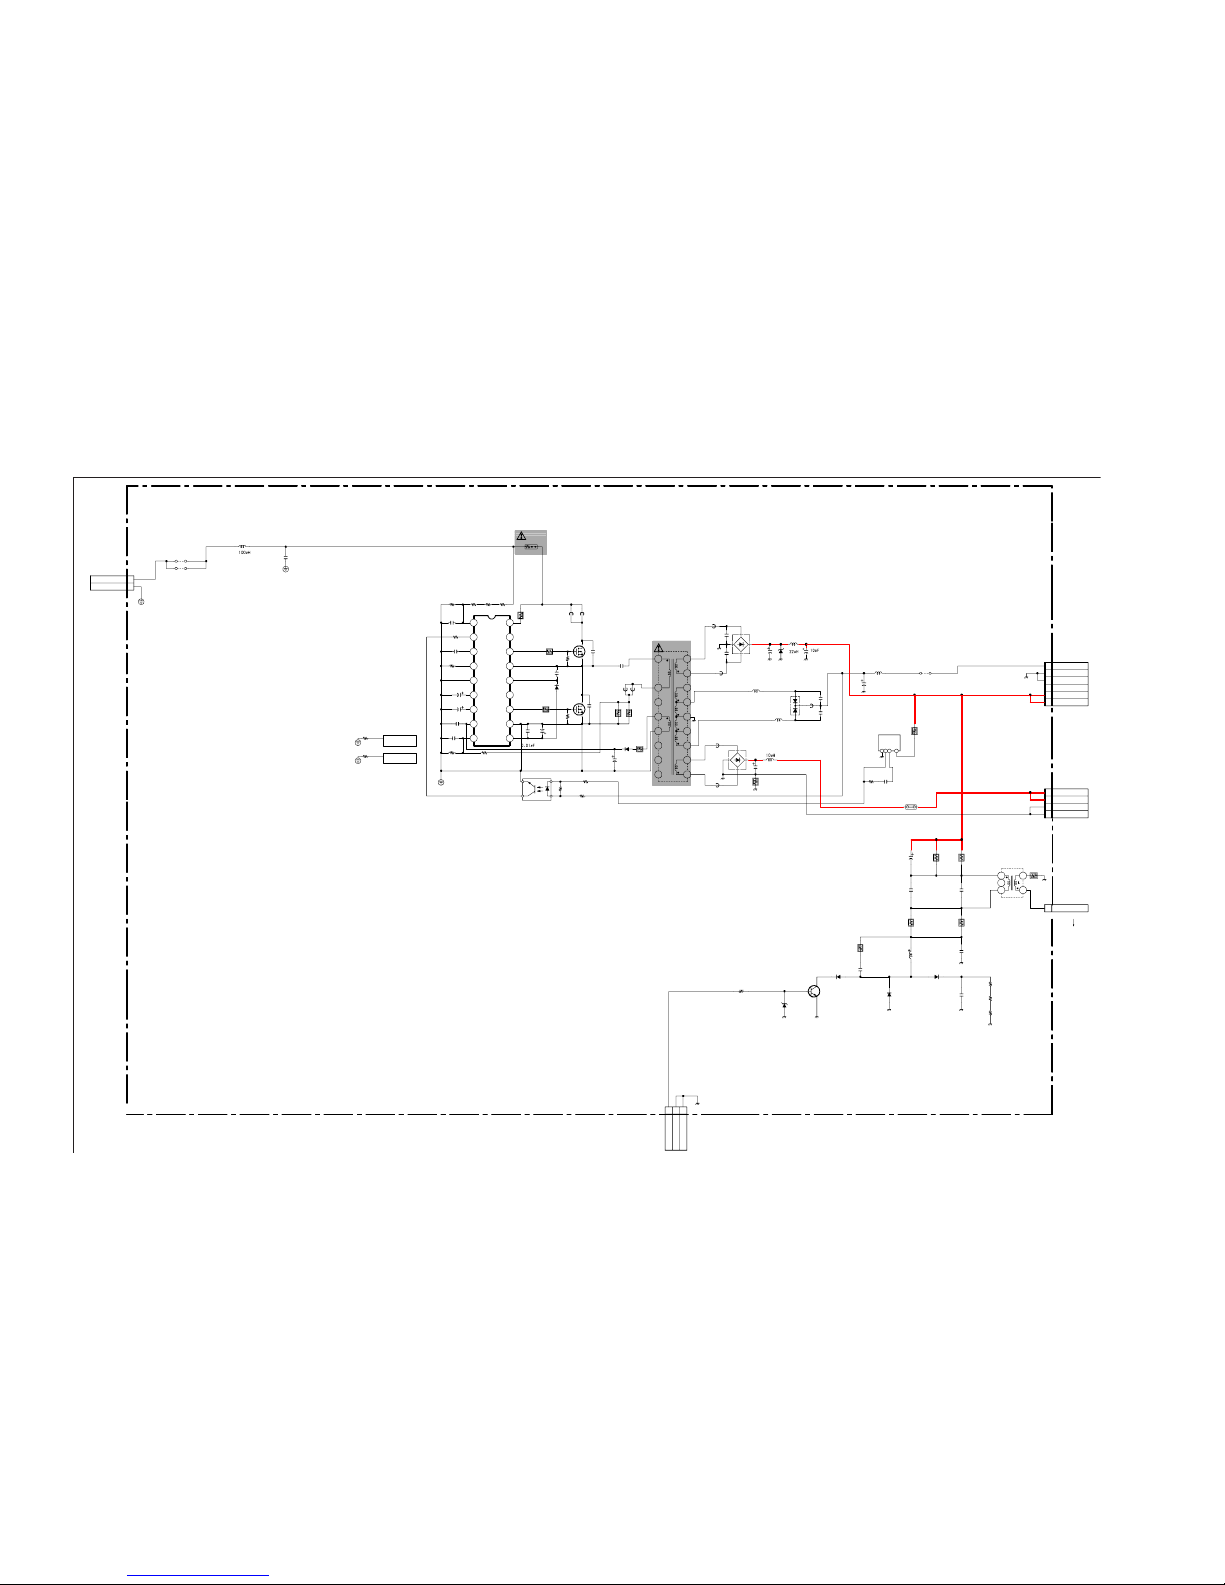
KV-27FA310/27FS120/29FA310/29FS120
45
KV-27FA310/27FS120/29FA310/29FS120
GD BOARD SCHEMATIC DIAGRAM (KV-27FA310/29FA310 ONLY)
1 | 2 | 3 | 4 | 5 | 6 | 7 | 8 | 9 | 10 | 11 | 12 | 13 | 14 |
A
—
B
—
C
—
D
—
E
—
F
—
G
—
H
—
I
—
1
2
3
4
5
6
7
8
9
1
0
1
1
1
2
1
3
1
4
1
5
1
6
1
7
1
8
1
2
-2
1
1
2
3
4
5
6
1
4
6
7
8
9
10
11
12
13
14
15
16
17
18
5
3
124
3
S
S
145 3
1
2
3
4
1
2
3 4
6
1
2
3
PS1401
R1852
R1851
C1820
C1819
C1818
R1849
R1850
C1817
R1848
C1816
C1815
L1805
D1812
R1847
R1846
R1845
D1811
D1810
D1809
T1801
CN1801
R1627
R1615
C1642
R1619
D1615
R1620
L1604
FB1602
C1609
C1604
FB1604
D1611
C1617
D1614
L1608
C1624
FB1609
C1670
C1669
C1616
R1629
R1630
C1633
C1634
C1635
C1637
R1650
R1651
PH1602
R1640
FB1616
FB1617
R1658
R1659
C1643
D1618
C1647
C1648
C1649
R1671
R1672
L1606
FB1606
FB1607
L1600
C1680
CN1601
R1626
C1620
R1625
R1631
C1645
R1632
R1647
C1602
R1660
R1670
R1617
R1616
R1618
R1667
C1652
JW1600
JW1601
JW1609
D1621
L1605
C1650
C1672
CN1402
CN1802
FB1618
FB1619
L1609
R1844
R1853
IC1601
IC1600
Q1600
Q1601
Q1810
CN1600
T1604
D1631
R1668
6.8k
6.8k
0.47
160V
220pF
1000pF
10k
10k
0.0039
630V
2.2k
2W
220p
500V
B
0.022
630V
10mH
1N4937/23
100k
1/4W
100k
1/4W
100k
1/4W
ERA38-06TP
1
ERA38-06TP
1
MTZJ-T-77-
15B
3P
5MM
0.1
1/2W
0.47
1/4W
D4SBL20UF3
10
1W
1.1UH
680p
500V
680p
500V
1.1UH
D4SBL20UF3
33
160V
EZ0150AV1
1.1UH
680p
500V
680p
500V
470k
470k
0.001
50V
10 50V
4.7 50V
0.1 50V
100k
100k
ON3171-R
1k
1/4W
1.1UH
1.1UH
10
1/4W
10
1/4W
0.1
50V
UF4005PKG2
3
47
25V
1000p
1000p
0.1
2W
0.1
2W
220
50V
2200
25V
5MM
5MM
2.2m
6P
8.2k
0.01
470
15k
0.001
100
91
10k
10k
1k
1.2k
5MM
10k
0.047
12.5MM
12.5MM
12.5MM
MA6D50
5mm
5mm
1000
47000p
4P
1P
5MM
5MM
5mm
10.0MM
5.0MM
DM-58
ERROR AMP
MCZ3001DB
SW REG CON
IRFIB7N50A
SW REG OUT
IRFIB7N50A
SW REG OUT
2SC3840K
DF-DRV
2P
PIT
1E3-TB
1.2k
1/4W
VSENSE
F/B
CT
RT
GND
TIMER
SS
VCI
OCP
VD
NC
CC
VS
VB
VG
P-GND
VC2
NC
PIN5
GND
+B
NC
GND
Q600
TO H/S
TO H/S Q601
AUDIO Vcc
AUDIO Vcc
AUDIO GND
AUDIO GND
LOW B
DF
TO A BOARD
(FOR DF)
D
F
-
D
R
V
G
N
D
G
N
D
TO:V BOARD
GD BOARD
TO-CN602
A-BOARD
+B
A-BOARD
AC/DC+
AC/DC-
TO-CN404
CN505
POWER SUPPLY
DEFLECTION
TO-CN601-A BOARD
9-965-960-01<BA6S>GD
CN2903
Page 46
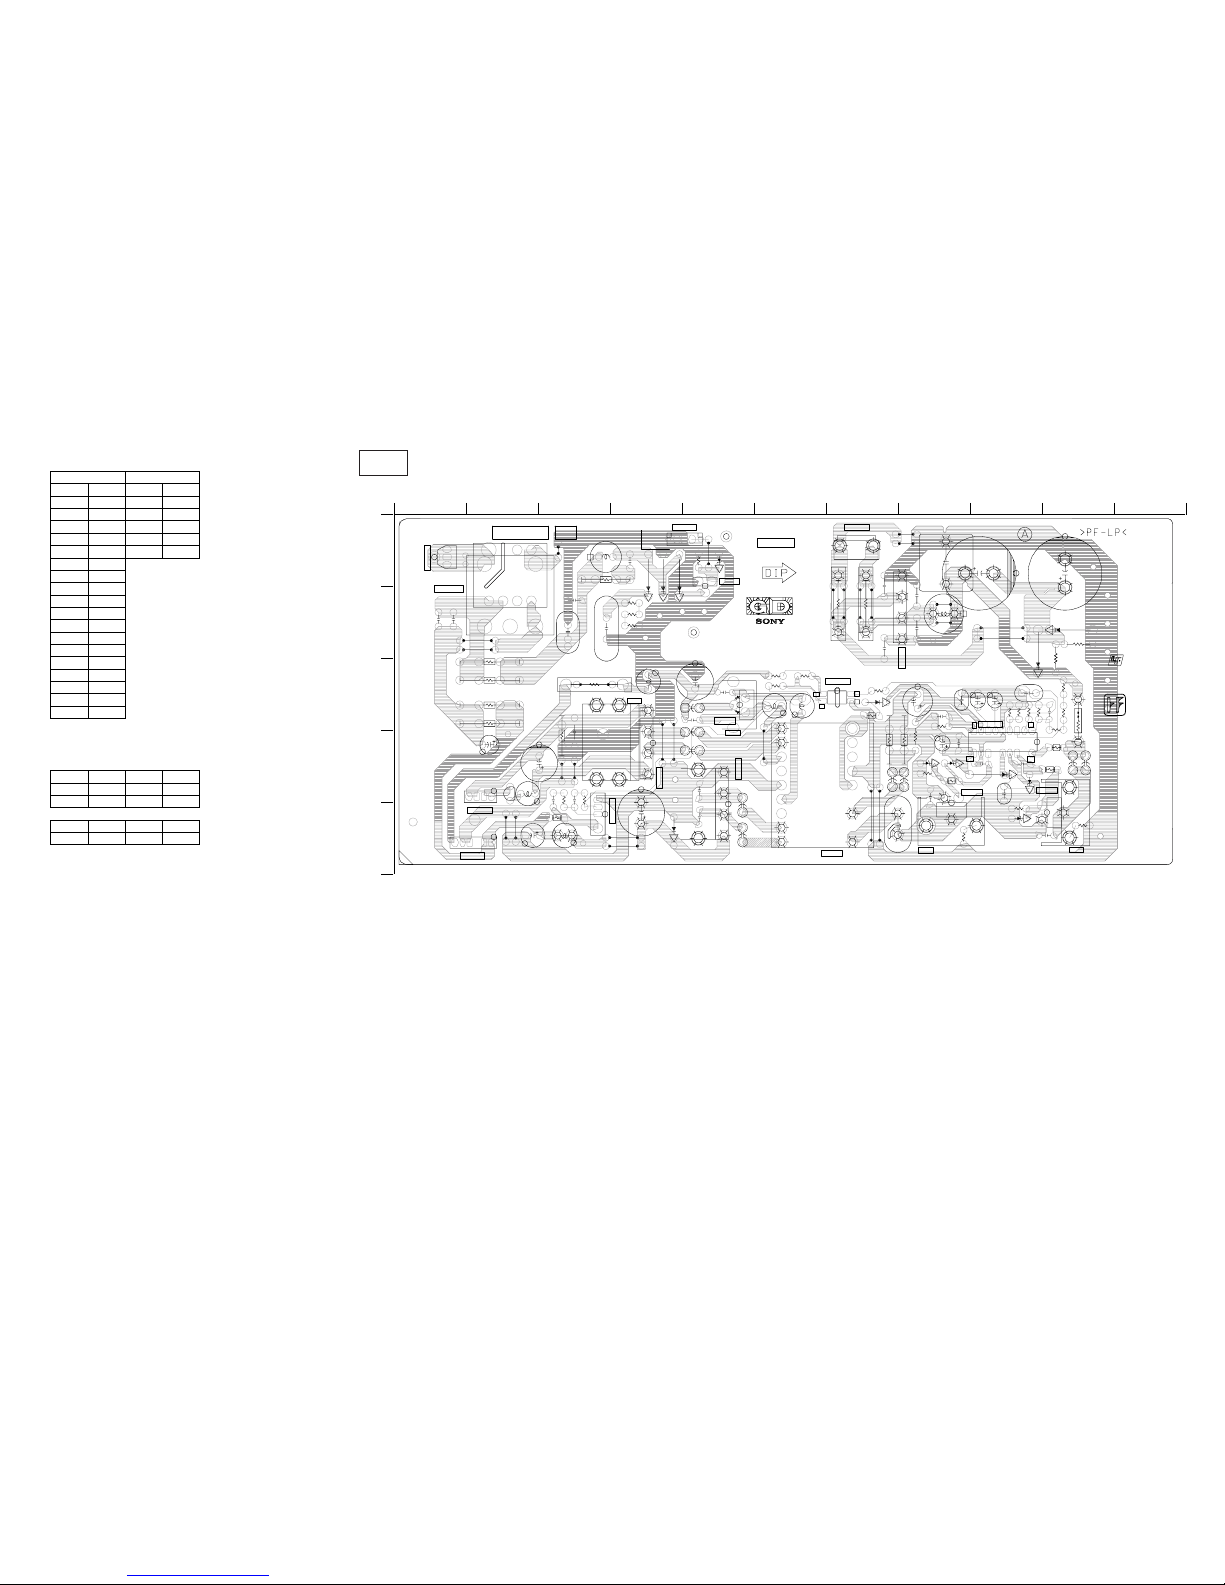
KV-27FA310/27FS120/29FA310/29FS120
46
KV-27FA310/27FS120/29FA310/29FS120
E
Y
3
E
Y
4
E
Y
6
3
E
Y
6
4
E
Y
6
7
E
Y
7
0
E
Y
7
9
E
Y
8
0
E
Y
8
1
E
Y
8
2
E
Y
8
3
E
Y
8
4
E
Y
8
5
E
Y
8
6
E
Y
8
7
E
Y
8
9
E
Y
9
0
H
S
6
2
1
J
W
3
3
J
W
3
4
E
Y
3
4
E
Y
3
3
E
Y
3
2
E
Y
3
1
E
Y
6
9
E
Y
8
8
J
W
3
6
E
Y
1
4
E
Y
1
3
H
S
6
0
0
H
S
6
0
1
E
Y
3
7
E
Y
3
8
E
Y
9
5
E
Y
9
6
E
Y
1
0
0
E
Y
9
9
J
W
3
7
H
S
6
1
5
J
W
1
4
5
7
J
W
1
4
6
0
J
W
1
4
5
8
E
Y
2
4
E
Y
2
2
E
Y
2
1
R
1
8
4
8
C
1
8
2
0
C
1
8
1
5
C
1
8
1
6
L
1
8
0
5
D
1
8
1
2
R
1
8
4
5
R
1
8
4
9
R
1
8
5
0
R
1
8
5
1
R
1
8
5
2
C
1
8
1
7
C
1
8
1
8
C
1
8
1
9
C
1
8
3
0
D
1
8
1
0
D
1
8
1
1
R
1
8
4
3
D
1
8
0
9
R
1
8
4
6
R
1
8
4
7
Q
1
8
1
0
C
N
1
8
0
1
C
L
P
8
1
1
C
L
P
8
1
2
J
W
6
1
2
R
1
6
0
0
R
1
6
0
2
J
W
1
6
0
0
J
W
1
6
0
1
J
W
1
6
0
2
J
W
1
6
0
3
C
1
6
1
3
C
1
6
1
4
C
1
6
1
5
C
1
6
1
9
J
W
1
6
0
4
J
W
1
6
0
7
C
1
6
8
0
C
1
6
2
9
C
1
6
2
1
J
W
1
6
0
5
J
W
1
6
0
6
D
1
6
1
2
D
1
6
1
3
R
1
6
1
2
R
1
6
2
8
R
1
6
1
5
R
1
6
3
0
R
1
6
2
9
R
1
6
2
7
R
1
6
2
6
R
1
6
2
1
R
1
6
3
1
R
1
6
9
6
C
1
6
3
3
L
1
6
0
0
C
1
6
2
0
F
B
1
6
1
6
F
B
1
6
1
7
R
1
6
4
0
R
1
6
5
8
D
1
6
0
7
C
1
6
2
8
C
1
6
3
4
C
1
6
3
5
C
1
6
3
7
C
1
6
4
8
R
1
6
5
0
R
1
6
5
1
R
1
6
6
0
D
1
6
1
0
C
1
6
4
3
D
1
6
1
8
C
1
6
2
7
C
1
6
0
2
C
1
6
4
2
C
1
6
4
5
R
1
6
3
2
C
1
6
4
7
D
1
6
0
9
D
1
6
1
7
R
1
6
7
0
R
1
6
5
9
C
1
6
4
9
C
1
6
7
2
F
B
1
6
1
8
F
B
1
6
1
9
R
1
6
7
1
R
1
6
7
2
D
1
6
3
1
R
1
6
2
5
R
1
6
1
9
R
1
6
1
7
R
1
6
1
8
R
1
6
1
6
L
1
6
0
6
L
1
6
0
5
C
1
6
7
0
F
B
1
6
0
6
F
B
1
6
0
7
F
B
1
6
0
9
C
1
6
6
9
C
1
6
0
4
C
1
6
0
9
F
B
1
6
0
2
F
B
1
6
0
4
D
1
6
1
4
C
1
6
1
7
R
1
6
6
7
R
1
6
6
8
L
1
6
0
9
C
1
6
5
0
C
1
6
2
5
C
1
6
2
6
C
1
6
5
2
R
1
6
1
0
L
1
6
0
8
C
1
6
2
4
R
1
6
2
0
R
1
6
4
7
L
1
6
0
4
P
S
1
4
0
1
R
1
6
0
9
J
W
1
6
0
9
J
W
1
8
0
0
J
W
1
8
0
1
J
W
1
6
1
0
J
W
1
6
1
1
J
W
1
4
6
1
E
Y
1
0
2
E
Y
1
0
3
E
Y
1
0
4
E
Y
1
0
5
E
Y
1
0
7
E
Y
1
0
8
E
Y
1
1
1
E
Y
1
1
2
E
Y
1
1
3
E
Y
1
1
4
E
Y
1
1
5
E
Y
1
1
6
C
1
6
1
6
J
W
3
1
J
W
3
2
E
Y
1
0
9
E
Y
1
1
0
E
Y
6
8
E
Y
2
3
E
Y
1
1
7
E
Y
1
1
8
R
1
8
4
4
R
1
8
5
3
C
N
1
4
0
2
I
C
1
6
0
1
I
C
1
6
0
0
P
H
1
6
0
2
C
N
1
6
0
0
T
1
6
0
4
D
1
6
1
1
T
1
8
0
1
C
N
1
8
0
2
D
1
6
2
1
D
1
6
0
5
Q
1
6
0
0
Q
1
6
0
1
D
1
6
1
5
C
N
1
6
0
1
E
Y
1
0
1
E
Y
1
0
6
+
-
+
-
G
S
G
S
1
1
8
1
0
9
1
2
4
3
E
B
1
3
+
-
1
4
1
6
1
-
8
6
2
-
1
9
1
-
1
1
1
7
2
4
2
1
5
1
1
A
-
1
4
1
0
-
9
2
7
-
A
3
G
N
D
2
G
N
D
1
D
F
-
D
R
V
L
O
W
B
N
C
+
B
+
B
G
N
D
G
N
D
A
U
D
G
N
D
A
U
D
G
N
D
A
U
D
V
C
C
A
U
D
V
C
C
D
F
A
C
/
D
C
+
A
C
/
D
C
-
B
A
6
S
0
4
1
A
B
C
D
E
234567891011
[POWER SUPPLY, DEFLECTION]
GD
COMPONENT SIDE (KV-27FA310/29FA310 ONLY)
GD BOARD IC VOLTAGE LIST
PIN VOLT PIN VOLT
1 2.5 1 133.7
2 1.8 2 N/C
32.232.5
4 2.5 4 11.3
5GND5GND
60.0
74.0
8 17.2
9GND
10 10.4
11 0.0
12 4.6
13 N/C
14 163.6
15 153.5
16 157.6
17 N/C
18 340.0
IC1600 IC1601
All voltages are in V.
GD BOARD TRANSISTOR VOLTAGE LIST
DGS
Q1600 313.0 160.0 156.0
Q1601 155.0 4.9 0.0
BCE
Q1810 0.0 59.7 GND
All voltages are in V.
Page 47
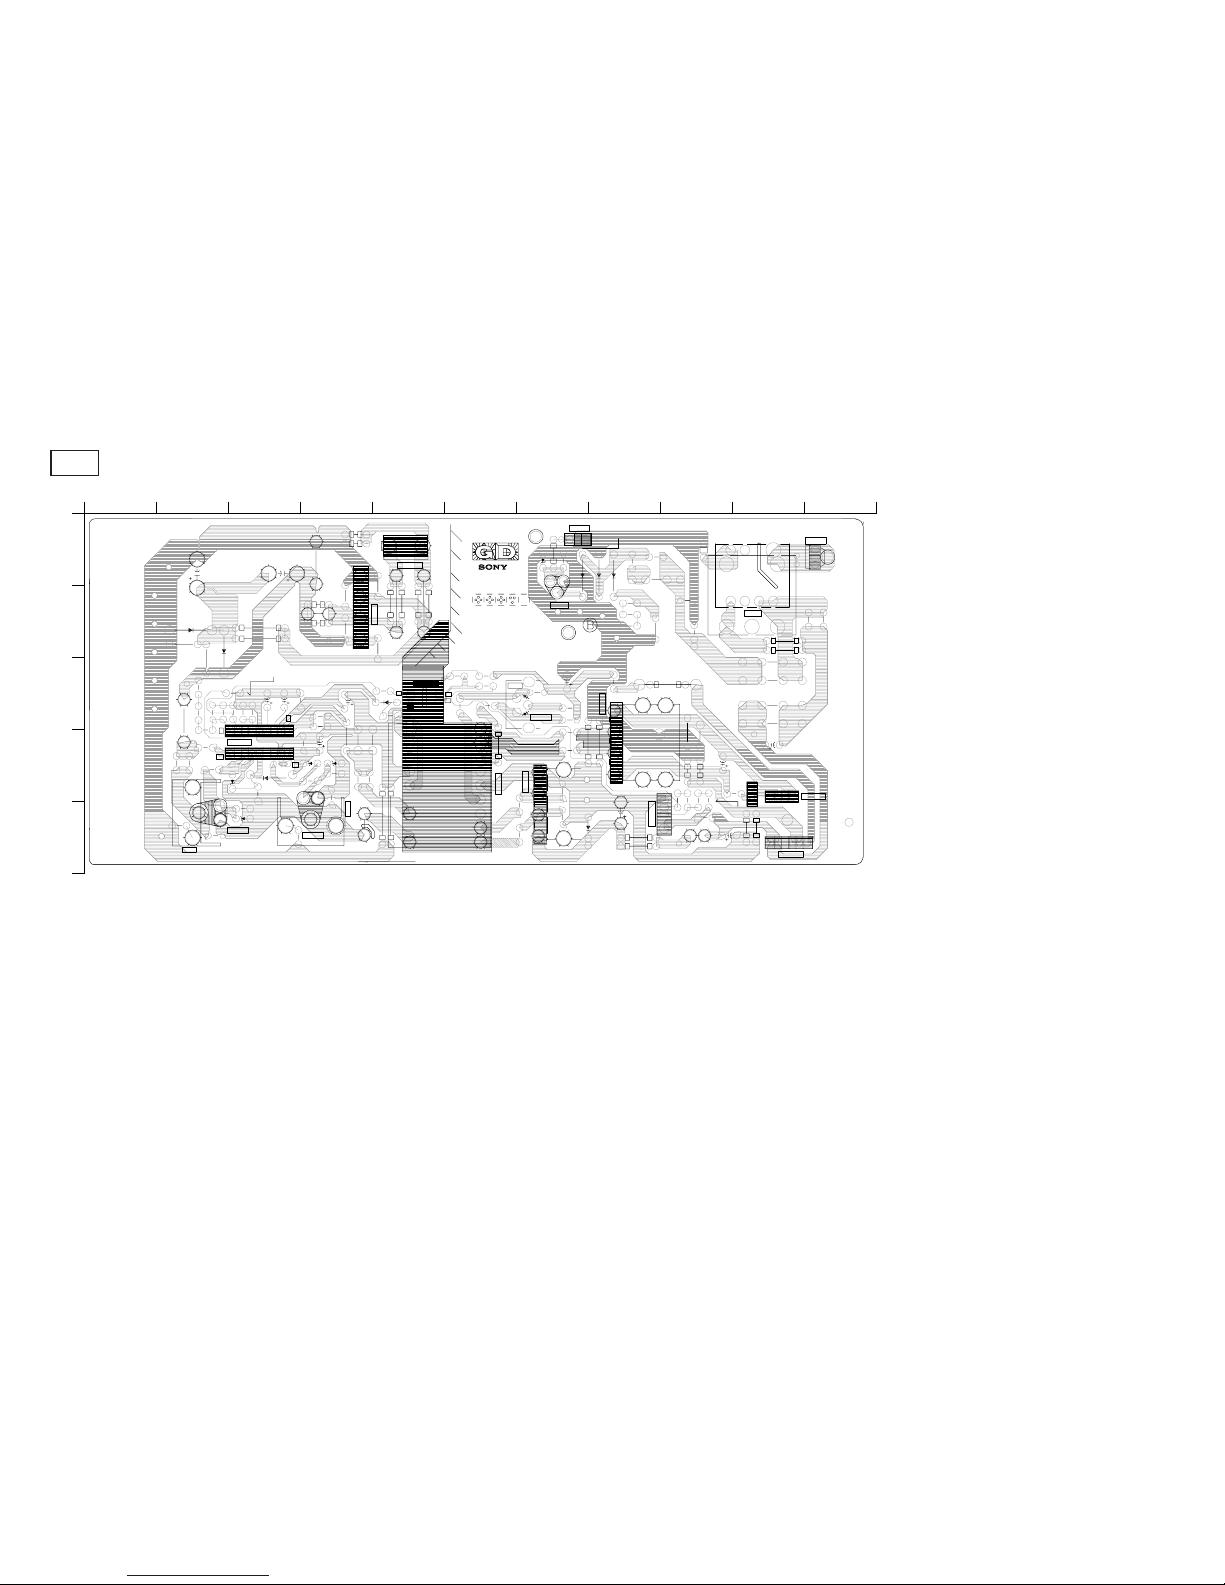
KV-27FA310/27FS120/29FA310/29FS120
47
KV-27FA310/27FS120/29FA310/29FS120
[POWER SUPPLY, DEFLECTION]
GD
HS615
H
S
6
2
1
H
S
6
0
0
HS601
C1816
R
1
8
4
6
R
1
8
4
7
D1810
D1811
D1812
R1843
D1809
R
1
8
4
8
C
1
8
2
0
C
1
8
3
0
C1815
L
1
8
0
5
R
1
8
4
5
R
1
8
4
9
R
1
8
5
0
R
1
8
5
1
R
1
8
5
2
C1817
C1818
C1819
Q
1
8
1
0
C
N
1
8
0
1
R1600
R1602
C1613
C1614
C1615
C1619
C1680
C
1
6
2
9
C1621
D
1
6
1
2
D1613
R1612
R
1
6
2
8
R1615
R1630
R1629
R
1
6
2
7
R1626
R1621
R1631
R1696
C
1
6
3
3
L
1
6
0
0
C1620
FB1616
FB1617
R
1
6
4
0
R
1
6
5
8
D1607
C
1
6
2
8
C1634
C1635
C1637
C
1
6
4
8
R1650
R
1
6
5
1
R
1
6
6
0
D
1
6
1
0
C1643
D
1
6
1
8
C
1
6
2
7
C1602
C1642
C
1
6
4
5
R
1
6
3
2
C1647
D
1
6
0
9
D
1
6
1
7
R
1
6
7
0
R
1
6
5
9
C1649
C1672
FB1618
FB1619
R1671
R1672
D
1
6
3
1
R
1
6
2
5
R
1
6
1
9
R
1
6
1
7
R
1
6
1
8
R
1
6
1
6
L1606
L
1
6
0
5
C
1
6
7
0
F
B
1
6
0
6
F
B
1
6
0
7
F
B
1
6
0
9
C
1
6
6
9
C1604
C1609
FB1602 FB1604
D1614
C1617
R1667
R
1
6
6
8
L1609
C1650
C1625
C1626
C1652
R1610
L
1
6
0
8
C
1
6
2
4
R1620
R1647
L
1
6
0
4
PS1401
R
1
6
0
9
C1616
C
N
1
6
0
0
Q
1
6
0
0
Q
1
6
0
1
I
C
1
6
0
0
T1604
D1611
D1615
IC1601
T
1
8
0
1
P
H
1
6
0
2
C
N
1
4
0
2
C
N
1
8
0
2
D1605
D
1
6
2
1
C
N
1
6
0
1
+
-
+
-
S
G
G
S
1
0
9
1
1
3
E
B
1
4
2 1
4
3
1
6
1
-
8
6
2
-
1
9
1
-
1
1
1
7
2
4
2
1
5
1
1
DF-DRV
GND
GND
AUD GND
AUD GND
AUD VCC
AUD VCC
LOW B
GND
GNDNC+B
+B
AC/DC-
AC/DC+
D
F
1
8
1
A
B
C
D
E
234567891011
CONDUCTOR SIDE (KV-27FA310/29FA310 ONLY)
Page 48
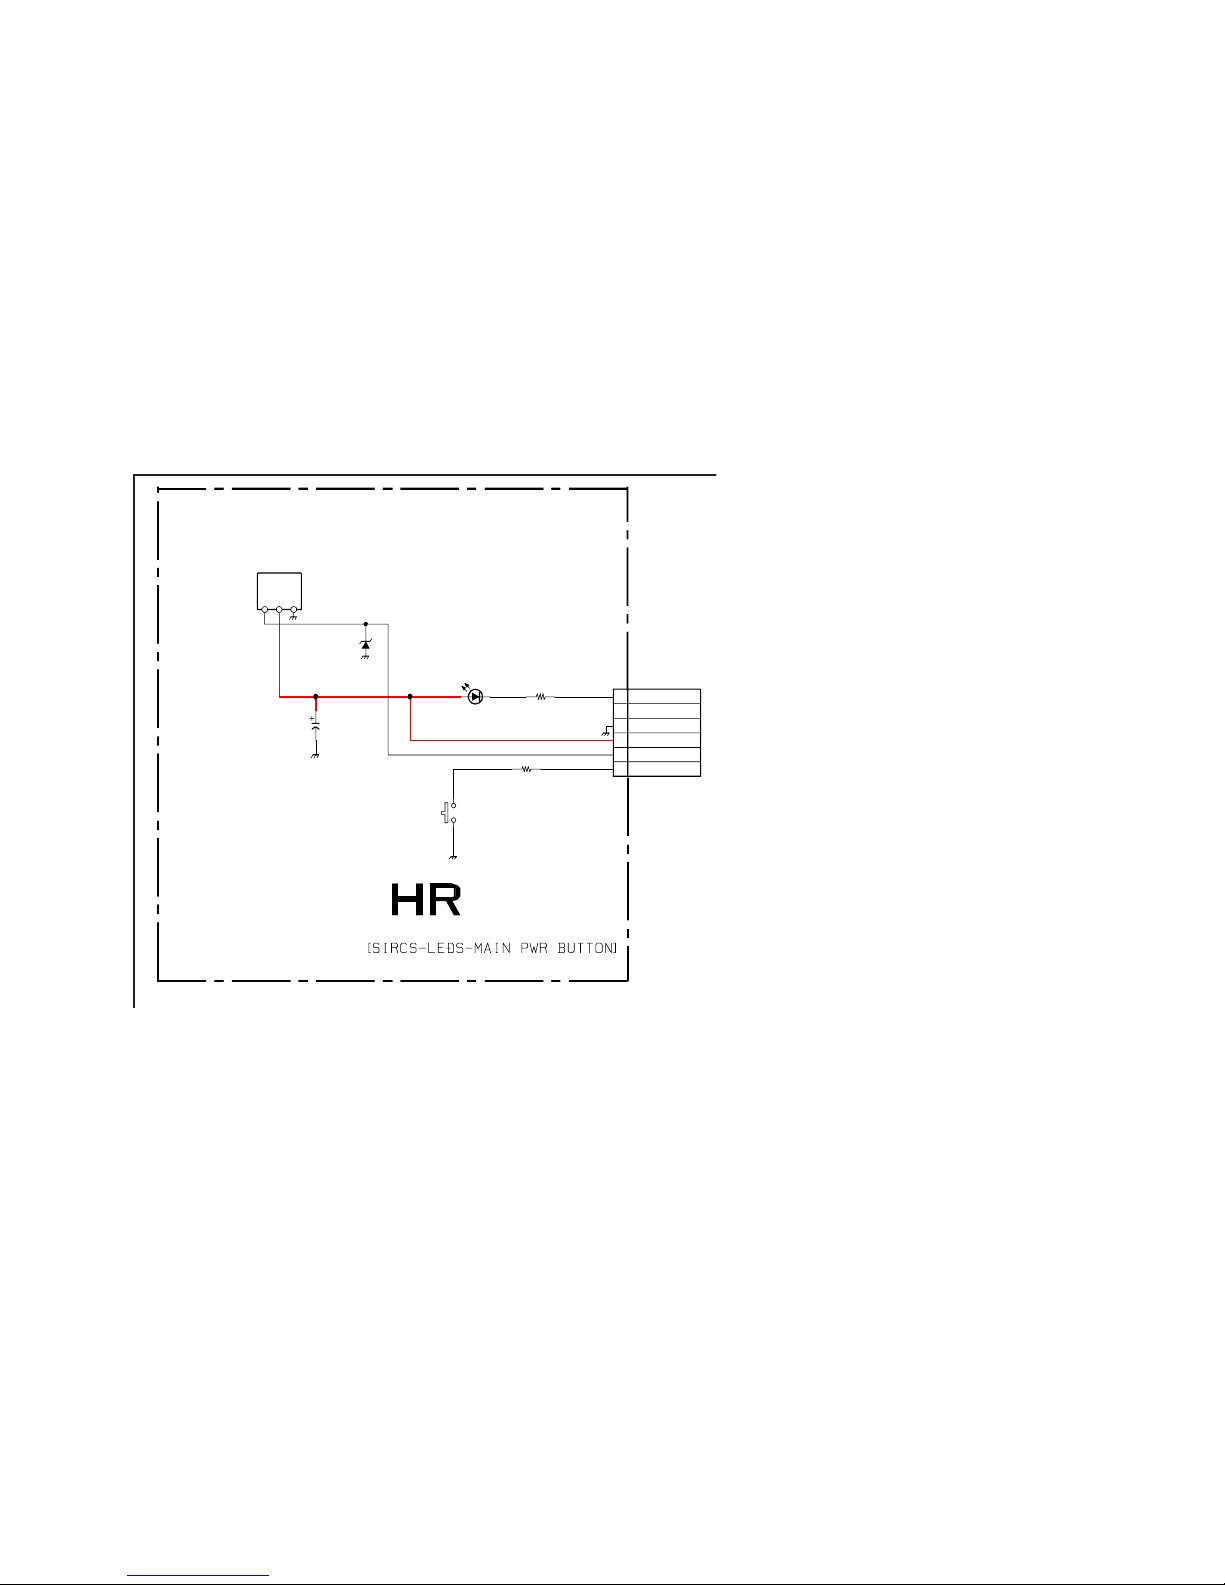
48
KV-27FA310/27FS120/29FA310/29FS120
KV-27FA310/27FS120/29FA310/29FS120
HR BOARD SCHEMATIC DIAGRAM (KV-27FA310/29FA310 ONLY)
1 | 2 | 3 | 4 | 5 |
A
—
B
—
C
—
D
—
E
1
2
3
4
5
6
G
N
D
V
C
C
O
U
T
IC3001
D3002
C3001
S3006
R3001
R3014
CN3001
D3001
SBX3071-71
DETECTOR
LNJ801LPDJA
TIMER LED
100
1k
100
6P L TYPE
:S-MICRO
MTZJ-T-77-5.6B
SIRCS
STBY 5V
TIMER LED
POWER ON
BEZNETBOTTOM IN
MPWR LED
GND
TO A BOARD
CN002
9-965-960-01<BA6S>HR
Page 49
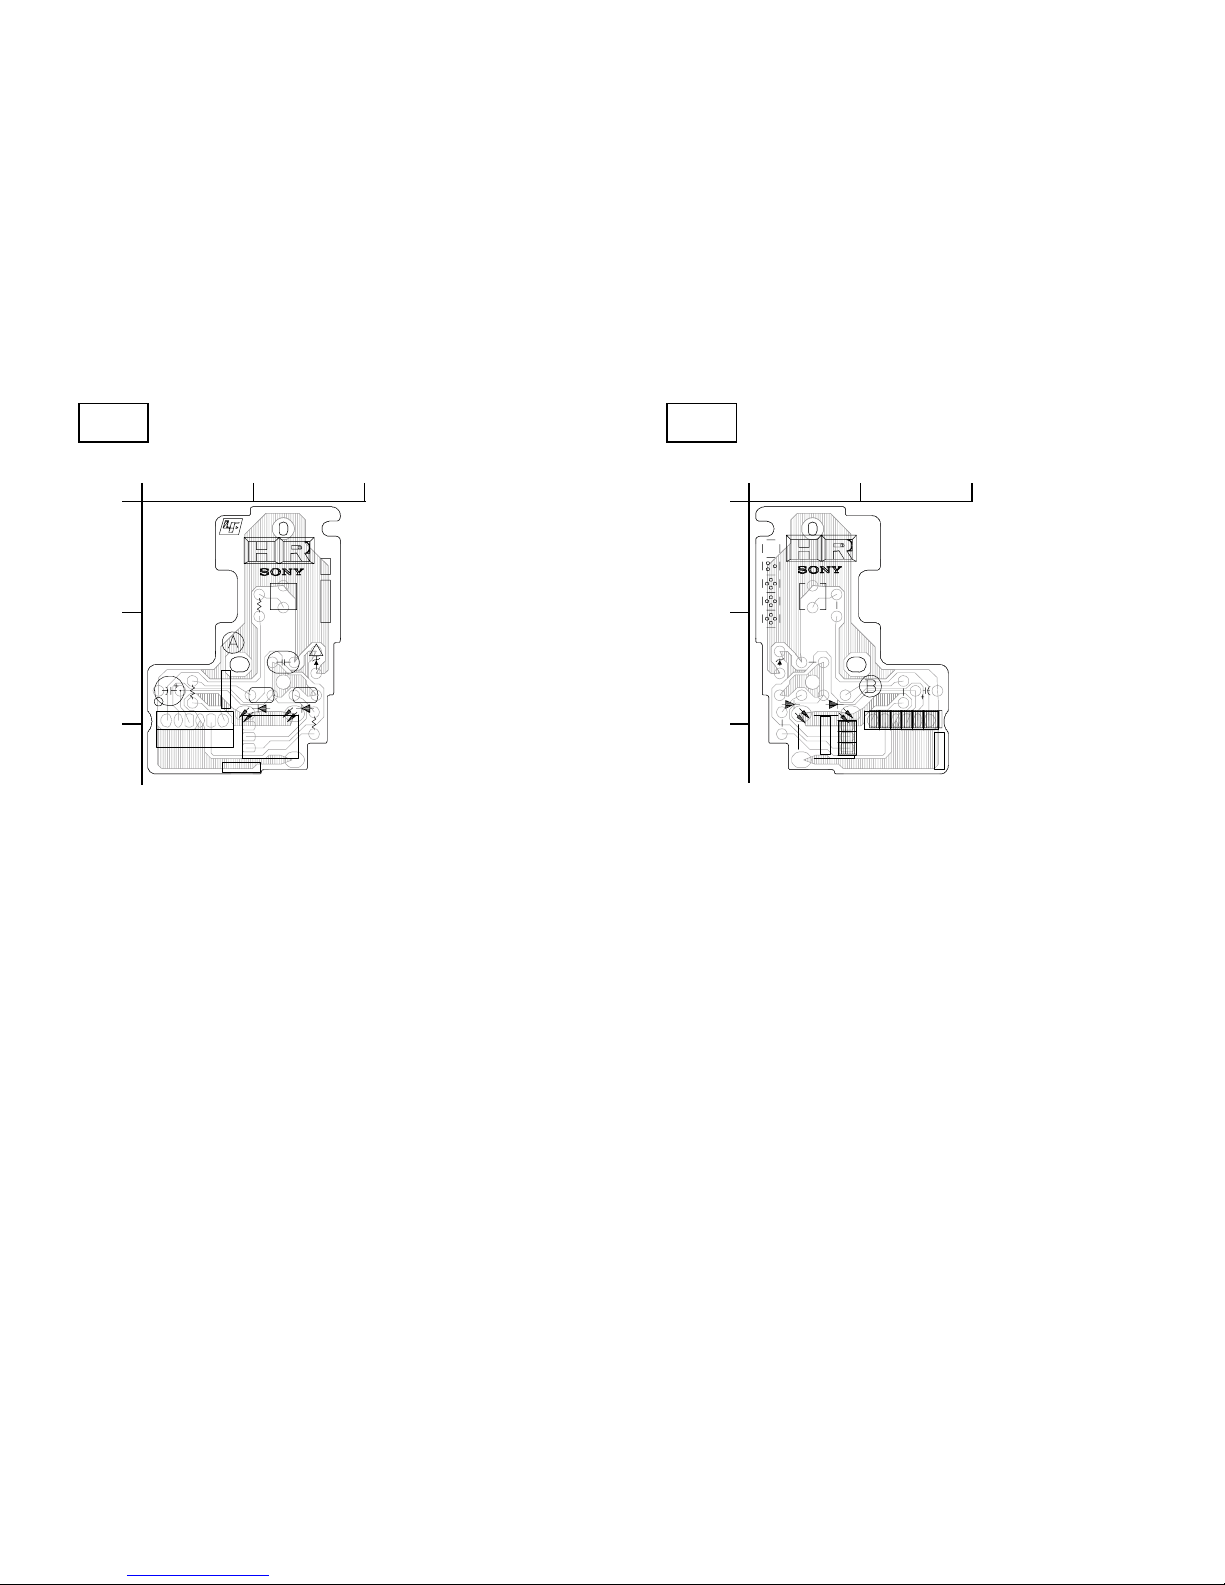
49
KV-27FA310/27FS120/29FA310/29FS120
KV-27FA310/27FS120/29FA310/29FS120
[SIRC, LEDS, MAIN POWER BUTTON]
HR
[SIRC, LEDS, MAIN POWER BUTTON]
HR
COMPONENT SIDE (KV-27FA310/29FA310 ONLY)
CONDUCTOR SIDE (KV-27FA310/29FA310 ONLY)
R
3
0
0
2
R
3
0
1
4
R
3
0
0
1
C3001
C3002
D
3
0
0
1
S
3
0
0
6
C
N
3
0
0
1
IC3001
D3002 D3003
1
6
G
O
>PF-LP<
A
-
1
4
0
0
-
2
5
1
-
A
1-684-544-12
172112212
M
P
W
R
G
N
D
S
T
B
Y
S
I
R
C
S
T
M
R
P
W
R
O
N
1
A
B
2
R
3
0
0
2
R
3
0
1
4
R
3
0
0
1
C3001
C3002
D
3
0
0
1
S
3
0
0
6
C
N
3
0
0
1
I
C
3
0
0
1
D3002D3003
G
O
1-684-544-12
172112212
T
I
M
E
R
M
P
W
R
G
N
D
S
T
B
Y
5
V
S
I
R
C
S
P
W
R
O
N
1
A
B
2
Page 50
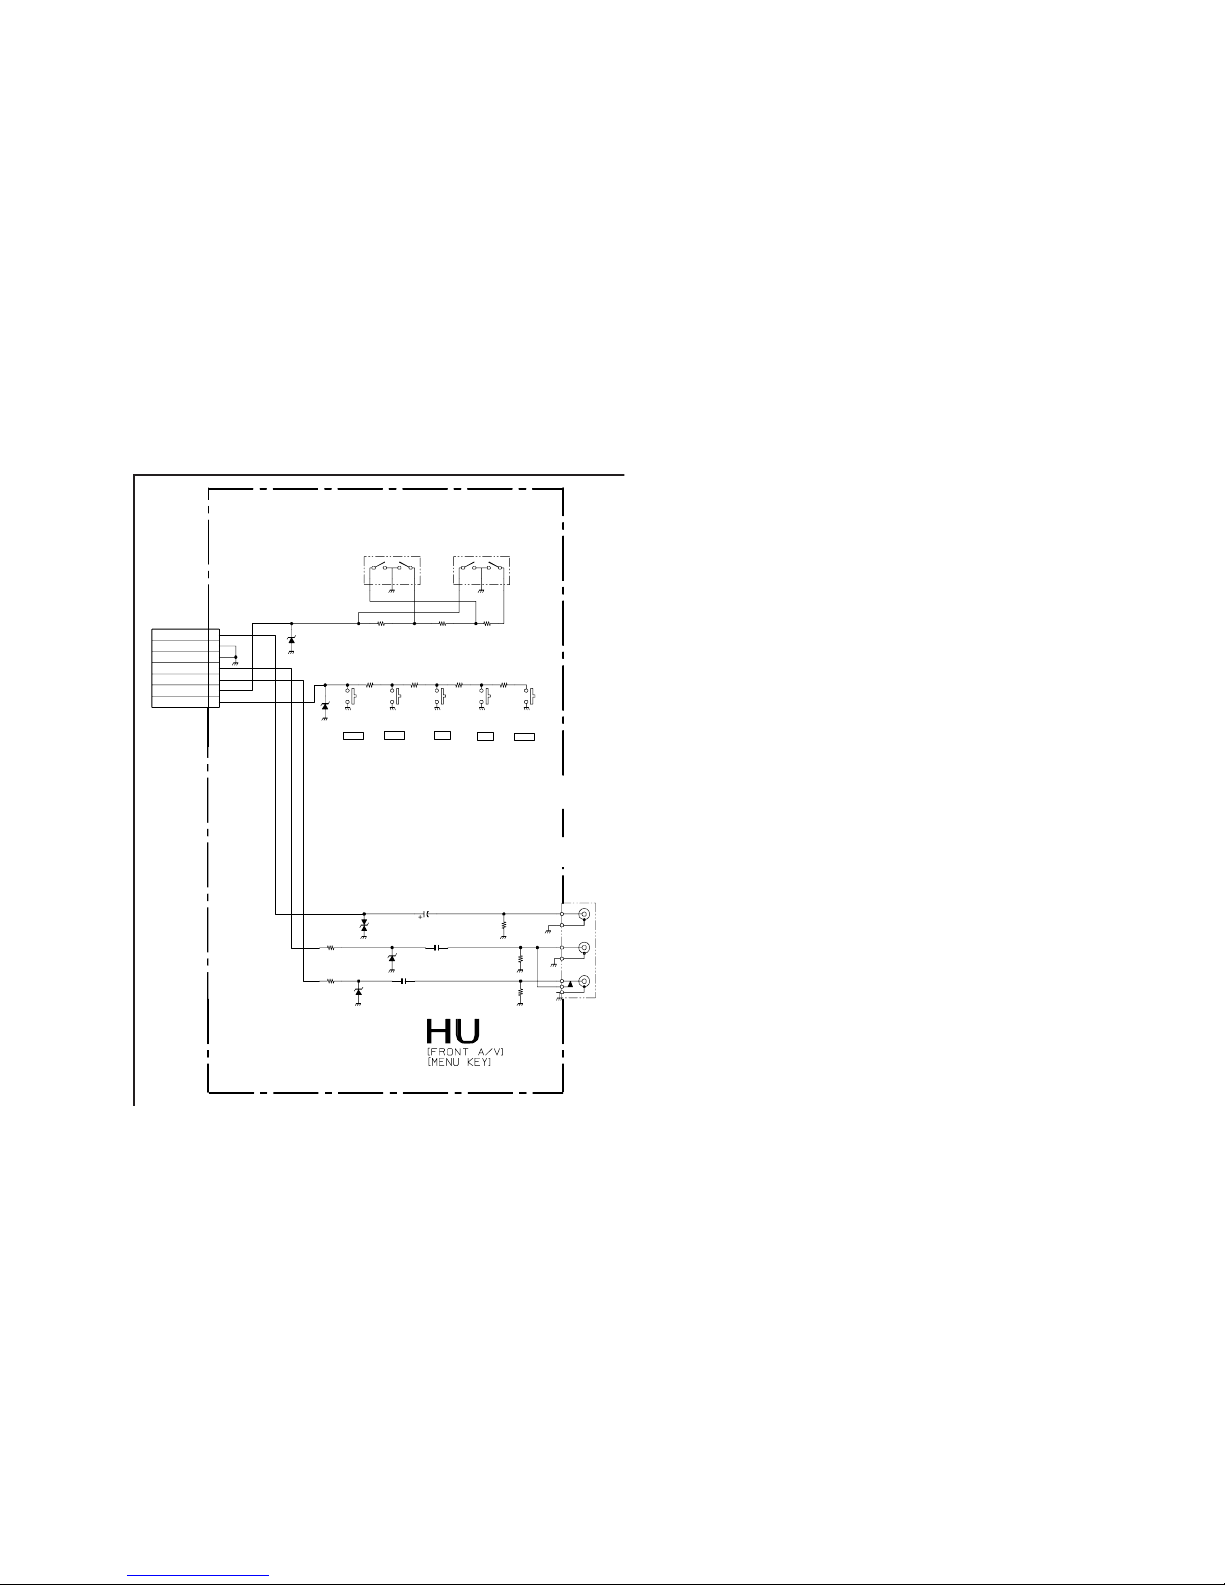
50
KV-27FA310/27FS120/29FA310/29FS120
KV-27FA310/27FS120/29FA310/29FS120
HU BOARD SCHEMATIC DIAGRAM (KV-27FA310/29FA310 ONLY)
1 | 2 | 3 | 4 |
A
—
B
—
C
—
D
—
E
—
F
V
L
R
1
2
3
4
5
6
7
S1008
S1007
J2231
C2234
C2235
R2236
R2238
R2235
R2237
S2002
S2003
S2004
S2005S2001
R2240
R2010 R2009
R2008
R1003
R1002 R1001
D2235
D2236
C2240
D301
R2011
D2240
D2241
CN1002
3P
0.47
0.47
100k
1/4W
100k
1/4W
220
1/4W
220
1/4W
75
1/4W
820
1/4W
2.2k
1/4W
6.8k
1/4W
1.5k
1/4W
2.2k
1/4W
6.8k
1/4W
RD9.1EW-T1
RD9.1EW-T1
5.0mm
RD9.1EW-T1
680
1/4W
MTZJ-T-77-10B
MTZJ-T-77-10B
7P
TV/V
CH+
CH-VOL+
VOL-
TOP TOP
MUD S
TO A BOARD
VIDEO 2
GND
GND
AUDIO L2
AUDIO R2
MENU
KEY
9-965-960-01<BA6S>HU
CN004
Page 51
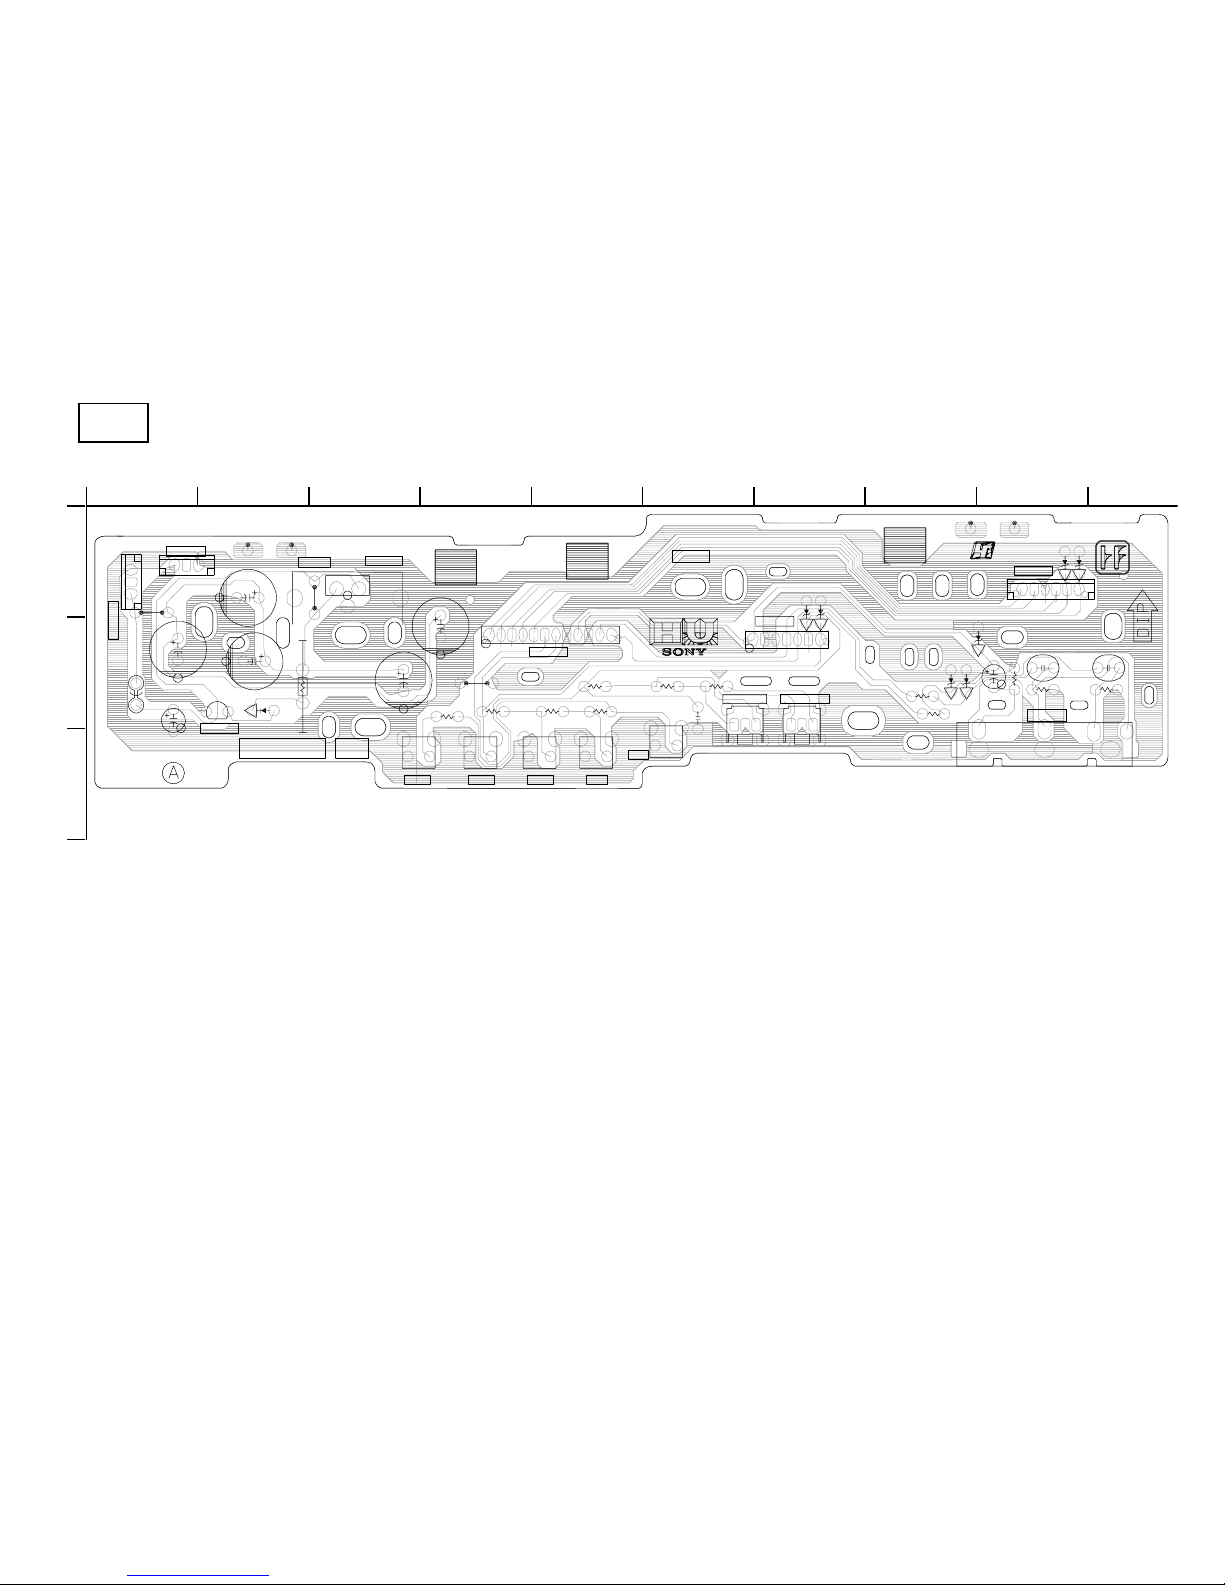
51
KV-27FA310/27FS120/29FA310/29FS120
KV-27FA310/27FS120/29FA310/29FS120
[FRONT A/V, MENU KEY]
HU
COMPONENT SIDE (KV-27FA310/29FA310 ONLY)
S
1
0
0
7
S
1
0
0
8
R
2
0
0
8
R
2
0
1
1
R
2
0
1
0
R
2
0
0
9
R
1
0
0
3
R
1
0
0
2
R
1
0
0
1
R
2
2
4
0
R
2
2
3
5
R
2
2
3
6
R
2
2
3
7
R
2
2
3
8
D
2
2
3
6
D
2
2
3
5
C
2
0
0
4
S
2
0
0
3
S
2
0
0
2
S
2
0
0
1
S
2
0
0
5
D
3
0
1
C
2
2
3
4
C
2
2
3
5
C
L
S
1
0
0
3
C
N
1
0
0
1
J
W
1
0
0
4
C
2
2
4
6
F
B
2
0
0
5
C
N
1
0
0
4
C
N
1
0
0
5
C
L
S
1
0
0
6
C
L
S
1
0
0
7
C
2
2
4
0
D
2
2
3
7
R
2
0
1
2
D
2
2
3
9
D
2
2
3
8
D
2
2
4
0
D
2
2
4
1
C
2
2
4
2
C
2
2
4
1
C
2
2
4
3
C
2
2
4
4
C
2
2
4
5
J
2
2
3
1
I
C
1
0
0
1
H
S
0
0
1
P
S
2
0
0
1
S
2
0
0
4
C
N
1
0
0
3
J
W
1
0
0
7
J
W
1
0
0
6
C
N
1
0
0
2
>
P
F
-
L
P
<
G
N
D
A
U
D
R
2
A
U
D
L
2
V
2
G
N
D
C
H
-
V
O
L
+
V
O
L
-
C
H
+
T
V
/
V
M
E
N
U
/
S
E
L
U
P
/
D
O
W
N
M
E
N
U
K
E
Y
1
6
I
O
1
3
1
T
I
M
E
R
L
E
D
M
P
W
R
L
E
D
G
N
D
5
V
S
T
B
Y
S
I
R
C
S
P
O
W
E
R
T
M
R
L
E
D
M
P
W
R
L
E
D
5
V
S
T
B
Y
S
I
R
C
S
P
O
W
E
R
M
E
N
U
K
E
Y
G
N
D
V
I
D
E
O
2
G
N
D
G
N
D
G
N
D
N
C
1
4
V
1
1
2
5
V
A
U
D
I
O
2
L
A
U
D
I
O
2
R
N
C
A
-
1
4
1
0
-
9
2
3
-
A
1
-
8
6
2
-
1
8
8
-
1
1
1
7
2
4
2
1
3
1
1
1
7
B
A
6
S
1
A
B
C
2345678910
Page 52
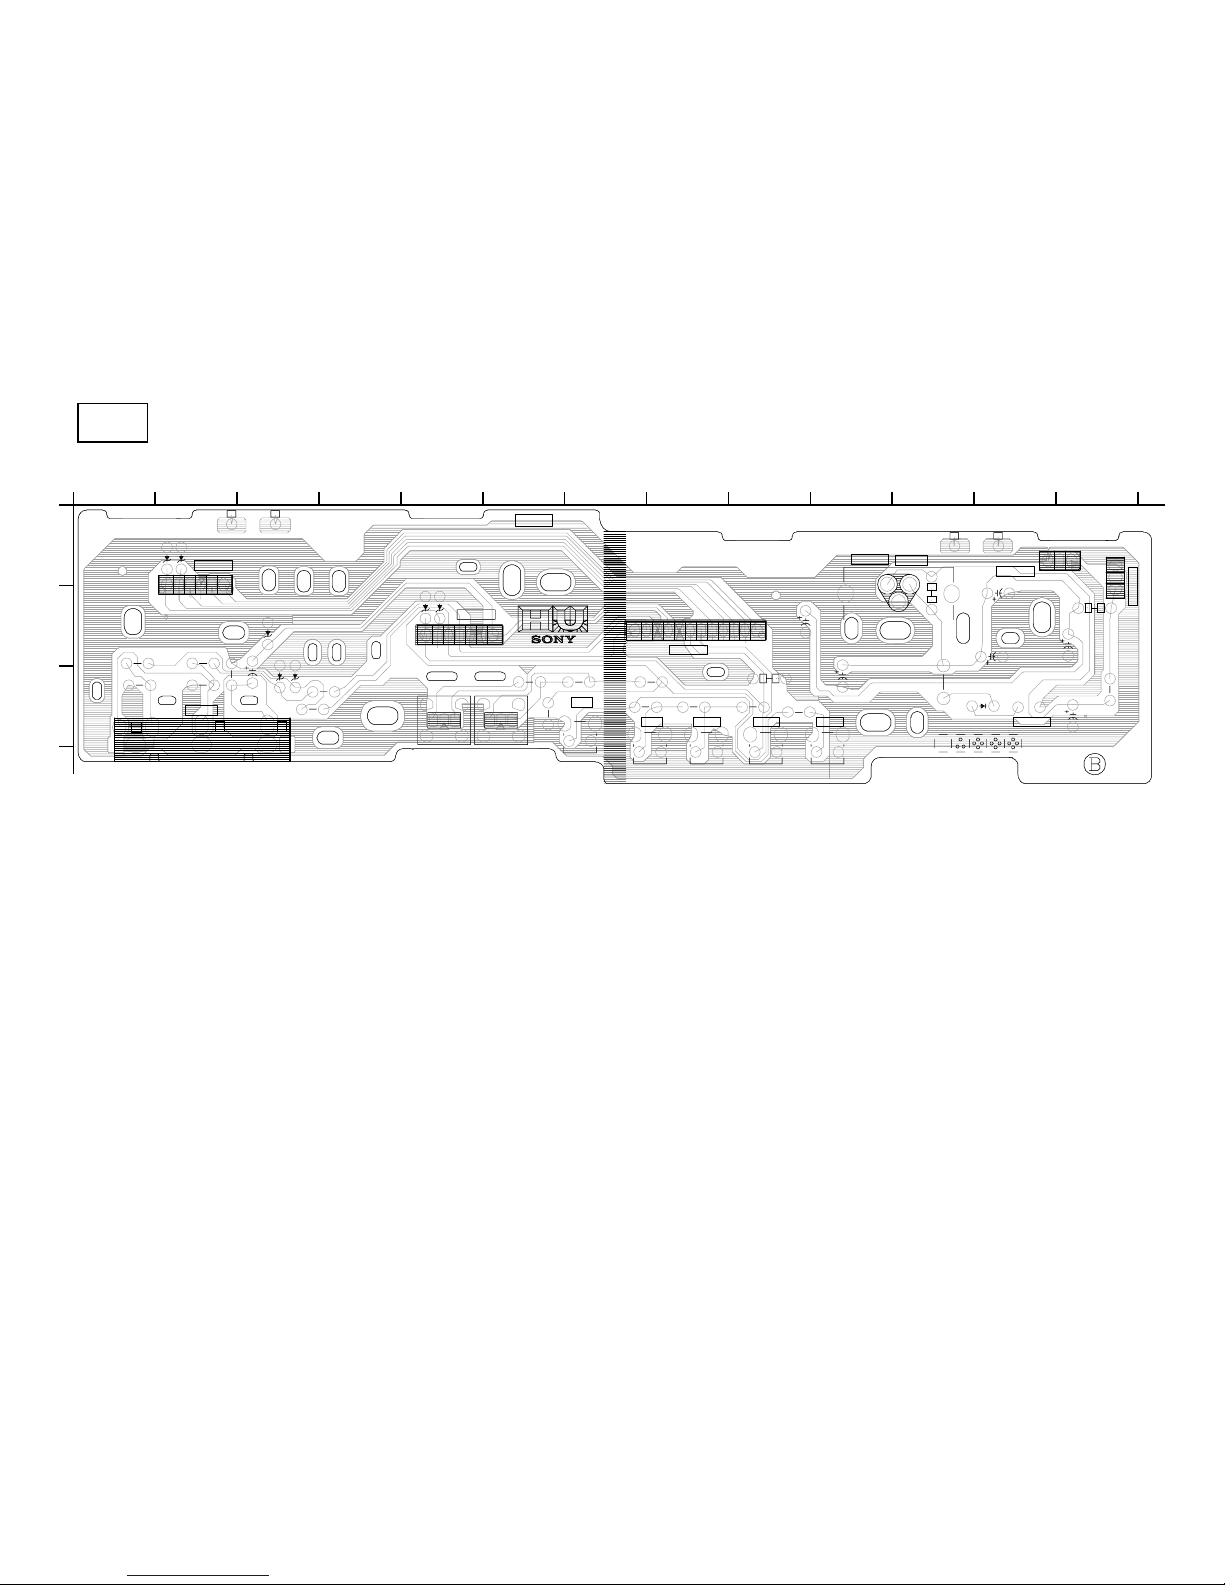
52
KV-27FA310/27FS120/29FA310/29FS120
KV-27FA310/27FS120/29FA310/29FS120
[FRONT A/V, MENU KEY]
HU
CONDUCTOR SIDE (KV-27FA310/29FA310 ONLY)
S
1
0
0
7
S
1
0
0
8
R
2
0
0
8
R
2
0
1
1
R
2
0
1
0
R
2
0
0
9
R
1
0
0
3
R
1
0
0
2
R
1
0
0
1
R2240
R
2
2
3
5
R
2
2
3
6
R
2
2
3
7
R
2
2
3
8
D2236
D2235
C2004
S
2
0
0
3
S
2
0
0
2
S
2
0
0
1
S
2
0
0
5
S
2
0
0
4
D301
J
2
2
3
1
C
2
2
3
4
C
2
2
3
5
C
L
S
1
0
0
3
C2246
FB2005
CN1005
C
N
1
0
0
4
CLS1006
C
L
S
1
0
0
7
C2240
D
2
2
3
7
R2012
D2239
D2238
D2240
D2241
C
2
2
4
1
C
2
2
4
3
C2244
C2245
C
2
2
4
2
C
N
1
0
0
1
H
S
0
0
1
I
C
1
0
0
1
P
S
2
0
0
1
C
N
1
0
0
3
C
N
1
0
0
2
AUDL2
GND
V2
R
L
V
AUDR2
KEY
MENU
1
6
I
O
1
3
GND
5VSTBY
SIRCS
POWER
MPWRLED
TMRLED
POWER
TIMERLED
MPWRLED
5VSTBY
SIRCS
MENU
KEY
GND
GND
VIDEO2
AUDIO2L
AUDIO2R
GND
G
N
D
N
C
NC
14V
GND
1
1
2
1
7
2
4
2
1
3
1
1
1
-
8
6
2
-
1
8
8
-
1
1
5
V
B
A
6
S
C
H
+
C
H
-
V
O
L
+
V
O
L
-
T
V
/
V
1
7
S
1
0
0
7
S
1
0
0
8
R
2
0
0
8
R
2
0
1
1
R
2
0
1
0
R
2
0
0
9
R
1
0
0
3
R
1
0
0
2
R
1
0
0
1
R2240
R
2
2
3
5
R
2
2
3
6
R
2
2
3
7
R
2
2
3
8
D2236
D2235
C2004
S
2
0
0
3
S
2
0
0
2
S
2
0
0
1
S
2
0
0
5
S
2
0
0
4
D301
J
2
2
3
1
C
2
2
3
4
C
2
2
3
5
C
L
S
1
0
0
3
C2246
FB2005
CN1005
C
N
1
0
0
4
CLS1006
C
L
S
1
0
0
7
C2240
D
2
2
3
7
R2012
D2239
D2238
D2240
D2241
C
2
2
4
1
C
2
2
4
3
C2244
C2245
C
2
2
4
2
C
N
1
0
0
1
H
S
0
0
1
I
C
1
0
0
1
P
S
2
0
0
1
C
N
1
0
0
3
C
N
1
0
0
2
AUDL2
GND
V2
R
L
V
AUDR2
KEY
MENU
1
6
I
O
1
3
GND
5VSTBY
SIRCS
POWER
MPWRLED
TMRLED
POWER
TIMERLED
MPWRLED
5VSTBY
SIRCS
MENU
KEY
GND
GND
VIDEO2
AUDIO2L
AUDIO2R
GND
G
N
D
N
C
NC
14V
GND
1
1
2
1
7
2
4
2
1
3
1
1
1
-
8
6
2
-
1
8
8
-
1
1
5
V
B
A
6
S
C
H
+
C
H
-
V
O
L
+
V
O
L
-
T
V
/
V
1
7
1
A
B
C
2345678910111213
Page 53
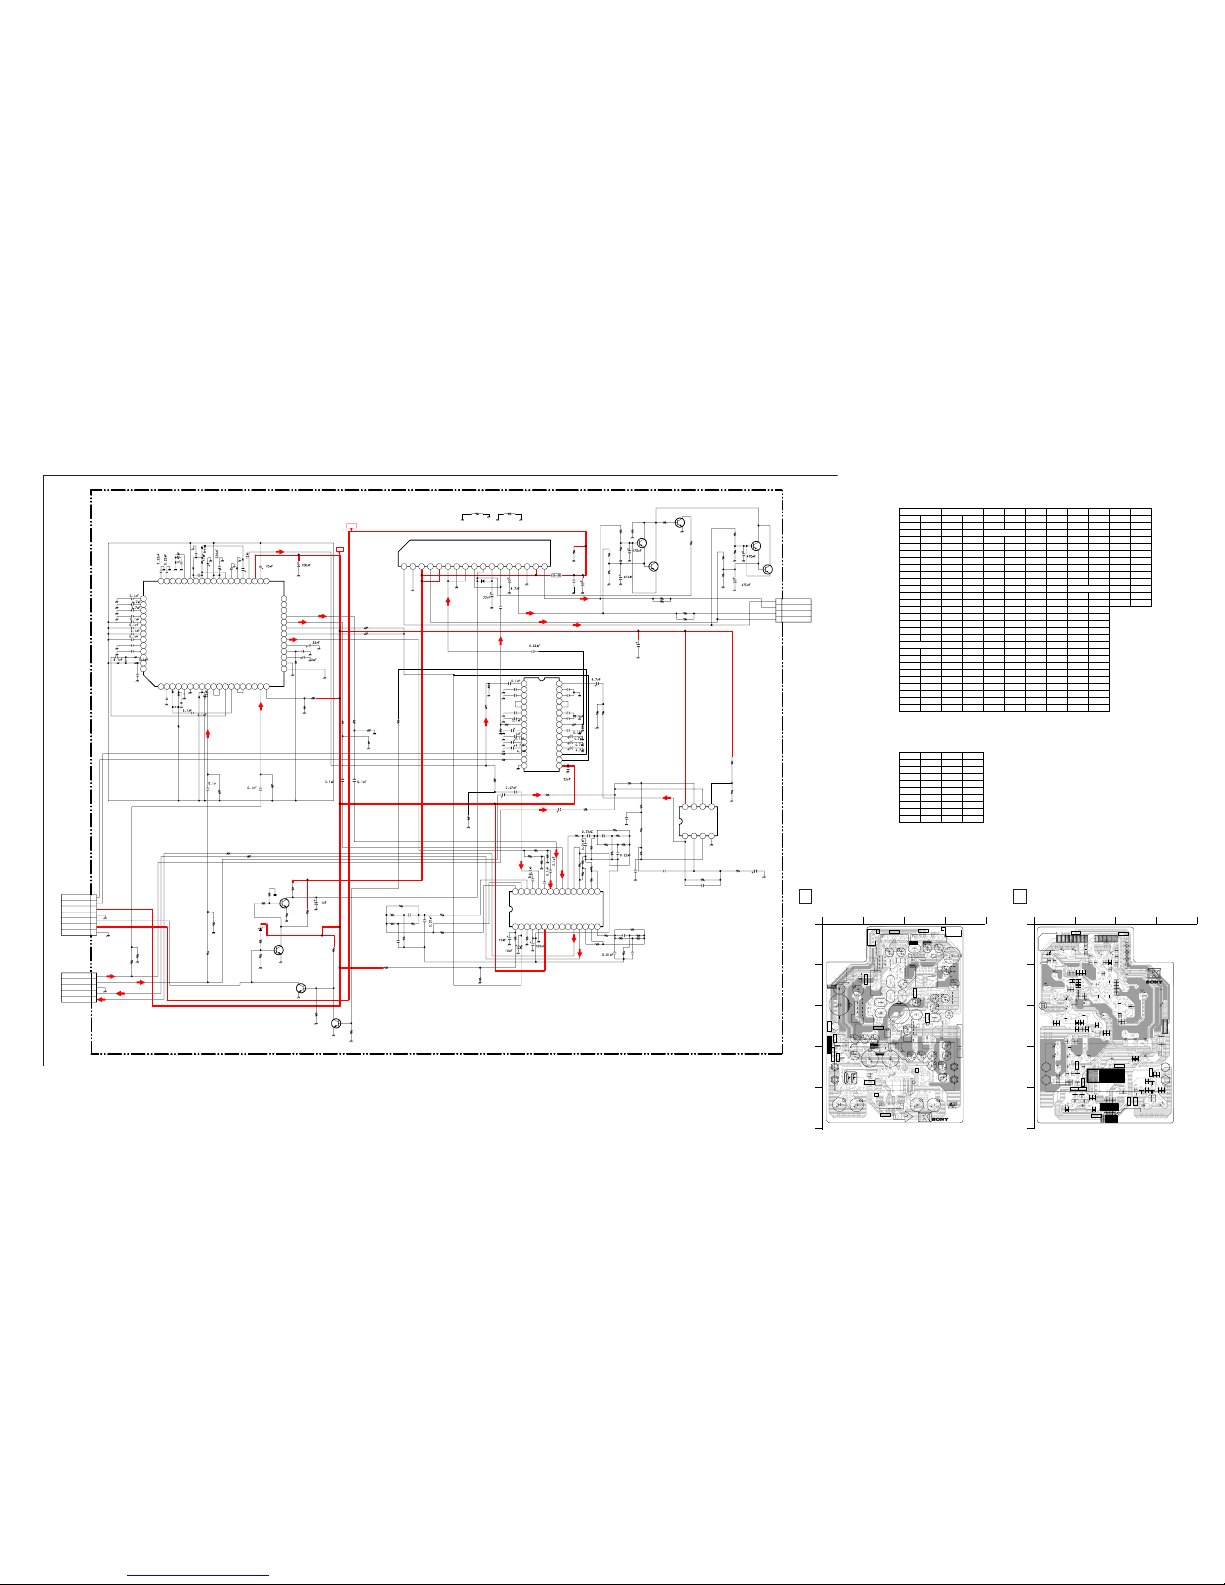
53
KV-27FA310/27FS120/29FA310/29FS120
KV-27FA310/27FS120/29FA310/29FS120
1 | 2 | 3 | 4 | 5 | 6 | 7 | 8 | 9 | 10 | 11 | 12 | 13 | 14 | 15 | 16 | 17 | 18 | 19 | 20 | 21 | 22
A
—
B
—
C
—
D
—
E
—
F
—
G
—
H
—
I
—
J
—
K
—
L
—
M
—
N
—
O
—
P
1 2 3 4 5 6 7 8 9
10 11 12 13 14 15 16 17
1
2
3
4
5
6
7
8
9
1
0
1
1
1
2
1
3
1
4
151
6
1
7
1
8
1
9
2
0
2
1
2
2
2
3
2
4
2
5
2
6
2
7
2
8
2
9
3
0
1 2 3 4 5 6 7 8 9
10 11 12 13 14 15 16 17 18 19
20
21
22
23
24
25
26
27
28
29
30
31
32
33343536373839404142434445464748495051
52
53
54
55
56
57
58
59
60
61
62
63
64
1
2
3
4
1 2 3 4 5 6 7 8 9
10 11 12 13 14 15
161718192021222324252627282930
1
2
3
4
5
-2
-2 -2
-2
-2
-2
-2
-2
1 2 3 4
5678
1
2
3
4
5
6
7
C2412
C2413
C2423
C2424
C2425
C2427
C2428
PS2401
Q2401
R2409
R2422
R2423
R2424
R2425
R2427
R2429
C2411
C2414
C2430
Q2400
R2432
R2434
C2426
R2426
R2488
R2443
R2440
R2421
R2420
C2434
C2442
C2450
C2451
C2490
R
2
4
0
7
R2410
R2411
R
2
4
1
3
R
2
4
1
4
R2416
R2417
R2418
R2419
R2447
R
2
4
4
8
R2451
R2452
R2456
R2491
R2493
R2494
C2431
C2432
C2433
C2435
C2436
C2437
C2438
C2439
C2440 C2480
C2479
C2477
R2401
C2403
C2404
C
2
4
0
7
C
2
4
1
5
C
2
4
1
7
C
2
4
1
9
C
2
4
2
2
R
2
4
3
0
R
2
4
3
1
C2468
C2467
C2466
C2465
C2464
R2455
C2463
C2462
C2461
C2452
C2453
C2454
C2458
C2457
C2456
C2455
C2405
C
2
4
0
8
C
2
4
4
5
C2459
C2470
C2471
C
2
4
7
2
C2473
C2474
C2475
C2476
C2478
C2481
C
2
4
8
2
C
2
4
8
6
C2487
C2488
C2489
R2458
R2459
R2461
R2462
R2463
R2464
R2465
R2466
R
2
4
6
7
R
2
4
6
8
R
2
4
6
9
R2470
R2471
R2472
R2473
R2474
R2475
R
2
4
7
8
R
2
4
7
9
R
2
4
8
0
R
2
4
8
4
R2485
R
2
4
8
6
R2487
R2489
R2490
R2495
R2496
R
2
4
9
7
R2403
R2428
R2433
R2435
R2436
R2437
R2438
R2439
R2481
C2420
C2421
C
2
4
1
0
C
2
4
1
8
R2453
R2449
R2454
D2400
R2442
JR2401
JR2402
R2483
R2492
R2498
R2499
R2501
R2502
R2503
R2504
R2505
R2507
C2493
C2494
C2495
C2496
Q2418
R2519
R2520
C2444
C2446
C2447
C2402 C2401
R
2
4
5
7
R2441
C
2
4
8
5
C
2
4
8
4
C2469
R2477
R2476
C2406
D2401
R
2
4
0
5
R2408
R
2
4
1
2
C2441
C2443
R
2
4
0
6
R
2
4
6
0
C2416
C2499
Q2419
R2521
R2522
R2523
R2524
JR2410
JR2411
JR2420
JR2421
C2460
C2429
C2449
C2448
R2446
R2500
R2402
R
2
4
8
2
R2404
R2450
CN2402
CN2401
CN2400
IC2404
IC2405
IC2402
IC2403
Q2414
Q2410
Q2411
Q2412
Q2413
IC2401
R
2
4
1
5
0.47
50V
1000
35V
0.047
16V
B
0.0068
25V
B
0.1
16V
B
47
25V
2200
25V
2SC2412K-T
-146-QR
10k
1/10W
10k
1/10W
39k
1/10W
39k
1/10W
39k
1/10W
470
1/10W
4.7k
1/10W
2S2412K-T-146-Q
0
100k
100p 50V CH
470 1/10W
2.2k
47k
22k
22k
1/10W
22k 1/10W
47000pF
3300p
1
5
k
15k
47k
4
7
k
1
5
k
22k
22k
100
100
1k
1
0
0
k
100k
1k
100
100k
100k
100k
0.22mF
22000p
22000p
100k
4700p
4
7
0
0
p
1
0
0
1
0
0
3300p
33000p
4700p
100
33000p
4700p
6
8
0
0
p
4700p
4700p
4700p
4700p
4700p
2.2M
470k
33k
75k
1.5k
51k
1.8k
6.2k
1
0
k
1
0
k
1
0
k
39k
1.8k
51k
2.2M
33k
75k
1
0
0
k
1
0
0
k
5
1
k
3
.
9
k
1k
1
k
11k
15k
100k
20k
150k
1
.
5
k
4.7k
4.7k
10k
10k
1k
10k
10k
10k
1.5k
0.47
0.47
C
H
I
P
47k
47k
1k
MA111-TX
1k
0
0
22k
22k
22k
22k
22k
22k
22k
22k
47k
100
1k
1k
47000p
0
10k
15k
15k
1
0
0
k
7.5k
7
.
5
k
680p
680p
8
.
2
k
8
.
2
k
5600p
470p
2CS2412K-T
10k
47k
47k
0
0
0
0
0
47000p
10k
4.7k
10k
1
0
k
15k
10k
5P
7P
4P
NJM2177
DOLBY SURROUND
NJM2180
TRUSURROUND
NJM4558M-T
AUDIO FILTER
NJW1164
C/SW PROCESSOR
2SD601A
MUTE
2SB709A
MUTE
2SB709A
MUTE
2SB709A
MUTE
2SB709A
MUTE
TDA8947J
AUDIO AMP
4
.
7
M
G
N
D
L
V
C
C
L
S
P
K
L
+
S
P
K
L
-
M
O
D
E
2
I
N
L
1
S
G
N
D
I
N
L
2
I
N
R
1
M
O
D
E
1
S
V
R
I
N
R
2
N
C
S
P
K
R
-
G
N
D
R
V
C
C
R
S
P
K
R
+
V
C
C
O
U
T
2
I
N
-
2
I
N
+
2
O
U
T
1
I
N
-
1
I
N
+
1
G
N
D
SCL
SDA
C
BBE-OUT
BBE2
BBE1
TONE-IN
TONE-H
TONE-L
OUT
AGC
SS-FIL
CUB
CVA
SDA
SCL
GND
SW
BBE1
BBE2
BBE-OUT
TONE-IN
TONE-H
TONE-L
OUT
SR-FIL
VREF
CTH
CTL
AUX1
AUX2
VCC
GND
L
R
HEADPHONES
GND
PGND
AUDIO/VCC
9V
VCS-TC2
VCS-TC1
VLR-TC1
VLR-TC2
S-RECT-OUT
C-RECT-OUT
R-RECT-OUT
L-RECT-OUT
S-RECT-OUT
C-RECT-OUT
L-BFP-OUT
L-BPF-IN
NC
N
C
L
-
R
E
C
T
-
T
C
R
-
B
P
F
-
O
U
T
R
-
B
P
F
-
I
N
R
-
R
E
C
T
-
T
C
G
N
D
A
B
-
G
A
T
E
A
B
-
H
O
L
D
-
T
C
L
-
A
B
-
I
N
L
-
A
B
-
O
U
T
L
-
I
N
L
-
I
N
B
U
F
-
O
U
T
R
-
I
N
B
U
F
-
O
U
T
R
-
I
N
R
-
A
B
-
O
U
T
N
C
N
C
R
-
A
B
-
I
N
N
-
L
N
T
-
E
NC
L-R-OUT
L+R-OUT
R-OUT
L-OUT
CENTER-CNT
MODE-CNT
S-OUT
LPF
HPF
REF
CNT-B
CNT-A
V
C
S
-
T
C
3
V
L
R
-
T
C
3
N
C
N
C
N
R
-
T
C
L
P
F
-
N
I
N
N
-
I
N
L
P
F
-
I
N
N
-
I
N
L
P
F
-
O
U
T
N
R
-
W
T
V
R
E
F
V
R
E
F
N
R
-
I
N
N
R
-
V
C
F
I
R
E
F
S
-
O
U
T
C
-
O
U
T
V
C
C
C
E
N
T
E
R
-
M
O
D
E
N
C
SW+
CS+
CS-
SW-
RT
LT
M
O
D
E
3
M
O
D
E
2
M
O
D
E
1
V
R
E
F
G
N
D
V
+
S
U
B
-
O
U
T
C
-
O
U
T
R
R
-
O
U
T
R
L
-
O
U
T
F
R
-
O
U
T
F
L
-
O
U
T
F
I
L
2
F
I
L
2
F
I
L
2
F
I
L
-
3
F
I
L
-
3
F
I
L
-
3
S
-
I
N
C
-
I
N
R
R
-
I
N
R
L
-
I
N
F
R
-
I
N
F
L
-
I
N
F
1
F
1
S
P
S
P
C
E
N
C
E
N
TO-CN402 ABOARD
TO-CN403 ABOARD
TO-SUB-WOOFER
SW
C
SW R
SW L
C-
C+
SW+
SW-
SW L
SW R
SW
C
R
L
C
SW R
SW L
K BOARD
AUDIO
9-965-960-01<BA6S>K
9V
19V
R
L
S
C
S
R
L
L
R
K BOARD SCHEMATIC DIAGRAM (KV-27FA310/29FA310 ONLY)
K BOARD IC VOLTAGE LIST
28 4.5 25 4.0 54 4.0 17 4.5
PIN VOLT PIN VOLT 29 4.5 26 4.0 55 4.0 18 4.5
1 8.3 1 4.5 30 4.5 27 4.37 56 4.0 19 4.5
2 GND 2 4.5 28 4.0 57 4.0 20 4.5
3 19.6 3 4.5 PIN VOLT 29 4.0 58 4.0 21 4.5
4 8.3 4 4.5 1 n/c 30 n/c 59 4.0 22 4.5
5 19.6 5 4.5 2 4.0 31 n/c 60 4.0 23 4.5
6 3.2 6 4.5 3 4.0 32 n/c 61 4.0 24 4.5
7 GND 7 4.5 4 4.0 33 n/c 62 4.0 25 4.5
8 0.0 8 4.5 5 4.0 34 4.0 63 4.0 26 4.5
9 3.2 9 1.0 6 GND 35 9.0 64 n/c 27 4.5
10 9.1 10 4.5 7 n/c 36 4.0 28 4.5
11 9.7 11 3.4 8 3.8 37 4.0 PIN VOLT 29 4.5
12 3.2 12 3.3 9 4.0 38 1.45 1 7.7 30 4.5
13 3.3 13 4.5 10 4.0 39 4.0 2 4.6
14 8.3 14 4.5 11 4.0 40 4.0 3 0.0
15 GND 15 GND 12 4.0 41 4.0 4 4.5
16 19.6 16 9.0 13 4.0 42 4.0 5 0.0
17 8.3 17 4.9 14 4.0 43 4.0 6 9.0
18 0.0 15 4.0 44 4.0 7 n/c
PIN VOLT 19 3.88 16 n/c 45 4.0 8 n/c
1 4.5 20 3.88 17 n/c 46 4.0 9 n/c
2 4.5 21 4.5 18 4.0 47 0.0 10 n/c
3 4.5 22 4.5 19 5.8 48 n/c 11 4.5
4 GND 23 4.5 20 GND 49 n/c 12 4.5
5 4.5 24 4.5 21 GND 50 4.0 13 4.5
6 4.5 25 4.5 22 4.0 51 3.0 14 4.5
7 4.5 26 4.5 23 2.65 52 3.0 15 4.5
8 9.0 27 4.5 24 4.0 53 3.0 16 4.5
IC2405
All voltages are in V.
IC2401 IC2403
IC2402
IC2404
K BOARD TRANSISTOR VOLTAGE LIST
BCE
Q2400 0.7 0.0 GND
Q2401 0.0 17.9 0.0
Q2410 4.8 0.0 4.8
Q2411 4.8 0.0 4.8
Q2412 4.8 0.0 4.9
Q2413 4.8 0.0 4.9
Q2414 0.0 0.2 GND
Q2418 0.0 0.7 GND
Q2419 0.0 0.0 GND
All voltages are in V.
[AUDIO]
K
COMPONENT SIDE (KV-27FA310/29FA310 ONLY)
CONDUCTOR SIDE (KV-27FA310/29FA310 ONLY)
EY2400 EY2401
HS2401
C
2
4
5
1
C
2
4
5
2
C
2
4
5
3
C
2
4
5
4
C2455
R
2
4
0
4
R
2
4
0
5
C
2
4
0
8
C2417
R
2
4
1
1
C2404
C
2
4
0
3
C2405C2490
C
2
4
0
7
C
2
4
1
6
R2406
I
C
2
4
0
1
C2412
I
C
2
4
0
2
C
2
4
2
4
R
2
4
2
5
C2413
EY2403EY2402
C
2
4
1
4
PS2401
R
2
4
2
4
IC2404
C2456
C
N
2
4
0
0
IC2403
IC2405
C2419
C2422
C2429
C2433
C2438
C2439
R2408
R2460
R2407
C
2
4
7
4
C2480
R
2
4
1
3
R
2
4
1
2
C
2
4
4
3
C
2
4
4
1
C
2
4
4
2
C
2
4
7
3
R
2
4
7
3
R
2
4
7
4
R
2
4
6
9
C2479
C
2
4
4
4
R
2
4
6
3
C
2
4
8
2
C
2
4
7
0
R
2
4
6
6
R
2
4
6
5
R
2
4
6
2
R
2
4
5
8
R
2
4
6
4
C
2
4
7
2
C
2
4
7
1
R
2
4
6
1
R
2
4
8
7
R
2
4
7
0
R
2
4
7
1
R
2
4
7
5
R
2
4
9
7
C
2
4
8
1
C
2
4
8
6
R
2
4
8
4
R
2
4
7
2
C
2
4
7
8
R
2
4
8
5
C
2
4
8
7
R
2
4
9
5
R
2
4
8
6
R
2
4
8
9
C
2
4
8
9
C
2
4
2
7
R
2
4
9
6
R
2
4
2
2
C
2
4
2
5
R
2
4
2
1
C
2
4
6
7
C
2
4
6
6
C
2
4
6
5
C
2
4
6
3
C
2
4
6
8
R
2
4
2
8
R
2
4
2
3
C
2
4
1
1
C
2
4
2
8
C
2
4
2
3
R
2
4
2
0
C2457
C2458
C
2
4
5
9
D2403
C
N
2
4
0
1
C
N
2
4
0
2
C
2
4
2
0
C
2
4
2
1
C2461
C
2
4
6
2
C
2
4
6
4
C
2
4
5
0
C2415
C
2
4
3
1
C2445
C
2
4
8
8
R
2
4
2
7
C2448
R
2
4
0
9
C
2
4
3
2
R2443
R2432
R2440
R2488
R2434
Q2400
Q2401
C
2
4
1
0
C
2
4
3
0
C
2
4
7
6
C2475
C2495
C2496
C
2
4
9
3
C
2
4
9
4
C
2
4
8
3
J
R
2
4
0
6
C2406
C2499
C
2
4
2
6
R
2
4
2
6
C
2
4
6
0
C
2
4
4
6
C2447
C
2
4
0
2
C
2
4
0
1
C2485
C2484
C
2
4
6
9
1
6
1
2
1
4
1
7
1
7
1
5
1
1
BA6S04
>
P
F
-
L
P
<
1
7
2
4
2
1
2
1
1
1
-
8
6
2
-
1
8
7
-
1
1
A-1410- 921-A
2
2
1
A
B
C
D
E
234
C
2
4
5
7
R2452
R2446
R2448
R2447
R2429
C2428
C
2
4
0
5
C2407
C2434
C2435
C2436
C2437
R2410
R2414
R
2
4
1
5
R
2
4
1
6
R
2
4
1
7
R
2
4
0
1
R2451
R2403
C
2
4
9
0
C2427
C
2
4
1
2
C
2
4
1
3
H
S
2
4
0
1
C2411
R2454
C2414
C2430
I
C
2
4
0
1
C
N
2
4
0
0
R
2
4
3
0
R
2
4
3
1
R2493
C2473
R2455
R2456
R2467
R
2
4
6
8
C
2
4
0
3
R
2
4
7
8
R
2
4
7
6
R
2
4
7
7
R
2
4
7
9
R
2
4
9
0
R
2
4
9
1
R
2
4
8
2
R2480
C
N
2
4
0
1
C
N
2
4
0
2
C2415
C2477
R2444
R2445
R2481
R2442
C
2
4
6
1
C2462
C2464
C2450
R2433
C2421
C2420
R2436R2437
R2438
R2439
R2402
R2441
R2457
D
2
4
0
0
D2401
C
2
4
1
0
C2440
R2494
C2475
R2492
R2483
R2498
R2505
R2507
C
2
4
9
4
C
2
4
9
3
R2499
R2502
R2504
R2503
C
2
4
9
6
C
2
4
9
5
R2449
JR2401
JR2402
Q
2
4
1
3
Q
2
4
1
2
R2501
C2449
C2409
C
2
4
5
6
R2450
R2435
Q2418
R2520
C2474
R2519
JR2403
JR2404
R2419
R2418
R2459
C2418
Q2410
D
2
4
5
1
D
2
4
5
0
R2524
Q2414
Q2411
D
2
4
5
2
D
2
4
5
3
R2522
R2523
Q2419
R2521
JR2405
C
2
4
5
9
C2458
C
2
4
4
8
R2500
R2453
C
2
4
4
5
J
R
2
4
0
7
C2406
C2432
C2431
JR2412
JR2413
JR2420
JR2421
JR2423
JR2422
JR2411
JR2410
C2491
C
2
4
6
0
C2446
C2447
C
2
4
0
2
C
2
4
0
1
C2485 C2484
C
2
4
6
9
1
4
2
1
6
1
7
B
A
6
S
0
4
1
7
1
5
VCC
PGND
HPHON
GND9VSDA
SCL
R
L
GNDLTRT
1
1
7
2
4
2
1
2
1
1
1
-
8
6
2
-
1
8
7
-
1
1
SW+
CS+
CS-
SW-
1
A
B
C
D
E
234
[AUDIO]
K
Page 54
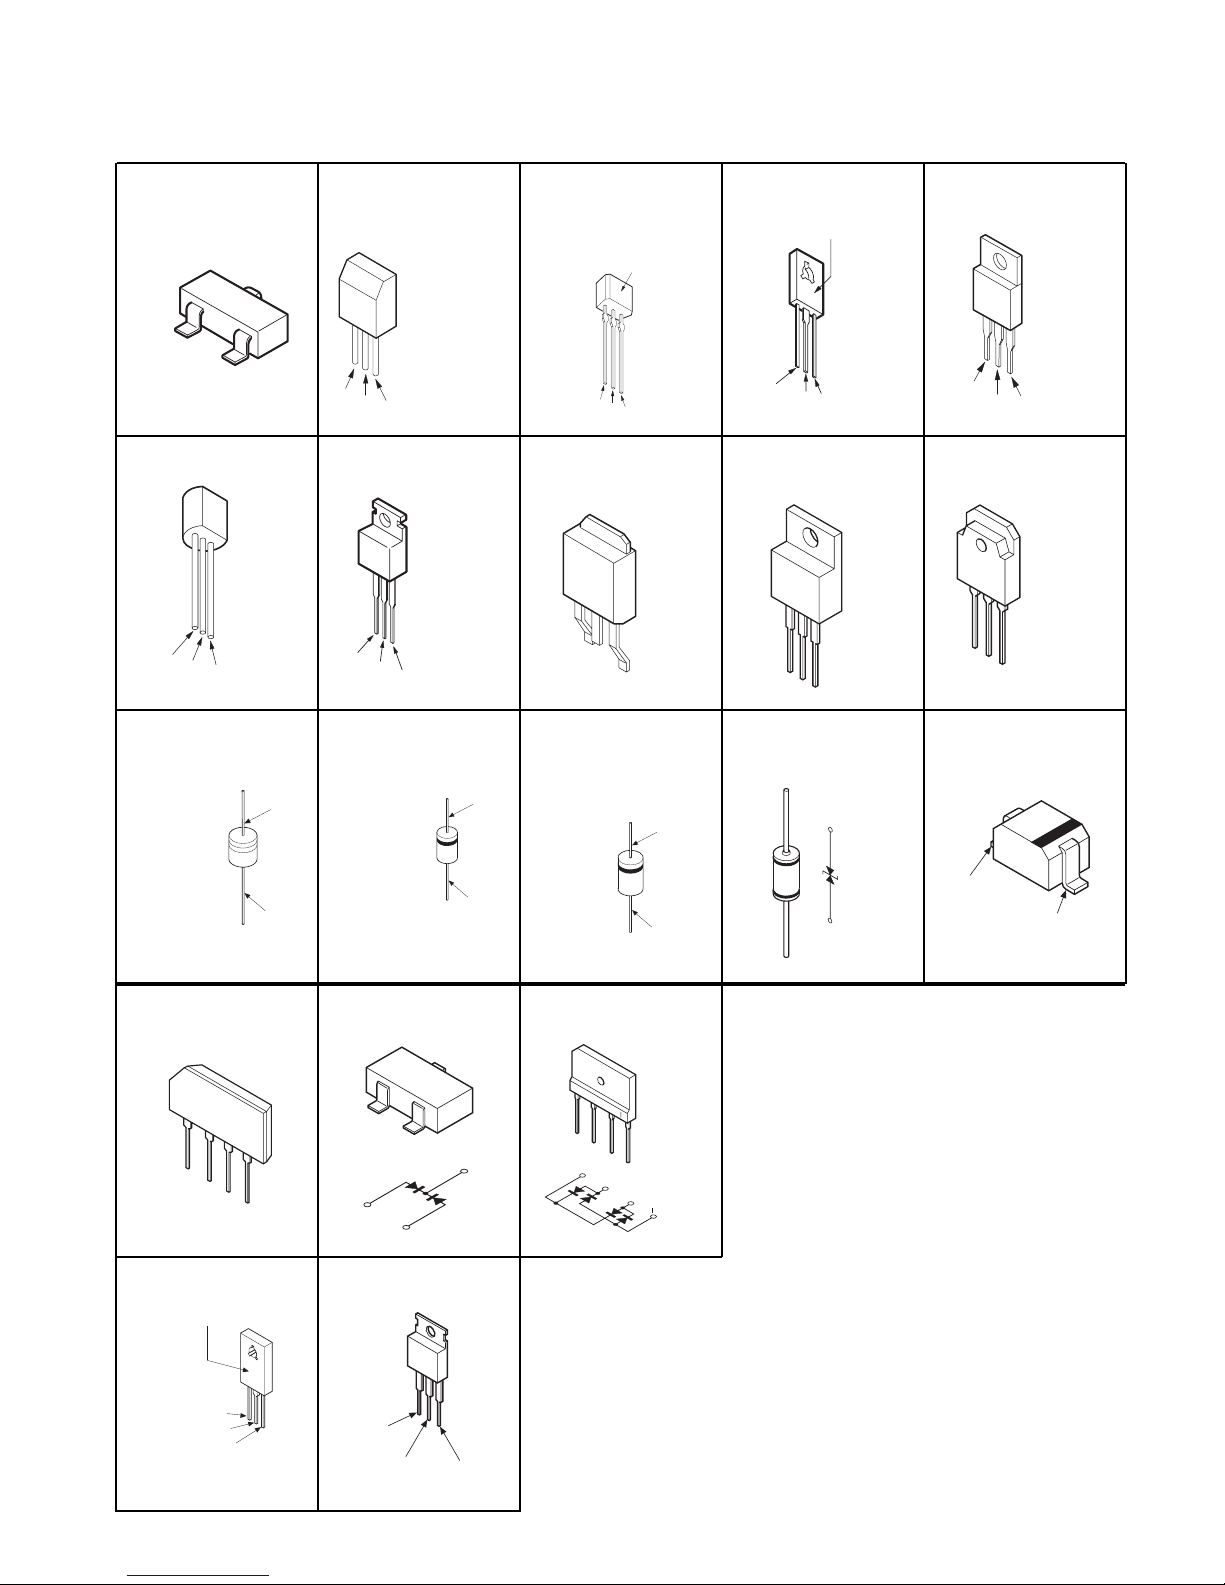
A
5-4. SEMICONDUCTORS
KV-27FA310/27FS120/29FA310/29FS120
2SB709A-QRS-TX
2SD601A-QRS-TX
C
B
E
2SA1091O-TPE2
E
C
B
ERA38-06TP1
ERA82-004TP5
1SS133T-77
D1NS0R-TA
MTZJ-T-77-12C
MTZJ-T-77-15B
MTZJ-T-77-33B
MTZJ-T-77-39
2SB734-T-34
2SC3209LK-TP
2SA1309A-QRSTA
2SC3311A-QRSTA
2SD2144S-TP-UVW
LETTER SIDE
E
C
B
E
C
B
IRF614 2SK2663 2SD2578-YB2SC4793
G
D
S
G
D
S
RU-1P
ERB44-06TP1
1SS83TD
GP08DPKG23
CATHODE
RGP10GPKG23
RU4AM-T3
CATHODE
CATHODE
ERC06-15S
EGP20DPKG23
MTZJ-T-77-5.1C
MTZJ-T-77-5.6C
MTZJ-T-77-7.5A
MTZJ-T-77-10B
ANODE
MTZJ-T-77-30D
RGP10-GPKG3
RGP02-17PKG23
ANODE
ANODE
RGP15GPKG23
2SC3840K
LETTER SIDE
E
C
B
2SA1837
B
C
1
2
RD9.1EW-T1 MA111-TX
UDZ-TE-17.5.1B
UDZ-TE-17.91B
NODE
E
3
CATHODE
D2SB60A-F04 DAP202K-T-146 D4SB60L-F
+
~
~
-
D5LC20U
MARKING SIDE VIEW
CATHODE
ANODE
CATHODE
2
1
2
1
TF541M
CATHODE
ANODE
KV-27FA310/27FS120/29FA310/29FS120
3
GATE
{
’
’
3
{
’
’
54
Page 55
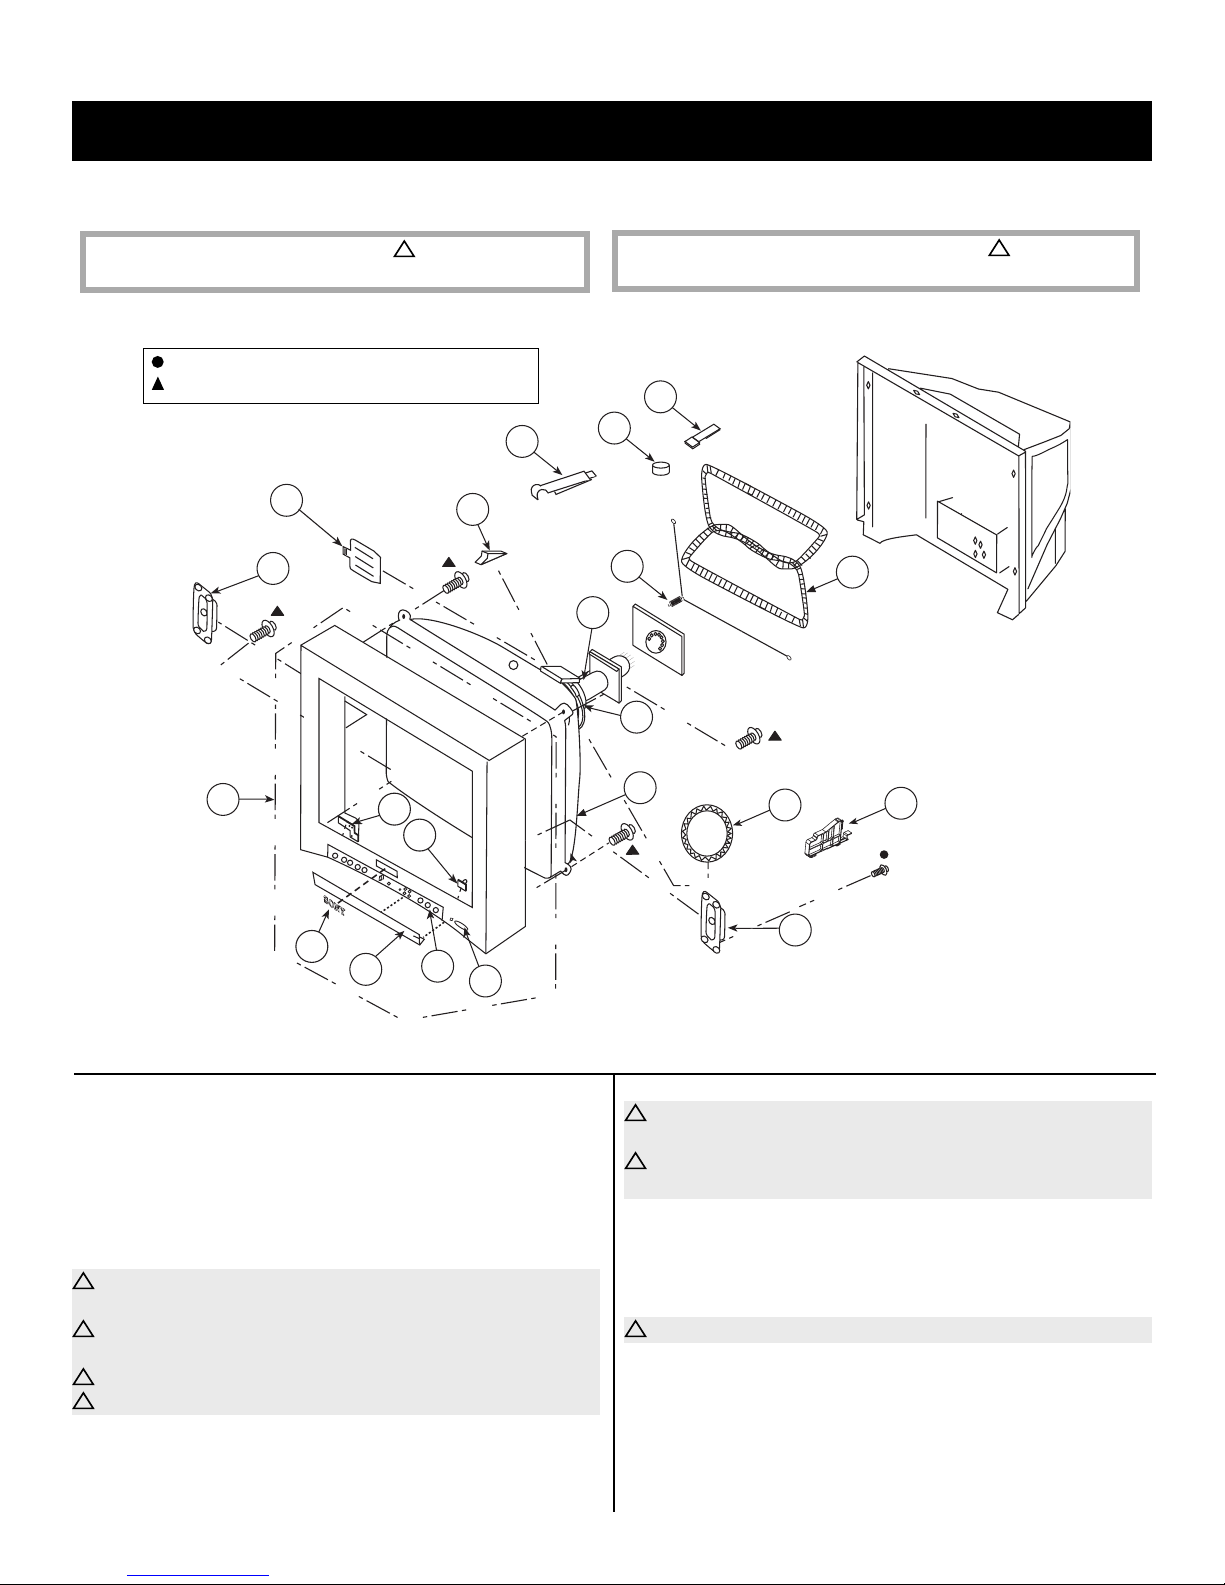
SECTION 6: EXPLODED VIEWS
KV-27FA310/27FS120/29FA310/29FS120
Components not identifi ed by a part number or
description are not stocked because they are seldom
required for routine service.
NOTE: The components identifi ed by shading and
Replace only with part number specifi ed.
The component parts of an assembly are indicated by the
reference numbers in the far right column of the parts list
and within the dotted lines of the diagram.
!
mark are critical for safety.
6-1. PICTURE TUBE (KV-27FS120/29FS120 ONLY)
4-388-477-01 SCREW(3X16),TAPPING,+BV WASHER
4-046-765-12 SCREW, TAPPING 7+CROWN WASHER
14
17
20
19
15
18
Items marked with an asterisk are not stocked since
*
they are seldom required for routine service. Expect
some delay when ordering these components.
!
NOTE: Les composants identifi es per un trame et une marque
la securite. Ne les remplacer que par une piece portant le numero specifi e.
sont critiques pour
13
16
12
9
1
7
8
10
11
6
20
2
3
REF. NO. PART NO. DESCRIPTION [ASSEMBLY INCLUDES] REF. NO. PART NO. DESCRIPTION [ASSEMBLY INCLUDES]
1 X-4043-163-1 BEZNET, ASSY [2-7]
2 4-046-160-31 EMBLEM, SONY NO.9
3 4-089-056-11 DOOR
4 4-089-016-01 LABEL, DOOR
5 4-089-057-11 BUTTON, POWER
4
5
11 4-089-062-02 SUPPORTER, CRT
!
12 1-419-156-21 COIL, DEGAUSSING
(ALL EXCEPT KV-29FS120 L. SOUTH)
!
12 1-419-523-21 COIL, DEGAUSSING
(KV-29FS120 L. SOUTH ONLY)
13 4-083-414-01 PIECE A(110), CONV CORRECT
6 4-089-058-01 GUIDE, LED
* 7 4-083-303-01 SPRING, METAL
!
8 8-735-082-05 CRT 29RSN(SDP)
(ALL EXCEPT KV-29FS120 L. SOUTH)
!
8 8-735-083-05 CRT 29RSN(SDP)(SOUTH)
(KV-29FS120 L. SOUTH ONLY)
!
9 8-451-494-41 DY Y29RSA-V
!
10 1-452-896-11 COIL, NA ROTATION (RT-200)
14 1-452-885-11 MAGNET, LANDING
* 15 4-062-970-12 CLIP (29RSN), DGC
16 4-036-329-01 SPRING (B), TENSION
!
17 8-453-011-11 NECK ASSEMBLY 299-M
18 4-053-005-01 SPACER, DY
19 4-081-170-01 PLATE, TLH CORRECTION
20 1-825-206-11 LOUDSPEAKER (6X12CM)
KV-27FA310/27FS120/29FA310/29FS120
55
Page 56
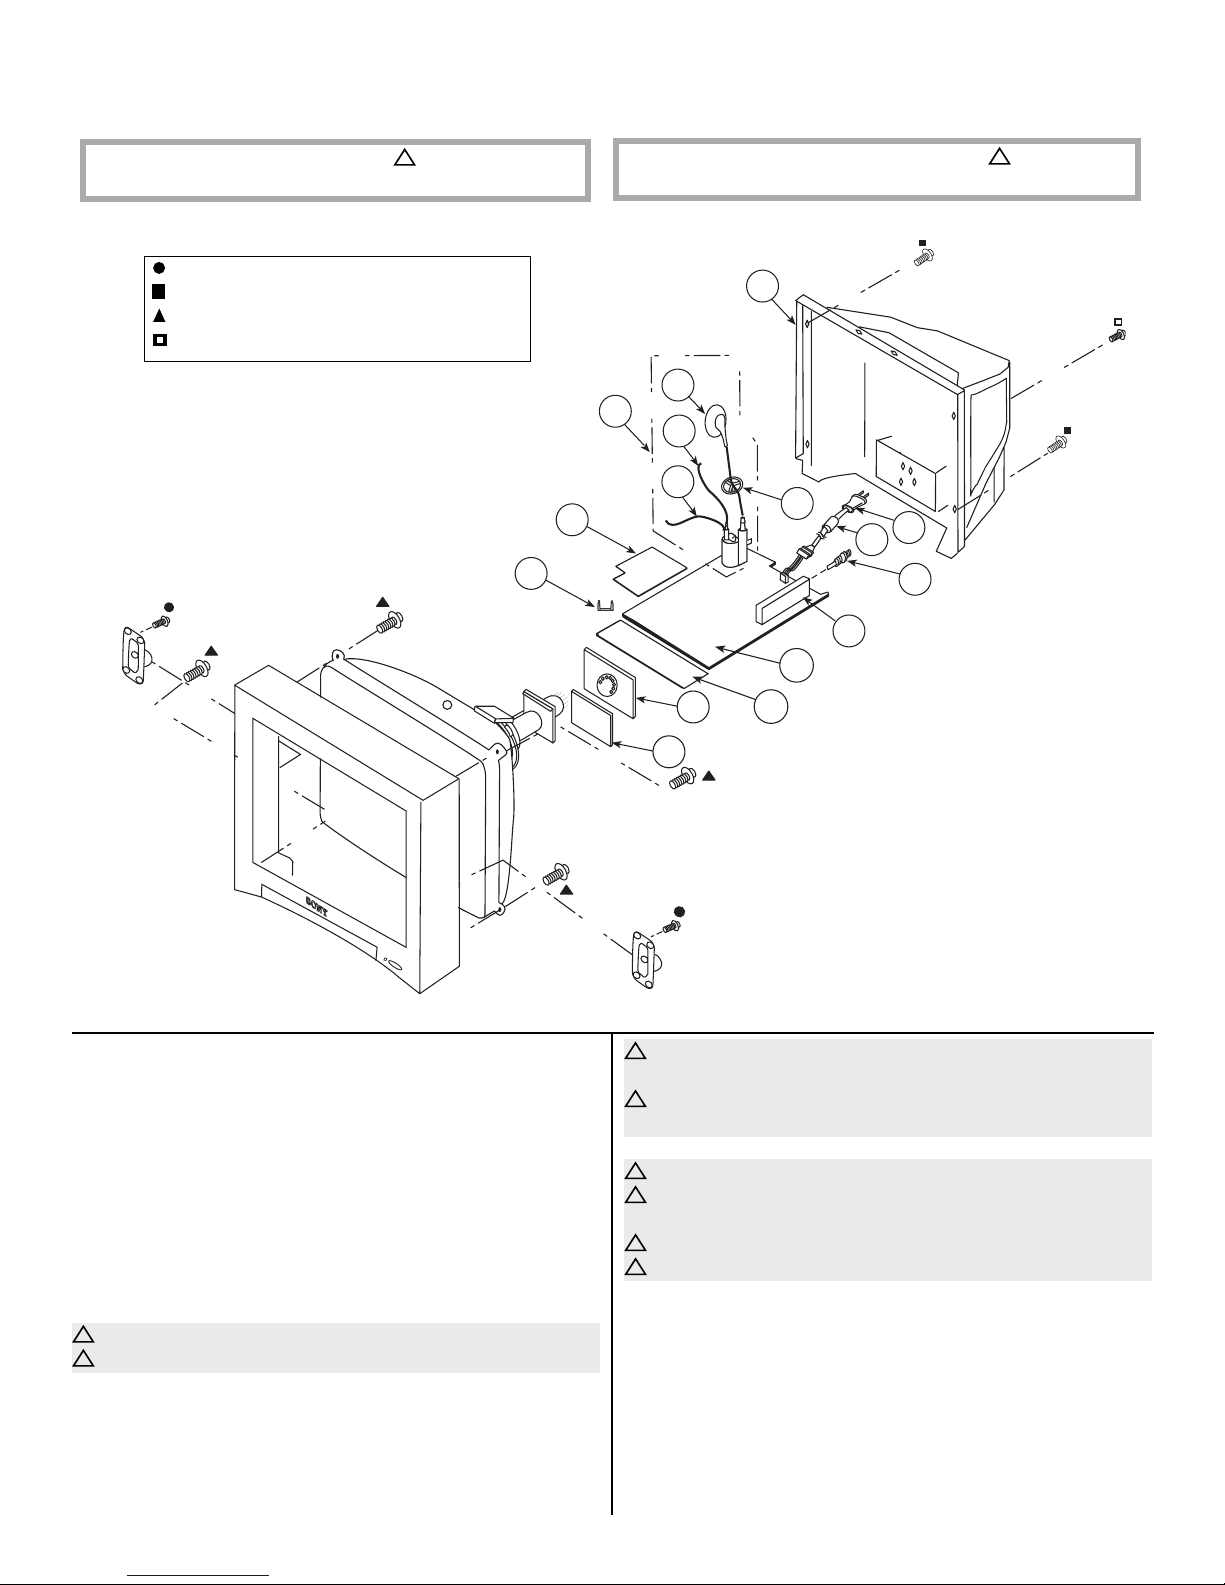
KV-27FA310/27FS120/29FA310/29FS120
!
NOTE: The components identifi ed by shading and
Replace only with part number specifi ed.
mark are critical for safety.
6-2. CHASSIS (KV-27FS120/29FS120 ONLY)
4-388-477-01 SCREW(3X16),TAPPING,+BV WASHER
7-685-663-71 SCREW +BVTP 4X16 TYPE2 IT-3
4-046-765-12 SCREW, TAPPING 7+CROWN WASHER
7-685-648-79 SCREW +BVTP 3X12 TYPE2 IT-3
54
53
!
NOTE: Les composants identifi es per un trame et une marque
la securite. Ne les remplacer que par une piece portant le numero specifi e.
sont critiques pour
55
50
49
51
52
48
47
46
45
44
43
41
42
REF. NO. PART NO. DESCRIPTION [ASSEMBLY INCLUDES]
* 40 A-1410-924-A V BOARD, MOUNTED
* 41 A-1410-925-A CW BOARD, MOUNTED
* 42 A-1415-674-A HS BOARD, MOUNTED
* 43 A-1052-931-A A BOARD, COMPLETE
(KV-29FS120 L. SOUTH ONLY)
The high-voltage leads associated with the FBT on the A board
are not included and must be ordered separately. (See 50-52)
* 43 A-1302-967-A A BOARD, COMPLETE
(ALL EXCEPT KV-29FS120 L. SOUTH)
The high-voltage leads associated with the FBT on the A board
are not included and must be ordered separately. (See 50-52)
!
44 8-598-593-50 TUNER, FSS BTF-WA421
!
45 1-766-374-11 PLUG, F-PIN
46 1-500-586-11 FILTER, CLAMP (FERRITE CORE)
(KV-29FS120 L. SOUTH ONLY)
40
REF. NO. PART NO. DESCRIPTION [ASSEMBLY INCLUDES]
!
47 1-824-069-11 CORD, AC POWER (WITH CONNECTOR)
(ALL EXCEPT KV-29FS120 L. SOUTH)
!
47 1-757-840-12 CORD, POWER (WITH CONNECTOR)
(KV-29FS120 L. SOUTH ONLY)
48 4-084-918-01 HOLDER, HV CABLE
!
49 1-453-310-21 FBT ASSY NX-4521//X4J4 [50-52]
!
50 1-251-374-14 CAP ASSY, HIGH-VOLTAGE
!
51 1-900-800-65 CONNECTOR ASSY, FOCUS LEAD
!
52 1-900-803-22 WIRE ASSY, G2 LEAD
* 53 A-1415-635-A D BOARD, MOUNTED
* 54 3-696-606-02 HINGE, VI
55 4-089-050-32 COVER, REAR
KV-27FA310/27FS120/29FA310/29FS120
56
Page 57
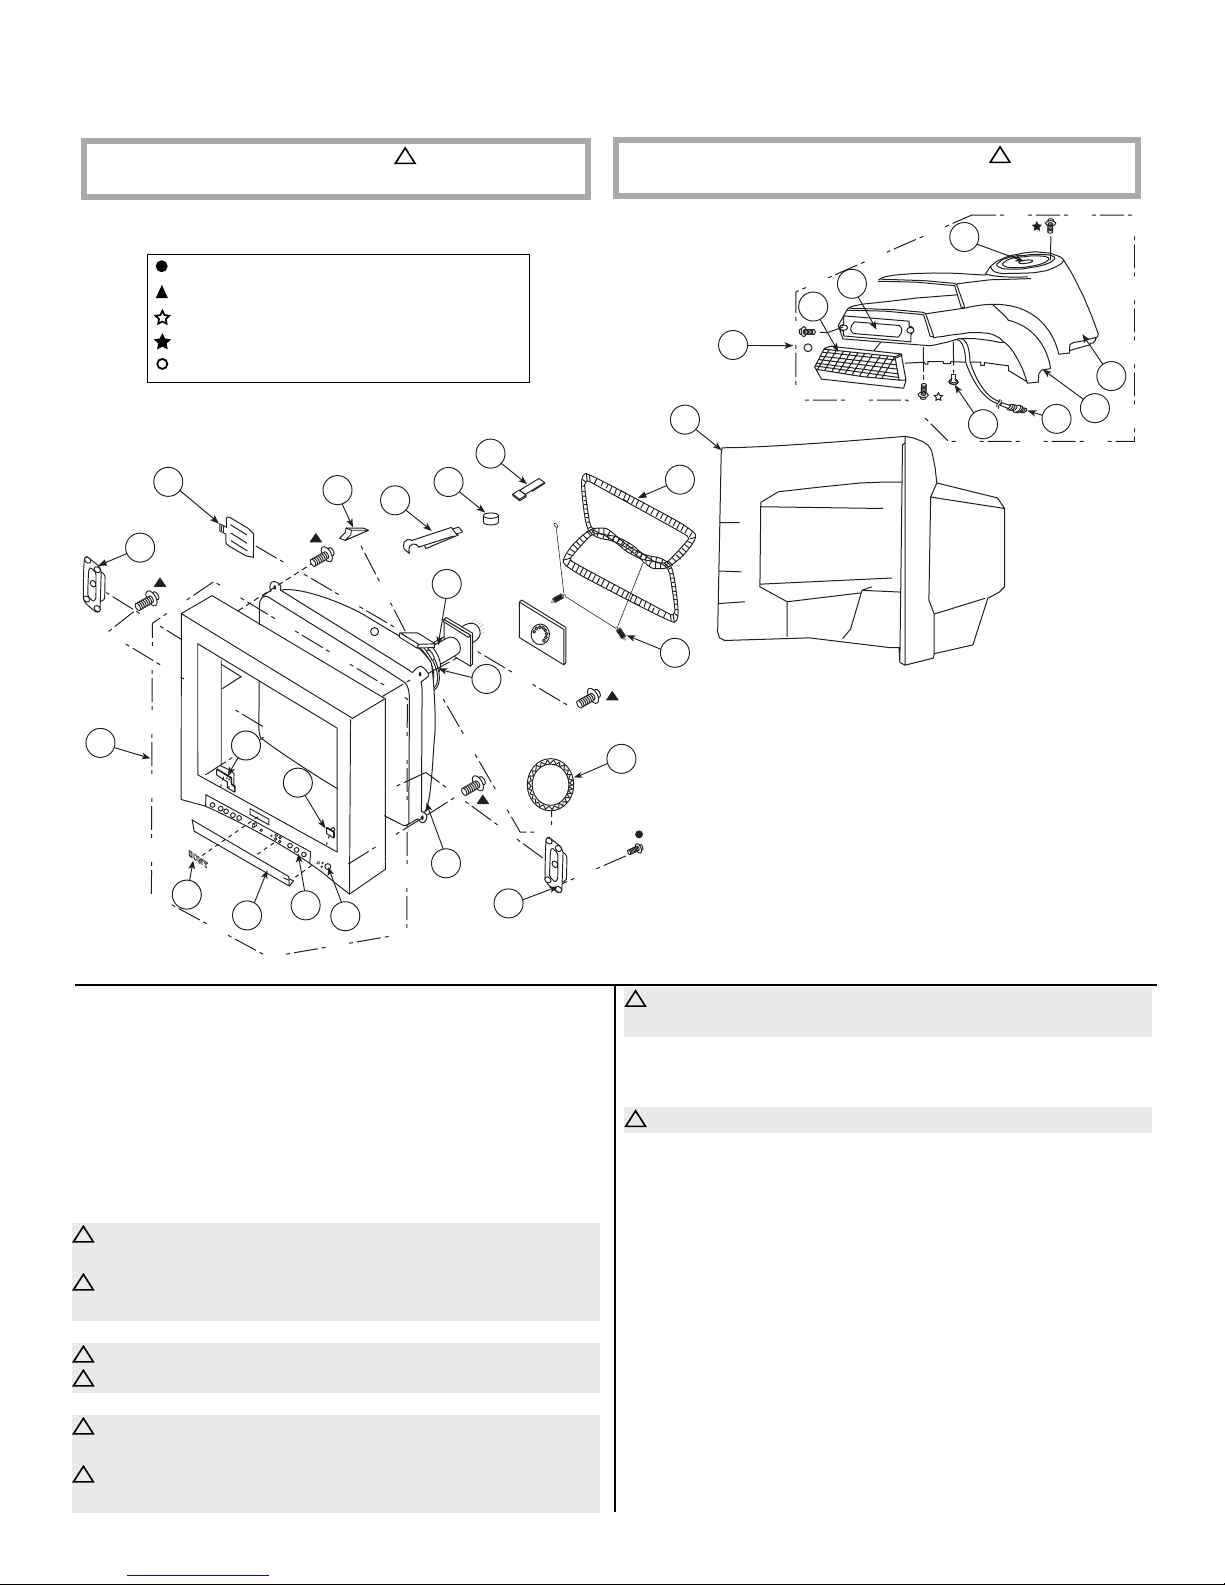
KV-27FA310/27FS120/29FA310/29FS120
!
NOTE: The components identifi ed by shading and
Replace only with part number specifi ed.
mark are critical for safety.
6-3. PICTURE TUBE (KV-27FA310/29FA310 ONLY)
4-388-477-01 SCREW(3X16),TAPPING,+BV WASHER
4-046-765-12 SCREW, TAPPING 7+CROWN WASHER
7-685-663-71 SCREW +BVTP 4X16 TYPE2 IT-3
7-685-661-14 SCREW +BVTP 4X12 TYPE2 IT-3
4-384-096-01 SCREW (4X16), TAPPING, +P
14
19
18
9
15
16
17
11
!
NOTE: Les composants identifi es per un trame et une marque
la securite. Ne les remplacer que par une piece portant le numero specifi e.
sont critiques pour
24
23
22
21
20
28
27
13
12
25
26
1
7
10
6
8
2
REF. NO. PART NO. DESCRIPTION [ASSEMBLY INCLUDES] REF. NO. PART NO. DESCRIPTION [ASSEMBLY INCLUDES]
4
3
5
1 X-4043-169-2 BEZNET ASSY [2-7]
(KV-27FA310 ONLY)
1 X-4043-169-1 BEZNET ASSY [2-7]
(KV-29FA310 ONLY)
2 4-046-160-31 EMBLEM, SONY NO.9
* 3 4-087-375-31 DOOR, CONTROL
4 4-087-376-21 LABEL, FRONT TERMINAL
5 4-087-150-41 BUTTON, POWER
6 4-087-156-01 GUIDE, LIGHT
7 4-087-374-11 SPRING, DOOR
!
8 8-735-082-05 CRT 29RSN(SDP) M68LNH050X
(KV-27FA310 & KV-29FA310 L. NORTH ONLY)
!
8 8-735-083-05 CRT 29RSN(SDP)(SOUTH)
(KV-29FA310 L. SOUTH ONLY)
9 1-825-417-21 LOUDSPEAKER (16X12CM)
!
10 1-452-896-11 COIL, NA ROTATION (RT-200)
!
11 8-451-494-41 DY Y29RSA-V
12 4-036-329-01 SPRING (B), TENSION
!
13 1-419-156-22 COIL, DEGAUSSING
(KV-27FA310 ONLY)
!
13 1-419-156-21 COIL, DEGAUSSING
9
!
13 1-419-523-21 COIL, DEGAUSSING
(KV-29FA310 L. SOUTH ONLY)
14 4-083-414-01 PIECE A(110), CONV CORRECT
15 1-452-885-11 MAGNET, LANDING
* 16 4-062-970-12 CLIP (29RSN), DGC
!
17 8-453-011-11 NECK ASSEMBLY 299-M
18 4-053-005-01 SPACER, DY
19 4-081-170-01 PLATE, TLH CORRECTION
20 4-093-996-12 COVER, REAR
(KV-27FA310 ONLY)
20 4-093-996-11 COVER, REAR
(KV-29FA310 ONLY)
21 A-1606-603-A SPEAKER ASSY (29) [22-28]
* 22 4-101-820-01 GRILLE, CENTER (W29)
23 1-825-809-11 LOUDSPEAKER (19.2CMX4.2CM)
24 1-825-807-11 LOUDSPEAKER (13CM)
* 25 X-2022-510-1 TOP ASSY (W29), COVER
* 26 4-101-830-01 COVER, BOTTOM (W29)
* 27 1-828-903-11 CONNECTION CABLE
* 28 4-068-528-41 FOOT
(KV-29FA310 L. NORTH ONLY)
KV-27FA310/27FS120/29FA310/29FS120
57
Page 58
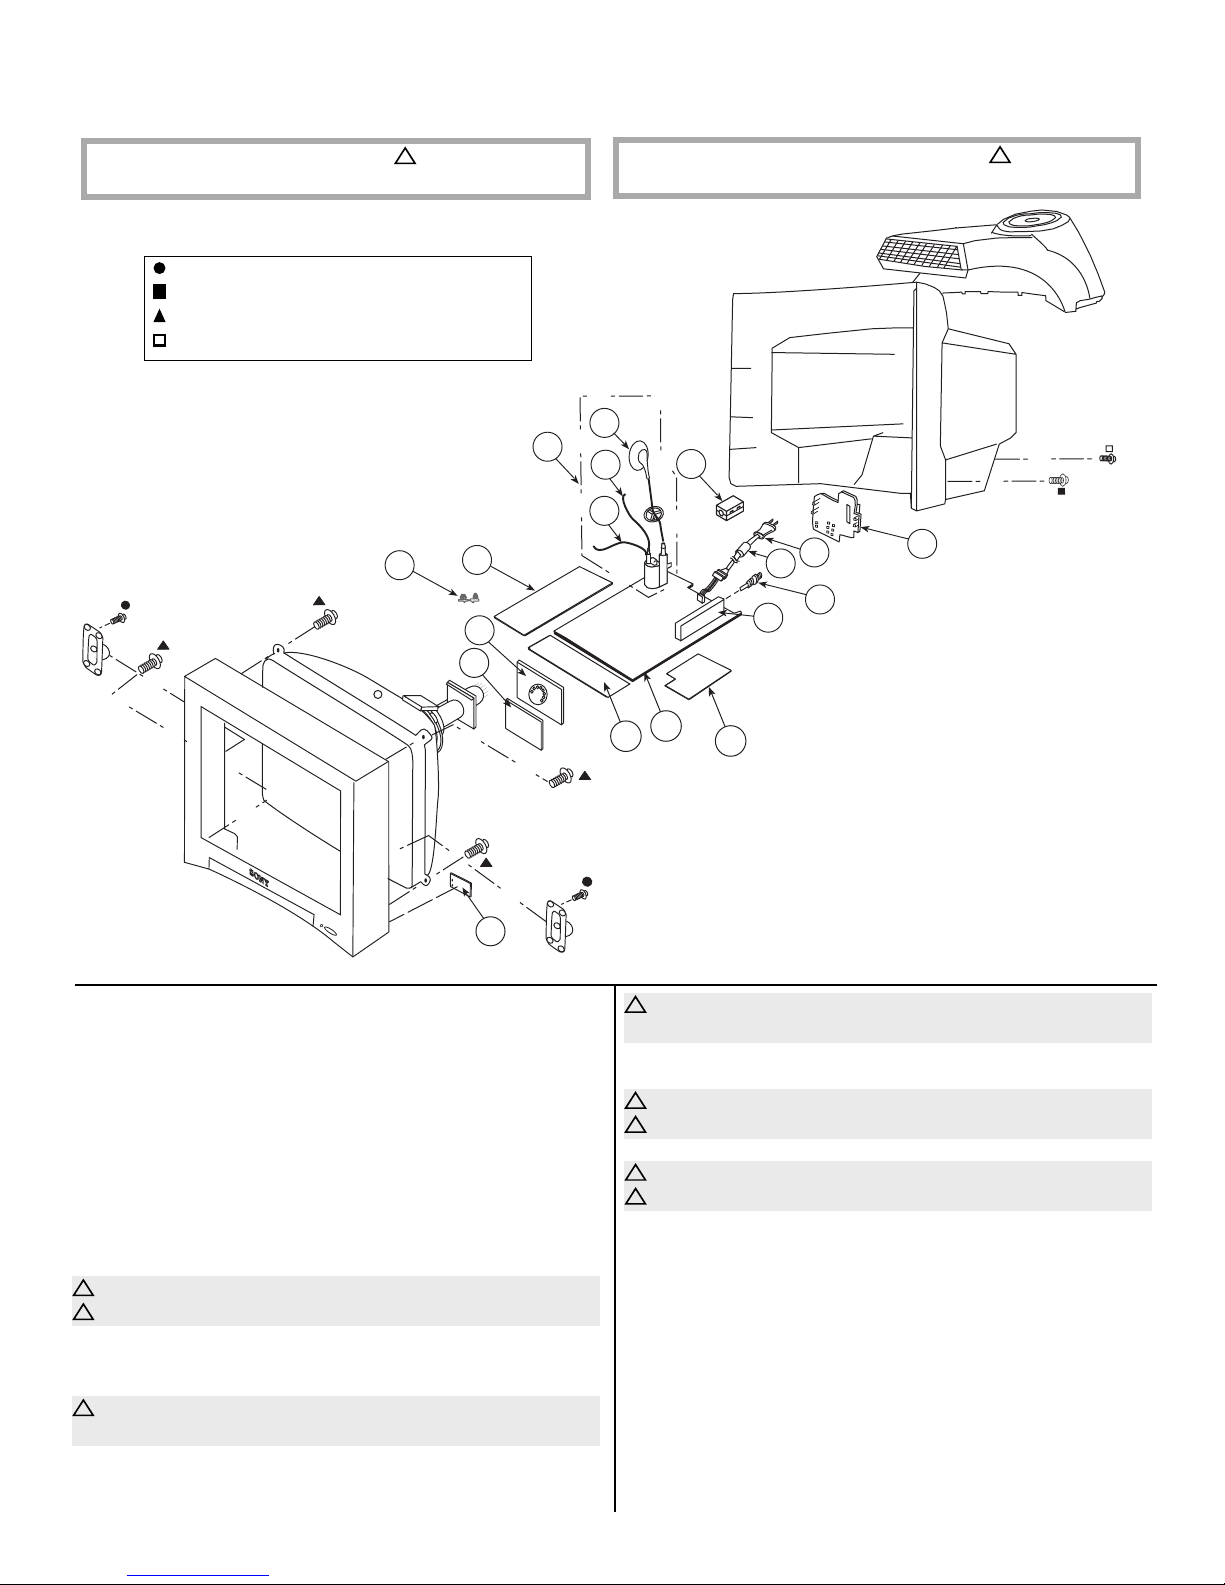
KV-27FA310/27FS120/29FA310/29FS120
!
NOTE: The components identifi ed by shading and
Replace only with part number specifi ed.
mark are critical for safety.
6-4. CHASSIS (KV-27FA310/29FA310 ONLY)
4-388-477-01 SCREW(3X16),TAPPING,+BV WASHER
7-685-663-71 SCREW +BVTP 4X16 TYPE2 IT-3
4-046-765-12 SCREW, TAPPING 7+CROWN WASHER
7-685-647-79 SCREW +BVTP 3X10 TYPE2 IT-3
50
55
54
56
57
NOTE: Les composants identifi es per un trame et une marque
la securite. Ne les remplacer que par une piece portant le numero specifi e.
!
51
52
49
53
46
47
48
45
44
42
41
43
sont critiques pour
40
REF. NO. PART NO. DESCRIPTION [ASSEMBLY INCLUDES] REF. NO. PART NO. DESCRIPTION [ASSEMBLY INCLUDES]
* 40 A-1415-629-A HR (VAR) BOARD, MOUNTED
. . .
* 41 A-1415-631-A HU (VAR) BOARD, MOUNTED
* 42 A-1302-880-A A BOARD, COMPLETE
(KV-27FA310 & KV-29FA310 L. NORTH ONLY)
The high-voltage leads associated with the FBT on the A board
are not included and must be ordered separately. (See 51-53)
!
47 1-757-840-12 CORD, POWER (WITH CONNECTOR)
(KV-29FA310 L. SOUTH ONLY)
* 48 4-087-877-41 TERMINAL BRACKET
49 1-500-082-11 CLAMP, SLEEVE FERRITE
!
50 1-453-310-21 FBT ASSY NX-4521//X4J4 [51-53]
!
51 1-251-374-14 CAP ASSY, HIGH-VOLTAGE
* 42 A-1302-954-A A BOARD, COMPLETE
(KV-29FA310 L. SOUTH ONLY)
The high-voltage leads associated with the FBT on the A board
are not included and must be ordered separately. (See 51-53)
!
52 1-900-800-65 CONNECTOR ASSY, FOCUS LEAD
!
53 1-900-803-22 WIRE ASSY, G2 LEAD
* 54 A-1410-927-A GD (COM) BOARD, MOUNTED
* 55 4-076-951-01 HINGE, PWB
* 43 A-1410-921-A K BOARD, MOUNTED
!
44 8-598-593-50 TUNER, FSS BTF-WA421
!
45 1-766-374-11 PLUG, F-PIN
* 56 A-1410-925-A CW BOARD, MOUNTED
* 57 A-1410-924-A V BOARD, MOUNTED
46 1-500-586-11 FILTER, CLAMP (FERRITE CORE)
(KV-29FA310 L. SOUTH ONLY)
!
47 1-824-069-11 CORD, AC POWER (WITH CONNECTOR)
(KV-27FA310 & KV-29FA310 L. NORTH ONLY)
KV-27FA310/27FS120/29FA310/29FS120
58
Page 59
SECTION 7: ELECTRICAL PARTS LIST
KV-27FA310/27FS120/29FA310/29FS120
NOTE: The components identifi ed by shading
!
mark are critical for safety. Replace only
and
with part number specifi ed.
NOTE: Les composants identifi es per un trame et
une marque
Ne les remplacer que par une piece portant le
numero specifi e.
REF. NO. PART NO. DESCRIPTION VALUES
!
sont critiques pour la securite.
A
* A-1052-931-A A BOARD, COMPLETE
(KV-29FS120LS ONLY)
* A-1302-880-A A BOARD, COMPLETE
(KV-27FA310/29FA310LN ONLY)
* A-1302-954-A A BOARD, COMPLETE
(KV-29FA310LS ONLY)
* A-1302-967-A A BOARD, COMPLETE
(KV-27FS120/29FS120LN ONLY)
!
1-533-223-11 FUSE HOLDER 0A 0V
* 4-374-846-11 COVER, CAPACITOR, CAP TYPE
4-382-854-11 SCREW (M3X10), P, SW (+)
The high-voltage leads associated with the FBT on the A board are not included and
must be ordered separately. Order the following leads when requesting this A Board:
!
1-251-374-14 CAP ASSY, HIGH-VOLTAGE
!
1-900-803-22 WIRE ASSY, G2 LEAD
!
1-900-800-65 CONNECTOR ASSY, FOCUS LEAD
CAPACITOR
C003 1-162-919-11 CERAMIC CHIP 22pF 5% 50V
C004 1-162-923-11 CERAMIC CHIP 47pF 5% 50V
C005 1-162-966-11 CERAMIC CHIP 0.0022µF 10% 50V
C006 1-126-942-61 ELECT 1000µF 20% 25V
C007 1-164-315-11 CERAMIC CHIP 470pF 5% 50V
C008 1-126-956-91 ELECT 0.1µF 20% 50V
C009 1-164-230-11 CERAMIC CHIP 220pF 5% 50V
C010 1-126-960-11 ELECT 1µF 20% 50V
C011 1-162-964-11 CERAMIC CHIP 0.001µF 10% 50V
C012 1-162-968-11 CERAMIC CHIP 0.0047µF 10% 50V
C014 1-126-960-11 ELECT 1µF 20% 50V
C015 1-107-826-11 CERAMIC CHIP 0.1µF 10% 16V
C019 1-126-956-91 ELECT 0.1µF 20% 50V
C021 1-107-826-11 CERAMIC CHIP 0.1µF 10% 16V
C022 1-126-964-11 ELECT 10µF 20% 50V
The components in this manual identifi ed by the following
symbol:
selected to satisfy regulations regarding X-ray radiation
for each set.
Should replacement be required for one of these
components, replace only with the value originally used.
Items marked with an asterisk are not stocked since they
*
are seldom required for routine service. Expect some delay
when ordering these components.
indicate parts that have been carefully factory-
REF. NO. PART NO. DESCRIPTION VALUES
C023 1-126-935-11 ELECT 470µF 20% 16V
C033 1-162-970-11 CERAMIC CHIP 0.01µF 10% 25V
C041 1-126-964-11 ELECT 10µF 20% 50V
C047 1-164-315-11 CERAMIC CHIP 470pF 5% 50V
C048 1-104-665-11 ELECT 100µF 20% 25V
C049 1-126-960-11 ELECT 1µF 20% 50V
C051 1-126-964-11 ELECT 10µF 20% 50V
C052 1-164-230-11 CERAMIC CHIP 220pF 5% 50V
C053 1-165-176-11 CERAMIC CHIP 0.047µF 10% 16V
C054 1-126-960-11 ELECT 1µF 20% 50V
C056 1-162-966-11 CERAMIC CHIP 0.0022µF 10% 50V
C057 1-107-826-11 CERAMIC CHIP 0.1µF 10% 16V
C064 1-165-176-11 CERAMIC CHIP 0.047µF 10% 16V
C074 1-126-964-11 ELECT 10µF 20% 50V
C075 1-126-935-11 ELECT 470µF 20% 16V
C076 1-104-665-11 ELECT 100µF 20% 25V
C077 1-126-947-11 ELECT 47µF 20% 35V
C079 1-162-968-11 CERAMIC CHIP 0.0047µF 10% 50V
C080 1-128-934-91 CERAMIC CHIP 0.33µF 20% 10V
C081 1-128-934-91 CERAMIC CHIP 0.33µF 20% 10V
C090 1-162-970-11 CERAMIC CHIP 0.01µF 10% 25V
C091 1-126-947-11 ELECT 47µF 20% 35V
C092 1-126-947-11 ELECT 47µF 20% 35V
C094 1-162-970-11 CERAMIC CHIP 0.01µF 10% 25V
C095 1-126-947-11 ELECT 47µF 20% 35V
C096 1-162-970-11 CERAMIC CHIP 0.01µF 10% 25V
C097 1-126-947-11 ELECT 47µF 20% 35V
C098 1-162-970-11 CERAMIC CHIP 0.01µF 10% 25V
C099 1-126-947-11 ELECT 47µF 20% 35V
C100 1-126-956-91 ELECT 0.1µF 20% 50V
C115 1-164-739-11 CERAMIC CHIP 560pF 5% 50V
C116 1-107-826-11 CERAMIC CHIP 0.1µF 10% 16V
C200 1-125-891-11 CERAMIC CHIP 0.47µF 10% 10V
C202 1-125-891-11 CERAMIC CHIP 0.47µF 10% 10V
C203 1-125-891-11 CERAMIC CHIP 0.47µF 10% 10V
KV-27FA310/27FS120/29FA310/29FS120
RESISTORS
• All resistors are in ohms
• F : nonfl ammable
• All variable and adjustable resistors
have characteristic curve B, unless
otherwise noted.
When ordering parts by reference
number, please include the board name.
A
59
Page 60
KV-27FA310/27FS120/29FA310/29FS120
NOTE: The components identifi ed by shading
!
mark are critical for safety. Replace only
and
with part number specifi ed.
REF. NO. PART NO. DESCRIPTION VALUES
C204 1-216-864-11 SHORT CHIP
C205 1-216-864-11 SHORT CHIP
C206 1-126-963-11 ELECT 4.7µF 20% 50V
C207 1-126-963-11 ELECT 4.7µF 20% 50V
C212 1-126-963-11 ELECT 4.7µF 20% 50V
C213 1-126-963-11 ELECT 4.7µF 20% 50V
C220 1-125-891-11 CERAMIC CHIP 0.47µF 10% 10V
C301 1-126-956-91 ELECT 0.1µF 20% 50V
C302 1-126-956-91 ELECT 0.1µF 20% 50V
C303 1-126-956-91 ELECT 0.1µF 20% 50V
C304 1-126-956-91 ELECT 0.1µF 20% 50V
C305 1-107-826-11 CERAMIC CHIP 0.1µF 10% 16V
C306 1-107-826-11 CERAMIC CHIP 0.1µF 10% 16V
C307 1-107-826-11 CERAMIC CHIP 0.1µF 10% 16V
C313 1-126-956-91 ELECT 0.1µF 20% 50V
C317 1-126-964-11 ELECT 10µF 20% 50V
C318 1-126-964-11 ELECT 10µF 20% 50V
C319 1-126-964-11 ELECT 10µF 20% 50V
C325 1-162-967-11 CERAMIC CHIP 0.0033µF 10% 50V
C326 1-164-505-11 CERAMIC CHIP 2.2µF 16V
C328 1-162-970-11 CERAMIC CHIP 0.01µF 10% 25V
C330 1-162-970-11 CERAMIC CHIP 0.01µF 10% 25V
C337 1-162-919-11 CERAMIC CHIP 22pF 5% 50V
C351 1-164-315-11 CERAMIC CHIP 470pF 5% 50V
C370 1-162-968-11 CERAMIC CHIP 0.0047µF 10% 50V
C390 1-162-970-11 CERAMIC CHIP 0.01µF 10% 25V
C400 1-128-934-91 CERAMIC CHIP 0.33µF 20% 10V
C401 1-164-227-11 CERAMIC CHIP 0.022µF 10% 25V
C402 1-164-174-11 CERAMIC CHIP 0.0082µF 10% 25V
C403 1-162-967-11 CERAMIC CHIP 0.0033µF 10% 50V
C404 1-162-967-11 CERAMIC CHIP 0.0033µF 10% 50V
C405 1-164-677-11 CERAMIC CHIP 0.033µF 10% 16V
C406 1-164-677-11 CERAMIC CHIP 0.033µF 10% 16V
C407 1-162-965-11 CERAMIC CHIP 0.0015µF 10% 50V
C408 1-162-965-11 CERAMIC CHIP 0.0015µF 10% 50V
C409 1-127-715-91 CERAMIC CHIP 0.22µF 10% 16V
C410 1-127-715-91 CERAMIC CHIP 0.22µF 10% 16V
C411 1-128-934-91 CERAMIC CHIP 0.33µF 20% 10V
C412 1-126-960-11 ELECT 1µF 20% 50V
C413 1-126-963-11 ELECT 4.7µF 20% 50V
C414 1-126-961-11 ELECT 2.2µF 20% 50V
C415 1-126-963-11 ELECT 4.7µF 20% 50V
C416 1-126-960-11 ELECT 1µF 20% 50V
C418 1-126-963-11 ELECT 4.7µF 20% 50V
NOTE: Les composants identifi es per un trame et une
marque
remplacer que par une piece portant le numero specifi e.
!
sont critiques pour la securite. Ne les
KV-27FA310/27FS120/29FA310/29FS120
A
REF. NO. PART NO. DESCRIPTION VALUES
C419 1-125-891-11 CERAMIC CHIP 0.47µF 10% 10V
C420 1-126-960-11 ELECT 1µF 20% 50V
C421 1-126-965-91 ELECT 22µF 20% 50V
C422 1-126-960-11 ELECT 1µF 20% 50V
C423 1-126-963-11 ELECT 4.7µF 20% 50V
C424 1-125-891-11 CERAMIC CHIP 0.47µF 10% 10V
C430 1-126-963-11 ELECT 4.7µF 20% 50V
C431 1-126-963-11 ELECT 4.7µF 20% 50V
C436 1-107-826-11 CERAMIC CHIP 0.1µF 10% 16V
C450 1-126-943-11 ELECT 2200µF 20% 25V
C451 1-126-959-11 ELECT 0.47µF 20% 50V
C452 1-126-960-11 ELECT 1µF 20% 50V
C457 1-127-715-91 CERAMIC CHIP 0.22µF 10% 16V
(KV-27FS120/29FS120LN/29FS120LS ONLY)
C457 1-165-176-11 CERAMIC CHIP 0.047µF 10% 16V
(KV-27FA310/29FA310 ONLY)
C458 1-127-715-91 CERAMIC CHIP 0.22µF 10% 16V
(KV-27FS120/29FS120LN/29FS120LS ONLY)
C458 1-165-176-11 CERAMIC CHIP 0.047µF 10% 16V
(KV-27FA310/29FA310 ONLY)
C460 1-126-943-11 ELECT 2200µF 20% 25V
C461 1-126-943-11 ELECT 2200µF 20% 25V
C462 1-126-943-11 ELECT 2200µF 20% 25V
C463 1-126-943-11 ELECT 2200µF 20% 25V
C470 1-126-935-11 ELECT 470µF 20% 16V
C501 1-126-959-11 ELECT 0.47µF 20% 50V
C502 1-102-112-00 CERAMIC 330pF 10% 50V
C503 1-106-383-00 MYLAR 0.047µF 10% 200V
C504 1-102-228-00 CERAMIC 470pF 10% 500V
C505 1-102-228-00 CERAMIC 470pF 10% 500V
!
C506 1-117-214-11 CERAMIC 0.001µF 10% 2KV
!
C507 1-127-717-21 FILM 19000pF 3% 1.2KV
!
C508 1-129-722-00 FILM 0.047µF 5% 630V
C509 1-126-964-11 ELECT 10µF 20% 50V
!
C510 1-162-116-00 CERAMIC 680pF 10% 2KV
C511 1-109-844-11 FILM 0.68µF 5% 400V
C512 1-104-987-11 MYLAR 0.001µF 5% 200V
!
C513 1-106-383-00 MYLAR 0.047µF 10% 200V
C514 1-115-521-11 FILM 0.82µF 5% 250V
C515 1-107-649-11 ELECT 2.2µF 20% 250V
C516 1-117-412-11 FILM 0.24µF 5% 250V
C519 1-216-864-11 SHORT CHIP
C520 1-126-965-91 ELECT 22µF 20% 50V
C521 1-126-960-11 ELECT 1µF 20% 50V
60
Page 61
KV-27FA310/27FS120/29FA310/29FS120
NOTE: The components identifi ed by shading
!
mark are critical for safety. Replace only
and
with part number specifi ed.
REF. NO. PART NO. DESCRIPTION VALUES
C522 1-102-244-00 CERAMIC 220pF 10% 500V
C523 1-165-529-11 MYLAR 0.22µF 10 275V
C525 1-164-646-11 CERAMIC 2200pF 10% 500V
C526 1-102-244-00 CERAMIC 220pF 10% 500V
C527 1-107-645-11 ELECT 22µF 20% 200V
C529 1-164-690-91 CERAMIC CHIP 0.0022µF 5% 50V
C534 1-162-966-11 CERAMIC CHIP 0.0022µF 10% 50V
C536 1-162-968-11 CERAMIC CHIP 0.0047µF 10% 50V
C537 1-162-964-11 CERAMIC CHIP 0.001µF 10% 50V
C539 1-162-970-11 CERAMIC CHIP 0.01µF 10% 25V
C542 1-162-966-11 CERAMIC CHIP 0.0022µF 10% 50V
C543 1-102-106-00 CERAMIC CHIP .0001µF 50V
(KV-27FA310/29FA310 ONLY)
C544 1-126-967-11 ELECT 47µF 20% 50V
C545 1-126-969-11 ELECT 220µF 20% 50V
C546 1-137-194-81 FILM 0.47µF 5% 50V
C549 1-101-821-00 CERAMIC 0.0022µF 500V
C550 1-104-666-11 ELECT 220µF 20% 25V
C551 1-126-960-11 ELECT 1µF 20% 50V
C552 1-126-964-11 ELECT 10µF 20% 50V
C553 1-107-826-11 CERAMIC CHIP 0.1µF 10% 16V
C554 1-162-970-11 CERAMIC CHIP 0.01µF 10% 25V
C555 1-101-821-00 CERAMIC 0.0022µF 500V
C558 1-162-318-11 CERAMIC 0.001µF 10% 500V
C559 1-216-864-11 SHORT CHIP
C560 1-216-833-11 METAL CHIP 10K 5% 1/10W
C561 1-126-963-11 ELECT 4.7µF 20% 50V
C562 1-104-666-11 ELECT 220µF 20% 25V
C563 1-162-970-11 CERAMIC CHIP 0.01µF 10% 25V
C566 1-107-635-11 ELECT 4.7µF 20% 160V
C571 1-104-665-11 ELECT 100µF 20% 25V
C581 1-136-161-00 FILM 0.047µF 5% 50V
C582 1-106-387-00 MYLAR 0.068µF 10% 200V
C585 1-104-666-11 ELECT 220µF 20% 25V
C588 1-137-417-11 MYLAR 0.015µF 10% 100V
C589 1-128-560-11 ELECT 22µF 20% 100V
C590 1-126-964-11 ELECT 10µF 20% 50V
C594 1-123-024-21 ELECT 33µF 160V
C595 1-104-666-11 ELECT 220µF 20% 25V
C597 1-104-666-11 ELECT 220µF 20% 25V
C600 1-126-964-11 ELECT 10µF 20% 50V
C601 1-117-703-11 CERAMIC 0.0047µF 250V
(KV-29FS120LS/29FA310LS ONLY)
NOTE: Les composants identifi es per un trame et une
marque
remplacer que par une piece portant le numero specifi e.
!
sont critiques pour la securite. Ne les
KV-27FA310/27FS120/29FA310/29FS120
A
REF. NO. PART NO. DESCRIPTION VALUES
!
C602 1-165-529-11 MYLAR 0.22µF 10 275V
!
C603 1-165-529-11 MYLAR 0.22µF 10 275V
!
C605 1-117-699-11 CERAMIC 0.001µF 20% 250V
C609 1-126-942-61 ELECT 1000µF 20% 25V
C610 1-164-645-11 CERAMIC 1000pF 10% 500V
(KV-27FS120/29FS120LN/29FS120LS ONLY)
C611 1-126-971-11 ELECT 470µF 20% 50V
C612 1-126-961-11 ELECT 2.2µF 20% 50V
C613 1-161-964-91 CERAMIC 0.0047µF 250V
C615 1-161-964-91 CERAMIC 0.0047µF 250V
C616 1-126-943-11 ELECT 2200µF 20% 25V
(KV-27FS120/29FS120LN/29FS120LS ONLY)
C617 1-107-935-11 ELECT 330µF 20% 100V
(KV-27FS120/29FS120LN/29FS120LS ONLY)
C618 1-107-935-11 ELECT 330µF 20% 100V
(KV-27FS120/29FS120LN/29FS120LS ONLY)
C620 1-162-970-11 CERAMIC CHIP 0.01µF 10% 25V
(KV-27FS120/29FS120LN/29FS120LS ONLY)
C621 1-117-893-11 ELECT 470µF 20% 250V
(KV-27FS120/29FS120LN/29FS120LS ONLY)
C621 1-117-894-11 ELECT 560µF 20% 250V
(KV-27FA310/29FA310 ONLY)
C624 1-107-636-11 ELECT 10µF 20% 160V
(KV-27FS120/29FS120LN/29FS120LS ONLY)
C625 1-126-964-11 ELECT 10µF 20% 50V
(KV-27FS120/29FS120LN/29FS120LS ONLY)
C629 1-117-893-11 ELECT 470µF 20% 250V
(KV-27FS120/29FS120LN/29FS120LS ONLY)
C629 1-117-894-11 ELECT 560µF 20% 250V
(KV-27FA310/29FA310 ONLY)
!
C631 1-113-896-11 CERAMIC 220pF 10% 250V
(KV-27FS120/29FS120LN/29FS120LS ONLY)
C632 1-126-967-11 ELECT 47µF 20% 50V
(KV-27FS120/29FS120LN/29FS120LS ONLY)
C633 1-136-479-11 FILM 0.001µF 5% 100V
(KV-27FS120/29FS120LN/29FS120LS ONLY)
C634 1-126-947-11 ELECT 47µF 20% 35V
(KV-27FS120/29FS120LN/29FS120LS ONLY)
C635 1-126-963-11 ELECT 4.7µF 20% 50V
(KV-27FS120/29FS120LN/29FS120LS ONLY)
C636 1-127-715-91 CERAMIC CHIP 0.22µF 10% 16V
(KV-27FS120/29FS120LN/29FS120LS ONLY)
C637 1-127-715-91 CERAMIC CHIP 0.22µF 10% 16V
(KV-27FS120/29FS120LN/29FS120LS ONLY)
C638 1-104-665-11 ELECT 100µF 20% 25V
61
Page 62
KV-27FA310/27FS120/29FA310/29FS120
NOTE: The components identifi ed by shading
!
mark are critical for safety. Replace only
and
with part number specifi ed.
REF. NO. PART NO. DESCRIPTION VALUES
C640 1-164-645-11 CERAMIC 1000pF 10% 500V
(KV-27FS120/29FS120LN/29FS120LS ONLY)
C642 1-126-969-11 ELECT 220µF 20% 50V
(KV-27FS120/29FS120LN/29FS120LS ONLY)
C643 1-130-777-00 MYLAR 0.1µF 5% 100V
(KV-27FS120/29FS120LN/29FS120LS ONLY)
C645 1-162-964-11 CERAMIC CHIP 0.001µF 10% 50V
(KV-27FS120/29FS120LN/29FS120LS ONLY)
C647 1-126-947-11 ELECT 47µF 20% 35V
(KV-27FS120/29FS120LN/29FS120LS ONLY)
C648 1-104-330-91 CERAMIC 470pF 10% 1KV
(KV-27FS120/29FS120LN/29FS120LS ONLY)
C650 1-126-942-61 ELECT 1000µF 20% 25V
(KV-27FS120/29FS120LN/29FS120LS ONLY)
C651 1-126-942-61 ELECT 1000µF 20% 25V
(KV-27FS120/29FS120LN/29FS120LS ONLY)
C652 1-164-227-11 CERAMIC CHIP 0.022µF 10% 25V
(KV-27FS120/29FS120LN/29FS120LS ONLY)
C655 1-104-330-91 CERAMIC 470pF 10% 1KV
(KV-27FS120/29FS120LN/29FS120LS ONLY)
C660 1-126-947-11 ELECT 47µF 20% 35V
C661 1-104-665-11 ELECT 100µF 20% 25V
C665 1-104-665-11 ELECT 100µF 20% 25V
C672 1-137-756-22 FILM 22000pF 3% 800V
(KV-27FS120/29FS120LN/29FS120LS ONLY)
C673 1-126-963-11 ELECT 4.7µF 20% 50V
!
C680 1-117-699-11 CERAMIC 0.001µF 20% 250V
C690 1-162-970-11 CERAMIC CHIP 0.01µF 10% 25V
C901 1-218-712-11 METAL CHIP 6.8K 0.50% 1/10W
NOTE: Les composants identifi es per un trame et une
marque
remplacer que par une piece portant le numero specifi e.
!
sont critiques pour la securite. Ne les
A
REF. NO. PART NO. DESCRIPTION VALUES
* CN515 1-580-798-11 CONNECTOR PIN (DY) 6P
* CN585 1-564-511-11 PLUG, CONNECTOR 8P
*
!
CN600 1-580-843-11 PIN, CONNECTOR (POWER)
* CN601 1-580-843-11 PIN, CONNECTOR (POWER)
(KV-27FA310/29FA310 ONLY)
* CN602 1-564-509-11 PLUG, CONNECTOR 6P
(KV-27FA310/29FA310 ONLY)
DIODE
D002 8-719-109-89 DIODE RD5.6ESB2
D003 8-719-110-17 DIODE RD10ESB2
D004 8-719-110-17 DIODE RD10ESB2
D005 8-719-110-17 DIODE RD10ESB2
D006 8-719-921-44 DIODE MTZJ-5.1C
D007 8-719-982-22 DIODE MTZJ-30D
D046 8-719-109-89 DIODE RD5.6ESB2
D047 8-719-109-89 DIODE RD5.6ESB2
D050 8-719-510-02 DIODE D1NS4
D051 6-500-175-01 DIODE 1E3-TB
D052 8-719-109-89 DIODE RD5.6ESB2
D200 8-719-929-15 DIODE HZS9.1NB2
D201 8-719-929-15 DIODE HZS9.1NB2
D202 8-719-929-15 DIODE HZS9.1NB2
D203 8-719-929-15 DIODE HZS9.1NB2
D204 8-719-929-15 DIODE HZS9.1NB2
D205 8-719-929-15 DIODE HZS9.1NB2
D206 8-719-070-62 DIODE PDZ9.1B-115
D207 8-719-404-50 DIODE MA111-TX
D208 8-719-929-15 DIODE HZS9.1NB2
CONNECTOR
* CN002 1-564-510-11 PLUG, CONNECTOR 7P
(KV-27FS120/29FS120LN/29FS120LS ONLY)
* CN002 1-564-509-11 PLUG, CONNECTOR 6P
(KV-27FA310/29FA310 ONLY)
* CN003 1-560-124-00 PLUG, CONNECTOR (2.5MM) 4P
* CN004 1-564-510-11 PLUG, CONNECTOR 7P
* CN401 1-564-507-11 PLUG, CONNECTOR 4P
* CN404 1-564-507-11 PLUG, CONNECTOR 4P
(KV-27FA310/29FA310 ONLY)
* CN501 1-573-963-11 PIN, CONNECTOR (PC BOARD) 3P
* CN506 1-564-507-11 PLUG, CONNECTOR 4P
(KV-27FS120/29FS120LN/29FS120LS ONLY)
KV-27FA310/27FS120/29FA310/29FS120
D209 8-719-404-50 DIODE MA111-TX
D230 8-719-108-12 DIODE RD9.1EW
D231 8-719-108-12 DIODE RD9.1EW
D232 8-719-108-12 DIODE RD9.1EW
D234 8-719-108-12 DIODE RD9.1EW
D235 8-719-108-12 DIODE RD9.1EW
D236 8-719-108-12 DIODE RD9.1EW
D237 8-719-108-12 DIODE RD9.1EW
D317 8-719-108-12 DIODE RD9.1EW
D321 8-719-110-17 DIODE RD10ESB2
D351 8-719-109-66 DIODE RD3.3ESB2
D390 8-719-404-50 DIODE MA111-TX
D401 8-719-921-63 DIODE MTZJ-7.5B
D405 8-719-991-33 DIODE 1SS133T-77
62
Page 63
KV-27FA310/27FS120/29FA310/29FS120
NOTE: The components identifi ed by shading
!
mark are critical for safety. Replace only
and
with part number specifi ed.
REF. NO. PART NO. DESCRIPTION VALUES
D412 1-216-864-11 SHORT CHIP
D414 8-719-921-63 DIODE MTZJ-7.5B
D430 8-719-929-15 DIODE HZS9.1NB2
D431 8-719-929-15 DIODE HZS9.1NB2
D500 8-719-404-50 DIODE MA111-TX
D501 8-719-404-50 DIODE MA111-TX
D505 8-719-081-00 DIODE BY228/A52A/
D506 8-719-312-10 DIODE RU4AM-T3
D507 8-719-991-33 DIODE 1SS133T-77
D508 8-719-404-50 DIODE MA111-TX
D510 8-719-081-00 DIODE BY228/A52A/
D513 8-719-404-50 DIODE MA111-TX
D514 8-719-908-03 DIODE GP08D
D515 8-719-908-03 DIODE GP08D
D525 8-719-991-33 DIODE 1SS133T-77
D526 8-719-074-25 DIODE PG104R
D528 8-719-991-33 DIODE 1SS133T-77
D545 8-719-908-03 DIODE GP08D
D558 8-719-404-50 DIODE MA111-TX
D559 8-719-404-50 DIODE MA111-TX
NOTE: Les composants identifi es per un trame et une
marque
remplacer que par une piece portant le numero specifi e.
!
sont critiques pour la securite. Ne les
A
REF. NO. PART NO. DESCRIPTION VALUES
D614 8-719-057-52 DIODE EZ0150AV1
(KV-27FS120/29FS120LN/29FS120LS ONLY)
D615 6-500-177-01 DIODE MA7D50
(KV-27FS120/29FS120LN/29FS120LS ONLY)
D618 8-719-979-64 DIODE UF4005PKG23
(KV-27FS120/29FS120LN/29FS120LS ONLY)
D620 8-719-911-19 DIODE 1SS119-25
D621 8-719-510-37 DIODE D5LC20U
(KV-27FS120/29FS120LN/29FS120LS ONLY)
D624 8-719-510-73 DIODE S3L20UF4
(KV-27FS120/29FS120LN/29FS120LS ONLY)
D628 8-719-404-50 DIODE MA111-TX
D629 8-719-110-31 DIODE RD12ESB2
D631 6-500-175-01 DIODE 1E3-TB
(KV-27FS120/29FS120LN/29FS120LS ONLY)
D641 8-719-991-33 DIODE 1SS133T-77
D642 8-719-982-22 DIODE MTZJ-30D
D644 8-719-110-31 DIODE RD12ESB2
D645 8-719-109-89 DIODE RD5.6ESB2
D650 8-719-109-89 DIODE RD5.6ESB2
D562 8-719-991-33 DIODE 1SS133T-77
!
D566 8-719-979-84 DIODE EGP20DPKG23
!
D567 8-719-991-33 DIODE 1SS133T-77
!
D568 8-719-921-63 DIODE MTZJ-7.5B
D569 8-719-921-44 DIODE MTZJ-5.1C
D587 8-719-074-25 DIODE PG104R
D589 8-719-991-33 DIODE 1SS133T-77
D596 8-719-979-85 DIODE EGP20G
D598 8-719-979-85 DIODE EGP20G
D603 8-719-064-12 DIODE S1NB60-4062
D604 6-500-890-01 DIODE 1N5406G-EB
(KV-27FS120/29FA310LN/29FS120LN ONLY)
D605 8-719-510-53 DIODE D4SB60L
(KV-29FS120LS/29FA310LS ONLY)
D606 6-500-890-01 DIODE 1N5406G-EB
(KV-27FS120/29FA310LN/29FS120LN ONLY)
D611 8-719-510-73 DIODE S3L20UF4
(KV-27FS120/29FS120LS/29FS120LN ONLY)
D612 8-719-068-00 DIODE ERC04-06SE
(KV-27FS120/29FA310LN/29FS120LN ONLY)
D613 8-719-068-00 DIODE ERC04-06SE
(KV-27FS120/29FA310LN/29FS120LN ONLY)
FUSE
!
F601 1-532-506-51 FUSE 6.3A 250V
(KV-29FS120LS/29FA310LS ONLY)
!
F601 1-576-193-11 FUSE 6.3A 125V
(KV-27FS120/29FA310LN/29FS120LN ONLY)
FERRITE BEAD
FB301 1-410-397-21 FERRITE 1.1µH
FB505 1-410-397-21 FERRITE 1.1µH
FB506 1-410-397-21 FERRITE 1.1µH
FB522 1-410-397-21 FERRITE 1.1µH
FB601 1-410-397-21 FERRITE 1.1µH
(KV-27FS120/29FS120LN/29FS120LS ONLY)
FB602 1-410-397-21 FERRITE 1.1µH
(KV-27FS120/29FS120LN/29FS120LS ONLY)
FB603 1-410-397-21 FERRITE 1.1µH
(KV-27FS120/29FS120LN/29FS120LS ONLY)
FB604 1-410-397-21 FERRITE 1.1µH
(KV-27FS120/29FS120LN/29FS120LS ONLY)
FB605 1-410-397-21 FERRITE 1.1µH
FB616 1-469-578-11 FERRITE 1.1µH
(KV-27FS120/29FS120LN/29FS120LS ONLY)
KV-27FA310/27FS120/29FA310/29FS120
63
Page 64
KV-27FA310/27FS120/29FA310/29FS120
A
REF. NO. PART NO. DESCRIPTION VALUES
FB617 1-469-578-11 FERRITE 1.1µH
(KV-27FS120/29FS120LN/29FS120LS ONLY)
FILTER
FL001 1-239-803-11 ENCAPSULATED COMPONENT
IC
IC001 6-804-178-01 IC M65582AUF-XXXFP
IC002 6-704-004-01 IC BR24L16F-WE2
IC003 8-759-352-91 IC PST9143NL
IC321 8-759-353-00 IC NJM2534M(TE2)
IC400 6-703-190-01 IC NJW1134AGK1-TE2
(KV-27FS120/29FS120LN/29FS120LS ONLY)
IC400 6-706-033-01 IC W1172JK1-TE
(KV-27FA310/29FA310 ONLY)
IC404 6-705-054-01 IC TDA8947J
IC545 8-759-696-71 IC STV9379A
IC561 8-759-700-07 IC NJM2903M
IC565 8-759-700-44 IC NJM2902M
IC600 6-705-810-01 IC MCZ3001DB
(KV-27FS120/29FS120LN/29FS120LS ONLY)
IC603 6-705-818-01 IC MC7809CF
(KV-27FS120/29FS120LN/29FS120LS ONLY)
IC603 6-705-466-01 IC BA90BC0T
(KV-27FA310/29FA310 ONLY)
IC604 8-749-012-13 IC DM-58
(KV-27FS120/29FS120LN/29FS120LS ONLY)
IC608 8-759-450-47 IC BA05T
IC633 6-703-080-01 IC LF33CV
JACK
J200 1-794-119-11 TERMINAL BLOCK, S 4P
J202 1-794-118-11 JACK BLOCK, PIN 3P
* J203 1-817-461-11 PIN JACK BLOCK 5P
J205 1-794-116-11 JACK BLOCK, PIN 2P
(KV-27FS120/29FS120LN/29FS120LS ONLY)
J205 1-818-352-11 PIN JACK W/ DIN CONNECTOR
(KV-27FA310/29FA310 ONLY)
REF. NO. PART NO. DESCRIPTION VALUES
CHIP CONDUCTOR
JR2 1-216-864-11 SHORT CHIP
JR6 1-216-864-11 SHORT CHIP
JR7 1-216-864-11 SHORT CHIP
JR12 1-216-864-11 SHORT CHIP
JR44 1-216-864-11 SHORT CHIP
JR102 1-216-864-11 SHORT CHIP
JR128 1-216-864-11 SHORT CHIP
JR201 1-216-864-11 SHORT CHIP
JR207 1-216-864-11 SHORT CHIP
JR209 1-216-864-11 SHORT CHIP
JR211 1-216-864-11 SHORT CHIP
JR212 1-216-864-11 SHORT CHIP
JR213 1-216-864-11 SHORT CHIP
JR214 1-216-864-11 SHORT CHIP
JR215 1-216-864-11 SHORT CHIP
JR216 1-216-864-11 SHORT CHIP
(KV-27FS120/29FS120LN/29FS120LS ONLY)
JR255 1-216-864-11 SHORT CHIP
JR301 1-216-864-11 SHORT CHIP
JR302 1-216-864-11 SHORT CHIP
JR303 1-216-864-11 SHORT CHIP
JR304 1-216-864-11 SHORT CHIP
JR305 1-216-864-11 SHORT CHIP
JR306 1-216-864-11 SHORT CHIP
JR310 1-216-864-11 SHORT CHIP
JR311 1-216-864-11 SHORT CHIP
JR312 1-216-864-11 SHORT CHIP
JR315 1-216-864-11 SHORT CHIP
JR317 1-216-864-11 SHORT CHIP
JR401 1-216-864-11 SHORT CHIP
JR411 1-216-864-11 SHORT CHIP
JR485 1-216-864-11 SHORT CHIP
JR486 1-216-864-11 SHORT CHIP
JR504 1-216-864-11 SHORT CHIP
JR585 1-216-864-11 SHORT CHIP
JR586 1-216-864-11 SHORT CHIP
JR1502 1-216-864-11 SHORT CHIP
JUMPER WIRE
KV-27FA310/27FS120/29FA310/29FS120
JW57 1-249-409-11 CARBON 220 5% 1/4W
64
Page 65
KV-27FA310/27FS120/29FA310/29FS120
NOTE: The components identifi ed by shading
!
mark are critical for safety. Replace only
and
with part number specifi ed.
REF. NO. PART NO. DESCRIPTION VALUES
COIL
L002 1-239-803-11 ENCAPSULATED COMPONENT
L003 1-239-803-11 ENCAPSULATED COMPONENT
L004 1-239-803-11 ENCAPSULATED COMPONENT
L005 1-239-803-11 ENCAPSULATED COMPONENT
L006 1-414-273-11 INDUCTOR 100µH
L007 1-414-273-11 INDUCTOR 100µH
L008 1-414-857-11 INDUCTOR 100µH
L009 1-414-857-11 INDUCTOR 100µH
L010 1-414-267-21 INDUCTOR 10µH
L011 1-239-803-11 ENCAPSULATED COMPONENT
L101 1-414-229-11 FERRITE 0µH
L513 1-406-677-11 INDUCTOR 10MH
L515 1-412-552-11 INDUCTOR 2.2MH
L516 1-419-714-11 INDUCTOR 100µH
L525 1-409-955-31 INDUCTOR 8MH
L527 1-410-397-21 FERRITE 1.1µH
!
L588 1-412-523-41 INDUCTOR 6.8µH
L606 1-412-525-31 INDUCTOR 10µH
(KV-27FS120/29FS120LN/29FS120LS ONLY)
L607 1-412-525-31 INDUCTOR 10µH
(KV-27FS120/29FS120LN/29FS120LS ONLY)
L608 1-412-533-21 INDUCTOR 47µH
(KV-27FS120/29FS120LN/29FS120LS ONLY)
L608 1-410-397-21 INDUCTOR 1.1µH
(KV-27FA310/29FA310 ONLY)
L609 1-412-525-31 INDUCTOR 10µH
PHOTO COUPLER
!
PH602 8-749-010-64 PHOTO COUPLER PC123F2
(KV-27FS120/29FS120LN/29FS120LS ONLY)
IC LINK
PS401 1-576-337-21 IC LINK 2.7A 50V
NOTE: Les composants identifi es per un trame et une
marque
remplacer que par une piece portant le numero specifi e.
!
sont critiques pour la securite. Ne les
A
REF. NO. PART NO. DESCRIPTION VALUES
Q009 8-729-422-27 TRANSISTOR 2SD601A-Q
Q300 8-729-422-27 TRANSISTOR 2SD601A-Q
Q301 8-729-424-02 TRANSISTOR 2SB709A-QRS-TX
Q303 8-729-424-02 TRANSISTOR 2SB709A-QRS-TX
Q304 8-729-424-02 TRANSISTOR 2SB709A-QRS-TX
Q305 8-729-424-02 TRANSISTOR 2SB709A-QRS-TX
Q306 8-729-424-02 TRANSISTOR 2SB709A-QRS-TX
Q316 8-729-422-27 TRANSISTOR 2SD601A-Q
Q390 8-729-422-27 TRANSISTOR 2SD601A-Q
Q391 8-729-422-27 TRANSISTOR 2SD601A-Q
Q400 8-729-422-27 TRANSISTOR 2SD601A-Q
Q401 8-729-422-27 TRANSISTOR 2SD601A-Q
Q404 8-729-422-27 TRANSISTOR 2SD601A-Q
Q411 8-729-422-27 TRANSISTOR 2SD601A-Q
Q412 8-729-422-27 TRANSISTOR 2SD601A-Q
Q501 8-729-423-33 TRANSISTOR 2SC3311A-QRSTA
Q502 8-729-140-50 TRANSISTOR 2SC3209LK
Q503 8-729-424-02 TRANSISTOR 2SB709A-QRS-TX
Q504 8-729-422-27 TRANSISTOR 2SD601A-Q
Q505 6-550-107-01 TRANSISTOR 2SD2645-YB
Q521 8-729-423-33 TRANSISTOR 2SC3311A-QRSTA
Q522 8-729-053-87 TRANSISTOR KTC4370A
Q531 8-729-422-27 TRANSISTOR 2SD601A-Q
Q533 8-729-424-02 TRANSISTOR 2SB709A-QRS-TX
Q572 8-729-422-27 TRANSISTOR 2SD601A-Q
Q573 8-729-424-02 TRANSISTOR 2SB709A-QRS-TX
Q578 8-729-422-27 TRANSISTOR 2SD601A-Q
Q590 6-550-362-01 TRANSISTOR KTA1279
Q600 8-729-053-36 TRANSISTOR 2SK2640-01MR-F122
(KV-27FS120/29FS120LN/29FS120LS ONLY)
Q601 8-729-053-36 TRANSISTOR 2SK2640-01MR-F122
(KV-27FS120/29FS120LN/29FS120LS ONLY)
Q604 8-729-424-02 TRANSISTOR 2SB709A-QRS-TX
Q608 8-729-922-37 TRANSISTOR 2SD2144S-UVW
Q650 6-550-409-01 TRANSISTOR KSC2383-O
TRANSISTOR
Q002 8-729-422-27 TRANSISTOR 2SD601A-Q
Q004 8-729-422-27 TRANSISTOR 2SD601A-Q
Q005 8-729-424-02 TRANSISTOR 2SB709A-QRS-TX
Q006 8-729-422-27 TRANSISTOR 2SD601A-Q
Q008 8-729-422-27 TRANSISTOR 2SD601A-Q
KV-27FA310/27FS120/29FA310/29FS120
RESISTOR
R002 1-216-864-11 SHORT CHIP
R003 1-216-821-11 METAL CHIP 1K 5% 1/10W
R004 1-216-817-11 METAL CHIP 470 5% 1/10W
R005 1-400-427-21 FERRITE 0µH
R006 1-216-829-11 METAL CHIP 4.7K 5% 1/10W
65
Page 66
KV-27FA310/27FS120/29FA310/29FS120
A
REF. NO. PART NO. DESCRIPTION VALUES
R007 1-400-427-21 FERRITE 0µH
R015 1-216-833-11 METAL CHIP 10K 5% 1/10W
R027 1-218-732-11 METAL CHIP 47K 0.50% 1/10W
R028 1-249-409-11 CARBON 220 5% 1/4W
R029 1-249-409-11 CARBON 220 5% 1/4W
R030 1-249-409-11 CARBON 220 5% 1/4W
R031 1-216-813-11 METAL CHIP 220 5% 1/10W
R032 1-216-813-11 METAL CHIP 220 5% 1/10W
R033 1-249-409-11 CARBON 220 5% 1/4W
R035 1-216-809-11 METAL CHIP 100 5% 1/10W
R037 1-216-833-11 METAL CHIP 10K 5% 1/10W
R038 1-216-821-11 METAL CHIP 1K 5% 1/10W
R039 1-216-815-11 METAL CHIP 330 5% 1/10W
R040 1-216-829-11 METAL CHIP 4.7K 5% 1/10W
R041 1-216-829-11 METAL CHIP 4.7K 5% 1/10W
R042 1-216-813-11 METAL CHIP 220 5% 1/10W
R043 1-216-813-11 METAL CHIP 220 5% 1/10W
R044 1-216-829-11 METAL CHIP 4.7K 5% 1/10W
R045 1-216-829-11 METAL CHIP 4.7K 5% 1/10W
R047 1-249-409-11 CARBON 220 5% 1/4W
R048 1-216-829-11 METAL CHIP 4.7K 5% 1/10W
R049 1-216-829-11 METAL CHIP 4.7K 5% 1/10W
R050 1-249-425-11 CARBON 4.7K 5% 1/4W
R051 1-249-417-11 CARBON 1K 5% 1/4W
R052 1-216-813-11 METAL CHIP 220 5% 1/10W
R053 1-249-433-11 CARBON 22K 5% 1/4W
R054 1-249-433-11 CARBON 22K 5% 1/4W
R055 1-216-829-11 METAL CHIP 4.7K 5% 1/10W
R056 1-216-833-11 METAL CHIP 10K 5% 1/10W
R057 1-249-417-11 CARBON 1K 5% 1/4W
R058 1-249-429-11 CARBON 10K 5% 1/4W
R059 1-249-417-11 CARBON 1K 5% 1/4W
R060 1-249-409-11 CARBON 220 5% 1/4W
R061 1-249-429-11 CARBON 10K 5% 1/4W
R062 1-249-413-11 CARBON 470 5% 1/4W
R063 1-216-829-11 METAL CHIP 4.7K 5% 1/10W
R070 1-249-409-11 CARBON 220 5% 1/4W
R072 1-249-425-11 CARBON 4.7K 5% 1/4W
R076 1-247-807-31 CARBON 100 5% 1/4W
R080 1-216-833-11 METAL CHIP 10K 5% 1/10W
R081 1-216-841-11 METAL CHIP 47K 5% 1/10W
R082 1-216-857-11 METAL CHIP 1M 5% 1/10W
R083 1-216-847-11 METAL CHIP 150K 5% 1/10W
R084 1-216-819-11 METAL CHIP 680 5% 1/10W
KV-27FA310/27FS120/29FA310/29FS120
REF. NO. PART NO. DESCRIPTION VALUES
R085 1-216-864-11 SHORT CHIP
R086 1-216-821-11 METAL CHIP 1K 5% 1/10W
R087 1-247-807-31 CARBON 100 5% 1/4W
R088 1-216-864-11 SHORT CHIP
R090 1-216-837-11 METAL CHIP 22K 5% 1/10W
R091 1-216-841-11 METAL CHIP 47K 5% 1/10W
R092 1-216-825-11 METAL CHIP 2.2K 5% 1/10W
R093 1-216-841-11 METAL CHIP 47K 5% 1/10W
R094 1-414-229-11 FERRITE 0µH
R095 1-216-813-11 METAL CHIP 220 5% 1/10W
R096 1-216-829-11 METAL CHIP 4.7K 5% 1/10W
R098 1-216-839-11 METAL CHIP 33K 5% 1/10W
R101 1-216-829-11 METAL CHIP 4.7K 5% 1/10W
R102 1-216-837-11 METAL CHIP 22K 5% 1/10W
R103 1-216-833-11 METAL CHIP 10K 5% 1/10W
R105 1-216-864-11 SHORT CHIP
R107 1-414-229-11 FERRITE 0µH
R108 1-414-229-11 FERRITE 0µH
R109 1-216-829-11 METAL CHIP 4.7K 5% 1/10W
R110 1-249-409-11 CARBON 220 5% 1/4W
R111 1-216-829-11 METAL CHIP 4.7K 5% 1/10W
R112 1-249-425-11 CARBON 4.7K 5% 1/4W
R115 1-216-817-11 METAL CHIP 470 5% 1/10W
R116 1-216-853-11 METAL CHIP 470K 5% 1/10W
R200 1-216-813-11 METAL CHIP 220 5% 1/10W
R202 1-216-845-11 METAL CHIP 100K 5% 1/10W
R203 1-216-845-11 METAL CHIP 100K 5% 1/10W
R210 1-216-845-11 METAL CHIP 100K 5% 1/10W
R211 1-249-409-11 CARBON 220 5% 1/4W
R212 1-249-409-11 CARBON 220 5% 1/4W
R213 1-216-845-11 METAL CHIP 100K 5% 1/10W
R215 1-216-853-11 METAL CHIP 470K 5% 1/10W
R216 1-216-853-11 METAL CHIP 470K 5% 1/10W
R217 1-249-409-11 CARBON 220 5% 1/4W
R218 1-216-813-11 METAL CHIP 220 5% 1/10W
R220 1-216-813-11 METAL CHIP 220 5% 1/10W
R221 1-249-409-11 CARBON 220 5% 1/4W
R222 1-249-409-11 CARBON 220 5% 1/4W
R227 1-218-285-11 METAL CHIP 75 5% 1/10W
R229 1-218-285-11 METAL CHIP 75 5% 1/10W
R230 1-218-285-11 METAL CHIP 75 5% 1/10W
R250 1-216-821-11 METAL CHIP 1K 5% 1/10W
R251 1-216-821-11 METAL CHIP 1K 5% 1/10W
R303 1-216-863-11 METAL CHIP 3.3M 5% 1/10W
66
Page 67
KV-27FA310/27FS120/29FA310/29FS120
A
REF. NO. PART NO. DESCRIPTION VALUES
R305 1-218-285-11 METAL CHIP 75 5% 1/10W
R308 1-216-821-11 METAL CHIP 1K 5% 1/10W
R309 1-216-833-11 METAL CHIP 10K 5% 1/10W
R310 1-216-821-11 METAL CHIP 1K 5% 1/10W
R311 1-216-813-11 METAL CHIP 220 5% 1/10W
R312 1-218-867-11 METAL CHIP 6.8K 0.50% 1/10W
R313 1-216-864-11 SHORT CHIP
R314 1-216-833-11 METAL CHIP 10K 5% 1/10W
R315 1-216-813-11 METAL CHIP 220 5% 1/10W
R316 1-216-825-11 METAL CHIP 2.2K 5% 1/10W
R317 1-216-813-11 METAL CHIP 220 5% 1/10W
R318 1-216-825-11 METAL CHIP 2.2K 5% 1/10W
R319 1-216-813-11 METAL CHIP 220 5% 1/10W
R320 1-216-825-11 METAL CHIP 2.2K 5% 1/10W
R321 1-247-807-31 CARBON 100 5% 1/4W
R322 1-218-684-11 METAL CHIP 470 0.50% 1/10W
R323 1-215-415-00 METAL 560 1% 1/4W
R324 1-216-821-11 METAL CHIP 1K 5% 1/10W
R325 1-216-864-11 SHORT CHIP
R326 1-400-427-21 FERRITE 0µH
R328 1-400-427-21 FERRITE 0µH
R330 1-218-285-11 METAL CHIP 75 5% 1/10W
R335 1-216-813-11 METAL CHIP 220 5% 1/10W
R337 1-216-801-11 METAL CHIP 22 5% 1/10W
R338 1-216-864-11 SHORT CHIP
R339 1-216-813-11 METAL CHIP 220 5% 1/10W
R351 1-216-829-11 METAL CHIP 4.7K 5% 1/10W
R352 1-216-853-11 METAL CHIP 470K 5% 1/10W
R363 1-218-285-11 METAL CHIP 75 5% 1/10W
R364 1-218-285-11 METAL CHIP 75 5% 1/10W
R370 1-216-825-11 METAL CHIP 2.2K 5% 1/10W
R371 1-216-849-11 METAL CHIP 220K 5% 1/10W
R372 1-216-827-11 METAL CHIP 3.3K 5% 1/10W
R382 1-216-863-11 METAL CHIP 3.3M 5% 1/10W
R390 1-216-864-11 SHORT CHIP
R391 1-216-829-11 METAL CHIP 4.7K 5% 1/10W
R392 1-216-818-11 METAL CHIP 560 5% 1/10W
R393 1-216-825-11 METAL CHIP 2.2K 5% 1/10W
R394 1-216-833-11 METAL CHIP 10K 5% 1/10W
R400 1-216-829-11 METAL CHIP 4.7K 5% 1/10W
R401 1-216-809-11 METAL CHIP 100 5% 1/10W
R402 1-216-864-11 SHORT CHIP
R403 1-216-809-11 METAL CHIP 100 5% 1/10W
R404 1-216-825-11 METAL CHIP 2.2K 5% 1/10W
KV-27FA310/27FS120/29FA310/29FS120
REF. NO. PART NO. DESCRIPTION VALUES
R405 1-216-833-11 METAL CHIP 10K 5% 1/10W
R406 1-216-813-11 METAL CHIP 220 5% 1/10W
R407 1-216-813-11 METAL CHIP 220 5% 1/10W
R408 1-216-864-11 SHORT CHIP
R409 1-216-864-11 SHORT CHIP
R410 1-216-833-11 METAL CHIP 10K 5% 1/10W
R411 1-216-833-11 METAL CHIP 10K 5% 1/10W
R415 1-216-809-11 METAL CHIP 100 5% 1/10W
(KV-27FA310/29FA310 ONLY)
R418 1-216-809-11 METAL CHIP 100 5% 1/10W
(KV-27FA310/29FA310 ONLY)
R419 1-216-864-11 SHORT CHIP
(KV-27FS120/29FS120LN/29FS120LS ONLY)
R420 1-216-864-11 SHORT CHIP
(KV-27FS120/29FS120LN/29FS120LS ONLY)
R421 1-216-864-11 SHORT CHIP
R422 1-216-833-11 METAL CHIP 10K 5% 1/10W
R427 1-216-841-11 METAL CHIP 47K 5% 1/10W
R429 1-216-841-11 METAL CHIP 47K 5% 1/10W
R430 1-216-845-11 METAL CHIP 100K 5% 1/10W
R431 1-216-845-11 METAL CHIP 100K 5% 1/10W
R433 1-216-809-11 METAL CHIP 100 5% 1/10W
R434 1-216-864-11 SHORT CHIP
R442 1-216-809-11 METAL CHIP 100 5% 1/10W
R450 1-249-425-11 CARBON 4.7K 5% 1/4W
R477 1-216-819-11 METAL CHIP 680 5% 1/10W
R478 1-216-833-11 METAL CHIP 10K 5% 1/10W
R479 1-216-821-11 METAL CHIP 1K 5% 1/10W
R499 1-216-845-11 METAL CHIP 100K 5% 1/10W
R501 1-249-411-11 CARBON 330 5% 1/4W
R502 1-249-425-11 CARBON 4.7K 5% 1/4W
R503 1-215-919-11 METAL OXIDE 2.2K 5% 3W
R504 1-249-425-11 CARBON 4.7K 5% 1/4W
R507 1-216-833-11 METAL CHIP 10K 5% 1/10W
R510 1-260-328-11 CARBON 1K 5% 1/2W
R513 1-215-908-00 METAL OXIDE 33 5% 3W
R514 1-215-910-00 METAL OXIDE 68 5% 3W
R515 1-215-882-00 METAL OXIDE 22 5% 2W
R517 1-216-839-11 METAL CHIP 33K 5% 1/10W
R520 1-216-833-11 METAL CHIP 10K 5% 1/10W
R521 1-216-819-11 METAL CHIP 680 5% 1/10W
R522 1-249-411-11 CARBON 330 5% 1/4W
R524 1-218-867-11 METAL CHIP 6.8K 0.50% 1/10W
R525 1-215-884-11 METAL OXIDE 47 5% 2W
67
Page 68
KV-27FA310/27FS120/29FA310/29FS120
NOTE: The components identifi ed by shading
!
mark are critical for safety. Replace only
and
with part number specifi ed.
REF. NO. PART NO. DESCRIPTION VALUES
R526 1-218-724-11 METAL CHIP 22K 0.50% 1/10W
R527 1-216-825-11 METAL CHIP 2.2K 5% 1/10W
R528 1-216-816-11 METAL CHIP 390 5% 1/10W
R529 1-218-720-11 METAL CHIP 15K 0.50% 1/10W
R530 1-218-865-11 METAL CHIP 5.6K 0.50% 1/10W
R533 1-218-712-11 METAL CHIP 6.8K 0.50% 1/10W
R534 1-218-720-11 METAL CHIP 15K 0.50% 1/10W
R535 1-218-865-11 METAL CHIP 5.6K 0.50% 1/10W
R536 1-216-833-11 METAL CHIP 10K 5% 1/10W
R537 1-216-855-11 METAL CHIP 680K 5% 1/10W
R539 1-216-864-11 SHORT CHIP
R540 1-249-429-11 CARBON 10K 5% 1/4W
R542 1-215-445-00 METAL 10K 1% 1/4W
R543 1-216-368-11 METAL OXIDE 0.82 5% 2W
R544 1-249-389-11 CARBON 4.7 5% 1/4W
R545 1-215-890-11 METAL OXIDE 470 5% 2W
R546 1-249-385-11 CARBON 2.2 5% 1/4W
R547 1-215-445-00 METAL 10K 1% 1/4W
R548 1-218-720-11 METAL CHIP 15K 0.50% 1/10W
R549 1-216-841-11 METAL CHIP 47K 5% 1/10W
R550 1-216-817-11 METAL CHIP 470 5% 1/10W
R551 1-216-829-11 METAL CHIP 4.7K 5% 1/10W
R553 1-216-821-11 METAL CHIP 1K 5% 1/10W
R554 1-216-827-11 METAL CHIP 3.3K 5% 1/10W
R555 1-216-833-11 METAL CHIP 10K 5% 1/10W
R556 1-216-825-11 METAL CHIP 2.2K 5% 1/10W
R557 1-216-825-11 METAL CHIP 2.2K 5% 1/10W
R560 1-216-821-11 METAL CHIP 1K 5% 1/10W
R561 1-216-833-11 METAL CHIP 10K 5% 1/10W
R562 1-249-429-11 CARBON 10K 5% 1/4W
R563 1-218-871-11 METAL CHIP 10K 0.50% 1/10W
!X
R564 1-218-730-11 METAL CHIP 39K 0.50% 1/10W
!
R565 1-218-716-11 METAL CHIP 10K 0.50% 1/10W
!
R566 1-215-469-00 METAL 100K 1% 1/4W
R567 1-215-927-00 METAL OXIDE 47K 5% 3W
R568 1-215-399-00 METAL 120 1% 1/4W
R569 1-249-429-11 CARBON 10K 5% 1/4W
R570 1-218-716-11 METAL CHIP 10K 0.50% 1/10W
R572 1-216-829-11 METAL CHIP 4.7K 5% 1/10W
R573 1-216-829-11 METAL CHIP 4.7K 5% 1/10W
R574 1-216-833-11 METAL CHIP 10K 5% 1/10W
R575 1-249-389-11 CARBON 4.7 5% 1/4W
R578 1-249-429-11 CARBON 10K 5% 1/4W
R581 1-249-441-11 CARBON 100K 5% 1/4W
A component identifi ed by this
has been carefully factory-selected to satisfy regulations
regarding X-ray radiation. Should replacement be required,
replace only with the value originally used.
KV-27FA310/27FS120/29FA310/29FS120
symbol indicates that it
A
REF. NO. PART NO. DESCRIPTION VALUES
R583 1-249-377-11 CARBON 0.47 5% 1/4W
R584 1-215-451-00 METAL 18K 1% 1/4W
R585 1-215-447-00 METAL 12K 1% 1/4W
R586 1-218-855-11 METAL CHIP 2.2K 0.50% 1/10W
R587 1-249-401-11 CARBON 47 5% 1/4W
R588 1-215-882-00 METAL OXIDE 22 5% 2W
R589 1-247-895-91 CARBON 470K 5% 1/4W
R590 1-249-429-11 CARBON 10K 5% 1/4W
R591 1-216-363-00 METAL OXIDE 0.33 5% 2W
R592 1-249-441-11 CARBON 100K 5% 1/4W
R593 1-249-429-11 CARBON 10K 5% 1/4W
R594 1-249-418-11 CARBON 1.2K 5% 1/4W
R595 1-247-895-91 CARBON 470K 5% 1/4W
R596 1-249-377-11 CARBON 0.47 5% 1/4W
R597 1-216-849-11 METAL CHIP 220K 5% 1/10W
R598 1-249-377-11 CARBON 0.47 5% 1/4W
R601 1-240-262-11 CEMENTED 0.68 5% 10W
(KV-27FS120/29FA310LN/29FS120LN ONLY)
R601 1-202-968-11 CEMENTED 1.2 5% 10W
(KV-29FS120LS/29FA310LS ONLY)
R602 1-240-262-11 CEMENTED 0.68 5% 10W
(KV-27FS120/29FA310LN/29FS120LN ONLY)
R602 1-202-968-11 CEMENTED 1.2 5% 10W
(KV-29FS120LS/29FA310LS ONLY)
!
R603 1-219-513-11 METAL 4.7M 5% 1/2W
(KV-27FS120/29FA310LN/29FS120LN ONLY)
R604 1-216-821-11 METAL CHIP 1K 5% 1/10W
R605 1-216-833-11 METAL CHIP 10K 5% 1/10W
R606 1-216-833-11 METAL CHIP 10K 5% 1/10W
R607 1-216-857-11 METAL CHIP 1M 5% 1/10W
R608 1-215-924-00 METAL OXIDE 15K 5% 3W
R609 1-202-962-11 CEMENTED 3.3 5% 10W
R611 1-240-262-11 CEMENTED 0.68 5% 10W
(KV-27FS120/29FA310LN/29FS120LN ONLY)
R611 1-202-968-11 CEMENTED 1.2 5% 10W
(KV-29FS120LS/29FA310LS ONLY)
R612 1-260-131-11 CEMENTED 470K 5% 1/2W
(KV-29FS120LS/29FA310LS ONLY)
R613 1-240-262-11 CEMENTED 0.68 5% 10W
(KV-27FS120/29FA310LN/29FS120LN ONLY)
R613 1-202-968-11 CEMENTED 1.2 5% 10W
(KV-29FS120LS/29FA310LS ONLY)
R614 1-216-825-11 METAL CHIP 2.2K 5% 1/10W
68
Page 69
KV-27FA310/27FS120/29FA310/29FS120
NOTE: The components identifi ed by shading
!
mark are critical for safety. Replace only
and
with part number specifi ed.
REF. NO. PART NO. DESCRIPTION VALUES
R615 1-202-933-61 FUSIBLE 0.1 10% 1/2W
(KV-27FS120/29FS120LN/29FS120LS ONLY)
R616 1-216-821-11 METAL CHIP 1K 5% 1/10W
(KV-27FS120/29FS120LN/29FS120LS ONLY)
R617 1-216-821-11 METAL CHIP 1K 5% 1/10W
(KV-27FS120/29FS120LN/29FS120LS ONLY)
R619 1-249-389-11 CARBON 4.7 5% 1/4W
(KV-27FS120/29FS120LN/29FS120LS ONLY)
R620 1-216-353-00 METAL OXIDE 2.2 5% 1W
R625 1-249-413-11 CARBON 470 5% 1/4W
(KV-27FS120/29FS120LN/29FS120LS ONLY)
R626 1-218-716-11 METAL CHIP 10K 0.50% 1/10W
(KV-27FS120/29FS120LN/29FS120LS ONLY)
R627 1-215-481-00 METAL 330K 1% 1/4W
(KV-27FS120/29FS120LN/29FS120LS ONLY)
R628 1-260-131-11 CEMENTED 470K 5% 1/2W
(KV-29FS120LS/29FA310LS ONLY)
R629 1-215-481-00 METAL 330K 1% 1/4W
(KV-27FS120/29FS120LN/29FS120LS ONLY)
R630 1-215-481-00 METAL 330K 1% 1/4W
(KV-27FS120/29FS120LN/29FS120LS ONLY)
R631 1-218-718-11 METAL CHIP 12K 0.50% 1/10W
(KV-27FS120/29FS120LN/29FS120LS ONLY)
R632 1-216-809-11 METAL CHIP 100 5% 1/10W
(KV-27FS120/29FS120LN/29FS120LS ONLY)
R634 1-215-905-11 METAL OXIDE 10 5% 3W
R640 1-249-417-11 CARBON 1K 5% 1/4W
(KV-27FS120/29FS120LN/29FS120LS ONLY)
R641 1-202-968-11 CEMENTED 1.2 5% 10W
(KV-29FS120LS/29FA310LS ONLY)
R641 1-240-262-11 CEMENTED 0.68 5% 10W
(KV-27FS120/29FA310LN/29FS120LN ONLY)
R647 1-216-811-11 METAL CHIP 150 5% 1/10W
(KV-27FS120/29FS120LN/29FS120LS ONLY)
R650 1-249-415-11 CARBON 680 5% 1/4W
R651 1-249-441-11 CARBON 100K 5% 1/4W
(KV-27FS120/29FS120LN/29FS120LS ONLY)
R652 1-249-441-11 CARBON 100K 5% 1/4W
(KV-27FS120/29FS120LN/29FS120LS ONLY)
NOTE: Les composants identifi es per un trame et une
marque
remplacer que par une piece portant le numero specifi e.
!
sont critiques pour la securite. Ne les
A
REF. NO. PART NO. DESCRIPTION VALUES
R667 1-216-833-11 METAL CHIP 10K 5% 1/10W
(KV-27FS120/29FS120LN/29FS120LS ONLY)
R668 1-249-418-11 CARBON 1.2K 5% 1/4W
(KV-27FS120/29FS120LN/29FS120LS ONLY)
R670 1-216-833-11 METAL CHIP 10K 5% 1/10W
(KV-27FS120/29FS120LN/29FS120LS ONLY)
R671 1-243-979-71 METAL OXIDE 0.1 5% 2W
(KV-27FS120/29FS120LN/29FS120LS ONLY)
R680 1-216-864-11 SHORT CHIP
R687 1-202-968-11 CEMENTED 1.2 5% 10W
(KV-29FS120LS/29FA310LS ONLY)
R687 1-240-262-11 CEMENTED 0.68 5% 10W
(KV-27FS120/29FA310LN/29FS120LN ONLY)
!
R699 1-218-265-11 METAL CHIP 8.2M 5% 1W
(KV-29FS120LS/29FA310LS ONLY)
R801 1-218-716-11 METAL CHIP 10K 0.50% 1/10W
R802 1-218-714-11 METAL CHIP 8.2K 0.50% 1/10W
R803 1-218-719-11 METAL CHIP 13K 0.50% 1/10W
R812 1-218-716-11 METAL CHIP 10K 0.50% 1/10W
R813 1-218-716-11 METAL CHIP 10K 0.50% 1/10W
R814 1-218-736-11 METAL CHIP 68K 0.50% 1/10W
R815 1-218-732-11 METAL CHIP 47K 0.50% 1/10W
R850 1-215-453-00 METAL 22K 1% 1/4W
!
R851 1-216-821-11 METAL CHIP 1K 5% 1/10W
R852 1-218-889-11 METAL CHIP 56K 0.50% 1/10W
R862 1-216-813-11 METAL CHIP 220 5% 1/10W
R890 1-216-843-11 METAL CHIP 68K 5% 1/10W
R893 1-216-864-11 SHORT CHIP
R901 1-218-714-11 METAL CHIP 8.2K 0.50% 1/10W
RELAY
RY501 1-755-198-11 RELAY, AC POWER
!
RY600 1-755-395-11 RELAY (AC POWER)
SWITCH
SW515 1-572-707-11 SWITCH, LEVER
R658 1-249-393-11 CARBON 10 5% 1/4W
(KV-27FS120/29FS120LN/29FS120LS ONLY)
R659 1-249-393-11 CARBON 10 5% 1/4W
(KV-27FS120/29FS120LN/29FS120LS ONLY)
R660 1-216-833-11 METAL CHIP 10K 5% 1/10W
(KV-27FS120/29FS120LN/29FS120LS ONLY)
KV-27FA310/27FS120/29FA310/29FS120
TRANSFORMER
T505 1-433-836-11 TRANSFORMER, HORIZONTAL DRIVE
!
T510 1-437-610-11 TRANSFORMER, FERRITE (PMT)
!
T511 1-433-850-11 TRANSFORMER, HORIZONTAL LINEAR
69
Page 70
KV-27FA310/27FS120/29FA310/29FS120
NOTE: The components identifi ed by shading
!
mark are critical for safety. Replace only
and
with part number specifi ed.
REF. NO. PART NO. DESCRIPTION VALUES
!
T585 1-453-310-21 FBT ASSY NX-4521//X4J4
!
T601 1-435-617-11 TRANSFORMER, LINE FILTER
!
T602 1-435-675-11 TRANSFORMER, STANDBY
(KV-27FS120/29FA310LN/29FS120LN ONLY)
!
T602 1-435-676-11 TRANSFORMER, STANDBY
(KV-29FS120LS/29FA310LS ONLY)
!
T603 1-439-898-21 CONVERTER TRANSFORMER
(KV-27FS120/29FS120LN/29FS120LS ONLY)
THERMISTOR
!
THP501 1-804-313-11 THERMISTOR, PTC
(KV-27FS120/29FA310LN/29FS120LN ONLY)
!
THP501 1-803-540-11 THERMISTOR, PTC
(KV-29FS120LS/29FA310LS ONLY)
TUNER
!
TU101 8-598-593-50 TUNER, FSS BTF-WA421
VARISTOR
!
VDR600 1-810-974-21 VARISTOR
(KV-27FS120/29FA310LN/29FS120LN ONLY)
!
VDR600 1-803-967-11 VARISTOR
(KV-29FS120LS/29FA310LS ONLY)
CRYSTAL
NOTE: Les composants identifi es per un trame et une
marque
remplacer que par une piece portant le numero specifi e.
!
sont critiques pour la securite. Ne les
CW
A
REF. NO. PART NO. DESCRIPTION VALUES
C2777 1-126-963-11 ELECT 4.7µF 20% 50V
C2778 1-126-947-11 ELECT 47µF 20% 35V
C3701 1-126-947-11 ELECT 47µF 20% 35V
C3702 1-136-497-81 FILM 0.1µF 5% 50V
C3703 1-126-947-11 ELECT 47µF 20% 35V
C3708 1-136-497-81 FILM 0.1µF 5% 50V
C3780 1-162-926-11 CERAMIC CHIP 82pF 5% 50V
C3781 1-162-926-11 CERAMIC CHIP 82pF 5% 50V
C3782 1-162-926-11 CERAMIC CHIP 82pF 5% 50V
C3901 1-107-667-11 ELECT 2.2µF 20% 400V
C3902 1-107-364-11 MYLAR 0.01µF 10% 200V
C3903 1-126-935-11 ELECT 470µF 20% 16V
C3904 1-130-471-00 MYLAR 0.001µF 5% 50V
C3905 1-107-364-11 MYLAR 0.01µF 10% 200V
C3906 1-130-471-00 MYLAR 0.001µF 5% 50V
C3907 1-107-638-11 ELECT 33µF 20% 160V
C3908 1-126-935-11 ELECT 470µF 20% 16V
C3909 1-104-999-11 MYLAR 0.1µF 5% 200V
C3910 1-104-999-11 MYLAR 0.1µF 5% 200V
C3911 1-104-665-11 ELECT 100µF 20% 25V
C3912 1-126-935-11 ELECT 470µF 20% 16V
C3913 1-126-933-11 ELECT 100µF 20% 16V
C3914 1-130-491-00 MYLAR 0.047µF 5% 50V
C3915 1-162-970-11 CERAMIC CHIP 0.01µF 10% 25V
C3930 1-104-655-91 ELECT 470µF 20% 6.3V
C3931 1-104-655-91 ELECT 470µF 20% 6.3V
X001 1-795-006-21 VIBRATOR, CRYSTAL
X301 1-781-377-21 VIBRATOR, CRYSTAL
CW
* A-1410-925-A CW BOARD, MOUNTED
4-382-854-11 SCREW (M3X10), P, SW (+)
C2751 1-107-652-11 ELECT 10µF 20% 250V
C2752 1-162-114-00 CERAMIC 0.0047µF 2KV
C2753 1-137-528-11 MYLAR 0.1µF 10% 250V
C2754 1-102-074-00 CERAMIC 0.001µF 10% 50V
C2755 1-107-651-11 ELECT 4.7µF 20% 250V
C2774 1-126-960-11 ELECT 1µF 20% 50V
C2775 1-126-935-11 ELECT 470µF 20% 16V
CAPACITOR
KV-27FA310/27FS120/29FA310/29FS120
CONNECTOR
CN2707 1-564-506-11 PLUG, CONNECTOR 3P
* CN2752 1-564-512-11 PLUG, CONNECTOR 9P
CN2753 1-785-879-11 CONNECTOR, ONE TOUCH
CN2755 1-695-915-11 TAB (CONTACT)
* CN3903 1-564-506-11 PLUG, CONNECTOR 3P
DIODE
D2701 8-719-108-12 DIODE RD9.1EW
D2754 8-719-901-83 DIODE 1SS83
D2755 8-719-901-83 DIODE 1SS83
D2756 8-719-901-83 DIODE 1SS83
D2758 8-719-074-25 DIODE PG104R
D3762 8-719-404-50 DIODE MA111-TX
D3763 8-719-404-50 DIODE MA111-TX
D3772 8-719-404-50 DIODE MA111-TX
70
Page 71
KV-27FA310/27FS120/29FA310/29FS120
NOTE: The components identifi ed by shading
!
mark are critical for safety. Replace only
and
with part number specifi ed.
REF. NO. PART NO. DESCRIPTION VALUES
D3773 8-719-404-50 DIODE MA111-TX
D3782 8-719-404-50 DIODE MA111-TX
D3783 8-719-404-50 DIODE MA111-TX
D3901 8-719-110-86 DIODE RD39ESB
D3902 8-719-110-86 DIODE RD39ESB
D3903 8-719-991-33 DIODE 1SS133T-77
D3905 8-719-510-02 DIODE D1NS4
D3906 8-719-404-50 DIODE MA111-TX
D3907 8-719-404-50 DIODE MA111-TX
D3908 8-719-404-50 DIODE MA111-TX
FERRITE BEAD
FB3700 1-410-397-21 FERRITE 1.1µH
FB3701 1-410-397-21 FERRITE 1.1µH
FB3702 1-410-397-21 FERRITE 1.1µH
FB3703 1-410-397-21 FERRITE 1.1µH
NOTE: Les composants identifi es per un trame et une
marque
remplacer que par une piece portant le numero specifi e.
!
sont critiques pour la securite. Ne les
CW
REF. NO. PART NO. DESCRIPTION VALUES
Q3762 8-729-422-27 TRANSISTOR 2SD601A-Q
Q3763 8-729-422-27 TRANSISTOR 2SD601A-Q
Q3771 8-729-422-27 TRANSISTOR 2SD601A-Q
Q3772 8-729-422-27 TRANSISTOR 2SD601A-Q
Q3773 8-729-422-27 TRANSISTOR 2SD601A-Q
Q3781 8-729-422-27 TRANSISTOR 2SD601A-Q
Q3782 8-729-422-27 TRANSISTOR 2SD601A-Q
Q3783 8-729-422-27 TRANSISTOR 2SD601A-Q
Q3901 8-729-053-87 TRANSISTOR KTC4370A
Q3902 6-550-247-01 TRANSISTOR KTA1659A
Q3903 8-729-422-27 TRANSISTOR 2SD601A-Q
Q3904 8-729-422-27 TRANSISTOR 2SD601A-Q
Q3905 8-729-424-02 TRANSISTOR 2SB709A-QRS-TX
Q3906 8-729-120-28 TRANSISTOR 2SC1623-L5L6
Q3907 8-729-120-28 TRANSISTOR 2SC1623-L5L6
Q3908 8-729-424-02 TRANSISTOR 2SB709A-QRS-TX
IC
IC2751 8-759-562-43 IC TDA6108JF/N1B
IC3701 8-759-803-42 IC LA6500-FA
JACK
!
J2751 1-451-544-11 SOCKET, CRT
CHIP CONDUCTOR
JR3910 1-216-864-11 SHORT CHIP
COIL
L2751 1-408-613-31 INDUCTOR 68µH
L3710 1-410-387-11 INDUCTOR 33µH
L3711 1-410-387-11 INDUCTOR 33µH
L3712 1-410-387-11 INDUCTOR 33µH
L3901 1-412-528-11 INDUCTOR 18µH
TRANSISTOR
Q2772 8-729-422-27 TRANSISTOR 2SD601A-Q
Q3710 8-729-424-02 TRANSISTOR 2SB709A-QRS-TX
Q3711 8-729-422-27 TRANSISTOR 2SD601A-Q
Q3712 8-729-422-27 TRANSISTOR 2SD601A-Q
Q3761 8-729-422-27 TRANSISTOR 2SD601A-Q
RESISTOR
R2756 1-260-328-11 CARBON 1K 5% 1/2W
R2757 1-260-328-11 CARBON 1K 5% 1/2W
R2758 1-260-328-11 CARBON 1K 5% 1/2W
R2760 1-260-087-11 CARBON 100 5% 1/2W
R2761 1-216-375-00 METAL OXIDE 3.3 5% 2W
R2762 1-216-375-00 METAL OXIDE 3.3 5% 2W
R2763 1-247-807-31 CARBON 100 5% 1/4W
R2764 1-247-807-31 CARBON 100 5% 1/4W
R2765 1-247-807-31 CARBON 100 5% 1/4W
R2766 1-247-807-31 CARBON 100 5% 1/4W
R2767 1-247-807-31 CARBON 100 5% 1/4W
R2768 1-247-807-31 CARBON 100 5% 1/4W
R2770 1-260-132-11 CARBON 560K 5% 1/2W
R2785 1-249-399-11 CARBON 33 5% 1/4W
R2788 1-249-421-11 CARBON 2.2K 5% 1/4W
R2789 1-249-425-11 CARBON 4.7K 5% 1/4W
R3700 1-249-433-11 CARBON 22K 5% 1/4W
R3701 1-216-833-11 METAL CHIP 10K 5% 1/10W
R3702 1-216-813-11 METAL CHIP 220 5% 1/10W
R3704 1-249-419-11 CARBON 1.5K 5% 1/4W
R3705 1-216-833-11 METAL CHIP 10K 5% 1/10W
R3706 1-249-381-11 CARBON 1 5% 1/4W
R3707 1-249-383-11 CARBON 1.5 5% 1/4W
R3710 1-216-821-11 METAL CHIP 1K 5% 1/10W
R3711 1-218-692-11 METAL CHIP 1K 0.50% 1/10W
KV-27FA310/27FS120/29FA310/29FS120
71
Page 72
KV-27FA310/27FS120/29FA310/29FS120
NOTE: The components identifi ed by shading
!
mark are critical for safety. Replace only
and
with part number specifi ed.
REF. NO. PART NO. DESCRIPTION VALUES
R3712 1-218-690-11 METAL CHIP 820 0.50% 1/10W
R3713 1-216-824-11 METAL CHIP 1.8K 5% 1/10W
R3714 1-216-821-11 METAL CHIP 1K 5% 1/10W
R3719 1-215-888-00 METAL OXIDE 220 5% 2W
R3760 1-216-829-11 METAL CHIP 4.7K 5% 1/10W
R3762 1-218-692-11 METAL CHIP 1K 0.50% 1/10W
R3763 1-216-835-11 METAL CHIP 15K 5% 1/10W
R3764 1-218-678-11 METAL CHIP 270 0.50% 1/10W
R3765 1-218-700-11 METAL CHIP 2.2K 0.50% 1/10W
R3766 1-216-827-11 METAL CHIP 3.3K 5% 1/10W
R3767 1-216-830-11 METAL CHIP 5.6K 5% 1/10W
R3768 1-216-821-11 METAL CHIP 1K 5% 1/10W
R3769 1-216-821-11 METAL CHIP 1K 5% 1/10W
R3770 1-216-829-11 METAL CHIP 4.7K 5% 1/10W
R3771 1-216-821-11 METAL CHIP 1K 5% 1/10W
R3772 1-218-692-11 METAL CHIP 1K 0.50% 1/10W
R3773 1-216-835-11 METAL CHIP 15K 5% 1/10W
R3774 1-218-678-11 METAL CHIP 270 0.50% 1/10W
R3775 1-218-700-11 METAL CHIP 2.2K 0.50% 1/10W
R3776 1-216-827-11 METAL CHIP 3.3K 5% 1/10W
R3777 1-216-830-11 METAL CHIP 5.6K 5% 1/10W
R3778 1-216-821-11 METAL CHIP 1K 5% 1/10W
R3779 1-216-821-11 METAL CHIP 1K 5% 1/10W
R3780 1-216-829-11 METAL CHIP 4.7K 5% 1/10W
R3782 1-218-692-11 METAL CHIP 1K 0.50% 1/10W
R3783 1-216-835-11 METAL CHIP 15K 5% 1/10W
R3784 1-218-678-11 METAL CHIP 270 0.50% 1/10W
R3785 1-218-700-11 METAL CHIP 2.2K 0.50% 1/10W
R3786 1-216-827-11 METAL CHIP 3.3K 5% 1/10W
R3787 1-216-830-11 METAL CHIP 5.6K 5% 1/10W
R3788 1-216-821-11 METAL CHIP 1K 5% 1/10W
R3901 1-249-405-11 CARBON 100 5% 1/4W
R3902 1-249-385-11 CARBON 2.2 5% 1/4W
R3903 1-249-414-11 CARBON 560 5% 1/4W
R3904 1-249-432-11 CARBON 18K 5% 1/4W
R3905 1-249-421-11 CARBON 2.2K 5% 1/4W
R3906 1-249-432-11 CARBON 18K 5% 1/4W
R3907 1-249-385-11 CARBON 2.2 5% 1/4W
R3908 1-249-414-11 CARBON 560 5% 1/4W
R3909 1-260-316-51 CARBON 100 5% 1/2W
R3910 1-215-915-11 METAL OXIDE 470 5% 3W
R3911 1-216-812-11 METAL CHIP 180 5% 1/10W
R3912 1-216-811-11 METAL CHIP 150 5% 1/10W
R3913 1-216-806-11 METAL CHIP 56 5% 1/10W
NOTE: Les composants identifi es per un trame et une
marque
remplacer que par une piece portant le numero specifi e.
!
sont critiques pour la securite. Ne les
KV-27FA310/27FS120/29FA310/29FS120
CW
REF. NO. PART NO. DESCRIPTION VALUES
R3914 1-216-820-11 METAL CHIP 820 5% 1/10W
R3915 1-216-829-11 METAL CHIP 4.7K 5% 1/10W
R3916 1-216-864-11 SHORT CHIP
R3917 1-216-829-11 METAL CHIP 4.7K 5% 1/10W
R3918 1-216-805-11 METAL CHIP 47 5% 1/10W
R3919 1-216-805-11 METAL CHIP 47 5% 1/10W
R3921 1-216-833-11 METAL CHIP 10K 5% 1/10W
R3922 1-249-397-11 CARBON 22 5% 1/4W
R3923 1-249-401-11 CARBON 47 5% 1/4W
R3930 1-216-864-11 SHORT CHIP
R3931 1-249-421-11 CARBON 2.2K 5% 1/4W
R3932 1-218-696-11 METAL CHIP 1.5K 0.50% 1/10W
R3933 1-216-864-11 SHORT CHIP
R3935 1-249-405-11 CARBON 100 5% 1/4W
R3938 1-216-864-11 SHORT CHIP
VARIABLE RESISTOR
RV2701 1-238-019-11 RES, ADJ, CARBON 47K
!
RV2750 1-241-656-11 RES, ADJ, METAL FILM 110M
D
* A-1415-635-A D BOARD, MOUNTED
(ALL EXCEPT KV-27FA310/29FA310)
!
1-900-807-96 WIRE ASSY, G2 LEAD 180
CAPACITOR
C1815 1-129-718-00 FILM 0.022µF 5% 630V
C1816 1-102-244-00 CERAMIC 220pF 10% 500V
C1817 1-129-709-91 FILM 0.0039µF 5% 630V
C1818 1-164-645-11 CERAMIC 1000pF 10% 500V
C1819 1-102-244-00 CERAMIC 220pF 10% 500V
C1820 1-109-954-11 ELECT 0.47µF 20% 160V
DIODE
D1809 8-719-110-41 DIODE RD15ESB2
D1810 8-719-970-87 DIODE ERA38-06
D1811 8-719-970-87 DIODE ERA38-06
D1812 8-719-081-93 DIODE 1N4937/23
D
72
Page 73
KV-27FA310/27FS120/29FA310/29FS120
NOTE: The components identifi ed by shading
!
mark are critical for safety. Replace only
and
with part number specifi ed.
REF. NO. PART NO. DESCRIPTION VALUES
COIL
L1805 1-406-677-11 INDUCTOR 10MH
TRANSISTOR
Q1810 8-729-043-95 TRANSISTOR 2SC3840(3)
RESISTOR
R1845 1-249-441-11 CARBON 100K 5% 1/4W
R1846 1-249-441-11 CARBON 100K 5% 1/4W
R1847 1-249-441-11 CARBON 100K 5% 1/4W
R1848 1-215-894-11 METAL OXIDE 2.2K 5% 2W
R1849 1-215-923-00 METAL OXIDE 10K 5% 3W
R1850 1-215-923-00 METAL OXIDE 10K 5% 3W
R1851 1-215-922-11 METAL OXIDE 6.8K 5% 3W
R1852 1-215-922-11 METAL OXIDE 6.8K 5% 3W
NOTE: Les composants identifi es per un trame et une
marque
remplacer que par une piece portant le numero specifi e.
!
sont critiques pour la securite. Ne les
D
GD
REF. NO. PART NO. DESCRIPTION VALUES
C1643 1-136-165-00 FILM 0.1µF 5% 50V
C1645 1-136-479-11 FILM 0.001µF 5% 100V
C1647 1-126-947-11 ELECT 47µF 20% 35V
C1648 1-164-143-11 CERAMIC 0.001µF 10% 1KV
C1649 1-164-143-11 CERAMIC 0.001µF 10% 1KV
C1650 1-100-120-51 ELECT 1000µF 20% 35V
C1652 1-137-374-11 MYLAR 0.047µF 5% 50V
C1669 1-164-625-11 CERAMIC 680pF 10% 500V
C1670 1-164-625-11 CERAMIC 680pF 10% 500V
C1672 1-165-953-11 FILM 47000pF 3% 800V
C1680 1-117-228-71 MYLAR 2.2µF 10% 450V
C1815 1-129-718-00 FILM 0.022µF 5% 630V
C1816 1-102-244-00 CERAMIC 220pF 10% 500V
C1817 1-129-709-91 FILM 0.0039µF 5% 630V
C1818 1-164-645-11 CERAMIC 1000pF 10% 500V
C1819 1-102-244-00 CERAMIC 220pF 10% 500V
C1820 1-109-954-11 ELECT 0.47µF 20% 160V
TRANSFORMER
T1801 1-433-533-12 TRANSFORMER, FERRITE (DFT)
GD
* A-1410-927-A GD (COM) BOARD, MOUNTED
(KV-27FA310/29FA310 ONLY)
!
1-900-807-96 WIRE ASSY, G2 LEAD 180
4-382-854-11 SCREW (M3X10), P, SW (+)
CAPACITOR
C1602 1-137-150-11 FILM 0.01µF 5% 100V
C1604 1-164-625-11 CERAMIC 680pF 10% 500V
C1609 1-164-625-11 CERAMIC 680pF 10% 500V
C1616 1-126-943-11 ELECT 2200µF 20% 25V
C1617 1-123-024-21 ELECT 33µF 160V
C1620 1-137-150-11 FILM 0.01µF 5% 100V
C1624 1-107-636-11 ELECT 10µF 20% 160V
C1633 1-136-479-11 FILM 0.001µF 5% 100V
C1634 1-126-964-11 ELECT 10µF 20% 50V
C1635 1-126-963-11 ELECT 4.7µF 20% 50V
C1637 1-136-165-00 FILM 0.1µF 5% 50V
C1642 1-126-969-11 ELECT 220µF 20% 50V
CONNECTOR
* CN1600 1-580-843-11 PIN, CONNECTOR (POWER)
DIODE
D1611 8-719-062-40 DIODE D4SBL20µF3
D1614 8-719-057-52 DIODE EZ0150AV1
D1615 8-719-062-40 DIODE D4SBL20µF3
D1618 8-719-979-64 DIODE µF4005PKG23
D1621 6-500-181-01 DIODE MA6D50
D1631 6-500-175-01 DIODE 1E3-TB
D1809 8-719-110-41 DIODE RD15ESB2
D1810 8-719-970-87 DIODE ERA38-06
D1811 8-719-970-87 DIODE ERA38-06
D1812 8-719-081-93 DIODE 1N4937/23
FERRITE BEAD
FB1602 1-410-397-21 FERRITE 1.1µH
FB1604 1-410-397-21 FERRITE 1.1µH
FB1609 1-410-397-21 FERRITE 1.1µH
FB1616 1-410-397-21 FERRITE 1.1µH
FB1617 1-410-397-21 FERRITE 1.1µH
KV-27FA310/27FS120/29FA310/29FS120
73
Page 74
KV-27FA310/27FS120/29FA310/29FS120
NOTE: The components identifi ed by shading
!
mark are critical for safety. Replace only
and
with part number specifi ed.
REF. NO. PART NO. DESCRIPTION VALUES
IC
IC1600 6-705-810-01 IC MCZ3001DB
IC1601 8-749-012-13 IC DM-58
COIL
L1600 1-406-977-21 INDUCTOR 100µH
L1604 1-412-525-31 INDUCTOR 10µH
L1608 1-412-529-81 INDUCTOR 22µH
L1805 1-406-677-11 INDUCTOR 10MH
PHOTO COUPLER
PH1602 8-749-924-35 PHOTO COUPLER ON3171-R
NOTE: Les composants identifi es per un trame et une
marque
remplacer que par une piece portant le numero specifi e.
!
sont critiques pour la securite. Ne les
GD
REF. NO. PART NO. DESCRIPTION VALUES
R1660 1-249-429-11 CARBON 10K 5% 1/4W
R1667 1-249-429-11 CARBON 10K 5% 1/4W
R1668 1-249-418-11 CARBON 1.2K 5% 1/4W
R1670 1-249-429-11 CARBON 10K 5% 1/4W
R1671 1-243-979-71 METAL OXIDE 0.1 5% 2W
R1672 1-243-979-71 METAL OXIDE 0.1 5% 2W
R1845 1-249-441-11 CARBON 100K 5% 1/4W
R1846 1-249-441-11 CARBON 100K 5% 1/4W
R1847 1-249-441-11 CARBON 100K 5% 1/4W
R1848 1-215-894-11 METAL OXIDE 2.2K 5% 2W
R1849 1-215-923-00 METAL OXIDE 10K 5% 3W
R1850 1-215-923-00 METAL OXIDE 10K 5% 3W
R1851 1-215-922-11 METAL OXIDE 6.8K 5% 3W
R1852 1-215-922-11 METAL OXIDE 6.8K 5% 3W
HR
IC LINK
PS1401 1-576-337-21 IC LINK 2.7A 50V
TRANSISTOR
Q1600 8-729-052-32 TRANSISTOR IRFIB7N50A-LF31
Q1601 8-729-052-32 TRANSISTOR IRFIB7N50A-LF31
Q1810 8-729-043-95 TRANSISTOR 2SC3840(3)
RESISTOR
!
R1615 1-202-933-61 FUSIBLE 0.1 10% 1/2W
R1616 1-249-418-11 CARBON 1.2K 5% 1/4W
R1617 1-249-417-11 CARBON 1K 5% 1/4W
R1619 1-249-377-11 CARBON 0.47 5% 1/4W
R1620 1-215-857-71 METAL OXIDE 10 5% 1W
R1625 1-249-413-11 CARBON 470 5% 1/4W
R1626 1-215-443-00 METAL 8.2K 1% 1/4W
R1629 1-245-478-21 METAL 470K 1% 1/4W
R1630 1-245-478-21 METAL 470K 1% 1/4W
R1631 1-215-449-00 METAL 15K 1% 1/4W
R1632 1-215-397-00 METAL 100 1% 1/4W
R1640 1-249-417-11 CARBON 1K 5% 1/4W
R1647 1-215-396-00 METAL 91 1% 1/4W
R1650 1-249-441-11 CARBON 100K 5% 1/4W
R1651 1-249-441-11 CARBON 100K 5% 1/4W
R1658 1-249-393-11 CARBON 10 5% 1/4W
R1659 1-249-393-11 CARBON 10 5% 1/4W
TRANSFORMER
!
T1604 1-437-606-12 COVERTER TRANSFORMER
T1801 1-433-533-12 TRANSFORMER, FERRITE (DFT)
HR
* A-1415-629-A HR (VAR) BOARD, MOUNTED
(KV-27FA310/29FA310 ONLY)
CAPACITOR
C3001 1-104-665-11 ELECT 100µF 20% 25V
CONNECTOR
* CN3001 1-564-521-11 PLUG, CONNECTOR 6P
DIODE
D3001 8-719-109-89 DIODE RD5.6ESB2
D3002 8-719-057-09 DIODE LNJ801LPDJA
IC
IC3001 8-742-211-20 HYB IC SBX3071-71
KV-27FA310/27FS120/29FA310/29FS120
74
Page 75
KV-27FA310/27FS120/29FA310/29FS120
REF. NO. PART NO. DESCRIPTION VALUES
RESISTOR
R3001 1-249-417-11 CARBON 1K 5% 1/4W
R3014 1-247-807-31 CARBON 100 5% 1/4W
SWITCH
S3006 1-786-338-12 SWITCH, TACTILE
HS
* A-1415-674-A HS BOARD, MOUNTED
(ALL EXCEPT KV-27FA310/29FA310)
C1001 1-104-665-11 ELECT 100µF 20% 25V
C1234 1-126-960-11 ELECT 1µF 20% 50V
C1235 1-126-960-11 ELECT 1µF 20% 50V
CAPACITOR
DIODE
HR
REF. NO. PART NO. DESCRIPTION VALUES
R1009 1-249-421-11 CARBON 2.2K 5% 1/4W
R1010 1-249-416-11 CARBON 820 5% 1/4W
R1011 1-249-415-11 CARBON 680 5% 1/4W
R1201 1-249-419-11 CARBON 1.5K 5% 1/4W
R1202 1-249-421-11 CARBON 2.2K 5% 1/4W
R1203 1-249-427-11 CARBON 6.8K 5% 1/4W
R1234 1-247-804-11 CARBON 75 5% 1/4W
R1235 1-249-409-11 CARBON 220 5% 1/4W
R1236 1-249-441-11 CARBON 100K 5% 1/4W
R1237 1-249-409-11 CARBON 220 5% 1/4W
R1238 1-249-441-11 CARBON 100K 5% 1/4W
SWITCH
S1001 1-692-431-21 SWITCH, TACTILE
S1002 1-692-431-21 SWITCH, TACTILE
S1003 1-692-431-21 SWITCH, TACTILE
S1004 1-692-431-21 SWITCH, TACTILE
S1005 1-692-431-21 SWITCH, TACTILE
S1006 1-692-431-21 SWITCH, TACTILE
S1007 1-762-816-11 SWITCH, TACTILE
S1008 1-762-816-11 SWITCH, TACTILE
HS
HU
D1001 8-719-929-15 DIODE HZS9.1NB2
D1002 8-719-070-80 DIODE LNK0120022G
D1003 8-719-929-15 DIODE HZS9.1NB2
D1004 8-719-109-89 DIODE RD5.6ESB2
D1005 8-719-109-89 DIODE RD5.6ESB2
D1233 8-719-108-12 DIODE RD9.1EW
D1235 8-719-108-12 DIODE RD9.1EW
D1236 8-719-108-12 DIODE RD9.1EW
IC
IC1001 8-742-212-20 HYB IC SBX3081-71
JACK
J1231 1-794-048-11 JACK, PIN 3P
RESISTOR
R1004 1-249-417-11 CARBON 1K 5% 1/4W
R1007 1-247-807-31 CARBON 100 5% 1/4W
R1008 1-249-427-11 CARBON 6.8K 5% 1/4W
HU
* A-1415-631-A HU (VAR) BOARD, MOUNTED
(KV-27FA310/29FA310 ONLY)
CAPACITOR
C2234 1-137-194-81 FILM 0.47µF 5% 50V
C2235 1-137-194-81 FILM 0.47µF 5% 50V
DIODE
D301 8-719-108-12 DIODE RD9.1EW
D2235 8-719-108-12 DIODE RD9.1EW
D2236 8-719-108-12 DIODE RD9.1EW
D2240 8-719-110-17 DIODE RD10ESB2
D2241 8-719-110-17 DIODE RD10ESB2
JACK
J2231 1-794-048-11 JACK, PIN 3P
KV-27FA310/27FS120/29FA310/29FS120
75
Page 76
KV-27FA310/27FS120/29FA310/29FS120
REF. NO. PART NO. DESCRIPTION VALUES
RESISTOR
R1001 1-249-427-11 CARBON 6.8K 5% 1/4W
R1002 1-249-421-11 CARBON 2.2K 5% 1/4W
R1003 1-249-419-11 CARBON 1.5K 5% 1/4W
R2008 1-249-427-11 CARBON 6.8K 5% 1/4W
R2009 1-249-421-11 CARBON 2.2K 5% 1/4W
R2010 1-249-416-11 CARBON 820 5% 1/4W
R2011 1-249-415-11 CARBON 680 5% 1/4W
R2235 1-249-409-11 CARBON 220 5% 1/4W
R2236 1-249-441-11 CARBON 100K 5% 1/4W
R2237 1-249-409-11 CARBON 220 5% 1/4W
R2238 1-249-441-11 CARBON 100K 5% 1/4W
R2240 1-247-804-11 CARBON 75 5% 1/4W
SWITCH
S1007 1-762-816-11 SWITCH, TACTILE
S1008 1-762-816-11 SWITCH, TACTILE
S2001 1-692-431-21 SWITCH, TACTILE
S2002 1-692-431-21 SWITCH, TACTILE
S2003 1-692-431-21 SWITCH, TACTILE
S2004 1-692-431-21 SWITCH, TACTILE
S2005 1-692-431-21 SWITCH, TACTILE
K
* A-1410-921-A K BOARD, MOUNTED
(KV-27FA310/29FA310 ONLY)
4-382-854-11 SCREW (M3X10), P, SW (+)
HU
REF. NO. PART NO. DESCRIPTION VALUES
C2414 1-126-963-11 ELECT 4.7µF 20% 50V
C2415 1-126-967-11 ELECT 47µF 20% 50V
C2416 1-164-172-11 CERAMIC CHIP 0.0056µF 10% 25V
C2417 1-162-968-11 CERAMIC CHIP 0.0047µF 10% 50V
C2418 1-125-891-11 CERAMIC CHIP 0.47µF 10% 10V
C2419 1-127-715-91 CERAMIC CHIP 0.22µF 10% 16V
C2420 1-126-959-11 ELECT 0.47µF 20% 50V
C2421 1-126-959-11 ELECT 0.47µF 20% 50V
C2422 1-127-715-91 CERAMIC CHIP 0.22µF 10% 16V
C2423 1-165-176-11 CERAMIC CHIP 0.047µF 10% 16V
C2424 1-162-969-11 CERAMIC CHIP 0.0068µF 10% 25V
C2425 1-107-826-11 CERAMIC CHIP 0.1µF 10% 16V
C2426 1-162-927-11 CERAMIC CHIP 100pF 5% 50V
C2427 1-126-947-11 ELECT 47µF 20% 35V
C2428 1-126-943-11 ELECT 2200µF 20% 25V
C2429 1-107-826-11 CERAMIC CHIP 0.1µF 10% 16V
C2430 1-126-960-11 ELECT 1µF 20% 50V
C2431 1-126-963-11 ELECT 4.7µF 20% 50V
C2432 1-126-963-11 ELECT 4.7µF 20% 50V
C2433 1-127-715-91 CERAMIC CHIP 0.22µF 10% 16V
C2434 1-107-826-11 CERAMIC CHIP 0.1µF 10% 16V
C2435 1-107-826-11 CERAMIC CHIP 0.1µF 10% 16V
C2436 1-107-826-11 CERAMIC CHIP 0.1µF 10% 16V
C2437 1-107-826-11 CERAMIC CHIP 0.1µF 10% 16V
C2438 1-164-227-11 CERAMIC CHIP 0.022µF 10% 25V
C2439 1-164-227-11 CERAMIC CHIP 0.022µF 10% 25V
C2440 1-107-826-11 CERAMIC CHIP 0.1µF 10% 16V
C2441 1-115-412-11 CERAMIC CHIP 680pF 5% 25V
C2442 1-165-176-11 CERAMIC CHIP 0.047µF 10% 16V
C2443 1-115-412-11 CERAMIC CHIP 680pF 5% 25V
K
CAPACITOR
C2401 1-130-495-00 MYLAR 0.1µF 5% 50V
C2402 1-130-495-00 MYLAR 0.1µF 5% 50V
C2403 1-126-964-11 ELECT 10µF 20% 50V
C2404 1-162-968-11 CERAMIC CHIP 0.0047µF 10% 50V
C2405 1-126-965-91 ELECT 22µF 20% 50V
C2406 1-126-964-11 ELECT 10µF 20% 50V
C2407 1-126-964-11 ELECT 10µF 20% 50V
C2408 1-162-969-11 CERAMIC CHIP 0.0068µF 10% 25V
C2410 1-126-969-11 ELECT 220µF 20% 50V
C2411 1-126-965-91 ELECT 22µF 20% 50V
C2412 1-137-194-81 FILM 0.47µF 5% 50V
C2413 1-100-120-51 ELECT 1000µF 20% 35V
KV-27FA310/27FS120/29FA310/29FS120
C2444 1-165-176-11 CERAMIC CHIP 0.047µF 10% 16V
C2445 1-126-965-91 ELECT 22µF 20% 50V
C2446 1-130-495-00 MYLAR 0.1µF 5% 50V
C2447 1-130-495-00 MYLAR 0.1µF 5% 50V
C2448 1-137-190-91 FILM 0.22µF 5% 50V
C2449 1-165-176-11 CERAMIC CHIP 0.047µF 10% 16V
C2450 1-126-963-11 ELECT 4.7µF 20% 50V
C2451 1-162-967-11 CERAMIC CHIP 0.0033µF 10% 50V
C2452 1-164-677-11 CERAMIC CHIP 0.033µF 10% 16V
C2453 1-162-968-11 CERAMIC CHIP 0.0047µF 10% 50V
C2454 1-107-826-11 CERAMIC CHIP 0.1µF 10% 16V
C2455 1-107-826-11 CERAMIC CHIP 0.1µF 10% 16V
C2456 1-126-963-11 ELECT 4.7µF 20% 50V
C2457 1-126-963-11 ELECT 4.7µF 20% 50V
76
Page 77
KV-27FA310/27FS120/29FA310/29FS120
K
REF. NO. PART NO. DESCRIPTION VALUES
C2458 1-126-963-11 ELECT 4.7µF 20% 50V
C2459 1-126-965-91 ELECT 22µF 20% 50V
C2460 1-137-194-81 FILM 0.47µF 5% 50V
C2461 1-126-963-11 ELECT 4.7µF 20% 50V
C2462 1-126-963-11 ELECT 4.7µF 20% 50V
C2463 1-107-826-11 CERAMIC CHIP 0.1µF 10% 16V
C2464 1-126-960-11 ELECT 1µF 20% 50V
C2465 1-107-826-11 CERAMIC CHIP 0.1µF 10% 16V
C2466 1-162-968-11 CERAMIC CHIP 0.0047µF 10% 50V
C2467 1-164-677-11 CERAMIC CHIP 0.033µF 10% 16V
C2468 1-162-967-11 CERAMIC CHIP 0.0033µF 10% 50V
C2469 1-130-495-00 MYLAR 0.1µF 5% 50V
C2470 1-162-968-11 CERAMIC CHIP 0.0047µF 10% 50V
C2471 1-162-968-11 CERAMIC CHIP 0.0047µF 10% 50V
C2472 1-162-970-11 CERAMIC CHIP 0.01µF 10% 25V
C2473 1-126-964-11 ELECT 10µF 20% 50V
C2474 1-126-964-11 ELECT 10µF 20% 50V
C2475 1-126-968-11 ELECT 100µF 20% 50V
C2476 1-162-970-11 CERAMIC CHIP 0.01µF 10% 25V
C2477 1-107-826-11 CERAMIC CHIP 0.1µF 10% 16V
C2478 1-162-968-11 CERAMIC CHIP 0.0047µF 10% 50V
REF. NO. PART NO. DESCRIPTION VALUES
DIODE
D2400 8-719-404-50 DIODE MA111-TX
D2401 8-719-070-60 DIODE PDZ7.5B-115
IC
IC2401 6-705-054-01 IC TDA8947J
IC2402 8-759-100-96 IC UPC4558G2
IC2403 6-706-034-01 IC NJW1164M-TE2
IC2404 8-759-165-01 IC NJM2177AFG1
IC2405 8-759-686-15 IC NJM2180M (TE2)
CHIP CONDUCTOR
JR2401 1-216-864-11 SHORT CHIP
JR2402 1-216-864-11 SHORT CHIP
JR2410 1-216-864-11 SHORT CHIP
JR2411 1-216-864-11 SHORT CHIP
JR2420 1-216-864-11 SHORT CHIP
JR2421 1-216-864-11 SHORT CHIP
IC LINK
C2479 1-107-826-11 CERAMIC CHIP 0.1µF 10% 16V
C2480 1-107-826-11 CERAMIC CHIP 0.1µF 10% 16V
C2481 1-162-968-11 CERAMIC CHIP 0.0047µF 10% 50V
C2482 1-107-826-11 CERAMIC CHIP 0.1µF 10% 16V
C2484 1-130-495-00 MYLAR 0.1µF 5% 50V
C2485 1-130-495-00 MYLAR 0.1µF 5% 50V
C2486 1-162-970-11 CERAMIC CHIP 0.01µF 10% 25V
C2487 1-127-715-91 CERAMIC CHIP 0.22µF 10% 16V
C2488 1-162-968-11 CERAMIC CHIP 0.0047µF 10% 50V
C2489 1-127-715-91 CERAMIC CHIP 0.22µF 10% 16V
C2490 1-104-665-11 ELECT 100µF 20% 25V
C2493 1-126-935-11 ELECT 470µF 20% 16V
C2494 1-126-935-11 ELECT 470µF 20% 16V
C2495 1-126-935-11 ELECT 470µF 20% 16V
C2496 1-126-935-11 ELECT 470µF 20% 16V
C2499 1-164-315-11 CERAMIC CHIP 470pF 5% 50V
CONNECTOR
* CN2401 1-564-510-11 PLUG, CONNECTOR 7P
* CN2402 1-564-508-11 PLUG, CONNECTOR 5P
PS2401 1-576-337-21 IC LINK 2.7A 50V
TRANSISTOR
Q2400 8-729-120-28 TRANSISTOR 2SC1623-L5L6
Q2401 8-729-120-28 TRANSISTOR 2SC1623-L5L6
Q2410 8-729-424-02 TRANSISTOR 2SB709A-QRS-TX
Q2411 8-729-424-02 TRANSISTOR 2SB709A-QRS-TX
Q2412 8-729-424-02 TRANSISTOR 2SB709A-QRS-TX
Q2413 8-729-424-02 TRANSISTOR 2SB709A-QRS-TX
Q2414 8-729-422-27 TRANSISTOR 2SD601A-Q
Q2418 8-729-120-28 TRANSISTOR 2SC1623-L5L6
Q2419 8-729-120-28 TRANSISTOR 2SC1623-L5L6
RESISTOR
R2401 1-216-845-11 METAL CHIP 100K 5% 1/10W
R2402 1-216-833-11 METAL CHIP 10K 5% 1/10W
R2403 1-216-829-11 METAL CHIP 4.7K 5% 1/10W
R2404 1-216-835-11 METAL CHIP 15K 5% 1/10W
R2405 1-218-895-11 METAL CHIP 100K 0.50% 1/10W
R2406 1-218-714-11 METAL CHIP 8.2K 0.50% 1/10W
R2407 1-216-835-11 METAL CHIP 15K 5% 1/10W
KV-27FA310/27FS120/29FA310/29FS120
77
Page 78
KV-27FA310/27FS120/29FA310/29FS120
K
REF. NO. PART NO. DESCRIPTION VALUES
R2408 1-218-868-11 METAL CHIP 7.5K 0.50% 1/10W
R2409 1-216-833-11 METAL CHIP 10K 5% 1/10W
R2410 1-216-835-11 METAL CHIP 15K 5% 1/10W
R2411 1-216-841-11 METAL CHIP 47K 5% 1/10W
R2412 1-218-868-11 METAL CHIP 7.5K 0.50% 1/10W
R2413 1-216-841-11 METAL CHIP 47K 5% 1/10W
R2414 1-216-835-11 METAL CHIP 15K 5% 1/10W
R2415 1-220-397-11 METAL CHIP 4.7M 5% 1/10W
R2416 1-216-837-11 METAL CHIP 22K 5% 1/10W
R2417 1-216-837-11 METAL CHIP 22K 5% 1/10W
R2418 1-216-809-11 METAL CHIP 100 5% 1/10W
R2419 1-216-809-11 METAL CHIP 100 5% 1/10W
R2420 1-216-837-11 METAL CHIP 22K 5% 1/10W
R2421 1-216-837-11 METAL CHIP 22K 5% 1/10W
R2422 1-216-833-11 METAL CHIP 10K 5% 1/10W
R2423 1-216-840-11 METAL CHIP 39K 5% 1/10W
R2424 1-216-840-11 METAL CHIP 39K 5% 1/10W
R2425 1-216-840-11 METAL CHIP 39K 5% 1/10W
R2426 1-216-817-11 METAL CHIP 470 5% 1/10W
R2427 1-216-817-11 METAL CHIP 470 5% 1/10W
REF. NO. PART NO. DESCRIPTION VALUES
R2454 1-216-821-11 METAL CHIP 1K 5% 1/10W
R2455 1-216-809-11 METAL CHIP 100 5% 1/10W
R2456 1-216-809-11 METAL CHIP 100 5% 1/10W
R2457 1-216-864-11 SHORT CHIP
R2458 1-216-861-11 METAL CHIP 2.2M 5% 1/10W
R2459 1-216-853-11 METAL CHIP 470K 5% 1/10W
R2460 1-218-714-11 METAL CHIP 8.2K 0.50% 1/10W
R2461 1-216-839-11 METAL CHIP 33K 5% 1/10W
R2462 1-218-296-11 METAL CHIP 75K 5% 1/10W
R2463 1-216-823-11 METAL CHIP 1.5K 5% 1/10W
R2464 1-218-331-11 METAL CHIP 51K 5% 1/10W
R2465 1-216-824-11 METAL CHIP 1.8K 5% 1/10W
R2466 1-218-866-11 METAL CHIP 6.2K 0.50% 1/10W
R2467 1-216-833-11 METAL CHIP 10K 5% 1/10W
R2468 1-216-833-11 METAL CHIP 10K 5% 1/10W
R2469 1-216-833-11 METAL CHIP 10K 5% 1/10W
R2470 1-216-840-11 METAL CHIP 39K 5% 1/10W
R2471 1-216-824-11 METAL CHIP 1.8K 5% 1/10W
R2472 1-218-331-11 METAL CHIP 51K 5% 1/10W
R2473 1-216-861-11 METAL CHIP 2.2M 5% 1/10W
R2428 1-216-829-11 METAL CHIP 4.7K 5% 1/10W
R2429 1-216-829-11 METAL CHIP 4.7K 5% 1/10W
R2430 1-216-809-11 METAL CHIP 100 5% 1/10W
R2431 1-216-809-11 METAL CHIP 100 5% 1/10W
R2432 1-216-864-11 SHORT CHIP
R2433 1-216-833-11 METAL CHIP 10K 5% 1/10W
R2434 1-218-895-11 METAL CHIP 100K 0.50% 1/10W
R2435 1-216-833-11 METAL CHIP 10K 5% 1/10W
R2436 1-216-821-11 METAL CHIP 1K 5% 1/10W
R2437 1-216-833-11 METAL CHIP 10K 5% 1/10W
R2438 1-216-833-11 METAL CHIP 10K 5% 1/10W
R2439 1-216-833-11 METAL CHIP 10K 5% 1/10W
R2440 1-216-837-11 METAL CHIP 22K 5% 1/10W
R2441 1-216-833-11 METAL CHIP 10K 5% 1/10W
R2442 1-216-821-11 METAL CHIP 1K 5% 1/10W
R2443 1-216-841-11 METAL CHIP 47K 5% 1/10W
R2446 1-216-833-11 METAL CHIP 10K 5% 1/10W
R2447 1-216-821-11 METAL CHIP 1K 5% 1/10W
R2448 1-216-845-11 METAL CHIP 100K 5% 1/10W
R2449 1-216-841-11 METAL CHIP 47K 5% 1/10W
R2450 1-216-833-11 METAL CHIP 10K 5% 1/10W
R2451 1-216-845-11 METAL CHIP 100K 5% 1/10W
R2452 1-216-821-11 METAL CHIP 1K 5% 1/10W
R2453 1-216-841-11 METAL CHIP 47K 5% 1/10W
KV-27FA310/27FS120/29FA310/29FS120
R2474 1-216-839-11 METAL CHIP 33K 5% 1/10W
R2475 1-218-296-11 METAL CHIP 75K 5% 1/10W
R2476 1-216-835-11 METAL CHIP 15K 5% 1/10W
R2477 1-216-835-11 METAL CHIP 15K 5% 1/10W
R2478 1-216-845-11 METAL CHIP 100K 5% 1/10W
R2479 1-216-845-11 METAL CHIP 100K 5% 1/10W
R2480 1-218-331-11 METAL CHIP 51K 5% 1/10W
R2481 1-216-823-11 METAL CHIP 1.5K 5% 1/10W
R2482 1-216-833-11 METAL CHIP 10K 5% 1/10W
R2483 1-216-837-11 METAL CHIP 22K 5% 1/10W
R2484 1-216-828-11 METAL CHIP 3.9K 5% 1/10W
R2485 1-216-821-11 METAL CHIP 1K 5% 1/10W
R2486 1-216-821-11 METAL CHIP 1K 5% 1/10W
R2487 1-218-717-11 METAL CHIP 11K 0.50% 1/10W
R2488 1-216-825-11 METAL CHIP 2.2K 5% 1/10W
R2489 1-216-835-11 METAL CHIP 15K 5% 1/10W
R2490 1-216-845-11 METAL CHIP 100K 5% 1/10W
R2491 1-216-845-11 METAL CHIP 100K 5% 1/10W
R2492 1-216-837-11 METAL CHIP 22K 5% 1/10W
R2493 1-216-845-11 METAL CHIP 100K 5% 1/10W
R2494 1-216-845-11 METAL CHIP 100K 5% 1/10W
R2495 1-218-292-11 METAL CHIP 20K 5% 1/10W
R2496 1-216-847-11 METAL CHIP 150K 5% 1/10W
R2497 1-216-823-11 METAL CHIP 1.5K 5% 1/10W
78
Page 79
KV-27FA310/27FS120/29FA310/29FS120
REF. NO. PART NO. DESCRIPTION VALUES
R2498 1-216-837-11 METAL CHIP 22K 5% 1/10W
R2499 1-216-837-11 METAL CHIP 22K 5% 1/10W
R2500 1-216-829-11 METAL CHIP 4.7K 5% 1/10W
R2501 1-216-837-11 METAL CHIP 22K 5% 1/10W
R2502 1-216-837-11 METAL CHIP 22K 5% 1/10W
R2503 1-216-837-11 METAL CHIP 22K 5% 1/10W
R2504 1-216-837-11 METAL CHIP 22K 5% 1/10W
R2505 1-216-841-11 METAL CHIP 47K 5% 1/10W
R2507 1-216-809-11 METAL CHIP 100 5% 1/10W
R2519 1-216-821-11 METAL CHIP 1K 5% 1/10W
R2520 1-216-821-11 METAL CHIP 1K 5% 1/10W
R2521 1-216-833-11 METAL CHIP 10K 5% 1/10W
R2522 1-216-841-11 METAL CHIP 47K 5% 1/10W
R2523 1-216-841-11 METAL CHIP 47K 5% 1/10W
R2524 1-216-864-11 SHORT CHIP
K
REF. NO. PART NO. DESCRIPTION VALUES
DIODE
D2801 8-719-109-89 DIODE RD5.6ESB2
D2802 8-719-991-33 DIODE 1SS133T-77
D2804 8-719-302-43 DIODE EL1Z
D2805 8-719-991-33 DIODE 1SS133T-77
D2806 8-719-991-33 DIODE 1SS133T-77
D2807 8-719-210-21 DIODE 11EQS04
D2808 8-719-991-33 DIODE 1SS133T-77
D2813 8-719-991-33 DIODE 1SS133T-77
IC
IC2801 6-701-598-01 IC UPC5023CS-184
COIL
V
V
* A-1410-924-A V BOARD, MOUNTED
CAPACITOR
C2801 1-128-578-11 ELECT 1µF 20% 100V
C2802 1-126-964-11 ELECT 10µF 20% 50V
C2803 1-137-378-11 MYLAR 0.22µF 5% 50V
C2804 1-137-378-11 MYLAR 0.22µF 5% 50V
C2805 1-129-745-61 FILM 0.033µF 5% 400V
C2808 1-162-970-11 CERAMIC CHIP 0.01µF 10% 25V
C2809 1-128-934-91 CERAMIC CHIP 0.33µF 20% 10V
C2810 1-130-495-00 MYLAR 0.1µF 5% 50V
C2811 1-129-725-00 FILM 0.082µF 5% 400V
C2812 1-162-970-11 CERAMIC CHIP 0.01µF 10% 25V
C2813 1-126-933-11 ELECT 100µF 20% 16V
C2821 1-162-970-11 CERAMIC CHIP 0.01µF 10% 25V
C2823 1-130-967-00 FILM 0.0027µF 5% 50V
C2824 1-165-176-11 CERAMIC CHIP 0.047µF 10% 16V
C2826 1-162-927-11 CERAMIC CHIP 100pF 5% 50V
C2862 1-126-964-11 ELECT 10µF 20% 50V
CONNECTOR
* CN2901 1-564-507-11 PLUG, CONNECTOR 4P
* CN2902 1-770-723-11 CONNECTOR, BOARD TO BOARD 8P
* CN2903 1-564-506-11 PLUG, CONNECTOR 3P
L2801 1-406-989-21 INDUCTOR 10MH
L2802 1-419-633-11 INDUCTOR 10MH
L2803 1-412-529-11 INDUCTOR 22µH
TRANSISTOR
Q2801 8-729-422-27 TRANSISTOR 2SD601A-Q
Q2802 8-729-424-02 TRANSISTOR 2SB709A-QRS-TX
Q2803 8-729-424-02 TRANSISTOR 2SB709A-QRS-TX
Q2804 8-729-424-02 TRANSISTOR 2SB709A-QRS-TX
Q2805 6-550-106-01 TRANSISTOR KTB764
Q2807 8-729-931-45 TRANSISTOR IRF614
Q2808 6-550-106-01 TRANSISTOR KTB764
Q2812 8-729-026-39 TRANSISTOR 2SA933AS-QT
RESISTOR
R2800 1-216-837-11 METAL CHIP 22K 5% 1/10W
R2801 1-216-841-11 METAL CHIP 47K 5% 1/10W
R2802 1-216-833-11 METAL CHIP 10K 5% 1/10W
R2803 1-216-837-11 METAL CHIP 22K 5% 1/10W
R2804 1-216-833-11 METAL CHIP 10K 5% 1/10W
R2805 1-216-829-11 METAL CHIP 4.7K 5% 1/10W
R2807 1-216-827-11 METAL CHIP 3.3K 5% 1/10W
R2808 1-216-833-11 METAL CHIP 10K 5% 1/10W
R2809 1-216-837-11 METAL CHIP 22K 5% 1/10W
R2811 1-249-393-11 CARBON 10 5% 1/4W
KV-27FA310/27FS120/29FA310/29FS120
79
Page 80
KV-27FA310/27FS120/29FA310/29FS120
V
REF. NO. PART NO. DESCRIPTION VALUES
R2815 1-215-862-11 METAL OXIDE 68 5% 1W
R2817 1-218-736-11 METAL CHIP 68K 0.50% 1/10W
R2818 1-216-809-11 METAL CHIP 100 5% 1/10W
R2819 1-216-841-11 METAL CHIP 47K 5% 1/10W
R2820 1-218-883-11 METAL CHIP 33K 0.50% 1/10W
R2821 1-218-714-11 METAL CHIP 8.2K 0.50% 1/10W
R2824 1-218-740-11 METAL CHIP 100K 0.50% 1/10W
R2825 1-216-845-11 METAL CHIP 100K 5% 1/10W
R2826 1-249-421-11 CARBON 2.2K 5% 1/4W
R2827 1-218-708-11 METAL CHIP 4.7K 0.50% 1/10W
R2828 1-218-728-11 METAL CHIP 33K 0.50% 1/10W
R2829 1-216-853-11 METAL CHIP 470K 5% 1/10W
R2833 1-218-710-11 METAL CHIP 5.6K 0.50% 1/10W
R2834 1-218-704-11 METAL CHIP 3.3K 0.50% 1/10W
R2837 1-218-871-11 METAL CHIP 10K 0.50% 1/10W
R2840 1-218-702-11 METAL CHIP 2.7K 0.50% 1/10W
R2841 1-218-706-11 METAL CHIP 3.9K 0.50% 1/10W
R2842 1-218-700-11 METAL CHIP 2.2K 0.50% 1/10W
R2855 1-218-706-11 METAL CHIP 3.9K 0.50% 1/10W
R2856 1-218-871-11 METAL CHIP 10K 0.50% 1/10W
R2857 1-218-875-11 METAL CHIP 15K 0.50% 1/10W
R2860 1-218-716-11 METAL CHIP 10K 0.50% 1/10W
R2864 1-218-668-11 METAL CHIP 100 0.50% 1/10W
R2866 1-249-438-11 CARBON 56K 5% 1/4W
R2870 1-216-825-11 METAL CHIP 2.2K 5% 1/10W
R2876 1-216-821-11 METAL CHIP 1K 5% 1/10W
R2890 1-218-728-11 METAL CHIP 33K 0.50% 1/10W
R2893 1-216-839-11 METAL CHIP 33K 5% 1/10W
REF. NO. PART NO. DESCRIPTION VALUES
ACCESSORIES AND PACKING
* 4-041-259-05 BAG, PROTECTION
* 2-190-595-01 CARTON, INDIVIDUAL
(KV-27FA310 ONLY)
* 4-102-073-01 CARTON, INDIVIDUAL
(KV-/29FA310 ONLY)
* 4-103-469-01 CARTON, INDIVIDUAL
(KV-27FS120 ONLY)
* 4-103-471-01 CARTON, INDIVIDUAL
(KV-29FS120 ONLY)
* 4-088-874-01 CUSHION, LOWER
(KV-27FS120/29FS120 ONLY)
* 4-102-075-01 CUSHION, LOWER
(KV-27FA310/29FA310 ONLY)
* 4-088-875-01 CUSHION, UPPER
(KV-27FS120/29FS120 ONLY)
* 4-102-074-01 CUSHION, UPPER
(KV-27FA310/29FA310 ONLY)
* 4-093-139-11 INSERT, DOOR BREAKAGE (L)
(KV-27FA310 ONLY)
4-101-451-41 MANUAL, INSTRUCTION
(KV-27FA310/29FA310 ONLY)
4-101-456-21 MANUAL, INSTRUCTION
(KV-27FS120/27FA310 ONLY)
4-101-456-31 MANUAL, INSTRUCTION
(KV-27FS120/27FA310 CANADA ONLY)
4-101-456-41 MANUAL, INSTRUCTION
(KV-29FS120LN/29FS120LS ONLY)
9-965-960-02
KV-27FA310/27FS120/29FA310/29FS120
1-476-680-21 REMOTE COMMANDER (RM-Y180)
(KV-27FA310/29FA310 ONLY)
1-478-707-11 REMOTE COMMANDER (RM-Y195)
(KV-27FS120/29FS120LN/29FS120LS ONLY)
4-978-977-11 BATTERY COVER (FOR RM-Y180/Y195)
Sony Corporation
Sony Technology Center
Technical Services
Service Promotion Department
REMOTE COMMANDER
English
2004CJ74WEB-1
Printed in USA
© 2004.3
80
Page 81

SERVICE MANUAL
In an effort to reduce the size of this pdf fi le the tiled
schematics are not attached to this Service Manual.
To receive a complete set of the tiled schematics for
this manual please submit a request to Nita Wardlaw at
[email protected].
BA-6
CHASSIS
Page 82
Connecting Additional Equipment
Operating Instructions
4-101-456-21(2)
© 2004 by Sony Corporation
KV-27FS120
Page 83

User Guide
Page 84
Connecting Additional Equipment
WARNING
To reduce the risk of fire or electric shock, do not expose the
TV to rain or moisture.
CAUTION
RISK OF ELECTRIC SHOCK
DO NOT OPEN
ATTENTION
RISQUE DE CHOC ELECTRIQUE,
NE PAS OUVRIR
PRECAUCION
RIESGO DE CHOQUE ELECTRICO
CAUTION: TO REDUCE THE RISK OF ELECTRIC SHOCK,
DO NOT REMOVE COVER (OR BACK).
NO USER-SERVICEABLE PARTS INSIDE.
REFER SERVICING TO QUALIFIED SERVICE PERSONNEL.
This symbol is intended to alert the user to the
presence of uninsulated “dangerous voltage”
within the product’s enclosure that may be of
sufficient magnitude to constitute a risk of electric
shock to persons.
This symbol is intended to alert the user to the
presence of important operating and maintenance
(servicing) instructions in the literature
accompanying the appliance.
Note to the CATV Installer
This reminder is provided to call the CATV system
installer’s attention to Article 820-40 of the NEC that
provides guidelines for proper grounding and, in particular,
specifies that the cable ground shall be connected to the
grounding system of the building as close to the point of
cable entry as practical.
SAFETY PRECAUTIONS
❏ Operate the TV only on 120 V AC.
❏ One blade of the power plug is wider than the other for
safety purposes and will fit into the power outlet only one
way. If you are unable to insert the plug fully into the
outlet, contact your dealer.
❏ If any liquid or solid object falls into the TV, unplug it and
have it checked by qualified personnel before operating it
further.
CAUTION
When using TV games, computers, and similar products
with your TV, keep the brightness and contrast functions at
low settings. If a fixed (non-moving) pattern is left on the
screen for long periods of time at a high brightness or
contrast setting, the image can be permanently imprinted
onto the screen. Continuously watching the same channel
can cause the imprint of station logos onto the TV screen.
These types of imprints are not covered by your warranty
because they are the results of misuse.
To reduce the risk of electric shock, do not use
this polarized plug with an extension cord,
receptacle, or other outlet unless the blades can
be fully inserted to prevent blade exposure.
NO ABRIR
✍
You are cautioned that any changes or modifications
not expressly approved in this manual could void
your authority to operate this equipment.
NOTIFICATION
This equipment has been tested and found to comply with
the limits for a Class B digital device pursuant to Part 15 of
the FCC Rules. These limits are designed to provide
reasonable protection against harmful interference in a
residential installation. This equipment generates, uses, and
can radiate radio frequency energy and, if not installed and
used in accordance with the instructions, may cause
harmful interference with radio communications. However,
there is no guarantee that interference will not occur in a
particular installation. If this equipment does cause harmful
interference to radio or television reception, which can be
determined by turning the equipment off and on, the user is
encouraged to try to correct the interference by one or more
of the following measures:
❏ Reorient or relocate the receiving antennas.
❏ Increase the separation between the equipment and
receiver.
❏ Connect the equipment into an outlet on a circuit different
from that to which the receiver is connected.
❏ Consult the dealer or an experienced radio/TV technician
for help.
Protecting the TV
❏ To prevent internal heat build-up, do not block the
ventilation openings.
❏ Do not install the TV in a hot or humid place, or in a place
subject to excessive dust or mechanical vibration.
Note on Caption Vision
This television receiver provides display of television closed
captioning in accordance with § 15.119 of the FCC rules.
Use of this television for other than private viewing of
programs broadcast on UHF or VHF or transmitted by cable
companies for the use of the general public may require
authorization from the broadcaster-cable company and/or
program owner.
Owner’s Record
The model and serial numbers are located on the front cover
of this manual and at the rear of your TV.
Trademarks and Copyrights
ENERGY STAR is a registered mark.
As an ENERGY STAR® Partner, Sony has
determined that this product or product
model meets the ENERGY STAR
for energy efficiency.
SRS and the ( )® symbol are trademarks of
SRS Labs, Inc.
Manufactured under license from BBE Sound, Inc.
Licensed by BBE Sound, Inc. under USP 4638258,
5510752 and 5736897. BBE and BBE symbol are
registered trademarks of BBE Sound, Inc.
WEGA, FD Trinitron, ClearEdge VM, Steady Sound
and Caption Vision are registered trademarks of
Sony Corporation.
®
guidelines
Page 85
User Guide
IMPORTANT SAFEGUARDS
For your protection, please read these instructions
completely, and keep this manual for future reference.
Carefully observe and comply with all warnings, cautions
and instructions placed on the set, or described in the
operating instructions or service manual.
WARNING
To guard against injury, the following basic safety
precautions should be observed in the installation, use, and
servicing of the set.
Use
Power Sources
This set should be operated only from
the type of power source indicated on
the serial/model plate. If you are not
sure of the type of electrical power
supplied to your home, consult your
dealer or local power company. For
those sets designed to operate from
battery power, refer to the operating instructions.
Grounding or Polarization
This set may be equipped with a
polarized alternating current line plug
(a plug having one blade wider than
other). This plug will fit into the
power outlet only one way. This is a
safety feature. If you are unable to insert the plug fully into the
outlet, try reversing the plug. If the plug still fails to fit, contact
your electrician to replace your obsolete outlet. Do not defeat
the safety purpose of the polarized plug.
For the set with a three-wire grounding type AC plug
This plug will only fit into a
grounding-type power outlet. This is
a safety feature. If you are unable to
insert the plug into the outlet, contact
your electrician to have a suitable
outlet installed. Do not defeat the
safety purpose of the grounding plug.
Overloading
Do not overload wall
outlets, extension
cords or convenience
receptacles beyond
their capacity, since
this can result in fire
or electric shock.
Always turn the set off when it is not to be used. When the
set is left unattended and unused for long periods of time,
unplug it from the wall outlet as a precaution against the
possibility of an internal malfunction that could create a fire
hazard.
Do not disconnect the antenna or the power cord during a
heavy storm. Lightning may strike while you are holding
the cable or cord, causing serious injury. Turn off your TV
and wait for the weather to improve.
Object and Liquid Entry
Never push objects of any kind into the set
through the cabinet slots as they may touch
dangerous voltage points or short out parts
that could result in a fire or electric shock.
Never spill liquid of any kind on the set.
Attachments
Do not use attachments not recommended
by the manufacturer, as they may cause
hazards.
Do not place any objects, especially heavy
objects, on top of the set. The object may
fall from the set, causing injury.
Cleaning
Unplug the set from the wall outlet before
cleaning or polishing it. Do not use liquid
cleaners or aerosol cleaners. Use a cloth
lightly dampened with water for cleaning
the exterior of the set.
If a snapping or popping sound from a TV set
is continuous or frequent while the TV is
operating, unplug the TV and consult your
dealer or service technician. It is normal for
some TV sets to make occasional snapping or
popping sounds, particularly when being
turned on or off.
Installation
Always use two or more people to lift or move the set. The
set is heavy and the bottom surface is flat. Serious injury can
result from trying to move the set by yourself alone, or from
unsteady handling.
Install the set on a stable, level surface.
Water and Moisture
Do not use power-line
operated sets near water —
for example, near a bathtub,
washbowl, kitchen sink, or
laundry tub, in a wet
basement, or near a
swimming pool, etc.
Accessories
Do not place the set on
an unstable cart, stand,
tripod, bracket, table,
or shelf. The set may
fall, causing serious
injury to a child or an
adult, and serious
damage to the set. Use
only a cart or stand recommended by the manufacturer for the
specific model of TV. Any mounting of the product should
follow the manufacturer’s instructions, and should use a
mounting accessory recommended by the manufacturer. An
appliance and cart combination should be moved with care.
Quick stops, excessive force, and uneven surfaces may cause
the appliance and cart combination to overturn.
Ventilation
The slots and openings in the cabinet and in the back or
bottom are provided for necessary ventilation. To ensure
reliable operation of the set, and to protect it from
overheating, these slots and openings must never be
blocked or covered.
• Never cover the slots and openings
with a cloth or other materials.
Page 86
Connecting Additional Equipment
•
Never block the slots and openings
by placing the set on a bed, sofa, rug
or other similar surface.
•
Never place the set in a confined
space, such as a bookcase or built-in
cabinet, unless proper ventilation is
provided.
• Do not place the set near or over a
radiator or heat register, or where it is
exposed to direct sunlight.
Power-Cord Protection
Do not allow anything to rest on or roll over the
power cord, and do not place the set where the
power cord is subject to wear or abuse.
Antennas
Outdoor Antenna Grounding
If an outdoor antenna is installed, follow the precautions
below. An outdoor antenna system should not be located in
the vicinity of overhead power lines or other electric light or
power circuits, or where it can come in contact with such
power lines or circuits.
WHEN INSTALLING AN OUTDOOR ANTENNA
SYSTEM, EXTREME CARE SHOULD BE TAKEN TO KEEP
FROM CONTACTING SUCH POWER LINES OR
CIRCUITS AS CONTACT WITH THEM IS ALMOST
INVARIABLY FATAL.
Be sure the antenna system is grounded so as to provide some
protection against voltage surges and built-up static charges.
Section 810 of the National Electrical Code (NEC) in USA and
Section 54 of the Canadian Electrical Code in Canada
provides information with respect to proper grounding of the
mast and supporting structure, grounding of the lead-in wire
to an antenna discharge unit, size of grounding conductors,
location of antenna discharge unit, connection to grounding
electrodes, and requirements for the grounding electrode.
Antenna Grounding According to the NEC
Antenna Grounding According to the National Electrical
Code, ANSI/NFPA 70.
ANTENNA
LEAD IN
GROUND
CLAMP
ELECTRIC
SERVICE
EQUIPMENT
NEC - NATIONAL ELECTRIC CODE
WIRE
ANTENNA
DISCHARGE UNIT
(NEC SECTION 810-20)
GROUNDING CONDUCTORS
(NEC SECTION 810-21)
GROUND CLAMPS
POWER SERVICE GROUNDING
ELECTRODE SYSTEM
(NEC ARTICLE 250, PART H)
Lightning
For added protection for this television receiver during a
lightning storm, or when it is left unattended and unused
for long periods of time, unplug it from the wall outlet and
disconnect the antenna. This will prevent damage to the
receiver due to lightning and power-line surges.
Service
Damage Requiring Service
Unplug the set from the wall outlet and refer servicing to
qualified service personnel under the following conditions:
When the power cord or plug
•
is damaged or frayed.
• If liquid has been spilled
into the set or objects have
fallen into the product.
• If the set has been exposed to
rain or water.
• If the set has been subject to
excessive shock by being
dropped, or the cabinet has
been damaged.
If the set does not operate
•
normally when following the operating
instructions. Adjust only those controls
that are specified in the operating
instructions. Improper adjustment of
other controls may result in damage and
will often require extensive work by a
qualified technician to restore the set to normal operation.
• When the set exhibits a distinct change in
performance — this indicates a need for service.
Servicing
Do not attempt to service the set yourself
since opening the cabinet may expose you
to dangerous voltage or other hazards. Refer
all servicing to qualified service personnel.
Replacement Parts
When replacement parts are required, be
sure the service technician certifies in
writing that he has used replacement
parts specified by the manufacturer that
have the same characteristics as the
original parts. Unauthorized
substitutions may result in fire, electric
shock, or other hazards.
Safety Check
Upon completion of any service or repairs to
the set, ask the service technician to perform
routine safety checks (as specified by the
manufacturer) to determine that the set is in
safe operating condition, and to so certify.
When the set reaches the end of its useful life,
improper disposal could result in a picture
tube implosion. Ask a qualified service
technician to dispose of the set.
Page 87

User Guide
Page 88
Contents
Introduction
Introducing the FD Trinitron WEGA® Features......................................................................... 1
About this Manual..........................................................................................................................2
Batteries for the Remote Control ..................................................................................................2
Front Panel Menu Controls ...........................................................................................................2
Using the Remote Control
Remote Control Description.......................................................................................................... 3
Programming the Remote Control...............................................................................................5
Manufacture’s Codes...................................................................................................................... 6
Using your TV Remote Control with Other Equipment........................................................... 7
Connecting Your TV
TV Rear Panel.................................................................................................................................. 9
Basic Connections ......................................................................................................................... 11
Connecting Additional Equipment............................................................................................ 12
Using Basic Functions
Setting Up the TV.......................................................................................................................... 23
Quick Start to the Menus ............................................................................................................. 24
Using the Menus
How to Access Menus.................................................................................................................. 27
Using the Video Menu......................................................................................................... 28
Using the Audio Menu ....................................................................................................... 29
Using the Channel Menu.................................................................................................... 31
Using the Parent Menu ....................................................................................................... 33
Parental Control..................................................................................................................... 34
United States: Selecting Custom Rating Options.............................................................. 36
Canada: Selecting Custom Rating Options........................................................................ 38
Using the Timer Menu ........................................................................................................ 39
Using the Setup Menu......................................................................................................... 40
Other Information
Troubleshooting............................................................................................................................ 41
Specifications................................................................................................................................. 45
Index...................................................................................................................................................... 47
Page 89

Page 90

Introduction
Congratulations on your purchase of the Sony FD Trinitron WEGA®.
®
Introducing the FD Trinitron WEGA Features
Some of the features you will enjoy include:
❏ FD Trinitron Flat CRT — Delivers a picture with uncompromising accuracy and
outstanding image detail via a technologically advanced tube.
❏ Y, PB, PR Inputs — Provides component video inputs for superior picture quality
(480i only).
❏ BBE — Gives sound more impact by using audio technology to compensate for phase
effects in speakers.
❏ SRS — Produces a dynamic three-dimensional sound for stereo programs.
❏ ClearEdge VM — Sharpens picture definition to give objects a crisp, clean edge.
❏ Favorite Channels — Provides instant access to your favorite channels with the touch of a
button.
❏ Info Banner — Displays the name and the remaining time of the current program viewed,
if available.
❏ Universal Remote Control — Operates your connected cable box, VCR, digital satellite
receiver, DVD player, or DVD/VCR combination unit.
❏ Energy Star
❏ Parental Control (V-Chip) — Helps parents monitor what their children watch on TV by
establishing rating limits.
❏ Front Panel Controls — Allows access to the on-screen menus without the use of a remote
control.
❏ Front A/V Inputs — Lets you quickly connect video games, camcorders or stereo/mono
equipment.
❏ 16:9 Enhanced — Provides enhanced picture resolution for wide-screen sources such as
DVD.
®
— Meets the Energy Star guidelines for energy efficiency.
1
Page 91
About this Manual
This manual provides instructions to help you enjoy your new TV. It shows you how to
connect to an antenna or cable, cable box, VCR, DVD, satellite receiver, stereo system, or
camcorder. Once your TV is connected, follow the instructions and use the remote control to
access the on-screen menus.
Batteries for the Remote Control
Insert two AA (R6) batteries (supplied) into the remote control using the following illustration
as a guide.
✍ Under normal conditions, batteries will last up to six months. If the remote control does not operate
properly, the batteries might be worn out.
✍ If you will not be using the remote control for an extended period of time, remove the batteries to
avoid possible damage from battery leakage.
Front Panel Menu Controls
>PC<
The front Audio/Video panel controls allow you to access the menu without the remote
control.
❏ Press to display the on-screen menu.
❏ Use the and buttons on the front Audio/Video panel instead of your remote
control.
❏ Use the button on the front Audio/Video panel to navigate through the menus, then
select an item. The front panel controls also allow you to change your channels (CH+/-),
adjust the volume (VOL +/-), and change video inputs.
✍ To navigate the menus with your remote control, see “Using the Menus” on page 27.
2
Page 92
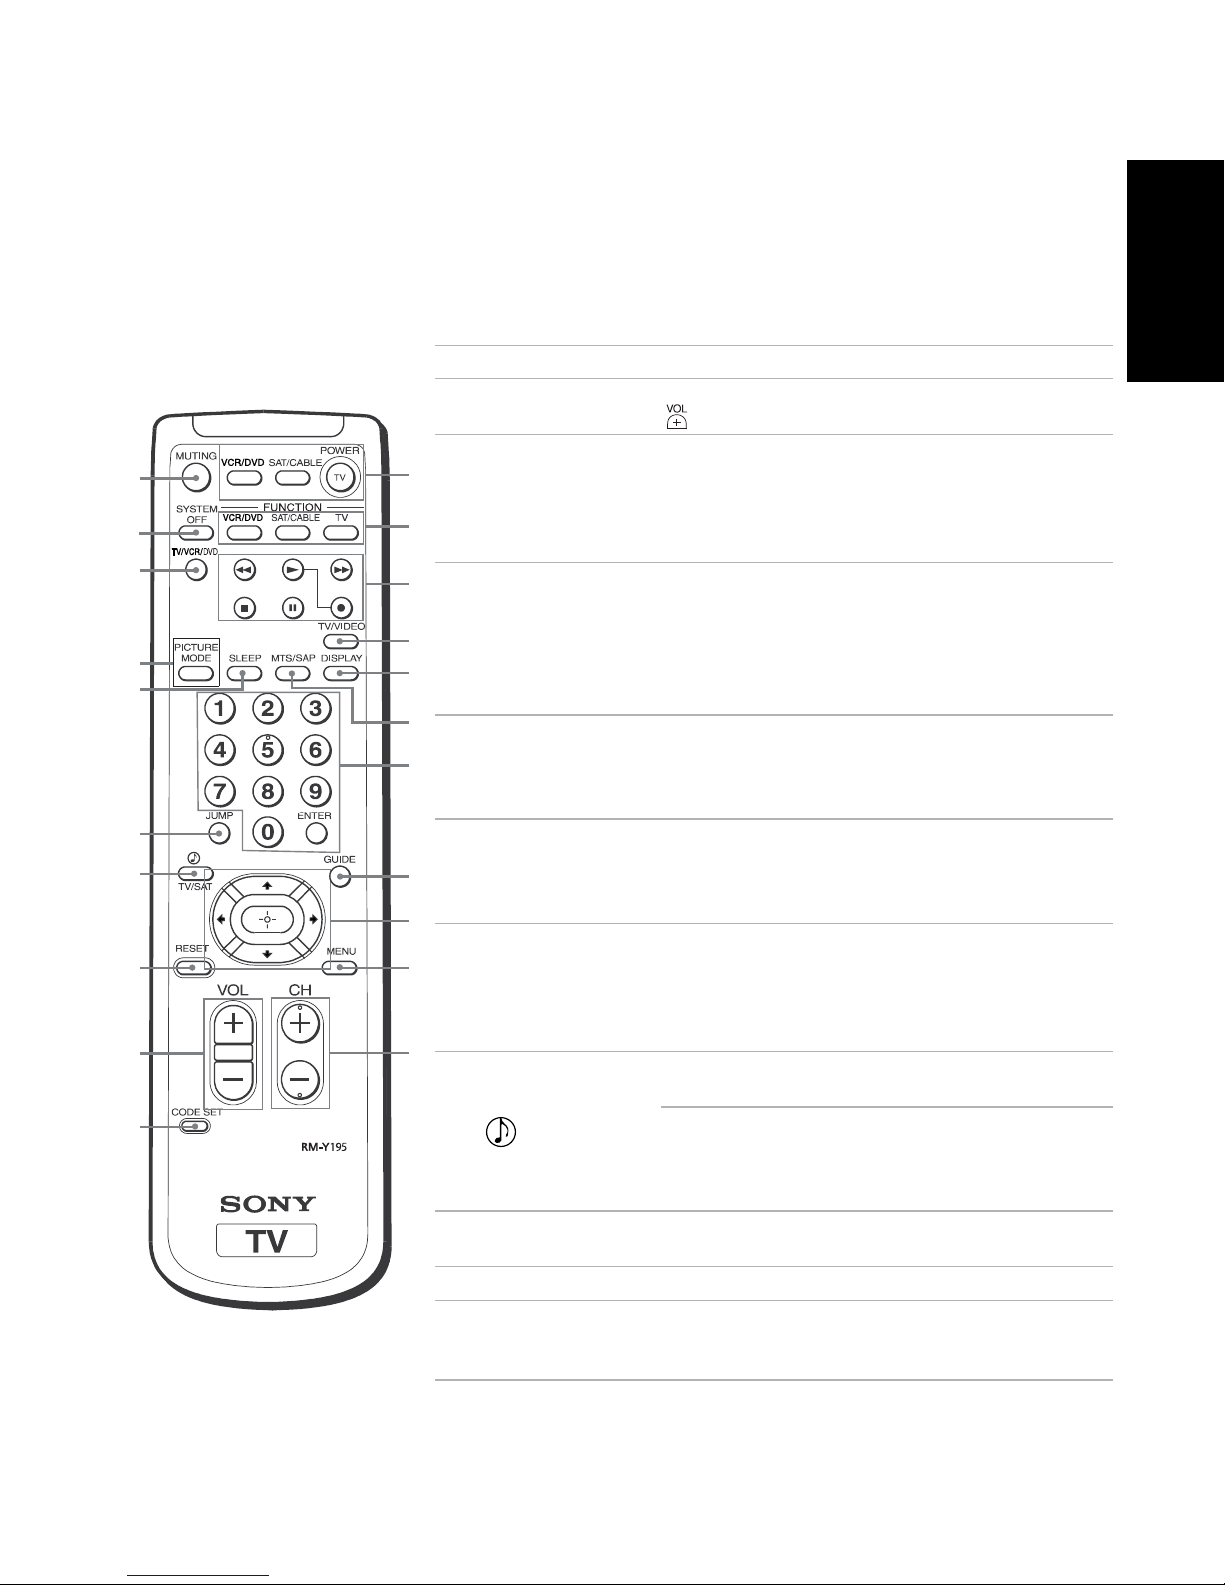
Using the Remote Control
Remote Control Description
Button Description
MUTING Press to turn off the sound. Press again or press
1
to restore sound.
SYSTEM OFF Press to turn off the equipment programmed into
2
A
B
C
D
E
F
G
H
I
J
K
L
M
N
O
P
Q
R
S
T
U
TV/VCR/DVD Press to change the VHF/UHF output of the VCR
3
PICTURE MODE Press repeatedly to step through the available video
4
SLEEP Press repeatedly until the TV displays the time in
5
JUMP Press to jump back and forth between two channels.
6
TV/SAT Press to switch between the TV and SAT (satellite)
7
RESET Press to return to factory settings while in an
8
VOL (volume) Press (+) or (-) to adjust the volume.
9
CODE SET Press to program your remote control to operate
q;
the remote control. See “Programming the Remote
Control” on page 5. This button does not work with
DVD/VCR combo units, and may not work with
older Sony equipment.
(or DVD/VCR combination unit). If you have a
non-Sony VCR or DVD, you will need to program
the remote control to recognize your VCR or DVD.
For details, see “Programming the Remote Control”
on page 5.
picture modes: Vivid, Standard, Movie and Pro.
Also available in the Video menu. See “Using the
Video Menu” on page 28 for details.
minutes (15, 30, 45, 60, or 90) that you want the TV
to remain on before shutting off automatically.
Cancel by pressing until Sleep Off appears.
The TV alternates between the current channel and
the last channel that you selected. JUMP will not
work if any FUNCTION Mode (VCR/DVD, SAT/
CABLE, TV) is activated.
inputs when in SAT FUNCTION mode.
Press for a direct selection of Effect settings
(Simulated, SRS, Off) when the remote is in TV
FUNCTION mode. See “Using the Audio Menu” on
page 29 for details.
on-screen menu.
connected video equipment. See “Programming the
Remote Control” on page 5.
Remote Control
3
Page 93
Button Description
POWER buttons Press to turn on and off the TV and other audio/
qa
video equipment you have programmed into the
remote control. For instructions, see “Programming
the Remote Control” on page 5.
FUNCTION buttons Press to select the equipment (VCR/DVD, SAT/
qs
CABLE, TV) that you want to operate with the
Remote Control
qd VCR (operating)
TV/VIDEO Press to cycle through available video inputs.
qf
DISPLAY Press once to display the current time (if set) and
qg
MTS/SAP Press to cycle through the Multi-channel TV Sound
qh
0 9
and
qj
ENTER
remote control. The indicator (LED) lights up
momentarily when pressed to show which device
the remote control is operating.
Press to operate your VCR. The VCR must be
programmed into the remote control. For
instructions, see “Programming the Remote
Control” on page 5.
the program status such as channel number,
Channel Label (if set), video input, and Video Label
(if set). Press again to turn off the display.
(MTS) options: Stereo, Auto SAP (Second Audio
Programming), and Mono.
Press to change channels. The channel changes after
two seconds.
GUIDE Press to display the program guide of your satellite
qk
ql
MENU Press to display the on-screen menu. Press again to
w;
CH (channel)
wa
✍ If you lose your remote control, see page 42.
receiver.
Press the arrow buttons to move the cursor in the
on-screen menus. Press the center button to select
an option.
exit the menu at any time.
Press to change channels. To scan rapidly through the
channels, press and hold down the CH+ or CH- button.
4
Page 94
Programming the Remote Control
If you have video equipment other than Sony brand (or if you have a Sony DVD/VCR
combination unit) that you want to control with the TV’s remote control, use the following
procedure to program the remote control.
1 Check the list of “Manufacturer’s Codes” on page 6 and find the three-digit code number
for the manufacturer of your component. If more than one code number is listed, use the
number listed first.
2 Press .
✍ The and FUNCTION button will flash when you press .
3 Press or FUNCTION button to indicate the type of component you want to
program with the remote control.
✍ You must do step 4 within 10 seconds of step 3, or you must redo steps 2 and 3.
Remote Control
4 Use the buttons to enter the three-digit manufacturer’s code number.
0 9
5 Press .
6 To check if the code number works, aim the TV’s remote control at the component and
press on the green POWER button (VCR/DVD, SAT/CABLE, TV) that corresponds with
that component. If it responds, you are done. If not try using another code listed for that
manufacturer.
✍ If you have problems programming your remote control, see “Troubleshooting” on page 42.
5
Page 95
Manufacturer’s Codes
VCRs
Manufacturer Code
Sony 301, 302, 303
Admiral
(M. Ward)
Aiwa 338, 344
Remote Control
Audio Dynamic 314, 337
Broksonic 319, 317
Canon 309, 308
Citizen 332
Craig 302, 332
Criterion 315
Curtis Mathes 304, 338, 309
Daewoo 341, 312, 309
DBX 314, 336, 337
Dimensia 304
Emerson 319, 320, 316,
Fisher 330, 335
Funai 338
General Electric 329, 304, 309
Go Video 322, 339, 340
Goldstar 332
Hitachi 306, 304, 305,
Instant Replay 309, 308
JC Penney 309, 305, 304,
JVC 314, 336, 337,
Kenwood 314, 336, 332,
LXI (Sears) 332, 305, 330,
Magnavox 308, 309, 310
Marantz 314, 336, 337
Marta 332
Memorex 309, 335
Minolta 305, 304
Mitsubishi/
MGA
Multitech 325, 338, 321
NEC 314, 336, 337
Olympic 309, 308
Optimus 327
Panasonic 308, 309, 306,
327
317, 318, 341
338
330, 314, 336,
337
345, 346, 347
337
335, 338
323, 324, 325,
326
307
Pentax 305, 304
Philco 308, 309
Philips 308, 309, 310
Pioneer 308
Quasar 308, 309, 306
RCA/
PROSCAN
Realistic 309, 330, 328,
Sansui 314
Samsung 322, 313, 321
Sanyo 330, 335
Scott 312, 313, 321,
Sharp 327, 328
Shintom 315
Signature 2000
(M. Ward)
SV2000 338
Sylvania 308, 309, 338,
Symphonic 338
Tashiro 332
Tatung 314, 336, 337
Teac 314, 336, 338,
Technics 309, 308
Toshiba 312, 311
Wards 327, 328, 335,
Yamaha 314, 330, 336,
Zenith 331
304, 305, 308,
309, 311, 312,
313, 310, 329
335, 324, 338
335, 323, 324,
325, 326
338, 327
310
337
331, 332
337
Laserdisc Players
Manufacturer Code
Sony 701
Panasonic 704, 710
Pioneer 702
DVD/VCR Combination
Units
Manufacturer Code
Sony 601
Broksonic 605
JVC 604
Panasonic 609
Samsung 603
Toshiba 602
DVD Players
Manufacturer Code
Sony 751
Hitachi 758
JVC 756
Magnavox 757
Mitsubishi 761
Onkyo 762
Oritron 759
Panasonic 753
Philips 757
Pioneer 752
RCA 755
Samsung 758
Tosh ib a 7 54
Zenith 760
Cable Boxes
Manufacturer Code
Sony 230
Hamlin/Regal 222, 223, 224,
Jerrold/G.I./
Motorola
Oak 227, 228, 229
Panasonic 219, 220, 221
Pioneer 211, 214, 215
Scientific
Altanta
Tocom 216, 217
Zenith 212, 213
225, 226
201, 202, 203,
204, 205, 206,
207, 208, 218
209, 210, 211
Satellite Receivers
Manufacturer Code
Sony 801
DIRECT TV 809
Dish Network 810
Echostar 810
General Electric 802
Hitachi 805
Hughes 804
Mitsubishi 809
Panasonic 803
RCA/
PROSCAN
Toshiba 806, 807
802, 808
6
Page 96
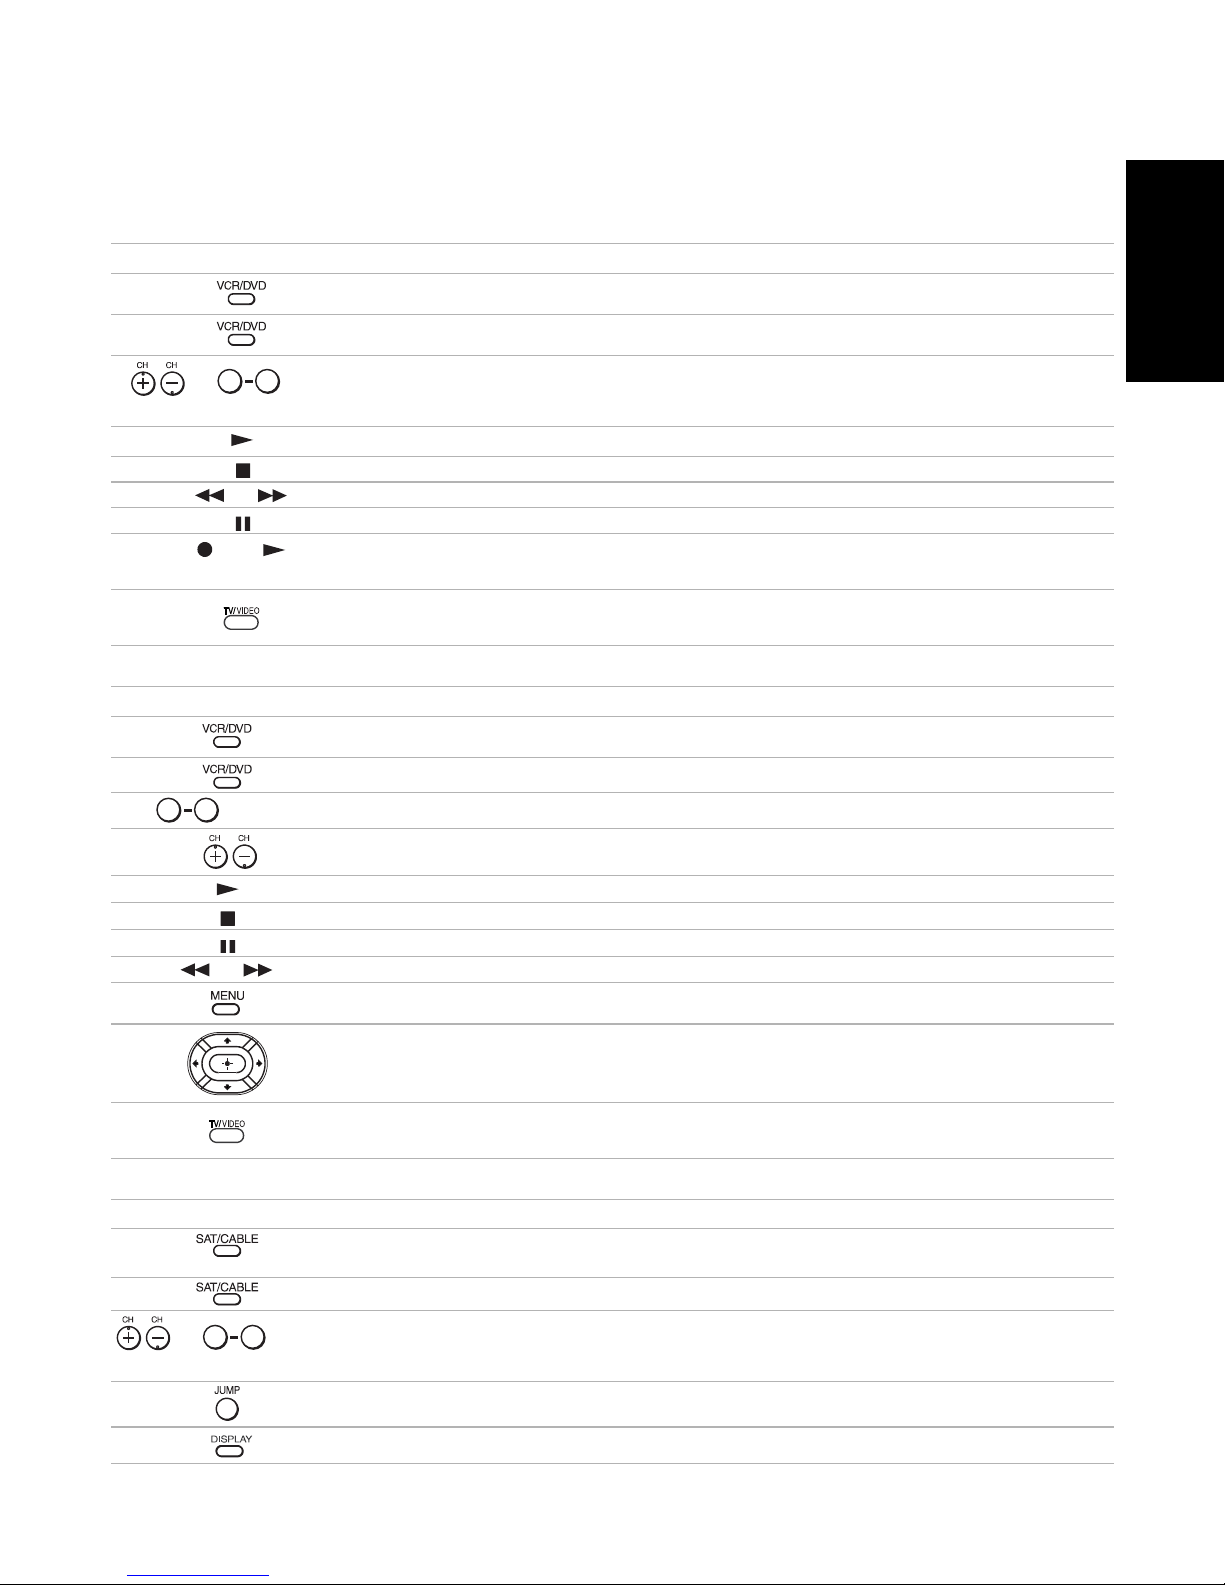
Using your TV Remote Control with Other Equipment
Operating a VCR
Press To
Activate the remote control to operate the VCR (FUNCTION button)
Power on/off the VCR (VCR/DVD green button)
0 9
or , ENTER
(using tuner)
or Rewind or Fast-forward a video tape
and
(Simultaneously)
Operating a DVD Player
Press To
Change channels
Play video tape
Stop
Pause
Record
Switch between VCR and TV inputs
Activate the remote control to operate the DVD (FUNCTION button)
Remote Control
Power on/off the DVD (VCR/DVD green button)
0 9
, ENTER
or
Select chapters
Search chapters forward or backward
Play DVD
Stop
Pause
Search the picture forward or backward during playback
Display the DVD menu
Use the arrow buttons to move the cursor in the menu, and the center button to
select an option
Switch between DVD and TV inputs
Operating a Cable Box or Satellite Receiver
Press To
Activate the remote control to operate the cable box or satellite receiver
(FUNCTION button)
Power on/off the cable box or satellite receiver (SAT/CABLE green button)
0 9
or , ENTER
(using tuner)
Change channels
Change back to previous channel
Display channel number (satellite receiver)
7
Page 97
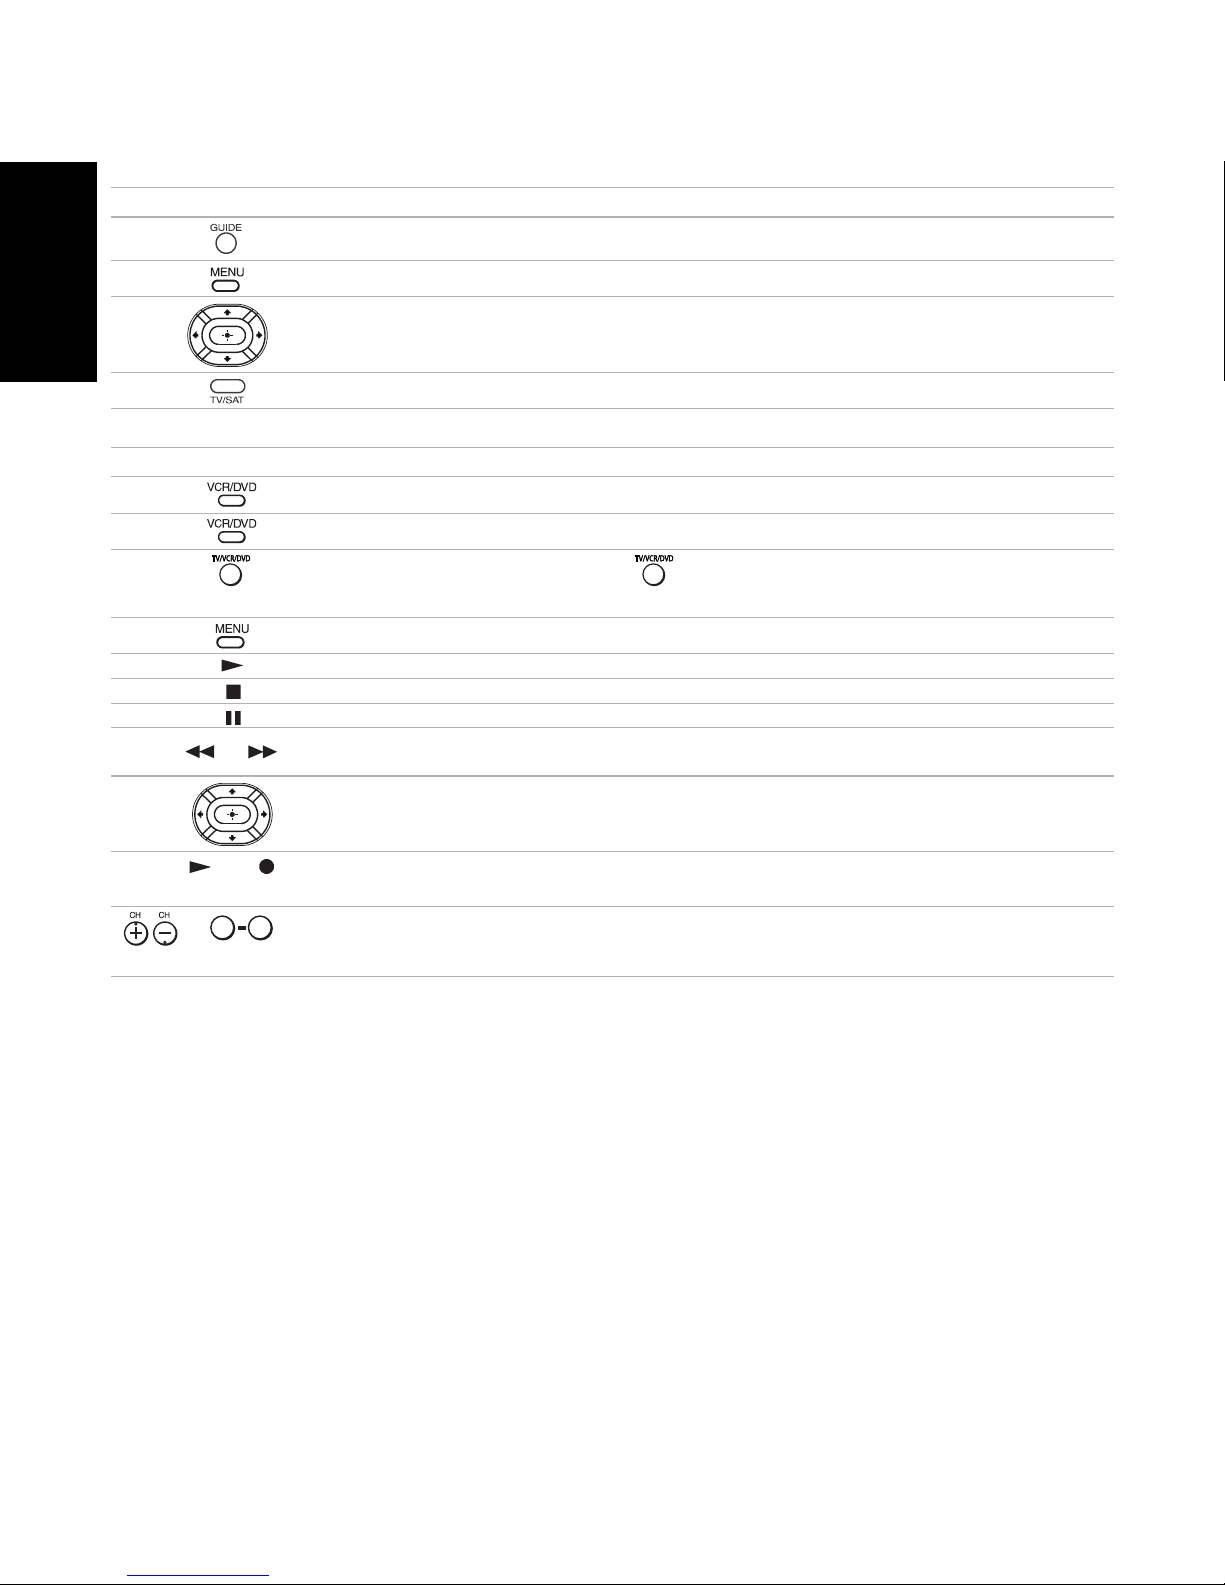
Operating a Cable Box or Satellite Receiver
Press To
Display SAT Guide (satellite receiver)
Display SAT Menu (satellite receiver)
Use the arrow buttons to move the cursor in the menu, and the center button to
select an option (satellite receiver)
Remote Control
Press to switch between the TV and SAT inputs (satellite receiver)
Operating a DVD/VCR Combination Unit
Press To
Activate the remote control to operate the DVD/VCR (FUNCTION button)
Power on/off the DVD/VCR combination unit (VCR/DVD green button)
When the VCR is not playing, switches between the DVD player and VCR’s
tuner
Display the DVD Menu
Play
Stop
Pause
or
Rewind or fast-forward a video tape (VCR)
Search the picture forward or backward during playback (DVD)
and
(Simultaneously)
0 9
or ,ENTER
(using tuner)
Use the arrow buttons to move the cursor in the menu, and the center button to select
an option (DVD)
Record (VCR)
Change channels (VCR)
8
Page 98
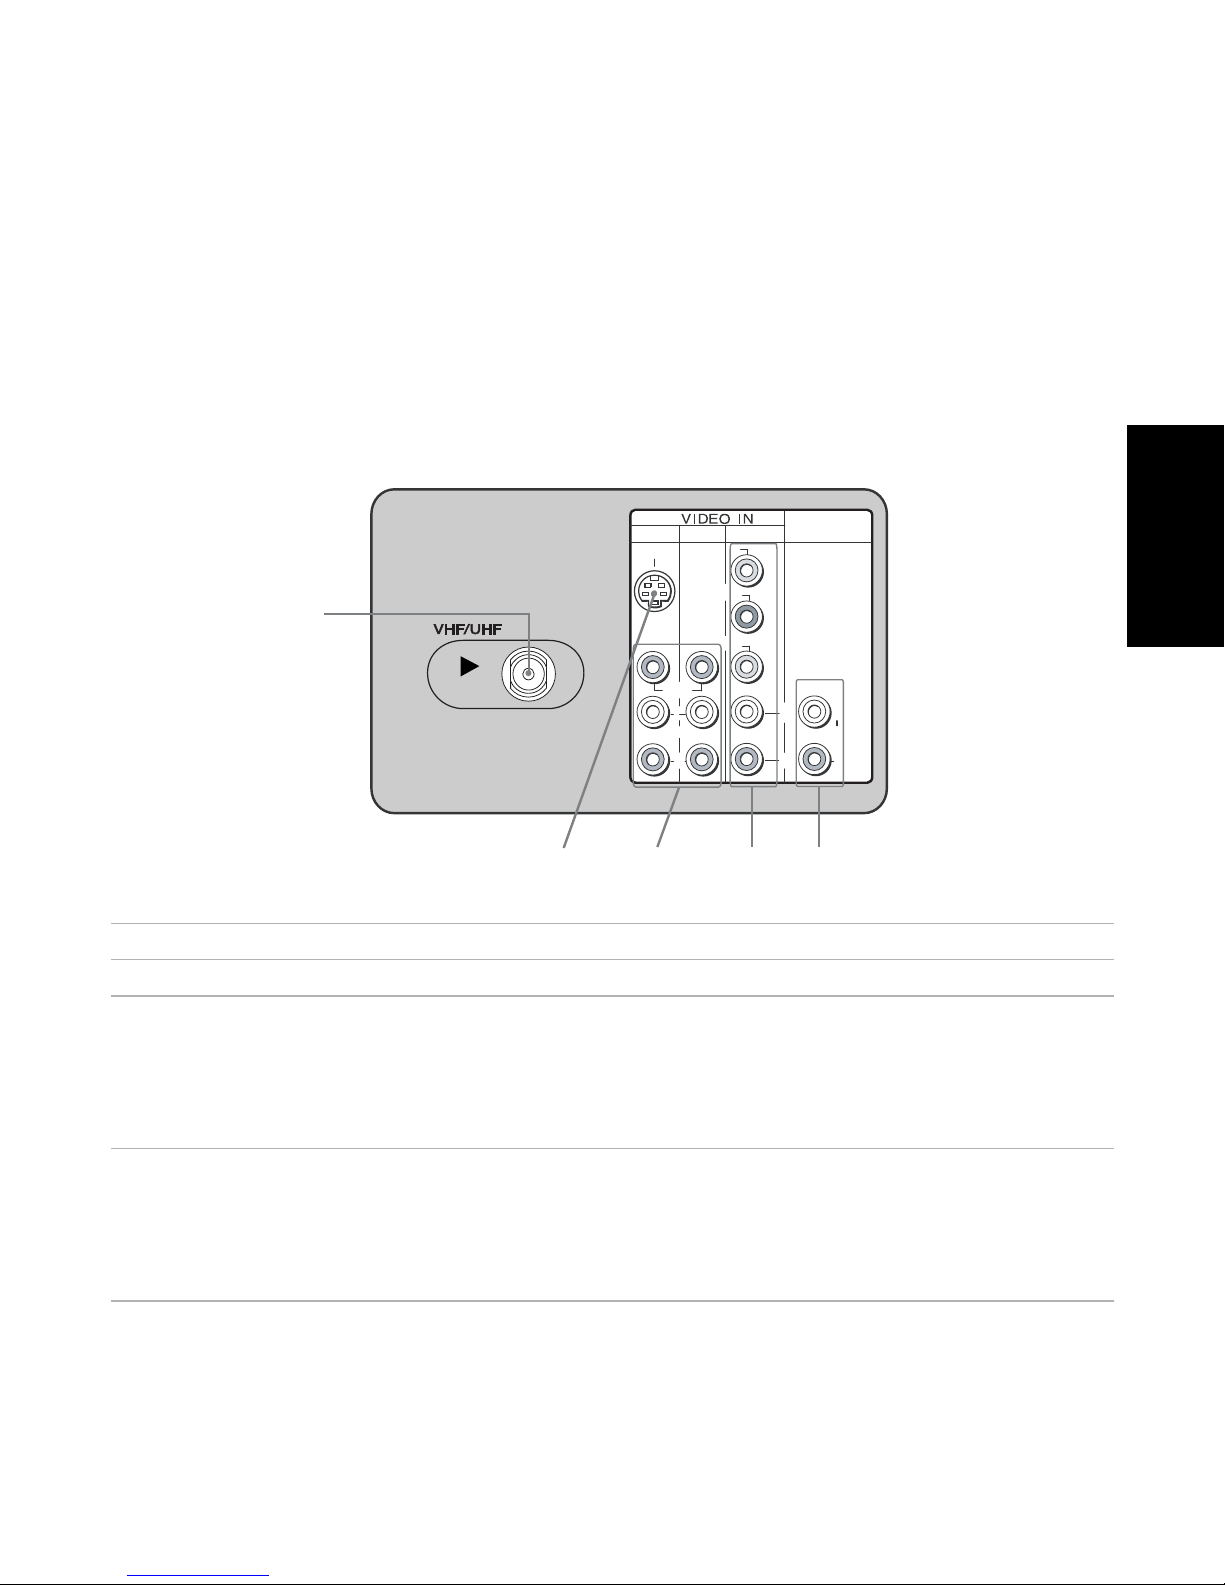
Connecting Your TV
Read this section before setting up your TV for the first time. This section explains how to
make the basic connections and how to connect optional equipment.
TV Rear Panel
AUDIO OUT
1
S VIDEO
3
Y
(VAR/FIX)
4
Connections
VIDEO
L
(MONO)
R
P B
P
R
L
R
45
L
(MONO)
R
1
23
Jack Description
1 VHF/UHF This input connects to your VHF/UHF antenna or cable.
2 S VIDEO This input connects to the S VIDEO OUT jack on your VCR or
other video equipment that has S VIDEO. S VIDEO provides
better picture quality than the VHF/UHF jacks or the video
input jack. S VIDEO does not provide sound, so you still must
connect the audio cables.
3 VIDEO/AUDIO
L(MONO), R
This input connects to the AUDIO/VIDEO output jacks on your
VCR or other video equipment. A third video input jack
(VIDEO 2) is located on the front panel of the TV. These
AUDIO/VIDEO input jacks provide better picture quality than
the VHF/UHF jack.
9
Page 99

4
Y, PB, PR/ L, R
This input connects to the component video Y, PB, PR, and
AUDIO L, R jacks on your DVD player or digital set-top box
(480i only).
5 AUDIO OUT
(VAR/FIX)
L(MONO), R
Connections
This jack connects to the Audio input jacks on your audio
equipment. You can listen to your TV’s audio through your
stereo system.
10
Page 100
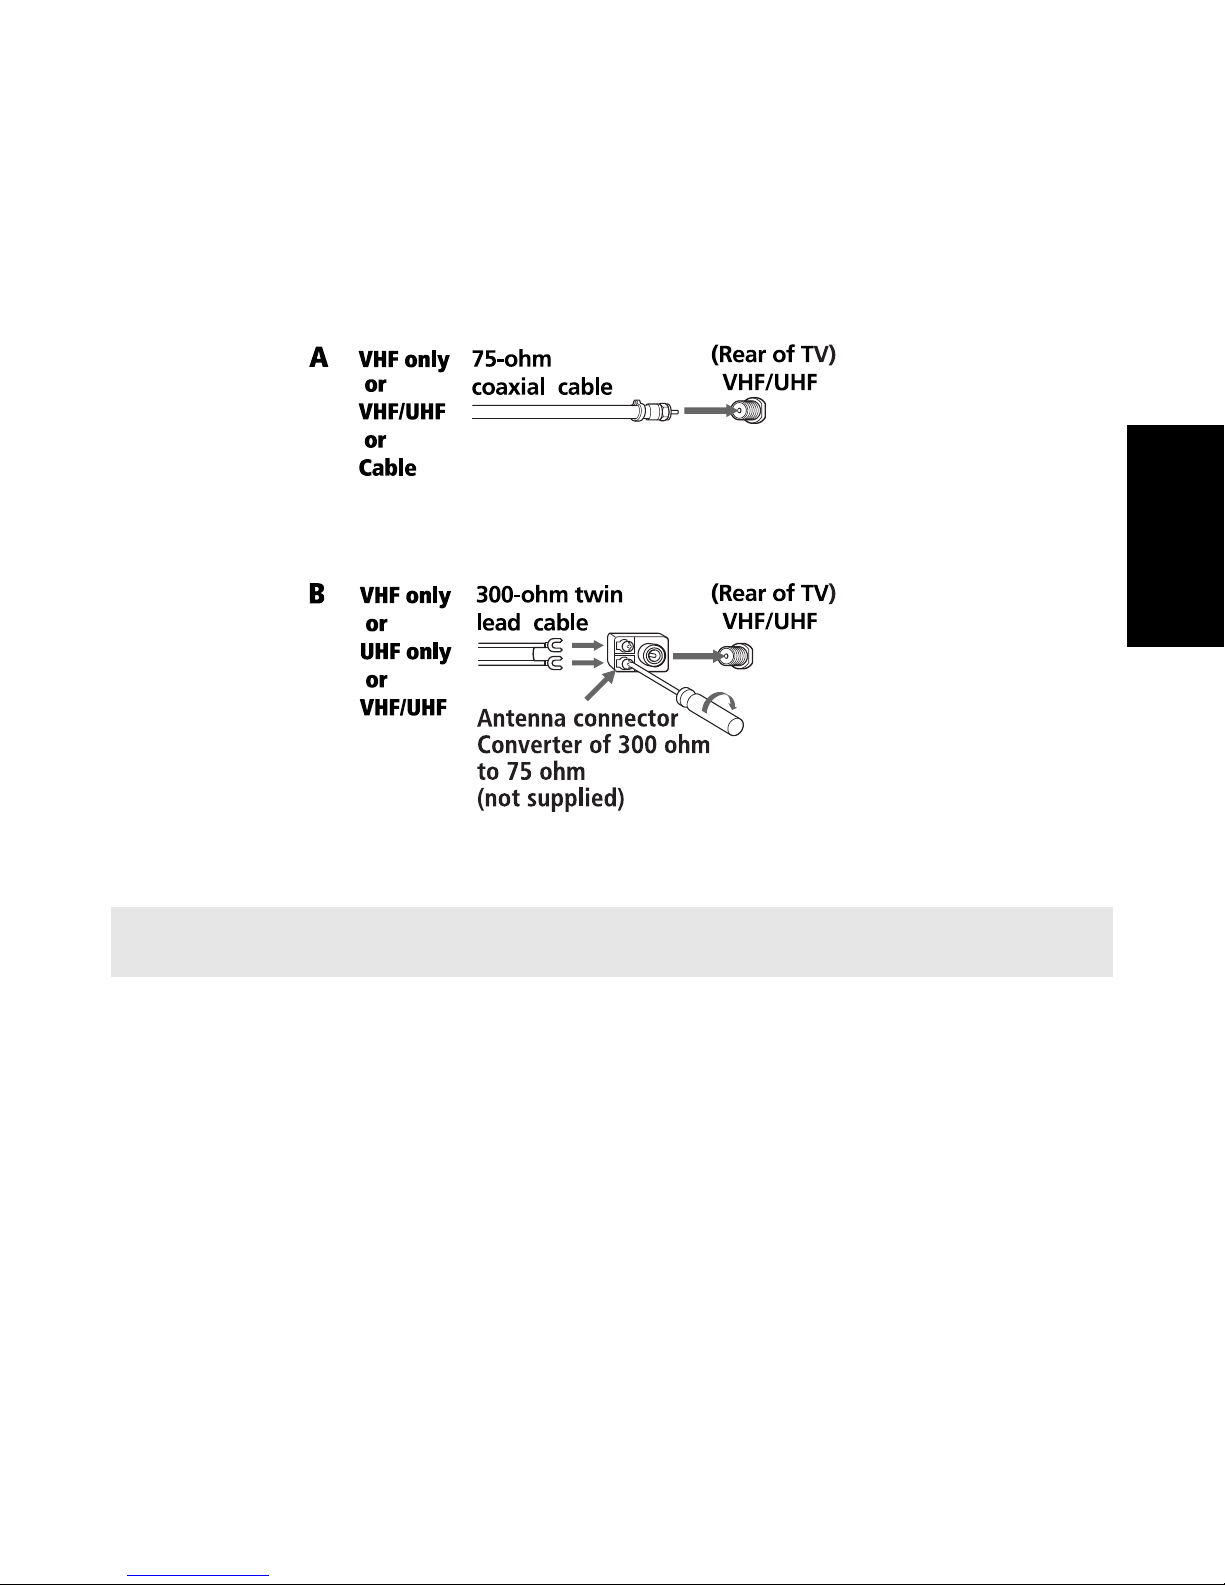
Basic Connections
TV with Cable, Indoor, or Outdoor Antenna
Depending on the cable system available in your home, choose one of the connections below:
Use this to connect the TV to a cable system or an antenna with a 75-ohm cable
(usually built into newer homes).
Connections
Use this to connect the TV to a dipole antenna, also known as a “rabbit ears” antenna
(usually found in older homes).
✍ If you are connecting to an indoor or outdoor antenna, you may need to adjust the orientation of the
antenna for the best reception.
11
 Loading...