

Page 1
3-860-137-11 (1)
KV-14V5D
KV-14V6D
KV-21V5D
KV-21V6D
Operating Instructions
Bedienungsanleitung
Mode d’emploi
Gebruiksaanwijzing
Bruksanvisning
GB
D
F
NL
S
Trinitr on Colour Video TV
PAL NTSC 4.43
© 1997 by Sony Corporation Printed in Spain
Page 2

WARNING
To prevent fire or shock hazard, do not expose the
unit to rain or moisture.
Dangerously high voltages are present inside the
set. Do not open the cabinet. Refer servicing to
qualified personnel only.
Caution
Television programmes, films, video tapes and
other materials may be copyrighted.
Unauthorized recording of such materials may be
contrary to the provisions of the copyright laws.
Colour System of Your
Set
This video TV is designed to receive TV
programmes based on PAL (B/G) colour system
and to record and play on PAL colour system. The
video TV can also play tapes on NTSC colour
system.
Precautions
Safety Information
For safe installation:
• Leave a clear space of 5 cm around the unit for
adequate ventilation.
• Do not install the unit in hot, humid, or
excessively dusty places.
• Do not install the unit where it may be exposed to
mechanical vibrations.
For your protection, refer all servicing to qualified
personnel.
About Moisture
Condensation
If the unit is brought directly from a cold place to a
warm place, moisture may condense on the video
head drum. If this happens, the tape may stick to
the head drum and it may be damaged or the unit
may not operate correctly. To avoid possible
damage caused by moisture condensation, be sure
not to leave a cassette inside the compartment
when the unit is not in use. When bringing the unit
from a cold place to a warm place, wait for about
10 minutes before operating it.
If the tape operation buttons do not work due to
moisture condensation, leave the power on for
more than one hour.
For general safety:
• Do not expose the unit to rain or moisture.
• Do not open the rear cover.
For safe operations:
• Do not operate the unit on anything but 220–240
V AC, 50 Hz.
• Do not operate the unit if any liquid or solid
object falls in it—have it checked immediately.
• Unplug the unit from the wall outlet if you do not
intend to use it for an extended period of time. To
disconnect the cord, pull it out by the plug, never
by the cord.
Getting Started
2
Page 3

Contents
Getting Started
Step 1—Preparation ................................................... 4
Checking the supplied accessories ....................... 4
Inserting batteries into the remote
control.................................................................... 4
Step 2—Connecting the Aerial ................................. 5
Connecting an indoor aerial (KV-14V5D,
KV-14V6D only) ................................................... 5
Connecting an outdoor aerial................................5
Step 3—Tuning in to TV Stations .............................6
Selecting the menu language................................. 6
Presetting channels automatically ........................ 7
Presetting channels manually ............................... 8
Skipping programme positions ............................ 9
Captioning a TV station name ............................ 10
Manual fine-tuning ............................................... 11
Tuning in to a channel temporarily.................... 12
Setting a Pay-TV channel (KV-14V6D,
KV-21V6D only) ................................................. 13
Step 4—Setting up ShowView* Manually ............ 14
Setting the guide channels ................................... 14
Step 5—Setting the Clock ........................................ 16
Basic Operations
Watching the TV ....................................................... 17
Switching the video TV on and off..................... 17
Selecting TV programmes.................................... 17
Adjusting the volume ........................................... 17
Adjusting the picture............................................ 18
Muting the sound.................................................. 19
Displaying the on-screen information ...............19
Watching line input .............................................. 19
Listening with headphones ................................. 19
Viewing Teletext ....................................................... 20
Switching Teletext on and off.............................. 20
Using Fasttext ........................................................ 20
Playing a Tape........................................................... 22
Inserting a video cassette ..................................... 22
Ejecting a video cassette ....................................... 22
Protecting your cassette against accidental
erasure ................................................................ 22
Playing a tape ........................................................ 23
Resetting the tape counter ................................... 23
Playing a tape repeatedly (AUTO REPEAT) .... 24
Replaying a scene automatically......................... 24
Setting the colour system ..................................... 25
Displaying the on-screen indications ................. 25
Viewing programmes in 16:9 mode ................... 26
Recording TV Programmes..................................... 27
Recording TV programmes ................................. 27
Recording with the TV off ................................... 27
Watching a TV programme while recording
another (KV-14V6D, KV-21V6D only) ............ 27
Recording TV Programmes Using the Timer ....... 28
Setting the timer .................................................... 28
Using the video TV before timer recording
starts.....................................................................30
Checking the timer settings ................................. 31
Changing or canceling the timer settings .......... 31
Recording using QUICK TIMER ........................32
Timer recording with VPS/PDC signals ........... 33
Recording TV Programmes Using ShowView ..... 34
Additional Operations
Switching Off Automatically—Sleep Timer ......... 36
Switching On at Your Desired Time—
On Timer ................................................................37
Using FUNCTION LOCK ....................................... 38
Searching Using the INDEX Function ................... 39
Enhancing Video Picture Quality........................... 40
Adjusting the tracking.......................................... 40
Adjusting with the optimum picture control
(OPC) ................................................................... 41
About the Auto Head Cleaner ............................ 41
Connecting Optional Equipment ........................... 42
Watching the picture input from optional
equipment ........................................................... 42
Editing with another VCR ................................... 43
Watching the Pay-TV channel (KV-14V6D,
KV-21V6D only) ................................................. 43
Additional Information
Troubleshooting........................................................ 44
Taking Care of Your Video TV ............................... 46
Video head cleaning ............................................. 46
Worn video heads ................................................. 46
Check the video heads after 1,000 hours
of use.................................................................... 46
Specifications............................................................. 47
Receivable channels and channel displays........ 47
Index to Parts and Controls .................................... 48
Video TV set—front .............................................. 48
Remote control ...................................................... 49
* ShowView is a trademark applied for by Gemstar
Development Corp. ShowView system is manufactured under
license from Gemstar Development Corporation.
The instructions in this manual are for models
KV-14V5D, KV-14V6D, KV-21V5D and KV21V6D. Before you begin to read this manual,
refer to the model number located on the rear of
your video TV. Model KV-14V6D is used for
illustration purposes throughout this manual.
Any differences in operation are indicated in the
text, for example, “KV-14V5D, KV-14V6D only.”
GB
Getting Started
3
Page 4
Getting Started
Step 1 — Preparation
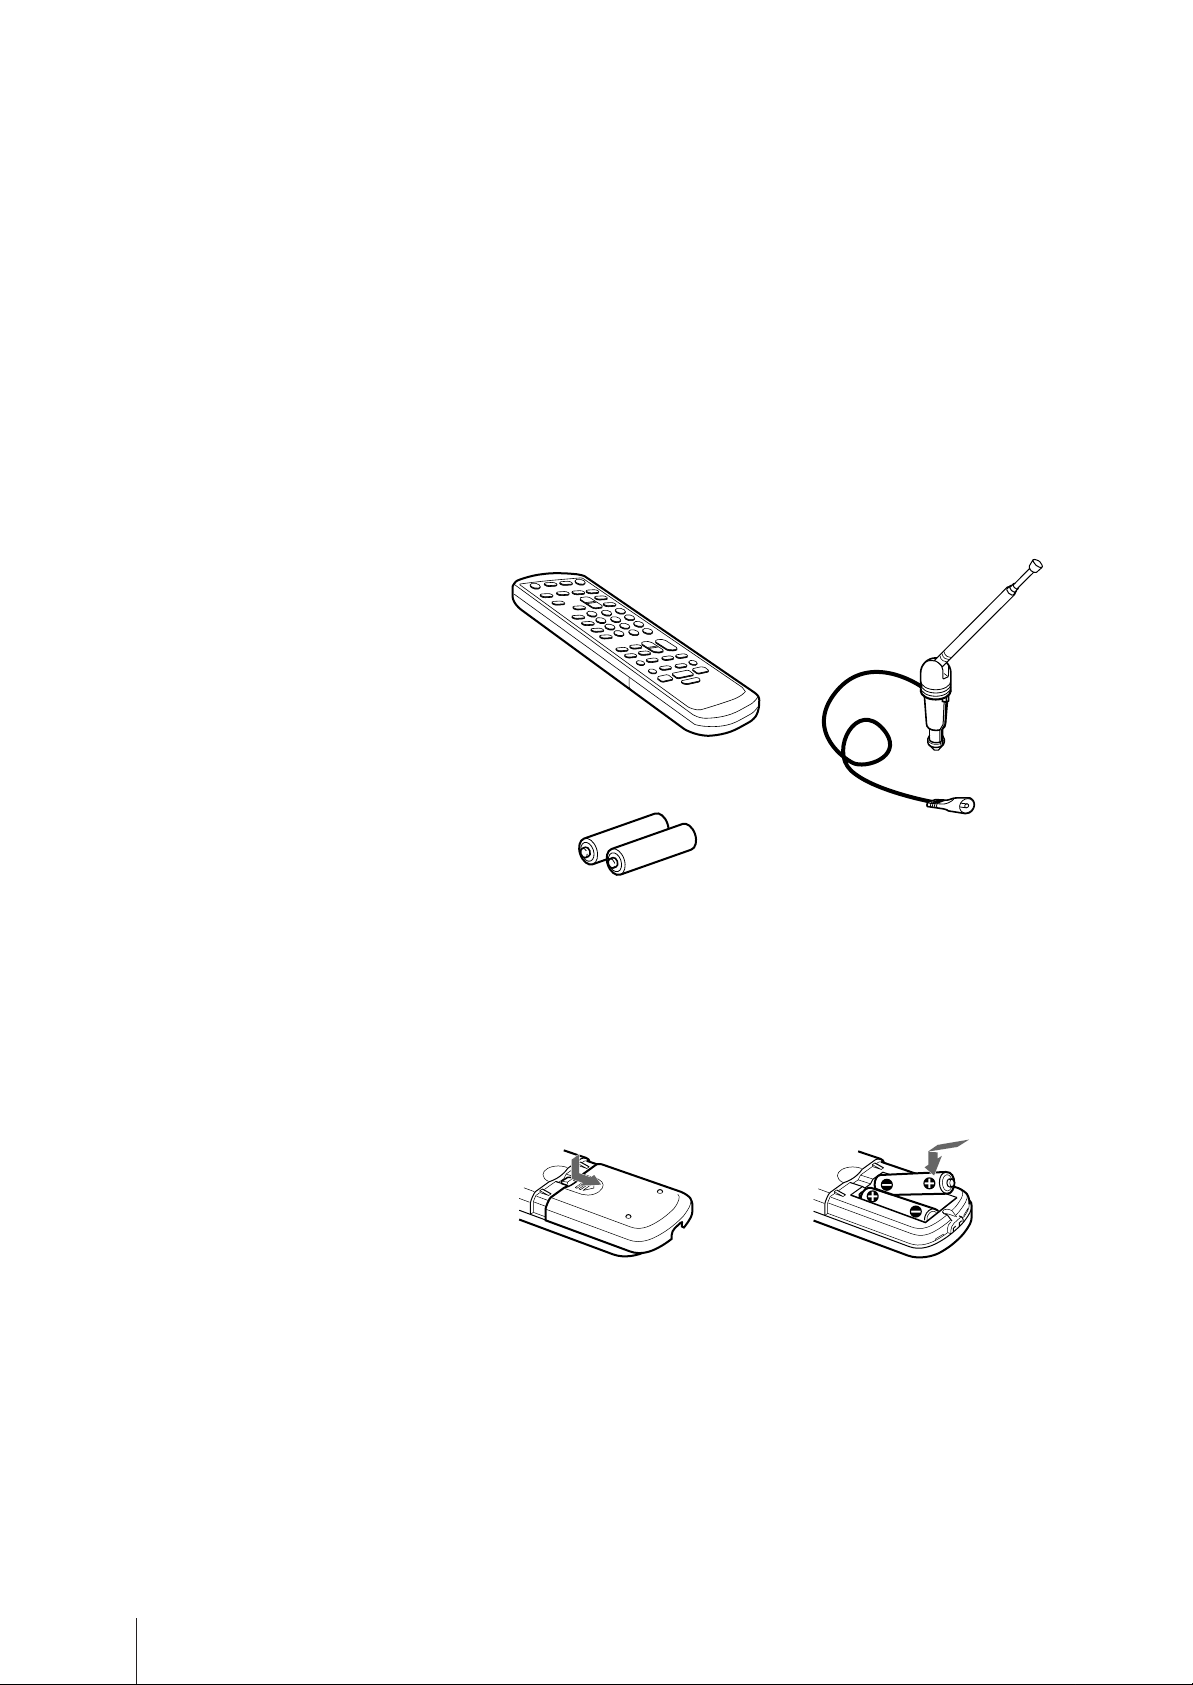
Checking the supplied accessories
When you have taken everything out of the carton, check that you have
these items:
• Remote control
• Two R6 (size AA) batteries
• Aerial (KV-14V5D, KV-14V6D only)
(KV-14V5D, KV-14V6D only)
Inserting batteries into the remote
control
Close the cover.
Turn the remote control
over, and remove the cover.
Check the polarities and position
two R6 batteries correctly.
Note
Always remember to dispose of
used batteries in an environmentally
friendly way.
Getting Started
4
Page 5
Step 2 — Connecting the Aerial
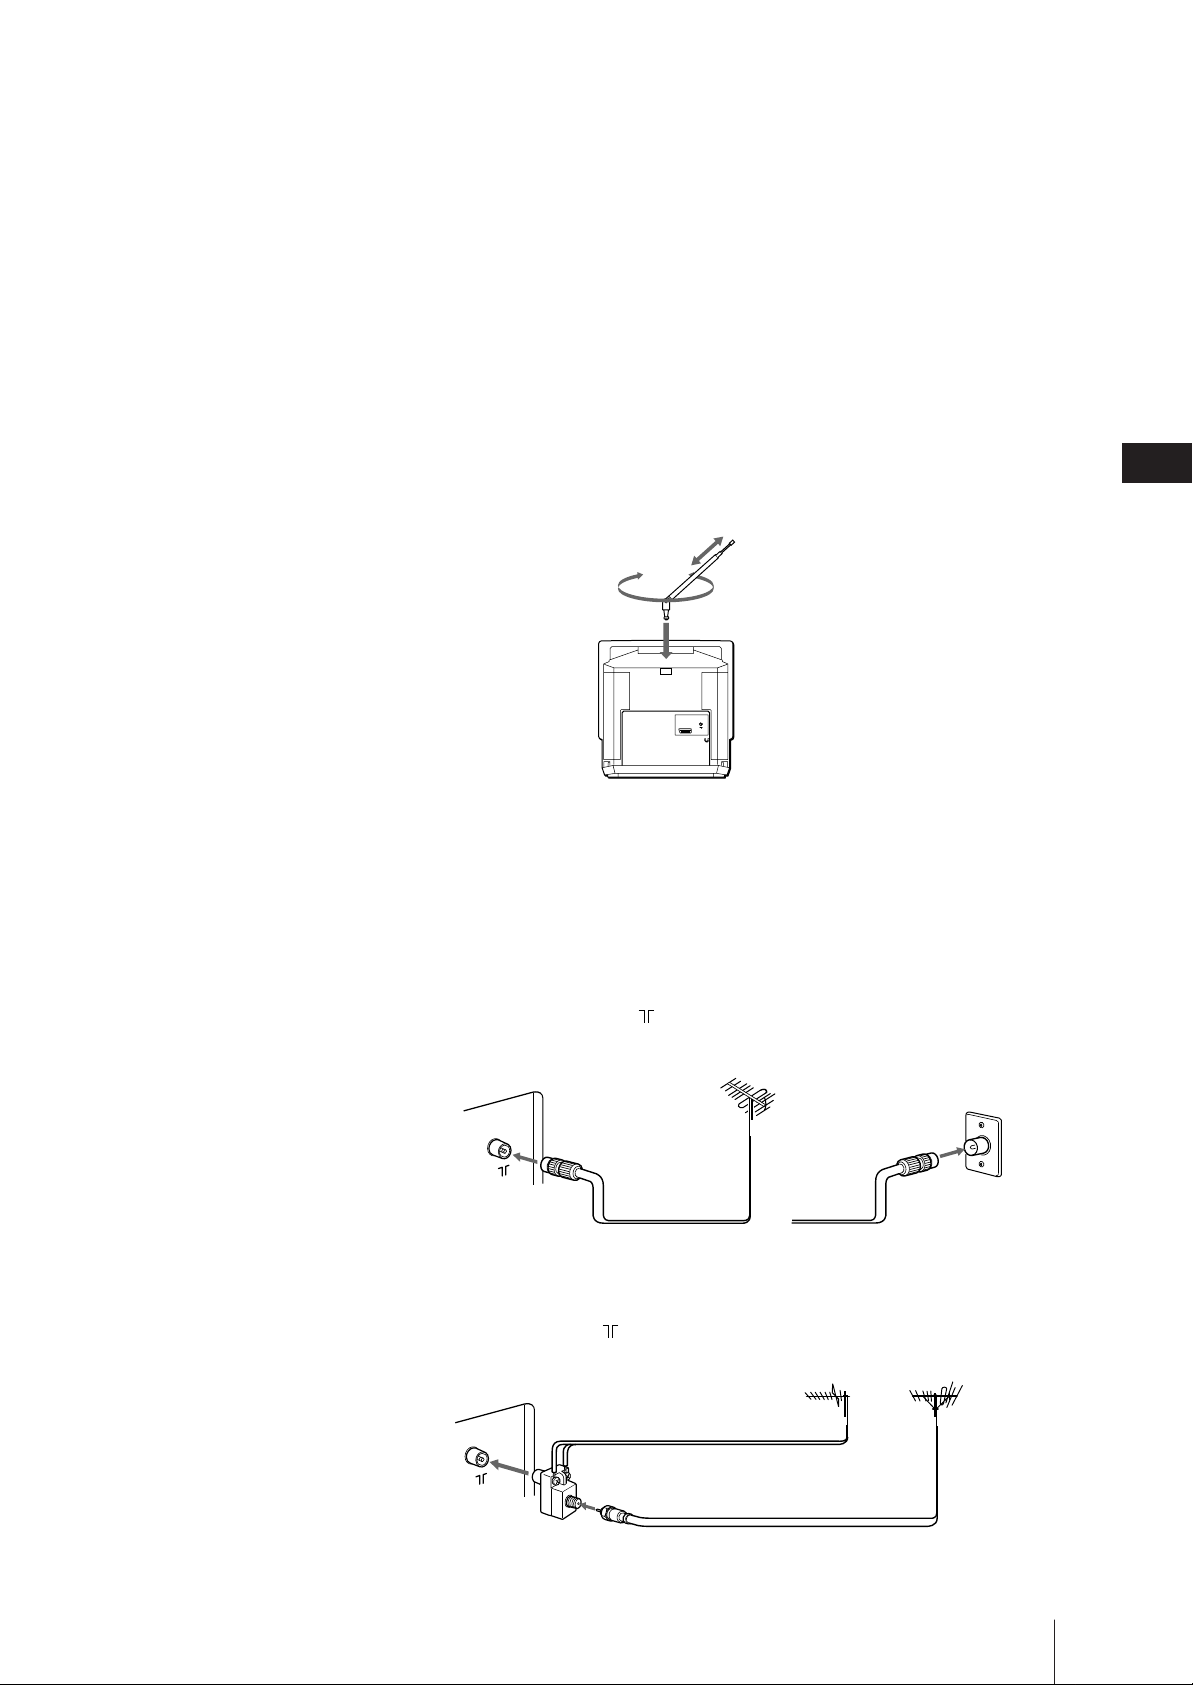
Connecting an indoor aerial (KV14V5D, KV-14V6D only)
If your local VHF/UHF signal is strong, an indoor aerial can be used to
obtain a clear picture. Connect the supplied aerial as follows:
1 Insert the aerial until it clicks.
2 After turning on the video TV, adjust the aerial for the best reception.
Be sure to adjust the aerial for the channel you want to record as well. If
reception is poor, connect an outdoor aerial to your video TV.
2
1
GB
Connecting an outdoor aerial
For better TV reception and clearer recording, connect an outdoor aerial to
your video TV.
To connect a VHF aerial or a combination
VHF/UHF aerial—75-ohm coaxial cable (round)
Attach an IEC aerial connector to 75-ohm coaxial cable.
Plug the connector into the (aerial) socket, located at the rear of the
video TV.
VHF/UHF aerial
Rear
or
To connect both VHF and UHF aerials
Attach the aerial cable ends to the VHF/UHF mixer (not supplied).
Plug the mixer into the (aerial) socket, located at the rear of the video
TV.
UHF aerial
Rear
300-ohm twin-lead cable
On a wall
VHF aerial
VHF/UHF mixer
75-ohm coaxial cable
After connecting the aerial, connect the mains lead to a wall outlet.
Getting Started
5
Page 6
Step 3 — Tuning in to TV Stations
You can preset up to 80 TV channels, either automatically or manually.
The automatic method is easier if you want to preset all receivable
channels at once. Use the manual method if you want to allocate
ON
TIMER
programme numbers to the channels one by one.
SLEEP
SHOW VIEW
TIMER
ON SCREEN
TIMER REC
ON/OFF
TIMER REC
CLEAR
REC
REPLAY
REW
1
4
7
-/--
QUICK
TIMER
INDEX SEARCH
PLAY
STOP
2
5
8
0
TAPE
SPEED
MENU
OK
3
6
9
C
PROGR
COUNTER
RESET
PAUSE
FF
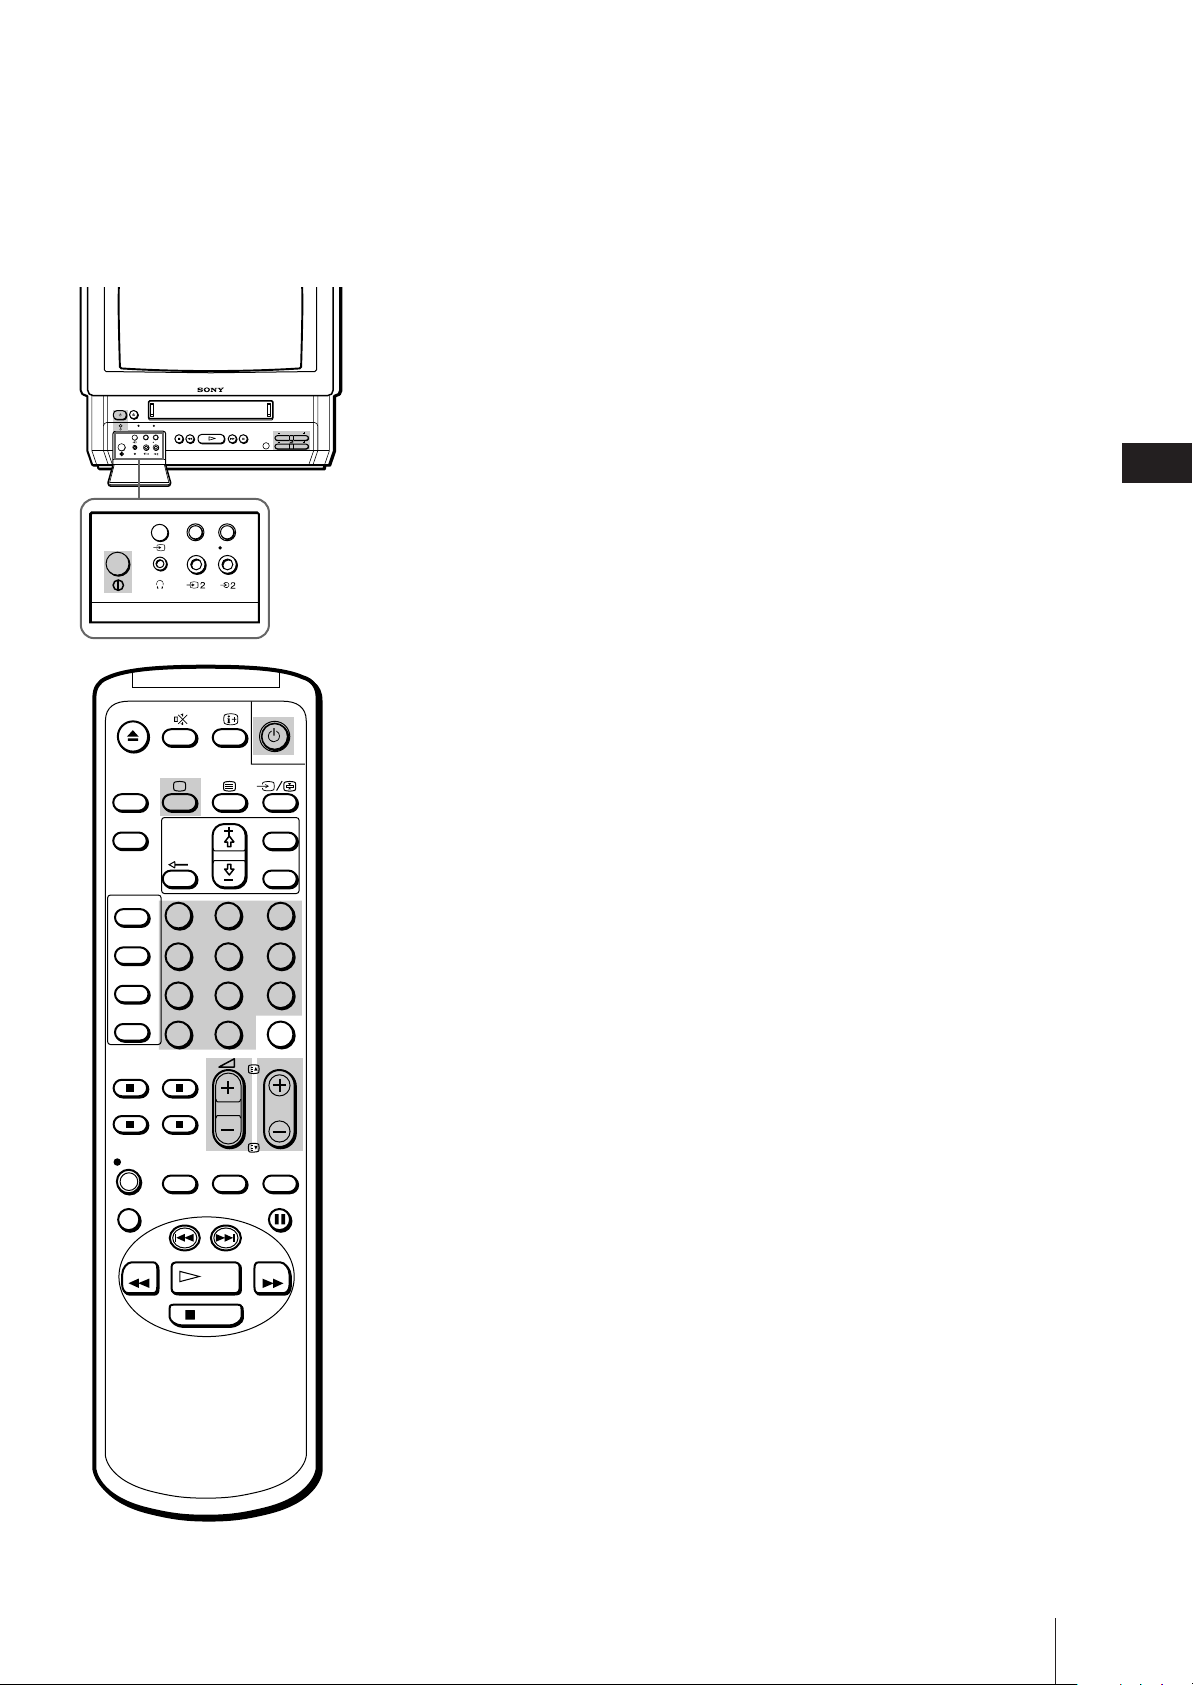
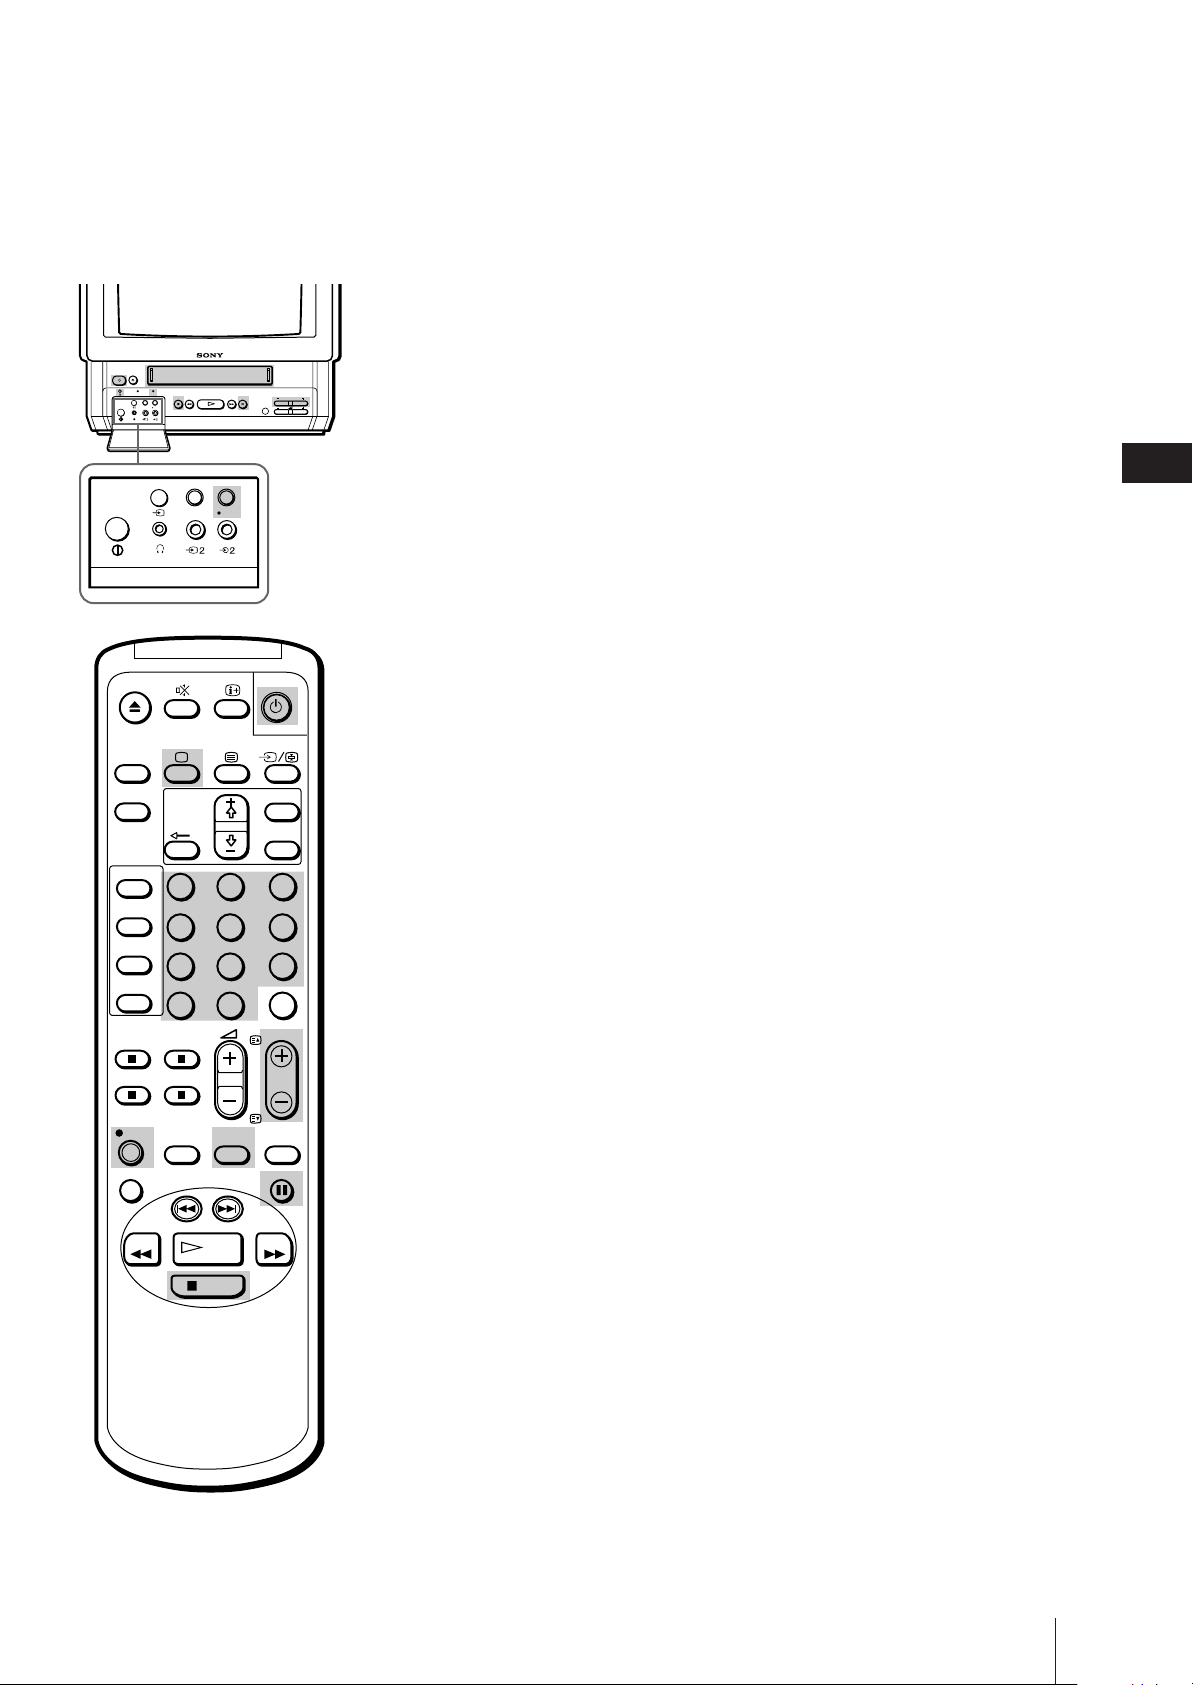
Before you begin
• Depress the U (MAIN POWER) switch, located behind the cover on the
front of the video TV, to turn the TV on.
If the u lamp on the video TV is lit in red (indicating that the video TV
is in standby mode), press ;, PROGR +/– or a number button on the
remote control.
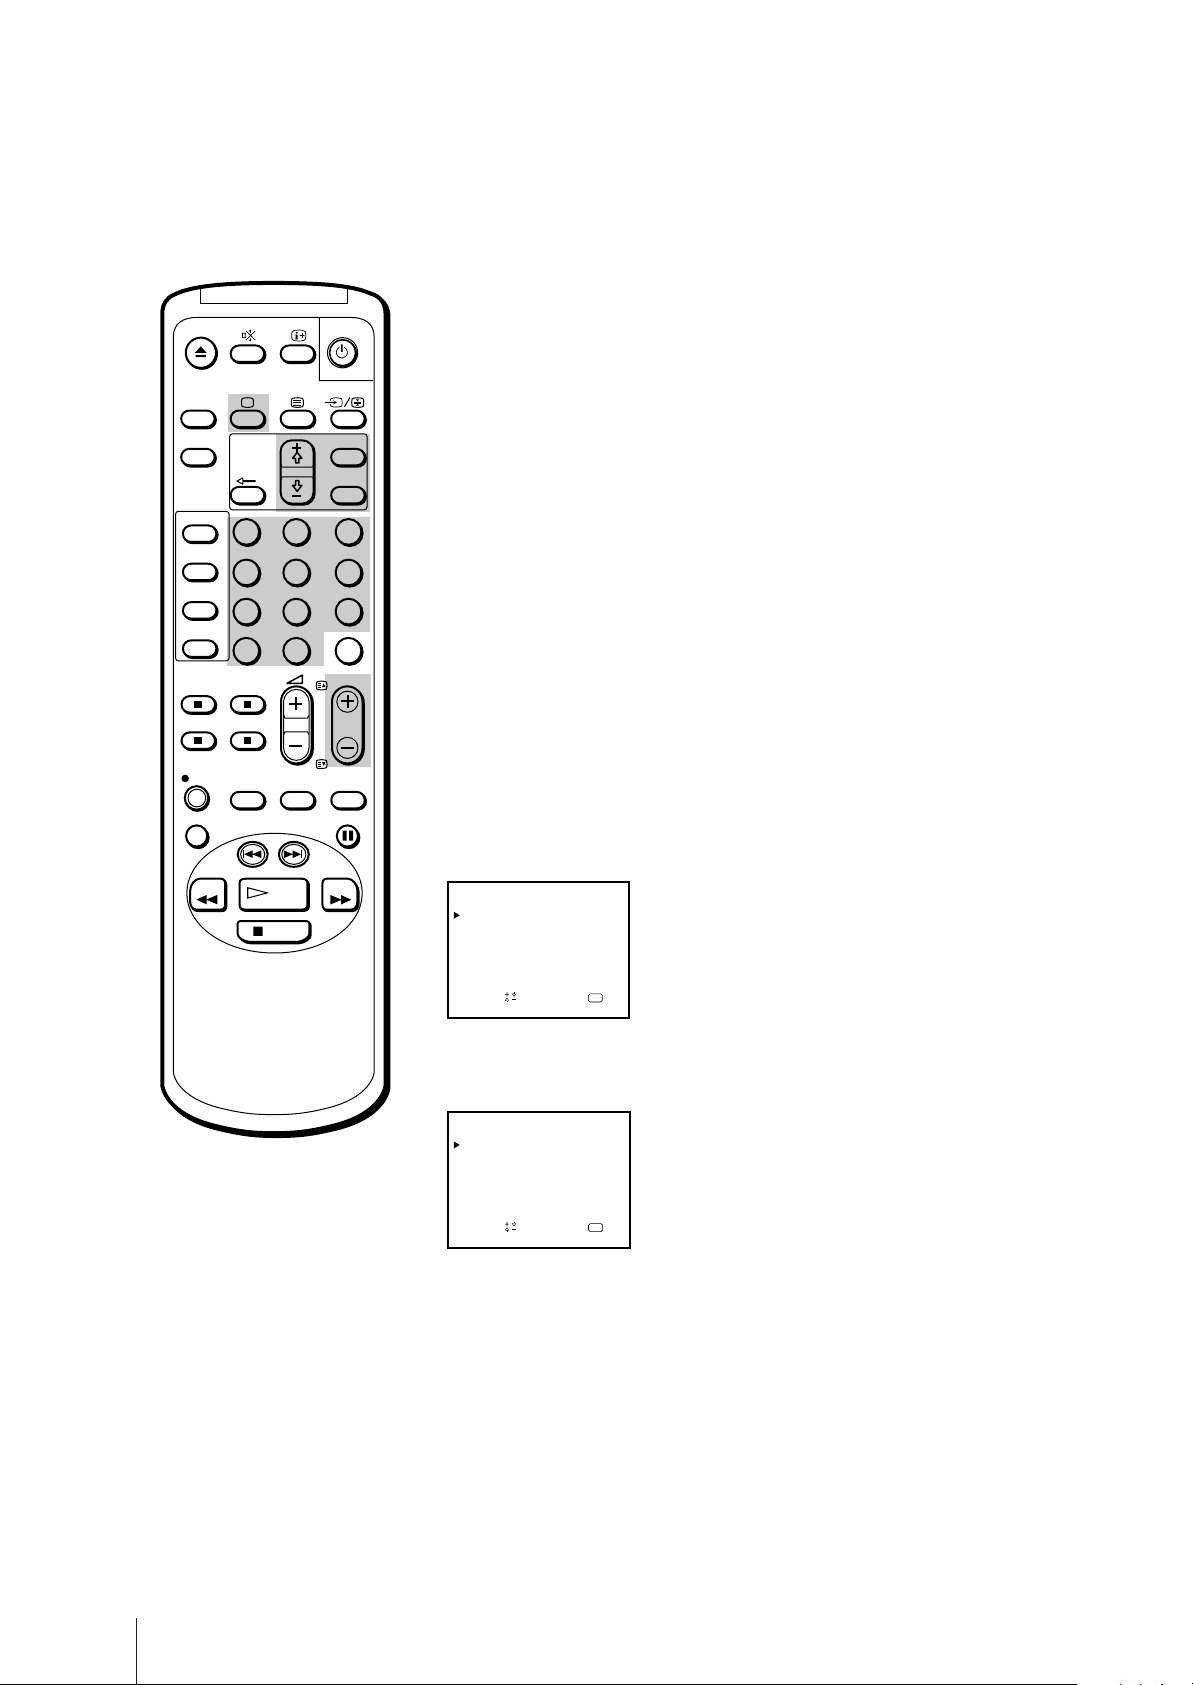
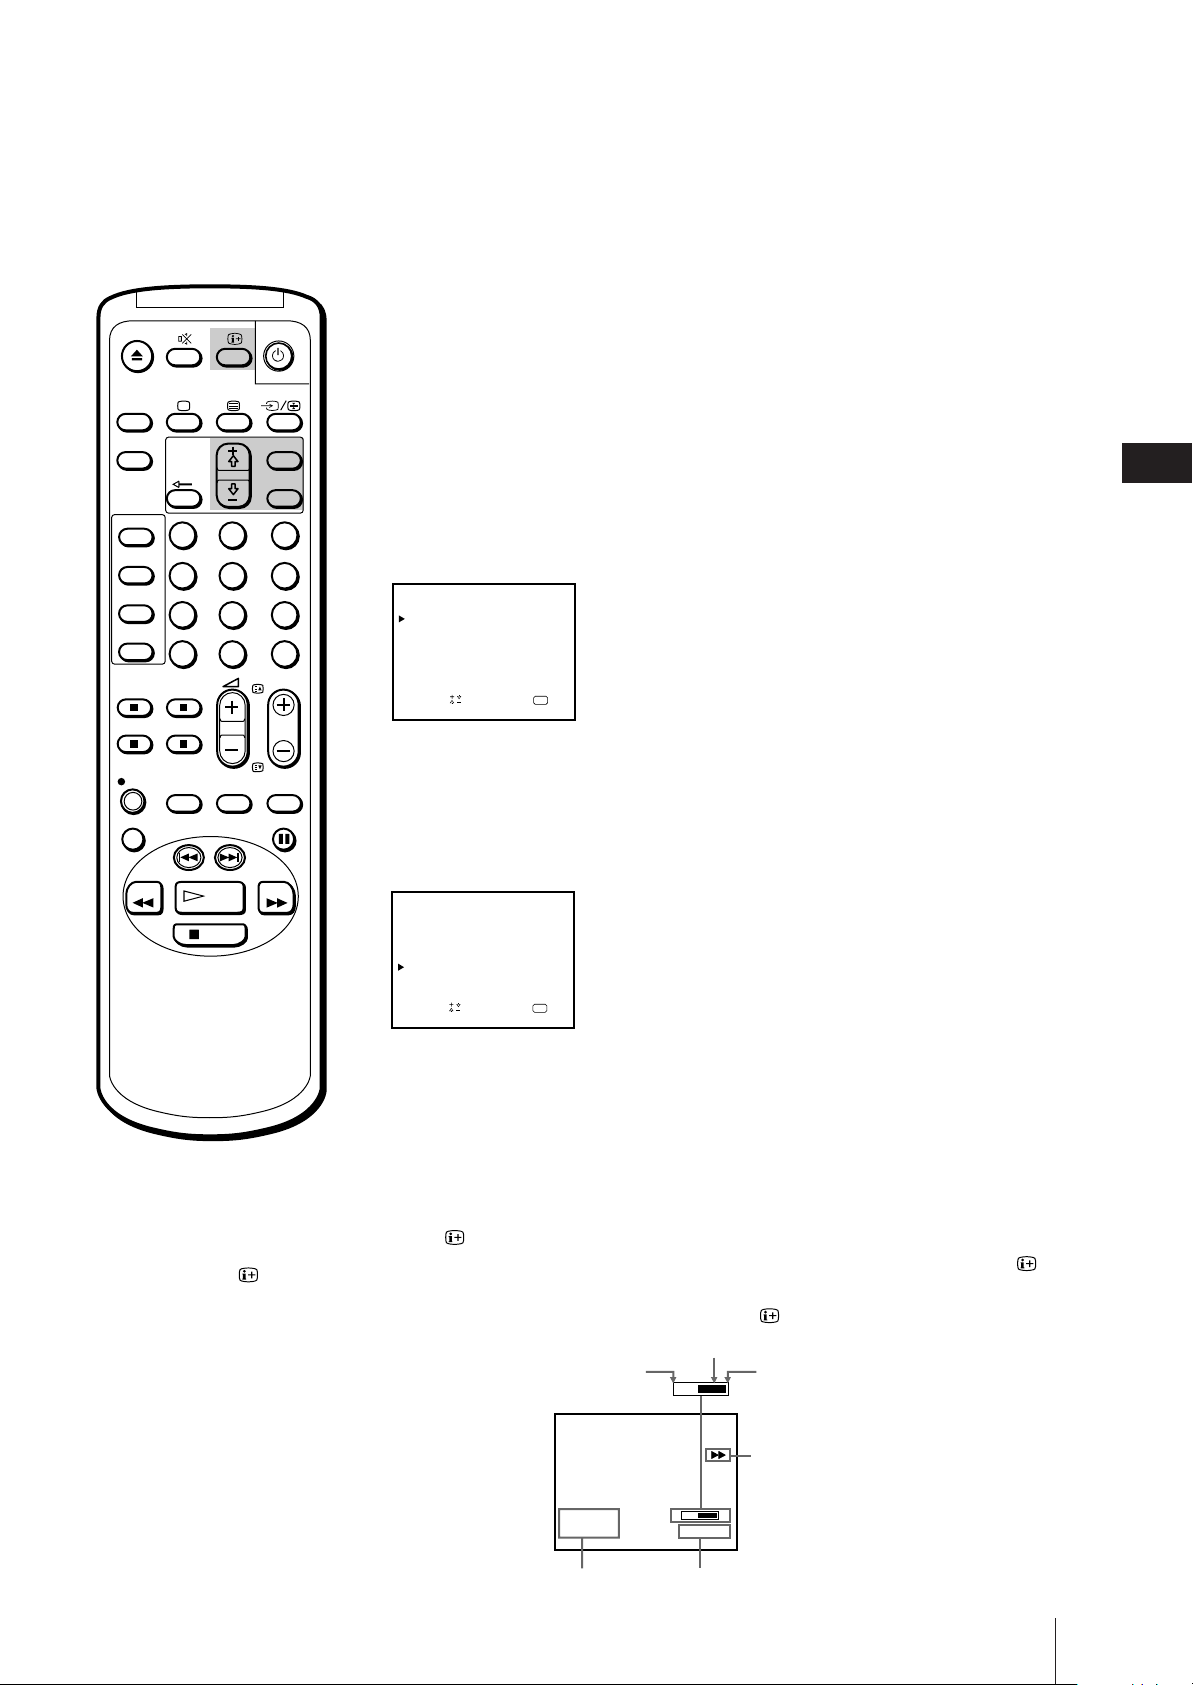
Selecting the menu language
You can select one of several languages for the menu and on-screen
information.
The initial setting is English.
1 Press MENU.
The main menu appears.
MENU
PICTURE CONTROL
ON TIMER SET
CLOCK SET
LANGUAGE
PROGRAMME PRESET
VCR MODE
FUNCTION LOCK
Sapelect nd ress
OK
Getting Started
6
2 Move the cursor (z) to “LANGUAGE” with + ◊ or – √ and press OK.
The LANGUAGE menu appears.
LANGUAGE
ENGLISH
DEUTSCH
FRANÇAIS
ITALIANO
ESPAÑOL
NEDERLANDS
PORTUGUÊS
Sape l ec t nd r es s
OK
3 Select the language you want with + ◊ or – √ and press OK.
The selected language is coloured green, and the menu appears in the
selected language.
4 Press MENU to return to the original screen.
Page 7

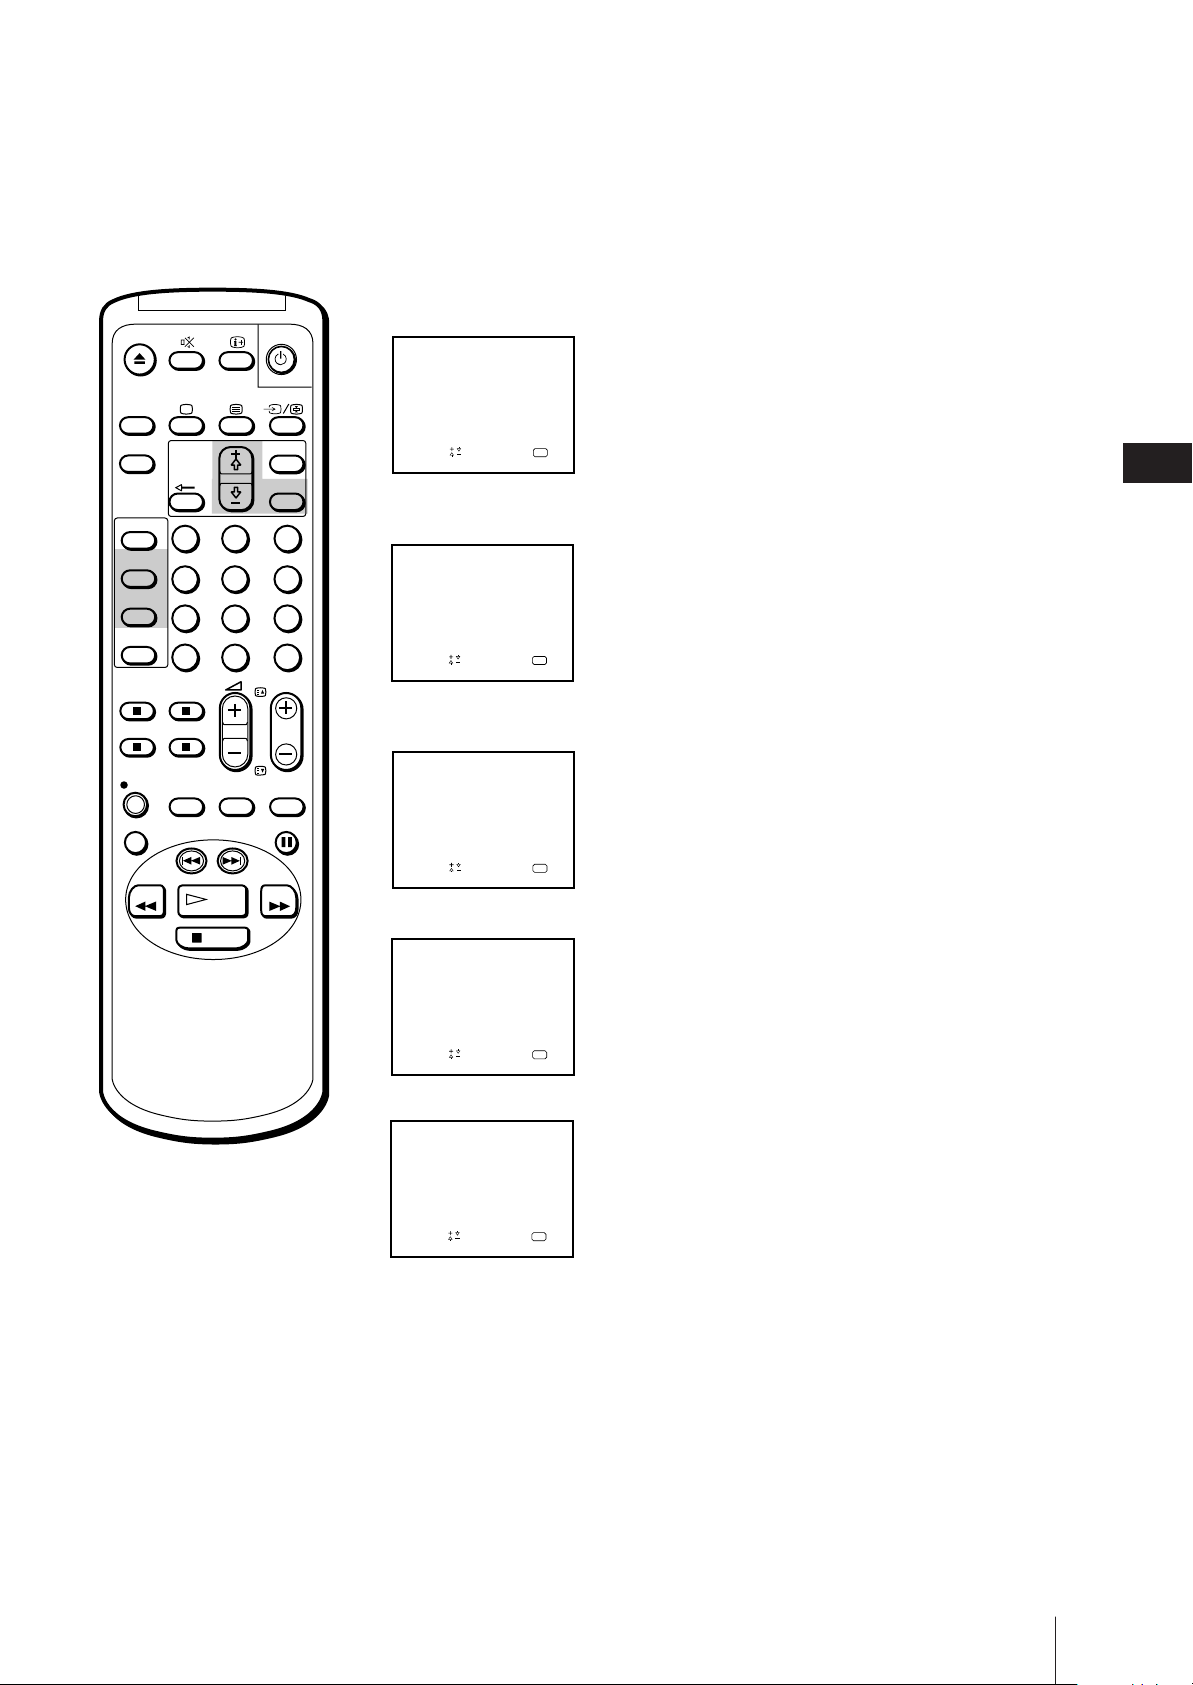
Presetting channels automatically
1 Press MENU to display the main menu.
ON
TIMER
SLEEP
SHOW VIEW
TIMER
ON SCREEN
TIMER REC
ON/OFF
TIMER REC
CLEAR
REC
REPLAY
REW
1
4
7
-/--
QUICK
TIMER
INDEX SEARCH
PLAY
STOP
2
5
8
0
TAPE
SPEED
MENU
OK
3
6
9
C
PROGR
COUNTER
RESET
PAUSE
FF
2 Move the cursor (z) to “PROGRAMME PRESET” with + ◊ or – √ and
press OK.
The PROGRAMME PRESET menu appears.
PROGRAMME PRESET
AUTO PROGRAMME
MANUAL PROGRAMME
SET UP GUIDE CH
Sape l ec t nd r es s
OK
3 Move the cursor (z) to “AUTO PROGRAMME” with + ◊ or – √ and press
OK.
The AUTO PROGRAMME menu appears.
AUTO PROGRAMME
SYSTEM
Sapelect nd ress
PROG CH
B
/G –– –––
OK
4 Press OK.
The programme number you previously watched appears in red in the
“PROG” position.
Using + ◊ or – √, select the programme number from which you want to
start presetting and press OK. You cannot begin presetting at 00.
The CH position turns red.
GB
To stop automatic channel
presetting
Press ? on the remote control.
AUTO PROGRAMME
SYSTEM
B
/G 01 C02
Sapelect nd ress
PROG
CH
OK
5 Select the channel with + ◊ or – √ and press OK.
The video TV starts scanning and presetting all receivable channels from
the programme number selected in step 4.
The preset programme and channel numbers are displayed on the screen
in sequence. When presetting is finished, the original screen reappears.
All available channels are now stored on successive number buttons.
Getting Started
7
Page 8
Presetting channels manually
1 Press MENU to display the main menu.
ON
TIMER
SLEEP
SHOW VIEW
TIMER
ON SCREEN
TIMER REC
ON/OFF
TIMER REC
CLEAR
REC
REPLAY
REW
1
4
7
-/--
QUICK
TIMER
INDEX SEARCH
PLAY
STOP
2
5
8
0
TAPE
SPEED
MENU
OK
3
6
9
C
PROGR
COUNTER
RESET
PAUSE
FF
2 Move the cursor (z) to “PROGRAMME PRESET” with + ◊ or – √ and
press OK.
The PROGRAMME PRESET menu appears.
PROGRAMME PRESET
AUTO PROGRAMME
MANUAL PROGRAMME
SET UP GUIDE CH
Sape l ec t nd r es s
OK
3 Move the cursor (z) to “MANUAL PROGRAMME” with + ◊ or – √ and
press OK.
The MANUAL PROGRAMME menu appears.
MANUAL PROGRAMME
PRG
SYS
B/G
1 C02 –– –
C04 – – – – – ON
B/G
2
C06 – – – – – ON
3B/G
B/G4
C12 – – – – – ON
5
S06 ––– – – ON
B/G
6
S24 ––– – –
B/G
CH
LABEL AFT
ndSelect press
a
–– ON
ON
D
–
–
–
–
–
–
OK
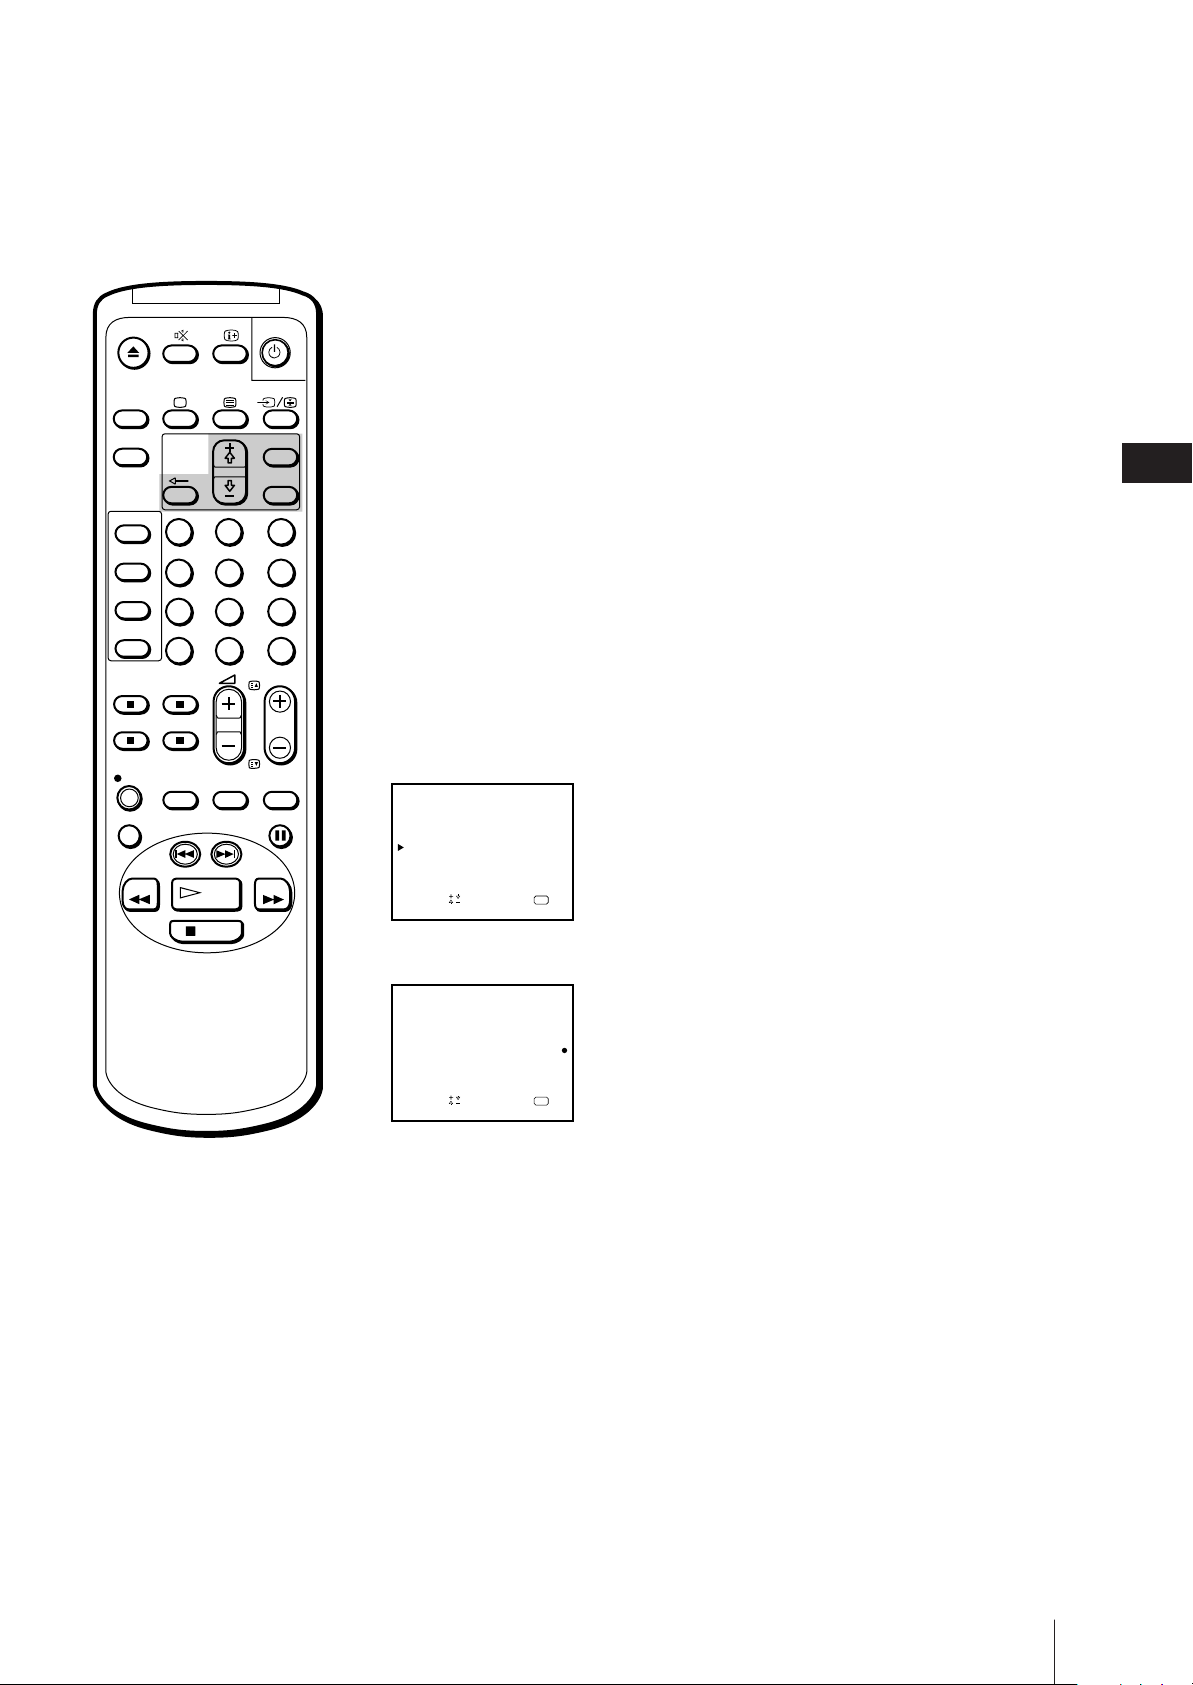
4 Using + ◊ or – √, move the cursor (z) to the programme position (number
button) to which you want to preset the channel, and press OK.
The “SYS” position turns red.
For programme positions
beyond 6
The display scrolls by pressing – √
repeatedly.
If you have made a mistake
Press ? to return to the previous
position.
MANUAL PROGRAMME
PRG
SYS
B/G
1 C02 –– –
C04 – – – – – ON
B/G
2
C06 – – – – – ON
3B/G
B/G4
C12 – – – – – ON
5
S06 ––– – – ON
B/G
6
S24 ––– – –
B/G
CH
LABEL AFT
ndSelect press
a
–– ON
ON
D
–
–
–
–
–
–
OK
5 Select the system with + ◊ or – √ and press OK.
The CH position turns red.
6 Select the channel you want to preset with + ◊ or – √ and press OK.
7 The video TV starts scanning receivable channels. When the channel is
found, it stops. If you want to preset this channel, press OK. If not, press
+ ◊ or – √ to search for another channel.
8 Repeat steps 4 through 7 to preset other channels.
9 After you finish presetting, press MENU to return to the original screen.
Getting Started
8
Page 9
ON
TIMER
SLEEP
SHOW VIEW
TIMER
ON SCREEN
TIMER REC
ON/OFF
TIMER REC
CLEAR
1
4
7
-/--
Skipping programme positions
You can skip unused programme positions when selecting programmes
with PROGR +/– buttons.
MENU
OK
2
3
5
6
9
8
C
0
PROGR
1 Press MENU to display the main menu.
2 Move the cursor (z) to “PROGRAMME PRESET” with + ◊ or – √ and
press OK.
The PROGRAMME PRESET menu appears.
3 Move the cursor (z) to “MANUAL PROGRAMME” with + ◊ or – √ and
press OK.
The MANUAL PROGRAMME menu appears.
4 Using + ◊ or – √, move the cursor (z) to the programme position which
you want to skip and press OK.
The “SYS” position turns red.
GB
QUICK
TAPE
REC
REPLAY
REW
TIMER
INDEX SEARCH
STOP
SPEED
PLAY
COUNTER
RESET
PAUSE
FF
For programme positions
beyond 6
The display scrolls by pressing – √
repeatedly.
MANUAL PROGRAMME
PRG
SYS
B/G
1 C02 –––
C04 ––––– ON
B/G
2
C06 ––––– ON
3B/G
B/G4
C12 ––––– ON
5
S06 ––––– ON
B/G
6
S24 –––––
B/G
CH
LABEL AFT
aOKndSelect press
–– ON
D
–
–
–
–
–
ON
–
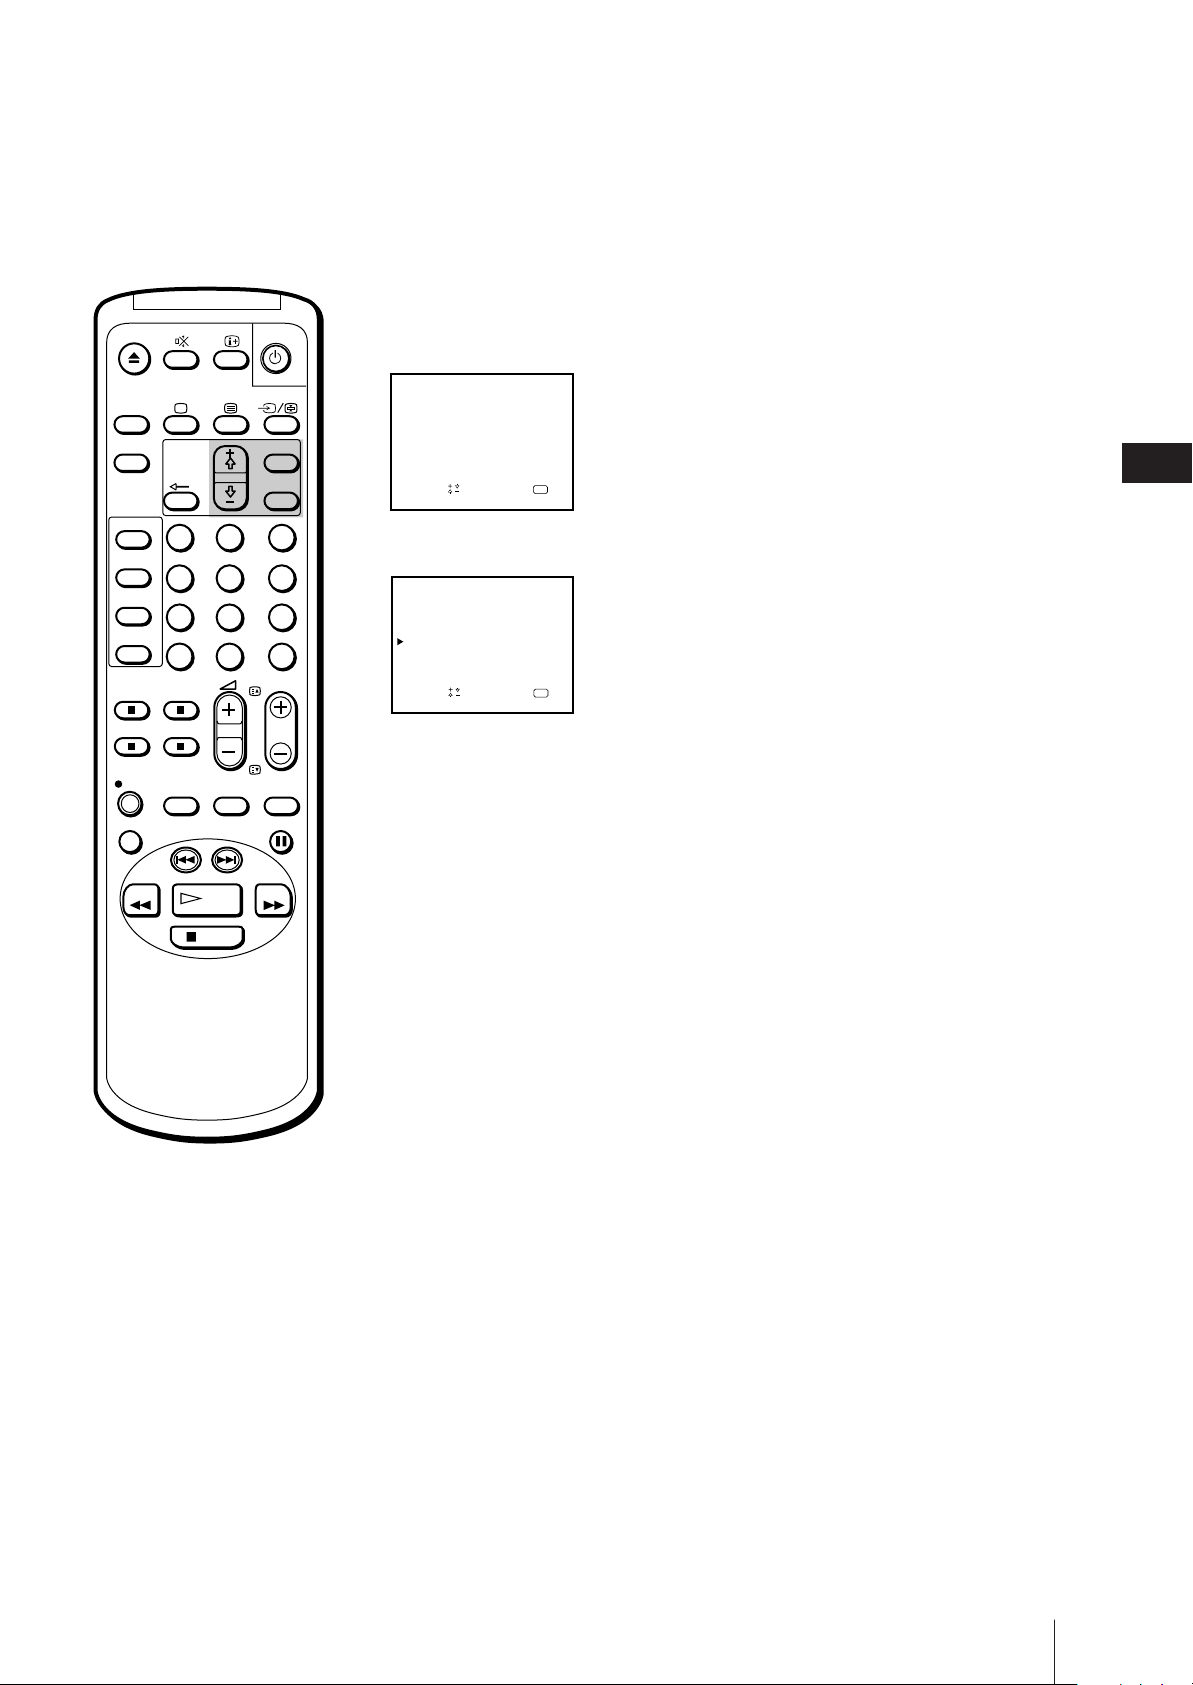
5 Press + ◊ or – √ until “---” appears in the “SYS” position and press OK.
MANUAL PROGRAMME
PRG SYS
B/G
1 C02 –– –
C04 ––––– ON
B/G
2
C06 ––––– ON
–––
3
B/G4
C12 ––––– ON
5
S06 ––––– ON
B/G
6
S24 –––––
B/G
CH
LABEL AFT
aOKndSelect press
–– ON
D
–
–
–
–
–
ON
–
When you select programmes using the PROGR +/– buttons, the
programme position is skipped.
6 Repeat steps 4 and 5 to skip other programme positions.
7 Press MENU to return to the original screen.
Getting Started
9
Page 10
ON
TIMER
Captioning a TV station name
You can name a channel using up to five characters (letters or numbers) to
be displayed on the TV screen (e.g. MTV). Using this function, you can
easily identify which channel you are watching.
SLEEP
SHOW VIEW
TIMER
ON SCREEN
TIMER REC
ON/OFF
TIMER REC
CLEAR
REC
REPLAY
REW
1
4
7
-/--
QUICK
TIMER
INDEX SEARCH
STOP
SPEED
PLAY
2
5
8
0
TAPE
MENU
OK
3
6
9
C
PROGR
COUNTER
RESET
PAUSE
FF
1 Press MENU to display the main menu.
2 Move the cursor (z) to “PROGRAMME PRESET” with + ◊ or – √ and
press OK.
The PROGRAMME PRESET menu appears.
3 Move the cursor (z) to “MANUAL PROGRAMME” with + ◊ or – √ and
press OK.
The MANUAL PROGRAMME menu appears.
MANUAL PROGRAMME
PRG
CH
SYS
B/G
1 C02 –– –
C04 ––––– ON
B/G
2
C06 ––––– ON
3B/G
B/G4
C12 ––––– ON
5
S06 ––––– ON
B/G
6
S24 –––––
B/G
LABEL AFT
ndSelect press
a
–– ON
ON
D
–
–
–
–
–
–
OK
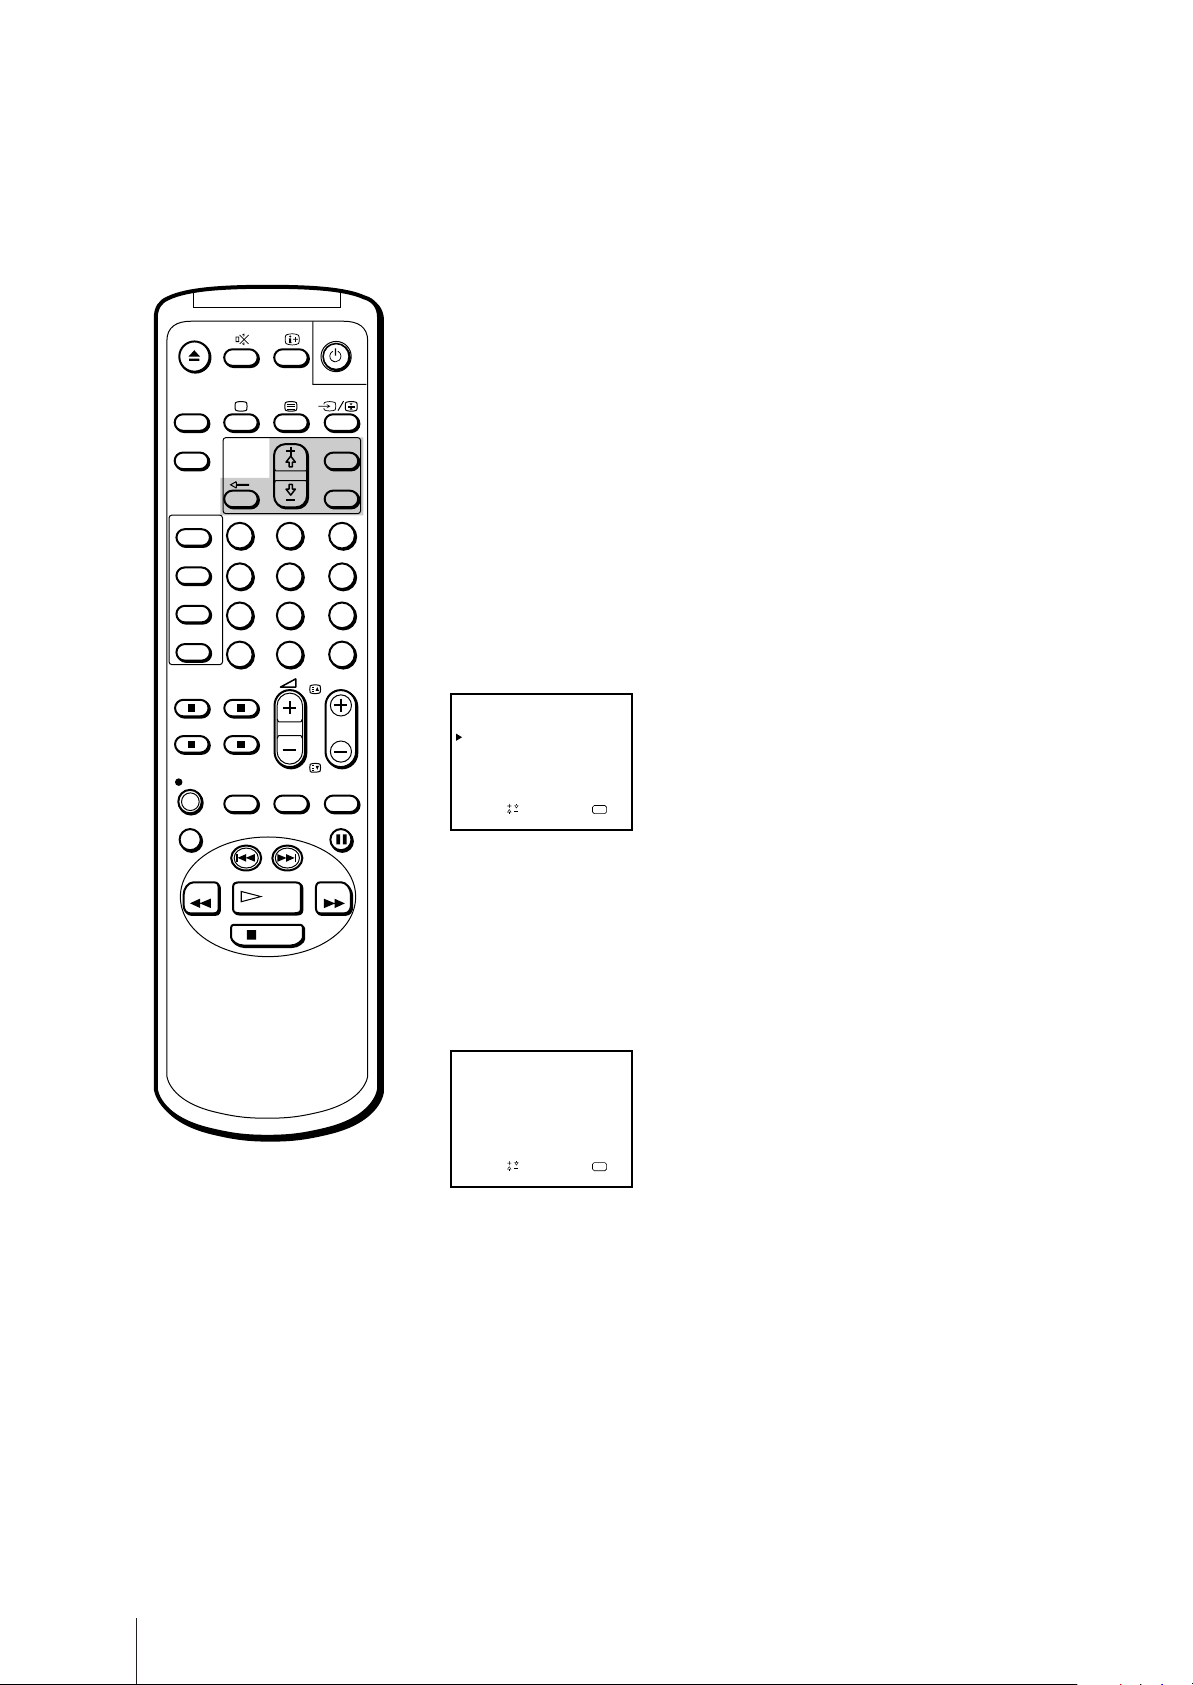
4 Using + ◊ or – √, move the cursor (z) to the programme position you want
to caption and press OK repeatedly until the first element of the “LABEL”
position turns red.
5 Select a letter or number with + ◊ or – √ and press OK.
The next element turns red. Select other characters in the same way. For
the element you want to leave blank, select “-” and press OK.
If you have made a mistake
Press ? to return to the previous
position.
Getting Started
10
MANUAL PROGRAMME
PRG SYS
B/G
1 C02 –– –
C04
B/G
2
C06 ––––– ON
3B/G
B/G4
C12 ––––– ON
5
S06 ––––– ON
B/G
6
S24 –––––
B/G
CH
LABEL AFT
MTV
aOKndSelect press
–– ON
––
ON
ON
D
–
–
–
–
–
–
6 After selecting all the characters, press OK repeatedly until the cursor
appears. Now the caption you chose is stored.
7 Repeat steps 4 through 6 to caption other channels.
8 Press MENU to return to the original screen.
Page 11

ON
TIMER
Manual fine-tuning
Normally, the automatic fine-tuning (AFT) is already working. However, if
the picture of a programme is distorted, you can use the manual finetuning function to obtain better picture reception.
SLEEP
SHOW VIEW
TIMER
ON SCREEN
TIMER REC
ON/OFF
TIMER REC
CLEAR
REC
REPLAY
REW
1
4
7
-/--
QUICK
TIMER
INDEX SEARCH
PLAY
STOP
2
5
8
0
TAPE
SPEED
MENU
OK
3
6
9
C
PROGR
COUNTER
RESET
PAUSE
FF
1 Press MENU to display the main menu.
2 Move the cursor (z) to “PROGRAMME PRESET” with + ◊ or – √ and press
OK.
The PROGRAMME PRESET menu appears.
3 Move the cursor (z) to “MANUAL PROGRAMME” with + ◊ or – √ and
press OK.
The MANUAL PROGRAMME menu appears.
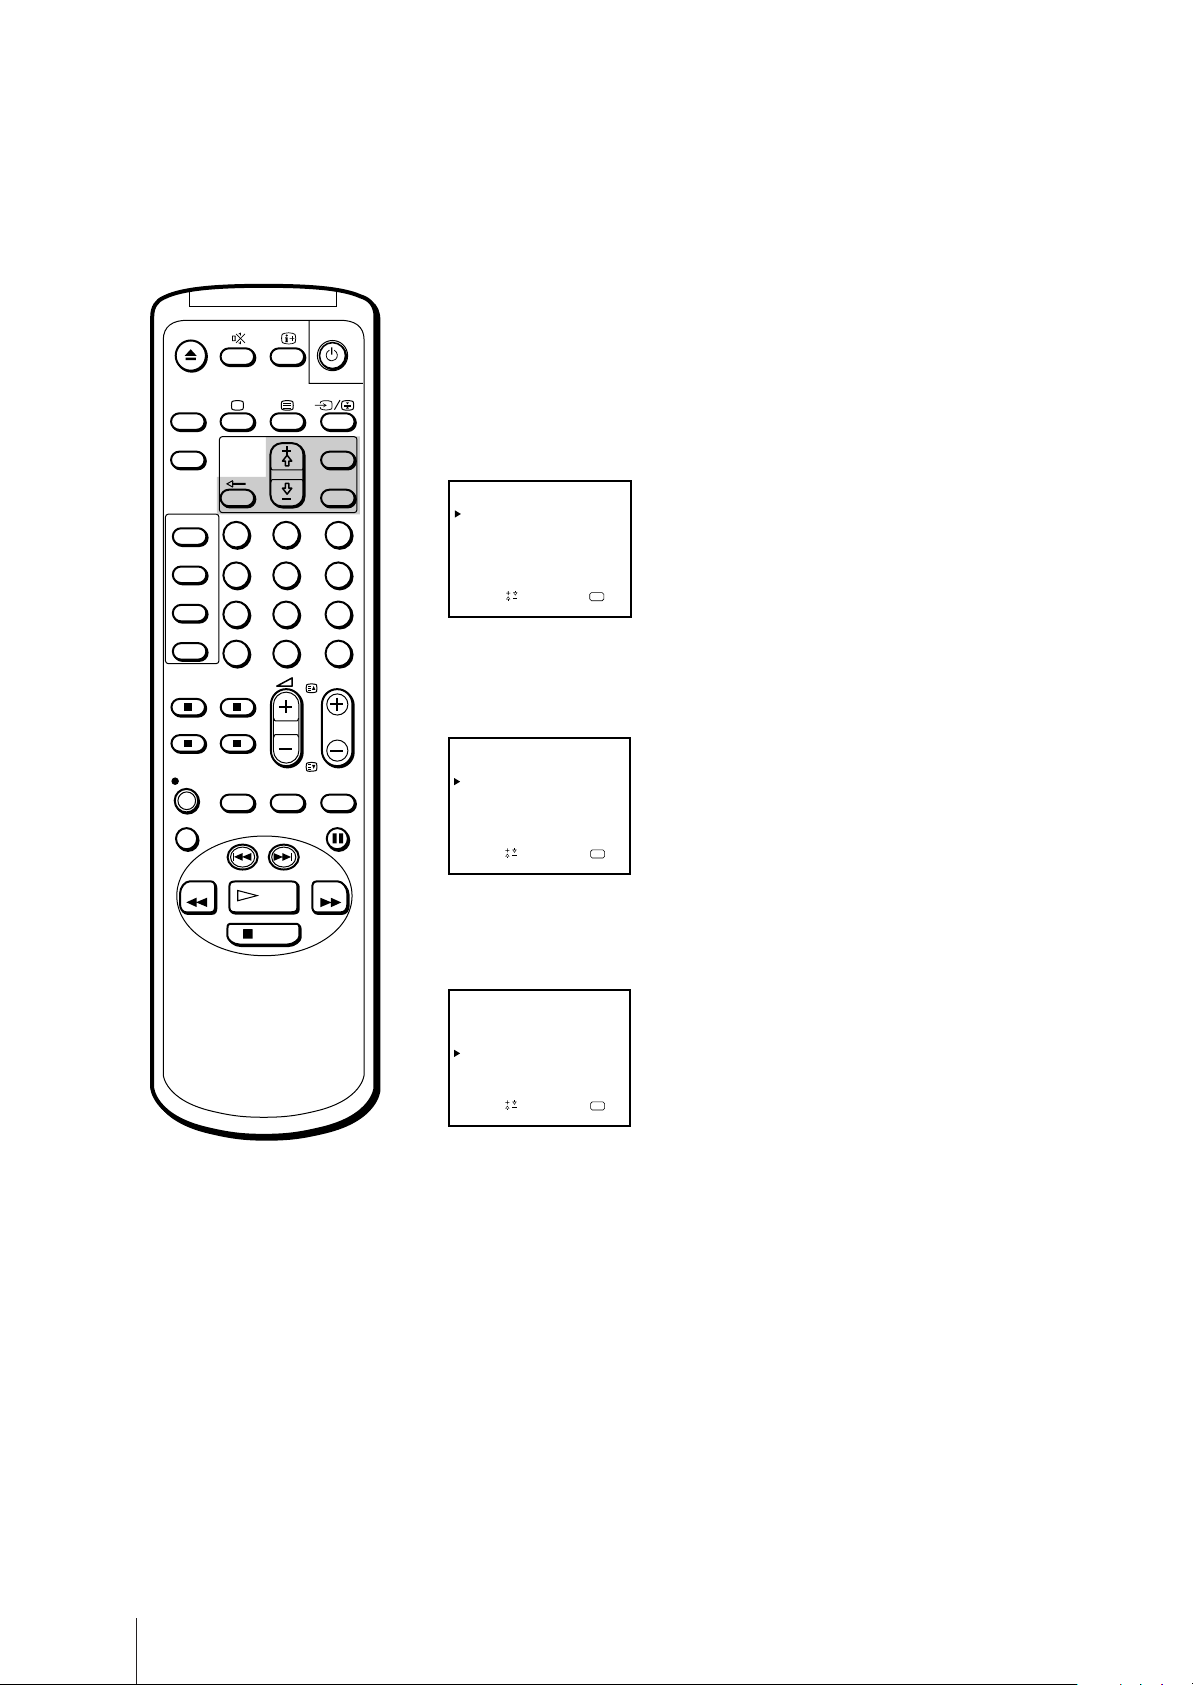
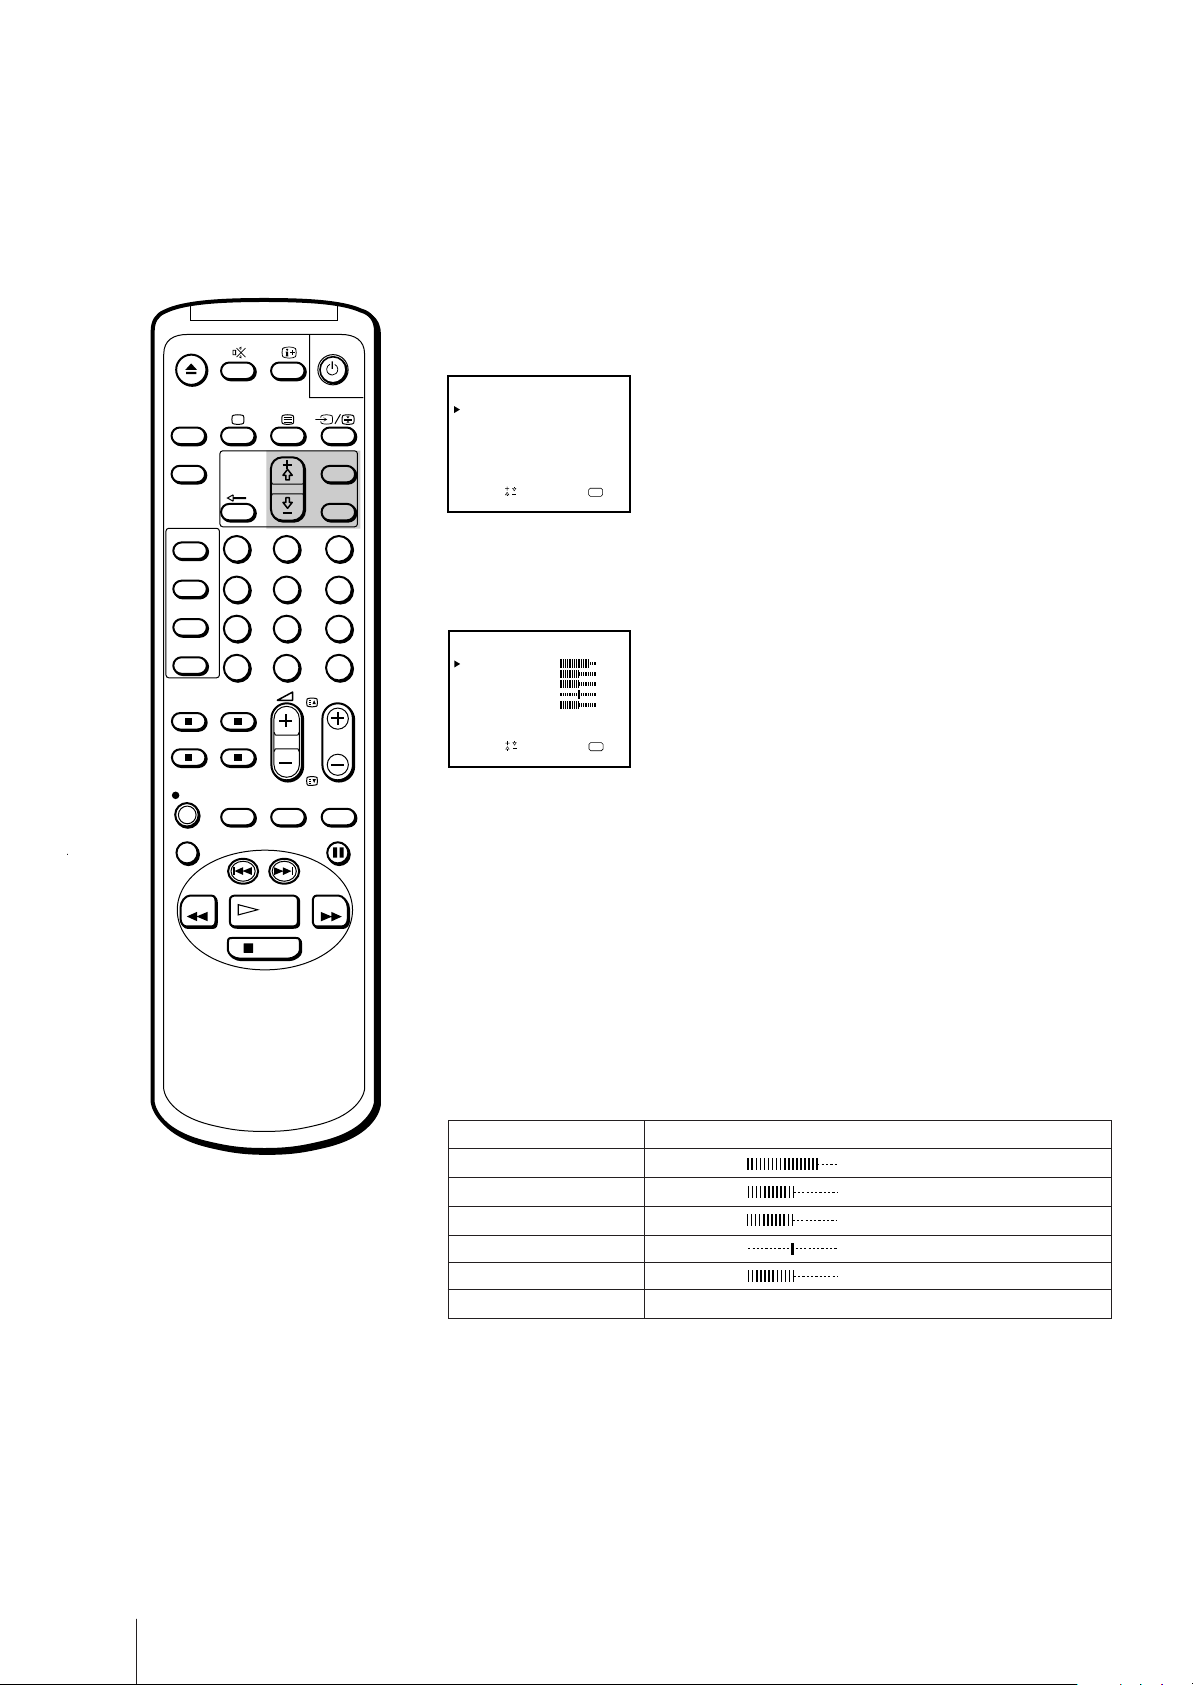
4 Using + ◊ or – √, move the cursor (z) to the programme position which
you want to manually fine-tune, and press OK repeatedly until the AFT
position turns red.
MANUAL PROGRAMME
PRG
SYS
B/G
1 C02 –– –
C04 ––––– ON
B/G
2
C06 ––––– ON
3B/G
B/G4
C12 ––––– ON
5
S06 ––––– ON
B/G
6
S24 –––––
B/G
CH
LABEL AFT
ndSelect press
a
–– ON
D
–
–
–
–
–
ON
–
OK
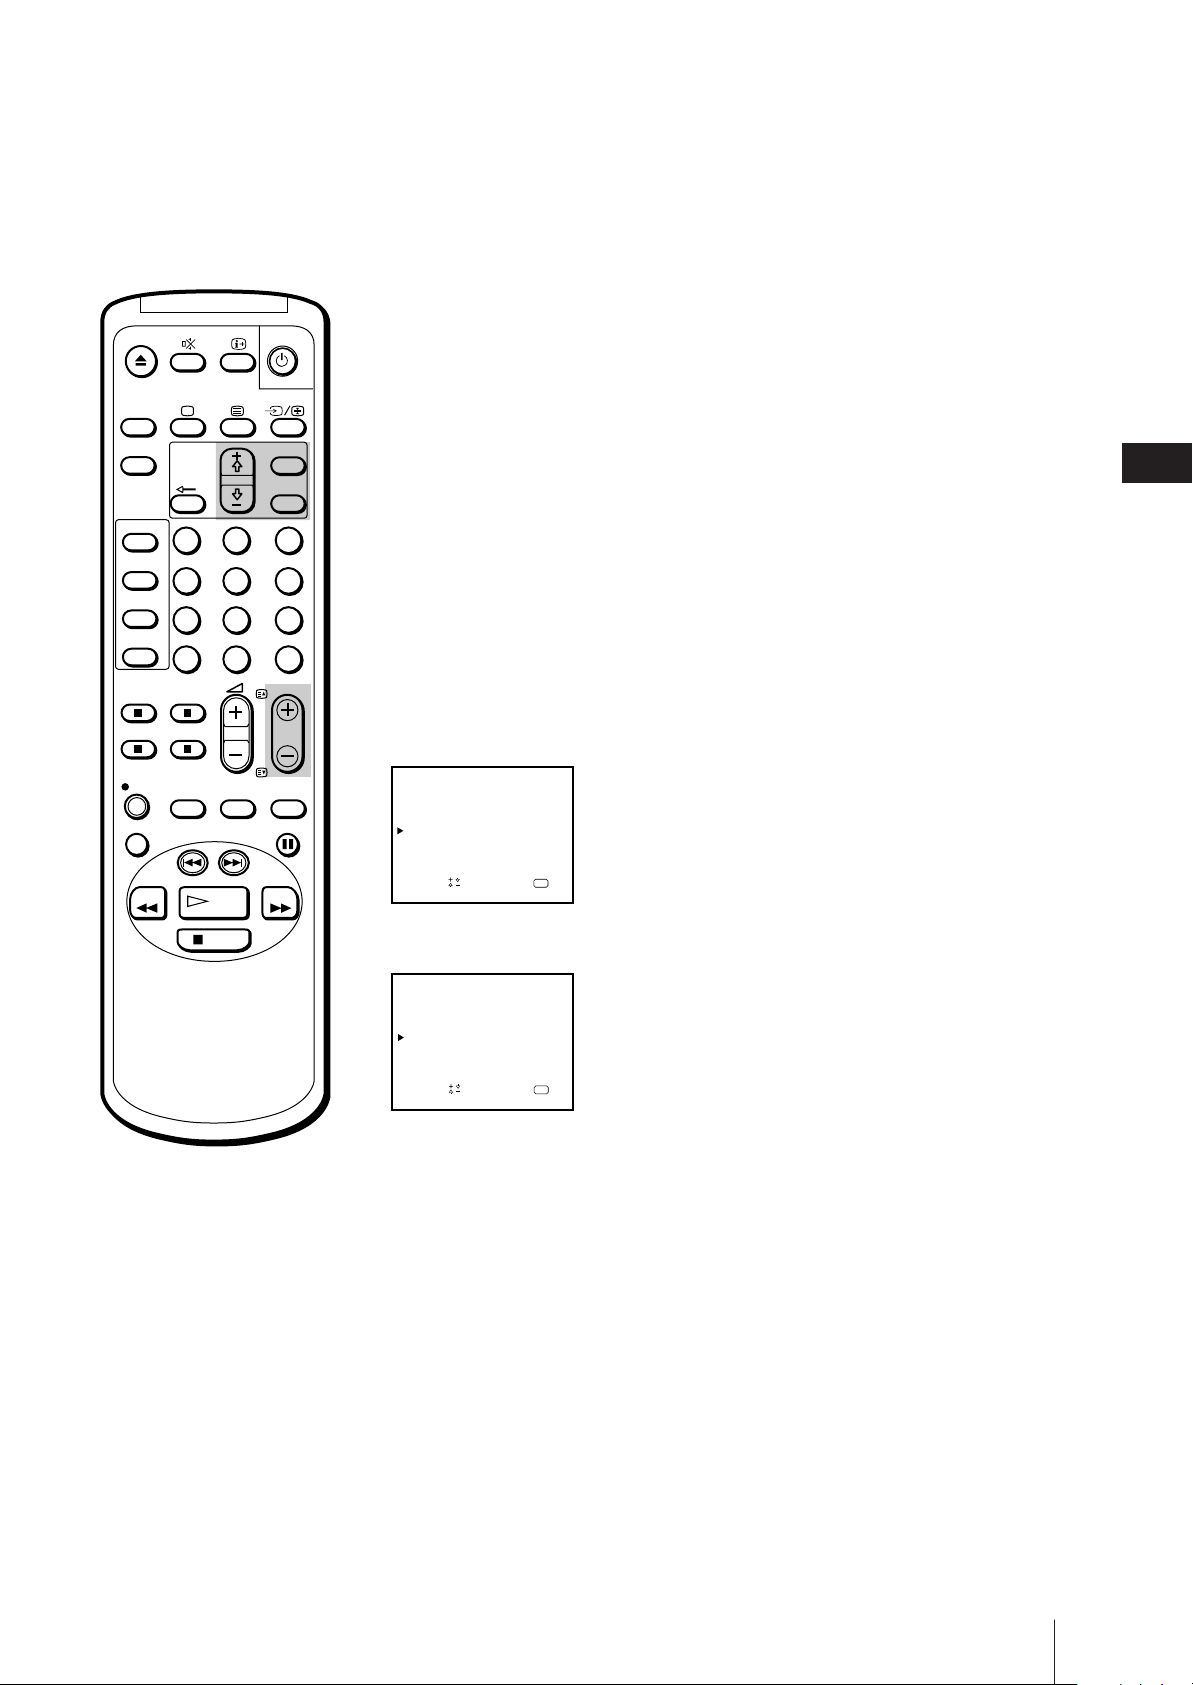
5 Fine-tune the channel while holding down + ◊ or – √ so that you get the
best TV reception. As you press these buttons, the frequency changes from
–15 to +15.
GB
To reactivate automatic finetuning (AFT)
Repeat from the beginning and
select “ON” in step 5.
MANUAL PROGRAMME
PRG
SYS
B/G
1 C02 –– –
C04 ––––– ON
B/G
2
C06 ––––– – 3
3B/G
B/G4
C12 ––––– ON
5
S06 ––––– ON
B/G
6
S24 –––––
B/G
LABEL AFT
CH
ndSelect press
a
–– ON
D
–
–
–
–
–
ON
–
OK
6 After fine-tuning, press OK.
The cursor (z) appears. The fine-tuned level is now stored.
7 Repeat steps 4 through 6 to fine-tune other channels.
8 Press MENU to return to the original screen.
Getting Started
11
Page 12
ON
TIMER
SLEEP
MENU
OK
Tuning in to a channel temporarily
You can tune in to a channel temporarily, even when the channel has not
been preset.
1 Press C on the remote control.
To tune in to a cable channel, press C twice. The indication “C” (for VHF/
UHF channels), or “S” (for cable channels) will appear on the screen.
SHOW VIEW
TIMER
ON SCREEN
TIMER REC
ON/OFF
TIMER REC
CLEAR
REC
REPLAY
REW
1
4
7
-/--
QUICK
TIMER
INDEX SEARCH
PLAY
STOP
2
5
8
0
TAPE
SPEED
3
6
9
C
PROGR
COUNTER
RESET
PAUSE
FF
2 Enter the double digit channel number using the remote control number
buttons (e.g. for channel 4, press 0, then 4).
The channel will appear. However, this channel will not be stored in the
video TV’s memory.
C04
Note (KV-14V6D, KV-21V6D
only)
In order to record a programme
received through a Pay-TV decoder,
you must preset the channel
according to the method on page 8
“Presetting channels manually”, or
page 13 “Setting a pay-TV channel,”
and then tune in to the channel
according to the method on page 17
“Selecting TV programmes”.
Getting Started
12
Page 13
Setting a Pay-TV channel
(KV-14V6D, KV-21V6D only)
ON
TIMER
SLEEP
SHOW VIEW
TIMER
ON SCREEN
TIMER REC
ON/OFF
TIMER REC
CLEAR
REC
REPLAY
REW
1
4
7
-/--
QUICK
TIMER
INDEX SEARCH
PLAY
STOP
2
5
8
0
TAPE
SPEED
MENU
OK
3
6
9
C
PROGR
COUNTER
RESET
PAUSE
FF
You can watch Pay-TV channels by connecting a Pay-TV decoder to the
:1/W 1 connector on the rear of the video TV.
1 Press MENU to display the main menu.
2 Move the cursor (z) to “PROGRAMME PRESET“ with + ◊ or – √ and
press OK.
The PROGRAMME PRESET menu appears.
3 Move the cursor (z) to “MANUAL PROGRAMME“ with + ◊ or – √ and
press OK.
The MANUAL PROGRAMME menu appears.
4 Move the cursor (z) to the programme position to which you want to set
the pay-TV decoder, and press OK until the D position turns red.
MANUAL PROGRAMME
PRG
SYS
B/G
1 C02 –– –
C04 ––––– ON
B/G
2
C06 ––––– ON
3B/G
B/G4
C12 ––––– ON
5
S06 ––––– ON
B/G
6
S24 –––––
B/G
CH
LABEL AFT
ndSelect press
a
–– ON
D
–
–
–
–
–
ON
–
OK
5 Press + ◊ or – √ until r appears in the D position and press OK.
GB
Note
While you are recording a program
which is being recorded through the
Pay-TV decoder, you will not be
able to view other programmes
through the decoder.
MANUAL PROGRAMME
PRG SYS
B/G
1 C02 –– –
C04 ––––– ON
B/G
2
C06 ––––– ON
3B/G
B/G4
C12 ––––– ON
5
S06 ––––– ON
B/G
6
S24 –––––
B/G
CH
LABEL AFT
aOKndSelect press
–– ON
D
–
–
–
–
ON
–
6 Press MENU to return to the original screen.
Getting Started
13
Page 14

Step 4 —
ON
TIMER
SLEEP
SHOW VIEW
TIMER
ON SCREEN
TIMER REC
ON/OFF
TIMER REC
CLEAR
1
4
7
-/--
MENU
OK
2
3
5
6
9
8
C
0
PROGR
Setting up ShowView Manually
The ShowView function allows you to simplify the task of programming
your video TV to make timer recordings. You should coordinate the
programme position of each channel with the guide channel (the number
that’s assigned to each TV station in advance). To find the guide channel
numbers, look in the programme guide for your area that features
ShowView numbers.
Before you begin
• If the u lamp on the video TV is lit in red (indicating that the video TV is
in standby mode), press ;, PROGR +/– or a number button on the
remote control.
Setting the guide channels
QUICK
TAPE
REC
REPLAY
REW
TIMER
INDEX SEARCH
STOP
SPEED
PLAY
COUNTER
RESET
PAUSE
FF
If you have made a mistake
Press ? to return to the previous
position.
1 Press MENU to display the main menu.
The main menu appears.
MENU
PICTURE CONTROL
ON TIMER SET
CLOCK SET
LANGUAGE
PROGRAMME PRESET
VCR MODE
FUNCTION LOCK
Sape l ec t nd r es s
OK
2 Move the cursor (z) to “PROGRAMME PRESET” with + ◊ or – √ and
press OK.
The PROGRAMME PRESET menu appears.
PROGRAMME PRESET
AUTO PROGRAMME
MANUAL PROGRAMME
SET UP GUIDE CH
Sapelect nd ress
OK
3 Move the cursor (z) to “SET UP GUIDE CH” with + ◊ or – √ and press
OK.
The SET UP GUIDE CH menu appears.
SET UP GUIDE CH
PROG
1 C02
C04
2
C06
3
4
C12 –– –
5
S06 – – –
6
S24
CH
ndSelect press
a
GUIDE CH
–––
–––
–––
–––
OK
Getting Started
14
Page 15
4 Using + ◊ or – √, move the cursor (z) to the programme position (number
button) to which you want to preset the guide channel, and press OK.
The GUIDE CH position turns red.
ON
TIMER
SLEEP
SHOW VIEW
TIMER
ON SCREEN
TIMER REC
ON/OFF
TIMER REC
CLEAR
REC
REPLAY
REW
1
4
7
-/--
QUICK
TIMER
INDEX SEARCH
PLAY
STOP
2
5
8
0
TAPE
SPEED
MENU
OK
3
6
9
C
PROGR
COUNTER
RESET
PAUSE
FF
SET UP GUIDE CH
PROG CH
1 C02
2
3
4
5
6
GUIDE CH
–––
–––
C04
C06
–––
C12 –– –
S06 – – –
–––
S24
aOKndSelect press
5 Select the guide channel you want to preset with + ◊ or – √, and press OK.
SET UP GUIDE CH
PROG
1 C02
C04
2
3
4
C12 –– –
5
S06 – – –
6
S24
CH
ndSelect press
a
GUIDE CH
–––
–––
99C06
–––
OK
6 Repeat steps 4 and 5 to preset other channels.
7 After you finish presetting, press MENU to return to the original screen.
GB
Getting Started
15
Page 16

Step 5 — Setting the Clock
You need to set the clock in order to use timer recording and quick-timer
recording functions.
1 Press MENU to display the main menu.
ON
TIMER
SLEEP
SHOW VIEW
TIMER
ON SCREEN
TIMER REC
ON/OFF
TIMER REC
CLEAR
1
4
7
-/--
MENU
OK
2
3
5
6
9
8
C
0
PROGR
MENU
PICTURE CONTROL
ON TIMER SET
CLOCK SET
LANGUAGE
PROGRAMME PRESET
VCR MODE
FUNCTION LOCK
Sape l ec t nd r es s
OK
2 Move the cursor (z) to “CLOCK SET” with + ◊ or – √ and press OK.
The CLOCK SET menu appears.
CLOCK SET
––. ––. –––– ––– –– : ––
QUICK
TAPE
REC
REPLAY
REW
TIMER
INDEX SEARCH
STOP
SPEED
PLAY
COUNTER
RESET
PAUSE
FF
If you have made a mistake
Press ? to return to the previous
position.
If the clock has stopped and
“--/--” is displayed
You have to re-set the clock.
OK
p ress
3 Press OK to start setting the clock.
The day section turns red.
CLOCK SET
1. 1. 1997 WED 0 : 00
OK
ndSelect press
a
4 Set the day with + ◊ or – √ and press OK.
The month section turns red.
CLOCK SET
4. 1. 1997 SAT 0 :00
aOKndSelect press
5 Using + ◊ or – √ and OK, set the month, year, hour and minute in the same
way as in step 4.
CLOCK SET
4. 2. 19 9 7 THU 15 : 3 01
Getting Started
16
aOKndSelect press
6 After setting the minute, press OK.
The clock starts working.
7 Press MENU to return to the original screen.
Page 17
Basic Operations
W atching the TV
This section explains the basic functions you use while watching the TV.
Most of the operations can be done using the remote control.
EJECT
TIMER REC
OPEN
TIMER REC
CL
ON
TIMER
SLEEP
SHOW VIEW
TIMER
ON SCREEN
TIMER REC
ON/OFF
TIMER REC
CLEAR
REC
Switching the video TV on and off
PLAYREW3STOP #FF PAUSE
REC
ON/OFF
TIMER REC
REC
ON/OFF
2
1
5
4
7
8
-/--
0
MENU
OK
3
6
9
C
PROGR
PROOR
Switching on
GB
Depress the U (MAIN POWER) switch, which is located behind the cover
on the front of the video TV.
Press ;, PROGR +/– or number buttons on the remote control, or PROGR
+/– on the video TV when the u lamp is lit in red (indicating that the
video TV is in standby mode).
Switching off temporarily
Press u.
The video TV enters standby mode and the u lamp on the front of the
video TV lights up in red.
To switch on again
Press ;, PROGR +/– or number buttons on the remote control, or PROGR
+/– on the video TV.
To switch off the main power
Press the U switch on the video TV.
Selecting TV programmes
QUICK
TAPE
REC
REPLAY
REW
TIMER
INDEX SEARCH
STOP
SPEED
PLAY
COUNTER
RESET
PAUSE
FF
Note
When the U switch is turned off, the
video operations do not work.
Press PROGR +/– or number buttons on the remote control, or PROGR
+/– on the video TV.
To select a double-digit number using the
number buttons
Press ÷, then the numbers.
For example, if you want to choose 14, press ÷, 1 and 4.
Adjusting the volume
Press Á +/–.
Basic Operations
17
Page 18
ON
TIMER
SLEEP
MENU
OK
Adjusting the picture
1 Press MENU to display the main menu.
MENU
PICTURE CONTROL
ON TIMER SET
CLOCK SET
LANGUAGE
PROGRAMME PRESET
VCR MODE
FUNCTION LOCK
Sapelect nd ress
OK
SHOW VIEW
TIMER
ON SCREEN
TIMER REC
ON/OFF
TIMER REC
CLEAR
REC
REPLAY
REW
1
4
7
-/--
QUICK
TIMER
INDEX SEARCH
PLAY
STOP
2
5
8
0
TAPE
SPEED
3
6
9
C
PROGR
COUNTER
RESET
PAUSE
FF
2 Move the cursor (z) to “PICTURE CONTROL” with + ◊ or – √ and press
OK.
The PICTURE CONTROL menu appears.
PICTURE CONTROL
CONTRAST
COLOUR
BRIGHTNESS
HUE
SHARPNESS 50
RESET
Sape l ec t nd r es s
80
50
50
00
OK
3 Using + ◊ or – √, select the item you want to adjust and press OK.
4 Adjust the picture with + ◊ or – √ and press OK.
With each press the vertical bars increase or decrease and the figure at the
right margin changes to show the control level. (See the table below.)
5 Repeat steps 3 and 4 to adjust other items.
6 Press MENU to return to the original screen.
The adjusted control levels are stored.
Effect of each control
Note
The HUE adjustment is available
only for the NTSC colour system.
Basic Operations
18
PICTURE CONTROL
CONTRAST
COLOUR
BRIGHTNESS
HUE
SHARPNESS
RESET
Effect
Less More
Less More
Darker Brighter
Greenish Reddish
Softer Sharper
Resets all the items to the factory preset levels.
Page 19
Muting the sound
Press ¤.
The ¤ indicator appears and stays on the screen.
EJECT
TIMER REC
REC
OPEN
TIMER REC
CL
ON/OFF
PLAYREW3STOP #FF PAUSE
REC
PROOR
To resume normal sound, press ¤ again or Á +.
GB
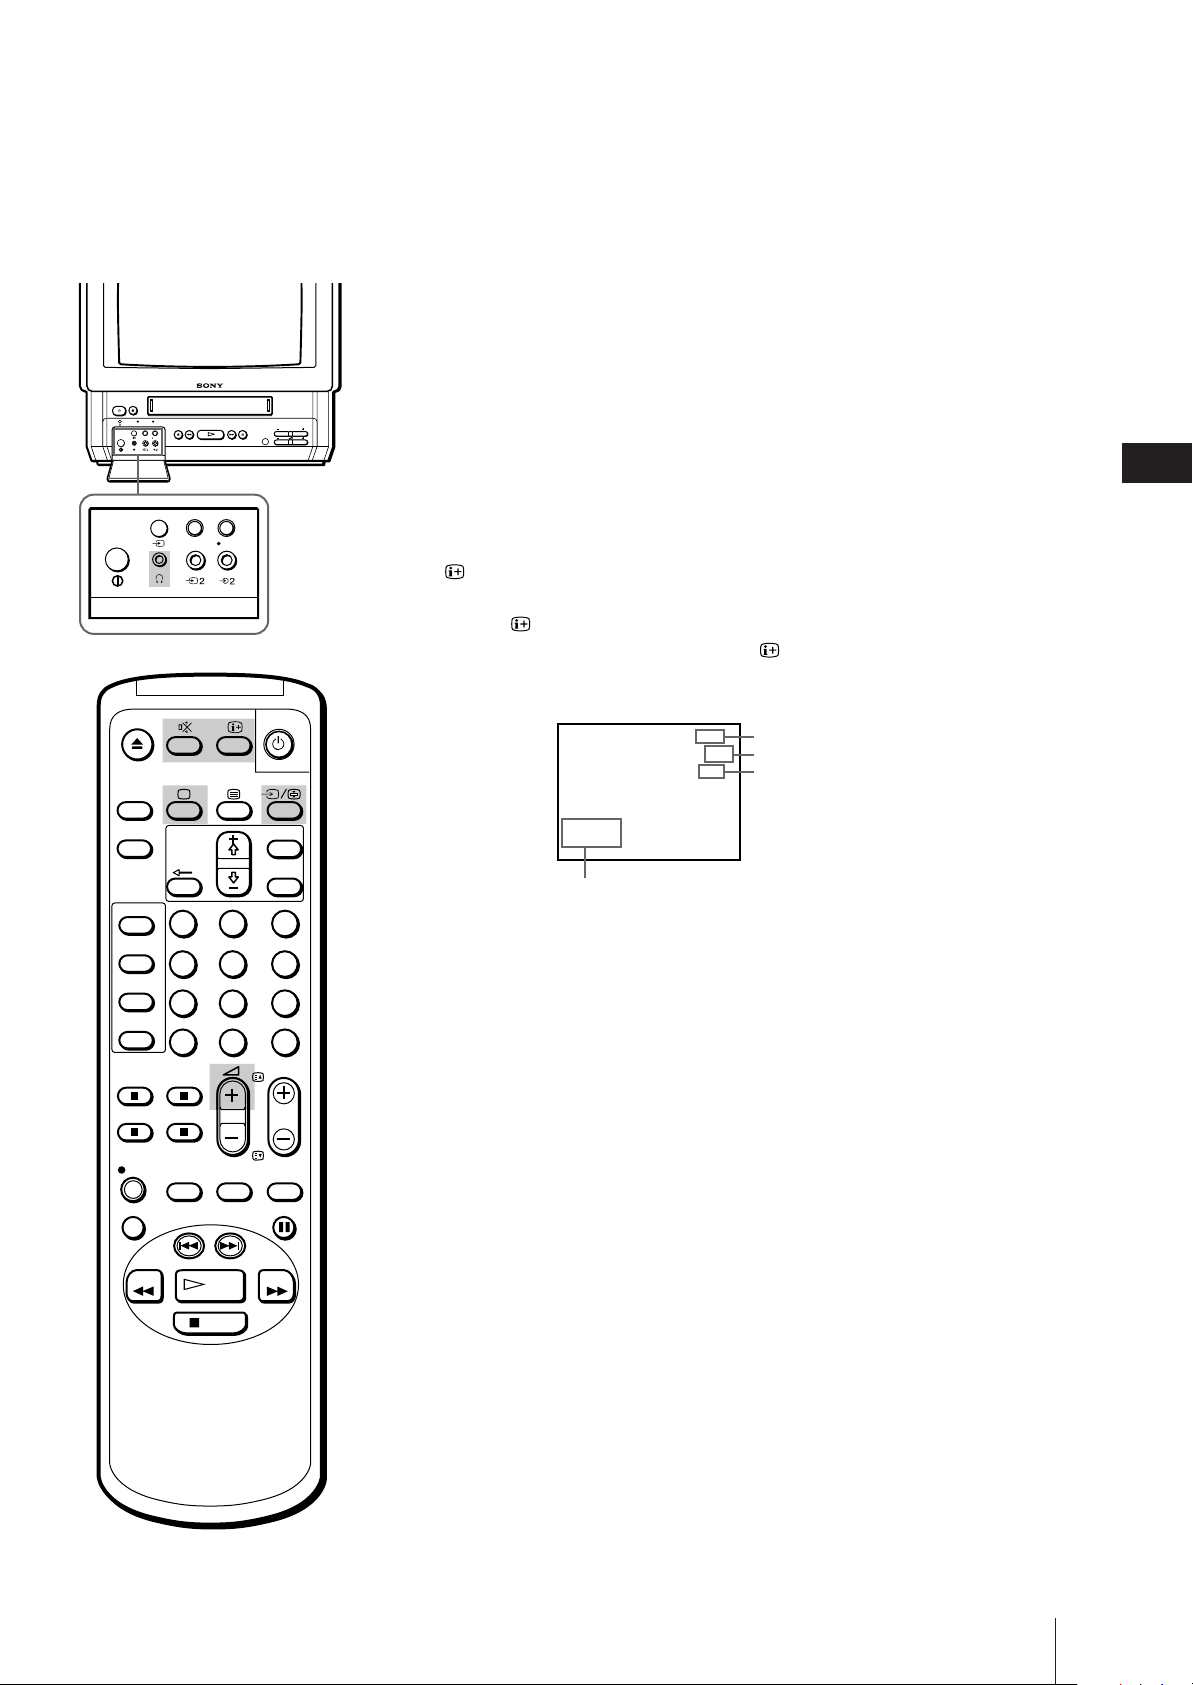
Displaying the on-screen
ON
TIMER
SLEEP
SHOW VIEW
TIMER
ON SCREEN
TIMER REC
ON/OFF
TIMER REC
CLEAR
TIMER REC
1
4
7
-/--
REC
ON/OFF
information
Press to display the following on-screen information.
To have the programme number, channel number and caption stay on the
screen, press again.
To make the indications disappear, press until no indications are
displayed on the screen.
ABC
MENU
OK
2
3
5
6
9
8
C
0
PROGR
Watching line input
Press … repeatedly until the desired input indicator appears.
To return to the normal TV picture, press … until the programme position
appears, or press ; on the remote control once. For details of the video
4.12THU
20:00
Current date and time
Caption
Programme position
12
Channel number
C02
input picture, see page 42.
REC
REPLAY
REW
QUICK
TIMER
INDEX SEARCH
PLAY
STOP
TAPE
SPEED
COUNTER
RESET
PAUSE
FF
Listening with headphones
Plug the headphones (not supplied) into the 2 (headphones) jack which is
located behind the cover on the front of the video TV.
The sound from the speaker is turned off.
Basic Operations
19
Page 20
Viewing Teletext
TV stations broadcast an information service called Teletext via the TV
channels. The Teletext service allows you to receive various information,
such as weather forecasts or news, at any time.
ON
TIMER
SLEEP
MENU
OK
Switching Teletext on and off
1 Select the TV channel which carries the Teletext service you want to watch.
SHOW VIEW
TIMER
ON SCREEN
TIMER REC
ON/OFF
TIMER REC
CLEAR
REC
REPLAY
REW
1
4
7
-/--
QUICK
TIMER
INDEX SEARCH
PLAY
STOP
2
5
8
0
TAPE
SPEED
3
6
9
C
PROGR
COUNTER
RESET
PAUSE
FF
2 Press V to display Teletext.
A Teletext page (normally the index page) is displayed. If there is no
Teletext broadcast, the indication P100 is displayed on a black screen.
3 Press the number buttons to enter the three digits of the Teletext number
you want.
The numbers are displayed on the screen and the requested page appears
in a few seconds.
If you have made a mistake, type in any three digits, then re-enter the
correct page number.
4 Press ; to return to the TV mode.
Using Fasttext
This feature allows you to access a Teletext page by pressing only one
button. When a Fasttext page is broadcast, a colour-coded menu appears
at the bottom of the screen. The colours of the menu correspond to the
red, green, yellow and blue buttons on the remote control. These coloured
buttons function as the Fasttext buttons in Teletext mode.
Press the coloured button which corresponds to the colour-coded menu.
The page is displayed after a few seconds.
To change the Teletext channel
• First press ; to return to the TV
mode, then repeat steps 1 through
3.
• If the signal of a TV channel is
weak, Teletext errors may occur.
Basic Operations
20
Page 21

ON
TIMER
SLEEP
SHOW VIEW
TIMER
ON SCREEN
TIMER REC
ON/OFF
TIMER REC
CLEAR
REC
REPLAY
REW
1
4
7
-/--
QUICK
TIMER
INDEX SEARCH
SPEED
PLAY
2
5
8
0
TAPE
MENU
OK
3
6
9
C
PROGR
COUNTER
RESET
PAUSE
FF
Accessing the next or preceding page
Press PROGR +/–/√/◊.
The next or preceding page appears on the screen.
Superimposing a Teletext page on the TV
picture
Each time you press V, the screen changes as follows:
n Teletext n Teletext and TV
Preventing a Teletext page from being
updated or changed
A Teletext page may consist of several subpages. You can stop the page
scrolling in order to read the text at your own pace.
Press (HOLD).
The symbol appears on the screen and the selected subpage is held.
Press again to return to normal Teletext operation.
GB
STOP
Basic Operations
21
Page 22
Playing a Tape
This section shows you how to insert a video cassette and to play it. More
convenient functions you can use while playing a tape are described in
“Additional Operations” on page 36.
Inserting a video cassette
EJECT
TIMER REC
OPEN
CL
ON
TIMER
SLEEP
SHOW VIEW
TIMER
ON SCREEN
TIMER REC
ON/OFF
TIMER REC
CLEAR
1 Press ;, PROGR +/– or number buttons on the remote control, or PROGR
REC
PLAYREW3STOP #FF PAUSE
TIMER REC
REC
ON/OFF
PROOR
+/– on the video TV when the u lamp is lit in red (indicating that the
video TV is in standby mode).
2 Gently insert a cassette with the arrow indication facing upwards. The
cassette is automatically loaded into the cassette compartment.
The Ò indicator appears on the screen and stays until the cassette has
been loaded.
The video TV turns on automatically when it is in standby mode. If you
insert a cassette with its safety tab removed, playback starts.
MENU
Ejecting a video cassette
OK
Press EJECT 6 on the video TV or 6 on the remote control.
1
4
7
-/--
2
3
5
6
9
8
C
0
PROGR
The Ò indicator appears and stays until the cassette is ejected.
You can eject the cassette even if the power is in standby.
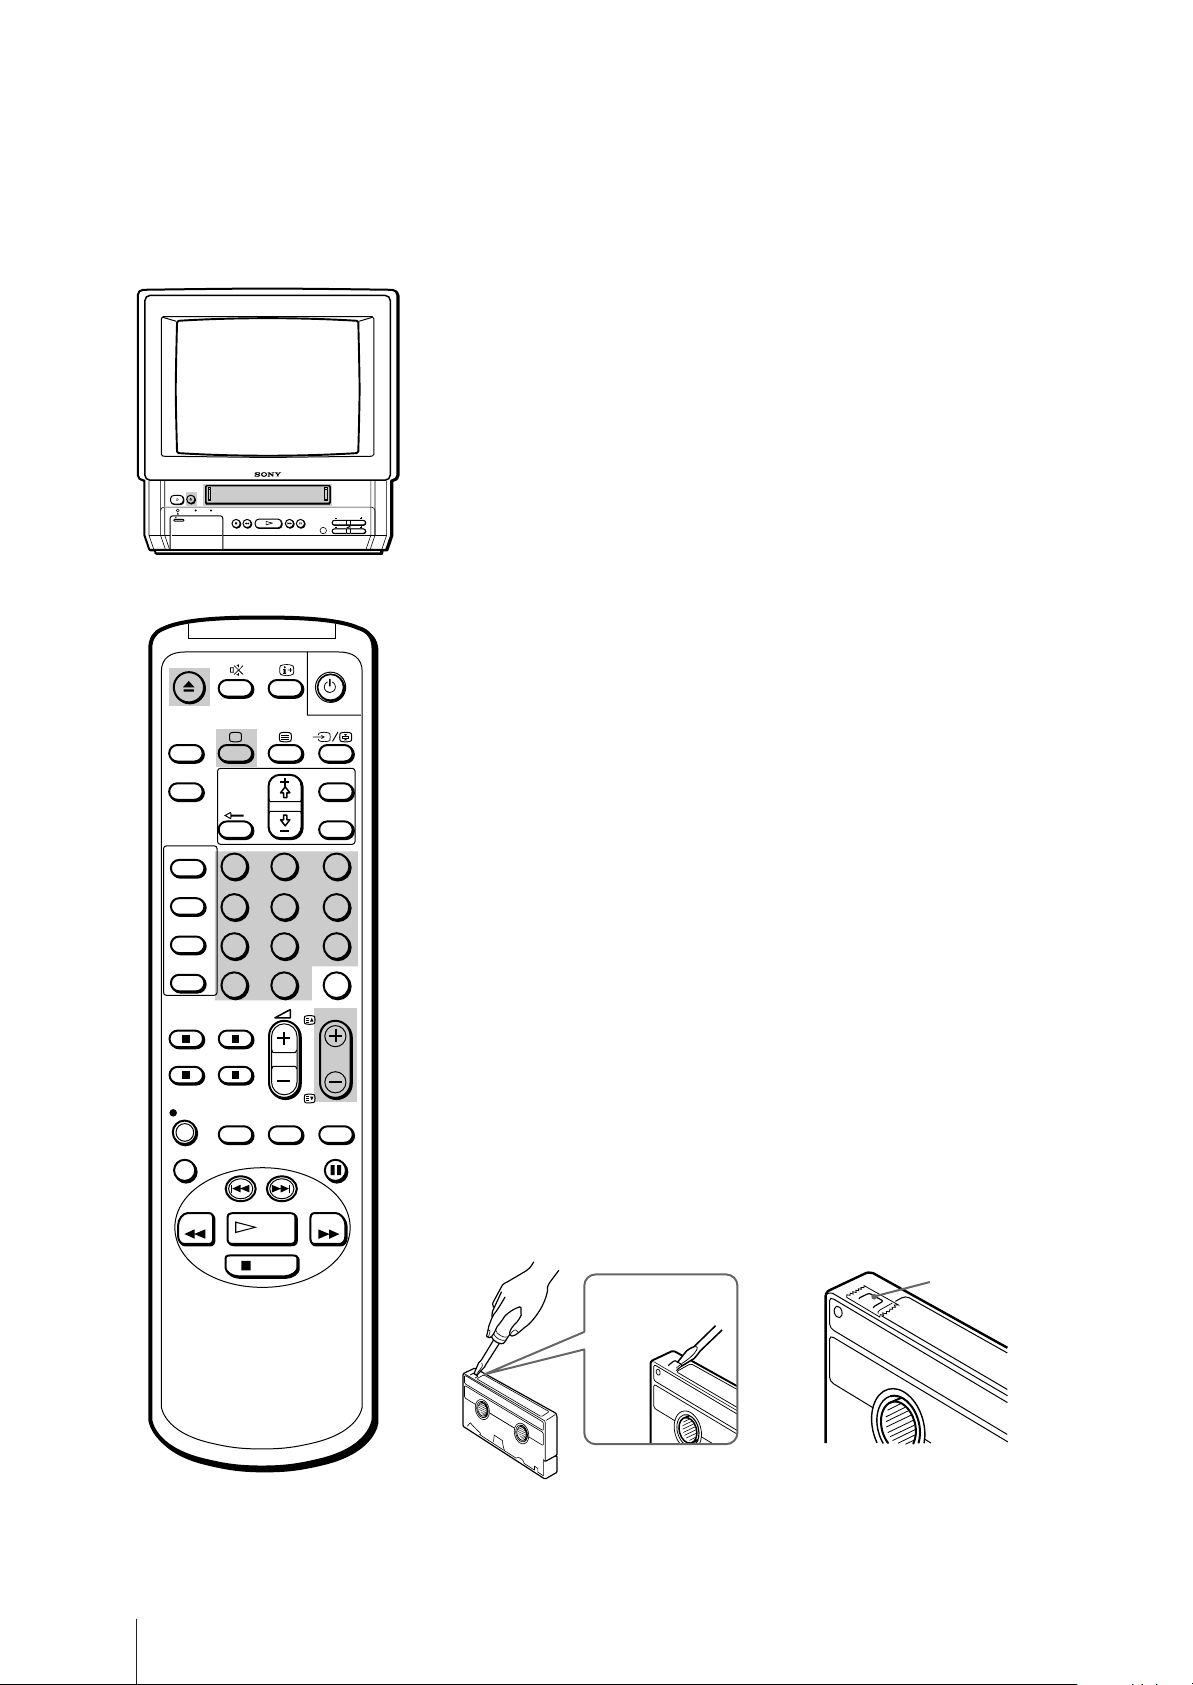
Protecting your cassette against
accidental erasure
REC
REPLAY
REW
Basic Operations
22
QUICK
TIMER
INDEX SEARCH
PLAY
STOP
TAPE
SPEED
COUNTER
RESET
PAUSE
FF
The cassette is provided with a safety tab to protect against accidentally
erasing a previous recording. Break off the safety tab with a screw driver
or a similar tool to prevent recording.
If the safety tab is removed, the cassette is ejected when you try to record
on it.
To record on a cassette with the safety tab broken off, simply cover the tab
hole with adhesive tape.
Adhesive tape
Safety tab
Page 23

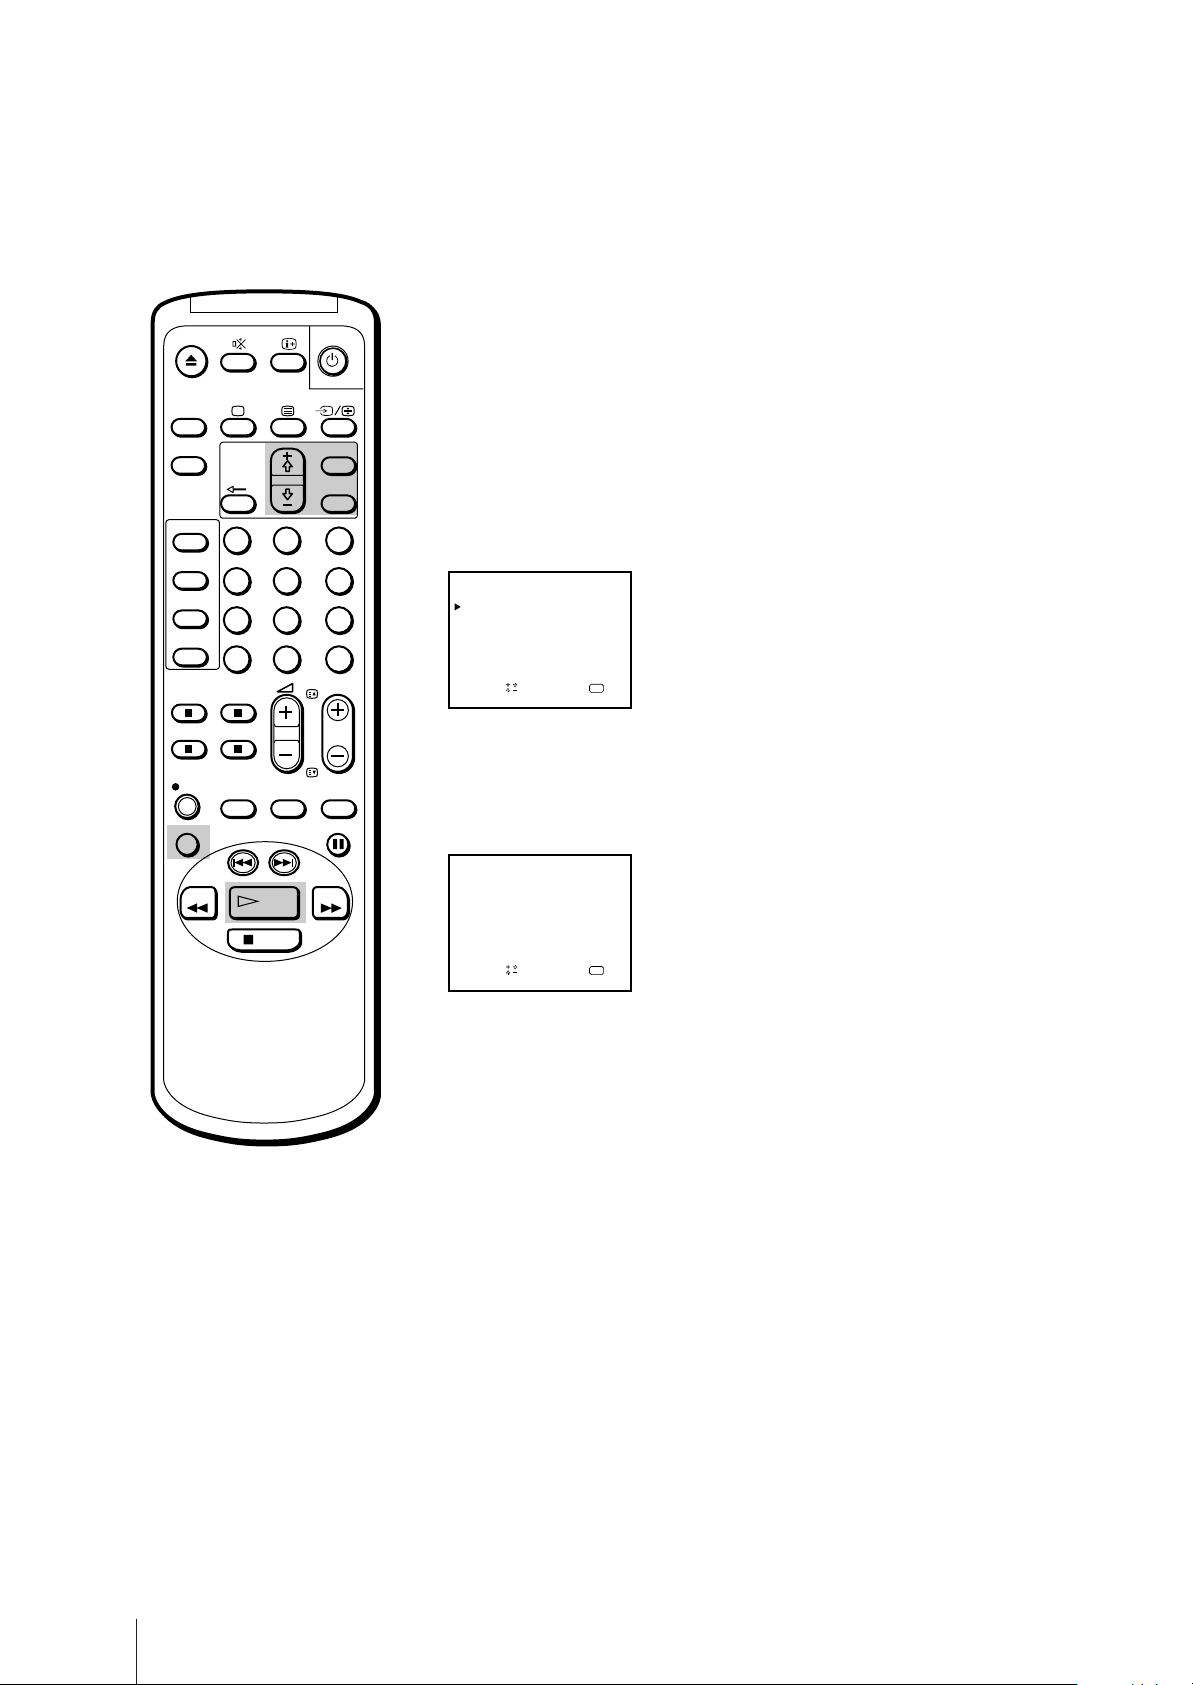
Playing a tape
1 If the u lamp on the video TV is lit in red (indicating that the video TV is in
standby mode), press ;, PROGR +/– or a number button on the remote
control.
EJECT
TIMER REC
OPEN
CL
ON
TIMER
SLEEP
SHOW VIEW
TIMER
ON SCREEN
TIMER REC
ON/OFF
TIMER REC
CLEAR
2 Insert the tape.
If you insert a tape with the safety tab removed, playback begins
REC
PLAYREW3STOP #FF PAUSE
TIMER REC
REC
ON/OFF
PROOR
immediately.
GB
3 Press PLAY ·.
Playback begins. On-screen information will automatically disappear after
several seconds.
To stop playback
Press STOP p.
The video TV returns to the normal TV picture.
To stop playback for a moment
Press PAUSE P. The picture pauses.
Press PAUSE P again or press PLAY · to resume playback.
If you leave your video TV in pause mode, normal playback resumes after
about 5 minutes.
To fast forward the tape
Press STOP p, then press FF ).
To rewind the tape
Press STOP p, then press REW 0.
1
4
7
-/--
MENU
OK
2
3
5
6
9
8
C
0
PROGR
REC
REPLAY
REW
QUICK
TIMER
INDEX SEARCH
PLAY
STOP
TAPE
SPEED
COUNTER
RESET
PAUSE
FF
To search a tape at high speed
During playback, press and hold REW 0 (rewind) or FF ) (fast
forward). A high-speed picture appears on the TV screen.
To resume normal playback, release the button.
To view the picture in fast forward or rewind mode
Press and hold FF ) during fast forward or REW 0 during rewind.
While you hold the button, you can view the picture.
When you release the button, fast forward or rewind mode is resumed.
Resetting the tape counter
The tape counter helps you to locate a certain scene after playback. Press
COUNTER RESET on the remote control to set the counter to “0:00:00”
before playing the tape. The tape counter is automatically reset to
“0:00:00” whenever a cassette is inserted. The video TV keeps counting
the length of the tape being played. Note, however, that the tape counter
does not count the portions without video signals recorded.
Basic Operations
23
Page 24
Playing a tape repeatedly (AUTO
REPEAT)
ON
TIMER
SLEEP
SHOW VIEW
TIMER
ON SCREEN
TIMER REC
ON/OFF
TIMER REC
CLEAR
REC
REPLAY
REW
1
4
7
-/--
QUICK
TIMER
INDEX SEARCH
PLAY
STOP
2
5
8
0
TAPE
SPEED
MENU
OK
3
6
9
C
PROGR
COUNTER
RESET
PAUSE
FF
You can play the recorded portion of a tape repeatedly.
1 Press MENU.
The main menu appears.
2 Using the + ◊ or – √ buttons, move the cursor (z) to “VCR MODE,” then
press OK.
VCR MODE
TRACKI NG CONTROL
OPC : ON
AUTO REPEAT : OFF
FORMAT : NORMAL
COL SYS : AUTO
Sape l ec t nd r es s
OK
3 Using the + ◊ or – √ buttons, move the cursor (z) to “AUTO REPEAT,”
then press OK.
4 Using the + ◊ or – √ buttons, select ON.
VCR MODE
TRACKI NG CONTROL
OPC : ON
AUTO REPEAT : ON
FORMAT : NORMAL
COL SYS : AUTO
Sapelect nd ress
OK
5 Press PLAY ·.
Playback begins. When the tape reaches its end, it will automatically
rewind and begin playing again.
Replaying a scene automatically
You can use the REPLAY key on your remote control to automatically
replay scenes.
Press REPLAY.
The tape will rewind for ten seconds of viewing time and then begin
playing automatically.
If you wish to replay more than ten seconds, press REPLAY repeatedly.
Each time you press the button, it will add ten seconds onto the playing
time, up to a total of 40 seconds.
Basic Operations
24
Page 25
ON
TIMER
Setting the colour system
Normally, you will want to leave the colour system on AUTO. However, if
you notice streaks appearing on the screen during playback, you may
want to set the colour system to the system that the tape was recorded in.
SLEEP
SHOW VIEW
TIMER
ON SCREEN
TIMER REC
ON/OFF
TIMER REC
CLEAR
REC
REPLAY
REW
1
4
7
-/--
QUICK
TIMER
INDEX SEARCH
STOP
SPEED
PLAY
2
5
8
0
TAPE
MENU
OK
3
6
9
C
PROGR
COUNTER
RESET
PAUSE
FF
1 Press MENU.
The main menu appears.
2 Using the + ◊ or – √ buttons, move the cursor (z) to “VCR MODE,” then
press OK.
VCR MODE
TRACKI NG CONTROL
OPC : ON
AUTO REPEAT : OFF
FORMAT : NORMAL
COL SYS : AUTO
Sape l ec t nd r es s
OK
3 Using the + ◊ or – √ buttons, move the cursor (z) to “COL SYS,” then
press OK.
4 Press the + ◊ or – √ buttons until the corresponding colour system appears
(PAL or NTSC), then press OK.
VCR MODE
TRACKI NG CONTROL
OPC : ON
AUTO REPEAT : OFF
FORMAT : NORMAL
COL SYS : P AL
Sape l ec t nd r es s
OK
GB
Note
The tape operation mode will be
displayed whenever you change the
mode (even when the is turned
off.)
5 Press MENU to return to the original screen.
Displaying the on-screen
indications
Press to display the following on-screen information. To show only the
amount of tape remaining and linear tape counter on the screen, press
again.
To make the indications disappear, press until no indications appear.
Amount of tape remaining
Beginning of the tape
4.12THU
20:00
Current date and time
S
2:05:10
Linear tape counter
End of the tape
ES
Tape operation mode
E
Basic Operations
25
Page 26

ON
TIMER
Viewing programmes in 16:9 mode
When viewing recordings of programmes which were originally broadcast
in 16:9 mode, you will want to set your video TV to 16:9 mode to prevent a
distorted picture.
SLEEP
SHOW VIEW
TIMER
ON SCREEN
TIMER REC
ON/OFF
TIMER REC
CLEAR
REC
REPLAY
REW
1
4
7
-/--
QUICK
TIMER
INDEX SEARCH
PLAY
STOP
2
5
8
0
TAPE
SPEED
MENU
OK
3
6
9
C
PROGR
COUNTER
RESET
PAUSE
FF
1 Press MENU.
The main menu appears.
2 Using the + ◊ or – √ buttons, move the cursor (z) to “VCR MODE,” then
press OK.
VCR MODE
TRACKI NG CONTROL
OPC : ON
AUTO REPEAT : OFF
FORMAT : NORMAL
COL SYS : AUTO
Sapelect nd ress
OK
3 Using the + ◊ or – √ buttons, move the cursor (z) to “FORMAT,” then
press OK.
4 Press the + ◊ or – √ buttons, select 16:9, then press OK.
VCR MODE
TRACKI NG CONTROL
OPC : ON
AUTO REPEAT : OFF
FORMAT : 16:9
COL SYS : AUTO
Sapelect nd ress
OK
Note
When you change channels, switch
between input sources, or turn the
power on and off, the video TV will
switch back to normal mode.
5 Press MENU to return to the original screen.
Basic Operations
26
Page 27
Recording TV Pr ogrammes
Recording TV programmes
1 Press ;, PROGR +/– or number buttons on the remote control, or PROGR
EJECT
TIMER REC
REC
STOP PAUSE
OPEN
TIMER REC
CL
ON/OFF
PLAYREW3#FF
REC
PROOR
+/– on the video TV when the u lamp is lit in red (indicating that the
video TV is in standby mode).
2 Insert a cassette with a safety tab.
ON
TIMER
SLEEP
SHOW VIEW
TIMER
ON SCREEN
TIMER REC
ON/OFF
TIMER REC
CLEAR
REC
REPLAY
TIMER REC
ON/OFF
1
4
7
-/--
QUICK
TIMER
INDEX SEARCH
REC
2
5
8
0
TAPE
SPEED
MENU
OK
3
6
9
C
PROGR
COUNTER
RESET
PAUSE
3 Press TAPE SPEED to select the recording speed, SP (Standard Play), or LP
(Long Play). Recording in LP mode will extend the length of your tape.
Maximum recording time
SP mode: 4 hours with E-240
LP mode: 8 hours with E-240
4 Select the programme position with PROGR +/–. You can also use
number buttons on the remote control. For double-digit numbers (e.g. 14),
first press ÷, then press 1 and 4.
5 Press REC r.
The REC lamp on the front of the video TV lights up and recording begins.
To stop recording
Press STOP p.
When the tape reaches the end, the video TV rewinds the tape
automatically to the beginning, then stops. This function does not work
when the power of the video TV is off.
To pause recording
Press PAUSE P.
To resume recording, press PAUSE P again.
You can cut out an unwanted scene during recording with this button.
1 Press PAUSE P when an unwanted scene appears on the screen.
Recording pauses.
2 Press PAUSE P again to release the pause mode at the desired scene.
Recording resumes from the point set in step 1.
When the recording pause mode lasts for about 5 minutes, the video TV
stops recording.
GB
REW
Note (KV-14V6D, KV-21V6D
only)
In order to record a Pay-TV
programme, you must set the
desired Pay-TV channel as
explained in “Setting a Pay-TV
channel” (page 13).
PLAY
STOP
FF
Recording with the TV off
Press u.
The TV screen is turned off and the u lamp lights up.
The video TV continues recording.
Watching a TV programme while
recording another (KV-14V6D, KV-
21V6D only)
You can watch a TV programme and record another at the same time if
your video TV has two tuners. Only models KV-14V6D and KV-21V6D are
equipped with two tuners.
Select the desired programme position with PROGR +/– or the number
buttons on the remote control or PROGR +/– on the video TV.
Basic Operations
27
Page 28

Recording TV Pr ogrammes Using
the Timer
The Timer Recording function allows you to preset your video TV to
record up to six programmes within a one-month period.
Before you begin
ON
TIMER
SLEEP
SHOW VIEW
TIMER
ON SCREEN
TIMER REC
ON/OFF
TIMER REC
CLEAR
1
4
7
-/--
MENU
OK
2
3
5
6
9
8
C
0
PROGR
• Press ;, PROGR +/– or number buttons on the remote control, or
PROGR +/– on the video TV to switch on the video TV.
• Make sure that the time and date clock are set. If not, the message
“Please set the time” is displayed on the screen. Refer to “Setting the
clock” on page 16.
• Make sure that the loaded cassette has its safety tab. If a cassette
without safety tab is loaded, the message “Tape with safety tab is
required for recording” is displayed.
• If you are using an indoor aerial, adjust the reception for the channel you
want to record.
Setting the timer
QUICK
TAPE
REC
REPLAY
REW
TIMER
INDEX SEARCH
STOP
SPEED
PLAY
COUNTER
RESET
PAUSE
FF
If you have made a mistake
during timer setting
Press ? to return to the previous
position and correct the setting.
If you try to enter the
recording start time prior to
the current time
All the items of the setting will be
erased.
Example: Here is how to record a programme broadcast on programme
position 26 from 20:15 to 21:55 on Saturday, 6th December 1997, in SP
mode.
1 Press TIMER ON SCREEN.
The PROGRAMME LIST appears.
PROGRAMME LIST
VPS/PDC : OFF
DATE
START STOP
––
–––
––
––
––
––
Sapelect nd ress
––::––––––––::–––
––:––––:––
––:––––:––
––:––––:––
––:––––:––
20 :00
THU12.4
PRG
–––
–––
––
––
––
––
OK
–
–
–
–
–
–
2 Press OK.
Today’s date coloured red appears.
3 Press + ◊ until “6 SAT” appears.
For daily and weekly recording see “Daily/weekly recording” on page 30.
PROGRAMME LIST
VPS/PDC : OFF
DATE
START STOP
6
SAT
–––
––
––
––
––
Sape l ec t nd r es s
––::––––––––::–––
––:––––:––
––:––––:––
––:––––:––
––:––––:––
20 :00
THU12.4
PRG
–––
–––
––
––
––
––
OK
–
–
–
–
–
–
4 Press OK, then set the hour of the recording start time to “20” with + ◊ or
– √.
PROGRAMME LIST
VPS/PDC : OFF
DATE
START STOP
6
SAT
–––
––
––
––
––
Sape l ec t nd r es s
––::––––––––::0–2
––:––––:––
––:––––:––
––:––––:––
––:––––:––
20 :00
THU12.4
PRG
–––
–––
––
––
––
––
OK
–
–
–
–
–
–
Basic Operations
28
Page 29
ON
TIMER
SLEEP
SHOW VIEW
TIMER
ON SCREEN
TIMER REC
ON/OFF
TIMER REC
CLEAR
REC
REPLAY
REW
1
4
7
-/--
QUICK
TIMER
INDEX SEARCH
PLAY
STOP
2
5
8
0
TAPE
SPEED
MENU
OK
3
6
9
C
PROGR
COUNTER
RESET
PAUSE
FF
5 Press OK, then set the minute of the recording start time to “15” with + ◊
or – √.
PROGRAMME LIST
VPS/PDC : OFF
DATE
START STOP
6
SAT
–––
––
––
––
––
Sape l ec t nd r es s
––::––––5–1–::0–2
––:––––:––
––:––––:––
––:––––:––
––:––––:––
20 :00
THU12.4
PRG
–––
–––
––
––
––
––
OK
–
–
–
–
–
–
6 Press OK, then set the hour of the recording stop time to “21” with + ◊ or
– √.
PROGRAMME LIST
VPS/PDC : OFF
DATE
START STOP
6
SAT
–––
––
––
––
––
Sapelect nd ress
20 :00
––::1–2–5–1–::0–2
––:––––:––
––:––––:––
––:––––:––
––:––––:––
PRG
OK
THU12.4
–––
–
–––
–
––
–
––
–
––
–
––
–
7 Press OK, then set the minute of the recording stop time to “55” with + ◊
or – √.
PROGRAMME LIST
VPS/PDC : OFF
DATE
START STOP
6
SAT
–––
––
––
––
––
Sapelect nd ress
5–::1–2–5–1–::0–2
––:––––:––
––:––––:––
––:––––:––
––:––––:––
20 :00
THU12.4
PRG
––5
–––
––
––
––
––
OK
–
–
–
–
–
–
8 Press OK, then set the programme position to “26” with + ◊ or – √.
PROGRAMME LIST
VPS/PDC : OFF
DATE
START STOP
6
SAT
–––
––
––
––
––
Sape l ec t nd r es s
5–::1–2–5–1–::0–2
––:––––:––
––:––––:––
––:––––:––
––:––––:––
20 :00
THU12.4
PRG
265
–––
––
––
––
––
OK
–
–
–
–
–
–
GB
If you try to do an incorrect
operation
The video TV displays a message on
the screen to interrupt your setting.
If you turn the U switch off
The TIMER REC buttons do not
function.
9 Press OK, then set the recording speed to SP, using the + ◊ or – √ buttons.
PROGRAMME LIST
VPS/PDC : OFF
DATE
START STOP
6
SAT
–––
––
––
––
––
Sapelect nd ress
5–::1–2–5–1–::0–2
––:––––:––
––:––––:––
––:––––:––
––:––––:––
20 :00
THU12.4
PRG
265
–––
––
––
––
––
OK
SP
–
–
–
–
–
10 Press OK.
The cursor (z) appears at the left margin.
11 When you want to set other programmes, press – √ to move the cursor to
the next line, then repeat steps 2 through 10.
12 Press TIMER REC ON/OFF.
The TIMER REC lamp on the front of the video TV lights up and the video
TV enters timer recording standby mode.
Press TIMER ON SCREEN to erase the PROGRAMME LIST.
Press u to turn the video TV off if you do not want to watch the TV.
The video TV turns on automatically and starts recording at the preset
start time, and goes off at the preset stop time.
Basic Operations
29
Page 30

EJECT
TIMER REC
OPEN
TIMER REC
CL
ON/OFF
ON
TIMER
SLEEP
SHOW VIEW
TIMER
ON SCREEN
TIMER REC
ON/OFF
TIMER REC
CLEAR
Daily/weekly recording
You can preset your video TV to record the same programme every day of
the week (daily recording) or the same programme on the same day every
week (weekly recording). Press – √ in step 3 until the desired setting
REC
PLAYREW3STOP #FF PAUSE
REC
PROOR
appears in the “DATE” position. With each press, the setting changes as
follows:
4 (today) n MON–SUN n MON–SAT n MON–FRI n EVERY SAT n
EVERY FRI n EVERY THU n EVERY WED n EVERY TUE n EVERY
TIMER REC
REC
ON/OFF
MON n EVERY SUN n 3 (next month) n 2......
To stop timer recording
Press TIMER REC ON/OFF.
The TIMER REC lamp turns off.
Using the video TV before timer
recording starts
1
4
7
-/--
MENU
OK
2
3
5
6
9
8
C
0
PROGR
You can watch a TV programme, check the timer settings and reset the
counter in timer recording standby mode. However, press TIMER REC
ON/OFF to turn off the TIMER REC lamp on the front of the video TV to
do the following operations:
•eject the cassette
•use the tape operation buttons
•change or cancel the timer settings
Remember to press TIMER REC ON/OFF again to make the TIMER REC
lamp light after the above operations.
REPLAY
Basic Operations
30
REC
REW
QUICK
TIMER
INDEX SEARCH
PLAY
STOP
TAPE
SPEED
COUNTER
RESET
PAUSE
FF
Page 31

Checking the timer settings
You can display the list of the timer settings which you preset.
ON
TIMER
SLEEP
SHOW VIEW
TIMER
ON SCREEN
TIMER REC
ON/OFF
TIMER REC
CLEAR
REC
REPLAY
REW
1
4
7
-/--
QUICK
TIMER
INDEX SEARCH
PLAY
STOP
2
5
8
0
TAPE
SPEED
MENU
OK
3
6
9
C
PROGR
COUNTER
RESET
PAUSE
FF
Press TIMER ON SCREEN.
The PROGRAMME LIST appears.
PROGRAMME LIST
VPS
/
PDC : OFF
DATE
START STOP
7
SUN
MON-SAT
EVERY SUN
––
––
Sapelect nd ress
20 :00
12
51::10215013::082SAT6
00:000:32
03:2155:9
––:––––:––
––:––––:––
PRG
OK
THU.4
265
SP
505
SP
1
SP
12
LP
––
–
––
–
Press TIMER ON SCREEN again to erase the PROGRAMME LIST.
Changing or cancelling the timer
settings
1 Press TIMER REC ON/OFF to turn off the TIMER REC lamp on the front
of the video TV.
2 Press TIMER ON SCREEN to display the PROGRAMME LIST.
3 Select the setting you want to change or cancel with + ◊ or – √.
PROGRAMME LIST
VPS/PDC : OFF
DATE
START STOP
7
SUN
MON-SAT
EVERY SUN
––
––
Sape l ec t nd r es s
20 :00
12
51::10215013::082SAT6
00:000:32
03:2155:9
––:––––:––
––:––––:––
OK
THU.4
PRG
265
SP
505
SP
1
SP
12
LP
––
–
––
–
GB
4 To change the setting
Using + ◊ or – √ and OK, re-enter all the items.
Refer to “Setting the timer” steps 2 through 10 on pages 28 and 29.
To cancel the setting
Press TIMER REC CLEAR.
5 Press TIMER ON SCREEN to return to the original screen.
6 If there are other timer settings on the list, press TIMER REC ON/OFF to
set the video TV to timer recording standby mode.
Basic Operations
31
Page 32

ON
TIMER
Recording using QUICK TIMER
You can preset your video TV to start timer recording immediately and to
automatically stop recording after a specific time period.
If you have not set the clock, QUICK TIMER recording cannot be used.
SLEEP
SHOW VIEW
TIMER
ON SCREEN
TIMER REC
ON/OFF
TIMER REC
CLEAR
REC
REPLAY
REW
1
4
7
-/--
QUICK
TIMER
INDEX SEARCH
PLAY
STOP
2
5
8
0
TAPE
SPEED
MENU
OK
3
6
9
C
PROGR
COUNTER
RESET
PAUSE
FF
If you are recording
1 Press QUICK TIMER on the remote control.
“QUICK TIMER 0:00” appears on the screen.
2 Press QUICK TIMER repeatedly to select the recording time period. With
each press, the time period changes as follows:
0:00 0:30 1:00 .... 7:30 8:00
Even if you switch off the video TV, it continues recording. After the
selected time period has elapsed, recording stops automatically.
If you are not recording
1 Press ;, PROGR +/– or number buttons on the remote control, or PROGR
+/– on the video TV to switch it on.
2 Insert a cassette with its safety tab.
3 Select the programme position which you want to record.
To change the recording time
period after QUICK TIMER
recording begins
Press QUICK TIMER until the
desired time period appears.
To display the remaining time
period during QUICK TIMER
recording
Press . The recording time
period decreases minute by minute.
To stop QUICK TIMER recording
Press TIMER REC ON/OFF.
Basic Operations
32
4 Press QUICK TIMER on the remote control.
“QUICK TIMER 0:00” appears on the screen.
5 Press QUICK TIMER repeatedly to select the recording time period. With
each press the time period changes as follows:
0:00 0:30 1:00 .... 7:30 8:00
The time period turns yellow and recording starts.
Even if you switch off the video TV, it continues recording.
When the preset time period has elapsed, the video TV stops recording.
Page 33

Timer recording with VPS/PDC
signals
ON
TIMER
SLEEP
SHOW VIEW
TIMER
ON SCREEN
TIMER REC
ON/OFF
TIMER REC
CLEAR
REC
REPLAY
REW
1
4
7
-/--
QUICK
TIMER
INDEX SEARCH
PLAY
STOP
2
5
8
0
TAPE
SPEED
MENU
OK
3
6
9
C
PROGR
COUNTER
RESET
PAUSE
FF
The German broadcasting system transmits VPS (Video Programme
System) signals or PDC (Programme Delivery Control) signals with the TV
programmes. These signals assure you that your timer recordings are
made regardless of broadcast delays, early starts, or broadcast
interruptions. For example, if an urgent news bulletin interrupts a regular
programme, recording stops. As soon as the interrupted programme
resumes, recording starts again.
1 If the TIMER REC lamp is lit on the front panel, press TIMER REC ON/
OFF to turn it off.
2 Press TIMER ON SCREEN.
The PROGRAMME LIST screen appears.
PROGRAMME LIST
VPS
/
PDC : OFF
DATE
START STOP
7
SUN
MON-SAT
EVERY SUN
––
––
Sapelect nd ress
20 :00
12
51::10215013::082SAT6
00:000:32
03:2155:9
––:––––:––
––:––––:––
PRG
OK
THU.4
265
SP
505
SP
1
SP
12
LP
––
–
––
–
3 Using the + ◊ or – √ buttons, select VPS/PDC, then press OK.
VPS/PDC will turn red.
GB
Notes on VPS/PDC recording
• If recording times overlap due to a
VPS/PDC time shift, the
programme that was broadcast first
has priority. Recording of the
second programme begins when
the first programme has finished.
• If the video TV could not receive a
VPS/PDC signal because it was too
weak or because the station failed
to transmit VPS/PDC signals, timer
recording is made without the
VPS/PDC function.
• (KV-14V5D, KV-21V5D only)
If you use VPS/PDC recording
while watching the TV, the
programme automatically changes
to the timer recording programme
and you cannot change
programmes. Make sure to use
VPS/PDC recording only when the
video TV is in standby mode. If
you watch the TV continuously,
cancel the VPS/PDC timer
recording.
PROGRAMME LIST
VPS
/
PDC : OFF
DATE
START STOP
7
SUN
MON-SAT
EVERY SUN
––
––
Sapelect nd ress
20 :00
12
51::10215013::082SAT6
00:000:32
03:2155:9
––:––––:––
––:––––:––
PRG
OK
THU.4
265
SP
505
SP
1
SP
12
LP
––
–
––
–
4 Using the + ◊ or – √ buttons, select ON, then press OK.
PROGRAMME LIST
VPS
/
PDC: ON
DATE
START STOP
7
SUN
MON-SAT
EVERY SUN
––
––
Sapelect nd ress
51::10215013::082SAT6
00:000:32
03:2155:9
––:––––:––
––:––––:––
20 :00
12
THU.4
PRG
265
505
12
––
––
OK
SP
SP
1
SP
LP
–
–
5 Set the timer following the steps in “Setting the timer” (pages 28 and 29).
Basic Operations
33
Page 34

Recording TV Pr ogrammes Using
ShowView
The ShowView function allows you to simplify the task of making timer
recordings. Using ShowView, you can make all the necessary settings by
just entering the desired programme’s 9-digit code, which is available in
your local programme guide. To take advantage of this function, you
ON
TIMER
SLEEP
SHOW VIEW
TIMER
ON SCREEN
TIMER REC
ON/OFF
TIMER REC
CLEAR
1
4
7
-/--
MENU
OK
2
3
5
6
9
8
C
0
PROGR
must first set up your video TV and assign programme positions to the
various guide channels. For details, see “Setting up ShowView manually”
on page 14.
Before you begin
• Press ;, PROGR +/– or a number button on the remote control, or
PROGR +/– on the video TV to switch on the video TV.
• Make sure that the time and date clock are set correctly. If not, refer to
“Setting the clock” on page 16.
• Make sure that the loaded cassette has its safety tab.
1 Press SHOWVIEW.
The SHOWVIEW menu appears.
QUICK
TAPE
PLAY
SPEED
COUNTER
RESET
PAUSE
FF
REC
REPLAY
REW
TIMER
INDEX SEARCH
STOP
If you have made a mistake
entering programme‘s
ShowView number
Press TIMER REC CLEAR and reenter the correct number.
SHOWVIEW
SHOWVIEW NO
[]
–
––––––––
Sapet nd ress
0–9
[]
SP
20 :00
12
OK
THU.4
2 Press the number buttons to enter the desired programme’s ShowView
number.
SHOWVIEW
SHOWVIEW NO
[]
8
2477691–
Sapet nd ress
0–9
[]
SP
20 :00
12
OK
THU.4
3 Press OK.
The recording information appears: date, start and stop times, programme
position number.
SHOWVIEW
SHOWVIEW NO
[]
8
2477691–
DATE START STOP
[]
SP
0:1200:026SPSAT
20 :00
12
THU.4
PRG
580
Basic Operations
34
Pr e s s
TIMER REC
[]
ON
/
OFF but ton
Check that the information is correct. If it is not, press TIMER REC
CLEAR to cancel the setting.
Page 35

ON
TIMER
4 Repeat steps 2 to 3 to preset another timer setting.
5 Press TIMER REC ON/OFF.
The TIMER REC lamp on the front of the video TV lights up and the video
TV enters timer recording standby mode.
SLEEP
SHOW VIEW
TIMER
ON SCREEN
TIMER REC
ON/OFF
TIMER REC
CLEAR
REC
REPLAY
REW
1
4
7
-/--
QUICK
TIMER
INDEX SEARCH
PLAY
STOP
2
5
8
0
TAPE
SPEED
MENU
OK
3
6
9
C
PROGR
COUNTER
RESET
PAUSE
FF
To stop recording
To stop the video TV while recording a programme, press STOP p.
GB
Basic Operations
35
Page 36

Additional Operations
Switching Off Automatically — Sleep
Timer
You can automatically switch the video TV into standby mode after a
selected time period.
Press SLEEP.
ON
TIMER
With each press, the time period (in minutes) changes as follows:
SLEEP
SHOW VIEW
TIMER
ON SCREEN
TIMER REC
ON/OFF
TIMER REC
CLEAR
REC
REPLAY
REW
1
4
7
-/--
QUICK
TIMER
INDEX SEARCH
PLAY
STOP
2
5
8
0
TAPE
SPEED
MENU
OK
3
6
9
C
PROGR
COUNTER
RESET
PAUSE
FF
OFF 30 60 90
One minute before the TV switches into standby mode, a message ‘‘Good
night’’ is displayed on the screen.
To cancel the timer
Press SLEEP to select “OFF”.
Additional Operations
36
Page 37

Switching On at Your Desired Time
— On Timer
You can preset your video TV to automatically switch on at a desired
time. You can choose either a TV programme or video playback to be
switched on.
ON
TIMER
SLEEP
SHOW VIEW
TIMER
ON SCREEN
TIMER REC
ON/OFF
TIMER REC
CLEAR
REC
REPLAY
REW
1
4
7
-/--
QUICK
TIMER
INDEX SEARCH
PLAY
STOP
2
5
8
0
TAPE
SPEED
MENU
OK
3
6
9
C
PROGR
COUNTER
RESET
PAUSE
FF
1 Press MENU to display the main menu.
2 Move the cursor (z) to “ON TIMER SET” with + ◊ or – √ and press OK.
The ON TIMER SET menu appears.
ON TIMER SET
TIME:
SOURCE:
ON TIMER: OFF
Sapelect nd ress
6:00
TV PROG 1
20 :00
THU12.4
OK
3 Press OK.
The timer setting hour section turns red.
4 Set the hour with + ◊ or – √ and press OK.
The minute section turns red.
5 Set the minutes (by one minute) with + ◊ or – √ and press OK.
The cursor appears beside “TIME.”
6 Move the cursor (z) to “SOURCE” with + ◊ or – √ and press OK.
7 Select TV or VCR (video playback) with + ◊ or – √ and press OK.
When you select TV, select the programme position with + ◊ or – √ and
press OK.
GB
To erase the message
Press any button on the video TV or
remote control.
ON TIMER SET
TIME:
SOURCE:
ON TIMER: OFF
Sapelect nd ress
7:30
TV PROG 1
20 :00
THU12.4
2
OK
8 Move the cursor (z) to “ON TIMER” with + ◊ or – √ and press OK, then
select ON with + ◊ or – √ and press OK.
9 Press MENU to return to the original screen.
10 Press ON TIMER.
If you are not using the video TV, press u to set the video TV in standby
mode.
At the preset time, the video TV automatically switches on.
If you do not press any button for 2 hours, the video TV automatically
shuts off.
Additional Operations
37
Page 38

Using FUNCTION LOCK
The FUNCTION LOCK feature prevents use of the buttons on the front of
the video TV. You may want to use this feature to prevent small children
from changing channels, viewing video tapes, etc.
ON
TIMER
SLEEP
SHOW VIEW
TIMER
ON SCREEN
TIMER REC
ON/OFF
TIMER REC
CLEAR
REC
REPLAY
REW
1
4
7
-/--
QUICK
TIMER
INDEX SEARCH
PLAY
STOP
2
5
8
0
TAPE
SPEED
MENU
OK
3
6
9
C
PROGR
COUNTER
RESET
PAUSE
FF
1 Press MENU.
The main menu appears.
2 Using the + ◊ or – √ buttons, move the cursor (z) to “FUNCTION LOCK,”
then press OK.
The FUNCTION LOCK menu appears.
FUNCT ION LOCK
FUNCT ION LOCK:
OK
p ress
OFF
3 Press OK to start setting the FUNCTION LOCK.
The ON/OFF section turns red.
Using + ◊ or – √ buttons, select OFF or ON, then press OK.
OFF: Factory setting.
ON: The buttons on the video TV will no longer function (except the
POWER button).
FUNCT ION LOCK
FUNCT ION LOCK:
ON
Sape l ec t nd r es s
OK
The remote control will still operate even if the FUNCTION LOCK is
activated.
Additional Operations
38
Page 39

Searching Using the INDEX
Function
The video TV marks the tape with an index signal at the point where each
recording begins. These signals can be used to find a specific recording.
Your video TV is capable of searching 99 signals forward or backward on a
tape.
ON
TIMER
SLEEP
SHOW VIEW
TIMER
ON SCREEN
TIMER REC
ON/OFF
TIMER REC
CLEAR
REC
REPLAY
1
4
7
-/--
QUICK
TIMER
INDEX SEARCH
2
5
8
0
TAPE
SPEED
MENU
OK
3
6
9
C
PROGR
COUNTER
RESET
PAUSE
1 Insert the tape.
2 Press INDEX SEARCH =/+ repeatedly to specify how many index
signals ahead or behind you want to search.
INDEX 5
SEARCH
The video begins searching, and the index number will appear on the
screen, counting down to zero. When zero is reached, playback begins
automatically.
To stop searching
Press STOP p.
GB
REW
PLAY
STOP
FF
Additional Operations
39
Page 40

Enhancing Video Pictur e Quality
Adjusting the tracking
ON
TIMER
SLEEP
SHOW VIEW
TIMER
ON SCREEN
TIMER REC
ON/OFF
TIMER REC
CLEAR
REC
REPLAY
REW
1
4
7
-/--
QUICK
TIMER
INDEX SEARCH
PLAY
STOP
2
5
8
0
TAPE
SPEED
MENU
OK
3
6
9
C
PROGR
COUNTER
RESET
PAUSE
FF
Adjusting the tracking automatically
The tracking condition is automatically adjusted on this video TV. The
AUTO TRACKING indicator will appear while the video TV is searching
for the best tracking condition.
Adjusting the tracking manually
If streaks or snow noise appear on the video playback picture, adjust the
tracking condition manually.
1 Press MENU to display the main menu.
2 Move the cursor (z) to “TRACKING CONTROL” with + ◊ or – √ and
press OK.
The TRACKING CONTROL menu appears.
TRACKING CONTROL
AUTO
MANUAL
Sape l ec t nd r es s
OK
To return to automatic
tracking
Select AUTO in the TRACKING
CONTROL menu with + ◊ or – √
and press OK.
3 Select MANUAL with + ◊ or – √ and press OK.
The tracking meter appears.
TRACKING CONTROL
AUTO
MANUAL
NORMAL TRACKING
Sape l ec t nd r es s
OK
4 Using + ◊ or – √, adjust the tracking to get the best picture.
5 Press OK.
The main menu reappears.
6 Press MENU to return to the original screen.
Additional Operations
40
Page 41

Adjusting with the optimum
picture control (OPC)
ON
TIMER
SLEEP
SHOW VIEW
TIMER
ON SCREEN
TIMER REC
ON/OFF
TIMER REC
CLEAR
REC
REPLAY
REW
1
4
7
-/--
QUICK
TIMER
INDEX SEARCH
PLAY
STOP
2
5
8
0
TAPE
SPEED
MENU
OK
3
6
9
C
PROGR
COUNTER
RESET
PAUSE
FF
This function allows you to improve playback and recording quality by
adjusting the system parameter automatically according to the condition
of the video tape.
This function is set to ON at the factory. To maintain better picture
quality, leave the function on. The OPC function works on all types of
tapes, even on rental tapes.
To change the setting, use the menu display.
1 Press MENU to display the main menu.
2 Move the cursor (z) to “VCR MODE” with + ◊ or – √ and press OK.
The VCR MODE menu appears.
VCR MODE
TRACKI NG CONTROL
OPC : ON
AUTO REPEAT : OFF
FORMAT : NORMAL
COL SYS : AUTO
Sape l ec t nd r es s
OK
3 Move the cursor (z) to “OPC” with + ◊ or – √ and press OK.
4 Select ON or OFF with + ◊ or – √ and press OK.
VCR MODE
TRACKI NG CONTROL
OPC : OFF
AUTO REPEAT : OFF
FORMAT : NORMAL
COL SYS : AUTO
GB
Sapelect nd ress
OK
5 Press MENU to erase the main menu.
About the Auto Head Cleaner
The Auto Head Cleaner built into this set automatically cleans the video
heads when a cassette is loaded or unloaded. If the effect of head cleaning
is not sufficient even after a cassette has been loaded/unloaded several
times, clean the heads using the Sony V-25CL video head cleaning cassette.
For details on head cleaning see page 46.
Additional Operations
41
Page 42

Connecting Optional Equipment
Watching the picture input from
optional equipment
Note
When connecting optional
equipment, such as videogames,
please use the connecting cables
recommended by the equipment's
manufacturer.
Rear
TIMER REC
ON/OFF
VMC-212CE EURO cable (not supplied)
to video/audio outputs
behind the cover on the
front
REC
to 21-pin
EURO-AV
connector
To watch the video input signal
Press … repeatedly until the desired input indicator appears on the
screen.
• … 1 for audio/video input or RGB input through the : 1/W 1
connector
•„ for audio/RGB input through the : 1/W 1 connector
•… 2 for audio/video input through the … 2/≤ 2 jacks located behind
the cover on the front of the video TV
Additional Operations
42
Page 43

Editing with another VCR
Using an additional VCR, you can edit a tape.
Editing from another VCR
Connections are the same as in “Watching the picture input from optional
equipment.”
Editing onto another VCR
Rear
to 21-pin
EURO-AV
connector
VMC-212CE EURO cable (not supplied)
Watching the pay-TV channel (KV14V6D, KV-21V6D only)
GB
You can connect the pay-TV decoder to the : 1/W 1 connector using
VMC-212CE EURO cable. Set the Pay-TV decoder following the steps in
“Setting a Pay-TV channel“ (page 13).
Rear
Pay-TV decoder
to 21-pin
EURO-AV
connector
VMC-212CE EURO cable (not supplied)
Additional Operations
43
Page 44

Additional Information
Troubleshooting
Function
TV reception
Clock and
timer
Playback
Problems
No picture (screen is
dark), no sound
Good picture but no
sound
No colour or poor
colour (screen is
dark) for colour
programmes, but
good sound.
No picture, no
sound from video
input source
The clock has
stopped and “--/--”
is displayed.
Power is on, but the
tape does not run.
Poor playback
picture
The sound drops
out.
Possible causes and remedies
• The mains lead is disconnected.
/Connect the mains lead.
• The video TV is switched off.
/Press ;, PROGR +/– or programme number on the remote
control, or PROGR +/– on the video TV.
• The headphones are connected to the 2 jack.
/Disconnect the headphones.
• The ¤ is displayed on the screen.
/Press ¤.
• Press Á +/–.
• Adjust “CONTRAST,” “COLOUR,” and “BRIGHTNESS” in the
PICTURE CONTROL menu. (page 18)
• The connecting cord between the video TV and the input source is
disconnected.
/Connect it firmly.
• Input is not selected correctly.
/Press … until the desired input indicator appears. (page 42)
• The power has been interrupted, the U (MAIN POWER) switch is
turned off or the mains lead is disconnected for more than a week.
/Re-set the clock and timer settings if necessary. (pages 16, 28, 34)
• The safety device has been activated.
/Switch off, disconnect the mains lead, and leave the set for about
one minute.
• The COL SYS setting in the VCR MODE menu is not correct.
/Set COL SYS to the system that the tape was recorded in. (page 25)
• Adjust the tracking. (page 40)
• The video heads are dirty.
/Clean the heads using the Sony V-25CL video head cleaning tape
(page 46). If the cleaning tape is not available in your area, have
the heads cleaned at your nearest Sony service facility. (Do not use
a commercially available wet-type cleaning tape, as it may
damage the video heads.)
• The tape is worn out.
/Use a new tape.
• The tape is defective.
/Use a new tape.
Additional Information
44
Page 45

Function
Recording
Timer
recording
Others
Problems
The cassette is
ejected when you
press REC r.
Recording does not
function.
Pay-TV programme
was not recorded.
You cannot view one
programme while
recording another.
Timer settings
cannot be made.
The cassette is
ejected when you
press TIMER REC
ON/OFF.
The TIMER REC
lamp does not light
up even though you
press TIMER REC
ON/OFF.
Timer recording was
not made.
A cassette cannot be
inserted.
The remote control
does not work.
Possible causes and remedies
• The safety tab of the cassette has been removed.
/Cover the tab hole with adhesive tape, or use another cassette
with a safety tab. (page 22)
• No cassette has been inserted.
/Insert a cassette with the safety tab.
• The tape is at its end.
/Rewind the tape.
• The Pay-TV channel was not set properly.
/Check the setting steps. (page 13)
• Verify your model number.
/Only models KV-14V6D and KV-21V6D are able to play one
programme while recording another.
• The clock has not been set.
/ Set the current time and date. (page 16)
• You made a mistake when setting the timer.
/ Check the setting steps. (pages 28 and 29)
• The safety tabof the cassette has been removed.
/ Cover the tab hole with adhesive tape, or use another cassette
with a safety tab.
• No cassette has been inserted.
/Insert a cassette with its safety tab.
• The tape is at its end.
/Rewind the tape.
• No setting is made for timer recording.
/Set the programme for timer recording. (pages 28 and 29)
• You did not press TIMER REC ON/OFF.
• There has been a power interruption lasting more than a week.
• Another cassette is already inserted.
/Press 6 to eject the cassette.
• The batteries are low.
/Replace the batteries. (page 4)
• The batteries are installed incorrectly.
/Install the batteries with correct polarities. (page 4)
GB
Additional Information
45
Page 46

Taking Care of Your Video TV
Video head cleaning
When playback pictures are noisy and hardly visible, or when no picture
appears, the video heads may be contaminated. In such a case, clean the
video heads using the V-25CL video head cleaning tape (not supplied), or
ask Sony service personnel to clean the video heads.
Symptoms caused by contaminated video heads
Note
Do not use a commercially available
wet-type cleaning tape, as it may
damage the video heads.
• Normal picture • Rough picture • Unclear picture • No picture (or
black & white
screen appears)
initial terminal
Worn video heads
If your video TV displays a poor picture after you clean the video heads,
you may need to replace them. Consult your dealer or the Sony Service
Center nearest you.
Check the video heads after 1,000
hours of use
A video TV is a high precision machine. It must record on or play from
magnetic tapes on which the image signals from the colour TV or the
video camcorder are recorded.
The video heads or mechanical parts for transporting the tape are
contaminated or worn after extended use. You should have your video TV
checked after each 1,000 hours of use.
Additional Information
46
Page 47

Specifications
TV Section
Television system B/G
Colour system PAL
NTSC3.58/NTSC4.43 (video
input only)
Channel coverage See “Receivable channels and
channel displays” below.
Picture tube KV-14V5D, KV-14V6D
Black Trinitron
KV-21V5D, KV-21V6D
HiBlack Trinitron
Aerial in 75-ohm aerial socket for VHF/
UHF
Video Section
Format VHS standard
Video recording system
Rotary 2-head helical scanning
system
Audio recording system
Monaural
Video signal PAL
Tape speed PAL
SP: 23.39 mm/sec.
LP: 11.70 mm/sec.
NTSC (playback only)
SP: 33.35 mm/sec.
EP: 11.12 mm/sec.
Maximum recording time
SP: 4 hours with E-240
LP: 8 hours with E-240
Inputs and Outputs
Inputs LINE IN VIDEO: phono jack (1)
1 Vp-p, 75 ohms, unbalanced,
sync negative
LINE IN AUDIO: phono jack (1)
Input level: 500 mVrms (100%
modulation)
EURO-AV: 21-pin
Output EURO-AV: 21-pin
Headphones jack Monaural minijack
General
Clock Quartz locked
Clock back up Approx. 7 days
Power requirements
220–240 V AC, 50 Hz
Power consumption
KV-14V5D: 67 W
KV-14V6D: 73 W
KV-21V5D: 97 W
KV-21V6D: 103 W
Operating temperature
5°C to 40°C (41°F to 104°F)
Storage temperature
–20°C to 60°C (–4°F to 140°F)
Dimensions KV-14V5D, KV-14V6D
Approx. 397 × 409 × 426 mm
(w/h/d) (15 3/4 × 16 1/8 ×
16 7/8 inches)
KV-21V5D, KV-21V6D
Approx. 526 × 518 × 476 mm
(w/h/d) (20 3/4 × 20 1/2 ×
18 3/4 inches)
Mass KV-14V5D, KV-14V6D
Approx. 14 kg (30 lbs. 14 oz)
KV-21V5D, KV-21V6D
Approx. 24 kg (52 lbs. 15 oz)
Accessories supplied
Remote control (1)
R6 (size AA) batteries (2)
Aerial (1) (KV-14V5D, KV-
14V6D only)
Design and specifications are subject to change
without notice.
Note
This appliance conforms with the EU Directive 89/
336/EEC regarding interference suppression.
GB
Receivable channels and channel displays
System Receivable Channels Channel Displays
B/G/H E2 .. E12, E21 .. E69 C02 .. C12, C21 .. C69
Cable TV (1) S1 .. S41 S01 .. S41
Cable TV (2) S01 .. S05, M1 .. M10, U1 .. U10 S42 .. S46, S01 .. S10, S11 .. S20
Italia A, B, C, D, E, F, G, H, H1, H2 C13, C14, C15, C16, C17, C18, C19, C20, C11
C12
Additional Information
47
Page 48

Index to Parts and Controls
Video TV set—front
This section briefly describes the buttons and controls on the video TV set and on the remote control.
For more information, refer to the pages next to each description.
KV-14V5D, KV-14V6D
EJECT
TIMER REC
REC
OPEN
TIMER REC
CL
REC
ON/OFF
TIMER REC
ON/OFF
PLAYREW 3STOP #FF PAUSE
REC
KV-21V5D, KV-21V6D
PROOR
EJECT
TIMER REC
REC
TIMER REC
CL
ON/OFF
TIMER REC
PLAYREW3STOP #FF PAUSE
REC
REC
ON/OFF
PROOR
1 EJECT 6 button (page 22)
2 u (standby) button (page 17)
3 Lamps
u (standby) (page 17)
TIMER REC (recording) (page 29)
REC (recording) (page 27)
4 … (input select) button (pages 19, 42)
5 U (MAIN POWER) switch (pages 6, 17)
6 Cassette compartment (page 22)
7 PROGR (programme) +/– buttons (pages 17, 27)
Additional Information
48
8 Á (volume) +/– buttons (page 17)
9 Remote sensor
!º Tape transport buttons (page 23)
!¡ TIMER REC ON/OFF button (pages 29, 30)
!™ REC (recording) r button (page 27)
!£ …2/≤2 (video/audio input) jacks (page 42)
!¢ 2 (headphones) jack (page 19)
Page 49

Remote control
ON
TIMER
2
5
8
0
TAPE
SPEED
MENU
OK
C
PROGR
COUNTER
RESET
PAUSE
FF
SLEEP
SHOW VIEW
TIMER
ON SCREEN
TIMER REC
ON/OFF
TIMER REC
CLEAR
REC
REPLAY
REW
1
4
7
-/--
QUICK
TIMER
INDEX SEARCH
PLAY
STOP
1 ¤ (muting) button (page 19)
2 6 (eject) button (page 22)
3 ; (TV power on) button (pages 6, 17)
4 ON TIMER button (page 37)
5 SLEEP button (page 36)
GB
6 SHOWVIEW button (page 34)
7 TIMER REC buttons
TIMER ON SCREEN (pages 28, 31)
ON/OFF (pages 29, 30)
CLEAR (pages 31, 34)
8 Teletext operation buttons (page 20)
9 REC r (recording) button (page 27)
3
6
9
!º QUICK TIMER button (page 32)
!¡ REPLAY button (page 24)
!™ Tape transport buttons (page 23)
PLAY ·, STOP p, REW (rewind) 0, FF
(fast forward) )
!£ (on-screen display) button (pages 19, 25)
!¢ u (standby) button (page 17)
!∞ (Teletext) button (page 20)
!§ … (input select)/ (hold) button (pages 19,
21, 42)
!¶ Menu operation buttons (pages 6, 7)
MENU
+ ◊/– √
?
OK
!• Number buttons (pages 17, 27, 34)
!ª C (direct tuning) button (page 12)
@º PROGR (programme) +/–/√/◊ (Teletext
page access) buttons (pages 17, 21, 27)
@¡ Á (volume) +/– buttons (page 17)
@™ COUNTER RESET button (page 23)
@£ TAPE SPEED button (page 27)
@¢ PAUSE P button (pages 23, 27)
@∞ INDEX SEARCH =/+ buttons (page 39)
Additional Information
49
Page 50

Additional Information
50
Page 51

Bedienungsanleitung
D
Erste Schritte
51
Page 52

ACHTUNG
•Um Feuer und die Gefahr eines elektrischen
Schlags zu vermeiden, setzen Sie das Gerät niemals
Regen oder sonstiger Feuchtigkeit aus.
Im Inneren des Geräts liegen sehr hohe
Spannungen an. Öffnen Sie deshalb niemals das
Gehäuse des Geräts, und überlassen Sie
Reparaturen ausschließlich Fachpersonal.
•Dieses Fernsehgerät entspricht laut dem
abgedruckten Zulassungsschein den gesetzlichen
Bestimmungen der Röntgenverordnung. Die auf
Grund der Auflage 2 gemessene Dosisleistung liegt
unterhalb des gesetzlich zugelassenen Wertes.
Zum sicheren Betrieb:
•Das Gerät nur mit 220–240 V Wechselstrom
betreiben, 50 Hz.
•Sollten Flüssigkeiten oder Fremdkörper in das
Innere des Geräts gelangt sein, das Gerät sofort
überprüfen lassen.
•Ziehen Sie den Netzstecker aus der Steckdose,
wenn Sie das Gerät für längere Zeit nicht benutzen
wollen. Ziehen Sie dabei immer am Stecker,
niemals am Kabel selbst.
Aufstellung:
Vorsicht
Fernsehprogramme, Filme und Videobänder usw.
können urheberrechtlich geschützt sein.
Unerlaubtes Aufzeichnen solcher Materialien
verstößt gegen das Urheberrecht.
•Um das Gerät 5 cm Platz lassen, damit eine
ausreichende Luftzufuhr gegeben ist.
•Das Gerät nicht an einem heißen, feuchten oder
übermäßig staubigen Platz aufstellen.
•Das Gerät nicht an einem Platz aufstellen, an dem
es Erschütterungen und Vibrationen ausgesetzt
ist.
Farbsystem
Zu Ihrem eigenen Schutz sollten Sie Reparaturen
Dieses Video-TV-Gerät kann TV-Programme
empfangen, die auf dem Farbsystem PAL (B/G)
basieren. Aufnahme und Wiedergabe erfolgen auf
der Grundlage des Farbsystems PAL. Bei der
Wiedergabe von Bändern ist auch das Farbsystem
NTSC zulässig.
V orsichtsmaßnahmen
Sicherheitsinformationen
Allgemeine
Sicherheitshinweise:
•Das Gerät keinesfalls Regen oder sonstiger
Feuchtigkeit aussetzen.
•Die Rückwand des Video-TV-Geräts keinesfalls
öffnen.
ausschließlich von Fachpersonal durchführen
lassen.
Kondensation
Wenn das Gerät direkt von einem kalten an einen
warmen Ort gebracht wird, kann sich auf der
Videokopfwalze Kondensation bilden. In diesem
Fall kann das Band an der Videokopfwalze kleben
bleiben und beschädigt werden, oder das Gerät
arbeitet nicht ordnungsgemäß. Um solche Schäden
zu vermeiden, lassen Sie nie eine Kassette im
Kassettenfach, wenn das Gerät nicht benutzt wird.
Wenn Sie das Gerät von einem kalten an einen
warmen Ort bringen, warten Sie vor dem Betrieb
ungefähr 10 Minuten.
Wenn die Bandbetriebstasten aufgrund von
Feuchtigkeitskondensation nicht funktionieren,
lassen Sie das Gerät über eine Stunde lang
eingeschaltet stehen.
Erste Schritte
52
Page 53

Inhaltsverzeichnis
Erste Schritte
Schritt 1 — Vorbereitung......................................... 54
Auspacken.............................................................. 54
Einlegen der Batterien in die Fernbedienung ... 54
Schritt 2 — Anschluß der Antenne ........................ 55
Anschluß einer Zimmerantenne (nur KV-
14V5D, KV-14V6D) ............................................ 55
Anschluß einer Außenantenne ........................... 55
Schritt 3 — Senderabspeicherung .......................... 56
Auswählen der Menüsprache ............................. 56
Automatisches Abspeichern von Sendern ........ 57
Manuelles Abspeichern von Sendern ................ 58
Überspringen nicht belegter
Programmspeicherplätze.................................. 59
Individuelle Senderkennung............................... 60
Manuelles Feinabstimmen eines Senders .......... 61
Vorübergehendes Einstellen eines Senders....... 62
Abspeichern eines Pay-TV-Kanals (nur KV-
14V6D, KV-21V6D) ............................................ 63
Schritt 4 — Einrichten von ShowView*................. 64
Einstellen der Leitzahlen...................................... 64
Schritt 5 — Einstellen der Uhr ................................ 66
Grundfunktionen des Video-TV-Geräts
TV-Betrieb .................................................................. 67
Ein- und Ausschalten des Video-TV-Geräts ..... 67
Programmwahl...................................................... 67
Einstellen der Lautstärke ..................................... 67
Einstellen des Bildes ............................................. 68
Abschalten des Tons ............................................. 69
Einblenden der Informationsanzeigen auf dem
Bildschirm ........................................................... 69
Anschauen des Videobildes
(Videoeingangsbetrieb) ..................................... 69
Anschluß von Kopfhörern ................................... 69
Anzeigen von Videotext .......................................... 70
Ein- und Ausschalten von Videotext ................. 70
Die TOPtext-Funktion .......................................... 70
Wiedergabe einer Videokassette ............................ 72
Einlegen der Videokassette ................................. 72
Herausnehmen einer Videokassette...................72
Schützen einer Kassette vor versehentlichem
Löschen................................................................ 72
Wiedergabe einer Kassette .................................. 73
Zurückstellen des Bandzählers ........................... 73
Wiederholte Wiedergabe einer Kassette
(AUTO REPEAT) ............................................... 74
Automatisches Wiederholen einer Szene .......... 74
Einstellen des Farbsystems .................................. 75
Aufrufen der Bildschirmanzeigen ...................... 75
Anzeigen von Programmen im 16:9-Modus ..... 76
Aufnahme von TV-Programmen ........................... 77
Aufnehmen von TV-Programmen...................... 77
Aufnahme bei ausgeschaltetem TV-Gerät......... 77
Anzeigen eines Fernsehsenders und
gleichzeitiges Aufnehmen eines anderen
(nur KV-14V6D, KV-21V6D) ............................ 77
Aufnahme von TV-Programmen mit dem
Timer ....................................................................... 78
Programmieren des Timers ................................. 78
Benutzung des Video-TV-Geräts vor der
Timer-Aufnahme ............................................... 80
Überprüfen der Timer-Einstellungen ................ 81
Ändern oder Löschen von Timer-
Einstellungen ...................................................... 81
Aufnehmen mit dem Sofort-Timer..................... 82
Timer-Aufnahme mit dem
Video-Programm-System VPS/PDC .............. 83
Aufnehmen von Fernsehprogrammen mit
ShowView .............................................................. 84
Weitere Funktionen
Automatische Abschaltfunktion (Sleep Timer)....86
Automatische Einschaltfunktion (On Timer) ....... 87
Die Funktion FUNKTIONSSPERRE ...................... 88
Suchen mit der Funktion INDEX ........................... 89
Verbessern der Videobildqualität .......................... 90
Einstellen der Spurlage ........................................ 90
Einstellen des Bildes mit der OPC-Funktion .... 91
Automatische Reinigung der Videoköpfe......... 91
Anschluß und Betrieb eines anderen
Videorecorders ...................................................... 92
Anschluß eines anderen Videorecorders zur
Wiedergabe ........................................................ 92
Überspielen mit einem anderen
Videorecorder.....................................................93
Anzeigen des Pay-TV-Kanals (nur KV-14V6D,
KV-21V6D).......................................................... 93
Weitere Informationen
Störungsbehebung.................................................... 94
Wartung ..................................................................... 96
Reinigung der Videoköpfe .................................. 96
Abgenutzte Videoköpfe ....................................... 96
Überprüfen der Videoköpfe nach jeweils
1000 Betriebsstunden......................................... 96
Technische Daten...................................................... 97
Empfangbare Kanäle und Kanalanzeigen......... 97
Lage und Funktion der Teile und
Bedienelemente ..................................................... 98
Video-TV-Gerät — Vorderseite .......................... 98
Fernbedienung....................................................... 99
* ShowView wurde von der Gemstar Development Corporation
als Warenzeichen beantragt. Das ShowView-System ist von
der Gemstar Development Corporation lizenziert.
Die Anweisungen in dieser Anleitung beziehen sich
auf die Modelle KV-14V5D, KV-14V6D, KV-21V5D
und KV-21V6D. Sehen Sie zunächst nach, welche
Modellnummer Ihr Video-TV-Gerät hat. Sie finden
diese Nummer an der Rückseite des Geräts. Die
Abbildungen in der gesamten Anleitung zeigen das
Modell KV-14V6D. Auf Unterschiede in der
Bedienung wird im Text deutlich hingewiesen, z. B.
“nur KV-14V5D, KV-14V6D”.
D
Erste Schritte
53
Page 54

Erste Schritte
Schritt 1 — Vorber eitung
Auspacken
Nehmen Sie alle Teile aus dem Karton, und prüfen Sie, ob folgendes
vorhanden ist:
•Fernbedienung
•Zwei R6-Batterien (Größe AA)
•Antenne (nur KV-14V5D, KV-14V6D)
(nur KV-14V5D, KV-14V6D)
Einlegen der Batterien in die
Fernbedienung
Fernbedienung umdrehen
und den Batteriefachdeckel
abnehmen.
Die beiden R6-Batterien mit
der richtigen Polarität einlegen.
Das Batteriefach
schließen.
Hinweis
Hinweis: Entsorgen Sie verbrauchte
Batterien immer gemäß den
geltenden
Umweltschutzbestimmungen.
Erste Schritte
54
Page 55

Schritt 2 — Anschluß der Antenne
Anschluß einer Zimmerantenne
(nur KV-14V5D, KV-14V6D)
Wenn das VHF/UHF-Signal in Ihrer Gegend stark genug ist, können Sie
schon mit einer Zimmerantenne ein scharfes Bild erzielen. Schließen Sie die
mitgelieferte Antenne folgendermaßen an.
1 Setzen Sie die Antenne ein, so daß sie mit einem Klicken einrastet.
2 Schalten Sie das Video-TV-Gerät ein, und richten Sie die Antenne so aus,
daß der Empfang optimal ist.
Achten Sie darauf, auch die Antenne auf den aufzunehmenden Kanal
einzustellen. Schließen Sie bei schlechtem Empfang eine Außenantenne
an Ihr Video-TV-Gerät an.
2
1
D
Anschluß einer Außenantenne
Sie erhalten einen besseren Fernsehempfang und ein klares Videobild,
wenn Sie eine Außenantenne an das Video-TV-Gerät anschließen.
Zum Anschließen einer VHF-Antenne oder
einer kombinierten VHF/UHF-Antenne wird ein
rundes Koaxial-Antennenkabel (75 Ohm)
benötigt
Den IEC-Antennenstecker mit dem Koaxial-Antennenkabel (75 Ohm)
verbinden. Danach den Stecker in die Antennenbuchse an der Rückseite
des Video-TV-Geräts einstecken.
VHF/UHF-Antenne
Rückseite
oder
Anschluß einer VHF- und einer UHF-Antenne
Die Enden des Antennenkabels mit dem VHF/UHF-Signalmischgerät (nicht
mitgeliefert) verbinden. Danach das Signalmischgerät in die Antennenbuchse an
der Rückseite des Video-TV-Geräts einstecken.
UHF-Antenne
Wandanschluß
VHF-Antenne
Rückseite
Zweiadriges Kabel (300 Ohm)
VHF/UHF-Signalmischgerät
Koaxial-Kabel (75 Ohm)
Wenn Sie die Antenne angeschlossen haben, verbinden Sie das Netzkabel
mit einer Netzsteckdose.
Erste Schritte
55
Page 56

Schritt 3 — Senderabspeicherung
Sie können bis zu 80 Fernsehkanäle automatisch oder manuell
abspeichern.
Wenn Sie alle empfangbaren Sender auf einmal abspeichern wollen,
sollten Sie die automatische Methode verwenden. Möchten Sie die Sender
ON
TIMER
SLEEP
MENU
einzeln mit Kanalnummer in der von Ihnen gewünschten Reihenfolge
abspeichern, empfiehlt sich die manuelle Methode.
SHOW VIEW
TIMER
ON SCREEN
TIMER REC
ON/OFF
TIMER REC
CLEAR
REC
REPLAY
REW
1
4
7
-/--
QUICK
TIMER
INDEX SEARCH
PLAY
STOP
2
5
8
0
TAPE
SPEED
OK
3
6
9
C
PROGR
COUNTER
RESET
PAUSE
FF
Bevor Sie beginnen
•Schalten Sie das Fernsehgerät mit dem Schalter U hinter der Klappe an
der Vorderseite des Video-TV-Geräts ein.
Wenn die Anzeige u auf dem Video-TV-Gerät rot leuchtet, d. h. das
Video-TV-Gerät sich im Bereitschaftsmodus befindet, drücken Sie ;,
PROGR +/– oder eine beliebige Zahlentaste auf der Fernbedienung.
Auswählen der Menüsprache
Sie können aus mehreren Sprachen eine Sprache für die Menüs und die
Anzeigeinformationen auswählen.
Werkseitig ist Englisch eingestellt.
1 Die Taste MENU drücken.
Das Hauptmenü wird eingeblendet.
MENU
PICTURE CONTROL
ON TIMER SET
CLOCK SET
LANGUAGE
PROGRAMME PRESET
VCR MODE
FUNCTION LOCK
e l ec t nd r ess
Sap
OK
Erste Schritte
56
2 Mit + ◊ oder – √ den Cursor (z) auf “LANGUAGE” stellen und
anschließend OK drücken.
Das Menü LANGUAGE wird eingeblendet.
LANGUAGE
ENGLISH
DEUTSCH
FRANÇAIS
ITALIANO
ESPAÑOL
NEDERLANDS
PORTUGUÊS
Sap
e l ec t nd r es s
OK
3 Mit + ◊ oder – √ die gewünschte Sprache wählen und danach OK drücken.
Die ausgewählte Sprache wird grün angezeigt, und das Menü erscheint in
der ausgewählten Sprache.
4 Die Taste MENU drücken, um zum ursprünglichen Bildschirm
zurückzukehren.
Page 57

Automatisches Abspeichern von
Sendern
ON
TIMER
SLEEP
SHOW VIEW
TIMER
ON SCREEN
TIMER REC
ON/OFF
TIMER REC
CLEAR
REC
REPLAY
REW
1
4
7
-/--
QUICK
TIMER
INDEX SEARCH
PLAY
STOP
2
5
8
0
TAPE
SPEED
MENU
OK
3
6
9
C
PROGR
COUNTER
RESET
PAUSE
FF
1 Die Taste MENU drücken, um das Hauptmenü einzublenden.
2 Den Cursor (z) mit + ◊ oder – √ auf “SENDERABSPEICHERUNG” stellen
und anschließend OK drücken.
Das Menü SENDERABSPEICHERUNG wird eingeblendet.
SENDERABSPEICHERUNG
AUTOM. ABSPEICHERN
MANUELL ABSPEICHERN
LEITZAHL EINSTELLEN
WuDählen nd r ü ke
OK
nc
3 Den Cursor (z) mit + ◊ oder – √ auf “AUTOM. ABSPEICHERN” stellen
und anschließend OK drücken.
Das Menü AUTOM. ABSPEICHERN wird eingeblendet.
AUTOM. ABSPEICHERN
SYSTEM
PROG KA
B
/G –– –––
uOKndWählen Drücken
4 OK drücken.
Die Nummer des Programms, das Sie zuvor gesehen haben, wird an der
Position “PROG” rot angezeigt.
Wählen Sie mit + ◊ oder – √ die Programmnummer aus, mit der das Gerät
beim Speichern beginnen soll, und drücken Sie OK. Sie können das
Abspeichern jedoch nicht bei 00 beginnen.
Die Position KA wird rot angezeigt.
AUTOM. ABSPEICHERN
SYSTEMBPROG KA
/G 01 C02
D
Beenden der automatischen
Senderabspeicherung
Auf der Fernbedienung ? drücken.
uOKndWählen Drücken
5 Den Kanal mit + ◊ oder –√ auswählen und OK drücken.
Das Video-TV-Gerät beginnt, alle empfangbaren Kanäle ab der in Schritt 4
ausgewählten Programmnummer zu suchen und abzuspeichern.
Eingestellte Programm- und Kanalnummern werden nacheinander auf
dem Fernsehschirm angezeigt. Wenn die Senderabspeicherung beendet ist,
erscheint wieder die vorherige Bildschirmanzeige. Die verfügbaren Kanäle
sind nun auf aufeinanderfolgenden Programmplätzen abgespeichert.
Erste Schritte
57
Page 58

Manuelles Abspeichern von
Sendern
ON
TIMER
SLEEP
SHOW VIEW
TIMER
ON SCREEN
TIMER REC
ON/OFF
TIMER REC
CLEAR
REC
REPLAY
REW
1
4
7
-/--
QUICK
TIMER
INDEX SEARCH
PLAY
STOP
2
5
8
0
TAPE
SPEED
MENU
OK
3
6
9
C
PROGR
COUNTER
RESET
PAUSE
FF
1 Die Taste MENU drücken, um das Hauptmenü einzublenden.
2 Den Cursor (z) mit + ◊ oder – √ auf “SENDERABSPEICHERUNG” stellen
und anschließend OK drücken.
Das Menü SENDERABSPEICHERUNG wird eingeblendet.
SENDERABSPEICHERUNG
AUTOM. ABSPEICHERN
MANUELL ABSPEICHERN
LEITZAHL EINSTELLEN
WuDählen nd r ü k e
OK
nc
3 Den Cursor (z) mit + ◊ oder – √ auf “MANUELL ABSPEICHERN” stellen
und anschließend OK drücken.
Das Menü MANUELL ABSPEICHERN wird eingeblendet.
MANUELL ABSPEICHERN
PRG
SYS KA
B/G
1 C02 –– –
C04 – – – – – EIN
B/G
2
C06 – – – – – EIN
3B/G
B/G4
C12 – – – – – EIN
5
S06 ––– – – EIN
B/G
6
S24 ––– – –
B/G
NAME AFT
OK
ndWählen Drücken
u
– – EIN
EIN
D
–
–
–
–
–
–
4 Den Cursor (z) mit + ◊ oder – √ an den Programmplatz (Zahlentaste)
stellen, auf dem Sie den Kanal abspeichern möchten, und OK drücken.
Die Position “SYS” wird rot angezeigt.
MANUELL ABSPEICHERN
PRG
SYS KA
C04 – – – – – EIN
B/G
C06 – – – – – EIN
B/G4
C12 – – – – – EIN
S06 ––– – – EIN
B/G
S24 ––– – –
B/G
u
NAME AFT
ndWählen Drücken
1 C02 –– –
2
3B/G
5
6
OK
D
– – EINB/G
–
–
–
–
–
EIN
–
Für Programmplätze über 6
Taste – √ wiederholt drücken, damit
weitergeblättert wird.
Falls Sie einen Fehler gemacht
haben
Taste ? drücken, um zur
vorhergehenden Position
zurückzukehren.
Erste Schritte
58
5 Das System mit + ◊ oder – √ auswählen und OK drücken.
Die Position KA wird rot angezeigt.
6 Mit + ◊ oder – √ den abzuspeichernden Kanal auswählen und OK
drücken.
7 Das Gerät beginnt mit der Suche nach empfangbaren Kanälen. Wird ein
Kanal gefunden, stoppt die Suche. Wenn Sie diesen Kanal abspeichern
wollen, OK drücken. Andernfalls mit + ◊ oder – √ nach einem anderen
Kanal suchen.
8 Die Schritte 4 bis 7 wiederholen, um weitere Sender abzuspeichern.
9 Nach dem Abspeichern MENU drücken, um zum ursprünglichen
Bildschirm zurückzukehren.
Page 59

Überspringen nicht belegter
Programmspeicherplätze
ON
TIMER
SLEEP
SHOW VIEW
TIMER
ON SCREEN
TIMER REC
ON/OFF
TIMER REC
CLEAR
REC
REPLAY
REW
1
4
7
-/--
QUICK
TIMER
INDEX SEARCH
PLAY
STOP
2
5
8
0
TAPE
SPEED
MENU
OK
3
6
9
C
PROGR
COUNTER
RESET
PAUSE
FF
Bei der Programmwahl mit den Tasten PROGR +/– können Sie nicht
belegte Programmplätze überspringen.
1 Die Taste MENU drücken, um das Hauptmenü einzublenden.
2 Den Cursor (z) mit + ◊ oder – √ auf “SENDERABSPEICHERUNG” stellen
und anschließend OK drücken.
Das Menü SENDERABSPEICHERUNG wird eingeblendet.
3 Den Cursor (z) mit + ◊ oder – √ auf “MANUELL ABSPEICHERN” stellen
und anschließend OK drücken.
Das Menü MANUELL ABSPEICHERN wird eingeblendet.
4 Den Cursor (z) mit + ◊ oder – √ auf den Programmplatz stellen, der
übersprungen werden soll, und anschließend OK drücken.
Die Position “SYS” wird rot angezeigt.
MANUELL ABSPEICHERN
PRG
SYS KA
C04 ––––– EIN
B/G
C06 ––––– EIN
B/G4
C12 ––––– EIN
S06 ––––– EIN
B/G
S24 –––––
B/G
u
NAME AFT
ndWählen Drücken
1 C02 –– –
2
3B/G
5
6
OK
D
– – EINB/G
–
–
–
–
–
EIN
–
5 + ◊ oder – √ mehrmals drücken, bis “---” in der Position “SYS” erscheint.
Anschließend OK drücken.
MANUELL ABSPEICHERN
PRG SYS KA
1 C02 –– –
2
3
5
6
C04 – – – – – EIN
B/G
C06 – – – – – EIN
–––
B/G4
C12 – – – – – EIN
S06 ––– – – EIN
B/G
S24 ––– – –
B/G
uOKndWählen Drücken
NAME AFT
– – EINB/G
EIN
D
–
–
–
–
–
–
D
Für Programmplätze über 6
Taste – √ wiederholt drücken, damit
weitergeblättert wird.
Bei der Programmwahl mit den Tasten PROGR +/– wird der gewählte
Programmplatz nun übersprungen.
6 Die Schritte 4 und 5 wiederholen, um weitere Programmspeicherplätze zu
überspringen.
7 Die Taste MENU drücken, um zum ursprünglichen Bildschirm
zurückzukehren.
Erste Schritte
59
Page 60

ON
TIMER
SLEEP
SHOW VIEW
TIMER
ON SCREEN
TIMER REC
ON/OFF
TIMER REC
CLEAR
REC
REPLAY
1
4
7
-/--
QUICK
TIMER
INDEX SEARCH
2
5
8
0
TAPE
SPEED
MENU
OK
3
6
9
C
PROGR
COUNTER
RESET
PAUSE
Individuelle Senderkennung
Zur individuellen Vergabe eines Namens für einen
Programmspeicherplatz (z. B. ARD oder MTV) stehen Ihnen bis zu 5
Zeichen (Zahlen oder Buchstaben) zur Verfügung. Mit Hilfe dieser
Funktion können Sie problemlos erkennen, welchen Sender Sie eingestellt
haben.
1 MENU drücken, um das Hauptmenü einzublenden.
2 Den Cursor (z) mit + ◊ oder – √ auf “SENDERABSPEICHERUNG” stellen
und anschließend OK drücken.
Das Menü SENDERABSPEICHERUNG wird eingeblendet.
3 Den Cursor (z) mit + ◊ oder – √ auf “MANUELL ABSPEICHERN” stellen
und anschließend OK drücken.
Das Menü MANUELL ABSPEICHERN wird eingeblendet.
MANUELL ABSPEICHERN
PRG
SYS KA
B/G
1 C02 –– –
C04 ––––– EIN
B/G
2
C06 ––––– EIN
3B/G
B/G4
C12 ––––– EIN
5
S06 ––––– EIN
B/G
6
S24 –––––
B/G
NAME AFT
OK
ndWählen Drücken
u
– – EIN
EIN
D
–
–
–
–
–
–
REW
STOP
PLAY
FF
Falls Sie einen Fehler gemacht
haben
Die Taste ? drücken, um zur
vorhergehenden Position
zurückzukehren.
4 Den Cursor (z) mit + ◊ oder – √ auf den Programmplatz stellen, den Sie
benennen möchten. Danach die Taste OK so oft drücken, bis das erste
Zeichen der Position “NAME” rot hervorgehoben wird.
5 Mit + ◊ oder – √ eine Zahl oder einen Buchstaben wählen und danach OK
drücken.
Nun wird die nächste Stelle rot hervorgehoben. Die vier weiteren Zeichen
auf die gleiche Weise wählen. Falls Sie eine Stelle leer lassen möchten, “-”
wählen und danach OK drücken.
MANUELL ABSPEICHERN
PRG SYS KA
1 C02 –– –
2
3B/G
5
6
C04 ––MTV EIN
B/G
C06 ––––– EIN
B/G4
C12 ––––– EIN
S06 ––––– EIN
B/G
S24 –––––
B/G
uOKndWählen Drücken
NAME AFT
– – EINB/G
EIN
D
–
–
–
–
–
–
6 Nachdem Sie alle Zeichen vergeben haben, drücken Sie so oft OK, bis der
Cursor erscheint. Nun ist die von Ihnen gewählte Senderkennung
gespeichert.
7 Die Schritte 4 bis 6 für alle weiteren Sender, die Sie benennen möchten,
wiederholen.
Erste Schritte
60
8 Die Taste MENU drücken, um zum ursprünglichen Bildschirm
zurückzukehren.
Page 61

Manuelles Feinabstimmen eines
Senders
ON
TIMER
SLEEP
SHOW VIEW
TIMER
ON SCREEN
TIMER REC
ON/OFF
TIMER REC
CLEAR
REC
REPLAY
REW
1
4
7
-/--
QUICK
TIMER
INDEX SEARCH
PLAY
STOP
2
5
8
0
TAPE
SPEED
MENU
OK
3
6
9
C
PROGR
COUNTER
RESET
PAUSE
FF
Normalerweise stellt die automatische Feinabstimmung (AFT) die Sender
optimal ein. Falls die Bildqualität jedoch nicht zufriedenstellend sein
sollte, können Sie sie mit der manuellen Feinabstimmung korrigieren.
1 MENU drücken, um das Hauptmenü einzublenden.
2 Den Cursor (z) mit + ◊ oder – √ auf “SENDERABSPEICHERUNG” stellen
und anschließend OK drücken.
Das Menü SENDERABSPEICHERUNG wird eingeblendet.
3 Den Cursor (z) mit + ◊ oder – √ auf “MANUELL ABSPEICHERN” stellen
und anschließend OK drücken.
Das Menü MANUELL ABSPEICHERN wird eingeblendet.
4 Den Cursor (z) mit + ◊ oder – √ an den Programmplatz stellen, den Sie
manuell feinabstimmen wollen, und so oft OK drücken, bis die Position
AFT rot angezeigt wird.
MANUELL ABSPEICHERN
PRG
SYS KA
C04 ––––– EIN
B/G
C06 ––––– EIN
B/G4
C12 ––––– EIN
S06 ––––– EIN
B/G
S24 –––––
B/G
u
NAME AFT
ndWählen Drücken
1 C02 –– –
2
3B/G
5
6
OK
D
– – EINB/G
–
–
–
–
–
EIN
–
D
Wiedereinschalten der
automatischen
Feinabstimmung (AFT)
Den Vorgang von Anfang an
wiederholen und in Schritt 5 “EIN”
wählen.
5 Die Kanäle feinabstimmen und dazu + ◊ oder – √ so lange gedrückt
halten, bis der bestmögliche Fernsehempfang eingestellt ist. Wenn Sie
diese Tasten gedrückt halten, wechselt die Frequenz von –15 bis +15.
MANUELL ABSPEICHERN
PRG
SYS KA
C04 – – – – – EIN
B/G
C06 ––– –– – 3
B/G4
C12 ––– –– EIN
S06 ––––– EIN
B/G
S24 –––––
B/G
NAME AFT
ndWählen Drücken
u
1 C02 –– –
2
3B/G
5
6
OK
D
– – EINB/G
–
–
–
–
–
EIN
–
6 Nach dem Feinabstimmen OK drücken.
Der Cursor (z) erscheint. Der Wert für die Feinabstimmung ist nun
gespeichert.
7 Die Schritte 4 bis 6 wiederholen, um weitere Sender feinabzustimmen.
8 Die Taste MENU drücken, um zum ursprünglichen Bildschirm
zurückzukehren.
Erste Schritte
61
Page 62

ON
TIMER
SLEEP
MENU
Vorübergehendes Einstellen eines
Senders
Sie können einen Sender vorübergehend einstellen, auch wenn er nicht
abgespeichert wurde.
SHOW VIEW
TIMER
ON SCREEN
TIMER REC
ON/OFF
TIMER REC
CLEAR
REC
REPLAY
REW
1
4
7
-/--
QUICK
TIMER
INDEX SEARCH
PLAY
STOP
2
5
8
0
TAPE
SPEED
OK
3
6
9
C
PROGR
COUNTER
RESET
PAUSE
FF
1 Drücken Sie C auf der Fernbedienung.
Wenn Sie einen Kabelkanal einstellen wollen, drücken Sie zweimal C. Die
Anzeige “C” (bei VHF/UHF-Kanälen) bzw. “S” (bei Kabelkanälen)
erscheint auf dem Bildschirm.
2 Geben Sie mit den Zahlentasten auf der Fernbedienung eine zweistellige
Zahl für den Kanal ein. Beispiel: Für Kanal 4 drücken Sie 0 und dann 4.
Der Kanal wird angezeigt. Dieser Kanal wird jedoch nicht im Speicher des
Video-TV-Geräts abgelegt.
C04
Hinweis (nur KV-14V6D, KV21V6D)
Wenn Sie ein über einen Pay-TVDecoder empfangenes Programm
aufnehmen wollen, müssen Sie den
Kanal wie auf Seite 58 unter
“Manuelles Abspeichern von
Sendern” oder auf Seite 63 unter
“Abspeichern eines Pay-TV-Kanals”
erläutert abspeichern und dann den
Kanal wie auf Seite 67 unter
“Programmwahl” beschrieben
einstellen.
Erste Schritte
62
Page 63

Abspeichern eines Pay-TV-Kanals
(nur KV-14V6D, KV-21V6D)
ON
TIMER
SLEEP
SHOW VIEW
TIMER
ON SCREEN
TIMER REC
ON/OFF
TIMER REC
CLEAR
REC
REPLAY
REW
1
4
7
-/--
QUICK
TIMER
INDEX SEARCH
PLAY
STOP
2
5
8
0
TAPE
SPEED
MENU
OK
3
6
9
C
PROGR
COUNTER
RESET
PAUSE
FF
Sie können einen Pay-TV-Kanal empfangen, indem Sie einen Pay-TVDecoder an den Anschluß :1/W 1 an der Rückseite des Geräts
anschließen.
1 MENU drücken, um das Hauptmenü einzublenden.
2 Den Cursor (z) mit + ◊ or – √ auf “SENDERABSPEICHERUNG” stellen
und OK drücken.
Das Menü SENDERABSPEICHERUNG wird eingeblendet.
3 Den Cursor (z) mit + ◊ or – √ auf “MANUELL ABSPEICHERN” stellen
und OK drücken.
Das Menü MANUELL ABSPEICHERN wird eingeblendet.
4 Den Cursor (z) auf den Programmplatz stellen, auf den Sie den Pay-TV-
Decoder einstellen wollen, und OK drücken, bis die Position D rot
angezeigt wird.
MANUELL ABSPEICHERN
PRG
SYS KA
C04 ––––– EIN
B/G
C06 ––––– EIN
B/G4
C12 ––––– EIN
S06 ––––– EIN
B/G
S24 –––––
B/G
u
NAME AFT
ndWählen Drücken
1 C02 –– –
2
3B/G
5
6
OK
D
– – EINB/G
–
–
–
–
–
EIN
–
D
Hinweis
Beim Aufnehmen eines Programms,
auf das der Pay-TV-Decoder
eingestellt ist, können die Signale
anderer Programmplätze nicht
gleichzeitig empfangen werden.
5 + ◊ or – √ drücken, bis r an der Position D erscheint, und OK drücken.
MANUELL ABSPEICHERN
PRG SYS KA
1 C02 –– –
2
3B/G
5
6
C04 – – – – – EIN
B/G
C06 – – – – – EIN
B/G4
C12 – – – – – EIN
S06 ––– – – EIN
B/G
S24 ––– – –
B/G
NAME AFT
– – EINB/G
EIN
uOKndWählen Drücken
D
–
–
–
–
–
6 Die Taste MENU drücken, um zum ursprünglichen Bildschirm
zurückzukehren.
Erste Schritte
63
Page 64

Schritt 4 — Einrichten von ShowView
Die ShowView-Funktion erleichtert das Programmieren des Video-TVGeräts für Timer-Aufnahmen. Sie müssen dazu den
Programmspeicherplätzen der einzelnen Kanäle eine Leitzahl zuordnen.
Die Leitzahl ist eine Zahl, die jedem Fernsehsender im voraus zugewiesen
ON
TIMER
SLEEP
MENU
wird. Die Leitzahlen finden Sie in Programmzeitschriften, die die
ShowView-Nummern angeben.
SHOW VIEW
TIMER
ON SCREEN
TIMER REC
ON/OFF
TIMER REC
CLEAR
REC
REPLAY
REW
1
4
7
-/--
QUICK
TIMER
INDEX SEARCH
PLAY
STOP
2
5
8
0
TAPE
SPEED
OK
3
6
9
C
PROGR
COUNTER
RESET
PAUSE
FF
Vorbereitungen
•Wenn die Anzeige u am Video-TV-Gerät rot leuchtet, d. h. das VideoTV-Gerät sich im Bereitschaftsmodus befindet, drücken Sie ;, PROGR
+/– oder eine Zahlentaste auf der Fernbedienung.
Einstellen der Leitzahlen
1 Rufen Sie mit MENU das Hauptmenü auf.
Das Hauptmenü wird angezeigt.
MENÜ
BILD–MENÜ
EIN–TIMER AKTIV
UHR EINSTELLEN
SPRACHE
SENDERABSPEICHERUNG
VCR–MODUS
FUNKTIONSSPERRE
WuDählen nd rü ke
2 Stellen Sie den Cursor (z) mit + ◊ oder – √ auf
“SENDERABSPEICHERUNG”, und drücken Sie OK.
Das Menü SENDERABSPEICHERUNG wird angezeigt.
SENDERABSPEICHERUNG
AUTOM. ABSPEICHERN
MANUELL ABSPEICHERN
LEITZAHL EINSTELLEN
OK
nc
Falls Sie einen Fehler gemacht
haben
Die Taste ? drücken, um zur
vorhergehenden Position
zurückzukehren.
Erste Schritte
64
WuDählen nd rü ke
3
Stellen Sie den Cursor (z) mit + ◊ oder – √ auf
OK
nc
“LEITZAHL EINSTELLEN”,
und drücken Sie OK.
Das Menü LEITZAHL EINSTELLEN wird angezeigt.
LEITZAHL EINSTELLEN
KA
PROG
1 C02
2
3
4
5
6
LEITZAHL
–––
C04
–––
C06
–––
C12 –– –
S06 – – –
S24
–––
OK
ndWählen Drücken
u
Page 65

ON
TIMER
SLEEP
SHOW VIEW
TIMER
ON SCREEN
TIMER REC
ON/OFF
TIMER REC
CLEAR
1
4
7
-/--
4 Stellen Sie den Cursor (z) mit + ◊ oder – √ auf die Programmposition
(Zahlentaste), der Sie die Leitzahl zuweisen möchten, und drücken Sie
OK.
Die Option LEITZAHL wird jetzt rot angezeigt.
LEITZAHL EINSTELLEN
PROG KA
MENU
OK
2
3
1 C02
2
3
4
5
6
LEITZAHL
–––
–––
C04
C06
–––
C12 –– –
S06 –– –
–––
S24
OK
u
ndWählen Drücken
D
5 Wählen Sie mit + ◊ oder – √ die Leitzahl aus, die Sie einstellen möchten,
5
6
9
8
C
0
PROGR
und drücken Sie OK.
LEITZAHL EINSTELLEN
PROG
1 C02
2
C04
3
4
C12 –– –
5
S06 – – –
6
S24
KA
LEITZAHL
–––
–––
99C06
–––
OK
u
ndWählen Drücken
REC
REPLAY
REW
QUICK
TIMER
INDEX SEARCH
PLAY
STOP
TAPE
SPEED
COUNTER
RESET
PAUSE
FF
6 Stellen Sie die Leitzahlen für weitere Kanäle wie in Schritt 4 und 5
beschrieben ein.
7 Nachdem Sie die Einstellung beendet haben, schalten Sie mit MENU
wieder zum ursprünglichen Bild zurück.
Erste Schritte
65
Page 66

Schritt 5 — Einstellen der Uhr
Um mit dem Timer und dem Sofort-Timer arbeiten bzw. aufnehmen zu
können, müssen Sie die Uhr einstellen.
1 Die Taste MENU drücken, um das Hauptmenü einzublenden.
ON
TIMER
SLEEP
SHOW VIEW
TIMER
ON SCREEN
TIMER REC
ON/OFF
TIMER REC
CLEAR
1
4
7
-/--
MENU
OK
2
3
5
6
9
8
C
0
PROGR
MENÜ
BILD–MENÜ
EIN–TIMER AKTIV
UHR EINSTELLEN
SPRACHE
SENDERABSPEICHERUNG
VCR–MODUS
FUNKTIONSSPERRE
WuDählen nd rü ke
OK
nc
2 Mit + ◊ oder – √ den Cursor (z) auf “UHR EINSTELLEN” stellen und
anschließend OK drücken.
Das Menü UHR EINSTELLEN wird eingeblendet.
UHR EINSTELLEN
––. ––. –––– ––– –– : ––
QUICK
TAPE
REC
REPLAY
REW
TIMER
INDEX SEARCH
STOP
SPEED
PLAY
COUNTER
RESET
PAUSE
FF
Falls Sie einen Fehler gemacht
haben
Die Taste ? drücken, um zur
vorhergehenden Position
zurückzukehren.
OK
cken
rü
D
3 OK drücken, um mit dem Einstellen der Uhr zu beginnen.
Die Tagesposition wird rot angezeigt.
UHR EINSTELLEN
1. 1. 1997 MI T 0 :00
WuDählen nd rü ke
OK
nc
4 Mit + ◊ oder – √ den Tag einstellen und anschließend OK drücken.
Danach wird die Monatsposition rot angezeigt.
UHR EINSTELLEN
4. 1. 1997 SAM 0 : 00
WuDählen nd rü ke
OK
nc
5 Genau wie in Schritt 4 mit + ◊ oder – √ und durch anschließendes Drücken
von OK den Monat und das Jahr sowie Stunden und Minuten einstellen.
UHR EINSTELLEN
4. 2. 1997 DON 5 :3011
Die Uhr steht, und “--/--” wird
angezeigt
Die Uhr neu einstellen.
Erste Schritte
66
WuDählen nd rü ke
OK
nc
6 Nach dem Einstellen der Minuten OK drücken.
Danach beginnt die Uhr zu laufen.
7 Die Taste MENU drücken, um zum ursprünglichen Bildschirm
zurückzukehren.
Page 67

Grundfunktionen des Video-TV-Geräts
TV -Betrieb
Dieser Teil der Bedienungsanleitung erläutert die Grundfunktionen, die
Sie beim TV-Betrieb am häufigsten verwenden werden. Die meisten dieser
Funktionen können mit der Fernbedienung ausgeführt werden.
EJECT
TIMER REC
REC
OPEN
TIMER REC
CL
ON/OFF
PLAYREW3STOP #FF PAUSE
REC
PROOR
Ein- und Ausschalten des Video-TVGeräts
ON
TIMER
SLEEP
SHOW VIEW
TIMER
ON SCREEN
TIMER REC
ON/OFF
TIMER REC
CLEAR
TIMER REC
1
4
7
-/--
REC
ON/OFF
Einschalten
D
Drücken Sie den Schalter U hinter der Klappe an der Vorderseite des
Video-TV-Geräts.
Die Taste ;, PROGR +/– oder die Zahlentasten auf der Fernbedienung
oder PROGR +/– am Video-TV-Gerät drücken, wenn die Anzeige u rot
leuchtet, d. h. das Video-TV-Gerät sich im Bereitschaftsmodus befindet.
Vorübergehendes Ausschalten
MENU
OK
2
3
5
6
9
8
C
0
PROGR
Die Taste udrücken.
Das Video-TV-Gerät wechselt in den Bereitschaftsbetrieb, und vorne am
Gerät leuchtet die Anzeige u rot auf.
So schalten Sie das Gerät wieder ein
Drücken Sie ;, PROGR +/– oder die Zahlentasten an der Fernbedienung
oder die Tasten PROGR +/– am Video-TV-Gerät.
So schalten Sie die Hauptstromversorgung aus
Drücken Sie den Schalter U des Video-TV-Geräts.
QUICK
TAPE
REC
REPLAY
REW
TIMER
INDEX SEARCH
STOP
SPEED
PLAY
COUNTER
RESET
PAUSE
FF
Hinweis
Wenn der Netzschalter U
ausgeschaltet ist, steht keine der
Videofunktionen zur Verfügung.
Programmwahl
Am Gerät PROGR +/–, auf der Fernbedienung PROGR +/– oder die
Zahlentasten drücken.
Auswählen einer zweistelligen Nummer mit
den Zahlentasten
Zuerst ÷ drücken, danach die zwei Zahlentasten.
Wenn Sie z. B. Programmplatz 14 wählen wollen, drücken Sie ÷, danach
die 1 und die 4.
Einstellen der Lautstärke
Á +/– drücken.
Grundfunktionen des Video-TV-Geräts
67
Page 68

ON
TIMER
SLEEP
MENU
OK
Einstellen des Bildes
1 Die Taste MENU drücken, um das Hauptmenü einzublenden.
MENÜ
BILD–MENÜ
EIN–TIMER AKTIV
UHR EINSTELLEN
SPRACHE
SENDERABSPEICHERUNG
VCR–MODUS
FUNKTIONSSPERRE
WuDählen nd rü ke
OK
nc
SHOW VIEW
TIMER
ON SCREEN
TIMER REC
ON/OFF
TIMER REC
CLEAR
REC
REPLAY
REW
1
4
7
-/--
QUICK
TIMER
INDEX SEARCH
PLAY
STOP
2
5
8
0
TAPE
SPEED
3
6
9
C
PROGR
COUNTER
RESET
PAUSE
FF
2 Den Cursor (z) mit + ◊ oder – √ auf “BILD-MENÜ” stellen und
anschließend OK drücken.
Das Menü BILD-MENÜ wird eingeblendet.
BILD–MENÜ
KONTRAST
FARBE
HELLIGKEIT
FARBTON
BILDSCHÄRFE
NORMWERTE
nen
WDähle r ück
uOKnd
80
50
50
00
50
3 Mit + ◊ oder – √ die Einstellung auswählen, die geändert werden soll, und
anschließend OK drücken.
4 Mit + ◊ oder – √ den gewünschten Wert einstellen und anschließend OK
drücken.
Die vorgenommenen Änderungen werden durch die vertikalen Balken
und den Wert am rechten Rand angezeigt. Einzelheiten finden Sie in der
Tabelle unten.
5 Die Schritte 3 und 4 wiederholen, um weitere Einstellungen vorzunehmen.
6 Die Taste MENU drücken, um zum ursprünglichen Bildschirm
zurückzukehren.
Die vorgenommenen Änderungen werden gespeichert.
Anmerkung
Die Funktion FARBTON steht nur
im Farbsystem NTSC zur
Verfügung.
Grundfunktionen des Video-TV-Geräts
68
Möglichkeiten der Bildeinstellung
BILD-MENÜ
KONTRAST
FARBE
HELLIGKEIT
FARBTON
BILDSCHÄRFE
NORMWERTE
Wirkung
Weniger Mehr
Weniger Mehr Farbe
Dunkler Heller
Grünlich Rötlich
Weicher Schärfer
Alle Bildwerte werden auf die Werkseinstellungen
zurückgesetzt.
Page 69

OPEN
ON
TIMER
SLEEP
Abschalten des Tons
Die Taste ¤ drücken.
Die Anzeige ¤ erscheint und bleibt auf dem Bildschirm.
EJECT
TIMER REC
REC
TIMER REC
CL
ON/OFF
PLAYREW3STOP #FF PAUSE
REC
PROOR
Um wieder den normalen Ton wiederzugeben, erneut ¤ drücken oder
Á + drücken.
Einblenden der
TIMER REC
ON/OFF
REC
Informationsanzeigen auf dem
D
Bildschirm
Die Taste drücken, um folgende Informationsanzeigen einzublenden.
erneut drücken, damit die Programm- und die Kanalnummer sowie der
Name des Kanals auf dem Bildschirm angezeigt bleiben.
Zum Löschen der Anzeigen so oft drücken, bis keine Anzeige mehr auf
dem Bildschirm erscheint.
ABC
Name
Programmnummer
12
C02
Kanalnummer
MENU
OK
4.12DON
20:00
SHOW VIEW
TIMER
ON SCREEN
TIMER REC
ON/OFF
TIMER REC
CLEAR
REC
REPLAY
REW
1
4
7
-/--
QUICK
TIMER
INDEX SEARCH
PLAY
STOP
2
5
8
0
TAPE
SPEED
3
6
9
C
PROGR
COUNTER
RESET
PAUSE
FF
Aktuelles Datum und Uhrzeit
Anschauen des Videobildes
(Videoeingangsbetrieb)
Die Taste … so oft drücken, bis die gewünschte Eingangsanzeige erscheint.
Um zum normalen TV-Betrieb zurückzukehren, so oft … drücken, bis der
gewünschte Programmplatz angezeigt wird, oder ; auf der
Fernbedienung einmal drücken. Einzelheiten zum Videoeingangsbild
finden Sie auf Seite 92.
Anschluß von Kopfhörern
Die Kopfhörer (nicht mitgeliefert) an die 2-Buchse (Kopfhörerbuchse)
hinter der Abdeckung vorne am Gerät anschließen.
Der Ton aus den Lautsprechern ist abgestellt.
Grundfunktionen des Video-TV-Geräts
69
Page 70

Anzeigen von Videotext
Fernsehsender strahlen über die Fernsehkanäle Informationen, den
sogenannten Videotext, aus. Mit Videotext können Sie jederzeit die
verschiedensten Informationen wie z. B. Wettervorhersagen oder
Nachrichten empfangen.
ON
TIMER
SLEEP
SHOW VIEW
TIMER
ON SCREEN
TIMER REC
ON/OFF
TIMER REC
CLEAR
REC
REPLAY
REW
1
4
7
-/--
QUICK
TIMER
INDEX SEARCH
PLAY
STOP
2
5
8
0
TAPE
SPEED
MENU
OK
3
6
9
C
PROGR
COUNTER
RESET
PAUSE
FF
Ein- und Ausschalten von
Videotext
1 Den Fernsehkanal mit dem gewünschten Videotext-Service auswählen.
2 Mit den Videotext aufrufen.
Eine Videotextseite (normalerweise die Indexseite) wird eingeblendet.
Wenn kein Videotext ausgestrahlt wird, erscheint die Anzeige P100 auf
einem schwarzen Fernsehschirm.
3 Mit den Zahlentasten die gewünschte dreistellige Videotextnummer
eingeben.
Die Zahlen werden auf dem Fernsehschirm angezeigt, und die
angeforderte Seite erscheint innerhalb von ein paar Sekunden.
Wenn Sie einen Fehler gemacht haben, drei beliebige Ziffern eingeben und
anschließend die korrekte Seitenzahl nochmals eingeben.
4 Mit ; zum Fernsehmodus zurückkehren.
Die TOPtext-Funktion
So wechseln Sie den
Videotextkanal
• Mit ; zunächst zum
Fernsehmodus zurückkehren und
dann wie in Schritt 1 bis 3
erläutert vorgehen.
• Wenn das Signal des
Fernsehkanals schwach ist, kann
der Videotext Fehler enthalten.
Dank dieser Funktion können Sie mit einem Tastendruck auf eine
bestimmte Videotextseite zugreifen. Wenn TOPtext ausgestrahlt wird,
erscheint am unteren Rand des Fernsehschirms ein farbcodiertes Menü.
Die Farben des Menüs entsprechen der roten, grünen, gelben und blauen
Taste auf der Fernbedienung. Diese farbigen Tasten fungieren im
Videotextmodus als TOPtext-Tasten.
Die gewünschte farbige Taste des farbcodierten Menüs drücken. Die
entsprechende Seite wird innerhalb von ein paar Sekunden eingeblendet.
Grundfunktionen des Video-TV-Geräts
70
Page 71

ON
TIMER
Zugreifen auf die nächste oder vorhergehende
Seite
PROGR +/–/√/◊ drücken.
Die nächste bzw. vorhergehende Seite erscheint auf dem Fernsehschirm.
SLEEP
SHOW VIEW
TIMER
ON SCREEN
TIMER REC
ON/OFF
TIMER REC
CLEAR
REC
REPLAY
REW
1
4
7
-/--
QUICK
TIMER
INDEX SEARCH
PLAY
STOP
2
5
8
0
TAPE
SPEED
MENU
OK
3
6
9
C
PROGR
COUNTER
RESET
PAUSE
FF
Einblenden einer Videotextseite in das
Fernsehbild
Mit jedem Tastendruck auf wechselt die Bildschirmanzeige
folgendermaßen:
n Videotext n Videotext und Fernsehbild
Verhindern der Aktualisierung oder Änderung
einer Videotextseite
Eine Videotextseite kann aus mehreren Zusatzseiten bestehen. Sie können
den Seitenwechsel stoppen, um den Text in einer Ihnen angenehmen
Geschwindigkeit lesen zu können.
(Halten) drücken.
Das Symbol erscheint auf dem Fernsehschirm, und die ausgewählte
Zusatzseite bleibt angezeigt.
Nochmals drücken, um zum normalen Videotextmodus zurückzukehren.
D
Grundfunktionen des Video-TV-Geräts
71
Page 72

Wiedergabe einer Videokassette
In diesem Abschnitt wird erläutert, wie Sie eine Videokassette einlegen und
wiedergeben. Weitere Funktionen, die Sie bei der Wiedergabe verwenden
können, finden Sie im Abschnitt “Weitere Funktionen” auf Seite 86.
Einlegen der Videokassette
1 Die Taste ;, PROGR +/– oder die Zahlentasten auf der Fernbedienung
EJECT
OPEN
CL
ON
TIMER
SLEEP
TIMER REC
REC
PLAYREW3STOP #FF PAUSE
TIMER REC
REC
ON/OFF
PROOR
MENU
oder PROGR +/– am Video-TV-Gerät drücken, wenn die Anzeige u rot
leuchtet, d. h. das Video-TV-Gerät sich im Bereitschaftsmodus befindet.
2 Die Kassette mit nach oben weisender Pfeilmarkierung vorsichtig in das
Kassettenfach hineinschieben, bis sie vom Einzugsmechanismus eingezogen
wird.
Bis die Kassette eingezogen ist, leuchtet im Display die Anzeige Ò auf.
Wenn sich das Video-TV-Gerät im Bereitschaftsmodus befand, schaltet es
sich automatisch ein. Wenn Sie eine Kassette einlegen, bei der die
Überspielschutzlasche entfernt wurde, beginnt die Wiedergabe
automatisch.
SHOW VIEW
TIMER
ON SCREEN
TIMER REC
ON/OFF
TIMER REC
CLEAR
REC
REPLAY
REW
1
4
7
-/--
QUICK
TIMER
INDEX SEARCH
PLAY
STOP
2
5
8
0
TAPE
SPEED
OK
3
6
9
C
PROGR
COUNTER
RESET
PAUSE
FF
Herausnehmen einer Videokassette
Auf der Fernbedienung die Taste 6 oder am Gerät die Taste EJECT 6
drücken.
Die Anzeige Ò im Display leuchtet auf und erlischt erst, wenn die Kassette
ausgeworfen wurde.
Die Kassette kann auch ausgeworfen werden, wenn sich das Gerät im
Bereitschaftsmodus befindet.
Schützen einer Kassette vor
versehentlichem Löschen
Die Kassette wird mit einer Überspielschutzlasche geliefert, um sie vor
versehentlichem Löschen zu schützen. Brechen Sie die
Überspielschutzlasche mit einem Schraubenziehler o. ä. heraus, damit die
Kassette nicht mehr überspielt werden kann.
Eine Kassette mit herausgebrochener Überspielschutzlasche wird
ausgeworfen, wenn Sie versuchen, sie zu bespielen.
Soll die Kassette wieder bespielt werden, überkleben Sie die Öffnung
einfach mit Klebeband.
Überspielschutzlasche
Klebeband
Grundfunktionen des Video-TV-Geräts
72
Page 73

EJECT
TIMER REC
OPEN
CL
REC
ON
TIMER
SLEEP
SHOW VIEW
TIMER
ON SCREEN
TIMER REC
ON/OFF
TIMER REC
CLEAR
Wiedergabe einer Kassette
1 Wenn die Anzeige u auf dem Video-TV-Gerät rot leuchtet, d. h. das Video-
TV-Gerät sich im Bereitschaftsmodus befindet, drücken Sie ;, PROGR +/–
oder eine beliebige Zahlentaste auf der Fernbedienung.
2 Legen Sie eine Kassette ein.
Wenn Sie eine Kassette mit herausgebrochener Überspielschutzlasche
REC
TIMER REC
PLAYREW3STOP #FF PAUSE
ON/OFF
2
1
5
4
7
8
-/--
0
PROOR
MENU
OK
3
6
9
C
PROGR
einlegen, beginnt die Wiedergabe sofort.
D
3 Drücken Sie PLAY ·.
Die Wiedergabe beginnt. Die Anzeigen auf dem Bildschirm werden nach
einigen Sekunden automatisch ausgeblendet.
Stoppen der Wiedergabe
Die Taste STOP p drücken.
Das Video-TV-Gerät wechselt zum normalen TV-Bildschirm.
Kurzes Unterbrechen der Wiedergabe
Die Taste PAUSE P drücken. Die Wiedergabe wird unterbrochen.
Zum Fortsetzen der Wiedergabe erneut PAUSE P oder PLAY · drücken.
Wenn Sie das Video-TV-Gerät im Pausemodus lassen, wird die normale
Wiedergabe nach etwa 5 Minuten wiederaufgenommen.
Vorspulen des Bands
Erst STOP p und dann FF ) drücken.
Zurückspulen des Bands
Erst STOP p und dann REW 0 drücken.
REC
REPLAY
REW
QUICK
TIMER
INDEX SEARCH
PLAY
STOP
TAPE
SPEED
COUNTER
RESET
PAUSE
FF
Durchsuchen eines Bandes bei hoher Geschwindigkeit
Während der Wiedergabe die Taste REW 0 (Zurückspulen) oder FF )
(Vorspulen) drücken und gedrückt halten.
Das Bild erscheint im Zeitraffer auf dem Fernsehschirm.
Um die normale Wiedergabe fortzusetzen, die Taste wieder loslassen.
Anzeigen des Bildes beim Vor- bzw. Zurückspulen
Beim Vorspulen die Taste FF ) drücken und gedrückt halten, beim
Zurückspulen die Taste REW 0.
Während Sie die Taste gedrückt halten, wird das Bild angezeigt.
Wenn Sie die Taste loslassen, wird das Vor- bzw. Zurückspulen fortgesetzt.
Zurückstellen des Bandzählers
Mit dem Bandzähler können Sie eine bestimmte Szene nach der Wiedergabe
leichter wiederfinden. Dazu muß der Bandzähler vor der Wiedergabe durch
Drücken der Taste COUNTER RESET auf der Fernbedienung auf “0:00:00”
gestellt werden. Beim Einlegen einer Kassette wird der Bandzähler
automatisch auf Null gesetzt. Das Video-TV-Gerät registriert die Länge des
wiedergegebenen Bands. Beachten Sie jedoch, daß der Bandzähler nur dann
mitzählt, wenn auf dem Band Videosignale aufgezeichnet sind.
Grundfunktionen des Video-TV-Geräts
73
Page 74

Wiederholte Wiedergabe einer
Kassette (AUTO REPEAT)
ON
TIMER
SLEEP
SHOW VIEW
TIMER
ON SCREEN
TIMER REC
ON/OFF
TIMER REC
CLEAR
REC
REPLAY
REW
1
4
7
-/--
QUICK
TIMER
INDEX SEARCH
PLAY
STOP
2
5
8
0
TAPE
SPEED
MENU
OK
3
6
9
C
PROGR
COUNTER
RESET
PAUSE
FF
Sie können den bespielten Teil eines Bandes wiederholt wiedergeben
lassen.
1 Drücken Sie MENU.
Das Hauptmenü wird angezeigt.
2 Stellen Sie den Cursor(z) mit den Tasten + ◊ oder – √ auf “VCR-MODUS”,
und drücken Sie dann OK.
VCR-MODUS
SPURLAGEREGELUNG
OPC : EIN
AUTO REPEAT : AUS
FORMAT : NORMAL
FARBSYSTEM : AUTO
WuDählen nd rü ke
OK
nc
3 Stellen Sie den Cursor(z) mit den Tasten + ◊ oder – √ auf “AUTO
REPEAT”, und drücken Sie dann OK.
4 Wählen Sie mit den Tasten + ◊ oder – √ die Option EIN.
VCR-MODUS
SPURLAGEREGELUNG
OPC : EIN
AUTO REPEAT : EIN
FORMAT : NORMAL
FARBSYSTEM : AUTO
WuDählen nd rü ke
OK
nc
5 Drücken Sie PLAY ·.
Die Wiedergabe beginnt. Wenn das Bandende erreicht ist, wird das Band
automatisch zurückgespult, und die Wiedergabe beginnt erneut.
Automatisches Wiederholen einer
Szene
Mit der Taste REPLAY auf der Fernbedienung können Sie automatisch
einzelne Szenen nochmals wiedergeben lassen.
Drücken Sie REPLAY.
Das Gerät spult zehn Sekunden der Aufnahme zurück und startet die
Wiedergabe dann automatisch.
Wenn Sie mehr als zehn Sekunden wiederholen lassen wollen, drücken Sie
REPLAY mehrmals. Mit jedem Tastendruck werden zehn Sekunden zur
Wiedergabedauer hinzugefügt, bis zu einer Dauer von maximal 40
Sekunden.
Grundfunktionen des Video-TV-Geräts
74
Page 75

ON
TIMER
SLEEP
SHOW VIEW
TIMER
ON SCREEN
TIMER REC
ON/OFF
TIMER REC
CLEAR
1
4
7
-/--
Einstellen des Farbsystems
In der Regel ist die Einstellung für das Farbsystem auf AUTO gesetzt.
Wenn während der Wiedergabe jedoch Streifen auf dem Bildschirm zu
sehen sind, müssen Sie das Farbsystem möglicherweise auf das System
MENU
OK
2
3
5
6
9
8
C
0
PROGR
einstellen, mit dem das Band aufgezeichnet wurde.
1 Drücken Sie MENU.
Das Hauptmenü wird angezeigt.
2 Stellen Sie den Cursor (z) mit den Tasten + ◊ oder – √ auf “VCR-
MODUS”, und drücken Sie dann OK.
VCR-MODUS
SPURLAGEREGELUNG
OPC : EIN
AUTO REPEAT : AUS
FORMAT : NORMAL
FARBSYSTEM : AUTO
WuDählen nd rü ke
OK
nc
D
QUICK
TAPE
REC
REPLAY
REW
TIMER
INDEX SEARCH
STOP
SPEED
PLAY
COUNTER
RESET
PAUSE
FF
Anmerkung
Die Bandlauf-Betriebsart wird
angezeigt, wenn Änderungen an der
Einstellung vorgenommen werden.
Die Anzeige erfolgt auch dann, wenn
ausgeschaltet ist.
3 Stellen Sie den Cursor(z) mit den Tasten + ◊ oder – √ auf
“FARBSYSTEM”, und drücken Sie dann OK.
4 Drücken Sie die Tasten + ◊ oder – √, bis das entsprechende Farbsystem
(PAL oder NTSC) erscheint, und drücken Sie dann OK.
VCR-MODUS
SPURLAGEREGELUNG
OPC : EIN
AUTO REPEAT : AUS
FORMAT : NORMAL
FARBSYSTEM : PAL
WuDählen nd rü ke
OK
nc
5 Drücken Sie MENU, um zum vorherigen Bildschirm zurückzukehren.
Aufrufen der Bildschirmanzeigen
Die Taste drücken, um die unten aufgeführten Bildschirmanzeigen
einzublenden. Damit nur die Anzeige für das restliche Band und der
lineare Bandzähler auf dem Bildschirm angezeigt werden, erneut
drücken.
Zum Löschen der Anzeigen so oft drücken, bis keine Anzeige mehr
erscheint.
Bandanfang
Restliches Band
Bandende
ES
4.12DON
20:00
Aktuelles Datum
und aktuelle Uhrzeit
BandlaufBetriebsart
E
S
2:05:10
Bandzähler
(linear)
Grundfunktionen des Video-TV-Geräts
75
Page 76

Anzeigen von Programmen im
16:9-Modus
ON
TIMER
SLEEP
SHOW VIEW
TIMER
ON SCREEN
TIMER REC
ON/OFF
TIMER REC
CLEAR
REC
REPLAY
REW
1
4
7
-/--
QUICK
TIMER
INDEX SEARCH
PLAY
STOP
2
5
8
0
TAPE
SPEED
MENU
OK
3
6
9
C
PROGR
COUNTER
RESET
PAUSE
FF
Wenn Sie Aufnahmen von Sendungen wiedergeben, die ursprünglich im
16:9-Modus ausgestrahlt wurden, können Sie Ihr Video-TV-Gerät in den
16:9-Modus schalten, damit das Bild nicht verzerrt angezeigt wird.
1 Drücken Sie MENU.
Das Hauptmenü wird angezeigt.
2 Stellen Sie den Cursor(z) mit den Tasten + ◊ oder – √ auf “VCR-MODUS”,
und drücken Sie dann OK.
VCR-MODUS
SPURLAGEREGELUNG
OPC : EIN
AUTO REPEAT : AUS
FORMAT : NORMAL
FARBSYSTEM : AUTO
WuDählen nd rü ke
OK
nc
3 Stellen Sie den Cursor(z) mit den Tasten + ◊ oder – √ auf “FORMAT”,
und drücken Sie dann OK.
4 Wählen Sie mit den Tasten + ◊ oder – √ die Option 16:9, und drücken Sie
dann OK.
VCR-MODUS
SPURLAGEREGELUNG
OPC : EIN
AUTO REPEAT : AUS
FORMAT : 1 6 : 9
FARBSYSTEM : AUTO
Hinweis
Wenn Sie den Kanal wechseln, eine
andere Eingangsquelle wählen oder
das Gerät ein- und ausschalten,
schaltet das Video-TV-Gerät wieder
in den normalen Betrieb zurück.
WuDählen nd rü ke
OK
nc
5 Drücken Sie MENU, um zum vorherigen Bildschirm zurückzukehren.
Grundfunktionen des Video-TV-Geräts
76
Page 77

Aufnahme von TV-Pr ogrammen
Aufnehmen von TV-Programmen
1 Die Taste ;, PROGR +/– oder die Zahlentasten auf der Fernbedienung
oder PROGR +/– am Video-TV-Gerät drücken, wenn die Anzeige u rot
EJECT
TIMER REC
OPEN
CL
ON
TIMER
SLEEP
SHOW VIEW
TIMER
ON SCREEN
TIMER REC
ON/OFF
TIMER REC
CLEAR
REC
TIMER REC
REC
ON/OFF
STOP PAUSE
TIMER REC
ON/OFF
1
4
7
-/--
PLAYREW3#FF
2
5
8
0
PROOR
REC
MENU
OK
3
6
9
C
PROGR
leuchtet, d. h. das Video-TV-Gerät sich im Bereitschaftsmodus befindet.
2 Eine Kassette mit Überspielschutzlasche in das Kassettenfach einlegen.
3 Wählen Sie mit TAPE SPEED die Aufnahmegeschwindgkeit SP (Standard
Play—Standardmodus) oder LP (Long Play—Langspielmodus) aus. Wenn
Sie im LP-Modus aufnehmen, verlängert sich die Aufnahmedauer.
Maximale Aufnahmedauer
SP-Modus: 4 Stunden mit E-240
LP-Modus: 8 Stunden mit E-240
4 Mit PROGR +/– oder den Zahlentasten auf der Fernbedienung den
gewünschten Programmplatz wählen. Bei zweistelligen Nummern, z. B. 14,
zuerst ÷ und anschließend 1 und 4 drücken.
5 Die Taste REC r drücken.
Die Anzeige REC vorne am Gerät leuchtet auf, und die Aufnahme beginnt.
Beenden der Aufnahme
Die Taste STOP p drücken.
Wenn das Ende der Kassette erreicht ist, wird das Band automatisch an den
Anfang zurückgespult. Diese Funktion steht nicht zur Verfügung, wenn das
Gerät ausgeschaltet ist.
Kurzes Unterbrechen der Aufnahme
Die Taste PAUSE P drücken.
Wenn die Aufnahme fortgesetzt werden soll, PAUSE P erneut drücken.
Mit dieser Funktion kann die Aufnahme kurzzeitig unterbrochen werden,
um z. B. eine unerwünschte Szene nicht aufzunehmen.
1 Wenn eine unerwünschte Szene beginnt, PAUSE P drücken. Die
Aufnahme wird gestoppt.
2 Wenn die Unterbrechung enden soll, erneut PAUSE P drücken. Die
Aufnahme wird an der Stelle, an der sie in Schritt 1 unterbrochen wurde,
fortgesetzt.
Bleibt das Video-TV-Gerät länger als etwa 5 Minuten im
Aufnahmepausemodus, wird die Aufnahme gestoppt.
D
QUICK
TAPE
REC
TIMER
REPLAY
Hinweis (nur KV-14V6D, KV-21V6D)
Wenn Sie ein Pay-TV-Programm
aufnehmen wollen, müssen Sie den
gewünschten Pay-TV-Kanal wie unter
“Abspeichern eines Pay-TV-Kanals”
(Seite 63) erläutert einstellen.
INDEX SEARCH
REW
STOP
SPEED
PLAY
COUNTER
RESET
PAUSE
FF
Aufnahme bei ausgeschaltetem TVGerät
Die Taste u drücken.
Der TV-Bildschirm wird ausgeschaltet, und die Bereitschaftsanzeige u
leuchtet auf.
Die Aufnahme wird fortgesetzt.
Anzeigen eines Fernsehsenders und
gleichzeitiges Aufnehmen eines
anderen (nur KV-14V6D, KV-21V6D)
Sie können gleichzeitig ein Fernsehprogramm anschauen und ein anderes
aufnehmen, wenn das Video-TV-Gerät über zwei Tuner verfügt. Nur die
Modelle KV-14V6D und KV-21V6D sind mit zwei Tunern ausgestattet.
Mit PROGR +/– oder den Zahlentasten auf der Fernbedienung oder mit
PROGR +/– am Gerät den gewünschten Programmplatz auswählen.
Grundfunktionen des Video-TV-Geräts
77
Page 78

Aufnahme von TV-Pr ogrammen mit
dem Timer
Der Timer ermöglicht das Programmieren von bis zu sechs Aufnahmen,
die sich über einen Monat erstrecken können.
Vor Beginn der Programmierung
ON
TIMER
SLEEP
SHOW VIEW
TIMER
ON SCREEN
TIMER REC
ON/OFF
TIMER REC
CLEAR
1
4
7
-/--
MENU
OK
2
3
5
6
9
8
C
0
PROGR
•Zum Einschalten des Video-TV-Geräts die Taste ;, PROGR +/– oder
die Zahlentasten auf der Fernbedienung oder PROGR +/– am Video-TVGerät drücken.
•Darauf achten, daß Datum und Uhrzeit richtig eingestellt sind. Falls
nicht, wird die Meldung ”Die Zeit einstellen” angezeigt. Weitere
Einzelheiten enthält der Abschnitt “Einstellen der Uhr” auf Seite 66.
•Darauf achten, daß die Überspielschutzlasche der Videokassette
unversehrt ist. Wenn Sie versuchen, eine Kassette ohne
Überspielschutzlasche einzulegen, erscheint die Meldung “Nur
Cassetten mit vorhandenem Löschschutzzapfen können bespielt
werden”.
•Den aufzunehmenden Kanal einstellen, wenn Sie eine Zimmerantenne
benutzen.
QUICK
TAPE
REC
REPLAY
REW
TIMER
INDEX SEARCH
STOP
SPEED
PLAY
COUNTER
RESET
PAUSE
FF
Falls Sie einen Fehler gemacht
haben
Die Taste ? drücken, um an die
vorhergehende Eingabeposition
zurückzukehren und die Eingabe zu
korrigieren.
Programmieren des Timers
Beispiel: Am Samstag, dem 6. Dezember 1997, soll von 20:15 bis 21:55 eine
Sendung auf Programmposition 26 im SP-Modus aufgenommen werden.
1 Die Taste TIMER ON SCREEN drücken.
Der Bildschirm TIMER ÜBERSICHT erscheint.
TIMER ÜBERSICHT
VPS / PDC : AUS
DATUM
START STOP
––
–––
––
––
––
––
WuDählen nd rü ke
2 Die Taste OK drücken.
Das aktuelle Datum wird in Rot angezeigt.
3 So oft + ◊ drücken, bis “6 SAM” erscheint.
Einzelheiten zur täglich oder wöchentlich wiederkehrenden Aufnahme
finden Sie im Abschnitt “Täglich/wöchentlich wiederkehrende
Aufnahme” auf Seite 80.
TIMER ÜBERSICHT
VPS / PDC : AUS
DATUM START STOP
6 SAM
–––
––
––
––
––
WuDählen nd rü ke
20 :00
DON12.4
PRG
–
–––
––::––––––––::–––
–
–––
–
––
––:––––:––
–
––
––:––––:––
–
––
––:––––:––
–
––
––:––––:––
OK
OK
––::––––––––::–––
20 :00
––:––––:––
––:––––:––
––:––––:––
––:––––:––
PRG
nc
DON12.4
–
–––
–
–––
–
––
–
––
–
––
–
––
nc
Wenn Sie als Einschaltzeit für
die Aufnahme einen bereits
vergangenen Zeitpunkt
einstellen
Wird die Einstellung gelöscht.
Grundfunktionen des Video-TV-Geräts
78
4 OK drücken. Danach mit + ◊ oder – √ die Stunde für die Einschaltzeit
einstellen (“20”).
TIMER ÜBERSICHT
VPS / PDC : AUS
DATUM START STOP
6 SAM
–––
––
––
––
––
WuDählen nd rü ke
20 :00
DON12.4
PRG
–––
––::––––––––::0–2
–
–––
–
––
––:––––:––
–
––
––:––––:––
–
––
––:––––:––
–
––
––:––––:––
OK
–
nc
Page 79

ON
TIMER
SLEEP
MENU
5 OK drücken. Danach mit + ◊ oder – √ die Minuten für die Einschaltzeit
einstellen (“15”).
TIMER ÜBERSICHT
VPS / PDC : AUS
DATUM START STOP
6 SAM
–––
––
––
––
––
WuDählen nd rü ke
20 :00
DON12.4
PRG
–
–––
––::––––5–1–::0–2
–
–––
–
––
––:––––:––
–
––
––:––––:––
–
––
––:––––:––
–
––
––:––––:––
OK
nc
OK
SHOW VIEW
TIMER
ON SCREEN
TIMER REC
ON/OFF
TIMER REC
CLEAR
REC
REPLAY
REW
Wenn Sie beim Programmieren
die falschen Schritte ausführen
Erscheint auf dem TV-Bildschirm
eine entsprechende Meldung.
1
4
7
-/--
QUICK
TIMER
INDEX SEARCH
PLAY
STOP
2
5
8
0
TAPE
SPEED
3
6
9
C
PROGR
COUNTER
RESET
PAUSE
FF
Wenn Sie den Schalter U
ausschalten
Die Tasten TIMER REC
funktionieren nicht.
6 OK drücken. Danach mit + ◊ oder – √ die Stunde für die Ausschaltzeit
einstellen (“21”).
TIMER ÜBERSICHT
VPS / PDC : AUS
DATUM START STOP
6 SAM
–––
––
––
––
––
WuDählen nd rü ke
20 :00
DON12.4
PRG
–––
––::1–2–5–1–::0–2
–
–––
–
––
––:––––:––
–
––
––:––––:––
–
––
––:––––:––
–
––
––:––––:––
OK
–
nc
7 OK drücken. Danach mit + ◊ oder – √ die Minuten für die Ausschaltzeit
einstellen (“55”).
TIMER ÜBERSICHT
VPS / PDC : AUS
DATUM START STOP
6 SAM
–––
––
––
––
––
WuDählen nd rü ke
20 :00
DON12.4
PRG
–
––5
5–::1–2–5–1–::0–2
–
–––
–
––
––:––––:––
–
––
––:––––:––
–
––
––:––––:––
–
––
––:––––:––
OK
nc
8 OK drücken. Danach mit + ◊ oder – √ den Programmplatz “26” einstellen.
TIMER ÜBERSICHT
VPS / PDC : AUS
DATUM START STOP
6 SAM
–––
––
––
––
––
WuDählen nd rü ke
20 :00
DON12.4
PRG
265
5–::1–2–5–1–::0–2
–
–––
–
––
––:––––:––
–
––
––:––––:––
–
––
––:––––:––
–
––
––:––––:––
OK
–
nc
9 OK drücken. Danach die Aufnahmegeschwindigkeit mit den Tasten + ◊
oder – √ auf SP einstellen.
TIMER ÜBERSICHT
VPS / PDC : AUS
DATUM START STOP
6 SAM
–––
––
––
––
––
WuDählen nd rü ke
20 :00
DON12.4
PRG
265
5–::1–2–5–1–::0–2
SP
–––
–
––
––:––––:––
–
––
––:––––:––
–
––
––:––––:––
–
––
––:––––:––
OK
–
nc
10 OK drücken.
Der Cursor (z) wird am linken Rand angezeigt.
11 Zum Programmieren weiterer Aufnahmevorgänge – √ drücken, um den
Cursor in die nächste Zeile zu stellen. Anschließend die Schritte 2 bis 10
wiederholen.
12 Die Taste TIMER REC ON/OFF drücken.
Die Anzeige TIMER REC vorne am Gerät leuchtet auf, und das Gerät
schaltet in den Bereitschaftsmodus für den Timer-gesteuerten
Aufnahmebetrieb um.
D
Die Taste TIMER ON SCREEN drücken, um den Bildschirm TIMER
ÜBERSICHT auszublenden.
Das Video-TV-Gerät ausschalten, es sei denn, Sie möchten sich gerade eine
Sendung im Fernsehen anschauen.
Das Video-TV-Gerät schaltet sich zur eingestellten Einschaltzeit
automatisch ein und zur programmierten Ausschaltzeit automatisch aus.
Grundfunktionen des Video-TV-Geräts
79
Page 80

Täglich/wöchentlich wiederkehrende
Aufnahme
Sie können das Video-TV-Gerät für täglich oder wöchentlich
EJECT
TIMER REC
REC
OPEN
TIMER REC
CL
ON/OFF
PLAYREW3STOP #FF PAUSE
REC
PROOR
wiederkehrende Aufnahmen vorprogrammieren. Bei der täglichen
Aufnahme wird eine Sendung jeden Tag zur selben Uhrzeit
aufgenommen, während bei der wöchentlichen Aufnahme eine Sendung
jede Woche am selben Wochentag aufgenommen wird.
Drücken Sie in Schritt 3 die Taste – √, bis in der Position “DATUM” die
TIMER REC
ON/OFF
REC
gewünschte Einstellung angezeigt wird. Je nachdem, wie oft Sie – √
drücken, ändern sich die Anzeigen wie folgt:
4 (Aktuelles Datum) n MON–SON n MON–SAM n MON–FRE n
JEDEN SAM n JEDEN FRE n JEDEN DON n JEDEN MIT n JEDEN
DIE n JEDEN MON n JEDEN SON n 3 (nächster Monat)n 2 ...
Stoppen der Timer-gesteuerten Aufnahme
ON
TIMER
SLEEP
SHOW VIEW
TIMER
ON SCREEN
TIMER REC
ON/OFF
TIMER REC
CLEAR
REC
REPLAY
REW
1
4
7
-/--
QUICK
TIMER
INDEX SEARCH
PLAY
STOP
2
5
8
0
TAPE
SPEED
MENU
OK
3
6
9
C
PROGR
COUNTER
RESET
PAUSE
FF
Die Taste TIMER REC ON/OFF drücken.
Die Anzeige TIMER REC erlischt.
Benutzung des Video-TV-Geräts vor
der Timer-Aufnahme
Im Bereitschaftsmodus für die Timer-gesteuerte Aufnahme können Sie
sich Sendungen im Fernsehen anschauen, die Timer-Einstellungen
überprüfen und den Zähler zurückstellen. Sie müssen jedoch TIMER REC
ON/OFF drücken, um die Anzeige TIMER REC vorne am Video-TV-Gerät
auszuschalten und folgende Funktionen ausführen zu können:
• Auswerfen der Kassette
• Verwenden der Bandbedienungstasten
• Ändern oder Löschen der Timer-Einstellungen
Vergessen Sie nicht, hinterher erneut TIMER REC ON/OFF zu drücken,
damit die Anzeige TIMER REC wieder aufleuchtet und die TimerFunktion wieder aktiviert wird.
Grundfunktionen des Video-TV-Geräts
80
Page 81

Überprüfen der TimerEinstellungen
ON
TIMER
SLEEP
SHOW VIEW
TIMER
ON SCREEN
TIMER REC
ON/OFF
TIMER REC
CLEAR
REC
REPLAY
REW
1
4
7
-/--
QUICK
TIMER
INDEX SEARCH
PLAY
STOP
2
5
8
0
TAPE
SPEED
MENU
OK
3
6
9
C
PROGR
COUNTER
RESET
PAUSE
FF
Auf dem Bildschirm kann eine Liste der programmierten TimerEinstellungen angezeigt werden.
Die Taste TIMER ON SCREEN drücken.
Der Bildschirm TIMER ÜBERSICHT erscheint.
TIMER ÜBERSICHT
VPS / PDC : AUS
DATUM
START STOP
7
SON
MON-SAM
JEDEN SON
––
––
nen
WDähl e rück
uOKnd
51::10215013::082SAM6
20 :00
12
00:000:32
03:2155:9
––:––––:––
––:––––:––
PRG
DON.4
SP
265
SP
505
SP
1
LP
12
–
––
–
––
Zum Ausblenden des Bildschirms TIMER ÜBERSICHT erneut TIMER ON
SCREEN drücken.
Ändern oder Löschen von TimerEinstellungen
1 Die Taste TIMER REC ON/OFF drücken. Daraufhin erlischt die Anzeige
TIMER REC vorne am Gerät.
2 TIMER ON SCREEN drücken, um den Bildschirm TIMER ÜBERSICHT
aufzurufen.
D
3 Mit + ◊ oder – √ die Einstellung auswählen, die geändert oder gelöscht
werden soll.
TIMER ÜBERSICHT
VPS / PDC : AUS
DATUM
START STOP
7
SON
MON-SAM
JEDEN SON
––
––
nen
WDähl e rück
uOKnd
51::10215013::082SAM6
20 :00
12
PRG
00:000:32
03:2155:9
––:––––:––
––:––––:––
DON.4
SP
265
SP
505
SP
1
LP
12
–
––
–
––
4 Ändern der Einstellung
Mit + ◊ oder – √ und OK alle Einstellungen neu eingeben.
Einzelheiten dazu finden Sie im Abschnitt “Programmieren des Timers”
auf den Seiten 78 und 79 (Schritte 2 bis 10).
Löschen der Einstellung
Die Taste TIMER REC CLEAR drücken.
5 Die Taste TIMER ON SCREEN drücken, um zum ursprünglichen
Bildschirm zurückzukehren.
6 Wenn noch weitere Timer-Aufnahmen programmiert sind, d. h. in der
Liste angezeigt werden, muß die Taste TIMER REC ON/OFF gedrückt
werden, damit das Gerät in den Bereitschaftsmodus für den Timergesteuerten Aufnahmebetrieb wechselt.
Grundfunktionen des Video-TV-Geräts
81
Page 82

ON
TIMER
SLEEP
SHOW VIEW
TIMER
ON SCREEN
TIMER REC
ON/OFF
TIMER REC
CLEAR
REC
REPLAY
REW
1
4
7
-/--
QUICK
TIMER
INDEX SEARCH
PLAY
2
5
8
0
TAPE
SPEED
MENU
OK
3
6
9
C
PROGR
COUNTER
RESET
PAUSE
FF
Aufnehmen mit dem Sofort-Timer
Sie können Ihr Video-TV-Gerät so programmieren, daß die TimerAufnahme sofort beginnt und nach einer bestimmten eingestellten
Zeitspanne automatisch stoppt.
Wenn Datum und Uhrzeit nicht eingestellt wurden, läßt sich eine
Aufnahme mit dem Sofort-Timer nicht durchführen.
Wenn bereits aufgenommen wird
1 Auf der Fernbedienung die Taste QUICK TIMER drücken.
Auf dem Bildschirm erscheint die Anzeige “QUICK TIMER 0:00”.
2 QUICK TIMER wiederholt drücken, um die gewünschte Aufnahmezeit
einzustellen. Mit jedem Drücken der Taste wird die Aufnahmedauer um
jeweils 30 Minuten erhöht:
0:00 0:30 1:00 .... 7:30 8:00
Die Aufnahme wird auch dann fortgesetzt, wenn Sie das Video-TV-Gerät
ausschalten. Ist die eingestellte Zeitspanne verstrichen, stoppt die
Aufnahme automatisch.
STOP
Ändern der Aufnahmezeit nach
Beginn der Sofort-TimerAufnahme
Die Taste QUICK TIMER drücken, bis
die gewünschte Zeitspanne angezeigt
wird.
Anzeigen der noch
verbleibenden Zeit während der
Sofort-Timer-Aufnahme
Die Taste drücken. Die noch
verbleibende Aufnahmezeit wird
angezeigt (in Minuten).
Stoppen der Sofort-TimerAufnahme
Die Taste TIMER REC ON/OFF
drücken.
Wenn noch nicht aufgenommen wird
1 Zum Einschalten des Video-TV-Geräts die Taste ;, PROGR +/– oder die
Zahlentasten auf der Fernbedienung oder PROGR +/– am Video-TV-Gerät
drücken.
2 Eine Kassette mit Überspielschutzlasche einlegen.
3 Den gewünschten Programmplatz auswählen.
4 Auf der Fernbedienung die Taste QUICK TIMER drücken.
Auf dem Bildschirm erscheint die Anzeige “QUICK TIMER 0:00”.
5 Die Taste QUICK TIMER wiederholt drücken, um die gewünschte
Aufnahmezeit einzustellen. Mit jedem Drücken der Taste wird die
Aufnahmezeit um jeweils 30 Minuten erhöht:
0:00 0:30 1:00 .... 7:30 8:00
Die Zeitanzeige leuchtet gelb und die Aufnahme wird gestartet.
Die Aufnahme wird auch dann fortgesetzt, wenn Sie das Video-TV-Gerät
ausschalten.
Ist die eingestellte Zeitspanne verstrichen, stoppt die Aufnahme
automatisch.
Grundfunktionen des Video-TV-Geräts
82
Page 83

Timer-Aufnahme mit dem VideoProgramm-System VPS/PDC
ON
TIMER
SLEEP
SHOW VIEW
TIMER
ON SCREEN
TIMER REC
ON/OFF
TIMER REC
CLEAR
REC
REPLAY
REW
1
4
7
-/--
QUICK
TIMER
INDEX SEARCH
PLAY
STOP
2
5
8
0
TAPE
SPEED
MENU
OK
3
6
9
C
PROGR
COUNTER
RESET
PAUSE
FF
Die deutschen Sendeanstalten strahlen zusammen mit den TVProgrammen VPS-Codes (VPS = Video-Programm-System) bzw. PDCCodes (PDC = Programme Delivery Control) aus, die den Timer über
Sendezeitänderungen und Programmunterbrechungen informieren, so
daß die programmierte Sendung trotz eventueller Programmänderungen
korrekt aufgezeichnet wird. Wenn beispielsweise das reguläre Programm
für eine wichtige Meldung unterbrochen wird, stoppt die Aufnahme
automatisch. Sobald das reguläre Programm fortgesetzt wird, beginnt
auch die Aufnahme wieder.
1 Wenn am Video-TV-Gerät die Anzeige TIMER REC leuchtet, die Taste
TIMER REC ON/OFF drücken, um die Anzeige auszuschalten.
2 Drücken Sie TIMER ON SCREEN.
Der Bildschirm TIMER ÜBERSICHT erscheint.
TIMER ÜBERSICHT
VPS / PDC : AUS
DATUM
START STOP
7
SON
MON-SAM
JEDEN SON
––
––
nen
WDähl e rück
uOKnd
51::10215013::082SAM6
00:000:32
03:2155:9
––:––––:––
––:––––:––
20 :00
12
DON.4
PRG
265
505
1
12
––
––
SP
SP
SP
LP
–
–
3 Wählen Sie mit den Tasten + ◊ oder – √ die Option VPS/PDC, und
drücken Sie dann OK.
VPS/PDC wird rot angezeigt.
TIMER ÜBERSICHT
VPS / PDC : AUS
DATUM
START STOP
7
SON
MON-SAM
JEDEN SON
––
––
nen
WDähl e rück
uOKnd
51::10215013::082SAM6
00:000:32
03:2155:9
––:––––:––
––:––––:––
20 :00
12
DON.4
PRG
265
505
12
––
––
SP
SP
SP
1
LP
–
–
D
Anmerkungen zur VPS/PDCAufnahme
• Wenn sich beim VPS/PDC-TimerAufnahmebetrieb Aufnahmevorgänge
aufgrund von Sendezeitänderungen
überlappen, besitzt der erste
Aufnahmevorgang Priorität. Der zweite
Aufnahmevorgang beginnt erst dann,
wenn die erste Sendung vollständig
aufgenommen ist.
• Hat das Video-TV-Gerät kein VPS/PDCSignal empfangen, weil das
Empfangssignal zu schwach war oder
die Sendeanstalt versehentlich kein VPS/
PDC-Signal ausgestrahlt hat, erfolgt die
Timer-Aufnahme ohne die VPS/PDCFunktion, d. h. der Timer startet die
Aufnahme zur vorprogrammierten
Aufnahmezeit, auch wenn die Anzeige
VPS/PDC leuchtet.
• (nur KV-14V5D, KV-21V5D)
Wenn Sie fernsehen und eine VPS/PDC-
Aufnahme programmiert haben,
wechselt das Programm automatisch
zum Programm für die TimerAufnahme, und Sie können nicht mehr
umschalten. Sie sollten also darauf
achten, VPS/PDC nur einzustellen,
wenn sich das Video-TV-Gerät im
Bereitschaftsmodus befindet. Wenn Sie
ohne Unterbrechung fernsehen möchten,
löschen Sie die VPS/PDC-TimerProgrammierung.
4 Wählen Sie mit den Tasten + ◊ oder – √ die Option EIN, und drücken Sie
dann OK.
TIMER ÜBERSICHT
VPS / PDC : EIN
DATUM
START STOP
7
SON
MON-SAM
JEDEN SON
––
––
nen
WDähl e rück
uOKnd
51::10215013::082SAM6
00:000:32
03:2155:9
––:––––:––
––:––––:––
20 :00
12
DON.4
PRG
265
505
12
––
––
SP
SP
SP
1
LP
–
–
5 Stellen Sie den Timer wie in den Schritten unter “Programmieren des
Timers” (Seite 78 und 79) beschrieben ein.
Grundfunktionen des Video-TV-Geräts
83
Page 84

Aufnehmen von Fernsehprogrammen
mit ShowView
Die ShowView-Funktion erleichtert Ihnen das Programmieren von TimerAufnahmen. Mit ShowView nehmen Sie alle erforderlichen Einstellungen
vor, indem Sie einfach den 9stelligen Code der gewünschten Sendung
eingeben, der in Ihrer Fernsehzeitschrift angegeben ist. Damit Sie diese
ON
TIMER
SLEEP
SHOW VIEW
TIMER
ON SCREEN
TIMER REC
ON/OFF
TIMER REC
CLEAR
1
4
7
-/--
MENU
OK
2
3
5
6
9
8
C
0
PROGR
Funktion nutzen können, müssen Sie Ihr Video-TV-Gerät zuerst einrichten
und den verschiedenen Leitzahlen Programmpositionen zuordnen.
Einzelheiten dazu finden Sie unter “Einrichten von ShowView” auf Seite
64.
Vorbereitungen
•Schalten Sie das Video-TV-Gerät mit ;, PROGR +/– oder einer
Zahlentaste auf der Fernbedienung bzw. mit PROGR +/– am Gerät
selbst ein.
•Achten Sie darauf, daß Uhrzeit und Datum richtig eingestellt sind. Ist
dies nicht der Fall, schlagen Sie unter “Einstellen der Uhr” auf Seite 66
nach.
•Achten Sie darauf, daß die Überspielschutzlasche der Videokassette
unversehrt ist.
QUICK
TAPE
REC
REPLAY
REW
TIMER
INDEX SEARCH
STOP
SPEED
PLAY
COUNTER
RESET
PAUSE
FF
Wenn Sie beim Eingeben der
ShowView-Nummer der
Sendung einen Fehler gemacht
haben
Drücken Sie TIMER REC CLEAR,
und geben Sie dann die richtige
Nummer ein.
1 Drücken Sie SHOWVIEW.
Das Menü SHOWVIEW wird angezeigt.
SHOWVIEW
SHOWVIEW NO
[
Mit 0–9 Wählen,
dann Drücken
–––––––––
OK
]
[
SP
4. 12DON
]
20:00
2 Geben Sie die ShowView-Nummer der gewünschten Sendung mit den
Zahlentasten ein.
SHOWVIEW
SHOWVIEW NO
[
Mit 0–9 Wählen,
dann Drücken
82477691–
OK
]
[
SP
4. 12DON
]
20:00
3 Drücken Sie OK.
Datum, Anfangs- und Endezeit sowie die Programmposition der
Aufnahme werden angezeigt.
SHOWVIEW
SHOWVIEW NO
[
82477691–
DATUM START STOP PRG
6 SAM 20:00 21:00 58
Drücken Sie die Taste
TIMER REC [ON/OFF]
20:00
4. 12DON
]
SP
Grundfunktionen des Video-TV-Geräts
84
Überprüfen Sie die Angaben. Wenn die Angaben nicht korrekt sind,
löschen Sie sie mit TIMER REC CLEAR.
Page 85

ON
TIMER
SLEEP
SHOW VIEW
TIMER
ON SCREEN
TIMER REC
ON/OFF
TIMER REC
CLEAR
REC
REPLAY
1
4
7
-/--
QUICK
TIMER
INDEX SEARCH
2
5
8
0
TAPE
SPEED
MENU
OK
3
6
9
C
PROGR
COUNTER
RESET
PAUSE
4 Wenn Sie weitere Timer-Einstellungen vornehmen möchten, gehen Sie wie
in Schritt 2 bis 3 beschrieben vor.
5 Drücken Sie TIMER REC ON/OFF.
Die Anzeige TIMER REC an der Vorderseite des Video-TV-Geräts leuchtet
auf, und das Video-TV-Gerät schaltet in den TimerAufnahmebereitschaftsmodus.
So stoppen Sie die Aufnahme
Drücken Sie STOP p, wenn Sie die Aufnahme beenden möchten.
D
REW
PLAY
STOP
FF
Grundfunktionen des Video-TV-Geräts
85
Page 86

Weitere Funktionen
Automatische Abschaltfunktion
(Sleep Timer)
Sie können einen Zeitpunkt einstellen, an dem das Video-TV-Gerät
automatisch in den Bereitschaftsbetrieb wechselt.
Die Taste SLEEP drücken.
ON
TIMER
SLEEP
MENU
OK
Wenn Sie diese Taste drücken, ändert sich die Angabe für den Zeitraum
(in Minuten) folgendermaßen:
AUS 30 60 90
SHOW VIEW
TIMER
ON SCREEN
TIMER REC
ON/OFF
TIMER REC
CLEAR
REC
REPLAY
REW
1
4
7
-/--
QUICK
TIMER
INDEX SEARCH
PLAY
STOP
2
5
8
0
TAPE
SPEED
3
6
9
C
PROGR
COUNTER
RESET
PAUSE
FF
Eine Minute, bevor das Gerät in den Bereitschaftsbetrieb wechselt,
erscheint auf dem Bildschirm die Meldung “Gute Nacht”.
Löschen des Timers
Die Taste SLEEP drücken und
“AUS” auswählen.
Weitere Funktionen
Grundfunktionen des Video-TV-Geräts
86
Page 87

Automatische Einschaltfunktion
(On Timer)
Sie können Ihr Video-TV-Gerät so programmieren, daß es sich zur
gewünschten Zeit einschaltet. Dabei können Sie auswählen, ob die
Fernseh- oder die Videofunktion aktiviert werden soll.
ON
TIMER
SLEEP
SHOW VIEW
TIMER
ON SCREEN
TIMER REC
ON/OFF
TIMER REC
CLEAR
REC
REPLAY
REW
1
4
7
-/--
QUICK
TIMER
INDEX SEARCH
PLAY
STOP
2
5
8
0
TAPE
SPEED
MENU
OK
3
6
9
C
PROGR
COUNTER
RESET
PAUSE
FF
1 Die Taste MENU drücken, um das Hauptmenü anzuzeigen.
2 Den Cursor (z) mit + ◊ oder – √ auf “EIN-TIMER AKTIV” stellen und OK
drücken.
Das Menü EIN-TIMER AKTIV wird eingeblendet.
EIN–TIMER AKTIV
ZEIT:
QUELLE:
ON TIMER: AUS
WuDählen nd rü ke
6:00
TV PROG 1
OK
20 :00
DON12.4
nc
3 Die Taste OK drücken.
Die Positionen zum Einstellen der Stunden leuchten rot auf.
4 Mit + ◊ oder – √ die gewünschte Stunde einstellen und anschließend OK
drücken.
Die Positionen für die Minuten leuchten rot auf.
5 Mit + ◊ oder – √ die Minuten einstellen und anschließend OK drücken.
Der Cursor erscheint neben “ZEIT”.
6 Den Cursor (z) mit + ◊ oder – √ zu “QUELLE” bewegen und anschließend
OK drücken.
7 Mit den Tasten + ◊ oder – √ die Option TV oder VCR (Video-Wiedergabe)
wählen und anschließend OK drücken.
Wenn Sie TV festgelegt haben, den gewünschten Programmplatz mit + ◊
oder – √ wählen und OK drücken.
EIN–TIMER AKTIV
ZEIT:
QUELLE:
ON TIMER: AUS
7:30
TV PROG 1
20 :00
DON12.4
2
D
Löschen der Meldung
Eine beliebige Taste am Gerät oder
auf der Fernbedienung drücken.
WuDählen nd rü ke
OK
nc
8 Den Cursor (z) mit den Tasten + ◊ oder – √ auf “ON TIMER” stellen und
OK drücken. Dann mit + ◊ oder – √ EIN wählen und OK drücken.
9 Die Taste MENU drücken, um zum ursprünglichen Bildschirm
zurückzukehren.
10 Die Taste ON TIMER drücken.
Wenn Sie das Video-TV-Gerät nicht mehr benutzen, die Taste u drücken,
um das Gerät in den Bereitschaftsbetrieb zu schalten.
Zur festgelegten Zeit schaltet sich das Gerät automatisch ein.
Wenn danach zwei Stunden lang keine Taste gedrückt wird, schaltet sich
das Video-TV-Gerät automatisch wieder aus.
Grundfunktionen des Video-TV-Geräts
Weitere Funktionen
87
Page 88

Die Funktion FUNKTIONSSPERRE
Mit der Sperrfunktion FUNKTIONSSPERRE lassen sich die Tasten an der
Vorderseite des Video-TV-Geräts sperren. Damit können Sie verhindern,
daß beispielsweise kleine Kinder Kanäle wechseln, Videos ansehen usw.
ON
TIMER
SLEEP
SHOW VIEW
TIMER
ON SCREEN
TIMER REC
ON/OFF
TIMER REC
CLEAR
REC
REPLAY
REW
1
4
7
-/--
QUICK
TIMER
INDEX SEARCH
PLAY
STOP
2
5
8
0
TAPE
SPEED
MENU
OK
3
6
9
C
PROGR
COUNTER
RESET
PAUSE
FF
1 Drücken Sie MENU.
Das Hauptmenü wird angezeigt.
2 Stellen Sie den Cursor(z) mit den Tasten + ◊ oder – √ auf
“FUNKTIONSSPERRE”, und drücken Sie dann OK.
Das Menü FUNKTIONSSPERRE sird eingeblendet.
FUNKTIONSSPERRE
FUNKT IONSSPERRE:
OK
Drück
en
AUS
3 Drücken Sie OK. Nun können Sie die FUNKTIONSSPERRE einstellen.
Die Optionen EIN/AUS werden rot angezeigt.
Wählen Sie mit den Tasten + ◊ oder – √ die Option AUS oder EIN, und
drücken Sie dann OK.
AUS: Werkseitige Einstellung.
EIN: Die Tasten am Video-TV-Gerät funktionieren nicht mehr (mit
Ausnahme der Taste POWER).
FUNKTIONSSPERRE
FUNKT IONSSPERRE:
EIN
uOKndWählen Drücken
Die Fernbedienung funktioniert, auch wenn die Funktion
FUNKTIONSSPERRE aktiviert ist.
Weitere Funktionen
88
Page 89

Suchen mit der Funktion INDEX
Das Video-TV-Gerät setzt jeweils am Anfang einer neuen Aufnahme als
Markierung ein Indexsignal. Anhand dieser Signale können Sie hinterher
bestimmte Aufnahmen mühelos wiederfinden. Das Video-TV-Gerät kann
auf dem Band 99 Signale vor oder nach der aktuellen Position suchen.
ON
TIMER
SLEEP
MENU
1 Legen Sie eine Kassette ein.
SHOW VIEW
TIMER
ON SCREEN
TIMER REC
ON/OFF
TIMER REC
CLEAR
REC
REPLAY
REW
1
4
7
-/--
QUICK
TIMER
INDEX SEARCH
PLAY
STOP
2
5
8
0
TAPE
SPEED
OK
3
6
9
C
PROGR
COUNTER
RESET
PAUSE
FF
2 Drücken Sie mehrmals INDEX SEARCH =/+ Damit geben Sie an,
das wievielte Indexsignal vor oder nach der aktuellen Position der
Videorecorder ansteuern soll.
INDEX 5
SUCHLAUF
Das Gerät startet die Suche, und die Indexnummer wird am
Fernsehschirm angezeigt und heruntergezählt, bis der Wert 0 erreicht ist.
Wenn Null erreicht ist, startet die Wiedergabe automatisch.
So beenden Sie die Suche
Drücken Sie STOP p.
D
Weitere Funktionen
89
Page 90

Verbessern der Videobildqualität
Einstellen der Spurlage
ON
TIMER
SLEEP
SHOW VIEW
TIMER
ON SCREEN
TIMER REC
ON/OFF
TIMER REC
CLEAR
REC
REPLAY
REW
1
4
7
-/--
QUICK
TIMER
INDEX SEARCH
PLAY
STOP
2
5
8
0
TAPE
SPEED
MENU
OK
3
6
9
C
PROGR
COUNTER
RESET
PAUSE
FF
Automatisches Einstellen der Spurlage
Dieses Video-TV-Gerät stellt die Spurlage automatisch möglichst gut ein.
Während des Einstellvorgangs erscheint die Anzeige SPURL. -AUTO.
Manuelles Einstellen der Spurlage
Wenn auf dem Video-Wiedergabebild Streifen oder “Schnee” erscheinen,
stellen Sie die Spurlage manuell ein.
1 Die Taste MENU drücken, um das Hauptmenü einzublenden.
2 Den Cursor (z) mit + ◊ oder – √ auf “SPURLAGEREGELUNG” stellen
und anschließend OK drücken.
Das Menü SPURLAGEREGELUNG wird eingeblendet.
SPURLAGEREGELUNG
AUTOMATIK
MANUELL
WuDählen nd rü ke
OK
3 Mit + ◊ oder – √ MANUELL auswählen und anschließend OK drücken.
Die Spurlageneinstellskala wird eingeblendet.
nc
Umschalten auf automatische
Spurlageneinstellung
Im Menü SPURLAGEREGELUNG
mit + ◊ oder – √ AUTOMATIK
auswählen und anschließend OK
drücken.
SPURLAGEREGELUNG
AUTOMATIK
MANUELL
SPURL. –EINSTELLUNG
WuDählen nd rü ke
OK
nc
4 Mit + ◊ oder – √ die Spurlage optimal einstellen.
5 OK drücken.
Das Hauptmenü wird wieder angezeigt.
6 Die Taste MENU drücken, um zum ursprünglichen Bildschirm
zurückzukehren.
Weitere Funktionen
90
Page 91

Einstellen des Bildes mit der OPCFunktion
ON
TIMER
SLEEP
SHOW VIEW
TIMER
ON SCREEN
TIMER REC
ON/OFF
TIMER REC
CLEAR
REC
REPLAY
REW
1
4
7
-/--
QUICK
TIMER
INDEX SEARCH
PLAY
STOP
2
5
8
0
TAPE
SPEED
MENU
OK
3
6
9
C
PROGR
COUNTER
RESET
PAUSE
FF
Diese Funktion verbessert die Aufnahme- und die Wiedergabequalität,
indem die Systemparameter automatisch an den Zustand des
Videobandes angepaßt werden.
Die Funktion wird werkseitig auf EIN gesetzt. Um eine bessere
Bildqualität zu erzielen, lassen Sie die Funktion eingeschaltet. Die OPCFunktion ist für alle Bandtypen geeignet, selbst für Leihkassetten.
Ändern können Sie die Einstellung über die Menüanzeige.
1 Die Taste MENU drücken, um das Hauptmenü anzuzeigen.
2 Den Cursor (z) mit + ◊ oder – √ auf “VCR-MODUS” stellen und
anschließend OK drücken.
Das Menü VCR-MODUS wird eingeblendet.
VCR-MODUS
SPURLAGEREGELUNG
OPC : EIN
AUTO REPEAT : AUS
FORMAT : NORMAL
FARBSYSTEM : AUTO
WuDählen nd rü ke
OK
nc
3 Den Cursor (z) mit + ◊ oder – √ auf “OPC” stellen und anschließend OK
drücken.
4 EIN oder AUS mit den Tasten + ◊ oder – √ wählen und anschließend OK
drücken.
VCR-MODUS
SPURLAGEREGELUNG
OPC : AUS
AUTO REPEAT : AUS
FORMAT : NORMAL
FARBSYSTEM : AUTO
D
uOKndWählen Drücken
5 Die Taste MENU drücken, um das Hauptmenü auszublenden.
Automatische Reinigung der
Videoköpfe
Die Reinigungsautomatik reinigt die Videoköpfe jedesmal, wenn eine
Kassette eingelegt oder herausgenommen wird. Falls sich selbst nach
mehrmaligem Einlegen bzw. Herausnehmen der Kassette kein
überzeugender Reinigungseffekt erzielen läßt, sollten Sie die Videoköpfe
mit der Sony-Reinigungskassette V-25CL reinigen. Einzelheiten zum
Reinigen der Köpfe finden Sie auf Seite 96.
Weitere Funktionen
91
Page 92

Anschluß und Betrieb eines anderen
Videor ecorders
Anschluß eines anderen
Videorecorders zur Wiedergabe
Rückseite
an Video/Audio-Ausgänge
Hinter der Abdeckung vorne
ENR PROG
REC
MAR/ARR
an EURO-AVAnschluß
(21polig)
Hinweis
Verwenden Sie beim Anschließen
zusätzlicher Geräte, z. B. von
Videospielgeräten, die
Verbindungskabel vom Hersteller
des jeweiligen Geräts.
EURO-Kabel VMC-212CE (nicht mitgeliefert)
Wahl des Videoeingangssignals
… so oft drücken, bis auf dem Bildschirm die Anzeige für den gewünschten
Videoeingang erscheint.
• … 1 für Audio/Video- oder RGB-Eingang über den Anschluß : 1/W 1
• „ für Audio-/RGB-Eingang über den Anschluß : 1/W 1
• … 2 für Audio-/Video-Eingang über die Buchsen … 2/≤ 2 hinter der
Klappe an der Vorderseite des Video-TV-Geräts
Weitere Funktionen
92
Page 93

Überspielen mit einem anderen
Videorecorder
Mit einem zusätzlichen Videorecorder können Kassetten überspielt
werden.
Überspielen von einem anderen
Videorecorder
Die notwendigen Anschlüsse und Verbindungen entsprechen denen im
Abschnitt “Anschluß eines anderen Videorecorders zur Wiedergabe”.
Überspielen auf einen anderen Videorecorder
Rückseite
D
an EURO-AVAnschluß
(21polig)
EURO-Kabel VMC-212CE (nicht mitgeliefert)
Anzeigen des Pay-TV-Kanals (nur
KV-14V6D, KV-21V6D)
Sie können den Pay-TV-Decoder mit dem EURO-Scart-Kabel VMC-212CE
an den Anschluß : 1/W 1 anschließen. Stellen Sie den Pay-TV-Decoder
wie in den Schritten unter “Abspeichern eines Pay-TV-Kanals” (Seite 63)
erläutert ein.
Rückseite
Pay-TV-Decoder
EURO-Kabel VMC-212CE (nicht mitgeliefert)
Weitere Funktionen
an EURO-AVAnschluß
(21polig)
93
Page 94

Weitere Informationen
Störungsbehebung
Funktion
TV-Empfang
Uhr und
Zeit
Wiedergabe
Probleme
Kein Bild (Bildschirm
dunkel), kein Ton.
Gutes Bild, aber kein
Ton.
Keine oder nur wenig
Farbe (Bildschirm
dunkel) bei
Farbprogrammen,
guter Ton.
Kein Bild, kein Ton
von der
Videoeingangsquelle.
Die Uhr steht, und
“--/--” wird
angezeigt.
Das Gerät wird mit
Strom versorgt, das
Band läuft jedoch
nicht.
Kein klares
Wiedergabebild.
Tonaussetzer
Mögliche Ursachen und Lösungen
•Das Netzkabel ist nicht angeschlossen.
/Netzkabel anschließen.
•Das Video-TV-Gerät ist ausgeschaltet.
/Die Taste ;, PROGR +/– oder die Programmnummer auf der
Fernbedienung oder PROGR +/– am Video-TV-Gerät drücken.
•Die Kopfhörer sind noch an die 2-Buchse angeschlossen.
/Die Kopfhörer herausziehen.
•Auf dem Bildschirm wird ¤ angezeigt.
/Die Taste ¤ drücken.
•Á +/– drücken.
•Im Menü BILD-MENÜ (Seite 68) die Optionen KONTRAST, FARBE
und HELLIGKEIT einstellen.
•Das Verbindungskabel zwischen dem Video-TV-Gerät und der
Eingangsquelle ist nicht angeschlossen.
/Das Kabel richtig anschließen.
•Es wurde der falsche Eingang gewählt.
/Die Taste … drücken, bis die gewünschte Eingangsanzeige erscheint
(Seite 92).
•Die Stromversorgung war über eine Woche lang unterbrochen, oder das
Gerät war über eine Woche lang ausgeschaltet (Schalter U).
/Datum, Uhrzeit und Timer-Programmierungen gegebenenfalls neu
einstellen (Seite 66, 78, 84).
•Die Sicherheitsschaltung wurde aktiviert.
/Das Gerät ausschalten, das Netzkabel lösen und etwa 1 Minute
abwarten.
•Die Einstellung FARBSYSTEM im Menü VCR-MODUS ist nicht korrekt.
/Setzen Sie FARBSYSTEM auf das Farbsystem, mit dem das Band
aufgezeichnet wurde (Seite 75).
•Die Spurlage einstellen (Seite 90).
•Die Videoköpfe sind verschmutzt.
/Die Videoköpfe mit der Sony-Reinigungskassette V-25CL säubern
(Seite 96). Wenn die Reinigungskassette nicht erhältlich ist, lassen
Sie die Videoköpfe von der nächsten Sony-Kundendienststelle
reinigen. Naßtyp-Reinigungskassetten dürfen nicht verwendet
werden, da sie die Videoköpfe möglicherweise beschädigen könnten.
•Das Band ist verbraucht.
/ Eine neue Kassette verwenden.
•Das Band ist beschädigt.
/Eine andere Kassette verwenden.
Weitere Informationen
94
Page 95

Funktion
Aufnahme
TimerAufnahme
Sonstiges
Probleme
Beim Drücken von
REC r wird die
Kassette
ausgeworfen.
Aufnehmen ist nicht
möglich.
Die Pay-TV-Sendung
wurde nicht
aufgenommen.
Sie können nicht
gleichzeitig ein
Programm ansehen
und ein anderes
aufnehmen.
Der Timer kann nicht
programmiert
werden.
Beim Drücken von
TIMER REC ON/
OFF wird die
Kassette
ausgeworfen.
Die Anzeige TIMER
REC leuchtet nicht
auf, obwohl TIMER
REC ON/OFF
gedrückt wurde.
Der Timer hat die
Aufnahme nicht
ausgeführt.
Eine Kassette kann
nicht eingelegt
werden.
Die Fernbedienung
arbeitet nicht.
Mögliche Ursachen und Lösungen
•Die Überspielschutzlasche der Kassette wurde herausgebrochen.
/Die Öffnung mit einem Stück Klebeband überkleben oder eine
andere Kassette mit intakter Überspielschutzlasche verwenden
(Seite 72).
•Es wurde keine Kassette eingelegt.
/Eine Kassette mit intakter Überspielschutzlasche einlegen.
•Das Band ist am Ende angelangt.
/Das Band zurückspulen.
•Der Pay-TV-Kanal wurde nicht korrekt eingestellt.
/Überprüfen Sie die Schritte zum Einstellen des Kanals (Seite 63).
•Überprüfen Sie die Nummer Ihres Modells.
/Nur bei den Modellen KV-14V6D und KV-21V6D ist es möglich,
ein Programm wiederzugeben und ein anderes aufzunehmen.
•Die Uhr ist nicht eingestellt.
/Die aktuelle Zeit und das aktuelle Datum einstellen (Seite 66).
•Beim Einstellen des Timers wurde ein Fehler gemacht.
/Die einzelnen Schritte überprüfen (Seite 78 bis 79).
•Die Überspielschutzlasche der Kassette wurde herausgebrochen.
/Die Öffnung mit einem Stück Klebeband überkleben oder eine
andere Kassette mit intakter Überspielschutzlasche verwenden.
•Es wurde keine Kassette eingelegt.
/Eine Kassette mit intakter Überspielschutzlasche einlegen.
•Das Band ist am Ende angelangt.
/Das Band zurückspulen.
•Der Timer wurde nicht programmiert.
/Den Timer programmieren (Seite 78 bis 79).
•TIMER REC ON/OFF wurde nicht gedrückt.
•Die Stromversorgung war länger als eine Woche unterbrochen.
•Es ist bereits eine Kassette eingelegt.
/6 drücken, damit die Kassette ausgeworfen wird.
•Die Batterien sind leer.
/Die Batterien austauschen (Seite 54).
•Die Batterien wurden nicht richtig eingelegt.
/Die Batterien richtig einlegen, dabei die Polarität beachten
(Seite 54).
D
Weitere Informationen
95
Page 96

W artung
Reinigung der Videoköpfe
Wenn das Wiedergabebild stark gestört oder fast nicht zu sehen ist oder
sogar ganz ausfällt, sind wahrscheinlich die Videoköpfe verschmutzt und
müssen gereinigt werden. Reinigen Sie in einem solchen Fall die
Videoköpfe mit der Videokopf-Reinigungskassette V-25CL (nicht
mitgeliefert), oder lassen Sie die Videoköpfe von einem SonyKundendienst reinigen.
Durch verschmutzte Videoköpfe hervorgerufene Symptome
• Normales Bild • Stark • Kaum erkennbares • Kein Bild
gestörtes Bild Bild (oder Schwarz-
weißbild)
Anmerkung
Keine der im Handel erhältlichen
Naßtyp-Reinigungskassetten
verwenden, da sie die Videoköpfe
möglicherweise beschädigen.
Anfangs am Ende
Abgenutzte Videoköpfe
Bleibt das Wiedergabebild auch nach der Reinigung gestört, müssen die
Videoköpfe möglicherweise ausgetauscht werden. Wenden Sie sich an die
nächste Sony-Kundendienststelle.
Überprüfen der Videoköpfe nach
jeweils 1000 Betriebsstunden
Ein Video-TV-Gerät ist ein Präzisionsgerät, das die vom TV-Gerät oder
einem Camcorder kommenden Signale auf Magnetbänder aufnimmt oder
Aufgenommenes wiedergibt.
Die Videoköpfe bzw. die mechanischen Teile zum Transportieren des
Bandes sind nach einer gewissen Zeit verschmutzt und abgenutzt. Lassen
Sie das Video-TV-Gerät deshalb nach jeweils 1000 Betriebsstunden von
einem Fachmann überprüfen.
Weitere Informationen
96
Page 97

Technische Daten
TV-Komponente
Fernsehsystem B/G
Farbsystem PAL
NTSC3,58/NTSC4,43 (nur
Videoeingang)
Kanalbereiche Siehe “Empfangbare Kanäle und
Kanalanzeigen” weiter unten.
Bildröhre KV-14V5D, KV-14V6D
Black Trinitron
KV-21V5D, KV-21V6D
HiBlack Trinitron
Antenneneingang
75 Ohm-Antennenbuchse für
VHF/UHF-Antenne
Video-Komponente
Format VHS-Standard
Video-Aufnahmesystem
Schrägspurverfahren (2 rotierende
Köpfe)
Audio-Aufnahmesystem
Monaural
Videosignal PAL
Bandgeschwindigkeit
PAL
SP: 23,39 mm/Sek.
LP: 11,70 mm/Sek.
NTSC (nur Wiedergabe):
SP: 33,35 mm/Sek.
EP: 11,12 mm/Sek.
Max. Aufnahmezeit
SP: 4 Stunden mit E-240
LP: 8 Stunden mit E-240
Ein- und Ausgänge
Eingänge LINE IN VIDEO: Cinchbuchse (1)
1 Vp-p, 75 Ohm, unsymmetrisch,
sync-negativ
LINE IN AUDIO: Cinchbuchse (1)
Eingangspegel: 500 mV
effektiver Mittelwert (100 %
Modulation)
EURO-AV: 21polig
Ausgang EURO-AV: 21polig
Kopfhörerbuchse
Monaurale Minibuchse
Allgemeines
Uhr Quartz-Locked-System
Notstromversorgung der Uhr
ca. 7 Tage
Stromversorgung
220–240 V Wechselspannung,
50 Hz
Leistungsaufnahme
KV-14V5D: 67 W
KV-14V6D: 73 W
KV-21V5D: 97 W
KV-21V6D: 103 W
Betriebstemperatur
5 °C bis 40 °C
Lagertemperatur
–20 °C bis 60 °C
Abmessungen KV-14V5D, KV-14V6D
ca. 397 × 409 × 426 mm (B/H/T)
KV-21V5D, KV-21V6D
ca. 526 × 518 × 476 mm (B/H/T)
Gewicht KV-14V5D, KV-14V6D
ca. 14 kg
KV-21V5D, KV-21V6D
ca. 24 kg
Mitgeliefertes Zubehör
Fernbedienung (1)
R6-Batterien (Größe AA) (2)
Antenne (1) (nur KV-14V5D, KV-
14V6D)
Änderungen, die dem technischen Fortschritt
dienen, bleiben vorbehalten.
Anmerkung
Dieses Gerät erfüllt bezüglich
Störstrahlungsunterdrückung die EU-Richtlinie 89/
336/EEC.
D
Empfangbare Kanäle und Kanalanzeigen
System Empfangbare Kanäle Kanalanzeigen
B/G/H E2 .. E12, E21 .. E69 C02 .. C12, C21 .. C69
Kabelfernsehen (1) S1 .. S41 S01 .. S41
Kabelfernsehen (2) S01 .. S05, M1 .. M10, U1 .. U10 S42 .. S46, S01 .. S10, S11 .. S20
Italien A, B, C, D, E, F, G, H, H1, H2 C13, C14, C15, C16, C17, C18, C19, C20,
C11, C12
Weitere Informationen
97
Page 98

Lage und Funktion der Teile und
Bedienelemente
Video-TV-Gerät—Vorderseite
Im folgenden erhalten Sie eine kurze Übersicht über die Tasten und Bedienelemente am Gerät und auf der
Fernbedienung. Nähere Erläuterungen finden Sie auf den jeweils angegebenen Seiten.
KV-14V5D, KV-14V6D KV-21V5D, KV-21V6D
EJECT
TIMER REC
REC
OPEN
TIMER REC
CL
REC
ON/OFF
TIMER REC
ON/OFF
PLAYREW 3STOP #FF PAUSE
REC
1 Auswurftaste (EJECT 6) (Seite 72)
2 Bereitschaftstaste (u) (Seite 67)
3 Anzeigen
u (Bereitschaft) (Seite 67)
TIMER REC (Aufnahme) (Seite 79)
REC (Aufnahme) (Seite 77)
4 Eingangswahltaste (…) (Seite 69, 92)
PROOR
EJECT
TIMER REC
REC
TIMER REC
CL
ON/OFF
TIMER REC
PLAYREW3STOP #FF PAUSE
REC
REC
ON/OFF
PROOR
8 Lautstärketasten (Á +/–) (Seite 67)
9 Fernbedienungssensor
!º Bandtransporttasten (Seite 73)
!¡ Ein/Aus-Taste für Timer-Aufnahme (TIMER
REC ON/OFF) (Seite 79, 80)
!™ Aufnahmetaste (REC r) (Seite 77)
5 Schalter U (Seite 56, 67)
6 Kassettenfach (Seite 72)
7 Programmtasten (PROGR +/–) (Seite 67, 77)
Weitere Informationen
98
!£ Video/Audio-Eingangsbuchsen (…2/≤2)
(Seite 92)
!¢ Kopfhörerbuchse (2) (Seite 69)
Page 99

Fernbedienung
ON
TIMER
2
5
8
0
TAPE
SPEED
MENU
PROGR
COUNTER
RESET
PAUSE
FF
SLEEP
SHOW VIEW
TIMER
ON SCREEN
TIMER REC
ON/OFF
TIMER REC
CLEAR
REC
REPLAY
REW
1
4
7
-/--
QUICK
TIMER
INDEX SEARCH
PLAY
STOP
1 Taste zum Aus- bzw. Wiedereinschalten des
Tons (¤) (Seite 69)
2 Auswurftaste (6) (Seite 72)
3 TV-Einschalttaste (;) (Seite 56, 67)
4 Taste für die automatische Einschaltfunktion
(ON TIMER) (Seite 87)
5 Taste für die automatische Abschaltfunktion
(SLEEP) (Seite 86)
D
6 SHOWVIEW-Taste (Seite 84)
7 Tasten für die Timer-Aufnahme (TIMER REC)
TIMER ON SCREEN (Seite 78, 81)
OK
ON/OFF (Seite 79, 80)
CLEAR (Seite 81, 84)
3
6
9
C
8 Tasten für Videotext (Seite 70)
9 Aufnahmetaste (REC r) (Seite 77)
!º Sofort-Timer-Taste (QUICK TIMER) (Seite 82)
!¡ Taste REPLAY (Seite 74)
!™ Bandtransporttasten (Seite 73)
PLAY ·, STOP p, REW (Zurückspulen) 0,
FF (Vorspulen) )
!£ Taste zum Einblenden von
Informationsanzeigen ( ) (Seite 69, 75)
!¢ Bereitschaftstaste (u) (Seite 67)
!∞ Taste V (Videotext) (Seite 70)
!§ Taste … (Eingangswahl)/Taste (Halten)
(Seite 69, 71, 92)
!¶ Menütasten (Seite 56, 57)
MENU
+ ◊ oder – √
?
OK
!• Zahlentasten (Seite 67, 77, 84)
!ª Taste C (direktes Einstellen) (Seite 62)
@º Programmtasten (PROGR +/–)/√/◊ (Zugriff
auf Videotextseiten) (Seite 67, 71, 77)
@¡ Tasten Á (Lautstärke) +/– (Seite 67)
@™ Taste zum Zurücksetzen des Bandzählers
(COUNTER RESET) (Seite 73)
@£ Taste TAPE SPEED (Seite 77)
@¢ Taste PAUSE P (Seite 73, 77)
@∞ Tasten INDEX SEARCH =/+ (Seite 89)
Weitere Informationen
99
Page 100

100
Weitere Informationen
 Loading...