

Sony Trinitron CPD-E100P Operating Instructions Manual
3-867-659-42 (1)
© 2000 Sony Corporation
Trinitron Color
Computer Display
â
Operating Instructions
Mode d’emploi
Bedienungsanleitung
Manual de instrucciones
Istruzioni per l’uso
Инструкция по эксплуатации
GB
FR
DE
ES
IT
RU
CPD-E100P
2
Owner’s Record
The model and serial numbers are located at the rear of the unit.
Record these numbers in the spaces provided below. Refer to them
whenever you call upon your dealer regarding this product.
Model No.
Serial No.
To prevent fire or shock hazard, do not expos e the
unit to rain or moisture.
Dangerously high voltages are present inside the
unit. Do not open the cabinet. Refer servicing to
qualified personnel only.
EN 55022 Compliance (Czech Republic Only)
INFORMATION
This product complies with Swedish National Council for Metrology
(MPR) standards issued in December 1990 (MPR II) for very low
frequency (VLF) and extremely low frequency (ELF).
INFORMATION
Ce produit est conforme aux normes du Swedish National Council
for Metrology de décembre 1990 (MPR II) en ce qui concerne les
fréquences très basses (VLF) et extrêmement basses (ELF).
INFORMACIÓN
Este producto cumple las normas del Consejo Nacional Sueco
para Metrología (MPR) emitidas en diciembre de 1990 (MPR II)
para frecuencias muy bajas (VLF) y frecuencias extremadamente
bajas (ELF).
WARNING
This device belongs to category B devices as described in EN
55022, unless it is specifically stated that it is a category A
device on the specification label. The following applies to
devices in category A of EN 55022 (radius of protection up to
30 meters). The user of the device is obliged to take all steps
necessary to remove sources of interference to
telecommunication or other devices.
As an
E
NERGY STAR Partner, Sony
Corporation has determined that this
product meets the
E
NERGY STAR
guidelines for energy efficiency.
This monitor complies with the
TCO’99 guidelines.

3
Table of Contents
•Trinitron is a registered trademark of
Sony Corporation.
• Macintosh is a trad emark licensed to
Apple Computer, Inc., registered in the
U.S.A. and other countries.
• Windows
and MS-DOS are registered
trademarks of Mi cros of t Co rpo rat io n in
the United States and other countries.
• IBM PC/AT and VGA are registered
trademarks of IBM Corporation of the
U.S.A.
• VESA and DDC
are trademarks of the
Video Electronics Standard
Association.
•
E
NERGY STAR is a U.S. registered
mark.
• All other product names ment i one d
herein may be the trademarks or
registered trad emarks of their r espective
companies.
•Furthermore, “” and “” are not
mentioned in each case in this manu al .
GB
Precautions. . . . . . . . . . . . . . . . . . . . . . . . . . . . . . . . . . . . . . . . . . . . 4
Identifying parts and controls . . . . . . . . . . . . . . . . . . . . . . . . . . . . . . 5
Setup. . . . . . . . . . . . . . . . . . . . . . . . . . . . . . . . . . . . . . . . . .6
Step 1:
Connect your monitor to your computer . . . . . . . . . . . . . . . 6
Step 2:
Connect the power cord. . . . . . . . . . . . . . . . . . . . . . . . . . . . 6
Step 3:
Turn on the monitor and computer . . . . . . . . . . . . . . . . . . . 7
Selecting the on-screen menu language (LANGUAGE/
INFORMATION) . . . . . . . . . . . . . . . . . . . . . . . . . . . . . . . . . . . . . . . . 7
Customizing Your Monitor . . . . . . . . . . . . . . . . . . . . . . . .8
Navigating the menu. . . . . . . . . . . . . . . . . . . . . . . . . . . . . . . . . . . . . 8
Adjusting the brightness and contrast. . . . . . . . . . . . . . . . . . . . . . . . 9
Adjusting the horizontal size or centering of the picture
(H-SIZE/CENTER) . . . . . . . . . . . . . . . . . . . . . . . . . . . . . . . . . . . . . 10
Adjusting the vertical size or centering of the picture
(V-SIZE/CENTER) . . . . . . . . . . . . . . . . . . . . . . . . . . . . . . . . . . . . . 10
Adjusting the curvature of the picture’s sides
(PIN/PIN BALANCE). . . . . . . . . . . . . . . . . . . . . . . . . . . . . . . . . . . . 10
Adjusting the angle of the picture’s sides
(KEY/KEY BALANCE) . . . . . . . . . . . . . . . . . . . . . . . . . . . . . . . . . . 10
Adjusting the picture’s rotation (ROTATION) . . . . . . . . . . . . . . . . . 11
Enlarging or reducing the picture (ZOOM) . . . . . . . . . . . . . . . . . . . 11
Adjusting the color of the picture (COLOR) . . . . . . . . . . . . . . . . . . 11
Additional settings (DEGAUSS/CANCEL MOIRE). . . . . . . . . . . . . 12
Resetting the adjustments . . . . . . . . . . . . . . . . . . . . . . . . . . . . . . . 12
Technical Features . . . . . . . . . . . . . . . . . . . . . . . . . . . . .13
Preset and user modes. . . . . . . . . . . . . . . . . . . . . . . . . . . . . . . . . . 13
Power saving function. . . . . . . . . . . . . . . . . . . . . . . . . . . . . . . . . . . 13
Troubleshooting. . . . . . . . . . . . . . . . . . . . . . . . . . . . . . . .13
If thin line appears on your screen (damper wire) . . . . . . . . . . . . . 13
On-screen messages . . . . . . . . . . . . . . . . . . . . . . . . . . . . . . . . . . . 13
Trouble symptoms and remedies . . . . . . . . . . . . . . . . . . . . . . . . . . 14
Self-diagnosis function . . . . . . . . . . . . . . . . . . . . . . . . . . . . . . . . . . 16
Specifications. . . . . . . . . . . . . . . . . . . . . . . . . . . . . . . . . .16
Appendix. . . . . . . . . . . . . . . . . . . . . . . . . . . . . . . . . . . . . . . i
Preset mode timing table . . . . . . . . . . . . . . . . . . . . . . . . . . . . . . . . . .i
TCO’99 Eco-document . . . . . . . . . . . . . . . . . . . . . . . . . . . . . . . . . . . .i
4
Precautions
Warning on power connections
• Use the supplied power cord. If you use a different power cord,
be sure that it is compatible with your local power supply.
For the customers in the UK
If you use the monitor in t he UK, be sure to use the supplied UK
power cable.
• Before disconnecting the power cord, wait at least 30 seconds
after turning off the power to allow the static electric ity on the
screen’s surface to discharge.
• After the power is turned on, the screen is demagnetized
(degaussed) for about 5 seconds. This generates a strong
magnetic field around the screen which may affect data stored
on magnetic tapes and disks placed near the monitor. Be sure to
keep magnetic recording equipment, tapes, and dis ks away
from the monitor.
Installation
Do not install the monitor in the following places:
• on surfaces (rugs, blankets, etc.) or near materials (curtains,
draperies, etc.) that may block the ventilation holes
• near heat sources such as radiators or air ducts, or in a place
subject to direct sunlight
• in a place subject to severe temperature chan ges
• in a place subject to mechanical vibrat ion or shock
• on an unstable surface
• near equipment which generates magnetism, such as a
transformer or high volta g e po w er lin es
• near or on an electrically charged metal surface
Maintenance
• Clean the screen with a soft cloth. If you use a glass cleaning
liquid, do not use any typ e of cleaner containing an anti-stati c
solution or similar additive as this may scratch the screen’s
coating.
• Do not rub, touch, or tap the surface of the screen with sharp or
abrasive items suc h as a ballpoint pen or screwdriver. This type
of contact may resu lt in a scratched picture tube.
• Clean the cabinet, pa ne l and controls with a soft cloth lightly
moistened with a mild detergent soluti on . Do no t use any typ e
of abrasive pa d, sc ouring powder or solv ent, s uch as a lcohol o r
benzene.
Transportation
When you transport this monitor for repair or shipment, use the
original carton and packing materials.
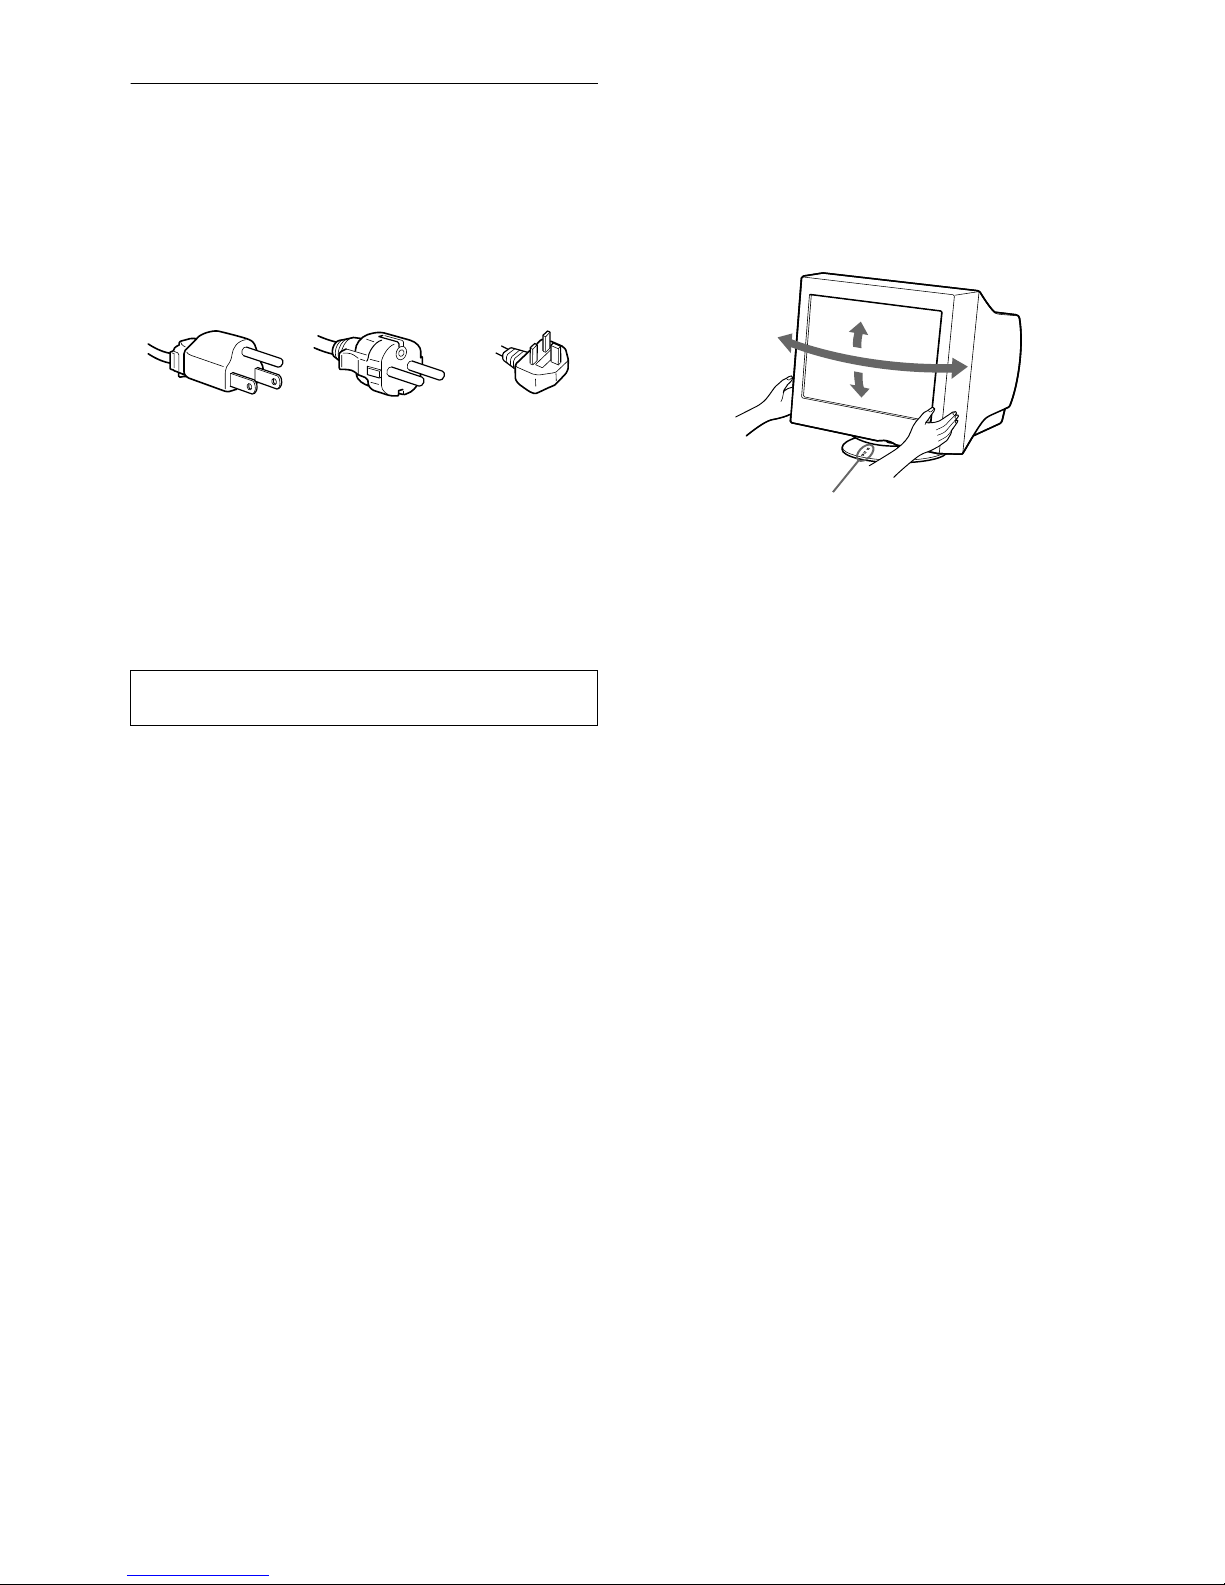
Use of the tilt-swivel
This monitor can be adjusted within the angles shown below. To
find the center of the mon itor’s t urning ra dius, a lign the center o f
the monitor’s screen with the centeri ng dots on the stand.
Hold the monitor at the bott om with bo th ha nd s whe n yo u tu rn it
horizontally or vertically. Be careful not to pinch your fingers at
the back of the monitor when you tilt the monitor up vertically.
The equipment should be in stalled near an easily accessible
outlet.
Example of plug types
for 100 to 120 V AC for 200 to 240 V AC for 240 V AC only
90°
5°
90°
15°
Centering dots
5
GB
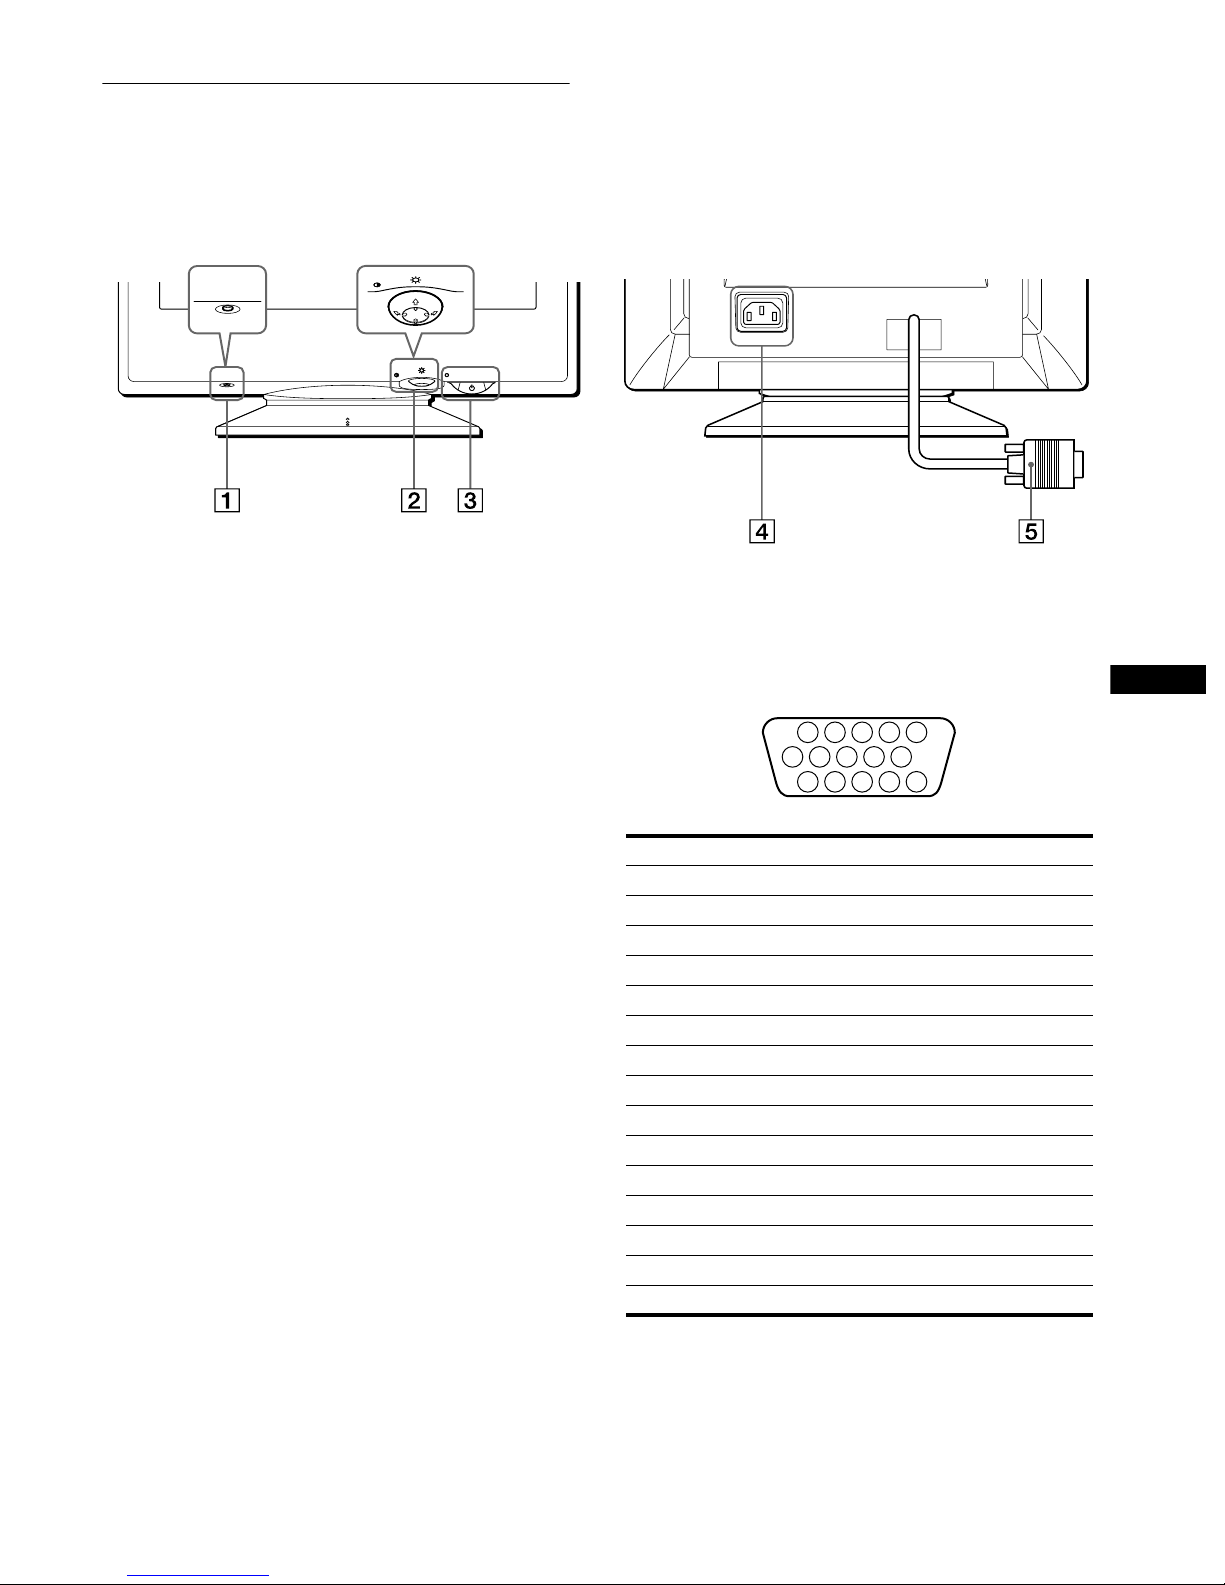
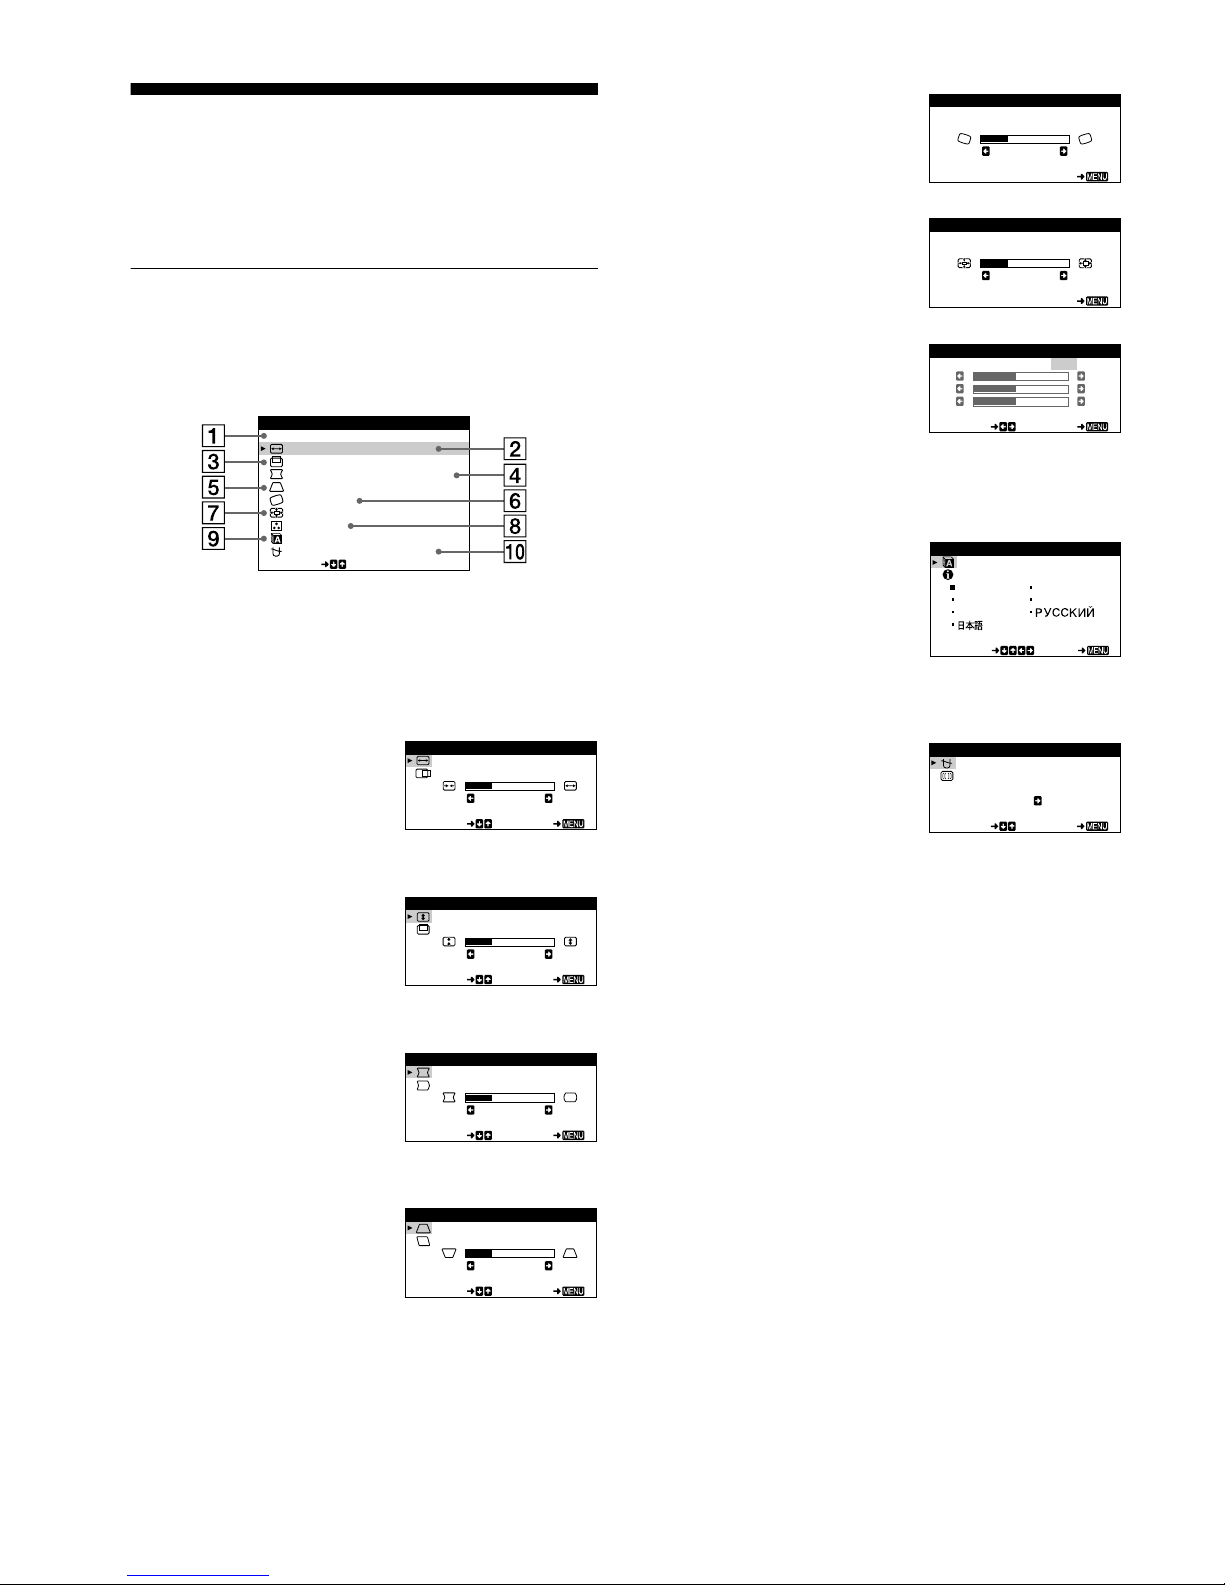
Identifying parts and controls
See the pages in parentheses for further details.
1
RESET button (page 12)
This button resets the adjustments to the factory settings.
2
Control button (page 9)
The control button is used to display the menu and make
adjustments to the monitor, including brightn ess and contrast
adjustments.
3 1
(power) switch and indicator (pages 7, 13, 16)
This button turns the monitor on and off. The power indicator
lights up in green when the monitor is turned on, and either
flashes in green and orange, or lights up in orange when the
monitor is in power saving mode.
4
AC IN connector (page 6)
This connector provides AC po wer to th e monitor.
5
Video input connector (HD15) (page 6)
This connector inputs RGB video signals (0.700 Vp-p,
positive) and sync signals.
* DDC (Display Data Chan ne l) is a stan dard of VESA.
AC IN
MENU
RESET
MENU
RESET
RearFront
Pin No. Signal
1Red
2 Green
3Blue
4 ID (Ground)
5 DDC Ground*
6 Red Ground
7 Green Ground
8 Blue Ground
9 DDC + 5V*
10 Ground
11 ID (Ground)
12 Bi-Directional Data (SD A )*
13 H. Sync
14 V. Sync
15 Data Clock (SCL)*
1 2 3 4
5
876
11 12 13 14 15
10
9
6
Setup
Before using your monitor, check that the following accessories
are included in your carton:
• Power cord (1)
• Warranty card (1)
• Notes on cleaning the screen’s surface (1)
• This instruction manual (1)
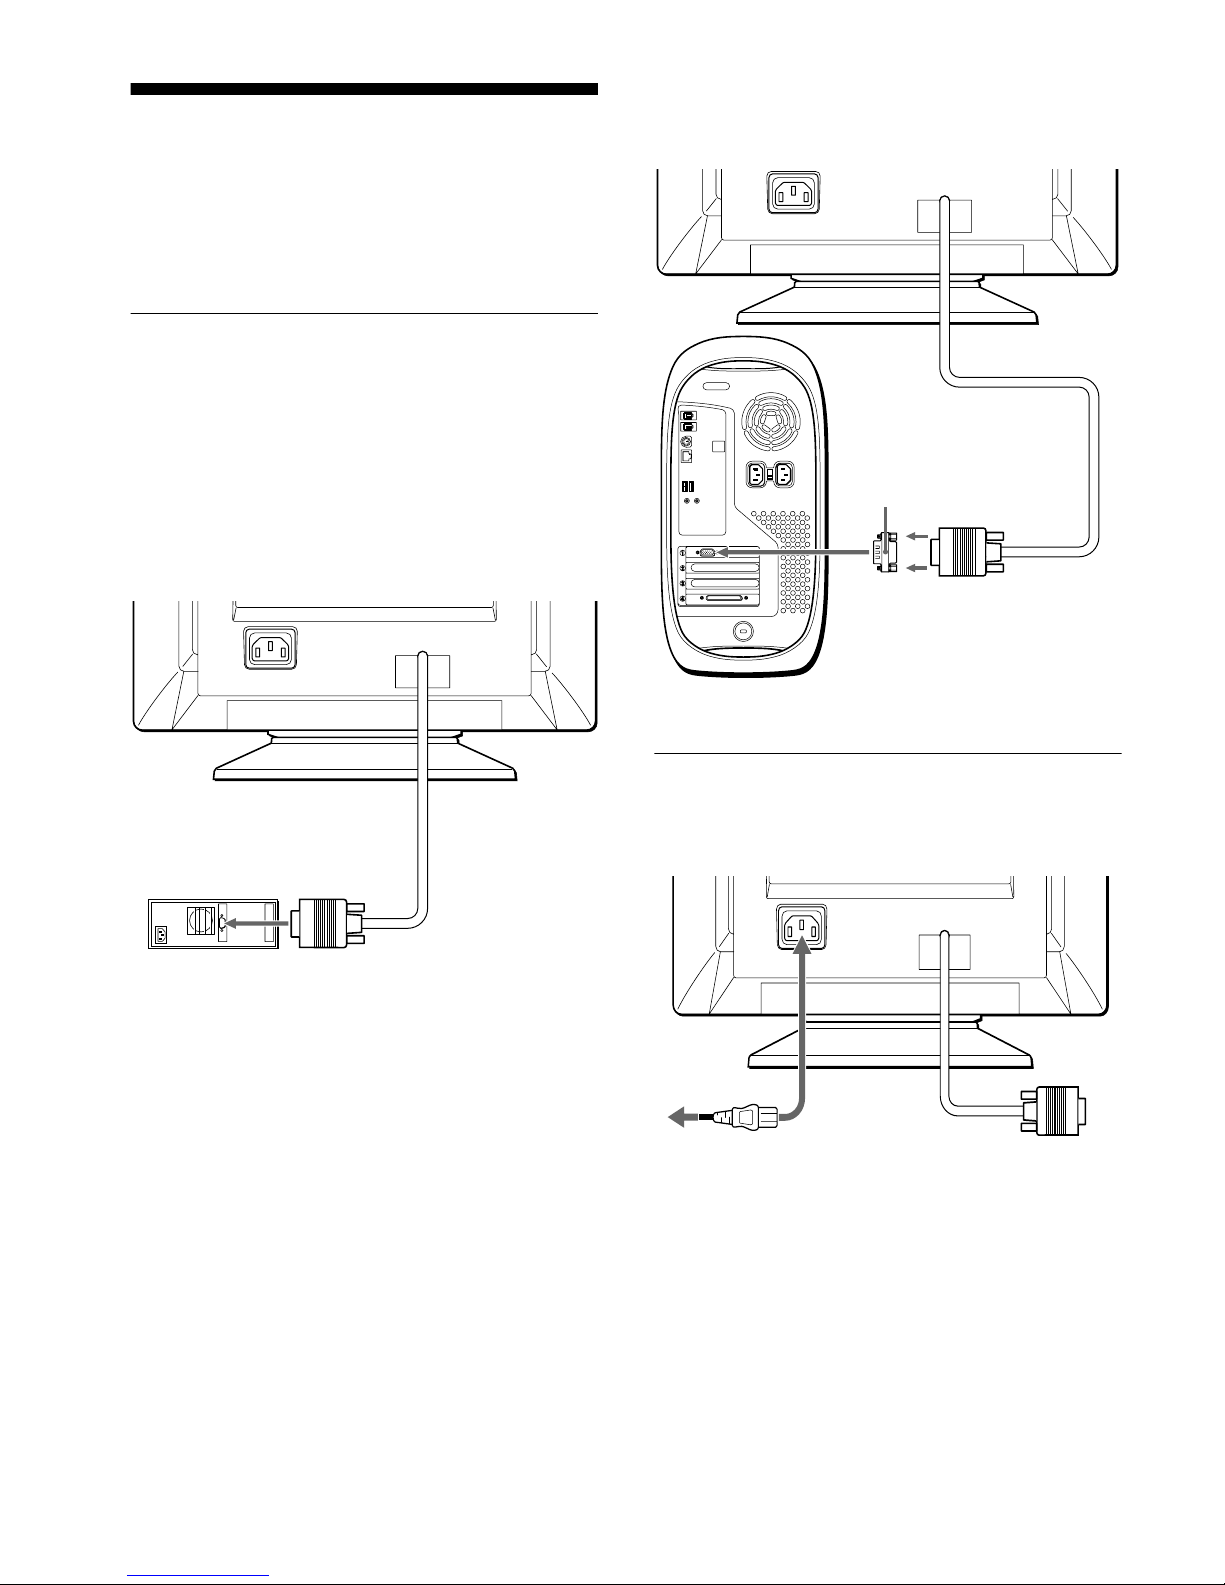
Step 1:Connect your monitor to
your computer
Turn off the monitor and computer before connecting.
Note
Do not touch the pins of the video cable connector as this might bend the
pins.
x
Connecting to an IBM PC/AT or compatible
computer
x
Connecting to a Macintosh or compatible
computer
Step 2:Connect the power cord
With the monitor and computer switched off, first connect the
power cord to the monitor, then connect it to a power outlet.
AC IN
IBM PC/AT or
compatible computer
to video output
AC IN
You will need a Macintosh adapter (not supplied).
Macintosh adapter (not supplied)
to video output
Macintosh or
compatible computer
AC IN
to AC IN
to a power outlet
power cord (supplied)
7
GB
Step 3:Turn on the monitor and
computer
First turn on the monitor, then turn on the computer.
The installation of your monitor is complete.
If necessary, use the monitor’s controls to adjust the picture.
If no picture appears on your screen
• Check that the monitor is correctly connected to the computer.
• If NO INPUT SIGNAL appears on the screen, confirm that
your computer’s graphic board is completely seated in the
correct bus slot.
• If you are replacing an old monitor with this model and OUT
OF SCAN RANGE appears on the screen, reconnect the old
monitor. Then adjust the computer’s graphic board so that the
horizontal frequency is between 30 – 70 kHz, and the vertical
frequency is between 48 – 120 Hz.
For more information about the on-screen messages, see “Trouble
symptoms and remedies” on page 14.
Setup on various OS (Operating System)
This monitor complies with the “DDC” Pl ug & Play sta nd ar d and
automatically detec ts all the monitor’s information. No speci fic dr i ve r
needs to be installed to the computer.
If you connect the monitor to your PC, and then boot your PC for the first
time, the setup Wizard may be displayed on the screen. Click on “Next”
several times according to the instru ctions from the Wizard unt il the Plug
& Play Monitor is automati cally sele cted so that you can use th is monitor .
For customers using Windows NT4.0
Monitor setup in Windows NT4.0 doe s not us e th e di spl ay driver. Refer
to the Windows NT4.0 instruction manual for further details on adjusting
the resolution, refresh rate, and number of colors.
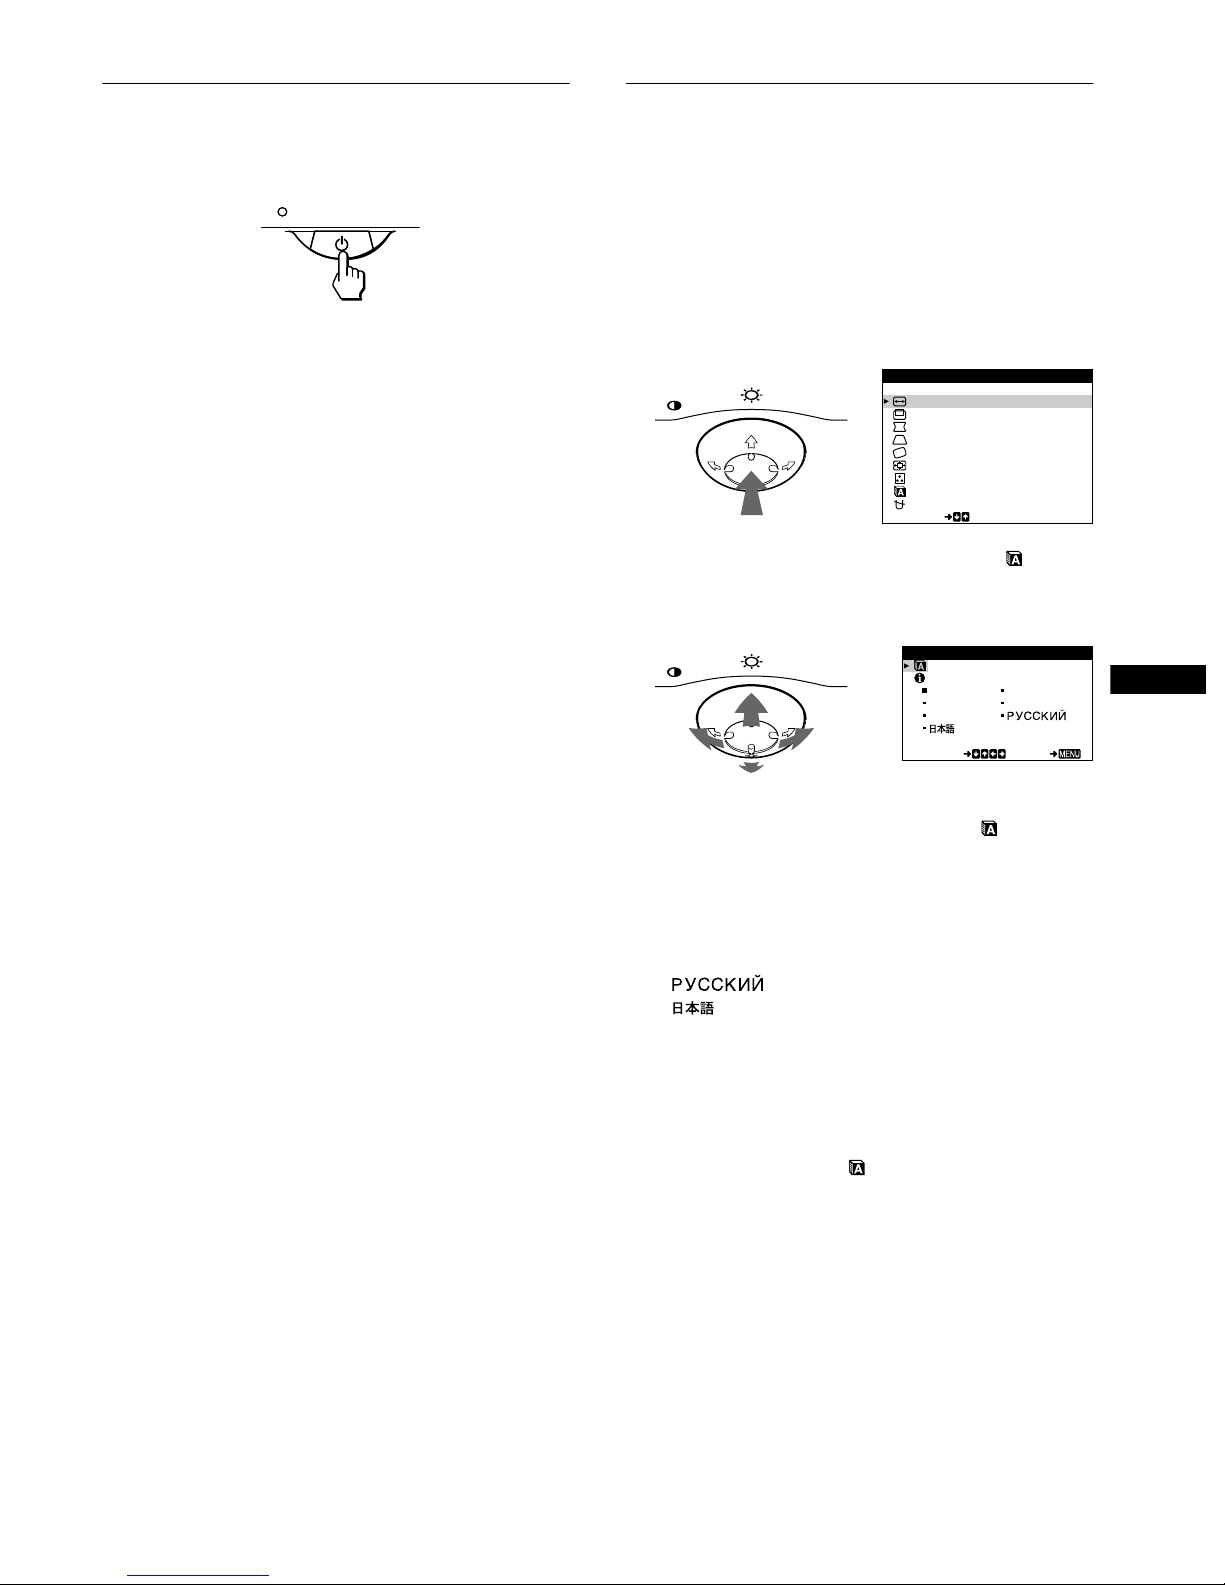
Selecting the on-screen menu
language (LANGUAGE/
INFORMATION)
English, French, German, Italian, Spanish, Russian and Japanese
versions of the on-screen menus are available. The de fault setting
is English.
1
Press the center of the control button.
See page 9 for more information on using the control button.
2
Move the control button m/M to highlight
LANGUAGE/INFORMATION and press the center of
the control button again.
3
Move the control button m/M to select
(LANGUAGE) and move </, to select a language.
• ENGLISH
• FRANÇAIS: French
• DEUTSCH: German
• ITALIANO: Italian
• ESPAÑOL: Spanish
• : Russian
• : Japanese
To close the menu
Press the center of the control button once to return to the main MENU,
and press again selecting EXIT to return to normal viewing. If no buttons
are pressed, the menu closes automatically after about 30 sec onds.
To reset to English
Press the RESET button while the (LANGUAGE) menu is displayed
on the screen.
MENU
EIT
H- S I ZE / CENTER
V-SIZE/CENTER
PIN/PIN BALANCE
KEY / KEY BAL ANCE
ROTAT I ON
ZOOM
COLOR
SELECT
LANGU AGE / I NFORMAT NOI
DEGAUSS/ CANCEL MO ERI
MENU
MENU
ENGL I SH FRAN A I S
DEUTSCH I T AL I ANO
ESPA OL
SELECT E I T
LANGUAGE / I NFORMATION

8
Customizing Your Monitor
You can make numerous adj ustments to your monito r u s ing the
on-screen menu.
Navigating the menu
Press the center of the control button to display the main MENU
on your screen. See page 9 for more information on using the
control button.
Use the control button to select one of the following menus.
1
EXIT
Select EXIT to close the menu.
2
H-SIZE/CENTER (page 10)
Select the H-SIZE/CENTER
menu to adjust the picture’s
horizontal size and centering.
3
V-SIZE/CENTER (page 10)
Select the V-SIZE/CENTER
menu to adjust the picture’s
vertical size and centering.
4
PIN/PIN BALANCE (page 10)
Select the PIN/PIN BALANCE
menu to adju st the curvatu r e
picture’s sides.
5
KEY/KEY BALANCE
(page 10)
Select the KEY/KEY BALANCE
menu to adju st the angle of the
picture’s sides.
6
ROTATION (page 11)
Select the ROTATION menu to
adjust the picture’s rotation.
7
ZOOM (page 11)
Select the ZOOM menu to enlarge
or reduce the picture.
EIT
H- S I ZE / CENTER
V-SIZE/CENTER
PIN/PIN BALANCE
KEY / KEY BAL ANCE
ROTAT I ON
ZOOM
COLOR
SELECT
LANGU AGE / I NFORMAT NOI
DEGAUSS/ CANCEL MO ERI
MENU
H-SIZE
26
SELECT E I T
H-SI ZE/CENTER
V-SIZE
26
SELECT E I T
V-SIZE/CENTER
PIN
26
SELECT E I T
P IN / P IN B ALANCE
KEY
26
SELECT E I T
KEY/ KEY BALANCE
ROTAT ION
26
EIT
ROTAT ION
ZOOM
26
EIT
ZOOM
8
COLOR (page 11)
Select the COLOR menu to adjust
the picture’s color temperatur e.
You can use this to match the
monitor’s colors to a printed
picture’s colors.
9
LANGUAGE/INFORMATION
(page 7, 15)
Select the LANGUAGE/
INFORMATION menu to choose
the on-screen menu’s language
and display this moni tor’ s
information box.
q;
DEGAUSS/CANCEL MOIRE
(page 12)
Select the DEGAUSS/CANCEL
MOIRE menu to deg a uss the
screen and ad j ust the moire
cancellation level.
KKK
R50
G50
B50
SELECT E I T
COLOR
5000 6500 9300
USER
ENGL I SH FRAN A I S
DEUTSCH I T AL I ANO
ESPA OL
SELECT E I T
LANGUAGE / I NFORMATION
DEGAUSS
ON
SELECT E I T
DEGAUSS/ CANCEL MOI RE

9
GB
x
Using the control button
1
Display the main MENU.
Press the center of the control button to display the main
MENU on your screen.
2
Select the menu you want to adjust.
Highlight the desired menu by moving the control button
towards the rear to go up (M), towards the front to go down
(m), and left (<) or right (,) to move sideways.
3
Adjust the menu.
Move the control button left (<) or right (,) to make the
adjustment.
4
Close the menu.
Press the center of the control button once to return to the
main MENU, and press again sele ct ing EXIT to return to
normal viewing. If no buttons are pressed, the menu closes
automatically after about 30 seconds.
x
Resetting the adjustments
Press the RESET button. See page 12 for more information on
resetting the adjustments.
Adjusting the brightness and
contrast
Brightness and contrast adjustments are made using a sep a r ate
BRIGHTNESS/CONTRAST menu.
These settings are stored in memory for all input signals.
1
Move the control button in any direction.
The BRIGHTNESS/CONTRAST menu appears on the
screen.
The horizontal and vertical frequencies of the current input
signal are displayed in the BRIGHTNESS/CONTRAST
menu. If the signal matches one of this monitor’s factory
preset modes, the resolution is also displayed.
2
Move the control button m/M to adjust the
brightness ( ), and </, to adjust the contras t
(6).
The menu automatically dis appears after about 3 seconds.
MENU
MENU MENU
REAR
FRONT
MENU
MENU
RESET
26 26
68.7kHz/85.0Hz
1024 768
BRIGHTNESS / CONTRAST
the resolution
of the current
input signal
the horizontal
and vertical
frequencies of
the current
input signal
10
Adjusting the horizontal size or
centering of the picture (H-SIZE/
CENTER)
These settings are stored in memory for the current input signal.
1
Press the center of the control button.
The main MENU appears on the screen.
2
Move the control button m/M to highlight H-SIZE/
CENTER and press the center of the control button
again.
The H-SIZE/CENTER menu appears on the screen.
3
First move the control button m/M to select the
desired adjustment item. Then move the control
button </, to make the adjustment.
Adjusting the vertical size or
centering of the picture (V-SIZE/
CENTER)
These settings are stored in memory for the current input signal.
1
Press the center of the control button.
The main MENU appears on the screen.
2
Move the control button m/M to highlight V-SIZE/
CENTER and press the center of the control button
again.
The V-SIZE/CENTER menu appears on the screen.
3
First move the control button m/M to select the
desired adjustment item. Then move the control
button </, to make the adjustment.
Adjusting the curvature of the
picture’s sides (PIN/PIN BALANCE)
These settings are stored in memory for the current input signal.
1
Press the center of the control button.
The main MENU appears on the screen.
2
Move the control button m/M to highlight PIN/
PIN BALANCE and press the center of the control
button again.
The PIN/PIN BALANCE menu appears on the screen.
3
First move the control button m/M to select the
desired adjustment item. Then move the control
button </, to make the adjustment.
Adjusting the angle of the picture’s
sides (KEY/KEY BALANCE)
These settings are stored in memory for the current input signal.
1
Press the center of the control button.
The main MENU appears on the screen.
2
Move the control button m/M to highlight KEY/
KEY BALANCE and press the center of the control
button again.
The KEY/KEY BALANCE menu appears on the screen.
3
First move the control button m/M to select the
desired adjustment item. Then move the control
button </, to make the adjustment.
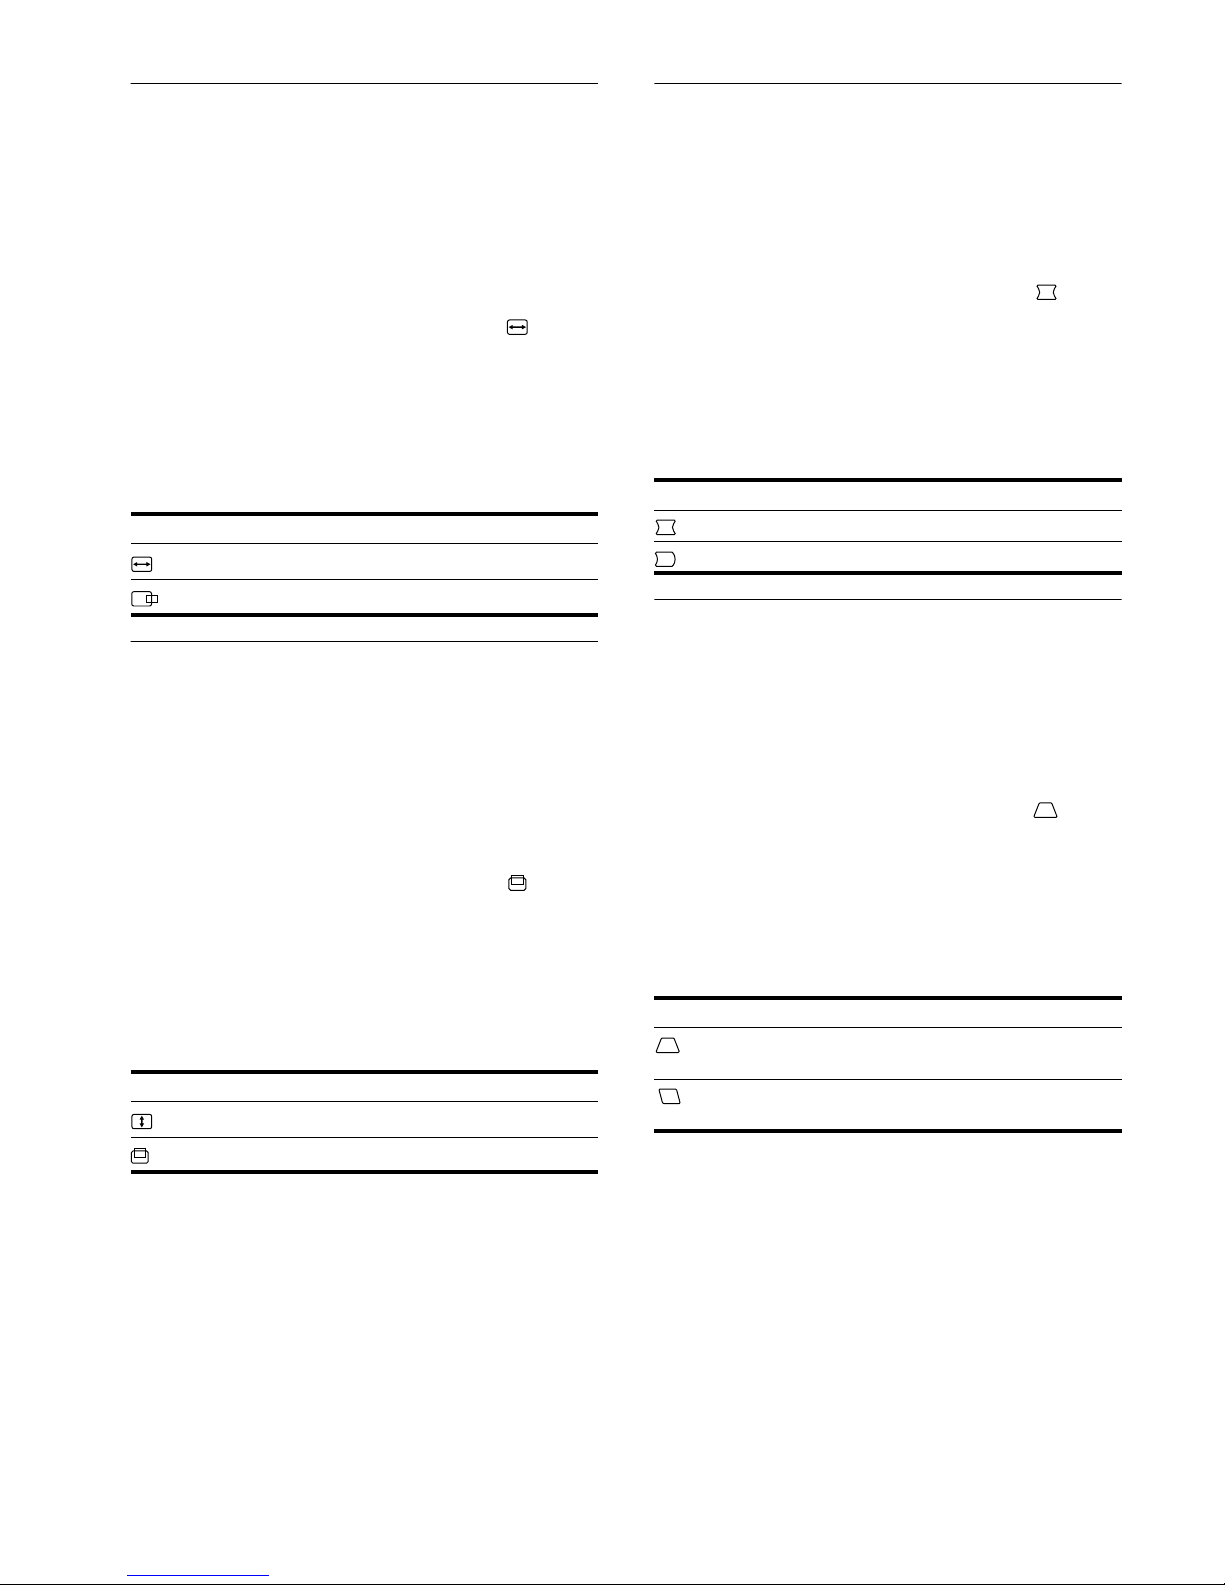
Select To
H-SIZE
adjust the horizontal size
H-CENTER
adjust the horizontal centering
Select To
V-SIZE
adjust the vertical size
V-CENTER
adjust the vertical centering
Select To
PIN
expand or contract the picture sides
PIN BALANCE
shift the picture sides to the left or right
Select To
KEY
adjust the picture width at the top of
the screen
KEY BALANCE
shift the picture to the left or right at
the top of the screen
11
GB
Adjusting the picture’s rotation
(ROTATION)
This setting is stored in memory for all input signals.
1
Press the center of the control button.
The main MENU appears on the screen.
2
Move the control button m/M to highlight
ROTATION and press the center of the control
button again.
The ROTATION menu appears on the screen.
3
Move the control button </, to rotate the picture.
Enlarging or reducing the picture
(ZOOM)
This setting is stored in memory for the current input signal.
1
Press the center of the control button.
The main MENU appears on the screen.
2
Move the control m/M button to highlight ZOOM
and press the center of the control button again.
The ZOOM menu appears on the screen.
3
Move the control button </, to enlarge or reduce
the picture.
Note
Adjustment stops when either th e horizontal or vertical size reaches i ts
maximum or minimum value.
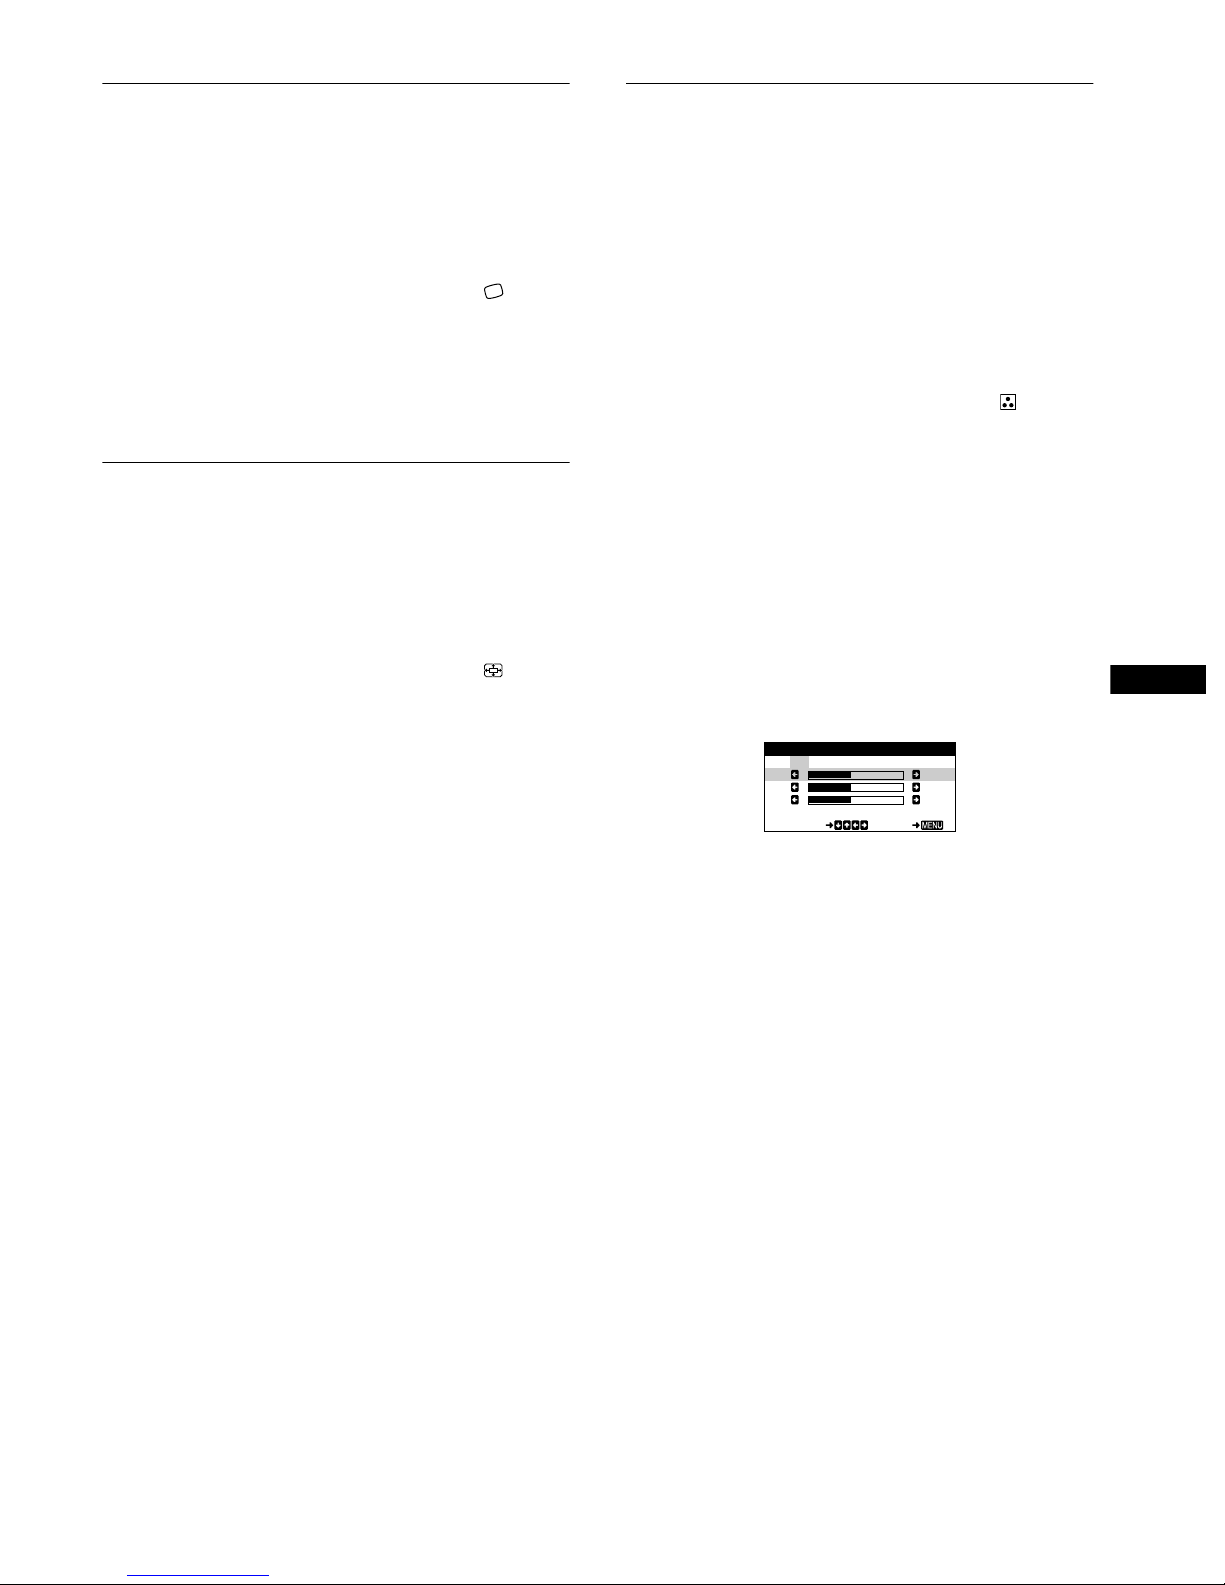
Adjusting the color of the picture
(COLOR)
The COLOR settings allow you to adjust the picture’s color
temperature by changing the color level of the white color field.
Colors appear reddish if the temperature is low, and bluish if the
temperature is high. This ad ju stment is useful for matching the
monitor’s colors to a printed picture’s colors.
This setting is stored in memory for all input signals.
1
Press the center of the control button.
The main MENU appears on the screen.
2
Move the control button m/M to highlight COLOR
and press the center of the control button again.
The COLOR menu appears on the screen .
3
Move the control button
</,
to select a color
temperature.
The preset color temperatures are 5000K, 6500K, and 9300K.
Since the default setting is 9300K, the whites will change
from a bluish hue to a reddish hue as the temperature is
lowered to 6500K and 5000K.
4
If necessary, fine tune the color temperature.
First move the control button </, to select USER. Then
move the control button m/M to select R (red), G (green), or
B (blue) and move </, to make the adjustment.
If you fine tune the color temperature, the new color settings
are stored in memory and recalled whenever you select
USER.
KKK
R50
G50
B50
SELECT E I T
COLOR
5000 6500 9300
USER
12
Additional settings (DEGAUSS/
CANCEL MOIRE)
You can manually degauss (demagnetize) the monitor, and adjust
the moire cancellation level.
1
Press the center of the control button.
The main MENU appears on the screen.
2
Move the control button m/M to highlight
DEGAUSS/CANCEL MOIRE and press the center of
the control button again.
The DEGAUSS/CANCEL MOIRE menu appears on the
screen.
3
Move the control button m/M to select the desired
adjustment item.
Adjust the selected item according to the following
instructions.
Degaussing the screen
The monitor is automaticall y demagnetized (degaussed) when the
power is turned on.
To manually degauss the monitor, first move the
control button m/M to select (DEGAUSS). Then move
the control button ,.
The screen is degaussed for about 5 seconds. If a second degauss
cycle is needed, allow a minimum interval of 20 minutes for the
best result.
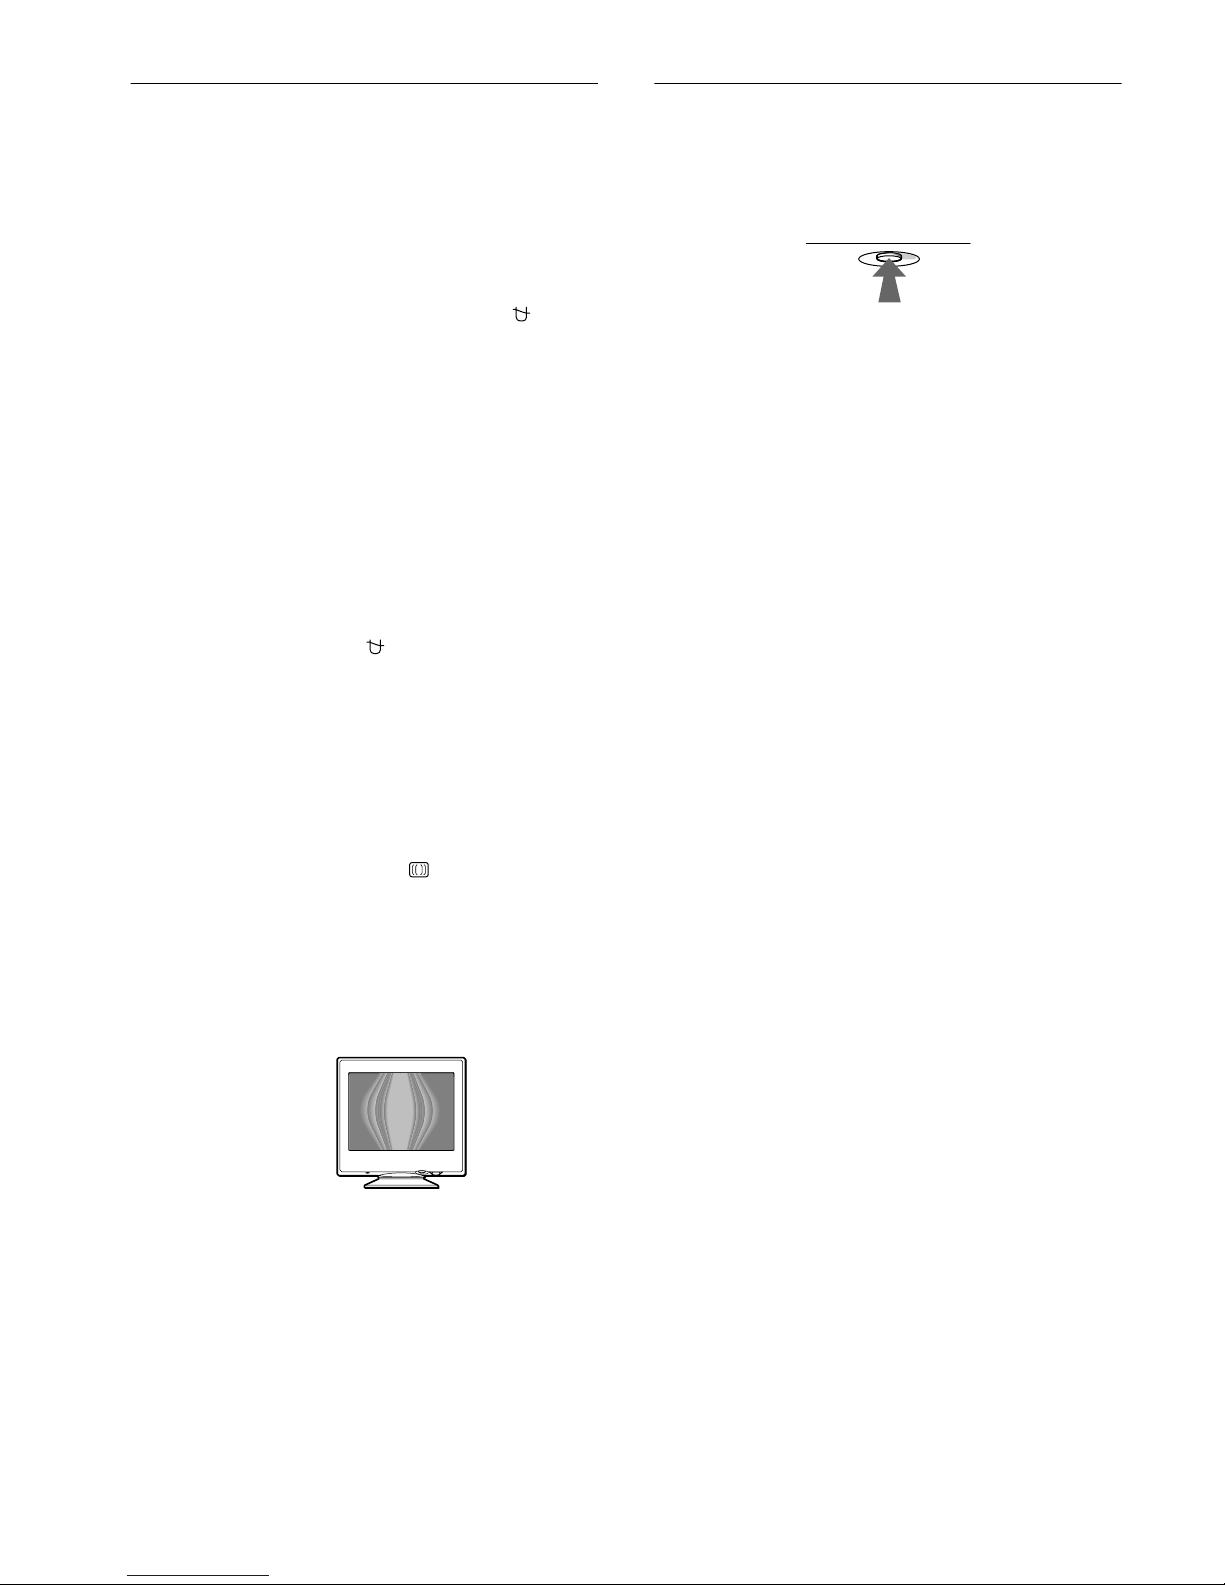
Adjusting the moire*
If elliptical or wavy patterns appear on the screen, adjust the
moire cancellation level.
To adjust the amount of moire cancellation, first move
the control button m/M to select (CANCEL MOIRE).
Then move the control button </, until the moire
effect is at a minimum.
* Moire is a type of natural interference which produces soft, wavy lines
on your screen. It may appear due to inte rfe rence between the pattern
of the picture on the screen and the phosphor pitch pattern of the
monitor.
Resetting the adjustments
This monitor has the following three reset methods. Use the
RESET button to reset the adjustments.
Resetting a single adjustment item
Use the control button to select the adjustment item you want to
reset, and press the RESET button.
Resetting all of the adjustment data for the
current input signal
Press the RESET button when no menu is d isplayed on the sc reen.
Note that the following items are not reset by this method:
• on-screen menu language (page 7)
• picture’s rotation (page 11)
Resetting all of the adjustment data for all input
signals
Press and hold the RESET button for more than two seconds.
Note that the following item is not reset by this method:
• color menu user settings (page 11)
Example of moire
RESET
13
GB
Technical Features
Preset and user modes
When the monitor receives an input signal, it automatically
matches the signal to one of the factory preset modes stored in the
monitor’s memory to provide a high quality picture at the center of
the screen.
(See Appendix for a list of the factory pr eset modes.)
For input signals that do not match one of the factory preset modes,
the digital Multiscan technology of this monitor ensures that a
clear picture appears on the screen for any timing in the monitor’s
frequency range (horizontal: 30 – 70 kHz, vertical: 48 – 120 Hz).
If the picture is adjusted, the adjustment data is stored as a user
mode and automatically recalled whenever the same input signal
is received.
Note for Windows users
For Windows users, check your gr aphic board manual or the
utility program which comes with your graphic board and select
the highest available refresh rate to maximize monitor
performance.
Power saving function
This monitor meets the power-saving guidelines set by VESA,
E
NERGY STAR, and NUTEK. If the monitor is connected to a
computer or video graphics board that is DPMS (Display Power
Management Signaling) com pliant, the monitor will autom atically
reduce power consumption in three stages as shown below
.
* “Sleep” and “deep sleep” are pow e r saving modes defined by the
Environmental Protection Agency.
** When y our computer enters the “active off” mode, the input signal is
cut and NO INPUT SIGNAL ap pears o n the sc reen. After 20 seco nds,
the monitor enters the power saving mode.
Troubleshooting
Before contacting technical support, refer to this section.
If thin line appears on your screen
(damper wire)
The visible line on your screen especially when the background
screen color is light (usually white), is normal for the Trinitron
monitor. This is not a malfunction. This is shadow from the
damper wire used to stabilize the aperture grille. The aperture
grille is the essential element that makes a Trinitron picture tube
unique by allowing more light to reach the screen, resulting in a
brighter, more detaile d pict u re .
On-screen messages
If there is something wrong with the input signal, one of the
following messages appears on the screen. To solve the problem,
see “Trouble symptoms and remedies” on page 14.
The input signal condition
OUT OF SCAN RANGE
indicates that the input signal is not supported by the monitor’s
specifications.
NO INPUT SIGNAL
indicates that no signal is being input to the monitor.
Power mode Power consumption1 (power)
indicator
normal
operation
≤
95 W green
1 standby
≤
15 W green and orange
alternate
2 suspend
(sleep)*
≤
15 W green and orange
alternate
3 active off**
(deep sleep)*
≤
5 W orange
power off 0 W off
Damper wire
INFORMATION
OUT OF SCAN RANGE
Input signal
condition

14
Trouble symptoms and remedies
If the problem is caused by the connected computer or other equipmen t, please refer to the connected equipment ’s instruction manual.
Use the self-diagnosis function (page 16) if the following recommendations do not resolve the problem.
Symptom Check these items
No picture
If the 1 (power) indicator is not lit • Check that the power cord is properly connected.
• Check that the 1 (power) switch is in the “on” position.
If the NO INPUT SIGNAL message
appears on the screen, or if the 1
(power) indicator is either orange or
alternating between green and
orange
• Check that the video signal cable is properly connected and all plugs are firmly seated in
their sockets (page 6).
• Check that the HD15 video input connector’s pins are not bent or pushed in.
x
Problems caused by the connected computer or other equipment
• The computer is in power saving mode. Try pressing any key on the keyboard or moving
the mouse.
• Chec k th at the compute r’s power is “on.”
• Check that the graphic board is completely seated in the proper bus slot.
If the OUT OF SCAN RANGE
message appears on the screen
x
Problems caused by the connected computer or other equipment
• Check that the video frequency range is within that specified for the monitor. If you
replaced an old monitor with this monitor, reconnect the old monitor and adjust the
frequency range to the following.
Horizontal: 30 – 70 kHz
Vertical: 48 – 120 Hz
If no message is displayed and the 1
(power) indicator is green or flashing
orange
• Use the Self-diagnosis function (page 16).
If using a Macintosh system • Check that the Macintosh adapter (not supplied) and the video signal cable are properly
connected (page 6).
Picture flickers, bounces,
oscillates, or is scrambled
• Isolate and eliminate any potential sources of electric or magnetic fields such as other
monitors, laser printers, electric fans, fluorescent lighting, or televisions.
• Move the monitor away from power lines or place a magnetic shield near the monitor.
• T ry plug gi ng the monito r into a different AC ou tle t, pref e ra bly on a different circuit.
• Try turning the monitor 90° to the left or right.
x
Problems caused by the connected computer or other equipment
• Check your graphic board manual for the proper monitor setting.
• Confirm that the graphics mode (VE SA, Macintosh 16" Color, etc.) and the frequency of
the input signal are supp ort ed by this monitor (Appendix). Even if the frequency is wi thin
the proper range, some graphic boards may have a sync pulse that is too narrow for the
monitor to sync correctly.
• Adjust the computer’s refresh rate (vertical frequency) to obtain the best possible picture.
Picture is fuzzy
• Adjust the brightness and contrast (page 9).
• Degauss the monitor* (page 1 2).
• Select CANCEL MOIRE and adjust the moire cancellation effect (page 12).
15
GB
* If a second degauss cycle is need ed, allow a minimum interval of 20 mi nut es for the best result. A humming noise m ay be heard, but this is not a
malfunction.
Displaying this monitor’s name, serial number,
and date of manufacture (INFORMATION)
1
Press the center of the control button.
The main MENU appears on the screen.
2
Move the control button m/M to highlight
LANGUAGE/INFORMATION and press the center o f
the control button again.
The LANGUAGE/INFORMATION menu appears on the
screen.
3
Move the control button m/M to select
(INFORMATION).
This monitor’s information box appears on the screen.
If the problem persists, call your authorized Sony dealer and give
the following information.
• Model name: CPD-E100P
• Serial number
• Name and specifications of your computer and graphics board.
Picture is ghosting
• Eliminate the use of video cable extensions and/or video switch boxes.
• Check that all plugs are firmly seated in their sockets.
Picture is not centered or sized
properly
• Adjust the size or centering (p age 10). Note that some vid eo modes do not fill the screen
to the edges.
Edges of the image are curved
• Select PIN/PIN BALANCE, KEY/KEYBALANCE, or ROTATION, and adjust the
picture’s shape and rotation (page 10, 11).
Wavy or elliptical pattern (moire)
is visible
• Select CANCEL MOIRE and adjust the moire cancellation effect (page 12) .
x
Problems caused by the connected computer or other equipment
• Change your desktop pattern.
Color is not uniform
• Degauss the monitor* (page 12). If you place equipment that generates a magnetic field,
such as a speaker, near the monito r , or if yo u change the direction th e monitor fa ces, color
may lose uniformity.
White does not look white
• Adjust the color temperature (page 11).
A hum is heard right after the
power is turned on
• This is the sound of the auto-degauss cycle. When the power is turned on, the monitor is
automatically degaussed for five seconds.
Symptom Check these items
MODEL CPD - E1 0 0 P
SERI AL 12345678
MANUFACTURED 2000 -52
SELECT E I T
LANGUAGE/ INFORMATION
Example
16
Self-diagnosis function
This monitor is equipped with a self-diagnosis function. If there is
a problem with your monitor or computer, the screen will go
blank and the 1 (power) indicator will either light up green or
flash orange. If the 1 (power) indicator is lit in orange, the
computer is in power saving mode. Try pressing any key on the
keyboard or moving the mouse.
If the 1 (power) indicator is green
1
Disconnect the video input cable or turn off the
connected computer.
2 Press the 1 (power) button twice to turn the monitor
off and then on.
3 Move the control button , for 2 seconds before the
monitor enters power saving mode.
If all four color bars appear (white, red, green, blue), the monitor
is working properly. Reconnect the video input cable and check
the condition of your computer.
If the color bars do not appear, there is a potential monitor failure.
Inform your authorized Sony dealer of the monitor’s condition.
If the 1 (power) indicator is flashing orange
Press the 1 (power) button twice to turn the monitor off
and then on.
If the 1 (power) indicator lights up green, the monitor is working
properly.
If the 1 (power) indicator is still flashing, there is a potential
monitor failure. Count the number of seconds between orange
flashes of the 1 (power) indicator and inform your authorized
Sony dealer of the monitor’s condition. Be sure to note the model
name and serial number of your monitor. Also note the make and
model of your computer and graphic board.
Specifications
CRT 0.24 mm aperture grille pitch (center)
15 inches measured diagonally
90-degree deflection
Viewable image size Approx. 285 × 214 mm (w/h)
(11 1/4 × 8 1/2 inches)
14.0" viewing image
Resolution
Maximum Horizontal: 1280 dots
Vertical: 1024 lines
Recommended Horizontal: 800 dots
Vertical: 600 lines
Standard image area Approx. 270 × 202 mm (w/h)
(10
3
/4 × 8 inches)
Deflection frequency* Horizontal: 30 to 70 kHz
Vertical: 48 to 120 Hz
AC input voltage/current 220 to 240 V, 50 – 60 Hz, 0.8 A
Power consumption Max. 95 W
Dimensions
Approx. 356 × 378 × 388 mm (w/h/d)
(14
1
/8 × 15 × 15 3/8 inches)
Mass Approx. 15 kg (33 lb 1 oz)
Plug and Play DDC2B
Supplied accessories See page 6
* Recommended horizontal and vertical timing condition
• Horizontal sync width should be more than 1.0 µsec.
• Horizontal blanking width should be more than 3.6 µsec.
• Vertical blanking width should be more than 500 µsec.
Design and specifications are subject to change without notice.
MENU
RESET
1 (power) indicator
MENU
•Trinitron est une marque comm erciale
déposée de Sony Corporation.
• Macintosh est une marque commerciale
sous licence d’Apple Computer, Inc.,
déposée aux Etats-Unis et dans d’autres
pays.
• Windows
et MS-DOS sont des
marques déposées de Microsoft
Corporation aux Et a ts-U nis et dans
d’autres pa ys.
• IBM PC/AT et VGA sont des marques
commerciales déposées d’IBM
Corporation aux Eta ts-U nis.
• VESA et DDC
sont des marques
commerciales de Video Electronics
Standard Association.
•
E
NERGY STAR est une marque
déposée aux Etats - U nis.
• Tous les autres noms de produits
mentionnés dans le présen t m ode
d’emploi peuvent être de s ma rque s
commerciales ou des marques
commerciales déposées de leurs
sociétés respectives.
• Les symboles “” et “” ne sont pas
mentionnés systématiquem en t dans le
présent mode d’emploi.
3
Table des Matières
FR
Précautions. . . . . . . . . . . . . . . . . . . . . . . . . . . . . . . . . . . . . . . . . . . . 4
Identification des composants et des commandes. . . . . . . . . . . . . . 5
Installation . . . . . . . . . . . . . . . . . . . . . . . . . . . . . . . . . . . . .6
Étape 1:
Raccordez le moniteur à votre ordinateur . . . . . . . . . . . . . 6
Étape 2:
Branchez le cordon d’alimentation. . . . . . . . . . . . . . . . . . . 6
Étape 3:
Mettez le moniteur et l’ordinateur sous tension . . . . . . . . . 7
Sélection de la langue d’affichage des menus
(LANGUE/INFORMATION) . . . . . . . . . . . . . . . . . . . . . . . . . . . . . . . 7
Personnalisation de votre moniteur. . . . . . . . . . . . . . . . .8
Navigation au sein des menus . . . . . . . . . . . . . . . . . . . . . . . . . . . . . 8
Réglage de la luminosité et du contraste . . . . . . . . . . . . . . . . . . . . . 9
Réglage de la taille horizontale ou du centrage de l’image
(TAILLE H/POSITION) . . . . . . . . . . . . . . . . . . . . . . . . . . . . . . . . . . 10
Réglage de la taille verticale ou du centrage de l’image
(TAILLE V/POSITION) . . . . . . . . . . . . . . . . . . . . . . . . . . . . . . . . . . 10
Réglage de l’incurvation des côtés de l’image
(COUSSIN/PIN BALANCE) . . . . . . . . . . . . . . . . . . . . . . . . . . . . . . 10
Réglage de l’angle des côtés de l’image
(TRAPÉZOÏD/PARALLÉL) . . . . . . . . . . . . . . . . . . . . . . . . . . . . . . . 10
Réglage de la rotation de l’image (ROTATION) . . . . . . . . . . . . . . . 11
Agrandissement ou réduction de l’image (ZOOM) . . . . . . . . . . . . . 11
Réglage de la couleur de l’image (COULEUR) . . . . . . . . . . . . . . . 11
Réglages supplémentaires (DÉMAGNÉTISÉ/MOIRÉ). . . . . . . . . . 12
Réinitialisation des réglages. . . . . . . . . . . . . . . . . . . . . . . . . . . . . . 12
Caractéristiques techniques. . . . . . . . . . . . . . . . . . . . . .13
Mode présélectionné et mode utilisateur . . . . . . . . . . . . . . . . . . . . 13
Fonction d’économie d’énergie. . . . . . . . . . . . . . . . . . . . . . . . . . . . 13
Dépannage . . . . . . . . . . . . . . . . . . . . . . . . . . . . . . . . . . . .13
Si une fine ligne apparaît à l’écran (fil d’amortissement) . . . . . . . . 13
Messages affichés à l’écran . . . . . . . . . . . . . . . . . . . . . . . . . . . . . . 13
Symptômes et remèdes . . . . . . . . . . . . . . . . . . . . . . . . . . . . . . . . . 14
Fonction d’autodiagnostic. . . . . . . . . . . . . . . . . . . . . . . . . . . . . . . . 16
Spécifications. . . . . . . . . . . . . . . . . . . . . . . . . . . . . . . . . .16
Appendix. . . . . . . . . . . . . . . . . . . . . . . . . . . . . . . . . . . . . . . i
Preset mode timing table . . . . . . . . . . . . . . . . . . . . . . . . . . . . . . . . . .i
TCO’99 Eco-document . . . . . . . . . . . . . . . . . . . . . . . . . . . . . . . . . . . .i
4
Précautions
Avertissement sur le raccordement à la source
d’alimentation
• Utilisez le cordon d’alimentation fourni. Si vous utilisez un
cordon d’alimentation différent, assurez-vous qu’il est
compatible avec votre tension d’alimentation secteur locale.
Pour les clients au Royaume-Uni
Si vous utilisez ce mon iteur au Royaume-Uni, utilisez le cordon
d’alimentation fourni au Royaume-Uni.
• Avant de débrancher le cordon d’ali mentation, attendez au
moins 30 secondes après avoir actio nné le commutateur
d’alimentation de manière à permettre la décharge de
l’électricité statique à la surface de l’écran .
• Après raccordement à une prise électrique, l’écran est
démagnétisé pendant en viron 5 secondes. Cela génère un
puissant champ magnétique autour de l’encadrement
métallique qui peut affecter les données mémorisées sur une
bande magnétique ou des disquettes situées à proximité. Placez
les systèmes d’enregistrement magnétique, bandes et disquettes
à l’écart du moniteur.
Installation
N’installez pas le moniteur dans les endroits suivants:
• sur des surfaces molles (moquette, nappe, etc.) ou à proximité
de tissus (rideaux, t entures, etc.) qui risquent d’obstruer les
orifices de ventilation
• à proxim ité d e sour ces de chal eur co mme d es ra diat eurs ou des
conduits d’air, ou dans un endroit directement exposé au
rayonnement solaire
• à un emplacement sujet à de fortes variations de tem pérat ure
• sur une surface soumise à des vibrations ou à de s chocs
mécaniques
• sur une surface instable
• à prox imité d’ap pareils g énérant un champ ma gnétique c omme
un transformateur ou des lignes à haute tension
• à proximité de ou sur une surface métallique chargée
électriquement
Entretien
• Nettoyez l’éc ran à l’aide d’u n chiffon do ux. Si vous utilisez un
produit nettoyant pour vitres, n’utilisez aucun type de produit
contenant une solution antistatique ou des additifs similaires.
Vous risquez de rayer le revêtement de l’écran.
• Ne frottez pas, ne touchez pas et ne tapotez pas la su rfa ce de
l’écran avec des objets abrasifs ou aux arêtes vives comme la
pointe d’un stylo à billes ou d’un tournevis. Ce type de contact
risque en effet de rayer le tube image.
• Nett oyez l e châss is, l e panne au et les comm andes à l’ai de d’u n
chiffon doux légèrement imprégné d’une solution détergente
neutre. N’utilisez jamais de tampons abrasifs, de poudre à
récurer ou de solvants tels que de l’alcool ou du benzène.
Transport
Pour transporter ce moniteur en vue de réparations ou de son
expédition, utilisez le carton d’emballage et les matériaux de
conditionnement d’origine.
Utilisation du support pivotant
Ce moniteu r peut êt re réglé su ivant le s angles précisé s ci-des sous.
Pour localiser le centre du rayon de pivotement du moniteur,
alignez le centre de l’écra n du mon iteur sur le s points de centrag e
du support.
Pour faire pivoter le moniteur horizontalement ou verticalement,
saisissez-le des deux mains par la base. Veillez à ne pas vous
coincer les doigts à l’arrière du moniteur lorsque vous le faites
pivoter verticalement.
L’appareil doit être installé à proximité d’une prise murale
aisément accessible.
Exemple de types de fiches
pour 100 à 120 V CA pour 200 à 240 V CA pour 240 V CA
uniquement
90°
5°
90°
15°
Points de centrage

5
FR
Identification des composants et
des commandes
Pour plus de détails, reportez-vous au pages indiquées entre
parenthèses.
1 Touche RESET (réinitialisation) (page 12)
Cette touche réinitialise les réglages aux valeurs par défaut.
2 Manette de commande (page 9)
La manette de commande sert à afficher le menu et à ajuster
les paramètres de réglage du moniteur, y compris la
luminosité et le contrast e.
3 Commutateur et indicateur 1 (alimentation)
(pages 7, 13, 16)
Cette touche met le moniteur sous et hors tension.
L’indicateur d’alimentation s’allume en vert lorsque le
moniteur est sous tension et clignote en vert et en orange ou
s’allume en orange lorsque le moniteur se trouve en mode
d’économie d’énergie.
4 Connecteur AC IN (page 6)
Ce connecteur assure l’alimentation du moniteur.
5 Connecteur d’entrée vidéo (HD15) (page 6)
Ce connecteur assure l’entrée des signaux vidéo RVB
(0,700 Vp-p, positifs) et des signaux de synchronisation.
* DDC (Display Data Chan ne l) e st une norme de VESA.
AC IN
MENU
RESET
MENU
RESET
ArrièreAvant
Broche n° Signal
1 Rouge
2Vert
3Bleu
4 ID (masse)
5 Masse DDC*
6 Masse rouge
7 Masse vert
8 Masse bleu
9 DDC + 5V*
10 Masse
11 ID (masse)
12 Données bidirectionnelles (SDA)*
13 Synchro H
14 Synchro V
15 Données d’horloge (SCL)*
1 2 3 4
5
876
11 12 13 14 15
10
9
6
Installation
Avant de mettre ce moniteur en service, vérifiez si tous les
accessoires suivants se trouvent bien dans le carton:
• Cordon d’a lim e ntation (1)
• Carte de garantie (1)
• Remarques sur l’entretien de la surface de l’écran (1)
• Ce mode d’emploi (1)
Étape 1: Raccordez le moniteur à
votre ordinateur
Mettez le moniteur et l’o rdinate ur hor s tensio n avan t de pro céder
au raccordement.
Remarque
Ne touchez pas les broches du connect eur de câble vidéo, car vous
risqueriez de les plier.
x
Raccordement à un ordinateur de type
PC/AT IBM ou à un ordinateur compatible
x
Raccordement à un ordinateur Macintosh
ou compatible
Étape 2: Branchez le cordon
d’alimentation
Le moniteur et l’ordina te ur ét ant hors tension, branche z d’a b or d
le cordon d’alimentation sur le moniteur et ensuite sur une prise
murale.
AC IN
PC/AT IBM ou
ordinateur compatible
vers la
sortie vidéo
AC IN
Vous avez besoin d’un adaptateur Macintosh (non fourni).
Adaptateur Macintosh (non fourni)
Macintosh ou ordinateur
compatible
vers la sortie vidéo
AC IN
vers AC IN
vers une prise
murale
cordon d’alimentation
(fourni)
7
FR
Étape 3: Mettez le moniteur et
l’ordinateur sous tension
Mettez d’abord le moniteur sous tensio n, puis l’ord ina teu r .
L’installation de votre moniteur est à présent terminée.
Si nécessaire, utilisez le s commandes du moniteur pour régler
l’image.
Si aucune image n’apparaît à l’écran
• Vérifiez que le moniteur est correctement raccordé à
l’ordinateur.
• Si l’indication PAS ENTREE VIDEO apparaît à l’écran,
vérifiez que la carte graphique de votre ordinateur est
complètement introduite dans la fente de bus correcte.
• Si vous remplacez un ancien moniteur par ce modèle et si
l’indication HORS PLAGE DE BALAYAGE apparaît à
l’écran, rebranchez l’ancien moniteur. Ajustez ensuite la carte
graphique de l’ordinateur de façon à ce que la fréquence
horizontale soit comprise entre 30 et 70 kHz et la fréquence
verticale entre 48 et 120 Hz.
Pour plus d’informations sur les messages affichés à l’écran,
reportez-vous à la section “Symptômes et remèdes” à la page 14.
Installation sous dif férents systèmes d’exploitation
Ce moniteur est conforme à la norme Plug & Play “DCC” permet t ant la
détection automatique de l’ensemble des informations relatives au
moniteur. Aucun pilote spécifique ne doit être installé sur l’ordinateur.
Si vous raccordez le moniteur à votre PC et si vous démarrez votre PC
pour la première fois, il se peut que l’a ssist ant d’installation s’affiche à
l’écran. Cliquez pl usieu rs foi s de s uite sur “Nex t” su ivant le s inst ructio ns
de l’assistant jusqu’à ce que le moniteur Plug & Play soit
automatiquement sélecti onné de façon à ce que vous puissiez utiliser ce
moniteur.
Pour les clients utilisant Windows NT4.0
L’installation du moniteur sous Windows NT4.0 ne fait pas appel au
pilote d’affichage. Reportez-vous au mode d’emploi de Windows NT4.0
pour des informations plus détaillées sur la résolution, le taux de
rafraîchissement et le nombr e de cou le urs.
Sélection de la langue d’affichage
des menus (LANGUE/
INFORMATION)
Les écrans de menu peuvent être affichés en français, anglais,
allemand, italien, espagnol, russe et japonais. La sélection par
défaut est l’anglais.
1
Appuyez au centre de la manette de commande.
Voir page 9 pour plus d’informations sur l’utilisation de la
manette de commande.
2
Déplacez la manette de commande vers le haut ou
le bas m/M pour mettre en évidence LANGUE/
INFORMATION et appuyez de no uveau au c entre de
la manette de commande.
3
Déplacez la manette de commande vers le haut ou
le bas m/M pour sélectionner (LANGUE) et
déplacez vers la gauche ou la droite </, pour
sélectionner une langue.
• ENGLISH: Anglais
• FRANÇAIS
• DEUTSCH: Allemand
• ITALIANO: Italien
• ESPAÑOL: Espagnol
• : Russe
• : Japonais
Pour quitter le menu
Appuyez une fois au centre de la manette de commande pour revenir au
MENU principal et app uyez ensuite de nouveau en séle ct ionnant
QUITTER pour revenir à la visualisation normale. Si vous n’actionnez
aucune touche, le menu se refe rm e automatiquement au bout de 30
secondes environ.
Pour restaurer l’anglais
Appuyez sur la touche RESET pendant que le menu
(LANGUE) est
affiché à l’écran.
MENU
UITTER
TA I L L E H / POS I T I ON
TA I L L E V/ POS I T I ON
COUSSIN/PINBALANEC
TRAPÉZO Ï D/ PARA LL É L
ROTAT I ON
ZOOM
COUL EUR
SELECT
LANGU E / I NFORMAT I ON
DÉMAGNÉTISÉ /MOI RÉ
MENU
MENU
ENGL I SH FRAN A I S
DEUTSCH I T AL I ANO
ESPA OL
SELECT E I T
LANGUE/ I NFORMATI ON
8
Personnalisation de votre
moniteur
Vous pouvez effectuer de multiples réglages su r votre moni teur à
l’aide des écrans de me nu.
Navigation au sein des menus
Appuyez au centre de la manette de commande pour afficher le
MENU principal à l’écran. Voir pa g e9 pour plus d’informations
sur l’utilisation de la manette de commande.
Utilisez la manette de commande pour sélectionner l’un des
menus suivants.
1 QUITTER
Sélectionnez QUITTER pour
quitter le menu.
2 TAILLE H/POSITION
(page 10)
Sélectionnez le menu TAILLE
H/POSITION pour régler la
taille horizontale et le centrage
de l’image.
3 TAILLE V/POSITION
(page 10)
Sélectionnez le menu TAILLE
V/POSITION pour régler la
taille verticale et le centrage de
l’image.
4 COUSSIN/PIN BALANCE
(page 10)
Sélectionnez le menu
COUSSIN/PIN BALANCE pour
régler l’incurvation des côtés de
l’image.
5 TRAPÉZOÏD/PARALLÉL
(page 10)
Sélectionnez le menu
TRAPÉZOÏD/PARALLÉL pour
régler l’angle des côtés de
l’image.
UITTER
TA I L L E H / POS I T I ON
TA I L L E V/ POS I T I ON
COUSS I N / P I N B A LAN EC
TRAPÉZO Ï D/ PARA LL É L
ROTAT I ON
ZOOM
COUL EUR
SELECT
LANGU E / I NFORMAT I ON
DÉMAGNÉTISÉ /MOI RÉ
MENU
TA I LL E H
26
SELECT E I T
TAILLE H/POSITION
TA I LL E V
26
SELECT E I T
TAI LLE V/POSITION
COUS S I N
26
SELECT E I T
COUSS I N/ P I N BALANCE
TRAPÉZO Ï D
26
SELECT E I T
TRAPÉZOÏ D / PARA L LÉL
6 ROTATION ( pa ge 11)
Sélectionnez le menu
ROTATION pour régler la
rotation de l’image.
7 ZOOM (page 11)
Sélectionnez le menu ZOOM
pour agrandir ou po ur réd u i re
l’image.
8 COULEUR (page 11)
Sélectionnez le menu
COULEUR pour régler la
température des couleurs de
l’image. Vous pouvez utiliser ce
menu pour faire correspondre les
couleurs du moniteur à celles
d’une image imprimée.
9 LANGUE/INFORMATION
(pages 7, 15)
Sélectionnez le menu LANGUE/
INFORMATION pour
sélectionner la langue
d’affichage des menus et afficher
la fenêtre d’information de ce
moniteur.
0 DÉMAGNÉTISÉ/MOIRÉ
(page 12)
Sélectionnez le menu
DÉMAGNÉTISÉ/MOIRÉ pour
démagnétiser l’écran et ajustez le
niveau de suppression du moiré.
ROTAT ION
26
EIT
ROTAT I ON
ZOOM
26
EIT
ZOOM
R50
G50
B50
SELECT E I T
COULEUR
5000 6500 9300
USER
ENGL I SH FRAN A I S
DEUTSCH I T AL I ANO
ESPA OL
SELECT E I T
LANGUE/ I NFORMATION
DÉMA GNÉ TISÉ
OU I
SELECT E I T
DÉMAGNÉTISÉ /MOIRÉ

9
FR
x
Utilisation de la manette de commande
1
Affichez le MENU principal.
Appuyez au centre de la manette de commande pour afficher
le MENU principal sur l’é cran.
2
Sélectionnez le menu que vous voulez régler.
Mettez en évidence le menu de votre choi x en déplaçant la
manette de comman de vers l’ a rr iè r e po ur mo n t er (M), vers
l’avant pour descendre (m) et vers la gauche (<) ou vers la
droite (,) pour vous déplacer latéralement.
3
Réglez le menu.
Déplacez la manette de commande vers la gauche (<) ou la
droite (,) pour effectuer le réglage.
4
Fermez le menu.
Appuyez une fois au centre de la manette de commande pour
revenir au ME NU pri ncipal et appuy ez en suite d e nouvea u en
sélectionnant QUITTER pour revenir à la visualisation
normale. Si vous n’ a c tio nn ez au cune touche, le menu se
referme automatiquement au bout de 30 secondes environ.
x
Réinitialisation des réglages
Appuyez sur la touche R ESET. Voir page 12 pour plus
d’informations sur la réinitialisation des réglages.
Réglage de la luminosité et du
contraste
Les réglages de la luminosité et du contraste sont effectués au
moyen d’un menu LUMINOSITÉ/CONTRASTE séparé.
Ces réglages sont enregistrés dans la mémoire pour tous les
signaux entrants.
1
Déplacez la manette de commande dans n’importe
quel sens.
Le menu LUMINOSITÉ/CONTRASTE apparaît à l’écran.
Les fréquences horizontale et verticale du signal d’entrée en
cours sont affichées dans le menu LUMINOSITÉ/
CONTRASTE. Si le signal correspond à l’un des modes
présélectionnés par défaut de ce moniteur, la résolution
s’affiche également.
2
Déplacez la manette de commande vers le haut ou
le bas m/M pour régler la luminosité ( ), et vers la
gauche ou la droite </, pour régler le contraste
(6).
Le menu disparaît automatiquement au bout d’environ
3 secondes.
MENU
MENU MENU
ARRIERE
AVANT
MENU
MENU
RESET
26 26
68.7 Hz/85.0Hz
1024 768
LUMINOSI TÉ / CONTRASTE
les fréquences
horizontales et
verticales du
signal d’entrée
en cours
l
a
r
é
s
o
l
u
t
i
o
n
d
u
s
i
g
n
a
l
d
’
e
n
t
r
é
e
e
n
c
o
u
r
s
10
Réglage de la taille horizontale ou
du centrage de l’image (TAILLE H/
POSITION)
Ces réglages sont enre gistrés dans la mémoire pour le signal
d’entrée en cours.
1
Appuyez au centre de la manette de commande.
Le MENU principal apparaît à l’écran.
2
Déplacez la manette de commande vers le haut ou
le bas m/M pour mettre en évidence TAILLE H/
POSITION et appuyez de nouveau au centre de la
manette de commande.
Le menu TAILLE H/POSITION apparaît à l’écran.
3
Déplacez d’abord la manette de commande vers le
haut ou le bas m/M pour sélectionner le paramètre
de réglage voulu. Déplacez ensuite la manette de
commande vers la gauche ou la droite </, pour
exécuter le réglage.
Réglage de la taille verticale ou du
centrage de l’image (TAILLE V/
POSITION)
Ces réglages sont enre gistrés dans la mémoire pour le signal
d’entrée en cours.
1
Appuyez au centre de la manette de commande.
Le MENU principal apparaît à l’écran.
2
Déplacez la manette de commande vers le haut ou
le bas m/M pour mettre en évidence TAILLE V/
POSITION et appuyez de nouveau au centre de la
manette de commande.
Le menu TAILLE V/POSITION apparaît à l’écran.
3
Déplacez d’abord la manette de commande vers le
haut ou le bas m/M pour sélectionner le paramètre
de réglage voulu. Déplacez ensuite la manette de
commande vers la gauche ou la droite </, pour
exécuter le réglage.
Réglage de l’incurvation des côtés
de l’image (COUSSIN/PIN
BALANCE)
Ces réglages so nt en r e gi strés dans la mémoir e po ur le sig na l
d’entrée en cours.
1
Appuyez au centre de la manette de commande.
Le MENU principal apparaît à l’écran.
2
Déplacez la manette de commande vers le haut ou
le bas m/M pour mettre en évidence COUSSIN/
PIN BALANCE et appuyez de nouveau au cen tre de
la manette de commande.
Le menu COUSSIN/PIN BALANCE apparaît à l’écran.
3
Déplacez d’abord la manette de commande vers le
haut ou le bas m/M pour sélectionner le paramètre
de réglage voulu. Déplacez ensuite la manette de
commande vers la gauche ou la droite </, pour
exécuter le réglage.
Réglage de l’angle des côtés de
l’image (TRAPÉZOÏD/PARALLÉL)
Ces réglages so nt en r e gi strés dans la mémoir e po ur le sig na l
d’entrée en cours.
1
Appuyez au centre de la manette de commande.
Le MENU principal apparaît à l’écran.
2
Déplacez la manette de commande vers le haut ou
le bas m/M pour mettre en évidence TRAPÉZOÏD/
PARALLÉL et appuyez de nouveau au centre de la
manette de commande.
Le menu TRAPÉZOÏD/PARALLÉL apparaît à l’écran.
3
Déplacez d’abord la manette de commande vers le
haut ou le bas m/M pour sélectionner le paramètre
de réglage voulu. Déplacez ensuite la manette de
commande vers la gauche ou la droite </, pour
exécuter le réglage.
Sélectionnez Pour
TAILLE H
régler la taille horizontale
POSITION H
régler le centra ge ho ri z on ta l
Sélectionnez Pour
TAILLE V
régler la taille verticale
POSITION V
régler le centrage vertical
Sélectionnez Pour
COUSSIN
élargir ou rétrécir les côtés de l’image
PIN BALANCE
décaler les côtés de l’image vers la
gauche ou la droite
Sélectionnez Pour
TRAPÉZOÏD
régler la largeur de l’image dans le
haut de l’écran
PARALLÉL
décaler l’image vers la gauche ou la
droite dans le haut de l’écra n

11
FR
Réglage de la rotation de l’image
(ROTATION)
Ce réglage est enregistré dans la mémoire pour tous les signaux
d’entrée.
1
Appuyez au centre de la manette de commande.
Le MENU principal apparaît à l’écran.
2
Déplacez la manette de commande vers le haut ou
le bas m/M pour mettre en évidence ROTATION
et appuyez de nouveau au centre de la manette de
commande.
Le menu ROTATION apparaît à l’écran.
3
Déplacez la manette de commande vers la gauche
ou la droite </, pour faire pivoter l’image.
Agrandissement ou réduction de
l’image (ZOOM)
Ce réglage est enregistré dans la mémoire pour le signal d’entrée
en cours.
1
Appuyez au centre de la manette de commande.
Le MENU principal apparaît à l’écran.
2
Déplacez la manette de commande vers le haut ou
le bas m/M pour mettre en évidence ZOOM et
appuyez de nouveau au centre de la manette de
commande.
Le menu ZOOM apparaît à l’écran.
3
Déplacez la manette de commande vers la gauche
ou la droite </, pour agrandir ou réduire l’image.
Remarque
Le réglage s’arrête lorsque la plage de réglage ho riz ontal ou vertical
atteint sa valeur limite maximum ou minimum.
Réglage de la couleur de l’image
(COULEUR)
Les réglages COULEUR permettent de régler la température de
couleur de l’image en chang eant le niveau de couleur du champ
de couleur blanc. Les couleurs apparaissent rougeâtres lorsque la
température est basse et bleuâtre s lo rsqu’elle est élevée. Ce
réglage est pratique pour faire correspondre les couleurs du
moniteur à celles d’une image imprimée.
Ce réglage est enregistré dans la mémoire pour tous les signaux
d’entrée.
1
Appuyez au centre de la manette de commande.
Le MENU principal apparaît à l’écran.
2
Déplacez la manette de commande vers le haut ou
le bas m/M pour mettre en évidence COULEUR et
appuyez de nouveau au centre de la manette de
commande.
Le menu COULEUR apparaît à l’écran.
3
Déplacez la manette de commande vers la gauche
ou la droite </, pour sélectionner une
température de couleur.
Les températures de couleur présélectionnées sont 5000K,
6500K, et 9300K . Comme le régla ge par défaut est 9300K, les
blancs passent d’une nuance bleuâtre à une nuance rougeâtre
lorsque la température est aba issée de 6500K à 5000K.
4
Si nécessaire, accordez fi nement l a température de
couleur.
Déplacez d’abor d la mane tte de com mande ve rs la gauc he ou
la droite </, pour sélectionner USER. Déplacez ensuite la
manette de com mande vers le haut ou le bas m/M pour
sélectionner R (rouge), G (vert) ou B (bleu) et déplac ez vers
la gauche ou la droite </, pour effectuer le réglage.
Si vous procédez au réglage pr éci s de la température des
couleurs, le nouveau réglage des couleurs est mémorisé et
rappelé chaque fois que vous sélectionne z USER.
R50
G50
B50
SELECT E I T
COULEUR
5000 6500 9300
USER

12
Réglages supplémentaires
(DÉMAGNÉTISÉ/MOIRÉ)
Vous pouvez dégausser (démagnétiser) manuellement le
moniteur et ajuster le niveau de suppr e ssion du moiré.
1
Appuyez au centre de la manette de commande.
Le MENU principal apparaît à l’écran.
2
Déplacez la manette de commande vers le haut ou
le bas m/M pour mettre en évidence
DÉMAGNÉTISÉ/MOIRÉ et appuyez de nouveau
au centre de la manette de commande.
Le menu DÉMAGNÉTISÉ/MOIRÉ apparaît à l’écran.
3
Déplacez la manette de commande vers le haut ou
le bas m/M pour sélectionner le paramètre de
réglage voulu.
Procédez au réglage du para mèt re sélectionné en suivant les
instructions ci-dessous.
Démagnétisation de l’écran
L’écran du moniteur est automatiquement démagnétisé à la mise
sous tension.
Pour démagnétiser manuelleme nt l’écran, déplacez
d’abord la manette de comm ande vers le haut ou le bas
m/M afin de sélectionner (DÉMAGNÉTISÉ). Déplacez
ensuite la manette de commande vers la droite ,.
L’écran est démagnét isé pendant environ 5 secondes. Si un
second cycle de démagnétisation s’avère nécessaire, laissez
s’écouler un intervalle de 20 minutes pour obtenir de meilleurs
résultats.
Réglage du moiré
*
Si des motifs elliptiques ou ondulés apparaissent sur l’écran,
réglez le niveau de suppression du moiré.
Pour régler le niveau de suppression du moiré,
déplacez d’abord la manett e de commande vers le haut
ou le bas m/M afin de sélectionner (ADAPTE
MOIRÉ). Déplacez ensuite la manette de commande
vers la gauche ou la droite </, jusqu’à ce que l’effet
de moiré soit minimal.
* L’effet de moiré est un type d’interférence naturelle qui pro duit de
légères lignes ondulées sur l’éc ran. Il peut résulter d’une interfére nce
entre le motif de l’image à l’éc ran et la disposition des points du
moniteur.
Réinitialisation des réglages
Ce moniteur offre trois méthodes de réinitialisation. Utilisez la
touche RESET pour réinitialiser les réglages.
Réinitialisation d’un seul paramètre de réglage
Utilisez la manette de commande pour sélectionner le paramètre
de réglage que vous voulez réinitia li ser et appuyez sur la touche
RESET.
Réinitialisation de toutes les données de réglage
pour le signal d’entrée en cours
Appuyez sur la touche RESET lorsqu’aucun menu n’est affiché
sur l’écran.
Attention que les paramètres su ivants n e sont pas réinitialisés par
cette méthode:
• langue d’affichage des menus (page 7)
• rotation de l’image (page 11)
Réinitialisation de toutes les données de réglage
pour tous les signaux d’entrée
Maintenez la touche RESET enfoncée pendant au moins deux
secondes.
Attention que le paramètre suivant ne peut être réinitialisé suivant
cette méthode:
• réglages utilisateur du menu couleur (page 11)
Exemple de moiré
RESET
13
FR
Caractéristiques
techniques
Mode présélectionné et mode
utilisateur
Lorsque le moniteur reçoit un signal d’entrée, il fait
automatiquement correspondre le signal à l’un des modes
présélectionnés qui sont enregistré s dans la mémoire du moniteur
de manière à offrir une image de haute qualité au centre de
l’écran. (Voir Appendix pour une liste des modes
présélectionnés.) Pour les signaux d’entrée qui ne correspondent
pas à l’un des modes présélectionnés, la technologie Multiscan
numérique intégrée dans ce mon iteur fait en sorte qu’une image
claire apparaisse à l’écran pour toutes les synchron isations dans la
plage de fréquences du moniteur (horizo ntale: 30 à 70 kHz;
verticale: 48 à 120 Hz). Lorsque l’image est réglée, les données
de réglage sont mémorisées comme un mode utilisateur et sont
rappelées automatiquement ch aqu e fois que le même signal
d’entrée est reçu.
Remarque à l’intention des utilisateurs de
Windows
Pour les utilisateurs de Windows, consultez le manuel de votre
carte graphique ou le programme d’utilitaire livré avec votre carte
graphique et sélectionnez le taux de r afraîchiss ement le pl us élevé
possible afin de maximiser les performances du moniteur.
Fonction d’économie d’énergie
Ce moniteur satisfait aux critères d’économi e d’énergie VESA,
E
NERGY STAR et NUTEK. Lorsque le moniteur est raccordé à
un ordinateur ou une carte graphique vidéo compatible DPMS
(Display Power Management Signaling), le moniteur réduit
automatiquement sa conso mmation d’énergie en trois étapes
comme indiqué ci-dessous.
* “Sommeil” et “sommeil profond” sont des m odes d’économie
d’énergie définis par l’Enviro nm ental Protection Agency.
** Lorsque vot re or di nat eur passe en mode “inactif”, le sign al d’entrée
est coupé et l’indication PAS ENTREE VIDEO apparaît à l’écran. Au
bout de 20 secondes, le moniteur passe en mode d’économie
d’énergie.
Dépannage
Consultez cette section ava nt de fai r e appel au service
d’assistance technique.
Si une fine ligne apparaît à l’écran
(fil d’amortissement)
La ligne visible sur l’écran, tout spécialement lorsque la couleur
d’arrière plan est claire (en général blanc) est une caractéristique
normale de votre moniteur Trinitron. Ceci est n ormal. Cette ligne
est en fait l’ombre du fil d’amorti ssement employé po ur stabiliser
la grille d’ouverture. Cette grille est un composant essentiel qui
rend le tube d’image Trinitron unique en permettant le passage
d’une plus grande quantité de lumière vers l’écran, vous
permettant ainsi d’obtenir une image plus lumineuse et plus
détaillée.
Messages affichés à l’écran
Lorsqu’une anomalie du signal d’entrée est détectée, l’un des
messages suivants apparaît à l’écran. Pour remédier au problè me,
voir “Symptômes et remèdes” à la page 14.
Condition du signal d’entrée
HORS PLAGE DE BALAYAGE
indique que le signal d’entrée n’est pas supporté par les
spécifications du moniteur.
PAS ENTREE VIDEO
indique qu’aucun si gnal n’est entré sur le mon iteur.
Mode
d’alimentation
Consommation
d’énergie
L’indicateur 1
(alimentation)
fonctionnement
normal
≤
95 W vert
1 veille
≤
15 W vert et orange en
alternance
2 interruption
(sommeil)*
≤
15 W vert et orange en
alternance
3 inactif**
(sommeil profond)*
≤
5 W orange
hors tension 0 W désactivé
Fil d’amortissement
INFORMATIONS
HORS PLAGE
DE BALAAGE
Condition du
signal d’entrée
 Loading...