

Sony TC-55 Owner's Instruction Manual
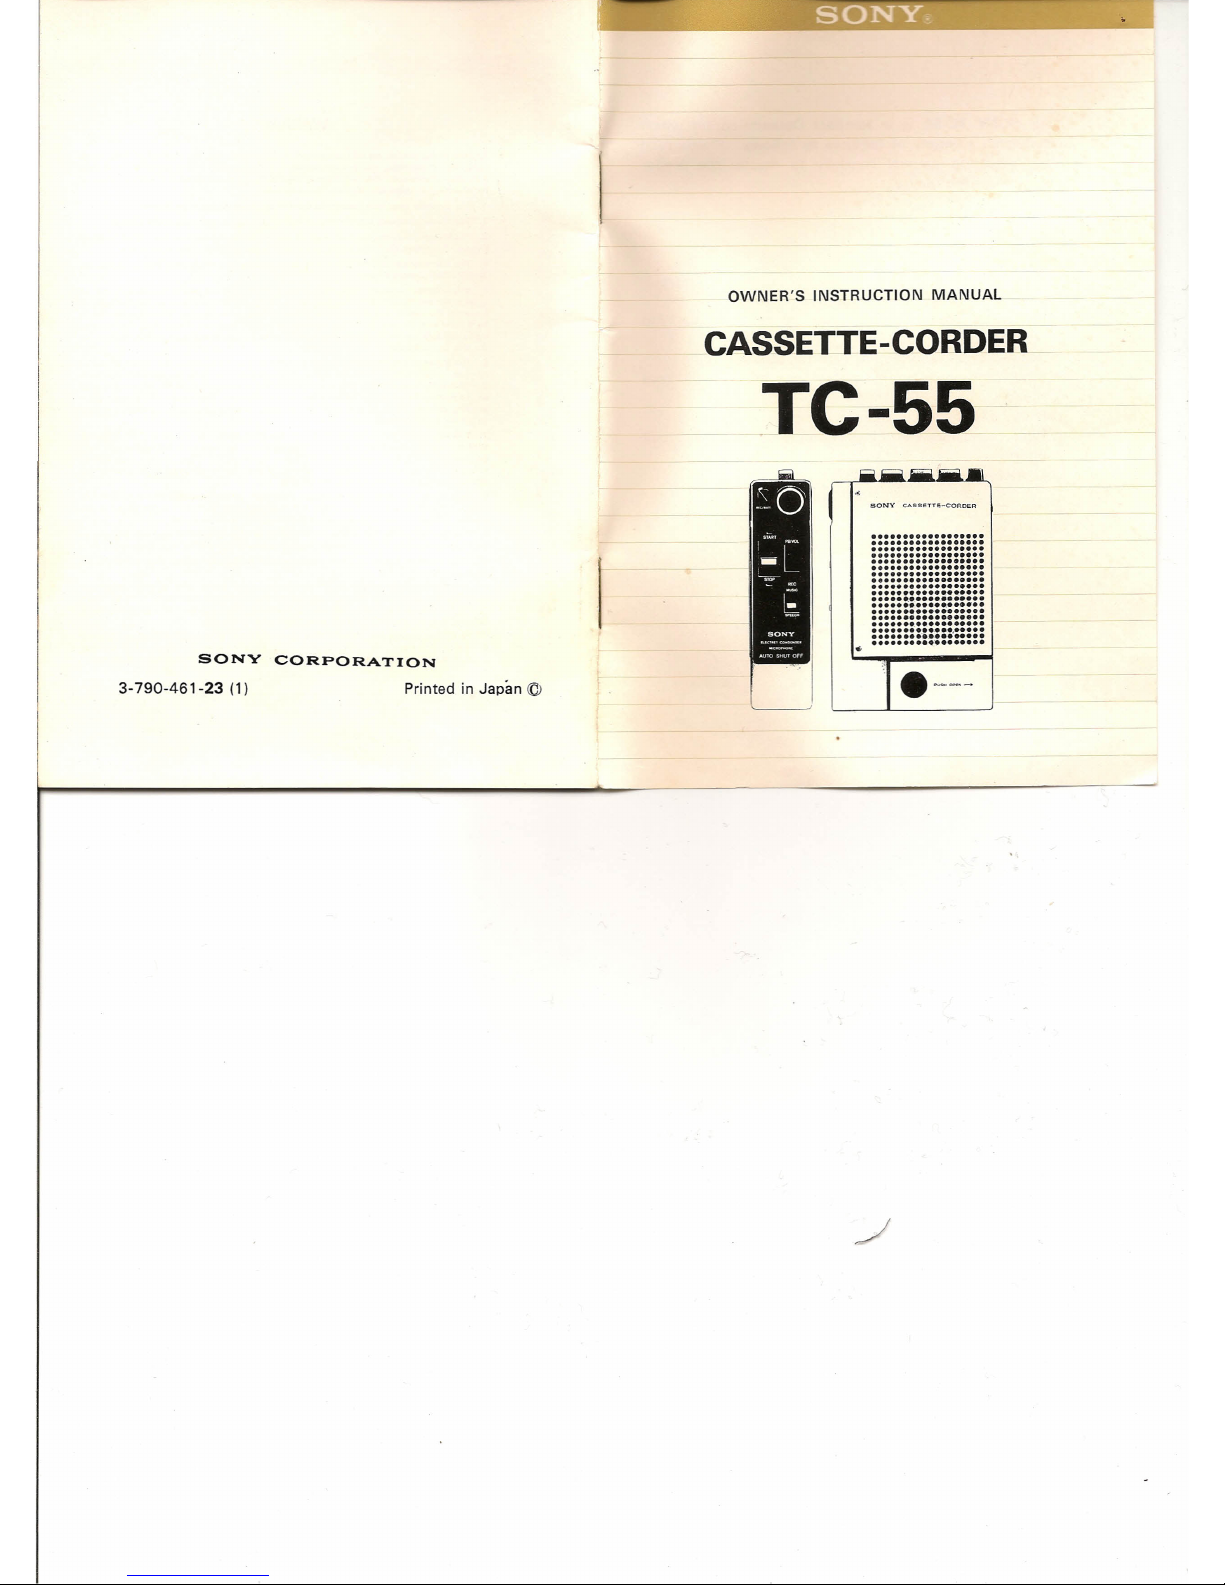
OWNER'S INSTRUCTION MANUAL
CASSETTE-CORDER
..................
..................
..................
..................
..................
..................
..................
..................
..................
..................
...................
...................
..................
..................
...................
..............,.....
...................
..........-.
..
SONY CORPORATION
3-790-461-23 (1)
Printed in Japan
©
.---

Your SONY TC-55 is a compact Cassette-corder which
offers such a variety of features as follows. Please read
this instruction manual carefully to master the proper
operation of the recorder.
FEATURES
o Built-in condenser microphone for maximum conveni-
ence
o Automatic shut-off mechanism in the playback and
record mode
o SO Y- ATIC recording
o Dual di eren
ial-balance
speed
recording
for stable tape
Printed circuit
PRECAUTIONS
1. The REC (record) button cannot be depressed in the
following cases.
o No cassette in the cassette compartment.
o A cassette is loaded with safety tab broken-out.
2. Tape will not move when the pause switch is set at
the STOP position. Before using, set this switch at
the START position.
3. Clean the record/playback head periodically. Other-
wise, the reproduced sound may be distorted. Refer
to page 21.
4. Do not expose the set to direct sunlight, or place too
near heaters for extended period.
CONTENTS
Notes on cassettes , .....•.......................... 4
Parts and controls 6
Power sources , , .. .. .. .• .. . . .. . . .. 8
Recording ...........................•................. 12
Playback 15
Recording from various sound sources 18
Erasing 20
Maintenance 21
Optional accessories ' 22
Warranty 23
Specifications 25
3

NOTES ON CASSETTES
o The sides of a cassette are marked "A" and •. B ",
When you wish to record or play back side" A", install
the cassette into the cassette compartment with side
•.A" up. When you wish to record or play back side
" B", install it with side" B" up. .
The letter" A" of the SONY Cassette is embossed to
help distinguish that side of the cassette in a dimly
lighted area.
o Before installing a cassette, remove any slack from the
tape by inserting a pencil into the hub and winding it
until the slack is eliminated.
4
o Tape Cassettes incorporate a convenient safety device
to prevent accidental erasure. (When the recorder is set
in the record mode, previous recordings are automati-
cally erased.)
When the small tabs at the rear of a cassette are broken
out, a safety device will be activated, preventing re-
cording.
To protect side •. A" recording, break out the tab of
side" A".
To protect side" B ", break out the tab of side" B"
When the cassette is installed with the tabs broken out,
the REC (record) button cannot be depressed.
To reuse a cassette for recording after the tabs have
been removed, simply cover each slot with a small
piece of cellophane or vinyl tape.
5
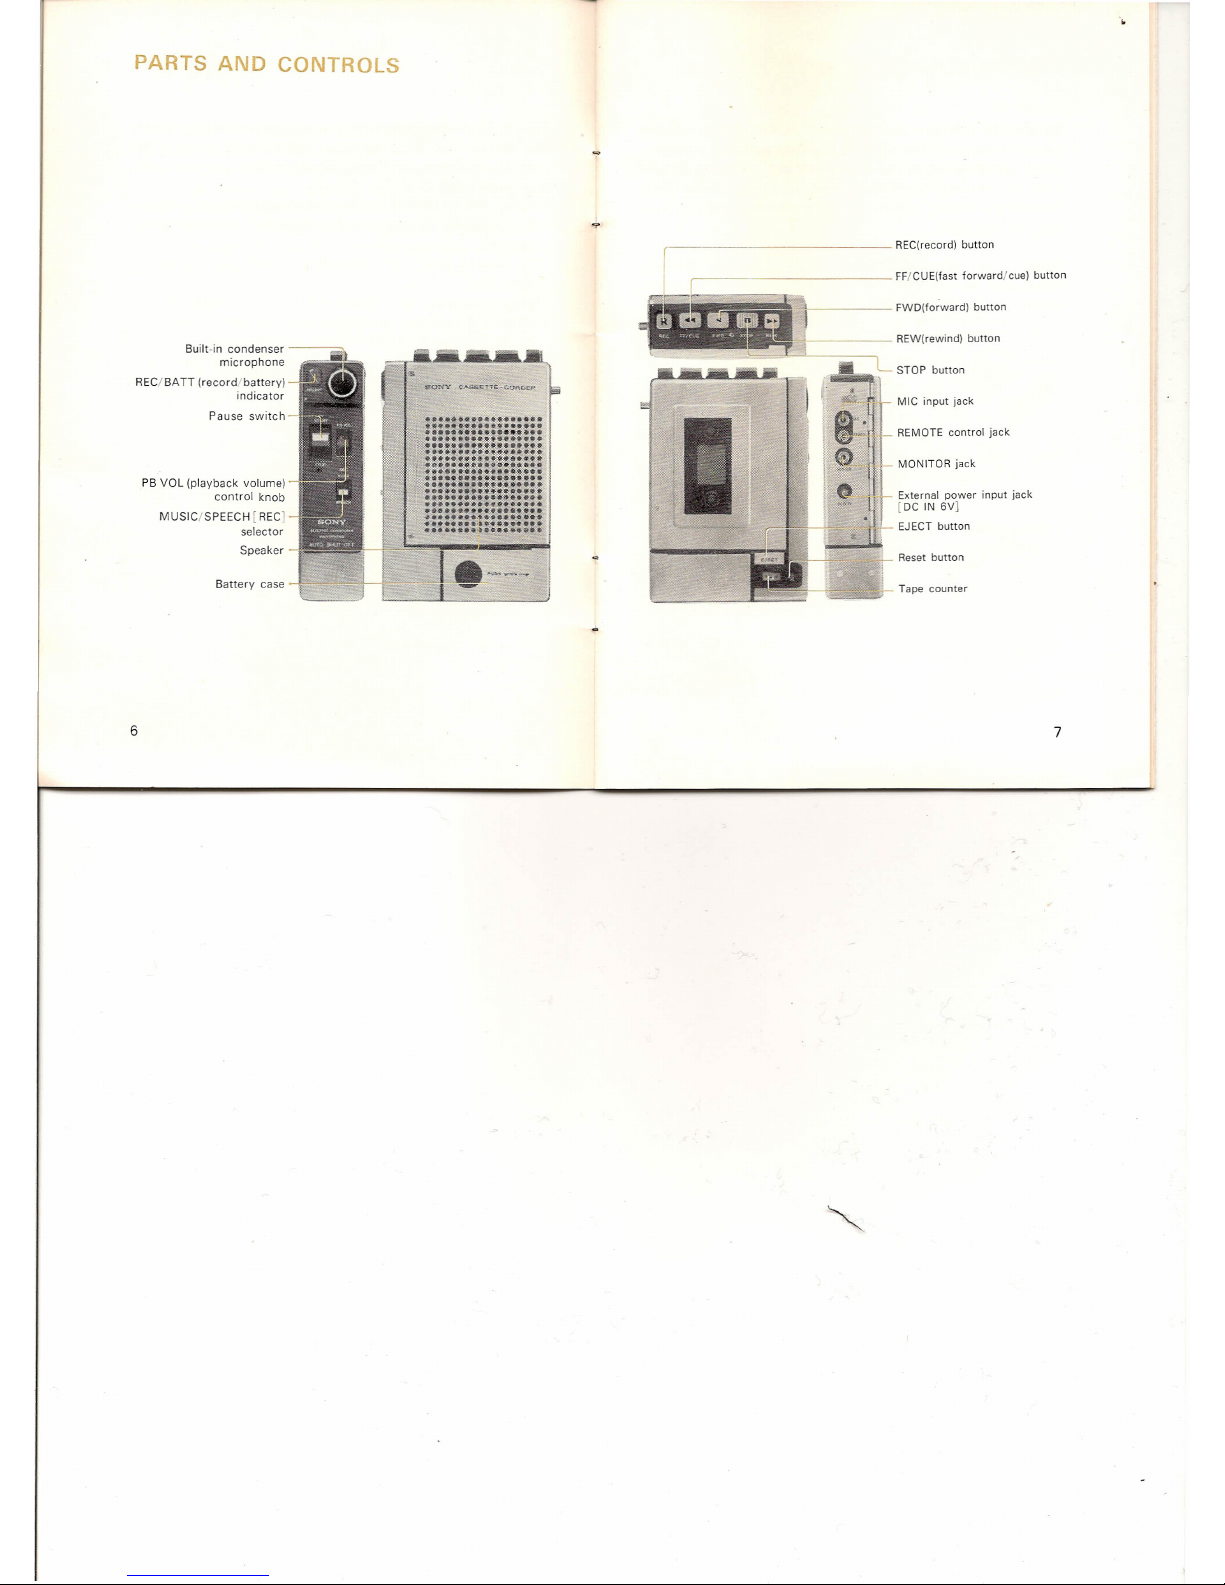
PARTS AND CONTROLS
Built-in condenser
microphone
REC/BATT (record/battery)
indicator
Pause switch
PB VOL (playback volume)
control knob
MUSIC/SPEECH [RECl
selector
Speaker -
Battery case
6
.•
. REC(record) button
r--------------
FF/CUE(fast forward/cue) button
'1;liii~lii!ii~jiiiJ~-----
FWD(forward) button
1II.l!!!!!!->d--------
REW(rewind) button
STOP button
MIC input jack
REMOTE control jack
MONITOR jack
External power input jack
[DC IN 6V]
EJECT button
Reset button
C-"l2Ekd"::::'::;';-
Tape counter
t..- _
7
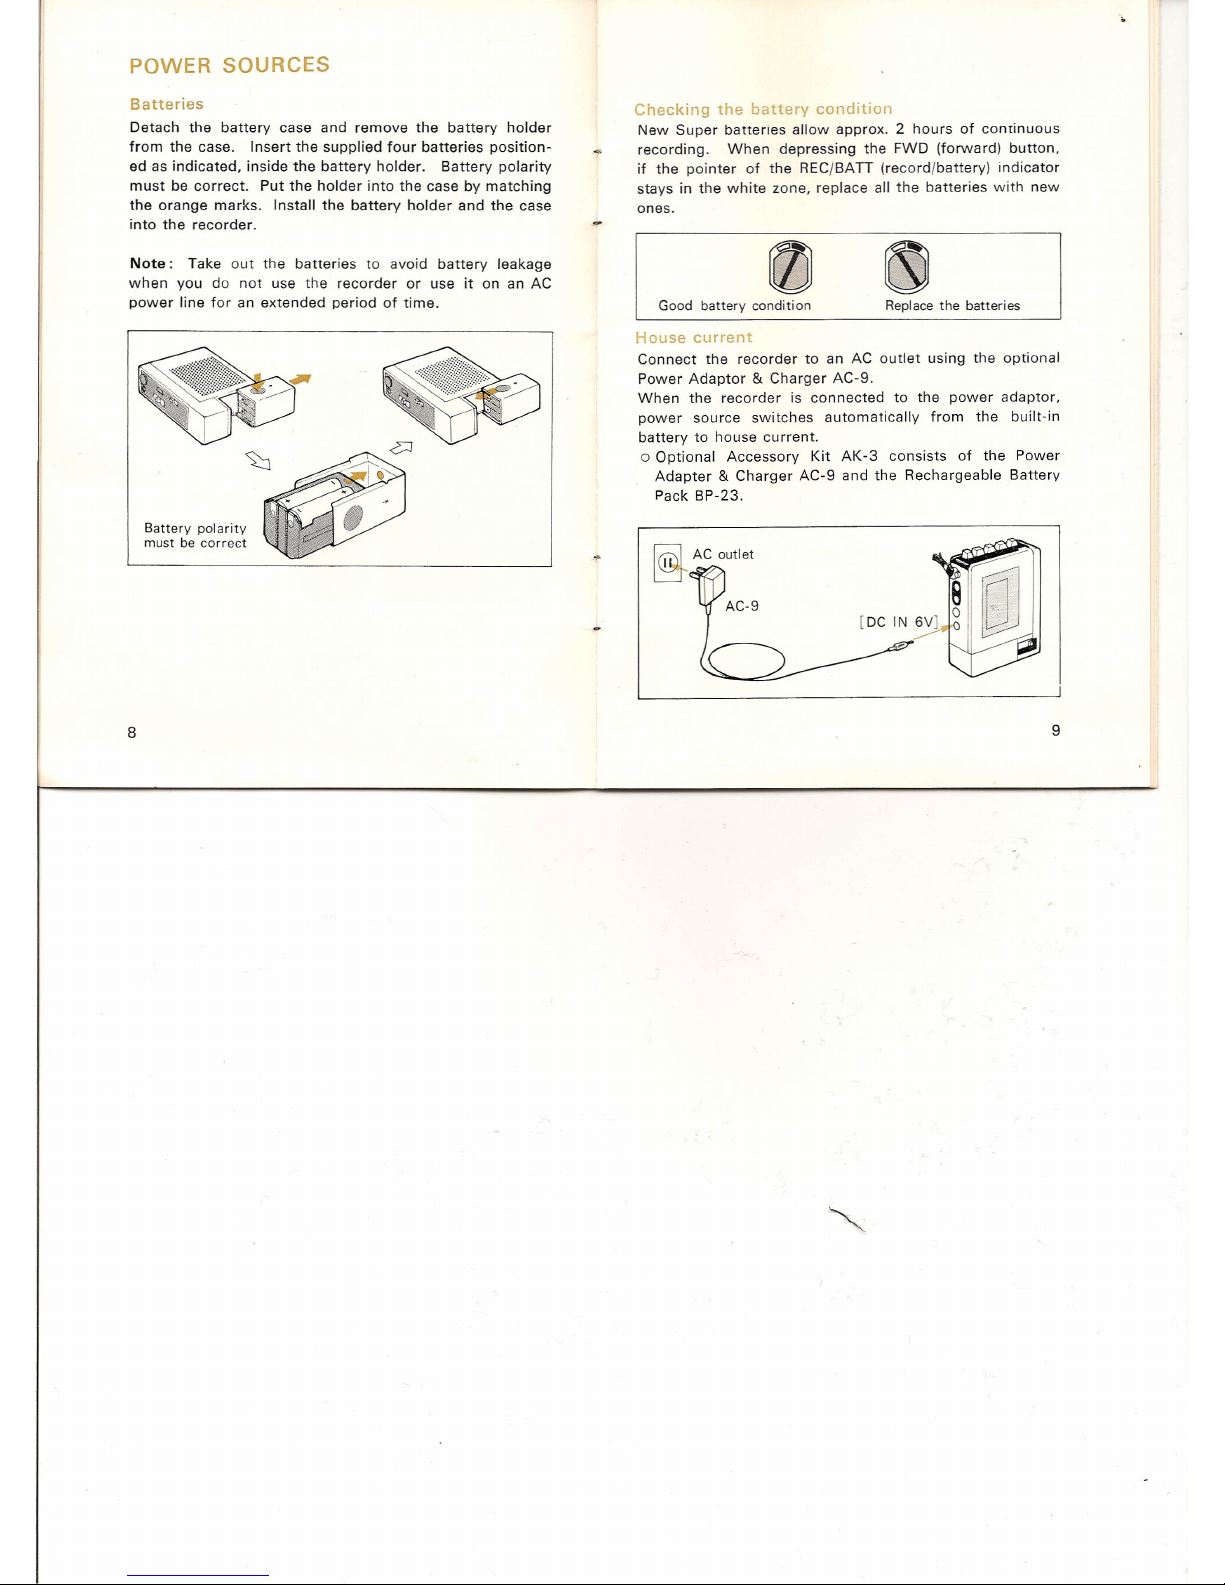
POWER SOURCES
Batteries
Detach the battery case and remove the battery holder
from the case. Insert the supplied four batteries position-
ed as indicated, inside the battery holder. Battery polarity
must be correct. Put the holder into the case by matching
the orange marks. Install the battery holder and the case
into the recorder.
Note:
Take out the batteries to avoid battery leakage
when you do not use the recorder or use it on an AC
power line for an extended period of time.
Battery polarity
must becorrect
8
Checking the battery condition
New Super batteries allow approx. 2 hours of continuous
recording. When depressing the FWD (forward) button,
if the pointer of the REC/BAIT(record/battery) indicator
stays in the white zone, replace all the batteries with new
ones.
Good battery condition Replacethe batteries
House current
Connect the recorder to an AC outlet using the optional
Power Adaptor & Charger AC-9.
When the recorder is connected to the power adaptor,
power source switches automatically from the built-in
battery to house current.
o Optional Accessory Kit AK-3 consists of the Power
Adapter&Charger AC-9 and the Rechargeable Battery
Pack BP-23.
~.AC outlet
9
Rechargeable Battery Pack BP-23
outonat aeeessor
This battery pack is good for
approx.
100 discharge and
recharge cycles. Before using, charge the battery com-
pletely. The Power Adapter&Charger AC-9 is used for
charging.
How to charge:
Install the BP-23 in the battery case
instead of the supplied battery holder. (The installation of
the BP-23 is the same as that of the supplied battery
holder.) Connect the recorder to an AC outlet, using the
Power Adapter & Charger for about4hours at nominal
operating voltage.
o
Fully charged BP-23 permits approx.3hours of continu-
ous recording.
o
If the pointer of the record/battery indicator stays in the
white zone during playback, recharge the battery as
described above.
o
The recorder can be operated while charging, though
more charging time is needed.
o
To avoid over-charging, be sure to remove the power
adaptor when charging is completed.
".
Car boat batter
With the use of the SONY Car Battery Cord DCC-126
(optional accessory). the recorder will operate on a 12V
car/boat battery through a cigarette lighter socket of your
car or boat. For details. refer to the instructions for the
DCC-126.
t
Cigarette lighter socket
battery case
BP-23
10
11
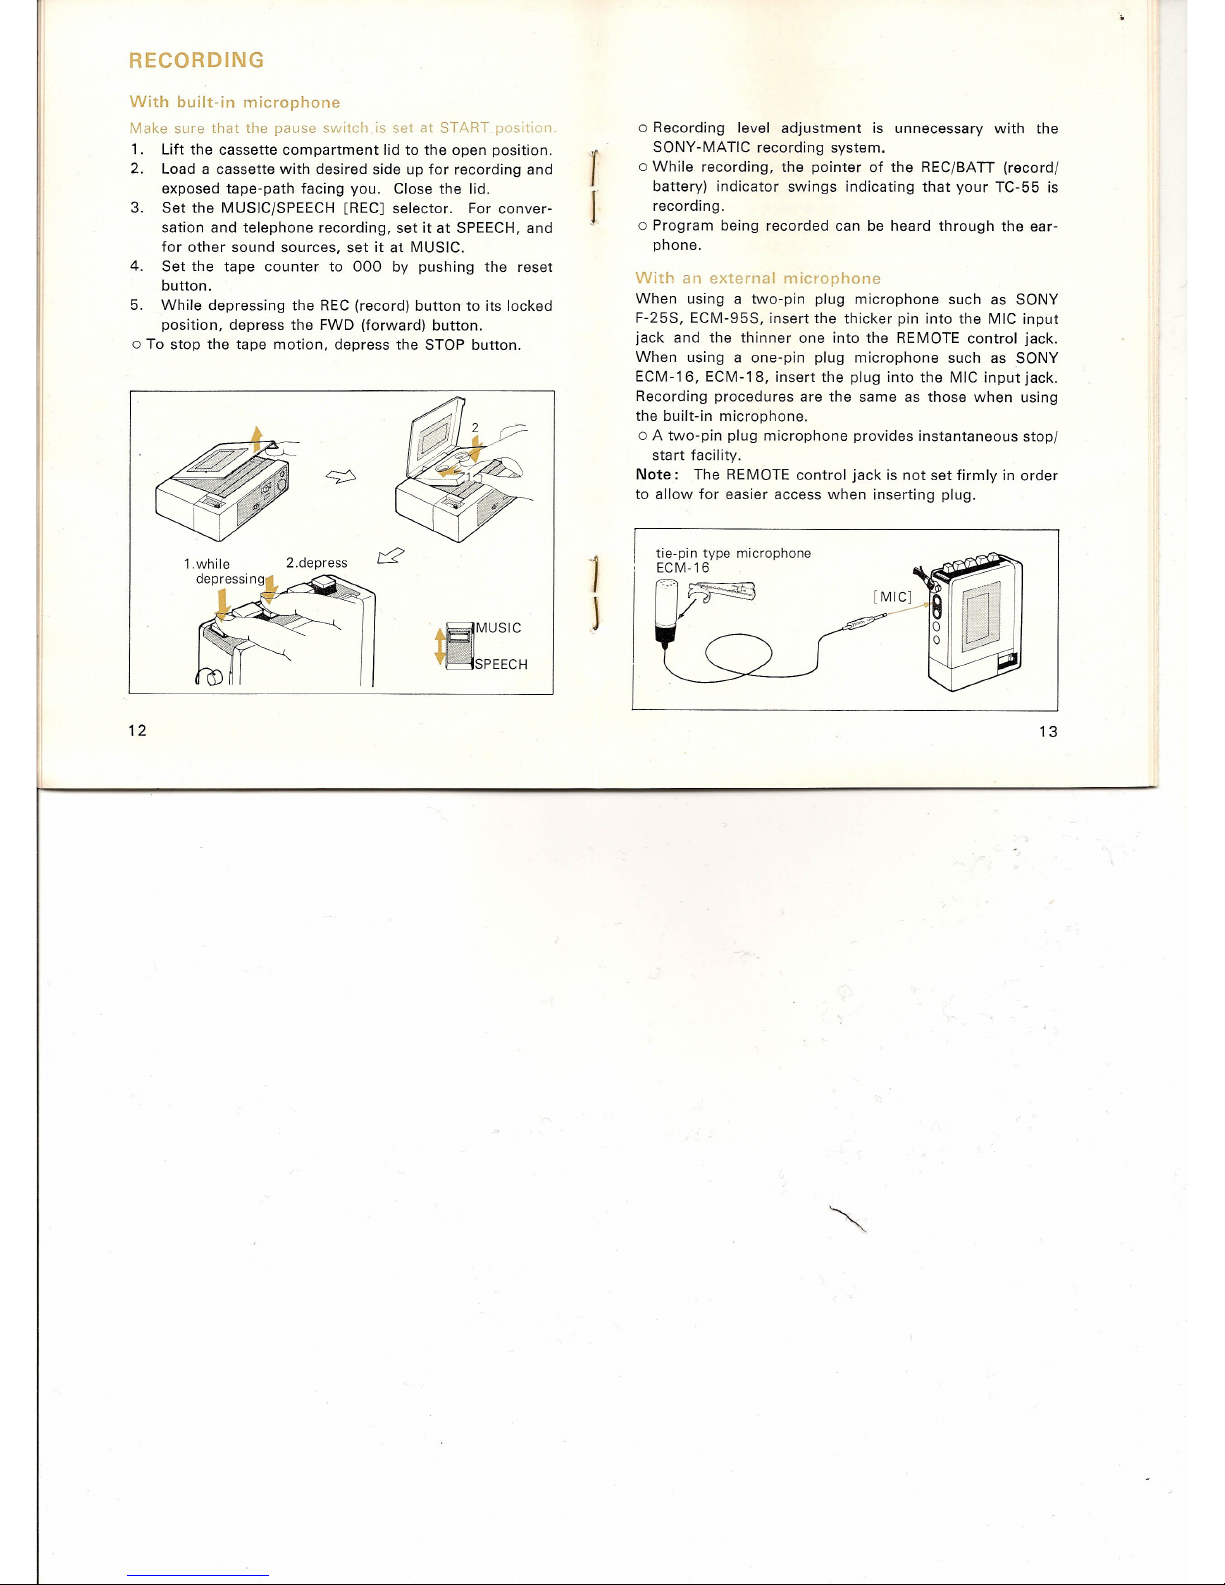
RECORDING
With built-in microphone
Make sure that the pause switch is set at START position.
1. Lift the cassette compartment lid to the open position.
2.
Load a cassette with desired side up for recording and
exposed tape-path facing you. Close the lid.
3.
Set the MUSIC/SPEECH [REC] selector. For conver-
sation and telephone recording, set it at SPEECH, and
for other sound sources, set it at MUSIC.
4.
Set the tape counter to
000
by pushing the reset
button.
5. While depressing the REC (record) button to its locked
position, depress the FWD (forward) button.
o
To stop the tape motion, depress the STOP button.
2.depress
MUSIC
SPEECH
12
T
J
o Recording level adjustment is unnecessary with the
SONY-MATIC recording system.
o
While recording, the pointer of the REC/BAn (record/
battery) indicator swings indicating that your TC-55 is
recording.
o
Program being recorded can be heard through the ear-
phone.
With an external microphone
When using a two-pin plug microphone such as SONY
F-25S, ECM-95S, insert the thicker pin into the MIC input
jack and the thinner one into the REMOTE control jack.
When using a one-pin plug microphone such as SONY
ECM-16, ECM-18, insert the plug into the MIC input jack.
Recording procedures are the same as those when using
the built-in microphone.
o
A two-pin plug microphone provides instantaneous stop/
start facility.
Note: The REMOTE control jack is not set firmly in order
to allow for easier access when inserting plug.
tie-pin type microphone
ECM-16
13
 Loading...