

Sony SPP-S9226 Service manual
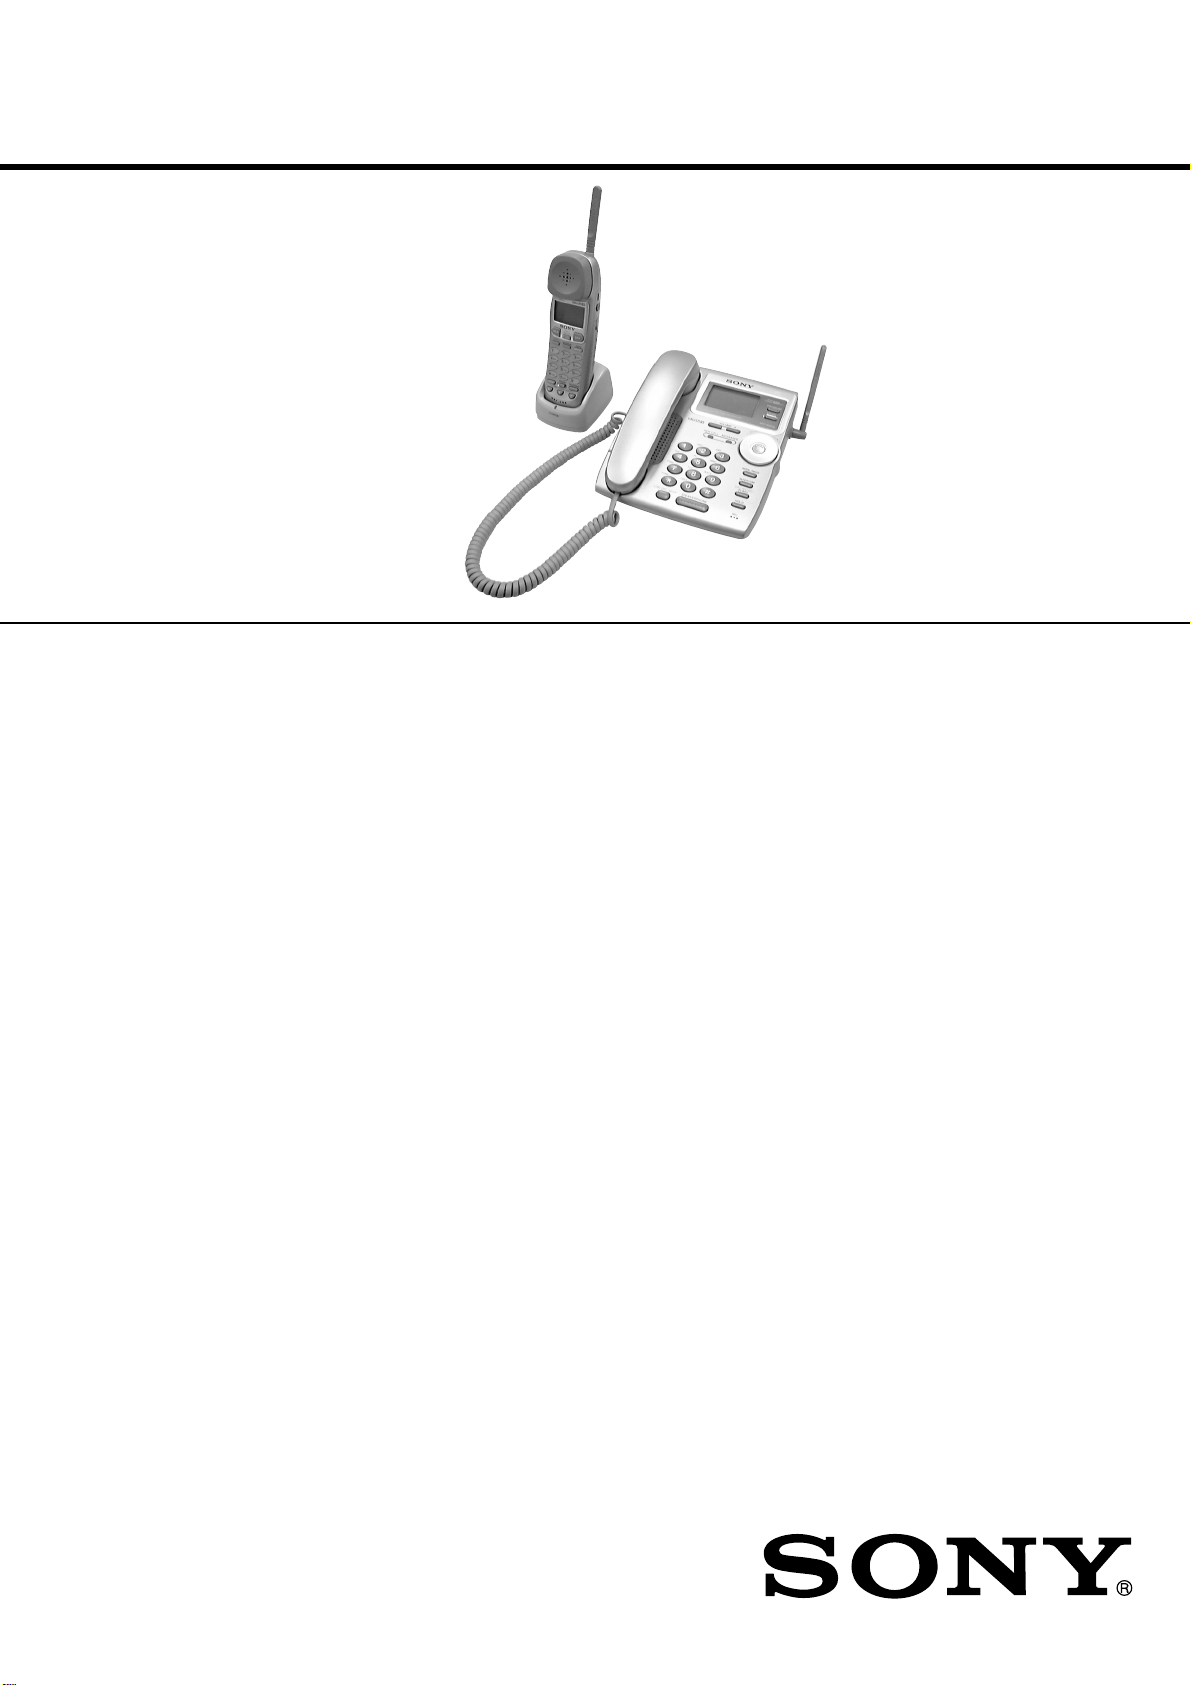
SPP-S9226
SERVICE MANUAL
Ver 1.0 2000. 08
SPECIFICATIONS
General
Spread method
Direct-Sequence Spread-Spectrum
Access method
FDMA-TDD
Frequency band
902 - 928 MHz
Operating channel
23 channels
Dial signal
Tone, 10 PPS (pulse) selectable
Supplied accessories
AC power adaptor (AC-T107)
Charger
Handset
Handset cord
Telephone line cords (2)
Wall bracket/stand for base phone
Rechargeable battery pack (BP-T24)
Belt clip
Cordless handset
Power source
Rechargeable battery pack BP-T24
Battery life
Standby: Approx. 6 days
Talk: Approx. 5 hours
Battery charging time
Approx. 12 hours
Dimensions
Approx. 58 x 185.4 x 48 mm (w/h/d),
antenna excluded
(approx. 2
Antenna: Approx. 72 mm
(approx. 2
3
⁄8 x 7 3⁄8 x 1 15⁄16 inches)
7
⁄8 inches)
Canadian Model
Mass
Approx. 260 g
(approx. 9.2 oz), battery included
Base phone
Power source
DC 11V from AC power adaptor
AC-T107
Dimensions
Approx. 175 x 60 x 214 mm (w/h/d),
antenna excluded
(approx. 7 x 2
Antenna: Approx. 112 mm
(approx. 4
Mass
Approx. 580 g
(approx. 1 lb 4 oz), wall bracket excluded
Charger
Power source
DC 6V from AC power adaptor
Dimensions
Approx. 72.5 x 60 x 85 mm (w/h/d)
(approx. 2
Mass
Approx. 204 g (approx. 7.2 oz)
Design and specifications are subject to
change without notice.
3
⁄8 x 8 1⁄2 inches)
1
⁄ 2 inches)
7
⁄ 8 x 2 3⁄8 x 3 3⁄8 inches)
US Model
CORDLESS TELEPHONE

TABLE OF CONTENTS
1. SERVICING NOTES ................................................ 3
2. GENERAL
Identifying the Parts ........................................................ 5
Setting Up the Base Phone ............................................. 6
Preparing the Battery Pack ............................................. 6
Setting up the Phone Services ........................................ 8
Setting the Day and Time ............................................... 9
Making Calls ................................................................... 10
Receiving Calls ............................................................... 11
Telephone Features ......................................................... 12
Caller ID Features ........................................................... 16
3. DISASSEMBLY ......................................................... 20
4. TEST MODE
Base Unit ......................................................................... 23
Handset ............................................................................ 25
5. DIAGRAMS
5-1. Block Diagram – BASE UNIT Section –...................... 27
5-2. Block Diagram – HANDSET Section – ........................ 29
5-3. Note for Printed Wiring Boards and
Schematic Diagrams ....................................................... 31
5-4. Printed Wiring Board
– BASE MAIN Board (Component Side) – ................... 33
5-5. Printed Wiring Boards
– BASE MAIN (Conductor Side)/
BASE MICROPHONE Boards –.................................... 35
5-6. Schematic Diagram – BASE MAIN (1/2)/
BASE MICROPHONE Boards –.................................... 37
5-7. Schematic Diagram – BASE MAIN Board (2/2) –....... 39
5-8. Printed Wiring Boards
– BASE KEY/KEY LED Boards –................................. 41
5-9. Schematic Diagram
– BASE KEY/KEY LED Boards –................................. 43
5-10. Printed Wiring Board – HAND MAIN Board – .......... 45
5-11. Schematic Diagram – HAND MAIN Board – .............. 47
5-12. IC Pin Function Description ........................................... 51
Notes on chip component replacement
• Never reuse a disconnected chip component.
• Notice that the minus side of a tantalum capacitor may be damaged by heat.
6. EXPLODED VIEWS ................................................ 57
7. ELECTRICAL PARTS LIST ............................... 59
SAFETY-RELATED COMPONENT WARNING!!
COMPONENTS IDENTIFIED BY MARK 0 OR DOTTED
LINE WITH MARK 0 ON THE SCHEMA TIC DIAGRAMS
AND IN THE PARTS LIST ARE CRITICAL TO SAFE
OPERATION. REPLACE THESE COMPONENTS WITH
SONY PARTS WHOSE PART NUMBERS APPEAR AS
SHOWN IN THIS MANUAL OR IN SUPPLEMENTS PUBLISHED BY SONY.
ATTENTION AU COMPOSANT AYANT RAPPORT
À LA SÉCURITÉ!
LES COMPOSANTS IDENTIFIÉS P AR UNE MARQUE 0
SUR LES DIAGRAMMES SCHÉMATIQUES ET LA LISTE
DES PIÈCES SONT CRITIQUES POUR LA SÉCURITÉ
DE FONCTIONNEMENT. NE REMPLACER CES COMPOSANTS QUE PAR DES PIÈCES SONY DONT LES
NUMÉROS SONT DONNÉS DANS CE MANUEL OU
DANS LES SUPPLÉMENTS PUBLIÉS PAR SONY.
– 2 –
SECTION 1
SERVICING NOTES
ERROR DISPLAY
After the power on, if the following display appears on the LCD,
check the item for which “1” is displayed in s.
BASE UNIT
ERROR=ss00s000
ID error→
Enter ID in the TEST MODE B. (See page 24)
DSP (IC651) error→
Check DSP and its peripheral circuits.
EEPROM (IC252) error→
Check EEPROM and its peripheral circuits.
• Precaution on replacing EEPROM
When the EEPROM (IC252) was replaced, write various parameters in the TEST MODE E, and write same ID as that of
handset in the TEST MODE B, and then press the [*] key to
finish the TEST MODE B. (See page 24)
Note:
Depending on the specifications of the set, replacing the EEPROM
(IC252) will cause the users telephone directory registered in the base
unit and caller ID data to be all cleared.
HANDSET
ERROR=s000s000
ID error→
Enter ID in the TEST MODE B. (See page 25)
EEPROM (IC52) error→
Check EEPROM and its peripheral circuits.
• Precaution on replacing EEPROM
When the EEPROM (IC52) was replaced, write var ious parameters in the TEST MODE E, and write same ID as that of base
unit in the TEST MODE B, and then press the [*] key to finish
the TEST MODE B. (See page 25)
Note:
The user’s telephone directory registered in the handset is cleared.
NOTE FOR REPLACEMENT OF THE CRYSTAL VIBRATOR
There are two types of crystal vibrators used for this set. The TYPE
A is used in the production, but use the TYPE B at the replacement. Also, for the following reference number parts (parts related to the crystal vibrators (see below for the combination)), use
the same type of parts according to which type of crystal vibrator
is used. Accordingly, when replacing the crystal vibrator, replace
the following reference number parts together. Similarly, when
the following reference number parts are replaced, check which
type of crystal vibrator is used and use the same type.
Ref. No. Ref. No.
Crystal Parts to be TYPE A TYPE B
(
vibrator replaced together
X201 C207 18PF 15PF
X231
X651 C655 15PF 18PF
X1
X31
[How to identify the TYPE A or B of crystal vibrator]
The type A or B can be identified from the initial character of a
character staring indicated on the top surface of the parts.
TYPE A: Starting with a numeric value
TYPE B: Staring with alphabet D
()
)
C243 12PF 4PF
C244 10PF 4PF
C6 15PF 18PF
C7 18PF 12PF
C43 12PF 3PF
C44 10PF 4PF
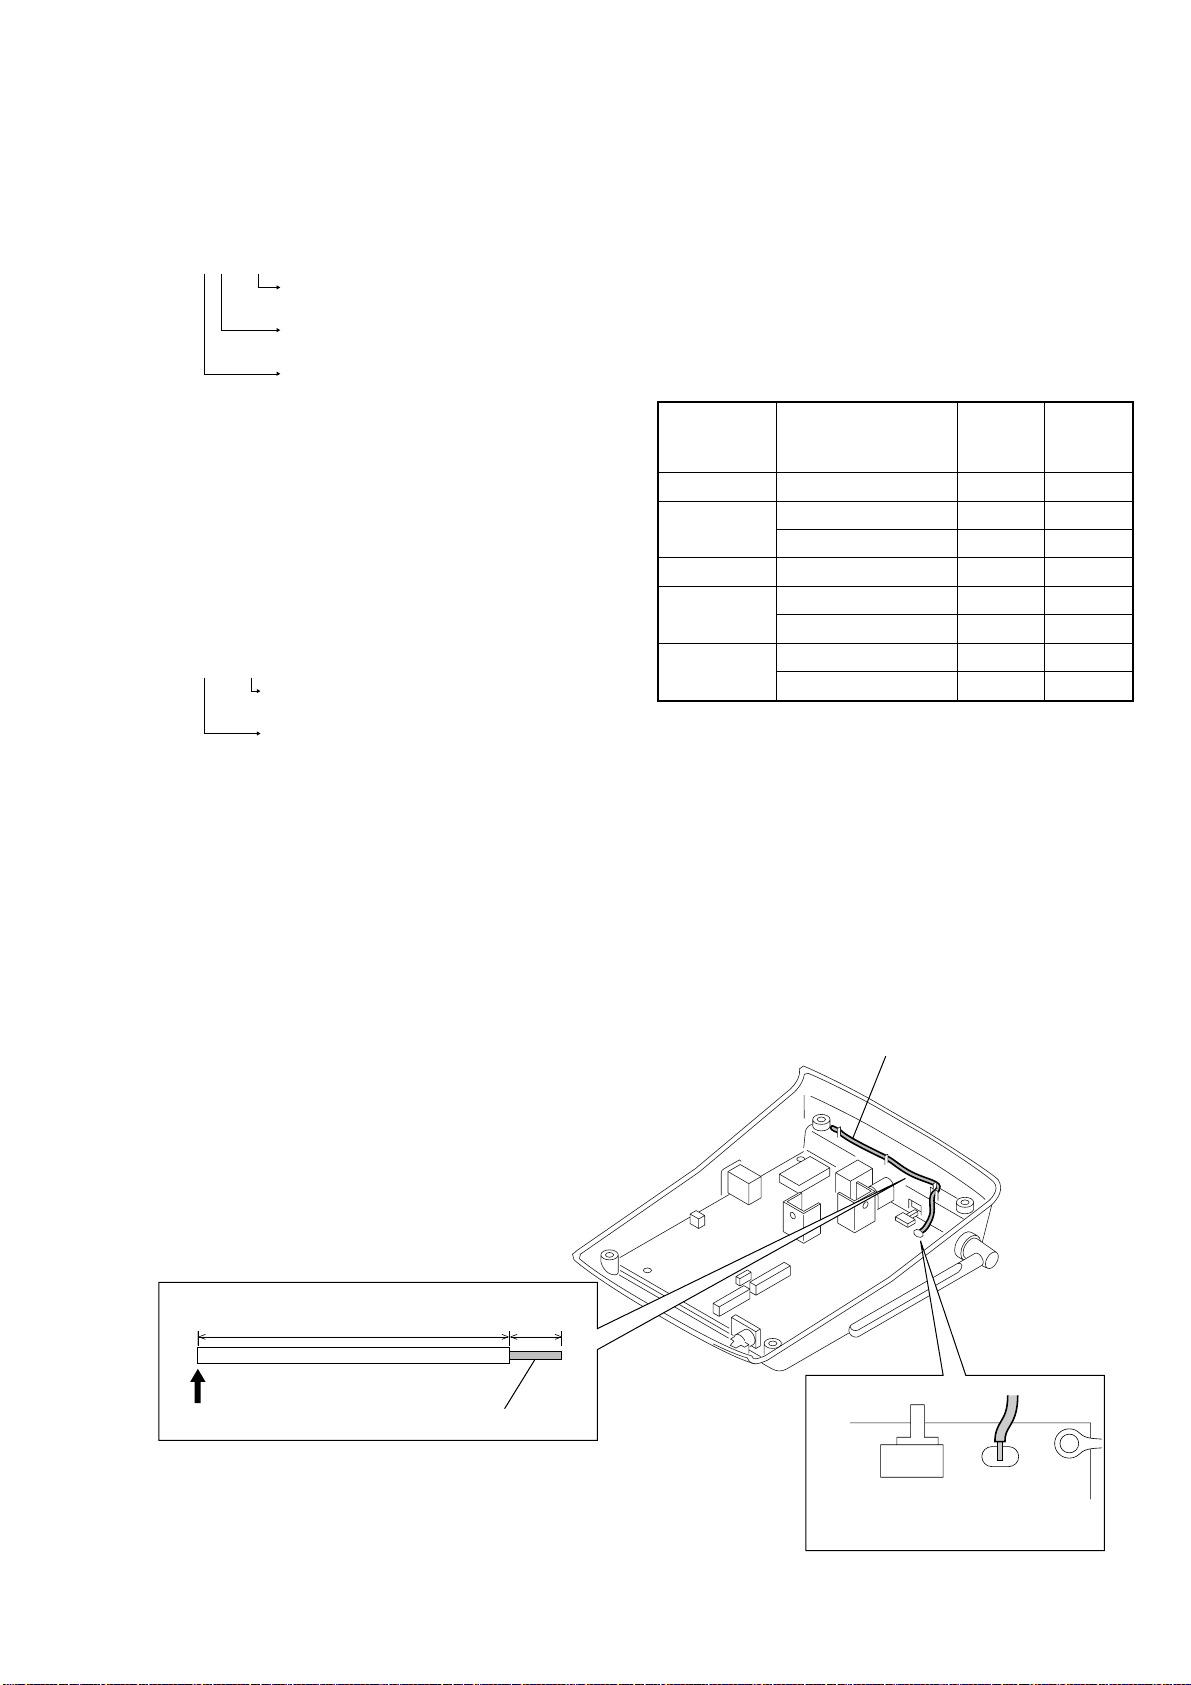
NOTE FOR REPLACEMENT OF THE LEAD WIRE
ANTENNA
When replacing the lead wire antenna (ANT102) used on the base
unit of this set, be sure to use the lead wire having the length within
120±1.5mm.
cut only
120
±
1.5mm 2.5 ± 1mm
solder
LEAD WIRE ANTENNA (ANT102)
Solder the lead wire antenna
in the direction shown in the figure.
– 3 –
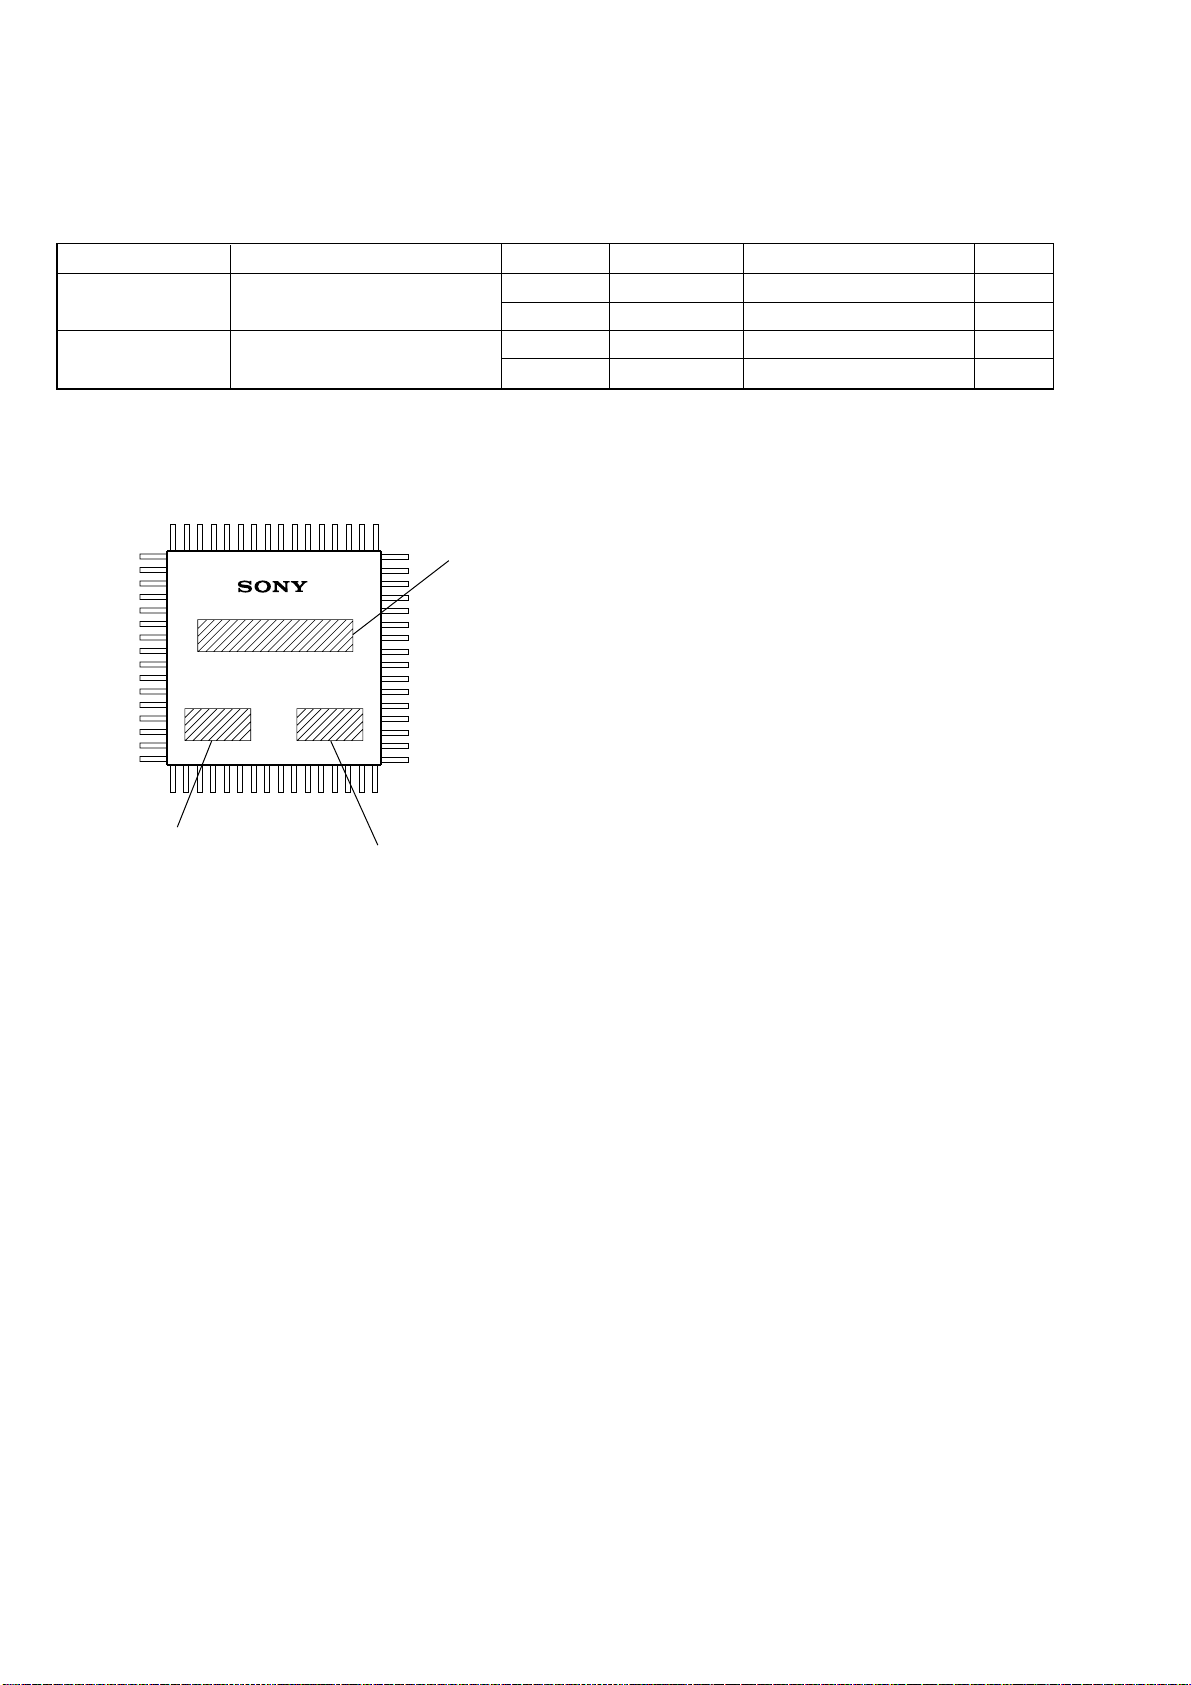
NOTE FOR REPLACEMENT OF THE MICROPROCESSOR
The microprocessor of this set has been modified in the midway of production.
The part constant and the test mode entry method vary depending on the OEM code of the microprocessor used, and therefore check the
OEM code and change each constant and the test mode.
Board/Ref. No. Par ts Name of Microprocessor OEM Code Parts Number Version of Microprocessor TYPE
BASE MAIN Board
IC251 5T01 8-759-827-35 2nd TYPE 2
HAND MAIN Board
IC51 5T02 8-759-827-36 2nd TYPE 2
• TYPE 1/TYPE 2 DISCREMINATION
Identify the OEM code from the silk-screen printing on the IC package.
LC875064W
LC875048W
Parts Name
5S70 8-759-686-11 1st TYPE 1
5S71 8-759-686-12 1st TYPE 1
OEM Code
Lot Number
– 4 –
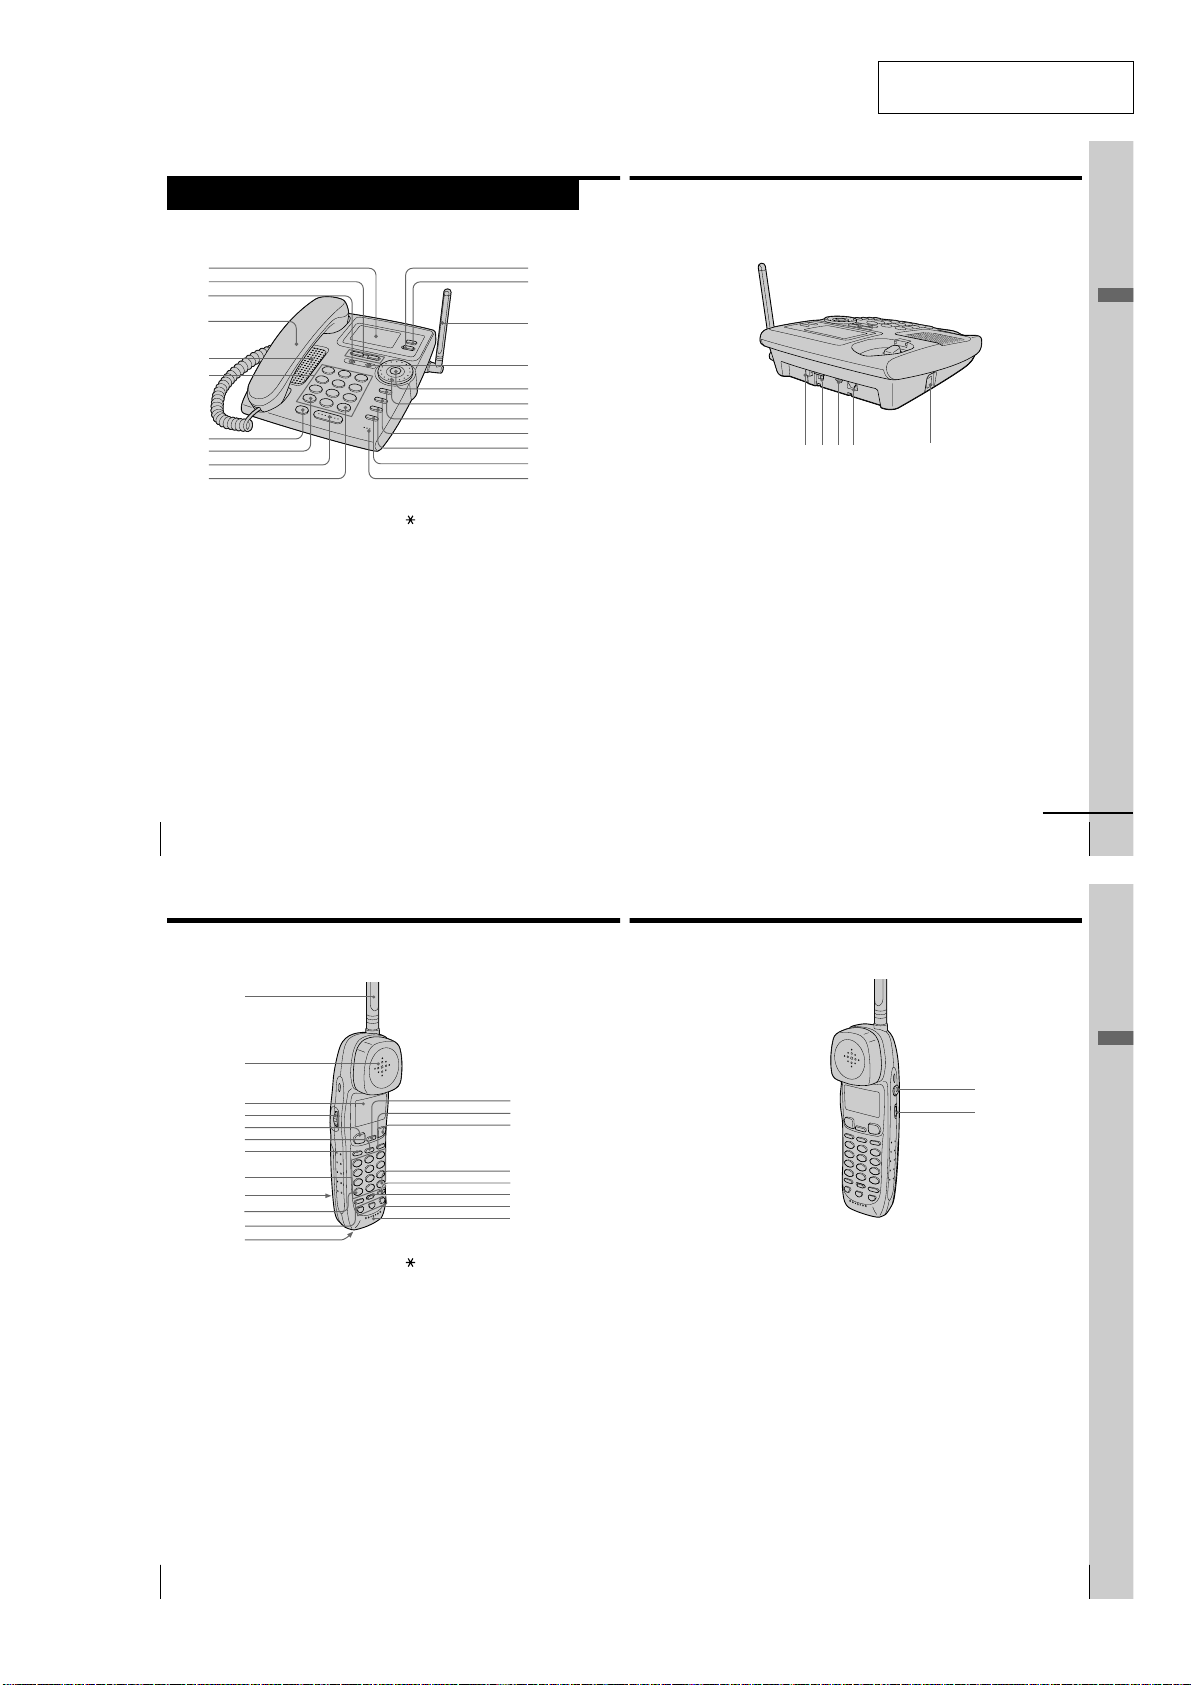
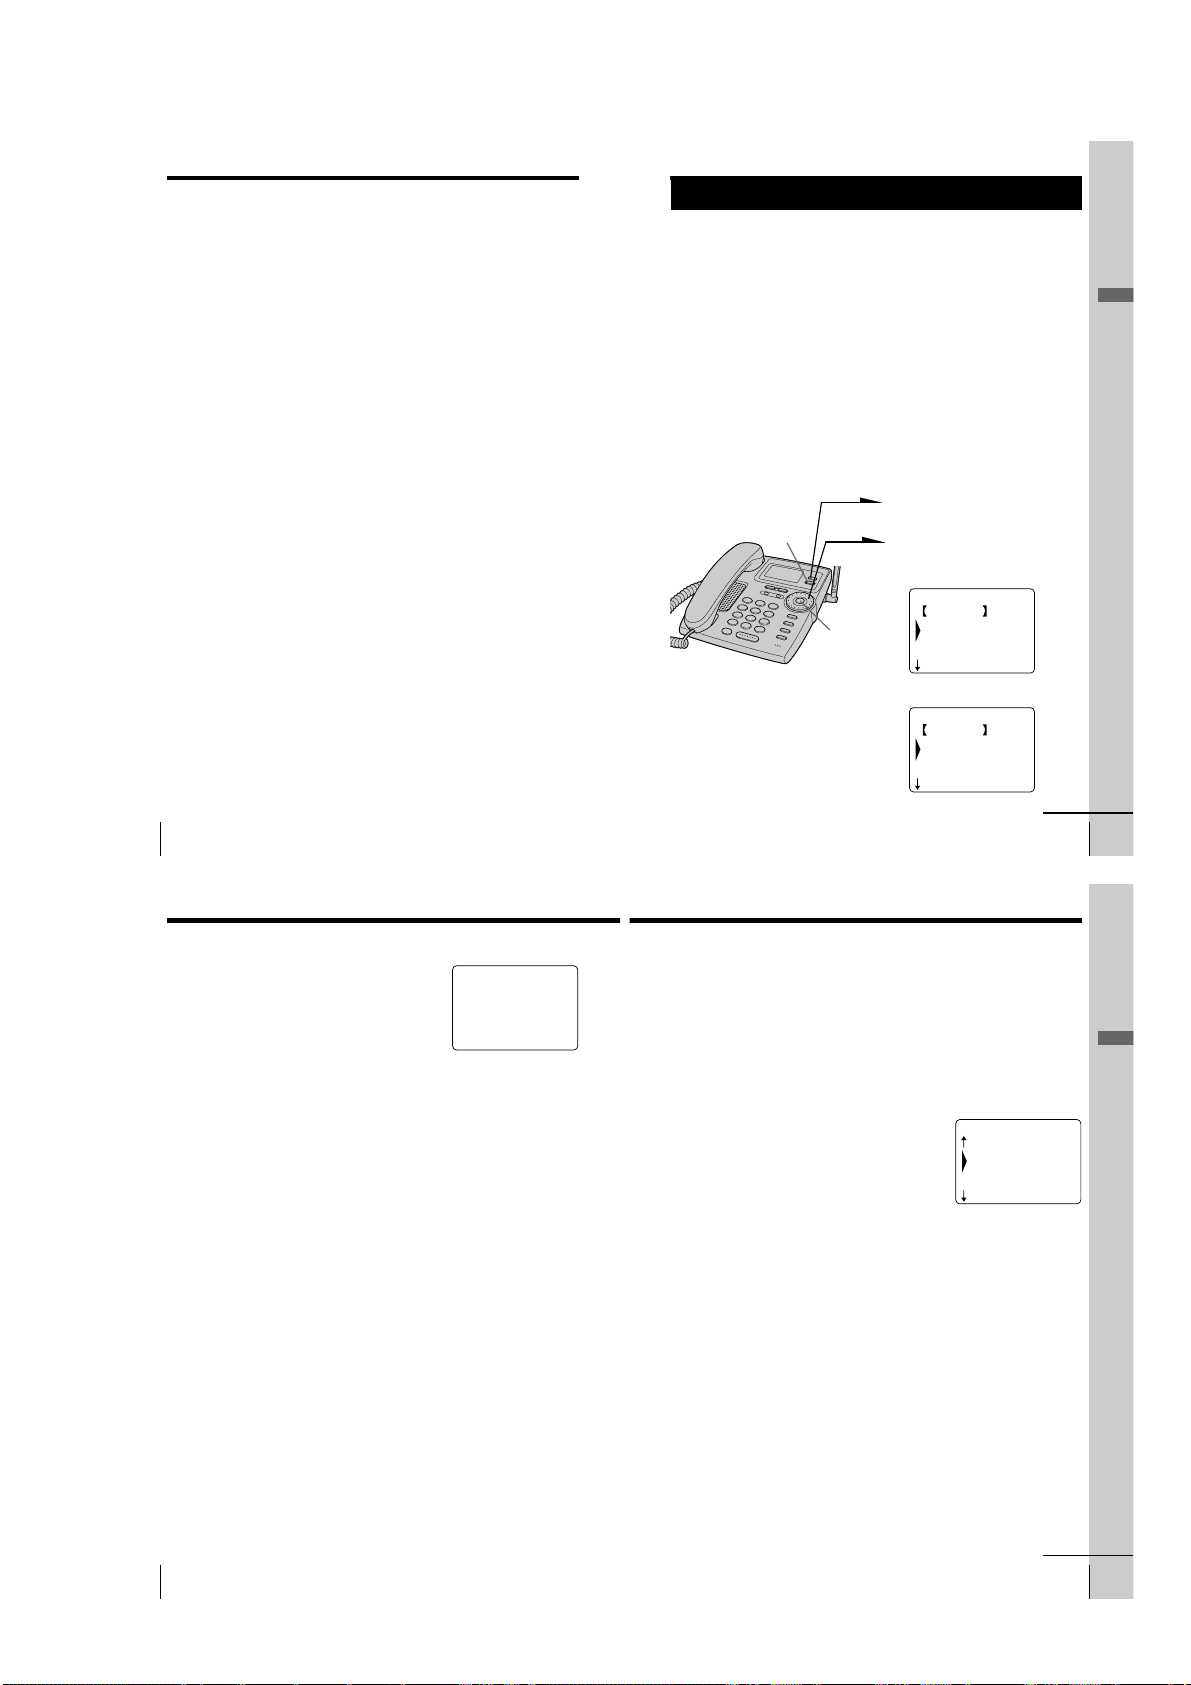
Identifying the parts
Refer to the pages indicated in parentheses for details.
Base phone
1
2
3
4
SECTION 2
GENERAL
qa
qs
qd
This section is extracted from
instruction manual.
Getting Started
5
6
7
8
9
0
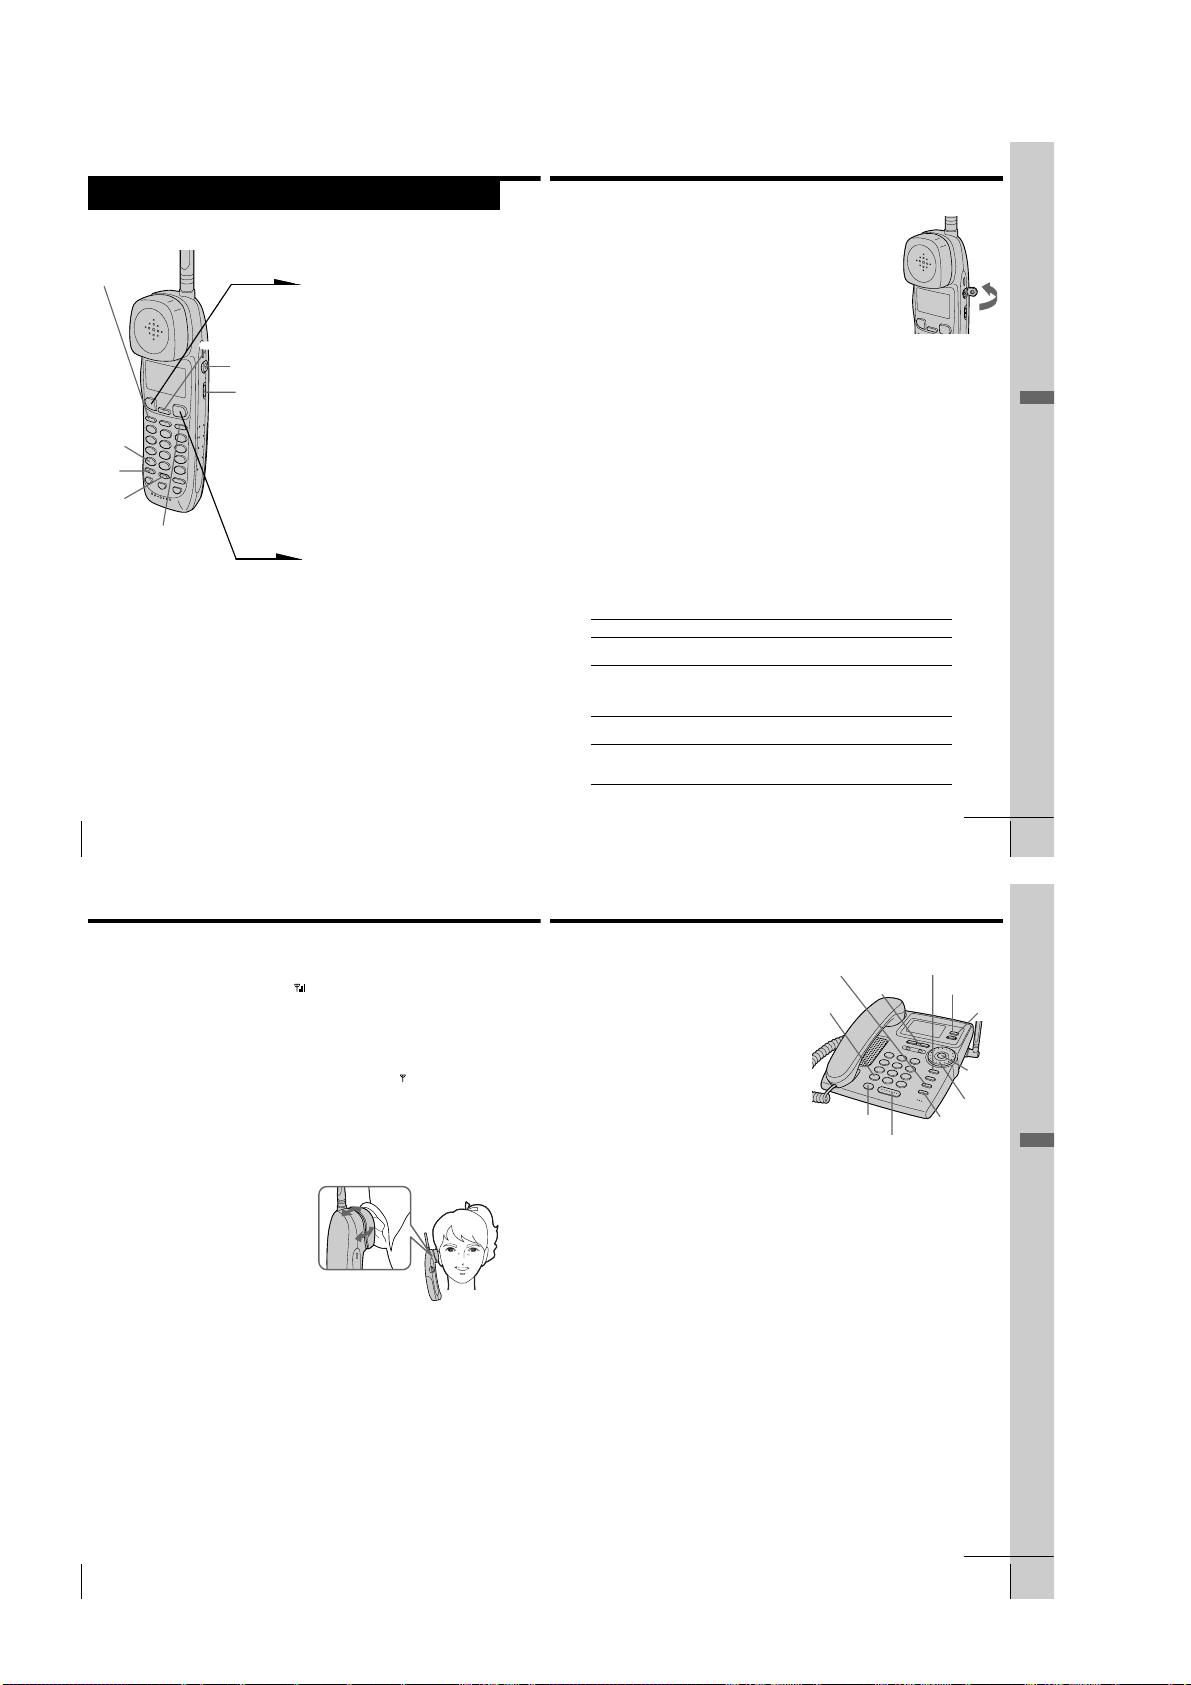
1 Display window (p. 33, 57)
2 VOLUME +/– buttons
(p. 34)
Adjusts the handset or speaker
volume.
3 NEW CALL lamp (p. 58)
Flashes when there is a “NEW”
data in the Caller ID list.
4 Handset (p. 11, 33, 39)
5 Speaker
6 Dialing keys (p. 33)
7 LONG DIST. SAVER button
(p. 21, 33)
Lets you make a long distance call
with the registered access number.
US
Getting Started
26
Identifying the parts (continued)
qf
qg
qh
qj
qk
ql
w;
wa
8 TONE button (p. 34)
Allows you to switch temporarily to
tone dialing.
9 SPEAKERPHONE button
(p. 33)
Lets you make or receive a call.
0 # button (p. 64)
Used to change the number of
digits of the phone number in the
Caller ID list.
qa ERASE button (p. 16, 22)
qs PROGRAM button (p. 15)
qd Antenna (p. 11, 69)
qf MESSAGES lamp (p. 67)
Flashes when you have messages.
qg Jog Button (ENTER) (p. 15)
wdws wf wg
qh Jog Dial (p. 15, 58)
qj REDIAL/PAUSE button (p. 35)
Redials one of the last five numbers
called/inserts a pause in the dialing
sequence.
qk INTERCOM button (p. 54)
Lets you talk between the base
phone and cordless handset.
ql CALL WAITING/FLASH button
(p. 34, 66)
Switches to a second call if you
have “call waiting” service, or lets
you make a new call.
w; HOLD button (p. 34)
Puts a call on hold.
wa MIC (microphone)
ws Hook for AC power adaptor
cord (p. 11, 69)
wh
wd DIAL MODE switch (p. 12)
Selects pulse or tone dialing.
wf DC IN 11V jack (p. 11, 69)
wg LINE (telephone line) jack
(p. 11, 69)
wh HANDSET jack (p. 11)
Getting Started
continued
US
27
Cordless handset
1
2
3
4
5
6
7
8
9
0
qa
qs
1 Antenna
2 Speaker [EZfit] (p. 32)
3 Display window (p. 30, 57)
4 Jog Dial (p. 41, 58)
5 TALK button (p. 30)
Lets you make or receive a call.
6 INTERCOM button (p. 53)
Lets you talk between the base
phone and the cordless handset.
7 LONG DIST. SAVER button
(p. 21, 31)
Lets you make a long distance call
with the registered access number.
8 Dialing keys (p. 30)
9 Battery compartment (p. 13)
qd
qf
qg
qh
qj
qk
ql
w;
0 TONE button (p. 31)
Allows you to switch temporarily to
tone dialing.
qa HOLD button (p. 31)
Puts a call on hold.
qs RING switch (p. 38)
Switches the ringer to on/off.
qd CALL WAITING/FLASH button
(p. 31, 66)
Switches to a second call if you
have “call waiting” service, or lets
you make a new call.
qf REDIAL/PAUSE button
(p. 35, 43)
Redials one of the last five numbers
called/inserts a pause in the dialing
sequence.
qg OFF button (p. 30)
Allows you to disconnect the call.
qh # button (p. 64)
Used to change the number of
digits of the phone number in the
Caller ID list.
qj PROGRAM button (p. 41)
qk ERASE button (p. 43)
ql ONE-TOUCH DIAL (A, B, C)
buttons (p. 44)
w; Microphone
wa I (HEADSET) jack (p. 30, 37, 71)
ws VOL (volume) switch (p. 31)
Adjust the cordless handset
volume.
Getting Started
wa
ws
US
28
Getting Started
– 5 –
Getting Started
US
29
Step 2
Setting up the base phone
Do the following steps:
• Choose the best location
• Connect the base phone
• Choose the dialing mode
Choose the best location
Where you place the base phone affects the reception quality of the
cordless handset.
Away from television
sets and other
electronic equipment
Near a central location
and on a level surface
CAUTION: • Should you experience intermittent loss of audio during a conversation, try
moving closer to the base or move base phone away from other noise sources.
• The cordless telephone operates at a frequency that may cause interference to
nearby TVs and VCRs; the base phone should not be placed near or on the top
of a TV or VCR; and, if interference is experienced, moving the cordless
telephone farther away from the TV or VCR will often reduce or eliminate the
US
10
interference.
Getting Started
Away from noise sources such as a window
by a street with heavy traffic
Away from heat sources, such as radiators,
airducts, and sunlight
Away from a microwave
oven
Away from excessive
moisture, extremely low
temperatures, dust,
mechanical vibration, or
shock
Away from a personal
computer
Away from another
cordless telephone
Connect the base phone
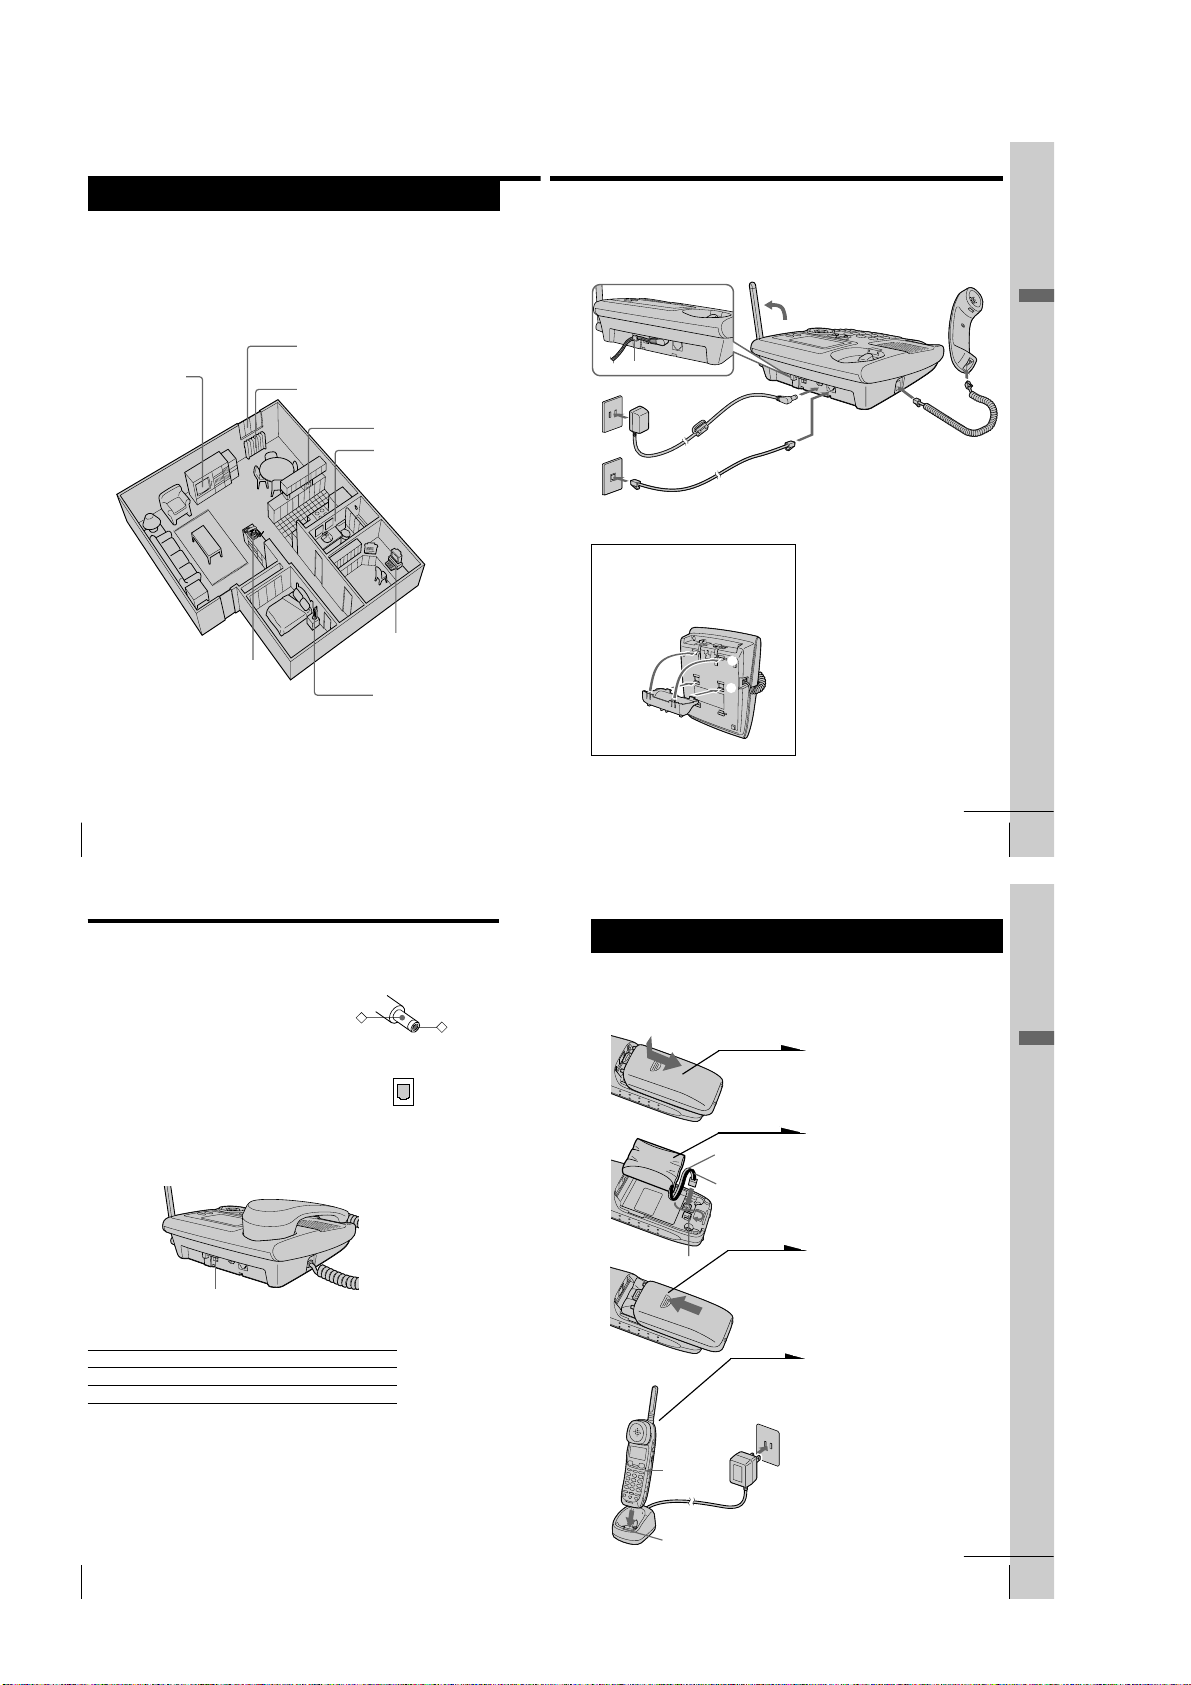
If you want to hang the base phone on the wall, see page 69.
4
Hook the cord.
To an AC outlet
3
2
To a telephone
outlet
To tilt the phone
If you want to tilt the phone, attach the
supplied wall bracket on the bottom of
the base phone.
Align the
f marks.
To DC IN 11V
AC power adaptor
(supplied
AC-T107)
Telephone line cord
(supplied)
2
1
To LINE
1 Connect the handset cord to the
HANDSET jack and to the
handset.
2 Connect the telephone line cord
to the LINE jack and to a
telephone outlet.
3 Connect the AC power adaptor
to the DC IN 11V jack and to an
AC outlet.
4 Raise the antenna. Make sure it
points towards the ceiling.
1
To
HANDSET
Getting Started
continued
Getting Started
US
11
Step 2: Setting up the base phone (continued)
Notes
• Use only the supplied AC-T107 AC power adaptor.
Do not use any other AC power adaptor.
• Connect the AC power adaptor to a continuous power
supply.
• Place the base phone close to the AC outlet so that
you can unplug the AC power adaptor easily.
Tip
If your telephone outlet is not modular, contact your
telephone service company for assistance.
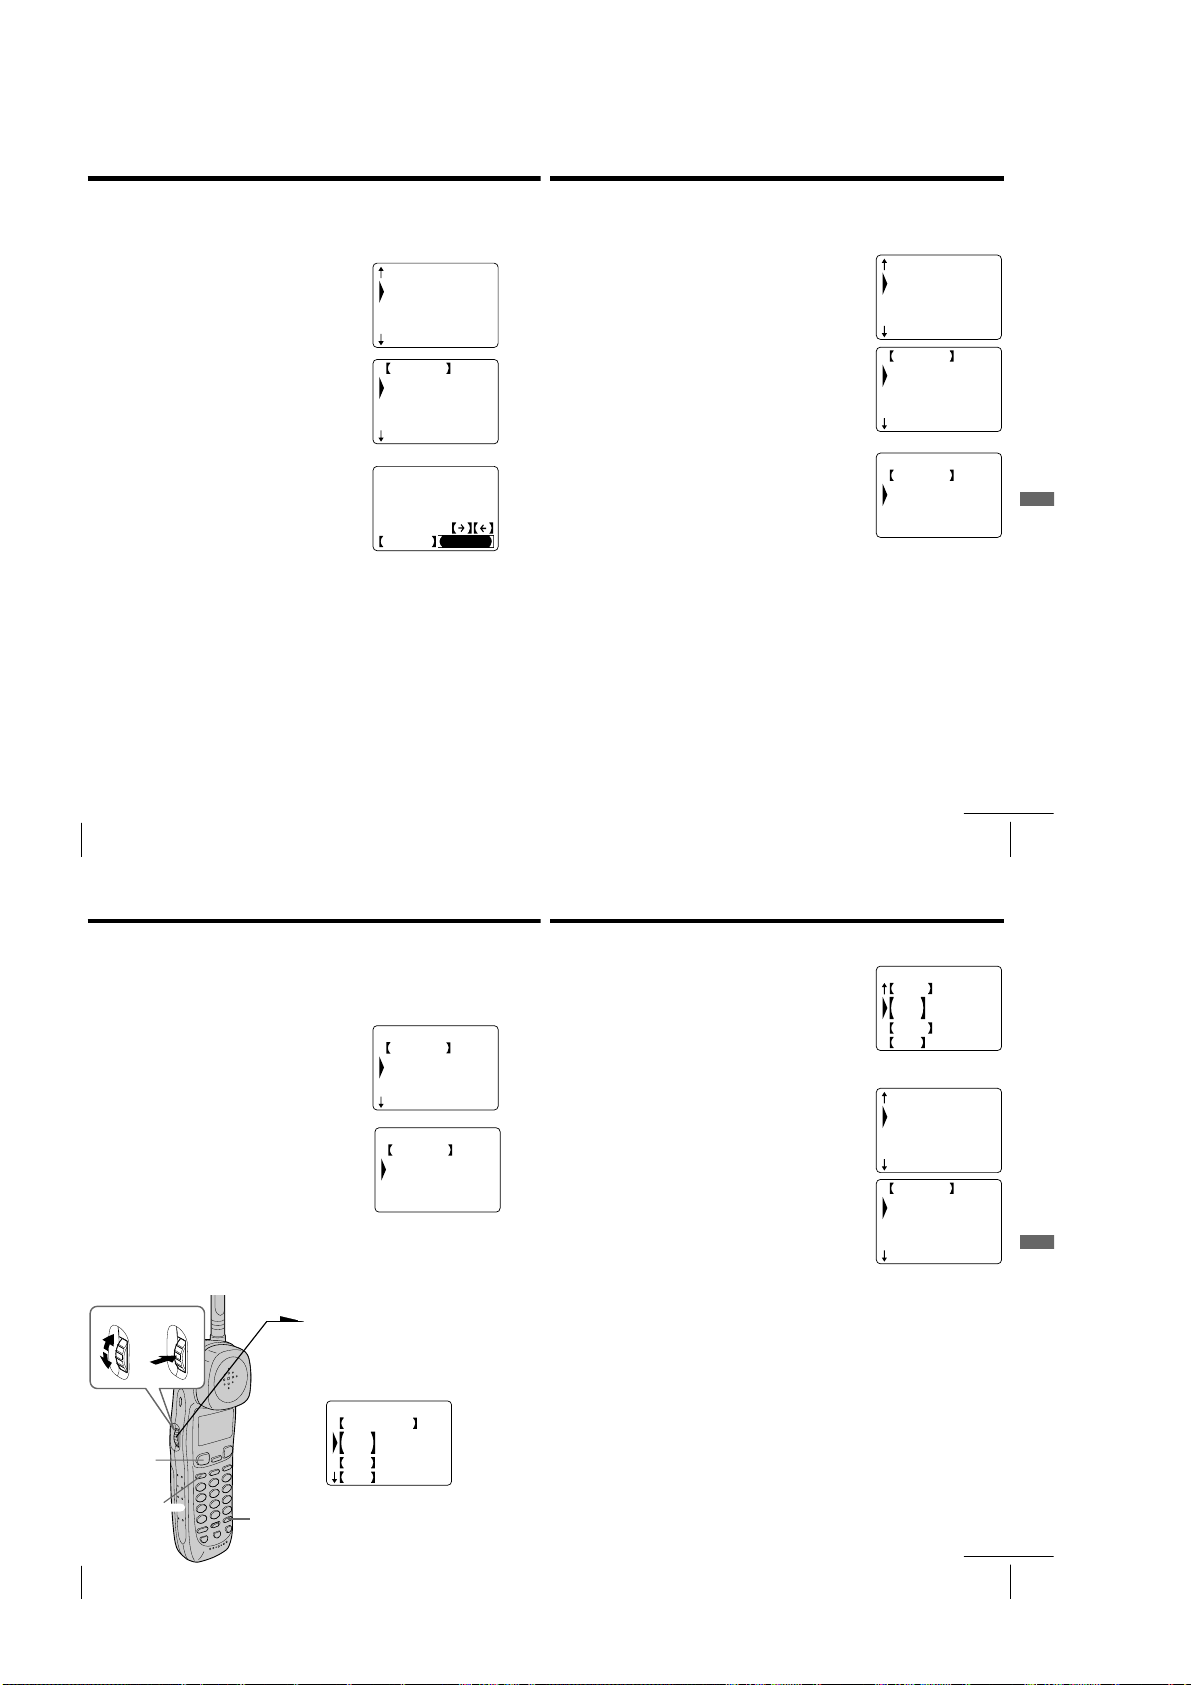
Choose the dialing mode
For the telephone to work properly, select an appropriate dialing mode
(tone or pulse).
DIAL MODE switch
Depending on your dialing system, set the DIAL MODE switch as
follows:
If your dialing system is Set the switch to
Tone T
Pulse P
If you aren't sure of your dialing system
Make a trial call with the DIAL MODE switch set to T.
If the call connects, leave the switch as is; otherwise, set to P.
US
Getting Started
12
Polarity of the plug
–
Modular
Step 3
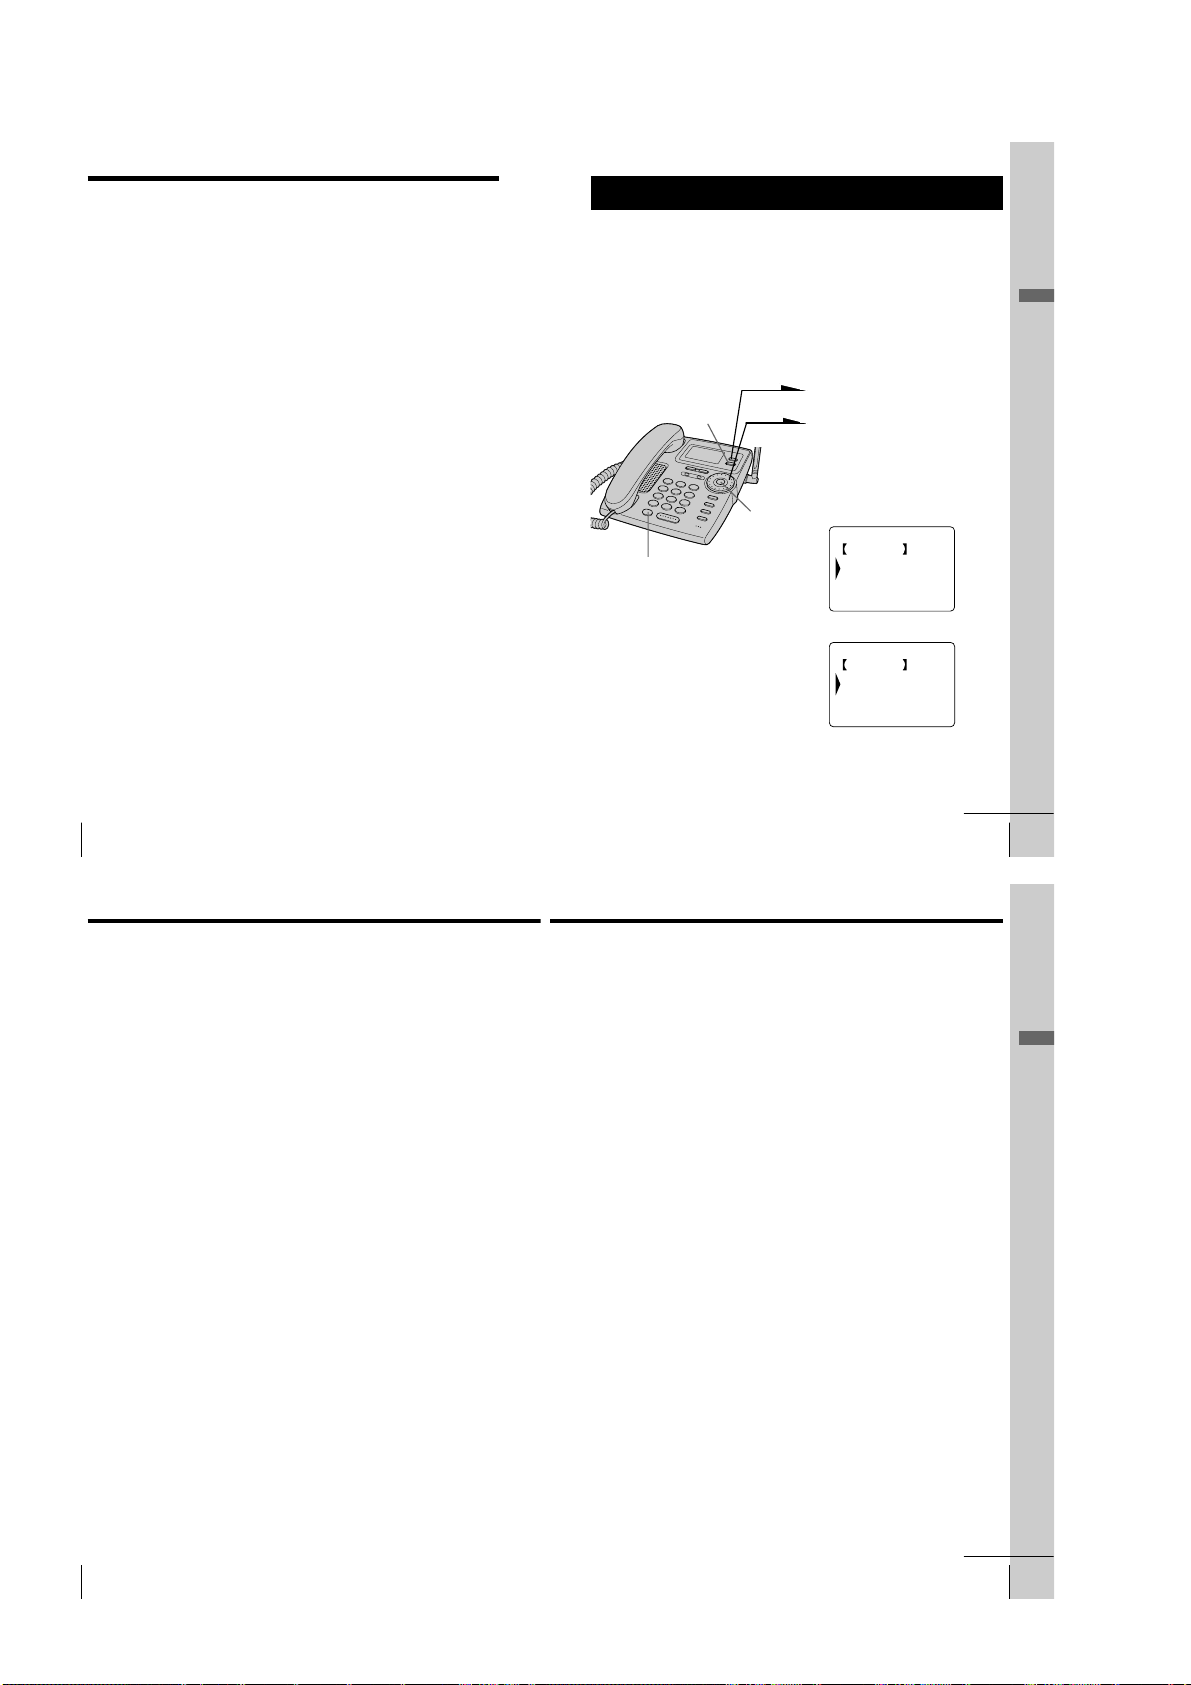
Preparing the battery pack
Charge the battery pack for more than 12 hours before you start using
+
your cordless handset.
BP-T24
Hook
Front side
CHARGE lamp
Red
Black
To an AC outlet
1 Slide open the battery
compartment lid of the cordless
handset.
2 Connect the battery connector
with correct polarity (black wire
goes on lower side and red wire
goes on upper side).
3 Hook the cords and insert the
battery pack. Then close the lid.
4 Connect the AC power adaptor
to an AC outlet and place the
cordless handset on the charger.
The CHARGE lamp on the
charger lights up when the
cordless handset is properly
seated on the charge terminals
of the charger. Charge the
battery pack for more than 12
hours so that the battery is fully
charged. The CHARGE lamp
remains lit even after charging
is completed.
continued
Getting Started
Getting Started
US
13
– 6 –
Step 3: Preparing the battery pack (continued)
Battery duration
A fully charged battery pack lasts for about:
• Approx. 5 hours when you use the cordless handset continuously
• Approx. 6 days when the cordless handset is in standby mode.
Notes
• The battery pack will gradually discharge over a long period of time, even
when not in use.
• If you leave the battery pack in the cordless handset without charging it, the
battery pack will be completely discharged.
It may require several times of charging to recover to its full capacity.
• While charging, the battery pack warms up. This is not a malfunction.
To obtain the best performance from the battery
Do not place the cordless handset on the charger after each call. The
battery works best if the cordless handset is returned to the charger
after two or three calls. However, do not leave the cordless handset off
the charger for a long period of time as this will completely discharge
the battery pack.
When to purchase a new battery pack
If the battery lasts only a few minutes even after 12 hours of charging,
the usable life of the battery has expired and needs replacement.
Contact your local Sony authorized dealer or service center, and ask
for a Sony BP-T24 rechargeable battery pack.
Note
Battery life may vary depending on usage condition and ambient temperature.
US
Getting Started
14
Step 4
Entering the area code
When you use this phone for the first time, or move to an area that has a
different area code, you must enter the area code. Otherwise, you cannot use
some functions of this phone and the Caller ID functions.
This is also necessary because the phone must be able to select an area code to
properly dial a call from the Caller ID list.
Depending on your region, enter the 3-digit area code as follows:
Case 1.
If 7-digit dialing (no area code) is accepted for local calls in your area, see “To enter
your home area code” below.
If you live in an area where calls from or to other local areas can also be made by 10-digit dialing
(area code + number), you can register up to 5 local area codes with this telephone to take
advantage of this system. See “To enter the local area code (For 10 digits phone number users)”
on page 17.
Case 2.
If 10-digit dialing (area code + number) is required for all local calls in your area, see
“To enter the local area code (For 10 digits phone number users)” on page 17.
Entering the area code is only possible on the base phone.
To enter your home area code
1
Press (PROGRAM).
(ERASE)
Jog Button
(ENTER)
2
Turn Jog Dial to choose “BASE
SETTINGS”, and then press Jog
Button (ENTER).
BASE SETTINGS
GO BACK
AREA CODE
PHONE SERVICES
MESSAGES LAMP
3
Press Jog Button (ENTER).
AREA CODE
GO BACK
HOME :
LOCAL 1:
LOCAL 2:
continued
Getting Started
Getting Started
US
15
Step 4: Entering the area code (continued)
4 Press Jog Button (ENTER) again.
“ENTER HOME AREA CODE.” appears on
the display.
5 Enter the three digits of your home area code
using the dialing keys.
6 Press (PROGRAM).
You hear a long confirmation beep.
Notes
• If the home area code is already entered, it appears on the display in step 3.
To enter a different home area code, see “To change the home area code”
below.
• Do not allow more than 20 seconds to elapse during the operation procedure.
• If the area code has not been entered, calling back from the Caller ID list and
storing the Caller ID data into the Phone Directory cannot be performed.
• If the home area code is not correctly entered, “SEND TO CORDLESS
HANDSET FAILED.” will appear on the display and five short error beeps
will be heard after (PROGRAM) is pressed in step 6. Move the cordless
handset closer to the base phone, and then start over the procedure.
Tips
• When you select “[GO BACK]”, you can return to the previous set display by
pressing Jog Button (ENTER).
• You may press Jog Button (ENTER) instead of (PROGRAM) in step 6.
• To check the current home area code, perform steps 1 to 3. The home area
code appears on the display for about 20 seconds.
To change the home area code
1 Perform steps 1 to 4 on pages 15 to 16.
The current home area code appears on the display.
2 Press (ERASE) to erase the current home area code.
3 Enter a new home area code using the dialing keys.
4 Press (PROGRAM).
You hear a long confirmation beep.
To erase the home area code
You can erase the home area code. Perform steps 1 and 2 above, then
press (PROGRAM).
The home area code will be erased, and you hear a long confirmation
beep.
US
Getting Started
16
ENTER HOME
AREA CODE.
_
To enter the local area code (For 10 digits
phone numbers users)
If a call matches one of the local area codes you entered, the phone
number will be registered with 10 digits in the Caller ID list (area code
+ number). If a call does not match one of the local area codes you
entered, the phone number will be registered with 11 digits in the
Caller ID list (1 + area code + number). Some regions of the country
allow you to have more than one local area code. (Up to five local area
codes can be entered in this phone.)
1
Perform steps 1 to 3 on page 15.
2
Select the number (“LOCAL 1” to “LOCAL 5”)
to enter the local area code by turning Jog Dial.
3
Press Jog Button (ENTER).
“ENTER LOCAL AREA CODE 1.” appears on
the display when you select “LOCAL 1” in step
2.
4
Enter the three digits of the local area code using
the dialing keys.
5
Press (PROGRAM).
You hear a long confirmation beep.
Notes
• If the local area code is already entered, it appears on the display in step 2. To
enter a different local area code, see “To change the local area code” on page
18.
• Do not allow more than 20 seconds to elapse during the operation procedure.
• If the local area code is not correctly entered, “SEND TO CORDLESS
HANDSET FAILED.” will appear on the display and five short error beeps
will be heard after (PROGRAM) is pressed in step 5. Move the cordless
handset closer to the base phone, and then start over the procedure.
Tips
• When you select “[GO BACK]”, you can return to the previous set display by
pressing Jog Button (ENTER).
• You may press Jog Button (ENTER) instead of (PROGRAM) in step 5.
• To check the current local area code, perform steps 1 and 2. The local area
code appears on the display for about 20 seconds.
AREA CODE
HOME :
LOCAL 1:
LOCAL 2:
LOCAL 3:
continued
Getting Started
Getting Started
US
17
– 7 –
Step 4: Entering the area code (continued)
Step 5
To change the local area code
1 Perform steps 1 to 3 on page 17.
The current local area code appears on the display.
2 Press (ERASE) to erase the current local area code.
3 Enter a new local area code using the dialing keys.
4 Press (PROGRAM).
You hear a long confirmation beep.
To erase the local area code
You can erase the local area code. Perform steps 1 and 2 on page 17,
then press (PROGRAM). The local area code will be erased, and you
hear a long confirmation beep.
US
Getting Started
18
Setting up the phone services
Set up the “Caller ID with call waiting”service, the Long Distance
Saver function and the voice mail service before use. Setting up the
phone services is only possible on the base phone.
To set up the “Caller ID with call waiting” service
In order to use this service, you must first subscribe to “Caller ID with
call waiting” service (see page 66). The “Caller ID with call waiting”
service is preset to “ACTIVE”.
1 Press (PROGRAM).
(LONG DIST. SAVER)
(ERASE)
Jog Button
(ENTER)
2 Turn Jog Dial to choose “BASE
SETTINGS”, and then press Jog
Button (ENTER).
3 Turn Jog Dial to choose
“PHONE SERVICES”, and then
press Jog Button (ENTER).
PHONE SERVICES
GO BACK
CALL WAITING ID
VOICE MAIL
LONG DISTANCE
4 Press Jog Button (ENTER).
CALL WAITING ID
GO BACK
ACTIVE
INACTIVE
5 Turn Jog Dial to choose
“ACTIVE” or “INACTIVE”, and
then press Jog Button (ENTER).
You hear a long confirmation
beep.
Getting Started
continued
Getting Started
US
19
Step 5: Setting up the phone services (continued)
Note
Do not allow more than 20 seconds to elapse during the operation procedure.
Tip
When you select “[GO BACK]”, you can return to the previous set display by
pressing Jog Button (ENTER).
To set up the Long Distance Saver function
Many telephone companies and service providers nowadays offer lowrate long distance calls separate from your standard long distance
provider. Such services are usually initiated by dialing an access
number prior to the long distance call itself.
The Long Distance Saver function enables you to dial the access
number of these special long distance service companies by pressing
just (LONG DIST. SAVER). After setting up the access number and
activating the button function in the menu, you only need to press
(LONG DIST. SAVER) for dialing the access number of your special long
distance carrier.
In order to use this function, you must first activate the button function
by memorizing the access number of your choice in the menu and by
setting the long distance menu function to “ACTIVE”
The long distance menu is preset to “INACTIVE”, no preset access
number is registered.
To set up the access number
1 Perform steps 1 and 3 on page 19.
2 Turn Jog Dial to choose “LONG DISTANCE”, and then
press Jog Button (ENTER).
3 Turn Jog Dial to choose “ACCESS NUMBER”, and then
press Jog Button (ENTER).
4 Enter the access number using the dialing keys.
5 Press (PROGRAM).
6 Turn Jog Dial to choose “YES” to activate
(LONG DIST. SAVER), and then press Jog Button (ENTER).
You hear a long confirmation beep.
Getting Started
US
20
Getting Started
– 8 –
continued
Getting Started
US
21
Step 5: Setting up the phone services (continued)
Notes
• DO NOT USE (LONG DIST. SAVER) to dial EMERGENCY services, customer
service numbers, your local telephone company, local numbers or toll
free numbers.
• If you press (LONG DIST. SAVER) twice, the dialing of the registered access
number is cancelled and “[LONG DISTANCE]” disappears from the display.
• If the access number is not correctly set, “SEND TO CORDLESS HANDSET
FAILED.” will appear on the display and five short error beeps will be heard
after Jog Button (ENTER) is pressed in step 6. Move the cordless handset
closer to the base phone, and then start over the procedure.
• You can register up to 24 digits as an access number.
To change the access number
1 Perform steps 1 and 3 on page 21.
The current access number appears on the display.
2 Press (ERASE) to erase the current access number.
3 Enter a new access number using the dialing keys.
4 Press (PROGRAM).
5 Turn Jog Dial to choose “YES” to activate
(LONG DIST. SAVER), and then press Jog Button (ENTER).
You hear a long confirmation beep.
To activate/deactivate the Long Distance Saver function
1 Perform steps 1 to 3 on page 19.
2 Turn Jog Dial to choose “LONG DISTANCE”, and then
press Jog Button (ENTER).
3 Turn Jog Dial to choose “ACTIVE” or “INACTIVE”(to
deactivate), and then press Jog Button (ENTER).
You hear a long confirmation beep.
Notes
• If you choose “INACTIVE” in step 3, (LONG DIST. SAVER) will be deactivated
and you cannot use (LONG DIST. SAVER) even with a registered access
number until the function is activated again.
• Some Long Distance services may not be available in your state. Prices and
conditions may vary. For details, contact your telephone company or your
long distance provider. Some long distance call programs require a
subscription with the carrier company before usage.
• If it is not correctly set in “ACTIVE” or “INACTIVE”, “SEND TO
CORDLESS HANDSET FAILED.” will appear on the display and five short
error beeps will be heard after Jog Button (ENTER) is pressed in step 3. Move
the cordless handset closer to the base phone, and then start over the
procedure.
US
Getting Started
22
To set up the voice mail service
In order to use this service, you must first subscribe to voice mail
service (see page 67). The voice mail service is preset to “ACTIVE”.
1
Perform steps 1 to 3 on page 19.
2
Turn Jog Dial to choose “VOICE MAIL”, and then press Jog
Button (ENTER).
3
Turn Jog Dial to choose “ACTIVE” or “INACTIVE”, and
then press Jog Button (ENTER).
You hear a long confirmation beep.
Getting Started
Getting Started
US
23
Step 6
Setting the day and time
1 Press (PROGRAM).
2 Turn Jog Dial to choose “BASE
SETTINGS”, and then press Jog
Button (ENTER).
3 Turn Jog Dial to choose
Jog Button
(ENTER)
“CLOCK”, and then press Jog
Button (ENTER).
CLOCK
GO BACK
MONDAY
TUESDAY
4 Set the correct day of the week
by turning Jog Dial, and then
press Jog Button (ENTER).
ENTER HOUR AND
PRESS JOG BUTTON
12:00AM
SUNDAY
5
Set the hour (1 to 12) by turning Jog Dial, and
then press Jog Button (ENTER).
ENTER MINUTE AND
PRESS JOG BUTTON
12:00AM
6
Set the minute (00 to 59) by turning Jog Dial,
and then press Jog Button (ENTER).
ENTER AM/PM AND
PRESS JOG BUTTON
12:00AM
7
Choose “AM” or “PM” by turning Jog Dial, and
then press Jog Button (ENTER).
You hear a long confirmation beep. Then the
phone starts counting time.
Notes
• Do not allow more than 60 seconds to elapse during the operation procedure.
•“SUN 12:00AM” on the display of the base phone flashes when the day and
time is cleared due to a power interruption, or when you connect the base
phone to the AC outlet for the first time.
Tip
When you select “[GO BACK]”, you can return to the previous set display by
pressing Jog Button (ENTER).
Getting Started
US
24
Getting Started
– 9 –
Getting Started
US
25
Basics
Making calls
1 Pick up the cordless handset
from the charger.
(LONG DIST. SAVER)
(CALL WAITING/FLASH)
I (HEADSET)
jack
VOL switch
(*TONE)
(HOLD)
(ERASE)
(REDIAL/PAUSE)
To make a call after checking the phone number
You can dial the phone number before pressing (TALK) or
(LONG DIST. SAVER). If you make a mistake when dialing the phone
number, press (ERASE) to erase the number.
US
Basics
30
2 Press (TALK) and wait until
“TALK” appears on the display
and the display also shows the
talk time in hours, minutes and
seconds.
The dialing keys light up.
You then hear a dial tone.
“CORDLESS HANDSET IN
USE” appears on the display of
the base phone.
If you hear five short error
beeps and “OUT OF RANGE”
appears on the display, move
closer to the base phone.
3 Dial the phone number.
4 When you’re done talking, press
(OFF) or replace the cordless
handset on the charger.
The display turns off.
Making calls when the headset is connected
When a headset (optional) is connected to the I
(HEADSET) jack on the cordless handset, you can
talk through the headset.
Making calls using the Long Distance Saver function
Set the menu for the Long Distance Saver function to “ACTIVE”. See
“To set up the Long Distance Saver function” on page 22.
1 Pick up the cordless handset from the charger.
2 Press (LONG DIST. SAVER).
“[LONG DISTANCE]” appears on the display.
To cancel this function, press (LONG DIST. SAVER) again or
press (TALK).
3 Dial the long distance phone number (e.g., 1-201-123-4567,
or 011-...).
4 When you’re done talking, press (OFF) or replace the
cordless handset on the charger.
To make a call via Private Branch Exchange (PBX)
Before pressing (LONG DIST. SAVER) in step 2 above, enter the outside
line access digit (e.g., 9).
Additional tasks
To
Adjust the cordless
handset volume
Put a call on hold
Switch to tone dialing
temporarily
Switch to another call
(“call waiting” service*)
* You need to subscribe to this service from your telephone company.
Do this
Set the VOL switch to H (high), M (middle) or L (low).
Press (HOLD). “HOLD” appears on the display.
Press (HOLD) again or pick up the cordless handset
from the charger (When Quick talk is set to “USE”; see
page 38) to resume the conversation.
Press (*TONE) after you’re connected.
The line will remain in tone dialing until disconnected.
Press (CALL WAITING/FLASH).
Press (CALL WAITING/FLASH) again to return to the first
caller.
Open
continued
Basics 31
Basics
US
Making calls (continued)
Notes
• When making a call on the cordless handset, “ ” appears on the display
indicating the receiver sensitivity with the base phone. Three bars indicate a
good reception, no bar indicates a bad reception. When calling from an area
with poor reception, you may experience interference or the call may be
disconnected, so try to use the cordless handset in areas that have a good
reception.
• When you increase the sound volume, in some cases the back ground noise
may be increased as well. You should adjust the volume accordingly.
• If the cordless handset beeps every second during a conversation and “ ”
appears on the display, move closer to the base phone; otherwise, you will
hear five short error beeps and “OUT OF RANGE” will appear on the
display, and the call will be disconnected after 30 seconds.
• While talking with an outside caller via the base phone, you cannot make a
call with the cordless handset. If you press (TALK), “BASEPHONE IN USE”
appears on the display and you will hear a busy tone.
• When the talk time exceeds 9:59:59, the display counts from 0:00:00 again.
EZfit
The “EZfit” adjusts to fit any shape ear,
thereby ensuring clear voice reception.
If the battery becomes weak during a call
The cordless handset will beep twice per second, “BATTERY LOW”
appears on the display. Finish your call and replace the cordless
handset on the charger to charge the battery pack. Or, to continue your
phone conversation with the base phone, press (HOLD) on the cordless
handset to hold the line, and then pick up the handset or press
(SPEAKERPHONE) on the base phone.
For optimum performance, charge the battery for a full 12 hours.
Note that during the initial charge time (approx. 10 minutes), “PLEASE
WAIT...” and “BATTERY LOW” appear on the display and the
cordless handset cannot be used.
After “BATTERY LOW” turns off, you may be able to use the cordless
handset, but the battery duration will be very short; thus it is
recommended that you fully charge the battery before next use.
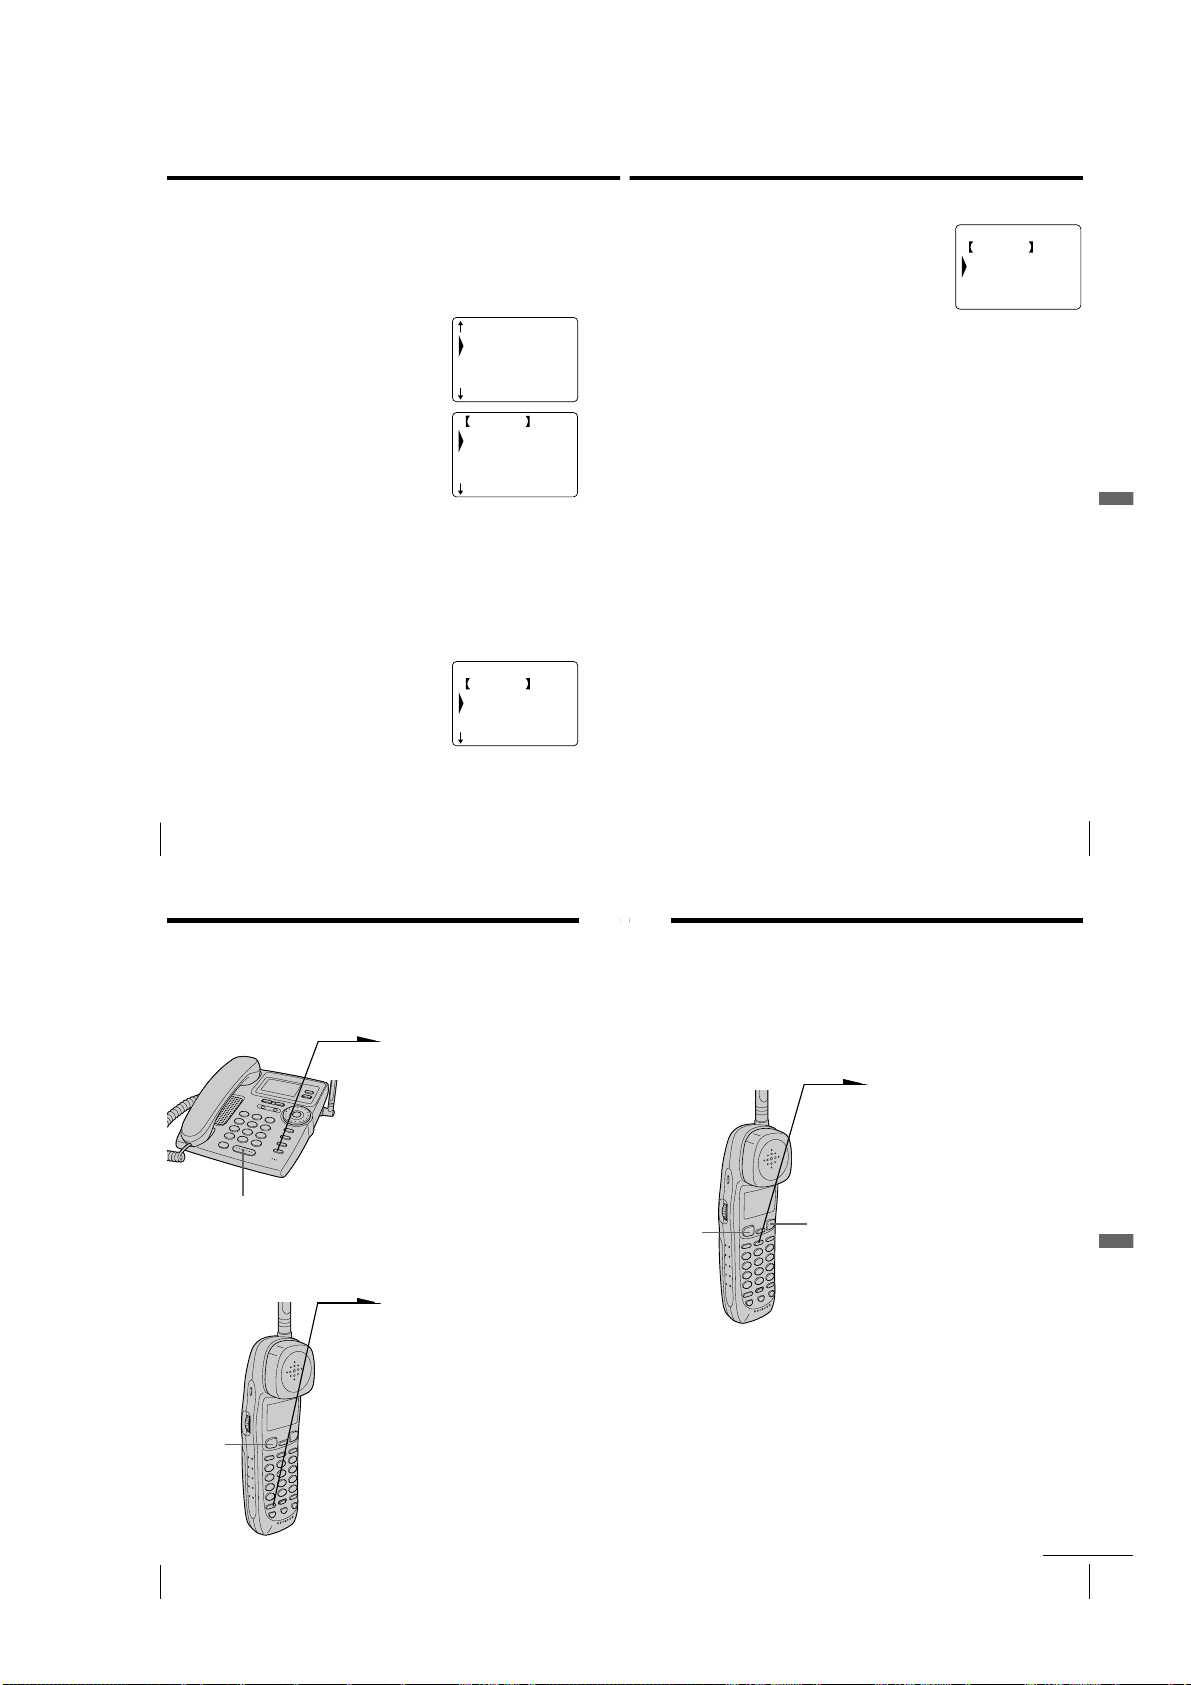
Making calls with the base phone
Pick up the handset or press
(SPEAKERPHONE) on the base phone.
“TALK” or “SPEAKERPHONE” appears
on the display and the display also shows
the talk time in hours, minutes and
seconds.
Dial the phone number.
When you’re done talking, replace the
handset in the cradle or press
(SPEAKERPHONE) again.
(CALL WAITING/ FLASH)
(VOLUME)
(*TONE)
(LONG DIST. SAVER)
(SPEAKERPHONE)
To make a call after checking the phone number
You can dial the phone number before picking up the handset or
before pressing (SPEAKERPHONE). If you make a mistake when
dialing the phone number, press (ERASE) to erase the number.
Making calls using the Long Distance Saver function
Set the menu for the Long Distance Saver function to “ACTIVE”. See
“To set up the Long Distance Saver function” on page 22.
1 Pick up the handset or press (SPEAKERPHONE) on the base
phone.
2 Press (LONG DIST. SAVER).
“[LONG DISTANCE]” appears on the display.
To cancel this function, press (LONG DIST. SAVER) again.
3 Dial the long distance phone number (e.g., 1-201-123-4567,
or 011-...).
4 When you’re done talking, replace the handset in the cradle
or press (SPEAKERPHONE) again.
To make a call via Private Branch Exchange (PBX)
Before pressing (LONG DIST. SAVER) in step 2 above, enter the outside
line access digit (e.g., 9).
(REDIAL/PAUSE)
(PROGRAM)
(ERASE)
Jog Dial
(HOLD)
Jog
Button
(ENTER)
Basics
US
Basics
32
continued
Basics 33
US
– 10 –
Making calls (continued)
Additional tasks
To
Adjust the handset or
speakerphone volume
Put a call on hold
Switch to tone dialing
temporarily
Switch to another call
(“call waiting” service*)
* You need to subscribe to the service from your telephone company.
Notes
• While talking with an outside caller via the cordless handset, the display on
the base phone shows “CORDLESS HANDSET IN USE” and you cannot
make a call with the base phone.
• When the talk time exceeds 9:59:59, the display counts from 0:00:00 again.
Tip
You can switch between phone conversations via the handset and those via the
speakerphone, simply by picking up the handset while talking over the
speakerphone, or by pressing (SPEAKERPHONE) while talking over the handset.
Do this
During phone conversation, press (VOLUME)(+)
or (-).
There are 3 steps for the handset volume level, and
7 steps for the speakerphone volume level.
Press (HOLD). “HOLD” appears on the display.
Press (HOLD), (SPEAKERPHONE), or pick up the
handset from the base phone to resume the
conversation.
Press (*TONE) after you’re connected.
The line will remain in tone dialing until
disconnected.
Press (CALL WAITING/ FLASH).
Press (CALL WAITING/ FLASH) again to return to the
first caller.
To obtain the best speakerphone performance
• You may not be able to hear the other party’s voice in a noisy place.
Therefore, use the speakerphone in a quiet room.
• Do not bring your hand or other object too close to the microphone
or you will hear a shrill noise (“feedback”).
• When the speaker volume is loud, or the base phone has been placed
close to a wall, you may find that the volume drops suddenly. This
is due to a circuit in the telephone designed to protect against
feedback. In such cases, lower the speaker volume slightly.
US
Basics
34
Redialing
Both the base phone and the cordless handset can each individually
store five dialed phone numbers.
1
Turn Press
(PROGRAM)
Notes
• When the Long Distance Saver function is set to “ACTIVE”, “LONG
DISTANCE” call can be made (see page 22).
• The redial memory only registers up to 30 digits. Exceeding numbers will not
be redialed.
• In the case of a power failure, only the redial on the base phone will be
erased.
• The redial button does not store the access number of the Long Distance
Saver. To redial a long distance call, press (LONG DIST. SAVER), then
(REDIAL/PAUSE).
Tips
• When “p” is displayed on the right end of the phone number on the redial list
in step 2, it means that some number follows the displayed phone number.
Moreover, when the phone number is selected by turning Jog Dial, all of the
phone number is displayed in two lines.
• If you redial the same number repeatedly, this number will only be counted
as one number of the total five registered numbers that can be redialed.
• When dialing from a phone number with a registered name, that name will
be displayed in the list in step 2.
Press (REDIAL/PAUSE).
2
Display the name or phone
number you want to call by
turning Jog Dial, and then press
Jog Dial. (If you’re at the base
phone, press Jog Button
(ENTER).)
3
Turn Jog Dial to choose “DIAL”
or “LONG DISTANCE”, and
then press Jog Dial (or Jog
Button (ENTER)).
The phone number will be
redialed.
continued
Basics
Basics
US
35
Making calls (continued)
To store the dialed phone number into the Phone Directory
1 Display the name or phone number you want to store by
doing steps 1 and 2 on page 35.
2 Turn Jog Dial to choose “PROGRAM”, and then press Jog
Dial. (If you’re at the base phone, press Jog Button (ENTER).)
3 Enter the name by doing steps 4 and 5 on page 42.
4 Turn Jog Dial to choose “[PGM]”, and then press Jog Dial (or
Jog Button (ENTER)).
You hear a long confirmation beep, and the name and the
number are stored.
Note
The dialed phone numbers of up to 20 digits can be stored in the Phone
Directory.
To erase the dialed phone number one by one
1 Display the name or phone number you want to erase by
doing steps 1 and 2 on page 35.
2 Turn Jog Dial to choose “ERASE REDIAL”, and then press
Jog Dial. (If you’re at the base phone, press Jog Button
(ENTER).)
3 Turn Jog Dial to choose “YES”, and then press Jog Dial (or
Jog Button (ENTER)).
You hear a long confirmation beep, and the number is
erased.
To erase the entire dialed phone numbers at once
1 Press (PROGRAM).
2 Turn Jog Dial to choose “MEMORY MANAGE”, and then
press Jog Dial. (If you’re at the base phone, press Jog Button
(ENTER).)
3 Turn Jog Dial to choose “ERASE ALL RDL”, and then press
Jog Dial (or Jog Button (ENTER)).
4 Turn Jog Dial to choose “ERASE REDIAL”, and then press
Jog Dial (or Jog Button (ENTER)).
You hear a long confirmation beep, and the entire number
are erased.
US
Basics
36
Receiving calls
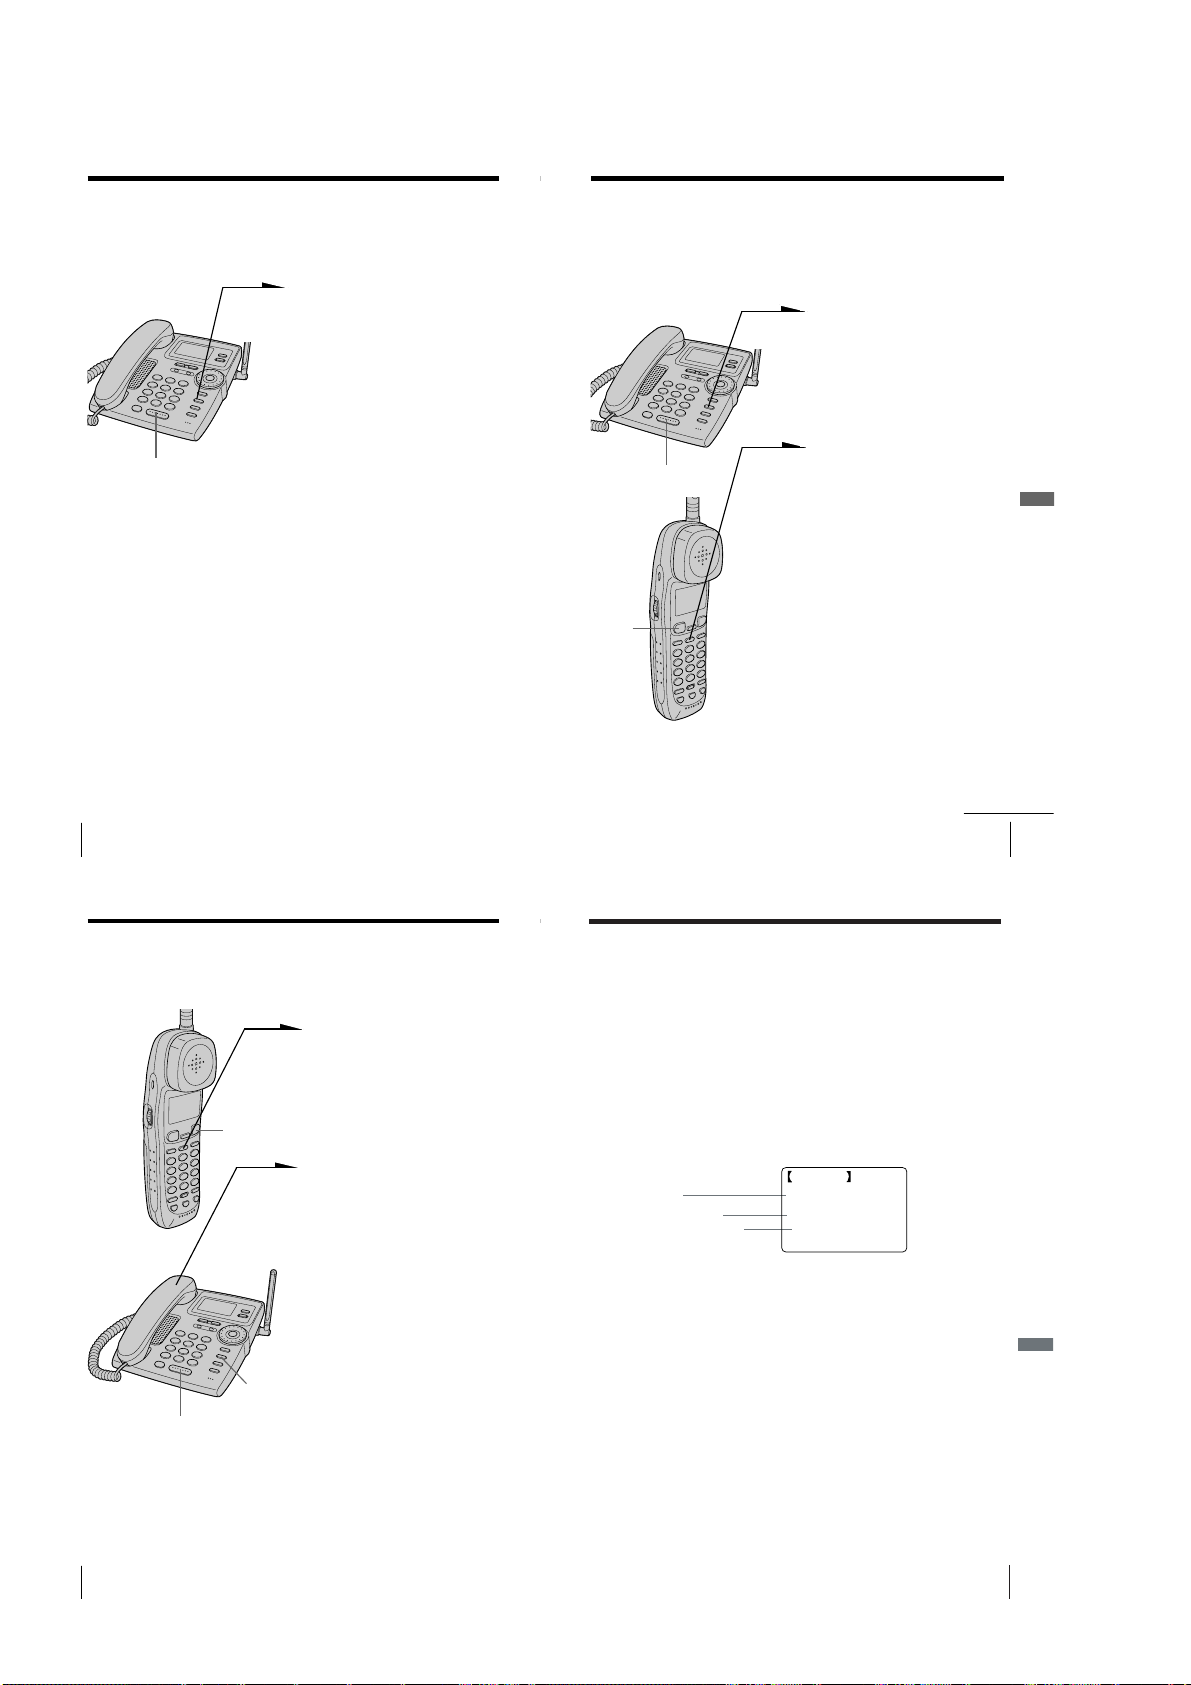
1
When you hear the phone ring:
• Press (TALK).
(CALL WAITING/FLASH)
I (HEADSET)
jack
VOL switch
(HOLD)
(PROGRAM)
Receiving calls when the headset is connected
When a headset (optional) is connected to the I
(HEADSET) jack on the cordless handset, you can
talk through the headset.
• Pick up the cordless handset
“TALK” appears on the display
and the display also shows the
talk time in hours, minutes and
seconds.
“CORDLESS HANDSET IN
USE” appears on the display of
the base phone.
2
When you’re done talking, press
(OFF) or replace the cordless
handset on the charger.
The display turns off.
or
from the charger when the
cordless handset is placed on
the charger. (When Quick talk
is set to “USE”; see page 38)
Open
continued
Basics
Basics
US
37
– 11 –
Receiving calls (continued)
Additional tasks
To
Adjust the cordless handset
volume
Put a call on hold
Switch to another call
(“call waiting” service*)
Receive a call by only picking
up the cordless handset from
the charger, without pressing
(TALK)(Quick talk)
* You need to subscribe to this service from your telephone company.
Note
If there is an incoming call during intercom conversation, intercom call will be
disconnected, and both the base phone and the cordless handset will ring.
Tip
To inform you of an incoming call, the display shows “** RINGING **” even
when you set the RING switch on the cordless handset to OFF.
If you have subscribed to the Caller ID service;
• the caller’s number and/or name appears on the display when you receive a
call (see page 57) or when another call comes in by “call waiting” service.
• the name stored in the one-touch dialing or Phone Directory appears on the
display if the call matches the number stored on ONE-TOUCH DIAL buttons
or in the Phone Directory (memory match function; see page 57).
• the ringer sound changes to a higher tone if the call matches the number VIP
stored on ONE-TOUCH DIAL buttons or in the Phone Directory (memory
match function; see page 57).
Do this
Set the VOL switch to H (high), M (middle) or L
(low).
Press (HOLD). “HOLD” appears on the display.
Press (HOLD) again or pick up the cordless
handset from the charger (When Quick talk is
set to “USE”; see below) to resume the
conversation.
Press (CALL WAITING/FLASH).
Press (CALL WAITING/FLASH) again to return to
the first caller.
Press (PROGRAM). Turn Jog Dial to choose
“QUICK TALK”, then press Jog Dial.
Turn Jog Dial to choose “USE”, then press Jog
Dial.
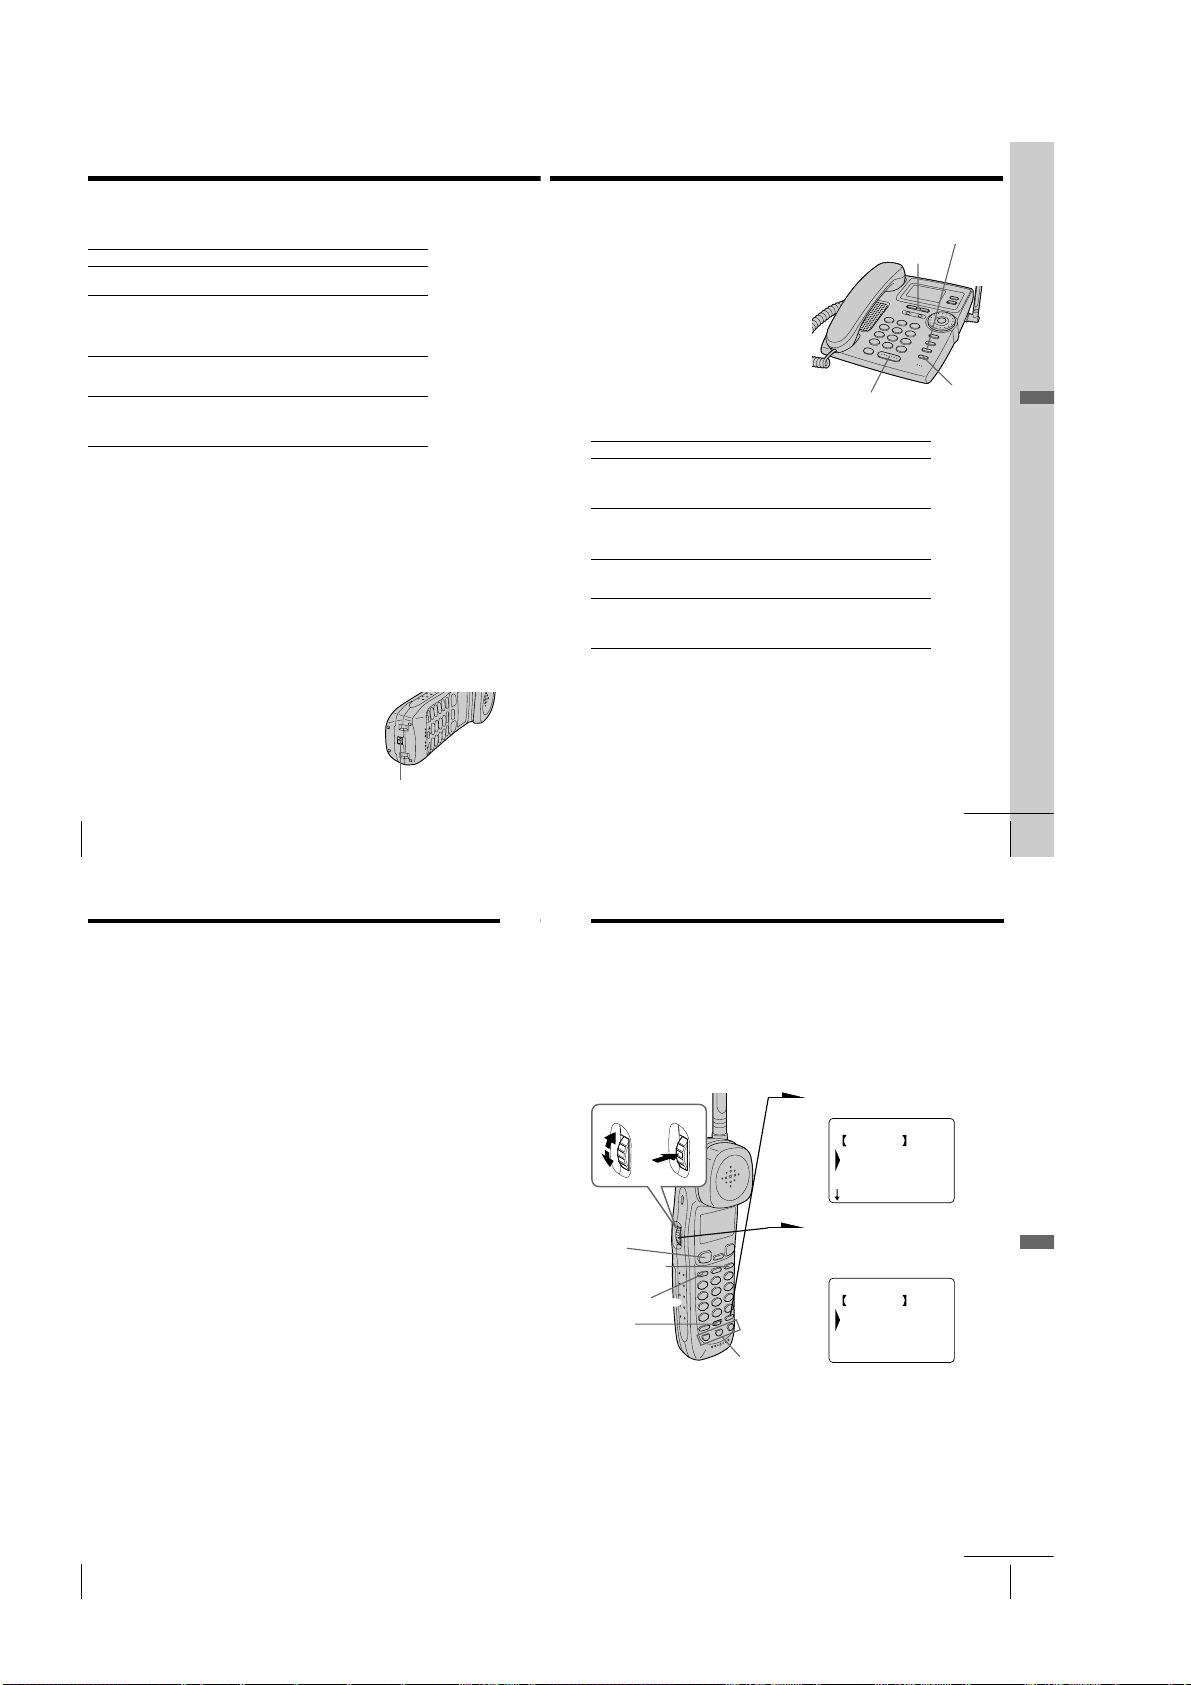
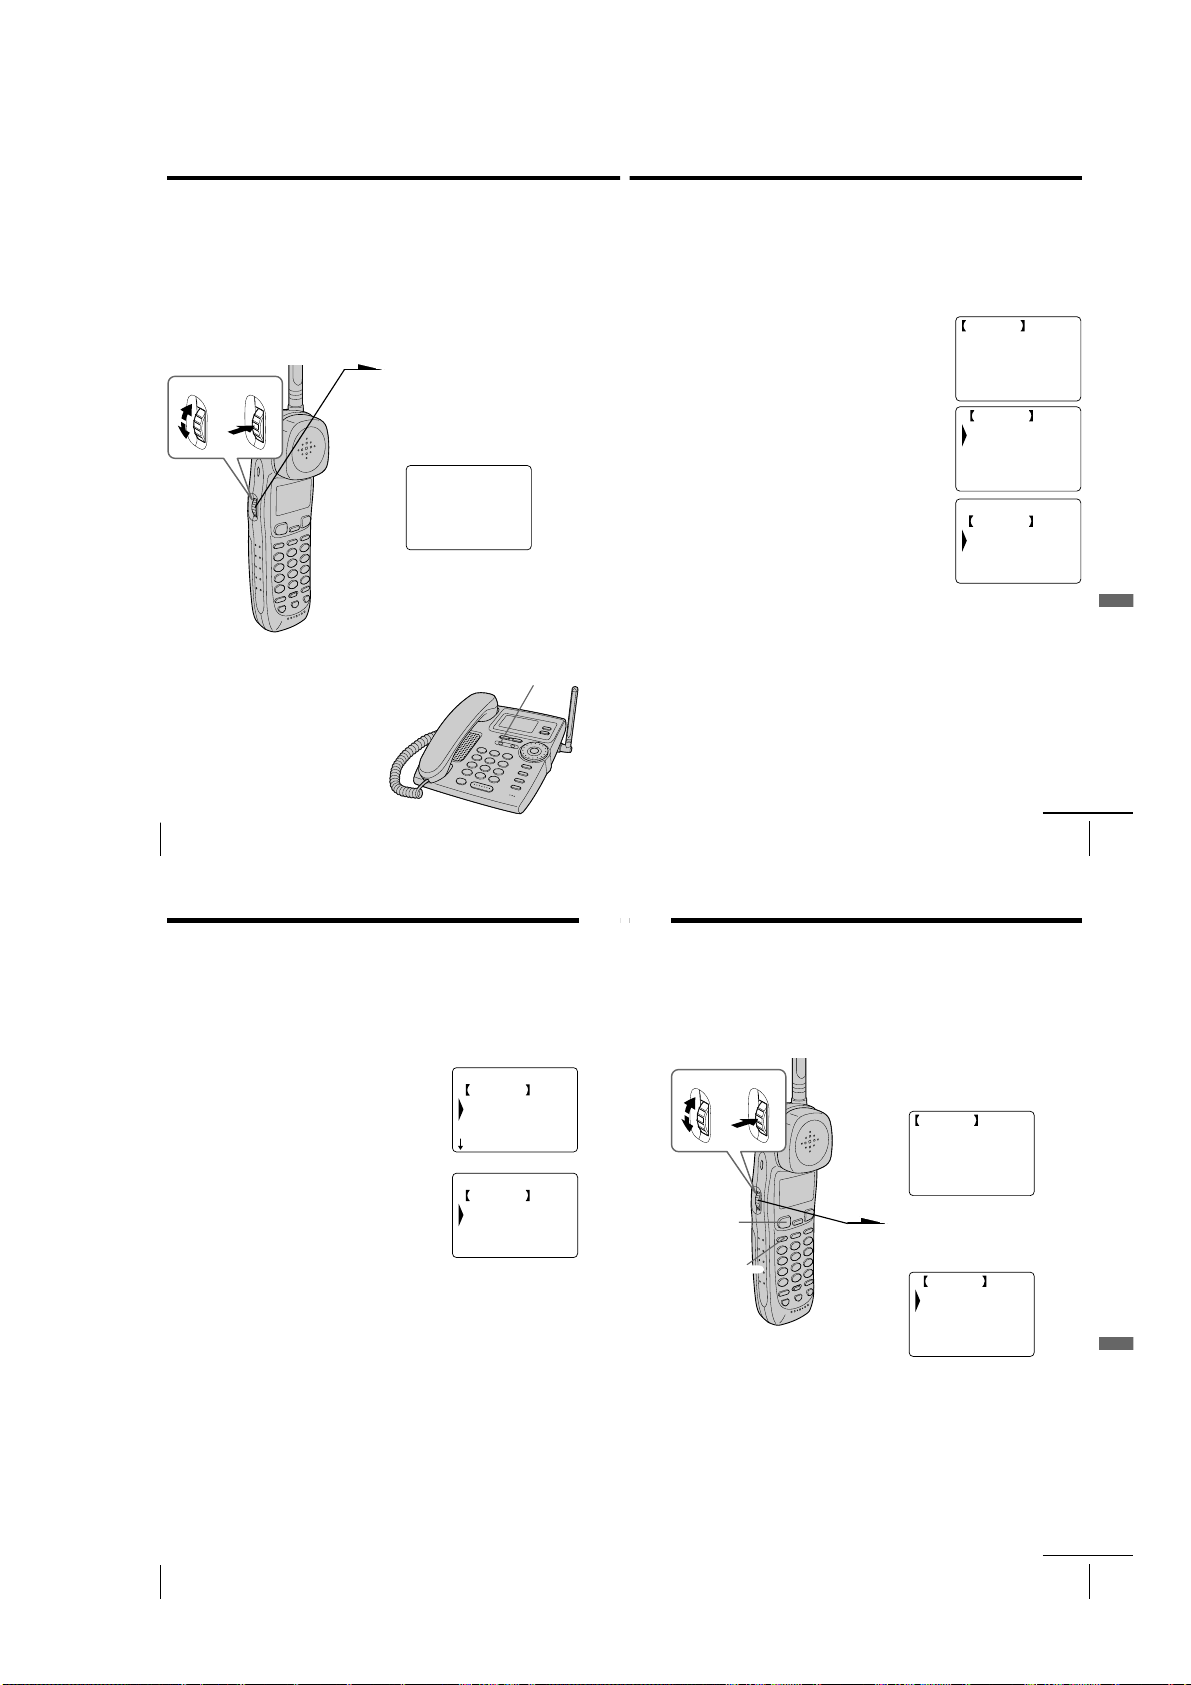
To turn the ringer off
Set the RING switch on the bottom to OFF.
“[RINGER OFF]” appears on the display.
The cordless handset won’t ring. You can still make
calls, and also receive calls if another telephone
connected to the same line rings to inform you on
incoming calls. You can also receive an intercom call.
US
Basics
38
RING switch
Receiving calls with the base phone
When you hear the phone ring, pick up
the handset or press (SPEAKERPHONE) on
the base phone.
“TALK” or “SPEAKERPHONE” appears
on the display and the display also shows
the talk time in hours, minutes and
seconds.
When you’re done talking, replace the
handset in the cradle or press
(SPEAKERPHONE) again.
To obtain the best speakerphone
performance, see page 34.
(SPEAKERPHONE)
Additional tasks
To
Adjust the handset or
speakerphone volume
Put a call on hold
Switch to another call
(“call waiting” service*)
Adjust the ringer volume
of the base phone
* You need to subscribe to the service from your telephone company.
Do this
During phone conversation, press (VOLUME)(+)
or (-).
There are 3 steps for the handset volume level, and
7 steps for the speakerphone volume level.
Press (HOLD). “HOLD” appears on the display.
Press (HOLD), (SPEAKERPHONE), or pick up the
handset from the base phone to resume the
conversation.
Press (CALL WAITING/ FLASH).
Press (CALL WAITING/ FLASH) again to return to the
first caller.
Press (VOLUME)(+) or (-). The ringer volume can
be adjusted to three different levels: high, low, and
“OFF”. If the ringer is set to “OFF”, “[RINGER
OFF]” will appear on the display.
(CALL WAITING/ FLASH)
(VOLUME)
(HOLD)
continued
Basics 39
Basics
US
Receiving calls (continued)
Notes
• Even when you set “RINGER VOL” on the base phone to “OFF”, the
cordless handset will ring when the RING switch on the cordless handset is
set to ON.
• If there is an incoming call during intercom conversation, intercom call will
be disconnected, and both the base phone and the cordless handset will ring.
Tips
• To inform you of an incoming call, the display shows “** RINGING **”
even when you set “RINGER VOL” on the base phone to “OFF”.
• You can switch between phone conversations via the handset and those via
the speakerphone, simply by picking up the handset while talking over the
speakerphone, or by pressing (SPEAKERPHONE) while talking over the
handset.
Telephone Features
One-touch dialing
You can dial with one touch of a key by storing a phone number on a
one-touch dialing button.
Storing phone numbers and names
Example: to store “SONY” “123-
4567”.
Turn Press
(TALK)
(REDIAL/PAUSE)
(LONG DIST. SAVER)
(ERASE)
ONE-TOUCH
DIAL buttons
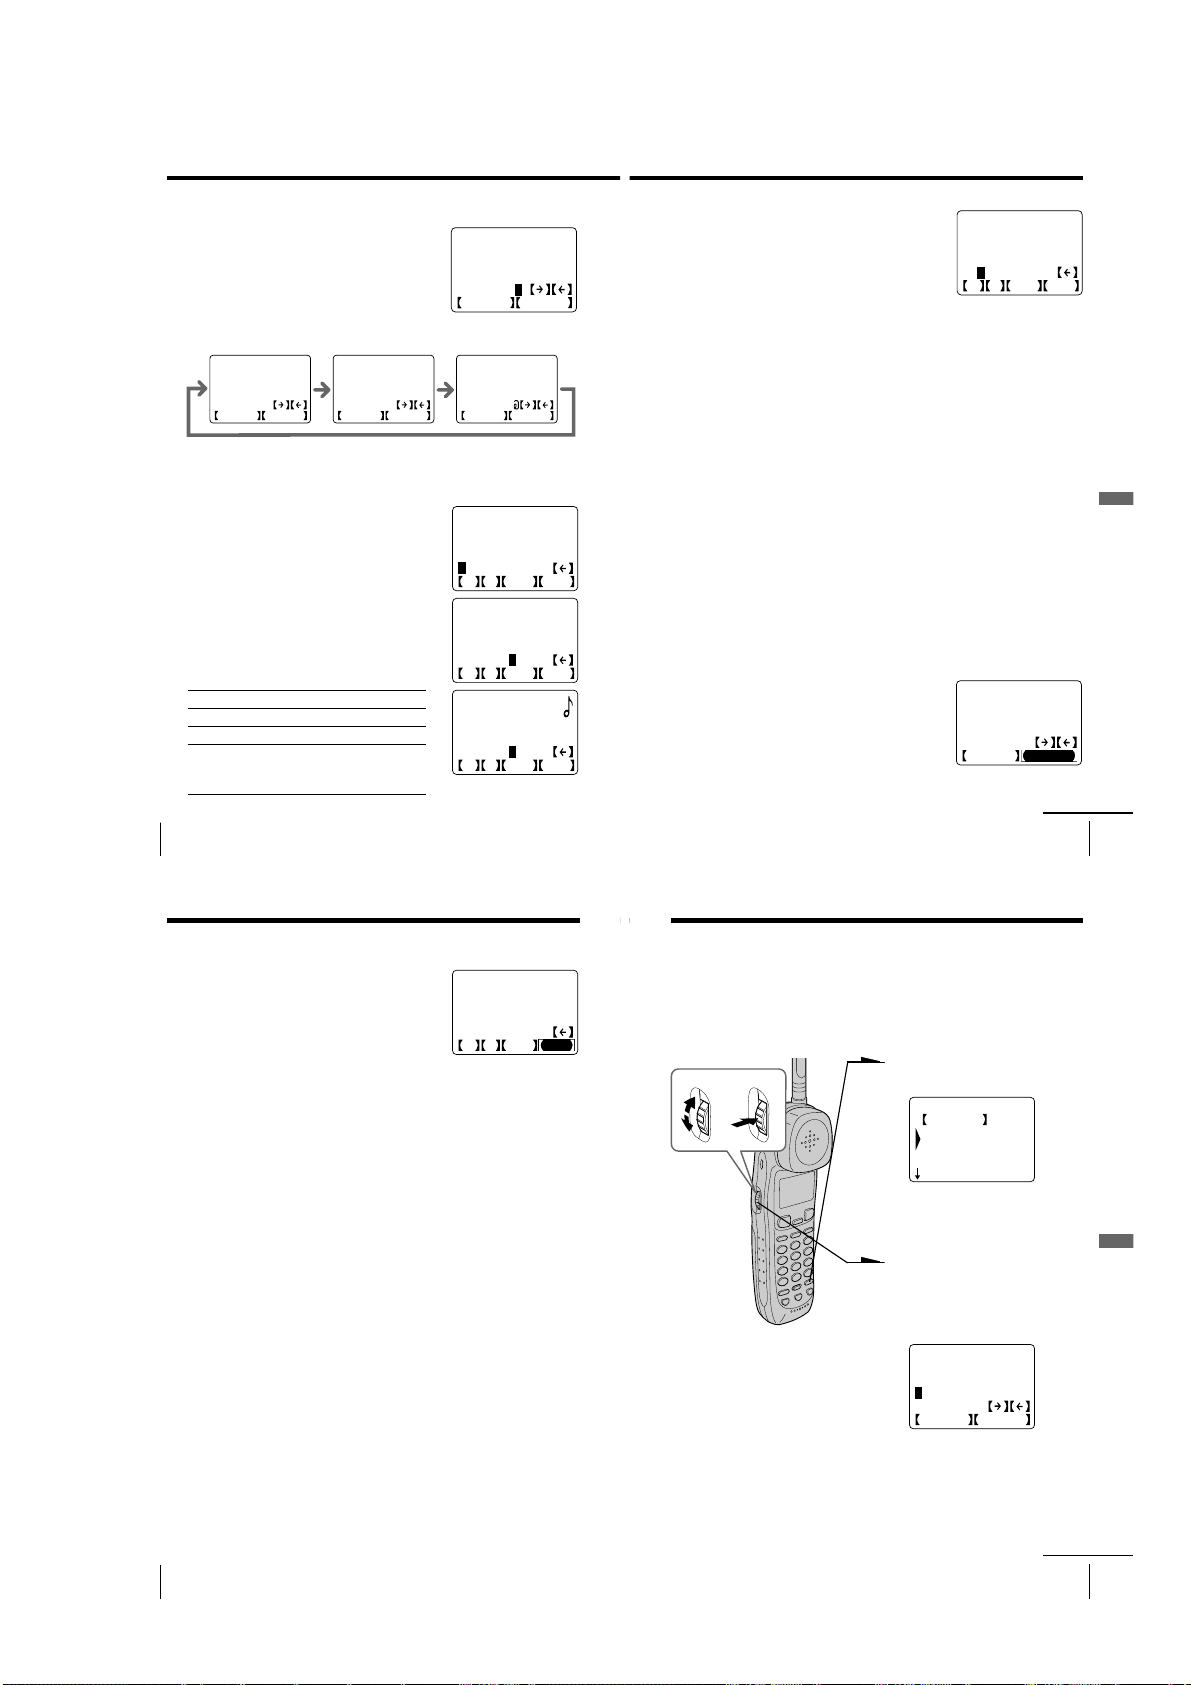
1 Press (PROGRAM).
HANDSET MENU
GO BACK
PHONE DIRECTORY
ONE-TOUCH DIAL
QUICK TALK
2 Turn Jog Dial to choose “ONE-
TOUCH DIAL”, and then press
Jog Dial.
ONE-TOUCH DIAL
GO BACK
ONE-TOUCH A
ONE-TOUCH B
ONE-TOUCH C
3 Turn Jog Dial to choose “ONE-
TOUCH A” to “ONE-TOUCH
C”, and then press Jog Dial.
Telephone Features
US
Basics
40
continued
Telephone Features
US
41
– 12 –
One-touch dialing (continued)
SONY
1234567890123456
12_
0123456789*#
F P VIP PGM
ENTER NAME
_
ABCDEFGHIJKLMNOP
QRSTUVWXYZ
SWITCH NUMBER
HANDSET MENU
GO BACK
PHONE DIRECTORY
ONE-TOUCH DIAL
QUICK TALK
4 Enter the name by turning Jog Dial.
You can enter up to 15 characters.
Turn Jog Dial until the desired character is
selected, and then press Jog Dial.
Each press of Jog Dial after choosing “[SWITCH]” switches the characters
from upper case letters t lower case letters t numbers and symbols.
ENTER NAME
_
ABCDEFGHIJKLMNOP
QRSTUVWXYZ
SWITCH NUMBER
Enter successive characters in the same way.
To enter a “space”, turn Jog Dial to choose
“[p]”, and then press Jog Dial.
5 Turn Jog Dial to choose “[NUMBER]”, and then
press Jog Dial.
“ENTER NUMBERS” appears on the display.
ENTER NAME
_
abcdefghijklmnop
qrstuvwxyz
SWITCH NUMBER
6 Enter the phone number by turning Jog Dial.
You can enter up to 20 digits, including a tone
and a pause, each of which is counted as one
digit.
Turn Jog Dial until the desired number is
selected, and then press Jog Dial.
Icon Meaning
[F] Flash can be entered.
[P] Pause can be entered.
[VIP] If [VIP] has been selected, “9” will appear
to the right of the displayed name. The
ring type will change when calls are
received from VIP registered numbers.
US
Telephone Features
42
ENTER NAME
SONY_
ABCDEFGHIJKLMNOP
QRSTUVWXYZ
SWITCH NUMBER
ENTER NAME
_
0123456789"#$&'(
)*+,-./:;
SWITCH NUMBER
SONY
ENTER NUMBERS
_
0123456789*#
F P VIP PGM
SONY
1234567_
0123456789*#
F P VIP PGM
SONY
1234567_
0123456789*#
F P VIP PGM
Enter successive numbers in the same way.
When the phone number of 16 digits or more
has been entered, the phone number appears in
two lines.
7
Turn Jog Dial to choose “[PGM]”, and then
press Jog Dial.
You hear a long confirmation beep, and the
name and the number are stored.
The display goes off.
Notes
• Names cannot be entered using the dialing keys.
• Do not allow more than 20 seconds to elapse during the operation procedure.
Tips
• When you select “[GO BACK]”, you can return to the previous set display by
pressing Jog Dial.
• If you have entered a wrong name or number in step 4 or 6, turn Jog Dial to
choose “[P]” then press Jog Dial or press (ERASE) to erase it. Then enter the
correct name or number.
• You may press (PROGRAM) instead of doing steps 5 and 7.
• Phone numbers can be entered using the dialing keys in step 6.
To store a number to be dialed via Private Branch Exchange
(PBX)
Before entering a phone number in step 6 on page 42, do as follows:
1
Enter the outside line access digit (e.g., 9).
2
Turn Jog Dial to choose “[P]” and then press Jog Dial, or
press (REDIAL/PAUSE).
Changing a stored name and/or phone number
1
Display the name you want to change by doing
steps 1 to 3 on page 41.
The cursor is at the right of the name.
2
Turn Jog Dial to choose “[P]”, then press Jog
Dial to erase the characters, and enter the new
name.
If you want to change only the number, skip this
step.
ENTER NAME
SONY_
ABCDEFGHIJKLMNOP
QRSTUVWXYZ
SWITCH NUMBER
Telephone Features
continued
Telephone Features
US
43
One-touch dialing (continued)
3 Turn Jog Dial to choose “[NUMBER]”, and then
press Jog Dial.
The cursor is at the right of the phone number.
4 Turn Jog Dial to choose “[P]”, then press Jog
Dial to erase the number, and enter the new
number.
If you don’t want to change the number, skip
this step.
5 Turn Jog Dial to choose “[PGM]”, and then
press Jog Dial.
You hear a long confirmation beep and the
name and/or the number is changed.
Note
The stored record with name and number can be replaced with a new name and
number but it is not possible to erase the whole entry at one time.
Tips
• Single character and number can be erased by pressing (ERASE) in steps 2
and 4.
• You may press (PROGRAM) instead of doing steps 3 and 5.
Making calls with one-touch dialing
1 Press (TALK) or (LONG DIST. SAVER) and wait until “TALK”
appears on the display.
2 Press one of the ONE-TOUCH DIAL buttons ((A) to (C)).
The phone number stored on the one-touch dialing button
will appear on the display and will be dialed.
To check the phone number before one-touch dialing
While the cordless handset is not in use, press one of the ONE-TOUCH
DIAL buttons ((A) to (C)).
The number stored on the button appears on the display for 20
seconds. To dial the number, press (TALK) while the number is
displayed.
US
Telephone Features
44
SONY
1234567_
0123456789*#
F P VIP PGM
Phone Directory
You can dial a number by scrolling through the Phone Directory.
Both the base phone and the cordless handset can each store up to 50
separate numbers.
Storing phone numbers and names
1
Turn Press
Note
If you try to save a 51st phone number, you will hear five short error beeps and
“THE MEMORY IS FULL.” will be displayed. You cannot store the phone
number. To store another phone number, erase one of the stored phone
numbers (see page 47).
Press (PROGRAM).
(Cordless handset)
If “PHONE DIRECTORY” is
not selected, turn Jog Dial to
select it.
2
Press Jog Dial. (If you’re at the
base phone, press Jog Button
(ENTER).)
“ENTER NAME” appears on
the display.
3
Enter the name and the phone
number by doing steps 4 to 7 on
pages 42 to 43.
continued
Telephone Features
Telephone Features
US
45
– 13 –
Phone Directory (continued)
Changing a stored name and/or phone
number
1 Display the name you want to change by doing
steps 1 to 3 on pages 48 to 49.
2 Press Jog Dial. (If you’re at the base phone, press
Jog Button (ENTER).)
3 Turn Jog Dial to choose “EDIT”, and then press
Jog Dial (or Jog Button (ENTER)).
The cursor is at the right of the name.
4 Change the name and/or the phone number by
doing steps 2 to 5 on pages 43 to 44.
BROWN JOHN
SONY
SMITH JOHN
SALINGER GREG
WAGNER ANTHONY
GO BACK
DIAL
LONG DISTANCE
EDIT
ERASE DIRECTORY
ENTER NAME
SONY_
ABCDEFGHIJKLMNOP
QRSTUVWXYZ
SWITCH NUMBER
Erasing a memory location
To erase the phone number one by one
1 Display the name you want to erase by doing
steps 1 to 3 on pages 48 to 49.
2 Press Jog Dial. (If you’re at the base phone, press
Jog Button (ENTER).)
3 Turn Jog Dial to choose “ERASE DIRECTORY”,
and then press Jog Dial (or Jog Button
(ENTER)).
4 Turn Jog Dial to choose “YES”, and then press
Jog Dial (or Jog Button (ENTER)).
You hear a long confirmation beep and the
memory location is erased.
BROWN JOHN
SONY
SMITH JOHN
SALINGER GREG
WAGNER ANTHONY
GO BACK
DIAL
LONG DISTANCE
EDIT
ERASE DIRECTORY
ERASE DIRECTORY
GO BACK
NO
YES
Telephone Features
US
Telephone Features
46
Phone Directory (continued)
To erase the entire memory at once
1 Press (PROGRAM).
2 Turn Jog Dial to choose “MEMORY
MANAGE”, and then press Jog Dial. (If you’re
at the base phone, press Jog Button (ENTER).)
3 Turn Jog Dial to choose “ERASE ALL DIR”,
and then press Jog Dial (or Jog Button (ENTER)).
4 Turn Jog Dial to choose “ERASE DIRECTORY”,
and then press Jog Dial (or Jog Button (ENTER)).
You hear a long confirmation beep and the
entire memory is erased.
Making calls from the Phone Directory
Turn Press
(TALK)
US
Telephone Features
48
(LONG DIST. SAVER)
(PROGRAM)
MEMORY MANAGE
GO BACK
SEND ALL DIR
ERASE ALL CID
ERASE ALL RDL
ERASE ALL DIR?
GO BACK
NO
ERASE DIRECTORY
1 Press Jog Dial. (If you’re at the
base phone, press Jog Button
(ENTER).)
“PHONE DIRECTORY”
appears on the display.
PHONE DIRECTORY
CALLER ID
ABC
DEF
GHI
2 Turn Jog Dial to select an alphabet group
([ABC], [DEF]...) which includes the initial
character of the name you want to search for,
and then press Jog Dial (or Jog Button
(ENTER)).
If a numbers or a symbol is the initial character,
select the “[etc]” group.
3 Select the name you want to call by turning Jog
Dial.
4 Press Jog Dial (or Jog Button (ENTER)).
5 Turn Jog Dial to choose “DIAL” or “LONG
DISTANCE”, and then press Jog Dial (or Jog
Button (ENTER)).
The phone number will be dialed.
Note
When the Long Distance Saver function is set to “ACTIVE”, “LONG
DISTANCE” can be selected in step 4 (see page 22).
Tips
• When you select “[GO BACK]”, you can return to the previous set display by
pressing Jog Dial. (If you’re at the base phone, press Jog Button (ENTER).)
• When you select “[CALLER ID]” in step 1, you can switch to display the
Caller ID list (see page 58).
• If there is no data recorded in the selected alphabet group in step 2, the data
memory of the next following group will be displayed.
• You may press (TALK) or (LONG DIST. SAVER) on the cordless handset (If
you’re at the base phone, pick up the handset from the base phone or press
(SPEAKERPHONE) or (LONG DIST. SAVER)) to make a call instead of doing
steps 4 and 5.
PHONE DIRECTORY
PQRS
TUV
WXYZ
etc
BROWN JOHN
SONY
SMITH JOHN
SALINGER GREG
WAGNER ANTHONY
GO BACK
DIAL
LONG DISTANCE
EDIT
ERASE DIRECTORY
continued
Telephone Features
continued
Telephone Features
US
47
Telephone Features
US
49
– 14 –
Phone Directory (continued)
Transferring the Phone Directory memory
The Phone Directory memory can be transferred one by one or all at
once (with a maximum of 50 numbers) from the cordless handset to
the base phone and from the base phone to the cordless handset.
To transfer one phone number from the Phone Directory
1 Display the name you want to transfer by doing
steps 1 to 3 on pages 48 to 49.
2 Press Jog Dial. (If you’re at the base phone, press
Jog Button (ENTER).)
3 Turn Jog Dial to choose “SEND DIRECTORY”,
and then press Jog Dial (or Jog Button
(ENTER)).
You hear a long confirmation beep and the
memory is transferred.
To transfer all phone numbers from the Phone Directory
The Phone Directory receiving the transfer will be totally overwritten.
BROWN JOHN
SONY
SMITH JOHN
SALINGER GREG
WAGNER ANTHONY
GO BACK
DIAL
LONG DISTANCE
EDIT
ERASE DIRECTORY
1 Press (PROGRAM).
3
Press Jog Dial again (or Jog Button (ENTER)).
4
Turn Jog Dial to choose “SEND DIRECTORY”,
and then press Jog Dial (or Jog Button
(ENTER)).
“SENDING…” appears on the display during
the transfer.
You hear a long confirmation beep and the
entire memory is transferred.
Notes
• If there are already 50 numbers stored in the Phone Directory receiving the
transferred number one by one from the other Phone Directory, “CORDLESS
HANDSET MEMORY IS FULL.” or “BASEPHONE MEMORY IS FULL.”
will appear on the display and five short error beeps will be heard to indicate
that the transfer was unsuccessful. To make the transfer possible, erase one of
the stored phone numbers existing in the Phone Directory (see page 47).
• If the transfer is unsuccessful, “SEND TO CORDLESS HANDSET
FAILED.” or “SEND TO BASEPHONE FAILED.” will appear on the
display, and five short error beeps will be heard. Move the cordless handset
closer to the base phone, and then start over the procedure.
(Cordless handset)
SEND ALL DIR?
GO BACK
NO
SEND DIRECTORY
(BASE OVERWRITE)
Telephone Features
2 Turn Jog Dial to choose “MEMORY
MANAGE”, and then press Jog Dial. (If you’re
at the base phone, press Jog Button (ENTER).)
US
Telephone Features
50
Switching the phones during a call
You can easily switch between the cordless handset and the base
phone without disconnecting the call.
To switch from the base phone to the
cordless handset
1 Press (HOLD) on the base
phone.
The call is on hold and “HOLD”
appears on the display.
2 Pick up the cordless handset
from the charger (When Quick
talk is set to “USE”; see page 38)
or press (TALK) or (HOLD) on
(SPEAKERPHONE)
To switch from the cordless handset to the
base phone
the cordless handset.
You can continue talking to the
caller through the cordless
handset.
1 Press (HOLD) on the cordless
handset.
The call is on hold and “HOLD”
appears on the display.
MEMORY MANAGE
GO BACK
SEND ALL DIR
ERASE ALL CID
ERASE ALL RDL
Talking between the phones
(Intercom)
You can talk between the base phone and the cordless handset. You
can start the intercom from either phone.
To talk from the cordless
handset to the base phone
Press (INTERCOM).
The base phone and cordless handset
ring and “** PAGING **” appears
on the display.
When a person at the base phone picks
up the handset from the base phone or
presses (SPEAKERPHONE) or
(INTERCOM), you can talk with each
other.
“INTERCOM” appears on the display.
When you are done talking
Replace the cordless handset on the
charger or press (OFF) on the cordless
handset.
If no one answers the phone
Press (INTERCOM) again.
(TALK)
(OFF)
Telephone Features
US
51
Telephone Features
US
Telephone Features
52
(TALK)
2 Pick up the handset from the
base phone or press
(SPEAKERPHONE) or (HOLD)
on the base phone.
You can continue talking to the
caller through the base phone.
– 15 –
continued
Telephone Features
US
53
Talking between the phones (Intercom) (continued)
Transferring a call
To talk from the base
phone to the cordless
handset
Press (INTERCOM).
The base phone and cordless handset
ring and “** PAGING **” appears
on the display.
When a person at the cordless handset
picks up the cordless handset from the
charger (When Quick talk is set to
“USE”; see page 38) or presses (TALK)
or (INTERCOM), you can talk with
each other.
(SPEAKERPHONE)
Notes
• If there is an incoming call during intercom conversation, intercom call will
be disconnected, and both the base phone and the cordless handset will ring.
• While talking with an outside caller via the base phone or cordless handset,
you cannot make an intercom call. If you press (INTERCOM) on the cordless
handset, “BASEPHONE IN USE” appears on the display and you will hear
a busy tone.
Tip
You can receive an intercom call on the base phone or the cordless handset even
when “RINGER VOL” on the base phone is set to “OFF”, or the RING switch
on the cordless handset is set to OFF. The phone will ring at a low level.
US
Telephone Features
54
“INTERCOM” appears on the display.
When you are done talking
Replace the handset in the cradle or
press (SPEAKERPHONE) on the base
phone.
If no one answers the phone
Press (INTERCOM) again.
You can transfer a call between the cordless handset and base phone
without disconnecting the call.
To transfer from the base phone to the
cordless handset
1 Press (INTERCOM) to page the
cordless handset.
The call is put on hold on the
base phone and the cordless
handset rings.
“** PAGING **” appears on
the display of both the base
phone and cordless handset.
2 Pick up the cordless handset
(SPEAKERPHONE)
(TALK)
Tips
• You can receive an intercom call on the cordless handset even when the
RING switch is set to OFF. The cordless handset will ring at a low level.
• If you have accidentally pressed (HOLD) in step 1, just press (INTERCOM)
and you will get the same result as by pressing (INTERCOM) only.
from the charger (When Quick
talk is set to “USE”; see page 38)
or press (TALK) or (INTERCOM)
on the cordless handset.
“INTERCOM” appears on the
display of both the cordless
handset and base phone.
You can talk between the base
phone and the cordless handset.
3 To talk to the caller with the
cordless handset, replace the
handset in the cradle or press
(SPEAKERPHONE) on the base
phone.
“TALK” appears on the display
of the cordless handset.
If no one answers the phone
Press (INTERCOM) again.
continued
Telephone Features
Telephone Features
US
55
Transferring a call (continued)
To transfer from the cordless handset to the
base phone
1 Press (INTERCOM) to page the
base phone.
The call is put on hold on the
cordless handset and the base
phone rings. “** PAGING **”
appears on the display of both
(OFF)
(INTERCOM)
(SPEAKERPHONE)
Tip
You can receive an intercom call on the base phone even when “RINGER
VOL” on the base phone is set to “OFF”. The base phone will ring at a low
level.
US
Telephone Features
56
the cordless handset and base
phone.
2 Pick up the handset from the
base phone or press
(SPEAKERPHONE) or
(INTERCOM) on the base phone.
“INTERCOM” appears on the
display of both the base phone
and cordless handset.
You can talk between the
cordless handset and the base
phone.
3 To talk to the caller with the
base phone, replace the cordless
handset on the charger or press
(OFF) on the cordless handset.
“TALK” or “SPEAKERPHONE”
appears on the display of the
base phone.
If no one answers the phone
Press (INTERCOM) again.
Caller ID Features
Understanding the Caller ID service
Caller ID allows the caller’s phone number to be shown on the display before you
answer the call. In order to use this feature, you must first subscribe to Caller ID
service. The name of this service may vary depending on your telephone company.
To use this feature, be sure to enter the area code (see page 15).
When you receive a call
The phone number appears on the display with the date and time as shown in the
following example.
If your Caller ID service includes the caller name service or if the phone number
stored in the one-touch dialing, or the Phone Directory matches with the Caller ID
data phone number, the caller’s name also appears on the display (up to 15 letters).
The caller’s name will appear by the name stored in the one-touch dialing or Phone
Directory if you receive a call from a phone number which is stored on one of the
ONE-TOUCH DIAL buttons or in the Phone Directory.
Caller’s name
Caller’s phone number
The date and time received
When you answer the call, the Caller ID display changes to the “TALK” or
“SPEAKERPHONE” display.
Notes
• The caller’s phone number and/or name will not appear in the following cases:
- “OUT OF AREA”: when the call is made through a telephone company which does not offer
Caller ID service (including international calls).
- “PRIVATE”: when the call is “blocked”. For privacy reasons, many states allow callers the
option to prevent his or her telephone data from being displayed on the other party’s Caller
ID display.
• If the call is from an office which uses multiple lines, the displayed phone number may not
match the number you use to call the extension.
About the memory match function
The name stored in the one-touch dialing or Phone Directory will appear on the
display if you receive a call from a phone number which is stored on one of the ONETOUCH DIAL buttons (see page 41) or in the Phone Directory (see page 45).
In addition, the ringer sound will change to a higher tone from the second ring and
“9” will appear to the right of the displayed name if you receive a call from a VIP
registered phone number on the base phone or the cordless handset.
Note
The memory match function does not work with “OUT OF AREA” or “PRIVATE” calls; and it
may not work with calls made from an office which uses multiple lines because the number does
not always match the one you stored in this phone.
NEW 01
SMITH JOHN
1-201-123-4567
7.04 4:53PM
Caller ID Features
Caller ID Features
US
57
– 16 –
Looking at the Caller ID list
The phone stores the data of the last 100 calls received including “OUT
OF AREA” and “PRIVATE” calls. It keeps track of all calls received;
even if they were not answered.
Viewing the Caller ID list
You can look through the Caller ID list on both the base phone and the
cordless handset to check the phone number and/or name of the calls
received.
Turn Press
1 Turn Jog Dial.
The display shows the number
of “NEW CALLS” (calls which
you have not viewed) and
“OLD CALLS” (calls which you
have viewed) calls.
CALLER ID
NEW CALLS 08
OLD CALLS 12
2 Turn Jog Dial down to display
older data or up to display
newer data.
Notes
• If a 101st call is received, the oldest data is automatically erased.
• When you have checked all data, “END OF LIST” appears.
Tip
If there is a “NEW” data, the NEW CALL lamp of
the base phone flashes.
The number of “NEW CALLS” can be confirmed
with the standby mode display of the base phone.
NEW CALL lamp
Erasing data from the Caller ID list
Old data will be erased automatically when a 101st call comes in, but
you can also manually erase unnecessary data one by one or erase the
entire list.
To erase the phone number one by one
1
Display the phone number you want to erase
from the Caller ID list (see page 58).
2
Press Jog Dial. (If you’re at the base phone, press
Jog Button (ENTER).)
3
Turn Jog Dial to choose “ERASE CALLER ID”,
and then press Jog Dial (or Jog Button
(ENTER)).
4
Turn Jog Dial to choose “YES”, and then press
Jog Dial (or Jog Button (ENTER)).
You hear a long confirmation beep and the data
is erased.
Note
Do not allow more than 20 seconds to elapse during the operation procedure.
Tip
When you select “[GO BACK]”, you can return to the previous set display by
pressing Jog Dial. (If you’re at the base phone, press Jog Button (ENTER).)
NEW 01
SMITH JOHN
1-201-123-4567
7.04 4:53PM
GO BACK
DIAL
LONG DISTANCE
PROGRAM
ERASE CALLER ID
ERASE CALLER ID
GO BACK
NO
YES
Caller ID Features
US
Caller ID Features
58
Looking at the Caller ID list (continued)
To erase the entire list at once
Entire Caller ID list deletion can only be made on the base phone.
Note that Caller ID data in the list that has not been viewed will also
be erased.
1 Press (PROGRAM).
2 Turn Jog Dial to choose “MEMORY
MANAGE”, and then press Jog Button
(ENTER).
3 Turn Jog Dial to choose “ERASE ALL CID”,
and then press Jog Button (ENTER).
4 Turn Jog Dial to choose “ERASE CALLER ID”,
and then press Jog Button (ENTER).
You hear a long confirmation beep and the
entire list is erased.
Note
Do not allow more than 20 seconds to elapse during the operation procedure.
Tip
When you select “[GO BACK]”, you can return to the previous set display by
pressing Jog Button (ENTER).
MEMORY MANAGE
GO BACK
SEND ALL DIR
ERASE ALL CID
ERASE ALL RDL
ERASE ALL CID?
GO BACK
NO
ERASE CALLER ID
Using the Caller ID list
By using the Caller ID list, you can call back a phone number from the
Caller ID list easily, or store numbers from the Caller ID list into the
Phone Directory.
Calling back a number from the Caller ID list
1
Turn Press
(TALK)
(LONG DIST. SAVER)
Display the phone number you
want to call from the Caller ID
list (see page 58).
NEW 01
SMITH JOHN
1-201-123-4567
7.04 4:53PM
2
Press Jog Dial. (If you’re at the
base phone, press Jog Button
(ENTER).)
GO BACK
DIAL
LONG DISTANCE
PROGRAM
ERASE CALLER ID
3
Turn Jog Dial to choose “DIAL”
or “LONG DISTANCE”, and
then press Jog Dial (or Jog
Button (ENTER)).
The phone automatically dials
the displayed number.
continued
Caller ID Features
US
59
Caller ID Features
US
60
Caller ID Features
– 17 –
continued
Caller ID Features
US
61
 Loading...