

Page 1

’12.2
INSTRUCTION MANUAL
Page 2

Introduction
Thank you for your purchase of "SO-04D".
For proper use of the SO-04D, read this manual carefully before and while you use the SO-04D.
Before using the terminal
●
SO-04D supports W-CDMA, GSM/GPRS and Wireless LAN Systems.
●
Because a terminal operates using radio frequencies, it cannot be used inside a tunnel, underground, in a
building or other locations where radio waves do not reach the terminal, in locations with weak radio wave
condition, or outside of the FOMA's service area. The services may not be available on high upper floors of
high-rise apartments or buildings, even if you can see no obstructions around you. On occasion, your calls
may become disconnected even in areas with strong radio wave condition, even if you are not moving, or
even if there are 4-antenna marks in the terminal's display.
●
Note that because the terminal operates on radio frequencies, your calls are at risk of being intercepted by
the third party. However, the W-CDMA, GSM/GPRS system automatically scrambles all calls through a
private call feature. Therefore, even if third party successfully intercepts your call, they will only hear noise.
●
The terminal operates on radio frequencies by converting voice into digital signals. If the caller moves into
an area of adverse radio wave condition, the digital signal may not be restored accurately, and the voice
received in the call may differ slightly from the actual voice.
●
Note down the information saved in the terminal in a separate note and keep it safely. Even if the data
may be lost as a result of malfunction, repair, change, or other handling of the terminal, under no
condition will DOCOMO be held liable for any lost data saved in the terminal.
●
You are recommended to save important data to microSD card.
●
As with PCs, some user-installed applications may disrupt the stability of the terminal performance, or
unexpectedly transmit information via the Internet causing improper use of your location information as
well as personal information recorded on the terminal. Therefore, verify the supplier and operating
conditions of the applications to be used before using them.
●
This terminal has FOMA Plus-Area and FOMA HIGH-SPEED Area support.
●
Descriptions in this manual are fore the terminal with a DOCOMO's UIM inserted.
SIM unlock
This terminal supports SIM unlock. If you release SIM lock, you can use SIM by a carrier other than NTT
DOCOMO.
●
The SIM unlock service is provided at a docomo Shop.
●
A SIM unlock charge is separately required.
●
If you use a SIM other than by DOCOMO, available services and functions will be limited. DOCOMO is not
liable to any failures or malfunctions.
●
For details of SIM unlock, refer to NTT DOCOMO website.
Page 3

1
・
SO-04D (with warranty)
・
クイックスタートガイド
(Quick Start Guide)
(In Japanese only)
・
SO-04D
のご利用にあたっての注意事項
安全上/取り扱い上のご注意
(Notes on usage Safety/Handling
precautions) (In Japanese only)
・
AC Adapter Cable SO04 (with warranty)
・
Desktop Holder SO12 (with warranty)
・
microSD card (2GB)* (Sample)
(with manual)
* Inserted in the terminal when purchased.
・
Stereo Headset with Microphone (Sample)
(with manual)
For details on optional devices, see "Optional
and related devices" (P.243).
Supplied accessories
Supplied accessories
クイック
スタート
ガイド
<AC adapter> <microUSB cable>
Page 4
2
In addition to this manual, the operations of
SO-04D are described in "
クイックスタートガ
イド
(Quick Start Guide)" (in Japanese only)
and "Instruction Manual" application of the
terminal.
The initial operations and settings after
purchasing the terminal, screen view
contents and operations of main function are
explained. (In Japanese only)
Similarly to this manual, operations and
settings of each function are explained.
To use "Instruction Manual" application, from
the Home screen,
u
Tap [Instruction
Manual]. For the first time using, download
and install it according to the onscreen
instructions. You can use the application as
an electronic book. You can also shift to
actual operations by tapping the description
in the contents or view reference contents.
❖
Note
・
For downloading or updating the application, a high
packet communication charge will be applied
because of a large amount data communication. For
this reason, subscription of packet flat-rate service is
highly recommended.
* If you use Wi-Fi function to download, packet
communication charges are not applied.
Operations and settings of each function are
explained.
It can be downloaded from NTT DOCOMO
website.
http://www.nttdocomo.co.jp/english/
support/trouble/manual/download/
index.html
* You can download the latest information of
"
クイックスタートガイド
(Quick Start Guide)"
(in Japanese only). The URL and contents are
subject to change without prior notice.
❖
Note
・
Reproduction or reprint of all or part of this manual
without prior permission is prohibited.
・
Important information for SO-04D is posted in the
following website. Be sure to check before using.
http://www.sonymobile.co.jp/support/use_support/
product/so-04d/
About manuals of SO-04D
"
クイックスタートガイド
(Quick
Start Guide)" (Supplied
accessories)
"Instruction Manual"
(Application of the terminal)
"Instruction Manual" (PDF file)
Page 5
3
In this manual, each key operation is
described with
p, x, y, t
,
m, k
. And selection operations of
the icons or function items on the touch
panel are described as follows.
❖
Information
・
In this manual, the instructions are described with
the default Home screen. If you set the other
application to the home screen, the operations may
differ from the descriptions.
・
Display examples and illustrations used in this
manual are just images for explanations and may be
different from actual ones.
・
In this manual, the easier procedure is described for
the functions and settings which have multiple
operating procedures.
・
Please note that "SO-04D" is called "the terminal" in
this manual.
・
In this manual, explanations for "docomo" as Home
application are provided. To switch the Home
applications, see "Learning Home screen" (P.66).
Operation descriptions
Description Operation
From the Home
screen, tap
t
and tap [Settings].
From the Home screen, tap
t
(Menu) key and tap
"Settings" on the screen.
Tap
[Settings]
u
[Date
& time]
u
[Set
date].
Tap "Settings" displayed on the
screen, and then tap "Date &
time" on the next screen and
"Set date" on the following
screen in order.
Tap to zoom
in or out on a map.
Tap displayed on the
screen to zoom in or out the
map.
Touch and hold
icon.
Keep touching the icon longer
(1-2 seconds).
Page 6
4
Contents/Precautions
Contents/Precautions
Supplied accessories . . . . . . . . . . . . . . . . . . . . . . . . . . . . . . . . . . . . . . . . . . . . . . . . . . . . . . . . . . . . . . . . 1
About manuals of SO-04D. . . . . . . . . . . . . . . . . . . . . . . . . . . . . . . . . . . . . . . . . . . . . . . . . . . . . . . . . . . 2
Notes on usage . . . . . . . . . . . . . . . . . . . . . . . . . . . . . . . . . . . . . . . . . . . . . . . . . . . . . . . . . . . . . . . . . . . . . 7
Safety Precautions (Always follow these directions) . . . . . . . . . . . . . . . . . . . . . . . . . . . . . . . . . . 9
Handling precautions . . . . . . . . . . . . . . . . . . . . . . . . . . . . . . . . . . . . . . . . . . . . . . . . . . . . . . . . . . . . . .18
Contents
Before Using the Terminal
→
P.29
・
Part names and functions................................................................... 29
・
UIM..............................................................................................................30
・
microSD card ........................................................................................... 31
・
Charging.................................................................................................... 33
・
Turning power on/off........................................................................... 37
・
Initial settings (Setup guide).............................................................. 39
・
Status bar ..................................................................................................41
・
Notification panel .................................................................................. 42
・
Notification LED...................................................................................... 43
・
Basic operations ..................................................................................... 44
・
Searching information in the terminal and web pages ........... 46
・
Character entry ....................................................................................... 47
・
Setting character entry ........................................................................ 60
・
Setting Japanese keyboard................................................................ 60
docomo Palette UI
→
P.66
・
Home screen............................................................................................ 66
・
Applications screen............................................................................... 71
Calling/Network Services
→
P.81
・
Making/Receiving a call....................................................................... 81
・
Call history................................................................................................ 85
・
Phonebook............................................................................................... 87
・
Network Services.................................................................................... 96
Page 7
5
Contents/Precautions
Settings
→
P.107
・
Viewing the setting menu ................................................................107
・
docomo service ....................................................................................107
・
Xperia
™ ...............................................................................
108
・
Wireless & networks............................................................................109
・
Call settings............................................................................................119
・
Sound .......................................................................................................119
・
Display......................................................................................................122
・
Location & security ..............................................................................124
・
Applications...........................................................................................129
・
Accounts & sync....................................................................................132
・
Privacy......................................................................................................135
・
Storage.....................................................................................................136
・
Language & keyboard........................................................................138
・
Voice input & output...........................................................................138
・
Accessibility............................................................................................139
・
Date & time.............................................................................................139
・
About phone .........................................................................................140
Mail/Internet
→
P.141
・
sp-mode mail.........................................................................................141
・
Message (SMS) ......................................................................................141
・
Email .........................................................................................................144
・
Using Gmail............................................................................................151
・
Google Talk.............................................................................................151
・
Early Warning "AreaMail"...................................................................152
・
Using Browser........................................................................................153
File management
→
P.158
・
Handling a file .......................................................................................158
・
Transferring and moving data.........................................................158
・
Using Infrared communication.......................................................163
・
Using Bluetooth function..................................................................166
・
Sharing files with DLNA devices via Connected devices (Media
server).......................................................................................................170
Page 8
6
Contents/Precautions
Applications
→
P.172
・
Shooting with the camera................................................................172
・
Capturing the screenshot .................................................................191
・
Playing multimedia content.............................................................192
・
Viewing photos/videos......................................................................193
・
Playing YouTube video.......................................................................198
・
Connecting the terminal to TV to watch photos and videos
....................................................................................................................199
・
Music player...........................................................................................200
・
Using Android Market........................................................................204
・
Timescape
™ ........................................................................
205
・
About location services .....................................................................209
・
1Seg ..........................................................................................................215
・
FM radio...................................................................................................222
・
Osaifu-Keitai...........................................................................................223
・
Calendar ..................................................................................................227
・
Alarm and Clock ...................................................................................229
・
OfficeSuite ..............................................................................................233
・
Other applications...............................................................................233
International roaming
→
P.234
・
Overview of International roaming (WORLD WING)...............234
・
Available Services.................................................................................234
・
Before using...........................................................................................235
・
Making/Receiving calls in the country you stay .......................238
・
International roaming settings .......................................................240
Appendix/Index
→
P.243
・
Optional and related devices...........................................................243
・
Troubleshooting...................................................................................243
・
Warranty and After Sales Services..................................................249
・
Updating software...............................................................................252
・
Main specification................................................................................255
・
Authorization and Compliance.......................................................257
・
Specific Absorption Rate of Mobile Phone, etc.........................258
・
End User Licence Agreement...........................................................270
・
About Open Source Software..........................................................271
・
Export Controls and Regulations ...................................................272
・
Intellectual Property Right................................................................272
・
Index.........................................................................................................272
Page 9
7
Contents/Precautions
Contents/Precautions
・
The terminal does not support i-mode sites
(programs) or i-
D
ppli.
・
The terminal automatically performs
communication for synchronizing data,
checking the latest software version, maintain
connection with the server, etc. If you
transmit a large amount of data such as
downloading applications or watching
movie, a packet communication charge
becomes high. Subscription of packet flatrate service is highly recommended.
・
Public mode (Driving mode) is not supported.
・
Setting the phone to silent mode does not
mute playback sound of video or music,
alarm, etc.
・
The names of the operators are displayed on
key lock canceling screen (P.39).
・
Your phone number (own number) can be
checked as follows:
From the Home screen, tap
t
and tap
[Settings]
u
[About phone]u[Status].
・
The software version of your terminal can be
checked as follows:
From the Home screen, tap
t
and tap
[Settings]
u
[About phone].
・
You can perform software update by
downloading an update file with a PC via
Internet and connecting the PC to the
terminal. For details, see "Connecting to a PC
and updating" (P.254).
・
By some software updates, the operating
system (OS) may be version-upgraded for
improving the terminal quality. For this
reason, you always need to use the latest OS
version. And some applications that used in
the previous OS version may not be available
or some unintended bugs may occur.
・
When using the terminal inserting some UIM
(FOMA card) (green), voice calls and packet
communication may not be available in some
overseas networks. For using overseas, please
visit a docomo Shop near you. DOCOMO
exchanges UIM (FOMA card) (green) for UIM
free of charge.
・
Set the screen lock to ensure the security of
your terminal for its loss. For details, see
"Screen lock" (P.127).
・
If your terminal is lost, change your each
account password to invalidate
authentication using a PC to prevent other
persons from using Google services such as
Google Talk, Gmail, Android Market, etc.,
Facebook, Twitter and mixi.
・
The terminal supports only sp-mode, mopera
U and Business mopera Internet. Other
providers are not supported.
Notes on usage
Page 10

8
Contents/Precautions
・
Battery is built into the terminal and cannot
be replaced by yourself.
・
To use tethering, subscription of sp-mode is
required.
・
Packet communication charge when using
tethering varies depending on the charging
plan you use. Subscription of packet flat-rate
service is highly recommended.
・
For details on usage charge, etc., refer to http:/
/www.nttdocomo.co.jp/ .
Notice:
Pursuant to the Japanese Radio Law (電波法)
and the Japanese Telecommunications
Business Law ( 電気通信事業法), this device
has been granted a designation number
according to the
"Ordinance concerning the Technical
Regulations Conformity Certification etc. of
Specified Radio Equipment (特定無線設備の
技術基準適合証明等に関する規則)"
R-(W-CDMA)/Article 2-1-11-3,
R-(W-CDMA)/Article 2-1-11-7,
IEEE802.11bgn (2.4GHz)/Article 2-1-19,
IEEE802.11an (5GHz)/Article 2-1-19-3,
IEEE802.11an (5GHz)/Article 2-1-19-3-2,
LTE/Article 2-1-11-19,
BT/Article 2-1-19:
202-SMA015
and "Ordinance Concerning Technical
Conditions Compliance Approval etc. of
Terminal Equipment ( 端末機器の技術基準適
合認定等に関する規則)"
T-(W-CDMA): AD 12-0012 202
Page 11
9
Contents/Precautions
■
For safe and proper use of the terminal, please
read the "Safety Precautions" prior to use.
Keep the Manual in a safe place for future
reference.
■
ALWAYS observe the safety precautions since
they intend to prevent personal injury or
property damage.
■
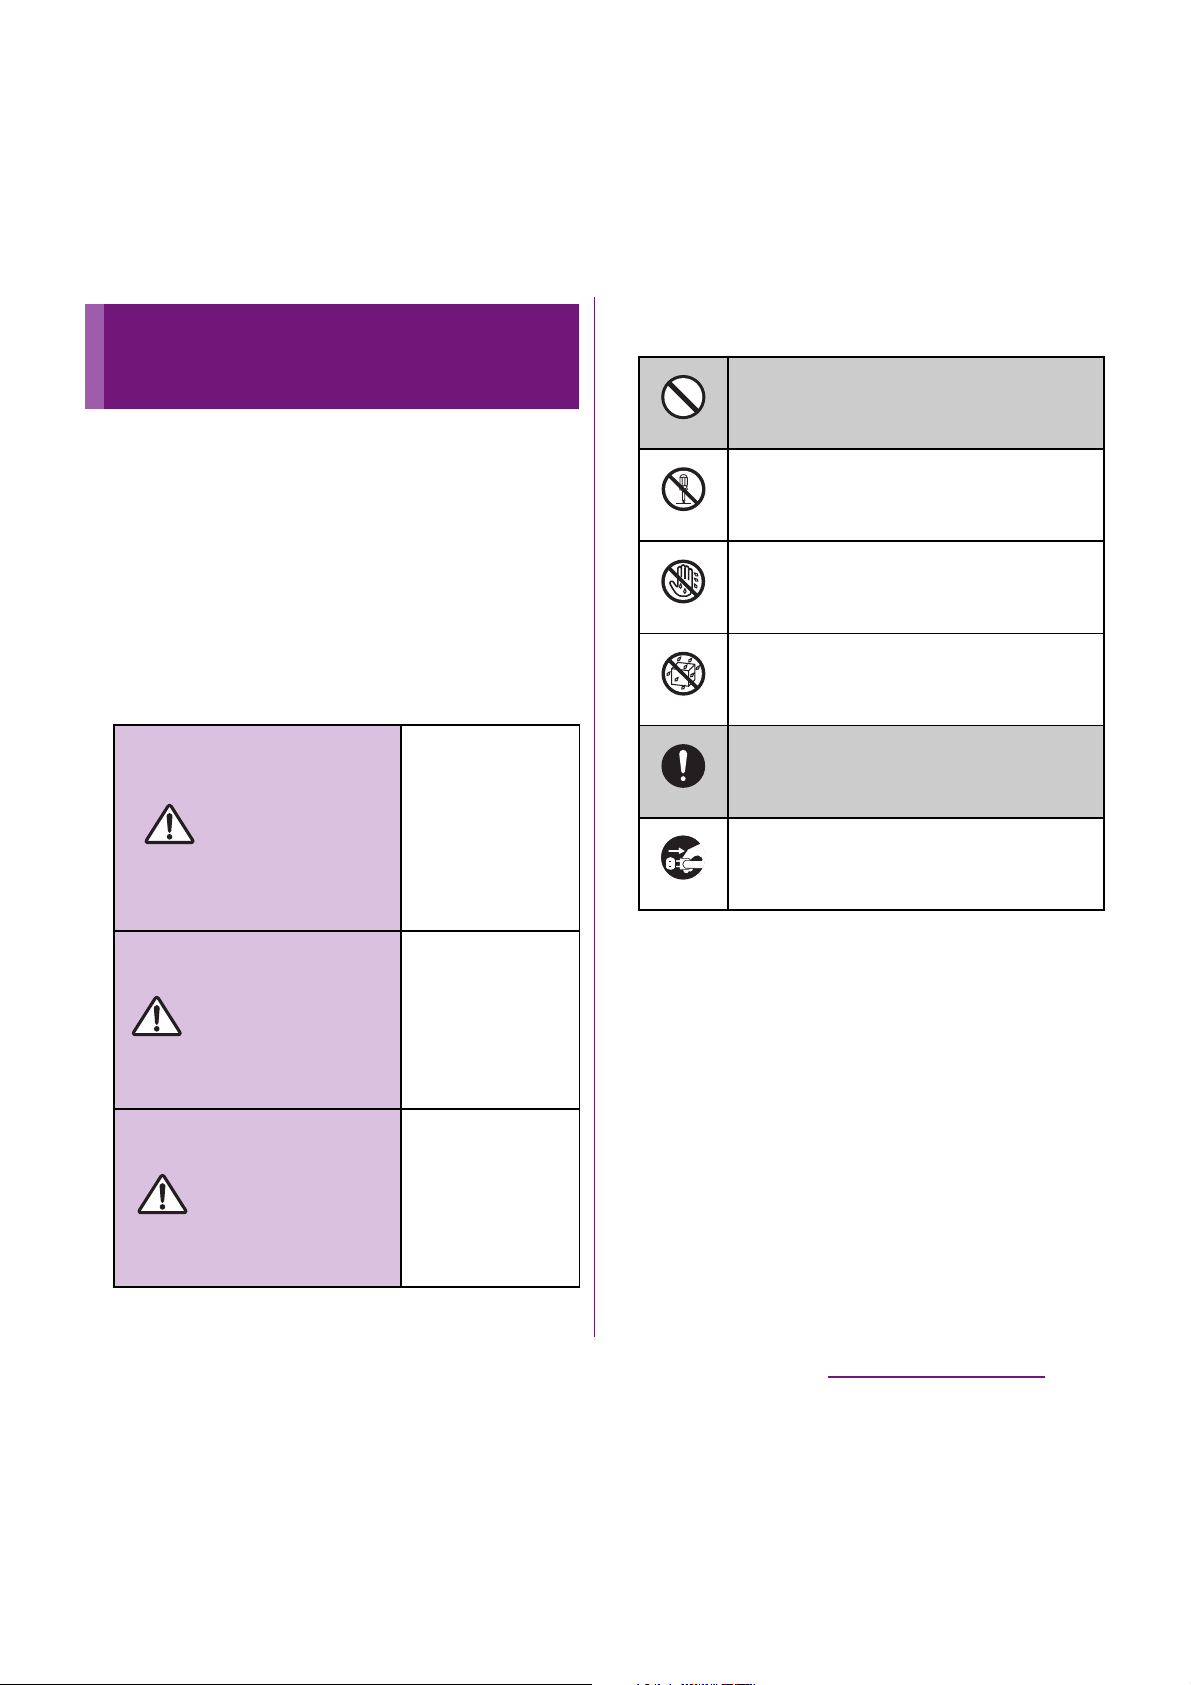
The following symbols indicate the different
levels of injury or damage that may result if
the guidelines are not observed and the
terminal is used improperly.
■
The following symbols indicate specific
directions.
■
"Safety Precautions" are described in the
following categories:
1. Handling the terminal, AC Adapter cable,
Desktop Holder and UIM (general) . . . . . . . . . 10
2. Handling the terminal . . . . . . . . . . . . . . . . . . . . . . 12
3. Handling the adapter and desktop holder. . . 15
4. Handling the UIM . . . . . . . . . . . . . . . . . . . . . . . . . . 16
5. Handling the terminal near electronic medical
equipment . . . . . . . . . . . . . . . . . . . . . . . . . . . . . . . . 16
6. Material list . . . . . . . . . . . . . . . . . . . . . . . . . . . . . . . . 17
Safety Precautions (Always
follow these directions)
Failure to
observe these
guidelines may
immediately
result in death
or serious
injury.
Failure to
observe these
guidelines may
result in death
or serious
injury.
Failure to
observe these
guidelines may
result in injury
and property
damage.
DANGER
WARNING
CAUTION
Indicates prohibited actions.
Indicates not to disassemble.
Indicates not to handle with wet
hands.
Indicates not to use where it could
get wet.
Indicates compulsory actions in
accordance with instructions.
Indicates to remove the power plug
from the outlet.
Don’t
No disassembly
No wet hands
No liquids
Do
Unplug
Page 12
10
Contents/Precautions
1. Handling the terminal, AC Adapter
cable, Desktop Holder and UIM
(general)
DANGER
Do not use, store or leave the equipment in
hot places (e.g. by the fire, near a heater,
under a kotatsu, in direct sunlight, in a car in
the hot sun). (including the event that you
ware the equipment in the pocket of your
clothes, etc.)
Doing so may cause fire, burns or injury.
Do not place equipment inside cooking
appliance such as a microwave oven or highpressure containers.
Doing so may cause fire, burns, injury or
electric shock.
Do not disassemble or modify the
equipment.
Doing so may cause fire, burns, injury or
electric shock.
Do not let the equipment get wet with
water, drinking water, urine of pet animals,
etc.
Doing so may cause fire, burns, injury or
electric shock.
Use the AC adapter cable for the terminal
specified by DOCOMO.
Failure to do so may cause fire, burns, injury or
electric shock.
WARNING
Do not subject the equipment to excessive
force or throw it.
Doing so may cause fire, burns, injury or
electric shock.
Do not allow the microUSB connecting jack,
headset connecting jack or HDMI
connecting jack to come in contact with
conducting foreign substances (a piece of
metal, pencil lead, etc.). Never allow these
objects to get into the connecting jack.
Doing so may cause fire, burns, injury or
electric shock.
Do not cover or wrap the equipment with a
cloth or bedding in use or while charging.
Doing so may cause fire or burns.
Power off the terminal before you step into a
place where flammable gas can leak, such as
gas stations. Stop charging if you charge the
battery.
Gas may catch fire.
When using Osaifu-Keitai in a place such as a
gas station, turn OFF the terminal before using
it.
(When Osaifu-Keitai lock is activated,
deactivate it before turning OFF the terminal.)
Don’t
Don’t
No disassembly
No liquids
Do
Don’t
Don’t
Don’t
Do
Page 13

11
Contents/Precautions
If you notice anything unusual about the
equipment such as an unusual odor,
overheating, discoloration or deformation
during operation, charging or storage,
immediately perform the following
measures.
・
Remove the power plug from the power
outlet.
・
Power off the terminal.
Failure to do so may cause fire, burns, injury or
electric shock.
CAUTION
Do not place on an unstable or inclined
platform.
Doing so may cause the device to fall and
cause injury.
Do not keep in a place that is very humid,
dusty, or subject to high temperature.
Doing so may cause fire, burns or electric
shock.
If children use the terminal, parents or
guardians should give them the proper
instructions for use. Make sure that they use
the terminal as instructed.
Failure to do so may cause injury.
Keep the equipment out of the reach of
babies and infants.
Failure to do so may cause accidental
swallowing or injury.
Be careful especially when you use the
terminal while it has been continuously
connected to the AC adapter cable for a long
period of time.
If you play a game or watch 1Seg for a long
time while charging, the temperature of the
terminal and AC adapter cable may rise.
If you are directly in contact with hot parts for
a long period of time, it may cause your skin to
become red, itchy, or develop a rash
depending on your physical condition and
also it may cause low-temperature burn.
Observe the followings for 3D image
function.
・
Do not view 3D images shot by the terminal
with a 3D compatible monitor for a long
time. Doing so may cause unpleasant
symptom such as eyestrain, fatigue, feeling
ill, etc.
・
For viewing 3D images, you are
recommended to take a proper break.
Necessary break length or frequency varies
by individual. Judge for yourself.
・
When you experience unpleasant symptom,
stop viewing 3D images until you get healed
up and seek the advice of a doctor if
necessary. Also refer to the manuals come
with the device for connecting to the
terminal or software.
・
Vision of child (especially younger than 7
years) is during development. Before a child
views 3D images, seek the advise of a doctor
such as pediatrics or ophthalmologist. Adults
should supervise a child for the above
precautions.
Do
Don’t
Don’t
Do
Do
Do
Do
Page 14
12
Contents/Precautions
2. Handling the terminal
■
The internal battery for the terminal is as
follows.
DANGER
Do not throw the terminal into fire.
Doing so may cause internal battery to ignite,
explode, overheat or leak.
Do not stick a nail into the terminal, hit it
with a hammer, or step on it.
Doing so may cause internal battery to ignite,
explode, overheat or leak.
If the internal battery fluid gets into your
eyes, do not rub, rinse with clean running
water, and get medical treatment
immediately.
Failure to do so may cause blindness.
WARNING
Do not direct the infrared data port toward
your eye and transmit signals.
Doing so may cause harmful effect your eyes.
Do not direct the infrared data port toward
home electric appliances etc. equipped with
infrared device when using infrared
communication.
Doing so may cause an accident because of
malfunction of infrared device.
Do not turn on the light with the lighting
luminescence part close to the eyes.
Especially to shoot infants or young
children, step away from them 1 m or more.
Doing so may cause blurred vision. Or injury
by dazzling eyes or surprising may occur.
Do not allow a foreign substance such as
water and other liquids, metal parts, or
flammables to get in the UIM or microSD
card insertion slot on the terminal.
Doing so may cause fire, burns, injury or
electric shock.
Do not turn on the light toward a driver of a
car etc.
Doing so may disturb driving and cause an
accident.
Display Type of Battery
Li-ion 00 Lithium Ion Battery
Don’t
Don’t
Do
Don’t
Don’t
Don’t
Don’t
Don’t
Page 15

13
Contents/Precautions
Power off the terminal in a place where the
use is prohibited such as in airplane or
hospital.
Failure to do so may affect electronic
equipment and electronic medical
equipment. If you set the automatic power-on
function, cancel it before powering off the
terminal.
Follow the instructions of each medical facility
for the use of mobile phones on their
premises.
Prohibited acts such as mobile phone usage
on board an airplane may be punished by law.
If usage of mobile phones in an aircraft is
admitted by setting airplane mode, etc., use
the terminal under the direction of the airline.
If the microUSB cable is connected into the
USB connecting jack for charging etc, the
terminal is automatically powered on
although the operations are not available. Be
careful not to connect the microUSB cable in a
place where the use is prohibited such as in
airplane or hospital.
Always keep the terminal away from your
ear when you talk setting the hands-free
function.
Also, when you play game, play back music,
etc. connecting the Earphone/Microphone,
etc. to the terminal, adjust the volume
adequately.
If the volume is too loud, it may cause
difficulty in hearing.
Moreover, if you barely hear the surrounding
sounds, it may cause an accident.
If you have a weak heart, set the vibrator or
ringtone volume carefully.
Failure to do so may affect your heart.
If you are wearing any electronic medical
equipment, check with the relevant medical
electronic equipment manufacturer or
vendor whether the operation may be
affected by radio waves.
The radio waves from the terminal may affect
electronic medical equipment.
Power off the terminal near electronic
devices or equipment operating on high
precision control or weak signals.
Failure to do so may interfere with the
operation of electronic devices or equipment.
* The followings are some electronic devices
or equipment that you should be careful of:
Hearing aids, implantable cardiac
pacemaker, implantable cardioverter
defibrillator, other electronic medical
equipment, fire detector, automatic door,
and other automatically controlled devices
or equipment.
If you use an implantable cardiac
pacemaker, implantable cardioverter
defibrillator, or other electronic medical
equipment, check with the relevant medical
electronic equipment manufacturer or
vendor whether the operation can be
affected by radio waves.
Be careful about broken glasses or exposed
internal from the terminal if the display or
the camera lens is broken.
Shatterproof film-applied hardened glass is
used on the display surface and the acrylic
resin is applied on camera lens so as not to be
shattered when broken. But they may cause
injury if you touch a cut surface or exposed
portion mistakenly.
Do
Do
Do
Do
Do
Do
Page 16
14
Contents/Precautions
If the internal battery leaks or hears an
unusual odor, immediately stop using and
move it away from fire.
The leaking liquid may ignite fire, catch fire, or
explode.
CAUTION
Do not swing the terminal around by
holding the antenna or strap.
The terminal may hit you or others and cause
accident such as injury.
Do not use damaged terminal.
Doing so may cause fire, burns, injury or
electric shock.
If the display is mistakenly damaged and
when the liquid crystal runs out, do not get
it on your skin such as face, hands, etc.
Doing so may cause blindness or injury on
your skin.
If the liquid crystal gets in your eye or mouth,
rinse with clean running water, and get
medical treatment immediately.
Also, if it gets on your skin or clothes, use
something such as alcohol to wipe off and
wash it with soap in clear water.
Do not discard the battery pack together
with other garbage.
The terminal may become the source of fire or
environmental destruction. Take the used
terminal to our service counter (docomo
Shop, etc.) or follow the instructions of the
local authorities in charge of collecting used
terminals.
To use the terminal in car, check with
automobile manufacturer or dealer to
determine how the device is affected by
radio waves before using.
In rare cases, using the phone in some vehicle
models can cause the vehicle's electronic
equipment to malfunction. In that case, stop
using the terminal immediately.
The use of the terminal may cause itching,
rashes, eczema, or other symptoms
depending on the user's physical condition.
Immediately stop using and get medical
treatment in such a case.
For material of each part →P.17 "Material list"
When watching the display, take a certain
distance from the display in a fully bright
place.
Failure to do so may reduce visual acuity.
If fluid etc. leaks out from the internal
battery, do not make the fluid contact with
your skin of face or hands.
Doing so may cause blindness or injury on
your skin.
If the fluid etc. gets into your eyes or mouth, or
contacts skin or clothes, immediately flush the
contacted area with clean running water.
If the fluid gets into the eyes or mouth,
immediately see a doctor after flushing.
Do
Don’t
Don’t
Don’t
Don’t
Do
Do
Do
Do
Page 17
15
Contents/Precautions
3. Handling the adapter and desktop
holder
WARNING
Do not use the microUSB cable if it is
damaged.
Doing so may cause fire, burns or electric
shock.
Do not use the AC adapter cable or the
desktop holder in a very humid or steamy
place such as bathroom.
Doing so may cause fire, burns or electric
shock.
DC adapter is only for a negative ground
vehicle. Do not use DC adapter for a positive
ground vehicle.
Doing so may cause fire, burns or electric
shock.
Do not touch the AC adapter cable if you
hear thunder.
Doing so may cause electric shock.
Do not short-circuit the microUSB plug
while it is connected to the power outlet. Do
not touch the microUSB plug with your
hands, fingers, or any part of your body.
Doing so may cause fire, burns or electric
shock.
Do not place any heavy objects on the
microUSB cable.
Doing so may cause fire, burns or electric
shock.
When you insert and remove AC adapter
from power outlet, do not contact a metal
strap or other metal objects with the jack.
Doing so may cause fire, burns or electric
shock.
Do not touch the cord of the AC adapter
cable, the desktop holder or the power
outlet with wet hands.
Doing so may cause fire, burns or electric
shock.
Use the adapter only on the specified power
supply and voltage.
Use the AC adapter cable available overseas
when you charge the battery overseas.
Failure to do so may cause fire, burns or
electric shock.
AC adapter : AC 100 V to 240 V (Make sure to
connect the adapter to a household AC power
outlet.)
DC adapter : DC 12 V or 24 V (only for a
negative-ground vehicle)
When the fuse in a DC adapter is blown,
make sure to use the specified fuse.
Failure to do so may cause fire, burns or
electric shock. For the specified fuse, see the
users manuals that supplied with a DC
adapter.
Clean dust from the power plug.
Failure to do so may cause fire, burns or
electric shock.
When you connect the AC adapter to the
power outlet, insert it firmly.
Failure to do so may cause fire, burns or
electric shock.
Don’t
Don’t
Don’t
Don’t
Don’t
Don’t
Don’t
No wet hands
Do
Do
Do
Do
Page 18
16
Contents/Precautions
Hold the AC adapter, not the microUSB
cable, when you remove the power plug
from the power outlet.
Failure to do so may cause fire, burns or
electric shock.
Remove the power plug from the power
outlet when not used for a long period of
time.
Failure to do so may cause fire, burns or
electric shock.
If liquid such as water gets into the adapter,
immediately remove it from the power
outlet.
Failure to do so may cause fire, burns or
electric shock.
Before cleaning, remove the power plug
from the power outlet.
Failure to do so may cause fire, burns or
electric shock.
4. Handling the UIM
CAUTION
Please be careful not to touch a cut surface
when you remove the UIM.
Failure to do so may cause injury.
5. Handling the terminal near
electronic medical equipment
■
The following instructions observe the
guidelines of the Electromagnetic
Compatibility Conference, Japan to protect
electronic medical equipment from radio
waves from mobile phones.
WARNING
Please observe the following guidelines in
medical facilities.
・
Do not take the terminal into the operating
rooms, ICU (Intensive Care Unit), or CCU
(Coronary Care Unit).
・
Power off the terminal inside hospital wards.
・
Power off the terminal in the lobby and
other places if there are any electronic
medical equipment operating in the vicinity.
・
Follow the instructions of each medical
facility when they specify areas forbidding to
use and carrying a mobile phone.
・
If you set the automatic power-on function,
cancel it before powering off the terminal.
Power off the terminal in crowded places
such as rush-hour trains. There may be a
person with an implantable cardiac
pacemaker or implantable cardioverter
defibrillator near you.
The radio waves from the terminal may affect
the operation of implantable cardiac
pacemaker or implantable cardioverter
defibrillator.
If you use an implantable cardiac pacemaker
or implantable cardioverter defibrillator,
keep the terminal 22 cm or more away from
the implant at all times.
The radio waves from the terminal may affect
the performance of electronic medical
equipment.
Do
Unplug
Unplug
Unplug
Do
Do
Do
Do
Page 19

17
Contents/Precautions
If you need to use electronic medical
equipment other than implantable cardiac
pacemaker or implantable cardioverter
defibrillator outside medical facilities such
as treating at home, check with the relevant
medical electronic equipment manufacturer
whether the operation may be affected by
radio waves.
The radio waves from the terminal may affect
the performance of electronic medical
equipment.
6. Material list
Part Material
Surface
treatment
Exterior case
(cover front)
(terminal color :
Black)
PC resin
(with glass) +
SUS plate
Urethan coating
Exterior case
(cover front)
(terminal color :
Aqua/Sakura/
Ceramic)
PC resin
(with glass) +
SUS plate
UV coating
Exterior case
(rear frame)
PC resin
(with glass)
Discontinuous
evaporation
coating (tin) +
UV coating
Exterior case
(cover back)
(terminal color :
Black)
PC resin
(with glass)
Urethan coating
Do
Exterior case
(cover back)
(terminal color :
Aqua/Sakura/
Ceramic)
PC resin
(with glass)
UV coating
Exterior case (HDMI/
headset/microUSB
connecting jack
cover)
PC resin Discontinuous
evaporation
coating (tin) +
UV coating
Exterior case
(microSD card slot/
UIM card slot cover)
(terminal color :
Black)
PC resin
(with glass)
Discontinuous
evaporation
coating (tin) +
urethane
coating
Exterior case
(microSD card slot/
UIM card slot cover)
(terminal color :
Aqua/Sakura/
Ceramic)
PC resin
(with glass)
Discontinuous
evaporation
coating (tin) +
UV coating
Transparent plate
(camera)
PC resin +
PMMA resin
AR treatment
Transparent plate
(flash)
PC resin
ー
Transparent plate
(display)
Glass + PET
resin
Hard coating
Side keys (power
key, volume key,
camera key)
PC resin UV coating
Whip antenna cap PC/ABS resin
ー
Part Material
Surface
treatment
Page 20
18
Contents/Precautions
■
Common precautions
・
Clean the terminal with a dry soft cloth
(such as used for cleaning eyeglasses).
- Do not rub it roughly with a dry cloth. The
display may be damaged.
- Drops of water or dirt left on the display may
cause stains.
- Do not use alcohol, thinner, benzine, cleaning
detergent, etc. to clean the terminal. These
chemicals may erase the printing on the
terminal or cause discoloration.
・
Clean the terminals occasionally with a
dry cotton swab.
If the jack is soiled, connection gets worse and it
may cause power to be turned off or insufficient
battery charge, so clean the jack with a dry
cotton swab etc. When cleaning, be careful not
to damage the terminals.
・
Do not leave the terminal near the air
conditioning vent.
Extreme temperature changes may produce
condensation and corrode the internal parts of
the terminal, causing it to malfunction.
・
Make sure to use the terminal etc. without
excessive force.
If you put the terminal in a bag full of items or sit
down with the terminal in the pocket of your
cloth, it may damage the display and internal
circuit board, and cause the terminal to
malfunction.
Also, while the external device is connected to
the microUSB connecting jack, headset
connecting jack or HDMI connecting jack, it may
damage the connector and cause malfunction.
・
Do not rub or scratch the display with
metal.
The display may get scratched and it may cause
malfunction or damage.
・
Make sure to see the user's manuals
supplied with the AC adapter cable.
Handling precautions
Page 21

19
Contents/Precautions
■
The terminal precautions
・
Do not press touch panel surface forcibly,
or not operate with a sharp-pointed
objects such as nail, ballpoint pen, pin,
etc.
Doing so may cause damage of touch panel.
・
Do not use the terminal in extremely hot
or cold places.
Use the terminal where the temperature ranges
between 5
℃
and 40℃ (limited to the temporary
use in a bathroom etc. when temperature is 36
℃
or more) and humidity ranges between 45% and
85%.
・
Using the terminal near ordinary phone,
television or radio may cause interference
in these electric appliances. Make sure to
move far away from them when using the
terminal.
・
Note down the information saved in the
terminal in a separate note and keep it
safely.
Under no condition will DOCOMO be held liable
for any damaged or lost data saved in the
terminal.
・
Do not drop or give a strong impact to the
terminal.
Doing so may cause malfunction or damage.
・
Do not plug the connector of the external
device into the microUSB connecting jack,
headset connecting jack or HDMI
connecting jack at the slant or pull it while
connecting.
Doing so may cause malfunction or damage.
・
The terminal could become warm while
in use and charging. This condition is not
abnormal. You can continue using the
terminal.
・
Do not leave the camera under direct
sunlight.
If you do so, some of the elements may melt or
become faded.
・
Usually use the terminal with the
connecting jack covers for microUSB/
headset/HDMI and covers for UIM card
slot and microSD card slot closed.
Failure to do so may get dust or water inside and
cause malfunction.
・
Do not remove the microSD card or
power off the terminal while using the
microSD card.
Doing so may cause data loss or malfunction.
・
Do not let magnetic cards, etc. close to
the terminal.
The magnetic data in cash cards, credit cards,
telephone cards, floppy disks, etc. may be erased.
・
Do not bring strong magnetic objects
close to the terminal.
Strong magnetic objects may cause
misoperation.
Page 22

20
Contents/Precautions
・
The internal battery is a consumable
accessory.
Even if the operating time of the terminal varies
depending on the operating conditions and
other factors, when the length of time you can
use the terminal with a fully charged battery
becomes unusually short, it is time to replace the
internal battery. For replacement of internal
battery, contact "General Inquiries" on the last
page of this manual or the DOCOMO-specified
repair office.
・
Charge the battery pack in an
environment with the proper ambient
temperature (5
℃
to 35℃).
・
The operating time of the internal battery
varies depending on the operating
environment and the secular degradation
of the internal battery.
・
Do not store the internal battery in the
following cases:
- The battery is fully charged (immediately after
the charging is complete)
- The battery has run out (the phone cannot
power on)
The performance and life of the internal battery
may deteriorate.
It is recommended that you store the internal
battery with the remaining battery level of about
40 percent as a guide.
■
The adapter precautions
・
Charge the battery pack in an
environment with the proper ambient
temperature (5
℃
to 35℃).
・
Do not charge in the following places.
- Places that are very humid, dusty or exposed to
strong vibrations.
- Near ordinary phone or TV/radio.
・
The AC adapter cable could become
warm while charging. This condition is
not abnormal. You can continue using the
terminal.
・
When using the DC adapter for charging,
do not turn off the vehicle engine.
Doing so may cause the vehicle battery run out.
・
When you use the power outlet with a
mechanism to prevent the plug from
being removed, follow the instructions on
the outlet's user's manual.
・
Do not give a strong impact to the
adapter. Also, do not bend or deform the
microUSB plug.
Doing so may cause malfunction.
■
UIM precautions
・
Do not use unnecessary force to insert/
remove the UIM.
・
Note that DOCOMO assumes no
responsibility for malfunctions occurring
as the result of inserting and using UIM
with another IC card reader/writer.
・
Always keep the IC portion clean when
you use the card.
・
Clean the terminal with a dry soft cloth
(such as used for cleaning eyeglasses).
Page 23
21
Contents/Precautions
・
Note down the information saved in the
UIM in a separate note and keep it safely.
Under no condition will DOCOMO be held liable
for any damaged or lost data saved in the
terminal.
・
Take an expended UIM to sales outlet
such as docomo Shop for proper disposal
in order to protect the environment.
・
Do not carelessly damage, contact, or
short-circuit an IC.
Doing so may cause data loss or malfunction.
・
Do not drop a UIM or subject it to impact.
Doing so may cause malfunction.
・
Do not bend a UIM or place a heavy
object on it.
Doing so may cause malfunction.
・
Do not insert the UIM on which any label
or seal is stuck into the terminal.
Doing so may cause malfunction.
■
Bluetooth function precautions
・
To secure the Bluetooth communication
security, the terminal supports the
security function compliant with
Bluetooth standards, but the security may
not be sufficient depending on the
setting. Concern about the
communication using the Bluetooth
function.
・
Please be aware that DOCOMO is not
responsible for data leak when making
data communications using Bluetooth.
・
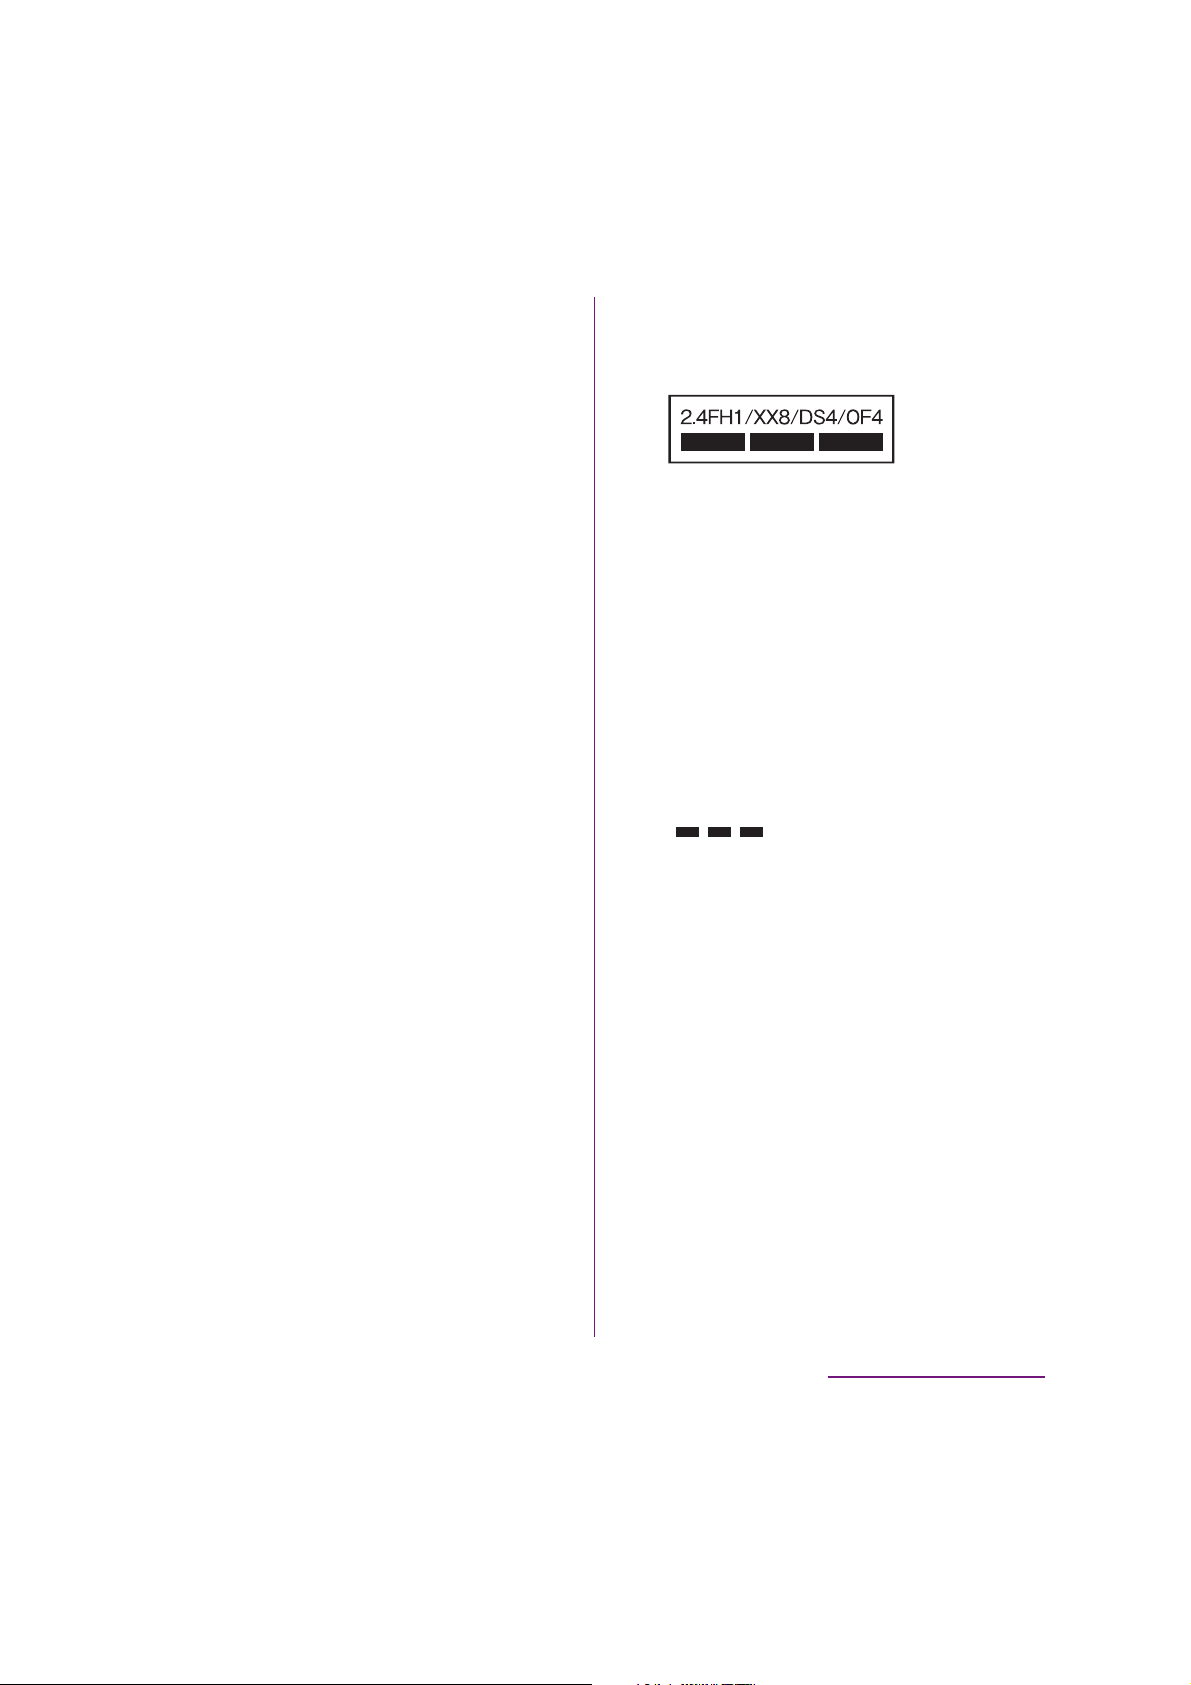
Frequency band
The frequency band used by the terminal's
Bluetooth/wireless LAN function is as follows.
2.4 : This radio equipment uses the 2400 MHz
band.
FH/XX/DS/OF
:
Modulation scheme is the
FH-SS, other system, DS-SS,
or OFDM system.
1 : The estimated interference distance is 10
m or less.
4 : The estimated interference distance is 40
m or less.
8 : The estimated interference distance is 80
m or less.
: The full band between 2400 MHz
and 2483.5 MHz is used and the
band of the mobile identification
device can be avoided.
Available channels vary depending on the
country.
For use in an aircraft, contact the airline
beforehand.
Page 24

22
Contents/Precautions
・
Bluetooth cautions
The operating frequency band of the terminal is
used by industrial, scientific, consumer and
medical equipment including microwave ovens,
premises radio stations for identifying mobile
units used in the manufacturing lines of plants
(radio stations requiring a license), specified low
power radio stations (radio stations requiring no
license) and amateur radio stations (hereinafter
referred to as "another station").
- Before using this equipment, confirm that
"another station" is not being operated nearby.
- In the event of the terminal causing harmful
radio wave interference with "another station",
promptly change the operating frequency or
stop radio wave emission by turning off the
power, etc.
- If you have further questions, contact "General
Inquiries" on the last page of this manual.
■
Wireless LAN (WLAN) precautions
・
Wireless LAN (WLAN) exchanges
information using radio waves, and allows
you to freely establish LAN connection if
you are within an area where radio wave
reaches. On the other side, if you
communicate without appropriate
security settings, communications may
be intercepted or hacked by malicious
parties. It is recommended to make
necessary security settings on your
responsibility and expense.
・
Wireless LAN
Do not use wireless LAN near magnetic devices
such as electrical appliances or AV/OA devices, or
in radio waves.
- Magnetism or radio waves may increase noises
or disable communications (especially when
using a microwave oven).
- When used near TV, radio, etc., reception
interference may occur, or channels on the TV
screen may be disturbed.
- If there are multiple wireless LAN access points
nearby and the same channel is used, search
may not work correctly.
・
2.4 GHz device cautions
The operating frequency band of the WLAN
device is used by industrial, scientific, consumer
and medical equipment including home electric
appliances such as microwave ovens, premises
radio stations for identifying mobile units used in
the manufacturing lines of plants (radio stations
requiring a license), specified low power radio
stations (radio stations requiring no license) and
amateur radio stations (radio stations requiring a
license).
- Before using the device, confirm that premises
radio stations for identifying mobile units,
specified low power radio stations and amateur
radio stations are not being operated nearby.
- If the device causes harmful radio interference
to premises radio stations for identifying
mobile units, immediately change the
frequency band or stop use, and contact
"General Inquiries" on the last page of this
manual for crosstalk avoidance, etc. (e.g.
partition setup).
Page 25

23
Contents/Precautions
- If the device causes radio interference to
specified low power radio stations or amateur
radio stations, contact "General Inquiries" on
the last page of this manual.
・
5 GHz device cautions
Channels available in Japan are as follows.
・
Outdoor use of 5GHz wireless LAN device
is prohibited by law.
■
FeliCa reader/writer function
precautions
・
FeliCa reader/writer function of the
terminal uses weak waves requiring no
licenses for radio stations.
・
It uses 13.56 MHz frequency band. When
using other reader/writers in your
surroundings, keep the terminal away
sufficiently from them. Before using the
FeliCa reader/writer, confirm that there
are no radio stations using the same
frequency band nearby.
■
Note
・
Do not use altered terminal. Using an
altered device is a violation of the Radio Law.
A "Technical Conformity Mark " affixed on the
manufacturer's specification sticker certifies that
the terminal meets technical regulations for
specified radio equipment that are based on the
Radio Law.
Channel No. (Ch)
Frequency (MHz)
5.2GHz
band
36 5,180
38 5,190
40 5,200
44 5,220
46 5,230
48 5,240
5.3GHz
band
52 5,260
54 5,270
56 5,280
60 5,300
62 5,310
64 5,320
5.6GHz
band
100 5,500
102 5,510
104 5,520
108 5,540
110 5,550
112 5,560
116 5,580
118 5,590
120 5,600
124 5,620
126 5,630
5.6GHz
band
128 5,640
132 5,660
134 5,670
136 5,680
140 5,700
Channel No. (Ch)
Frequency (MHz)
Page 26

24
Contents/Precautions
If you remove the screws and alter the inside of
the terminal, the technical regulations
conformity certification becomes invalid.
Do not use the terminal with the certification
invalid, as it is a violation of the Radio Law.
・
Be careful when using the terminal while
driving.
Using a handheld mobile phone while driving
will result in a penalty.
However, absolutely necessary cases such as
rescue of a sick person or maintaining public's
safety are exempted.
・
Use the FeliCa reader/writer function only
in Japan.
FeliCa reader/writer function of the terminal
conforms to Japanese radio standards. If you use
this function overseas, you may be punished.
・
Do not alter the basic software illegally.
It is regarded as the software modification and
Repairs may be refused.
Page 27

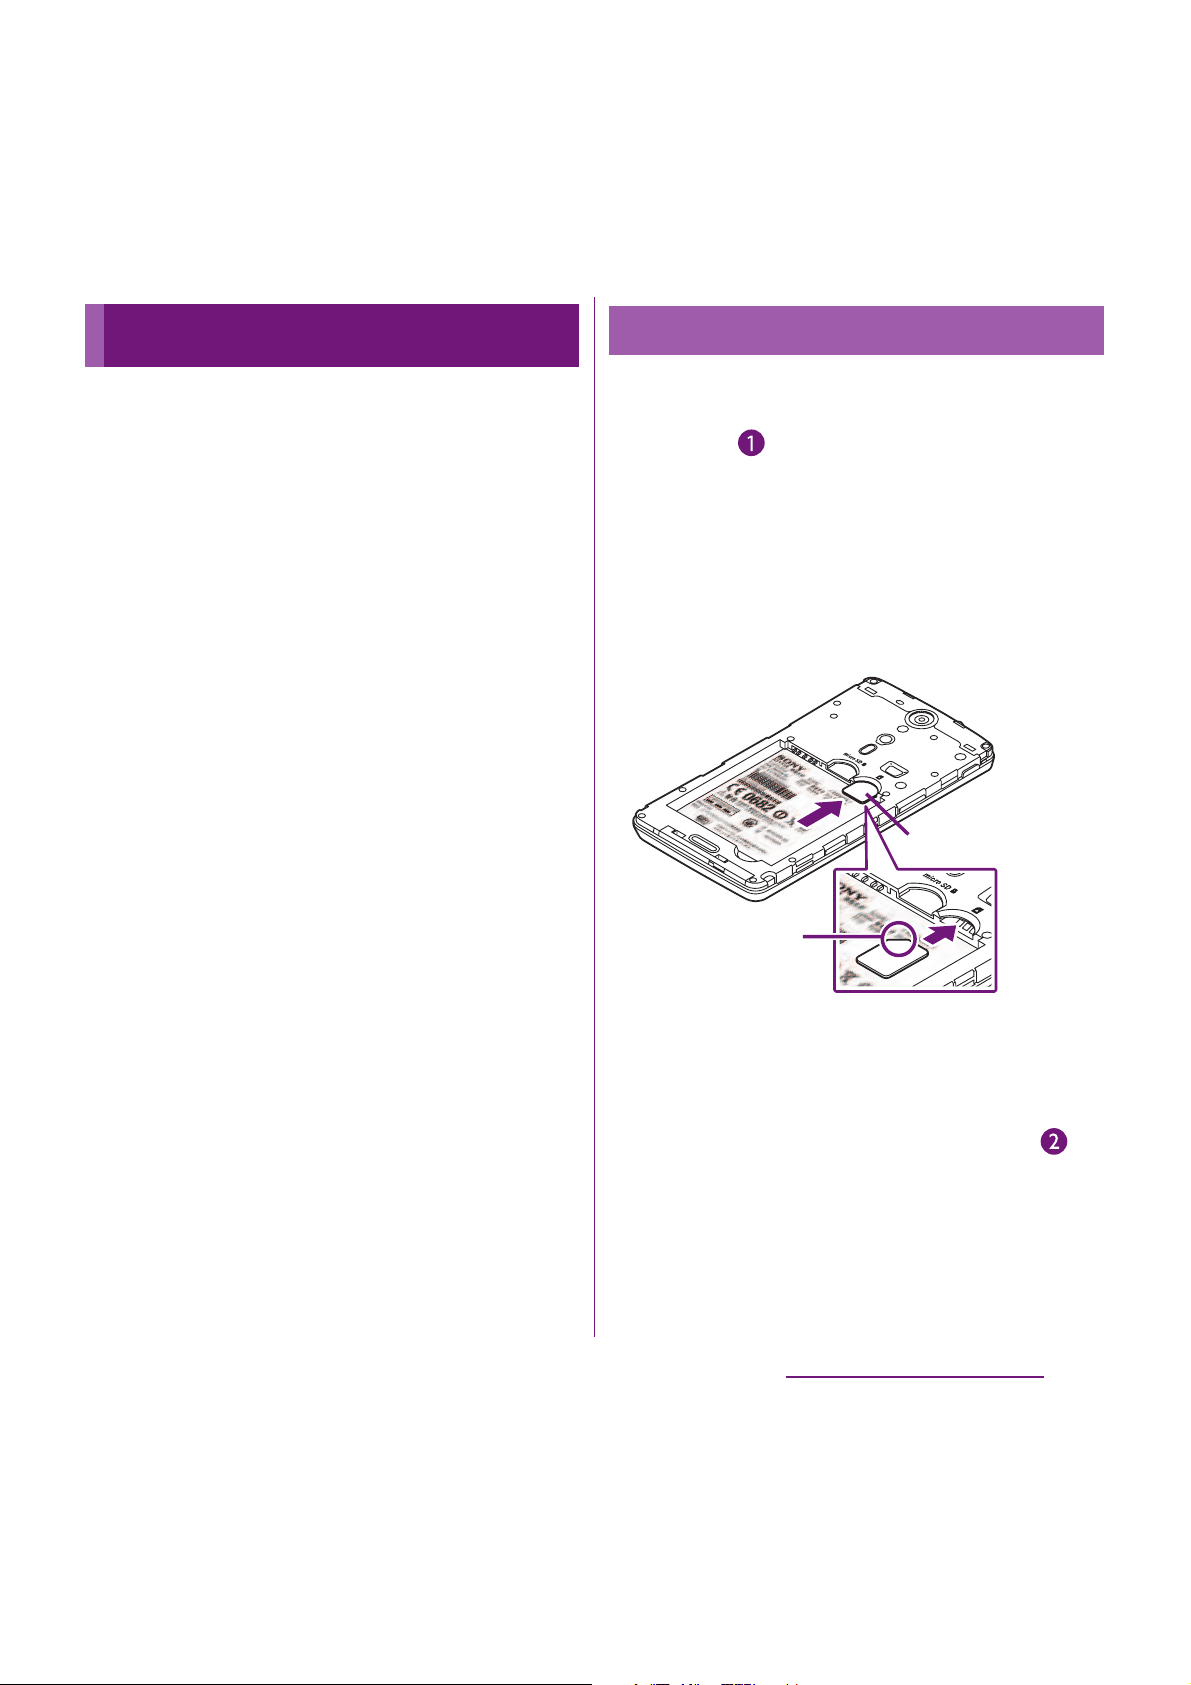
25
Before Using the Terminal
a
Light sensor : Used for auto controlling of the screen
brightness.
b
Proximity sensor : Turns on or off the touch screen
to prevent misoperation during a call.
c
Ear speaker
d
Front camera lens
e
Notification LED
f
Touch screen
g
GPS antenna section*
h
Camera lens
i
Xi/Wi-Fi/Bluetooth antenna section*
j
Photo light
k
mark
l
Second microphone : Reduce noise to make easy to
listen.
m
Speaker
n
Xi antenna section*
o
Power key/Screen lock key
p
Strap hole
q
Connector for microUSB cable
r
Volume key/Zoom key
s
Camera key
t
Headset connector
u
Microphone
* The antenna is built into the main body. Covering around
the antenna with your hand may affect the quality.
❖
Note
・
Do not put stickers etc. on each sensors.
Part names and functions
j
l
m
n
s
k
g i t
u
h
o
q
r
p
a
b
c d e
f
Page 28
26
Before Using the Terminal
The UIM is an IC card recorded user
information such as your phone number etc.
If the UIM is not inserted to the terminal, you
cannot use some functions (phone function,
etc.) of the terminal.
・
In this terminal, the UIM (blue) is not available.
If you have a UIM (blue), bring it to the nearest
docomo Shop to replace.
・
Do not use docomo mini UIM card attaching
with conversion adapter. Doing so may cause
malfunction.
・
When inserting/removing the UIM, make sure
to power off the terminal. Do not connect the
AC Adapter cable.
❖
Information
・
Please be careful not to touch or scratch a metal part
(IC) when you handle the UIM. Doing so may cause
malfunction or damage.
■
Security codes of the UIM
The UIM has a Security code, namely PIN. It
is set "0000" at the subscription. They can be
changed by yourself. (P.127)
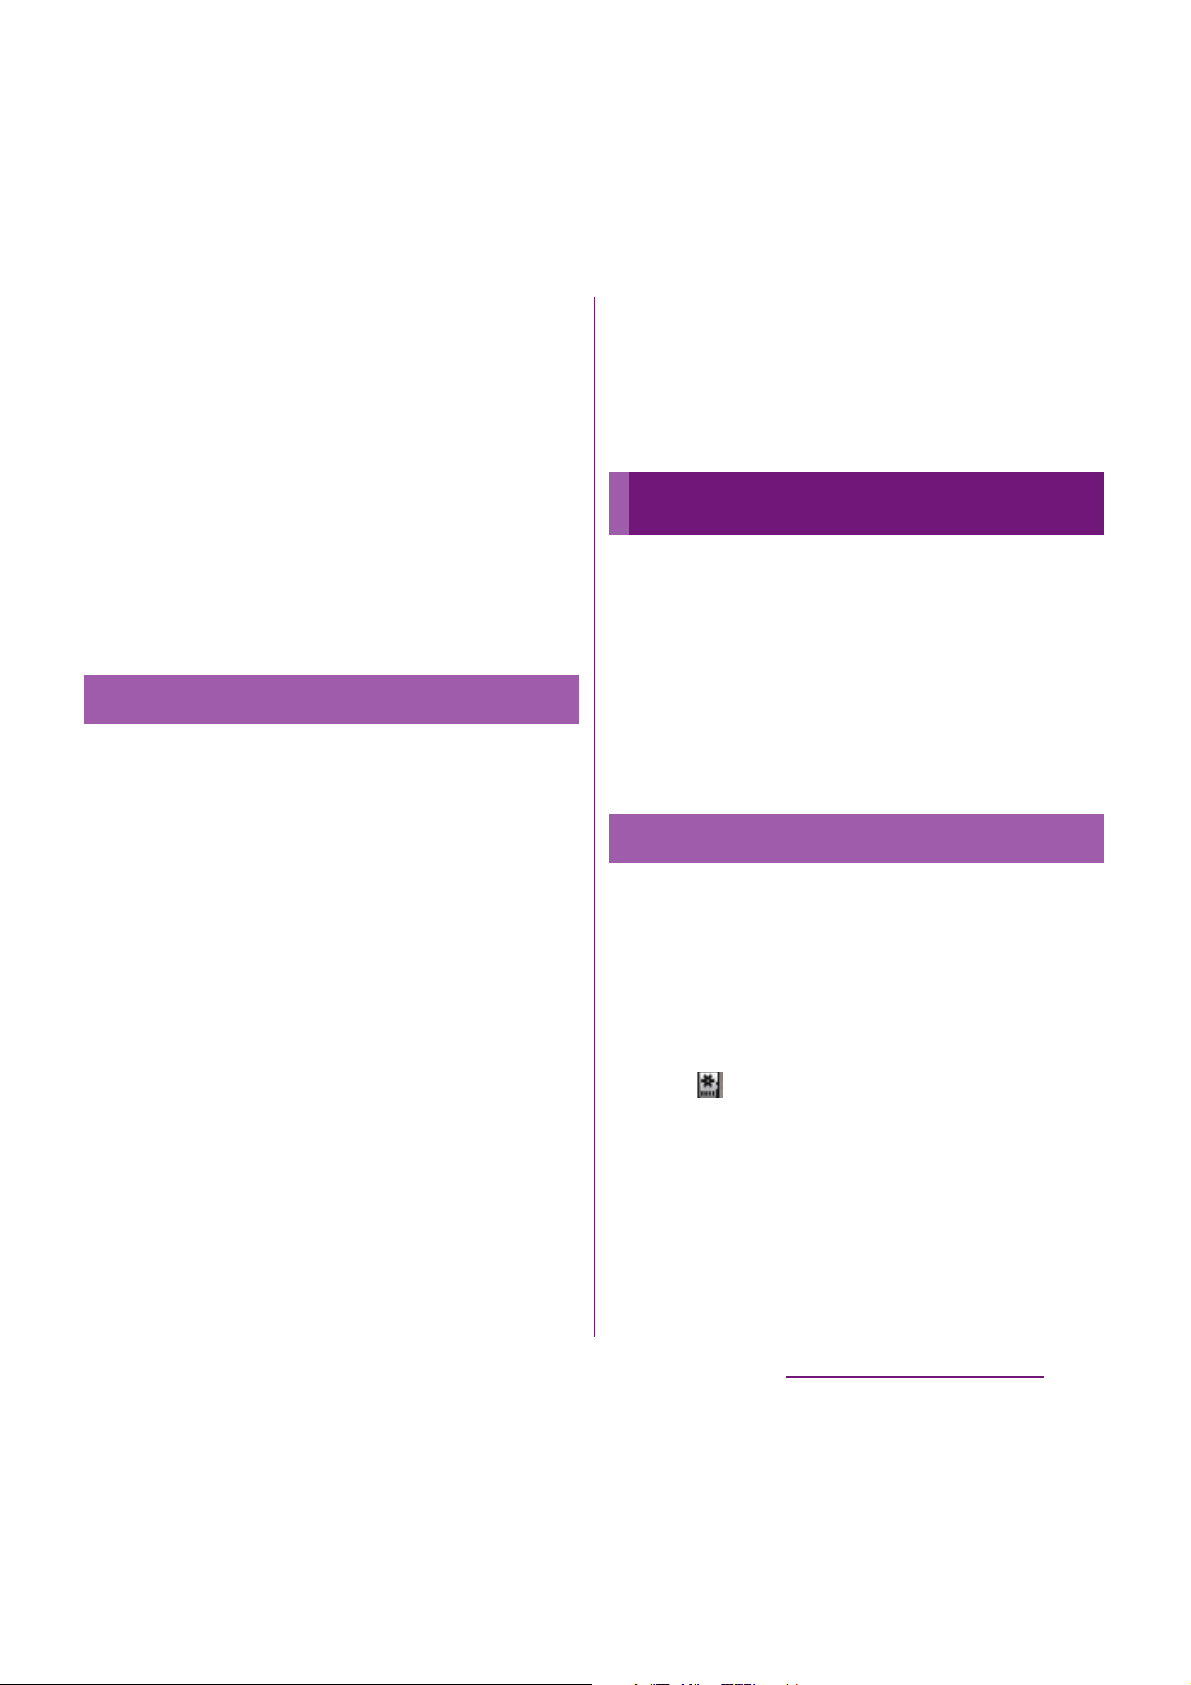
1
Open the UIM card slot cover, hook
your fingernail by the projection
part ( ) on the edge of the tray to
pull the tray straight out, and then
insert it straight along with the
tray with metal part (IC) of the UIM
down.
・
Check the orientation of UIM corner
cut.
2
Push the tray straight to the end,
close the UIM card slot cover, and
then confirm there is no gap
between the body and cover ( ).
UIM
Inserting UIM
Corner cut
UIM
Page 29
27
Before Using the Terminal
1
Open the UIM card slot cover, hook
your fingernail by the projection
part on the edge of the tray to pull
the tray straight out, and then
remove the UIM.
2
Push the tray straight to the end,
close the UIM card slot cover, and
then confirm there is no gap
between the body and cover.
You can use microSD card for any other
compatible devices.
・
The terminal supports microSD card of up to
2GB, and microSDHC card of up to 32GB (As of
February, 2012).
・
For compatible microSD cards, contact
manufacturers of microSD cards.
1
Open the microSD card slot cover,
check the orientation of microSD
card to insert it slowly straight into
the terminal until it clicks.
・
Insert the microSD card with metal
contacts side up.
・
" Preparing SD card" appears on the
status bar to notify that reading or
writing from/onto microSD card
becomes enabled.
Removing UIM
microSD card
Inserting microSD card
Page 30

28
Before Using the Terminal
2
Close the microSD card slot cover
and confirm there is no gap
between the body and cover ( ).
Make sure to unmount (disable reading and
writing) microSD card before removing.
1
From the Home screen, tap
t
and tap
[Settings]
u
[Storage]u[Unmount
SD card].
・
When unmounting microSD card, "
SD card safe to remove" appears in the
status bar to notify that reading or
writing from/onto microSD card
becomes disabled.
2
Open the microSD card slot cover
and insert the microSD card
straight into the slot all the way
until it clicks.
3
Pull out microSD card slowly.
・
" Removed SD card" appears on the
status bar to notify that microSD card is
removed.
Removing microSD card
Page 31
29
Before Using the Terminal
4
Close the microSD card slot cover
and confirm there is no gap
between the body and cover.
❖
Information
・
If you remove the microSD card without
unmounting, " SD card unexpectedly removed"
appears in the status bar and files may be damaged
or data may be lost.
The battery pack is not full charged when you
purchased the terminal.
Charging time is an estimate of the time
required to charge a completely empty
internal battery. Charging under low
temperature requires longer time.
The following time varies by the internal
battery condition or operating environment.
For details, see (P.256).
・
The internal battery is a consumable
accessory. The usage duration of the battery
per one charge decreases gradually each time
the battery is recharged.
・
When the usage duration per one charge
becomes about half of a new battery pack,
the life of the internal battery is assumed to be
almost over. It is recommended that you
replace the battery pack ahead of time.
Charging
Charging time
AC Adapter Cable SO03
(supplied accessory)
Approx. 190 min.
DC adapter 03 (Optional) Approx. 190 min.
Operation time on full charge
(estimate)
Continuous
stand-by time
FOMA/3G Approx. 410 hours
(stationary)
GSM Approx. 290 hours
(stationary)
Continuous
call time
FOMA/3G Approx. 430 min.
GSM Approx. 400 min.
Internal battery life
Page 32
30
Before Using the Terminal
・
The supplied AC adapter's power plug is
compatible with AC 100 V to 240 V. For using
the terminal overseas, a plug adapter that fits
the electrical outlets in the country you stay is
needed. Do not use an electrical transformer
for overseas use to charge the terminal.
・
Use the supplied AC Adapter cable for
charging.
・
When charging starts, the notification LED
turns on in red/orange/green. Green means
the remaining battery level reaches 90% or
more. To check the battery level, tap
t
from the Home screen, then tap
[Settings]
u
[About phone]u[Status] and
check "Battery level". When charging is
completed, "100%" is displayed in the battery
level.
・
When you start charging the battery with the
terminal powered off, the power turns on.
However, you cannot operate the terminal.
Do not charge the battery in a place where
the use is prohibited such as in airplane or
hospital.
Do not charge the battery pack for a
long time (several days)
・
If you remain charging the terminal for a long
time, the power supply starts from the
internal battery after completion of charging.
The usage time duration may be short. In that
case, please charge it again correctly. For
recharging, remove the terminal from the AC
Adapter cable and reconnect it again.
For charging, attach the backside cover to the
terminal. For the backside cover, see "Part
names and functions" (P.29).
1
Insert the supplied microUSB
cable with the microUSB plug
engraved side facing up into the
connecting jack of the supplied
desktop holder ( ).
2
Insert the microUSB cable
horizontally with the USB plug
engraved side facing up into the
USB connecting jack of the
supplied AC Adapter, and insert
the AC Adapter plug to the power
outlet.
Charging
Charging with the desktop
holder
Page 33

31
Before Using the Terminal
3
Insert the terminal to the desktop
holder.
4
After charging is finished, remove
the terminal from the desktop
holder, and then remove the AC
adapter from the power outlet.
❖
Note
・
The battery cannot be charged by connecting the
desktop holder and a PC.
・
If the microUSB cable is connected into the
connecting jack of the desktop holder for charging
using the desktop holder, the terminal is
automatically powered on although the operations
are not available. Be careful not to connect the
microUSB cable in a place where the use is
prohibited such as in airplane or hospital.
・
Check the connecting direction to connect correctly.
Wrong connection may cause damage.
Page 34
32
Before Using the Terminal
1
Open the microUSB connecting
jack cover, and insert the
microUSB cable horizontally with
the microUSB plug engraved
side facing down into the
microUSB connecting jack of the
terminal.
2
Insert the microUSB cable
horizontally with the USB plug
engraved side facing up into the
USB connecting jack of the
supplied AC Adapter, and insert
the AC Adapter plug to the power
outlet.
3
When the charging is completed,
remove the microUSB plug of the
microUSB cable from the terminal.
4
Remove the AC Adapter from the
power outlet.
❖
Note
・
If the microUSB cable is connected into the USB
connecting jack for charging etc., the terminal is
automatically powered on although the operations
are not available. Be careful not to connect the
microUSB cable in a place where the use is
prohibited such as in airplane or hospital.
1
Open the microUSB connecting
jack cover, and insert the
microUSB cable horizontally with
the microUSB plug engraved
side facing down into the
microUSB connecting jack of the
terminal.
2
Insert the USB plug of the
microUSB cable horizontally into
the USB port of a PC.
・
When "PC Companion software" screen
appears on the terminal, tap [Skip].
・
When a screen for new hardware
detection etc. appears on the PC, select
[Cancel].
3
When the charging is completed,
remove the microUSB plug of the
microUSB cable from the terminal.
4
Remove the USB plug of the
microUSB cable from the USB port
of the PC.
❖
Note
・
If the microUSB cable is connected into the USB
connecting jack for charging etc., the terminal is
automatically powered on although the operations
are not available. Be careful not to connect the
microUSB cable in a place where the use is
prohibited such as in airplane or hospital.
Charging with AC adapter Charging with a PC
Page 35
33
Before Using the Terminal
・
Check the connecting direction to connect correctly.
Wrong connection may cause damage.
1
Press and hold
p
for over a
second.
・
The key unlock screen appears.
2
Deactivate the key lock.
・
For deactivating the key lock, see
"Unlocking the keys" (P.39).
❖
Information
・
The first time you turn on, "Setup guide" (P.39)
appears.
・
If you activate the screen lock (P.127) or SIM card lock
(P.126), a canceling the screen lock/PIN code entry
screen appears when turning power on and
canceling the key lock. For canceling the screen lock,
see "Unlocking the screen" (P.128), and for canceling
SIM card lock, see "Entering the PIN code when
powered on" (P.126).
Turning power on/off
Turning power on
Page 36
34
Before Using the Terminal
1
Press and hold
p
for over a
second.
・
Phone options menu appears.
2
Tap [Power off].
3
Tap [OK].
You can force the terminal quit if the screen
does not respond or the power cannot be
turned off.
1
Press and hold
p
and upper of
m
at the same time for
approximately 10 seconds.
2
Lift up your finger after the
terminal vibrates 3 times.
・
The terminal is forced quit and the
power turns off.
❖
Information
・
To restart the terminal, press
p
and upper of
m
at the same time for approximately 5
seconds, and release your fingers after the terminal
vibrates once.
When the key lock is set, the screen light
turns off. You can avoid the touch screen or
button from false operations.
・
The terminal keys are locked with turning the
screen light off after the specified time
duration.
1
Press
p
.
❖
Information
・
For details on settings for turning the backlight off
and the duration of time before the key lock
activation, see "Adjusting the idle time before the
screen turns off" (P.123).
・
There is no function to deactivate the key lock.
・
You can check the notifications or activate
application even if you do not unlock the keys. For
details, refer to "Setting information displayed on the
key unlock screen" (P.123).
・
If you set the screen lock, entering the pattern, PIN or
password is needed when the key lock is canceled.
For setting the screen lock, see "Screen lock" (P.127).
Turning power off
Performing force-quit
Setting key lock
Page 37
35
Before Using the Terminal
A key unlocking screen appears when
turning the power on or the backlight on by
pressing
p
.
1
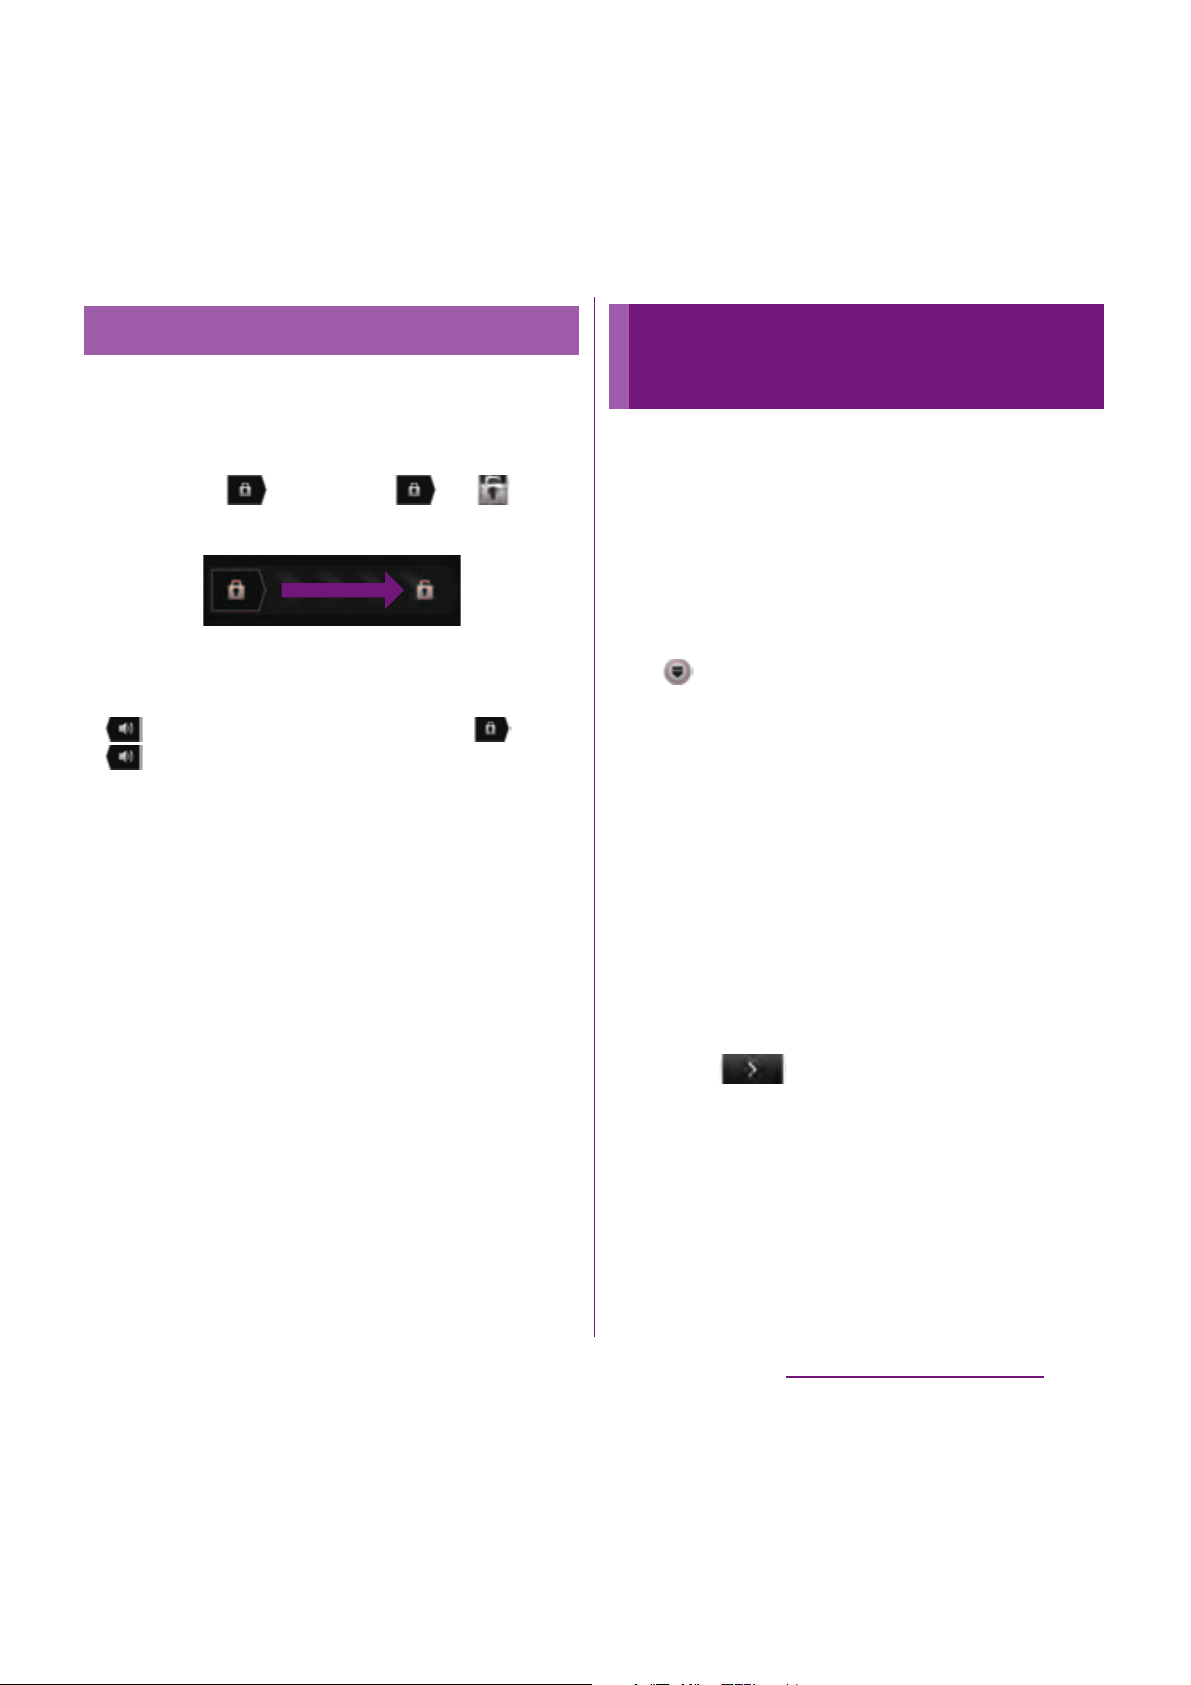
Touch and drag to until
it laps over.
❖
Information
・
appears on the right until you touch . Touch
and drag left to switch the manner mode on
and off without unlocking the keys or screen lock.
When you turn on the terminal for the first
time, Setup guide appears to set up the
display language, wireless network, online
services, etc. and to import contacts.
❖
Information
・
You can set or change the items later as required.
To change the settings later, from the Home screen,
tap , then tap [Settings] or [Setup guide] to set up
from the menu.
1
Press and hold
p
for over a
second.
・
A screen for selecting language
appears.
2
Tap [English (United
States)]
u
[Done].
・
"Welcome!" screen appears and you
can learn how to use the function and
make initial settings.
3
Tap .
・
The Internet connection screen
appears. Tap [Mobile network and WiFi] or [Wi-Fi only] to select.
Unlocking the keys
Key lock
Initial settings (Setup
guide)
Page 38
36
Before Using the Terminal
4
Tap .
・
The wireless network screen appears.
Tap [Search for networks] to add Wi-Fi
network.
5
Tap .
・
A service screen appears. Make settings
of "Google (P.132)", "Facebook (P.133)",
"Exchange ActiveSync (P.144)".
6
Tap .
・
Automatic renewal screen appears. Tap
[Synchronize automatically] or [No
thank you] to select.
7
Tap .
・
The import contacts screen appears.
For information on import contacts, see
"Using PhoneBookCopy" (P.94).
8
Tap .
・
Preferred applications screen appears.
Tap either [doocmo applications] or
[Xperia™ applications] to select.
9
Tap
u
[Finish].
・
Initial settings (Setup guide) end and an
initial setting screen for docomo service
appears.
10
Tap .
・
Application batch installation screen
appears. Tap [Install] or [Not install] to
select.
11
Tap .
・
Osaifu-Keitai screen appears. Tap [Set]
or [Not set] to select. If you select [Set],
the initial setting screen for OsaifuKeitai appears. Follow the onscreen
instructions.
12
Tap .
・
A setting screen for docomo
application password appears. Tap [Set]
and enter a password.
13
Tap .
・
A setting screen for location provision
appears. Tap any of [Location providing
ON]/[Location providing OFF]/
[Unknown blocking] to select.
14
Tap
u
[OK].
・
A home screen appears.
❖
Information
・
Make sure to check if the data connection is available
(3G/GPRS) before setup online services. For checking
the data connection status, see "Status icon" (P.41).
Page 39
37
Before Using the Terminal
A status bar appears at the top of the screen.
In the status bar, the terminal status and
notification are displayed. Notification icons
appear on the left side, and the terminal
status icons appear on the right side of the
status bar.
❖
Note
・
If you cancel the "status bar" of applications forcibly
(P.130), operations may not be performed correctly.
The main status icons displayed on the
screen are as follows.
The main notification icons displayed on the
screen are as follows.
Status bar
Status icon
Signal strength
During International roaming
No signal
HSDPA available
Communicating in HSDPA
GPRS available
Communicating in GPRS
3G (packet) available
Communication in 3G (packet)
Status bar
Connecting to Wi-Fi
Connecting to Wi-Fi using AutoIP function
Bluetooth function is ON
Connecting to Bluetooth device
Positioning with GPS
During Data synchronization
Airplane mode activated
Silent mode (vibration) ON
Sound OFF (Ringtone volume 0)
Speakerphone ON
Microphone set to mute
Alarm is set
Battery status
The battery is charging
UIM is locked or not inserted
Notification icon
New email message
New Gmail message
New message (SMS)
Problem with message (SMS) delivery
New instant message
New Area Mail
New Facebook message
Uploading data to Facebook
Uploading data to Facebook completed
Page 40
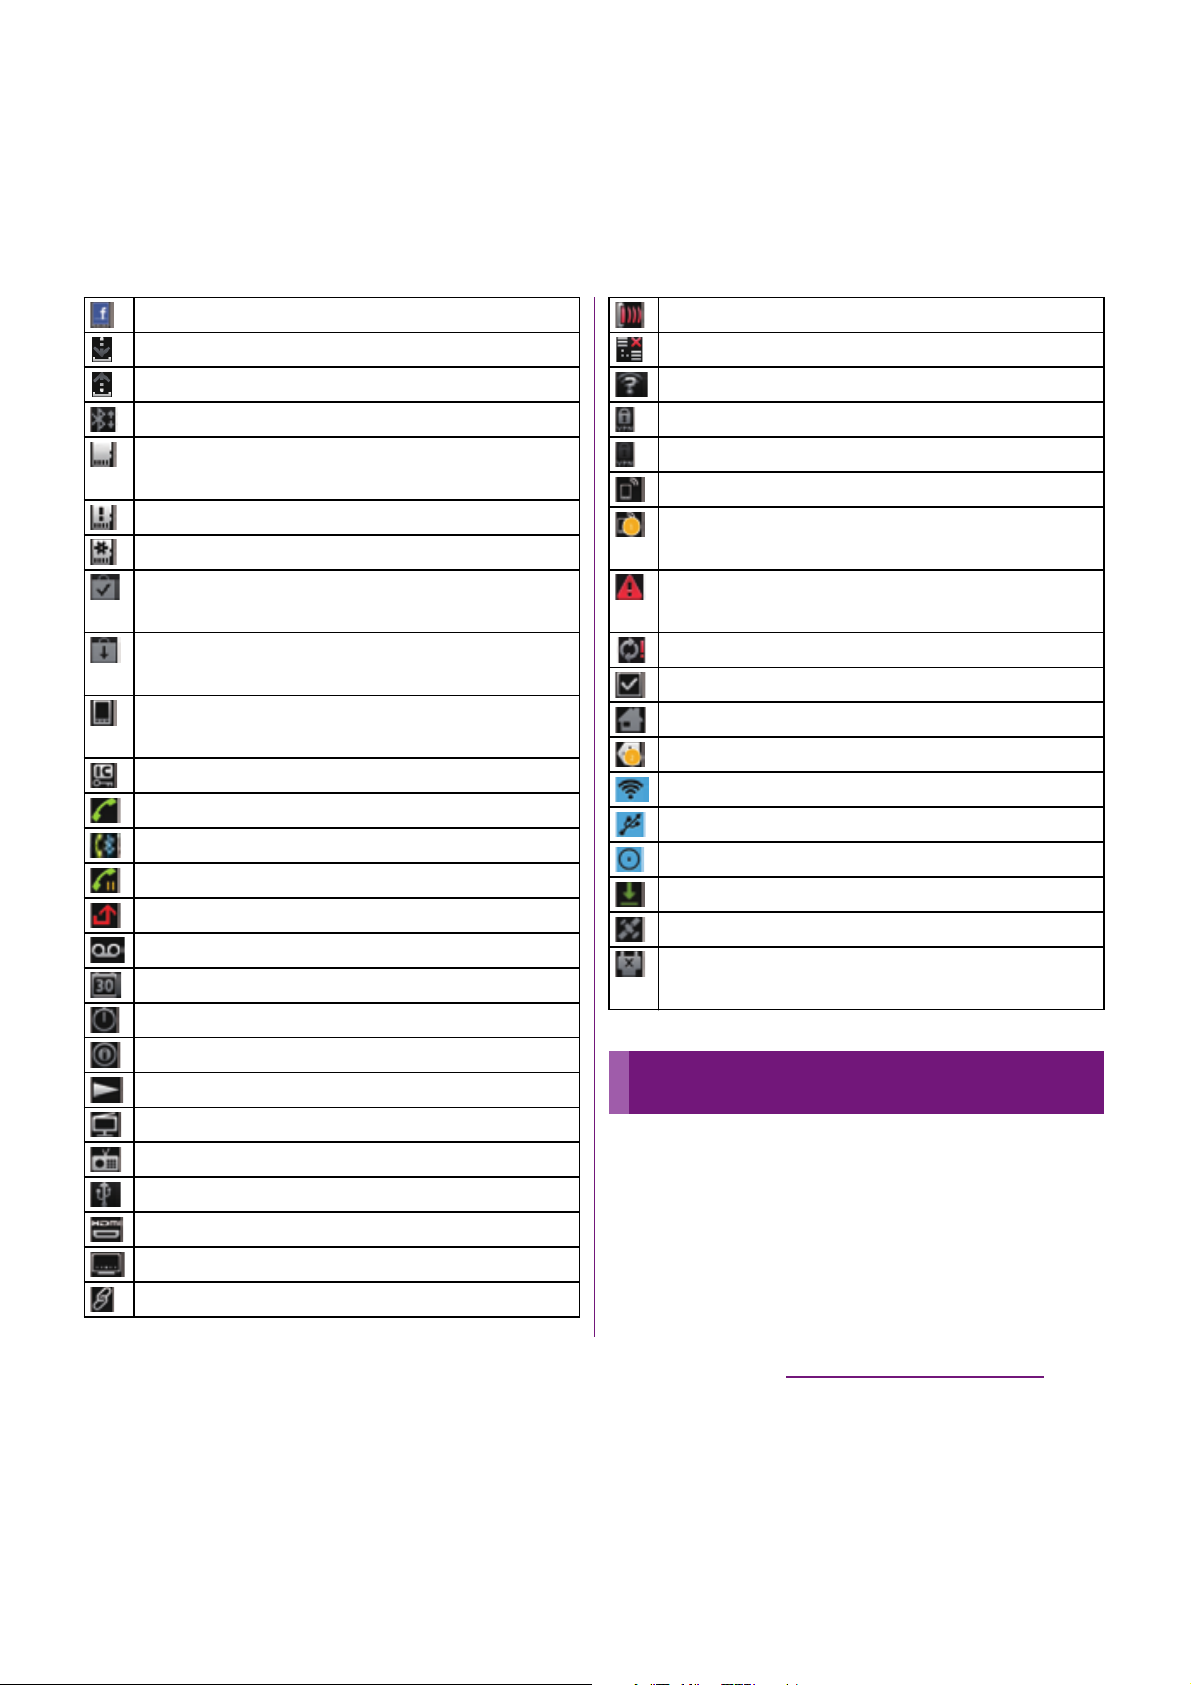
38
Before Using the Terminal
Notification icons are displayed in the
Notification panel. You can open
notifications, such as messages, remainders,
or event notifications directly from the
Notification panel.
Facebook setting request notification
Receiving/Downloading data
Sending/Uploading data
Bluetooth connection request notification
Unmount microSD card to remove (reading/
writing unavailable)
microSD card is removed
Preparing microSD card/internal storage
Installation is completed (when installing
applications from Android Market, etc.)
Update notification (when update of the
installed market application is notified)
Software update notification or updating
software
Osaifu-Keitai lock is activated
Making or receiving a call, during a call
Calling with Bluetooth device
Call on hold
Missed call
New voice mail
Upcoming calendar event
Stopwatch is running
Timer is set
Playing a track
Activating 1Seg
FM radio in use
USB connected
HDMI connected
Available to activate TV launcher
Accessory connected
Communicating via Infrared
Data communication invalid
Wi-Fi open network available
Connecting to a VPN
Not connected to a VPN
Media server executed in Connected Device
Media server connection request notification by
Connected devices
Red: Error messages
Yellow: Warning messages
Problem with sync
Setup guide unchecked
Personal area notification
More (undisplayed) notifications
Setting Wi-Fi tethering
Setting USB tethering
Setting Wi-Fi tethering and USB tethering
Backing up/restoring
AUTO-GPS is set
Green Heart energy saving icon (remove the AC
adapter from the power outlet)
Notification panel
Page 41
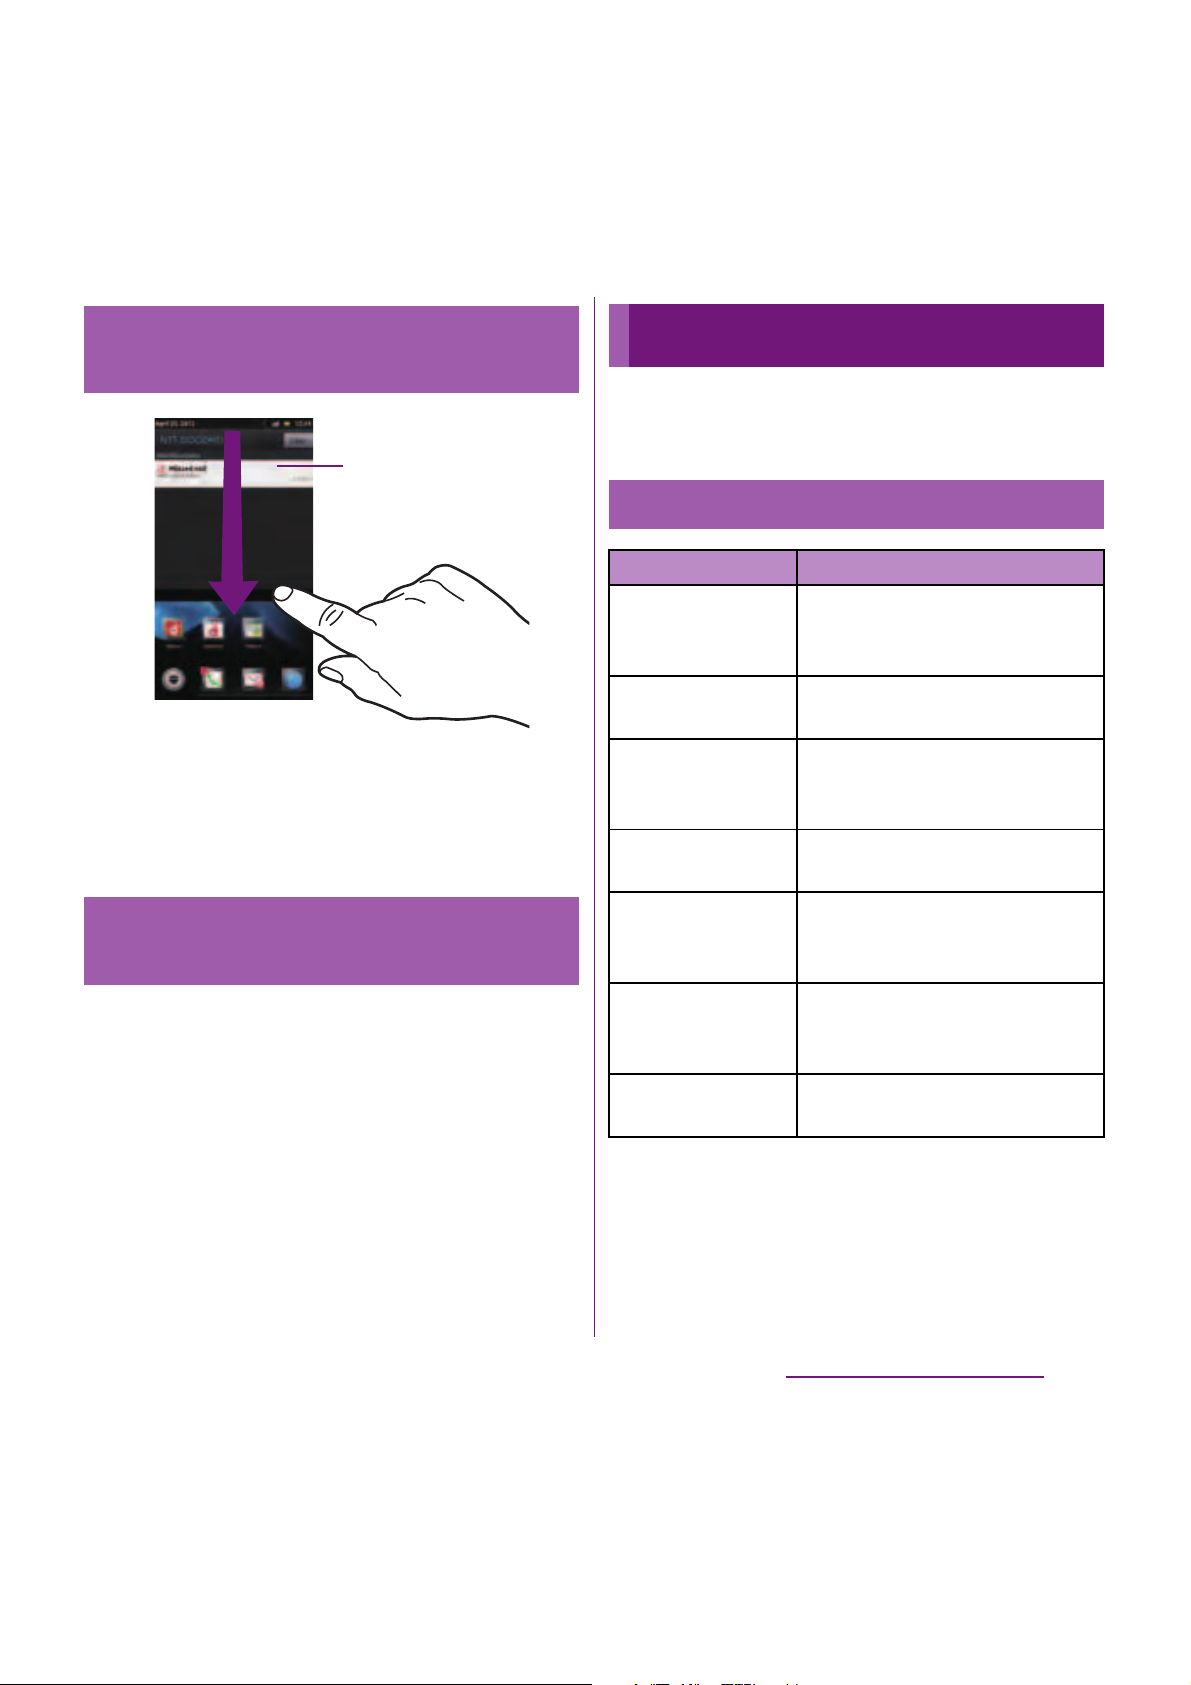
39
Before Using the Terminal
1
Drag the status bar downwards.
・
Tap
x
to close the notification
panel.
1
On the Notification panel, tap
[Clear].
❖
Information
・
Some notifications cannot be cleared.
Notification LED provides information on the
terminal status, incoming/receiving, etc.
Opening/Closing the
Notification panel
Clearing contents on the
Notification panel
Notication panel
Notification LED
LED status
Status Indication
Red
The battery is charging when the
remaining battery level is 10% or
less.
Flashing red
The remaining battery level is
10% or less.
Green
The battery is charging when the
remaining battery level is 90% or
more.
Flashing green
Received Gmail mails while
backlight is off exist.
Flashing blue
While backlight is off, missed
calls/incoming messages (SMS)/
new email messages are notified.
Orange
The battery is charging when the
remaining battery level is 11% 89%.
Flashing white
microSD card is mounted/
unmounted.
Page 42
40
Before Using the Terminal
* In this manual, each key operation is described with
x, y, t
.
Precautions on using touch screen
・
Touch screen is designed for being touched
lightly with fingers. Do not push it forcibly
with a finger or press it with sharp objects
(nail, ballpoint pen, pin, etc.).
・
Touching the touch screen may not work in
the following cases. Note that it may cause
malfunction.
- Operation with gloved hands
- Operation with tip of fingernail
- Operation with foreign object on the screen
- Operation with protective sheet or seal on
the screen
Operations on the touch screen
■
Tap
Touch an item such as icon or menu with
your finger lightly and release it.
・
Double-tap means tapping twice quickly.
■
Touch
Touch and hold an icon or menu item long.
■
Drag
Touch the screen, drag to the desired
position and release the finger.
Basic operations
Basic key operation
x
Back
・
Go back to the previous screen. Or
close a dialog box, Option menu,
or the Notifications panel.
・
Close the software keyboard.
y
Home
・
Go to the Home screen.
・
Touch and hold down to open a list
of recently used applications.
t
Menu
・
Open a list of options available in
the Home screen or application.
・
Touching and holding down when
entering characters switches
display/not display the software
keyboard.
Using the touch screen
Page 43
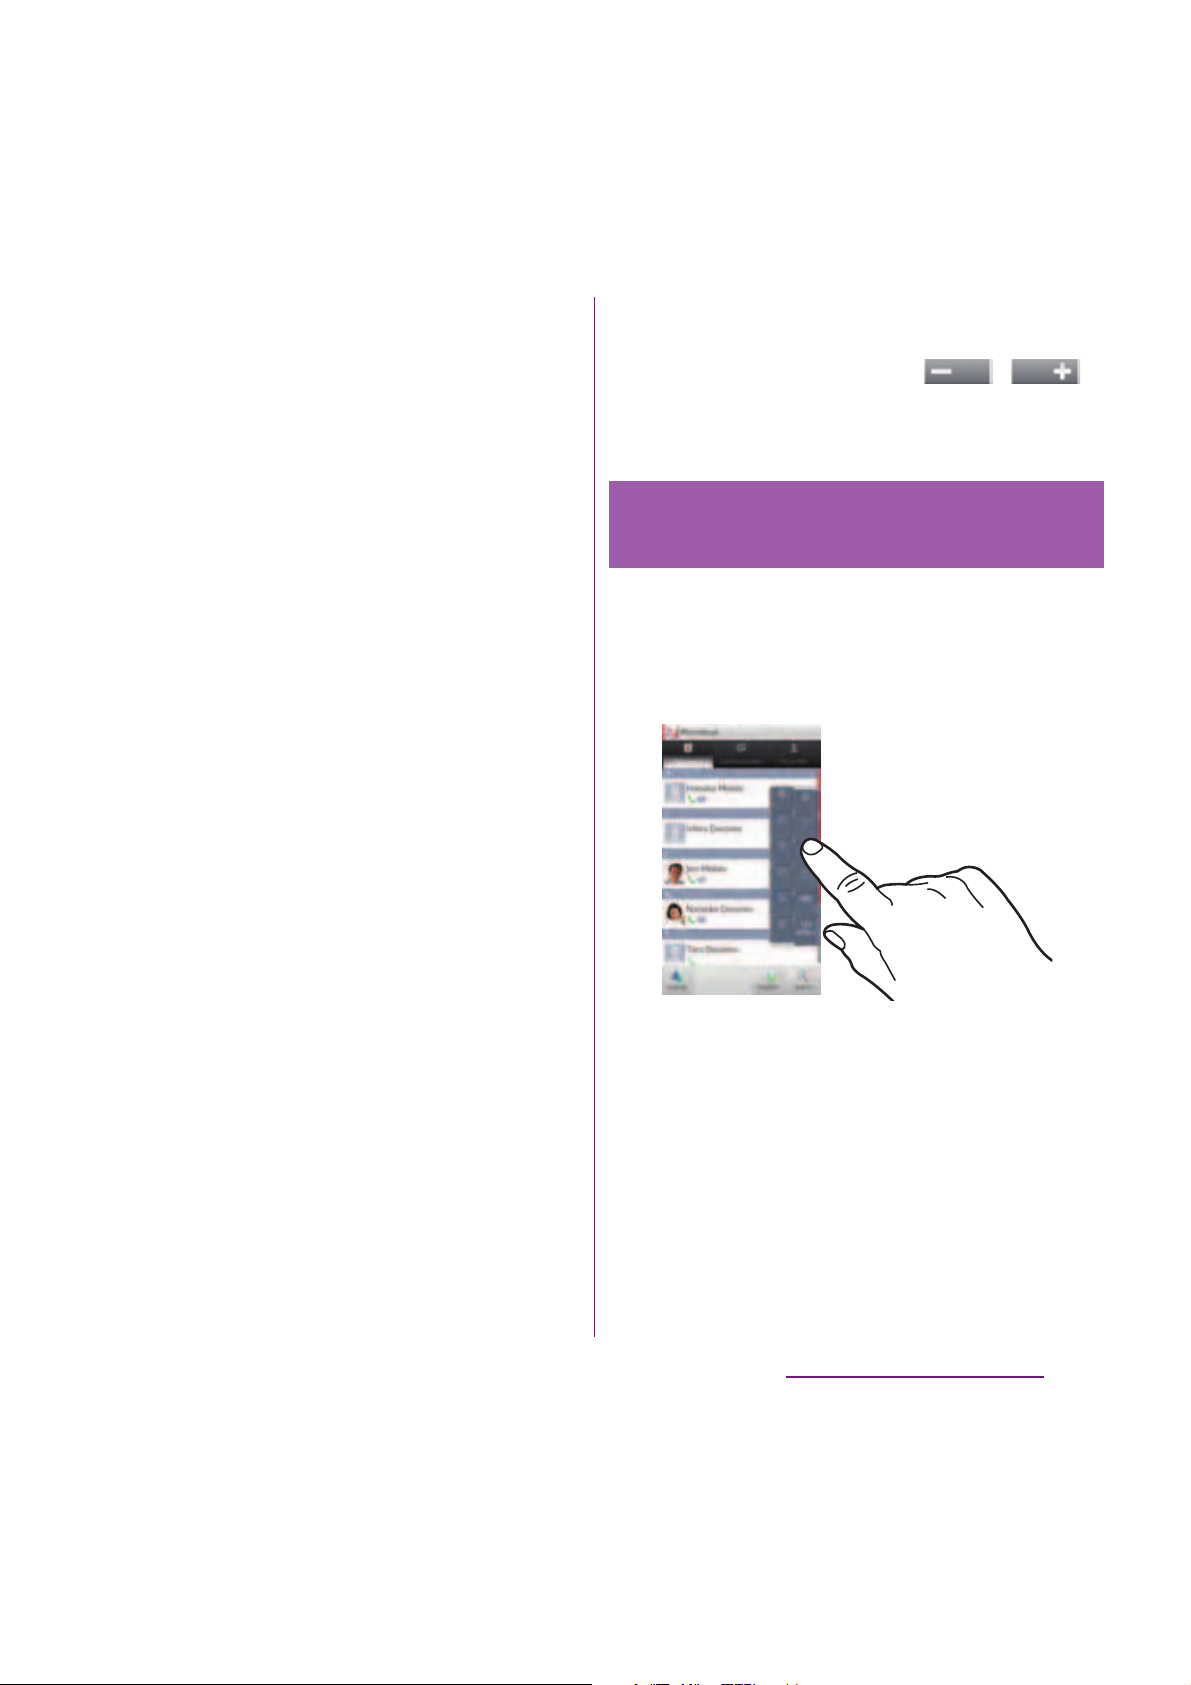
41
Before Using the Terminal
■
Flick
Stroke the screen with your finger lightly
and flick up/down/left/right. Flick operation
is used to switch or scroll the screen.
■
Pinch
Touch the screen with two fingers and
widen (pinch-out) or narrow (pinch-in) the
fingers' distance. On some screens, pinchout to zoom in and pinch-in to zoom out.
❖
Information
・
You can zoom in or out also by double-tapping or by
tapping the zoom control icons ( / ).
The zoom control icons may appear when you drag
in any direction on the screen.
Tap the right end of the screen to display
index characters with which you can search
by Japanese syllabary and alphabetic order.
・
Tap the index character to move on the list.
Selecting items quickly from a
list
Page 44
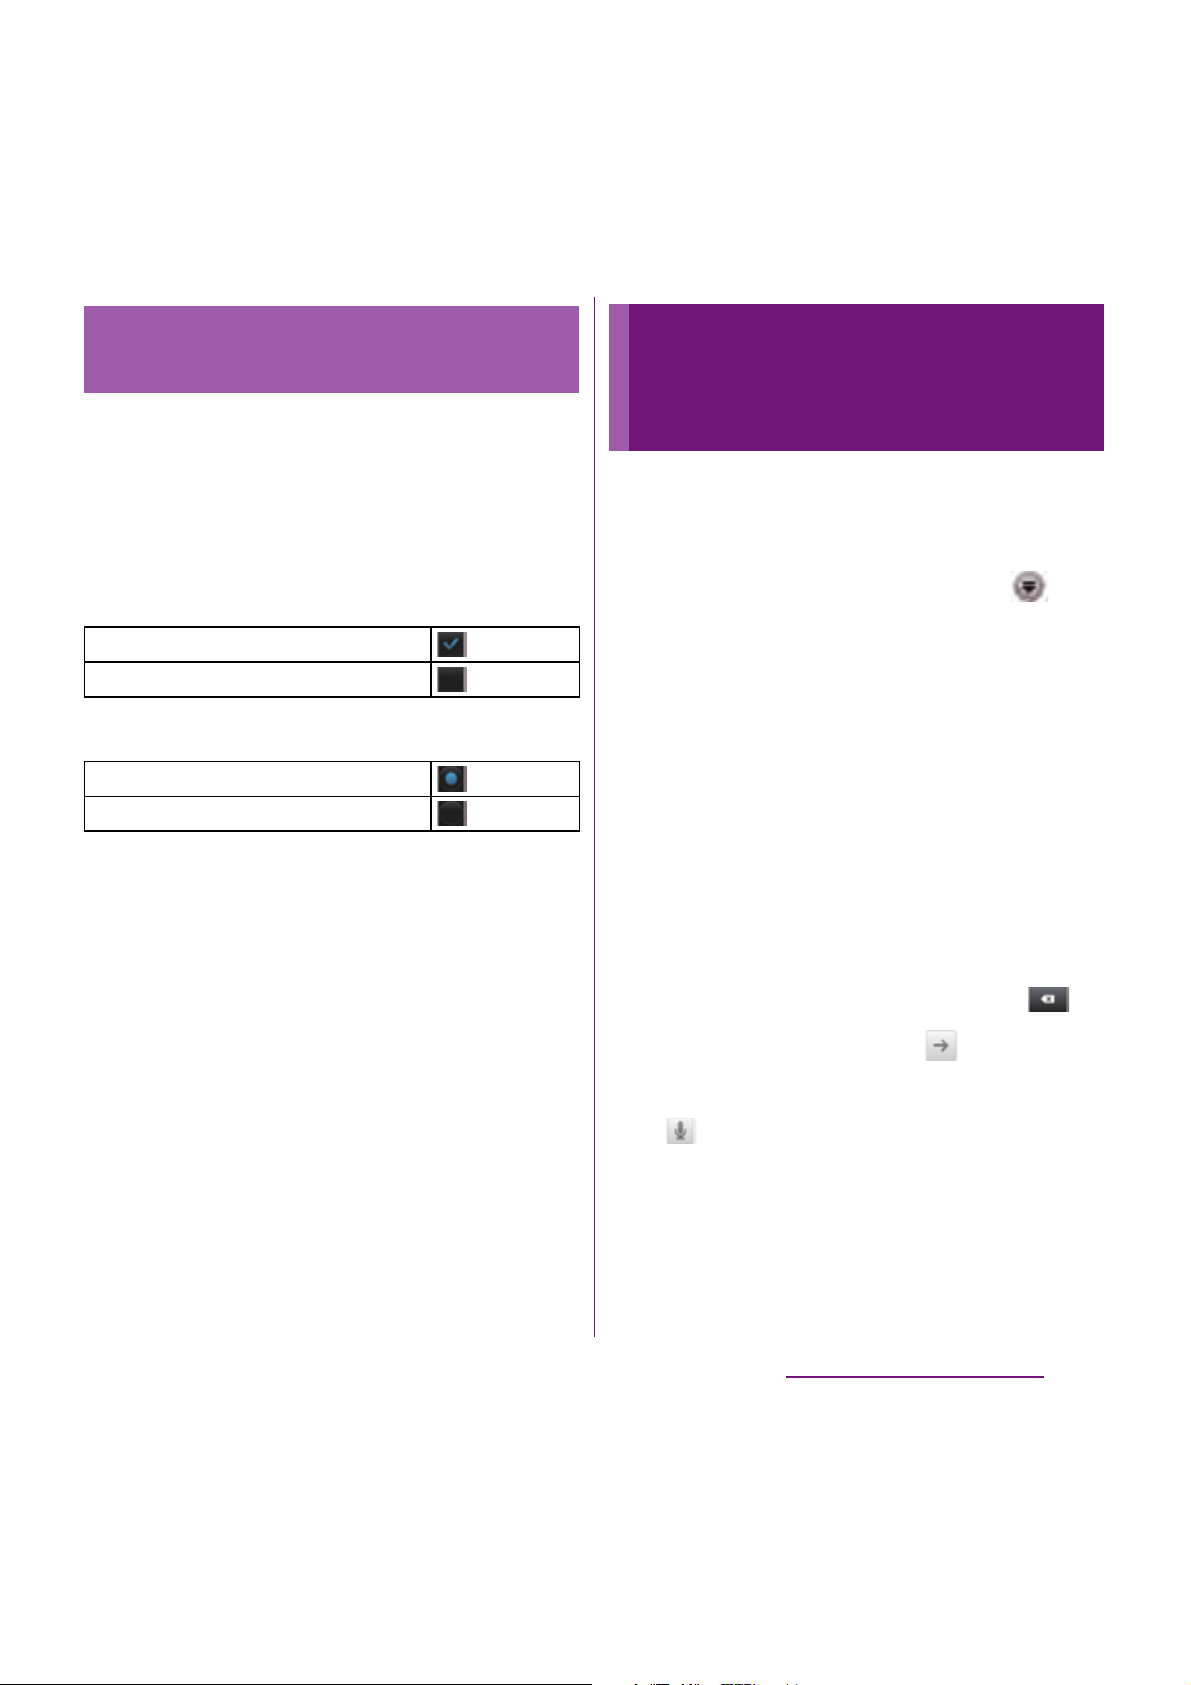
42
Before Using the Terminal
You can switch on/off of the option settings
by marking or unmarking the checkboxes or
radio buttons.
・
To switch on/off of the option setting, tap the
checkbox or radio button.
■
Checkboxes
■
Radio button
Enter a word in the search box to browse the
information in the terminal or on the
Internet.
1
From the Home screen, tap ,
then tap [Google Search].
・
For the first time to join Latitude, a
message confirming whether to agree
to Google's privacy policy appears.
Select [Agree] or [Disagree].
・
The software keyboard appears.
2
Enter a search word.
・
Search suggestions appear as you enter
a character.
・
For character entry, see "Character
entry" (P.47).
・
To enter a new search word, tap .
3
Tap a search item or .
❖
Information
・
Tap on the right of the search box to input a
search word by voice to browse the Internet.
Marking or unmarking option
checkbox
Mark
Unmark
Mark
Unmark
Searching information in
the terminal and web
pages
Page 45
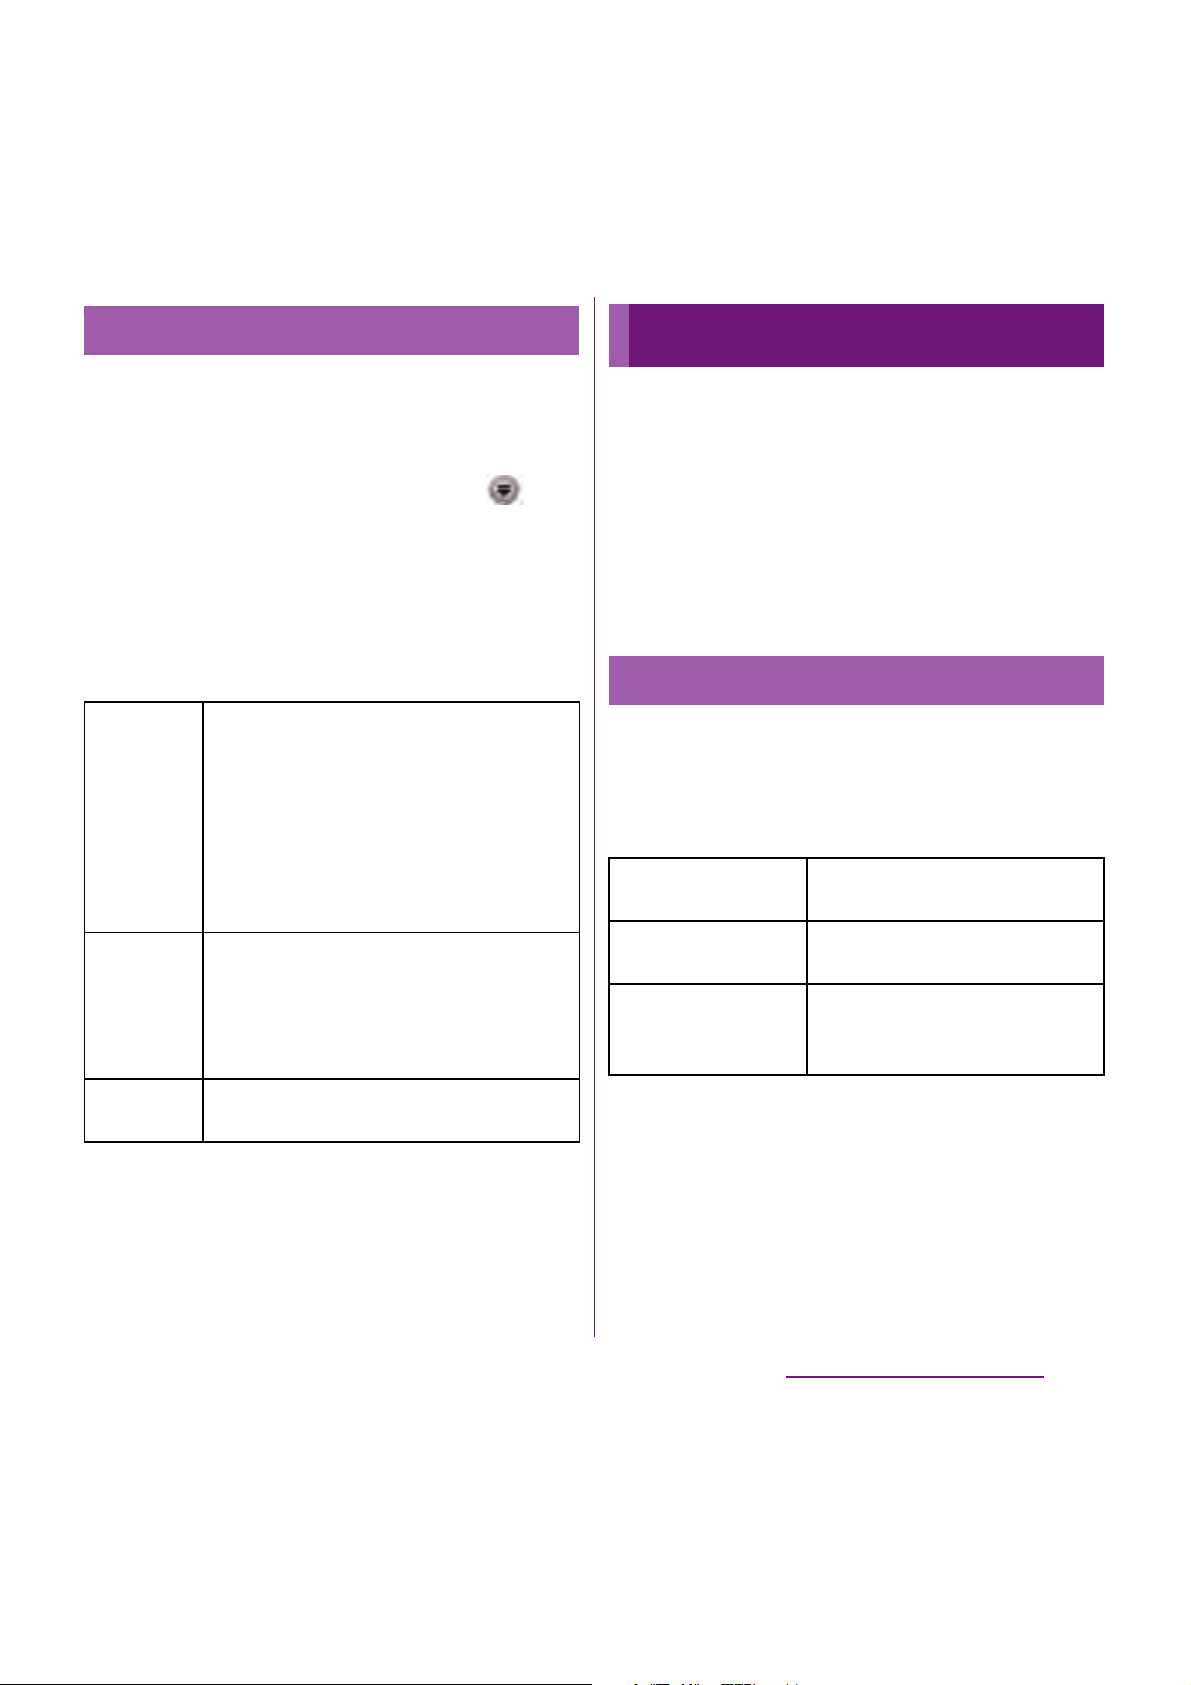
43
Before Using the Terminal
You can set search engines to use for Quick
search box or set search objectives in the
terminal.
1
From the Home screen, tap ,
then tap [Google Search].
2
Tap
t
and then [Search
settings].
・
A search settings screen appears. You
can set the following items.
To enter characters, use the software
keyboard which appears when you tap the
character input box in a message,
phonebook, etc.
❖
Information
・
To return to the previous screen from the character
entry screen, tap
x
.
In this terminal, you can select Input method
(keyboard type) from "Xperia
™
Chinese
keyboard", "Xperia
™
Japanese keyboard" or
"Xperia
™
keyboard".
1
On a character entry screen, touch
and hold the text box.
2
Tap [Input method]u[Xperia™
Chinese keyboard]/[Xperia
™
Japanese keyboard]/[Xperia
™
keyboard].
Search settings
Google
search
Set whether to display search options
when a search word is entered, or
whether to reflect the previous search
result in the search options. You can also
open the web search log settings page
by Browser.
・
You need to create your Google
account.
Searchable
items
Change the search range by marking/
unmarking data categories (Web, Apps,
Contacts, Email, Messaging, Music player,
OfficeSuite, Phonebook, Voice Search) in
the terminal.
Clear
shortcuts
Set not to display recently selected
search results.
Character entry
Selecting input method
Xperia™ Chinese
keyboard
Select to enter Chinese.
Xperia™ Japanese
keyboard
Select to enter Japanese.
Xperia™ keyboard
Select a language for text entry.
Select to enter language other
than Japanese.
Page 46
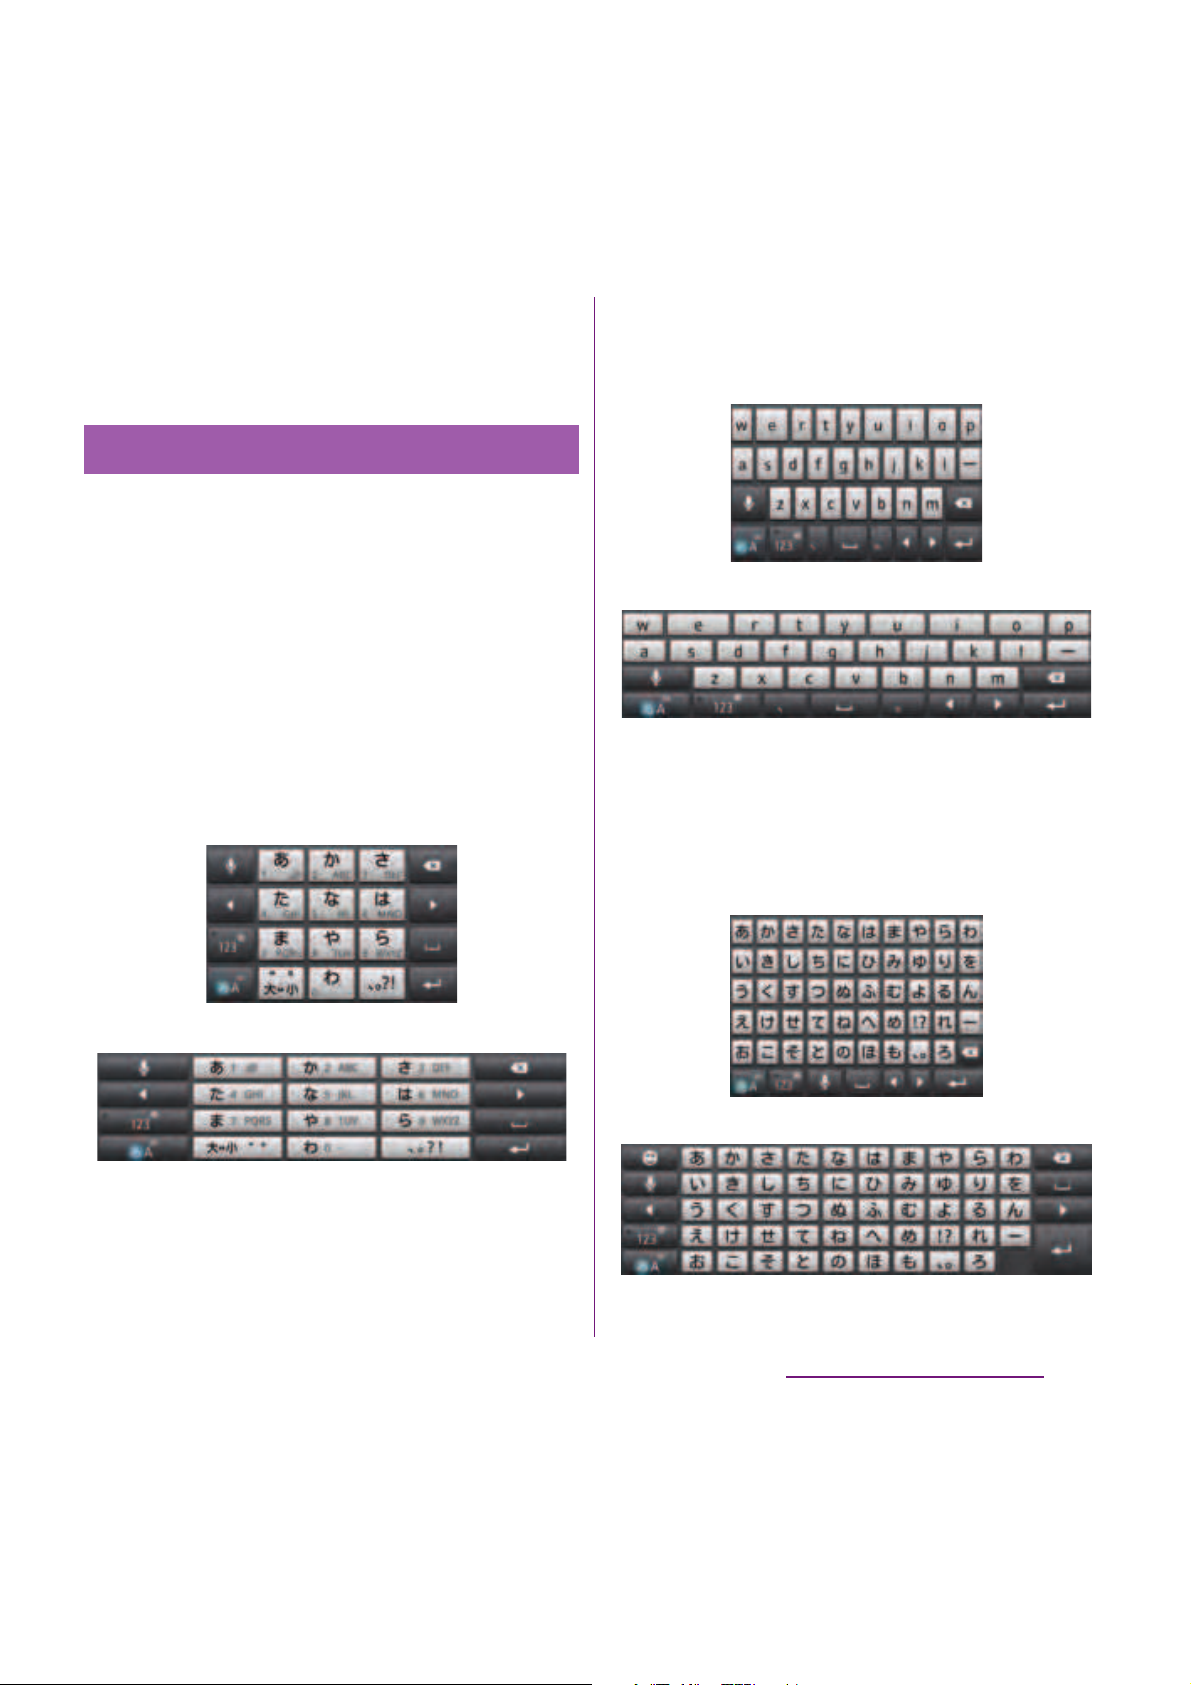
44
Before Using the Terminal
❖
Information
・
You can change Input method (keyboard type)
during character entry.
For Japanese keyboard, there are 4 types of
software keyboards: phonepad, QWERTY,
Japanese syllabary and handwritten input.
❖
Information
・
The key display of software keyboard varies
depending on the entry screen, character mode or
settings.
■
Phonepad keyboard
Japanese characters can be entered in
"Kana input" mode.
■
QWERTY keyboard
Japanese characters can be entered in
"Romaji input" mode.
■
Japanese syllabary keyboard
You can use the software keys arranged
according to the Japanese syllabary to enter
Japanese characters in "Kana input" mode.
Software keyboard
Portrait
Landscape
Landscape
Portrait
Portrait
Landscape
Page 47
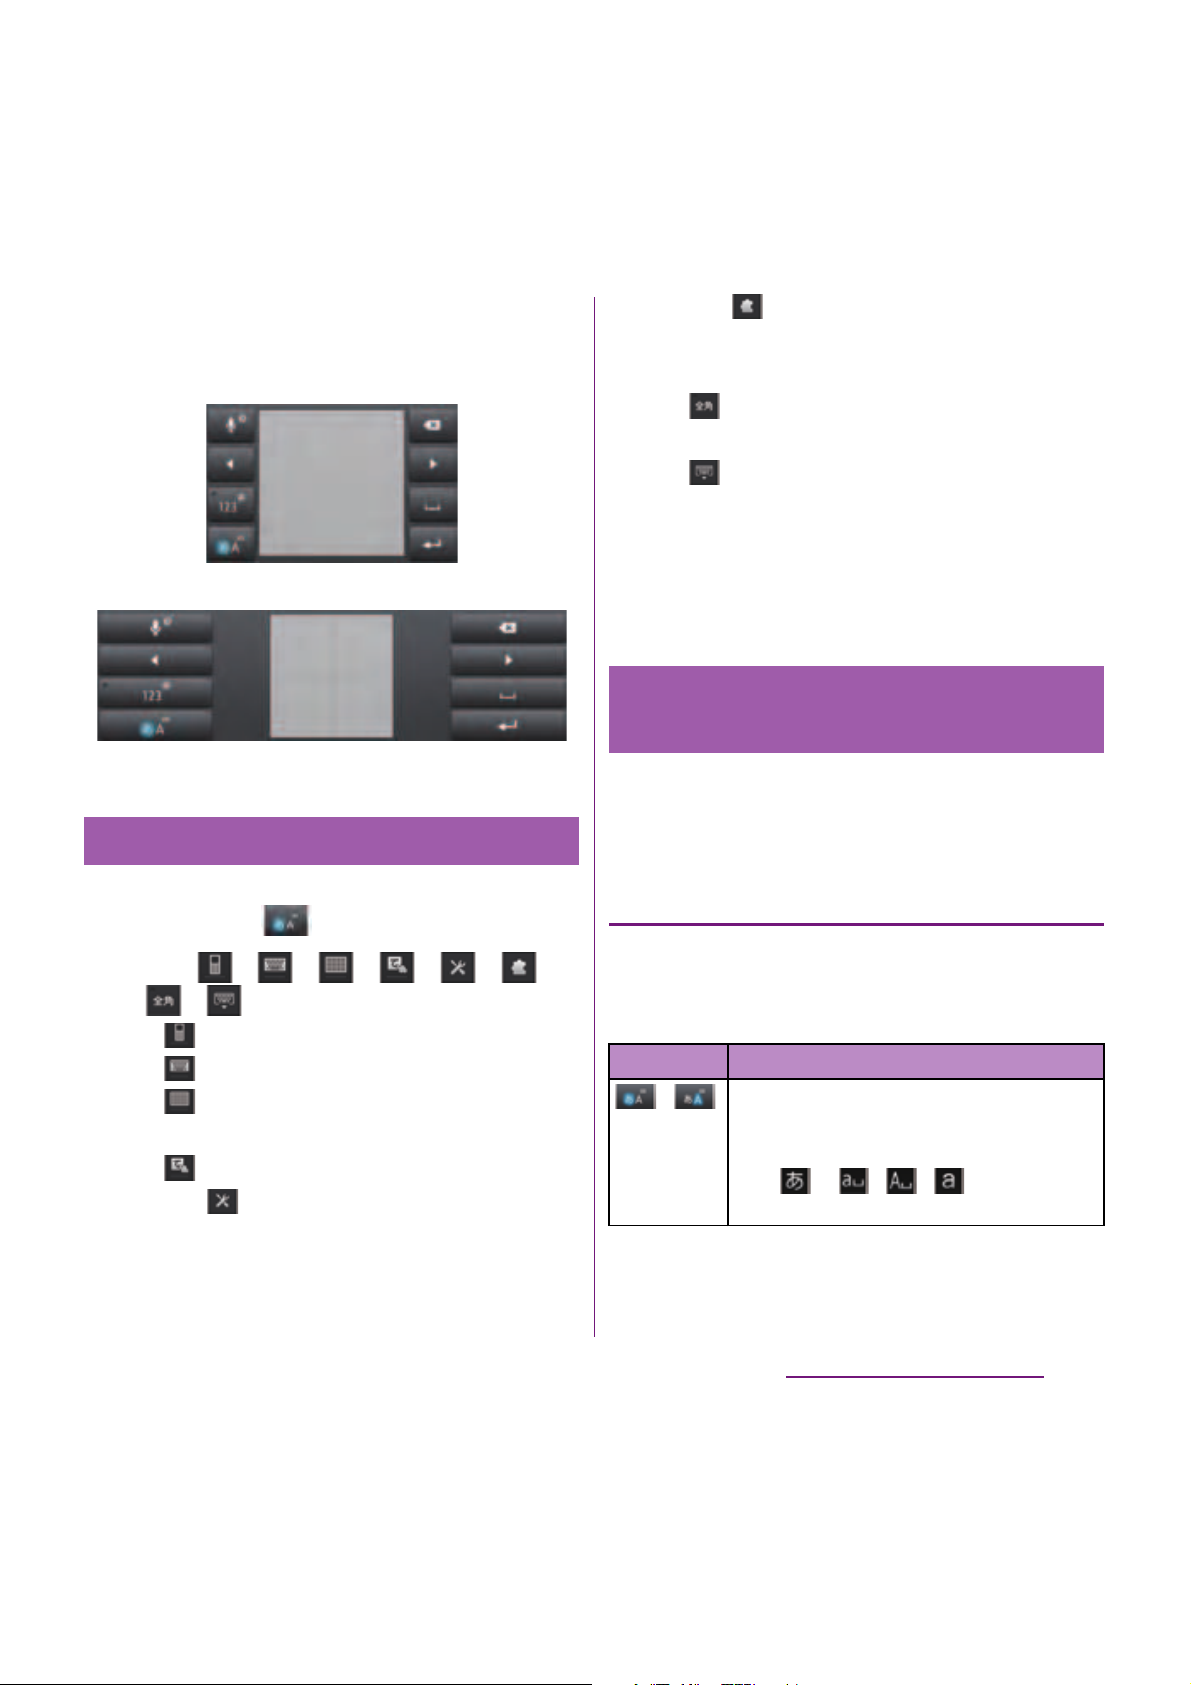
45
Before Using the Terminal
■
Handwritten input
Japanese characters can be entered in
"Handwritten input" mode.
1
On a character entry screen, touch
and hold .
2
Tap / / / / / /
/ .
・
: The phonepad keyboard appears.
・
: The QWERTY keyboard appears.
・
: The Japanese syllabary keyboard
appears.
・
: The handwritten input appears.
・
Tap to display Japanese keyboard
settings screen and you can check/
change the settings.
・
Tap to display plug-in applications
list. Tap [Contact Picker 2.3] to quote
contacts to enter.
・
: Switch one-byte/two-byte
character.
・
: Hide the software keyboard.
❖
Information
・
The phonepad keyboard is set by default. Also, "Auto
capitalization", "Word suggestions", "Error correction"
and "Pop-up on key press" are set to on.
You can use the software keys arranged
according to the Japanese syllabary to enter
Japanese characters in "Kana input" mode.
The main functions of the touch-keys
・
To change character modes and other
entering operations, tap the following icons
on the phonepad keyboard.
Switching the keyboard
Portrait
Landscape
Entering characters on the
phonepad keyboard
Icon Function
/
Each time you tap, the character mode
switches "Hiragana/Kanji"
→
"Alphanumeric" in order and a status
icon,
→
/ / appears in the
status bar.
Page 48
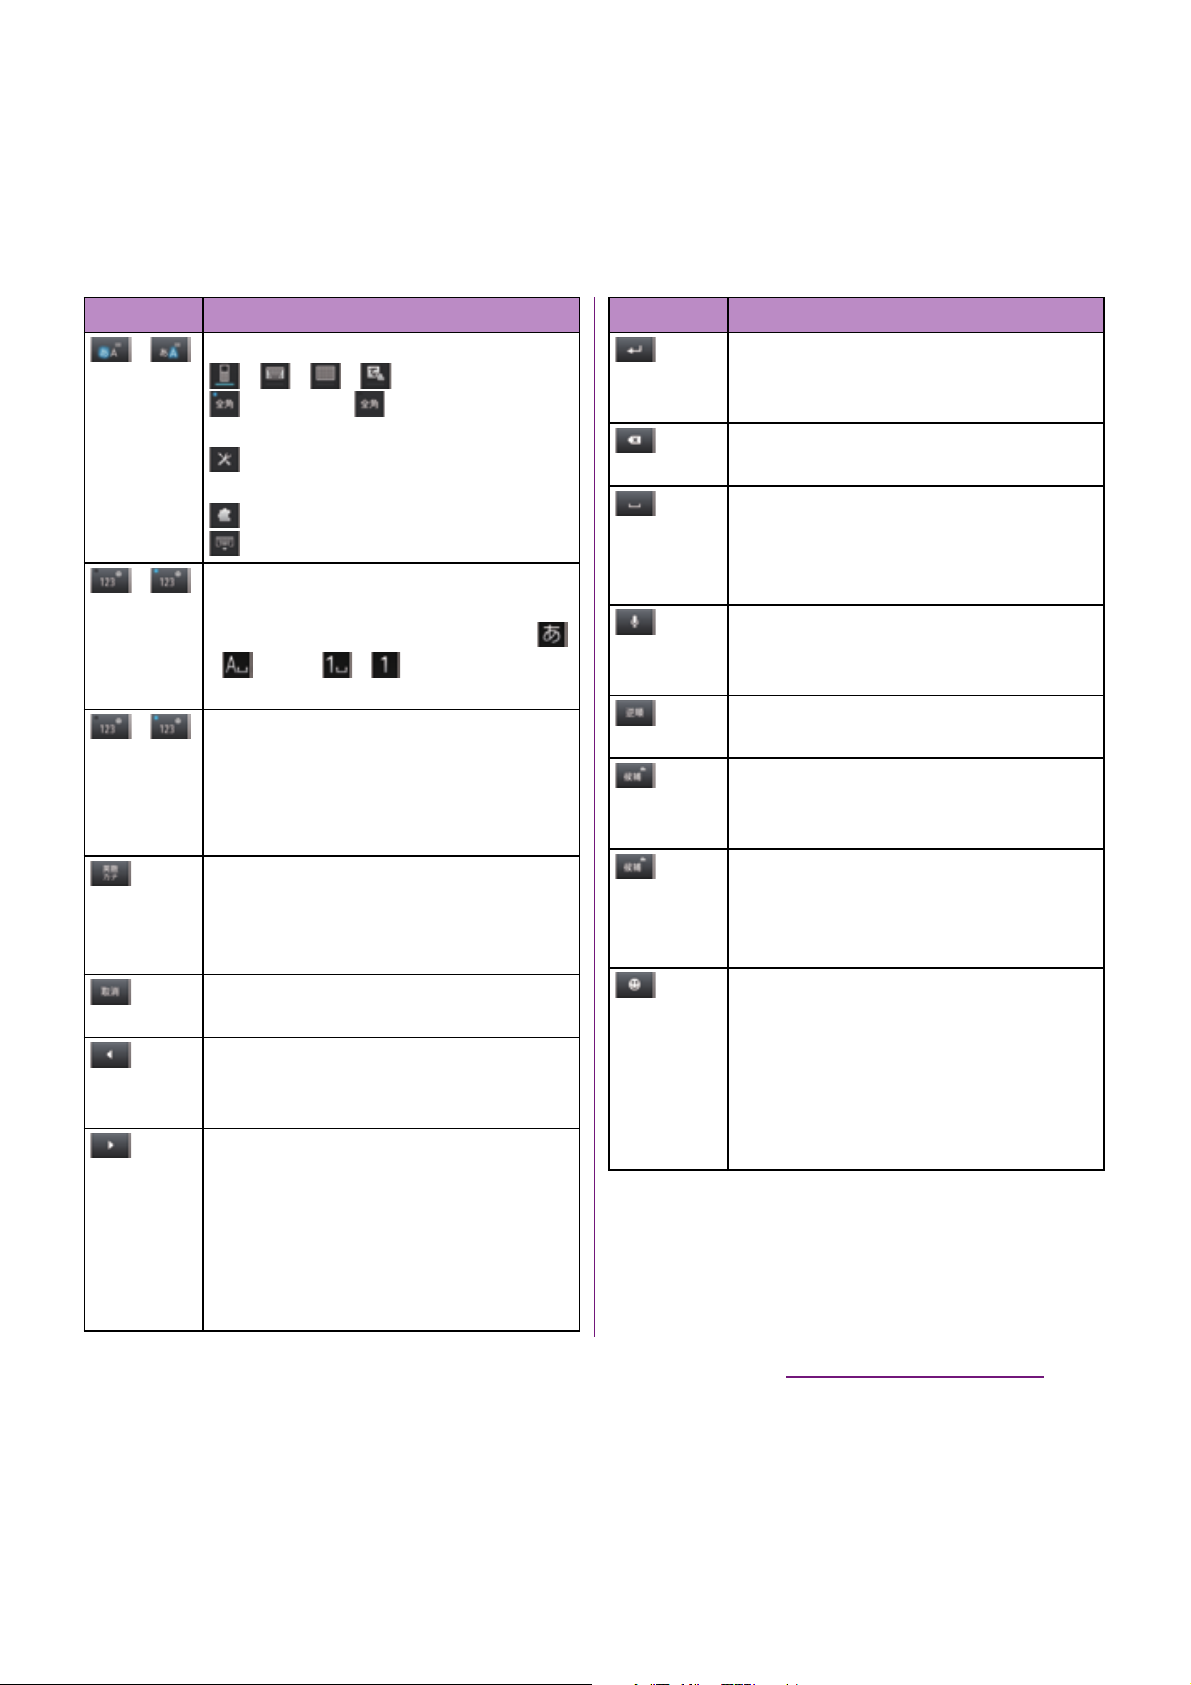
46
Before Using the Terminal
*1 When any characters are entered, just tap the
desired position on the entered character string to
move the cursor.
/
Touch and
hold
Display a pop-up window.
/ / / : Keyboard switch
(two-byte)/ (one-byte) :
Character mode switch
: Display the setting screen for
Japanese keyboard
: Display plug-in applications list
: Hide the software keyboard
/
Each time you tap, the character mode
switches "Hiragana/Kanji/alphabets" →
"Number" in order and a status icon,
/ , etc.
→
/ appears in the
status bar.
/
Touch and
hold
Display a one-byte/two-byte symbol list
to enter them. Switch tabs to display
smiley list to enter them. (a pictogram
tab and deco-mail tab are also displayed
when entering in sp-mode mail.)
Displayed before fixing character. Display
word predictions or alphanumeric
conversion candidates assigned to
tapped key.
Appears after conversion is fixed to
return to text before conversion.
Move the cursor
*1
: To the left.
Touch and hold to move continuously.
Or change the range for conversion.
Move the cursor
*1
: To the right.
Touch and hold to move continuously.
Or change the range for conversion.
When there is an unfixed character string
with the cursor at the right end, tap to
enter the same character as the one at
the end.
Icon Function
*2
Fix entered or converted characters.
When characters are already fixed, enter
a line feed at the cursor position.
Delete the character before the cursor.
Touch and hold to delete continuously.
When any character is entered or after
entered character is fixed, a space can be
entered. Touch and hold to input spaces
continuously.
Enter characters by voice. A candidate
list appears. Tap the character string you
want to enter.
Display the previous character (opposite
order).
In Hiragana/Kanji input mode,
conversion candidates can be displayed
to enter.
Touch and
hold
Activate online dictionary.
You need to mark "Online dictionary"
checkbox in the Japanese keyboard
setting screen.
Appears when entering number. Onebyte/two-byte symbol list can be
displayed to enter them. Switch tabs to
display smiley list to enter them. (a
pictogram tab and deco-mail tab are
also displayed when entering in spmode mail.)
Icon Function
Page 49
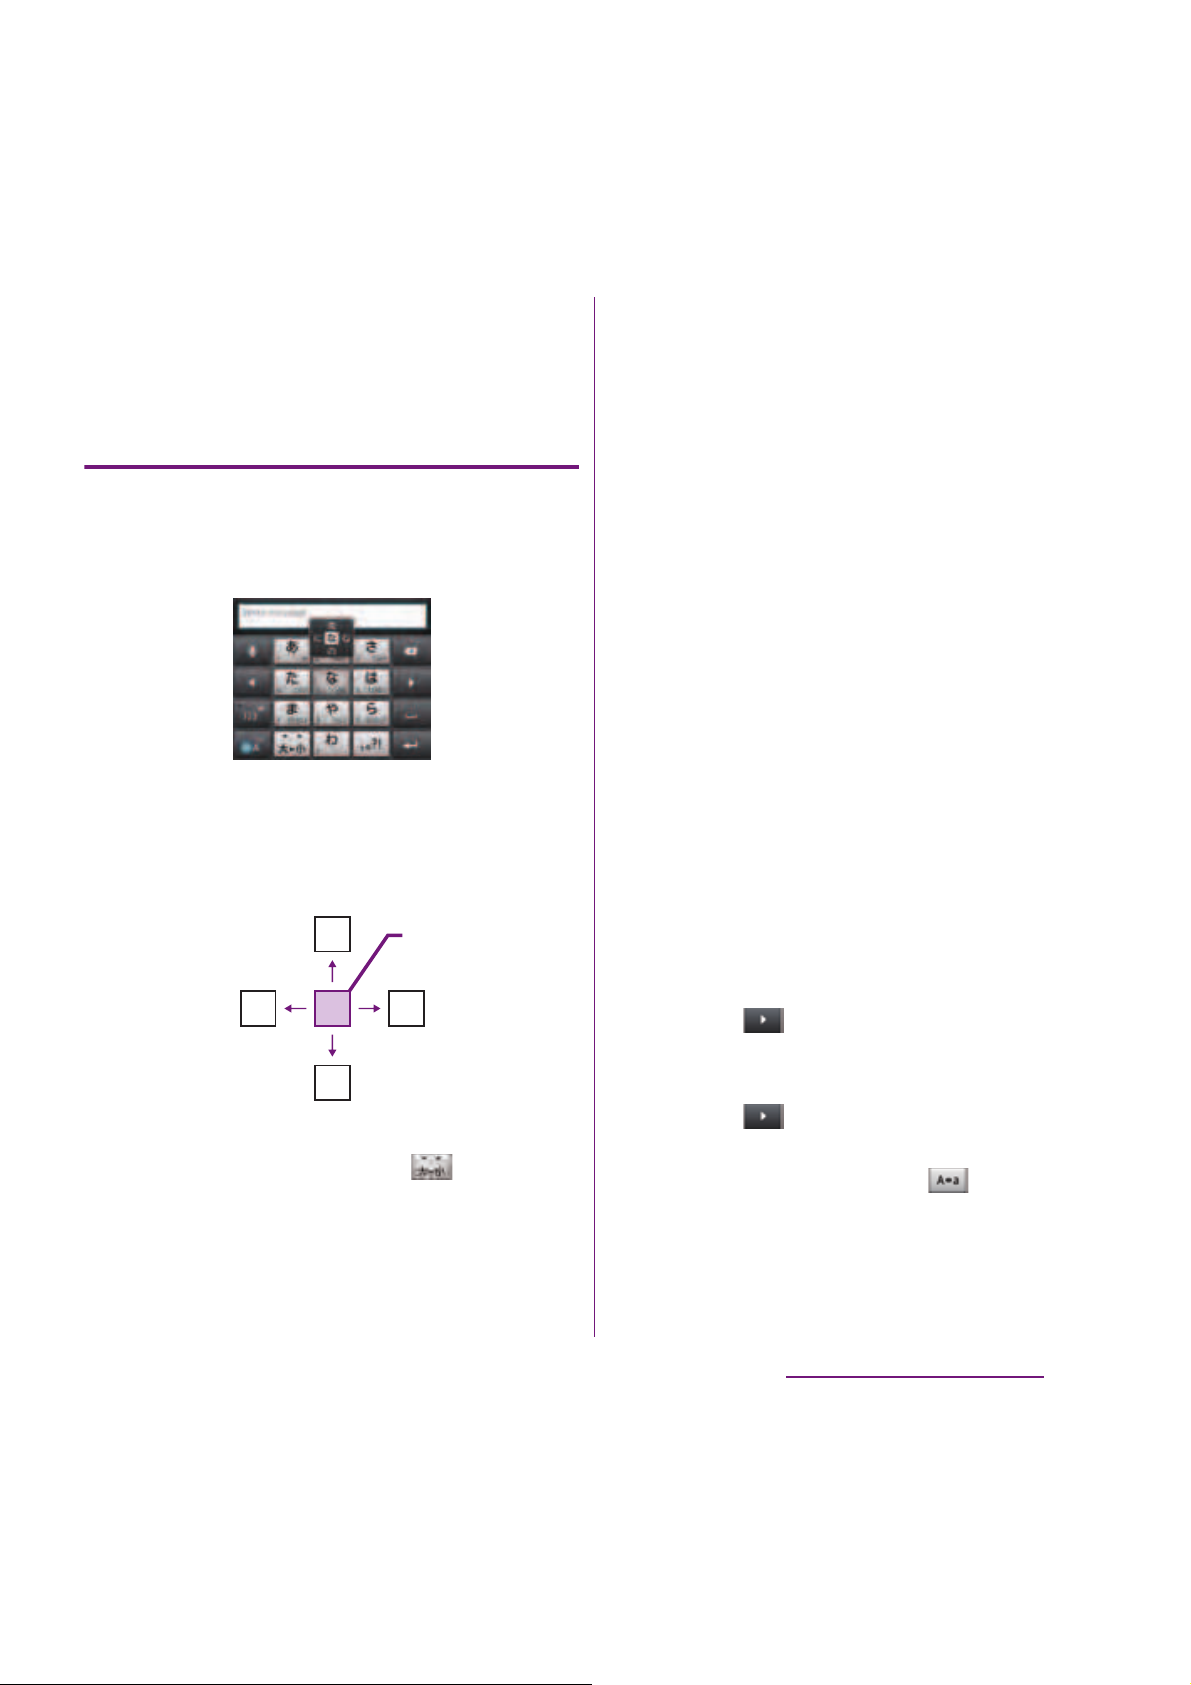
47
Before Using the Terminal
*2 Before the conversion is fixed, "確定 (Fix)" is
displayed. In some screens such as the search box
or mail account registration screen, "
次へ
(Next)", "
完
了
(Done)", "実行 (Go)", etc. appear.
Settings of key entry
■
Flick input
Flick up/down/left/right to enter characters
in each column of kana syllabary.
・
Ex: Entering characters in "な" column
You can enter "な" only by tapping. Flick
left for "
に
", up for "ぬ", right for "ね" and
down for "
の
".
・
To switch upper/lower case or change to
voiced sound, flick or tap .
・
Flick input is available by default. You can
cancel by the following operation
beforehand.
a
From the Home screen, tap
t
and
tap [Settings].
b
Tap [Language & keyboard] →
[Xperia
™
Japanese keyboard] → [On-
screen keyboard settings].
c
Unmark [Flick input] checkbox.
・
To change sensitivity of the flick input, on
the Japanese keyboard setting screen, tap
[On-screen keyboard settings]
u
[Select
sensitivity], then select "High"/"Medium
(default)"/"Low".
■
Toggle entry
Tap the same key continuously to enter the
assigned character.
To enter characters assigned to the same
key continuously, operate the followings.
・
Ex: To enter "
あお
"
a
Tap "あ" once.
b
Tap , and tap "あ" 5 times.
・
Ex: To enter "ca"
a
Tap "abc" 3 times.
b
Tap
*
.
c
Tap "abc" once.
※
In some applications, tap in Step b.
ぬ
ねに
の
な
Flick left
Flick up
Tap
Flick right
Flick down
Page 50
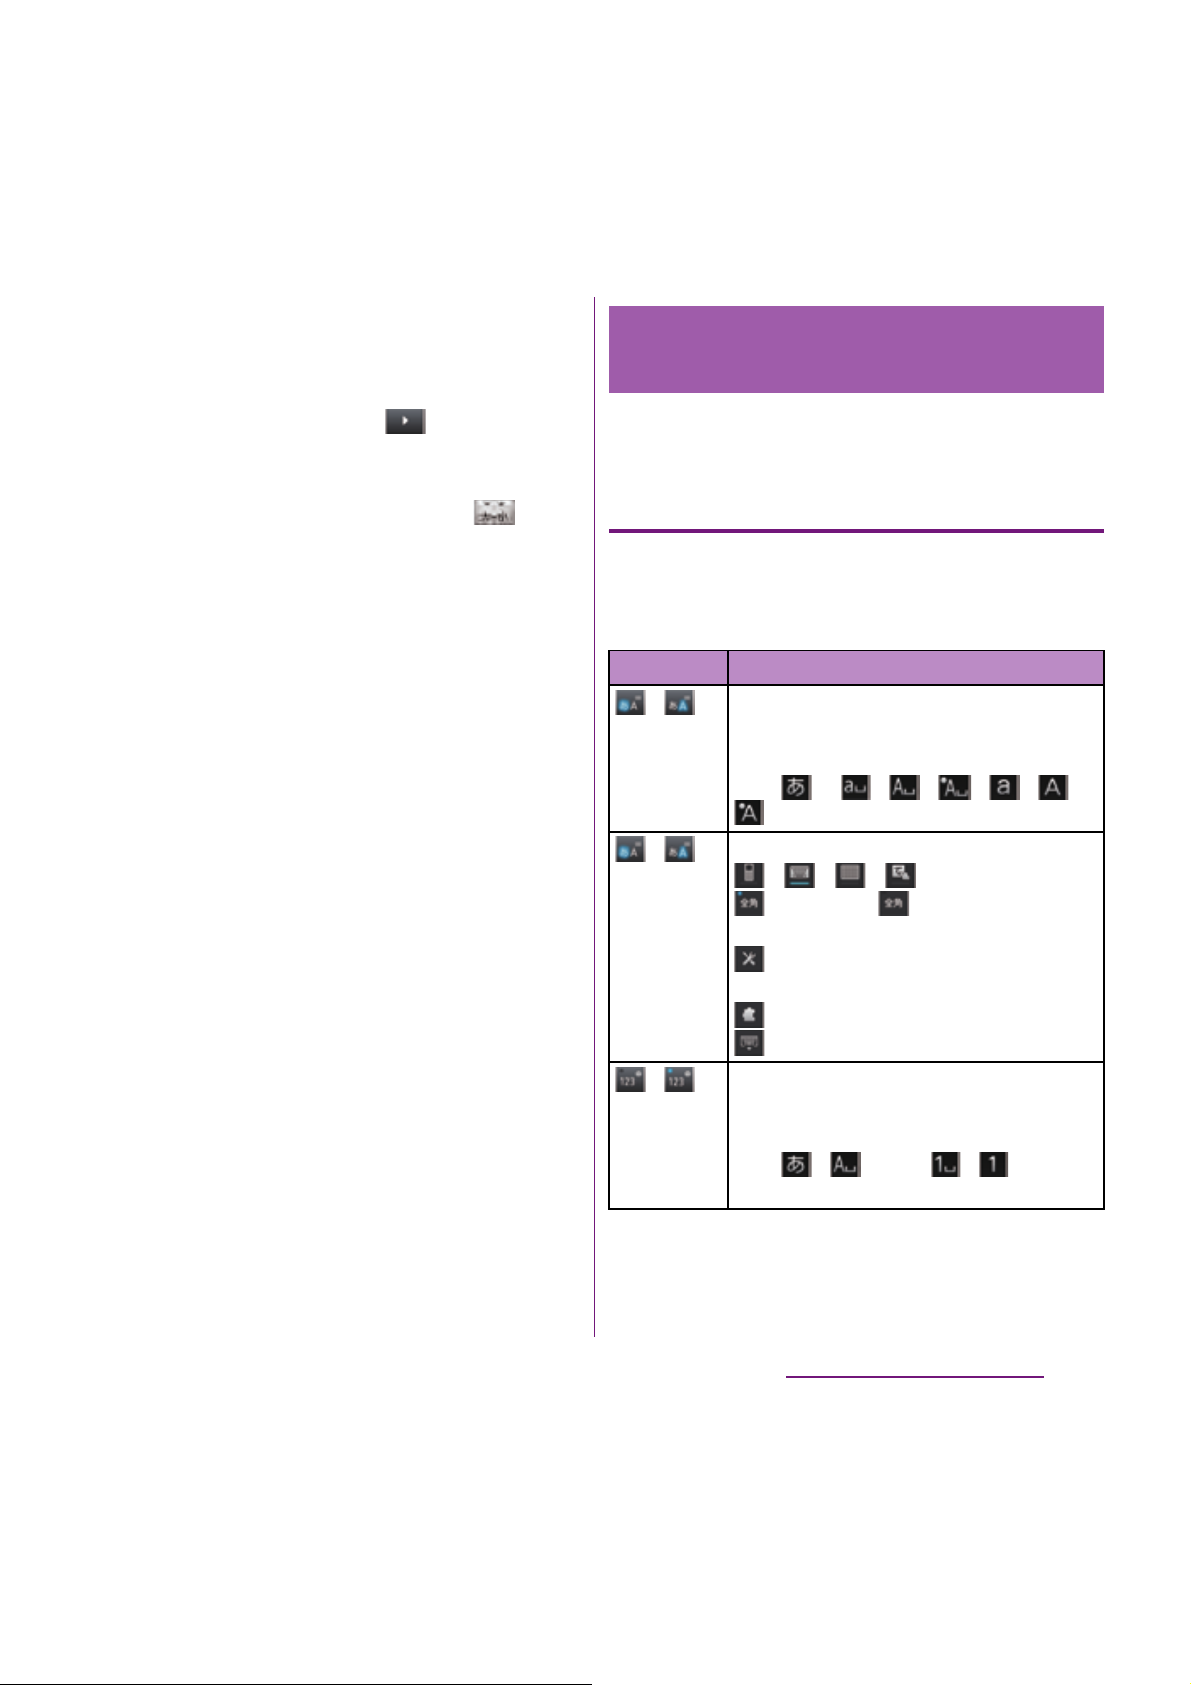
48
Before Using the Terminal
❖
Information
・
When a certain time is passed after the key tapped,
the tapped key's highlighter goes off and you can
enter a character assigned to the same key
consecutively without tapping .
・
To switch upper/lower case or change to
voiced/semi-voiced sound, tap .
・
Multitap text input is available by default.
You can cancel by the following
operation beforehand.
a
From the Home screen, tap
t
and
tap [Settings].
b
Tap [Language & keyboard] →
[Xperia
™
Japanese keyboard] → [On-
screen keyboard settings].
c
Unmark [Multitap text input]
checkbox.
Use the QWERTY keyboard to enter Japanese
characters in "Romaji input" mode.
The main functions of the touch-keys
・
To change character modes and other input
operations, tap the following icons on the
QWERTY keyboard.
Entering characters on the
QWERTY keyboard
Icon Function
/
Each time you tap, the character mode
switches "Hiragana/Kanji"
→
"Alphanumeric" in order and a status
icon,
→
/ / / / /
appears in the status bar.
/
Touch and
hold
Display a pop-up window.
/ / / : Keyboard switch
(two-byte)/ (one-byte) :
Character mode switch
: Display the setting screen for
Japanese keyboard
: Display plug-in applications list
: Hide the software keyboard
/
Each time you tap, the character mode
switches "Hiragana/Kanji/alphabets"
→
"Number/symbol" in order and a status
icon, / , etc.
→
/ appears
in the status bar.
Page 51
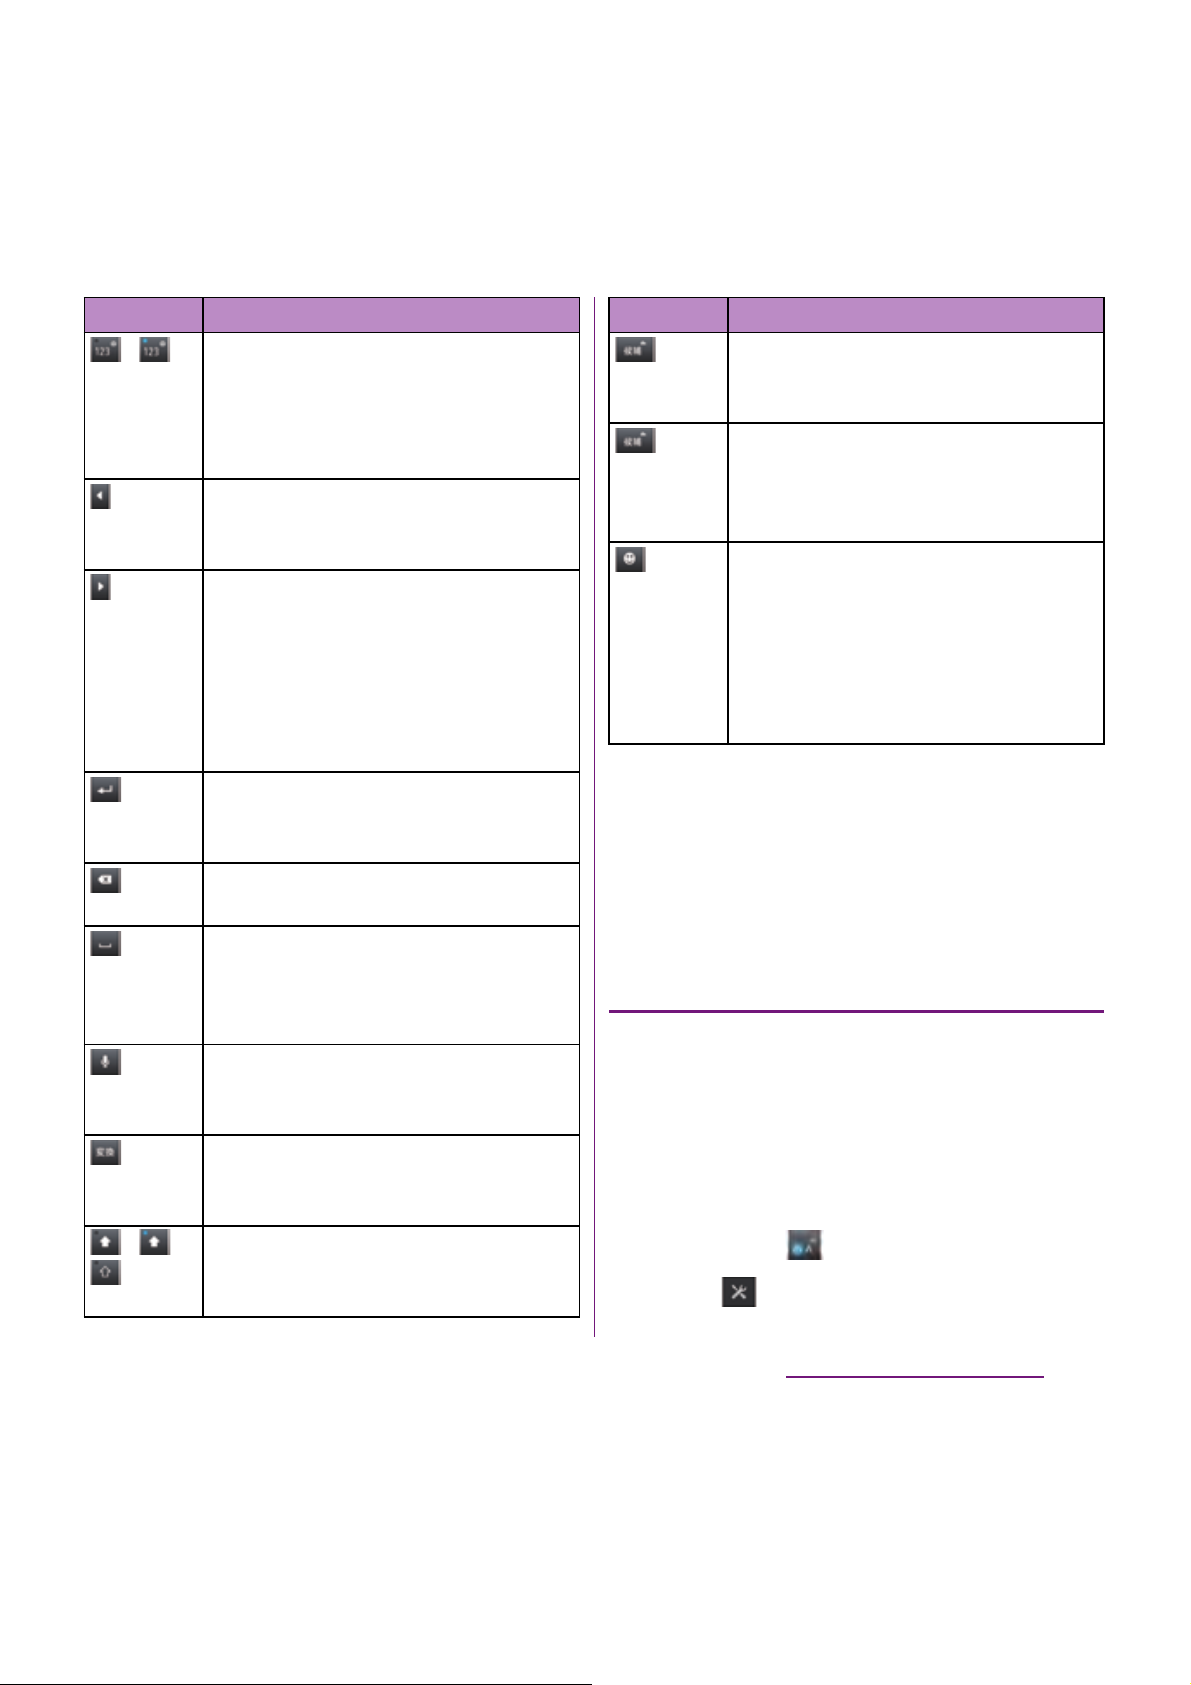
49
Before Using the Terminal
*1 When any characters are entered, just tap the
desired position on the entered character string to
move the cursor.
*2 Before the conversion is fixed, "
確定
(Fix)" is
displayed. In some screens such as the search box
or mail account registration screen, "
次へ
(Next)", "
完
了
(Done)", "実行 (Go)", etc. appear.
Selecting an assistant keyboard
When you enter in Hiragana/Kanji input
mode using the QWERTY keyboard, you can
change the assistant keyboard to make the
frequent using keys to be displayed widely
for easy tapping.
1
On a character entry screen, touch
and hold .
2
Tap .
/
Touch and
hold
Display a one-byte/two-byte symbol list
to enter them. Switch tabs to display
smiley list to enter them. (a pictogram
tab and deco-mail tab are also displayed
when entering in sp-mode mail.)
Move the cursor
*1
: To the left. Touch and
hold to move continuously. Or change
the range for conversion.
Move the cursor
*1
: To the right. Touch
and hold to move continuously. Or
change the range for conversion.
When there is an unfixed character string
with the cursor at the right end, tap to
enter the same character as the one at
the end.
*2
Fix entered or converted characters.
When characters are already fixed, enter
a line feed at the cursor position.
Delete the character before the cursor.
Touch and hold to delete continuously.
When any character is entered or after
entered character is fixed, a space can be
entered. Touch and hold to input spaces
continuously.
Enter characters by voice. A candidate
list appears. Tap the character string you
want to enter.
Appears before conversion is fixed. Tap
to switch conversion methods to "Direct
conversion".
/ /
In alphanumerics input mode, tap to
switch capitalization/upper case/lower
case.
Icon Function
In Hiragana/Kanji input mode,
conversion candidates can be displayed
to enter.
Touch and
hold
Activate online dictionary.
You need to mark "Online dictionary"
checkbox in the Japanese keyboard
setting screen.
Appears when entering number. Onebyte/two-byte symbol list can be
displayed to enter them. Switch tabs to
display smiley list to enter them. (a
pictogram tab and deco-mail tab are
also displayed when entering in spmode mail.)
Icon Function
Page 52
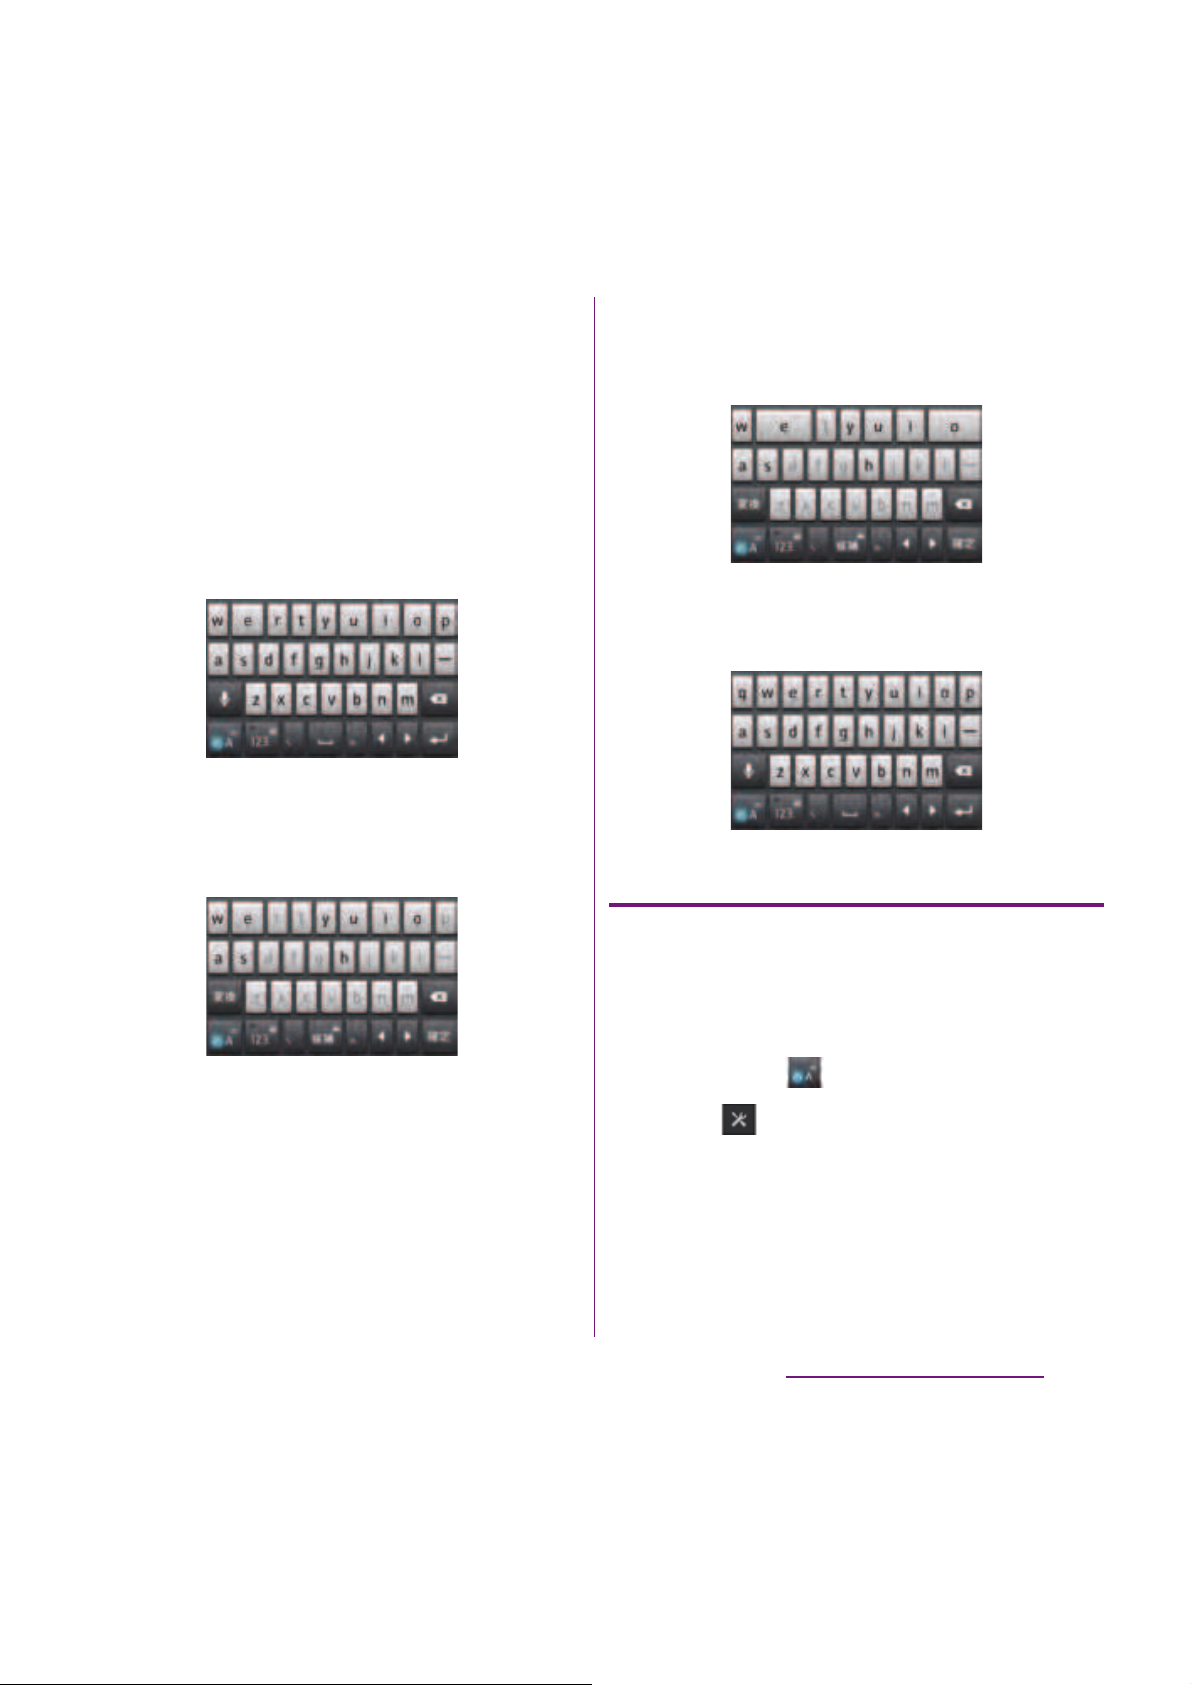
50
Before Using the Terminal
3
Tap [On-screen keyboard
settings]
u
[Choose key type].
4
Tap any of [Static key resizing]/
[Key highlight while typing]/
[Dynamic key resizing with
highlight]/[Off].
■
Static key resizing
Widen frequent using key for easy tapping.
■
Key highlight while typing
Widen frequent using key and highlight the
key that is predicted for the next entry.
■
Dynamic key resizing with highlight
Widen the key that is predicted for the next
entry much further and highlight it.
■
Off
Display equally the width of each key.
Changing display keys
・
For Japanese input, you can set not to display
less-frequent-used keys (Q, X, C, etc.) on the
QWERTY keyboard.
1
On a character entry screen, touch
and hold .
2
Tap .
Page 53
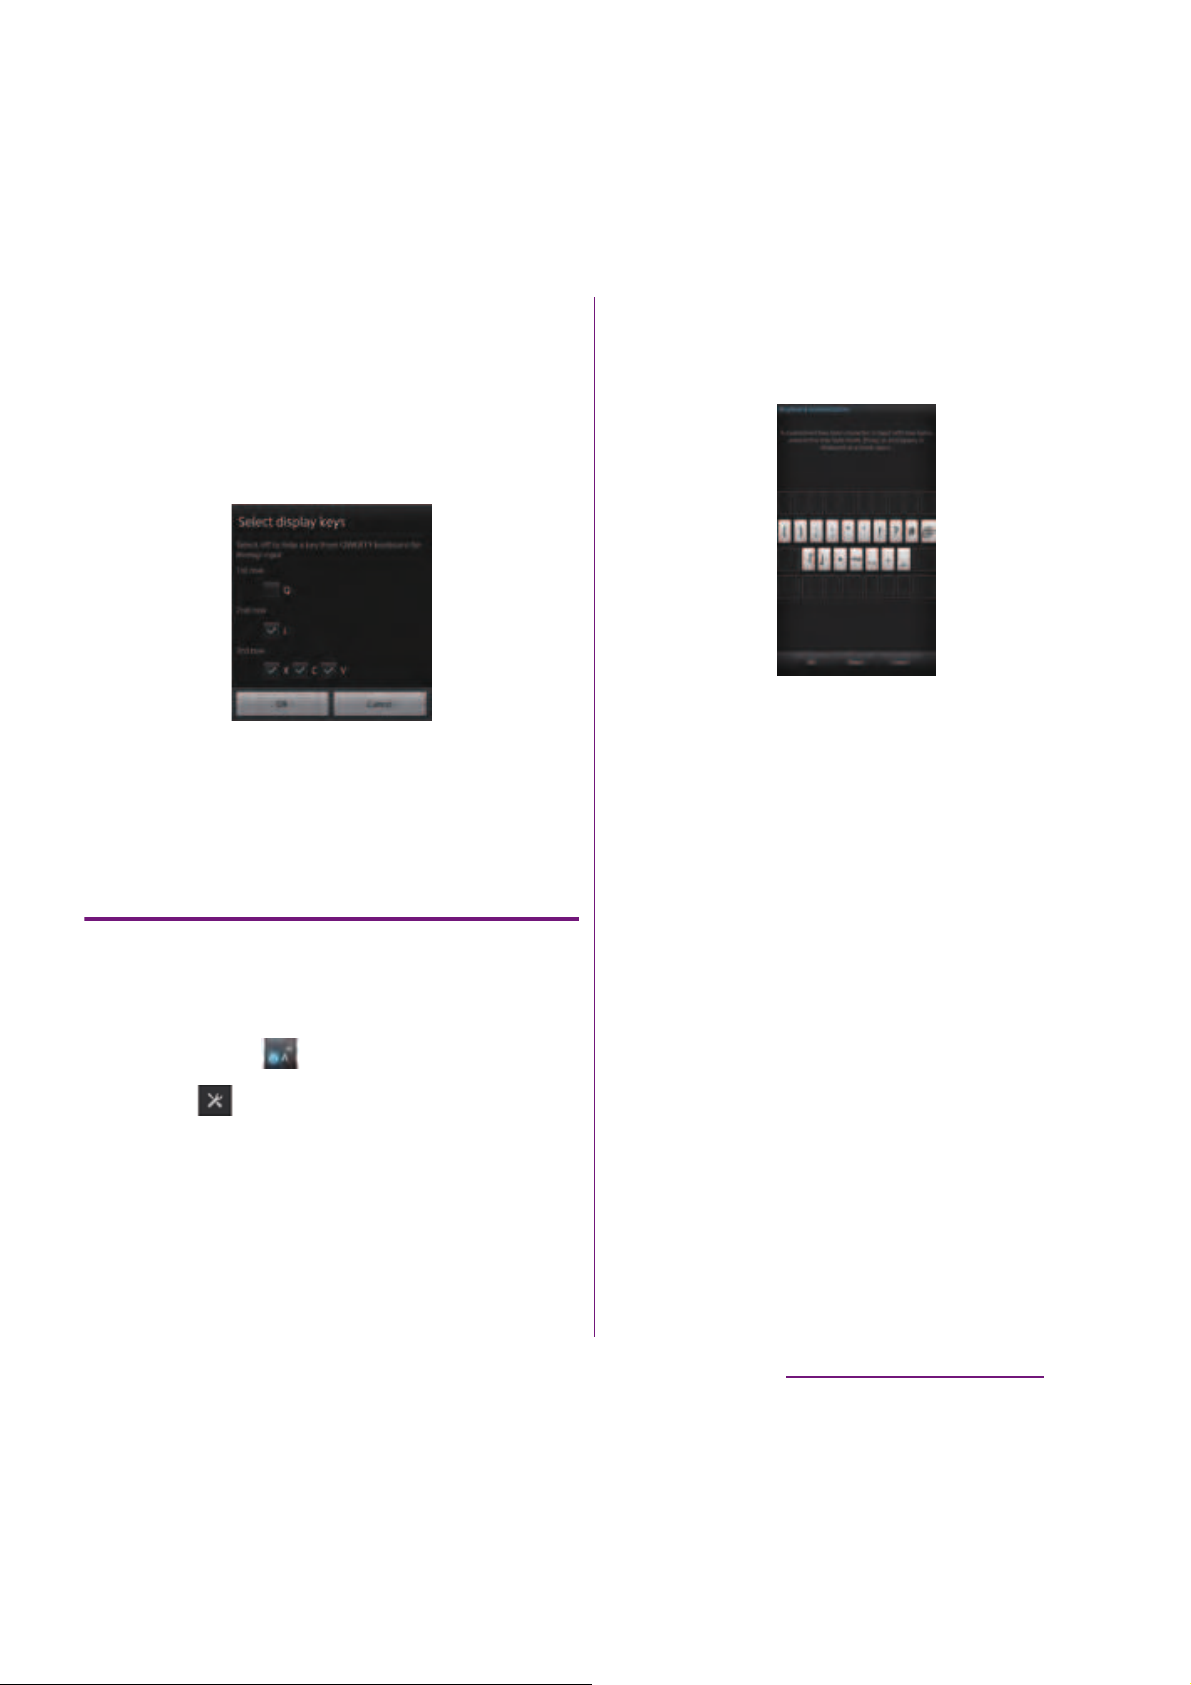
51
Before Using the Terminal
3
Tap [On-screen keyboard
settings]
u
[Select display keys].
・
When the assist keyboard (P.53) is set to
"Off", [Select display keys] cannot be
selected and you cannot change a
displaying key.
4
Unmark the checkbox of the key
you want to hide.
5
Tap [OK].
Customizing keyboard
・
You can switch the position for symbols of the
keyboard displayed when entering numbers.
1
On a character entry screen, touch
and hold .
2
Tap .
3
Tap [On-screen keyboard
settings]
u
[Keyboard
customization].
4
Tap a symbol you want to change
and delete character previously
set, then enter a character to
display.
・
Only one character (two-byte or onebyte character) can be entered.
5
Tap [OK]u[OK].
❖
Information
・
To return to the default status, in Step 3, tap
[Reset]
u
[OK].
Page 54
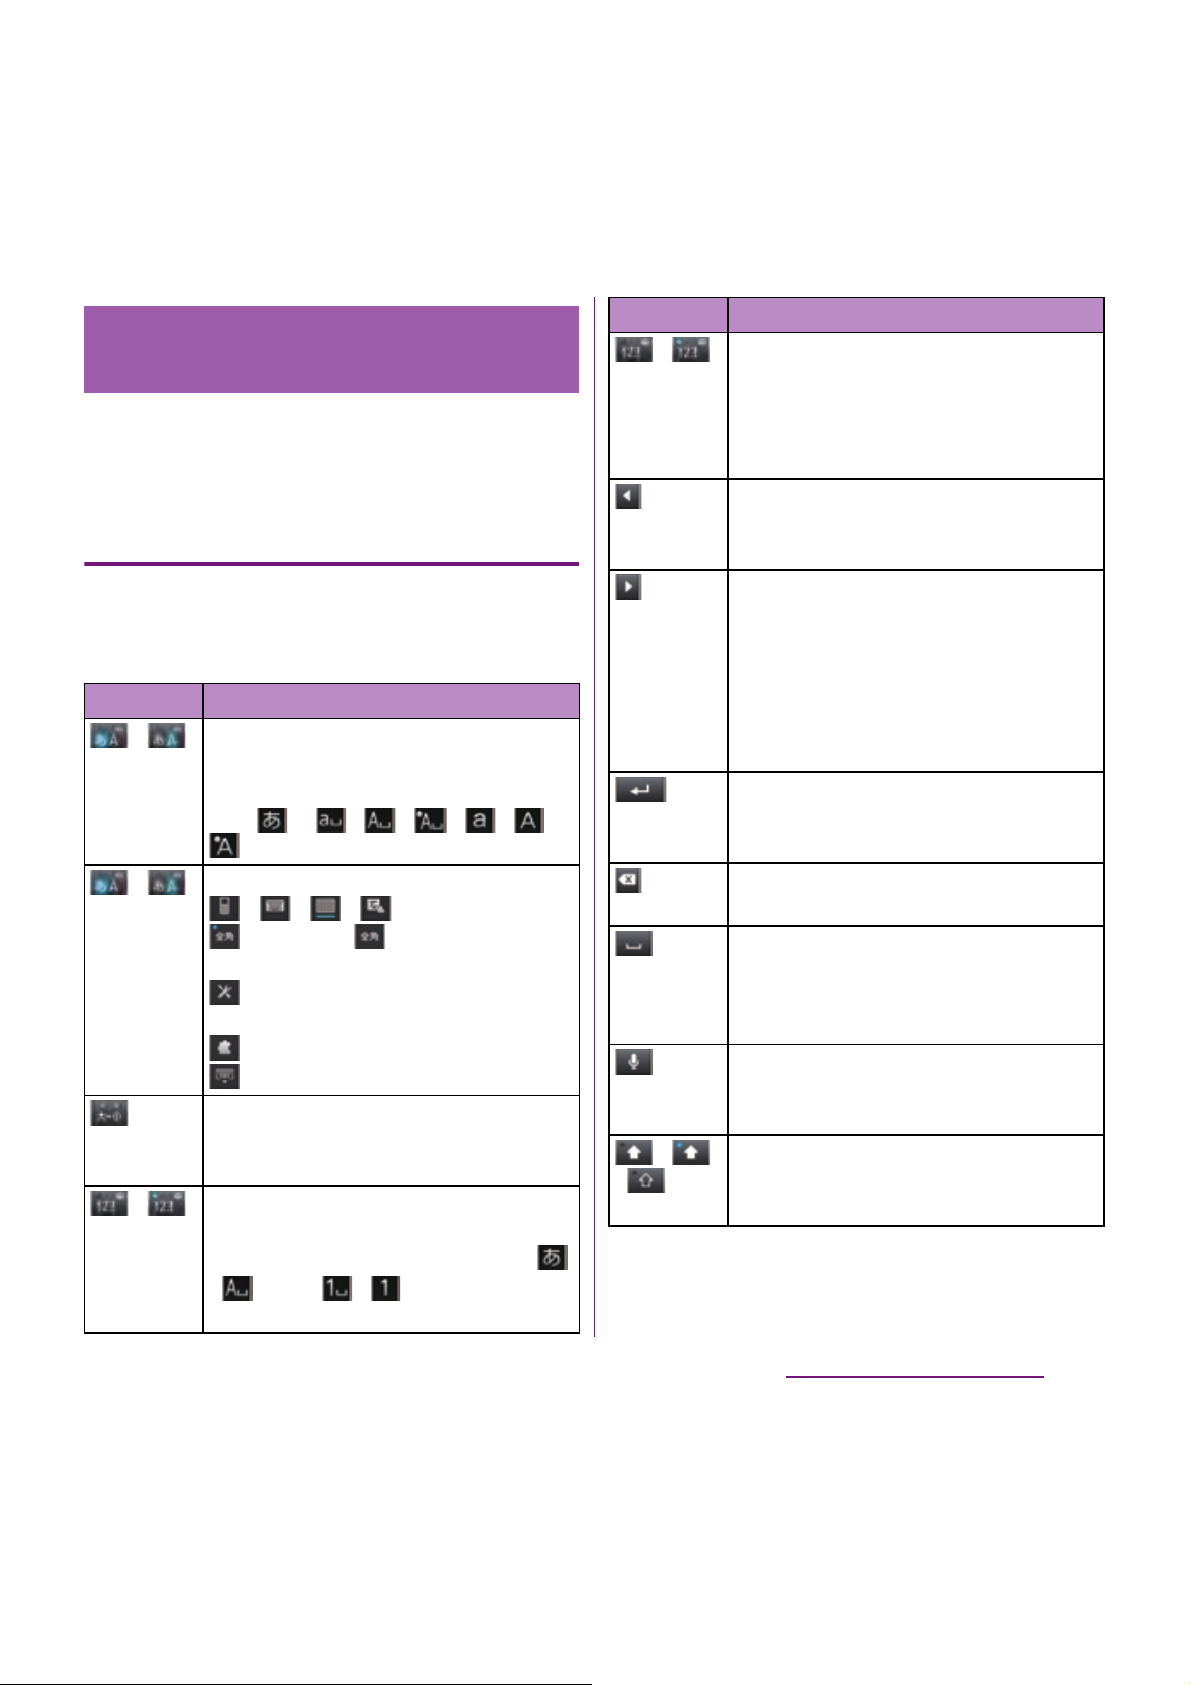
52
Before Using the Terminal
You can use the software keys arranged
according to the Japanese syllabary to enter
Japanese characters in "Kana input" mode.
The main functions of the touch-keys
・
To change character modes and other input
operations, tap the following icons on the
Japanese syllabary keyboard.
Entering characters on the
Japanese syllabary keyboard
Icon Function
/
Each time you tap, the character mode
switches "Hiragana/Kanji"
→
"Alphanumeric" in order and a status
icon,
→
/ / / / /
appears in the status bar.
/
Touch and
hold
Display a pop-up window.
/ / / : Keyboard switch
(two-byte)/ (one-byte) :
Character mode switch
: Display the setting screen for
Japanese keyboard
: Display plug-in applications list
: Hide the software keyboard
Appears in Hiragana/Kanji input mode.
Switch upper/lower case or add voiced
sound/semi-voiced sound.
/
Each time you tap, the character mode
switches "Hiragana/Kanji/alphabets"
→
"Number" in order and a status icon,
/ , etc.
→
/ appears in the
status bar.
/
Touch and
hold
Display a one-byte/two-byte symbol list
to enter them. Switch tabs to display
smiley list to enter them. (a pictogram
tab and deco-mail tab are also displayed
when entering in sp-mode mail.)
Move the cursor
*1
: To the left.
Touch and hold to move continuously.
Or change the range for conversion.
Move the cursor
*1
: To the right.
Touch and hold to move continuously.
Or change the range for conversion.
When there is an unfixed character string
with the cursor at the right end, tap to
enter the same character as the one at
the end.
*2
Fix entered or converted characters.
When characters are already fixed, enter
a line feed at the cursor position.
Delete the character before the cursor.
Touch and hold to delete continuously.
When any character is entered or after
entered character is fixed, a space can be
entered. Touch and hold to input spaces
continuously.
Enter characters by voice. A candidate
list appears. Tap the character string you
want to enter.
/ / In alphanumerics input mode, tap to
switch capitalization/upper case/lower
case or switch allocated symbols.
Icon Function
Page 55
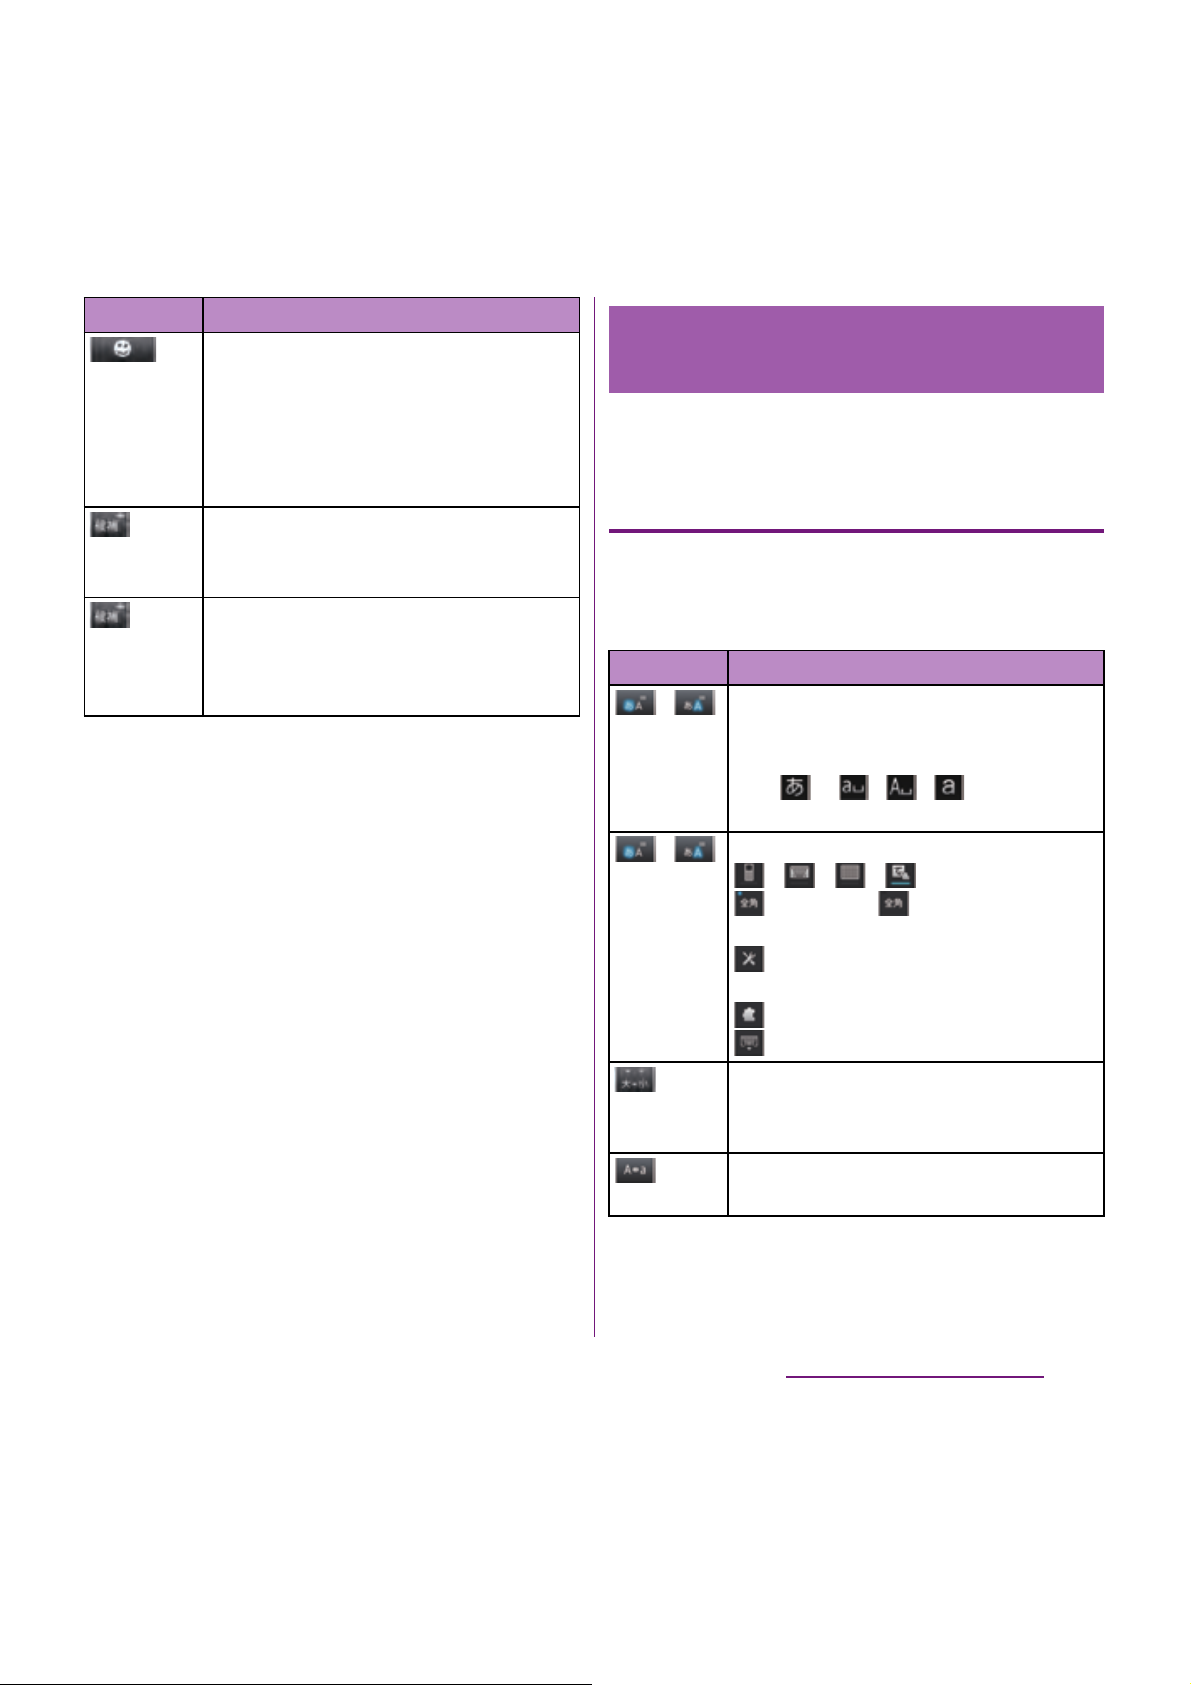
53
Before Using the Terminal
*1 When any characters are entered, just tap the
desired position on the entered character string to
move the cursor.
*2 Before the conversion is fixed, "
確定
(Fix)" is
displayed. In some screens such as the search box
or mail account registration screen, "
次へ
(Next)", "
完
了
(Done)", "実行 (Go)", etc. appear.
You can use the handwritten input screen to
enter Japanese by "handwriting input".
The main functions of the touch-keys
・
To change character modes and other input
operations, tap the following icons on the
handwritten input.
Appears in landscape view. One-byte/
two-byte symbol list can be displayed to
enter them. Switch tabs to display smiley
list to enter them. (a pictogram tab and
deco-mail tab are also displayed when
entering in sp-mode mail.)
In Hiragana/Kanji input mode,
conversion candidates can be displayed
to enter.
Touch and
hold
Activate online dictionary.
You need to mark "Online dictionary"
checkbox in the Japanese keyboard
setting screen.
Icon Function
Entering characters on the
handwritten input
Icon Function
/
Each time you tap, the character mode
switches "Hiragana/Kanji"
→
"Alphanumeric" in order and a status
icon,
→
/ / appears in the
status bar.
/
Touch and
hold
Display a pop-up window.
/ / / : Keyboard switch
(two-byte)/ (one-byte) :
Character mode switch
: Display the setting screen for
Japanese keyboard
: Display plug-in applications list
: Hide the software keyboard
Appears in Hiragana/Kanji input mode.
Switch upper/lower case or add voiced
sound/semi-voiced sound.
Appears in alphanumerics input mode,
tap to switch upper case and lower case.
Page 56
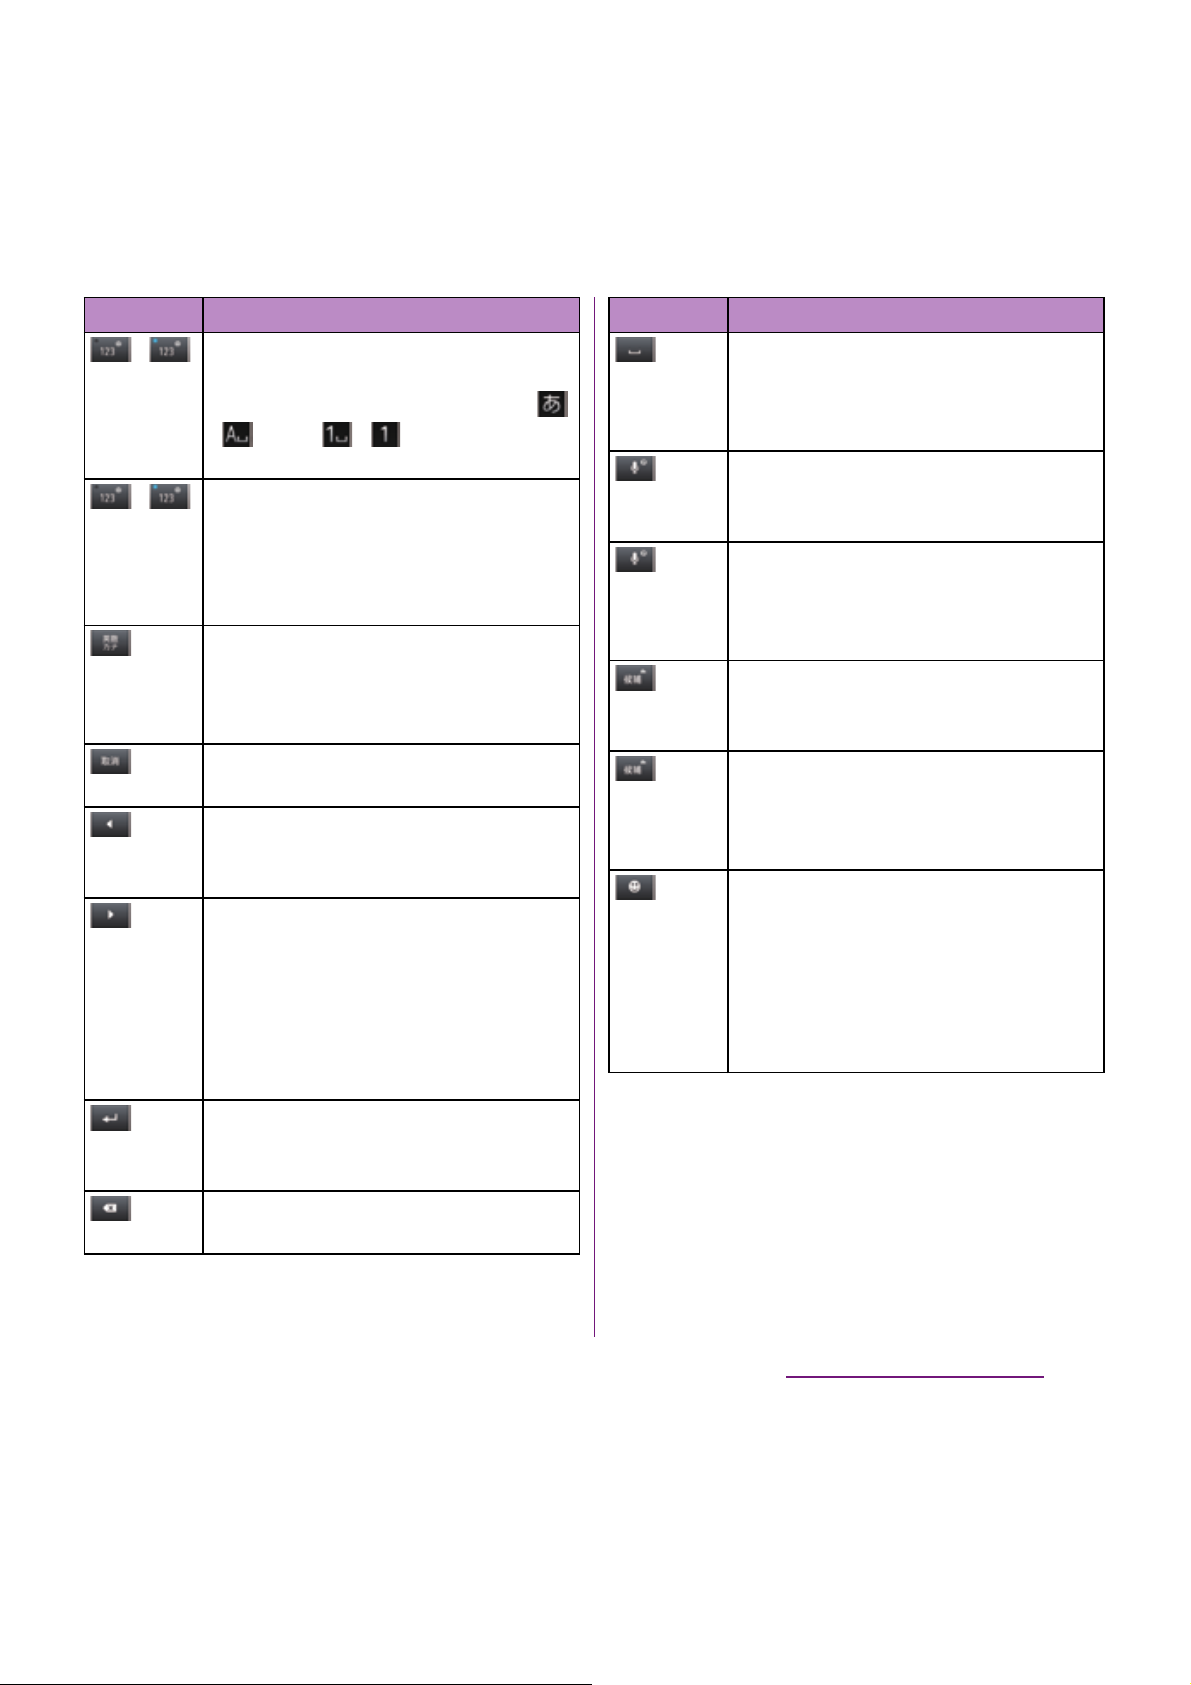
54
Before Using the Terminal
*1 When any characters are entered, just tap the
desired position on the entered character string to
move the cursor.
*2 Before the conversion is fixed, "
確定
(Fix)" is
displayed. In some screens such as the search box
or mail account registration screen, "
次へ
(Next)", "
完
了
(Done)", "実行 (Go)", etc. appear.
/
Each time you tap, the character mode
switches "Hiragana/Kanji/alphabets" →
"Number" in order and a status icon,
/ , etc.
→
/ appears in the
status bar.
/
Touch and
hold
Display a one-byte/two-byte symbol list
to enter them. Switch tabs to display
smiley list to enter them. (a pictogram
tab and deco-mail tab are also displayed
when entering in sp-mode mail.)
Displayed before fixing character. Display
word predictions or alphanumeric
conversion candidates assigned to
entered letter.
Appears after conversion is fixed to
return to text before conversion.
Move the cursor
*1
: To the left.
Touch and hold to move continuously.
Or change the range for conversion.
Move the cursor
*1
: To the right.
Touch and hold to move continuously.
Or change the range for conversion.
When there is an unfixed character string
with the cursor at the right end, tap to
enter the same character as the one at
the end.
*2
Fix entered or converted characters.
When characters are already fixed, enter
a line feed at the cursor position.
Delete the character before the cursor.
Touch and hold to delete continuously.
Icon Function
When any character is entered or after
entered character is fixed, a space can be
entered. Touch and hold to input spaces
continuously.
Enter characters by voice. A candidate
list appears. Tap the character string you
want to enter.
Touch and
hold
Handwritten input guide in the POBox
Touch User Guide (Japanese) activates
and you can view the detailed
explanations on the handwritten input.
In Hiragana/Kanji input mode,
conversion candidates can be displayed
to enter.
Touch and
hold
Activate online dictionary.
You need to mark "Online dictionary"
checkbox in the Japanese keyboard
setting screen.
Appears when entering number. Onebyte/two-byte symbol list can be
displayed to enter them. Switch tabs to
display smiley list to enter them. (a
pictogram tab and deco-mail tab are
also displayed when entering in spmode mail.)
Icon Function
Page 57
55
Before Using the Terminal
❖
Information
・
When you enter character by handwritten input for
the first time, a screen indicating how to input
appears. Tap [OK] or
x
.
・
In handwritten input, hiragana, alphabet, number,
some symbols can be entered.
・
You can enter a character continuously without
deleting entered character.
・
For voiced sound and semi voiced sound mark, enter
in the right upper part of the handwritten input
screen.
・
For punctuation mark and lower case, enter in the
lower part from the center of the handwritten input.
・
For entering alphabet, enter it with reference to
lower horizontal line of the handwritten input screen.
While entering characters, touch and hold
the text box to display the "Edit text" menu
and edit entered text.
Editing text
Select word
Drag the slider to select a part of
entered text.
Select all
Select all entered text.
Input method
P.47
Add "xx" to
dictionary
Add the entered text to the User
dictionary.
Cut
Display when [Select word]/[Select
all] is selected. Cut the text selected
by [Select word]/[Select all].
Copy
Display when [Select word]/[Select
all] is selected. Copy the text selected
by [Select word]/[Select all].
Paste
Display when [Cut]/[Copy] is
selected. Paste the cut/copied text by
[Cut]/[Copy].
Page 58
56
Before Using the Terminal
For each type of keyboard, you can make
settings related to character entry.
1
From the Home screen, tap
t
and tap [Settings]
u
[Language &
keyboard].
2
Tap [Xperia™ keyboard]/[Xperia™
Chinese keyboard]/[Xperia
™
Japanese keyboard].
・
The settings screen for each keyboard
appears. Tap an item displayed on the
screen to set.
❖
Information
・
The items vary depending on the keyboard type.
Make keyboard settings such as Key sound,
Vibrate, etc.
1
From the Home screen, tap
t
and tap [Settings]
u
[Language &
keyboard]
u
[Xperia™ Japanese
keyboard].
・
The setting screen for Japanese
keyboard appears.
2
Tap [On-screen keyboard settings].
・
Tap (mark/unmark) an item in
"Common on-screen keyboard
settings" to set.
Setting character entry Setting Japanese keyboard
Common settings of software
keyboard
Key sound
Set whether to sound at the time of key
tapping.
Vibrate
Set whether to vibrate at the time of key
tapping.
Pop-up on
key press
Set to popup the key you have tapped at
the time of key tapping.
Keep
keyboard
type
Set to stabilize the last status of
keyboard (phonepad/QWERTY/
Japanese syllabary keyboard/
handwritten input) in the each portrait/
landscape screen by kana/alphabet/
number input mode.
Page 59

57
Before Using the Terminal
Auto capitalization
Set to capitalize automatically the top letter
you enter in English input mode.
1
From the Home screen, tap
t
and tap [Settings]
u
[Language &
keyboard]
u
[Xperia™ Japanese
keyboard].
2
Mark [Auto capitalization].
You can change keyboard skin.
1
From the Home screen, tap
t
and tap [Settings]
u
[Language &
keyboard].
2
Tap [Xperia™ Japanese keyboard]
u
[Select keyboard skin].
3
Select from displayed keyboards
and tap [Set skin].
❖
Information
・
To download and add keyboard skins from a website,
tap [Search for skin] in Step 3. Some keyboard skins
downloaded from website may not support the
terminal. To delete the downloaded keyboard skin,
from the Home screen, tap
t
, and tap
[Settings]
u
[Applications]u[Manage applications],
and tap the keyboard skin you want to delete in the
"Downloaded" tab, and then tap
[Uninstall]
u
[OK]u[OK].
The Word suggestion function shows
predicted conversion candidates when you
enter Japanese/English characters. Mark the
checkbox of Word suggestion checkbox to
set options "Error correction" and "Auto
space". These options help you entering
characters with ease.
Setting Word suggestion
1
From the Home screen, tap
t
and tap [Settings]
u
[Language &
keyboard].
2
Tap [Xperia™ Japanese keyboard].
3
Mark [Word suggestions]
checkbox.
❖
Information
・
Flick or drag downward in the word suggestion field
to enlarge suggestion field in which you can see
more word suggestions and to hide the keyboard.
Tap [
前候補
(previous suggestion)]/[
次候補
(next
suggestion)]/[
確定
(fix)] shown at the bottom of the
word suggestions screen to select/fix characters to
be entered. To show the software keyboard, tap [
戻る
(Back)] or
x
.
Keyboard skin settings
Word suggestion settings
Page 60

58
Before Using the Terminal
Setting Error correction
・
Error correction corrects mistyped characters
and shows conversion candidates before
conversion in one-byte alphabet input mode
when entering characters with QWERTY
keyboard.
1
From the Home screen, tap
t
and tap [Settings]
u
[Language &
keyboard].
2
Tap [Xperia™ Japanese keyboard].
3
Mark [Error correction] checkbox.
Setting Auto space
・
When selecting English word suggestion,
Auto space enters next to the entered
character. However, space is not entered
automatically in the mail address or URL input
fields.
1
From the Home screen, tap
t
and tap [Settings]
u
[Language &
keyboard].
2
Tap [Xperia™ Japanese keyboard].
3
Mark [Auto space] checkbox.
To display the word as the preferred
candidate when entering characters, set the
user dictionary beforehand.
Registering words in user dictionaries
There are 2 types of user dictionaries: "My
words Japanese" and "My words English".
1
From the Home screen, tap
t
and tap [Settings]
u
[Language &
keyboard].
2
Tap [Xperia™ Japanese keyboard].
3
Tap [My words Japanese]/[My
words English].
4
Tap
t
and [Add].
5
Tap the character input box for
"Reading" and fill it out, then tap
[
次へ
(Next)].
6
Enter a word in the input box for
"Word" and tap [
完了
(Done)].
7
Tap [Save].
❖
Information
・
Up to 50 characters (regardless of one-byte or twobyte characters) can be stored for a "Reading" and
"Word", and up to 500 items can be stored in the user
dictionary.
User dictionary settings
Page 61
59
Before Using the Terminal
・
When entering characters, tapping [直変 (Direct
conversion)] in the word suggestion field may give
priority to some registered words.
Editing user dictionary
1
On the user dictionary screen,
select a word you want to edit.
2
Tap
t
and [Edit].
3
Edit the content and tap [Save].
Deleting words from user dictionary
1
On the user dictionary screen,
select a word you want to delete.
2
Tap
t
and tap [Delete]u[OK].
・
To delete all words in the list, tap
[Delete all]
u
[OK].
Setting Words by learning
1
From the Home screen, tap
t
and tap [Settings]
u
[Language &
keyboard].
2
Tap [Xperia™ Japanese
keyboard]
u
[Learn words].
3
Mark [Save word while typing].
・
To reset already learned words, tap
[Delete saved words]
u
[OK].
❖
Information
・
To delete learned words individually, touch and hold
a word you want to delete and tap [
学習データ削除
(Delete learned word)].
Setting online dictionary
When entering characters, touch and hold
to activate online dictionary.
1
From the Home screen, tap
t
and tap [Settings]
u
[Language &
keyboard].
2
Tap [Xperia™ Japanese
keyboard]
u
[Online dictionary].
3
Tap [Online dictionary].
4
Read the note and tap [Agree].
・
[Online dictionary] is marked.
Backing up and restoring dictionary
User dictionary and Words by learning can be
backed up onto an internal storage and
restored when needed.
1
From the Home screen, tap
t
and tap [Settings]
u
[Language &
keyboard].
2
Tap [Xperia™ Japanese
keyboard]
u
[Backup & restore].
3
Tap [Backup]/[Restore].
Page 62
60
Before Using the Terminal
4
Mark a dictionary you want to
back up or restore from among
[My words Japanese], [My words
English], or [Learn words].
5
Tap [Go].
・
When backing up, a screen asking
whether to overwrite the user
dictionary on the internal storage
appears. When restoring, a screen
asking whether to overwrite the user
dictionary in the terminal appears.
6
Tap [OK]u[OK].
・
The data is backed up or restored.
❖
Information
・
If restoring data is failed, user dictionary in the
terminal restores to the default.
・
User dictionary and Words by learning are not
backed up onto microSD card.
When entering characters, touch and hold
and tap to display the plug-in
application list and use desired plug-in
applications.
Using Contact Picker 2.3
If contacts are registered to the Contacts, you
can use "Contact Picker 2.3" to enter contact
information when entering characters.
"Contact Picker 2.3" is a preinstalled plug-in
application.
1
On a character entry screen, touch
and hold .
2
Tap .
3
Tap [Contact Picker 2.3].
4
On the contacts list screen, tap the
contact to be quoted.
5
Mark the item you want to enter
and tap [Done].
・
If you want to select/deselect all items,
tap [Mark all]/[Unmark all].
❖
Information
・
On the contacts list screen, tap [History] or [Favorites]
to display specified contacts.
Adding a plug-in application
You can install and add plug-in applications
to use when entering characters.
1
From the Home screen, tap
t
and tap [Settings]
u
[Language &
keyboard].
2
Tap [Xperia™ Japanese
keyboard]
u
[Manage extensions].
3
On the Info screen, tap [OK].
・
The POBox plug-in setting screen
appears.
Using a plug-in application
Page 63
61
Before Using the Terminal
4
Tap [Download new extensions].
5
Tap an application and follow the
onscreen instructions.
❖
Information
・
Marked plug-in applications in the POBox plug-in
setting screen can be activated in the character entry
screen. Checkboxes for preinstalled plug-in
applications, "Contact Picker 2.3" is marked by
default.
You can view the detailed explanations on
the high performance Japanese keyboard
from the basic to application. The latest
information can be obtained from the
websites for plug-in applications or keyboard
skins.
1
From the Home screen, tap
t
and tap [Settings]
u
[Language &
keyboard].
2
Tap [Xperia™ Japanese
keyboard]
u
[POBox Touch User
Guide].
❖
Information
・
Touch and hold in the handwritten input to
activate the handwritten input guide in the POBox
Touch User Guide (Japanese) to view the detailed
explanations on the handwritten input.
POBox Touch User Guide
Page 64
62
docomo Palette UI
docomo Palette UI
Home screen is a start screen for using
applications. You can personalize the Home
screen by adding or moving, for example,
application shortcuts and widgets, or
changing the wallpaper.
Tapping
y
displays Home screen which
consists of up to 12 screens you can use
flicking left and right.
a
Home screen position : Current position in 7 home
screens
b
Widget : Google Search
c
Widget : i-Channel
d
Widget : Machi-chara
e
Shortcuts (applications)
f
Applications button
g
Wallpapers
❖
Information
・
You can switch the home application between
"docomo" and "Xperia
™
" in the terminal.
"docomo" is set to the home application by default.
To switch the home application, from the Home
screen, tap
u
[Setup guide] and on the Preferred
applications screen, [Change now]
u
[Home screen],
or from the Home screen, tap
t
,
[Settings]
u
[Xperia™]u[Preferred apps
settings]
u
[Home screen]. To switch applications
(Home, phonebook (contacts), video or music player)
to be used in the terminal all at once, from the Home
screen, tap [Preferred apps settings]
u
[OK], or from
the Home screen, tap
t
,
[Settings]
u
[Xperia™]u[Preferred apps
settings]
u
[Set all to].
・
When the home application is switched, widgets or
shortcuts on the screen may not be displayed
correctly depending on home screen layout etc.
Switching the Home screen
1
Flick the Home screen to left or
right.
・
The Home screen switches.
❖
Information
・
You can check the current position of the Home
screen with at the top of the screen.
・
Alternatively, display "Home screens" (P.67) and then
tap any home screen to switch.
Home screen
Learning Home screen
a
b
c
e
f e
g
d
Page 65
63
docomo Palette UI
Displaying a list of home screens
1
From the Home screen, pinch-in.
・
A home screen list appears.
❖
Information
・
At the left end home screen, tap
y
or from the
Home screen, tap
t
and tap [Home screens] to
display the list.
・
To return to the home screen, pinch-out, or tap
y
or
x
.
1
From the Home screen, tap
t
.
2
Tap [Add].
・
"Add to home screen" menu appears to
change the Home screen.
■
Add to home screen
❖
Information
・
"Add to home screen" appears also by touching and
holding anywhere on the Home screen without
icons.
Adding a shortcut to the Home screen
1
In "Add to home screen" menu, tap
[Shortcut].
2
Select a shortcut you want to add.
・
The shortcut appears on the Home
screen.
❖
Information
・
Alternatively, you can add from the Home screen,
and touch and hold an icon you want to add, tap
[Add].
Adding to the Home screen
Shortcut
Add shortcuts of applications or
setting screens. (P.67)
Widget
Add widgets. (P.68)
Folder
Create new folder or add folders
related to the Phonebook. (P.69)
Kisekae
Change the background of the
home screen or application screen,
or download from website to add.
(P.69)
Wallpaper
Change the wallpaper or download
from website to add. (P.69)
Group
Add group shortcut of applications
screen. (P.70)
Page 66
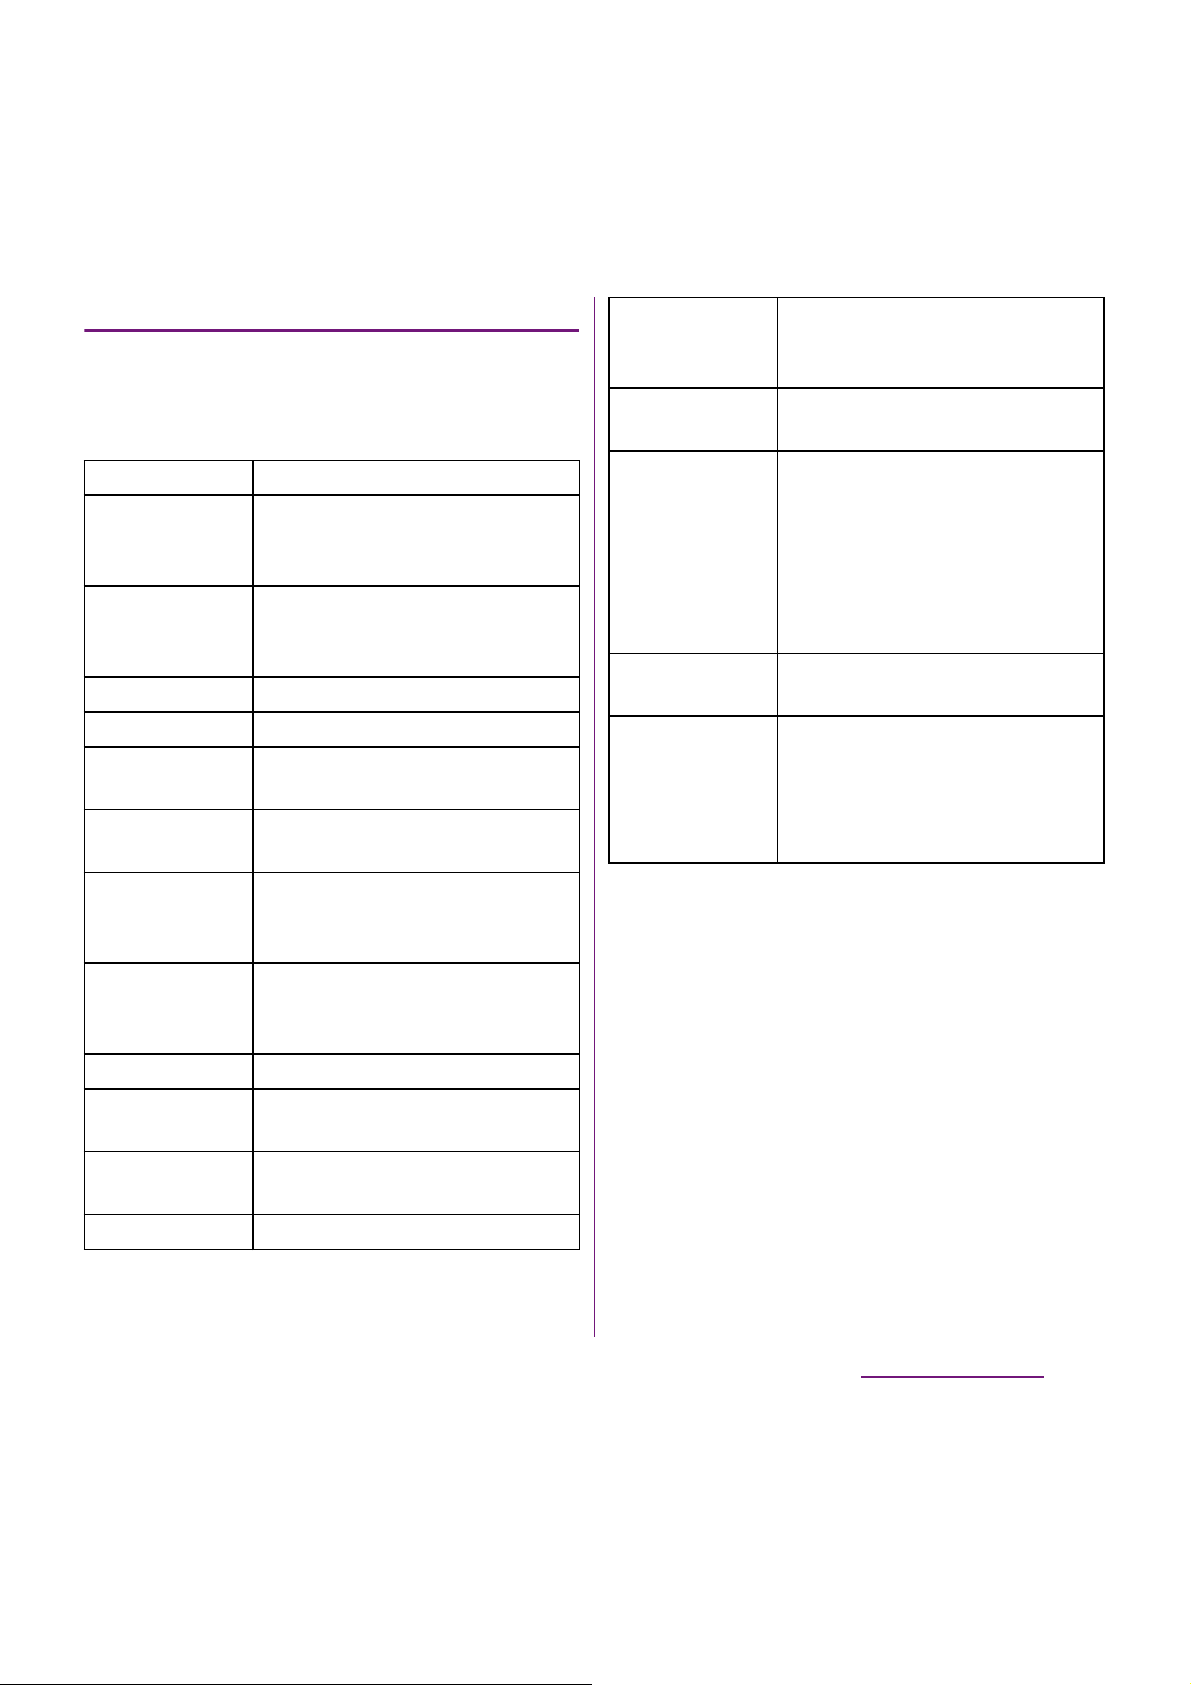
64
docomo Palette UI
Adding a widget to the Home screen
1
In "Add to home screen" menu, tap
[Widget].
・
A list of widgets appears.
2
Select an item.
❖
Information
・
If you install an application with widget from Android
Market, the installed widget is added to the widget
list.
Calendar
Display the calendar.
Contents
Headline
Display the latest contents
information of music, video, ebook, etc.
docomo
location
information
Display docomo location
information application.
Facebook
View comments of members.
Google Search
Display the Quick search box.
Google+
Display Google+, compose article
to post.
Home screen
tips
Display tips of the Home screen
operation.
Infrared
Display "Send Myself" button and
"Receive file" button for infrared
communication.
i
チャネルウィ
ジェット
(i-
Channel widget)
Display the latest information such
as news or weather information in
ticker.
Latitude
View locations of members.
Machi-chara
Display reception of mails or calls
information with Machi-chara.
Market
Display recommended
applications of Android Market.
Personal area
Display personal area.
Phonebook
Select members
Display history of calls or message
(SMS) of 3 contacts selected from
the Phonebook fixed/at random.
Schedule &
Memo
Display memos or photo memos
on the calendar.
Traffic
Display necessary time to transfer
from your current location to your
destination and the widget on the
Home screen when you enter a
widget name or destination. Tap to
confirm the provided traffic
condition.
YouTube
Display the list of frequently played
movies and recommended.
ドコモ地図ナビ
ウィジェット
(DOCOMO map
navigation
widget)
Display a map around current
location and neighboring spots
Page 67

65
docomo Palette UI
Adding a folder to the Home screen
1
In "Add to home screen" menu, tap
[Folder].
2
Select a folder you want to add.
・
The folder appears on the Home
screen.
・
You can rename or add items to a folder
by selecting [New folder] on the folder
selection screen.
■
Renaming
Touch and hold a folder you want to
rename
u
Tap [Edit name]uTap the
[Folder name] entry box to enter a folder
name and tap [OK].
■
Adding an item
From the Home screen, touch and hold a
shortcut you want to add to the
folder
u
Drag it onto a folder and lift up
your finger.
・
A shortcut is moved into a folder.
❖
Information
・
Alternatively, open a folder by tapping and then
touch and hold the title bar to display the [Folder
name] entry box to change.
Changing Kisekae
1
In "Add to home screen" menu, tap
[Kisekae].
2
Select Kisekae you want to change
to and tap [Set].
❖
Information
・
You can add Kisekae contents by tapping [Search] to
download from website. To delete added Kisekae
contents, select the image and tap
[Delete]
u
[Delete].
・
Alternatively, from the Home screen, tap
t
and
tap [Kisekae/Wallp].
Changing wallpaper
1
In "Add to home screen" menu, tap
[Wallpaper].
2
Tap [Gallery]/[Live wallpapers]/
[Wallpaper gallery]/[Xperia
™
wallpapers].
・
When you tap [Xperia™ wallpapers],
select an image to set to the wallpaper,
tap [Set wallpaper].
・
When you tap [Gallery], select an image
to set to the wallpaper, pinch or the
cropping frame or drag it to area you
want to use as wallpaper, and tap [Save]
to set wallpaper.
Page 68
66
docomo Palette UI
・
When you tap [Live wallpapers], select a
content, tap [Set wallpaper]. You can
also download and add Live wallpaper
content from a web page. For some
contents, you can change type or
contents displayed on the wallpaper by
tapping [Settings].
・
When you tap [Wallpaper gallery],
select an image you want to use as
wallpaper, then tap [Set wallpaper].
❖
Information
・
Alternatively, from the Home screen, tap
t
and
tap [Kisekae/Wallp].
Adding a group to the Home screen
1
In "Add to home screen" menu, tap
[Group].
2
Select a group of applications you
want to add.
❖
Information
・
Alternatively, on the Applications screen (P.71), touch
and hold the group name and then tap [Add].
You can add, delete, sort home screens while
the home screen list is displayed.
・
For details on the home screen list, see
"Displaying a list of home screens" (P.67).
Adding a home screen
1
From the Home screen, tap
t
and tap [Home screens].
2
Tap .
❖
Information
・
There are 7 home screens by default. You can add 5
home screens moreover.
Deleting a home screen
1
From the Home screen, tap
t
and tap [Home screens].
2
Touch and hold a home screen you
want to delete and tap [Delete].
❖
Information
・
Alternatively, touch and hold a home screen you
want to delete from the home screen list and drag to
displayed at the bottom of the screen.
Sorting home screens
1
From the Home screen, tap
t
and tap [Home screens].
2
Touch and hold a home screen you
want to sort.
3
Drag it to the place you want to
move and lift up your finger.
Changing the Home screen
Page 69
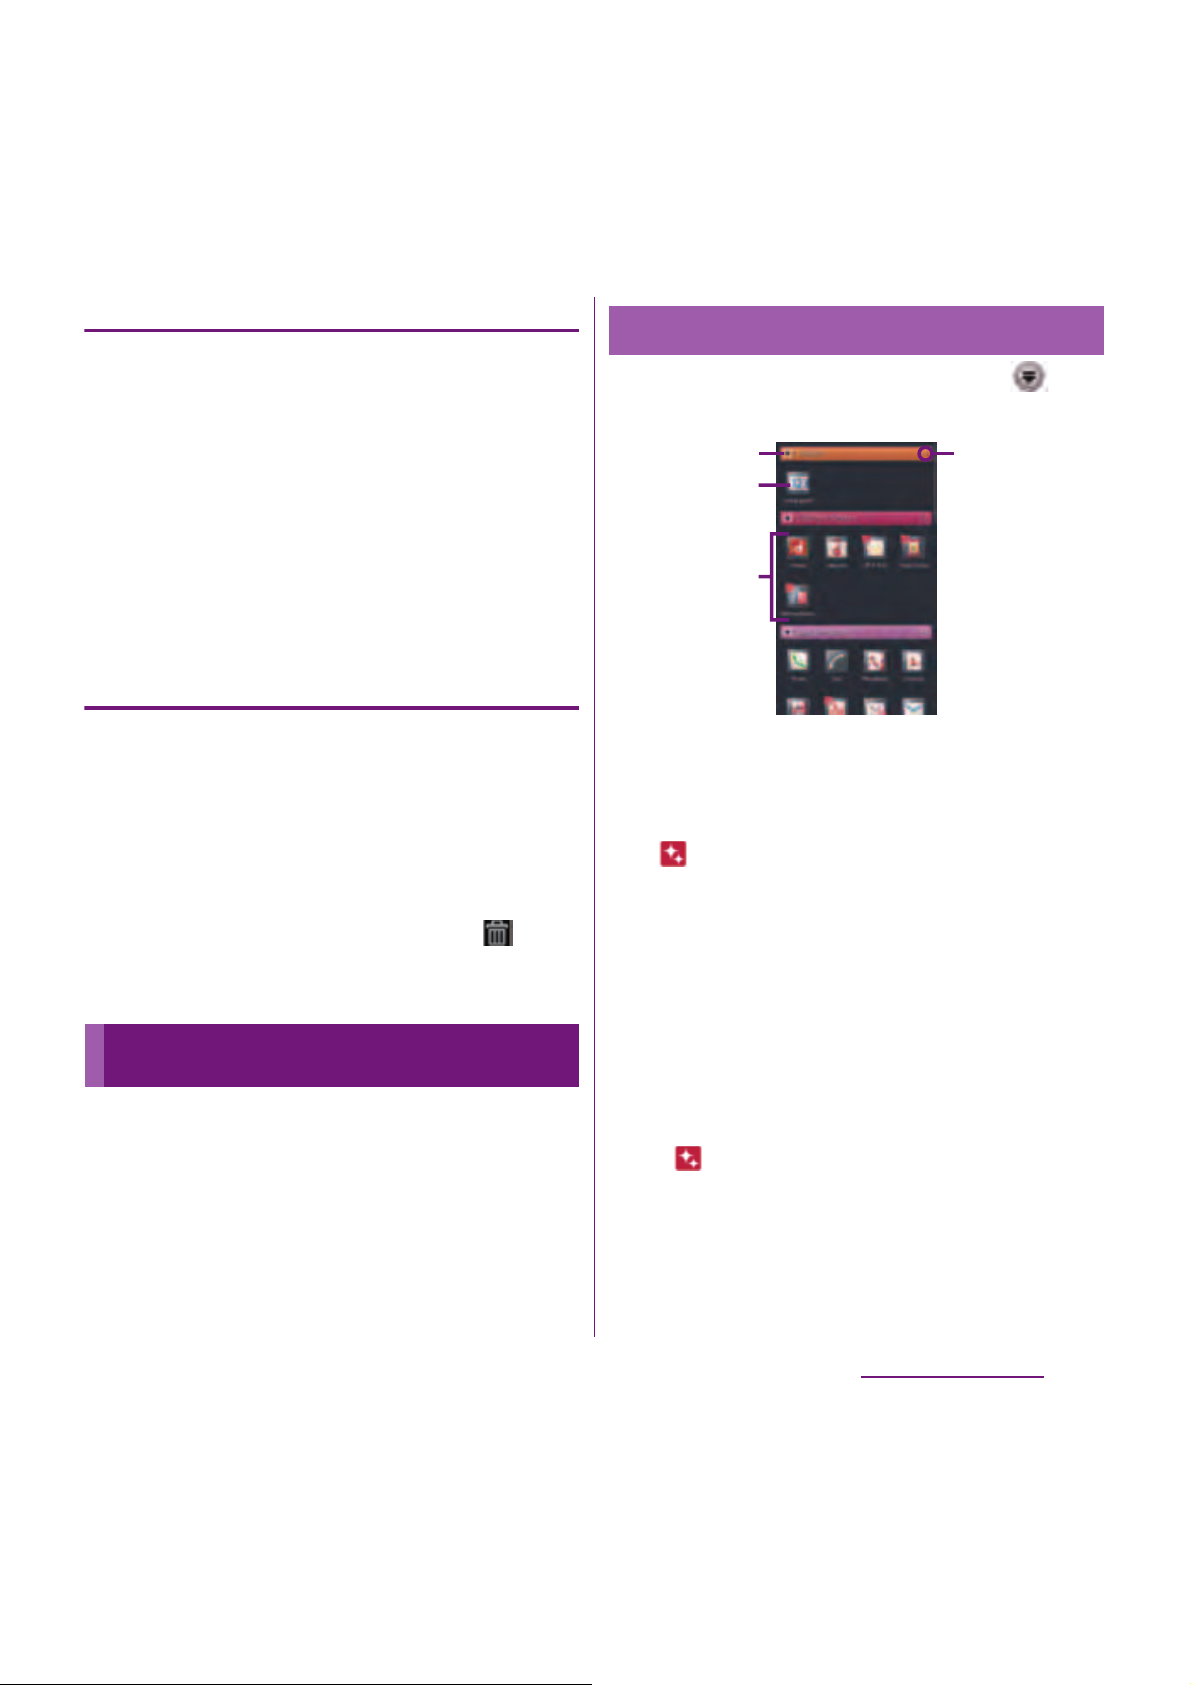
67
docomo Palette UI
Moving an icon on the Home screen
1
From the Home screen, touch an
icon you want to move.
2
Drag it anywhere.
・
To move to another Home screen, keep
touching the icon and drag to left or
right.
3
Release your finger from the icon.
Deleting an icon from the Home
screen
1
From the Home screen, touch an
icon you want to delete.
2
Tap [Delete].
❖
Information
・
Alternatively, touch and hold an icon you want to
delete from the Home screen and drag to
displayed at the bottom of the screen.
You can access the applications installed in
the terminal using the Applications screen.
1
From the Home screen, tap .
・
The Applications screen appears.
a
Group name
・
To display/hide applications in the group, tap the
group name.
b
Application icon
・
is displayed for newly arrived application.
・
Some application icons are displayed with a
number of missed calls or unread mails.
c
Applications in the group
・
To display/hide all applications in the group,
pinch on the Applications screen.
d
Number of applications in the group
❖
Information
・
To close the Applications screen, tap
x
or
y
.
・
If you download applications from website, icons
with are added to the Applications screen.
Applications screen
Learning Applications screen
a
d
c
b
Page 70
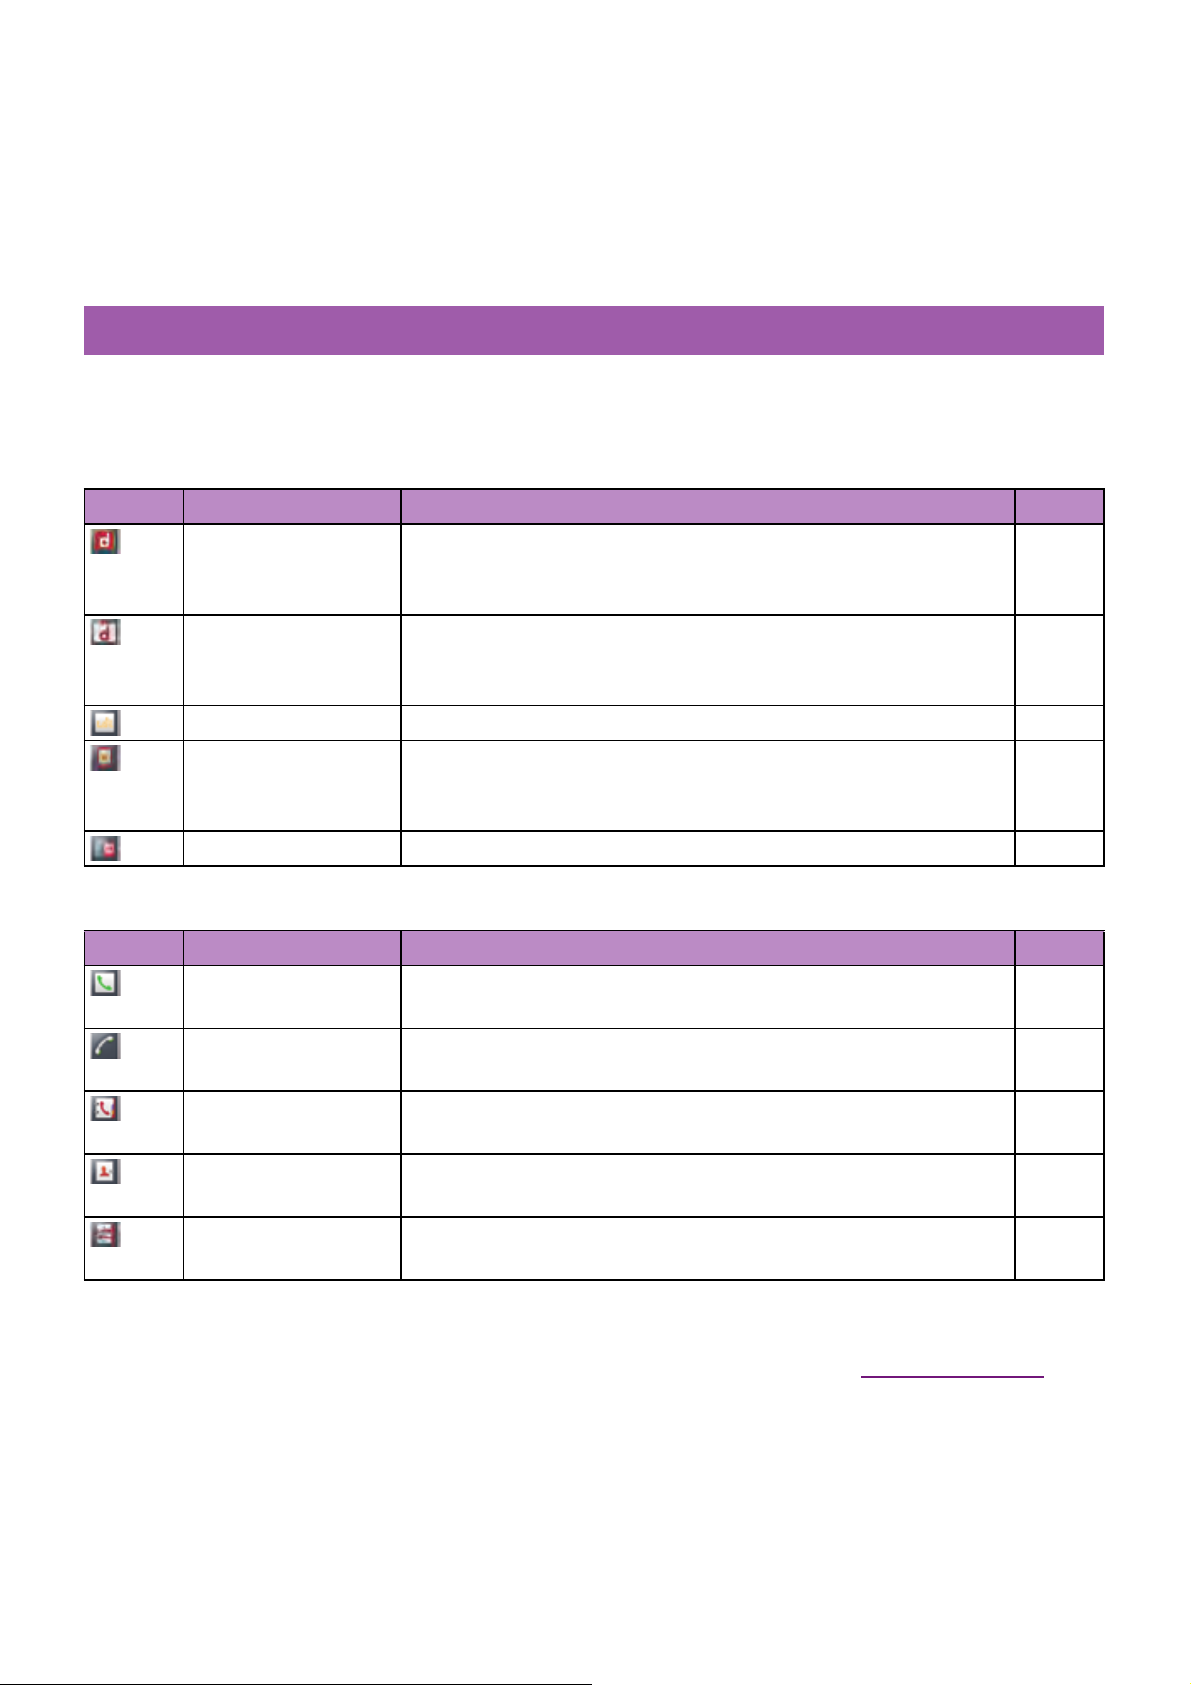
68
docomo Palette UI
The applications displayed on the Applications screen by default are as follows.
・
For usage of some applications, separate subscription (Charged) is required.
■
DOCOMO Services
■
Basic Functions
Applications
Icon Applications Description Page
dmenu A shortcut application for "dmenu" to find contents that you used
in i-mode and joyful and convenient contents for smartphones
readily.
−
dmarket Activate dmarket. You can buy contents such as music, videos,
books at the dmarket. Applications on the Android market are also
featured.
−
i
チャネル
(i-Channel)
An application for using i-Channel.
−
Machi-chara An application for displaying character on the terminal screen. The
character moves on the widget and informs you i-concier
information, mail reception, incoming calls, etc.
−
docomo backup Back up or restore phonebook data etc.
−
Icon Applications Description Page
Phone Activate DOCOMO phone application to make/receive calls, and
switch between calls.
P.81
Dial Activate Xperia
™
phone application to make/receive calls, and
switch between calls.
−
Phonebook Activate DOCOMO phonebook application to manage phonebooks
of your friends or colleagues.
P.87
Contacts Activate Xperia
™
phonebook application to manage contacts of
your friends or colleagues.
−
PhoneBookCopy An application to move or copy phonebook data using external
memory such as microSD card.
P.94
Page 71
69
docomo Palette UI
■
Entertainment
声の宅配便
(Koe-no-
Takuhaibin)
Use "Koe-no-Takuhaibin" easily and conveniently on the
smartphone. You can record and play voice messages with a simple
operation.
P.105
sp
モードメール
(sp-
mode mail)
Send/receive mails using docomo mail address (@docomo.ne.jp).
You can use pictogram and Deco-mail. Mails can be received
automatically.
P.141
Email Send and receive emails (multiple accounts are also available). P.144
Gmail Send and receive mails from/to a Google account. P.151
Area Mail Receive early warning "Area Mail" and view received Area Mail. P.152
Messaging Send and receive messages (SMS). P.141
Talk Chat with friends using Google Talk instant messaging. P.151
Anshin Scan Protect your terminal from virus damage. Detect virus hidden in
installed applications or microSD card.
−
災害用キット
(Disaster
kit)
An application which helps you to record and check messages on
the docomo Disaster Message Board.
−
Instruction Manual Display the terminal instruction manual. You can start a function
you want to use from the explanation.
P.2
Setup guide Display Setup guide. P.39
Browser Browse Web and WAP sites (except for WML) and download files. P.153
Google Search Search information in the terminal and web pages from keywords. P.46
Voice Search Use Google search by voice input. P.46
Market Access to the Android Market, download and buy new applications. P.204
APP NAVI Introduce applications for Android terminals. You can search
applications from categories, rankings, etc.
−
Icon Applications Description Page
Book Store MyShelf An application for viewing e-books you purchased on the dmarket
BOOK store.
−
Media Player Play music and videos.
−
Icon Applications Description Page
Page 72
70
docomo Palette UI
■
Tools
Videos An application for accessing movie rental service of Android
market. Select a movie you want to watch and rent it.
−
YouTube Playback videos around the world or upload recorded videos. P.198
G
ガイド番組表
(G-Guide program
table)
View ground-based broadcasting, BS digital broadcasting.
Searching programs by key words or categories,watching 1Seg, and
remote recording 1Seg program from outside are available.
−
1Seg Watch 1Seg program. P.215
Music player Playback music data stored on the internal storage or microSD card. P.200
FM radio Use FM radio. P.222
Connected devices Set and manage media server via Connected devices, and connect
DLNA device to the terminal via Wi-Fi network to share files.
P.170
Facebook Activate Facebook client application. P.133
Google+ Activate Social Network Service (SNS) client application "Google+"
provided by Google.
−
Messenger Chat with friends using Google+ instant messaging.
−
Timescape
™
View Social Networking Service (SNS) history. P.205
Gallery View photos and videos you took, and images posted on Picasa or
Facebook.
P.193
Icon Applications Description Page
Camera Take photos and record video clips. P.172
Memo Create/Manage memos.
−
Schedule Create/Manage schedule.
−
Calendar Display a calendar and manage schedule. P.227
地図アプリ
(Map
Application)
Functions such as 地図 (Map),
お店や施設検索
(Shop and facility
search),
ナビ
(Navigation), 乗換 (Transfer function),
訪れた街
(Visited
places) support your outing.
−
Maps Use Google map services, such as viewing current location, finding
another location and calculating routes.
P.211
Icon Applications Description Page
Page 73
71
docomo Palette UI
■
Osaifu/Shopping
■
Settings
Navigation Display Google map navigation to receive detailed guides for your
destination.
P.213
Places Use various information registered on Google map, such as shops
around the current location.
P.212
Latitude Check and share the location information of specified friends. P.214
Name card creator Create original name card to display in the My profile field of
docomo "Phonebook" application.
−
Infrared An application which allows you to send and receive phonebook
data, etc. via infrared communication.
P.163
Calculator Perform basic calculations such as addition, subtraction,
multiplication, and division.
−
Alarm and Clock Display clock or set an alarm, etc. P.229
OfficeSuite View and read Office documents. P.233
Icon Applications Description Page
Osaifu-Keitai Use Osaifu-Keitai. P.223
iD
設定アプリ
(iD
setting application)
Make settings for use of electronic money, iD. P.226
ToruCa Acquire, display, search, or refresh ToruCa. P.226
Icon Applications Description Page
Settings Make the terminal settings. P.107
eco
モード
(eco mode)
An application to set "eco mode" for reducing battery consumption
by adjusting each setting such as display brightness.
−
AUTO-GPS Use GPS compatible services which inform you weather
information, location information such as shop locations, tourist
information, etc. according to your location.
−
Icon Applications Description Page
Page 74
72
docomo Palette UI
❖
Information
・
Some application names may not be displayed fully.
・
Some application require downloading and installation. If you cannot download application by tapping, from
the Home screen, tap
t
and [Settings]u[Applications]u[Unknown sources]u[OK], mark the checkbox and
then tap the application.
docomo location
information
Provide location information such as imadoco search,
imadocokantan search, Keitai-Osagashi Service, Emergency
Location Report.
Also access service website to change or make various settings.
−
Update center Update the latest software or application. P.252
Flash Player Settings Change settings for controlling application running method in
Flash Player.
−
Icon Applications Description Page
Page 75
73
docomo Palette UI
From the Applications screen, you can add
icons, sort icons, uninstall applications. Also
you can change group setting.
Adding an application icon to the
Home screen
1
From the Applications screen,
touch and hold an icon you want to
add to the Home screen.
2
Tap [Add].
・
The application icon is added onto the
Home screen.
❖
Information
・
From the Home screen, tap
t
and
[Add]
u
[Shortcut]uTap [Application] and select an
application to add.
Sorting application icons
1
From the Applications screen,
touch and hold an application icon
you want to sort.
2
Drag it to the place you want to
move and lift up your finger.
・
The application icon moves.
❖
Information
・
To move an application icon to another application
group, touch and hold the icon on the Applications
screen, tap [Move], then select a group you want to
move to.
Uninstalling an application
Some application icons can be deleted from
the Applications screen.
・
Before uninstalling application, back up
contents related to the application that you
want to save including data saved in the
application.
・
Some applications cannot be uninstalled.
1
From the Applications screen,
touch and hold an icon of
application you want to uninstall.
2
Tap [Uninstall].
・
Uninstall screen appears.
3
Tap [OK]u[OK].
❖
Information
・
Some applications pre-installed in the terminal may
not be uninstalled.
・
Application icons can be deleted from the managing
applications screen. For details, refer to "Deleting
installed application" (P.131).
Changing the Applications
screen
Page 76

74
docomo Palette UI
Adding a shortcut of group to the
Home screen
1
From the Applications screen,
touch and hold a group you want
to add to the Home screen.
2
Tap [Add].
・
Shortcuts to the group is added to the
Home screen.
❖
Information
・
From the Home screen, tap
t
and [Add]uTap
[Group] and select a group to add.
Changing a label color of the group
name
1
From the Applications screen,
touch and hold a group you want
to change the color.
2
Tap [Edit label] and select label
color to change.
・
The color for group name is changed.
Deleting a group
1
From the Applications screen,
touch and hold a name of a group
you want to delete.
2
Tap [Delete]u[OK].
・
Application icons belonged to the
deleted group move to the "Download
Application" group.
❖
Information
・
"Recently", "DOCOMO Services", and "Download
Application" groups cannot be deleted.
Changing a group name
1
From the Applications screen,
touch and hold a group name you
want to rename.
2
Tap [Edit name].
3
Enter a group name in the [Group
name] entry box and tap [OK].
・
The group is renamed.
❖
Information
・
"Recently", "DOCOMO Services", and "Download
Application" groups cannot be renamed.
Adding a group
1
From the Applications screen, tap
t
and tap [Add group].
2
Enter a group name in the [Group
name] entry box and tap [OK].
・
A new group is added.
Page 77
75
docomo Palette UI
Sorting groups
1
From the Applications screen,
touch and hold an group name you
want to sort.
2
Drag it to the place you want to
move and lift up your finger.
・
The group is moved.
You can view and access recently used
applications from this window.
1
Touch and hold
y
.
・
Recently used applications appear on a
list.
Search application installed into the terminal
to activate.
1
From the Applications screen, tap
t
and then tap [Search].
・
For the first time to join Latitude, a
message confirming whether to agree
to Google's privacy policy appears.
Select [Agree] or [Disagree].
・
The software keyboard appears.
2
Tap at the left of the search box
and select [Apps].
3
Enter application name you want
to search.
・
Search suggestions appear as you enter
a character.
4
Tap a search item.
・
The application activates.
❖
Information
・
Alternatively, from the Home screen, tap , then
tap [Google Search] to search application. For details,
refer to "Searching information in the terminal and
web pages" (P.46).
Opening the recently used
applications window
Searching applications
Page 78
76
docomo Palette UI
Icons on the Applications screen can be
displayed in a list or tiles.
1
From the Applications screen, tap
t
and then tap [List format]/
[Tile format].
You can check information on the home
application and make display setting.
Displaying the Home application
information
1
From the Home screen, tap
t
and then tap [More].
2
Tap [Application info].
・
The home application information
appears.
Making display setting for the Home
screen
1
From the Home screen, tap
t
and then tap [More].
2
Tap [Home settings].
・
The "Home settings" screen appears
and the following setting can be made.
Switching application screens
Home application information
Personal area
Set whether to display personal area
on the Home screen.
Wallpaper loop
Set whether to loop wallpaper on
the Home screen.
Sync function
Set whether to automatically refresh
personal area information.
International
roaming
Set whether to automatically refresh
personal area information during
International roaming.
Page 79
77
Calling/Network Services
Calling/Network Services
1
From the Home screen, tap
[Phone]
u
[Dial].
2
Enter the number of the recipient
and tap .
・
If a wrong number is entered, tap
to delete the number.
❖
Information
・
To activate Xperia™ phone application, from the
Home screen, tap , then tap [Dial].
Entering pause (,)
This function allows you to operate voice
mail at home, to reserve tickets, or to check
the balance of a bank account, etc.
1
From the Home screen, tap
[Phone]
u
[Dial].
2
Enter the phone number, then tap
t
and tap [Add 2–sec pause].
When the terminal is within range of the
service area, you can make an emergency call
of 110 (Police), 119 (Fire and ambulance), or
118 (Japan Coast Guard).
1
From the Home screen, tap
[Phone]
u
[Dial].
2
Enter the number of the
emergency call and tap .
・
If a wrong number is entered, tap
to delete the number.
❖
Note
・
If UIM is not inserted to the terminal, emergency calls
(110, 119, 118) cannot be made in Japan.
・
This terminal supports "Emergency call location
information". If you use the terminal to place a call to
emergency numbers such as 110, 119, or 118, the
information of a location where you are calling from
(location information) is automatically notified to the
Emergency call acceptance organization such as the
Police Station.
The Emergency call acceptance organization may not
be able to figure out your exact location depending
on the location where you place a call or radio wave
condition.
If you make a call hiding your caller ID, such as by
entering a phone number with "184" for each call, the
location information and phone number are not
notified. However, the Emergency call acceptance
organization may decide to obtain the location
information and phone number regardless of your
settings when they consider it is necessary for
lifesaving, etc. Note that the areas/time for which the
"Emergency call location information" is ready to be
used vary depending on the preparatory state of each
Emergency call acceptance organization.
Making/Receiving a call
Making a call
Emergency call
Page 80
78
Calling/Network Services
・
When calling 110, 119 or 118 for emergency from the
terminal, tell that you are calling from a mobile
phone, and give your phone number and your
current location precisely for checking callback from
the police/fire department. Also, make a point to call
in a stationary position to prevent the call from being
dropped. Do not power off the terminal for at least
10 minutes after the emergency call just in case the
Police or Fire/Ambulance may have to get in contact
with you.
・
Note that you may not connect to the local Fire
Department or Police Station depending on where
you are calling from. In this case, try to call from a
public phone or an ordinary phone in the
neighborhood.
Making an emergency call while UIM
is locked
1
Tap [Emergency call].
2
Enter the emergency number and
tap [Call].
・
If a wrong number is entered, tap
on the right of the phone number field
to delete the number.
❖
Note
・
In Japan, while entering PIN code on the screen
(P.126) or during PUK lock (P.127), the emergency
numbers of 110/119/118 are not available.
1
Tap [End call].
For details on WORLD CALL, refer to
DOCOMO International Services website.
1
From the Home screen, tap
[Phone]
u
[Dial].
2
Touch and hold [0] key until "+"
sign appears.
・
When making an international call, "+"
is replaced by an international access
code.
3
Enter Country codeuArea code
(City code)
u
the number of the
recipient and tap .
・
If the area code begins with "0", omit "0".
However, "0" may be required to dial to
some countries or areas such as Italy.
1
While receiving a call, touch
(left) and drag it to (right).
❖
Information
・
If you are using regular headphones without a
microphone, you need to speak to the microphone
of the terminal.
・
Even during the screen lock or key lock, the icon
appears and you can answer a call by the same
operation.
Ending a call
Making an international call
(WORLD CALL)
Receiving a call
Page 81
79
Calling/Network Services
1
While receiving a call, touch
(right) and drag it to (left).
❖
Information
・
Even during the screen lock or key lock, the icon
appears and you can decline a call by the same
operation.
You can make or answer a call with Stereo
Headset with Microphone (Sample)
connecting to the terminal.
■
Making a call
1
Make a call with Stereo Headset
with Microphone (Sample)
connected.
・
An operation of making a call is the
same as usual operation. (P.81)
2
Press the switch to end the call.
■
Receiving a call
1
While receiving a call, press the
switch of Stereo Headset with
Microphone (Sample).
・
The call is connected.
・
When receiving a call, you can decline
the call by pressing the switch for a
second or more.
2
To end a call, press the switch
again.
❖
Information
・
Even when you listen to music with Stereo Headset
with Microphone (Sample) connecting to the
terminal, you can answer a call by pressing the
switch. Music pauses on calling. Music restarts when
ending the call automatically depending on the
player application.
・
Connecting and removing Stereo Headset with
Microphone (Sample) repeatedly during a call may
disconnect a call.
Declining a call
Using Stereo Headset with
Microphone
Page 82
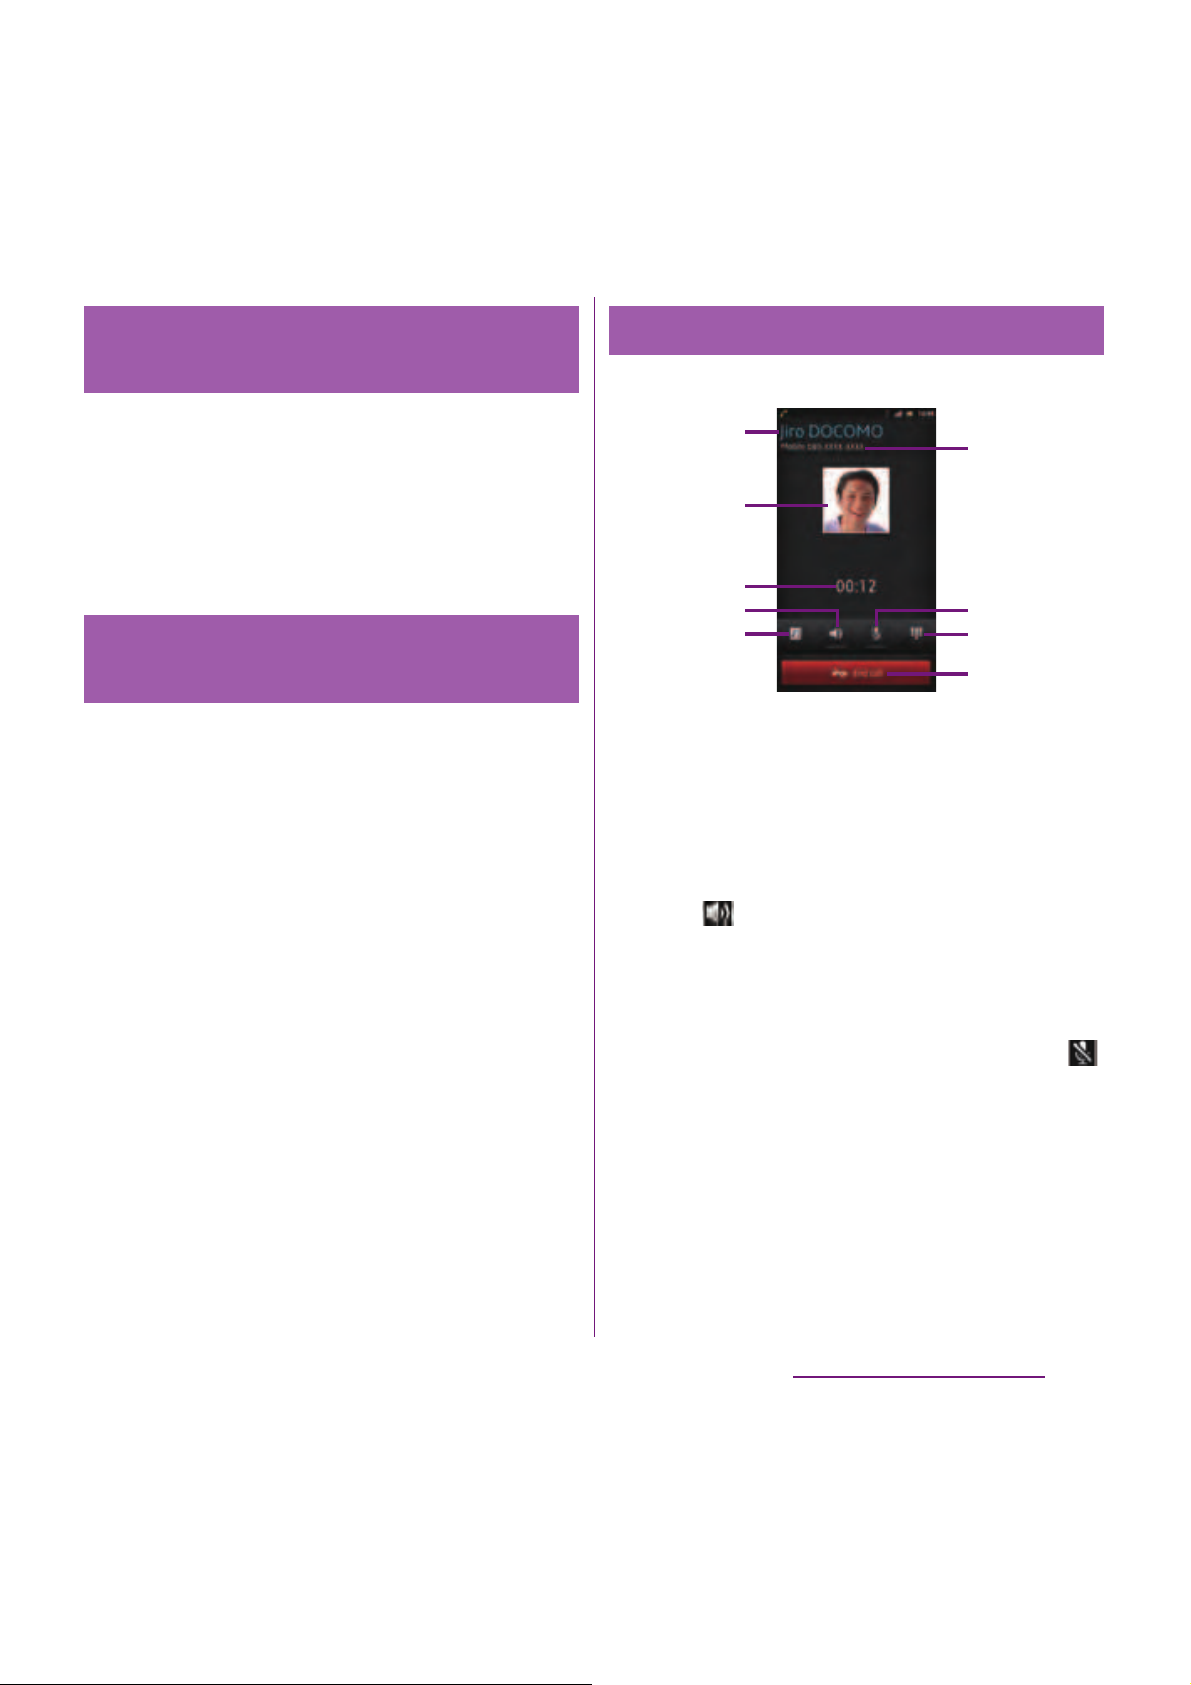
80
Calling/Network Services
1
During a call, press
m
to
adjust.
❖
Information
・
You can adjust the ear speaker volume only during a
call.
1
When receiving a call, press
m
.
❖
Information
・
Alternatively, press
p
to mute the ringtone for
incoming call.
・
From the Home screen, press
m
to mute the
ringtone for an incoming call.
■
Calling screen
a
Name of the other party
b
A photo saved in Phonebook
c
Call duration time
d
Speaker : Set speakerphone on/off.
・
Other party's voice can be heard from the speaker
and handsfree call can be made.
・
When the speakerphone is on, a speakerphone
icon appears in the status bar.
e
Phonebook : View phonebook entry list screen.
f
Number of the other party
g
Mute : Set muting on/off of the microphone during
a call.
・
When the microphone is muted, a mute icon
appears in the status bar.
h
Dial key : Enter the phone number you want to add
to make a call.
・
The ongoing call is automatically on hold.
・
To add a call, "Call waiting" subscription is
required. (P.101)
i
End call
Adjusting the ear speaker
volume
Muting the ringtone for an
incoming call
Operations during a call
e
f
a
i
h
b
c
g
d
Page 83
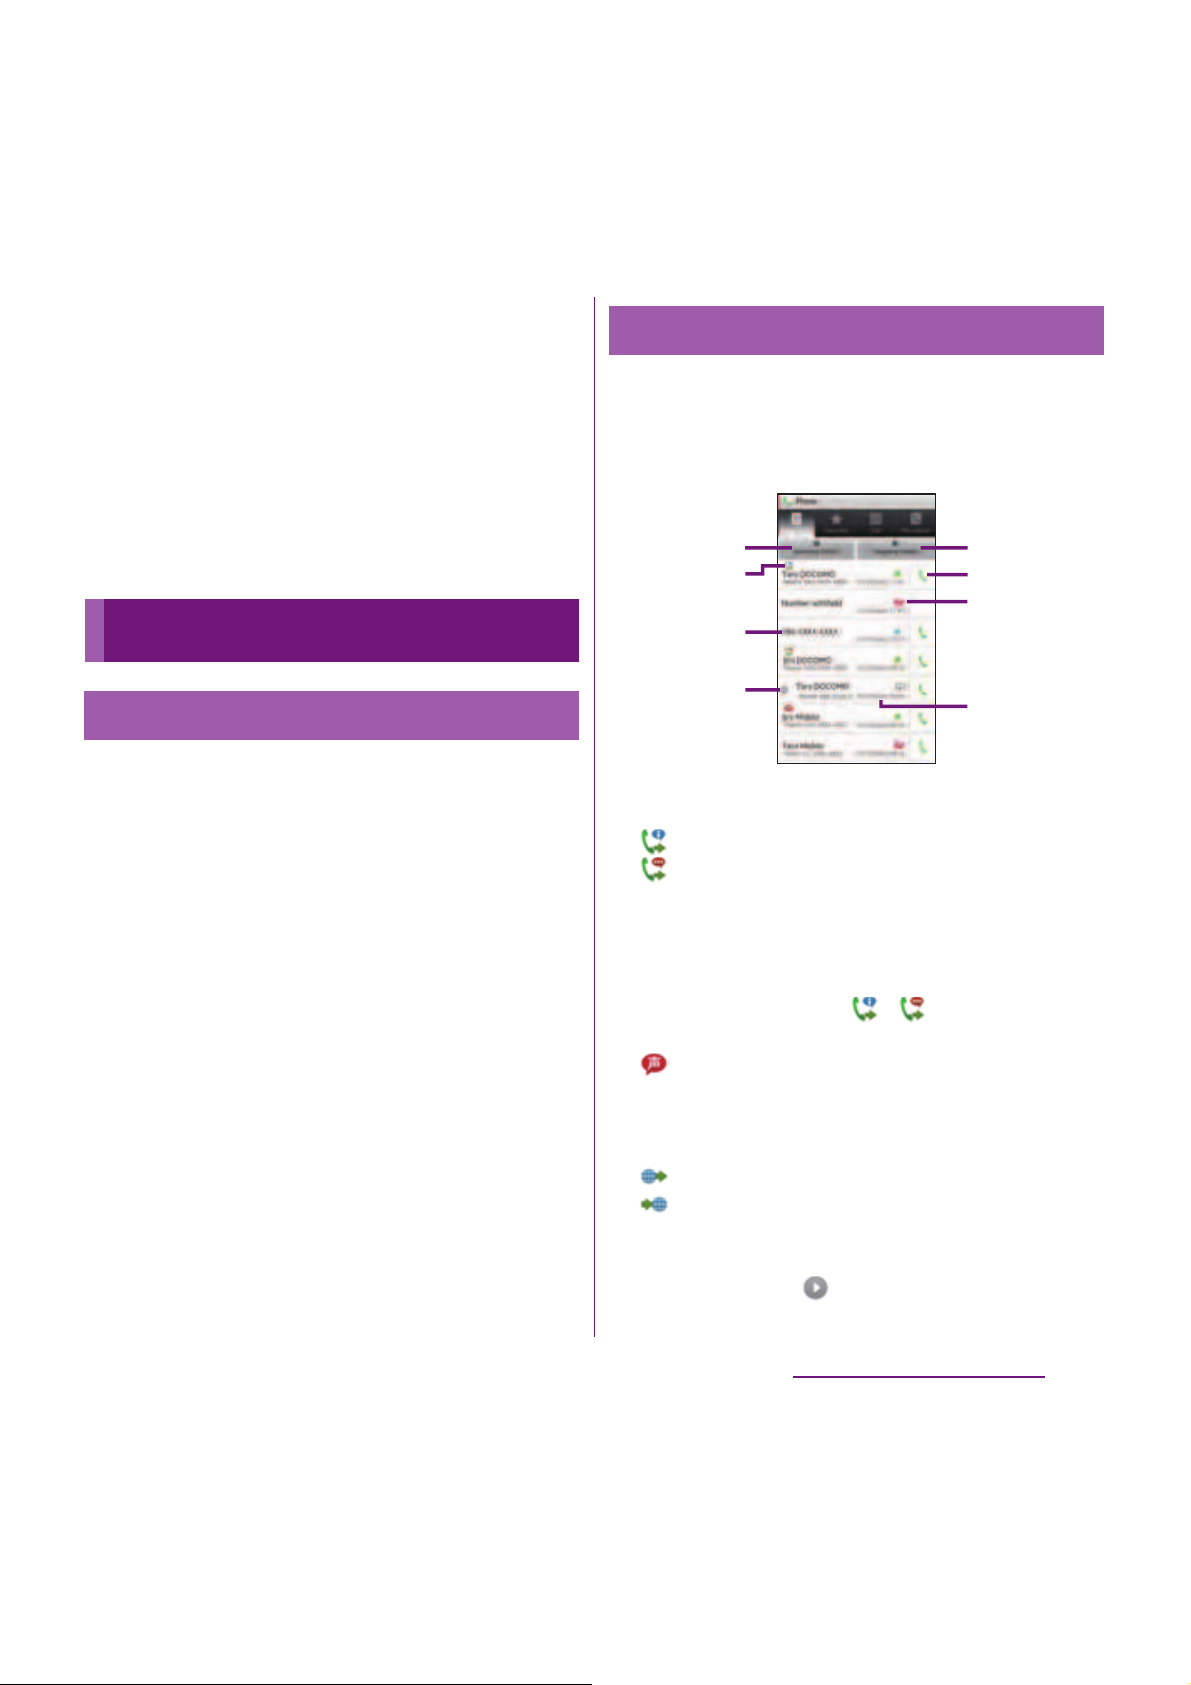
81
Calling/Network Services
❖
Information
・
During a call/on hold, tap
t
to display "Hold"/
"Retrieve call".
・
To set a call on hold, "Call waiting" subscription is
required. (P.101)
❖
Note
・
Do not bring the terminal close to your ear with the
speakerphone on to avoid from hearing damage.
1
From the Home screen, tap
[Phone]
u
[Recent calls].
・
The Recent calls screen appears.
On the Recent calls screen, incoming call
history and outgoing call history are
displayed in chronological order.
a
Incoming history
b
Call status icons
: Caller ID notified
: Caller ID hidden
・
Notified if calls are made with "186" (Notify)/"184"
(Hide) prefixed to the number.
・
If entering phone number and tap
t
, then
select [Caller ID notification]u[Notify]/[Not
notify] to make a call, / does not appear in
the call log list.
: Koe-no-Takuhaibin
・
For details on Koe-no-Takuhaibin, refer to "
声の宅
配便
(Koe-no-Takuhaibin)" (P.105) or NTT
DOCOMO website.
: Outgoing international call
: Incoming international call
c
Phone number/name
d
Consecutive calls with the same party
・
Tap a history or to display combined history,
tap again to display individually.
Call history
Showing call history
Recent calls screen
a
b
c
e
g
h
d
f
Page 84
82
Calling/Network Services
・
Number in bracket indicates number of
combined history.
e
Outgoing history
f
Outgoing
g
History icons
: Missed call
: Incoming call
: Outgoing call
h
Date
❖
Information
・
On the Recent calls screen, tap
t
and tap [Search
location] to check the current location of the party
using imadocokantan search.
When you have missed calls, appears in
the status bar.
1
Drag the status bar downwards.
2
Tap [Missed call].
❖
Information
・
When you have missed calls, a missed call icon
appears on the key lock screen. For details on the
setting to show/hide icons, see "Setting information
displayed on the key unlock screen" (P.123).
1
On the Recent calls screen (P.85),
tap .
1
On the Recent calls screen (P.85),
touch and hold a phone number
and then tap [Add to phonebook].
・
You can also select by tapping the
number and then [Add to phonebook]
at the bottom of the screen.
2
Tap desired phonebook entry, or
tap [Register new].
・
Tap [Register new] to display a screen
for selection of the saving locations
appears. You can select Phone contacts
or docomo as the saving location.
3
Edit the phonebook entry and tap
[Save].
1
On the Recent calls screen (P.85),
tap [Incoming history]/[Outgoing
history].
2
On the incoming history list
screen/outgoing history list
screen, tap
t
and tap [Delete
all]
u
[OK].
Displaying missed calls
Making a call from call history
Adding a number from the call
history to Phonebook
Deleting a call history
Page 85
83
Calling/Network Services
❖
Information
・
On the Recent calls screen, touch and hold a log you
want to delete, tap [Remove from call log]
u
[OK] to
delete an item.
In the Phonebook, you can enter various
information for contacts, for example, phone
numbers, mail addresses and web service
accounts. You can display phonebook entry
to get quick access to that contact.
1
From the Home screen, tap ,
then tap [Phonebook].
・
The phonebook list screen appears.
・
Alternatively, from the Home screen,
tap [Phone] and tap [Phonebook] tab to
display phonebook list screen.
❖
Information
・
To activate Xperia™ phone application, from the
Home screen, tap , then tap [Contacts].
On the phonebok list screen, you can view
details of your contacts. You can add a
picture to a phonebook entry, and display
phonebook entries by group.
a
Phonebook tab
b
Entry items
・
Icons indicate entry items.
c
Name registered in the phonebook entry
d
Photo set in the phonebook entry
e
Group
・
Select a group to be displayed.
f
Communication tab
・
History of communication exchanged by calls
and mails is shown.
g
My profile tab
h
Index character area
・
Tap the right end of the phonebook list screen to
display index character with which you can
search a name in Japanese syllabary and
alphabetic order.
i
Register
j
Search
Phonebook
Opening Phonebook
Phonebook list screen
i
a
f
j
b
c
d
e
g
h
Page 86
84
Calling/Network Services
Adding a new phonebook entry
1
On the phonebook list screen
(P.87), tap [Register].
2
Tap [Phone contacts]/[docomo].
・
When you set Google account etc., set
account appears as a saving location.
3
Enter a name.
4
Select or enter desired additional
information for the contact.
・
You can add items besides ringtone,
phone number and mail address by
tapping in "Others", then tap [Add]
to add items.
5
Tap [Save].
❖
Information
・
When you save "Phonetic name (family/given)",
phonebook list is displayed according to Japanese
syllabary order or alphabets order of "Phonetic
name".
Using shortcuts of Phonebook
When you tap the photo (image) part on the
phonebook list screen, shortcuts for phone,
mail, etc. appear. Tap the shortcut to make a
call, or create and send a mail.
* You can also use the registered addresses, etc.
❖
Information
・
When you tap a part other than photo (image) on
the phonebook list screen, profile screen of the
phonebook appears instead of shortcuts.
・
Email shortcut appears when email address is saved
in the selected phonebook entry and you have set
your email account. If you have not set your email
account, shortcut for Gmail ( ) appears.
・
For a phonebook entry with only name, tapping
photo (image) does not display the shortcut.
Searching for a phonebook entry
1
On the phonebook list screen
(P.87), tap [Search].
2
Enter name or reading you want to
search in the search field.
・
All phonebook entries beginning with
those letters appear.
Managing phonebook
Make a call to saved phone number.
Create and send message (SMS).
Select Email application to create and send an
email.
・
If [Use by default for this action.] checkbox is
marked, application selection screen will not
appear for the next time.
Page 87

85
Calling/Network Services
Changing display conditions for
phonebook entries
You can set registered phonebook entries to
be displayed in the phonebook list.
1
On the phonebook list screen
(P.87), tap
t
, then tap
[Others]
u
[Display settings].
■
Setting display condition
Mark [Only contacts with phones].
・
Only phonebook entries with phone
numbers registered are displayed.
■
Setting show/hide
Tap a Social Networking Service (SNS)
name which is made phonebook entry
saving location setting or account setting
(P.133)
u
Mark/Unmark [Other
phonebook], [All phonebook].
・
Mark to display synchronized
phonebook entries, or unmark not to
display them.
2
Tap [Done].
Editing a phonebook entry
1
On the phonebook list screen
(P.87), tap a phonebook entry to
edit.
・
The profile screen of the phonebook
appears.
2
Tap [Edit].
・
By tapping [Add] on the profile editing
screen, you can add information to
enter.
3
Edit the desired information and
tap [Save].
❖
Information
・
Alternatively, touch and hold a phonebook entry in
the phonebook list and tap [Edit] to display profile
editing screen.
Combining phonebook entries
You can bind multiple phonebook entries
together into one.
1
On the phonebook list screen
(P.87), tap a phonebook entry to
combine.
・
The profile screen of the phonebook
appears.
2
Tap
t
and [Join/Separate].
・
Phonebook entries to be combined are
displayed.
3
Tap the phonebook entry to
combine.
❖
Information
・
To cancel binding, on the profile screen of the
phonebook, tap
t
, then tap [Join/
Separate]
u
[Separate].
Page 88

86
Calling/Network Services
Deleting a phonebook entry
1
On the phonebook list screen
(P.87), tap
t
, then tap [Delete].
2
Mark the phonebook entry you
want to delete.
・
If you want to delete all phonebook
entries, tap [Select all].
3
Tap [Delete]u[OK].
❖
Information
・
Alternatively, on the phonebook list screen, touch
and hold a phonebook entry you want to delete, tap
[Delete]
u
[OK] to delete.
Making a call using the phonebook
1
On the phonebook list screen
(P.87), tap a phonebook entry to
call.
・
The profile screen of the phonebook
appears.
2
Tap a desired phone number.
3
Tap [Call].
❖
Information
・
Alternatively, touch and hold a phonebook entry in
the phonebook list and tap [Phone] to make a call.
Checking My profile and editing
information
1
On the phonebook list screen
(P.87), tap [My profile].
2
Tap [Edit].
・
Profile editing screen appears.
3
Enter the new information or make
the changes you want.
・
By tapping [Add] on the profile editing
screen, you can add information to
enter.
・
Tap in "Others", then tap [Add] to
add information.
4
When you are done, tap [Save].
❖
Information
・
You can register multiple phone numbers, mail
addresses, etc. in "My profile". Registered phone
number and logs of calls and mails between you and
registered phone numbers can be displayed in the
"Communication" tab.
Page 89
87
Calling/Network Services
Sending phonebook via infrared
communication/Bluetooth/Email/
Gmail
Registered phonebook and My profile
information can be sent using infrared
communication (P.163), Bluetooth function
(P.166), or email attachment function.
■
Sending phonebook
1
Tap a phonebook entry you want
to send on the phonebook list
screen (P.87).
・
The profile screen of the phonebook
appears.
2
Tap
t
and [Share].
3
Select sending method and follow
the onscreen instructions.
■
Sending My profile
1
Tap [My profile] on the phonebook
list screen (P.87).
2
Tap
t
and [Share].
3
Select sending method and follow
the onscreen instructions.
❖
Information
・
If you use Bluetooth function, tap [Turn on] to turn
on the Bluetooth function, search receiver's
Bluetooth device and send.
・
If you want to send data as files attached to email/
Gmail, send from the compose screen for the mail
service in which you have set an account. When you
have not set a Gmail account, setup wizard appears.
You can create and send email after settings are
done.
・
Messaging is not available.
・
You cannot send some information such as name
card data set in phonebook.
・
For sending all phonebook entries, see "Sharing
phonebook entry currently displayed" (P.94).
Registering a phonebook entry to
Favorites
You can mark a phonebook entry as a
favorite. The favorite list provides quick
access to the phonebook entry you have
marked.
1
On the phonebook list screen
(P.87), tap a phonebook entry you
want to mark.
・
The profile screen of the phonebook
appears.
2
Tap .
❖
Information
・
Only phonebook entries saved to the docomo
account can be added to Favorites.
・
To display phonebook entries added to Favorites, tap
[Groups] on the phonebook list screen
u
[Favorites]
or from the Home screen, tap [Phone]
u
[Favorites]
tab.
Page 90
88
Calling/Network Services
・
From the Home screen, tap [Phone]u[Favorites] to
display the phonebook data registered in Favorites
and "Commonly used phonebook data". Touch and
hold the phonebook data registered in Favorites or
Commonly used phonebook data to select "Remove
from favorites"/"Add to favorites".
Setting photo in a phonebook entry
1
On the phonebook list screen
(P.87), tap a phonebook entry you
want to add a picture.
・
The profile screen of the phonebook
appears.
2
Tap [Edit].
3
Tap [Settings] for image.
4
Tap [Add image]/[Take photo].
・
If you select [Add image], select a saved
photo and tap [Save].
・
Select [Take photo] to shoot a photo
and save it.
5
Tap [OK].
6
Tap [Save].
❖
Information
・
You can also set photo to a phonebook entry by the
following operation.
From the Home screen, tap
u
[Gallery]. View an
image you want to set and tap
t
, [Set
as]
u
[Phonebook icon]/[Contact picture]. Select a
phonebook entry to register to and tap [Save].
You can export/import phonebook entries
from/to microSD card or UIM. This is useful,
for example, when you want to transfer the
contact information to another phone.
❖
Information
・
You can also use a synchronization service for
synchronizing your phonebook. For details, refer to
"Data synchronization" (P.134).
Exporting phonebook to microSD
card
1
On the phonebook list screen
(P.87), tap
t
, then tap
[Others]
u
[Import/Export].
2
Tap [Export to SD card].
3
Select a phonebook you want to
export.
・
Tap to select any of [Export one
phonebook data]/[Export multiple
phonebook data]/[Export all
phonebook data], then tap [OK].
・
If you select [Export one phonebook
data]/[Export multiple phonebook
data] and tap [OK], select phonebook
entries to export then tap [OK].
Exporting/Importing
phonebook entries
Page 91

89
Calling/Network Services
4
Select [Yes]/[No] to attach name
card.
5
Tap [OK].
Importing phonebook from microSD
card
1
On the phonebook list screen
(P.87), tap
t
, then tap
[Others]
u
[Import/Export].
2
Tap [Import from SD card].
3
Tap [Phone contacts]/[docomo].
・
When you set Google account etc., it
appears as an import destination.
4
Select vCard file you want to
import.
・
If there is only one file, vCard file
selection screen does not appear. The
file is imported immediately.
・
If a file has multiple phonebook entries,
they are imported all at once.
・
If there are two or more vCard files, tap
any of [Import one phonebook data]/
[Import multiple phonebook data]/
[Import all phonebook data] to select.
5
Tap [OK].
・
If you select [Import one phonebook
data]/[Import multiple phonebook
data] and tap [OK], select vCard files to
import then tap [OK].
❖
Information
・
For some phonebook entries, a part of data may not
be imported or exported.
Importing phonebook entries from
UIM
1
On the phonebook list screen
(P.87), tap
t
, then tap
[Others]
u
[Import/Export].
2
Tap [Import from SIM card].
3
Tap [Phone contacts]/[docomo].
・
When you set Google account etc., it
appears as an import destination.
4
To import one contact, tap the
contact you want to import.
・
To import all contacts, tap [Import all].
・
If there is a phonebook entry whose
name is matched with the imported
entry, the entry is imported as a
separated one.
❖
Information
・
Names and phone numbers can be imported.
Page 92
90
Calling/Network Services
・
Alternatively, on the phonebook list screen, tap [My
profile] tab, then tap
t
and [General
settings]
u
[Data management]u[Import]u[Import
from SIM card] to import contacts from the UIM.
・
To export phonebook entries to UIM, use Xperia™
phonebook application. Note that only name and
the first phone number can be saved because of
memory space of UIM. For some phonebook entries,
a part of data may not be exported.
Sharing phonebook entry currently
displayed
1
On the phonebook list screen
(P.87), tap
t
, then tap
[Others]
u
[Import/Export].
2
Tap [Share phonebook data].
3
Select sending method and follow
the onscreen instructions.
・
If [Use by default for this action.]
checkbox is marked, application
selection screen will not appear for the
next time.
❖
Information
・
If display conditions for phonebook (P.89) are set,
only phonebook entries to be displayed are
exported.
・
If you use Bluetooth function, tap [Turn on] to turn
on the Bluetooth function, search receiver's
Bluetooth device and send.
・
If you want to send data as files attached to email/
Gmail, send from the compose screen for the mail
service in which you have set an account. When you
have not set a Gmail account, setup wizard appears.
You can create and send email after settings are
done.
・
Messaging is not available.
・
When sending two or more phonebook entries via
infrared communication, you need to enter a
passcode to authenticate. Passcode is a 4-digit
number fixed up between you and other parties in
advance.
・
You cannot send some information such as name
card data set in phonebook.
Phonebook data can be copied to another
terminal using microSD card. You can also
copy the Contacts data registered in Google
account to docomo account.
1
From the Home screen, tap ,
then tap [PhoneBookCopy].
・
When you use for the first time, agree to
"
使用許諾契約書
(License Agreement)".
Using PhoneBookCopy
Page 93

91
Calling/Network Services
Importing phonebook from microSD
card
1
Attach the microSD card with
phonebook entries saved to the
terminal.
2
On the "
インポート
(Import)" tab
screen, tap a file you want to
import.
3
Tap [
上書き
(Overwrite)]/[
追加
(Add)].
・
Imported phonebook data is saved in
docomo account.
Exporting phonebook to microSD
card
1
Attach the microSD card to the
terminal.
2
On the "
エクスポート
(Export)" tab
screen, tap [
開始
(Start)].
・
The Phonebook data saved in docomo
account is saved onto the microSD
card.
Copying contacts registered in
Google account to docomo account
1
On the "docomo
アカウントへコピー
(Copy to account)" tab screen, tap
a Google account you want to
copy.
2
Tap [
上書き
(Overwrite)]/[
追加
(Add)].
・
Copied phonebook data is saved in
docomo account.
・
You can also copy the phonebook data
saved in "Phone contact" to docomo
account as well as Google account.
❖
Information
・
If phonebook item names (e.g. Phone number, etc.)
of the other terminal are different from ones of your
terminal, the item names may be changed or
deleted. Also, some text may be deleted in copied
destination, because savable characters in a
phonebook entry vary by terminal.
・
When importing phonebook entries from microSD
card, files created by "all backup" cannot be loaded.
・
When exporting phonebook entries to microSD card,
data without Name cannot be copied.
・
If you use phonebook entries created (exported) by
PhoneBookCopy in other than PhoneBookCopy, they
may not be displayed correctly.
Page 94
92
Calling/Network Services
You can use the following DOCOMO network
services on the terminal. For details on the
outline and how to use each service, see the
relevant pages indicated in the following
table.
・
You cannot use the network services when
you are outside of the service area or in a
location without the radio wave.
・
"Stop of service" does not mean canceling the
subscription such as Voice Mail service, Call
Forwarding Service, etc.
・
For details, see the "Mobile Phone User's
Guide [Network Services]".
・
For subscription and inquiry, contact "General
Inquiries" on the last page of this manual.
・
Besides, you can use International roaming
setting (P.240).
❖
Information
・
In this manual, the outlines of each network service
are described with menu operations.
Network Services
Available Network Services
Service name
Monthly
charge
Application Page
Voice Mail service
Paid Required P.97
Call forwarding
Free Required P.99
Call Waiting
Paid Required P.101
Caller ID
Notification
Free Not required P.102
Nuisance Call
Blocking service
Free Not required P.103
Caller ID Display
Request Service
Free Not required P.103
Second call settings
Free Not required P.104
Remote operation
settings
Free Not required P.104
声の宅配便
(Koe-no-
Takuhaibin)
Free Not required P.105
Page 95
93
Calling/Network Services
The Voice Mail Service takes messages for
you, as long as it answers a call with the
answering message, if there is an incoming
call when you are in a location without the
radio wave, while the terminal is powered off,
or when you cannot answer a call within the
preset ring time.
・
When the Voice Mail service is set to "Activate"
and if you do not answer an incoming voice
call, the call is saved in "Recent calls" as a
"Missed call" and (Missed call) appears in
the status bar.
❖
Information
・
This terminal does not have Record message
function which records voice messages on internal
memory. Use the Voice Mail Service.
・
The message can be recorded up to 3 minutes for 1
message, up to 20 messages, and stored up to 72
hours.
・
The number of Voice Mail messages appears until
you have played all messages.
Basic flow of the Voice Mail Service
Voice Mail service
Your terminal receives a call
If you do not answer the call, it is
connected to the Voice Mail service center
The caller leaves a message
The receiver is notied that the Voice Mail
service center has taken the voice message
Play the voice message
▼
Activate the Voice Mail Service
▼
▼
▼
▼
If you are in a hurry and wish to leave a
message without listening to the Voice Mail
answering message, you can interrupt the
answering message and switch to message
recording mode immediately by tapping
[Dialpad]→[#]
Page 96
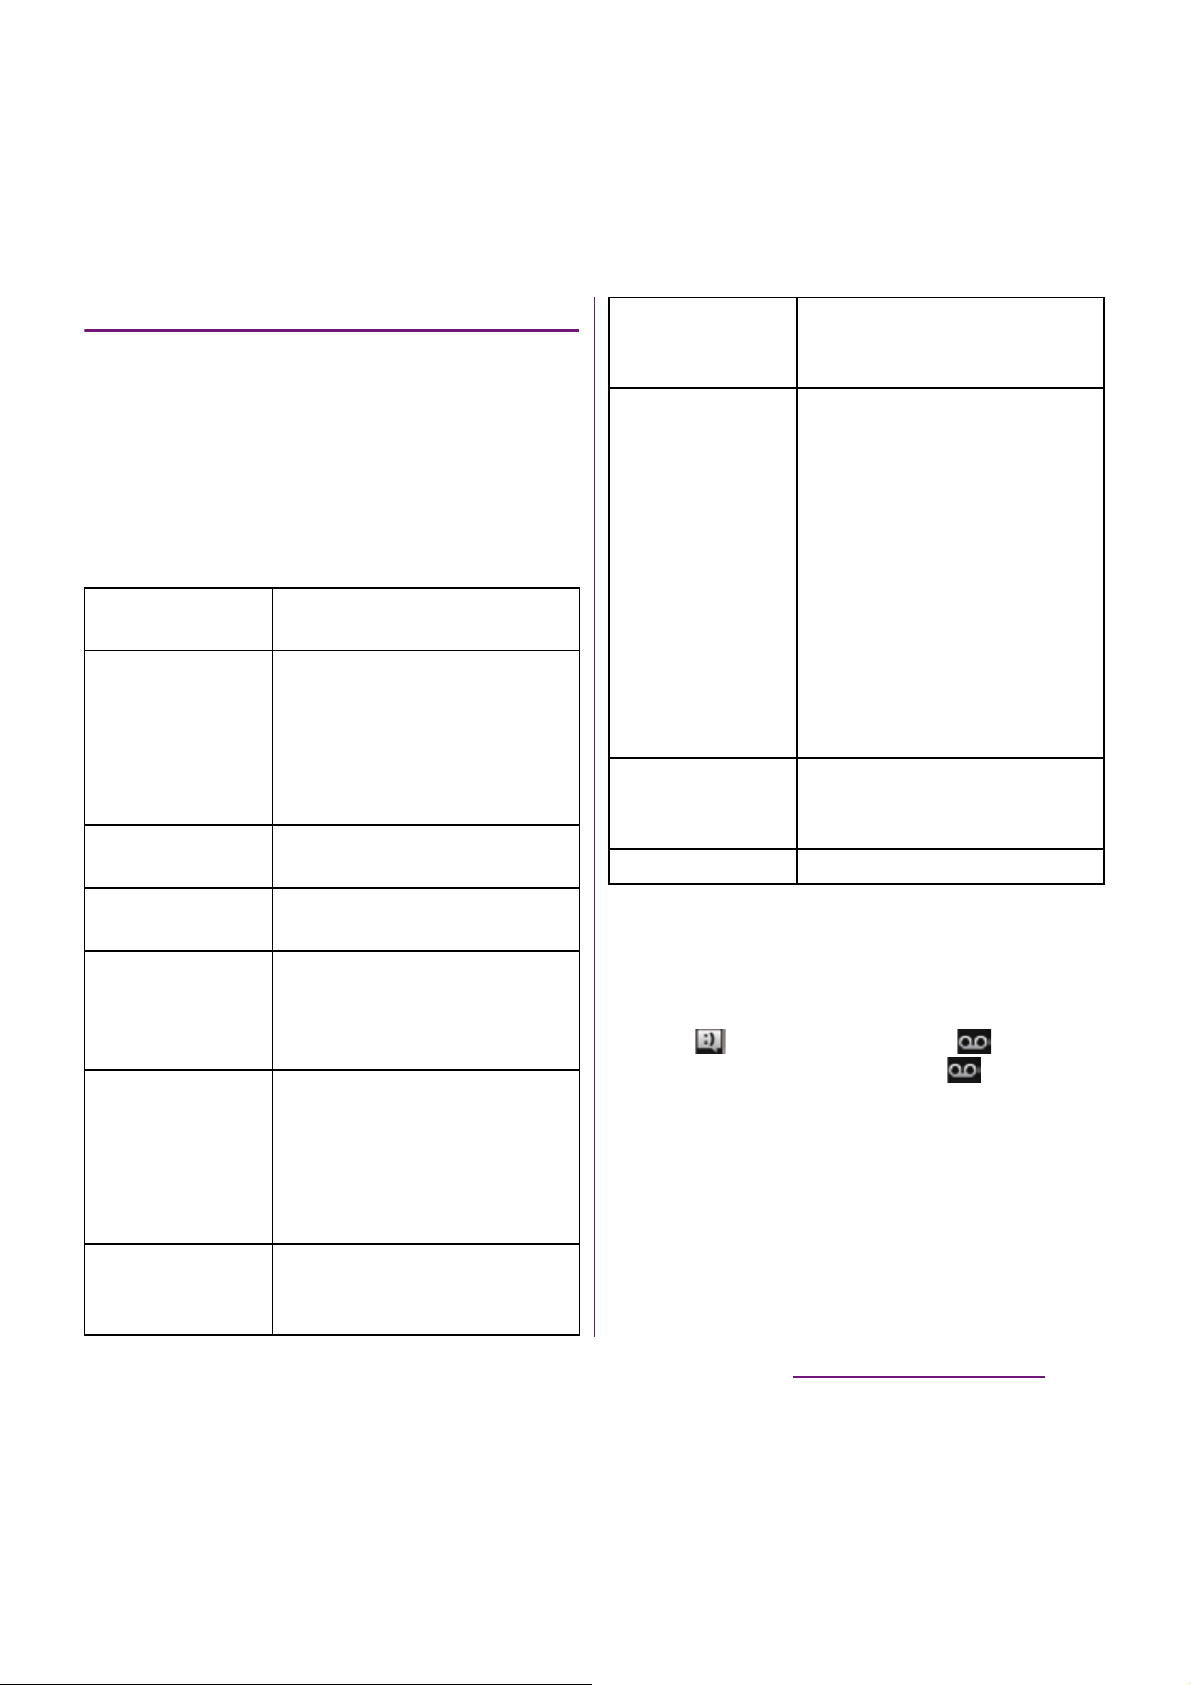
94
Calling/Network Services
Setting Voice Mail Service
1
From the Home screen, tap
t
and tap [Settings].
2
Tap [Call settings]u[Network
service setting].
3
Tap [Voicemail].
・
Select items you want to use.
* After operation is finished, you receive the "NTT
DoCoMo VM:XX" SMS.
❖
Information
・
If messages are stored at the Voice Mail service
center, (New SMS message) and (Voice Mail
message) appear on the status bar. (Voice Mail
message) disappears when you delete all messages.
・
The notification setting and notifications (message
(SMS) reception) are not charged.
Activate Voicemail
Tap [OK] to activate the Voice
Mail Service.
Set ring time
Enter the ring time (0 to 120
seconds).
It changes only the ring time.
If the ring time is set to 0
seconds, an incoming call is not
saved in "Recent calls".
Deactivate
Voicemail
Tap [OK] to deactivate the Voice
Mail Service.
Check Voicemail
setting
Check the current service
settings.
Play messages
*
Tap [OK] to call the Voice Mail
service center. After this step,
follow the voice prompts to play
the message.
Voicemail setting*Tap [OK] to change the Voice
Mail setting with the voice
prompts. The call is connected to
the Voice Mail service center.
After this step, follow the voice
prompts to operate.
Check messages*Check if a new message is stored.
After checking, the completion
message appears.
Notification
settings
Set whether to alert you of a new
message with the tone or
vibration.
Activate Missed
Call Notif.
When it is received while the
terminal is powered off or
outside of the service area, an
SMS is sent to notify you of the
information about the call (date,
time and the caller ID) once you
turn the terminal back on or
move back in to the service area.
Select [All Calls] to notify you of
all received calls.
Select [Calls with Caller ID] to
notify you of only the calls with
the caller ID.
Deactiv. Missed
Call Notif.
While starting the notification,
tap [OK] to deactivate the
notification.
Check setting
Check the notification settings.
Page 97
95
Calling/Network Services
Playing the voice message
1
When the SMS notification "NTT
DoCoMo VM:XX" appears, tap
[New message] from the
Notification panel (P.43).
・
A recorded message plays.
2
Follow the voice prompts to
operate.
The Call Forwarding Service forwards a voice
call to a preset forwarding number when you
are in a location without the radio wave, the
terminal is powered off, or you do not answer
the call within the preset ring time.
・
When the Call Forwarding Service is set to
"Activate Call Forwarding" and if you do not
answer an incoming voice call, the call is
saved in "Recent calls" as a "Missed call" and
(Missed call) appears in the status bar.
Basic flow of the Call Forwarding
Service
Call charge for the Call Forwarding
Service
Call forwarding
▼
▼
▼
Save the forwarding number
Activate the Call Forwarding Service
Your terminal receives a call
If you do not answer the call, it is
automatically forwarded to the specied
forwarding number
Call Forwarding Service subscriber
Caller
Forwarding party
The caller is charged for a call fee
The Call Forwarding Service
subscriber is charged for a call fee
Page 98
96
Calling/Network Services
❖
Information
・
Even when the Call Forwarding Service is set to
"Activate Call Forwarding", you can answer the call
during a ringtone sounds.
Setting Call Forwarding Service
1
From the Home screen, tap
t
and tap [Settings].
2
Tap [Call settings]u[Network
service setting].
3
Tap [Call Forwarding].
・
Select items you want to use.
* A subscription of Voice Mail service is required.
Setting on/off of the Call Forwarding
guidance
1
From the Home screen, tap
[Phone]
u
[Dial].
2
Tap [1][4][2][9]
u
.
・
Follow the voice prompts to operate.
For details, see the "Mobile Phone
User's Guide [Network Services]".
Activate Call
Forwarding
Enter the forwarding phone number
and ring time, then tap [OK] to
activate the Call Forwarding Service.
Change
forwarding
number
Mark the checkbox and
enter the forwarding
number.
Register
ring time
Mark the checkbox and
enter the ring time (0 to
120 seconds).
If the ring time is set to
0 seconds, an incoming
call is not saved in
"Recent calls".
Deactivate
Call
Forwarding
Tap [OK] to deactivate the Call
Forwarding Service.
Register
number
Change the forwarding phone
number. Enter the forwarding phone
number and tap [OK].
Activate Call
Forwarding
Mark the checkbox to
change the forwarding
phone number and to
activate the Call
Forwarding Service
simultaneously.
If fwd
number
busy
*
When the forwarding number is busy,
an incoming call is connected to the
Voice Mail service center. Tap
[Connect] to turn on the setting; tap
[Do not connect] to turn off the
setting.
Check setting
Check the current service settings.
Page 99
97
Calling/Network Services
When there is another incoming call while
you are on a call, the in-call ringtone notifies
you of the second call. You can answer the
second call by putting the first call on hold.
You can also put your current call on hold
and place a call to another party.
❖
Information
・
Even when the call is on hold, the caller is charged for
a call fee.
Setting Call Waiting
1
From the Home screen, tap
t
and tap [Settings].
2
Tap [Call settings]u[Network
service setting].
3
Tap [Call Waiting].
・
Select items you want to use.
Putting the current call on hold and
answering an incoming call
1
When you hear the beep during a
call, tap [Answer].
・
The first call is put automatically on
hold and the incoming call is received.
- The terminal does not support
Conference call.
- Tap [Busy] to connect the incoming
call to the Voice Mail service center.
Activating Voice Mail service is
required beforehand.
2
Switch to the first call.
・
To end the later call, tap [End call].
The later call is terminated and switched
to the first call.
・
To put the later call on hold, tap [Switch
to this call].
The later call is put on hold and
switched to the first call. Tapping
[Switch to this call] switches the party.
Ending the current call and
answering an incoming call
1
When you hear the beep during a
call, tap [End current call and
answer].
・
The first call is terminated and the
incoming call is received.
Call Waiting
Activate Call
Waiting
Tap [OK] to activate the Call
Waiting Service.
Deactivate Call
Waiting
Tap [OK] to deactivate the Call
Waiting Service.
Check settings
Check the current service
settings.
Page 100
98
Calling/Network Services
Putting the current call on hold and
making a call to another party
1
During a call, tap (Phonebook)/
(Dialpad).
2
Enter the other party's phone
number, then tap .
・
The first call is automatically on hold
and switched to the new call you made.
You can also search for a party by
tapping (Phonebook).
3
Switch to the first call.
・
To terminate the new call, tap [End call].
The new call is terminated and switched
to the first call.
・
To put the new call on hold, tap [Switch
to this call].
The new call is put on hold and
switched to the first call. Tapping
[Switch to this call] switches the party.
When making a call, your phone number can
be shown in the display of the recipient's
phone you are calling. The caller ID is
important personal information. Carefully
decide whether you notify a recipient of your
caller ID.
・
You cannot set the Caller ID notification
where the terminal indicates the outside of
service area ( ).
・
The setting is available only the other party's
phone can display the caller ID.
・
If an announcement requesting caller ID is
heard when making a call, set Caller ID
notification or add prefix 186 to the phone
number to call again.
1
From the Home screen, tap
t
and tap [Settings].
2
Tap [Call settings]u[Network
service setting].
3
Tap [Caller ID Notification].
・
Select items you want to use.
Caller ID Notification
Activate Caller
ID Notification
Enter the Network security code,
then tap [OK].
Your phone number is notified to
the other party.
Deactivate
Caller ID
Notification
Enter the Network security code,
then tap [OK].
The caller ID notification is
deactivated.
Check settings
Check the current settings.
 Loading...