

Sony PCG-GRX590 Primary, PCG-GRX590K, PCG-GRX590P, VAIO PCG-GRX500 Series Quick Start Manual

®
VAIO
Notebook
Quick Start
PCG-GRX500 Series


Contents
Welcome.......................................................5
Unpacking Your Notebook .........................................7
Registering Your Notebook ........................................9
Setting Up Your Dial-Up Connection.......................10
Setti ng Up Your VAIO® Notebook....... ....15
Locating Controls and Ports......................................16
Connecting a Power Sour ce ........ ..............................21
Starting Your Notebook ....................... ....... ....... .......27
Shutting Down Your Notebook............ ....... ....... .......28
Adding Memory.........................................31
Precau tio n s an d Pro ced u res.......................................32
Typical ex pansion memory conf i g u rati o n.... ......... ....33
Removing a memory modul e ........ ....... ....... ....... .......34
Installing a memory module......................................36
Viewin g th e amount of mem o ry................ ... .............37
About the Software on Your Not e book...39
Software Overview....................................................40
Application, Driver, and System Recovery CDs .......47
Using Your Recovery CDs........................................48
3

V AIO® Notebook Quick Start
Troubleshooting........................................55
Getting Help...............................................61
Suppor t Op ti o n s........... .................................... .........6 2
Software Support Information ..................................64
Index........................................................... 67
4

Welcome
Congratulati ons o n your p ur chas e of t he Sony VAIO® notebook. Sony h as
combined leading-edge technology in audio, vide o, co mputing, and
communications to provide you with state-of-the-a rt personal computing.
Features
✍ For a complete description of the spe cifications of your VAIO ® notebook, see the
Specifications flyer supplied with your notebook.
❑ Exceptional performance — Your notebook includes a Mobile Intel®
Pentium® 4 processor-M that supports Enhanced Intel® SpeedStep™
technology
*
and a V.90 compatible modem.† To combine perf o rmance and
portability, Sony has implemented speed-controlling te chnology designed to
maximize bat tery life during mobile com puter use. Windows® reported
actual CPU speed may not reflect the maximum CPU speed.
❑ Wireless LAN capability — A Wire less LAN PC Card is supplie d with
‡
selected models. For more information on using the wireless capability, see
the on li n e U ser G u id e.
❑ Portability — Recharge able battery pack provides hours of use without
AC power.
❑ Sony audio and video quality — High-quality MPEG1/MPEG2 video,
which supports full-screen display and enables you to take advantage of
today’s advanced multimedia applications, games, and entertainment
software.
* The proce s s or ma y be r e duced to a lower operating speed under certain conditions.
† Actual upl oad and download speeds may vary due to line conditions, ISP s upport, and
govern m ent re gula ti on s.
‡ Depending on the specifi c m odel you purch ased, speed- controlling technolo gy ma y not be
present.
5

V AIO® Notebook Quick Start
❑ Multimedia features — Enjo y th e s t er eo s p ea ke r s or us e a pa ir of
headphones (not supplied) to listen to audio CDs and DVDs.
❑ Microsoft® Win d ows ® op er atin g system — Your system inc ludes
Microsoft® Windows® XP Professional, Microsoft® Windows® XP Home
Edition, or Microsoft® W indows® 2000 Professio n al.
❑ Communications — Access popular online services, send e-mail, browse
the Internet, and use fa x f ea tures.
❑ Optical drive (CD-RW/DVD Combo or DVD-ROM) — Your system
includes either a CD-R W/DVD Combo Drive or a DVD-ROM drive. The
CD-RW/DVD Combo Drive utilizes a new optical storage technology that
combi n es th e fe at ures of bot h a CD- RW driv e an d DVD-ROM d ri v e,
providing increased storage capacity and a rich multimedia computing
experience . Optical drives play most DVD-ROM, DVD-R, CD-ROM, CDRW, and CD-R discs. This drive is hot-swappable.
✍ Your computer’s optical disc drive and other parts may differ depending on the
model you purchased.
6
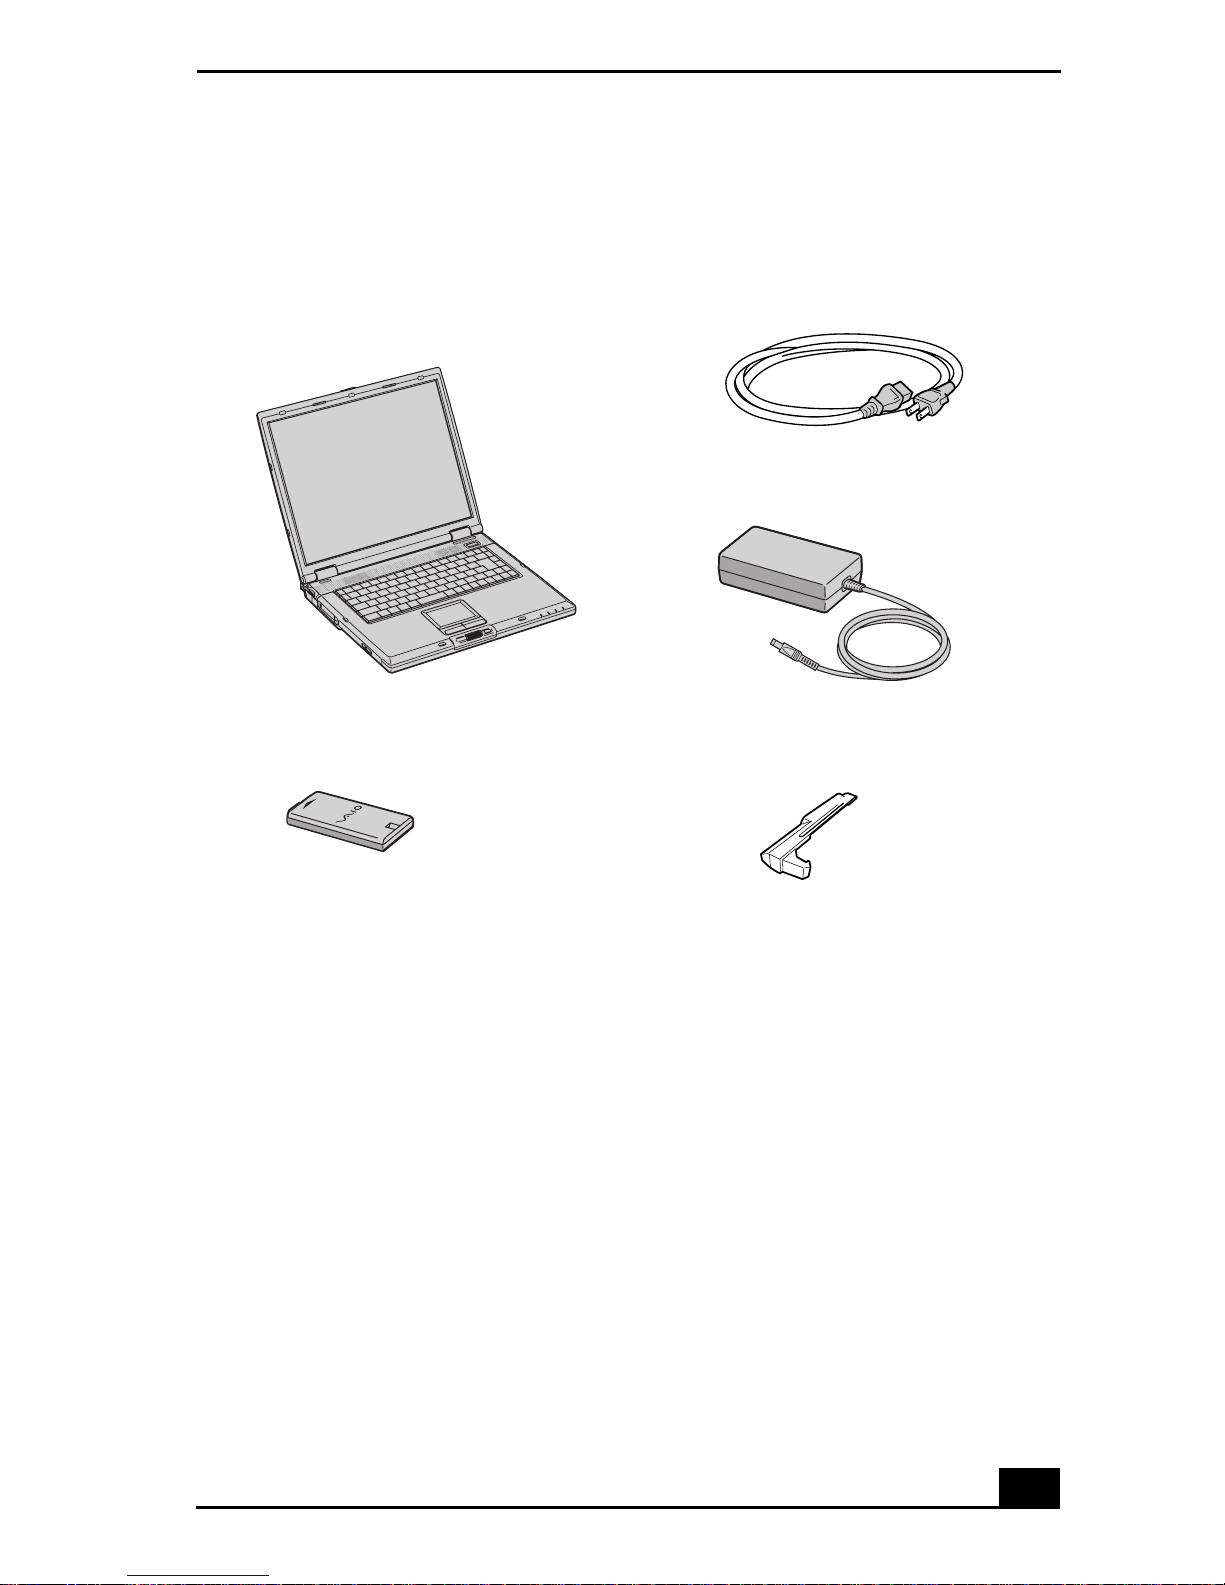
Unpacking Your Notebook
Remove the following hardware items from the box:
Unpacking Your Notebook
Main unit
Rechargeable battery pack
*
Power cord
AC adapter
Weigh t saver
* The removable optical disc drive is pr einstalled in your notebook.
Documents
❑ VAIO® Notebook User Guide — A s earc hab le o nli ne help fi le that c onta ins
detail ed informa tio n on how to us e your new no tebook. (W i ndows XP) Pre ss
Star t on the Windows ® taskbar, select VAIO Help and Support, and click
VAIO User Guid e to open this fi le. (Windows 2000) Press Sta rt, selec t VAIO
Help Cente r, and VAIO Documentation.
❑ VAIO® Notebook Quick Start — Contains information on unpacking an d
setting up your notebook, supplementary updates, and software information.
❑ Microsoft® Windows® manual — E x pl ai n s ho w to use th e ba si c f eatures
of this latest Windows operating system.
7

V AIO® Notebook Quick Start
❑ VAIO® Notebook Notes on Use — Explains notes on use and offers
safe ty tips.
❑ VAIO® Notebook Specifications flyer — Details the hardwar e
specifications for your notebo ok.
Software CDs
❑ Microsoft® Word — Enables you to r einstall Microsoft Word to the
VAIO® notebook you purchased.
Recovery CDs
❑ Application Recovery CD(s) — Enables you to re install individual
appl ic at io n s if they be co me cor r upt ed or ar e erased.
❑ Driver Recovery CD(s) — Enables you to reinstall individual device
drivers if they become corrupted or are erased.
❑ System Recovery CD(s) — Enabl es y o u t o re s tore th e o per ati n g sy st em an d
software that shi pped with your computer if they bec om e corrupted or are
erased.
Other
❑ Packet containing special product offers
❑ Warranty Card
8

Registering Your Notebook
Registering Your Notebook
Take advantage of Sony’s commitment to quality customer support and receive
these bene fits by registerin g your notebook:
❑ Sony Customer Support — Talk to a Support Representative to
troubleshoot problems you may be having with your notebook.
❑ Limited Wa rr anty — Protect your investment. See the Warranty Card for
more details.
✍ You are prompted to register your computer the f irst time you turn on the unit .
Follow the on-screen instructi ons to comp lete the registra tion process. If y ou are not
able to register your computer during the first session, you are provided with
additional registration opportunities later.
9
V AIO® Notebook Quick Start
Setting Up Your Dial-Up Connection
This section describes the basic steps for setting up your dia l-up connection for
the first tim e. The Connection Wizard guides you through the process of
connecting to the Internet and then choosing an Int ernet Service Provide r (ISP) or
setting up an existing accoun t.
Setting up your dial-up connection
(Win dows® XP Home Edition/ Windows® XP Professional)
1 Click Start from the Windows taskbar and select All Programs.
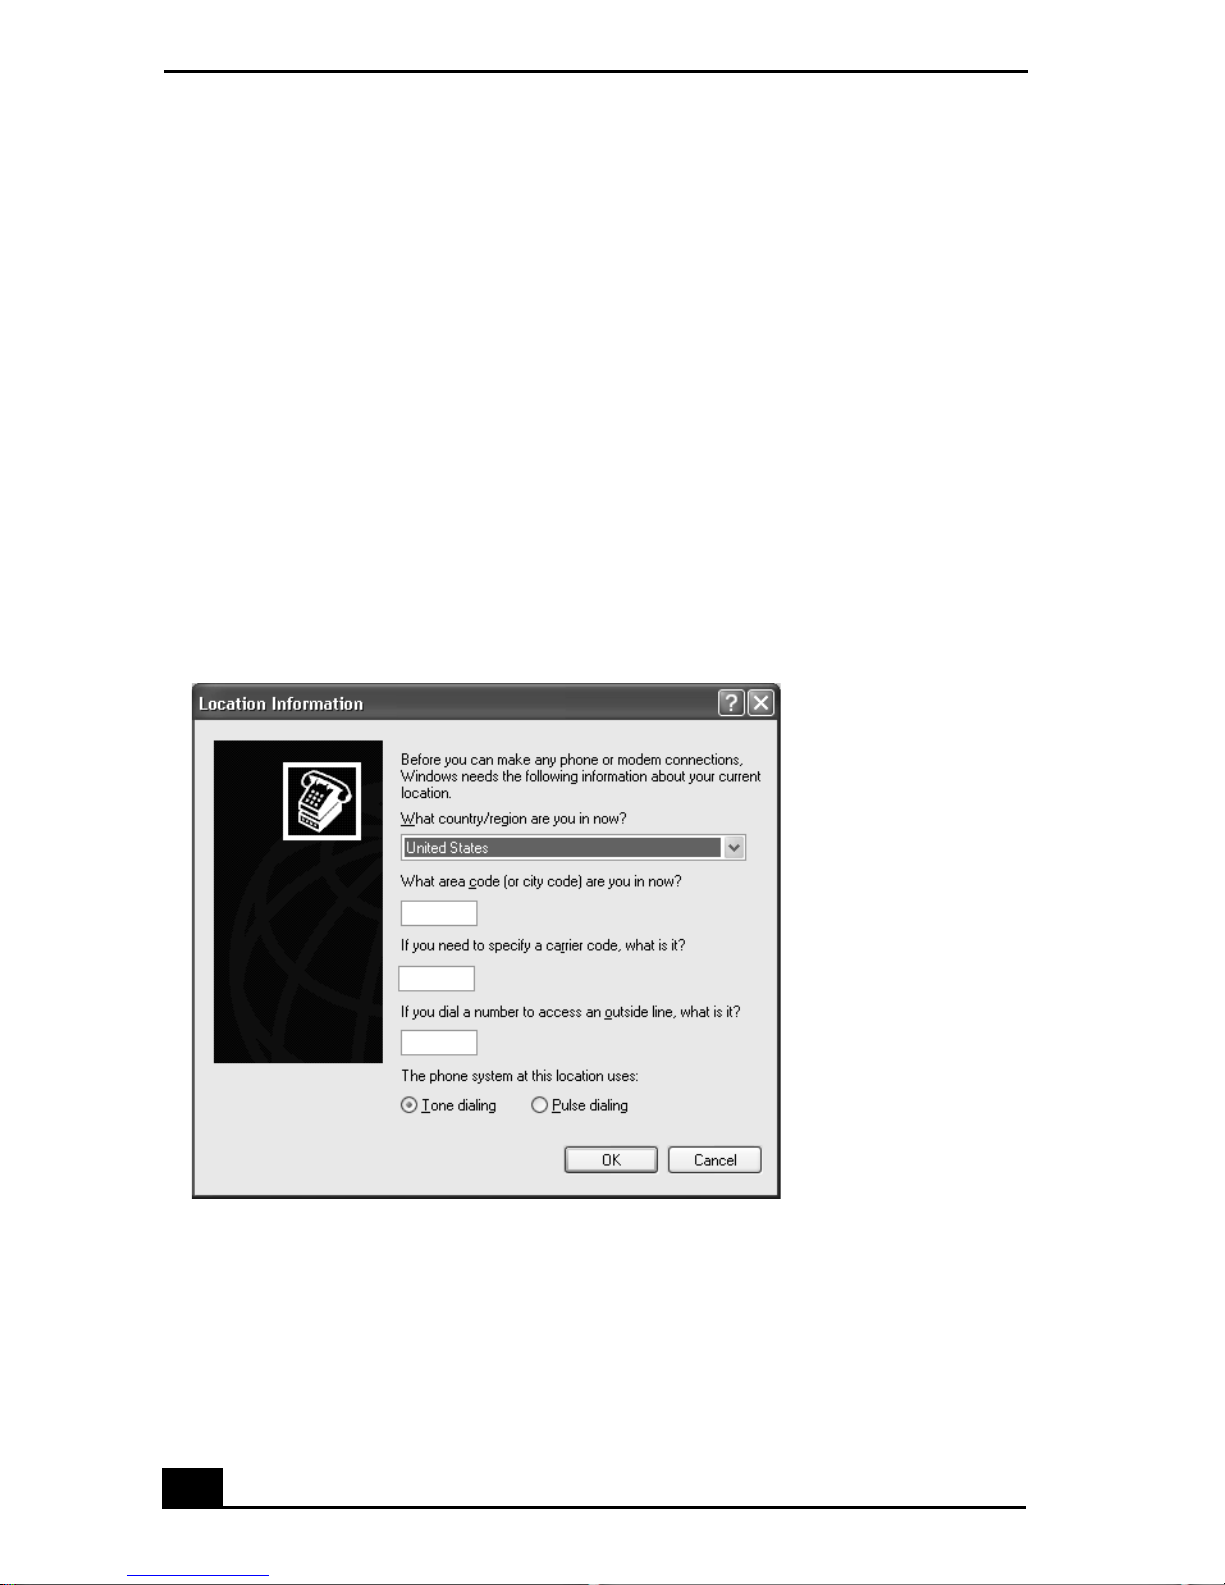
2 Point to Accessories, Communica tions, and then click New Connection
Wizard. The Location Information window appears.
Location Information window
3 Follow th e instructions on-screen and then click OK to continue. The Phone
and Modem Options window appears.
10
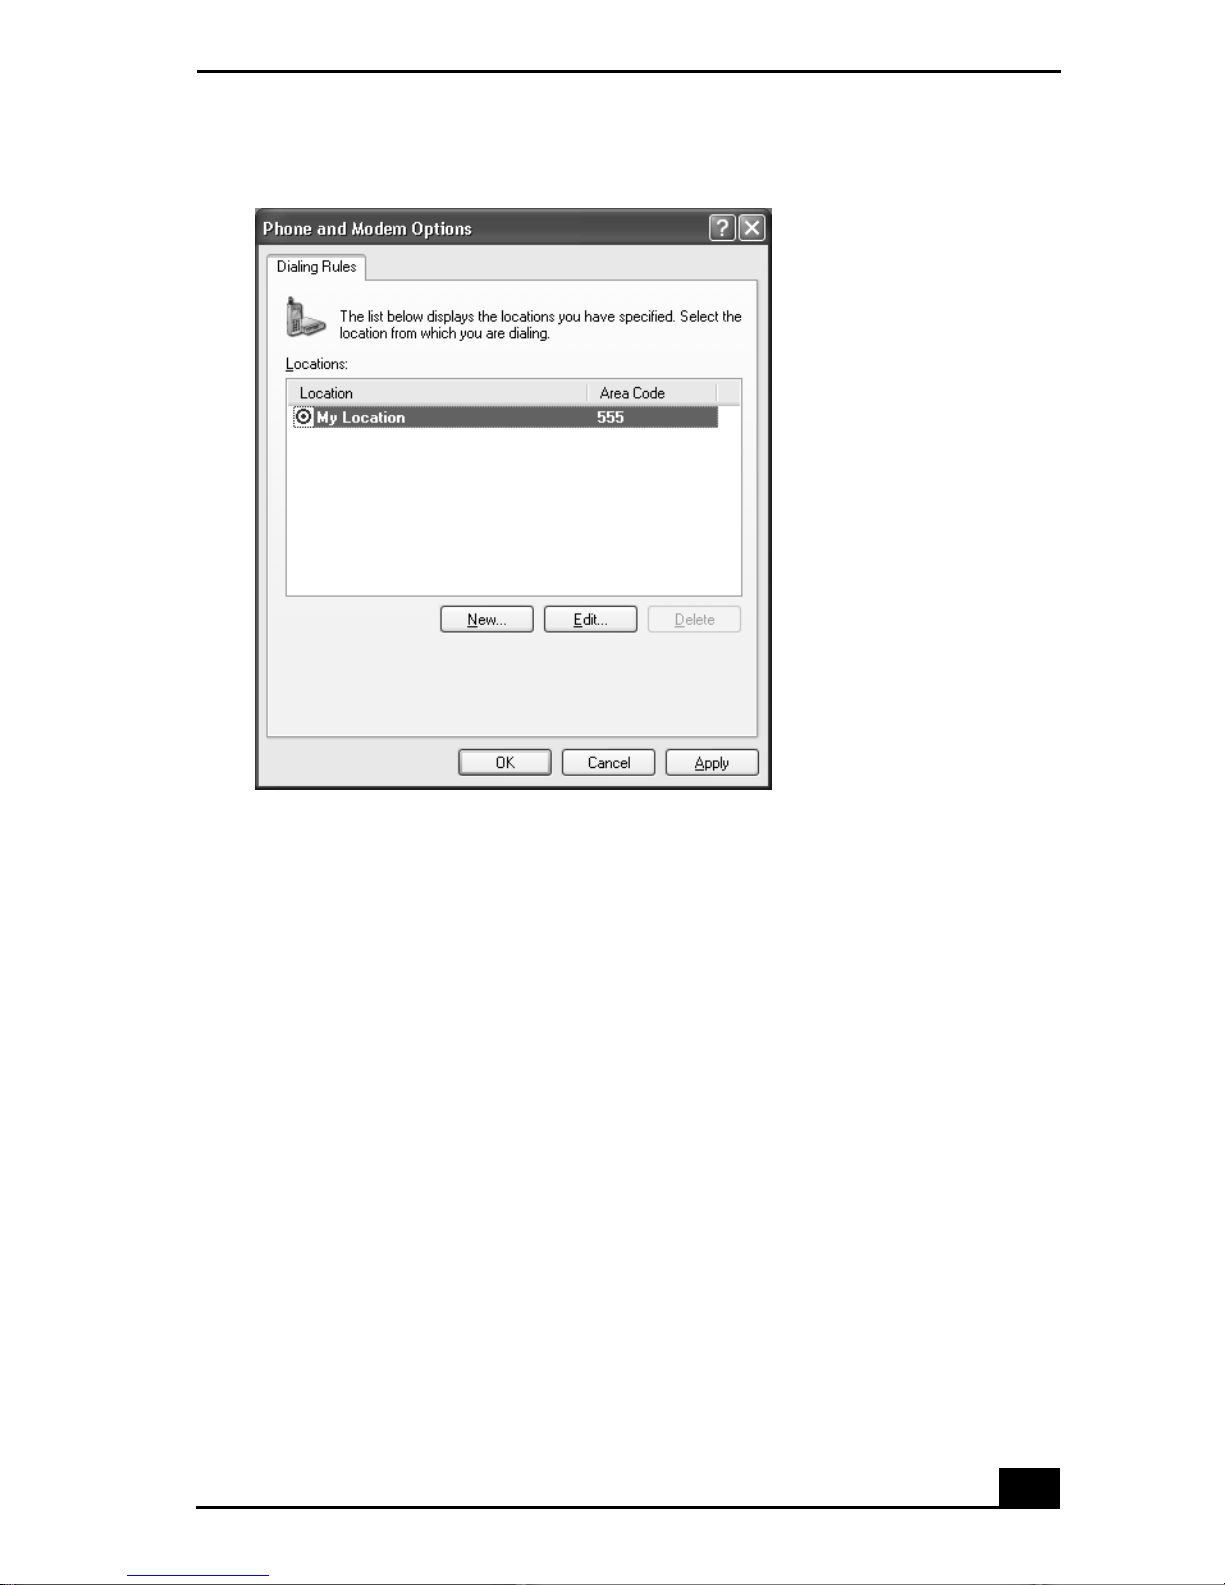
Phone and Modem Options window
Setting Up Your Dial-Up Connection
4 Select th e location from where you are dia ling and then click OK. The New
Connecti on Wizard appears.
11

V AIO® Notebook Quick Start
New Connection Wizard
5 Follow the on-s creen instructions to finish setting up your di al-up
connection.
12
Setting Up Your Dial-Up Connection
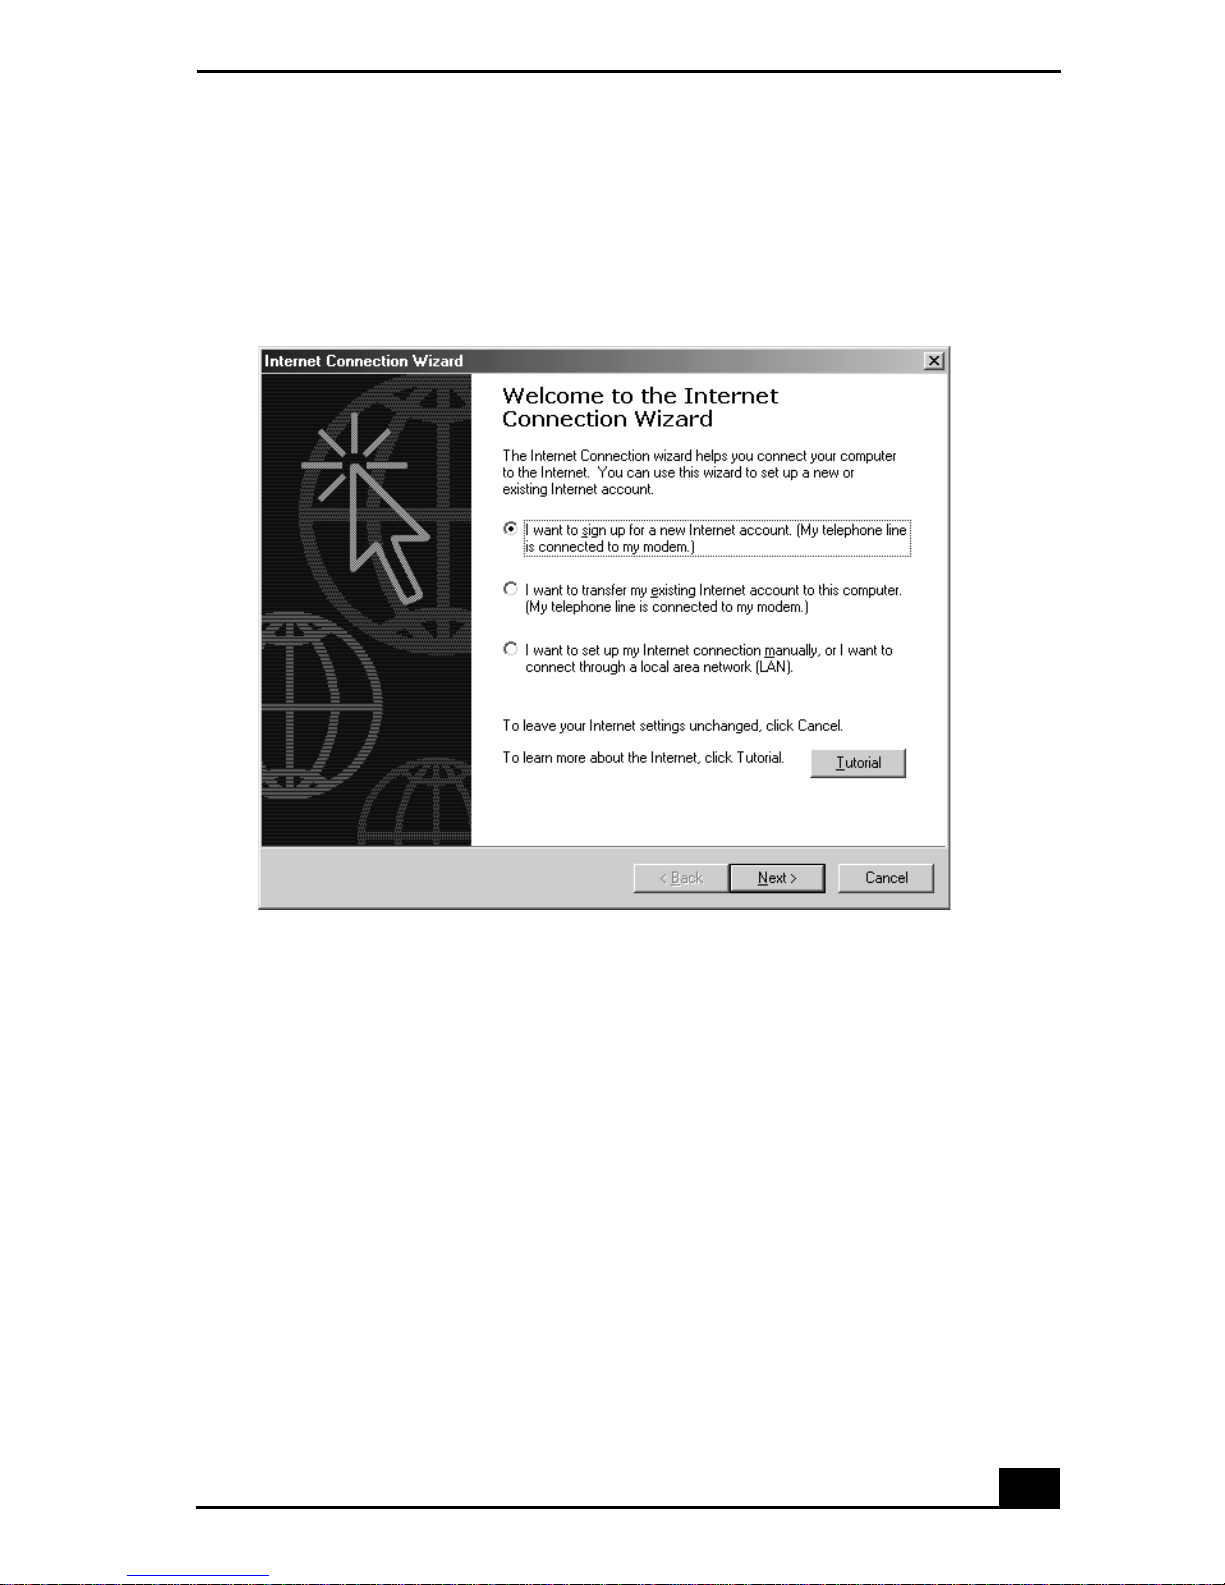
(Win dows® 2000 Professi onal)
1 Double- click the Connec t to the Interne t icon on the Windows desktop. The
Internet Connection Wizard appears.
Internet Co nnection Wizard
2 Follow the on-s cre en instructions to finish setting up your dial-up
connection and to choose your ISP.
13

V AIO® Notebook Quick Start
14

Setting Up Your VAIO®
Notebook
This section describ es all the con tr ols and por ts on your note book, how to
connect your note book to a power sou r ce , and how to sta rt and shut down
your notebook.
❑ Locating Controls and Ports
❑ Connecting a Power Source
❑ Starting Your Notebook
❑ Shutting Down Your Notebook
15
V AIO® Notebook Quick Start
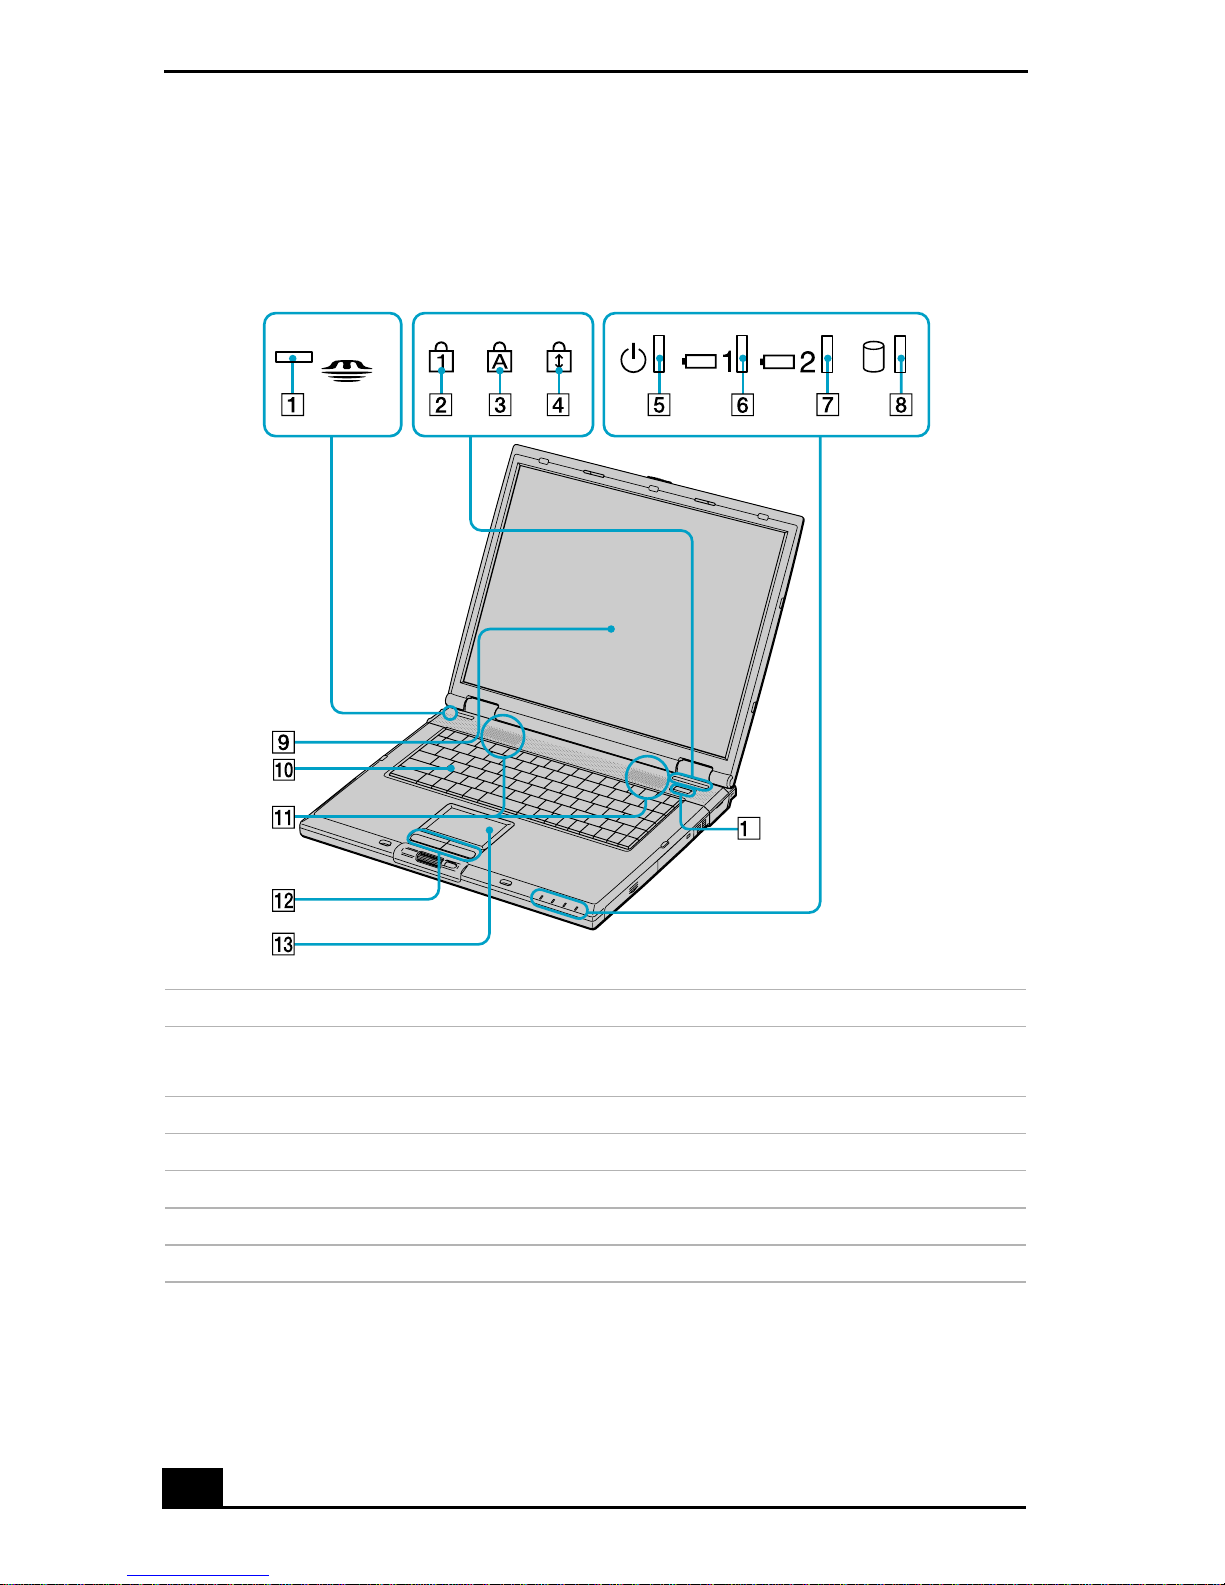
Locating Controls and Ports
Front
4
1 Memory Stick® indicator 8 Hard disk drive indicator
2 Num Lock indicator 9 LCD (Liquid Crystal Display)
screen
3 Caps Lock indicator 10 Keyboard
4 Scroll Lock indicator 11 Speakers
5 Power indicator 12 L eft and right button s
6 Battery 1 indicator 13 Touchpad
7 Battery 2 indicator 14 Power button
16
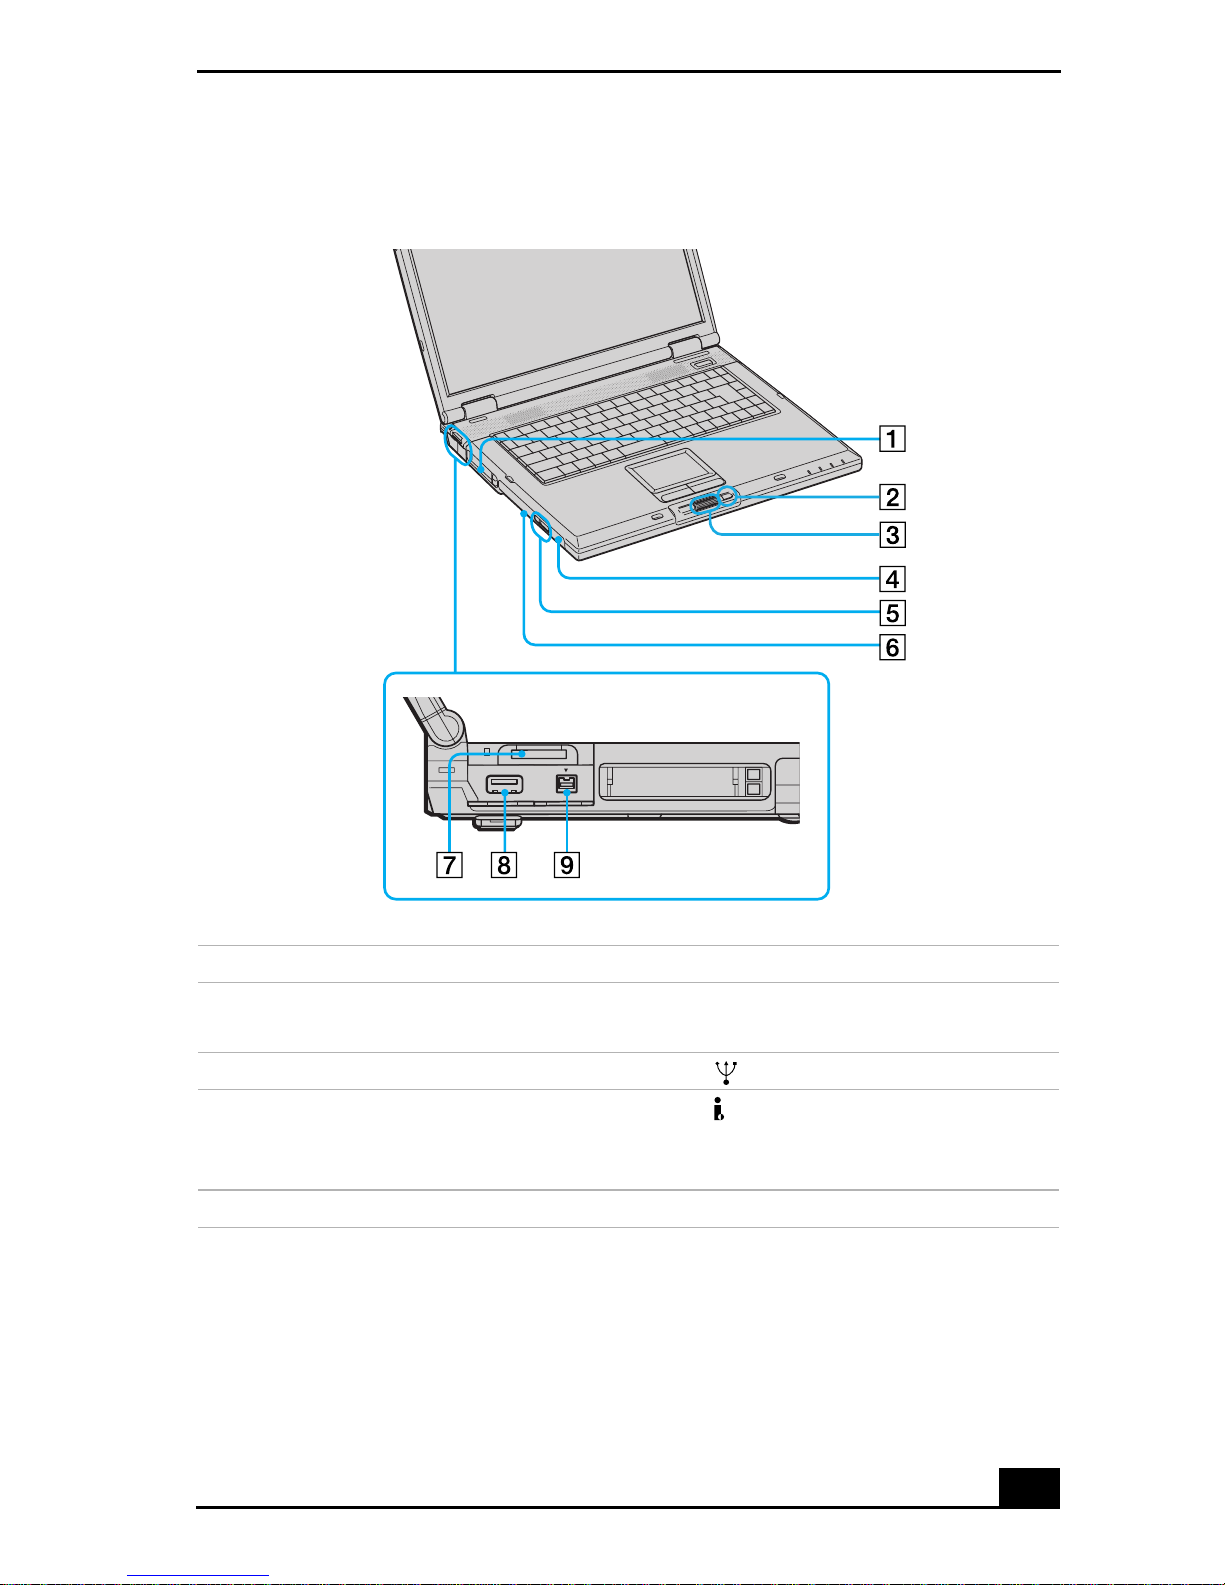
Left
Locating Controls and Ports
1 PC Card slots 6 Manual ej ect button
2 Back button for center
7 Memory Stick® slot
Jog Dial™ control
3 Center Jog Dial™ control 8 USB port
4 CD-RW/DVD Combo Drive or
DVD-ROM drive in
multipurpose bay
*
9 i.LINK® (IEEE 1394) S400
port
5 Eject but ton
* This multi pur pose bay can ho use either an opti cal disc drive or an optional second battery.
17

V AIO® Notebook Quick Start
Right
1 Drive bay with hard dis k drive
2 Battery bay
3 Headphone jack
4 Microphone jack
*
5 USB port
* There is a protrud ing dot above th e Micr ophone jack to further dis tingui sh i t from ot he r jacks
and ports. Do not connect a microphone to the Headphone jack.
18

Back
Locating Controls and Ports
1 Air vent 5 Printer port
2 DC In port 6 USB port
3 Ethernet port 7 AV O u t ja ck
4 VGA port 8 Phone line jac k
Only connect 10BASE-T and 100BASE-TX cables to the Ethernet port.
Do not connect any other type of network cable or any te lephone line.
Connectin g cables other than those li sted above may r esult in an electric
current overload and could cause a mal function, excessive heat, or fire in
the port. To connect the unit to the network, contact your network
administrator.
✍ There is a ventilati on slot located on t he left side of the back panel. Do not cover the
ventilation slot when your notebook is on.
19
V AIO® Notebook Quick Start
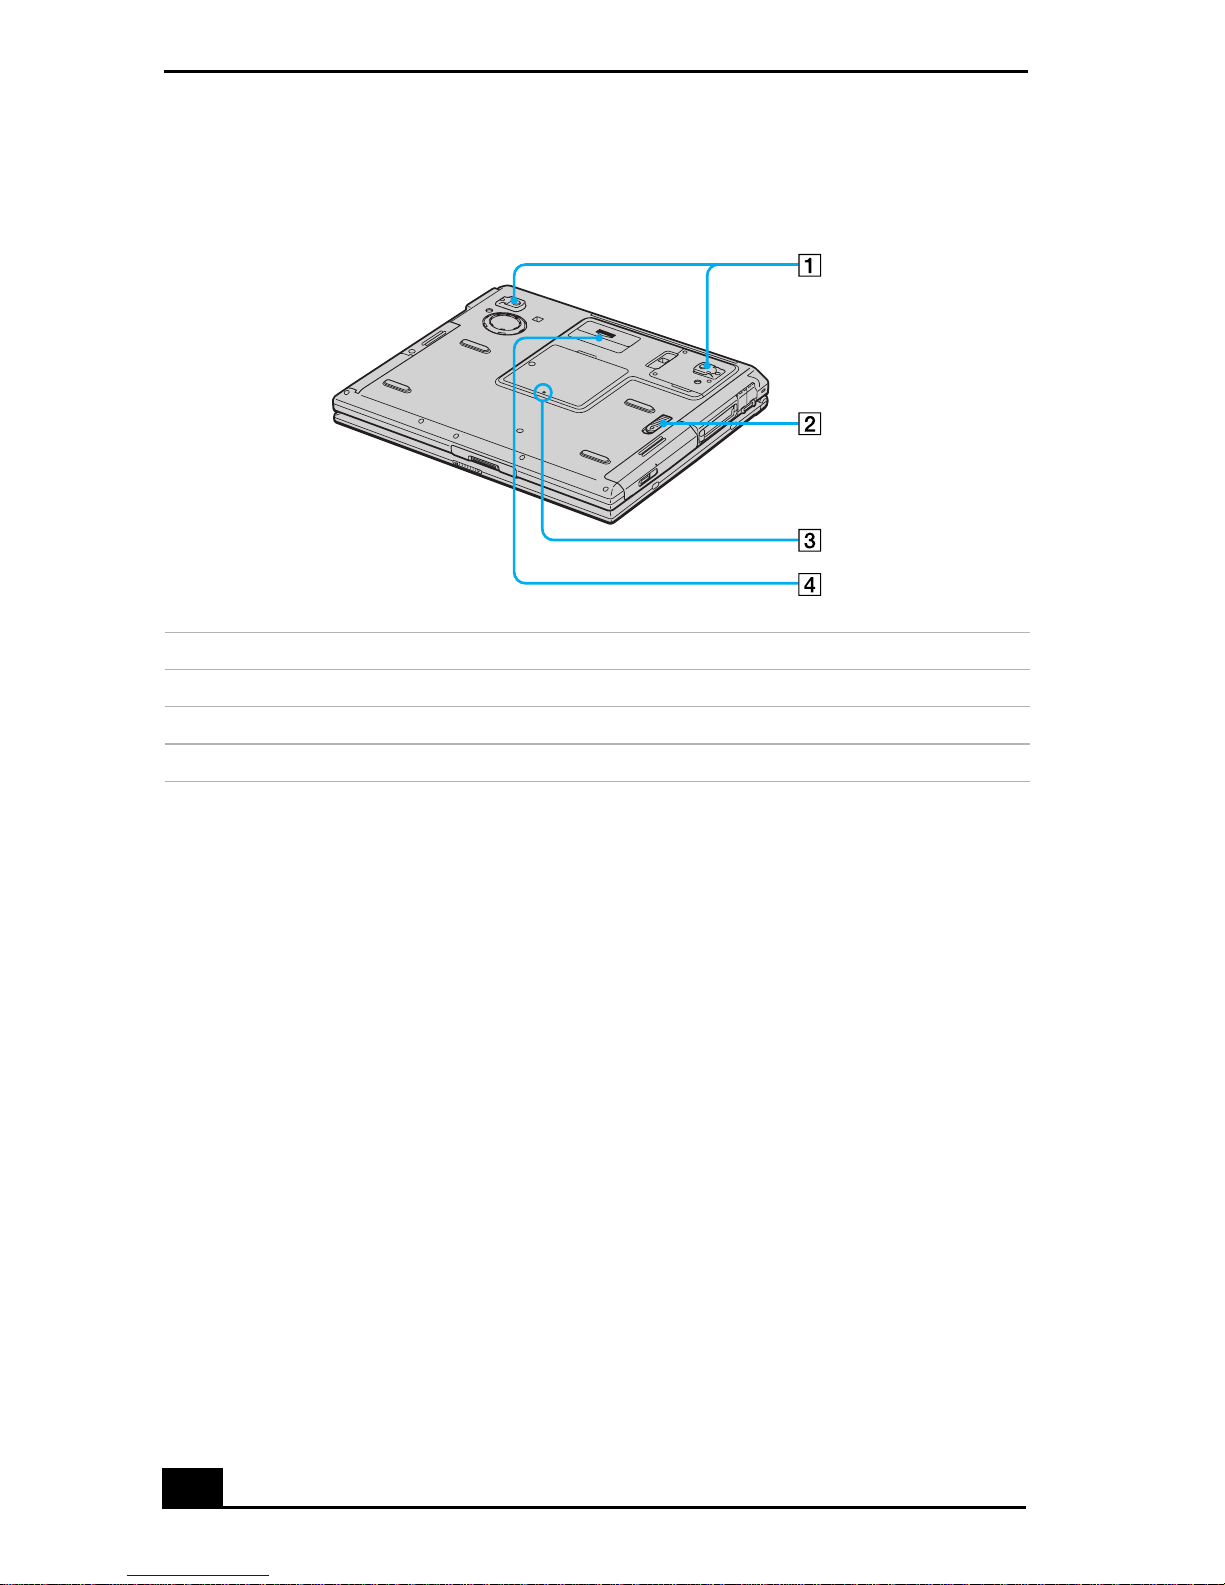
Bottom
1 Tilt stands
2 Multipurpose bay RELEASE lever
3 Reset button
4 Port replicator connector
20

Connecti ng a Power Source
Connecting a Power Source
You can use either AC power or a rechargeable battery pack as a power source.
Using the AC adapter
1 Plug the cable attached to the AC adapter into the DC In port on the
notebook.
2 Plug one end of the powe r cord into the AC adapter.
3 Plug the other end of the power cord into an AC outlet.
Connecting the AC adapter
Notebook
AC adapter
(supplied)
To DC In
Power cord
(supplied)
Notes o n t h e A C ad ap ter
❑ Your notebook operates on 100V-240V AC 50/60 Hz.
❑ Do not share the AC outlet with other power-consum ing equipment, such as
a copy machine or shredder.
❑ You can purchase a power strip with a surge protec tor. This device prevents
damage to your not ebook caused by sudden power surges such as those that
may occur during an electrical storm.
❑ Do not place heavy objec ts on the power cord.
❑ To disconnec t the cord, pull it out by the plug. Never pull the cord its elf.
❑ Unplug your notebook from the wall outlet if you will not be using the
notebook for a long time.
21
V AIO® Notebook Quick Start
❑ The LED indicator on th e AC adapte r may be turned on unti l the AC adapter
is unplugged from your notebook.
❑ When the AC adapter is not us ed, unplug it from the AC outlet.
❑ Use only the AC adapter s upplied. Do not use any other AC ada pter.
Using battery power
You can use one or two battery packs as a source of power. The second battery
pack inserts into the multipurpose bay on the left side of the notebook. (See
“Using a Second Ba ttery Pack” in the online User Guide for more information.)
Additional battery packs are available as a separate option.
The battery pack that comes with your not ebook is not fully charged at the time
of purchase. Follow the steps below to insert and charg e the battery pack.
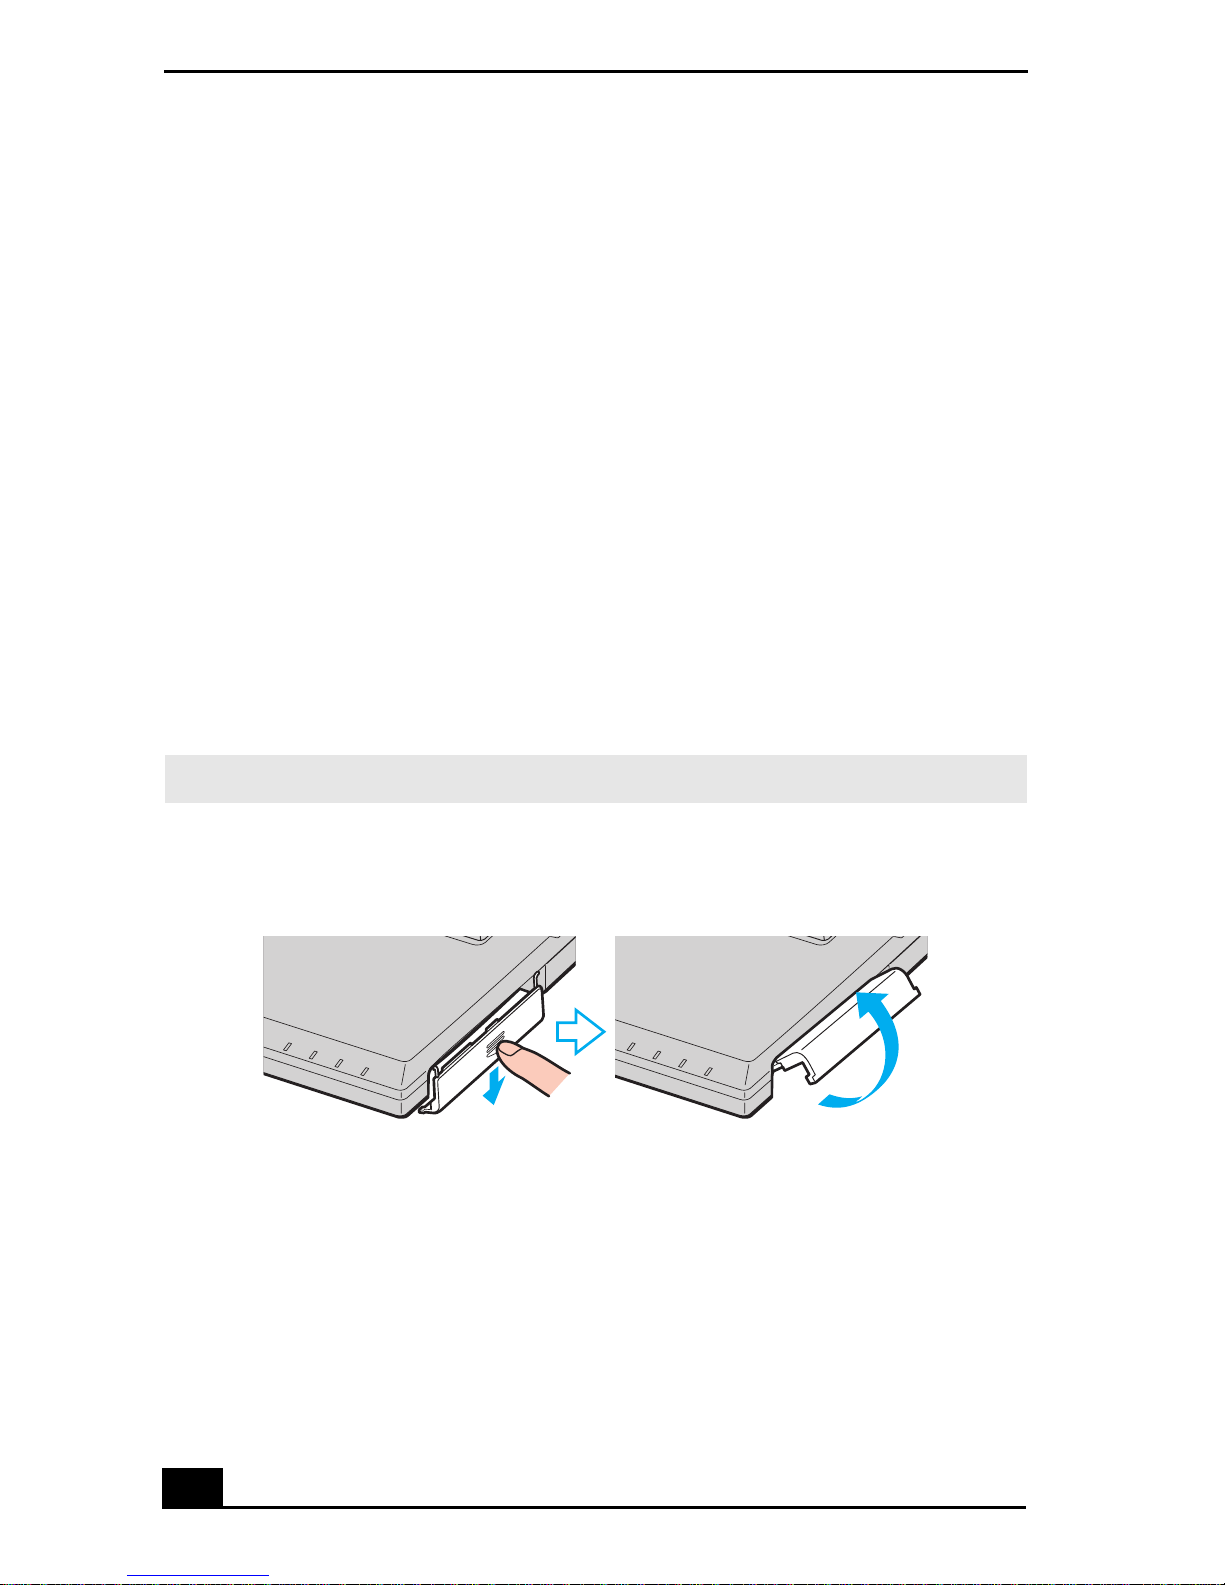
To insert the batte ry pack
1 Push the battery bay cover down to open it.
✍ The battery bay cover swings out but does not detach.
Battery bay
22
 Loading...