

Page 1

4-245-486-11(2)
Compact Disc
MiniDisc Deck
Operating Instructions
MXD-D400
©2003 Sony Corporation
Page 2

WARNING
To prevent fire or shock hazard, do not
expose the unit to rain or moi st u r e.
To prevent fire, do not cover the ventil at ion of the
apparatus with news papers, table-cloths, curtains, etc.
And don’t place lighted candle s on the apparatus.
To prevent fire or shock hazard, do not place obje c ts
filled with liquids, such as vases, on the apparatus
This appliance is
classified as a CLASS 1
LASER product. This
label is located on th e
rear exterior.
The following caution la be l is loc a te d inside the
apparatus.
Don’t throw away the batte r y
with general house waste,
dispose of it correctly as
chemical waste.
For the customer in the U.S.A.
Owner’s Record
The model and serial numbers are located on the rear
of the unit. Record the serial number in the space
provided below. Refer to them whenever you call upon
your Sony dealer regarding this product.
Model No. MXD-D400 Seral No.
Caution
The use of optical instruments with this product will
increase eye hazard.
WARNING
This equipment has been tested and found to comply
with the limits for a Class B digital device, pursuant to
Part 15 of the FCC Rules. These limits are designed to
provide reasonable protectio n aga i nst ha r mf ul
interference in a residential installation. This
equipment generates, uses, and ca n r adia te radio
frequency energy and, if not in sta ll ed and used in
accordance with the instructions, may cause harmful
interference to radio communications. However, there
is no guarantee that interference will not occur in a
particular installa tion. If this equipment doe s ca use
harmful interference to radio or television reception,
which can be determined by turning the equipment off
and on, the user is encouraged to try to correct the
interference by one or more of the following measures:
– Reorient or relocate the rece iv i ng an tenna.
– Increase the separation betwe e n the equi pment and
receiver.
– Connect the equipment int o an outle t on a circ uit
different from tha t to w h i ch the receiver is
connected.
– Consult the dealer or an experie nc ed radio/TV
technician for help.
CAUTION
You are cautioned that any changes or modif icat ions
not expressly approved in this manual could void your
authority to operate this equipment.
IN NO EVENT SHALL SELLER BE LIABLE
FOR ANY DIRECT, INCIDENTAL OR
This symbol is intended to a le rt th e
user to the presence of unins u lat ed
“dangerous voltage” within the
product’s enclosure that may be of
sufficient magnitude to constitute a
risk of electric shock to persons.
This symbol is intended to a lert the
user to the presence of impo rtant
operating and maintenance
(servicing) instructions in the
literature accompanying the
appliance.
GB
2
CONSEQUENTIAL DAMAGES OF ANY
NATURE, OR LOSSES OR EXPENSES
RESULTING FROM ANY DEFECTIVE
PRODUCT OR THE USE OF ANY PRODUCT.
Except for European model
ENERGY STAR® is a U.S.
registered mark. As an E
®
TAR
partner, Sony Corporation
S
has determined that this product
meets the E
guidelines for energy efficiency.
NERGY STAR
NERGY
®
Page 3

Table of Contents
How to use this manual...........................4
Playable discs..........................................4
Getting Started
Unpacking...............................................7
Hooking up..............................................7
CD/MP3/MD – Play
Loading a CD..................... .... .................9
Playing a CD...........................................9
— Normal Play/Shuffle Play/Search Play
Playing an MP3 file ..............................10
— Normal Play/Shuffle Play/Search Play
Loading an MD............................. .... ... .11
Playing an MD......................................12
—
Normal Play/Shuffle Play
Locating a specific track.......................13
—
AMS Function
Playing repeatedly.................................14
—
Repeat Play
Creating your own program.................. 14
—
Program Play
Playing only the tracks in th e desired
group...............................................15
Falling asleep to music..........................16
—
Sleep Timer
Changing the pitch of the MD ..............17
—
Pitch Control Function
Using the display...................................18
MD – Recording
Before you start recording.................... 19
Recording a CD on an MD...................20
— CD-MD Synchro Recording/High-
Speed CD-MD Synchro Recording
Recording on an MD manually .............21
—
Manual Recording
Starting recording with 6 seconds of
prestored audio data........................22
—
Time Machine Recording
Marking track numbers.........................23
Making a space between tracks 3 seconds
long automatically..........................24
—
Smart Space
Adjusting the recording level ...............25
—
Music Synchro-Recording
Recording the current CD track............ 27
—
REC-IT Function
Synchro-Recording with an external audio
equipment.......................................27
Fading in and out..................................28
—
Fader
Recording tips.......................................29
MD – Editing
Editing tips............................................ 30
Registering tracks in groups.................31
—
Group Function
Labeling an MD/group/track................ 32
—
Name Function
Creating a new group............................34
—
Create Function
Releasing group registrations............... 35
—
Release Function
Erasing recordings....................... .... ..... 36
—
Erase Function
Moving recorded tracks........................38
—
Move Function
Combining recorded tracks...................39
—
Combine Function
Dividing recorded tracks ......................40
—
Divide Function
Undoing the last edit.............................41
—
Undo Function
Changing the recorded level after recording 41
—
S.F Edit Function
Troubleshooting
Problems and remedies.........................43
Self-diagnosis display...........................44
Messages............................................... 45
Additional Information
Precautions............................................46
System limitations of MDs................... 47
Specifications........................................48
List of button locations and reference
pages...............................................49
GB
3
Page 4

How to use this manual
• Before operating the deck, connect your deck
by referring to
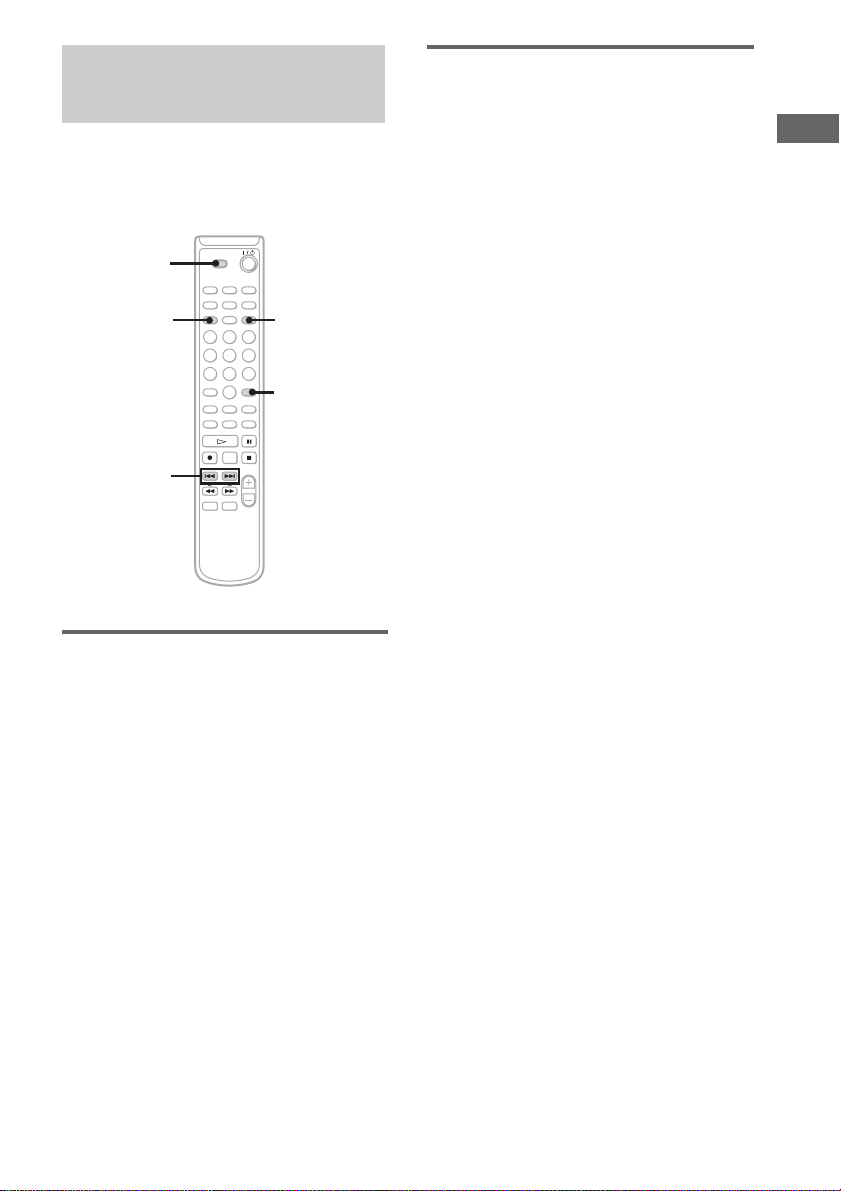
• This manual mainly explains operations using
the remote, but the same operations can also
be performed using the buttons on the de ck
having the same or similar names.
“Getting Started.”
Playable discs
You can play back the following discs on this
deck. Other discs cannot be played back.
List of playable discs
Format of
discs
Audio CDs Audio
MD Audio
CD-R/CD-RW Audio
Disc logo Contents
Notes on CD-R and CD-RW
• This deck can play C D -R/CD-RW discs
edited by the user. However, note that
playback of some di s cs may not be possible
depending on th e recording device used for
recording or th e di sc condition.
• CD-R and CD-RW discs that ha ve not been
finalized (pro cessing to allow play by a
normal CD player) cannot be played.
• The deck may be unable to play MP3 format
files that do not have the extender “.MP3” at
the end of the file nam e.
• Attempting to play non-MP3 format files that
have the extender “.MP3” may res ult in noise
or malfunction.
• The recommended bit rate for playing MP3
files is 128kbps or more.
• Playback of dtsC Ds or reco rd ing f ro m di gi tal
dtsCDs to MDs is not supported.
Music discs encoded with
copyright protection
technologies
This product is designed to playback discs that
conform to the Compact Disc (CD) standard.
Recently, various music discs encoded with
copyright protect io n t echnologies are marketed
by some record compani es. Plea se be awar e that
among those discs, there are some tha t do not
conform to the CD standard and may not be
playable by this prod uct.
You can play MP3 files on the deck. For details,
see “Playing a disc with MP3 files” on page 5.
Discs that this deck cannot
play
• CD-ROMs (PHOTO CDs included)
• CD-Rs/CD-RWs o ther tha n thos e re corded in
the following formats:
– music CD format
– MP3 format that co nforms to ISO9660 *
Level 1/Level 2, Romeo or Joliet
* A logical format of files and folders on CD-ROMs,
defined by ISO (International Standard
Organization)
GB
4
Page 5

Playing a disc with MP3 files
About MP3 files
MP3 (MPEG 1 Audio Layer-3) is a standard
technology an d fo rmat for c ompre ss ing a sou nd
sequence. The file is com pressed to about 1/ 10
of its original size. Sounds outside the range of
human hearing are compressed while the sounds
we can hear are not co m pressed.
Playback of same M P3 files may not be
possible, depending on the recording.
The encoding method (i.e., the bit rate selected
for encoding) will affect the sound quality of the
MP3 files created. The bit r ate typicall y used for
MP3 files is 128 kbps.
About ID3 tags
An ID3 tag is song in formation (such as track
name, album title, and artist name) that is
attached to MP3 fi l es.
Notes on discs
You can play MP3 files recorded on CD-ROMs, CDRs (recordable CDs), and CD-RWs (rewritable CDs).
The disc must be in the ISO 9660
format, or Joliet or Romeo in the expansion form at .
You can use a disc recorded in Multi Session
*1
ISO 9660 Format
The most common intern a tional standard for the
logical format of the files an d folders on a CD -ROM.
There are several specification levels. In Level 1, file
names must be in the 8.3 format (no more than eight
characters in the name, no more than th ree charact ers
in the extension “.MP3”) and in capital letters. Folder
names can be no longer than eight characters. There
can be no more than eight nested folder levels. Level
2 specifications al low file n ames up to 31 char acters
long.
For Joliet or Romeo in the expansion format, make
sure of the contents of the writin g soft ware, etc.
*2
Multi Session
This is a recording method that enable s a dding of
data using the Track-At-Once met h o d.
Conventional CDs be gin at a CD control area called
the Lead-in and end at an area called Lead-out. A
Multi Session CD has multiple sessions, with each
Lead-in to Lead-out segment regarde d as a sing le
session.
CD-EXTRA: A format in which CD-DA (audio) data
are recorded in the tracks of s es sio n 1 an d com put er
data in the tracks of session 2.
Mixed CD: A format in which computer data are
*1
level 1 or level 2
*2
.
recorded in the first track and CD-DA (audio) data in
the following tracks with in a se ssion.
Notes
• With format othe r th an ISO 9660 le ve l 1, fol de r
names or file names may not be displayed correctly.
• When naming, be sure to add the file extension
“.MP3” to the file name.
• If you add the exte nsi on “. MP 3” to a file ot he r th an
MP3, the unit cannot recognize the file properly and
will generate random noise that could damage your
speakers.
• The following discs take a longer time to start
playback.
– a disc recorded with a complicated tree st r u cture.
– a disc recorded in Multi Session.
Cautions when playing a disc that is
recorded in Multi Session
CD-DA (audio) data or MP3 files stored on a Multi
Session CD may be subject to some res tric ti ons on
playback.
– If the disc begins with a CD-D A se ssion, it is
recognized as a CD-DA (audio) disc, and playback
continues until an MP3 session is encountered.
– If the disc begins with an MP 3 se ssion, it is
recognized as an MP3 disc, and playback continues
until a CD-DA (audio) session is encountered.
– The playback range of an MP3 disc is determined by
the tree structure of files produced by analyzing of
the disc.
– A disc with a mixed CD format will be recognized as
a CD-DA (audio) disc.
GB
5
Page 6

The playback ord er of the MP3
files
The playback order of the folders and fil es as
follows.
Folder (album)
MP3 files
(tracks)
Tree 1 Tree 2 Tree 3 Tree 4 Tree 5
Notes
• A folder that does not include an MP3 file is skipped.
• When you insert a dis c wit h ma ny tr e es , it tak es a
longer time to s tar t play back. We recom mended th at
you make only one or two trees for each disc.
• The maximum number of MP3 files and folders is
300, and the maximum number of folde rs is 150
(including the root folder and empty folders).
• If the maximum number of folders or MP3 files is
exceeded, the additional fold er/MP3 files are not
recognized. For example, if you insert the disc with
151 folders, the player reads only 150 fo lde rs.
• The CD player can play th e M P3 fil es in a folde r
whose depth in the folder tree is up to 8.
Tip
To specify a desired playback order, before the folder
or file name, input the order by number (e.g .,
“01”,
“02”), then recor d contents onto a disc. (The
order differs depending on the writing software.)
Note on playback of MP3 files
Depending on the encoding/writing software,
recording device, or the record ing media used at the
time an MP3 file is recorded, you may encounter such
problems as disabled playback, soun d inte rr uptions,
and noise.
About the information
displayed for MP3 files
• The level meter do es not function during
playback.
• The following ID tags are displayed:
track name/album title/artist name.
• When ID3 tags ar e displayed, the I D 3
indicator lights up.
• When MP3 files are played, the track name is
displayed as foll ow s :
ID3v1/ID3v2/file name
• Depending on the disc, ID tags may not be
displayed.
• ID tags cannot be displayed while the deck is
stopped.
• The display of so me characters in vol u m e
labels, album titles or tr ack name is not
supported. These characters are replaced by
spaces or by characters special t o the system.
GB
6
Page 7

Getting Started
Unpacking
Check that you received the following items:
• Audio connection cords (2)
• Remote commander (remote) (1 )
• Sony R6 (size-A A ) batteries (2)
Inserting two R6 (size AA)
batteries into the remote
Hooking up
Perform the following procedures 1 to 5 to
hook up your de ck us ing th e sup pli ed cord s an d
accessories.
to a wall outlet
TAPE/MD
REC
OUT
AV Amplifier
Signal flow
IN
DIGITAL
OPTICAL IN
DIGITAL
OPTICAL OUT
Getting Started
Note
If you do not use the remote for a long period of time,
remove the batteries to avoid pos sible damage from
battery leakage and corrosion.
Tip
When the remote no longer operates the deck, replace
both batteries with new ones.
1 Prepare the cords.
• Audio connection cords (supplied) (2)
White
(L)
Red
(R)
• Optical ca ble (not supplie d) (2)
White
(L)
Red
(R)
continued
GB
7
Page 8

2 Connect the deck to an amplifier.
Connect the amplifier to the ANALOG IN/
OUT jacks using the audio connecting
cords (supplied), making sure to match the
color-coded cords to the appropriate jacks
on the components: red (right) to red and
white (left) to white. Be sure to make
connections firmly to prevent hum and
noise.
Amplifier
MXD-D400
ANALOG
IN
OUT
L
R
TAPE/MD
OUT
Signal flow
Connecting the deck to a digital
component such as a digital ampl ifier ,
CD player, or an MD deck
Connect the digital component (digital
amplifier, CD player, MD deck or DAT
deck, etc.) to the DIGITAL OPTICAL IN/
OUT connectors on the deck with an optical
cable (not supplie d) .
Be sure to insert the plug until it clicks into
place.
4 Turn on the amplifier and set the
source selector to the position for this
deck.
5 To turn on the deck, press ?/1.
The STANDBY indicator turns off.
IN
L
R
Tips
• If “Din Unlock” and “C71” alternate in the display,
the optical cable is not connected properly. Check
that the connections are secure.
• A built-in sa mpl ing r a te converter automatically
converts the sampling frequency of various digital
sources to the 44.1 kHz sampling rate of this deck.
This allows you to record source such as 32- and 48kHz DAT or satellite broadcasts, as well as compact
discs and MDs.
3 Connect the power cord to a wall
outlet.
GB
8
Page 9

CD/MP3/MD – Play
Loading a CD
1 Press OPEN/CLOSE.
2 Place a disc with the label side up on
the disc tray.
Playing a CD
— Normal Play/Shuffle Play/Search Play
CD/MP3/MD – Play
1
2
When you pl ay a 8 c m di sc, plac e it
on the inner circle of the tray.
3 Press OPEN/CLOSE again to close the
disc tray.
If you press H instead of OPEN/CLOSE,
the disc tray will cl ose and playback will
start automatically.
Notes
• Do not use a disc with tape, seals or paste on it as th is
may cause malfunction.
• Do not forcibly press the disc tray closed with your
finger, as this may cause malfunc tion.
3
m/M
Example: When a CD is loaded
Total number of track
X
x
Total playing time
1 Set to CD in CD MD select switch.
2 Press PLAY MODE in stop mode
repeatedly until the mode you want
appears in the display.
Select To play
No display
(Normal Play)
SHUFFLE
(Shuffle Play)
PROGRAM
(Program Play)
The tracks on the disc in
original order.
All tracks on the disc in
random order.
The tracks on the disc in the
order you want them to be
played (see “Creatin g your
own program” on page 14).
3 Press H.
Note
You cannot change the play mode during pla yback.
continued
GB
9
Page 10

Other operations
To Do this
Stop play Press x.
Pause Press X. Press again to resume
Find a point in a
track (Search)
Find a point
quickly by
observing the
display (Highspeed Search)
Remove a disc Press OPEN/CLOSE on the deck.
Tip
If “—Over—” appears while you are pressing M,
the disc has reached to its end. Press m or . (or
turn AMS counter clockwise) to go back.
Note
Tracks that are only a few seconds long may be too
short to scan using the search function.
play.
Keep pressing m or M during
playback and release it at the
desired point.
Keep pressing m or M during
playback pause until you find the
desired point.
There is no sound output during
this operation.
Playing an MP3 file
— Normal Play/Shuffle Play/Search Play
1
2
4
3
Example: When an MP3 disc is loaded
MP3
Playing the desired album
1 Set to CD in CD MD select switch.
2 Press PLAY MODE in stop mode
repeatedly until the mode you want
appears in the display.
Select To play
No display
(Normal Play)
ALBUM
(ALBUM Play)
SHUFFLE
(Shuffl e Play)
ALBUM
SHUFFLE
(Album Shuffle
Play)
PROGRAM
(Program Play)
The tracks on the disc in
original order.
All MP3 audio tracks in the
album on the disc you have
selected in original order.
All tracks on the disc in
random order.
The MP3 audio tracks in the
album on the disc you have
selected in random order.
The tracks on the disc in the
order you want them to be
played (see “Creating your
own program” on page 14).
10
GB
Page 11

3 Press ALBUM/GROUP – or +
repeatedly until the desired album
number appears.
When using the butt ons on the deck, press
ALBUM (“ALBUM SELECT” appears)
and turn AMS.
4 Press H.
Playing the desired track in the
album
1 Do step 1 to 3. (see “Playing the
desired album” on page 10)
When using the butt ons on the deck, press
ALBUM. “ALBUM SELECT” disappears.
2 Press . or > repeatedly (or turn
AMS on the deck) until the desired title
or track number appears.
3 Press H.
Notes
• If no album CD is played while in “ALBUM” mode,
CDs are played in t he same way as in “Nor mal Play ”
mode.
• If you do not select an album, playback starts from
the first track of the f irst album.
• You cannot change the play mode during playback.
• “0.00” appears when skipping a portion of ID3 tag
ver.2 (at the beginning of the track).
Skip time changes depending ID3 tag ver.2 capacity.
Other operations
See “Other operations” on page 10.
Loading an MD
Insert an MD.
With the label
side up, and
the shutter on
the righthand
side.
With the arrow pointing toward the deck.
Tip
When you insert an MD while the de ck is in sta ndby
mode, the disc tray will close and the deck will turn on
automatically.
CD/MP3/MD – Play
11
GB
Page 12

Playing an MD
— Normal Play/Shuffle Play
1
3
m/M
Example: When a MD is loaded
Other operations
To Do this
Stop play Press x.
Pause Press X. Press again to resume
2
X
x
Find a point in a
track (Search)
Find a point
quickly by
observing the
display during
playback pause
(High-speed
Search)
Remove a MD Press EJECT on the deck.
Tip
If “—Over—” appears during High-speed Search, th e
disc has reached to its end. Press m or . (or turn
AMS counter clockwise) to go back.
Notes
play.
Keep pressing m or M during
playback and release it at the
desired point.
Keep pressing m or M until
you find the desired point.
There is no sound output during
this operation.
• If the disc reaches the end during Search, the
deck stop.
• Tracks that are on l y a few seconds long m ay
be too short to scan using the search function.
12
Total number of track
Total playing time
1 Set to MD in CD MD select switch.
2 Press PLAY MODE in stop mode
repeatedly (or turn AMS) until the
mode you want appears in the display.
Select To play
No display
(Normal Play)
SHUFFLE
(Shuffle Play)
PROGRAM
(Program Play)
The tracks on the MD in
original order.
All tracks on the MD in
random order.
The tracks on the MD in the
order you want them to be
played (see “Creating your
own program” on page 14).
3 Press H.
Note
You cannot change the play mode during pla yba c k.
GB
Page 13

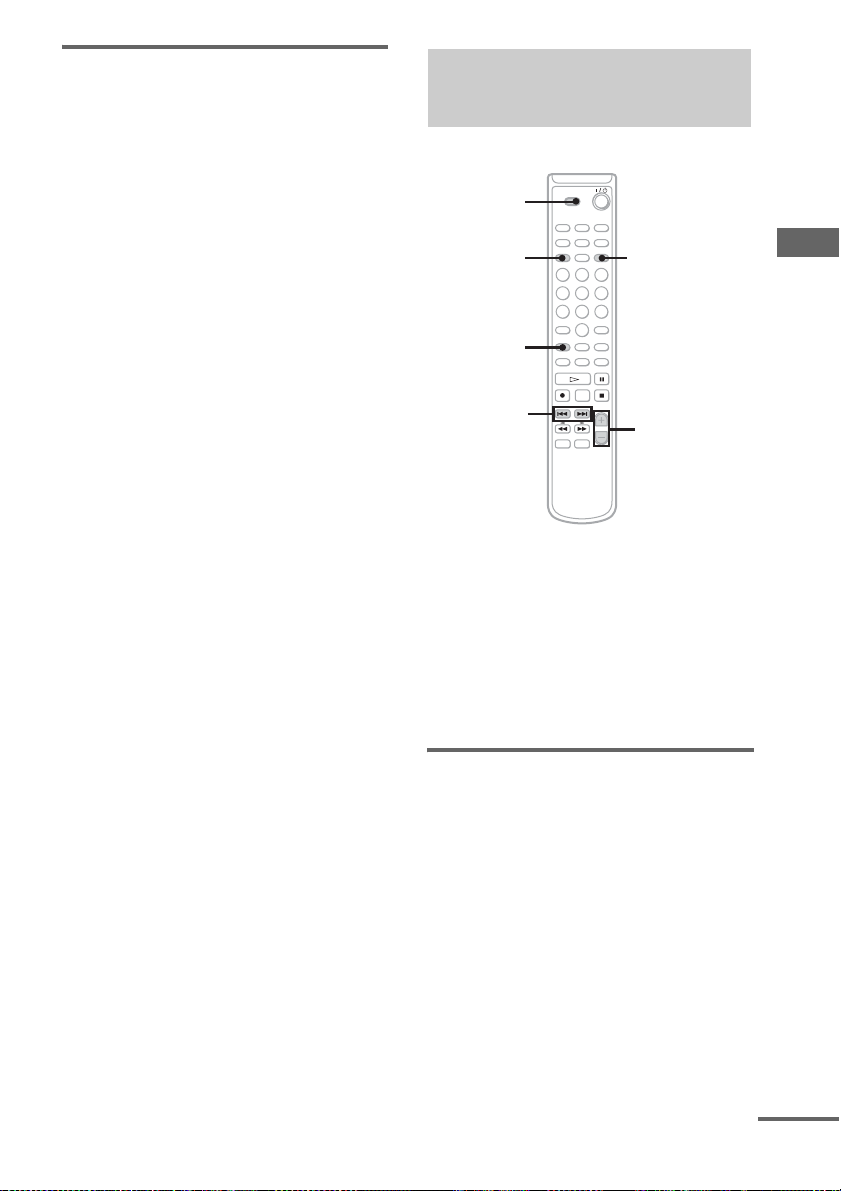
Locating a specific track
— AMS Function
CD/MD
Number buttons
H
./>
Playing a track by entering the
track number
You can also sele ct th e desired track using the
remote during Normal Play. Press the number
button(s). Playback automatically starts.
To enter a track number over 10
1 Press >10 once if it is a 2-digit track number,
and twice if it is a 3-digit track number.
2 Enter the corresponding digits for the same
number of “–” flashing in the display.
To enter 0, press 10/0.
Examples:
• To enter 6 while “– – –” flashes in the display, press
10/0, 10/0 and 6.
• To enter 100 while “– – –” flas he s in the display,
press 1, 10/0 and 10/0.
CD/MP3/MD – Play
.
AMS
(CD)
>
.
AMS
(MD)
>
Set to CD or MD in CD MD select switch.
You can quickly locate any tra ck by using the
AMS (Automatic Music Sensor) cont rol on the
deck, . and > buttons on the remote, or
number buttons on th e remote.
To locate Do this
The next or
succeeding tra cks
The beginning of
the current or
preceding tracks
A specific track
by using AMS
Tips
• To go quickly to the beginning of the last track, press
. (or turn AMS counter clockwise) in stop mode.
• To pause playing at the beginning of a track, press
. or
During playback, press > (or
turn AMS clockwise) until you
find the track.
During playback, press . (or
turn AMS counter clockwise) until
you find the track.
While the deck is stopped, press
> (or turn AMS), then
. or
press H (or AMS).
> (or turn AMS) after pausing playback.
13
GB
Page 14

Playing repeatedly
/
P
Creating your own
— Repeat Play
You can play all t he tra cks or a singl e trac k on a
disc.
1
2
1 Set to CD or MD in CD MD select
switch.
2 Press REPEAT during playback until
“REPEAT” or “REPEAT 1” appears.
REPEAT: For all the tracks on the disc.
REPEAT 1: For a single track only.
To cancel Repeat Play
Press REPEAT repeatedly until both
“REPEAT” and “REPEAT 1” disappear.
Tip
You can perform Repeat Play dur ing Shuffle Play or
Program Play. In Shuffle Play mode, all the tracks are
shuffled and played back repeatedly. In Program Play
mode, programmed tracks are played back repeatedly.
program
— Program Play
You can make a program of up to 25 steps.
1
2
4
CLEAR
6
3
1 Set to CD or MD in CD MD select
switch.
2 Press PLAY MODE in stop mode
repeatedly until “PROGRAM” appears.
3 Press . or > repeatedly (or turn
AMS) until the desired title or track
number appears.
Selected track number
AL: When you select “AL” in MP3 Play, all
MP3 audio tracks in the album you
have selected in or ig i nal order.
4 Press YES (or AMS).
The track is program m ed.
The step number appears, followed by the
last programmed track number.
5 To program additional tracks, repeat
steps 3 and 4.
6 Press H.
Program Play st arts.
ALBUM
GROUP
+/–
Total playing time
14
GB
Page 15

Other operations
To Do this
Cancel Program PlayPress PLAY MODE in stop
Check the program
order
Select the desired
tracks using the
number buttons
Add a track to the
end of the program
Program an MP3
Erase the prog ram Pres s CL E AR in step 4. Eac h
Tips
• The program you made rem a ins a f te r Progr a m Pl a y
finishes. To play the same program again, press H.
However, the program is cleared when you open the
disc tray, eject the MD or pull out the power cord.
• “– – –:– –” appears when the total playing time of the
CD exceeds 100 minutes or when the tota l pl ay ing
time of the MD exceeds 1,000 minutes.
• “– – –:– –” appears when the MP3 files are
programed. The total playing tim e cannot be
displayed during MP3 Play.
mode repeatedly until both
“PROGRAM” and “SHUFFLE”
disappear.
Press . or > repeatedly (or
turn AMS) in pause mode.
Press number buttons instead of
performing steps 3 – 4.
Perform steps 3 – 4 in stop mode.
Press ALBUM/GROUP – or +
(or press
AMS) to select album, before
step 3.
time you press the button, a track
is cleared from the end of the
program.
ALBUM, then turn
Playing only the tracks in the desired group
This function allows you to listen only to your
favorite tracks which you have regist ered into a
group. For details of the Group Function, see
“Registering tracks in groups” on page 31.
1
2
5
4
1 Set to MD in CD MD select switch.
2 Press GROUP ON/OFF in stop mode
repeatedly until “GROUP ON” appears.
3 Press ALBUM/GROUP – or + (or
GROUP SKIP) repeatedly until the
desired group appears.
4 To start playing from a specific track in
the group, press . or >
repeatedly (or turn AMS) until the
desired track appears.
Proceed to step 5 w hen you start playing
from the first track in the group.
5 Press H.
Playback star t s.
When the playing of the last track in the
group finishes , t he M D deck stops
automatically.
3
CD/MP3/MD – Play
continued
15
GB
Page 16

Note
If you select a group that does not have any tracks
registered and press
track of the first group on the MD.
Tip
You can change play mode (Normal Play/Shuffle Play/
Repeat Play/Program Play) only for the tracks in the
group. To select the desired play mode, select the play
mode before step 3.
H, playback starts from th e first
Falling asleep to music
— Sleep Timer
You can set the deck to turn off after a certain
time, so that you ca n fall asleep to music.
You can specify the t ime until the deck tur ns off
by 30 minutes.
SLEEP
16
GB
Press SLEEP.
Each time you press the button, the minute
display (the turn-o ff time ) chang es c yclical ly as
follows:
SLEEP OFF t 30min t 60min t 90min t
120min
Other operations
To Press
Check the
remaining time
Change the time
to turn off
Cancel the Sleep
Timer Function
SLEEP once.
SLEEP to select the time you
want.
SLEEP repeatedly until “SLEEP
OFF” appears.
Page 17
Changing the pitch of the MD
— Pitch Control Function
You can change the pitch of the MD by lowering the
playback speed. The tone falls at lower pitches.
1
2,5
3,4
CLEAR
3,4
Setting the pitch
automatical ly i n steps (Auto
Step Control Function)
You can lower the pitch by up to 36 steps. (One octave
equals 12 steps.)
1 Set to MD in CD MD select switch.
2 Press MENU/NO repeatedly until
“Setup Menu” appears.
3 Press . or > repeatedly (or turn
AMS) until “Pitch” appears, then press
YES (or AMS).
4 Press . or > repeatedly (or turn
AMS) to select the desired step value,
then press YES (or AMS).
5 Press MENU/NO.
Finely controlling the pitch
(Fine Contr ol Function)
You can fine cont rol the playing spee d in 0. 1%
increments from -87.5% to 0.0%.
1 Set to MD in CD MD select switch.
2 Press MENU/NO repeatedly until
“Setup Menu” appears.
3 Press . or > repeatedly (or turn
AMS) until “Pfine” appears, then press
YES (or AMS).
4 Press . or > repeatedly (or turn
AMS) to select the desired value, then
press YES (or AMS).
5 Press MENU/NO.
To recall the factory setting
Press CLEAR while setting the value.
Notes
• The playing sound drops out momentarily when you
change the fin e control value.
• The fine control value reverts to “0.0%” (factory
setting) and the step valu e returns to “0” (factory
setting) when you turn off the deck or ejec t the MD.
• When a dot (.) appears to the right of the step value
in the pitch display, this indicates th at you ha ve
performed fine adjustment (see this page) and the
pitch value is between steps. The ste p and fine
control values are linked; changi ng one value also
changes the other.
CD/MP3/MD – Play
17
GB
Page 18

Using the display
You can use the d i splay to check di sc and track
information such as total track number, total
playing time of the tracks, track number and
remaining time of the current track, remaining
recordable time of the MD, and disc name.
• When eithe r of the detailed displ ay is selected, the
disc name appears whenever the deck is stopped. The
name of the current track appears when a track is
playing. If the CD has no text information or no title
is recorded on the MD, “No Name” appears instead.
• If you insert a CD containing CD TEXT data, “CD
TEXT” light up in the display.
• To scroll a long name , pres s SC R O LL. Pres s
SCROLL again to pause scrolling, an d again to
continue scroll.
• When you load a disc with MP3 files, the total
playing time is not displayed .
DISPLAY
TIME
Changing the display
Each time you press DISPLAY while the deck is
stopped or playing, you can change the display
as follows:
CD/MD divide d dis play t Detailed display for
CD player section t Detailed display for MD
player section
CD/MD divi ded display
Detailed display for CD player section
Detailed display for MD deck section
Checking the remaining t im e
and titles
Press TIME during Normal Play.
Each time you press t he button, the display
changes cyclical l y as follows:
x When playing a CD
Current track number and elapse d playing time
t Current track number and remaining time
t Remaining time of the current disc*1
x When playing an MD
Current track number and elapse d playing time
t Current track number and remaining time
t Remaining time of the MD
*1
These are not displayed during MP3 Play.
*2
When the Group Function is on, the remaining time
of all tracks in the group is displayed.
*2
Checking the remaining
recordable time of the MD
1 Set to MD in CD MD select switch.
2 Press TIME in stop mode.
Each time you press t he button, the display
changes cyclical l y as follows:
Total number of tracks and the total playing
*3
t Remaining recordable time
time
(recordable MD only)
18
Tips
• Whenever you ch an ge the op era tion status of the
deck, the display autom atically changes to reflect
that status.
GB
*3
When the Group Function is on, the total number of
groups (when no group is selected) or the total
number of tracks and the to ta l pla y ing time within
the group (when a group is selected) are displa ye d.
Page 19

MD – Recording
Before you start recording
MDs (MiniDisc) let you digitally record and
play music with high quality sound. Ano th er
feature of MDs is t ra ck marking. The trac k
marking feature let s yo u quickly locate a
specific point or easily edit the re corded tracks.
However, depending on the source you record,
the recording me thod and the way the track
numbers are reco rd ed differ.
When the source you record from
is:
• CDs loaded in this deck’s CD
player
– The MD deck per f o r m s digital recordin g.
– Track numbers are automatic al ly marked as
on the original CD. However, track numbers
are not marked depending on the track
(page 5).
• Other digital components
connected to the DIGITAL
OPTICAL IN jack
– The MD deck per f o r m s digital recordin g.
– Track numb er s are marked differently
depending on the source you record.
• Other analog components
connected to the ANALOG IN
jacks
– The MD deck performs analog recor ding.
– A track number is marked at the beginning of
a recording only, but when you turn on the
Level Synchro Recording Function (page 23),
track numbers are automatically marked in
sync with the level of the input signal.
Note on MD track numbers
On an MD, the track numbers (track sequence),
track start and end poi nt i nformation, etc., are
recorded in the TO C** area independent of the
sound information. You can edit recorded tracks
quickly by modifying the TOC information.
*
*
When recording MP-3 format files
on a CD-R or CD-RW
Only normal-sp eed CD synchro record i ng i s
supported. This is because the digital signal of
the MP3 file is first converted to an analog
signal before it is recorded.
About recording errors
• With the follow in g ki nds of discs, you may
experience a reading failure or noise when
recorded on an MD:
– Discs with adhesive la bels atta ched to th em
– Irregularly sh aped discs (for example,
heart- or star- shaped)
– Discs wit h printed text co ncentrat ed on one
side only
– Scratched discs
– Dirty discs
– Warped discs
• If the following occurs during CD playback or
recording, a reading error may occur or noise
may be produced in the recorded results:
– The disc tray or other part of the deck is
bumped.
– The deck is place d on an uneven or soft
surface.
– The deck is located near a speaker, door, or
other source of vibrat ion.
• If the above reading errors occur, an extra
soundless tra ck may be created. You can erase
these extra tracks us in g Erase Function
(page 36).
* For details on the limitations of digital recording,
see “System limitations of MDs” on page 47.
**TOC: Table Of Contents
MD – Recording
continued
19
GB
Page 20

After recording
Press EJECT to remove the MD or press ?/
1 (power) to turn off the deck.
“TOC” starts flashing. The TOC is updated and
recording is completed.
Before pulling out the power cord
MD recording is completed when the MD Table
of Contents (TOC) is updated. The TOC is
updated when you eject the MD or press ?/1 to
turn off the deck. Do not pull out the mains lead
before updating the TOC or while updating the
TOC (while “TOC” lights up or flashes) to
ensure a complete recording.
Protecting a recorded MD
• To protect a recorded MD, slide the tab on the
side of the MD to open the slot. In this
position, the MD cannot be recorded . To
record on the MD, slide the tab to close the
slot.
Tab
Slide the tab
• If the MD is record protected, “C 11” and
“Protected” appear alternately and the MD
cannot be recorded. Remove the MD, then
slide the record protection tab to the closed
position.
Recording a CD on an MD
— CD-MD Synchro Recording/High-
Speed CD-MD Synchro Recording
You can record a whole CD on an MD. You can
select the recording time by switching the
recording m ode.
In addition to recording at norma l speed, you
can also record at high speed (approximately 4×
normal speed).
When using the remote, switch the function to
MD.
GROUP
1
2
4
3
ON/OFF SKIP
5
x X
1 Load a recordable MD.
2 Load a CD you want to record.
3 Press REC MODE repeatedly to select
the recording mode.
Select the desired recording time.
To record in Select Recording time*
Stereo Blank (No
indicator)
LP2 Stereo LP2 120 minutes
LP4 Stereo LP4 240 minutes
Monaura l MONO 120 minute s
*Maximum recording time using a 60 -minute
MD.
60 minutes
4 Press CD SYNCHRO NORMAL or HIGH.
To record using High-Speed CD-MD
Synchro Recording, press H IG H .
The MD deck stands by for recording and
the CD player pauses for play.
5 After “New Track” is displayed, press
H or X on the MD deck.
Recording starts.
When the recording is completed, the CD
player and the MD deck stop automatically.
20
GB
Page 21

To stop recording
Press x.
To record using the Group
Function
Press GROUP ON/OFF repeatedly until
“GROUP ON” appears after step 2. Press
ALBUM/GROUP – or + (or GROUP SKIP)
repeatedly unti l “New Group” or the desi red
group appears afte r step 4.
To record only your favorite CD
tracks
You can record only your favorite CD tracks
using the Program Play. Between steps 2 and 3,
perform steps 1 to 5 of “Cr eating your own
program” (page 14).
About recording MP3 files
• When recording MP3 files, the files are converted to
audio CD format. This may cause the data volume to
increase beyond the capacity of the disc.
• To protect copyrighted music contents, the following
restrictions are applied when recording MP3 file s on
the deck:
1)Only normal-speed CD synchro recording is
supported.
2)The digital signal of the MP3 files is converted to
an analog signal before it is recorded.
3)The recording level canno t be ad justed.
• During recording, the elapsed time for the CD and
MD on the display may differ slightly. This does not
constitute a probrem.
Notes
• You cannot pause the r ecor ding.
• If the MD play mode is set to the Shuffle Play or
Program Play, the play mode switches to Normal
Play in step 5.
Tips
• For details about LP2/LP4 recording, see “Recording
for long times” on page 29.
• For details about High-Speed C D -MD Sy nc hr o
Recording, see page 29.
Recording on an MD manually
— Manual Recording
You can record just the portions you like from a
CD, or other conn ected component.
When using the remote, switch the function to
MD.
GROUP
2
4
ON/OFF SKIP
x
X
6
5
3
1 Load a recordable MD.
2 Press INPUT repeatedly to select the
desired source to record.
• CD: To record from this deck’s CD
player.
• OPT: To record from the digital
component connected to the DIGITAL
OPTICAL IN jack.
• ANALOG: To record from the analog
component connected to the ANALOG
IN jacks.
3 Press REC MODE repeatedly to select
the recording mode.
Select the desired recording time.
To record in Select Recording time*
Stereo Blank (No
indicator)
LP2 Stereo LP2 120 minutes
LP4 Stereo LP4 240 minutes
Monaural MONO 120 minutes
*Maximum record ing time using a 60-minute
MD.
60 minutes
4 Press REC z.
The MD deck stand s by for recording.
5 Press H, then start playing the
desired source to record.
MD – Recording
continued
21
GB
Page 22

To stop recording
Press x.
To record using the Group
Function
Press GROUP ON/OFF repeatedly until
“GROUP ON” ap pears after step 2. Press
ALBUM/GROUP – or + (or GROUP SKIP)
repeatedly until “New Group” or the desired
group appears a ft er step 3.
Notes
You cannot record over existin g tracks. The new tracks
are recorded after the existing tracks.
Tips
• You can check the remaining record able t ime on t he
MD during recording by pressing TIME.
• For details about LP2/LP4 recording, see “Recording
for long times” on page 29.
• You can adjust the recording level (page 25).
Starting recording with
6 seconds of prestored
audio data
— Time Machine Recording
When recording from an FM or satellite
broadcast, the first few seconds of ma terial are
often lost due to the time it t akes you to ascertain
the contents and pr es s the record button. T o
prevent the loss of this material, the Time
Machine Rec ording fea ture con stantly stores th e
most recent audio data in a buffer me mory. This
lets you record the sound from 6 seconds before
starting recording, as shown in the illustration
below:
Start recording (step6)
6
seconds
Beginning of the source to be recorded
Stop Recording
Time
Recorded
portion
22
GB
2
4
3
6
1 Load a recordable MD.
2 Press INPUT repeatedly to select the
desired source to record.
Page 23

3 Press REC MODE repeatedly to select
the recording mode.
Select the desired recording time.
To record in Select Recording time*
Stereo Blank (No
indicator)
LP2 Stereo LP2 120 minutes
LP4 Stereo LP4 240 minutes
Monaural MONO 120 minutes
*Maximum recording time using a 60-m inute
MD.
60 minutes
4 Press z.
The MD deck stands by for recording.
5 Start playing the desired source to
record.
6 Press T.REC at the desired point to
start recording.
To stop Time Machine Recording
Press x.
Note
The MD deck starts storing audio dat a whe n the d eck
stands by for recording in step 4 and you start playing
the source. If less than 6 seconds have passed when you
press T.REC (or AMS), Time Machine Recording
starts with less than 6 seconds of audio da ta .
Tip
For details about LP2/LP4 record ing, see “Recording
for long times” on page 29.
Marking track numbers
After recording
Use the Divide Func ti on (page 40).
At any point during recor ding
— Track Mark
You can mark track numbers during manual
recording of any sour ce.
Press z during manual recording at the
point you want to add a track mark.
Presetting to automatically
mark track numbers before
recording
— Level-Synchro Recording
The Level Synchro Re cor di ng Function is
factory set to on, so the track numbers are
automatically marked. Track numbers are
automatically marked when the input signal is
continuously below a certain level for more th an
two seconds and t h en exceeds that leve l. If
“L.SYNC” does not appear during recordi ng,
turn on the Level Synchro Recording as follows.
MD – Recording
1
2,5
3,4
3,4
continued
23
GB
Page 24

1 Set to MD in CD MD select switch.
2 Press MENU/NO repeatedly until
“Setup Menu” appears.
3 Press . or > repeatedly (or turn
AMS) until “T.Mark” appears, then
press YES (or AMS).
4 Press . or > repeatedly (or turn
AMS) until “T.Mark LSync” appears,
then press YES (or AMS).
“L.SYNC” lights up.
5 Press MENU/NO.
To continue recording, follow the
procedures described for each typ e of
recording.
Other operations
To Do this
Turn off the Level
Synchro Recording
Function
Change the trigger
lever fo r Level
Synchro
Recording*
* When the recording source is tape or rad io progr a m
and the track numbers are not ma rk ed prop erly
because of noise, set this level higher so that track
numbers are marked easily. The factory se tting is
“–50 dB”.
Notes
• Track numbers are not ma r ked depending on the
track.
• When recording a CD, track numbers are marked
where you paused recording. In addition, the tracks
might be recorded as the same single track with a
single track number when the same single track of
the same CD is recorded repeatedly .
In step 4, press . or >
repeatedly (or turn AMS) until
“T.Mark Off” appears, then
press YES (or AMS).
After step 2, press . or >
repeatedly (or turn AMS) until
“LS(T)” appears, then pres s
YES (or AMS). Press . or
> repeated ly (or turn AMS)
to select the level between –72
dB and 0 dB (in 2 dB steps),
press YES (or AMS), then press
MENU/NO.
Making a space between tracks 3 seconds long automatically
—Smart Space
Smart Space: Lets you make the blank spaces
between tracks 3 seconds long automatic ally
while maki ng a digital rec ording from a CD. Fo r
other types of reco rding, if the Smart Space
Function is on and t here is no sound input fo r
about 3 seconds or m o r e (but less than
30 second s ) w hi le recording, the MD deck
replaces this sil ence with a blank of about
3 seconds and continues recor di ng.
The Smart Space Function is factory set to on.
No sound input for less than 30 seconds
Off
On
Replaced with a blank of 3 seconds and
recording continues
Auto Cut: When the Smart Space Function is
on, if there is no sound input for 30 seconds or
more, the MD deck replaces this silence with a
blank of about 3 seconds and enters recording
pause.
No sound input for 30 seconds or more
Off
On
Replaced with a blank of 3 seconds and
recording pauses
24
GB
Page 25

1
Adjusting the recording level
2,5
3,4
3,4
1 Set to MD in CD MD select switch.
2 Press MENU/NO repeate dl y until
“Setup Menu” appears.
3 Press . or > repeatedly (or turn
AMS) until “S.Space Off” appears, then
press YES (or AMS).
4 Press . or > repeatedly (or turn
AMS) until “S.Space On” appears, then
press YES (or AMS).
5 Press MENU/NO.
To continue recording, follow the
procedures described for each type of
recording.
To turn off the Smart Space
Function
In step 3, press . or > repeatedly (or turn
AMS) until “S.Spa ce On” appears, then p re ss
YES (or AMS).
In step 4, press . or > repeatedly (or turn
AMS) until “S.Spa ce Off” appears, then press
YES (or AMS).
When recording on an MD, you can adju st the
recording level to the desired volume. You can
adjust the recording level n ot only when making
an analog recording, but also when making a
digital recording from a CD, etc.
Adjusting the analog recording level can be
performed using the buttons on the deck only .
Adjusting the recording level
when making an analog
recording
2
4
1
1 Press INPUT repeatedly until
“ANALOG” appears.
2 Press REC z.
The MD deck stand s by for recording.
3 Start playing the desired source to
record.
4 Turn REC LEVEL on the deck to adjust
the recording level.
Adjust to the optimum level while making
sure that “OVER” does not appear in the
display at the loudest portion.
Adjust the level so as not
to light up “OVER”.
MD – Recording
ANALOG
continued
25
GB
Page 26

5 Stop playing the sound source.
To continue recording, follow the
procedures described for each typ e of
recording.
Adjusting t he recording level
when making a digital
recording
1
4,7
5
2
5,6
6 Press . or > repeatedly (or turn
AMS) to adjust the recording level.
Adjust to the optimum level while making
sure that “OVER” does not appear i n the
display at the loudest portion.
7 Press MENU/NO.
8 Stop playing the sound source.
Tips
• You can also adjust the recording lev el d uring
recording.
• Once adjusted, the recording level is maintained until
you adjust it again.
• You cannot adju st the recording level during CDMD Synchro Recording.
• You cannot adju st the recording level during MD
playback.
26
5
5,6
4,7
1 Press INPUT repeatedly until “CD” or
“OPT” appears.
2 Press REC z.
The MD deck stand s by for recording.
3 Start playing the desired source to
record.
4 Press MENU/NO repeatedly until
“Setup Menu” appears.
5 Press . or > repeatedly (or turn
AMS) until “CD” or “OPT” appears,
then press YES (or AMS).
GB
2
1
Page 27

Recording the current CD
Synchro-Recording with
track
— REC-IT Function
You can record specific tracks on a CD whi le
listening to them. This function allows you to
put only the tracks you like onto the MD.
1
3
2
1 Set to CD in CD MD select switch.
2 Press H to start playback.
Make sure that the MD deck section is
stopped.
3 Press REC-IT when you hear a track
you want to record.
Play returns to the start of the track and
recording start s. The recording stops at the
end of the t rack, but CD playba ck contin ues
from the next track.
To stop Recording
Press x.
Note
• Make sure that the remaining record able ti me on the
MD is longer than the playing time of the CD tr a ck.
• The recording level specified in the Setup Menu is
not applied during REC-IT Recording. The initial
reference level (0.0 dB) is used instead.
• During MP3 playback, REC-IT Recording cannot be
made. For details about the MP3 recording, See
“When recording MP-3 format files on a CD-R or
CD-RW” on page 19
an external audio
equipment
— Music Synchro-Recording
By using the MUSIC S Y NC button on the
remote, you can automatically st art recordin g in
sync with a CD in the deck or the signal input
from the progra m source connected to t he deck.
2
3
1 Do steps 1 to 4. (see “Recording on an
MD manually” on page 21).
2 Switch the function to MD.
3 Press MUSIC SYNC.
“REC” and “SYNC” flash and the deck
changes to recording pause.
4 Start playing the program source you
want to record.
The deck starts re cording automatically.
To stop Music Synchro-Recording
Press x.
Note
When Music Synchro-Recording, the Smart Space
Function and the Auto Cut Function tur n on
automatically regardless of th eir setting (“O n” or
“Off”).
MD – Recording
27
GB
Page 28

Fading in and out
—Fader
You can gradually i ncrease the recording level
at the beginning of a recording (fade-in
recording) or gradually decrease the recording
level at the end of a recording (fade- out
recording).
FADER
Fade-out recording
During recording pause, press FADER at
the position where you want to start fadeout recordi n g.
B flashes and the d eck performs the fade-out
recording until the counter reaches
Tip
You can set the duration of fade-in and fade-out
recording independently (page 42) .
“0.0s.”
28
Fade-in recording
During recording pause, press FADER at
the position where you want to start fade-in
recording.
b flashes and the deck performs the fade-in
recording until the counter reaches
GB
“0.0s.”
Page 29

Recording tips
High-Speed CD-MD Syn chr o
Recording
Recording for long times
This deck has two long time recording modes:
LP2 and LP4 (MDLP recordin g).
Press REC MODE to select the recording mode.
Refer to each pages about recording (pa ges 20
and 21).
MDs recorded in MDLP Stereo mode are played
back only on the deck with the following marks.
MDs recorde d i n MDLP St er eo mo de ca nn ot be
played back on the deck that does not support
MDLP mode.
Notes
• Even if the reco r ding mode is set to “MONO”, the
sound from the speakers are output as recorded in the
source (in stereo when recording the stereo source).
• Some MDs recorded in MDLP Stereo mode are
edited so that “LP:” is displayed to indicate that
playback is not possible when an attempt is made to
play back these MDs on a deck that does not support
MDLP mode. However, this deck supports MDLP
mode, so “LP:” is not displayed when these MDs are
played back.
Tips
• LP4 stereo mode (4 × long ti me recording mode)
achieves a long stereo recording time by use of a
special compression deck. When placing emphasis
on sound quality, Stereo recordin g or LP2 ste r e o
recording (2× long time recording mode) is
recommended.
• You can mix the recording mode in an MD.
• The selected recording mode is kept even after
recording has finished. To change the reco rd ing
mode, press REC MODE repeatedly.
When recording an entire CD as is or in the
programmed track order, you can record at
higher speed tha n nor m al (approximately 4 ×
normal speed).
If you cannot use High-Speed CDMD Synchro Recording
A reading failure has occurred, and t he deck is
trying to read the da ta again.
• If the ret ry was su ccessf ul, the deck co ntinue s
with High-Speed CD-MD Synchro
Recording.
• If the condition of the inserted CD or the deck
is poor, and retry fails, High-Speed CD -MD
Synchro Recordin g is di sabled. In this case,
“Retry” and “NOR MAL” fl as h i n t he di sp lay
and the MD deck automatically starts
recording in normal CD-MD Synchro
Recording. Note the monitoring of the
recorde d signal is not p ossible when this
occurs.
Notes
• You cannot recor d ove r exi sti ng tr a ck s. The ne w
tracks are reco rd ed after the existin g tra c k s.
• When recording all the tracks on a CD, be s ure to use
a recording MD with a lon g e r remaining time than
the CD play time.
• You cannot pa use r ecordi ng dur ing CD- MD Sync hro
Recording and High-Speed CD-MD Synchro
Recording.
• If the CD play mode is set to Repeat Play or Shuffle
Play, it automa tically switches to Normal Play.
• The following items are either inoperative or cannot
be used during High-Speed CD-MD Synchro
Recording:
– The Auto Cut Function
– The recording level specified in the Setup me nu
• There is no sound output during High-Speed CD-MD
Synchr o R e cording.
MD – Recording
29
GB
Page 30

MD – Editing
Editing tips
Before you start editing
You can edit an MD only when:
• The MD is recordable.
• The MD play mode is Normal Play.
Check the followi ng, before editing.
1 Check the tab of the MD to be edited.
Slide the tab to close the slot.
If the MD is protected, you cannot edit the
MD.
2 Press PLAY MODE repeatedly until
both “SHUFFLE” and “PROGRAM”
disappear.
You can edit the MD only in Normal Play
mode. You cannot edit the MD in Shuffle or
Program Play mode.
To quit while editing
Press MENU/NO.
Operation buttons for Editing
MENU/NO
./>
YES
After editing
Press EJECT to remove the MD or press ?/
1 (power) to turn off the deck.
“TOC” star t s flashing. T he TOC is up dated and
editing is completed.
Before pulling out the mains lead
MD editing is completed when the MD Table of
Contents (TOC) is updated. The TOC is updated
when you eject the MD or press ?/1 to turn off
the deck. Do not pull out the mains lead before
updating the TOC or while up da ting the TOC
(while “TOC” lights up or flashes) to ensure a
complete editing.
30
GB
Page 31

Registering tracks in groups
— Group Function
What is the Group Function?
The Group Function allows you to play, record
and edit the tracks on an MD in groups. For
example, you can register tracks 1 to 5 on an MD
to the “Rock” gr oup, and tracks 6 t o 9 t o the
“Pops” group. Then yo u can listen to the tracks
in only the desired group, add new tracks to a
group, and perform other operations. In
addition, the Group F unction can be easily
turned on and off s imply by pressing GROUP
ON/OFF.
MD
Track number
MD
Track number
Group Function: Off
Track number
Operations using the Group
Function
• Playing only the tracks in the desired group
(page 15)
• Recording a CD (page 20)
• Recording on an MD manually (page 21)
• Starting recording wit h 6 seconds of prestored
audio data (page22)
• Labeling a group (page 32)
• Registering recorded tracks into a new group
(page 35)
• Releasing group registrations (page 35)
Note
MDs recorded using the Group Func tion of this deck
can be used with other deck that supports the Group
Function. However, note that the Group Func ti on
operations of other deck may differ from the operations
for this deck.
How is group information
recorded?
When recording using the Group Fu nction, the
group management information is automatically
recorded on the MD as the disc title.
Specifically, a character string such as the
following is written in the disc title recording
area.
Disc title recording area
MD – Editing
Group 1
When the group function is turned on, track
numbers within groups are renumbered, starting
from track 1. In the above figure, for example,
tracks 4 to 7 are renu mbered to 1 to 4 when the
group function is turned on.
Group 2
Group Function: On
0 ; F a v ourites // 1 – 5 ; Roc k // 6 – 9 ; P ops // ...
231
1The disc title is “Favorites”.
2Tracks 1 to 5 ar e r egi stered in the “Rock”
group.
3Tracks 6 to 9 ar e registered in the “Pops”
group.
continued
31
GB
Page 32

Therefore, when an MD recorded using the
/
Group Function is loaded on a deck that does not
support the Group Function or on this deck with
the Group Function turned off, the above
character string is di splayed in i ts entir ety as the
disc title.
Note that if you rewrite this character
string by mistake using th e Nam e
Function, you may be unable to use the
Group Function of that MD.
* “GROUP ON” flashes. To use the Group Function
again, first perform the procedure for “Rel easing all
groups on an MD” (page 36) and release the
registrations of all tracks on the MD.
*
If “Group Full!” appears during
operation
You cannot start r ecording because there is
insufficient character space for group
management. D elete unnecessary characters
(disc title or track titl es) until gro up recordi ng is
possible (page 34).
Notes
• The Group Functi on se tting is stored even if you
eject the MD or turn off the deck.
• When the Group Function is on, tracks which are not
registered to a group are not displayed and cannot be
played.
• You cannot change the group order.
• The new group is added aft er any ex isting groups
with tracks registered.
• When you newly recor d a tra c k into an ex isting
group, the new track is added after any existing
tracks in the group.
• Up to 99 groups can be registered on a single MD.
• When you newly recor d a tra c k into an ex isting
group, the track numbers following the newly
recorded track may change when the Gro up Function
is turned off.
• If you load a disc with gr oup management
information written in other than the proper format,
“GROUP ON” flashes. In this case you cannot use
the Group Function.
Labeling an MD/group/ track
— Name Function
You can create titles for your recorded MDs,
tracks, and groups as follo w s.
After recording
Use Name Function.
You can input a total of approximately
1,700 characters for the d isc title, track titles and
group titles on a sin gle MD.
When labeling an MD recorded using the
Group Function, be sure to label the disc
with the Group Function on so as not to
rewrite the group management
information by mistak e.
For details on the gro up management
information, see “How is group information
recorded?” on page 31.
Labering using the buttons on the
remote
1
SCROLL
2,3
6
4
GROUP
ON/OFF
./>
m/M
CLEAR
ALBUM
GROUP
+/–
32
1 Set to MD in CD MD select switch.
GB
Page 33

2 Perform the following procedure
depending on what you want to label:
To label a track
Press . or > repeatedly until the
desired track numb er appears, then press
NAME EDIT/SELECT.
To label an MD
Press NAME EDIT/SELECT while the
total number of tracks (or groups when the
Group Function is on) is displayed.
To label a group
Press GROUP ON/OFF repeatedly until
“GROUP ON” appears, then press
ALBUM/GROUP – or + rep ea te dl y until
the desired group appears. Press NAME
EDIT/SELECT while the total number of
tracks within the desired group is displayed.
The cursor starts flashing.
3 Press NAME EDIT/SELECT to select
the desired type of character.
Character type Select
Alphabet (upper cases)/
blank space/symbols
Alphabet (lower cases)/
blank space/symbols
Numbers Selected 12
Selected AB
Selected ab
4 Enter a character.
Character type Do this
Alphabet Press the corresponding
Numbers Press the corresponding
Blank space Press 10/0.
´ – / , . ( ) : ! ? Press 1 repeatedly.
& + < > _ = “ ; # $
% @ `
letter button (or . or
>) repeatedly until the
character to be entered
flashes, then press M.
number buttons.
Press 1, then press . or
> repeatedly.
5 Repeat steps 3 and 4 to enter the rest of
the name.
6 Press YES.
To change the character
In step 3 or 4, press m or M repeatedly until
the character to be changed flashes, press
CLEAR to erase the character, then repeat steps
3 and 4.
To add a character
After steps 1 and 2, press m or M until the
cursor comes to th e point you want to add a
character, then proceed to step 3.
Labering using the buttons on the
deck
1 Press MENU/NO repeatedly until “Edit
Menu” appears.
2 Turn AMS until “Nm In?” appears in the
display and press AMS.
3 Turn AMS to select “Disc” to label an MD, or
to specify the track or group to label.
While recording, go to step 5.
4 Press AMS or YES.
A flashing cursor appears in the display.
The deck starts playing and you can name a
track while monitoring the sound.
5 Press TIME to change the type.
Character type Select
Alphabet (upper cases) “A”
Alphabet (lower cases) “a”
Numbers “0”
Symbols “ ´ ”
6 Turn AMS to select the character.
The selected character flashes.
Letters, numbers, symbols, and a space
appear in sequential order as you turn AMS.
To enter a space, press AMS while the
cursor is flashing. (You cannot select a
space for the first character to the title.)
7 Press AMS to enter the select character.
The selected character stops flashing and
the cursor flashes waiting for the input of the
next character.
8 Repeat steps 6 and 7 until you have entered
the entire title.
9 Press YES.
continued
33
MD – Editing
GB
Page 34

Note
If you enter the symbol “//” between the characters in
disc titles such as “abc//def”, you may be unable to use
the Group Function.
Tips
• You can label a track title during playback. The
playback repeats until you fin ish la be li ng.
• During the CD-MD Synchro Recording (page 20),
CD-TEXT info rm a tion is recorded automatically.
Checking the titles
Creating a new group
— Create Function
1
3
4,6
To check the disc titles, press SCROLL in stop
mode. To check the track title, press SCROLL
during playback. The title appears scrolling in
the display.
To check the group titles, press GROUP ON/
OFF repeatedly in stop mode until “GROUP
ON” appears, press ALBUM/GROUP – or + (or
GROUP SKIP) re peatedly until the des ir ed
group appears, then press SCROLL.
To stop scrolling, press SCROLL. Press the
button again to resume scrolling.
Erasing the titles
1 To erase group titles, press GROUP
ON/OFF repeatedly in stop mode until
“GROUP ON” appears.
2 Press MENU/NO in stop mode.
3 Press . or > repeatedly (or turn
AMS) until “Nm Erase?” appears, then
press YES (or AMS).
4 Press . or > repeatedly until
“Disc” (to erase the disc title), the track
title or the group title appears
5 Press YES (or AMS).
“Complete!” ap pears.
Note
You cannot erase the title of a group that does not have
any tracks registered.
2
4,6
The Create Function allows you to create a new
group without registering any tracks, or to create
a new group and regi ster one or more
consecutive tracks into that group. Only tracks
that have not yet been registered into any group
can be registered .
For details on the Grou p Function, see
“Registering trac ks in groups” on page 31.
1 Set to MD in CD MD select switch.
2 Press GROUP ON/OFF repeatedly until
“GROUP ON” appears.
3 Press MENU/NO.
4 Press . or > repeatedly (or turn
AMS) until “Gp Create?” appears, then
press YES (or AMS).
5 Perform steps 3 to 6 of “Labeling an
MD/group/track” (page 32).
6 Press . or > repeatedly (or turn
AMS) until “Assign None” appears,
then press YES (or AMS).
Note
When creating a group without registering any tracks,
you must enter the group title .
34
GB
Page 35
To register tracks into a group
In step 6, press . or > repeatedly (or
turn AMS) to select the number of the first
track you want to register, then press YES
(or AMS).
When registeri ng only one track, press Y ES
again. When regist er in g t w o or more tracks,
press . or > (or turn AMS) repeatedly to
select the n umber of th e last track yo u want to
register, then press YES (or AM S).
Notes
• You cannot register the same track to more than one
group.
• If you do not enter a group title in step 5, “Group **
(group number)” appears as the group title.
Tip
You can also register tracks that were recorded on a
deck that does not support the Group Func tion.
Releasing group registrations
— Release Function
1
4
5,6
2
5
These functions al lo w you to release group
registrations simply by specifying the group for
which you want to rel ease the registrations . In
addition, yo u can also rel ease the regi strations of
all groups on an MD at once.
For details on the group management
information, see “Registering tracks in groups”
on page 31.
3
MD – Editing
Releasing a single group
— Group Release Function
You can release a specified group and erase that
group. (However, note that the t racks are not
erased.)
1 Set to MD in CD MD select switch.
2 Press GROUP ON/OFF repeatedly until
“GROUP ON” appears.
3 Press ALBUM/GROUP – or + (or
GROUP SKIP) repeatedly until the
desired group appears.
4 Press MENU/NO.
continued
35
GB
Page 36

5 Press . or > repeatedly (or turn
AMS) until “Gp Release?” appears,
then press YES (or AMS).
“REL Gp** (selected group number)??”
appears.
6 Press YES (or AMS).
Releasing all groups on an MD
— All Release Function
1 In step 5 above, press . or >
repeatedly (or turn AMS) repeatedly
until “Gp All REL?” appears, then
press YES (or AMS).
“All REL??” appears .
2 Press YES (or AMS).
Erasing recordings
— Erase Function
The MD deck lets you er as e unwanted tracks
quickly and easily.
You can restore the erased contents us in g the
Undo function immediately after the erasing
(page 41 ). H ow ever, you cannot restore the
erased contents after performing other editing.
Before erasing, make sure if it is al l right to erase
the content.
The three options for erasing recordings are:
• Erasing a single track (Track Erase Function)
• Erasing all tracks (A l l Er ase Function)
• Erasing a portion of a track (A-B Erase
Function)
Erasing a sing le track
— Track Erase Function
When you erase a track, the total number of
tracks on the MD decreases by one and all the
tracks following the erased one are renumbered.
Example: Erasing track 2
36
GB
Track number
Original
tracks
After
ERASE
As the track numbers are renumbered as above,
it is recommended to erase from the latter tra cks
when erasin g s ever al t r ack s, so as no t t o ch ange
the track numberin g of unerased tracks.
A
A
Erase track 2
BC
CD
D
1 Set to MD in CD MD select switch.
2 Press MENU/NO.
3 Press . or > repeatedly (or turn
AMS) until “Tr Erase?” appears, then
press YES (or AMS).
Playback of the selected track starts.
Page 37

4 Press . or > repeatedly (or turn
AMS) until the desired track number
appears.
5 Press YES (or AMS).
“Complete!” appears. The track selected in
step 4 is eras ed and playback of the
following track s ta rts. When you erase the
last trac k, the play back of the p revious tr ack
starts.
Note
If you erase all the tracks within a group, the group
itself is also erased.
Erasing a portion of a track
— A-B Erase Function
You can specify a por t ion within a track and
erase the portion with ease. You can shift the
desired portion by frame
intervals.
This function is convenient to erase the
unneccessary parts recorded from satellite
broadcast or radio programs.
* 1 frame is 1/86 sec o nd.
*, minute or second
MD – Editing
Erasing all tracks
— All Erase Function
You can erase all the contents recorded on an
MD (the disc title, group titles, all recorded
tracks and their tit l es) at once.
1 Set to MD in CD MD select switch.
2 Press MENU/NO.
3 Press . or > repeatedly (or turn
AMS) until “All Erase?” appears, then
press YES (or AMS).
“All Erase??” appea rs .
4 Press YES (or AMS) again.
Note
If you perform the above operation when the Group
Function is on, not only the tracks within the group, but
all the tracks on the MD are erased.
Example: Erasing a portion of track 2
Track number
Original
tracks
After A-B
ERASE
12
12
Point A
B A
A
A B (A + C)
B B
Point B
3
B C
3
C
1 Set to MD in CD MD select switch.
2 Press MENU/NO.
3 Press . or > repeatedly (or turn
AMS) until “A-B Erase?” appears, then
press YES (or AMS).
Playback star t s.
4 Press . or > repeatedly (or turn
AMS) until the desired track number
appears.
5 While monitoring the sound, press YES
(or AMS) at the starting point of the
portion to be erased (point A).
“—Rehearsal—” and “Point A ok?” appear
alternately while the deck repeats a few
seconds of a porti o n before point A.
continued
37
GB
Page 38

6 Press YES (or AMS) if point A is
correct.
“Point B set” appears and playback for
setting the ending point of the portion to be
erased (point B) starts.
If the point A is incorrect, press m or
M
repeatedly to flash minute, second, or frame
indication, then press
AMS).
. or > (or turn
Minutes
Second
Frame
Moving recorded tracks
— Move Function
You can use this function to change the order of
any track on the disc. When you move tracks,
the tracks are automatically renumb ered.
Example: Moving track 3 to position 2
Track number
Original
tracks
A
B
C
D
You can shift the point by 1/86 second
(1 frame) intervals.*
* You can shift the point by 2-frame in tervals (i n
Monaural mode and LP2 stereo mode) or by
4-frame intervals (in LP4 stereo mode).
7 Continue playback until the deck
reaches point B, then press YES (or
AMS).
“A-B Ers” and “Poi nt B ok?” appear
alternately and the deck repeats a portion of
the few seconds before point A and after
point B successively.
8 Press YES (or AMS) if point B is
correct.
“Complete!” a ppe ars f or a fe w seco nds an d
the portion between point A and B is erased.
Playback sta r ts from the beginning of the
track.
If the point B is incorrect, press m or
M repeatedly to find the ending point of
the portion to be er ased (point B) while
monitoring th e sound, then press Y E S (or
AMS).
You can shift the point by 1/86 second
(1 frame) intervals.*
* You can shift the point by 2-frame in tervals (i n
Monaural mode and LP2 stereo mode) or by
4-frame intervals (in LP4 stereo mode).
After
MOVE
AC
BD
1 Set to MD in CD MD select switch.
2 Press MENU/NO.
3 Press . or > repeatedly (or turn
AMS) until “Move?” appears, then
press YES (or AMS).
Playback starts.
4 Press . or > repeatedly (or turn
AMS) until the desired track number to
move appears, then press YES (or
AMS).
5 Press . or > repeatedly (or turn
AMS) until the new track position
appears.
Original track
number
New track
position
6 Press YES (or AMS).
“Complete!” appears for a few seconds and
the moved track starts playing.
Note
When you move a track to a track number that is
registered into a group, the move d track is re-regi stered
into the group. In addition, if you mo ve a track that is
registered into a group to a track number that is not
registered into a group, the group registr a tion of the
moved track is released. However, when the Gro up
Function is on, you can only move tracks within the
selected group.
38
GB
Page 39

Combining recorded tracks
— Combine Function
You can use this function to combine 2 tracks
into a sing le track. Th e total num b er of tracks
decreases by one and all tracks followin g th e
combined ones are renumbered.
Example: Combining track 3 to track 1
Track number
Original
tracks
After
COMBINE
Example: Combining track 1 to track 4
Track number
Original
tracks
A
A
B
A
B
C
C
BD
C
D
D
5 Press . or > repeatedly (or turn
AMS) until the second track number of
the two to be combined appears.
Second track
First track number
number to be
continued
6 Press YES (or AMS).
“Complete!” appears for a few s econds.
Playback of the track starts.
Notes
• When you combine two tracks that are regis tered into
different groups, the second track is reregistered into
the group containing the first tra c k. In ad dition, if
you combine a track that is registered to a group with
a track that is not registered to a group, the second
track takes the same registr a tion setting as the first
track. However, when the Group Function is on, you
can only combine tracks within the se le c te d group.
• Tracks recorded in different recordin g modes (stereo,
LP2, LP4 or MONO) cannot be combined.
• If both of the combined track s h ave track titles, th e
title of the second track is era se d.
MD – Editing
After
COMBINE
B
CD
A
1 Set to MD in CD MD select switch.
2 Press MENU/NO.
3 Press . or > repeatedly (or turn
AMS) until “Combine?” a ppears, then
press YES (or AMS).
Playback starts.
4 Press . or > repeatedly (or turn
AMS) until the first track number of the
two to be combined appears, then
press YES (or AMS).
For example, to combine track 1 to 4, select
4.
39
GB
Page 40

Dividing recorded tracks
— Divide Function
If the point to be divided is incorrect,
press m or M repeatedly to flash minute,
second, or frame indicatio n, th en press
>
(or turn AMS).
. or
You can use this function to mark track numbers
after recording. You can also use this func t io n
when recording from tapes or radio pr ograms
and track number s are not marked
automatically, and want to mark tracks. The
total number of tracks increases by one and all
the tracks following the divided ones are
renumbered.
Example: Dividing track 2 into two tracks
Track number
Original
tracks
After
DIVIDE
A
A
C
B
Divide track 2 into
track B and C
B
C
D
D
1 Set to MD in CD MD select switch.
2 Press MENU/NO.
3 Press . or > repeatedly (or turn
AMS) until “Divide?” appears, then
press YES (or AMS).
Playback starts.
4 Press . or > repeatedly (or turn
AMS) until the desired track number to
divide appears.
5 While monitoring the sound, press YES
(or AMS) at the point to be divided.
“—Rehearsal—” appears and the portion to
be divided is played repeatedly.
6 Press YES (or AMS) again if the point to
be divided is correct.
“Complete!” a ppe ars f or a fe w seco nds an d
the newly created track starts playing.
Minutes
Second
Frame
You can shift the point by 1/86 second
(1 frame) intervals.*
* You can shift the point by 2-frame intervals (in
Monaural mode and LP2 stereo mode ) or by 4frame intervals (in LP4 stereo mode).
Note
If you divide a labeled track (page 32) into two tracks,
only the first track ret a ins the track title.
Example:
A
A
B
BC
The new track is not labeled.
C
40
GB
Page 41

Undoing the last edit
Changing the recorded
— Undo Function
You can use this function to cancel the last edit
and restore the contents of the MD to th e
condition befo re the edit.
Note, however, tha t yo u cannot undo the edit if
you do any of the follow i ng after the edit:
• Do another edit.
• Do the recordi ng procedure.
• Update the TOC by turning off the deck or
ejecting the MD.
• Disconnect t he power cord.
1 Press MENU/NO in stop mode.
2 Press . or > repeatedly (or turn
AMS) until “Undo?” appea r s .
“Undo?” does not appear when there is no
editing function that can be canceled.
3 Press YES (or AMS).
Following message appears depending on
the last ed it.
Editing Message
Labeling discs or tracks
Erasing the titles
Creating a new group
Releasing all group s
Deleting a por tion of a
track
Deleting a tra ck
Deleting all the tracks
Moving tracks Move Undo?
Dividing a track Divide Undo?
Combining tracks Combin Undo?
Name Undo?
Group Undo?Releasing a group
Erase Undo?
4 Press YES (or AMS) again.
level after recording
— S.F Edit Function
You can change the vol ume of recorded tracks.
The original track is recorded over at the new
recording level . When changing the recording
level, you can select Fade-i n Recording to
gradually in cr ease the sig nal lev el at th e st ar t of
recording, or Fa de-out Recording to gradually
decrease the si gnal level at the end of the
recording.
Changing the overall
recording level
1 Set to MD in CD MD select switch.
2 Press MENU/NO.
3 Press . or > repeatedly (or turn
AMS) until “S.F Edit?” appears, then
press YES (or AMS).
4 Press . or > repeatedly (or turn
AMS) until “Tr Level?” appears, then
press YES (or AMS).
Playback star t s.
5 Press . or > repeatedly (or turn
AMS) until the track number you want
to change the recording level appears,
then press YES (or AMS).
“Level 0dB” appears.
6 While monitoring the sound, press .
or > repeatedly (or turn AMS) to
change the recorded level.
The recording level can be changed from
–12 dB to +12 dB, in 2 dB steps. Change to
the optimum level while making sure that
“OVER” does not appear in the display at
the loudest portion.
Adjust the level so as not
to light up “OVER”.
MD – Editing
ANALOG
continued
41
GB
Page 42

7 Press YES (or AMS).
“Edit OK?” appears.
8 Press YES (or AMS) again.
The deck starts recording over the existing
track.
“S.F Edit ** %” appears while the track is
being recorded. An amount of time that is
roughly equal to or longer than the playback
time of the track is required when recording
over the tra ck. When the r ecording finishes,
“Complete!” ap pears.
Fade-in and Fade-out
Recording
1 Set to MD in CD MD select switch.
2 Press MENU/NO.
3 Press . or > repeatedly (or turn
AMS) until “S.F Edit?” appears, then
press YES (or AMS).
4 Press . or > repeatedly (or turn
AMS) until “Fade In?” or “Fade Out?”
appears, then press YES (or AMS).
Playback starts.
5 Press . or > repeatedly (or turn
AMS) until the track number you want
to change the recording level appears,
then press YES (or AMS).
“Time5.0s” appears.
6 While monitoring the sound, press .
or > repeatedly (or turn AMS) to
change the Fa d e - i n or Fade-out
recording time.
The deck plays the po rt i on t hat will be
recorded over using Fade-in or Fade-out
Recording. You can set the time at any
value between 1.0 second and 15.0 seconds,
in 0.1 second steps. You cannot set t he time
longer than the track.
7 Press YES (or AMS).
“Edit OK?” appears.
8 Press YES (or AMS) again.
The deck starts recording over the existing
track.
“S.F Edit ** %” appears while the track is
being recorded. When the recording
finishes, “Complete!” appears.
To cancel the operation
Press MENU/NO during step 3 through 7. After
pressing YES
recording, you cannot interrupt the op eration.
Notes
• You cannot change the rec or ding level of the tracks
recorded in MDLP mode.
• Repeatedl y changing the recording level results in
poor sound quality.
• The recording level will not return to the exa c t
original level once the recording level has been
changed even if it returned to the original leve l.
• You cannot undo the S.F Ed it F unc ti on ev en if you
use the Undo Function.
(or AMS) in step 8 to start
42
GB
Page 43

Troubleshooting
Problems and remedies
If you experience any of the following
difficulties while using the deck, use this
troubleshooting gu ide to help you remed y th e
problem.
CD player section
The player does not start playing.
• Insert a CD.
• Place the CD properly.
•Clean the CD.
• Remove the CD, then leave the deck turned on for
about an hour until the moisture evap or at e s.
MD deck section
The deck does not operate or operates poorly.
• The MD may be damaged (
appears)
. Take the MD out and in se r t it a g a in. If
“Read Error” remains, replace the MD.
The deck does not play back.
• Remove the MD, then leave the deck in a warm
place for several hours until the moisture
evaporates.
•Press
?/1 to turn the deck on.
• Slide the MD into the disc slot with the label side
up and the arrow pointing towards the opening.
• Replace the disc with one that has been recorded .
The deck does not record.
• The MD is record-protected (
“C11” alternate).
tab to close the slot (page 20).
• Connect the optional component properly
(page 7).
• Press INPUT repeatedly to select the recording
source correctly.
• Readjust the r ecor d i ng le vel (page 25).
• A premastered MD is inserted. Replace with a
recordable MD.
• There is not enough time left on the MD. Replace
it with another recordable MD with fewer
recorded tracks, or erase unnecessary tracks.
• There has been a power failu re or the AC power
cord has been disconnected during recording.
Data recorded to that point may be lost. Repeat the
recording procedure.
“Read Error”
“Protected” and
Remove the MD and slide the
The deck does not edit.
• Press PLAY MODE repeatedly until both
“PROGRAM” and “SHUFFLE” disappear.
• Remove the MD and sl ide th e ta b to c lo se t he s l ot
(page 20).
The sound has a lot of static.
• Stron g ma gne tism from a television or a similar
device is interferin g wi th ope r a tions. Move the
deck away from the source of strong mag net ism .
The three- or five letters appear.
• The Se lf-Diagnosis Function is on. Check the
table on pa ge 44.
Troubleshooting
Others
No sound is output.
• Make the conne c ti ons prope r ly.
• Opera te the am plifier property.
• When using the headphones, turn PHONE
LEVEL to turn up the output level.
The remote does not function.
• Make sure that th er e is no obstacl es between the
deck and the remote.
• Point the remote at the remote sensor on the deck.
• Replace the batteries in the remote.
After you’ve attempted the
prescribed remedies
If the deck still does not operate properly, or if
other problems not described above occur, turn
off the deck, then re insert the plug into th e
power outlet.
If the problem persists, r eset the deck as follo ws:
1 Turn off the deck and unplug the AC power
cord.
2 Reinsert the plug into the power outlet while
pressing down ?/1.
Should any prob le m persist even after res et ting
the deck, consult yo ur nearest Sony dealer.
43
GB
Page 44

Self-diagnosis display
This deck has a Self-diagnosis display function
to let you know if there is a deck malfunction.
The display shows a code made up of three or
five letters and a message alternately to show
you the problem. To solve the problem refer to
the following list. If any problem persists,
consult your nearest Sony dealer.
C11/Protected
The MD is protected against erasure.
cRemove the MD and slide the tab to close the slot
(page 20).
C12/Cannot Copy
You tried to record a CD with a format that the deck
does not support, such as a CD-ROM or MD data.
cReplace the playable disc.
C13/REC Error
Recording could not be performed proper ly.
cMove the deck to a stable place, and start
recording over from the beginning.
The MD is dirty or scratched, or the MD does not
meet the standards.
cReplace the MD and start recording over fr om the
beginning.
C13/Read Error
The MD deck cannot read the disc information
properly.
cRemove the MD once, then inser t it a g a in.
C14/TOC Error
The MD deck cannot read the disc information
properly.
cReplace the MD.
cErase all the recorded contents of the MD using
the All Erase Function (page 37).
C41/Cannot Copy
The digitally dubbed material cannot be recorded
digitally (page 47).
C71/Din Unlock
The digitally dubbed material cannot be recorded
digitally (page 47).
A moment’s lighting is due to the sig na ls of the
digital program being recorded. This does not affect
the recorded material.
The digital optical cable is disconnected, or the
power of the connected component is turned off
while recording the digital audio from the
component connected to the DIGITAL OPTICAL
IN jack.
cConnec t the digi tal optical cable, or turn on the
power of the connected component.
E0001/MEMORY NG
The component has internal problem.
cConsult your ne a rest Sony deale r .
E0101/LASER NG
There is a problem with the laser pickup.
cThe laser pi ck up ma y be dam a ged . C onsult your
nearest Sony dealer.
E0201/LOADING NG
There is a problem with the loading.
cThe loading may be failed. Consult your neare st
Sony dealer.
44
GB
Page 45

Messages
One of the follow i n g me ssages may appear or
flash in the display during operation.
Blank Disc
The inserted recordable MD is new, or all t racks on
the MD have been erased.
Cannot Copy
An attempt was made to make a second copy from a
digitally dubbed MD (page 47).
Cannot Edit
• You tried to edit in Program or Shuffle Play mode.
• The track is recorded in MD LP mode .
• The MD is record-protected.
CD Error!
An operational error has occurre d in th e CD pl ay er
section. Wait a few seconds, and then try the
operation again.
Disc Full!
The MD is full (see System Limitations on page 47).
Edit NOW
You pressed ?/1 while in S.F Edit (changing the
recording level after recording, Fade-i n, Fad e-ou t)
mode.
If you turn off the deck while in S.F Edit mode, any
changes that you have made will not be made
properly. Finish the changes and leave S.F Edit
mode before turning off the deck.
Impossible
You tried to make an impossi ble edi ting operation
(page 30).
Incomplete!
Adjustment of the recording level after recording or
Fade-in and Fade-out procedures ha ve failed since
the deck was either subjec t to vibra tio n or the re is a
damaged or dirty disc in the tra y.
Initialize (flashing when you turn on the deck)
The power was off for a long time, so the deck is
initializing itself.
Name Full!
The title capac ity of the MD has reached its limit
(about 1,700 characters).
No Change
While attempting to change the recording level after
recording, you pressed YES (or AMS) without
actually changing the recording level, so no change
was made .
—No Disc—
There is no disc in the MD deck, or no disc in the
CD player.
No Name
The disc or track has not been labeled.
Premastered
An attempt was made to record on the premastered
MD.
Retry
The deck is retrying reading data from the CD
during High-Speed CD-MD Synchro Recording
(page 29).
Step Full!
You tried to program more tracks (steps) .
TrProtected
Tracks and other data that have been checked out on
Net MD equipment are protected, so you cannot use
some of the MD editing functions.
Troubleshooting
45
GB
Page 46

Additional Information
Precautions
On safety
• AC power cord must be changed only at the qualified
service shop.
• The unit is not disconnected from the AC power
source (mains) as long as it is connected to the wall
outlet, even if th e unit itself has been turned of f.
On placement
• Do not place the deck in an incline d position.
• Do not place the deck in locations wh e re it is;
– Extremely hot or cold
– Dusty or dirty
– Very humid
– Subject to vibrations
– Subject to direct sunlight.
– near a Tuner, TV set or Video deck.
On condensation in the deck
If the deck is brought directly from a cold to a warm
location, or is placed in a very damp room, moisture
may condense on the lenses inside the deck. Should
this occur, the deck may not oper at e property. In this
case, remove the CD or MD and leave the deck turned
on for about an hour un til the moisture evap or ates.
Notes on MDs
• Do not open the shutter to expose the MD. Close the
shutter immediately if the shutter opens.
• Affix the label supplied with the disc only to the
specified label indentatio n. Do not affix the label
around the shutter or in other locations. Note that the
shape of the indentation depends on the disc.
Notes on CDs
• Before playing, clean the disc with a cleaning cloth.
Wipe the disc from the center out.
• Do not use solvent s suc h as benze ne , thinne r ,
commercially available cleaners or anti-static spray
intended for vinyl LPs.
• Do not expose the disc to direct sunlight or heat
sources such as hot air ducts, nor leave it in a car
parked in direct sunlight.
• Do not use discs encircl ed wi th a prot ection ring.
This may cause a malfunction to th e de ck .
• When using dis cs that hav e glu e or similar tacky
substance on the label side of the disc or that used a
special ink when th e labe l was printed, there is a
chance that the disc or label may become attached to
parts inside this unit. When this occurs, it may not be
possible to remove th e d is c, and may also cause this
unit to malfunctio n. B e sur e to check that the label
side of the disc is not sticky before u sing.
The following types of disc should not be used:
– Rental or used discs with attached seals where the
glue extends beyond the seal. The perimeter of the
seal on the disc is tacky.
– D i sc s tha t ha ve label s pri nte d using a special ink
that feels tacky when touched.
• CDs with non-standard shapes (e.g., heart, square,
star) cannot be played on this unit. Attempting to do
so may damage the unit. Do not use such CDs.
Cleaning the cabinet
Clean the cabinet, panel and controls with a soft cloth
slightly moistened with mild detergent solution. Do not
use any type of abrasive pad, scouring powder or
solvent such as thinner, benzene or alcohol.
46
Label
position
• Wipe the disc car tr idge wit h a dry cloth to remove
dirt.
• Do not expose the MD to di rec t sunl ight or heat
sources such as hot air ducts, nor leave it in a car
parked in direct sunlight.
GB
Shutter
Page 47

System limitations of MDs
The recording system in your MD deck has the
limitations described belo w.
Note, however, that these limitations are due to
the inherent nature of the MD recording system
itself, not to mechanical causes.
“Disc Full!” appears before the MD
has reached the maximum recording
time
When 255 tracks have been recorded on the MD, “Disc
Full!” appears rega r dless of the total record e d time.
More than 255 tracks cannot be record ed on the MD.
To continue recordi ng, eras e unnecess ary track s or use
another recordable MD.
“Disc Full!” appears before the
maximum number of tracks (255) is
reached
Fluctuations in em phas is within tracks are someti mes
interpreted as track intervals, increasing the track count
and causing “Disc Full!” to ap pe ar.
“Group Full!” appears in the display
• When the Group Function is on, “Group Full!” may
be display ed if editin g is performe d. This means
there are insufficient characters for group
management. Delete any unnecessary disc titles,
group titles or other characte rs .
• Even when the Group Function is off, the group
management information is updated automatically
when Move, Divide and other editing operations are
performed, so “Group Full!” may be displayed.
The remaining recording time does
not increase even after erasing
numerous short tracks
Tracks shorter than 12 seconds* are not counted, so
erasing them may not inc r ea se the recording time.
* During Stereo recording.
In Monaural or LP2 stereo mode: abo ut 24 se c onds
In LP4 stereo mode: about 48 seconds.
“Impossible” appea rs wh en yo u use
A-B Erase Function or Combine
Function
This happens when you have edited the same track
many times. This is due to a technical limitation of the
MD deck and is not a mechanical error.
The total recorded time and the
remaining time on the MD do no t a dd
up to the maximum recording time
Recording is done in minimum units of 2 seconds*
each, no matter how short the material. The recorded
contents may be shorter than the ma ximum recording
capacity. Disc space may a lso b e r educed by s cratches .
* During Stereo recording.
In Monaural or LP2 stereo mode: about 4 secon ds
In LP4 stereo mode: about 8 seconds.
The sound may drop-out while
searching the edited tracks
Tracks created through editing ma y ex hibi t sound
dropout during searching because high-speed playback
requires time to search for the position on the disc
when the tracks are not in order.
Track numbers cannot be marked
Even in the Level Synchro Recording, the track
numbers may not be marked at the beginning of the
track:
• if the input signal is below a certain fixed level for
less than 2 seconds between tracks .
• if the input signal is below a certain fixed level for
more than 2 seconds in the middle of the tr ack.
• if you record a tra c k tha t is 4 se co nds or le ss*.
* During Stereo, Monaural or LP2 ste reo reco rd ing
mode (In LP4 stereo recording mode: 8 seconds or
less).
Extra tracks are created
When there is a long silence between CD tracks, an
extra track may be created.
The number of tracks on the CD and
the recorded MD is different
When there are short tracks on th e CD, t rack n um b ers
may not be marked for these tracks, and the number of
tracks recorded on the MD may differ fro m that of the
CD.
Additional Information
continued
47
GB
Page 48

Guide to the Serial Copy Management
System
Digital audio components, such as CDs, MDs, and
DATs let you copy music easily with high quali ty by
processing music as a digita l signal.
To protect the copyrighted mu sic pr ogr a ms, this deck
uses the Serial Copy Management System that allows
you to make only a single copy of a digitally recorded
source through digital-to-d i gital connections.
You can make only a first generation
* through a digital-to-digital
copy
connection.
For example:
1 You cannot make a second digital cop y via the
digital input jack onto ano ther DAT or MD deck
from the first-gener ation copy recorded by the
deck digitally.
2 You can make a copy of a digital signal from a
digitally recorded analogue so und programme
(for example, an analogue record or a music
cassette tape) or from a digital satellite
broadcast programme, but yo u cannot make a
second copy.
* A first-generation copy means a digital recording of
a digital signal made on digital audio equipment. For
example, if you reco rd from t his de ck’s CD player to
the MD deck, you make a first-g en era tion copy.
Specifications
CD player section
System Compact Disc digital
Laser Semiconductor laser
Frequency response 20 Hz – 20 kHz (±0.5 dB)
Wow and flutter Below measureable limit
MD deck section
System MiniDisc digital audio system
Disc MiniDisc
Laser Semiconductor laser
Sampling frequency 44.1 kHz
Frequency response 20 Hz – 20 kHz (±0.5 dB)
Inputs
Jack type Input
ANALOG IN
DIGITAL
OPTICAL IN
Pin jack 47 kilohms 500 mVrms 250 m Vrms
Squqre
optical
connector
jack
Outputs
Jack type Rated output Load
ANALOG OUT
DIGITAL
OPTICAL OUT
PHONES
Pin jack 2 Vrms
Squqre optical
connector jack
Stereo phone
jack
General
Power requirements
U.S.A. and Canada 120 V AC , 60 Hz
Europe 230 V AC, 50/60 Hz
Power consumption 19 watts
Dimensions (w/h/d) incl. projecting parts and controls
Mass Approx. 5.4 kg
Supplied accessorie s
See page 7.
US and foreign patents licensed from Dolby
Laboratories.
Design and specifications are subject to change
without notice.
audio system
(λ=780 nm)
(±0.001% W.PEAK)
(λ=780 nm)
Emission duration:
continuous
impedance
Optical wave
length:
660 nm
Rated
input
– –
(at 47 kilohms)
-18 dBm Optical wave
10 mW 32 ohms
Less than 1 watt (at the
power saving mode)
Approx. 430 × 108 × 399 mm
Minimum
input
impedance
Over 10 kilohms
length:660 nm
48
GB
Page 49

List of button locations and reference pages
Illustrati
0q
How to use this page
Use this page to find the location of buttons and other
parts of the deck that are mentioned in the text .
Main unit
ALPHABETICAL ORDER
A – I
ALBUM wh (11, 15)
AMS wa wg (10, 11, 12, 13, 14,
15, 17, 24, 25, 26, 33, 34, 36,
38, 39, 40, 41, 42)
CD SYNCHRO NORMAL/HIGH
4
(20)
CLEAR ws (15)
Disc tray 3 (9)
DISPLAY ql (18)
Display window wf (18)
EJECT 6 (12)
GROUP ON/OFF 9 (15, 21, 22,
33, 34, 35)
GROUP SKIP 0 (21, 22, 34, 35)
INPUT qa (21, 22, 25, 26)
J – Z
MD slot 5 (11)
MDLP indicator 7 (29)
MENU/NO wd (17, 24, 25, 26, 30,
33, 34, 35, 36, 37, 38, 39, 40,
41, 42)
OPEN/CLOSE 2 (9,10)
PHONES jack es
PHONE LEVEL ed(43)
PLAY MODE qj wj (9, 10, 12,
14, 30)
REC LEVEL qd (25)
REC MODE 8 (20, 21, 23, 29)
REC z qs (21, 25, 26)
STANDBY indicator ef (8)
TIME qk wk (18)
YES w;(14, 17, 24, 25, 26, 33, 34,
35, 36, 37, 38, 39, 40, 41, 42)
on number
r
ALBUM wh (11, 15)
Name of button/part Reference page
RR
BUTTON DESCRIPTIONS
?/1 (power/standby) 1 (8, 20,
30)
H (play) qf wl (9, 11, 12, 15,
20, 27)
X (pause) qh e; (10.12)
x (stop) qg ea (10, 12, 21, 22,
23, 27)
ef
ed
1
es
23 45679
wl
wk
wj
wh
wg
wf
wd
w;
waws
qk
ql
e;
ea
qj
qh
8
qg
qf
qd
continued
qs
a
Additional Information
GB
49
Page 50

Remote control
ALPHABETICAL ORDER
A – M
ALBUM/GROUP -/+ qf (15, 21,
22, 33, 34, 35)
CD MD select wk (9, 10, 12, 13,
14, 15, 17, 18, 24, 25, 27, 32,
35, 36, 37, 38, 39, 40, 41, 42)
CD SYNCHRO NORMAL/
HIGH wa (20)
CLEAR 8 (15)
DISPLAY wg (18)
FADER ws (28)
GROUP ON/OFF wd (15, 21, 22,
33, 34, 35)
INPUT wj (21, 22, 25, 26)
MENU/NO wf (17, 24, 25, 26, 30,
33, 34, 35, 36, 37, 38, 39, 40,
41, 42)
MUSIC SYNC 9 (27)
N – Z
NAME EDIT/SELECT 6 (33)
number buttons 7 (13, 15, 33)
PLAY MODE 3 (9, 10, 12, 14,
30)
REC MODE 2 (20, 21, 23, 29)
REC-IT 0 (27)
REPEAT qh (14)
SCROLL wh (18, 34)
SLEEP qg (16)
T.REC qd (23)
TIME 4 (18)
YES 5 (14, 17, 24, 25, 26, 33,
34, 35, 36, 37, 38, 39, 40, 41,
42)
BUTTON DESCRIPTIONS
. / > (skip)qk (10, 11, 12,
13, 14, 15, 17, 24, 25, 26, 33,
34, 36, 37, 38, 39, 40, 41, 42)
?/1 (power/standby) 1 (8, 20,
30)
m / M (search) qj (10, 12, 33)
H (play) w; (9, 11, 12, 15, 20,
27)
X (pause) qa (10, 12)
x (stop) qs (10, 12, 21, 22, 23,
27)
z (record) ql (23)
50
GB
Page 51

51
Additional Information
GB
Page 52

Sony Corporation Printed in Malaysia
 Loading...