

Sony KV-29LS40K User Manual
R
Trinitron Colour
Television
4-103-269-51
410326951
Operating Instructions
Before operating the TV, please read the “Safety Information” section of
this manual. Retain this manual for future reference.
Инструкции за използване
Преди да използвате телевизора, прочетете раздела
"Информация за безопасността" на това ръководство. Запазете
това ръководство за бъдещи справки.
Návod k použití
Před zapnutím televizoru si prosím pozorně přečtěte část
"Bezpečnostní upozornění" v tomto návodu. Návod si uschovejte i pro
budoucí potřebu.
Kezelési utasítás
Mielőtt elkezdené használni a televíziót, kérjük, olvassa el a jelen
kézikönyv Biztonsági tudnivalók c. szakaszát. Őrizze meg a
kézikönyvet későbbi használatra.
Instrukcja obsługi
Przed przystąpieniem do eksploatacji telewizora należy zapoznać się z
rozdziałem "Informacje dotyczšce bezpieczeństwa" w niniejszej
instrukcji. Prosimy o zachowanie niniejszej instrukcji do wglądu w
przyszłości.
Инструкция по эксплуатации
Перед тем как включить телевизор, просим Вас ознакомиться с
разделом "Общие правила техники безопасности" настоящей
инструкции. Сохраняйте настоящую инструкцию на будущее.
GB
BG
CZ
HU
PL
RU
KV-29LS40K
©2004 Sony Corporation

Sony Spain S.A.
Pol. Ind. Can Mitjans s/n
08232 Viladecavalls (Barcelona)
Spain Printed in Spain
Сони Спзйн C.A. завод в Барселоне
Пол.Кан Митьянс с/н 08232
Виладекавальс, Барселона,
Испания Отпечатано в Испания

Introduction
Thank you for choosing this Sony FD Trinitron Colour Television.
Before operating the TV, please read this manual thoroughly and retain it for future reference.
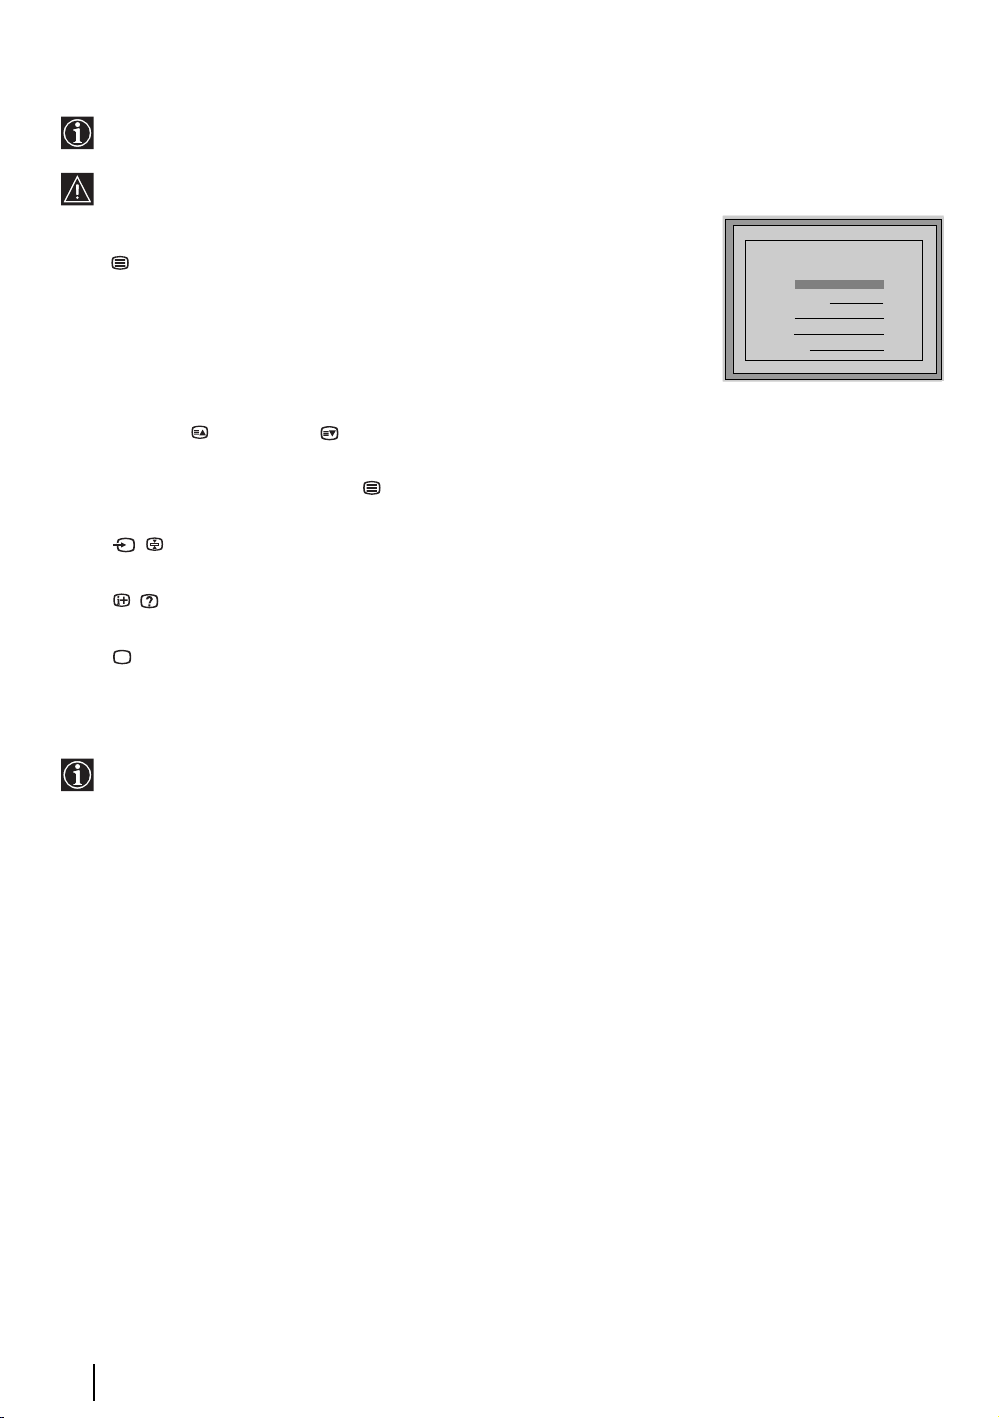
•Symbols used in this manual:
• Informs you of possible hazards.
• Important information.
• Information on a feature.
• 1,2.. Sequence of instructions.
• Shaded buttons on the remote control show you the
buttons you have to press to follow the sequence of
the instructions.
• Informs you of the result of instructions.
Table of Contents
Introduction ...........................................................................................................................................3
Safety Information.................................................................................................................................4
Overview
Overview of Remote Control Buttons....................................................................................................5
Overview of TV Buttons ........................................................................................................................6
Installation
Inserting Batteries into the Remote Control ..........................................................................................6
Connecting the Aerial and VCR ............................................................................................................6
First Time Operation
Switching On the TV and Automatically Tuning....................................................................................7
Menu System
Introducing and Using the Menu System..............................................................................................9
Menu Guide:
Picture Adjustment ...........................................................................................................................9
Sound Adjustment ............................................................................................................................10
Sleep Timer ......................................................................................................................................11
Language/Country............................................................................................................................11
Auto Tuning ......................................................................................................................................11
Programme Sorting ..........................................................................................................................12
Programme Labels ...........................................................................................................................12
AV Preset .........................................................................................................................................12
Manual Programme Preset...............................................................................................................13
Noise Reduction ...............................................................................................................................14
AV2 Output.......................................................................................................................................14
RGB Centring ...................................................................................................................................15
Picture Rotation................................................................................................................................15
GB
Teletext..............................................................................................................................................16
Additional Information
Connecting Optional Equipment ...........................................................................................................17
Using Optional Equipment ....................................................................................................................18
Specifications........................................................................................................................................19
Troubleshooting ....................................................................................................................................20
Table of Contents
3
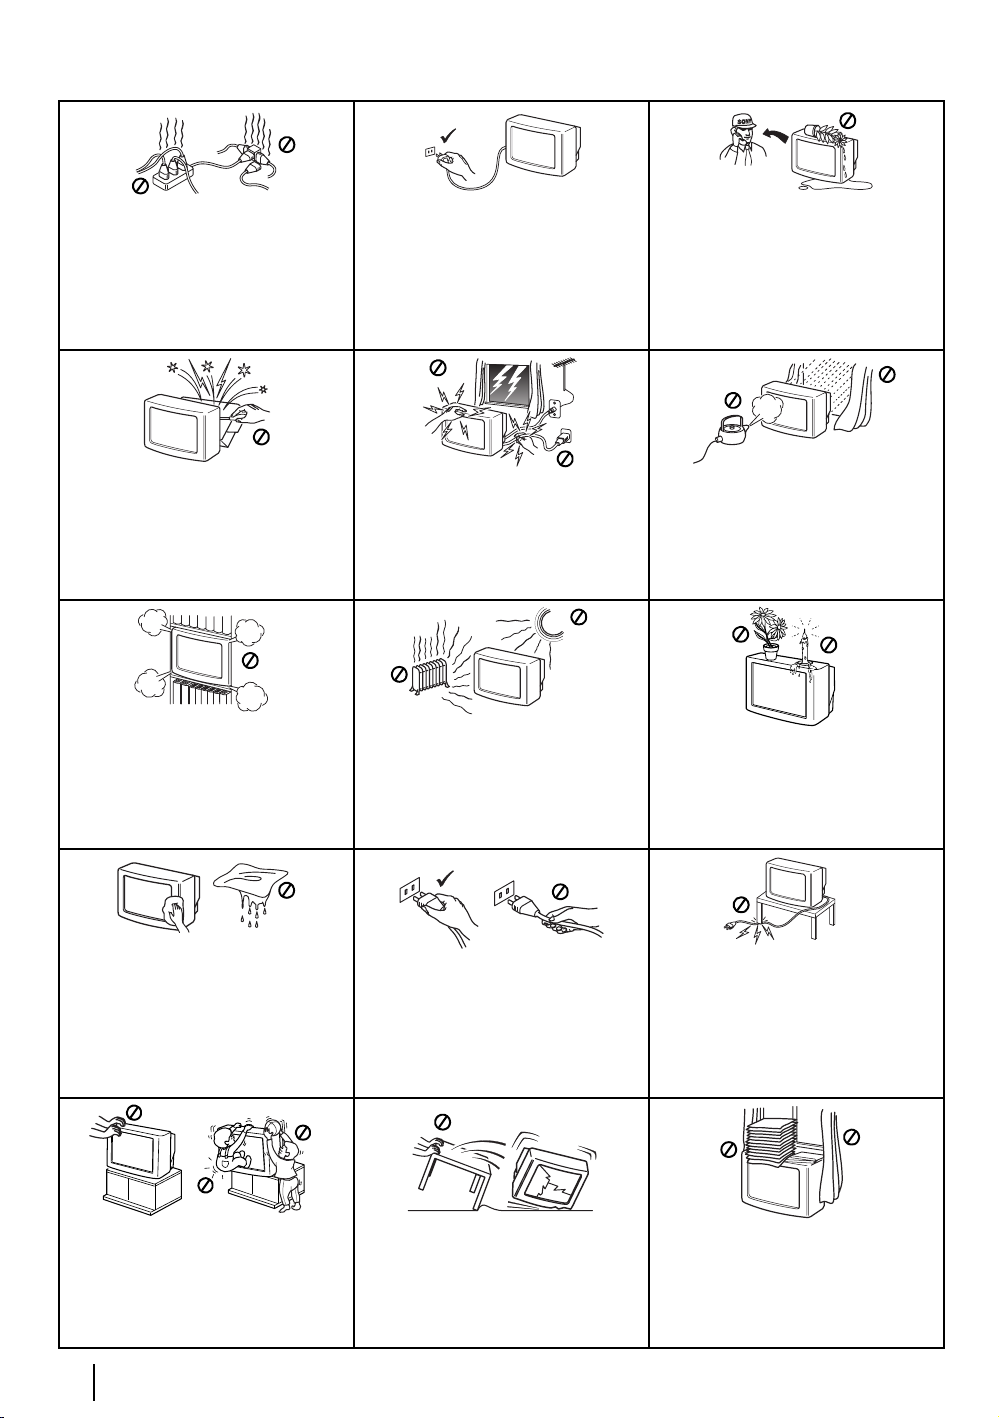
Safety Information
This set is to operate on a 220-240V AC
supply only. Take care not to connect too
many appliances to the same power
socket as this could result in fire or
electric shock.
Do not open the cabinet and the rear
cover of the TV. Refer to qualified
service personnel only.
Do not cover the ventilation openings of
the TV For ventilation, leave a space of
at least 10cm all around the set.
For environmental and safety reasons, it
is recommended that the TV set is not
left in standby mode when not in use.
Disconnect from the mains. However,
some TVs may have features which
require they are left in standby. The
instructions in this manual will inform you
if this applies.
For your own safety, do not touch any
part of the TV, power lead or aerial lead
during lightning storms.
Never place the TV in hot, humid or
excessively dusty places. Do not install
the TV where it may be exposed to
mechanical vibrations.
Never push objects of any kind into the
set as this could result in a fire or electric
shock. Never spill liquid of any kind on
the set. If any liquid or solid object does
fall into the cabinet, do not operate the
TV. Have it checked immediately by
qualified personnel.
To prevent fire or shock hazard, do not
expose the TV to rain or moisture.
Do not place any objects on the TV. To
prevent fire, keep inflammable objects or
naked lights (eg candles) away from the
TV.
Clean the screen and cabinet with a soft,
lightly dampened cloth. Do not use any
type of abrasive pad, alkaline cleaner,
scouring powder or solvent, such as
alcohol or benzine, or antistatic spray.
As a safety precaution, unplug the TV
before cleaning it.
Place the TV on a secure stable stand.
Never attempt to move the TV and stand
together -always move the TV and stand
separately. Do not place the TV on its
side or face up. Do not allow children to
climb on to it.
Safety Information
4
Pull out the power lead by the plug. Do
not pull on the power lead itself.
Unplug the power lead before moving
the TV. Avoid uneven surfaces, quick
steps or excessive force. If the set has
been dropped or damaged, have it
checked immediately by qualified
service personnel.
Take care not to place heavy objects on
the power lead as this could result in
damage. We recommend you wind any
excess lead around the holders provided
on the rear of the TV.
Do not cover the ventilation openings of
the TV with items such as curtains or
newspapers etc.

Overview of Remote Control Buttons
qj
qh
qg
qf
qd
qs
1
2
3
4
5
6
7
8
9
q;
1 To Temporarily Switch Off TV: Press to temporarily switch off TV
(standby indicator on TV lights up). Press again to switch on TV
from standby mode. To save energy we recommend switching off
completely when TV is not in use.
After 15 minutes without a signal and without any button being
pressed, the TV switches automatically into standby mode.
2 Selecting input source: Press repeatedly until the desired input
symbol of the source appears on the TV screen.
3 Selecting channels: Press to select channels. For double-digit
programme numbers, enter the second digit within 2.5 seconds.
4 Press to watch the last channel selected (watched for at least 5
seconds).
5 This button only works in Teletext mode.
6 This button only works in Teletext mode.
7 Selecting Teletext: Press to switch on teletext.
8 When MENU is switched on, use these buttons to operate the menu
system. For details refer to “Introducing and Using the Menu System”
on page 9.
When MENU is switched off, press OK to show a channel overview.
Then press v or V to select the channel and then press again the OK
button to watch the selected channel.
9 Selecting Screen format: Press to view programmes in 16:9 mode.
Press again to return to 4:3 mode.
qa
q; Selecting channels: Press to select the next or previous channel.
qa Muting the Sound: Press to mute TV sound. Press again to restore
the sound.
qs Adjusting TV volume: Press to adjust the volume of the TV.
qd Displaying the menu system: Press to display the menu on the TV
screen. Press again to remove the menu display from the TV screen.
qf Selecting TV mode: Press to switch off teletext or video input.
qg Selecting Sound mode: Press repeatedly to change the sound
mode.
qh Selecting Picture mode: Press repeatedly to change the picture
mode.
qj Displaying on Screen information: Press to display all on-screen
indications. Press again to cancel.
Besides TV functions, all coloured buttons as well as green
symbols are also used for Teletext operation. For more details,
please refer to “Teletext” section of this instruction manual.
Overview
5

Overview of TV Buttons
Press on the mark
on the door flap to
reveal the control
panel
Selecting
Input
source
Video Input jack
Programme
Up or Down
buttons
(Selects TV
channels)
Volume
control
buttons
Auto Start
Up button
S-video
Input jack
Audio
Input jacks
Standby
indicator
On/Off
button
Headphone jack
Inserting Batteries into the Remote Control
Make sure you insert the supplied batteries using the correct polarities.
Always remember to dispose of used batteries in an environmentally friendly way.
S
O
N
Y
C
O
R
P
O
R
A
T
I
O
N
J
A
P
A
N
/4
N/4
PA
JA
N
ATIO
OR
RP
Y CO
N
O
S
Connecting the Aerial and VCR
Connecting cables are not supplied.
For more details of VCR connection, please
refer to the section “Connecting Optional
Equipment” of this instruction manual.
Overview-Installation
6
or
VCR
OUT IN
Scart lead is optional
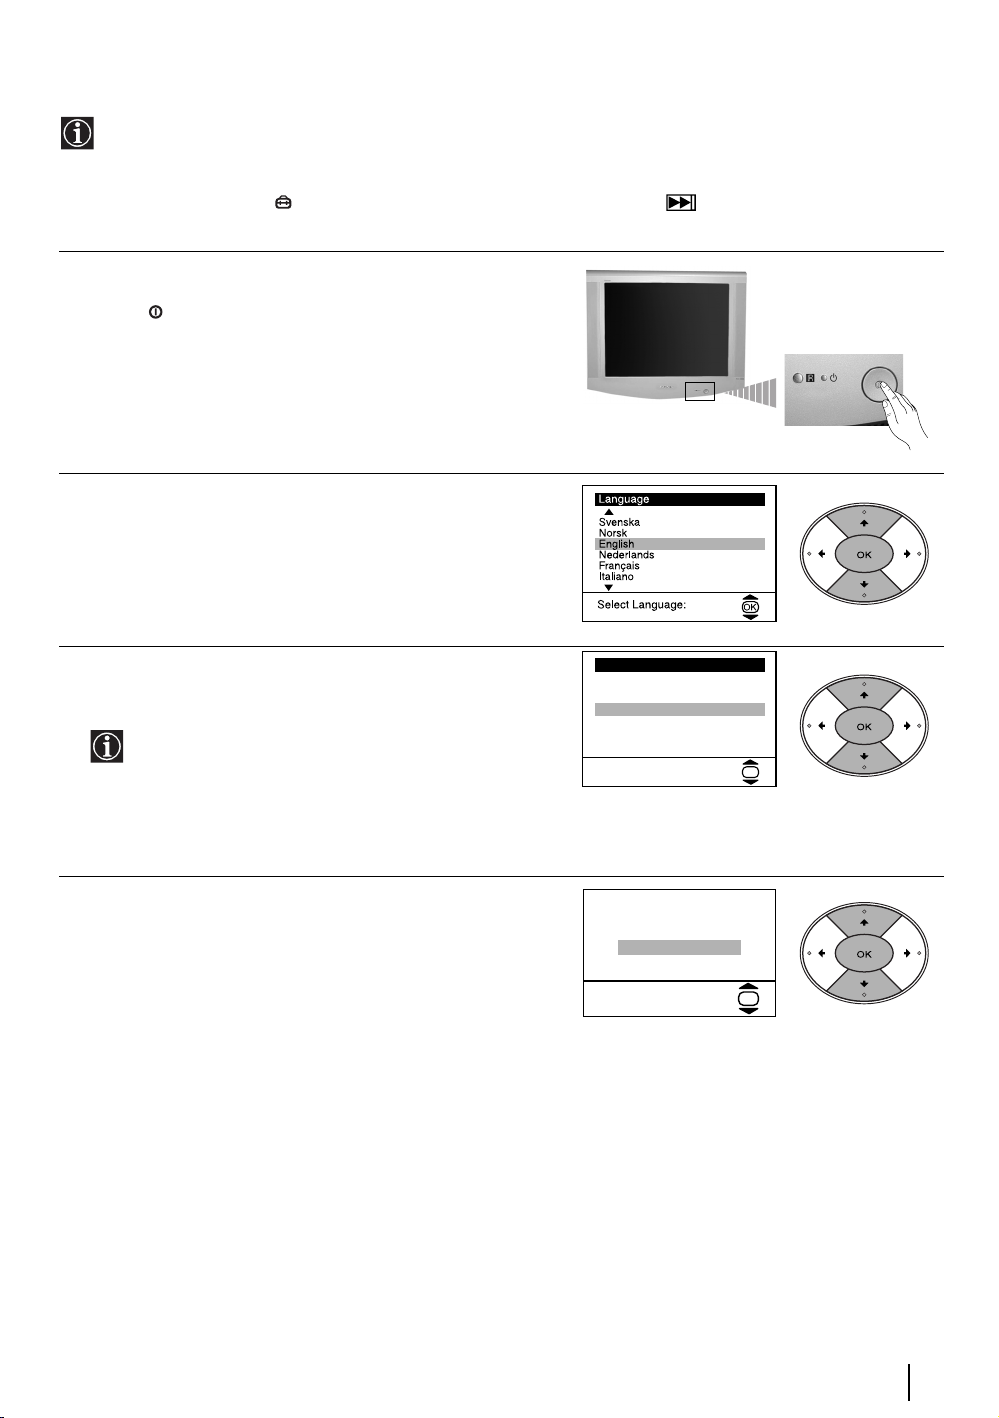
Switching On the TV and Automatically Tuning
The first time you switch on your TV, a sequence of menu screens appear on the TV enabling you to: 1)
choose the language of the menu screen, 2) choose the country in which you wish to operate the TV, 3)
adjust the picture slant 4) search for and store all available channels (TV Broadcasts) and 5) change the
order in which the channels (TV Broadcasts) appear on the screen.
However, if you need to change any of these settings at a later date, you can do that by selecting the
appropriate option in the (Set Up menu) or by pressing the Auto Start Up Button on the TV set.
Connect the TV plug to the mains socket (220-240V AC,
1
50Hz)
Press the on/off button on the TV set to turn on the TV.
The first time you switch on the TV, a Language menu
appears automatically on the TV screen.
Press the v or V button on the remote control to select the
2
language, then press the OK button to confirm your
selection. From now on all the menus will appear in the
selected language.
The Country menu appears automatically on the TV screen.
3
Press the v or V
operate the TV set, then press the OK button to confirm your
selection.
• If the country in which you want to use the TV set does
not appear in the list, select “-” instead of a country.~
• In order to avoid wrong teletext characters for Cyrillic
languages we recommend you select Russia as the
country if your own country does not appear in the list.
Because of the earth’s magnetism, the picture might slant.
4
The Picture Rotation menu allows you to correct the picture
slant if it is necessary.
button to select the country in which you will
a) If it is not necessary, press the v or V button to select Not
necessary and press OK.
b) If it is necessary, press the v or V button to select Adjust
now, then press OK and correct any slant of the picture
between –5 and +5 by pressing the v or V button. Finally
press OK to store.
continued...
First Time Operation
7
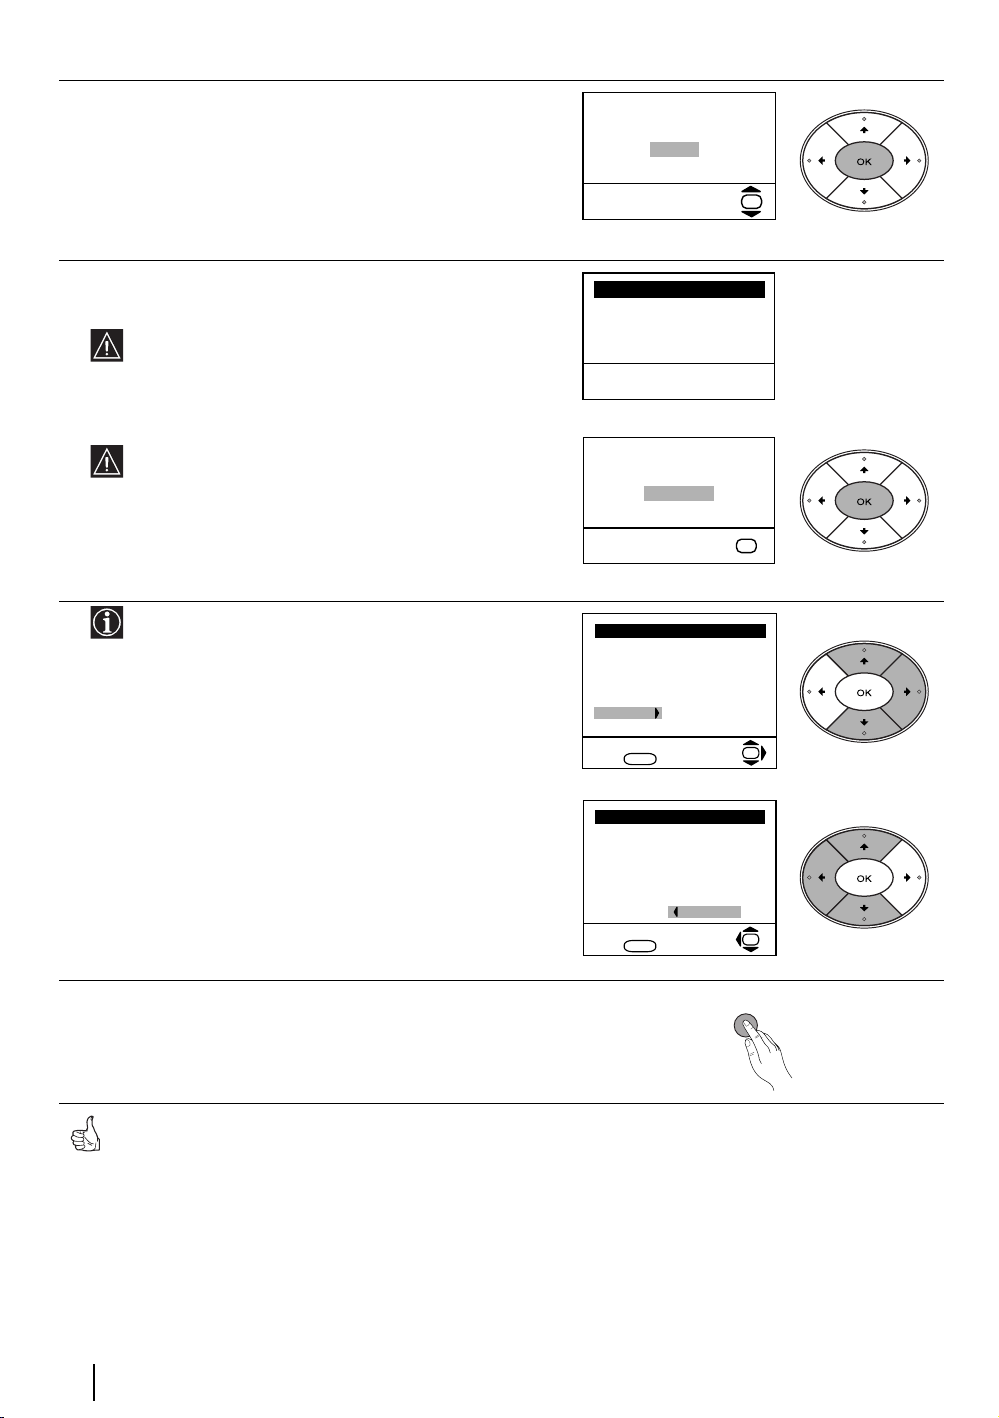
The Auto Tuning menu appears on the screen. Press the OK
5
button to select Yes.
The TV starts to automatically search and store all available
6
broadcast channels for you.
This procedure could take some minutes. Please be
patient and do not press any buttons, otherwise the
automatic tuning will not be completed.
Do you want to start
automatic tuning?
Ye s
No
Auto Tuning
Programme:
System:
Channel:
Searching...
OK
01
B/G
C21
If no channels were found during the auto tuning
process then a new menu appears automatically on the
screen asking you to connect the aerial. Please
connect the aerial (see page 6) and press OK. The auto
tuning process starts again.
7
After all available channels are captured and stored,
the Programme Sorting menu appears automatically
on the screen enabling you to change the order in
which the channels appear on the screen.
a) If you wish to keep the broadcast channels in their tuned
order, go to step 8.
b) If you wish to store the channels in a different order:
1 Press the v or V button to select the programme
number that has the channel (TV Broadcast) you wish
to rearrange, then press the b
2 Press the v or V button to select the new programme
number position for your selected channel (TV
Broadcast), then press B.
3 Repeat steps b)1 and b)2 if you wish to change the
order of the other channels.
Press the MENU button to remove the menu from the
8
screen.
button.
No channel found
Please connect aerial
Confirm
Programme Sorting
Programme:
01 TVE
02 TVE2
03 TV3
04 C33
05 C27
06 C58
Select channel:
Exit: MENU
Programme Sorting
Programme:
01 TVE
02 TVE2
03 TV3
04 C33
05 C27
06 C58 05 C27
Select new position:
Exit:
MENU
OK
OK
OK
MENU
Your TV is now ready for use.
First Time Operation
8
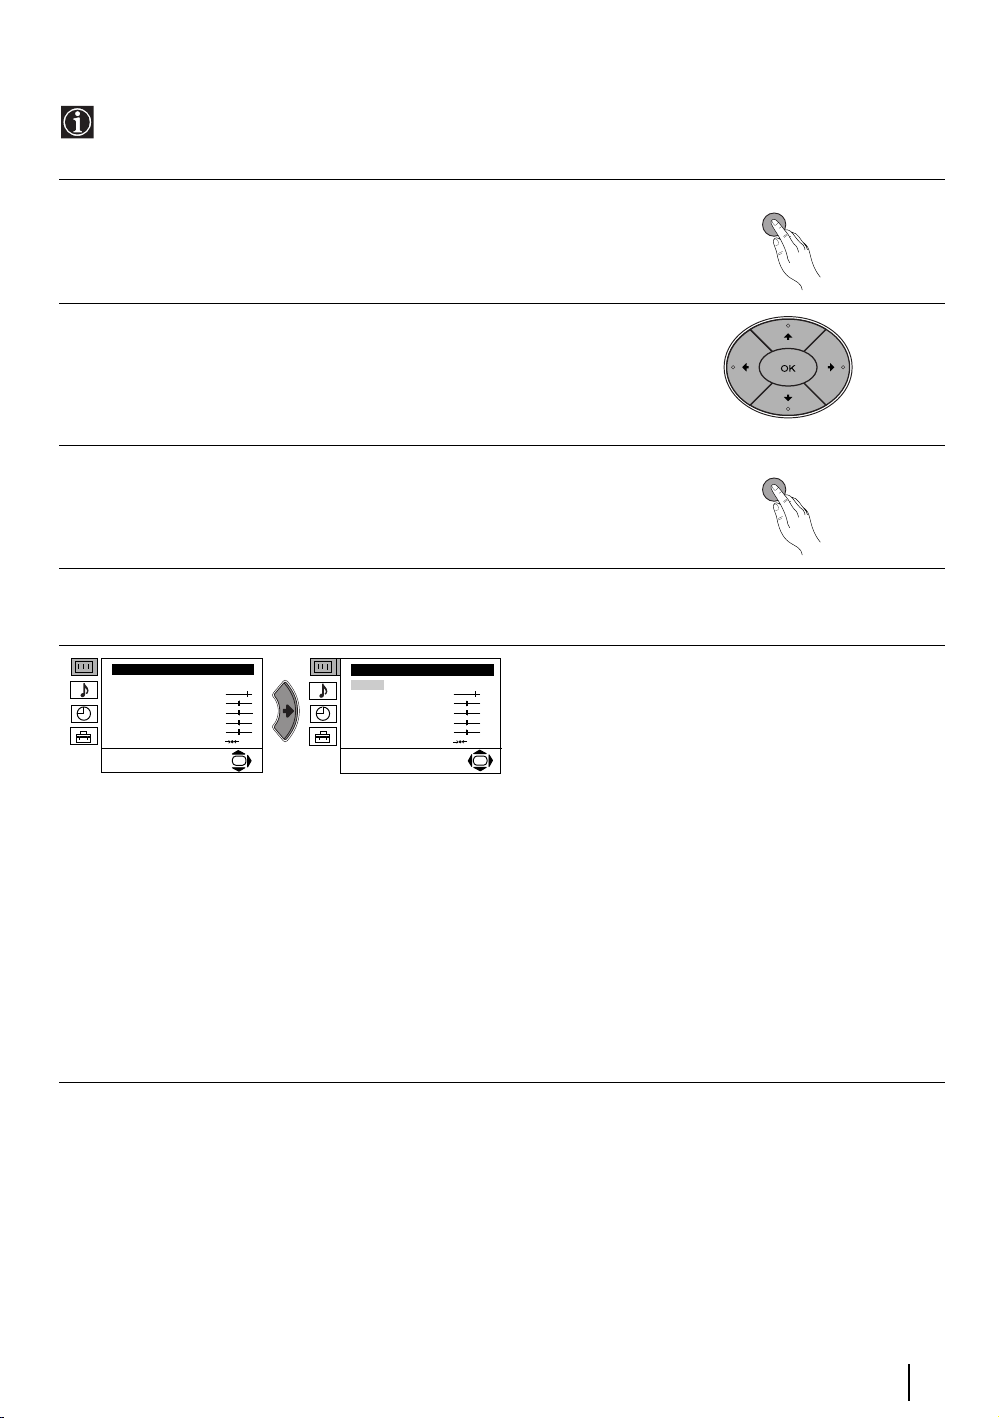
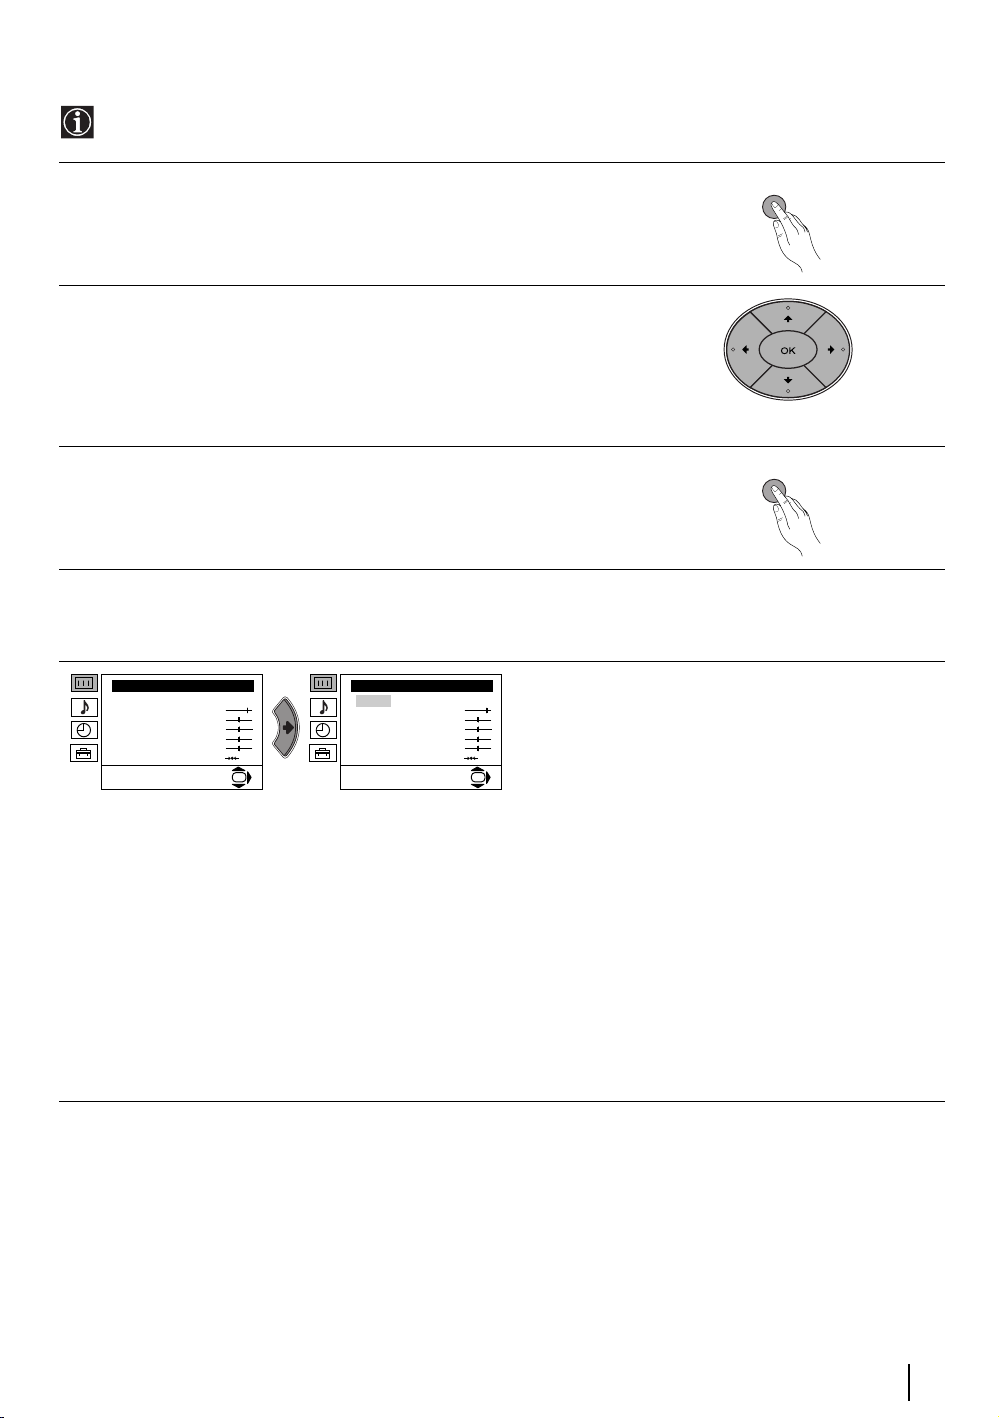
Introducing and Using the Menu System
Your TV uses an on-screen menu system to guide you through the operations. Use the following buttons on
the Remote control to operate the menu system:
Press the MENU button to switch the first level menu on.
1
• To highlight the desired menu or option, press v or V button.
2
• To enter to the selected menu or option, press b.
• To return to the last menu or option, press B
.
MENU
• To alter the settings of your selected option, press v/V/B or b.
• To confirm and store your selection, press the OK button.
Press the MENU button to remove the menu from the screen.
3
MENU
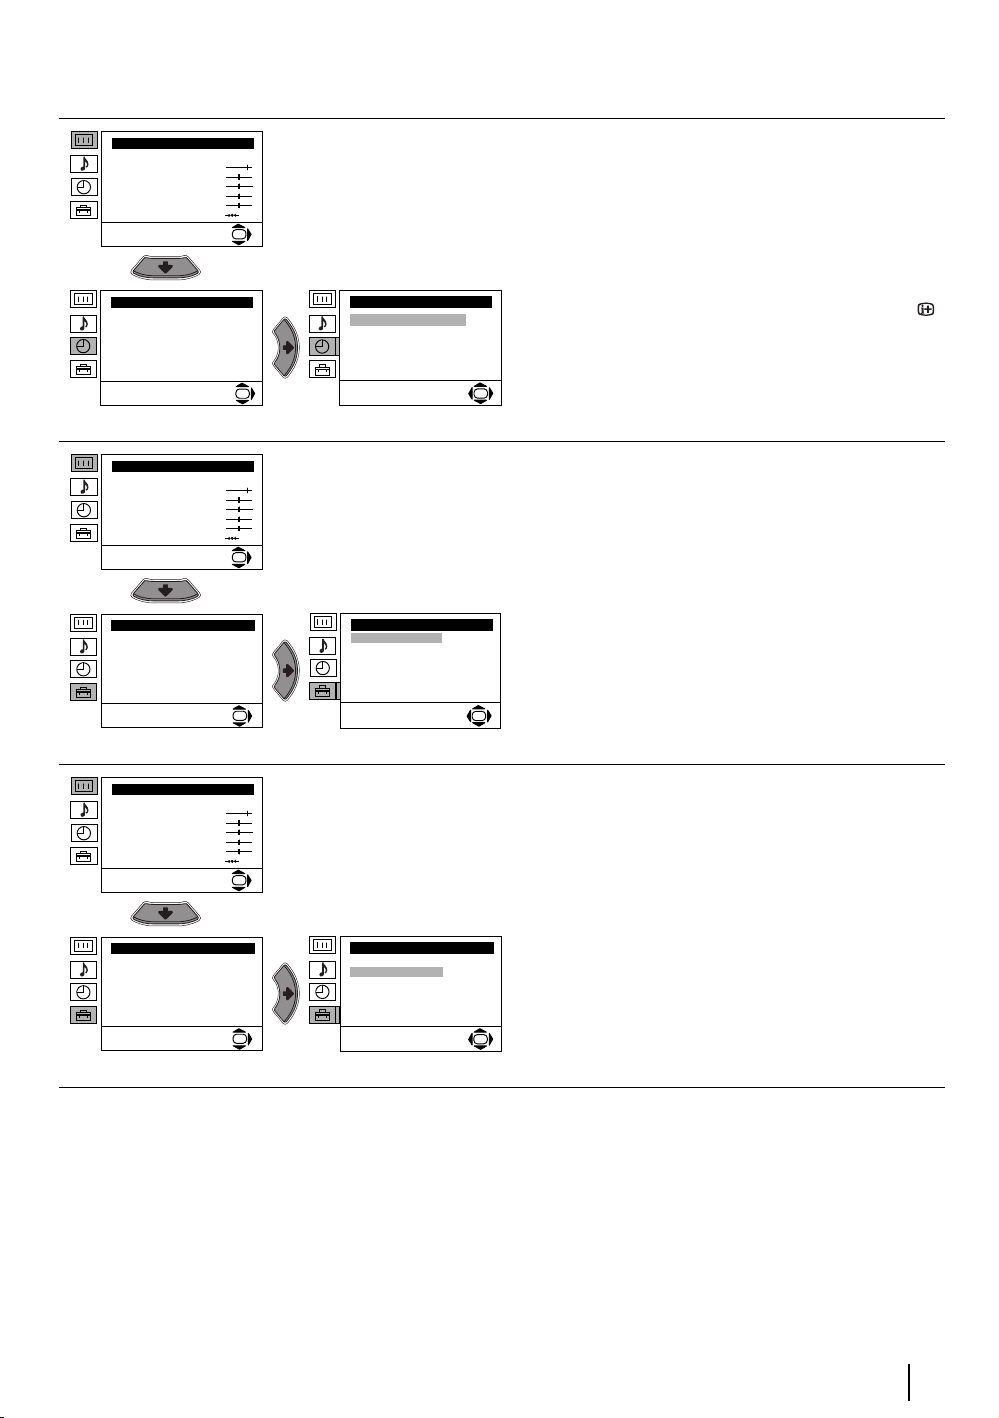
Menu Guide
Level 1 Level 2 Level 3 / Function
Picture Adjustment
Mode: Personal
Contrast
Brightness
Colour
Sharpness
Hue
Reset
Picture Adjustment
Mode: Personal
Contrast
Brightness
Colour
Sharpness
Hue
OK
Reset
PICTURE ADJUSTMENT
The “Picture Adjustment” menu allows you to alter
the picture adjustments.
To do this: after selecting the item you want to alter
OK
press b, then press repeatedly v/V/B or b to adjust it
and finally press OK to store the new adjustments.
This menu also allows you to customise the picture
mode based on the programme you are watching:
v Personal (for individual settings).
v Live (for live broadcast programmes, DVD and
Digital Set Top Box receivers).
v Movie (for films).
• Brightness, Colour and Sharpness can only be altered if “Personal” mode is selected.
• Hue is only available for NTSC colour signal (e.g: USA video tapes).
• Select Reset and press the OK button to return the picture settings to their factory preset levels.
continued...
Menu System
9

Level 1 Level 2 Level 3 / Function
Picture Adjustment
Mode: Personal
Contrast
Brightness
Colour
Sharpness
Hue
Reset
OK
SOUND ADJUSTMENT
The “Sound Adjustment” menu allows you to alter the
sound adjustments.
To do this: after selecting the item you want to alter
press b, then press repeatedly v/V/B or b to adjust it
and finally press OK to store the new adjustments.
Sound Adjustment
Mode: Natural
Tre b l e
Bass
Balance
Reset
Dual Sound: Mono
Detail Adjustment
OK
Sound Adjustment
Mode: Natural
Tre b l e
Bass
Balance
Reset
Dual Sound: Mono
Detail Adjustment
OK
This menu also contains two submenus as following:
Mode bvPersonal (for individual settings)
Rock
Pop
Jazz
Detail Adjustment bvDolby* Virtual: v Off: Normal.
v On: Simulates the sound effect of Dolby Pro Logic
surround.
v Auto volume: v Off: Volume level changes according to the broadcast
signal.
v On: Volume level of the channels will stay the same,
independent of the broadcast signal (e.g. in the case
of advertisements).
v TV Speakers: v Off: Sound from external amplifier connected to the
audio outputs on the rear of the TV set.
v On: Sound from the TV set.
• Treble and Bass can only be altered if “Personal” mode is selected.
• Select Reset and press OK to reset the sound to the factory preset levels.
• In case of a bilingual broadcast select Dual Sound and set A for sound channel 1, B for sound channel 2 or
Mono for mono channel if available. For a stereo broadcast you can choose Stereo or Mono.
• If you are listening to the TV through headphones “Dolby Virtual” option will automatically be switched to “Off”.
• If you switch “Dolby Virtual” to “On”, the “Auto Volume” option will automatically be switched to “Off” and vice
versa.
* This TV has been designed to create the “Dolby Surround” sound effect by simulating the sound of four
speakers with two speakers, when the broadcast audio signal is Dolby Surround encoded. The sound
effect can also be improved by connecting a suitable external amplifier (for details refer to “Connecting
to external audio Equipment” on page 18).
* Manufactured under license from Dolby Laboratories. “Dolby”, “Pro Logic” and the double-D symbol
are trademarks of Dolby Laboratories.
continued...
Menu System
10
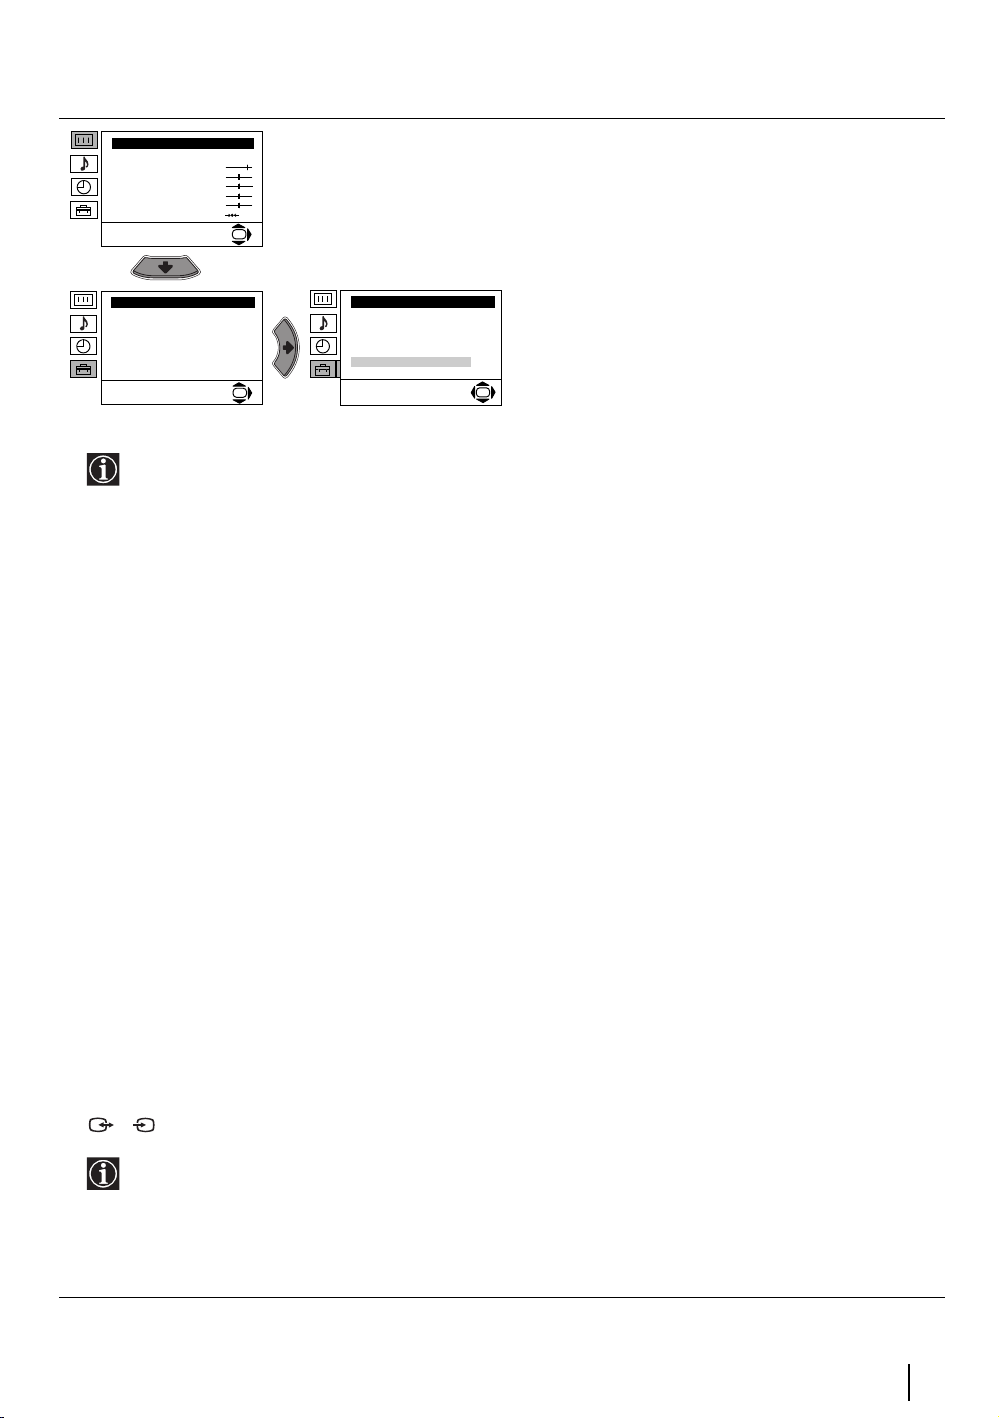
Level 1 Level 2 Level 3 / Function
Picture Adjustment
Mode: Personal
Contrast
Brightness
Colour
Sharpness
Hue
Reset
Timer
Sleep Timer: Off
Picture Adjustment
Mode: Personal
Contrast
Brightness
Colour
Sharpness
Hue
Reset
Set Up
Language/Country
Auto Tuning
Programme Sorting
Progamme Labels
AV Preset
Manual Programme Preset
Detail Set Up
SLEEP TIMER
The “Sleep Timer” option in the “Timer” menu allows
you to select a time period for the TV to switch itself
automatically into the standby mode.
OK
To do this: after selecting the option press b, then
press v or V to set the time period delay (max. of 4
hours) and finally press OK to store.
Timer
Sleep Timer: Off
• While watching the TV, you can press the
button on the remote control to display the time
remaining.
• One minute before the TV switches it self into
OK
OK
standby mode, the time remaining is displayed on
the TV screen automatically.
LANGUAGE / COUNTRY
The “Language / Country” option in the “Set Up”
menu allows you to select the language that the
menus are displayed in. It also allows you to select
OK
Set Up
Language/Country
Auto Tuning
Programme Sorting
Progamme Labels
AV Preset
Manual Programme Preset
OK
Detail Set Up
the country in which you wish to operate the TV set.
To do this: after selecting the option press b, and
then proceed in the same way as in the steps 2 and
3 of the section “Switching On the TV and
Automatically Tuning”.
OK
Picture Adjustment
Mode: Personal
Contrast
Brightness
Colour
Sharpness
Hue
Reset
Set Up
Language/Country
Auto Tuning
Programme Sorting
Progamme Labels
AV Preset
Manual Programme Preset
Detail Set Up
AUTO TUNING
The “Auto Tuning” option in the “Set Up” menu allows
you to automatically search for and store all available
TV channels.
OK
Set Up
Language/Language
Auto Tuning
Programme Sorting
Progamme Labels
AV Preset
Manual Programme Preset
OK
Detail Set Up
To do this: after selecting the option press b, and
then proceed in the same way as in the steps 5 and
6 of the section “Switching On the TV and
Automatically Tuning”.
OK
continued...
Menu System
11
Level 1 Level 2 Level 3 / Function
Picture Adjustment
Mode: Personal
Contrast
Brightness
Colour
Sharpness
Hue
Reset
Set Up
Language/Country
Auto Tuning
Programme Sorting
Progamme Labels
AV Preset
Manual Programme Preset
Detail Set Up
Picture Adjustment
Mode: Personal
Contrast
Brightness
Colour
Sharpness
Hue
Reset
Set Up
Language/Country
Auto Tuning
Programme Sorting
Progamme Labels
AV Preset
Manual Programme Preset
Detail Set Up
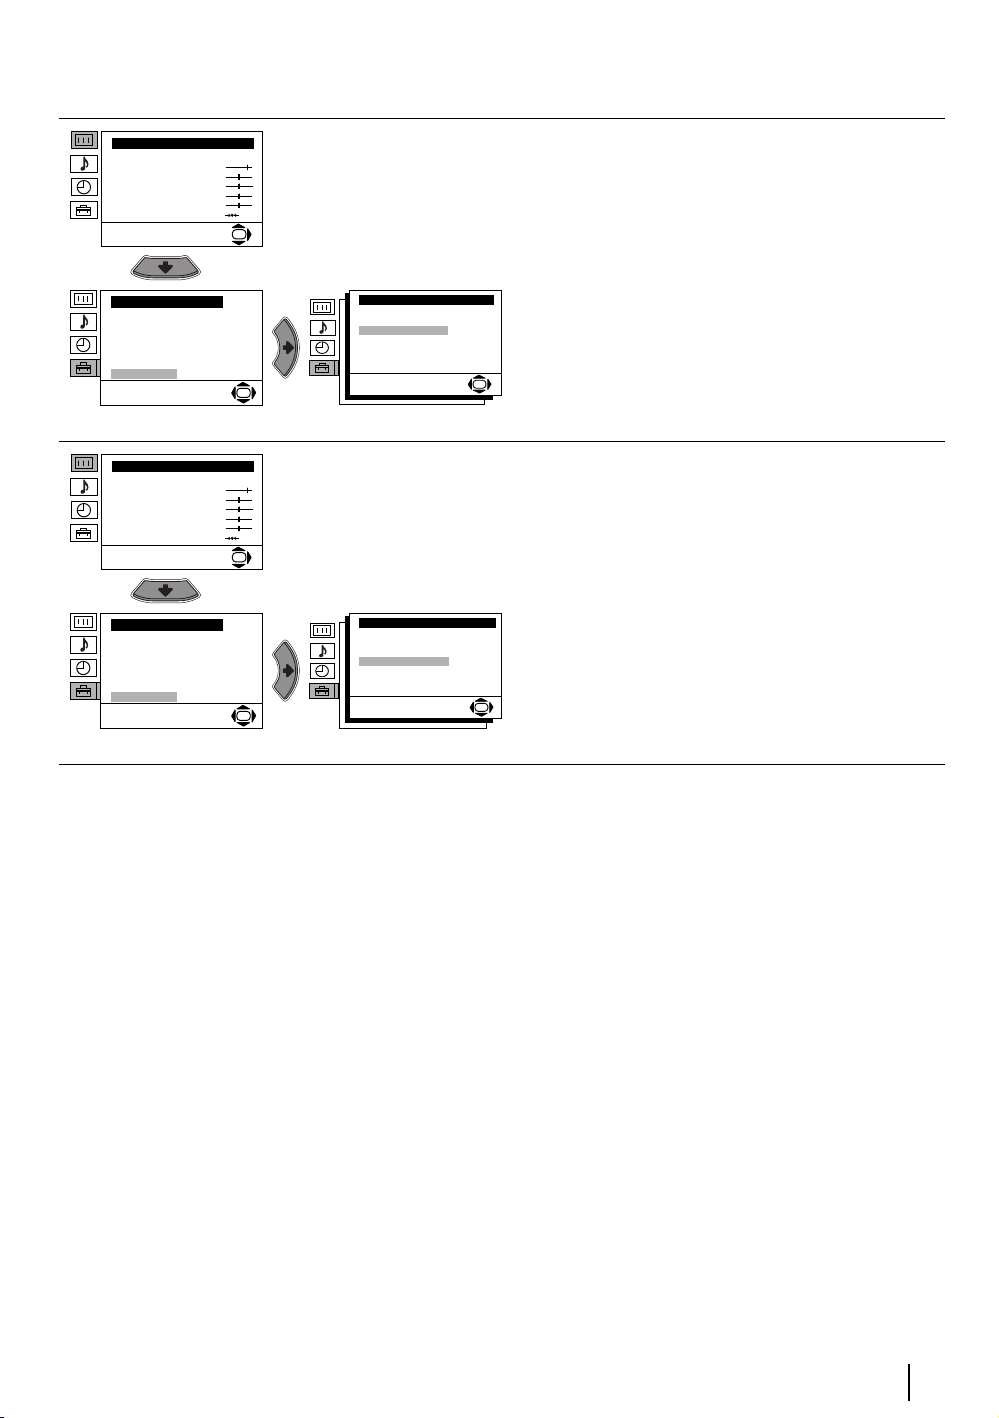
PROGRAMME SORTING
The “Programme Sorting” option in the “Set Up”
menu allows you to change the order in which the
channels (TV Broadcast) appear on the screen.
OK
To do this: after selecting the option press b, and
then proceed in the same way as in step 7b) of the
section “Switching On the TV and Automatically
Set Up
Language/Country
Auto Tuning
Programme Sorting
Progamme Labels
AV Preset
Manual Programme Preset
OK
Detail Set Up
Tuning”.
OK
PROGRAMME LABELS
The “Programme Labels” option in the “Set Up” menu
allows you to name a channel using up to five
characters (letters or numbers).
OK
Set Up
Language/Country
Auto Tuning
Programme Sorting
Progamme Labels
AV Preset
Manual Programme Preset
OK
Detail Set Up
To do this:
1 After selecting the option, press b, then press v or
V to select the programme number with the
channel that you wish to name.
2 Press b. With the first element of the Label column
highlighted, press v or V to select a letter or
number (select “-” for a blank), then press b to
confirm this character. Select the other four
OK
characters in the same way. Finally press OK to
store.
Picture Adjustment
Mode: Personal
Contrast
Brightness
Colour
Sharpness
Hue
Reset
Set Up
Language/Country
Auto Tuning
Programme Sorting
Progamme Labels
AV Preset
Manual Programme Preset
Detail Set Up
AV PRESET
The “AV Preset” option in the “Set Up” menu allows
you to designate a name to the external equipment
you have connected to the sockets of this TV.
OK
Set Up
Language/Country
Auto Tuning
Programme Sorting
Progamme Labels
AV Preset
Manual Programme Preset
OK
Detail Set Up
To do this:
1 After selecting the option, press b, then press v or
V to select the input source that you wish to name
(AV1 and AV2 are for the rear Scarts and AV3 for
side connectors). Then press b.
2 In the label column automatically appears a label:
a) If you want to use one of the 6 predefined labels
OK
(CABLE, GAME, CAM, DVD, VIDEO or SAT),
press v or V to select the desired label and
finally press OK to store.
b) If you want to set a different label, select Edit
and press b. Then with the first element
highlighted, press v or V to select a letter,
number or “-” for a blank, then press b to confirm
this character. Select the other four characters
in the same way and finally press OK to store.
continued...
Menu System
12
Level 1 Level 2 Level 3 / Function
Picture Adjustment
Mode: Personal
Contrast
Brightness
Colour
Sharpness
Hue
Reset
OK
MANUAL PROGRAMME PRESET
The “Manual Programme Preset” option in the “Set
Up” menu allows you to:
a) Preset channels or the VCR channel one by one to
the programme order of your choice. To do this:
1 After selecting the ”Manual Programme Preset”
Set Up
Language/Country
Auto Tuning
Programme Sorting
Progamme Labels
AV Preset
Manual Programme Preset
Detail Set Up
Set Up
LanguageCountry
Auto Tuning
Programme Sorting
Progamme Labels
AV Preset
Manual Programme Preset
Detail Set Up
OK
OK
option, press b then with Programme option
highlighted press b. Press v or V to select on
which programme number you want to preset the
channel (for VCR, select programme number “0”).
Then press B.
2 The following option is only available depending on the country you have selected in the “Language /
Country” menu.
After selecting the System option, press b. Then press v or V to select the TV Broadcast system (B/G for
western European countries or D/K for eastern European countries). Then press B.
3 After selecting the Channel option, press b. Then press v or V to select the channel tuning (“C” for terrestrial
channel or “S” for cable channels). Next press b. After that, press the number buttons to enter directly the
channel number of the TV broadcast or the channel of the VCR signal. If you do not know the channel
number, press v or V to search for it. When you tune the desired channel, press OK twice to store.
Repeat all the above steps to tune and store more channels.
b) Label a channel using up to five characters.
To do this: Highlighting the Programme option, press the PROG +/- button to select the programme number
with the channel you wish to name. When the programme you want to name appears on the screen, select
the Label option and press b. Next press v or V to select a letter, number or “-“ for a blank. Press b to confirm
this character. Select the other four characters in the same way. After selecting all the characters, press OK
twice to store.
c) Normally the automatic fine tuning (AFT) will give the best possible picture, however you can manually fine
tune the TV to obtain a better picture reception in case the picture is distorted.
To do this: while watching the channel (TV Broadcast) you wish to fine tune, select the AFT option and press
b. Next press v or V to adjust the fine tuning between -15 and +15. Finally press OK twice to store.
d) Skip any unwanted programme numbers when they are selected with the PROG +/- buttons.
To do this: Highlighting the Programme option, press the PROG +/- button to select the programme number
you want to skip. When the programme you want to skip appears on the screen, select the Skip option and
press b. Next press v
or V to select Yes. Finally press OK twice to confirm and store.
To cancel this function afterwards, select “No” instead of “Yes” in the step above.
e) This option allows you to view and record scrambled channels when using a decoder connected to the Scart
S
2/ directly or through a VCR.
This option is only available depending on the country you have selected in the ‘Language/Country’
menu.
To do this: select the Decoder option and press b. Next press v or V to select On. Finally press OK twice
to confirm and store.
To cancel this function afterwards, select “Off” instead of “On” in the step above.
continued...
Menu System
13

Level 1 Level 2 Level 3 / Function
Picture Adjustment
Mode: Personal
Contrast
Brightness
Colour
Sharpness
Hue
Reset
Set Up
Language/Country
Auto Tuning
Programme Sorting
Progamme Labels
AV Preset
Manual Programme Preset
Detail Set Up
Picture Adjustment
Mode: Personal
Contrast
Brightness
Colour
Sharpness
Hue
Reset
Set Up
Language/Country
Auto Tuning
Programme Sorting
Progamme Labels
AV Preset
Manual Programme Preset
Detail Set Up
NOISE REDUCTION
The “Noise Reduction” option in the “Detail Set Up”
menu allows you to automatically reduce the picture
noise visible in the broadcast signal.
OK
To do this: after selecting the option, press b. Then
press v or V to select Auto. Finally press OK to
confirm and store.
Detail Set Up
Noise Reduction:
AV2 Output:
RGB Centring:
Picture Rotation:
OK
Auto
To cancel this function afterwards, select “Off”
TV
0
instead of “Auto” in the step above.
0
OK
AV2 OUTPUT
The “AV2 Output” option in the “Detail Set Up” menu
allows you to select the source to be output from the
Scart connector 2/ . You can record from this
OK
Scart any signal coming from the TV or from external
equipment connected to the Scart connectors
1/ or side connectors 3 and 3.
Detail Set Up
Noise Reduction:
AV2 Output:
RGB Centring:
Picture Rotation:
OK
Auto
TV
0
0
OK
If your VCR supports Smartlink, this procedure
is not necessary.
To do this: after selecting the option, press b. Then
press v or V to select the desired output signal: TV,
AV1, AV3, YC3 or AUTO.
S
If you select “AUTO”, the output signal will
always be the same one that is displayed on the
screen.
If you have connected a decoder to the Scart
S
2/ or to a VCR connected to this Scart,
please remember to change back the “AV2
Output” to “AUTO” or “TV” for correct
unscrambling.
continued...
Menu System
14
Level 1 Level 2 Level 3 / Function
Picture Adjustment
Mode: Personal
Contrast
Brightness
Colour
Sharpness
Hue
Reset
Set Up
Language/Country
Auto Tuning
Programme Sorting
Progamme Labels
AV Preset
Manual Programme Preset
Detail Set Up
Picture Adjustment
Mode: Personal
Contrast
Brightness
Colour
Sharpness
Hue
Reset
Set Up
Language/Country
Auto Tuning
Programme Sorting
Progamme Labels
AV Preset
Manual Programme Preset
Detail Set Up
RGB CENTRING
When connecting an RGB source, such as a
“PlayStation”, you may need to readjust the
horizontal position of the picture. If this is the case,
OK
you can readjust it through the “RGB Centring” option
in the “Detail Set Up”.
To do this: while watching an RGB source select the
Detail Set Up
Noise Reduction:
AV2 Output:
RGB Centring:
Picture Rotation:
OK
“RGB Centring” option and press b. Then press v or
Auto
V to adjust the centre of the picture between –10 and
TV
0
+10. Finally press OK to confirm and store.
0
OK
PICTURE ROTATION
Because of the earth’s magnetism, the picture might
slant. If this is the case, you can correct the pictures
slant by using the “Picture Rotation” option in the
OK
Detail Set Up
Noise Reduction:
AV2 Output:
RGB Centring:
Picture Rotation:
OK
“Detail Set Up” menu.
To do this: after selecting the option, press b. Then
press v or V to correct any slant of the picture
between -5 and +5 and finally press OK to store.
Auto
TV
0
0
OK
Menu System
15
Teletext
Teletext is an information service transmitted by most TV stations. The index page of the teletext service
(usually page 100) gives you information on how to use the service. To operate teletext, use the remote
control buttons as indicated below.
Make sure that you use a channel (TV Broadcast) with a strong signal, otherwise teletext errors may occur.
To switch on Teletext:
After selecting the TV channel which carries the teletext service you wish to view,
press .
To select a Teletext page:
Input 3 digits for the page number, using the numbered buttons.
• If you make a mistake, retype the correct page number.
• If the counter on the screen continues searching, it is because the page is not
available. If this is the case, input another page number.
To access the next or preceding page:
Press PROG + () or PROG - ().
To superimpose teletext on to the TV:
Whilst you are viewing teletext, press . Press it again to cancel teletext mode.
To freeze a teletext page:
Press / . Press it again to cancel the freeze.
To reveal concealed information (e.g: answer to a quiz):
Press / . Press it again to conceal the information.
To Switch Off Teletext:
Press .
TELETEXT
TELETEXT
TELETEXT
TELETEXT
TELETEXT
TELETEXT
TELETEXT
TELETEXT
Index
Index
Index
Index
Index
Index
Index
Index
Programme
Programme
Programme
Programme
Programme
Programme
Programme
Programme
News
News
News
News
News
News
News
News
Sport
Sport
Sport
Sport
Sport
Sport
Sport
Sport
Weather
Weather
Weather
Weather
Weather
Weather
Weather
Weather
153
153
153
153
153
153
153
153
101
101
101
101
101
101
101
101
25
25
25
25
25
25
25
25
98
98
98
98
98
98
98
98
Fastext
Fastext service lets you access Teletext pages with one button push.
When you are in Teletext mode and Fastext is broadcast, a colour coded menu appears at the bottom of
the teletext page. Press the appropriate coloured button (red, green, yellow or blue) to access the page
corresponding to your menu choice.
16
Teletext
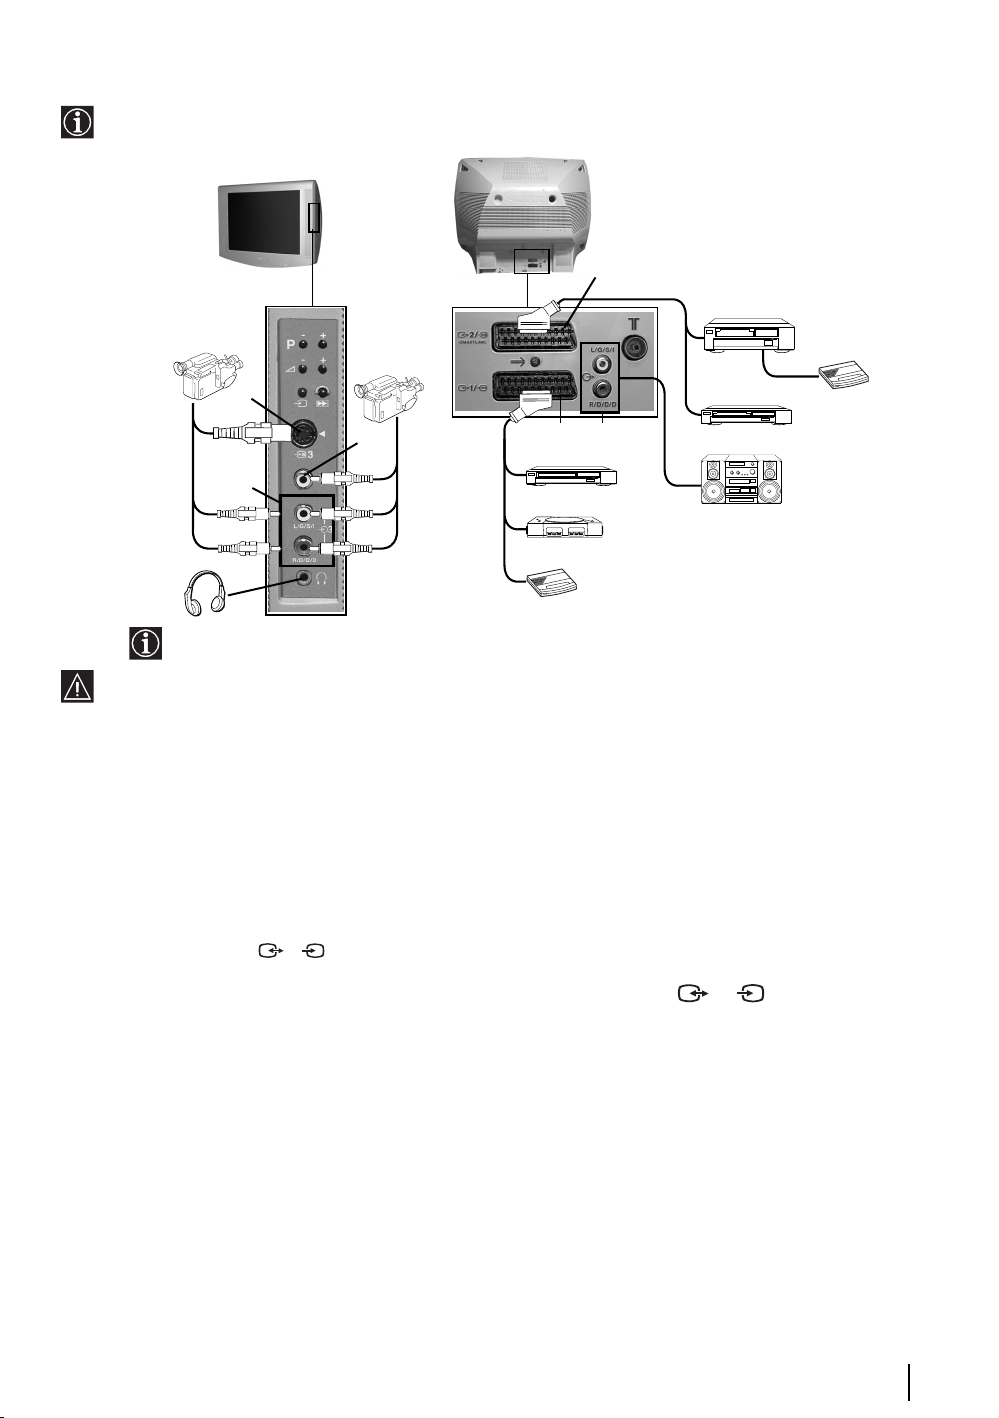
Connecting Optional Equipment
Using the following instructions you can connect a wide range of optional equipment to your TV set.
(Connecting cables are not supplied).
S-VHS/Hi8
DVC
Camcorder
A
C
When you connect the headphones, the
TV speakers will automatically be muted.
To avoid picture distortion, do not connect external equipment to connectors A and B at the same time.
8mm/Hi8/
DVC
Camcorder
B
DVD
“PlayStation”*
Decoder
F
DE
2
1
VCR
Decoder
DVD
Hi-Fi
* “PlayStation” is a product of Sony
Computer Entertainment, Inc.
* “PlayStation” is a trademark of
Sony Computer Entertainment, Inc.
Connecting a VCR:
To connect a VCR, please refer to the section “Connecting the aerial and VCR” of this instruction manual. We
recommend you connect your VCR using a scart lead. If you do not have a scart lead, tune in the VCR test signal
to the TV programme number “0” by using the “Manual Programme Preset” option. (for details of how to manually
programme these presets, see page 13, step a).
Refer to your VCR instruction manual to find out how to find the output channel of your VCR.
Connecting a VCR that supports Smartlink:
Smartlink is a direct link between the TV set and the VCR. For more information on Smartlink, please refer to the
instruction manual of your VCR.If you use a VCR that supports Smartlink, please connect the VCR to the TV using
a Scart lead to the Scart 2/ F.
If you have connected a decoder to the Scart 2/ or through a
S
S
VCR connected to this Scart:
Select the “Manual Programme Preset” option in the “Set Up” menu and after entering the “Decoder**” option,
select “On” (by using v or V
**This option is only available depending on the country you have selected in the “Language/Country” menu.
). Repeat this option for each scrambled signal.
continued...
Additional Information
17
Connecting to external Audio Equipment:
Plug in your Hi-Fi equipment to the audio output sockets E if you wish to amplify the audio output from TV. Next,
using the menu system, select the “Sound Adjustment” menu. Enter the “Detail Set Up” option and set “TV
Speakers” to “Off”.
Audio level of the external speakers can be modified by pressing the volume buttons on the remote control.
Also treble and bass settings can be modified through the “Sound Adjustment” menu.
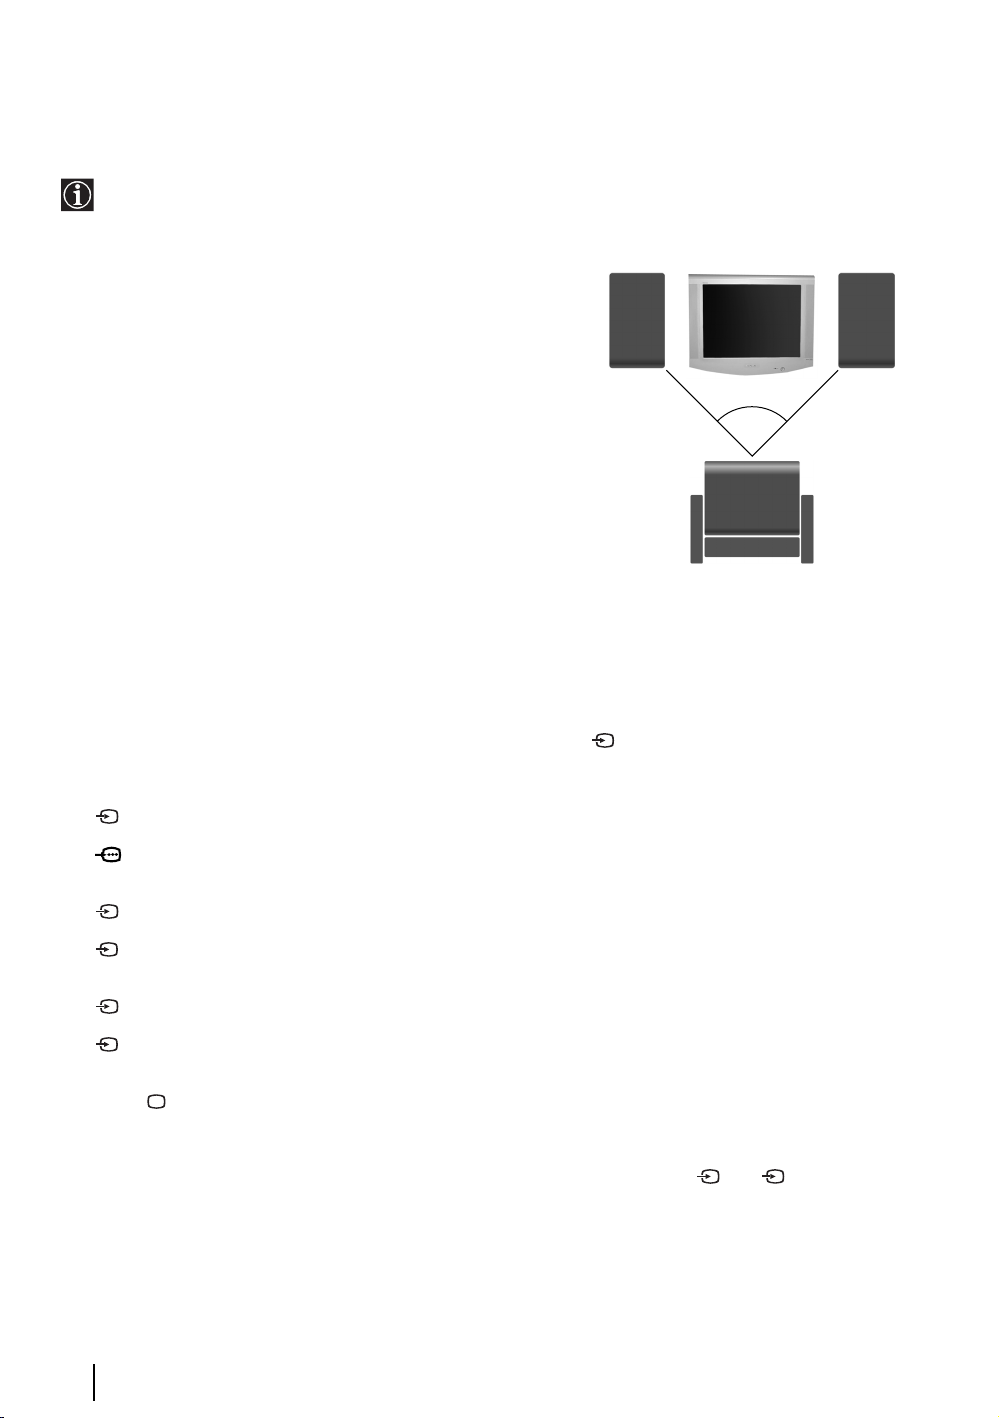
To enjoy “Dolby Virtual” sound effect through your Hi-Fi
equipment:
Place the speakers of your equipment in front of your listening
position and beside the TV set but keeping a distance of 50 cm
between each speaker and the TV set.
Then by using the menu system, select the menu “Sound
Adjustment”. Next select “Detail Adjustment” and set “Dolby
Virtual” to “On”.
Left Hi-Fi
Speaker
~50º
Your sitting position
Right Hi-Fi
Speaker
Using Optional Equipment
1 Connect your equipment to the designated TV socket, as indicated in the previous page.
2 Switch on the connected equipment.
3 To watch the picture of the connected equipment, press the button repeatedly until the correct input
symbol appears on the screen.
Symbol Input Signals
1 • Audio / video input signal through the Scart connector D
• RGB input signal through the Scart connector D. This symbol appears only if an RGB source
has been connected.
2 • Audio/video input signal through the Scart connector F.
S
2 • S Video Input signal through the Scart connector F. This symbol appears only if an S Video
3 • Video input signal through the phono socket B and Audio input signal through C.
S
3 • S Video Input signal through the front S Video input jack A and Audio signal through C.
source has been connected.
This symbol appears only if an S Video source has been connected.
4 Press button on the remote control to return to the normal TV picture.
For Mono Equipment
Connect the phono plug to the L/G/S/I socket on the front of the TV and select 3 or 3 input signal using
the instructions above. Finally, refer to the “Sound Adjustment” section of this manual and select “Dual Sound”
“A” on the sound menu screen.
S
Additional Information
18

Specifications
TV system:
Depending on your country selection:
B/G/H. D/K
Colour system:
PAL, SECAM
NTSC 3.58, 4.43 (only Video In)
Channel Coverage:
VHF: E2-E12
UHF: E21-E69
CATV: S1-S20
HYPER: S21-S41
D/K R1-R12, R21-R69
Picture Tube:
Flat Display FD Trinitron:
29” (approx. 73 cm. measured diagonally)
Rear Terminals
1/ 21-pin scart connector (CENELEC
2/ 21-pin Scart connector (CENELEC
(SMARTLINK)standard) including audio / video input, S
standard) including audio/video input,
RGB input, TV audio/video output.
S
video input, selectable audio / video output
and Smartlink interface.
Audio outputs (Left/Right) - phono jacks
Sound Output:
2 x 14 W (music power)
2 x 7 W (RMS)
Power Consumption:
94 W
Standby Power Consumption:
0.5 W
Dimensions (w x h x d):
Approx. 771 x 592 x 553 mm.
Weight:
Approx. 49 Kg.
Accessories supplied:
1 Remote Control (RM-947)
2 Batteries (IEC designated, AA/R6 size)
Other features:
• Teletext, Fastext, TOPtext
• Sleep Timer
• Smartlink (direct link between your TV set and a
compatible VCR. For more information on Smartlink,
please refer to the Instruction Manual of your VCR).
• Dolby Virtual.
Side Terminals
S
3 S Video input – 4 pin DIN
3 video input – phono jack
3 audio input – phono jacks
headphones jack
Design and specifications are subject to change without notice
Ecological Paper - Totally Chlorine Free
Additional Information
19
Troubleshooting
Here are some simple solutions to the problems which may affect the picture and sound.
Problem Solution
No picture (screen is dark), no sound. • Check the aerial connection.
Poor or no picture (screen is dark), but good sound. • Using the menu system, select the “Picture
No picture or no menu information from equipment
connected to the Scart connector.
Good picture, no sound. • Press the button on the remote control.
No colour on colour programmes. • Using the menu system, select the “Picture
Distorted picture when changing programmes or
selecting teletext.
Wrong characters appear when viewing teletext. • Using the menu system, enter to the “Language/
• Plug the TV in and press the button on the front
of TV.
• If the standby indicator is on, press button
on the remote control.
Adjustment” menu and select “Reset” to return to the
factory settings.
• Check that the optional equipment is on and press
the button repeatedly on the remote control until
the correct input symbol is displayed on the screen.
• Check that “TV Speakers” is “On” on the “Sound
Adjustment” menu.
• Check that headphones are not connected.
Adjustment” menu and select “Reset” to return to
factory settings.
• Turn off any equipment connected to the Scart
connector on the rear of the TV.
Country” menu and select the country in which you
operate the TV. For Cyrillic languages, we
recommend to select Russia country in the case that
your own country does not appear in the list.
Picture slanted. • Using the menu system, select the “Picture
Noisy picture when viewing a TV channel. • Using the menu system, select the “Manual
No unscrambling or unstable picture whilst viewing a
scrambling channel with a decoder connected through
the Scart connector 2/ .
Remote control does not function. • Replace the batteries.
The standby indicator on the TV flashes. • Contact your nearest Sony service centre.
In case of problems, have your TV serviced by qualified personnel. Never opening the casing yourself.
Additional Information
20
S
Rotation” option in the “Detail Set Up” menu to
correct the slant.
Programme Preset” menu and adjust Fine Tuning
(AFT) to obtain better picture reception.
• Using the menu system, select the “Noise
Reduction” option in the “Detail Set Up” menu and
select “Auto” to reduce the noise in the picture.
• Using the menu system, select the “Set Up” menu.
Then enter to the “Detail Set Up” option and set
“AV2 Output” to “TV”.

21223


Увод
Благодарим Ви за избора на този цветен телевизор Sony с плосък екран FD Trinitron.
Преди използване на телевизора прочетете внимателно това ръководство за експлоатация и го
запазете за бъдещи изяснения.
Символии използввани в това ръководство:
• Потенциална опасност.
• Важна информация.
• Информация за функцията.
• 1,2.. Последователност за следване на
инструкциите.
• Потьменените бутони на дистанционното
управление показват кои бутони трябва да се
натискат за изпълнението на различните операции.
• Информация за резултата от инструкциите.
Съдържание
Увод .............................................................................................................................................................. 3
Техника на безопасност ............................................................................................................................. 4
Основно описание
Основно описание на бутоните на дистанционното управление ........................................................... 5
Основно описание на бутоните на телевизора........................................................................................ 6
Инсталиране
Инсталиранe на батериите в устро йството за дистанционното управление....................................... 6
Свързване на антената и видеото ............................................................................................................ 6
Първоначално включване
включване и автоматично настройване на телевизора.......................................................................... 7
Ситема от менюта на екрана
Увод и боравене със системата от менюта.............................................................................................. 9
Водач на менютата::
Настройка на Картината........................................................................................................................ 9
Настройка на звука................................................................................................................................ 10
Автоматично Изключв ........................................................................................................................... 11
Език / Държава ....................................................................................................................................... 11
Автоматично Захващане........................................................................................................................ 11
Подреждане на Програми...................................................................................................................... 12
Надписване на програми ....................................................................................................................... 12
Запаметени AV настройки..................................................................................................................... 12
Програмиа Ръчен Избор ........................................................................................................................ 13
Потискане на шума................................................................................................................................. 14
AV2 изход ................................................................................................................................................ 14
RGB Център ............................................................................................................................................ 15
Въртене на Картината ........................................................................................................................... 15
BG
Телетекст............................................................................................................................................... 16
Допълнителна информация
Свързване на допълнителни апарати....................................................................................................... 17
Боравене с допълнителни апарати ........................................................................................................... 18
Характеристики........................................................................................................................................... 19
Отстраняване на неизправности............................................................................................................... 20
Съдържание
Техника на безопасност
По причини за безопасност и предпазване
Този телевизор може да работи
само на захранващо напрежение
220-240V. Внимавайте да не
включвате твърде много уреди в
един контакт, тъй като това може
да причини токов удар.
от въздействие от природни явления е
препоръчително да не оставяте
телевизора в режим “stand by” когато не се
използва. Изключвайте от
електрическата мрежа. Някои телевизори
имат функции, които за да бъдат
използвани, изискват уреда да бъде
оставен в режим “stand by”. Инструкциите
в това ръководство ще Ви информират
дали това е необходимо.
Никога не пъхайте каквито и да било
предмети в телевизора, тъй като това
може да причини пожар или токов удар.
Никога не разливайте течности по
телевизора. В случай, че течност или
твърд предмет попаднат в телевизора
го изключете. Свържете се незабавно с
квалифицирани служители на Сони.
Не отваряйте кутията и задния
капак на телевизора. Обръщайте
се само към квалифициран
сервизен персонал.
Не покривайте вентилационните
отвори на телевизора. Оставете
най-малко 10 см. разтояние около
телевизора за вентилация.
Почиствайте екрана и кутията с
мека, влажна кърпа. Не
използвайте абразивни кърпи,
алкални почистващи средства,
изстъргващи препарати или
разтворители като спирт или
бензин, както и антистатичен
спрей.
За Ваша собствена безопасност не
пипайте телевизора, кабела или
антената му по време на
гръмотевични бури.
Никога не поставяйте телевизора
на горещи, влажни или
изключително прашни места. Не
инсталирайте телевизора на места
където може да бъде изложен на
механични вибрации.
Когато изключвате телевизора,
дърпайте щепсела, а не кабелa.
За да предотвратите риска от
токов удар, не излагайте
телевизора на дъжд или влага.
За да избегнете пожар, дръжте
настрана от телевизора
възпламеними предмети и открити
източници на светлина /например
свещи/.
Не поставяйте тежки предмети
върху кабела, тъй като това може
да го повреди.
Препоръчваме ви да навиете
излишния захранващ кабел около
предназначените за целта
приспособления на задната страна
на телевизора.
Поставяйте телевизора на сигурна,
стабилна поставка. Никога не се
опитвайте да премествате телевизора
и поставката едновременно – винаги
премествайте телевизора и поставката
отделно. Не обръщайте телевизора
настрани или по “гръб”. Не
позволявайте на деца да се катерят по
него.
Техника на безопасност
4
Изключвайте кабела на телевизора
преди да го местите. При
преместването избягвайте неравни
повърхности и не правете бързи
крачки. Ако изпуснете или нараните
телевизора, незабавно се
консултирайте с квалифицирани
сервизни служители на Сони.
Не покривайте вентилационните
отвори на телевизора с предмети
като пердета, вестници и др.
Основно описание на бутоните на дистанционното управление
1 временно изключване на телевизора: натиснете го за временно
изключване на телевизора (индикаторът за режим на очакване)
ще светне). Натиснете го отново за да вклочите телевизора от
режима на временно изключване (standby). За икономия на еп.
енергия се препоръчва цялостното изключване на телевизора
когато не се използва. Ако в продължение на 15 мин. няма TB
сигнал и не се натискат бутоните, телевизора ще мйне
автоматично в режим на временно изключване (standby).
2 Избор на входен сигнал: Натиснете го няколко пъти, докато
символа на желания входен сигнал се появи на екрана.
3 Избор на канали: Hатиснете за избор на канали. За двуцифрени
погрмни номера натиснете втората цифра за времетраене помалко от 2.5 сек.
4 Натиснете го за да върнете последния избран канал (предният
канаи трябва да е бил изобразен в продължение на най-малко 5
сек.).
5 Този бутон функционира самно в режим на телетекст.
6 Този бутон функционира самно в режим на телетекст.
7 Избор на телетекста: Натиснете го за ииобраияване на
телетекста.
8
Когато MENU е активирано,
предвижване през системата от менюта. За повече детайли вижте
в глава «Увод и боравене със системата от менюта
Когато MENU не е активирано,
генералния списък на настроените канала. Изберете канала (TB
предаване) натискайки
за да видите избрания канал.
v или V и след това натиснете отново OK
използвайте
натиснете OK за
тези бутони за
» на стр. 9.
визуализиране на
9 Избор на формат на екрана: Натиснете го няколко пъти за смяна
на формат на екрана: 4:3 за обикновенен образ или 16:9 за
имитация на панорамен екран.
q; Избор на канали: Натиснете го за избор на преден илиследващ
канал.
qj
qh
qg
qf
qd
qs
qa
1
2
3
4
5
6
7
8
9
q;
qa Елиминиране на звука: Натиснете го за премахване на звука.
Натиснете го отново за възвръщане на звука.
qs Настройване на силата на звука: Натиснете го за настройване на
силатана звука.
qd Активиране на системата от менюта: Натиснете го за да видите
менюто наекрана. Натиснете го отново за премахване и връщане
на нормалния ТВ екран.
qf Избор на режим на телевизия: Натиснете го за да изключите
телетекста или входа за видео.
qg Избор на режим за звука: Натиснете няколко пъти за промяна на
режима на звука.
qh Избор на режим на образа: Натиснете го няколко пъти за смяна
на режима на образа.
qj Изобразяване на информация на екрана: Натиснете го за
изобразяване на всички индикации на екрана.Натиснете го отново
за премахване.
Освен телевизионните функции,всички цветни бутони се
използват също така и за операциите на телетекста. За повече
информация вижте в главата «Телетекст »,в това ръководство
за експлоатация.
Основно описание
5
Основно описание на бутоните на телевизора
Натиснете върху
маркировката на
капачето за
откриване на
буксите
Букса за видео вход
Бутон за
избор на
входен
сигнал
Бутон За избор
на предна/
следваща
програма (избор
на TB
предавания).
Бутони за
контрол на
силата на звука.
Бутон За
връщане към
фабричната
настройка на
телевизора
Вход за S video
Вход за видео
Индикатор за режим
на временно
изключване (standby).
Бутон за
включване/
изключване
Букса за слушалки
Инсталиране на батериите в устройството за дистанционно управление
Поставете приложените батерии с правилно разположени полюси.
Опазвайте околната среда и изхвърляйте използваните батерии в контейнерите за тази цел.
S
O
N
Y
C
O
R
P
O
R
A
T
I
O
N
J
A
P
A
N
/4
N/4
PA
JA
N
ATIO
OR
RP
Y CO
N
O
S
Свързване на антената и видеото
Кабелите за свързване не са приложени серийно.
Кабелите за свързване не са приложени
серийно.За повече детайли за
свързването на видеото вижте в главата
«Свързване на допълнителни апарати», в
това ръководство за експлоатация.
Основноописание - Инсталиране
6
или
видео
OUT IN
Свързването чрез
Евроконектора е опция
Включване и автоматично настройване на телевизора
Когато включите за първи път телевизора, на екрана ще се появи последователност от менюта чрез
които ще можете да: 1) изберете езика на менютата, 2) изберете държавата в която желаете да
използвате апарата, 3) настроите наклона на картината, 4) тьрсите и запаметите автоматично всички
канали на разположение (TB предавания) и 5) смените реда на появяване на каналите (TB предавания).
Ако за в бъдеще желаете да измените някои от тези нагласи, това може да се извърши избирайки
съответната опция в (меню Инсталиране) или натискайки бутона за фабрично програмираната
настройка.
Включете кабела за захранването (220-240V AC, 50Hz).
1
Когато свържете телевизора за първи път в ел. мрежа, той
се включва автоматично. Ако не, натиснете бутона вкл./
изкл. на лицевия панел на телевизора, за да го
включите.
Когато включите телевизора за първи път, на екрана
автоматично ще се появи менюто Language (Език).
Натиснете бутона v или V от дистанционното управление
2
за да изберете езика и после натиснете бутона OK за да
потвърдите избора. От този момент всички менюта ще се
появяват на избрания език.
На екрана автоматично ще се появи менюто Държава.
3
Натиснете бутона v или V за избор на Държавата, където
желаете да използвате телевизора, след което натиснете
OK за потвърждаване на избора.
•Ако в списъка не фигурира държавата в която ще
използвате телевизора изберете «-» на мястото на
държава.
• За да бъдат правилни знаците на Кирилица в
Телетекста ви препоръчваме да изберете Русия, в
случаите когато Вашата страна не фигурира в
списъка.
Възможно е, в резултат на земния магнетизъм, образа да
4
се появи наклонен. Мнюто Въртене на карт. позволява
настройването на образа, при необходимост.
a) Ако не е необходимо, натиснете v или V за избор на Не
е необходимо и натиснете OK.
б) Ако е необходимо, натиснете v или V за избор на
Регулрай сега и натиснете OK. B последствие
настройте наклона на картината нагласяйки между -5 и
+5 натискайки v или V.
Дъpжaвa
i
v
Sverige
Norge
Italia
Deutschland
Österreich
i
V
Избepи дъpжaвa:
Aкo кapт. нe e xopизoнт.
Peгyл. въpт. нa кapт.
He e нeoбxoдимo
Peгyлpaй ceгa
OK
OK
продължава...
Първоначално включване
7

Менюто Автоматично Захващане се появява на екрана.
5
Натиснете OK за да изберете Да.
Телевизора започва автоматично да търси и запаметява
6
всички канали (TB предавания) на разположение.
Този процес може да продължи няколко минути.
Бъдете търпеливи и не натискайте нито един бутон,
докато продължава процеса на настройване, в
противнен случай процеса няма да се завърши.
Жeлaeтe ли дa cтapтиpaтe
aвтoмaтичнa нacтpoйкa?
Дa
He
OK
Aвтoм. Зaxвaщaнe
Пpoгpaмa:
Cиcтемa:
Kaнaл:
Tъpcи...
01
B/G
C21
Ако телевизора не открие нито един канал
(телевизионно предаване) след завършване на
автоматичната настройка, на екрана ще се появи
съобщение искайки да включите антената. Моля
включете я така както е описано на стр. 6 в това
ръководство и натиснете OK. Процеса на
автоматична настройка започва отново.
7
След като телевизора се настрои и запамети всички
канали (TB предавания), на екрана автоматично ще
се появи менюто Подреждане на програми, за да
можете да смените реда на появяване на програмите
на екрана.
a) Ако не желаете да смените реда на каналите,
отидетевстъпка 8.
б) IАко желаете да смените реда на каналите:
1 Натиснете бутона v или V за да изберете номера на
програма на съответния канал (TB предаване), чиято
позиция желаете да смените и след това натиснете
b.
2 Натиснетеv или V за избор на новия номер на
програмата, на която желаете да запаметите
избрания канал (TB предаване), след което
натиснете
3 Повторете стъпките б)1 и б)2 ако желаете да
преподредите други TB канали.
B.
Пpoгpaмa нe e нaмepeнa
Пoля cвъpжeтe aнтeнa
Пoтвъpждeниe
OK
Пoдpeждaнe нa Пpoгpaми
Пpoгpaмa:
01 TVE
02 TVE2
03 TV3
04 C33
05 C27
06 C58
Избepи кaнaл:
Изпизaнe:
Пpoгpaмa:
01 TVE
02 TVE2
03 TV3
04 C33
05 C27
06 C58 05 C27
Избop нa нoмep:
Изпизaнe:
MENU
Пoдpeждaнe нa Пpoгpaми
MENU
OK
OK
Натиснете бутона MENU, за връщанекъмнормален TB
8
режим.
Телевизора е готов за работа
Първоначално включване
8
MENU
Увод и боравене със системата от менюта
Този телевизор използва система от менюта на екрана за да Ви води при различните операции.
Използвайте следните бутони от дистанционното управление, за да се движите през менютата:
Натиснете бутона MENU за поява на първото ниво от менюто на
1
екрана.
•
За подчертаване на желаното меню или избор, натиснете v или V.
2
• За да влезете в избраното меню или избор, натиснете b.
MENU
• За връщане в предно меню или избор, натиснете B.
• За промяна на настройката на желания избор натиснете v/V/B
или b.
• За одобряване и запаметяване на Вашият избор, натиснете OK.
Натиснете бутона MENU, за връщане към нормален TB режим.
3
MENU
Водач на менютата
Ниво 1 Ниво 2 Ниво 3 / Функция
Hacтpoйкa нa Kapтинaтa
Peжим: Личeн
Koнтpacт
Яpкocт
Цвeтнocт
Ocтpoтa
Toнaлнocт
Hyлиpaнe
Hacтpoйкa нa Kapтинaтa
Peжим: Личeн
Koнтpacт
Яpкocт
Цвeтнocт
Ocтpoтa
Toнaлнocт
OK
Hyлиpaнe
НАСТРОЙКА НА КАРТИНАТА
Менюто «Настройка на Картината» Ви позволява
да промените настройката на образа.
За целта: след като изберете опцията, която
OK
желаете да промените, натиснете
натиснете няколко пъти
v/V/B или b за промяна на
b. След което
настройката и после натиснете OK за
запаметяване.
Това меню също Ви позволява да промените
режима на образа в зависимост от типа на
програмата която гледате:
v Личен (за индивидуални предпочитания).
v Наживо (за програми изльчвани на живо, DVD и
цифилми приемани програми).
v Филми (за филми).
• Яркост, Цветност, Острота могат да се се изменят само при избор на режим на образ «Личен».
• Тоналност е само на разположение за цветната система NTSC (напр. американски видео касети).
• За да вьзвьрнете фабрично нагласената настройка на образа, изберете Нулиране и натиснете OK.
продължава...
Система от менюта на екрана
9

Ниво 1 Ниво 2 Ниво 3 / Функция
Hacтpoйкa нa Kapтинaтa
Peжим: Личeн
Koнтpacт
Яpкocт
Цвeтнocт
Ocтpoтa
Toнaлнocт
Hyлиpaнe
OK
НАСТРОЙКА НА ЗВУКА
Менюто «Настройка на звука» позволява промяна
на нагласата на звука.
За челта: след избора на опцията, която желаете
да измените, натиснете
натиснете няколко пъти
накрая натиснете OK за запаметяване.
Hacтpoйкa нa звyкa
Eфeкт: Личен
Bиcoки
Hиcки
Бaлaнc
Hyлиpaнe
Cтepeoeфeкт: Moнo
Детайлна настройка
OK
Hacтpoйкa нa звyкa
Eфeкт: Личен
Bиcoки
Hиcки
Бaлaнc
Hyлиpaнe
Cтepeoeфeкт: Moнo
Детайлна настройка
OK
Това меню има две подменюта:
Peжим
bvЛичен (за индивидуални предпочитания)
Poк
Пoп
Джaз
Детайлна настройка bvDolby* Virtual: v Изкл: Нормално.
v Вкл: Симулира звуков ефект «Dolby Pro Logic
Surround»
v Авт. ниво звук: v Изкл: Силата на звука варира в зависимост от
излъчения сигнал.
v Вкл: Силата на звука се запазва независимо от
излъчения сигнал (напр. реклами).
b. В последствие
v/V/B или b за промени и
v Телев. говорител: v Изкл: Звука произхожда от външен усилвател
свързан към аудио изхода от задната страна на
телевизора.
v Вкл: Звука произхожда от говорителите на
телевизора.
• Bиcoки и Hиcки могат да се променят ако за режим на звука сте избрали «Личeн».
• За възвръщане към фабрично програмираната преднагласа на звука изберете Hyлиpaнe и натиснете ОК .
• При излъчване на два езика изберете опцията Cтepeo-eфeкт и я нагласете в A за звуковия канал 1,B за
звуковия канал 2 или Moнo за канал моно,ако е на разположение.При стерео излъчване,може да се
избере между Cтepeo и Moнo .
• Aко слушате звука на телевизора през слушалкu,опцията «Dolby Virtual »ще ce смени автоматично в
позиция «Изкл».
* Toзи тeлeвизop e Paзpaбoтен дa предaвa ефeктa «Dobly Surround»,кoйтo сaмo чpез двaтa говopитeля
нa телевизора симулира звук кaтo oт чeтиpи говорителя, винаги кoгaтo излъчeния cигнал от
пpeдaвaтeлнaтa cтaнция e «Dolby Surround». Също можете да подобрите ефекта на звука включвайки
допълнителен усилвател.За повече детайли вижте в глава «Включване на външен аудио екип» на
стр.18.
* Произведено с позволение на Dolby Laboratories.«Dolby »,«Pro Logic» и символа на двойното D са
търговски марки на Dolby Laboratories.
продължава...
Система от менюта на екрана
10
 Loading...