

Sony KV 20VS42, KV-20VM42, KV-13VM42, KV-13VM43 User Manual

KV-13VM42/43/KV-20VM42/KV-20VS42
9-884-613-02 (1)
Operating Instructions
KV-13VM42/43
KV-20VM42
Mode d’emploi
KV-20VS42
®
Manuel de instrucciones
Trinitron Color Video/TV
US
FR
ES
G
Owner's Record
The model and serial numbers are located at the rear
of the video TV. Record these numbers in the spaces
provided below. Refer to them whenever you call
upon your Sony dealer regarding this product.
Model No. Serial No.
© 1999 Sony Corporation Printed in U.S.A.
Getting Started
1
WARNING
Precautions
To prevent fire or shock hazard, do not expose
the unit to rain or moisture.
This symbol is intended to alert the user to
the presence of uninsulated “dangerous
voltage” within the product's enclosure
that may be of sufficient magnitude to
constitute a risk of electric shock to
persons.
This symbol is intended to alert the user to
the presence of important operating and
maintenance (servicing) instructions in the
literature accompanying the product.
CAUTION
TO PREVENT ELECTRIC SHOCK, DO NOT USE THIS
POLARIZED AC PLUG WITH AN EXTENSION CORD,
RECEPTACLE OR OTHER OUTLET UNLESS THE
BLADES CAN BE FULLY INSERTED TO PREVENT
BLADE EXPOSURE.
When using TV games, computers, and similar products
with your Video/TV, keep the brightness and contrast
functions at low settings. If a fixed (non-moving) pattern
is left on the screen for long periods of time at a high
brightness or contrast setting, the image can be
permanently imprinted onto the screen. These types of
imprints are not covered by your warranty because they
are the result of misuse.
Note to CATV system installer
This reminder is provided to call the CATV system
installer's attention to Article 820-40 of the NEC that
provides guidelines for proper grounding and, in
particular, specifies that the cable ground shall be
connected to the grounding system of the building as
close to the point of cable entry as practical.
Safety
• Operate the Video/TV only on 120 V AC.
• One blade of the plug is wider than the other for safety
purposes and will fit into the power outlet only one
way. If you are unable to insert the plug fully into the
outlet, contact your dealer.
• Should any liquid or solid object fall into the cabinet,
unplug the Video/TV and have it checked by qualified
personnel before operating it any further.
• Unplug the Video/TV from the wall outlet if you are
not to going to use it for several days or more. To
disconnect the cord, pull it out by the plug. Never pull
the cord itself.
Installing
• To prevent internal heat build-up, do not block the
ventilation openings.
• Do not install the Video/TV in a hot or humid place, or
in a place subject to excessive dust or mechanical
vibration.
Cleaning
Clean the Video/TV with a soft dry cloth. Never use
strong solvents such as thinner or benzine, which might
damage the finish of the cabinet.
Transport
Keep the original carton and packing materials to use for
safety transport of your Video/TV in the future.
Information
You are cautioned that any changes or modifications not
expressly approved in this manual could void your
authority to operate this equipment.
If you have any questions or problems concerning your
Video/TV, please contact your nearest Sony dealer.
This Video/TV receiver displays closed captioning in
accordance with 15.119 of the FCC rules.
Caution
Television programs, films, video tapes and other
materials may be copyrighted. Unauthorized recording
of such material may be contrary to the provisions of the
copyright laws. Also, use of this Video/TV receiver for
other private viewing of programs broadcast on VHF or
UHF or transmitted by cable companies for the use of the
general public may require authorization from the
broadcaster/cable company and/or program owner.
Note on condensation
If the Video/TV is brought directly from a cold to a
warm location, moisture may condense inside the VCR
and cause damage to the video head and tape. When you
first install the Video/TV, or when you move it from a
cold to a warm location, wait for about one hour before
operating the Video/TV.
Getting Started
2

Contents
Getting Started
Step 1 — Preparation ................................................. 4
Checking the supplied accessories ....................... 4
Inserting batteries into the remote control .......... 4
Step 2 — Connecting the Antenna ........................... 5
Connecting an antenna........................................... 5
Connecting an antenna/cable TV system ........... 5
Step 3 — Setting Up the Video/TV Automatically
– AUTO SET UP ........................................................................... 6
Erasing and adding channels ................................ 7
Setting cable TV on or off....................................... 9
Presetting channels – AUTO PROGRAM..................... 10
Changing the menu language ............................. 11
Step 4 — Setting the Clock ...................................... 12
Setting the clock automatically ........................... 12
Setting the date and clock manually .................. 15
Step 5 — Setting Up VCR Plus+ system* ............ 16
Setting the guide channel..................................... 16
Basic Operations
Watching the TV ....................................................... 18
Switching the Video/TV on and off................... 18
Selecting TV programs ......................................... 18
Adjusting the volume ........................................... 18
Muting the sound.................................................. 18
Switching quickly between two channels ......... 18
Adjusting the picture............................................ 19
Adjusting the sound (KV-20VS42 only)............. 20
Selecting stereo or bilingual programs
(KV-20VS42 only)............................................... 21
Listening to surround sound effects
(KV-20VS42 only)............................................... 23
Displaying on-screen information ......................24
Watching a video input signal through
the line input jacks ............................................. 24
Listening with headphones ................................. 24
Playing a Tape........................................................... 25
Inserting a video cassette ..................................... 25
Ejecting a video cassette ....................................... 25
Protecting your cassette against accidental
erasure ................................................................. 25
Resetting the tape counter ................................... 25
Playing a tape ........................................................ 26
Playing a tape repeatedly – AUTO REPEAT............. 27
Displaying on-screen information ......................28
Displaying the tape counter ................................ 28
Recording TV Programs .......................................... 29
Recording TV programs....................................... 29
Recording with the TV off ................................... 29
Recording TV Programs Using the Timer.............30
Setting the timer .................................................... 30
Using the Video/TV before timer recording
starts..................................................................... 32
Checking the timer settings ................................. 33
Changing or cancelling the timer settings ......... 33
Recording using QUICK TIMER.........................34
Recording TV Programs Using VCR Plus+ system ..
35
Additional Operations
Automatically Switching the Video/TV
On or Off – ON/OFF TIMER .................................. 36
Switching Off Automatically – Sleep Timer ................. 37
Selecting the Video/TV’s Cable Box Input
Channel – CHANNEL FIX .........................................38
Displaying Caption Vision/XDS............................ 39
Blocking Out Programs – Parental Control................. 40
Activating the Parental Control feature............. 40
Selecting custom ratings in U.S.A....................... 43
Selecting custom ratings in Canada....................46
Changing the password ....................................... 47
If you have forgotten your password................. 48
What the Ratings Mean ........................................... 49
Ratings in U.S.A. ................................................... 49
Ratings in Canada ................................................. 50
Setting Your Favorite Channels – FAVORITE
CHANNEL ................................................................................. 52
Searching Using the Index Function...................... 54
Playing back to the beginning of each
program – Index Scan....................................................... 54
Locating the desired program – Index Search ......... 54
Enhancing Video Picture Quality........................... 55
Adjusting the tracking automatically................. 55
Adjusting the tracking manually ........................ 55
Reducing the Picture Noise..................................... 56
Connecting Optional Equipment ........................... 57
Watching the picture input from optional
equipment ........................................................... 57
Additional Information
Troubleshooting........................................................ 58
Specifications............................................................. 60
Index to Parts and Controls .................................... 61
Video/TV set—front............................................. 61
Remote control....................................................... 62
* VCR Plus+ and PlusCode are registered trademarks of
Gemstar Development Corporation.
The VCR Plus+ system is manufactured under license from
Gemstar Development Corporation.
The instructions in this manual are for models
KV-13VM42, KV-13VM43, KV-20VM42, and KV20VS42. Before you begin to read this manual,
refer to the model number located on the rear of
your Video/TV. Model KV-20VS42 is used for
illustration purposes throughout this manual.
Any differences in operation are indicated in the
text, for example, “KV-20VS42 only.”
Getting Started
US
3
Getting Started
Step 1 — Preparation
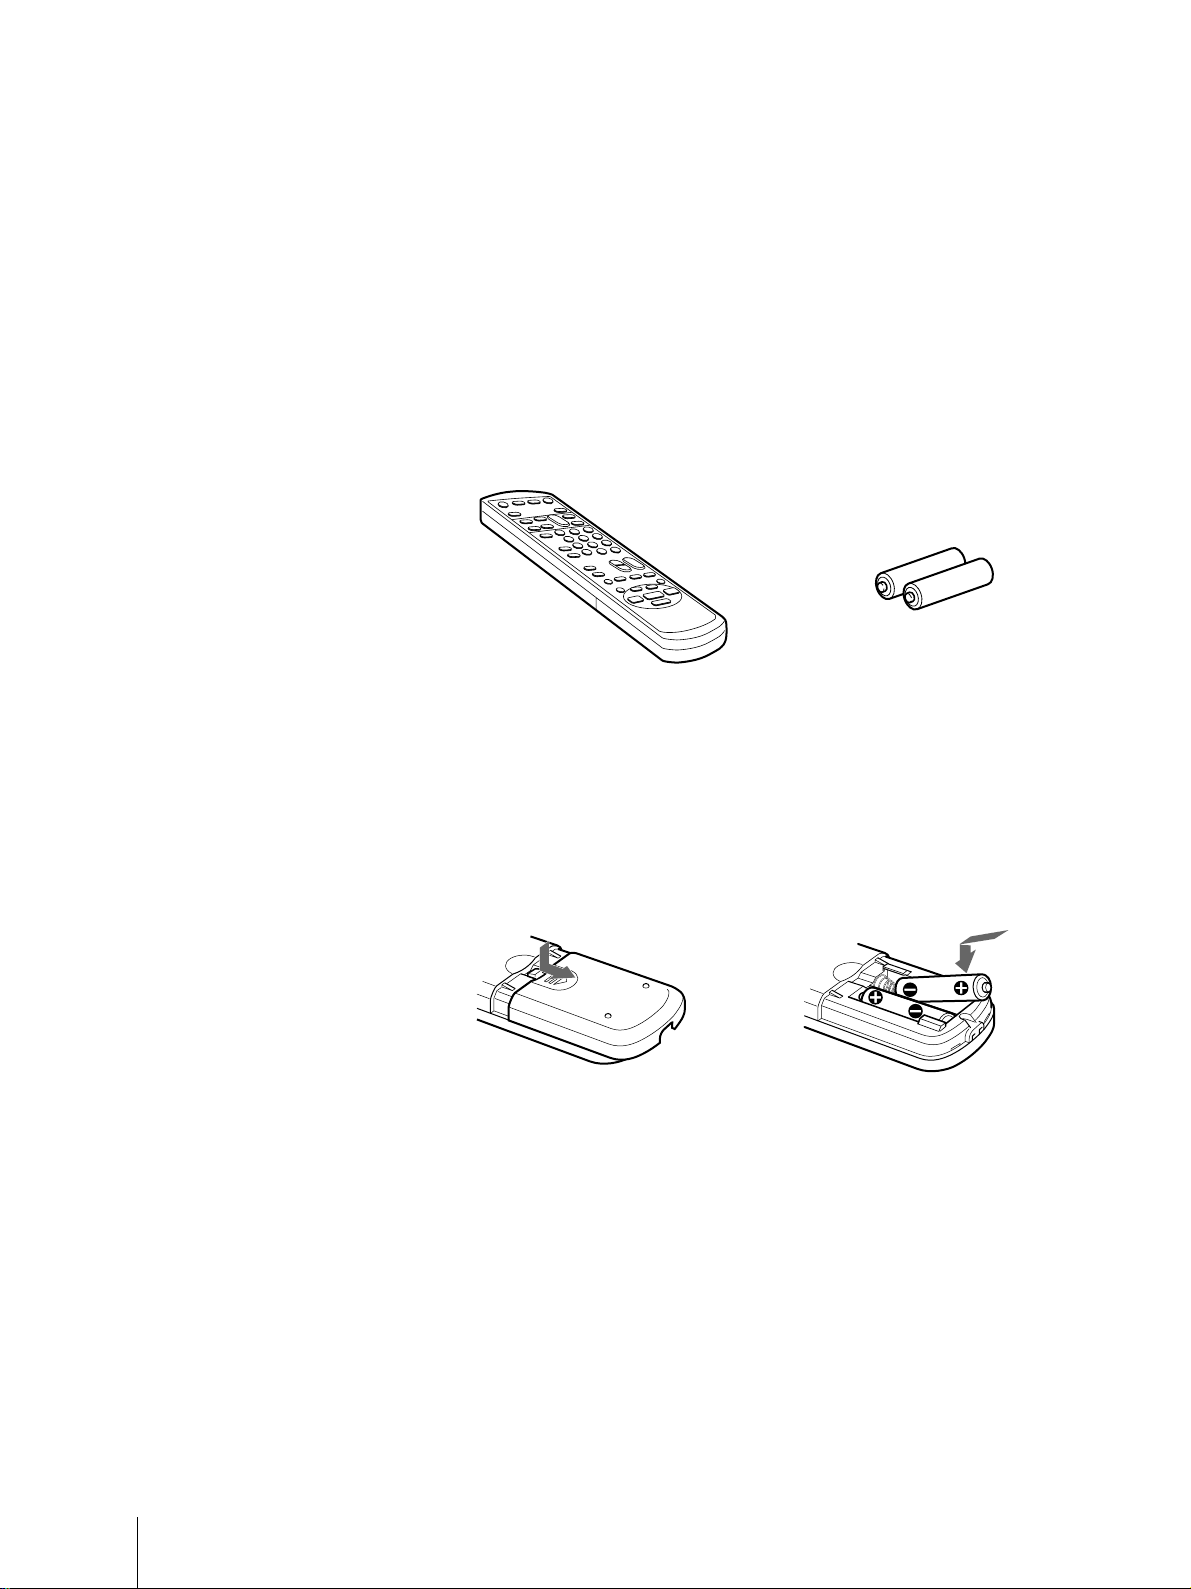
Checking the supplied accessories
When you have taken everything out of the carton, check that you have
these items:
• Remote control
• Two size AA (R6) batteries
Inserting the batteries
Insert two size AA (R6) batteries by
matching the + and – on the
batteries to the diagram inside the
battery compartment.
Insert the negative (–) end first, then
push in and down until the positive
(+) end clicks into position.
Notes
• With normal use, the batteries
should last about three to six
months.
• If you do not use the remote
control for an extended period of
time, remove the betteries to avoid
possible damage from battery
leakage.
• Do not use a new battery with an
old one.
• Do not use different types of
batteries.
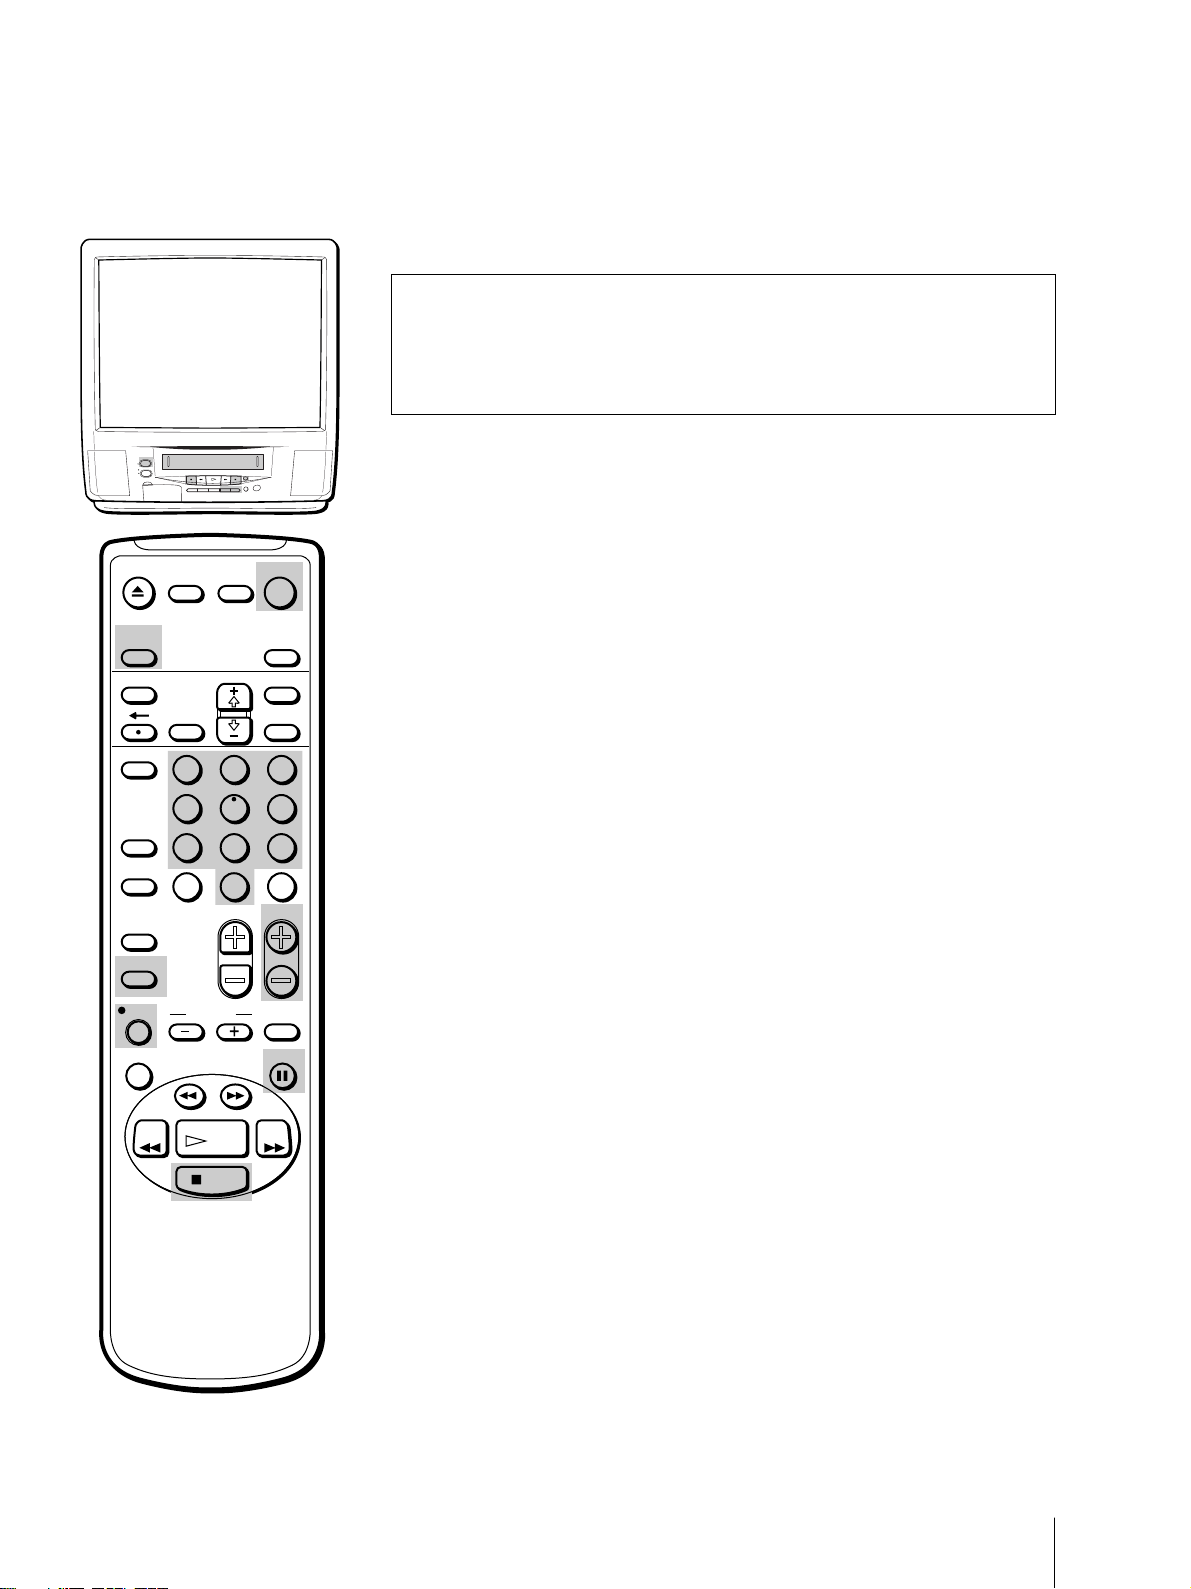
Inserting batteries into the remote
control
Turn the remote control
over, and remove the cover.
Check the polarities and insert the
two size AA (R6) batteries correctly.
Getting Started
4

Step 2 — Connecting the Antenna
Although you can use either an indoor or outdoor antenna with your
Video/TV, we recommend connecting an outdoor antenna or a cable TV
system for better picture quality.
Connecting an antenna
Connect your antenna cable to the VHF/UHF antenna terminal. If you
cannot connect your antenna cable directly to the terminal, follow the
instructions that match your cable type.
A
75-ohm coaxial
cable
(Rear of Video/TV)
VHF/UHF
B
300-ohm
twin lead cable
C
Coaxial cable and
twin lead cable
Antenna connector
(not supplied)
EAC-66 U/V mixer
(not supplied)
(Rear of Video/TV)
VHF/UHF
(Rear of Video/TV)
VHF/UHF
Connecting an antenna/cable TV
system
Connecting a single cable to the antenna
Connect the cable directly to the antenna.
(Rear of Video/TV)
VHF/UHF
Notes
• Most VHF/UHF combination
antennas have a signal splitter.
Remove the splitter before
attaching the appropriate
connector.
• If you use the U/V mixer, snow
and noise may appear in the
picture when viewing cable TV
channels over 37 (W+1).
• The cable box is supplied by the
cable company.
Connecting to a cable box
Some pay cable TV systems use scrambled or encoded signals that require
a cable box to view all channels.
If you control all channel selection through your cable box, you should
consider using the CHANNEL FIX feature (see “Selecting the Video/TV’s
Cable Box Input Channel – CHANNEL FIX” on page 38.)
(Rear of Video/TV)
VHF/UHF
Getting Started
5
Step 3 — Setting Up the Video/TV
Automatically –
You can set up your Video/TV easily by using the AUTO SET UP feature.
To set up each item individually, see “Changing the menu language”
(page 11), “Setting cable TV on or off” (page 9), and “Presetting channels –
AUTO PROGRAM” (page 10).
Before you begin
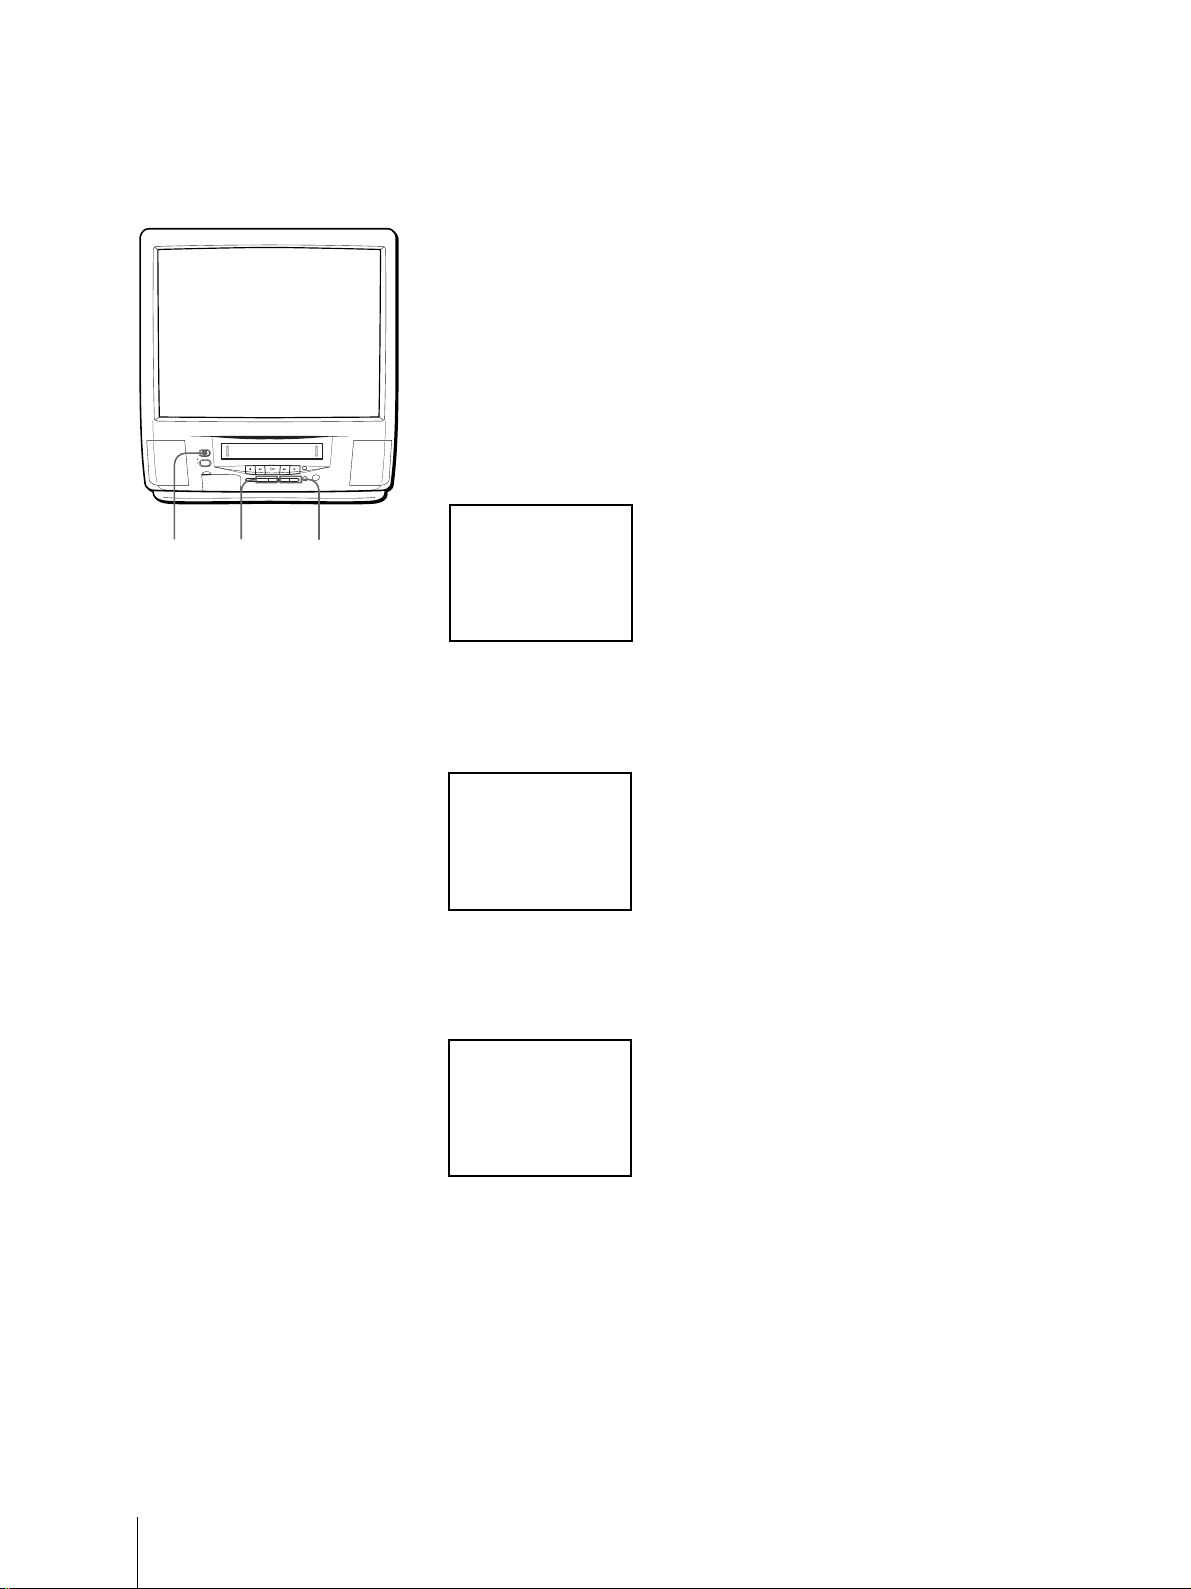
• Connect the antenna or cable to the Video/TV.
POWER
STANDBY
EJECT
REC
TIMER REC
INPUT
– VOL + – CHANNEL +
SELEECT
POWER VOL +/– CHANNEL +/–
1 Press POWER to turn the Video/TV on.
ENGLISH : [CH+
~
ESPANOL : [CH–
FRANÇAIS : [VOL+
AUTO SET UP : [VOL–
First please connect
the antenna
Press [INPUT SELECT
to exit
2 Select the on-screen menu language.
If you prefer Spanish or French to English, you can change the on-screen
menu language by pressing CHANNEL – for Spanish or VOL + for
French.
AUTO SET UP
]
]
]
]
]
To reset the factory settings
Press POWER on the Video/TV
while pressing RESET on the remote
control.
ENGLISH : [CH+
~
ESPANOL : [CH–
FRANÇAIS : [VOL+
AUTO SET UP : [VOL–
Primero conecte la
antenna
Oprima [INPUT SELECT
para sal i r
]
]
]
]
]
All of the on-screen menus are set to the factory preset condition in the
selected language.
3 Press VOL – to start AUTO SET UP.
AU TO PROGRAM
“AUTO PROGRAM” appears on the screen and the Video/TV starts
scanning and presetting channels automatically. When all receivable
channels are stored, “AUTO PROGRAM” disappears and the lowest
numbered channel is displayed.
To exit AUTO SET UP
Getting Started
6
Press INPUT SELECT.
EJECT
INPUT
SELECT
MUTING DISPLAY
POWER
TV
SLEEP
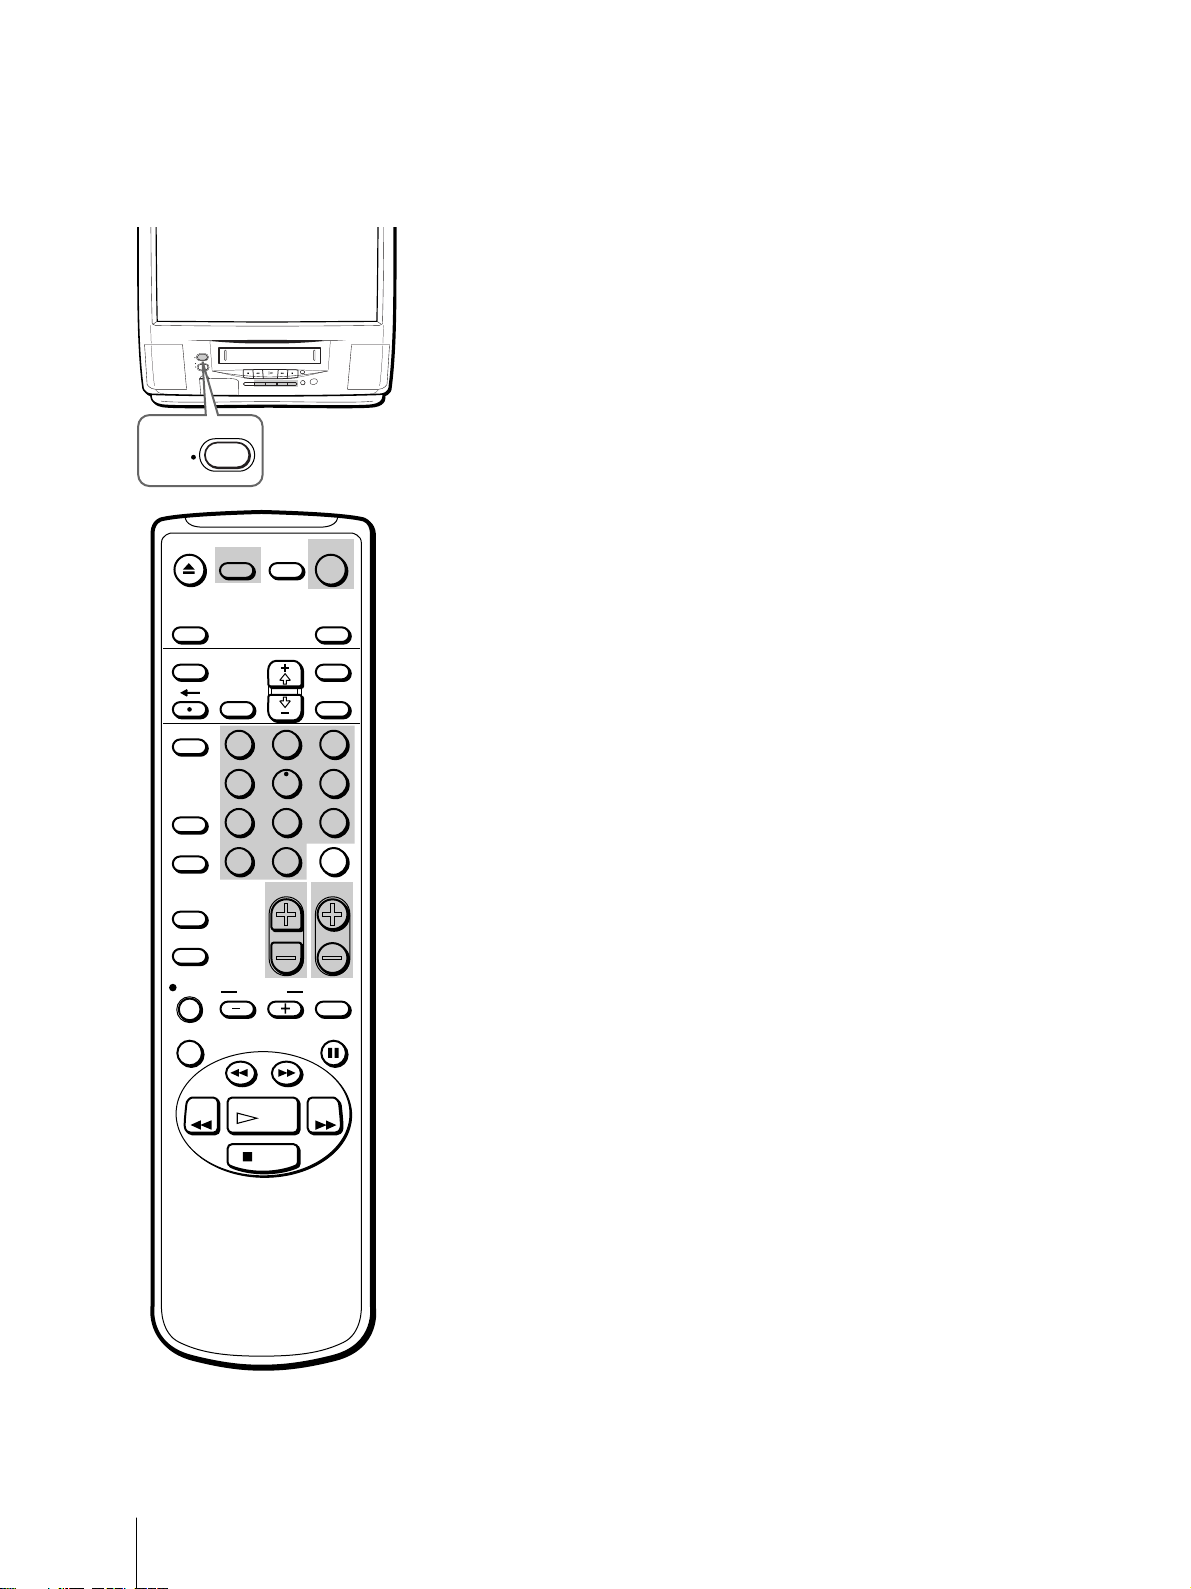
Erasing and adding channels
After AUTO SET UP, you can erase unnecessary channels or add more
channels.
TIMER ON SCREEN
VCR Plus
COUNTER/
REMAIN
COUNTER
RESET
INDEX
TAPE SPEED
REC
X2 PAUSE
REW FF
2
1
5
4
7
8
JUMP ENTER
0
&7
SLOW
SEARCH
PLAY
STOP
MENU
SELECTRESET
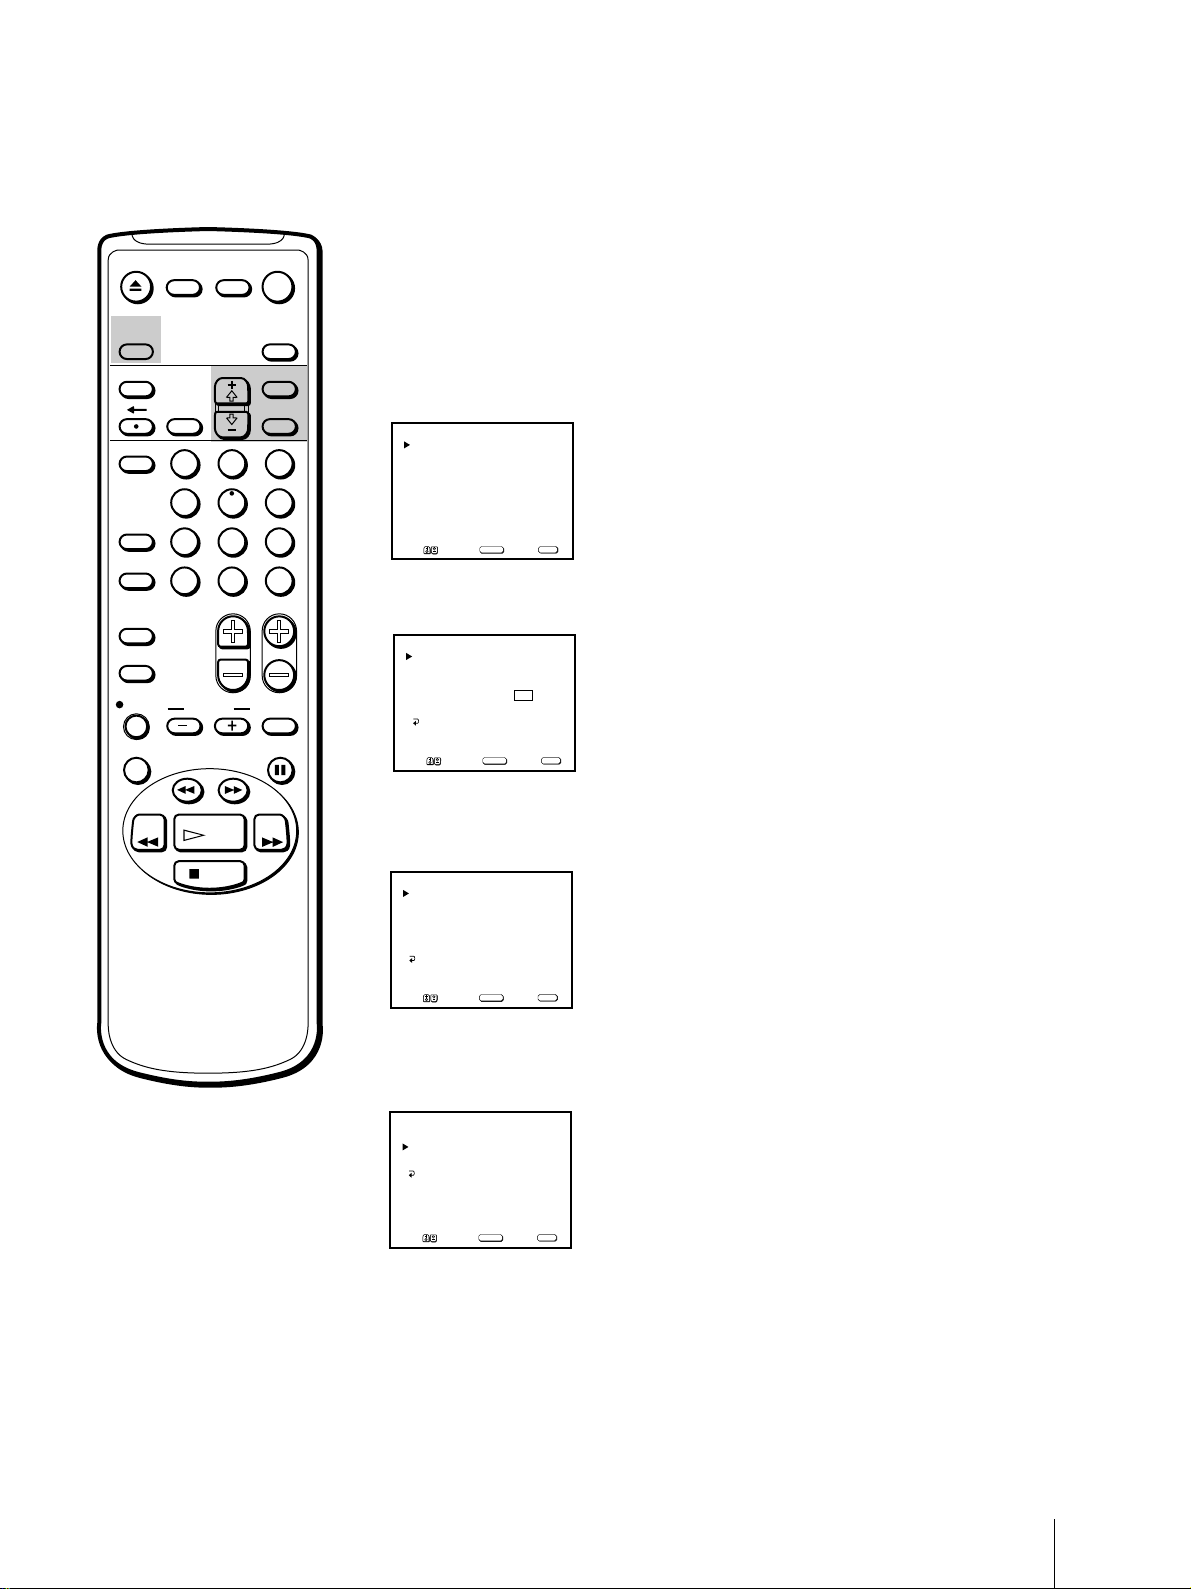
1 Press MENU to display the main menu.
The main menu appears.
V IDEO
3
6
9
AUDIO
TIMER
TAPE
SET UP
Move Select Exit
SELECT
MENU
2 Move the cursor (z) to “SET UP” with + ◊ or – √ and press SELECT.
CHVOL
The SET UP menu appears.
SET UP
CHANNEL SET UP
PARENTAL CONTROL
FAVORITE CHANNEL
CAPTION VISION: CC 1
LANGUAGE: ENGLISH
MENU
MENU
Move Select Exit
SELECT
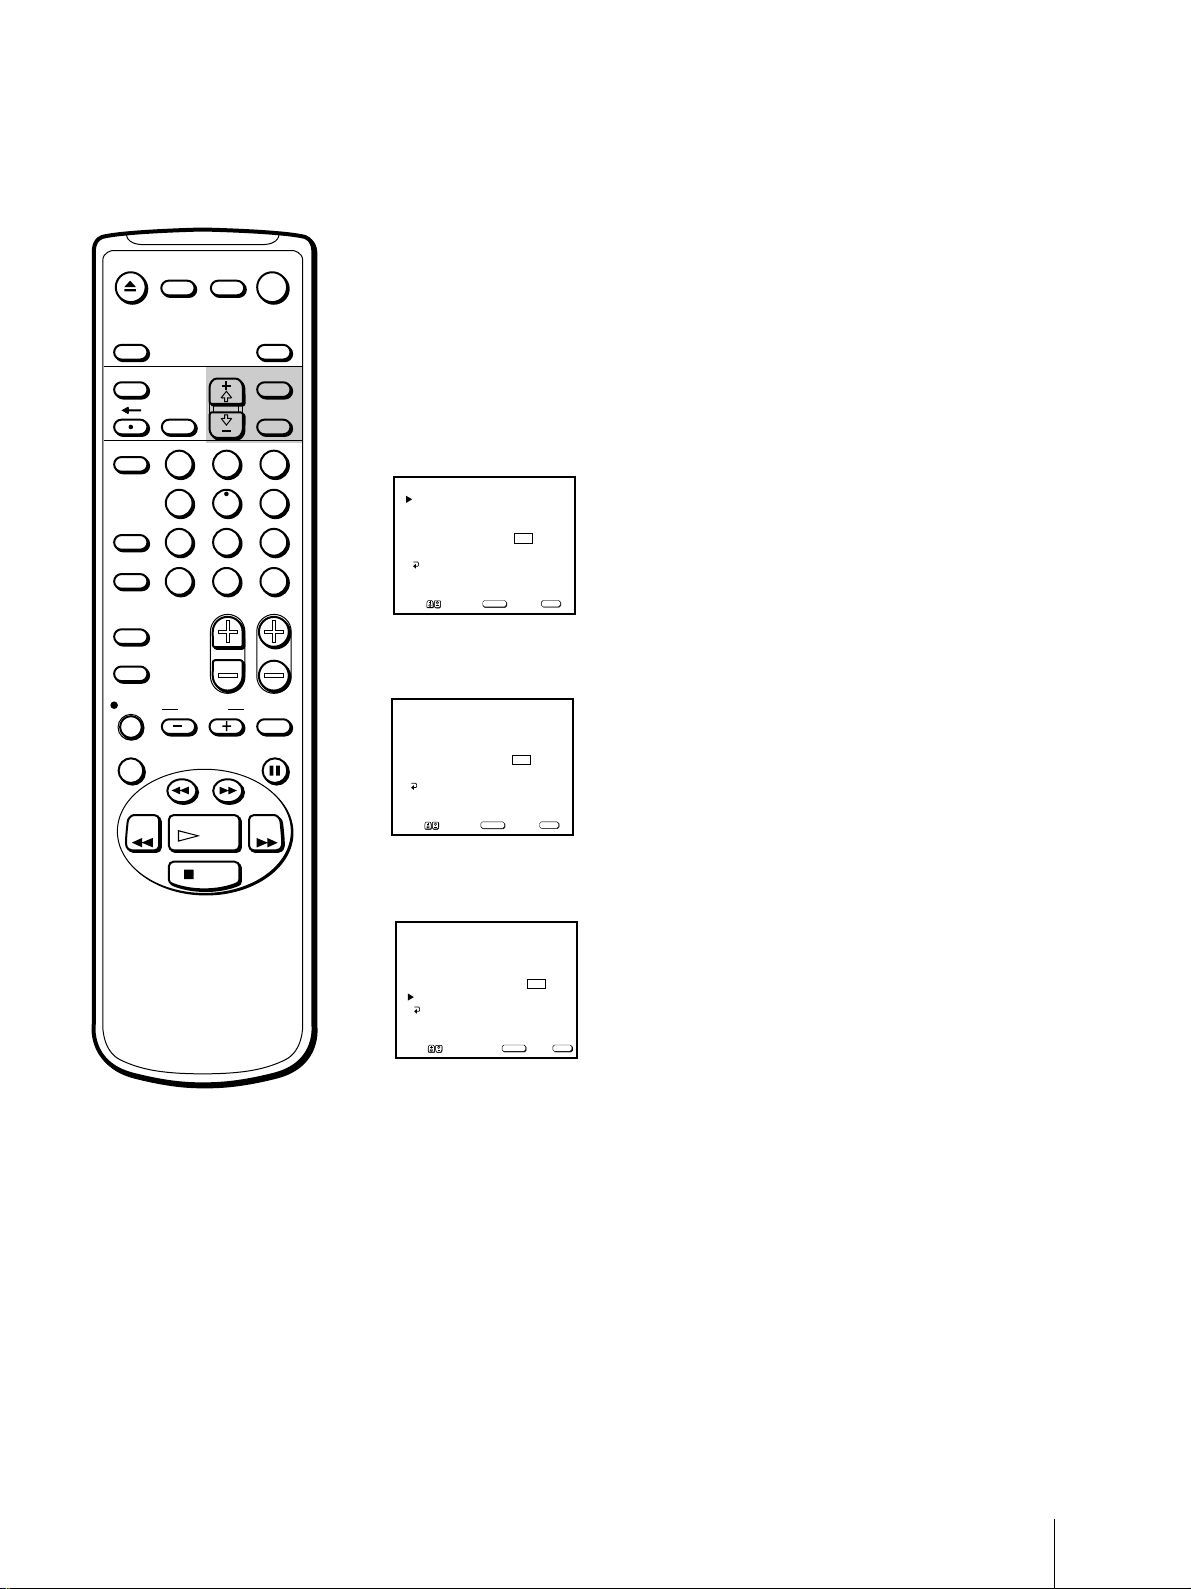
3 Move the cursor (z) to “CHANNEL SET UP” with + ◊ or – √ and press
SELECT.
The CHANNEL SET UP menu appears.
CHANNEL SET UP
CABLE: OFF
CHANNEL FIX: OFF
AUTO PROGRAM
CHANNEL SKIP/ADD
VCR P l u s+ SET UP
MENU
Note
If CHANNEL SKIP/ADD appears
in black, the Video/TV is set to
receive a video input signal through
the input jacks and you cannot select
CHANNEL SKIP/ADD. Press
INPUT SELECT so that a channel
number appears on the screen.
MENU
Move Select Exit
SELECT
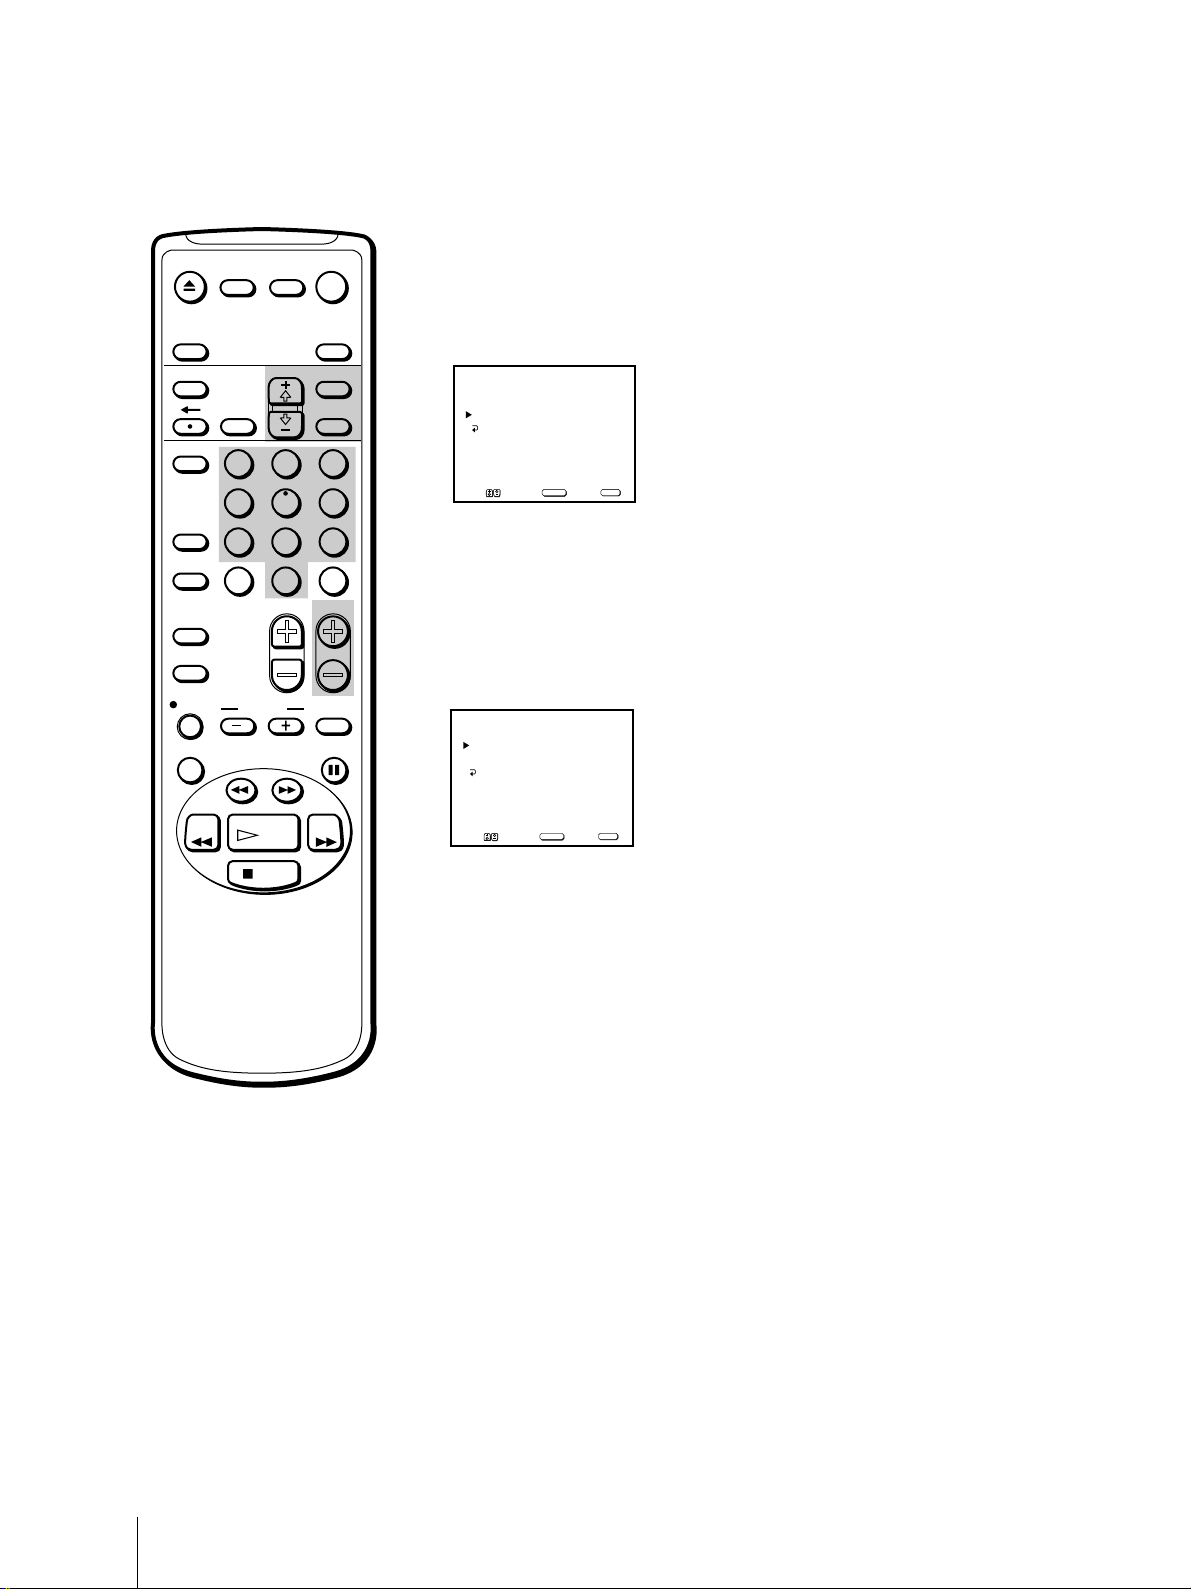
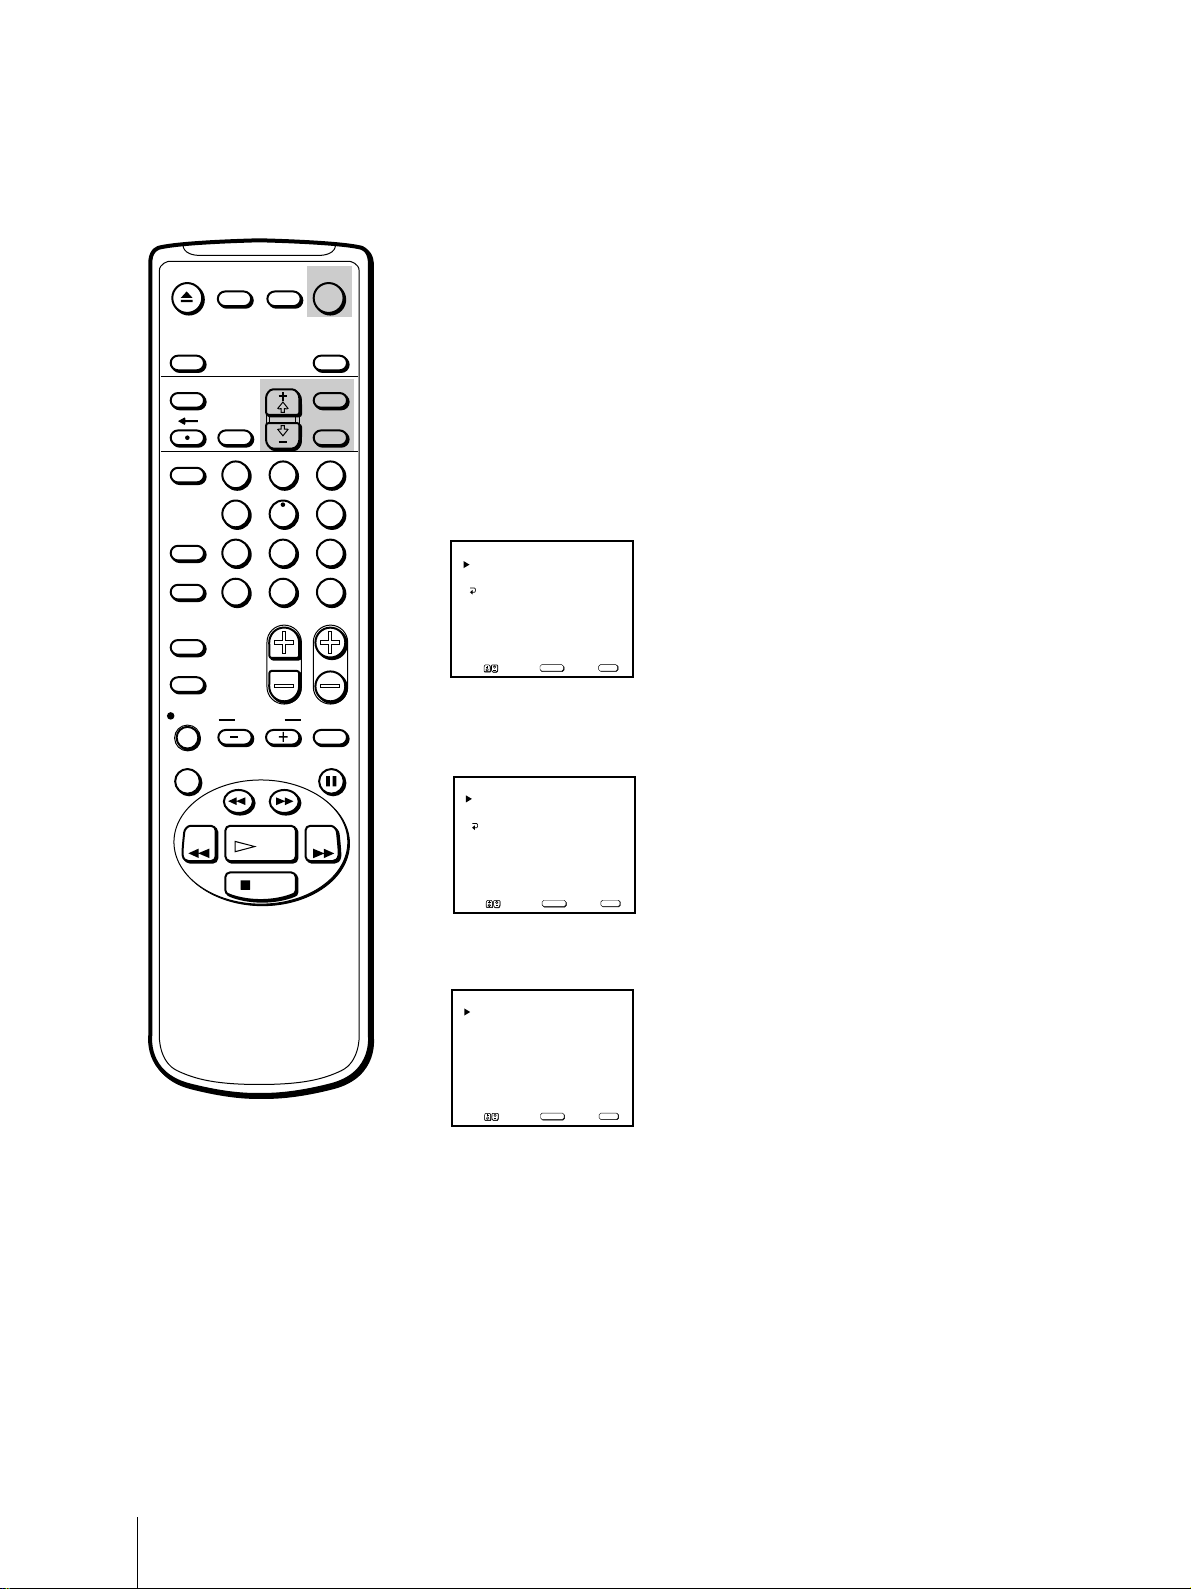
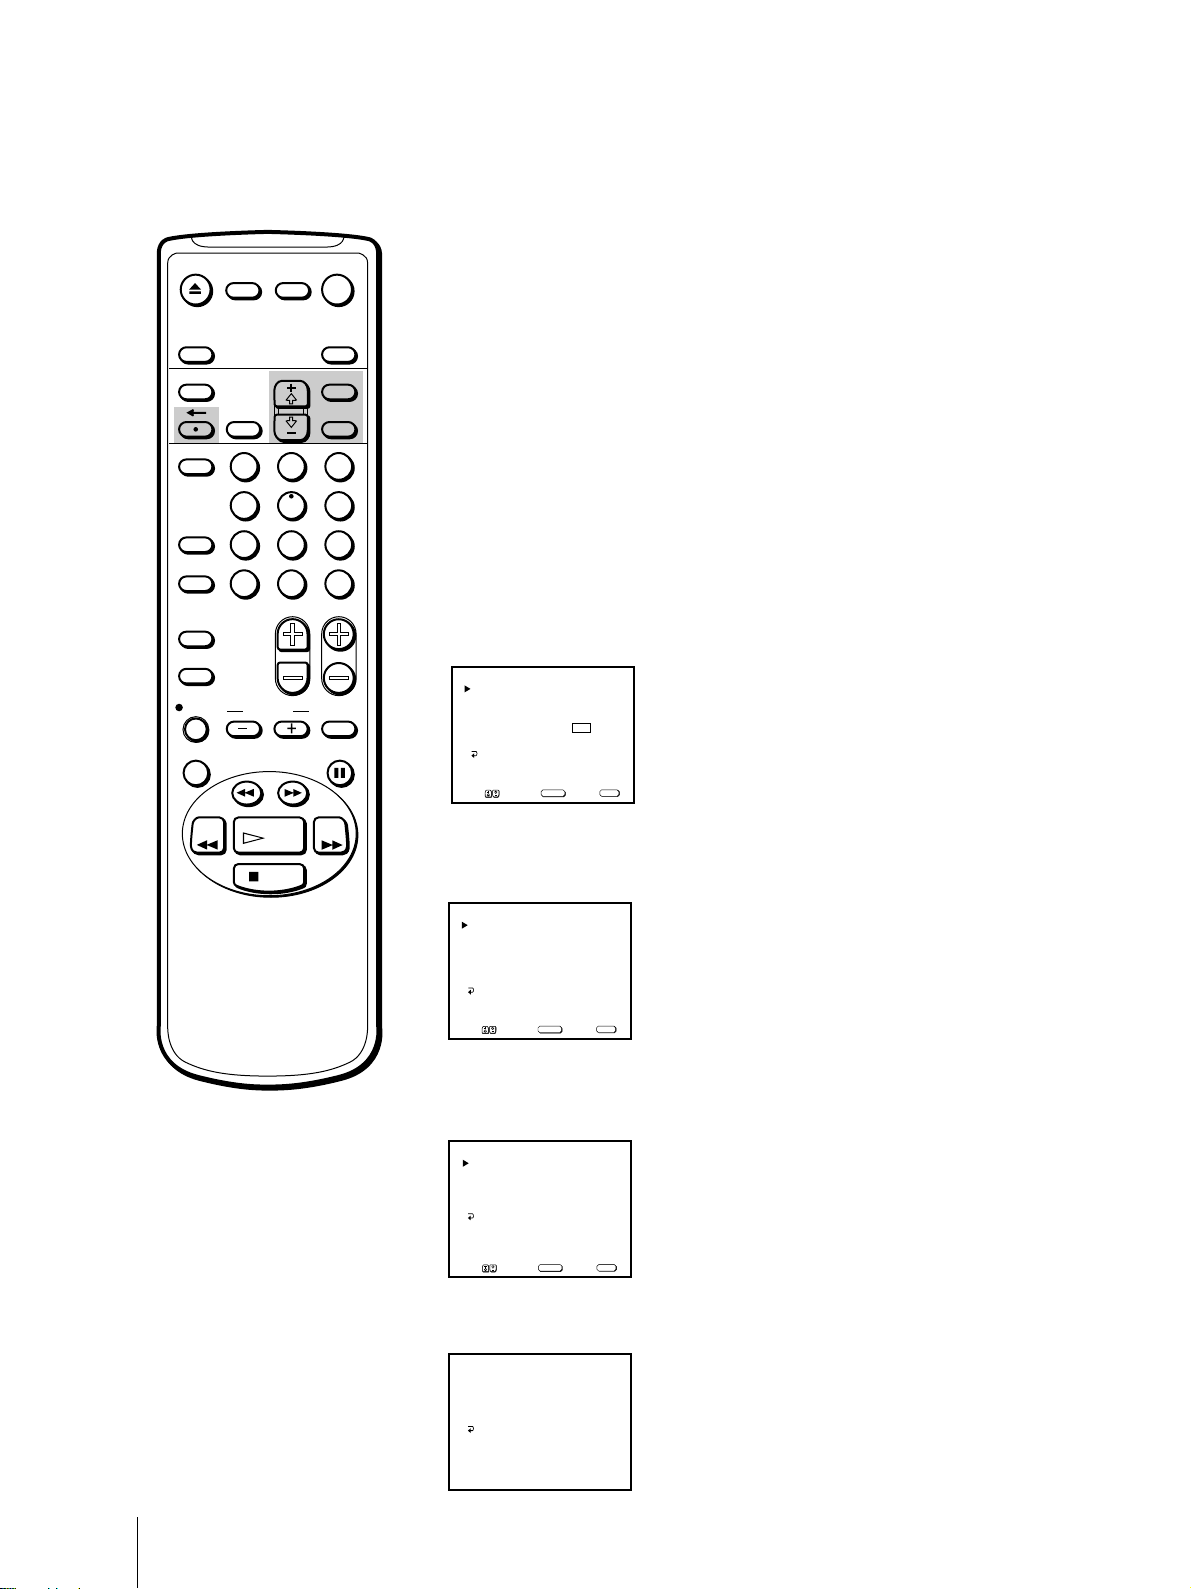
4 Move the cursor (z) to “CHANNEL SKIP/ADD” with + ◊ or – √ and
press SELECT.
The CHANNEL SKIP/ADD menu appears.
CHANNEL SKIP/ADD
SKIP
ADD
MENU
]or[
Use[0–9
to select the channel
Move Select Exit
CH+/–
SELECT
2
]
MENU
Getting Started
7
EJECT
MUTING DISPLAY
INPUT
SELECT
TIMER ON SCREEN
VCR Plus
COUNTER/
REMAIN
COUNTER
RESET
INDEX
TAPE SPEED
REC
X2 PAUSE
REW FF
2
1
5
4
7
8
JUMP ENTER
0
&7
SLOW
SEARCH
PLAY
POWER
TV
SLEEP
MENU
SELECTRESET
3
6
9
CHVOL
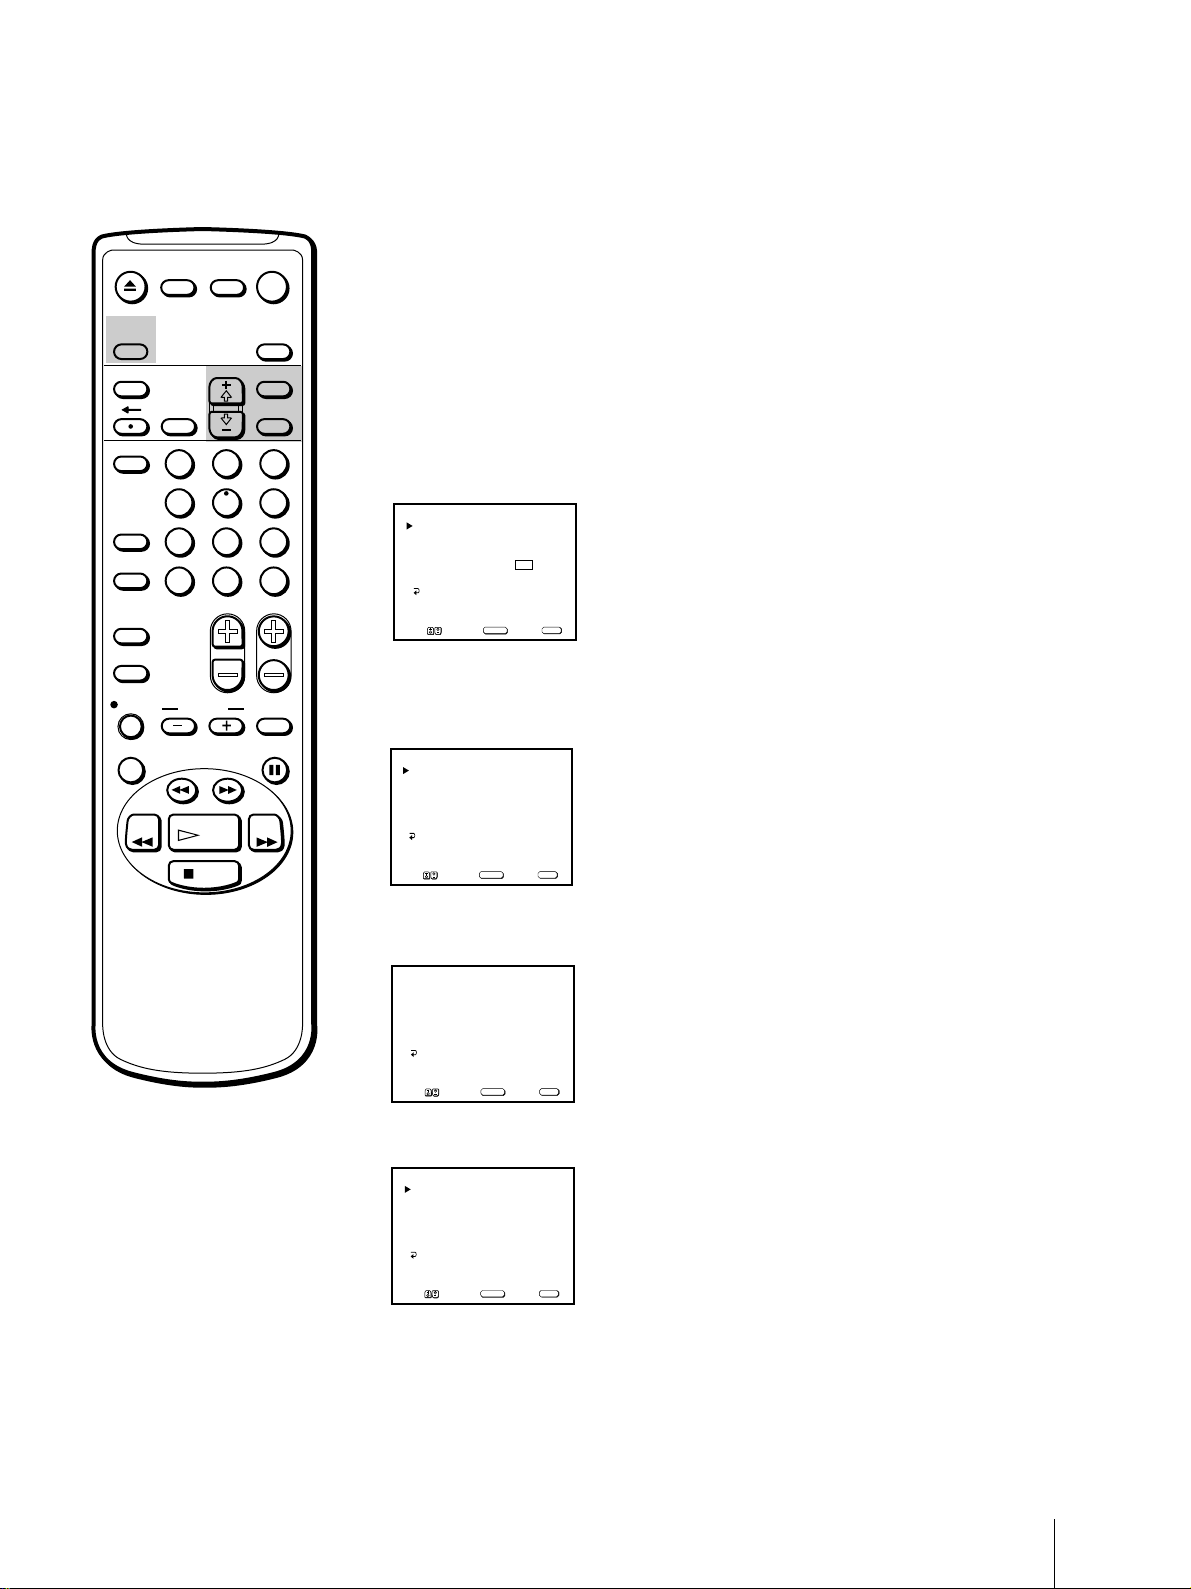
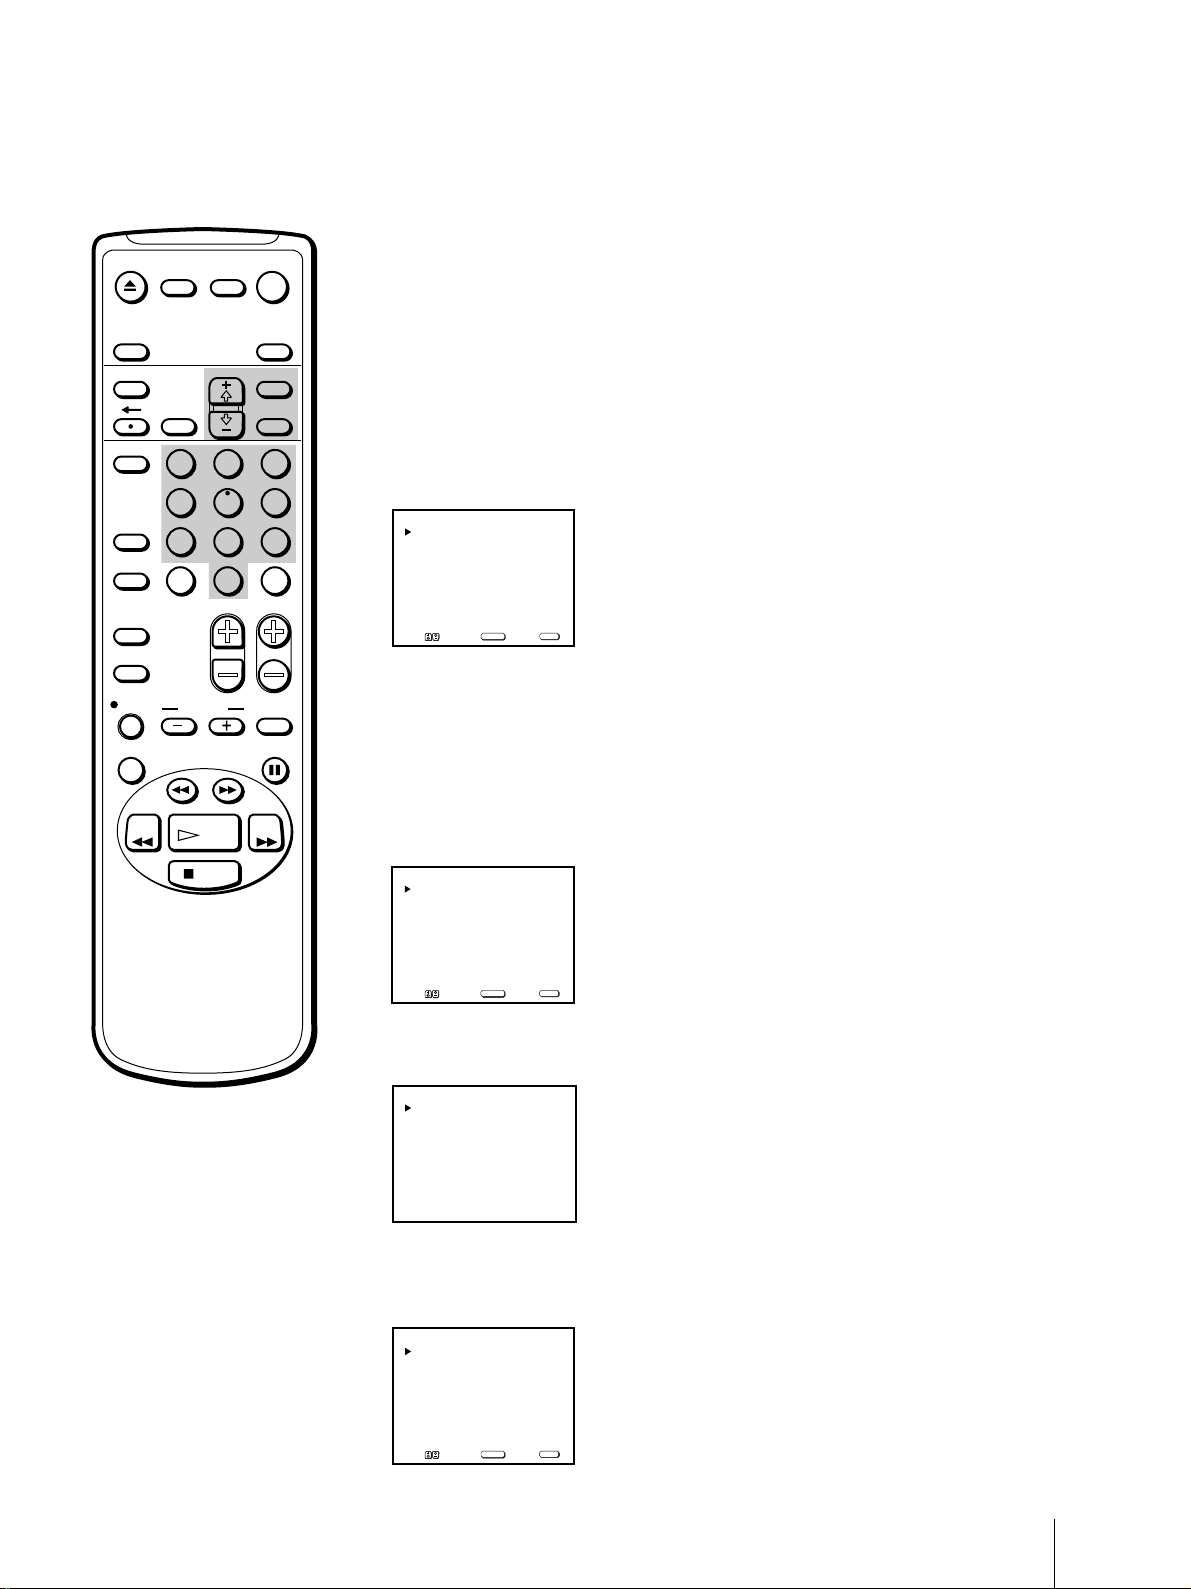
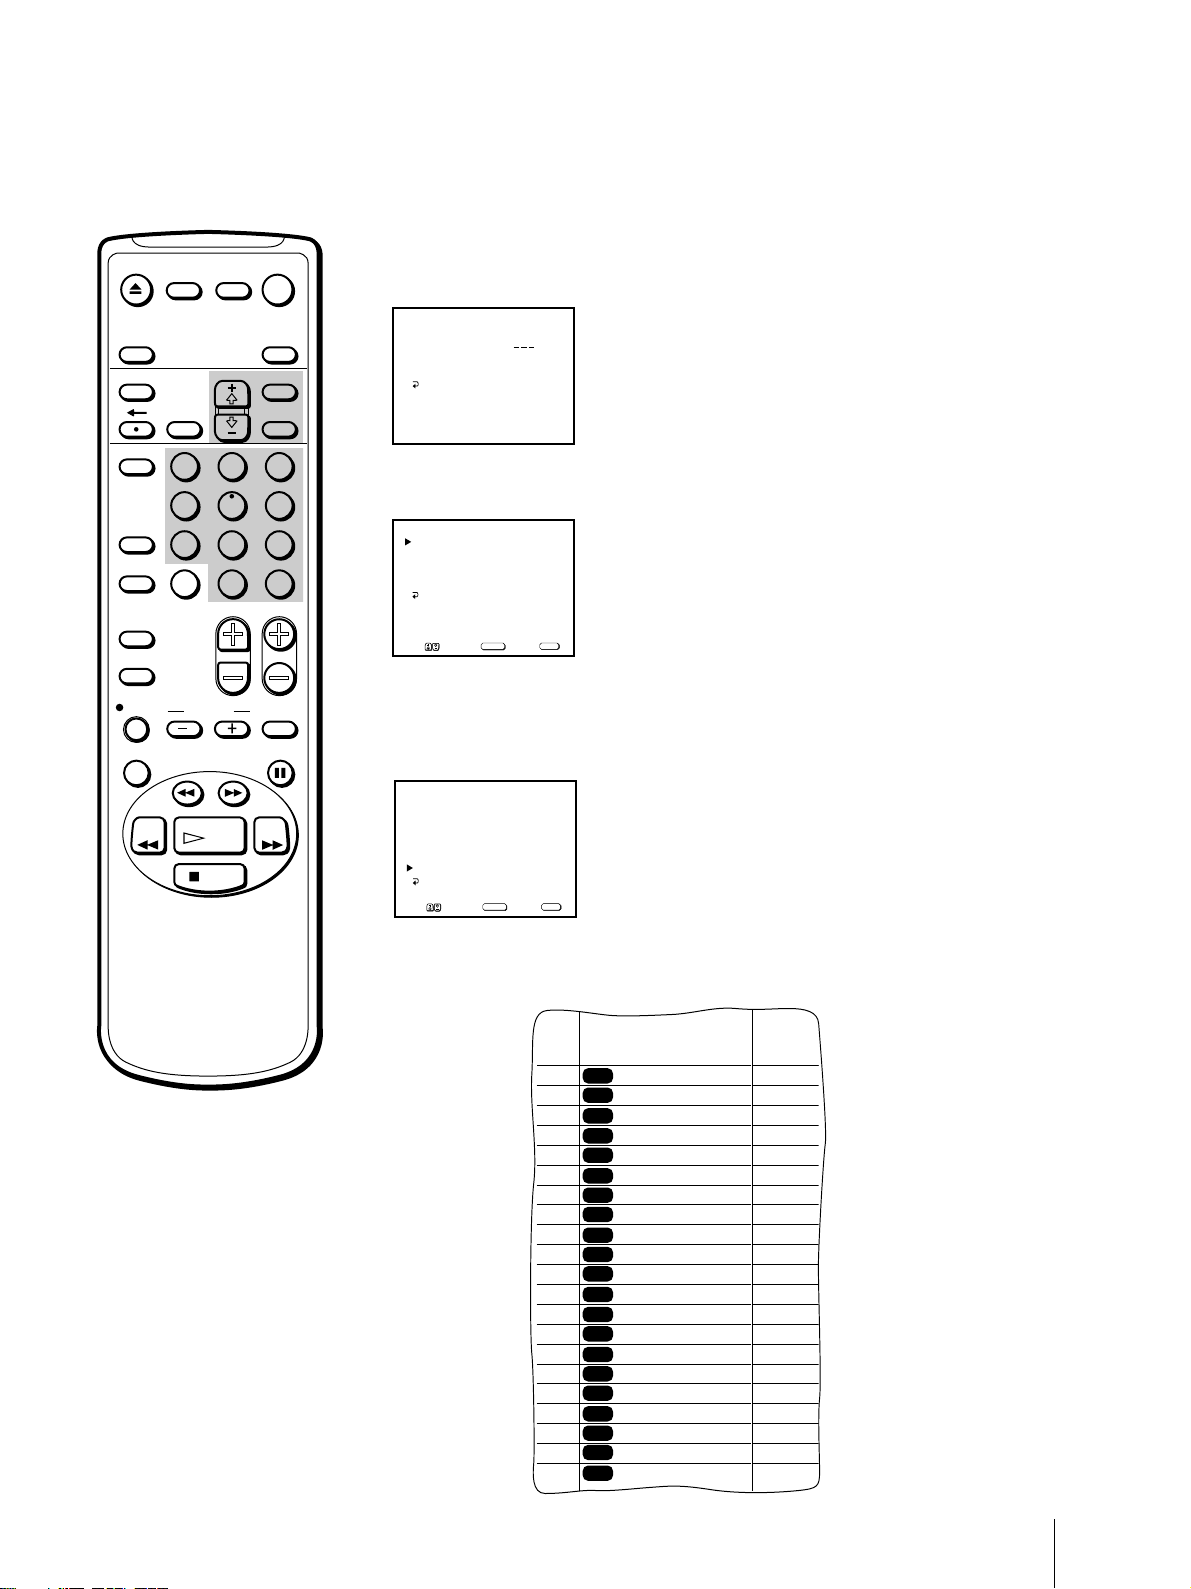
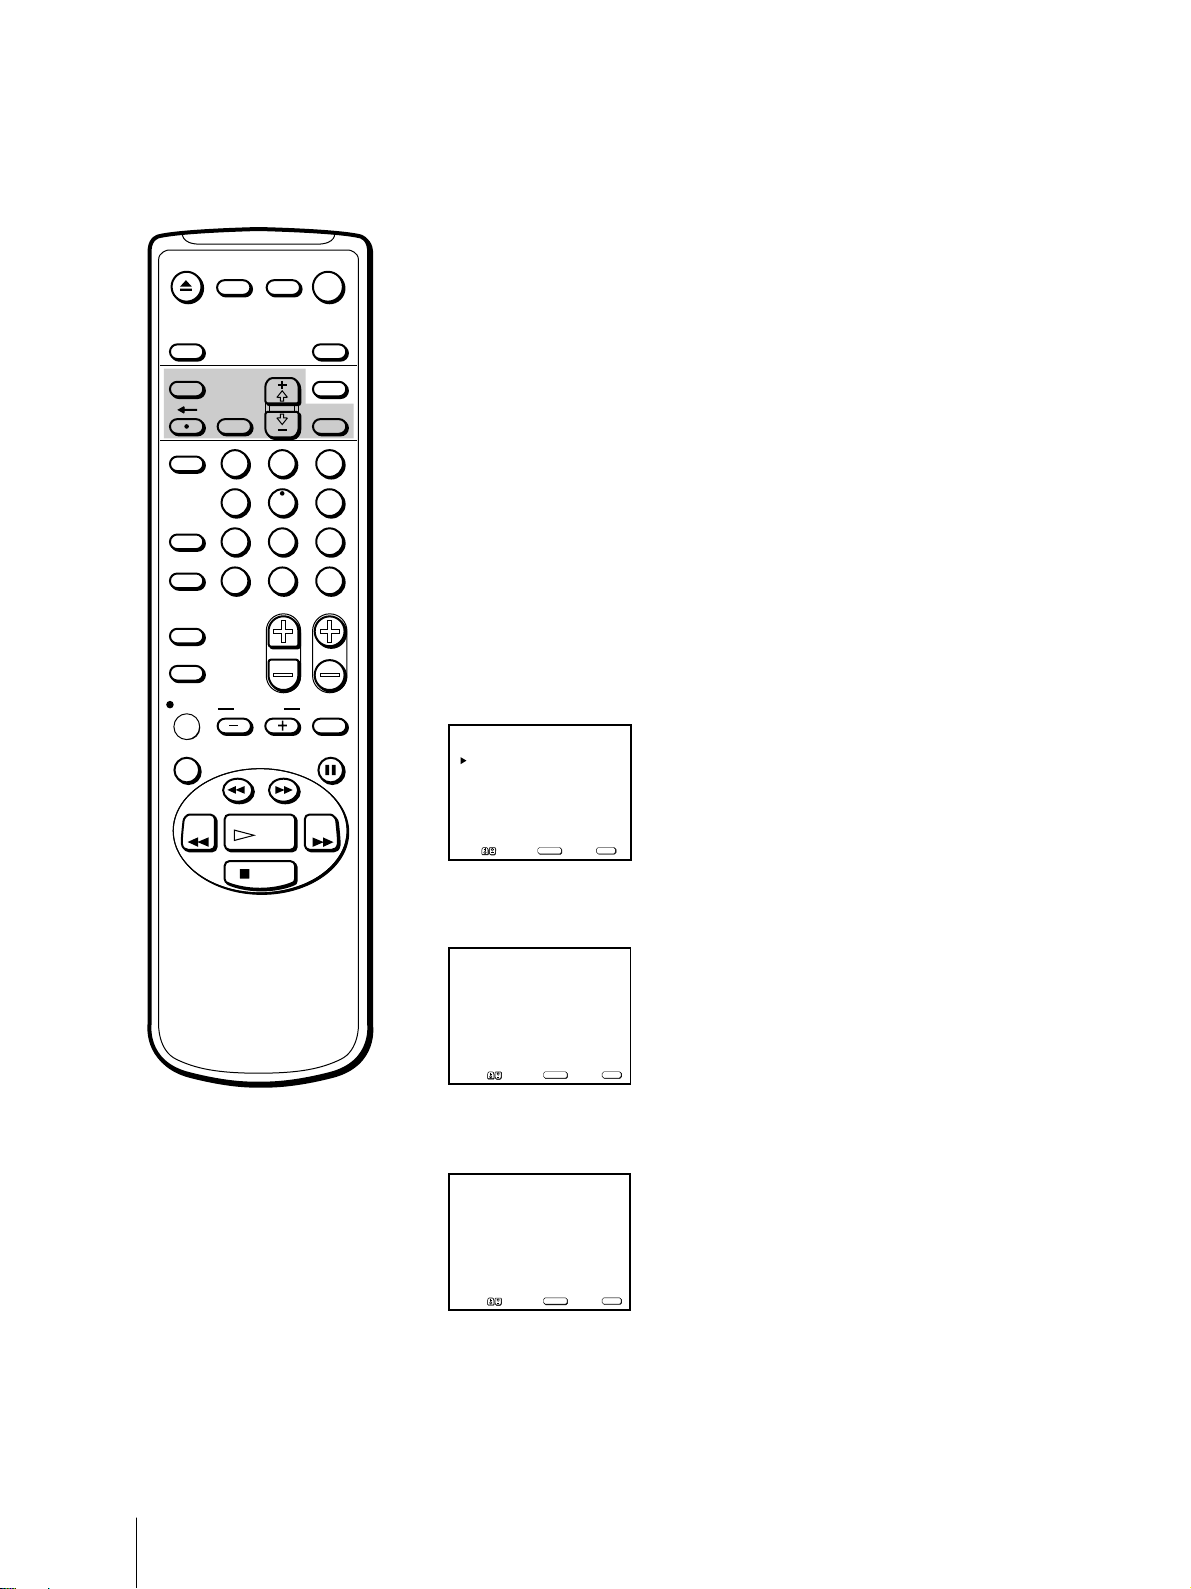
5 Erase and/or add channels:
To erase an unwanted channel
(1) Make sure the cursor (z) is beside SKIP.
(2) Press CH +/– or the 0 - 9 buttons to select the channel you want to
erase and press SELECT.
CHANNEL SKIP/ADD
SKIP
ADD
MENU
]or[
Use[0–9
to select the channel
Move Select Exit
CH+/–
SELECT
The message “Channel will be skipped” appears for several seconds and
the cursor (z) moves to ADD.
To add a channel
(1) Make sure the cursor (z) is beside ADD.
(2) Press CH+/– or the 0 - 9 buttons to select the channel you want to add
and press SELECT.
CHANNEL SKIP/ADD
SKIP
ADD
MENU
]or[
Use[0–9
to select the channel
Move Select Exit
CH+/–
SELECT
3
]
MENU
3
]
MENU
STOP
The message “Channel will be added” appears and the cursor (z) moves
to SKIP.
6 To erase and/or add other channels, repeat step 5.
7 Press MENU to return to the original screen.
Getting Started
8
EJECT
MUTING DISPLAY
INPUT
SELECT
TIMER ON SCREEN
POWER
TV
SLEEP
MENU
SELECTRESET
Setting cable TV on or off
If you have connected the Video/TV to a cable TV system, set CABLE to
ON (the factory setting). If not, set CABLE to OFF to watch VHF or UHF
channels.
1 Press MENU to display the main menu.
VCR Plus
COUNTER/
REMAIN
COUNTER
RESET
INDEX
TAPE SPEED
REC
X2 PAUSE
REW FF
2
1
5
4
7
8
JUMP ENTER
0
&7
SLOW
SEARCH
PLAY
STOP
3
6
9
CHVOL
2 Move the cursor (z) to “SET UP” with + ◊ or – √ and press SELECT.
The SET UP menu appears.
SET UP
CHANNEL SET UP
PARENTAL CONTROL
FAVORITE CHANNEL
CAPTION VISION: CC 1
LANGUAGE: ENGLISH
MENU
MENU
Move Select Exit
SELECT
3 Move the cursor (z) to “CHANNEL SET UP” with + ◊ or – √ and press
SELECT.
The CHANNEL SET UP menu appears.
CHANNEL SET UP
CABLE: OFF
CHANNEL FIX: OFF
AUTO PROGRAM
CHANNEL SKIP/ADD
VCR P l u s+ SET UP
MENU
Move Select Exit
SELECT
MENU
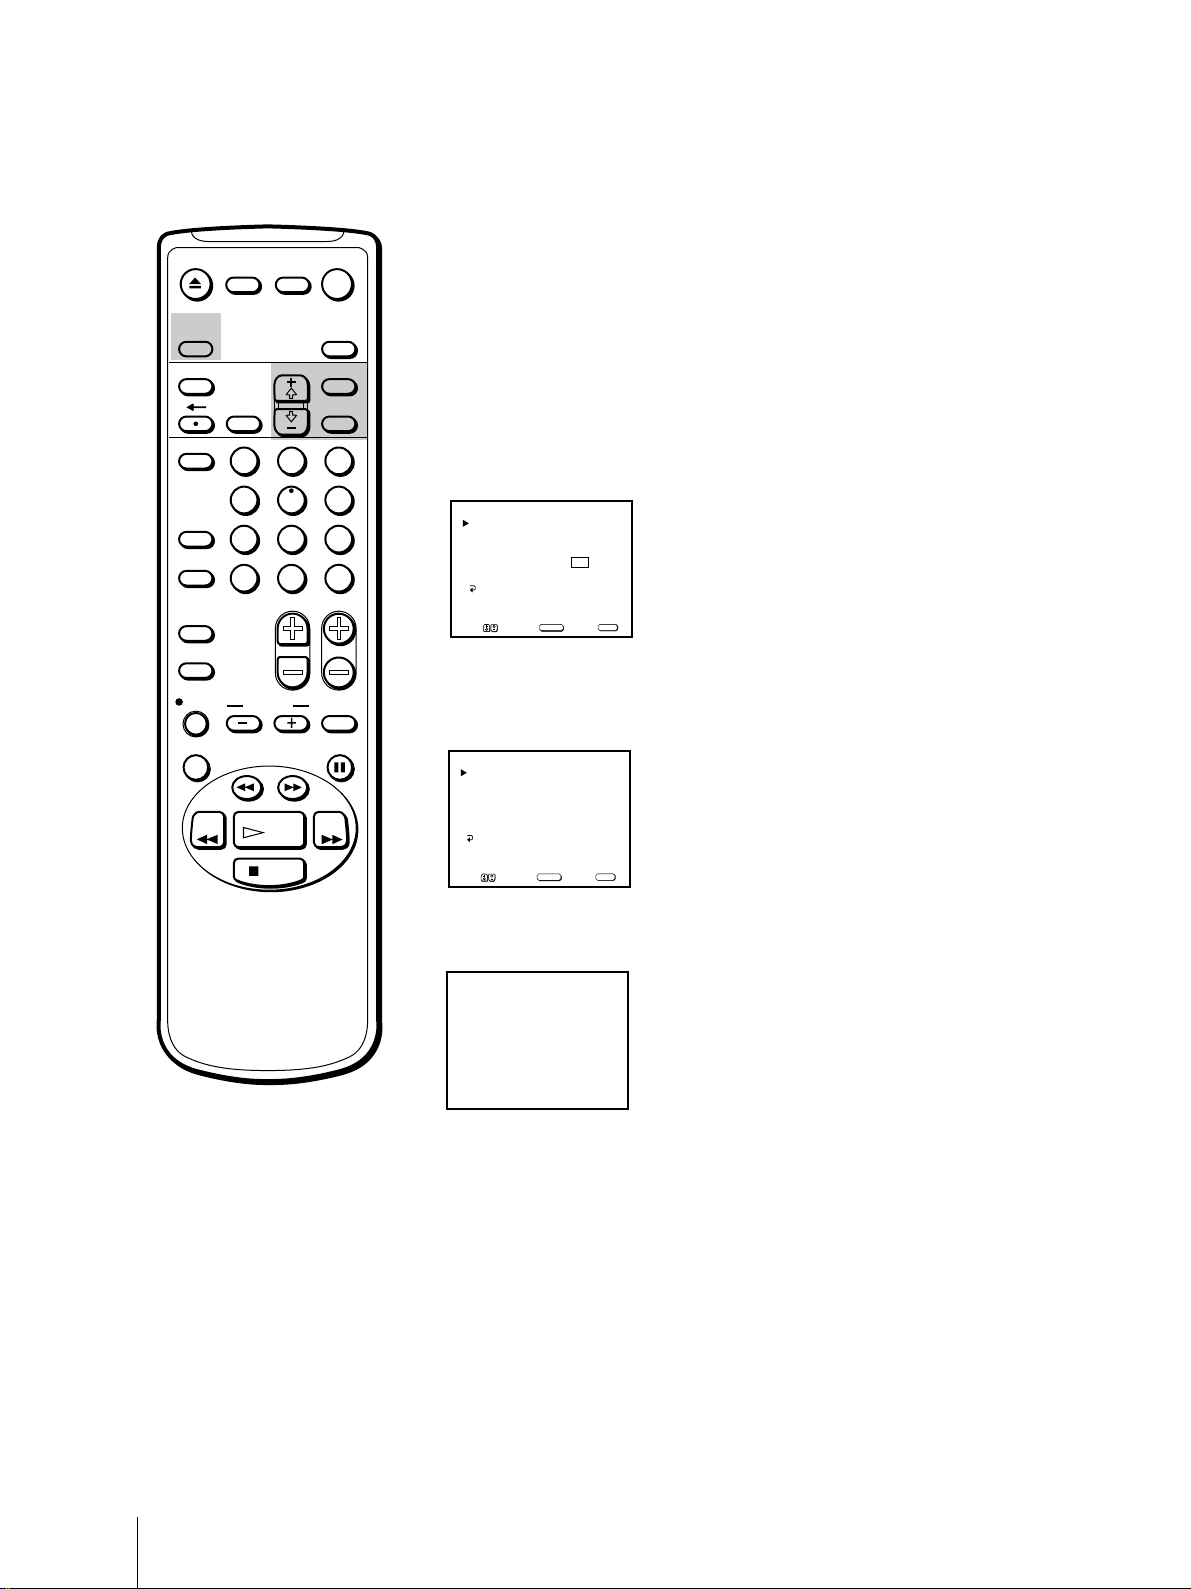
4 Move the cursor (z) to “CABLE” with + ◊ or – √ and press SELECT.
The selected position turns red.
CHANNEL SET UP
CABLE: OFF
CHANNEL FIX: OFF
AUTO PROGRAM
CHANNEL SKIP/ADD
VCR P l u s + SET UP
MENU
Note
If CABLE appears in black, the
Video/TV is set to receive a video
input signal through the input jacks
and you cannot select CABLE. Press
INPUT SELECT so that a channel
number appears on the screen.
MENU
Move Select Exit
SELECT
5 Using + ◊ or – √, select “ON” or “OFF” and press SELECT.
CHANNEL SET UP
CABLE: ON
CHANNEL FIX: OFF
AUTO PROGRAM
CHANNEL SKIP/ADD
VCR P l u s + SET UP
MENU
MENU
Move Select Exit
SELECT
6 Press MENU to return to the original screen.
Getting Started
9
EJECT
MUTING DISPLAY
INPUT
SELECT
TIMER ON SCREEN
POWER
TV
SLEEP
MENU
SELECTRESET
Presetting channels – AUTO PROGRAM
You can preset TV channels easily by using the AUTO PROGRAM feature.
Preset channels during the day rather than late at night, when some
channels may not be broadcasting.
1 Press MENU to display the main menu.
VCR Plus
COUNTER/
REMAIN
COUNTER
RESET
INDEX
TAPE SPEED
REC
X2 PAUSE
REW FF
2
1
5
4
7
8
JUMP ENTER
0
&7
SLOW
SEARCH
PLAY
STOP
3
6
9
CHVOL
2 Move the cursor (z) to “SET UP” with + ◊ or – √ and press SELECT.
The SET UP menu appears.
SET UP
CHANNEL SET UP
PARENTAL CONTROL
FAVORITE CHANNEL
CAPTION VISION: CC 1
LANGUAGE: ENGLISH
MENU
Move Select Exit
SELECT
MENU
3 Move the cursor (z) to “CHANNEL SET UP” with + ◊ or – √ and press
SELECT.
The CHANNEL SET UP menu appears.
CHANNEL SET UP
CABLE: OFF
CHANNEL FIX: OFF
AUTO PROGRAM
CHANNEL SKIP/ADD
VCR P l u s+ SET UP
MENU
MENU
Move Select Exit
SELECT
4 Move the cursor (z) to “AUTO PROGRAM” with + ◊ or – √ and press
SELECT.
Receivable channels for this
Video/TV
VHF: 2 – 13
UHF: 14 – 69
Cable: 1 – 125
Note
If AUTO PROGRAM appears in
black, the Video/TV is set to receive
a video input signal through the
input jacks and you cannot select
AUTO PROGRAM. Press INPUT
SELECT so that a channel number
appears on the screen.
To erase unnecessary channels,
or to add channels
See “Erasing and adding channels”
(page 7).
Getting Started
10
AU TO PROGRAM
“AUTO PROGRAM” appears on the screen and the Video/TV starts
scanning and presetting channels automatically. When all receivable
channels are stored, “AUTO PROGRAM” disappears and the lowest
numbered channel is displayed.
5 Press MENU to return to the original screen.
To exit AUTO PROGRAM
Press any button.
EJECT
INPUT
SELECT
MUTING DISPLAY
POWER
TV
SLEEP
Changing the menu language
If you prefer Spanish or French to English, change the menu language with
the following steps.
TIMER ON SCREEN
VCR Plus
COUNTER/
REMAIN
COUNTER
RESET
INDEX
TAPE SPEED
REC
X2 PAUSE
REW FF
2
1
5
4
7
8
JUMP ENTER
0
&7
SLOW
SEARCH
PLAY
STOP
MENU
SELECTRESET
1 Press MENU to display the main menu.
2 Move the cursor (z) to “SET UP” with + ◊ or – √ and press SELECT.
3
6
9
CHVOL
The SET UP menu appears.
SET UP
CHANNEL SET UP
PARENTAL CONTROL
FAVORITE CHANNEL
CAPTION VISION: CC 1
LANGUAGE: ENGLISH
MENU
MENU
Move Select Exit
SELECT
3 Move the cursor (z) to “LANGUAGE” with + ◊ or – √ and press SELECT.
The language position turns red.
SET UP
CHANNEL SET UP
PARENTAL CONTROL
FAVORITE CHANNEL
CAPTION VISION: CC 1
LANGUAGE: ENGLISH
MENU
MENU
Move Select Exit
SELECT
4 Using + ◊ or – √, select the language you want and press SELECT.
The entire menu appears in the selected language.
PREFERENCIAS
AJUSTE DE CANAL
CONTROL PATERNO
CANAL FAVORITO
CAPTION VISION : CC1
LENGUAJE : ESPAÑOL
MENU
MENU
Mover Seleccionar Salir
SELECT
5 Press MENU to return to the original screen.
Getting Started
11
Step 4 —
EJECT
MUTING DISPLAY
INPUT
SELECT
TIMER ON SCREEN
VCR Plus
1
JUMP ENTER
RESET
4
7
COUNTER/
REMAIN
COUNTER
INDEX
TAPE SPEED
POWER
TV
SLEEP
MENU
SELECTRESET
2
3
5
6
9
8
0
CHVOL
Setting the Clock
Setting the clock automatically
Some TV and cable channels transmit time signals with their broadcasts.
Your Video/TV can pick up these time signals to automatically set the
clock (AUTO CLOCK). The AUTO CLOCK feature works only if a channel
in your area is broadcasting a time signal. If your Video/TV cannot pick
up the signals, set the clock manually (page 15).
1 Press MENU to display the main menu.
2 Move the cursor (z) to “TIMER” with + ◊ or – √ and press SELECT.
The TIMER menu appears.
TIMER
CURRENT TIME SET
ON/OFF TIMER
MENU
SUN 12:00 AM
Move Select Exit
SELECT
MENU
REC
&7
SLOW
X2 PAUSE
SEARCH
REW FF
PLAY
STOP
Note
If there are only a few channels in
your area that carry time signals,
setting the clock automatically may
take up to about 45 minutes. If
nothing happens even after you wait
for about 45 minutes, set the clock
manually.
3 Move the cursor (z) to “CURRENT TIME SET” with + ◊ or – √ and press
SELECT.
The CURRENT TIME SET menu appears.
CURRENT TIME SET
AUTO
MANUAL
MENU
MENU
Move Select Exit
SELECT
4 Move the cursor (z) to “AUTO” with + ◊ or – √ and press SELECT.
The AUTO CURRENT TIME SET menu appears.
AUTO CURRENT TIME SET
FULL AUTO
OPTIONS
MENU
Move Select Exit
SELECT
5 Move the cursor (z) to “FULL AUTO” with + ◊ or – √ and press SELECT.
The message “Please turn TV off to receive clock data” appears for 5
seconds.
6 To activate the Auto Clock setting, press POWER to turn the Video/TV
off.
The time signals automatically set the time for your time zone and adjust
for daylight saving time.
Getting Started
12
EJECT
MUTING DISPLAY
INPUT
SELECT
TIMER ON SCREEN
VCR Plus
COUNTER/
REMAIN
COUNTER
RESET
INDEX
TAPE SPEED
REC
X2 PAUSE
2
1
5
4
7
8
JUMP ENTER
0
&7
SLOW
SEARCH
POWER
TV
SLEEP
MENU
SELECTRESET
3
6
9
CHVOL
If the clock does not activate
If the clock is set, but your time zone or daylight saving time is not set
correctly, you can adjust these settings manually. If you live close to a time
zone border, the Video/TV’s clock may not match the actual broadcast
times of the programs. To confirm the time zone of the broadcast service,
contact your cable company and set the clock accordingly.
1 Follow steps 1-5 in “Setting the clock automatically” and select
“OPTIONS” in step 5.
The CURRENT TIME SET CHANNEL menu appears.
CURRENT TIME SET CHANNEL
AUTO
MANUAL CH___
MENU
Move Select Exit
If you know a channel number that carries a time signal
(1) Move the cursor (z) to “MANUAL” with + ◊ or – √ and press SELECT.
The CH position turns red.
(2) Using the 0-9 buttons, enter the channel number and press SELECT.
Then skip steps 2-5.
SELECT
REW FF
PLAY
STOP
2 Move the cursor (z) to “AUTO” with + ◊ or – √ and press SELECT.
The AUTO CURRENT TIME SET menu appears.
AUTO CURRENT TIME SET
TIME ZONE: AUTO
DAYLIGHT SAVING TIME AUTO
OK
MENU
Move Select Exit
SELECT
3 Move the cursor (z) to “TIME ZONE” with + ◊ or – √ and press SELECT.
The TIME ZONE menu appears.
TIME ZONE
AUTO
ATLANTIC
EASTERN
CENTRAL
MOUNTAIN
PACIFIC
ALASKA
HAWAII
OK
4 Using + ◊ or – √, select “AUTO.” Then move the cursor (z) to “OK,” and
press SELECT.
The DAYLIGHT SAVING TIME menu appears.
DAYLIGHT SAVING TIME
AUTO
STANDARD TIME
DAYLIGHT SAVING TIME
OK
Move Select Exit
SELECT
MENU
Getting Started
13
EJECT
MUTING DISPLAY
INPUT
SELECT
TIMER ON SCREEN
RESET
POWER
TV
SLEEP
MENU
SELECT
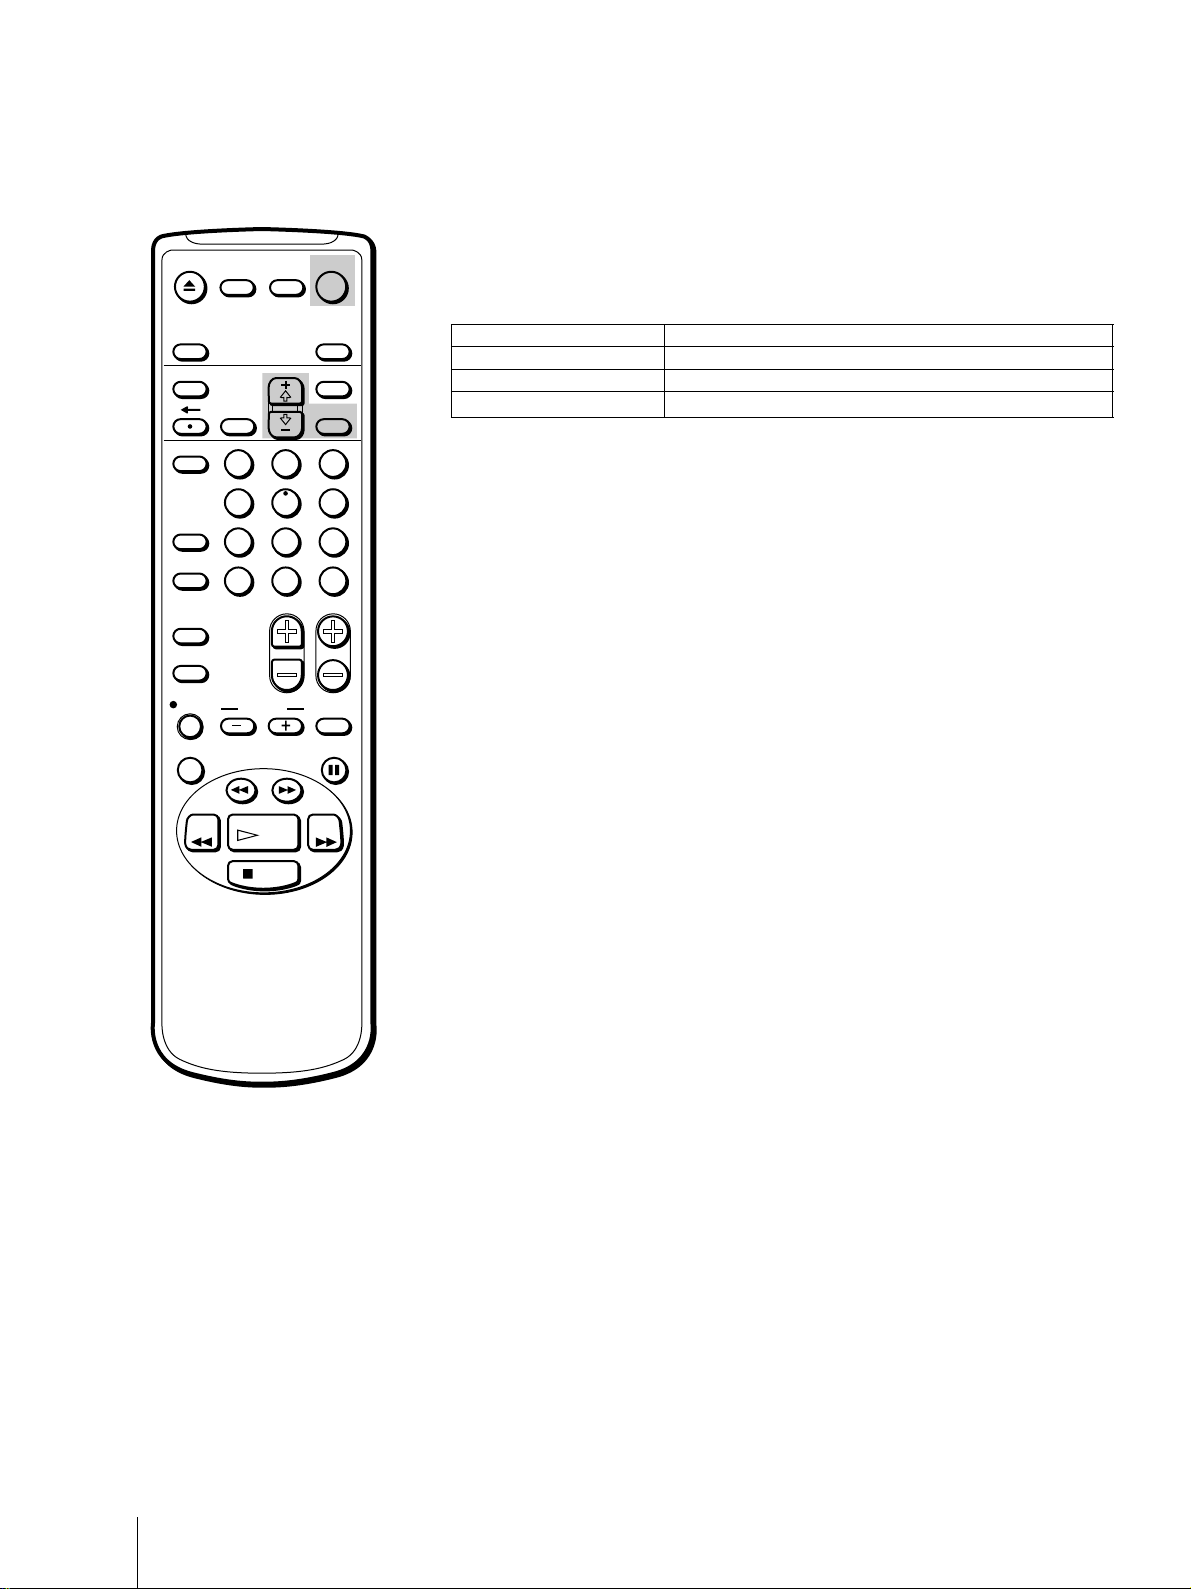
5 Using + ◊ or – √, select “AUTO,” “STANDARD TIME,” or “DAYLIGHT
SAVING TIME.” (See the table below). Then move the cursor (z) to “OK,”
and press SELECT.
Choose To
AUTO Select to set the daylight saving time automatically.
STANDARD TIME Select if your area does not use daylight saving time.
DAYLIGHT SAVING TIME Select if your area uses daylight saving time.
VCR Plus
COUNTER/
REMAIN
COUNTER
RESET
INDEX
TAPE SPEED
REC
X2 PAUSE
REW FF
2
1
5
4
7
8
JUMP ENTER
0
&7
SLOW
SEARCH
PLAY
STOP
3
6
6 To activate the Auto Clock setting, press POWER to turn the Video/TV
off.
9
CHVOL
Getting Started
14
EJECT
MUTING
INPUT
SELECT
TIMER ON SCREEN
DISPLAY
POWER
TV
SLEEP
MENU
Setting the date and clock
manually
Setting the date and clock enables you to use the timer feature for
recording or automatically turning the Video/TV on or off.
VCR Plus
COUNTER/
REMAIN
COUNTER
RESET
INDEX
TAPE SPEED
REC
X2 PAUSE
REW FF
2
1
5
4
7
8
JUMP ENTER
0
&7
SLOW
SEARCH
PLAY
STOP
SELECTRESET
3
6
9
1 Press MENU to display the main menu.
2 Move the cursor (z) to “TIMER” with + ◊ or – √ and press SELECT.
The TIMER menu appears.
3 Move the cursor (z) to “CURRENT TIME SET” with + ◊ or – √ and press
SELECT.
The CURRENT TIME SET menu appears.
CHVOL
4 Move the cursor (z) to “MANUAL” with + ◊ or – √ and press SELECT.
The CURRENT TIME SET menu appears.
CURRENT TIME SET
__/__ ____ ___ __:__
MENU
Move Select Exit
SELECT
AM
MENU
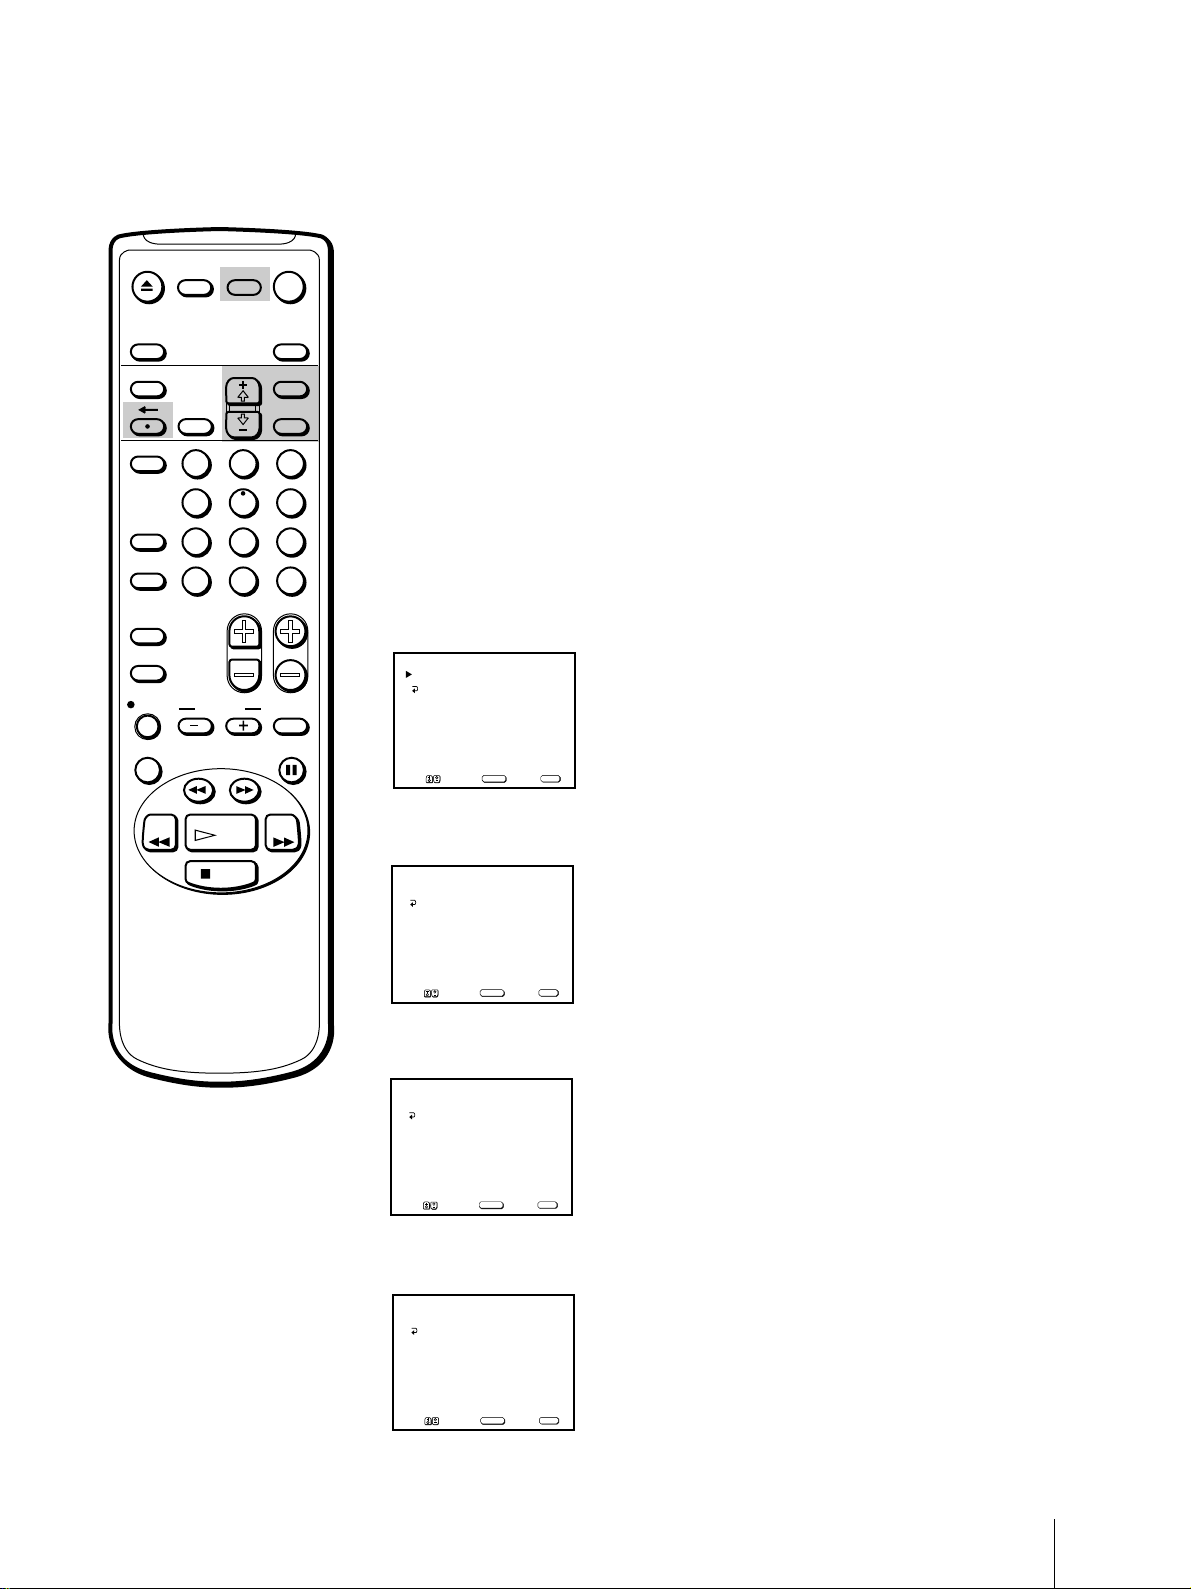
5 Press SELECT to start setting the clock.
The month section turns red.
CURRENT TIME SET
1 /__ ____ ___ __:__
MENU
Set the month
Move Select Exit
SELECT
AM
MENU
To display the time
Press DISPLAY.
If you have made a mistake
Press ? to return to the previous
position.
If the clock has stopped and
“--/--” is displayed
You have to re-set the clock.
6 Using + ◊ or – √, set the month and press SELECT.
The day section turns red.
CURRENT TIME SET
7/1 ____ ___ __:__
MENU
Set the day
Move Select Exit
SELECT
AM
MENU
7 Using + ◊ or – √ and SELECT, set the day, year, hour and minute in the
same way as in step 6.
CURRENT TIME SET
7/10 1999 SAT 7:30PM
MENU
MENU
Move Select Exit
SELECT
8 After setting the minutes, press SELECT.
The clock starts working.
9 Press MENU to return to the original screen.
Getting Started
15
Step 5 —
EJECT
MUTING DISPLAY
INPUT
SELECT
TIMER ON SCREEN
VCR Plus
1
POWER
TV
SLEEP
MENU
SELECTRESET
2
3
Setting Up VCR Plus+ system
The VCR Plus+ system feature allows you to simplify the task of
programming your Video/TV to make recordings with the timer. Setting
up your Video/TV involves coordinating the TV channel number (the
number you turn to on your Video/TV or VCR to watch a program) with
the guide channel (the number that’s assigned to that channel in your
program guide). To find the guide channel numbers, look in the “Channel
Line-up Chart” in the program guide for your area that features VCR
PlusCode numbers. It usually looks like the example on the next page.
5
COUNTER/
COUNTER
INDEX
TAPE SPEED
4
REMAIN
7
JUMP ENTER
RESET
REC
&7
SLOW
X2 PAUSE
SEARCH
REW FF
PLAY
STOP
6
9
8
0
CHVOL
Note
If VCR Plus+ System appears in
black, the Video/TV is set to receive
a video input signal through the
input jacks and you cannot select
VCR Plus+ System. Press INPUT
SELECT so that a channel number
appears on the screen.
If you have made a mistake
Press ? to return to the previous
position.
Setting the guide channel
1 Press MENU to display the main menu.
2 Move the cursor (z) to “SET UP” with + ◊ or – √ and press SELECT.
The SET UP menu appears.
SET UP
CHANNEL SET UP
PARENTAL CONTROL
FAVORITE CHANNEL
CAPTION VISION: CC 1
LANGUAGE: ENGLISH
MENU
MENU
Move Select Exit
3 Move the cursor (z) to “CHANNEL SET UP” with + ◊ or – √ and press
SELECT.
The CHANNEL SET UP menu appears.
CHANNEL SET UP
CABLE: OFF
CHANNEL FIX: OFF
AUTO PROGRAM
CHANNEL SKIP/ADD
VCR P l u s+ System
MENU
Move Sel e c t E xi t
4 Move the cursor (z) to “VCR Plus+ System” with + ◊ or – √ and press
SELECT.
The VCR Plus+ System SET UP menu appears.
VCR Plus+ System SET UP
GUIDE CH – TV CH
__ – ___
CHANNEL LIST
MENU
Move Sel e c t E xi t
5 Press SELECT to enter the guide channel number.
The GUIDE CH position turns red.
VCR Plus+ System SET UP
GUIDE CH – TV CH
__ – ___
CHANNEL LIST
MENU
Use [0-9] to set a
guide channel
Then press [ENTER]
SELECT
SELECT
SELECT
MENU
MENU
Getting Started
16
EJECT
MUTING DISPLAY
INPUT
SELECT
TIMER ON SCREEN
VCR Plus
COUNTER/
REMAIN
COUNTER
RESET
INDEX
TAPE SPEED
REC
X2 PAUSE
REW FF
2
1
5
4
7
8
JUMP ENTER
0
&7
SLOW
SEARCH
PLAY
STOP
POWER
TV
SLEEP
MENU
SELECTRESET
3
6
9
CHVOL
6 Press the 0-9 buttons to enter the channel number assigned in the guide
channel and press ENTER.
The TV CH position turns red.
VCR Plus+ SET UP
GUIDE CH – TV CH
16
–
CHANNEL LIST
MENU
Use [0-9] to set a
TV channel
Then press [ENTER]
7 Press the 0-9 buttons to enter the actual channel number on your Video/
TV and press ENTER.
VCR Plus+ SET UP
GUIDE CH – TV CH
–
16 125
CHANNEL LIST
MENU
MENU
Move Select Exit
SELECT
8 Repeat steps 6 and 7 for each guide channel number you want to enter.
9 Move the cursor (z) to “CHANNEL LIST” with + ◊ or – √ and press
SELECT to confirm your channel settings.
CHANNEL LIST
GUIDE– TV GUIDE– TV
16 – 125 33 – 49
17 – 22 59 – 3
20 – 42 61 – 47
21 – 28 99 – 102
PAGE 1
MENU
MENU
Move Select Exit
SELECT
Notes
• If you enter more than eight
channels, the additional channels
are stored on separate “pages.”
Move the cursor (z) to “PAGE”
and use + ◊ or – √ buttons to view
the entire list.
• The maximum number of guide
channels is 99.
10 After you finish presetting, press MENU to return to the original screen.
Example of a “Channel Line-up Chart”
CABLE
CH
16
17
20
21
22
25
34
35
5
27
29
30
31
38
39
45
17
44
49
50
51
AMC
American Movie Classics
BRV
Bravo(program grid only)
CNN
Cable News Network
CSP
C-SPAN
DIS
The Disney Channel
DSC
The Discovery Channel
ESN
ESPN
FAM
The Family Channel
HBO
Home Box Office
LIF
Lifetime
MAX
Cinomax
MTV
Music Television
NIK
Nickelodeon
SC
Sports Channel
SAMPLE
SCA
Sports Channel America
SHO
Showtime
TBS
TBS SuperStation
TMC
The Movie Channel
TNN
The Nashville Network
TNT
Turner Network Television
USA
USA Network
VCR Plus+
GUIDE CH
35
54
42
28
53
37
34
47
33
46
45
48
38
59
70
41
43
58
49
52
44
Getting Started
17
Basic Operations
Watching the TV
This section explains the basic functions to use while watching the TV.
Most of the operations can be done using the remote control.
STANDBY
REC
TIMER REC
‰/
STANDBY
EJECT
INPUT
SELECT
TIMER ON SCREEN
VCR Plus
COUNTER/
REMAIN
COUNTER
RESET
INDEX
TAPE SPEED
POWER
EJECT
INPUT
–
VOL
+ –
SELEECT
POWER
MUTING DISPLAY
1
4
7
JUMP ENTER
Switching the Video/TV on and off
CHANNEL
+
POWER
TV
SLEEP
MENU
SELECTRESET
2
3
5
6
9
8
0
CHVOL
Switching on
Press POWER.
The STANDBY lamp flashes until the picture appears.
Switching off
Press POWER.
The Video/TV enters standby mode and the STANDBY lamp on the front
of the Video/TV lights up in red if a tape is inserted in the Video/TV.
If a tape is not inserted in the Video/TV, the STANDBY lamp disappears.
Selecting TV programs
Turn the cable mode ON or OFF to select the type of channel you want to
watch. For more information on setting the cable mode, see “Setting cable
TV on or off” on page 9.
Press CH +/– or the 0-9 buttons on the remote control, or CHANNEL +/–
on the Video/TV.
To select a double-digit numbers using the
0-9 buttons
REC
X2 PAUSE
Note
You can not jump to channels you
scanned through using the CH +/–
buttons.
Basic Operations
18
&7
SLOW
SEARCH
REW FF
PLAY
STOP
For example, if you want to select 21, first press 2, then press 1.
Adjusting the volume
Press VOL +/–.
Muting the sound
Press MUTING.
“MUTING” appears on the screen.
To resume normal sound, press MUTING again, or press VOL +.
Switching quickly between two
channels
Press JUMP. The channel switches to the previously selected channel.
Pressing JUMP again switches the channel back to the originally selected
channel.
EJECT
MUTING DISPLAY
INPUT
SELECT
TIMER ON SCREEN
VCR Plus
COUNTER/
REMAIN
COUNTER
RESET
INDEX
TAPE SPEED
REC
X2 PAUSE
2
1
5
4
7
8
JUMP ENTER
0
&7
SLOW
SEARCH
POWER
TV
SLEEP
MENU
SELECTRESET
3
6
9
CHVOL
Adjusting the picture
When watching TV programs, you can adjust the picture to suit your taste.
You can adjust the picture received through the input jacks as well.
These adjustments are retained in memory even when you turn off the TV.
1 Press MENU to display the main menu.
The main menu appears.
V IDEO
AUDIO
TIMER
TAPE
SET UP
MENU
Move Select Exit
2 Move the cursor (z) to “VIDEO” with + ◊ or – √ and press SELECT.
The VIDEO menu appears.
VIDEO
PICTURE
BRIGHTNESS
COLOR
HUE
SHARPNESS
MENU
Move Select Exit
SELECT
SELECT
MENU
REW FF
PLAY
STOP
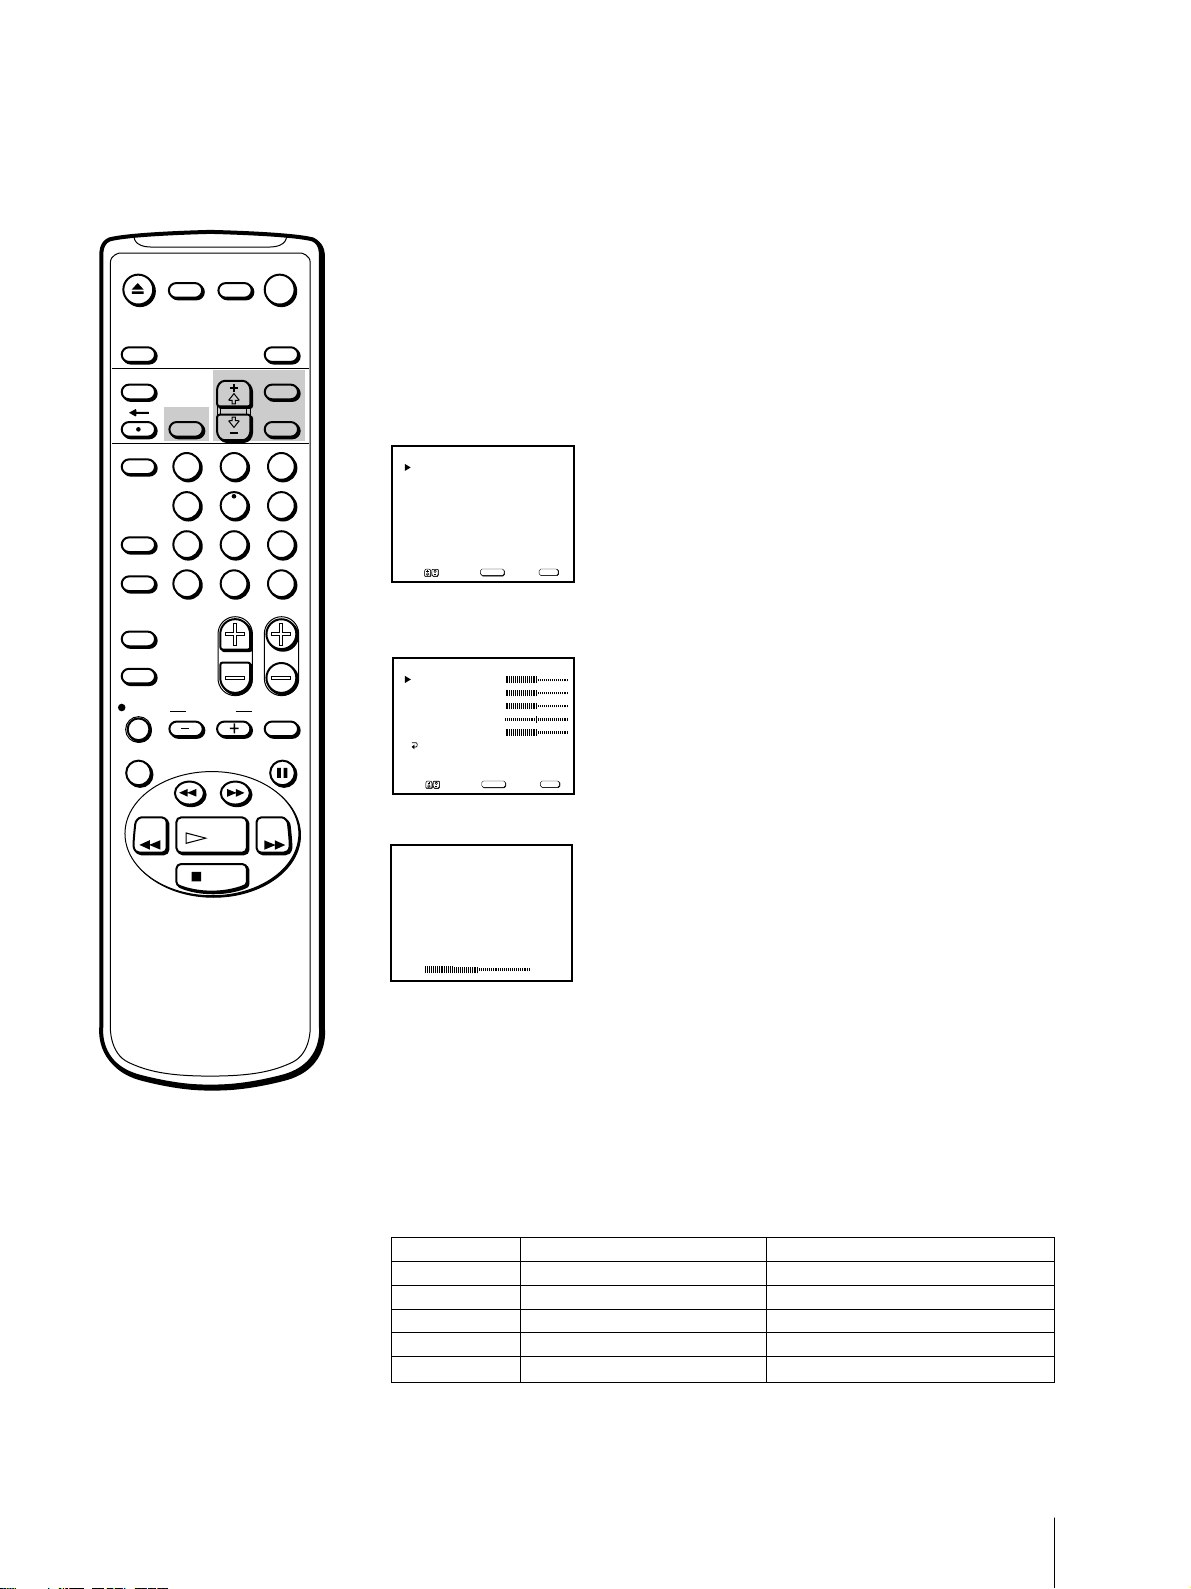
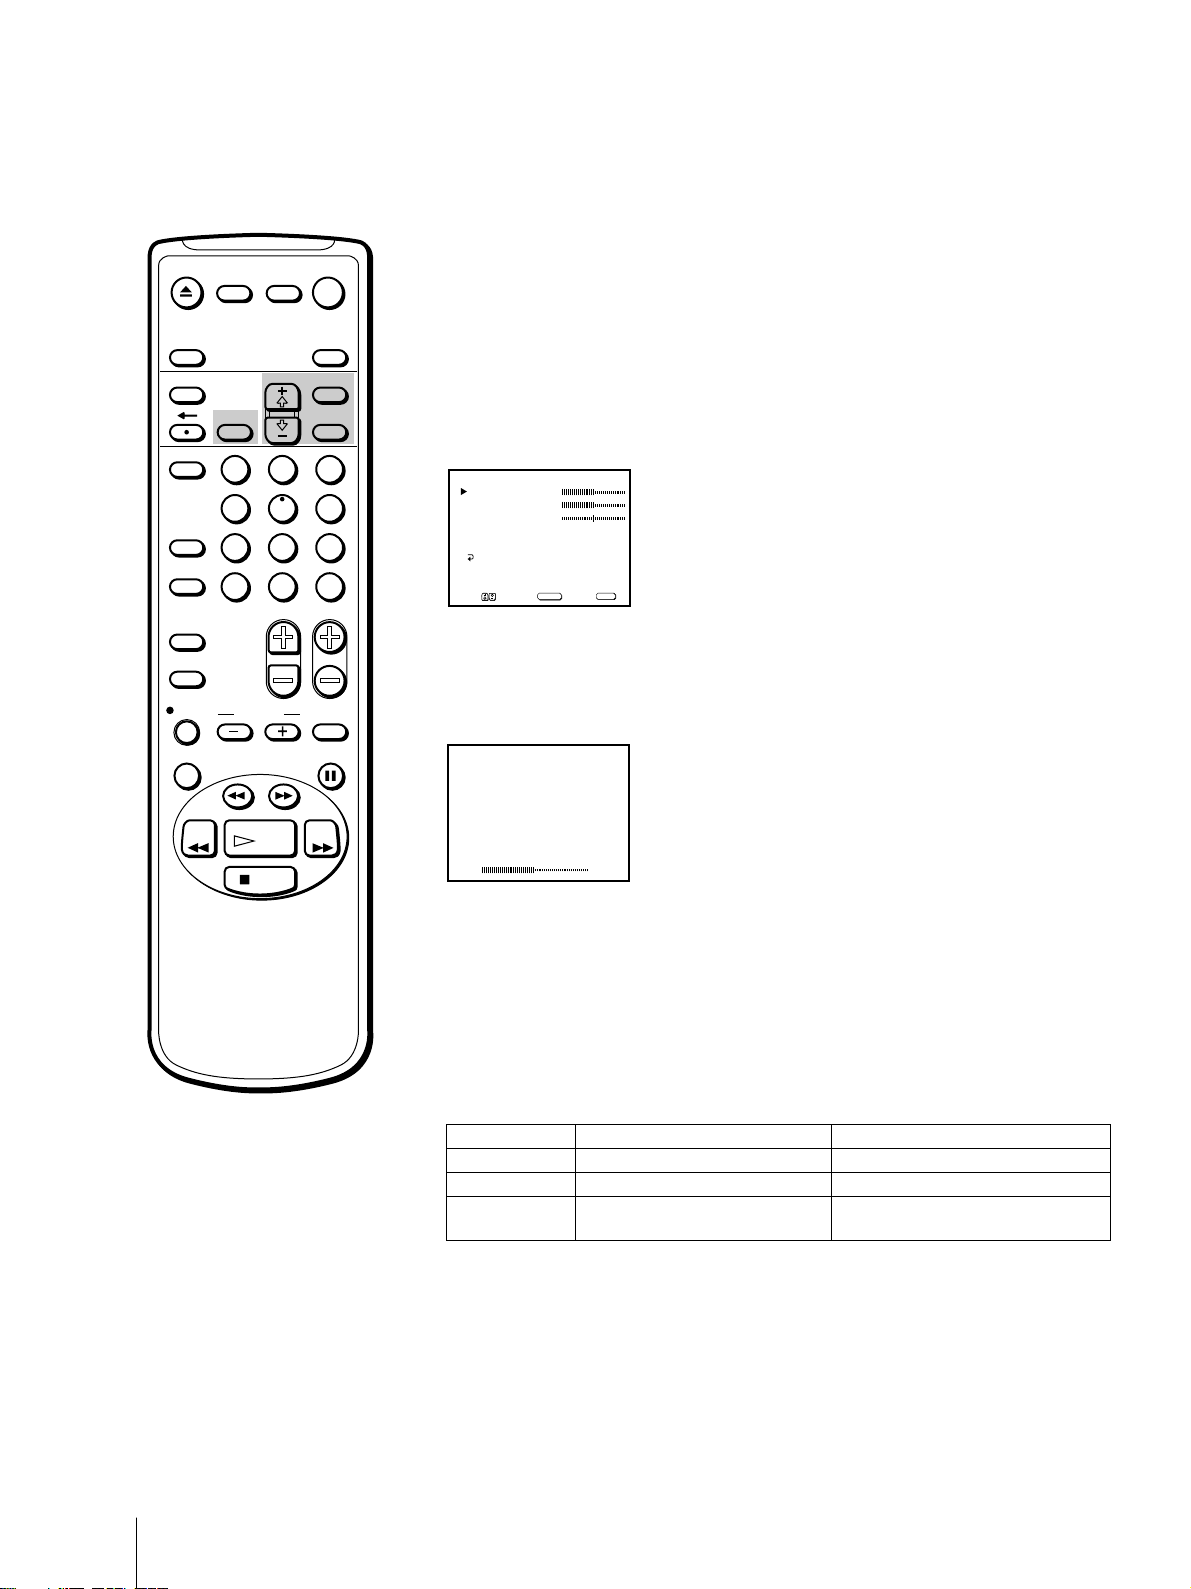
3 Using + ◊ or – √, select the item you want to adjust and press SELECT.
PICTURE
4 Adjust the picture with + ◊ or – √ and press SELECT.
With each press, the vertical bars increase or decrease and the figure at the
right margin changes to show the control level. (See the table below.)
5 To adjust other items, repeat steps 3 and 4 above.
6 Press MENU to return to the original screen.
The adjusted control levels are stored.
Description of adjustable items
Item
PICTURE
BRIGHTNESS
COLOR
HUE
SHARPNESS
Press +
◊◊
◊ to
◊◊
Increase picture contrast.
Brighten the picture.
Increase color intensity.
Make picture tones greenish.
Sharpen the picture.
Press –
Decrease picture contrast.
Darken the picture.
Decrease color intensity.
Make picture tones purplish.
Soften the picture.
√√
√ to
√√
To restore the factory settings
Press RESET after selecting and displaying the VIDEO menu.
All of the settings are restored to the factory settings.
Basic Operations
19
EJECT
MUTING DISPLAY
INPUT
SELECT
TIMER ON SCREEN
POWER
TV
SLEEP
MENU
Adjusting the sound (KV-20VS42 only)
You can adjust the bass, treble, and balance to suit your taste. You can
adjust the sound of the signal received through the input jacks as well.
1 Press MENU to display the main menu.
VCR Plus
COUNTER/
REMAIN
COUNTER
RESET
INDEX
TAPE SPEED
REC
X2 PAUSE
REW FF
2
1
5
4
7
8
JUMP ENTER
0
&7
SLOW
SEARCH
PLAY
STOP
SELECTRESET
2 Move the cursor (z) to “AUDIO” with + ◊ or – √ and press SELECT.
The AUDIO menu appears.
3
6
9
CHVOL
AUDIO
BASS
TREBLE
BALANCE
MTS : STEREO
SURROUND : ON
MENU
Move Select Exit
SELECT
MENU
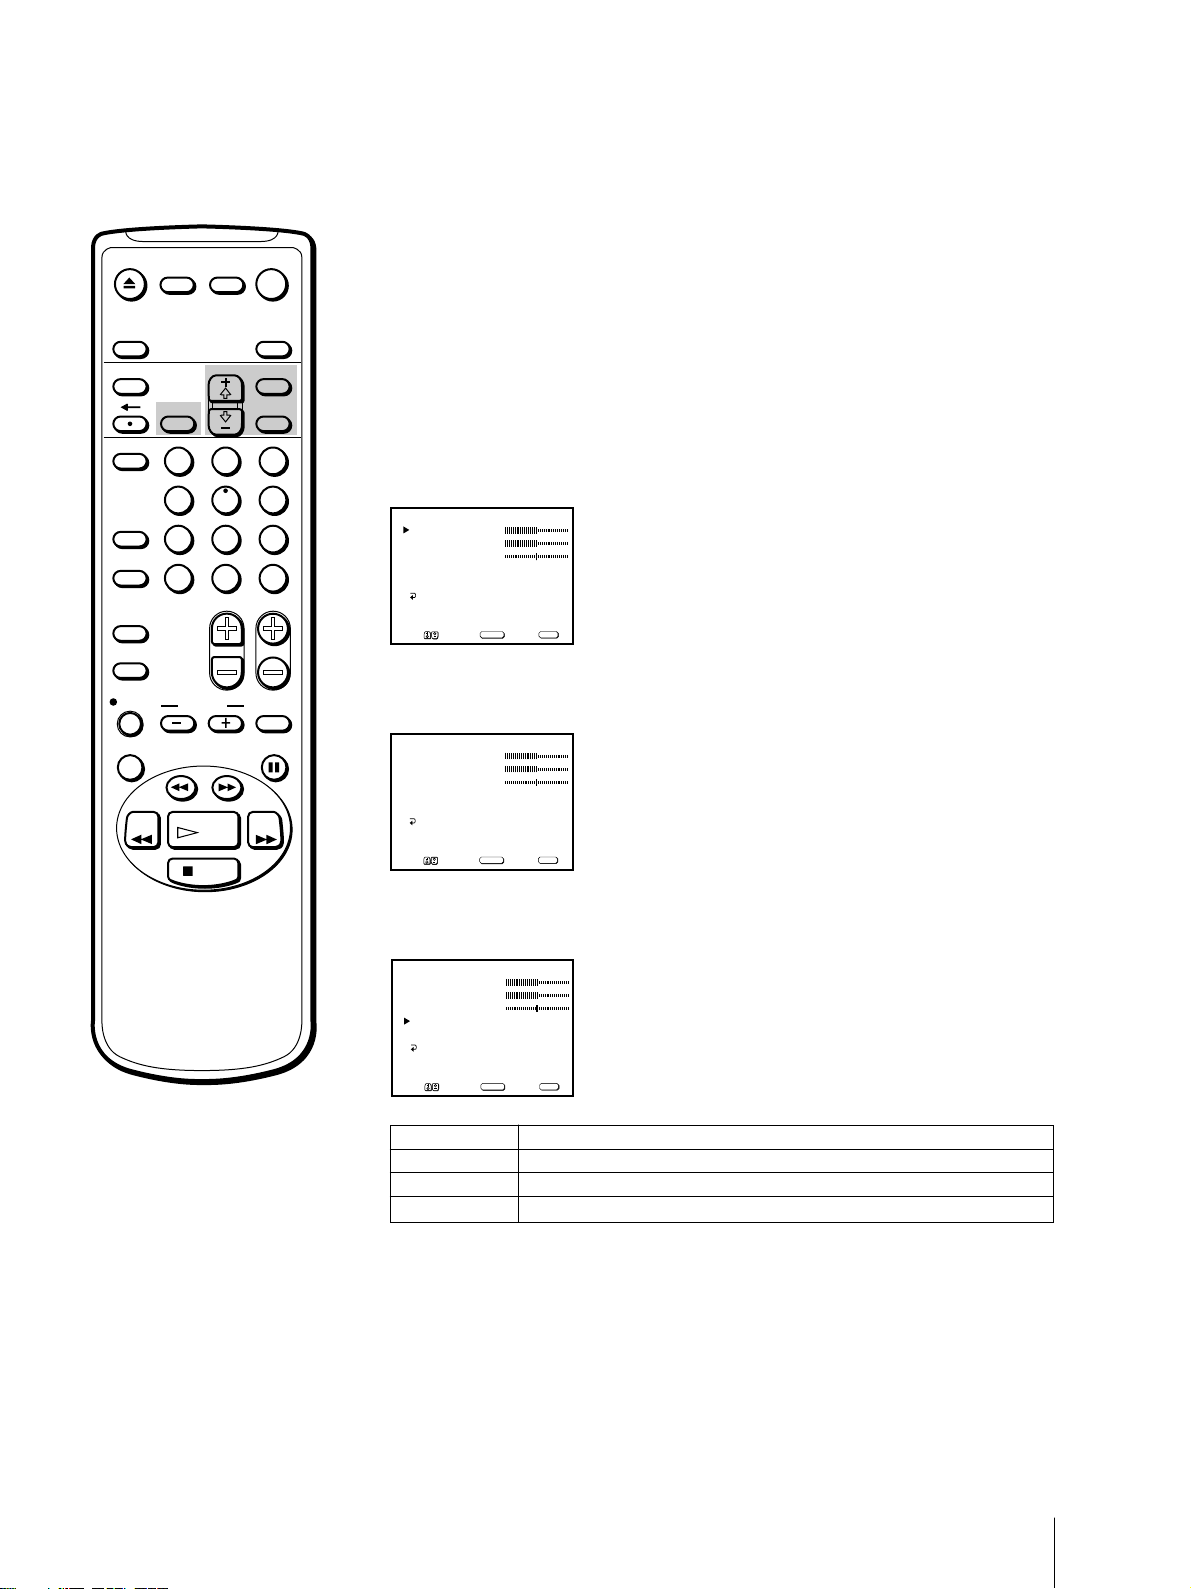
3 Select the item you want to adjust.
For example:
To adjust bass, move the cursor (z) with + ◊ or – √ to “BASS” and press
SELECT.
BASS
4 Adjust the selected item:
Press + ◊ or – √ to adjust the item and press SELECT.
Basic Operations
20
5 To adjust other items, repeat steps 3 and 4 above.
6 Press MENU to return to the original screen.
Description of adjustable items
Item
BASS
TREBLE
BALANCE
Press +
Increase the low pitched sounds.
Increase the high pitched sounds.
Emphasize the right speaker's
◊◊
◊ to
◊◊
Press –
Decrease the low pitched sounds.
Decrease the high pitched sounds.
Emphasize the left speaker's volume.
volume.
To restore the factory settings
Press RESET after selecting and displaying the AUDIO menu.
All of the settings are restored to the factory settings.
√√
√ to
√√
EJECT
MUTING DISPLAY
POWER
TV
Selecting stereo or bilingual
programs
(KV-20VS42 only)
INPUT
SELECT
TIMER ON SCREEN
VCR Plus
COUNTER/
REMAIN
COUNTER
RESET
INDEX
TAPE SPEED
REC
X2 PAUSE
REW FF
2
1
5
4
7
8
JUMP ENTER
0
&7
SLOW
SEARCH
PLAY
STOP
SLEEP
MENU
SELECTRESET
3
6
9
CHVOL
The Multichannel TV Sound (MTS) feature allows you to switch between
stereo, mono, and Second Audio Program (SAP).
1 Press MENU to display the main menu.
2 Move the cursor (z) to “AUDIO” with + ◊ or – √ and press SELECT.
The AUDIO menu appears.
AUDIO
BASS
TREBLE
BALANCE
MTS : STEREO
SURROUND : ON
MENU
MENU
Move Select Exit
SELECT
3 Move the cursor (z) to “MTS” with + ◊ or – √ and press SELECT.
The selected position turns red.
AUDIO
BASS
TREBLE
BALANCE
MTS : STEREO
SURROUND : ON
MENU
MENU
Move Select Exit
SELECT
Note
If you set MTS to “SAP” and a SAP
signal is not being broadcast, no
sound will come from the speakers.
(However, the program’s primary
audio channel will be recorded.) See
page 22 for a table describing the
relation between the speakers and
the source signal.
4 Using + ◊ or – √, select “STEREO,” “SAP,” or “MONO” and press
SELECT.
AUDIO
BASS
TREBLE
BALANCE
MTS : SAP
SURROUND : ON
MENU
MENU
Move Select Exit
Choose
STEREO
SAP
MONO
To restore the factory settings
Press RESET after selecting and displaying the AUDIO menu.
All of the settings are restored to the factory settings.
SELECT
To
Select for stereo reception when viewing a program broadcast in stereo.
Select to listen to a bilingual broadcast.
Select for mono reception (use to reduce noise during stereo broadcasts).
Basic Operations
21

This table describes the relation between the sound output from the
speaker, the recorded sound, and the MTS mode. For instance, if you set
MTS to “SAP” and a SAP signal is not being broadcast, the sound from the
speakers is muted. However, if you record the same program, the sound
will be recorded in the program’s primary audio channel (stereo or mono).
Source
Signal
Mono
Stereo
Mono
+
SAP
Stereo
+
SAP
MTS
Mode
Mono
Stereo
SAP
Mono
Stereo
SAP
Mono
Stereo
SAP
Mono
Stereo
SAP
Speaker Output
L R
L + R L + R
L + R L + R
Mute Mute
L + R L + R
LR
Mute Mute
L + R L + R
L + R L + R
SAP SAP
L + R L + R
LR
SAP SAP
Recorded Sound
Hi-Fi “L” Hi-Fi “R” Normal
Track Track Track
L + R L + R L + R
L + R L + R L + R
L + R L + R L + R
L + R L + R L + R
L R L + R
L R L + R
L + R L + R L + R
L + R L + R L + R
SAP SAP SAP
L + R L + R L + R
L R L + R
SAP SAP SAP
On-screen
Display
None
None
SAP
None
STEREO
SAP
None
None
SAP
None
STEREO
SAP
Basic Operations
22
EJECT
MUTING DISPLAY
POWER
TV
Listening to surround sound
effects
(KV-20VS42 only)
INPUT
SELECT
TIMER ON SCREEN
VCR Plus
COUNTER/
REMAIN
COUNTER
RESET
INDEX
TAPE SPEED
REC
X2 PAUSE
REW FF
2
1
5
4
7
8
JUMP ENTER
0
&7
SLOW
SEARCH
PLAY
STOP
SLEEP
MENU
SELECTRESET
The surround feature simulates the sound reproduction of a movie theater
or a concert hall. Surround is only effective for stereo programs.
1 Press MENU to display the main menu.
3
6
9
CHVOL
2 Move the cursor (z) to “AUDIO” with + ◊ or – √ and press SELECT.
The AUDIO menu appears.
AUDIO
BASS
TREBLE
BALANCE
MTS : STEREO
SURROUND : ON
MENU
MENU
Move Select Exit
SELECT
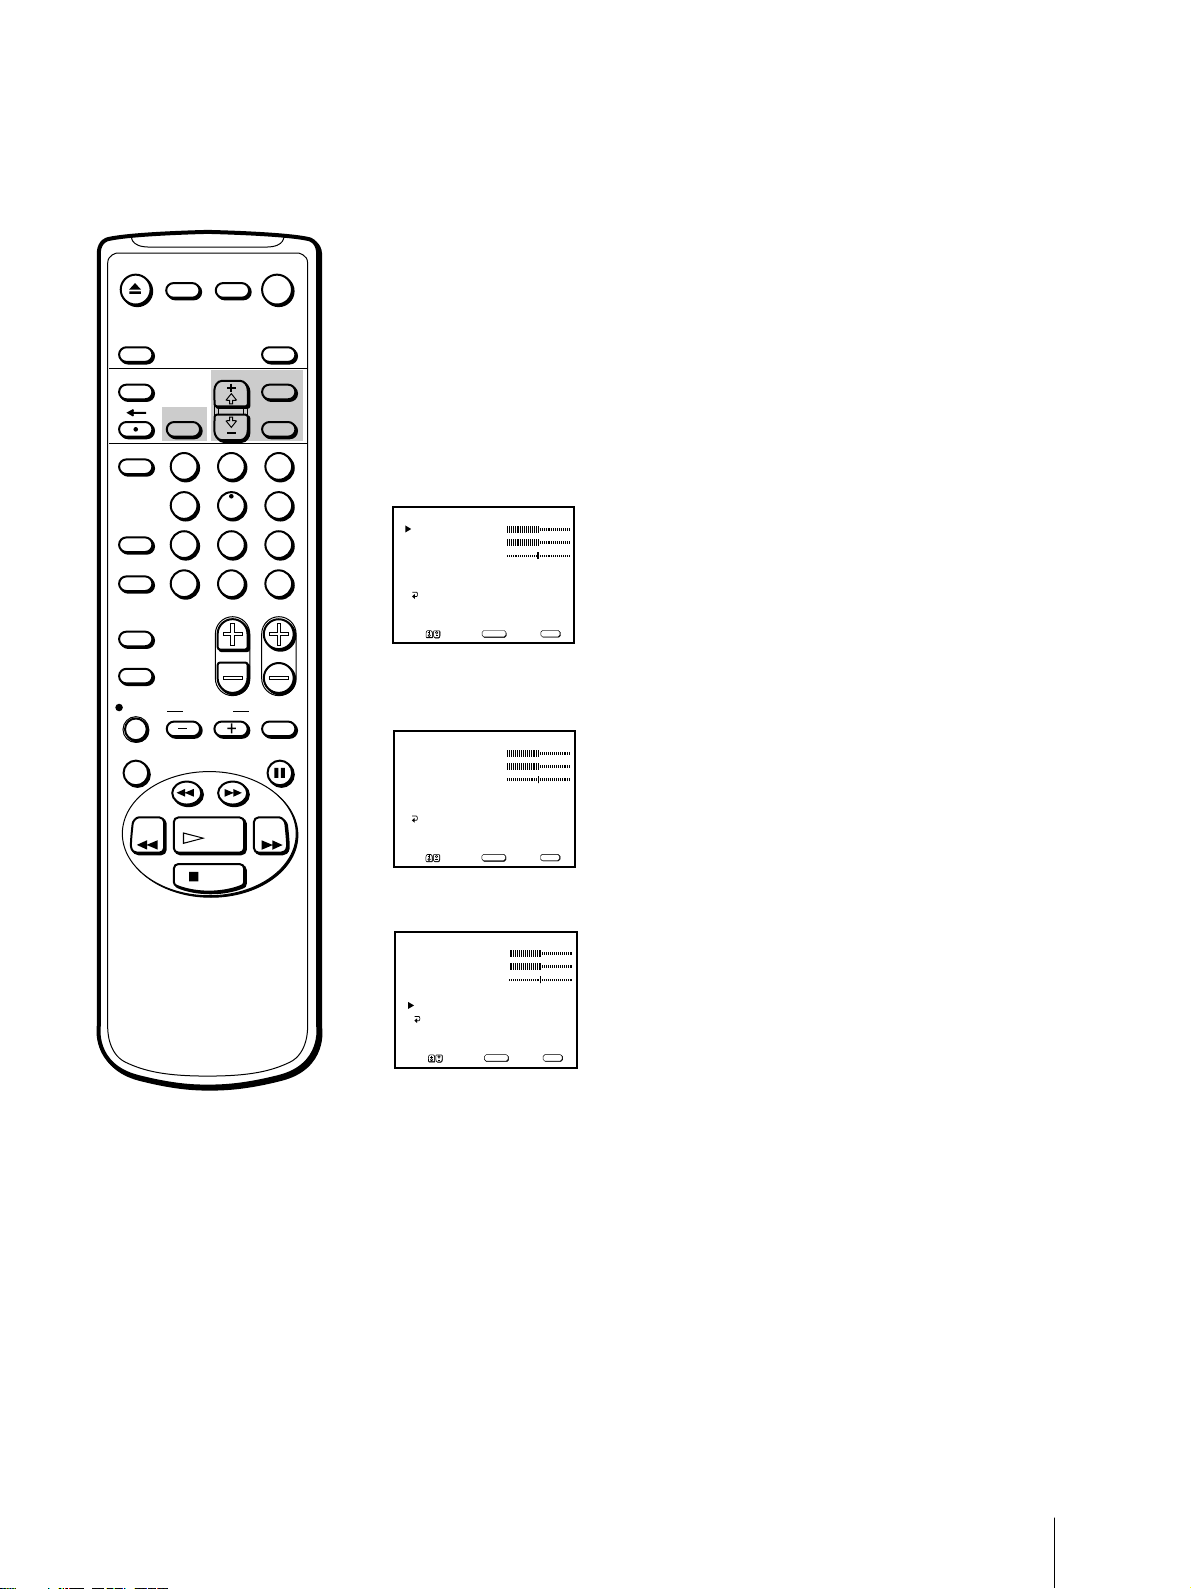
3 Move the cursor (z) to “SURROUND” with + ◊ or – √ and press SELECT.
The selected position turns red.
AUDIO
BASS
TREBLE
BALANCE
MTS : STEREO
SURROUND : OFF
MENU
MENU
Move Select Exit
SELECT
4 Using + ◊ or – √, select “ON” or “OFF” and press SELECT.
AUDIO
BASS
TREBLE
BALANCE
MTS : STEREO
SURROUND : ON
MENU
MENU
Move Select Exit
SELECT
To restore the factory settings
Press RESET after selecting and displaying the AUDIO menu.
All of the settings are restored to the factory settings.
Basic Operations
23
POWER
STANDBY
EJECT
REC
TIMER REC
VIDEO L AUDIO R
EJECT
INPUT
SELECT
INPUT
– VOL + – CHANNEL +
SELEECT
VIDEO
L AUDIO R
MUTING DISPLAY
INPUT SELEECT
POWER
TV
SLEEP
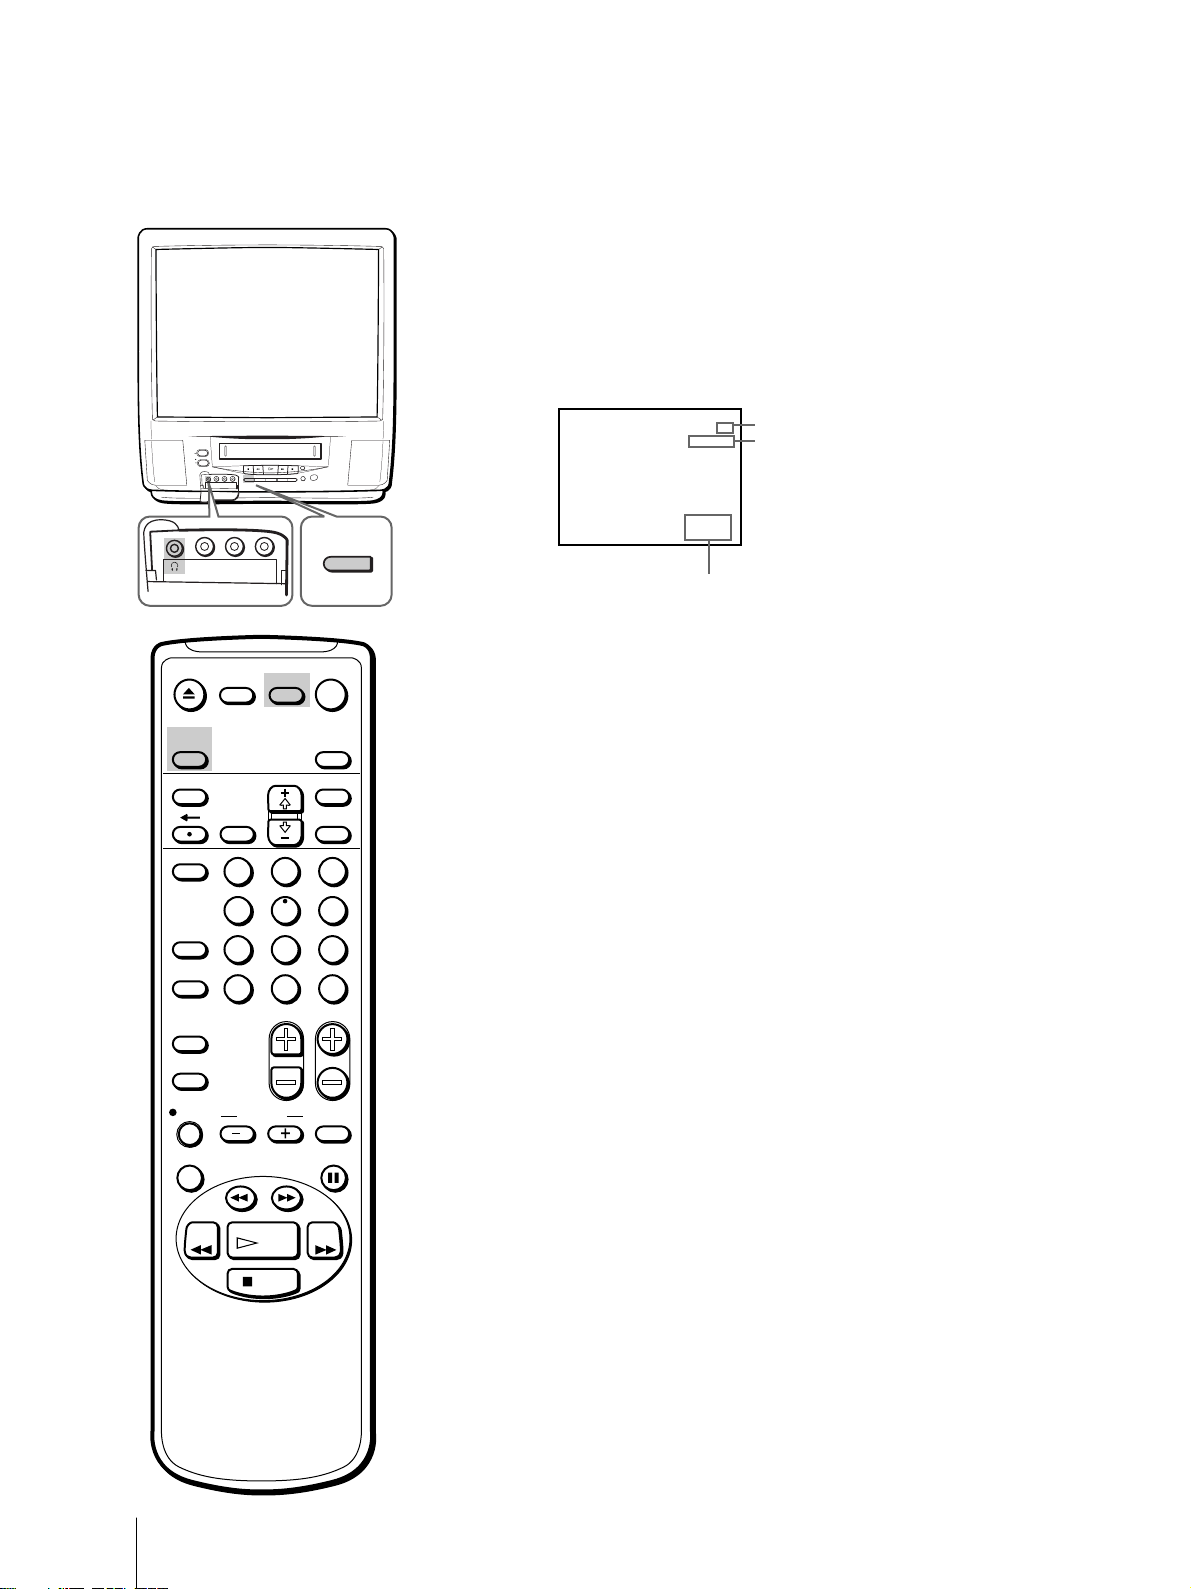
Displaying on-screen information
Press DISPLAY to turn the display on or off.
The channel number, date and time, audio mode are displayed.
Press DISPLAY repeatedly to scroll between XDS ON, CAPTION, and
DISPLAY OFF. For more information on XDS and CAPTION, see page 39.
STEREO
8:40PM
4/9FRI
Audio mode
Channel number
24
Current date and time
To make the indications disappear, press DISPLAY repeatedly until
“DISPLAY OFF” appears.
Watching a video input signal
TIMER ON SCREEN
VCR Plus
COUNTER/
REMAIN
COUNTER
RESET
INDEX
TAPE SPEED
REC
X2 PAUSE
REW FF
2
1
5
4
7
8
JUMP ENTER
0
&7
SLOW
SEARCH
PLAY
STOP
MENU
SELECTRESET
through the line input jacks
Press INPUT SELECT repeatedly until the desired input indicator appears.
3
6
9
CHVOL
To return to the normal TV picture, press INPUT SELECT until the
channel number appears. For more information on using the line input
jacks, see page 57.
Listening with headphones
Plug the headphones (not supplied) into the 2 (headphones) jack which is
located inside the cover on the front of the Video/TV.
The sound from the speaker is turned off.
Basic Operations
24
Playing a Tape
This section shows you how to insert a video cassette and to play it. For
more information on using the advanced features, see “Additional
Operations” on pages 36 through 57.
Inserting a video cassette
Gently insert a cassette with the arrow indication facing upwards. The
POWER
STANDBY
EJECT
REC
TIMER REC
INPUT
– VOL + – CHANNEL +
SELEECT
cassette is automatically loaded into the cassette compartment and the
Video/TV turns on. If you insert a cassette without a safety tab, playback
automatically starts.
EJECT
MUTING DISPLAY
INPUT
SELECT
TIMER ON SCREEN
VCR Plus
COUNTER/
REMAIN
COUNTER
RESET
INDEX
TAPE SPEED
REC
X2 PAUSE
2
1
5
4
7
8
JUMP ENTER
0
&7
SLOW
SEARCH
POWER
TV
SLEEP
MENU
SELECTRESET
3
6
9
CHVOL
Ejecting a video cassette
Press EJECT 6.
You can eject the cassette even if the power is in standby mode.
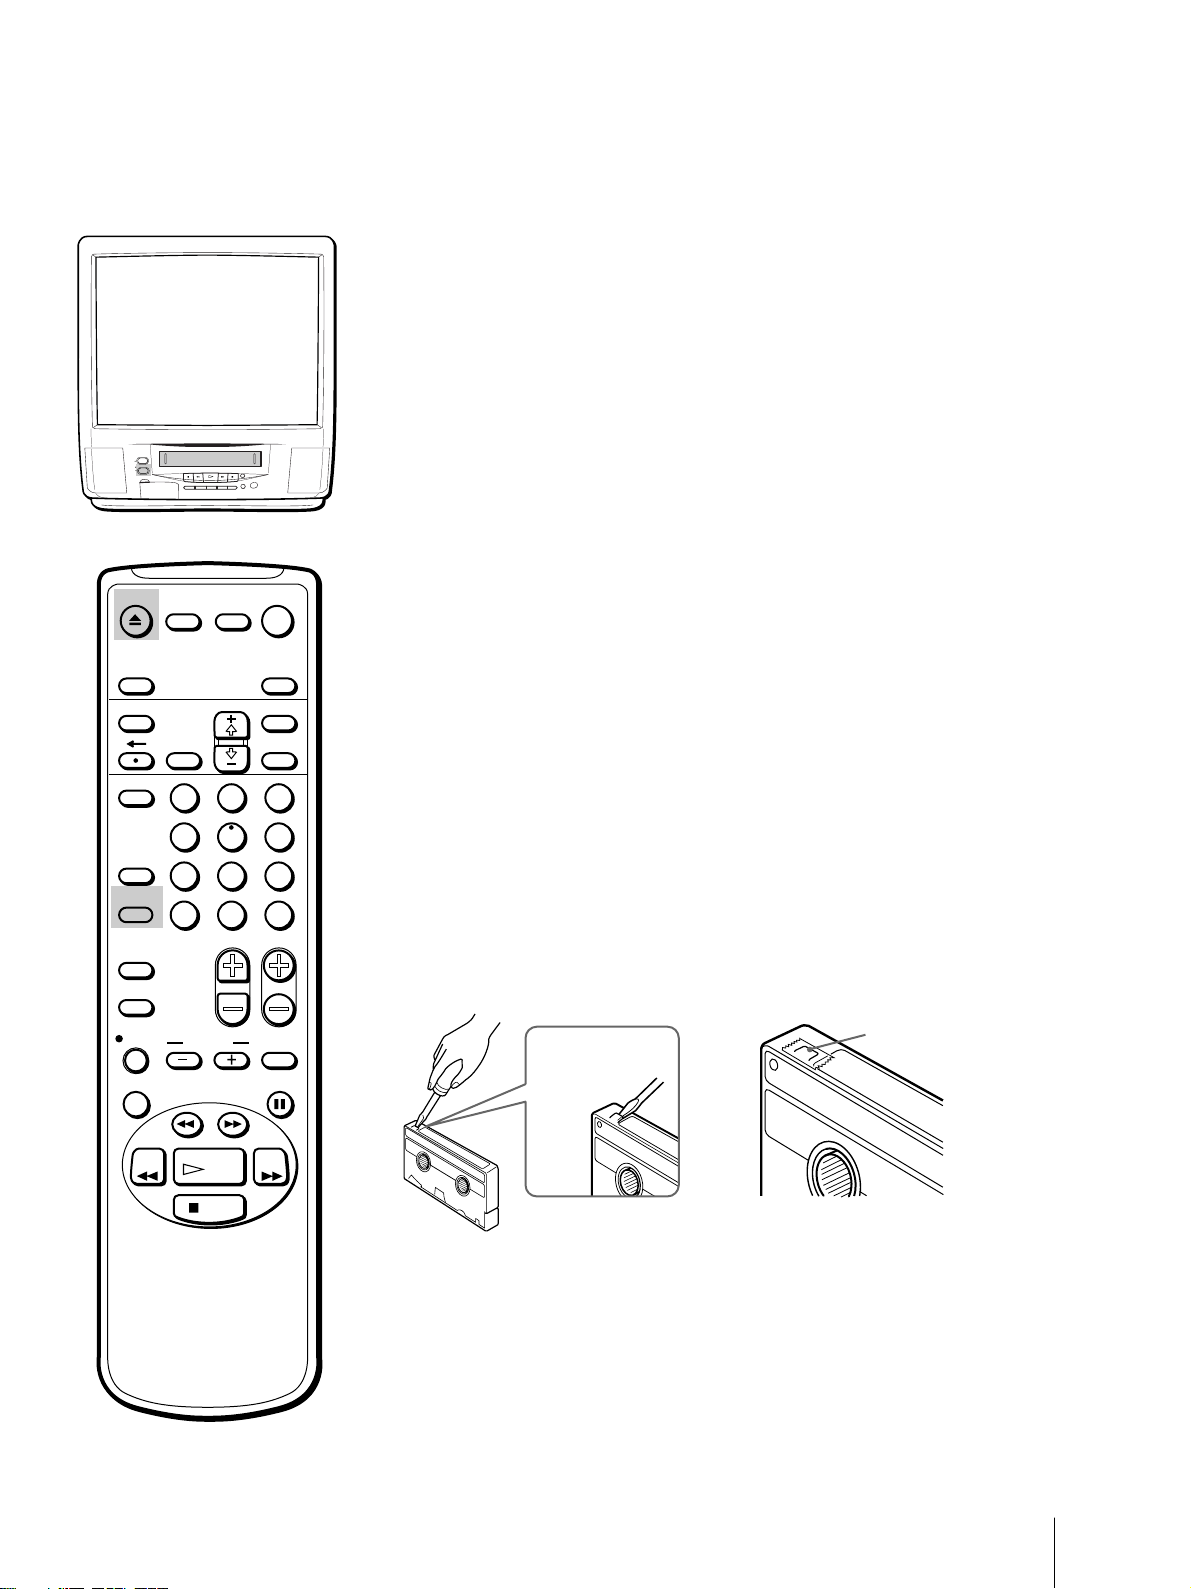
Protecting your cassette against
accidental erasure
The cassette has a safety tab to protect against accidentally erasing a
previous recording. Break off the safety tab with a screw driver or a
similar tool to prevent recording.
If the safety tab is removed, the cassette is ejected when you try to record
on it.
To record on a cassette with the safety tab broken off, simply cover the tab
hole with adhesive tape.
Adhesive tape
Safety tab
REW FF
PLAY
STOP
Resetting the tape counter
The tape counter helps you to locate a certain scene after playback. Press
COUNTER RESET on the remote control to set the counter to “00:00:00”
before playing the tape. The tape counter is automatically reset to
“00:00:00” whenever a cassette is inserted. The Video/TV keeps counting
the length of the tape being played. Note, however, that the tape counter
does not count the portions without video signals recorded.
Basic Operations
25
POWER
STANDBY
EJECT
REC
TIMER REC
EJECT
MUTING DISPLAY
INPUT
SELECT
TIMER ON SCREEN
VCR Plus
COUNTER/
REMAIN
COUNTER
JUMP ENTER
RESET
INDEX
TAPE SPEED
REC
1 Insert the tape.
2 Press PLAY ·.
INPUT
– VOL + – CHANNEL +
SELEECT
POWER
TV
SLEEP
MENU
SELECTRESET
2
1
4
7
&7
SLOW
3
5
6
9
8
0
CHVOL
Playing a tape
The Video/TV automatically turns on. If you insert a cassette without a
safety tab, playback automatically begins.
Playback begins. On screen-information automatically disappears after
several seconds.
To stop playback
Press STOP p.
The Video/TV returns to the normal TV picture.
To stop playback for a moment
Press PAUSE P. The picture pauses.
Press PAUSE P again or press PLAY · to resume playback.
If you leave your Video/TV in pause mode, normal playback resumes
after about 5 minutes.
To fast forward the tape
Press STOP p, then press FF ).
To rewind the tape
Press STOP p, then press REW 0.
To view a tape at high speed
During playback, press and hold REW 0 (rewind) or FF ) (fast
forward). A high-speed picture appears on the TV screen.
To resume normal playback, release the button.
X2 PAUSE
SEARCH
REW FF
PLAY
STOP
Notes
• The sound is muted during all
operations except for normal
playback.
• If the OFF timer is activated
during playback, playback stops.
Basic Operations
26
To view the picture while in fast forward or rewind mode
Press and hold FF ) during fast forward or REW 0 during rewind.
The picture appears on the screen.
When you release the button, fast forward or rewind mode is resumed.
To view the picture at high speed
During playback, press SEARCH ) or SEARCH 0.
To view the picture at twice the normal speed
During playback, press X2.
To view the picture in slow motion
During playback, press SLOW & +/–.
To playback frame by frame
Press PAUSE P during normal playback, then press 7 (frame).
EJECT
MUTING DISPLAY
POWER
TV
Playing a tape repeatedly – AUTO
REPEAT
INPUT
SELECT
TIMER ON SCREEN
VCR Plus
COUNTER/
REMAIN
COUNTER
RESET
INDEX
TAPE SPEED
REC
X2 PAUSE
REW FF
2
1
5
4
7
8
JUMP ENTER
0
&7
SLOW
SEARCH
PLAY
STOP
SLEEP
MENU
SELECTRESET
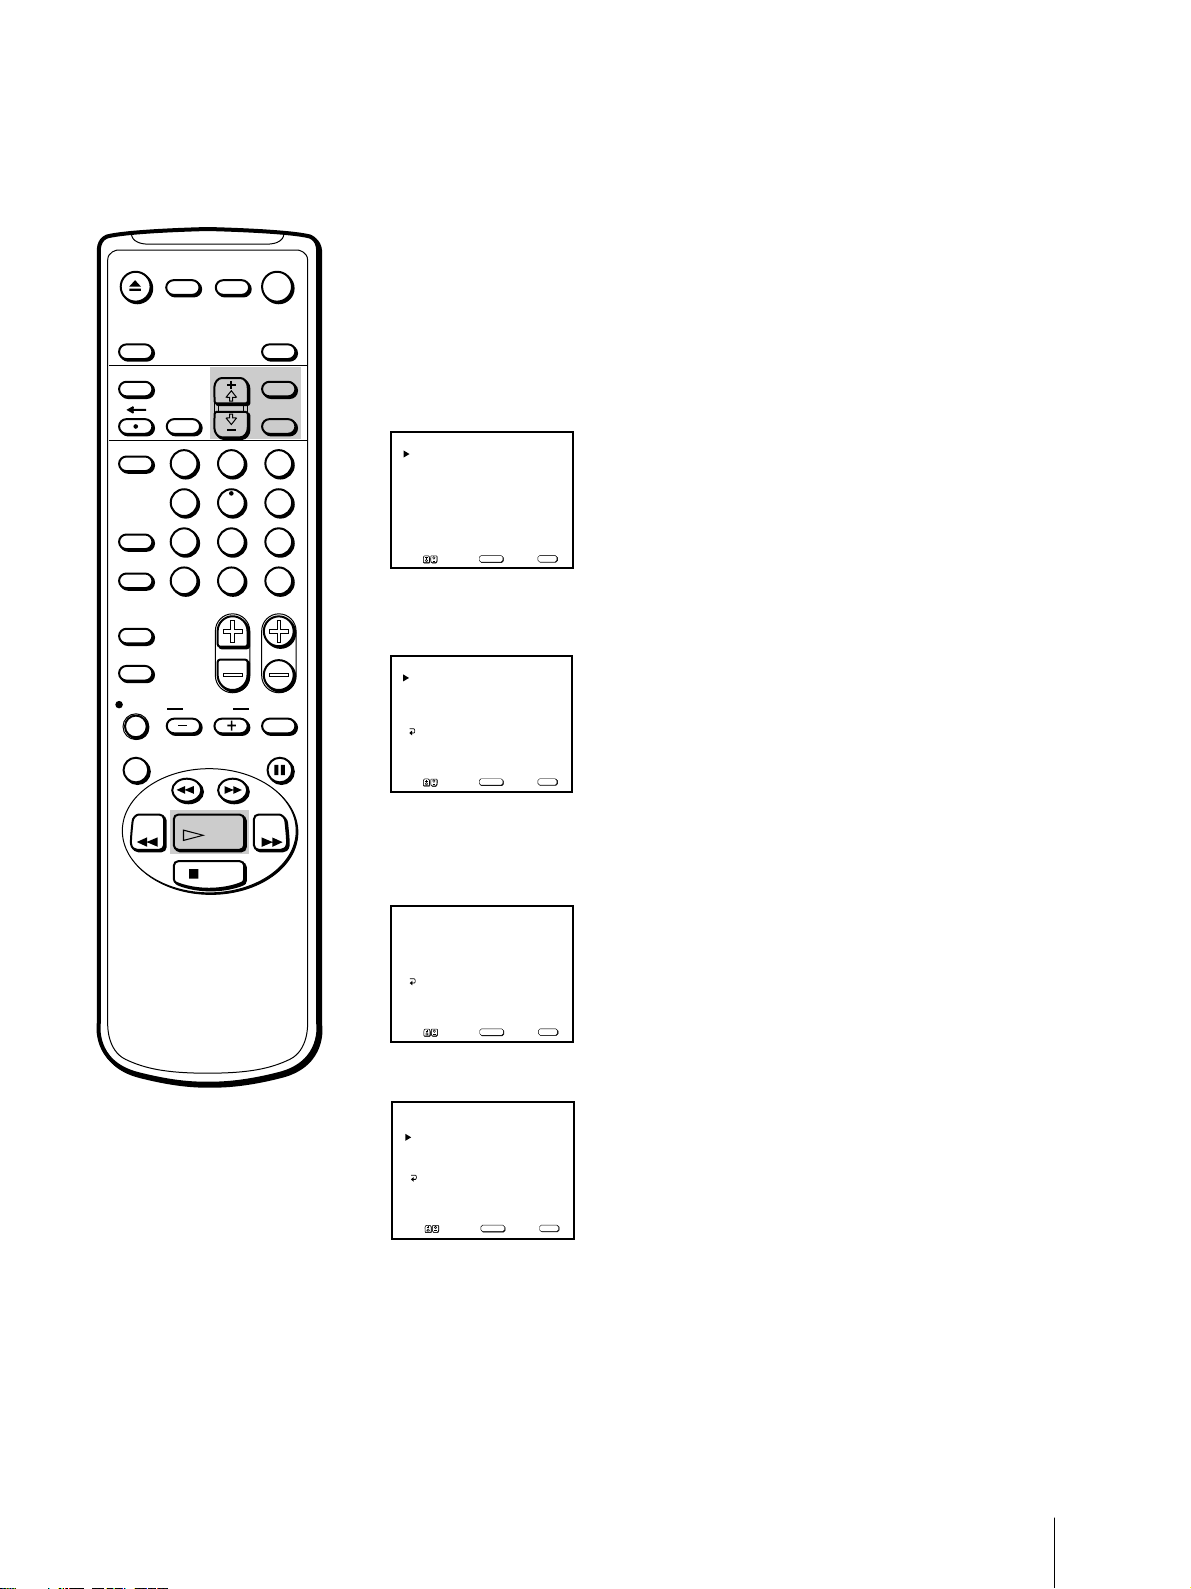
You can play the recorded portion of a tape repeatedly.
1 Press MENU.
The main menu appears.
3
6
9
CHVOL
V IDEO
AUDIO
TIMER
TAPE
SET UP
MENU
Move Select Exit
SELECT
2 Move the cursor (z) to “TAPE” with + ◊ or – √ and press SELECT.
The TAPE menu appears.
TAPE
TAPE REMAIN: T-120
AUTO REPEAT: OFF
NOISE REDUCTION: OFF
TRACKING
MENU
MENU
Move Select Exit
SELECT
3 Move the cursor (z) to “AUTO REPEAT” with + ◊ or – √ and press
SELECT.
The selected position turns red.
TAPE
TAPE REMAIN: T-120
AUTO REPEAT: OFF
NOISE REDUCTION: OFF
TRACKING
MENU
Note
If you eject the cassette tape or turn
off the power, AUTO REPEAT will
return to OFF.
MENU
Move Select Exit
SELECT
4 Using + ◊ or – √, select “ON” and press SELECT.
TAPE
TAPE REMAIN: T120
AUTO REPEAT: ON
NOISE REDUCTION: OFF
TRACKING
MENU
MENU
Move Select Exit
SELECT
5 Press MENU to return to the original screen.
6 Press PLAY ·.
Playback begins. When the tape reaches the end, it will automatically
rewind and begin playing again.
Basic Operations
27
EJECT
MUTING DISPLAY
INPUT
SELECT
TIMER ON SCREEN
POWER
TV
SLEEP
MENU
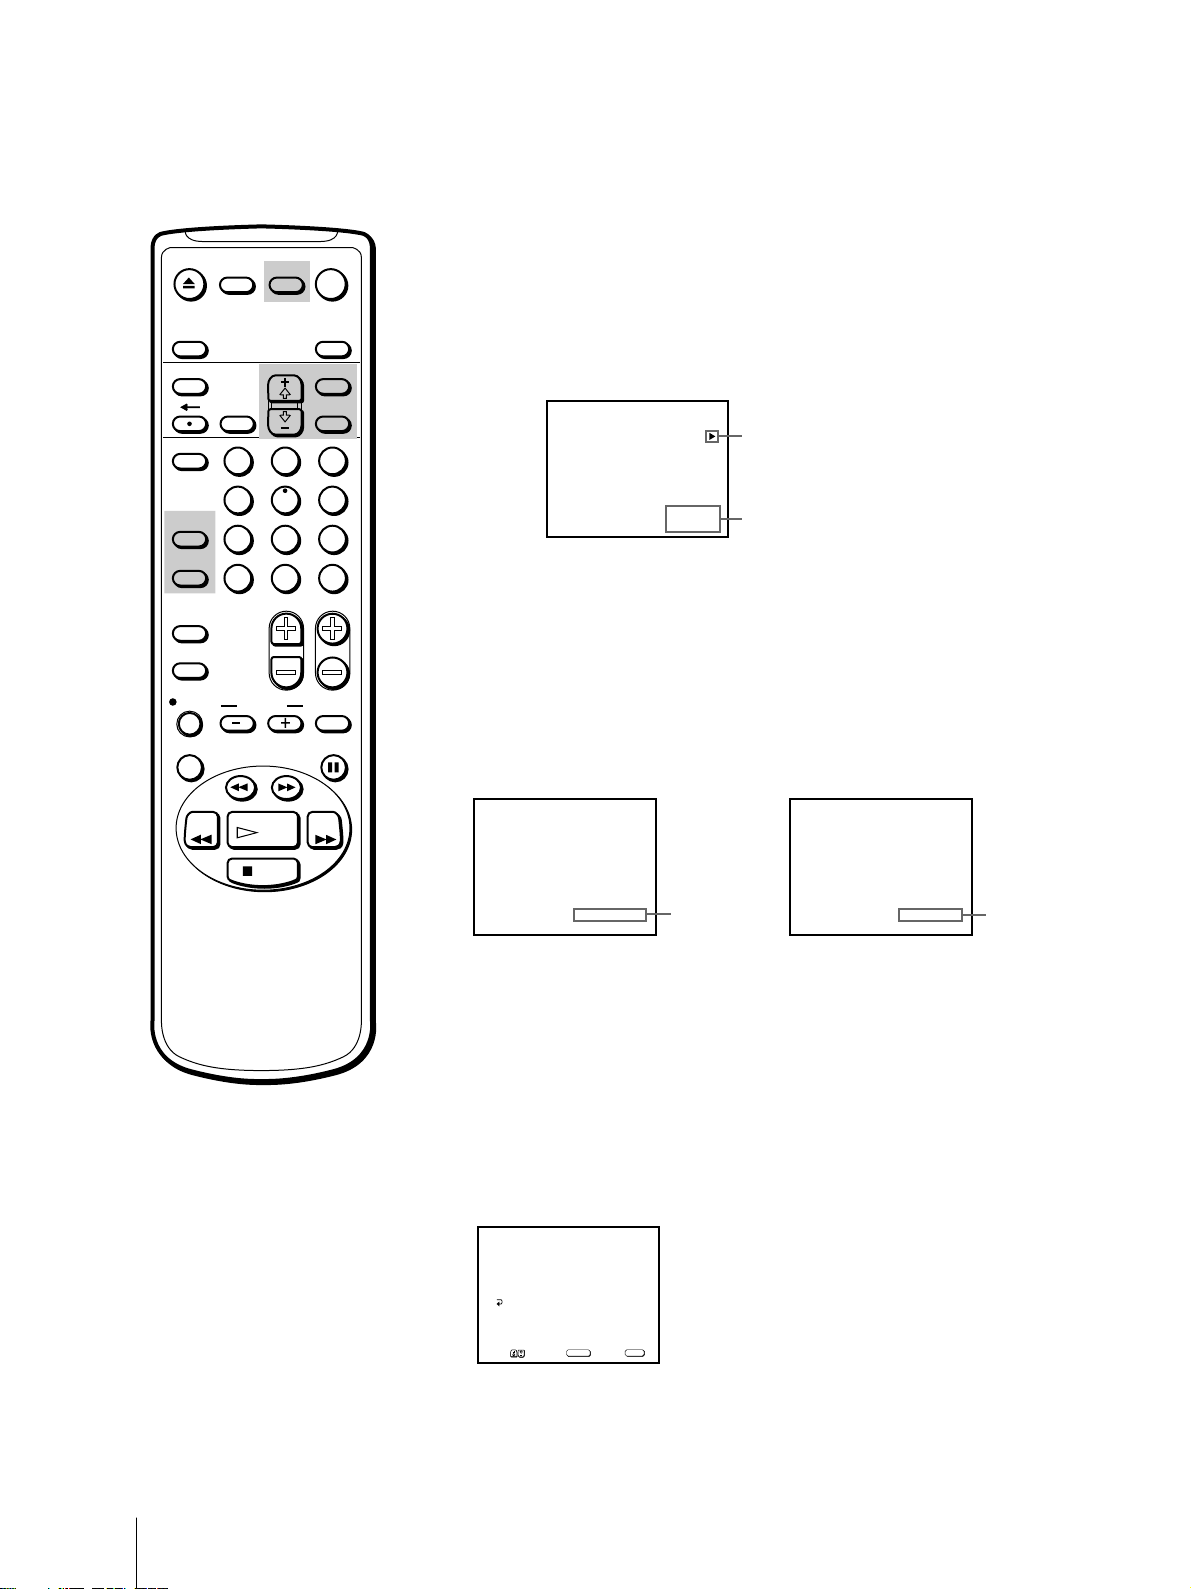
Displaying on-screen information
Press DISPLAY to turn the display on or off.
The date and time, tape operation mode is displayed.
Press DISPLAY repeatedly to scroll between XDS ON, CAPTION, and
DISPLAY OFF. For more information on XDS and CAPTION, see page 39.
RESET
VCR Plus
COUNTER/
REMAIN
COUNTER
RESET
INDEX
TAPE SPEED
REC
X2 PAUSE
REW FF
2
1
5
4
7
8
JUMP ENTER
0
&7
SLOW
SEARCH
PLAY
STOP
SELECT
3
6
9
CHVOL
VTR
Tape operation mode
8:40PM
7/15THU
Current date and time
Displaying the tape counter
Press COUNTER/REMAIN to display the tape counter. The tape counter
shows the tape travel time in hours, minutes and seconds during
recording or playback. Each time you press COUNTER/REMAIN, the
time counter and the remaining tape time counter appears alternately.
Press COUNTER RESET to restore the counter to “00:00:00.”
SP 00:00:36
Time counter
REM 1:15
Remaining tape
time counter
Notes
• The tape operation mode is
displayed on the screen whenever
you change the mode.
• If you are rewinding a tape and
the time counter is displayed on
the screen, the tape will stop when
the counter reaches “00:00:00.”
Use this function to search for the
beginning of a recording.
Basic Operations
28
When you use a 2-hour (120 minute) tape, set TAPE REMAIN to T-120.
When you use a tape longer than 120 minutes, set TAPE REMAIN to
OTHERS.
1 Press MENU to display the main menu.
2 Move the cursor (z) to “TAPE” with + ◊ or – √ and press SELECT.
3 Move the cursor (z) to “TAPE REMAIN” with + ◊ or – √ and press
SELECT.
The selected position turns red.
TAPE
TAPE REMAIN: T-120
AUTO REPEAT: OFF
NOISE REDUCTION: OFF
TRACKING
MENU
MENU
Move Select Exit
SELECT
4 Using + ◊ or – √, select “T-120” (the factory setting) or “OTHERS” and
press SELECT.
5 Press MENU to return to the original screen.
Recording TV Programs
Recording TV programs
Caution
Television programs, films, video tapes and other materials may be
copyrighted. Unauthorized recording of such material may be contrary
to the provisions of the copyright laws. Also, use of this recorder with
cable television transmission and/or program owner.
POWER
STANDBY
EJECT
REC
TIMER REC
INPUT
–
VOL
+ –
CHANNEL
+
SELEECT
EJECT
MUTING DISPLAY
INPUT
SELECT
TIMER ON SCREEN
VCR Plus
COUNTER/
REMAIN
COUNTER
RESET
INDEX
TAPE SPEED
REC
X2 PAUSE
2
1
5
4
7
8
JUMP ENTER
0
&7
SLOW
SEARCH
POWER
TV
SLEEP
MENU
SELECTRESET
3
6
9
CHVOL
1 Insert a cassette with a safety tab.
The Video/TV turns on automatically.
2 Press INPUT SELECT until a channel number appears on the screen.
To record from a cable box, turn it on.
3 Press TAPE SPEED to select the recording speed, SP (Standard Play), or EP
(Extended Play). Recording in EP mode will extend the length of your
tape.
Maximum recording time
SP mode: 2 hours 40 minutes with T-160
EP mode: 8 hours with T-160
4 Select the channel with CH +/–. You can also use the 0-9 buttons on the
remote control. To enter double-digit numbers (such as 24), first press 2,
then press 4.
5 Press REC r.
The REC lamp on the front of the Video/TV lights up and recording
begins.
To stop recording
Press STOP p.
When the tape reaches the end, it stops and ejects the cassette.
To pause recording
Press PAUSE P.
To resume recording, press PAUSE P again.
REW FF
Note
If the ON or OFF timer is activated
during recording, the TV screen
turns on or off, but the recording
continues.
PLAY
STOP
You can cut out an unwanted scene during recording with this button.
1 Press PAUSE P when an unwanted scene appears on the screen.
Recording pauses.
2 Press PAUSE P again to release the pause mode at the desired scene.
Recording resumes from the point set in step 2.
When the recording pause mode is left on for more than 5 minutes, the
Video/TV stops recording.
Recording with the TV off
Press POWER.
The TV screen is turned off and the STANDBY lamp and REC lamp on the
front of the Video/TV light up.
The Video/TV continues recording.
Basic Operations
29
Recording TV Programs Using the
Timer
The Timer Recording function allows you to preset your Video/TV to
EJECT
MUTING DISPLAY
INPUT
SELECT
TIMER ON SCREEN
VCR Plus
COUNTER/
REMAIN
COUNTER
RESET
INDEX
TAPE SPEED
REC
X2 PAUSE
REW FF
2
1
5
4
7
8
JUMP ENTER
0
&7
SLOW
SEARCH
PLAY
STOP
POWER
TV
SLEEP
MENU
SELECTRESET
3
6
9
CHVOL
record up to six programs within a one-month period.
Before you begin
• Make sure that the time and date clock are set. If not, the message
“Please set the clock first” is displayed on the screen. Refer to “Setting
the Clock” on page 12.
• Make sure that the loaded cassette has its safety tab. If a cassette
without safety tab is loaded, the message “Please insert a recordable
tape” is displayed.
Setting the timer
Here’s an example of how to record a program broadcast on channel 26
from 8:15 PM to 9:55 PM on Wednesday, 6th of October 1999, in EP mode.
1 Press TIMER ON SCREEN.
The TIMER SET/CHECK menu appears.
TIMER SET / CHECK 10 / 5
DATE START STOP CH
_/__ _:__ _:__ ___ _
_/__ _:__ _:__ ___ _
_/__ _:__ _:__ ___ _
_/__ _:__ _:__ ___ _
_/__ _:__ _:__ ___ _
_/__ _:__ _:__ ___ _
Move Select Exit
SELECT
2 Press SELECT.
Today’s date and the day of the week appears in red.
TIMER SET / CHECK 10 / 5
DATE START STOP CH
10/ 5TUE
_:__ _:__ ___ _
_/__ _:__ _:__ ___ _
_/__ _:__ _:__ ___ _
_/__ _:__ _:__ ___ _
_/__ _:__ _:__ ___ _
_/__ _:__ _:__ ___ _
Move Select Exit
SELECT
TUE
MENU
TUE
MENU
If you have made a mistake
Press ? to return to the previous
position and correct the setting.
To erase the settings
Press RESET while displaying the
TIMER SET/CHECK menu.
If you try to enter a recording
start time that is prior to the
current time
All of the items of the recording
settings are erased.
If you set MTS to “SAP” in the
AUDIO menu (KV-20VS42 only)
The SAP signal will be recorded only
if a SAP signal is being broadcast.
Otherwise, the program’s primary
audio channel will be recorded
(stereo or mono.) See page 22 for a
table describing the relation between
the speakers and the source signal.
Basic Operations
30
3 Press + ◊ until “6 WED” appears.
For daily and weekly recording, see “Daily/weekly recording” on page 32.
TIMER SET / CHECK 10 / 5
DATE START STOP CH
10/ 6WED
_:__ _:__ ___ _
_/__ _:__ _:__ ___ _
_/__ _:__ _:__ ___ _
_/__ _:__ _:__ ___ _
_/__ _:__ _:__ ___ _
_/__ _:__ _:__ ___ _
Move Select Exit
SELECT
TUE
MENU
 Loading...