

Page 1

9-881-397-11 (1)
KV-13 VM40/41
KV-20VM40
KV-20VS40
Trinitron Color VideolTV
VHS Video
Operating Instructions Jj^
Mode d'emploi
Manuel de instrucciones
VC
SflS
Owner's Record
The model and serial numbers are located at the rear
of the video TV. Record these numbers in the spaces
provided below. Refer to them whenever you call
upon your Sony dealer regarding this product.
Model No.
' 1998 by Sony Corporation Printed in U.S.A. Getting Started I \
Serial No.
Page 2
WARNING
Precautions
To prevent fire or shock hazard, do not expose
the unit to rain or moisture.
CAUTION
RISK OF ELECTRIC SHOCK
DO NOT OPEN
CAUTION: TO REDUCE THE RISK OF ELECTRIC SHOCK,
DO NOT REMOVE COVER (OR BACK).
NO USER-SERVICEABLE PARTS INSIDE.
REFER SERVICING TO QUALIFIED SERVICE PERSONNEL
This symbol is intended to alert the user to
the presence of uninsulated "dangerous
voltage" within the product's enclosure
that may be of sufficient magnitude to
constitute a risk of electric shock to
persons.
This symbol is intended to alert the user to
the presence of important operating and
maintenance (servicing) instructions in the
literature accompanying the product.
CAUTION
TO PREVENT ELECTRIC SHOCK, DO NOT USE THIS
POLARIZED AC PLUG WITH AN EXTENSION CORD,
RECEPTACLE OR OTHER OUTLET UNLESS THE
BLADES CAN BE EULLY INSERTED TO PREVENT
BLADE EXPOSURE.
When using TV games, computers, and similar products
with your Video/TV, keep the brightness and contrast
functions at low settings. If a fixed (non-moving) pattern
is left on the screen for long periods of time at a high
brightness or contrast setting, the image can be
permanently imprinted onto the screen. These types of
imprints are not covered by your warranty because they
are the result of misuse.
Note to CATV system installer
This reminder is provided to call the CATV system
installer's attention to Article 820-40 of the NEC that
provides guidelines for proper CTounding and, in
particular, specifies that the cable ground shall be
connected to the grounding system of the building as
close to the point of cable entry as practical.
Safety
• Operate the Video/TV only on 120 V AC.
• One blade of the plug is wider than the other for safety
purposes and will fit into the power outlet only one
way. If you are unable to insert the plug fully into the
outlet, contact your dealer.
• Should any liquid or solid object fall into the cabinet,
unplug the Video/TV and have it checked by qualified
personnel before operating it any further.
• Unplug the Video/TV from the wall outlet if you are
not to going to use it for several days or more. To
disconnect the cord, pull it out by the plug. Never pull
the cord itself.
Installing
• To prevent internal heat build-up, do not block the
ventilation openings.
• Do not install the Video/TV in a hot or humid place, or
in a place subject to excessive dust or mechanical
vibration.
Cleaning
Clean the Video/TV with a soft dry cloth. Never use
strong solvents such as thinner or benzine, which might
damage the finish of the cabinet.
Transport
Keep the original carton and packing materials to use for
safety transport of your Video/TV in the future.
Information
You are cautioned that any changes or modifications not
expressly approved in this manual could void your
authority to operate this equipment.
If you have any questions or problems concerning your
Video/TV, please contact your nearest Sony dealer.
This Video/TV receiver displays closed captioning in
accordance with 15.119 of the FCC rules.
Caution
Television programs, films, video tapes and other
materials may be cop)uighted. Unauthorized recording
of such material may be contrary to the provisions of the
copyright laws. Also, use of this Video/TV receiver for
other private viewing of programs broadcast on VHF or
UHF or transmitted by cable companies for the use of the
general public may require authorization from the
broadcaster/cable company and/or program owner.
Note on condensation
If the Video/TV is brought directly from a cold to a
warm location, moishu-e may condense inside the VCR
and cause damage to the video head and tape. When you
first install the Video/TV, or when you move it from a
cold to a warm location, wait for about one hour before
operating the Video/TV.
Getting Started
Page 3

Contents
Getting Started
Step 1 — Preparation
Checking the supplied accessories..........................4
Inserting batteries into the remote
control
...................................................................
Step 2 — Connecting the Antenna
Connecting an antenna
Connecting an antenna/cable TV system
Step 3 — Setting Up the Video/TV Automatically
-AUTO SET UP
Erasing and adding channels..................................7
Setting cable TV on or off
Presetting channels - AUTO PROGRAM
Changing the menu language...............................11
Step 4 — Setting the Clock.......................................12
Setting the clock automatically.............................12
Setting the date and clock manually
Step 5 — Setting Up VCR Plus+*............................16
Setting the guide channel
...................................^,...........
............................
...........................................
..............
.......................................................
.......................................
...........
....................
......................................
10
15
16
Basic Operations
Watching the TV.......................................................18
Switching the Video/TV on and off
Selecting TV programs..........................................18
Adjusting the volume
............................................
Muting the sound...................................................18
Switching quickly between two channels
Adjusting the picture........................................... 19
Adjusting the sound (KV-20VS40 only)
Selecting stereo or bilingual programs
(iCV-20VS40 only)
.............................................
Listening to surround sound effects
(KV-20VS40 only)
..............................................
Displaying on-screen information
Watching a video input signal through
the line input jacks
.............................................
Listening with headphones....................................24
Playing a Tape...........................................................25
Inserting a video cassette
......................................
Ejecting a video cassette........................................25
Protecting your cassette against accidental
erasure.................................................................25
Resetting the tape counter
....................................
Playing a tape.........................................................26
Playing a tape repeatedly - AUTO REPEAT
Displa)ang on-screen information
Displaying the tape counter
Recording TV Programs
Recording TV programs
Recording with the TV off
..................................
..........................................
.......................................
....................................
Recording TV Programs Using the Timer..............30
Setting the timer.....................................................30
......................
.............
..............
........................
......
........................
18
18
20
21
23
24
24
25
25
27
28
28
29
29
29
18
Using the Video/TV before timer recording
starts
4
4
5
5
5
Recording TV Programs Using VCR Plus+
Additional Operations
Automatically Switching the Video/TV
6
Switching Off Automatically - Sleep Timer
9
Selecting the Video/TV's Cable Box Input
Displaying Caption Vision/XDS......................................39
Blocking Out a Channel - CHANNEL BLOCK
Setting Your Eavorite Channels - FAVORITE
Searching Using the Index Function
Enhancing Video Picture Quality
Reducing the Picture Noise..............................................46
Connecting Optional Equipment......................................47
..........................................................................
Checking the timer settings
Changing or cancelling the timer settings
Recording using QUICK TIMER.................................34
On or Off - ON/OFF TIMER
Channel - CHANNEL RX............................................38
CHANNEL
Playing back to the beginning of each
program - Index Scan................................................44
Locating the desired program - Index Search
Adjusting the tracking automatically
Adjusting the tracking manually
Watching the picture input from optional
equipment..................................................................47
...................................................................
..........................................
....................
....................
.......................................
....................
..............
................................
..............
....................................
...........................
..................................
32
33
33
35
36
37
40
42
44
44
45
45
45
Additional Information
Troubleshooting................................................................48
Specifications....................................................................50
Index to Parts and Controls..............................................51
Video/TV set—front.....................................................51
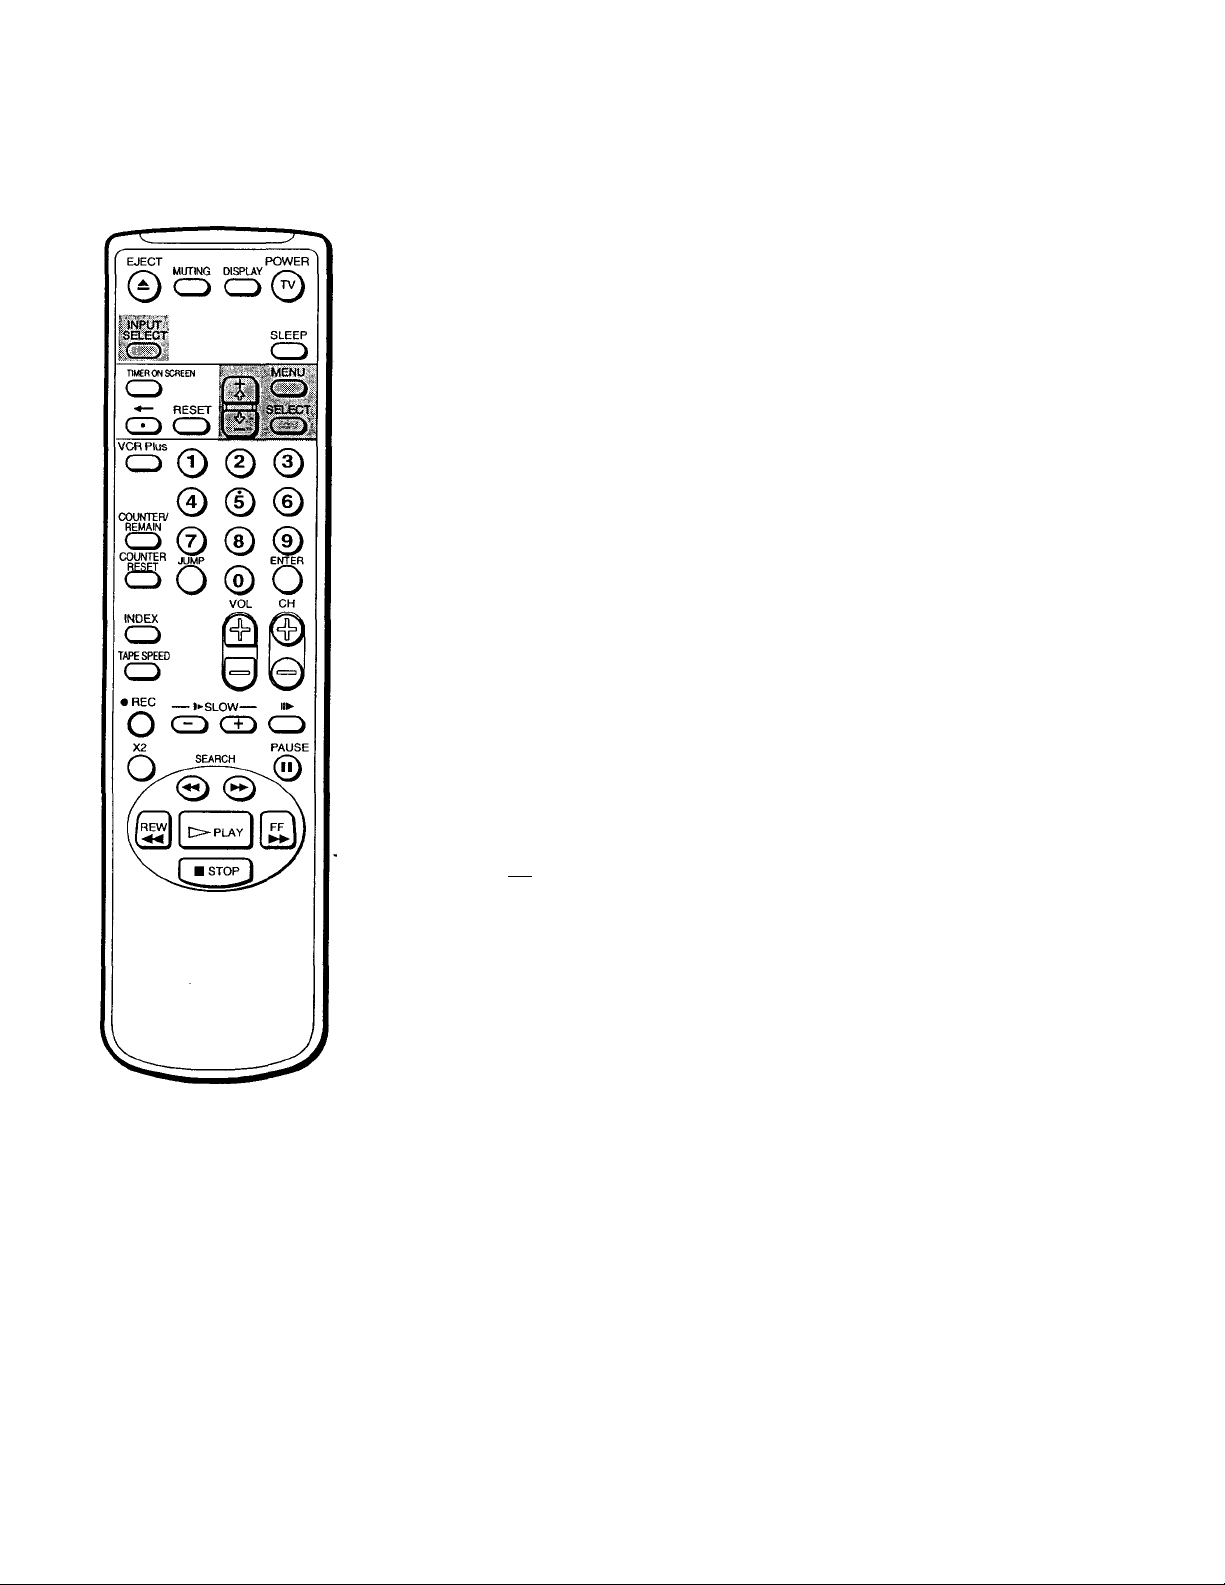
Remote control..............................................................52
* VCR Plus+ and PlusCode are Tradeinarks of Gemstar
Development Corp.
VCR Plus+ system is manufactured under license from
Gemstar Development Corporation.
The instructions in this manual are for models
KV-13VM40, KV-13VM41, KV-20VM40, and KV20VS40. Before you begin to read this manual,
refer to the model number located on the rear of
your Video/TV. Model KV-20VS40 is used for
illustration purposes throughout this manual.
Any differences in operation are indicated in the
text, for example, "KV-20VS40 only."
Page 4
Getting Started
Step 1
Preparation
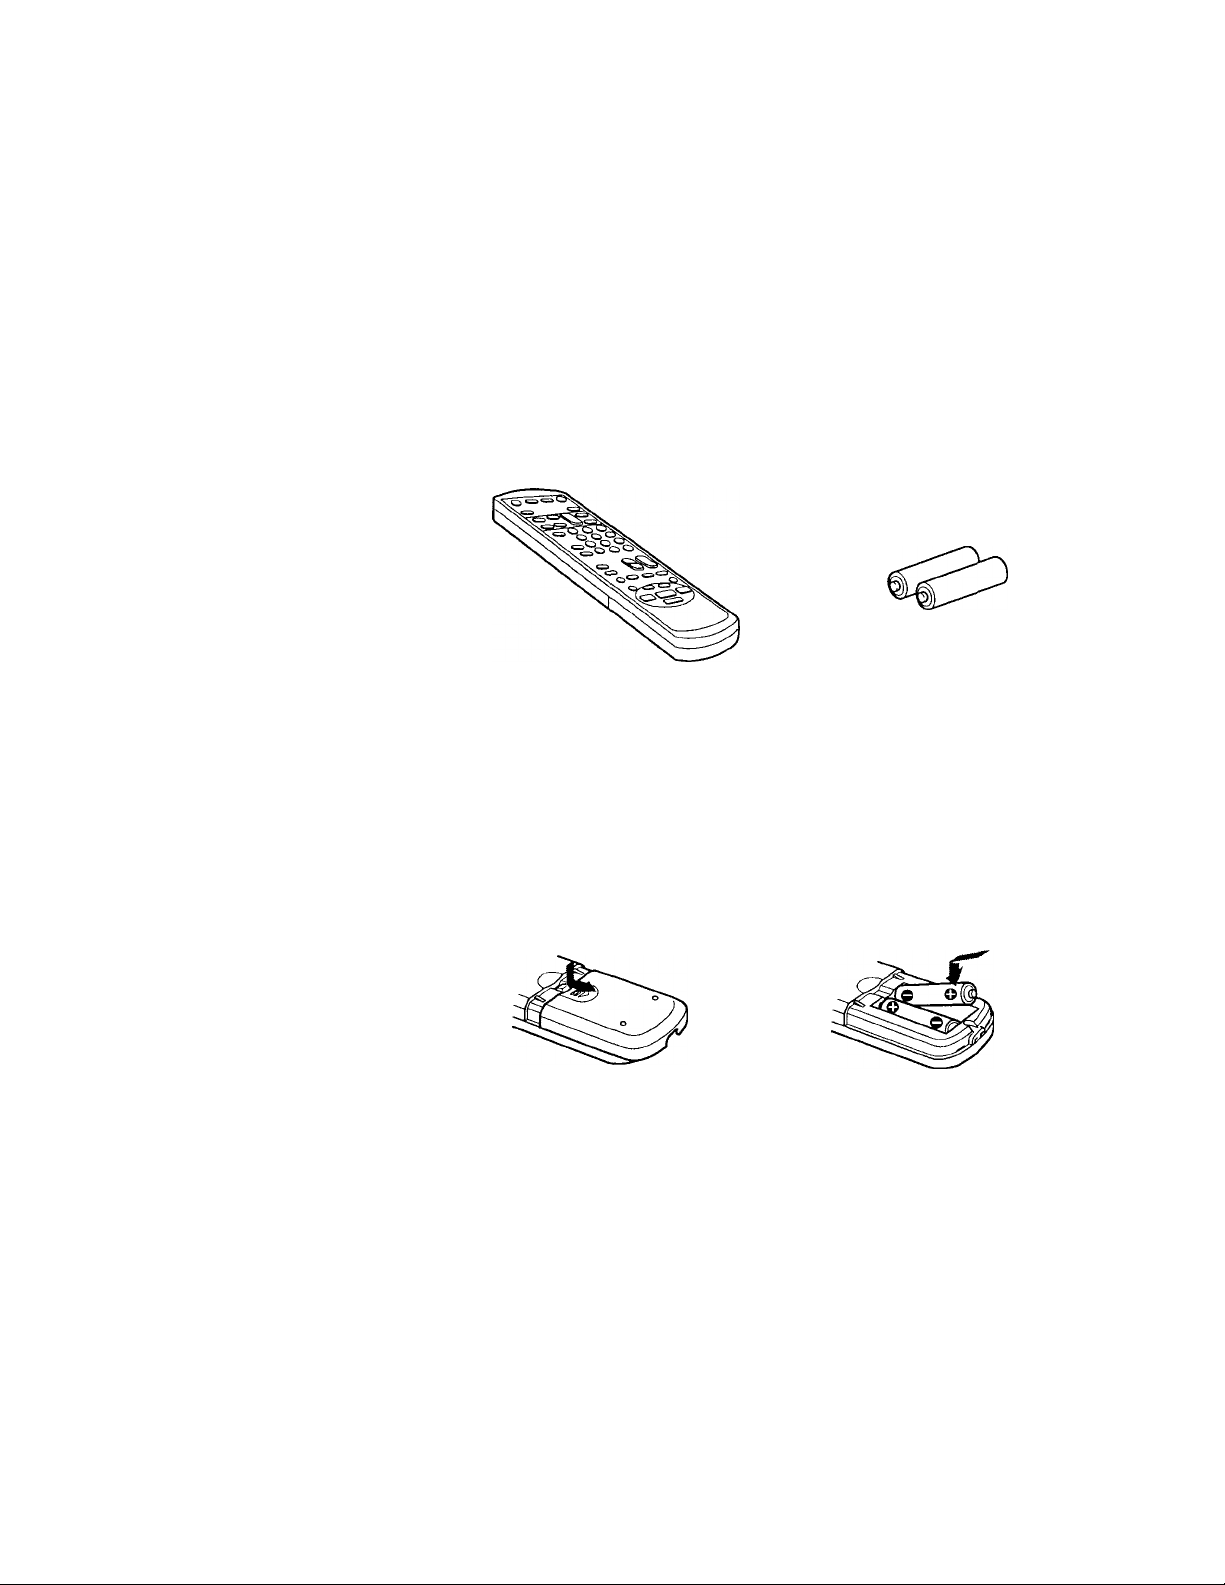
Checking the supplied accessories
When you have taken everything out of the carton, check that you have
these items:
• Remote control
• Two R6 (size A A) batteries
Notes:
• With normal use, the batteries
should last for approximately six
months.
• If you do not use the remote
control for an extended period of
time, remove the batteries to avoid
possible damage from battery
leakage.
Inserting batteries into the remote
control
Turn the remote control
over, and remove the cover.
Check the polarities and insert the
two R6 batteries correctly.
4 I Getting Started
Page 5
step 2 — Connecting the Antenna
Although you can use either an indoor or outdoor antenna with your
Video/TV, we recommend connecting an outdoor antenna or a cable TV
system for better picture quality.
Connecting an antenna
Connect your antenna cable to the VHF/UHF antenna terminal. If you
cannot connect your antenna cable directly to the terminal, follow the
instructions that match your cable type.
(Rear of Video/TV)
75-ohm coaxial
cable
300-ohm
twin lead cable
VHF/UHF
(Rear of Video/TV)
VHF/UHF
Notes
• Most VHF/UHF combination
antennas have a signal splitter.
Remove the splitter before
attaching the appropriate
coimector.
• If you use the U/V mixer, snow
and noise may appjear in the
picture when viewing cable TV
chaimels over 37 (W+1).
• The cable box is supplied by the
cable company.
Coaxial cable and
twin lead cable
Connecting an antenna/cable TV system
Connecting a single cable to the antenna
Connect the cable directly to the antenna.
Connecting to a cable box
Some pay cable TV systems use scrambled or encoded signals that require
acableboxto view all channels. „
't È
(Rear of Video/TV)
VHF/UHF
(Rear of Video/TV)
VHF/UHF
If you control all channel selection through your cable box, you should
consider using the CHANNEL FIX feature (see "Selecting the Video/TV's
Cable Box Input Channel - CHANNEL FIX" on page 38.)
Getting Started
Page 6

step 3 — Setting Up the
Automatically - auto set up
You can set up your Video/TV easily by using the AUTO SET UP feature.
To set up each item individually, see "Changing the menu language"
(page n), "Setting cable TV on or off" (page 9), and "Presetting channels
— AUTO PROGRAM" (page 10).
Before you begin
• Connect the antenna or cable to the Video/TV.
1 Press POWER to turn the Video/TV on.
ENGLISH : 1CH+)
ESPAÑOL ICH-l
FRANÇAIS IVOLil
POWER VOL+/- CHANNEL+/-
AUTO SET UP : [VOL-l
First please
the antenna
Press (INPUT SELECT)
to exit
connect
2 Select the on-screen menu language.
If you prefer Spanish or French to English, you can change the on-screen
menu language by pressing CHANNEL - for Spanish or VOL + for
French.
To reset the factory settings
Press POWER on the Video/TV
while pressing RESET on the remote
control.
ENGLISH ; (CH+)
ESPAÑOL : (CH-I
FRANÇAIS : IVOLtl
AUTO SET UP ; IVOL-l
Primero conecte la
antenna
Oprima (INPUT SELECT)
para sal i r
All of the on-screen menus are set to the factory preset condition in the
selected language.
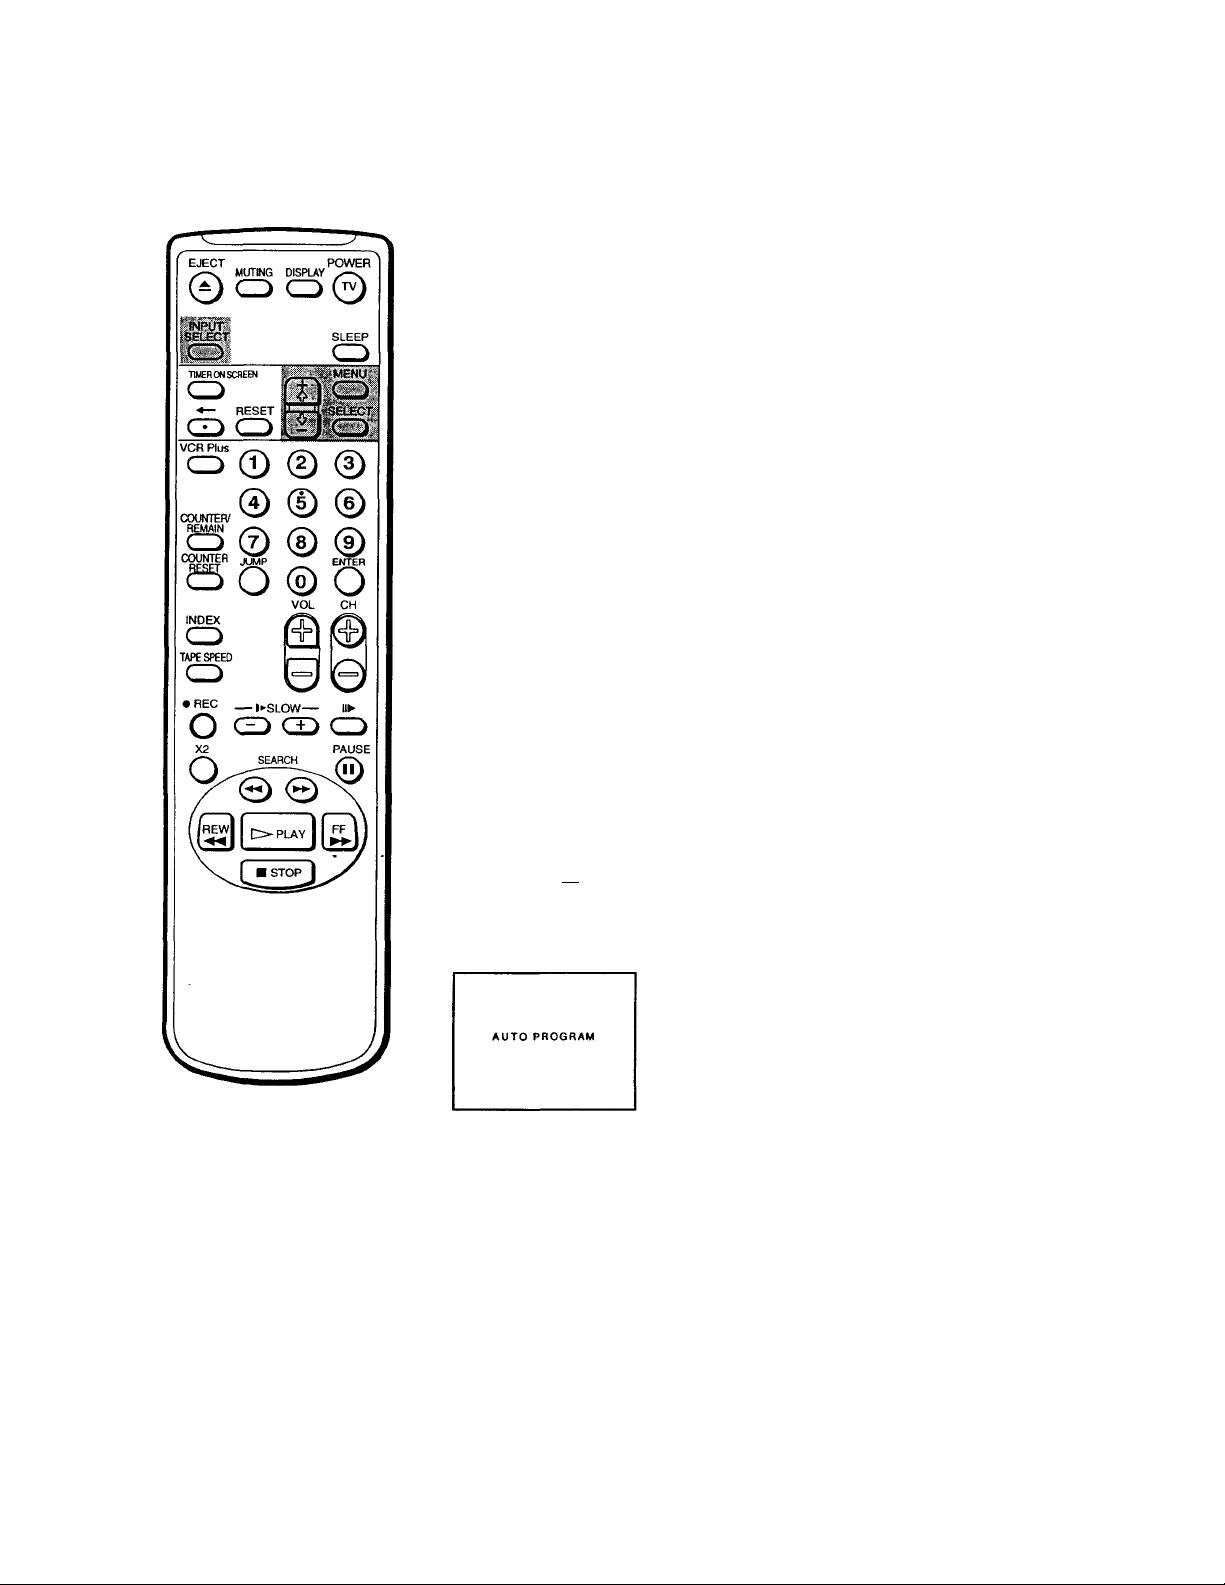
3 Press VOL - to start AUTO SET UP.
"AUTO PROGRAM" appears on the screen and the Video/TV starts
scaiming and presetting channels automatically. When all receivable
channels are stored, "AUTO PROGRAM" disappears and the lowest
numbered channel is displayed.
To exit AUTO SET UP
Getting Started
Press INPUT SELECT.
Page 7

Erasing and adding channels
After AUTO SET UP, you can erase unnecessary channels or add more
channels.
1 Press MENU to display the main menu.
The main menu appears.
►VIDEO
AUDIO
TIMER
TAPE
SET UP
MoveOXS Selects^ Exitseo
2 Move the cursor (►) to "SET UP" with + ■(> or - O and press SELECT.
The SET UP menu appears.
SET UP
►CHANNEL SET UP
FAVORITE CHANNEL
CAPTION VISlON:G20l
LANGUAGE: ENGLISH
7MENU
MoveSXS Select^IcTi Exit@Sl
3 Move the cursor (►) to "CHANNEL SET UP" with + O or - O and press
SELECT.
The CHANNEL SET UP menu appears.
CHANNEL SET UP
► CABLE: OFF
CHANNEL FIX: OFF
AUTO PROGRAM
CHANNEL SKIP/ADD
VCR PIUS+ SET UP
PMENU
Note
If CHANNEL SKIP/ADD appears
in black, the Video/TV is set to
receive a video input signal through
the input jacks and you cannot select
CHANNEL SKIP/ADD. Press
INPUT SELECT so that a channel
number appears on the screen.
Movefflo Select6B££D Exitfigm
4 Move the cursor (►) to "CHANNEL SKIP/ADD" with + 0 or - O and
press SELECT.
The CHANNEL SKIP/ADD menu appears.
CHANNEL SKIP/ADD
► SKIP
ADD
PMENU
Use(0-9]or(CH+/-l
to select the channel
MoveOXS SelectCBBD Exitspn
Getting Started I
Page 8
5 Erase and/or add channels:
^To erase an unwanted channel
(1) Make sure the cursor (►) is beside SKIP.
(2) Press CH +/- or the 0-9 buttons to select the channel you want to
erase and press SELECT.
CHANNEL SKIP/ADD
SKIP
► ADD
PMENU
Use(0-9]or[CH+/-)
to select the channel
MoveOXS SelectSjSD Exita^aa
The message "Channel will be skipped" appears for several seconds and
the cursor (►) moves to ADD.
To add a channel
(1) Make sure the cursor (►) is beside ADD.
(2) Press CH-i-/- or the 0-9 buttons to select the channel you want to add
and press SELECT.
CHANNEL SKIP/ADD
► SKIP
ADD
PMENU
Use|0-9jor[CH+/-]
to select the channel
MoveSm SelecttsELfcn Exitl^Sl
The message "Channel will be added" appears and the cursor (►) moves
to SKIP.
6 To erase and/or add other channels, repeat step 5.
7 Press MENU to return to the original screen.
3 Getting Started
Page 9
Setting cable TV on or off
If you have connected the Video/TV to a cable TV system, set CABLE to
ON (the Settingfactory setting). If not, set CABLE to OFF to watch VHF or
UHF channels.
1 Press MENU to display the main menu.
2 Move the cursor (►) to "SET UP" with + ■(> or - O and press SELECT.
The SET UP menu appears.
SET UP
MoveOX9 Setect^££D Exit(SS)
3 Move the cursor (►) to "CHANNEL SET UP" with + O or - O and press
SELECT.
The CHANNEL SET UP menu appears.
CHANNEL SET UP
-
► CHANNEL SET UP
FAVORITE CHANNEL
CAPTION VISI0N:ES]1
LANGUAGE; ENGLISH
PMENU
► CABLE: OFF
CHANNEL FIX: OFF
AUTO PROGRAM
CHANNEL SKIP/ADD
VCR PIUS+ SET UP
PMENU
Note
IfCABLEappears inblack,theVideo/
TVissettoreceiveavideoinputsignal
throughtheinputjacksandyoucannot
seIectCABLE,PressINPUTSELECTso
thatachannelnumberappearsonthe
screen.
MoveiDili Selects^ Exitugwa
4 Move the cursor (►) to "'CABLE" with + 0 or - -(V and press SELECT.
The selected position turns red.
CHANNEL SET UP
CABLE: OFF
CHANNEL FIX; OFF
AUTO PROGRAM
CHANNEL SKIP/ADD
VCR PIU8+ SET UP
PMENU
MovefSiS SetectSSD Exite
5 Using + 0oT-<>, select "ON" or "OFF" and press SELECT.
CHANNEL SET UP
► CABLE: ON
CHANNEL FIX: OFF
AUTO PROGRAM
CHANNEL SKIP/ADD
VCR PIUS+ SET UP
PMENU
MoveSX9 SelactCBBS ExItCB
6 Press MENU to return to the original screen.
Getting Started I 0
Page 10
Presetting channels - auto program
You can preset TV channels easily by using the AUTO PROGRAM feature.
Preset channels during the day rather than late at night, when some
channels may not be broadcasting.
1 Press MENU to display the main menu.
2 Move the cursor (►) to "SET UP" with + O or - O and press SELECT.
The SET UP menu appears.
SET UP
►CHANNEL SET UP
FAVORITE CHANNEL
CAPTION VISI0N:E21
LANGUAGE: ENGLISH
PMENU
MoveffiSi Selects^ Exitesa
3 Move the cursor (►) to "CHANNEL SET UP" with + O or - O and press
SELECT.
The CHANNEL SET UP menu appears.
CHANNEL SET UP
►CABLE; OFF
CHANNEL FIX: OFF
AUTO PROGRAM
CHANNEL SKIP/ADD
VCR PIUS+ SET UP
PMENU
Receivable channels for this
Video/TV
VHF:2-13
UHF: 14 - 69
Cable; 1 -125
Note
If AUTO PROGRAM appears in
black, the Video/TV is set to receive
a video input signal through the
input jacks and you cannot select
AUTO PROGRAM. Press INPUT
SELECT so that a channel number
appears on the screen.
To erase unnecessary channels,
or to add channels
See "Erasing and adding channels"
(page 7).
MoveQXS Selects^ Exiitffia
4 Move the cursor (►) to "AUTO PROGRAM" with + O or - O and press
SELECT.
"AUTO PROGRAM" appears on the screen and the Video/TV starts
scanning and presetting channels automatically. When all receivable
channels are stored, "AUTO PROGRAM" disappears and the lowest
numbered channel is displayed.
5 Press MENU to return to the original screen.
To exit AUTO PROGRAM
Press any button.
10 I Getting Started
Page 11
Changing the menu language
^ -
If you prefer Spanish or French to English, change the menu language with
the following steps.
1 Press MENU to display the main menu.
2 Move the cursor (►) to "SET UP" with + 0 or - 0 and press SELECT.
The SET UP menu appears.
SET UP
►CHANNEL SET UP
FAVORITE CHANNEL
CAPTION VISI0N:E2)1
LANGUAGE: ENGLISH
PMENU
MoveQH) SelectiaL££D ExItS^
3 Move the cursor (►) to "LANGUAGE" with + -O or - O and press SELECT.
The language position turns red .
SET UP
CHANNEL SET UP
FAVORITE CHANNEL
CAPTION VISI0N:ES)1
LANGUAGE: ENGLISH
PMENU
MovefDS SalecteaiCTt ExitHPiOt
4 Using + 0 or - 0, select the language you want and press SELECT.
The entire menu appears in the selected language.
PREFERENCIAS
AJUSTE DE CANAL
CANAL FAVORITO
CAPTION VISION :IÜÜIl
►LENGUAJE : ESPAÑOL
PMENU
MoverSXS SelecclonarSSDSalirfi
5 Press MENU to return to the original screen.
Getting Started I ^ ^
Page 12
step 4 — Setting the Clock
Setting the clock automatically
Some TV and cable channels transmit time signals with their broadcasts. Your
Video/TV can pick up these time signals to automatically set the clock
(AUTO CLOCK). The AUTO CLOCK feature works only if a channel in
your area is broadcasting a time signal. If your Video/TV cannot pick up
the signals, set the clock manually (page 15).
1 Press MENU to display the main menu.
2 Move the cursor (►) to "TIMER" with + O or - 0 and press SELECT.
The TIMER menu appears.
TIMER
► CURRENT TIME SET
ONXIFF TIMER
CHANNEL BLOCK
SMENU
Note
If there are only a few channels in
your area that carry time signals,
setting the clock automatically may
take up to about 45 minutes. If
nothing happetts even after you wait
for about 45 minutes, set the dock
manually.
Movemo Select^££D ExittopOi
SUN 12:00 AM
3 Move the cursor (►) to "CURRENT TIME SET" with + O or - O and press
SELECT.
The CURRENT TIME SET menu appears.
CURRENT TIME SET
►AUTO
MANUAL
PMENU
Move(D(S SflIectisELEcn ExitlS^
4 Move the cursor (►) to "AUTO" with + ■& or - O and press SELECT.
The AUTO CURRENT TIME SET menu appears.
AUTO CURRENT TIME SET
► FULL AUTO
OPTIONS
MoveffiQ) SelectSEB
ExitiSSi
5 Move the cursor (►) to "FULL AUTO" with + <1 or - O and press SELECT.
The message "Please turn TV off to receive clock data" appears for 5
seconds.
6 To activate the Auto Clock setting, press POWER to turn the Video/TV
off.
The time signals automatically set the time for your time zone and adjust
for daylight saving time.
*12 I Getting Started
Page 13
If the clock does not activate
If the €lock is set, but your time zone or daylight saving time is not set
correctly, you can adjust these settings manually. If you live close to a time
zone border, the Video/TV's clock may not match the actual broadcast
times of the programs. To confirm the time zone of the broadcast service,
contact your cable company and set the clock accordingly.
1 Follow steps 1-5 in "Setting the clock automatically" and select
"OPTIONS" in step 5.
The CURRENT TIME SET CHANNEL menu appears.
CURRENT TIME SET CHANNEL
► AUTO
MANUAL CH
__________
MoveOXS SelectSBD EitMggWDi
If you know a channel number that carries a time signal
(1) Move the cursor (►) to "MANUAL" with O or - O and press SELECT.
The CH position turns red.
(2) Using the 0-9 buttons, enter the channel number and press SELECT.
Then skip steps 2-5.
Move the cursor (►) to "AUTO" with + •(> or - 0 and press SELECT.
The AUTO CURRENT TIME SET menu appears.
AUTO CURRENT TIME
► TIME ZONE; AUTO
DAYLIGHT SAVING TIMEAUTO
OK
SET
MovefOS SelectSBD
ExitlSm
3 Move the cursor (►) to "TIME ZONE" with + O or - 0 and press SELECT.
The TIME ZONE menu appears.
TIME ZONE
► AUTO
ATLANTIC
EASTERN
CENTRAL
MOUNTAIN
PACIFIC
ALASKA
HAWAII
OK
4 Using + O or - 0, select "AUTO". Then move the cursor (►) to "OK," and
press SELECT.
The DAYLIGHT SAVING TIME menu appears.
DAYLIGHT SAVING TIME
►AUTO
STANDARD TIME
DAYLIGHT SAVING TIME
OK
MovdfSS SelacICBB ExIt^BI
Getting Started I ^ 3
Page 14

5 Using + 0 or - 0, select "AUTO," "STANDARD TIME," or "DAYLIGHT
^SAVING TIME." (See the table below). Then move the cursor (►) to "OK,"
^and press SELECT.
Choose To
AUTO
STANDARD TIME
DAYLIGHT SAVING TIME
Select to set the daylight saving time automatically.
Select if your area does not use daylight saving time.
Select if your area uses daylight saving time.
6 To activate the Auto Clock setting, press POWER to turn the Video/TV
off.
^ 4 Getting Started
Page 15
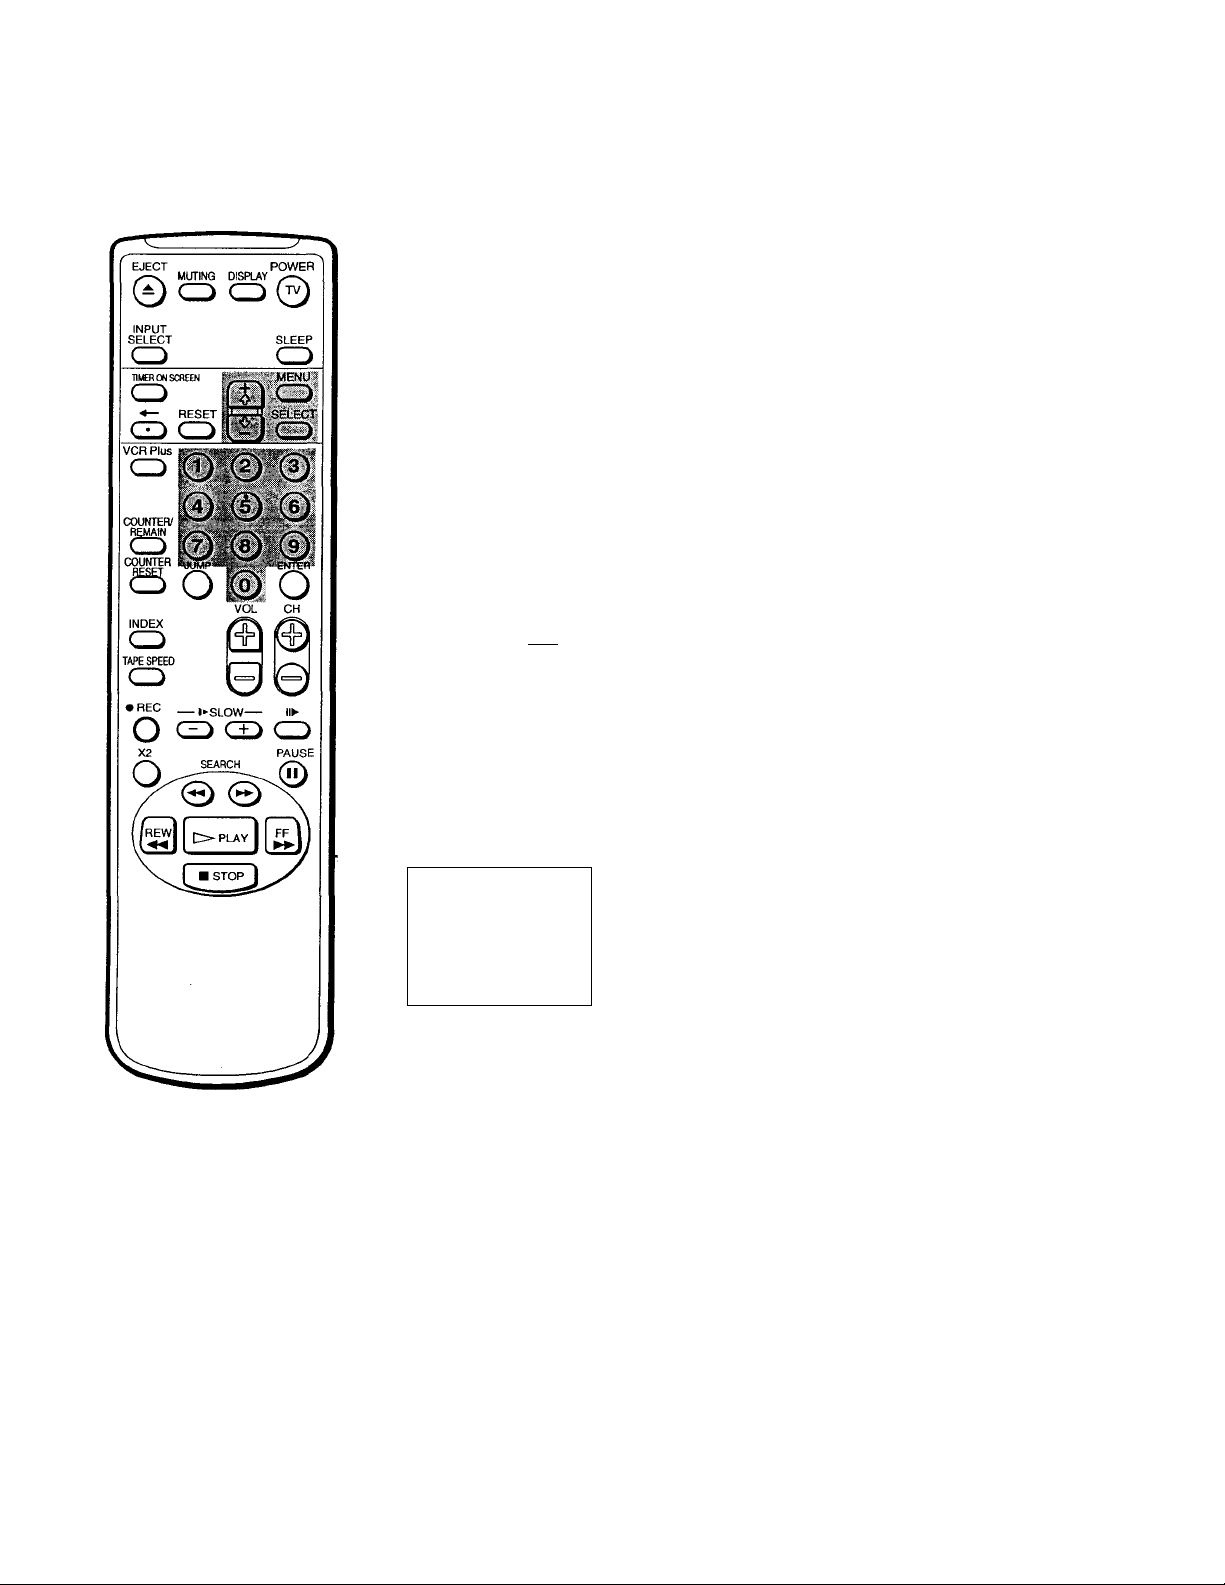
TTT5—
( EJECT POWER')
© 0 <=
INPUT
SELECT SLEEP
Q
Q T
/vnrius .
> 1!
i©
Q
1 Q
[ SELECT.
1 CD
o © © ©
COUNTER/
REMAINHbMAIN /»—V >—V ✓ -N.
0 0©
s® ® ®
o © o
Setting the date and clock manually
Setting the date and clock enables you to use the timer feature for
recording or automatically tuning the Video/TV on or off.
1 Press MENU to display the main menu.
2 Move the cursor (►) to "TIMER" with + O or - O and press SELECT.
The TIMER menu appears.
3 Move the cursor (►) to "CURRENT TIME SET" with -t 0 or - O and press
SELECT.
The CURRENT TIME SET menu appears.
4 Move the cursor (►) to "MANUAL" with -i- 0 or - 0 and press SELECT.
The CURRENT TIME SET menu appears.
CURRENT TIME SET
►__/
_________________________;____
PMENU
MoveSKS SfllectcsELKm ExitiSS
AM
To display the time
Press DISPLAY.
If you have made a mistake
Press to return to the previous
position.
If the clock has stopped and
is displayed
You have to re-set the clock.
5 Press SELECT to start setting the dock.
The month section turns red.
CURRENT TIME SET
1/
__________________
PMENU
Set the month
MoveSK?] SelectaSD Exiifl»roi
6 Using -K> or - 0, set the month and press SELECT.
The day section turns red.
CURRENT TIME SET
7/1
_____________
PMENU
Set the day
MoveQKS SelectSE9 Exitscn
7 Using + O or - 0 and SELECT, set the day, year, hour and minute in the
same way as in step 6.
CURRENT TIME SET
PMENU
7/10 199B FRI
7:30PM
MoveQlSl SelectSBS)
ExitQBS
8 After setting the minutes, press SELECT.
The dock starts working.
9 Press MENU to return to the original screen.
Getting Started I ^ 5
Page 16
step 5 — Setting Up VCR Plus+
The VCR Plus+ feature allows you to simplify the task of programming
^our Video/TV to make recordings with the timer. Setting up your Video/
TV involves coordinating the TV channel number (the number you turn to
on your Video/TV or VCR to watch a program) with the guide channel
(the number that's assigned to that channel in your program guide). To
find the guide channel numbers, look in the "Channel Line-up Chart" in
the program guide for your area that features VCR PlusCodes. It usually
looks like the example on the next page.
Setting the guide channel
1 Press MENU to display the main menu.
2 Move the cursor (►) to "SET UP" with O or - O and press SELECT.
The SET UP menu appears.
SET UP
►CHANNEL SET UP
FAVORITE CHANNEL
CAPTION VISI0N:K311
LANGUAGE: ENGLISH
PMENU
Note
If VCR Plus+ SET UP appears in
black, the Video/TV is set to receive
a video input signal through the
input jacks and you cannot select
VCR Plus+ SET UP. Press INPUT
SELECT so that a chaimel number
appears on the screen.
If you have made a mistake
Press to return to the previous
position.
MovelDS SelectiSE!) ЕхКвШ!
3 Move the cursor (►) to "CHANNEL SET UP" with + ■(} or - ■O’ and press
SELECT.
The CHANNEL SET UP menu appears.
CHANNEL SET UP
► CABLE; OFF
CHANNEL FIX: OFF
AUTO PROGRAM
CHANNEL SKIP/ADD
VCR PIUS+ SET UP
PMENU
MoveiDQ SefectSES ExItSEQ
4 Move the cursor (►) to "VCR PIus+ SET UP" with + 0 or - and press
SELECT.
The VCR Plus+ SET UP menu appears.
VCR PIUS+ SET UP
►GUIDE CH - TV CH
CHANNEL LIST
PMENU
Move({}Q) SelecteSD ExitlS)
Press SELECT to enter the guide channel number.
The GUIDE CH position turns red.
VCR PIU8+ SET UP
GUIDE CH - TV CH
'I g I Getting Started
CHANNEL LIST
PMENU
Use (0*9] to eel •
guide channel
Then press (ENTER]
Page 17

6 Press the 0-9 buttons to enter the channel number assigned in the guide
channel and press ENTER.
The TV CH position turns red.
VCR PIUS+ SET UP
Use (0-9] to set a
TV channel
Then press (ENTER)
7 Press the 0-9 buttons to enter the actual channel number on your Video/
TV and press ENTER.
VCR PIUS+ SET UP
GUIDE CH - TV CH
CHANNEL LIST
PMENU
►GUIDE CH - TV CH
16
CHANNEL LIST
PMENU
195
Notes
• If you enter more than eight
channels, the additional channels
are stored on separate "pages."
Move the cursor (►) to "PAGE"
and use + 0 or - buttons to view
the entire list.
• The mciximum number of guide
channels is 99.
Move(S(S SelectSBQ
Exitiago
8 Repeat steps 6 and 7 for each guide channel number you want to enter.
9 Move the cursor (►) to "CHANNEL LIST" with + O or - 0- and press
SELECT to confirm your channel settings.
CHANNEL LIST
TV
GUIDE-
16 - 125 33 - 49
17 20 - 42 61 - 47
21 - 28 99 -
►PAGE 1
PMENU
MoveSXS Sfliact^ieh ExitwERoi
GUIDE- TV
22 59 - 3
102
10 After you finish presetting, press MENU to return to the original screen.
Example of a "Channel Line-up Chart"
A
CABLE
CH
16
17
20
21
22
25
34
35
5
27 BB 46
29
30 48
31
38
39
45
17
44
49
50
51
American Movie Classics
Bravo(pfogram grid only)
Cable News Network
G^AN
The (Disney Clwinel
The Discovery Channel ^
ESPN
^^B The Family Chij^oQi^
Home Box
■■
Charviel
^^B Sporte Channel America
^B Showtime
^B TBS SuperStation
BB The Movie Channel
BB ^ Nashville Network
BBB Turner Network Television
^^B USANetwork
VCR Plus+
GUIDE CH
35
54
42
^ 28
>53
>34
47
33
45
38
59
70
41
43
58
49
52
44
Getting Started I ^ ~¡
Page 18

Basic Operations
Watching the TV
This section explains the basic functions to use while watching the TV.
Jvlost of the operations can be done using the remote control.
Switching the Video/TV on and off
Switching on
Press POWER.
The STANDBY lamp flashes until the picture appears.
Switching off
Press POWER.
The Video/TV enters standby mode and the STANDBY lamp on the front
of the Video/TV lights up in red if a tape is inserted in the Video/TV.
If a tape is not inserted in the Video/TV, the STANDBY lamp disappears.
Selecting TV programs
Turn the cable mode ON or OFF to select the type of channel you want to
watch. For more information on setting the cable mode, see "Setting cable
TV on or off" on page 9.
Press CH +/- or the 0-9 buttons on the remote control, or CHANNEL +/on the Video/TV.
To select a double-digit numbers using the 0-9 buttons
For example, if you want to select 21, first press 2, then press 1.
Adjusting the volume
Press VOL -(-/-.
Muting the sound
Press MUTING.
"MUTING" appears on the screen.
To resume normal sound, press MUTING again, or press VOL +.
Note
You can not jump to channels you
scanned through using the CH +/-
buttons.
18 1 Basic Operations
Switching quickly between two channels
Press JUMP. The chaimel switches to the previously selected channel.
Pressing JUMP again switches the channel back to the originally selected
channel.
Page 19

Adjusting the picture
yf~ -
When watching TV programs, you can adjust the picture to suit your taste.
You can adjust the picture received through the input jacks as well.
These adjustments are retained in memory even when you turn off the TV.
1 Press MENU to display the main menu.
The main menu appears.
►VIDEO
AUDIO
TIMER
TAPE
SET UP
MoveQKS SelectfiSS ExitiSS)
2 Move the cursor (►) to "VIDEO" with + O or - <V and press SELECT.
The VIDEO menu appears.
VIDEO
► PICTURE
BRIGHTNESS Nlllinillinin----»»
COLOR
HUE
SHARPNESS
PMENU
Move(Qll) SeleclBEUcn ExitUgsa
3 Using + O or - ■<>, select the item you want to adjust and press SELECT.
IUII>tllllWtU'~<*-~«
lllllllllllillllh...
4 Adjust the picture with + 0 or - O and press SELECT.
With each press, the vertical bars increase or decrease and the figure at the
right margin changes to show the control level. (See the table below.)
5 To adjust other items, repeat steps 3 and 4 above.
6 Press MENU to return to the original screen.
The adjusted control levels are stored.
Description of adjustable items
Item
PICTURE
BRIGHTNESS
COLOR
HUE
SHARPNESS
Press + 0 to
Increase picture contrast.
Brighten the picture.
Increase color intensity.
Make picture tones greenish.
Sharpen the picture.
Press - to
Decrease picture contrast.
Darken the picture.
Decrease color intensity.
Make picture tones purplish.
Soften the picture.
To restore the factory settings
Press RESET after selecting and displaying the VIDEO menu.
AU of the settings are restored to the factory settings.
Basic Operations I 19
Page 20

Adjusting the sound (kv-2ovs4o only)
You can adjust the bass, treble, and balance to suit your taste. You can
adjust the sound of the signal received through the input jacks as well.
1 Press MENU to display the main menu.
2 Move the cursor (►) to "AUDIO" with + 0 or - 0 and press SELECT.
The AUDIO menu appears.
AUDIO
►BASS
TREBLE
BALANCE
MTS:
SURROUND : ON
PMENU
MoveSlQ SelectSBS Exit(S3
3 Select the item you want to adjust.
For example:
To adjust bass, move the cursor (►) with + •(> or - 0 to "BASS" and press
SELECT.
STEREO
4 Adjust the selected item;
Press + ■& or - O to adjust the item and press SELECT.
5 To adjust other items, repeat steps 3 and 4 above.
6 Press MENU to return to the original screen.
Description of adjustable items
Item Press + 0 to Press -Oto
BASS
TREBLE Increase the high pitched sounds. Decrease the high pitched sounds.
BALANCE
Increase the low pitched sounds.
Emphasize the right speaker's
volume.
Decrease the low pitched sounds.
Emphasize the left speaker's volume.
To restore the factory settings
Press RESET after selecting and displaying the AUDIO menu.
All of the settings are restored to the factory settings.
20 I Basic Operations
Page 21

Selecting stereo or bilingual programs (kv-2ovs4o only)
The Multichannel TV Sound (MTS) feature allows you to switch between
stereo, mono, and Second Audio Program (SAP).
1 Press MENU to display the main menu.
2 Move the cursor (►) to "AUDIO" with + ■(> or - O and press SELECT.
The AUDIO menu appears.
AUDIO
►BASS
TREBLE
BALANCE
MTS:
SURROUND :
PMENU
MoveQlS SelectSSD Exitogwa
3 Move the cursor (►) to "MTS" with + O or - O and press SELECT.
The selected position turns red.
AUDIO
BASS
TREBLE lUtlUNIIIIIIti-x
BALANCE
MTS;
SURROUND :
7MENU
STEREO
ON
STEREO
ON
.....
..................................
Note
If you set MTS to "SAP' and a SAP
signal is not being broadcast, no
sound will come from the speakers.
(However, the program's primary
audio channel will be recorded.) See
page 22 for a table describing the
relation between the speakers and
the source signal.
Move(£i!|) Select^^D Exitggwt
4 Using + O or - O, select "STEREO," "SAP," or "MONO" and press
SELECT.
AUDIO
BASS
TREBLE
BALANCE
►MTS: SAP
SURROUND :
7MENU
Moveil)@ SelectSBD Exiles
Choose
STEREO
SAP
MONO Select for mono reception (use to reduce noise during stereo broadcasts).
To restore the factory settings
Press RESET after selecting and displaying the AUDIO menu.
All of the settings are restored to the factory settings.
Maiguwiii<'*»<-«>"
ON
To
Select for stereo reception when,viewing a program broadcast in stereo.
Select to listen to a bilingual broadcast.
Basic Operations I 21
Page 22

This table describes the relation between the sound output from the
^speaker, the recorded sound, and the MTS mode. For instance, if you set
MTS to "SAP" and a SAP signal is not being broadcast, the sound from the
speakers is muted. However, if you record the same program, the sound
will be recorded in the program's primary audio channel (stereo or mono).
Source
Signal
Mono
Stereo
Mono
+
SAP
Stereo
+
SAP
MTS
Mode
Mono
Stereo
SAP
Mono
Stereo
SAP
Mono
Stereo
SAP
Mono
Stereo
SAP
Speaker Output
L R
L + R L + R
L + R
Mute
L + R L + R
L R
Mute Mute
L + R L + R
L + R
SAP SAP
L + R
L R
SAP SAP
L + R
Mute
L + R
L + R
Recorded Sound
Hi-Fi "L"
Track
L + R
L + R L + R L + R
L + R L + R L + R
L + R L + R L + R
L R L + R
L
L + R L + R L + R
L + R
SAP SAP SAP
L + R
L R L + R
SAP SAP SAP
Hi-Fi "R"
Track
L + R
R
L + R
L + R L + R
Normal
Track
L + R
L + R
L + R
On-screen
Display
None
None
SAP
None
STEREO
SAP
None
None
SAP
None
STEREO
SAP
22 I Basic Operations
Page 23

Listening to surround sound
effects (KV-20VS40 only)
The surround feature simulates the sound reproduction of a movie theater
or a concert hall. Surround is only effective for stereo programs.
1 Press MENU to display the main menu.
2 Move the cursor (►) to "AUDIO" with + O or - O and press SELECT.
The AUDIO menu appears.
AUDIO
► BASS
TREBLE
BALANCE
MTS
SURROUND : ON
7MENU
MoveSXD Select^^ ExitSEQ
3 Move the cursor (►) to "SURROUND" with + O or - ■(> and press SELECT.
The selected position turns red.
AUDIO
BASS
TREBLE
BALANCE
MTS:
SURROUND : OFF
PMENU
STEREO
imiitillliillll..
STEREO
Moveaxs Select^fCT) Exitagsa
4 Usirig + 0 or - 0, select "ON" or "OFF" and press SELECT.
AUDIO
BASS
TREBLE
BALANCE
MTS:
►SURROUND : ON
PMENU
MoveQXH SelectQBED ExHfliPP
To restore the factory settings
Press RESET after selecting and displaying the AUDIO menu.
All of the settings are restored to the factory settings.
IHUUUWWI"'~"»«~
STEREO
Basic Operations I 23
Page 24

Displaying on-screen information
Press DISPLAY to turn the display on or off.
The channel number, date and time, audio mode are displayed.
Press DISPLAY repeatedly to scroll between XDS ON, CAPTION, and
DISPLAY OFF. For more information on XDS and CAPTION, see page 39.
Channel number
rg4l
-
jsTEnEa—
6:40PW
4/9THU
Current date and time
To make the indications disappear, press DISPLAY repeatedly until
"DISPLAY OFF" appears.
Audio mode
Watching a video input signal through the line input jacks
Press INPUT SELECT repeatedly until the desired input indicator appears.
To return to the normal TV picture, press INPUT SELECT until the
channel number appears. For more information on using the line input
jacks, see page 47.
Listening with headphones
Plug the headphones (not supplied) into the D (headphones) jack which is
located inside the cover on the front of the Video/TV.
The sound from the speaker is turned off.
Page 25

Playing a Tape
This section shows you how to insert a video cassette and to play it. For
more information on using the advanced features, see "Additional
Operations" on pages 36 through 47.
Inserting a video cassette
Gently insert a cassette with the arrow indication facing upwards. The
cassette is automatically loaded into the cassette compartment and the
Video/TV turns on. If you insert a cassette without a safety tab, playback
automatically starts.
Ejecting a video cassette
Press EJECT ±.
You can eject the cassette even if the power is in standby mode.
Protecting your cassette against accidental erasure
The cassette has a safety tab to protect against accidentally erasing a
previous recording. Break off the safety tab with a screw driver or a
similar tool to prevent recording.
If the safety tab is removed, the cassette is ejected when you try to record
on if.
To record on a cassette with the safety tab broken off, simply cover the tab
hole with adhesive tape.
Resetting the tape counter
The tape counter helps you to locate a certain scene after playback. Press
COUNTER RESET on the remote control to set the counter to "00:00:00"
before playing the tape. The tape counter is automatically reset to
"00:00:00" whenever a cassette is inserted. The Video/TV keeps counting
the length of the tape being played. Note, however, that the tape counter
does not count the portions without video signals recorded.
Basic Operations I 25
Page 26

EJECT POWER
MOriNG DISPUY
©
INPUT
SELECT
TIMER ON SCREEN
Q
■«— RESET
VCR Plus
O CD©
Q Q
Q © © ©
© © ®
COUNTER/
REMAINHfcMAIN y,—V y—v y/—\
S,
S O ® O
TAPE SPEED
Q
Playing a tape
1 Insert the tape.
The Video/TV automatically turns on. If you insert a cassette without a
safety tab, playback automatically begins.
2 Press PLAY t>.
Playback begins. On screen-information automatically disappears after
several seconds.
To stop playback
Press STOP ■.
The Video/TV returns to the normal TV picture.
To stop playback for a moment
Press PAUSE II. The picture pauses.
Press PAUSE II again or press PLAY C> to resume playback.
If you leave your Video/TV in pause mode, normal playback resumes
after about 5 minutes.
To fast forward the tape
Press STOP ■, then press FF
To rewind the tape
Press STOP ■, then press REW
To view a tape at high speed
During playback, press and hold REW (rewind) or FF
forward). A high-speed picture appears on the TV screen.
To resume normal playback, release the button.
(fast
Notes
• The sound is muted during all
operations except for normal
playback.
• If the OFF timer is activated
during playback, playback stops.
26 1 Basic Operations
To view the picture while in fast forward or rewind mode
Press and hold FF during fast forward or REW ◄◄ during rewind.
The picture appears on the screen.
When you release the button, fast forward or rewind mode is resumed.
To view the picture at high speed
During playback, press SEARCH ►► or SEARCH
To view the picture at twice the normal speed
During playback, press X2.
To view the picture in slow motion
During playback, press SLOW !►+/-.
To playback frame by frame
Press PAUSE II during normal playback, then press !!► (frame).
Page 27

Playing a tape repeatedly - auto
REPEAT
You can play the recorded portion of a tape repeatedly.
1 Press MENU.
The main menu appears.
►VIDEO
AUDIO
TIMER
TAPE
SET UP
Move{Q(S SelectSBfi Exit^Si
2 Move the cursor (►) to "TAPE" with + 0 or - O and press SELECT.
The TAPE menu appears.
TAPE
►TAPE REMAIN: T-120
AUTO REPEAT: OFF
NOISE REDUCTION; OFF
TRACKING
PMENU
MoveSXI) SelBcttSELtCTi Exitl^^
3 Move the cursor (►) to "AUTO REPEAT" with + O or - 0 and press
■ SELECT.
The selected position turns red.
TAPE -
TAPE REMAIN: T-120
AUTO REPEAT: OFF
NOISE REDUCTION: OFF
TRACKING
PMENU
Note
If you eject the cassette tape or turn
off the power, AUTO REPEAT will
return to OFF.
MoveSJS SelectSBD ExItflBi
4 Using + O or - O, select "ON" and press SELECT.
TAPE
TAPE REMAIN: T120
►AUTO REPEAT: ON
NOISE REDUCTION: OFF
TRACKING
PMENU
MoveOiQ SelectOBD ExitlHa
5 Press MENU to return to the original screen.
6 Press PLAY t>.
Playback begins. When the tape reaches the end, it will automatically
rewind and begin playing again.
Basic Operations I 27
Page 28

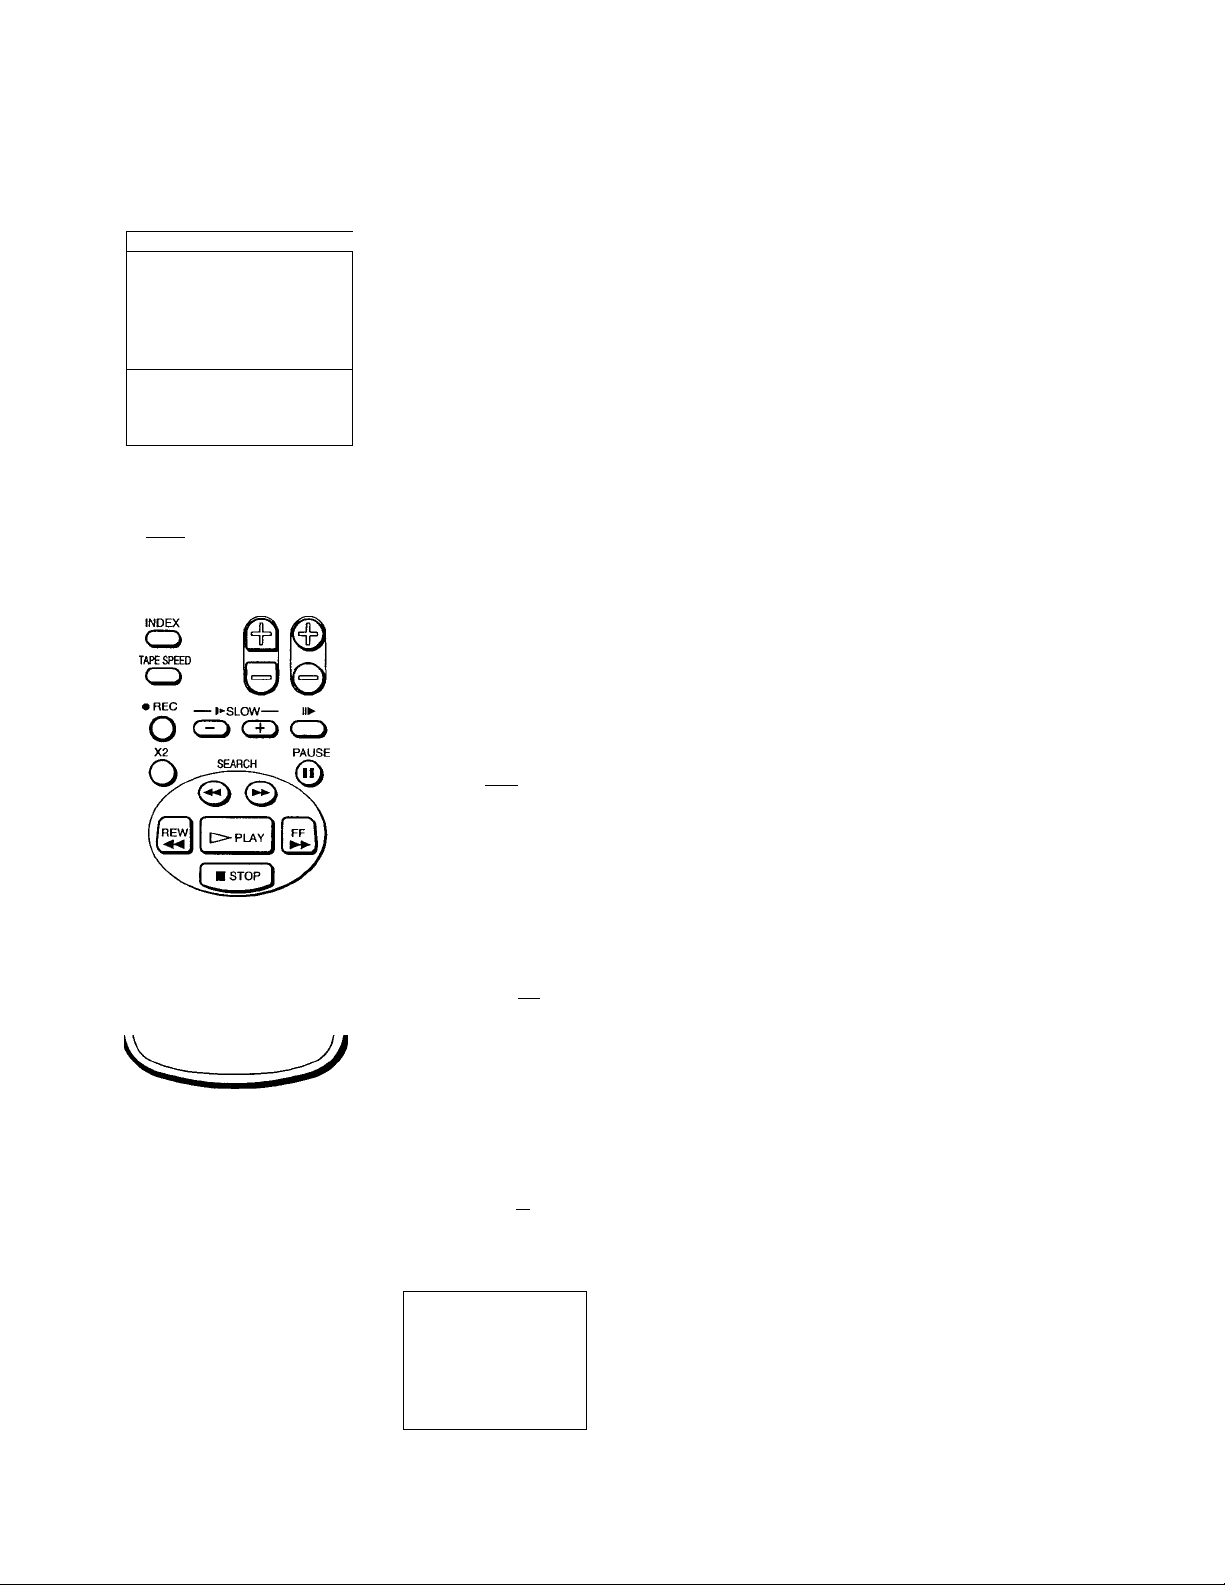
r EJECT
... ..POWER^
pISPLAY.i
© 0
INPUT
SELECT SLEEP
Q
Q Q
VCR Plus
IRON SCREEN |
RESETj
I
I
Q © © ©
Displaying on-screen information
Press DISPLAY to turn the display on or off.
The date and time, tape operation mode is displayed.
Q
Press DISPLAY repeatedly to scroll between XDS ON, CAPTION, and
DISPLAY OFF. For more information on XDS and CAPTION, see page 39.
El—Tape operation mode
"5^
s® © ©
ibCXMIcR .iiiiuip PMfFp
o © o
INDEX
Q
TAPE SPEED
Q
O Q CD Q
X2 PAUSE
Q SEARCH 0
6;40PM
7/15WED
- Current date and time
Displaying the tape counter
Press COUNTER/REMAIN to display the tape counter. The tape counter
shows the tape travel time in hours, minutes and seconds during
recording or playback. Each time you press COUNTER/REMAIN, the
time counter and the remaining tape time counter appears alternately.
Press COUNTER RESET to restore the counter to "00:00:00."
Time counter
When you use a 2-hour (120 minute) tape, set TAPE REMAIN to T-120.
When you use a tape longer than 120 minutes, set TAPE REMAIN to
OTHERS.
Remaining tape
time counter
Notes
• The tape operation naode is
displayed on the screen whenever
you change the mode.
• If you are rewinding a tape and
the time counter is displayed on
the screen, the tape will stop when
the counter reaches "00:00:00."
Use this function to search for the
beginning of a recording.
28 1 Basic Operations
1 Press MENU to display the main menu.
2 Move the cursor (►) to "TAPE" with -i- ft or - <1 and press SELECT.
3 Move the cursor (►) to "TAPE MMAIN" with + or - O and press
SELECT.
The selected position turns red.
TAPE
TAPE REMAIN: T-120
AUTO REPEAT: OFF
NOISE REDUCTION: OFF
TRACKING
9MENU
MoveOXS Sel«ct6BD Exitms
4 Using + O or - O, select 'T-120" (the factory setting) or "OTHERS" and
press SELECT.
5 Press MENU to return to the original screen.
Page 29

Recording TV Programs
To record from a cable box, turn it on.
EJECT
MUIHMÜ UIS>^TJ\Y
©
TIMER ON SCREEN
Q
Q CD
VCR Plus fc
O CD
RESET
Q © © ©
© © ©
»UNTER/
REMAIN \ ^
CD (a) (?
»UNTER «Sin
SO® ‘
INDEX
Q
VÜL CH
— l►SLOW— «►
CZ> OJ Q
i®
3 Press TAPE SPEED to select the recording speed, SP (Standard Play), or EP
(Extended Play). Recording in EP mode will extend the length of your
tape.
Maximum recording time
SP mode: 2 hours 40 minutes with T-160
EP mode: 8 hours with T-160
4 Select the channel with CH +/-. You can also use the 0-9 buttons on the
remote control. To enter double-digit numbers (such as 24), first press 2,
. then press 4.
5 Press REC •.
The REC lamp on the front of the Video/TV lights up and recording
begins.
To stop recording
Press STOP ■.
When the tape reaches the end, it stops and ejects the cassette.
To pause recording
Press PAUSE II.
To resume recording, press PAUSE II again.
Note
If the ON or OFF timer is activated
during recording, the TV screen
turns on or off, but the recording
continues.
You can cut out an unwanted scene during recording with this button.
1 Press PAUSE II when an unwanted sCene appears on the screen.
Recording pauses.
2 Press PAUSE II again to release the pause mode at the desired scene.
Recording resumes from the point set in step 2.
When the recording pause mode is left on for more than 5 minutes, the
Video/TV stops recording.
Recording with the TV off
Press POWER.
The TV screen is turned off and the STANDBY lamp and REC lamp on the
front of the Video/TV light up.
The Video/TV continues recording.
Basic Operations I 29
Page 30

Recording TV Programs Using the
Timer
c. ,
( EJECT POWER ^
\ MUTING DISPLAY
0 CD C30
INPUT
Q CD
TOPUMScacm
iQ.S
. ■ MENU
8EL^C»1|
CD
Q © © ©
© © ©
COUNTER/
REMAINHbMAIN V—«V >—V yv
s. ® ^
G O ® O
INDEX
Q
TAPE SPEED
CD
•
----
KSLOW
-------
«►
O Q
X2 PAUSE
O/
The Timer Recording function allows you to preset your Video/TV to
jecord up to six programs within a one-month period.
Before you begin
• Make sure that the time and date clock are set. If not, the message
"Please set the clock first" is displayed on the screen. Refer to "Setting
the Clock" on page 12.
• Make sure that the loaded cassette has its safety tab. If a cassette
without safety tab is loaded, the message "Please insert a recordable
tape" is displayed.
Setting the timer
Here's an example of how to record a program broadcast on channel 26
from 8:15 PM to 9:55 PM on Tuesday, 6th of October 1998, in EP mode.
1 Press TIMER ON SCREEN.
The TIMER SET/CHECK menu appears.
TIMER SET/CHECK 10/ 5 MON
DATE START STOP CH
► _/
___
_/__
_/__ ___________
_/_.
^/__ ____________
_/__________ _____
Move(Dul SeIflctisELfcn ExilfgHOi
__________
____________
_____________
_
If you have made a mistake
Press 4^ to return to the previous
position and correct the setting.
To erase the settings
Press RESET while displaying the
TIMER SET/CHECK menu.
If you try to enter a recording
start time that is prior to the
current time
All of the items of the recording
settings are erased.
If you set MTS to "SAP" in the
AUDiO menu (KV-20VS40 oniy)
The SAP signal will be recorded only
if a SAP signal is being broadcast.
Otherwise, the program's primary
audio channel will be recorded
(stereo or mono.) See page 22 for a
table describing the relation between
the speakers and the source signal.
I Basic Operations
30
2 Press SELECT.
Today's date and the day of the week appears in red.
TIMER SET/CHECK 10/5 MON
DATE START STOP CH
10/ 5MM
_/__
Move(S(9 SelectSSD ExItiBi
3 Press + •& until "6 TUE" appears.
For daily and weekly recording see "Daily/weekly recording" on page 32.
TIMER SET/CHECK 10/ 5 MON
DATE START STOP CH
1(y 6Tll_
_
_/___
-
_
-
MoveSKS SelectttBD ExItffiB
Page 31

4 Press SELECT, then set the hour of the recording start time to "8" with + 0
or -0.
TIMER SET/CHECK 10/ 5 MON
DATE START STOP CH
ro 6H*
_/__
Move(S(S SelectSDES) Exited
5 Press SELECT, then set the minute of the recording start time to "15" with
+ O or - O.
TIMER SET/CHECK 10/5 MON
DATE START STOP CH
«y 6nS8:15FU
_/__
MoveSKS SelectSBD Exliffia
_
_____
_ ____
___
_
_____
6 Press SELECT, then set the hour of the recording stop time to "9" with + O
or - 0.
TIMER SET/CHECK 10/5 MON
DATE START STOP CH
W 6TUEfi
_
-/_-
_
_/__
MoveflX!] SelectSSD Exitffpxa
If you try to do an incorrect
operation
The Video/TV displays a message
on the screen and interrupts the
operation.
When the ON timer overiaps a
timer program
• If the start time of the ON timer is
the same or earlier than that of a
timer recording program, the ON
timer activates and the timer
recording does not operate.
• If the start time of the ON timer is
later than that of a timer recording
program, the TV screen turns on at
the ON timer start time, and the
recording continues.
7 Press SELECT, then set the minute of the recording stop time to "55" with
+ O or - O.
TIMER SET/CHECK 10/ 5 MON
DATE START STOP CH
1<y 6TUE8 1 5PM 9 55PM
/
MoveQlS SeiectSBD ExitŒi
________
—
------------
_
-
-
------
—
------------
8 Press SELECT, then set the chaimel to "26" with + or - 0.
TIMER SET/CHECK 10/ 5 MON
DATE START STOP CH
W 6TUE8;15PII 9:55PM 26 _
_/__
__
_/___________
_/_____
_/_____ ____
Move(B9 SelectOED ExHgPP
9 Press SELECT, then set the recording speed to EP with + 0 or - 0.
TIMER SET/CHECK 10/5 MON
DATE START STOP CH
W 6HEe:15PH 8;55PH 26 &
_/
_
-/„
Move(QSI SelectSBD ExitQBD
_____
____
Basic Operations I 31
Page 32

V
----------------------
MUTING DISPLAY i
©oo©
INPUT
Q
kEIK I
cdIcd
>—
f EJECT TOWER ^
Q
• MENU!
SELECT
3 CD
10 Press SELECT.
^The message "Please turn TV off to set timer" is displayed for three
seconds. Then the TIMER SET/CHECK menu reappears and the cursor
(►) is displayed at the left margin.
11 When you want to set other programs, press - Oto move the cursor (►) to
the next line, then repeat steps 2 through 10.
12 Press MENU to exit the TIMER SET/CHECK menu.
Q © © ©
© ® ®
CXXWTtR/
REMAIN
HhMAIN x-*sy /«■—s.
Q © ®
cou^R ^ ^
Q O ® O
CD
TAPE SPEED
CD
• f’EC l•■SLOW «►
O ^ CD
X2 PAUSE
Q SEARCH 0
VOL CH
13 Press POWER to turn off the Video/TV.
The TIMER REC lamp on the front of the Video/TV lights up and the
Video/TV enters recording standby mode.
The Video/TV turns on automatically and starts recording at the preset
start time, and the TIMER REC lamp on the front of the Video/TV lights
up.
Daily/weekly recording
You can preset your Video/TV to record the same program every day of
the week (daily recording) or the same program on the same day every
week (weekly recording). Press - O in step 3 until the desired setting
appears in the "DATE" position. With each press, the setting changes as
follows:
4 (today) SUN-SAT -♦ MON-FRI -> EVERY SAT -► EVERY FRI ->
EVERY THU -> EVERY WED EVERY TUE EVERY MON ->
EVERY SUN -*■ 3 (next month) -*■ 2
....
To cancel timer recording
1 Press POWER to turn on the Video/TV.
2 Press TIMER ON SCREEN.
3 Using + •& or - O, select the timer setting which you want to stop
recording and press RESET.
When preset timer recordings
overlap
• If the tum-on time of two
programs are the same, the
program listed first in the menu
has priority.
• If the recording start time of the
second program comes before
recording of the first program is
over, the second program starts
recording only after the first
program has finished.
32 I Basic Operations
Using the Video/TV before timer recording starts
To use the Video/TV before timer recording begins, just press POWER.
The TIMER REC lamp turns off and the Video/TV switches on.
Page 33

Checking the timer settings
^ -
You can display the list of the timer settings which you preset.
Press TIMER ON SCREEN.
The TIMER SET/CHECK menu appears.
TIMER SET/CHECK 10/ 5 MON
DATE START STOP CH
PKV 6TUE6 1 5PU9
l(y 7107 3on 6 30Plil 50 EP
UON- SAT 11OOfV 12OOAU32SP
EVERY THJ9
-/__ -
MoveQXH SelecteLOa Exlt^m
55AU
__
5 5PU 26 EP
123 0Pli 21 EP
_
Press TIMER ON SCREEN again to erase the TIMER SET/CHECK menu.
Changing or cancelling the timer settings
1 Press TIMER ON SCREEN to display the TIMER SET/CHECK menu.
2. Select the setting you want to change or cancel with + ■(> or - <t.
TIMER SET/CHECK 10/ 5 MON
DATE START STOP CH
1(V 6TUE6: 1 5PU 9 5SPU 26 EP
► liy 7»O7;30Py 8 30PW 50 EP
UON- SATILOOPU 12 OOAU 32 SP
EVERY THU9:55AH 12/3 0PU 21 O'
MoveiQO SeledSCS
Exitf^l
3 To change the setting
Using + or - O and SELECT, re-enter the items you want to change.
Refer to steps 2 through 10 of "Setting the timer" on pages 30 through 32.
To cancel the setting
Press RESET.
4 Press TIMER ON SCREEN to return to the original screen.
5 If there are other timer settings on the list, press POWER to set the Video/
TV to timer recording standby mode.
Basic Operations I 33
Page 34

Recording using QUICK TIMER
You can preset your Video/TV to start recording immediately and to
automatically stop recording after a specific time period.
Even if you have not set the clock, QUICK TIMER recording can be used.
To record
1 Insert a cassette with its safety tab intact.
2 Select the channel which you want to record with the 0-9 buttons or CH
+/-.
3 Press QUICK TIMER REC on the front of the Video/TV.
"QUICK TIMER 0;00" appears on the screen.
4 Press QUICK TIMER REC repeatedly to select the recording time period.
With each press, the time period changes as follows;
To change the recording time
period after QUICK TIMER
recording begins
Press QUICK TIMER REC until the
desired time period appears.
0:00-►0:30-^ 1:00-
t
_______________
The time period turns yellow and recording starts.
Even if you switch off the Video/TV, it continues recording.
When the preset time period has elapsed, the Video/TV stops recording.
■7:30-►8:00
________
I
To stop QUICK TIMER recording
Press STOP ■ or QUICK TIMER REC repeatedly until "QUICK TIMER
0:00" appears on the screen.
Note
If the OFF timer is activated during
quick timer recording, the TV screen
turns off, but the quick timer
recording continues.
34 I Basic Operations
Page 35

Recording TV Programs Using VCR
Plus+
How VCR Plus+ works
Whenever you want to record a TV program, all you need to do is look up
the program's "PlusCode," a number assigned to each program published
INPUT
SELECT
COUNTER
SO®, o
INDEX
VOL CH
Q
TAPE SPEED
• — KSLOW—
O GD Q
in the TV section of most newspapers, cable TV listings, and even TV
GUIDE magazine. Then, just enter the Plus Code of the program you want
and the VCR is automatically programmed to record that show. It's that
simple. You can preset up to six programs within a one month time frame.
To take advantage of this function, you must first set up your Video/TV
and assign channel positions to the various guide channels. For details,
see "Setting Up VCR Plus+" on page 16.
Before you begin
• Make sure that the time and date are set correctly. If not, refer to "Setting
the Clock" on page 12.
• Make sure that the loaded cassette has its safety tab intact.
1 Press VCR plus.
The VCR Plus+ menu appears.
PlusCode TAPE SPEED
[
-----------
1 (AT)
Use (0-9} to select
PlusCode
To change tape speed,
press (TAPE SPEED)
Then press
If you have made a mistake
entering program's PiusCode
Press RESET and re-enter the correct
number.
To check the timer setting
Press TIMER ON SCREEN. You can
check the Ust of the timer settings.
The timer wili not accept a
setting in the following cases:
• When you enter the PlusCode of a
program that has already ended.
• When you enter the PlusCode of a
program that has already been set
to record.
• If the 6 programs have already
been preset, "6 programs have
already been set" appears on the
m
screen.
Press the 0-9 buttons to enter the desired program's PlusCode.
Example of "PlusCode"
PlusCode TAPE SPEED
(53292—] (AT)
U&e {0-9} to select
PlusCode
To change tape speed,
press (TAPE SPEED]
Then press seerti
5:301
I MOVIE—Musical(2hrs ) 1330441
I SPORT—Golf(1hr.25min.) 42060
■—WS9974
' 6:30nB DRAMA-Comedy(2hrs.) 17390 '
■ SCIENCE AND TECHNOLOGY
(1hrs.15nnin.) 73457
PlusCode
A
Press TAPE SPEED repeatedly to select SP, EP, or AT (automatic tape
speed) and press SELECT. AT will automatically adjust the tape speed
between SP and EP so that the program you selected fits in the tape. (Note
that recording may stop if the tape is not long enough to record the
program in EP mode.)
The recording information (date, start and stop times, channel number,
and tape speed) appears in green.
VCR Plu$+ tO/SMON
PiusCode TAPE SPEED
[53292 ] (EP)
RECORDING TIME
DATE START STOP CH
1/05MM 9:00AM 10:30AM 7 EP
Please turn
TV off
to set llmer
Check that the information is correct. If it is not, press RESET to cancel the
setting.
Repeat steps 2 to 3 to preset another timer setting.
Press POWER to turn the Video/TV off.
The TIMER REC lamp on the front of the Video/TV lights up and the
Video/TV enters recording standby mode.
Basic Operations I
35
Page 36

Additional Operations
Automatically Switching the Video/TV On or Off - on/off timer
You can set the Video/TV to turn on and off at any time. Make sure the
^lock is set correctly. If it is not, set the clock first (page 12).
1 Press MENU to display the main menu.
2 Move the cursor (►) to "TIMER" with + 0 or - O’ and press SELECT.
The TIMER menu appears.
3 Move the cursor (►) to "ON/OFF TIMER" with + 0 or - O and press
SELECT.
The ON/OFF TIMER menu appears.
ON/OFF TIMER
►
—:— AM _H
PMENU
CH
______
If you have made a mistake
Press to return to the previous
position.
SUN
Movesm SeiacicgEcn
12:00 AM
4 Press SELECT to enter the ON/OFF TIMER setting.
5 Press + ■& or - O to set the day(s), and press SELECT.
Each time you press + Oor - 0, the days change as shown below.
EVERY SUN-SAT -«VERY MON-FRI -«UNDAY ...^. SATURDAY
-«VERY SUNDAY ...^. EVERY SATURDAY.
ON/OFF TIMER
EVERY MON-FRI
1 2:00 AM _H CH
PMENU
Set Ihe day
Move(i)l9 Selecti^^ Exiti^a
______
SUN 12:00 AM
6 Press + O or - O to set the time (hour then minute) that you want the
Video/TV to turn on and press SELECT.
ON/OFF TIMER
EVERY MON-FRI
12:02 AM H CH _
PMENU
Set the time
MoveQXS SelectSBD
SUN
12:00 AM
ExitSSa
To erase the settings
Press RESET while the ON/OFF
timer menu is displayed.
Note
If the OFF timer is activated during
quick timer recording, the TV screen
tunrs off, but the quick timer
recording continues.
36 I Additional Operations
7 Press + 0 or - O to set the duration time and press SELECT.
With each press, the duration increases by one hour for up to twelve
hours.
ON/OFF TIMER
EVERY MON-FRI
12:02 AM 1H CH
9MENU
Set Ihe duration
MoveCDS) SeiecmCD
______
SUN 12:00 AM
Exit№B
Page 37

8 Press + 0 or - 0 to set the channel and press SELECT.
ON/OFF TIMER
► EVERY MON-FRi
12:02 AM 1H
PMENU
CH 1
Select a channel
MoveSXS SalectBELECTi ExitffgHOi
SUN
12:00 AM
9 Press MENU to return to the original screen.
If you are not using the Video/TV, press POWER to set the Video/TV in
standby mode.
One minute before the Video/TV turns off, the message "TV will turn off
soon" appears on the screen.
Switching Off Automatically - sleep Timer
You can automatically switch the Video/TV into standby mode after a
selected time period.
Press SLEEP.
With each press, the time period (in minutes) changes as follows;
OFF->30-^60-^90
t
________________
I
One minute before the TV switches into standby mode, the message "TV
will turn off soon" is displayed on the screen.
Additional Operations I 37
Page 38

Selecting the Video/TV's Cable Box Input Channel - channel fix
Use the CHANNEL FIX feature to prevent the Video/TV's input channel
from being accidentally changed.
It is recommended that you set up your Video/TV as follows when you
connect a cable box.
1 Press MENU to display the main menu.
2 Move the cursor (►) to "SET UP" with + 0 or - O and press SELECT.
The SET UP menu appears.
3 Move the cursor (►) to "CHANNEL SET UP" with + O or - and press
SELECT.
The CHANNEL SET UP menu appears.
CHANNEL SET UP
► CABLE: OFF
CHANNEL FIX: OFF
AUTO PROGRAM
CHANNEL SKIP/ADD
VCR PIUS4 SET UP
7MENU
MoveQUi SelectSlS) Exiti^S
4 Move the cursor (►) to "CHANNEL FIX" with + O or - O and press
SELECT.
The selected position turns red.
CHANNEL SET UP
CABLE: OFF
CHANNEL FIX: OFF
AUTO PROGRAM
CHANNEL SKIP/ADD
VCR PLUS+ SET UP
;>MENU
MoveSXS SelectiSSES) ExitSEi
5 Using + O or - O, select the Video/TV's cable box input channel that you
want to set and press SELECT.
With each press, the input mode changes as follows:
OFF- LINE
_J
When you set CHANNEL FIX to "2-6," you can only watch the TV channel
that you have fixed, or the input line.
When you set CHANNEL FIX to "LINE," you cannot switch the line input
to a TV channel.
When you want to switch CHANNEL FIX off, set it to "OFF."
38 I Additional Operations
6 Press MENU to return to the original screen.
Page 39

Displaying Caption Vision/XDS
Some programs are broadcast with Caption Vision. To display Caption
Visioivselect either CCl, CC2, TEXTl, or TEXT2 from the menu.
CCl or CC2 shows you an on-screen version of the dialogue or sound
effects of a program. (The mode should be set to CCl for most programs.)
TEXTl or TEXT2 shows you on-screen information presented using either
half or the whole screen. It is not usually related to the program.
Some programs are broadcast with XDS (Extended Data Service) which
shows a network name, program name, program length, call letters and
time of the show. When you select XDS with the DISPLAY button, this
information will be displayed on the screen if the broadcaster offers this
service.
1 Press MENU to display the main menu.
2 Move the cursor (►) to "SET UP" with + -(for - <tand press SELECT.
The SET UP menu appears.
Note
Poor reception of TV progranxs can
cause errors in Caption Vision.
Captions may appear with errors
instead of the correct words.
3 Move the cursor (►) to "CAPTION VISION" with + O or - O and press
SELECT.
The caption setting turns red.
SET UP
CHANNEL SET UP
FAVORITE CHANNEL
CAPTION VISI0N:(£S1
LANGUAGE: ENGLISH
PMENU
MoveSO Select(S££D ExitSS)
4 Using + Oor - O, select the caption type you want and press SELECT.
SET UP
CHANNEL SET UP
FAVORITE CHANNEL
CAPTION VISION: TEXT2
LANGUAGE; ENGLISH
PMENU
MovelfiS SelectSBS ExItQSi
5 Press MENU to return to the original screen.
To cancel caption display
Press DISPLAY repeatedly until "DISPLAY OFF" appears on the screen.
With each press, the display changes as follows:
On-screen information —iXDS —Caption Vision or Text
t
_ _ _ _
DISPLAY OFF.
Additional Operations I 39
Page 40

Blocking Out a Channel - channel block
The CHANNEL BLOCK feature allows you to prevent children from
^watching unsuitable programs. Make sure the dock is set correctly. If it is
not, set the clock first (page 12.)
1 Press MENU to display the main menu.
2 Move the cursor (►) to "TIMER" with + Oor - <Vand press SELECT.
3 Move the cursor (►) to "CHANNEL BLOCK" with + ■& or - O and press
SELECT.
The CHANNEL BLOCK menu appears.
CHANNEL BLOCK
► 1 .
____________
—:— AM _H CH_.
2.
_____
—:— AM _H CH_.
?MENU
Select a program
Movedm) Selecti^^ Exitigsa
SUN 12:00 AM
If you have made a mistake
Press ^ to return to the previous
position.
To erase the setting
Press RESET while the CHANNEL
BLOCK menus is displayed.
4 Press SELECT to enter the CHANNEL BLOCK setting.
5 Press + 0 or - O to set the days.
With each press, the days change as shown below.
EVERY SUN-SAT -«VERY MON-FRI -SUNDAY ...^. SATURDAY
-«VERY SUNDAY ...^. EVERY SATURDAY.
CHANNEL BLOCK
1. EVERY MON-FRI
— :— AM _H CH_______________
2.
___________
—:— AM _H CH
PMENU
Set the day
MoveQXD Selectaggn ExitflgO
_______________
SUN 12:00 AM
6 Press + O or - 0 to set the time (hour then minute) that you want to block
out and press SELECT.
CHANNEL BLOCK
1 .EVERY MON-FRI
7:00 AM _H CH
2.EVERY SUN -SAT
—:— AM _H CH
9MENU
Set the time
MoveQXI) Selects^!) ExitiHl
7 Press + ■(> or - O to set the duration time that you want to block and press
SELECT.
CHANNEL BLOCK
1 .EVERY MON-FRI
7:00 AM 1H CH
2.
_________
—:— AM _H CH
PMENU
Set the duration
MovecOQ) SelectCSBD ExltHBP
______________
_______________
SUN 12:00 AM
______________
_______________
SUN 12:00 AM
40 I Additional Operations
Page 41

8 Press + 0 or - O to set the channel that you want to block out and press
SELECT.
CHANNEL BLOCK
► 1 EVERY MON-
7:00 AM 1 H
?
PMENU
Select a channel
MovedXS SelectS£ZD
FRt
— AM H CH
SUN 12;00 AM
ExItUSSO
CH125
9 To set another program, press - O to move the cursor (►) to the next line,
then repeate steps 4 through 8.
10 Press MENU to return to the original screen.
If you try to select a channel during the time that it is blocked, the message
"BLOCKED" appears and the picture is blocked and the sound is muted.
Additional Operations I 41
Page 42

Setting Your Favorite Channels -
FAVORITE CHANNEL
The FAVORITE CHANNEL feature allows your Video/TV to memorize
Jlhe channels that you watch the most. If the feature is set to AUTO, the
last five channels you selected with the 0-9 buttons are automatically set as
your favorite channels. If you want to input your own selection of
channels, set the feature to MANUAL.
1 Press MENU to display the main menu.
2 Move the cursor (►) to "SET UP" with -i- O or - and press SELECT.
3 Move the cursor (►) to "FAVORITE CHANNEL" with + O or - O and
press SELECT.
The FAVORITE CHANNEL menu appears.
FAVORITE CHANNEL
►MODE: AUTO
1.125
2. 7
3. 2B
4 . 46
5. 31
9MENU
MoveOHS SelectiSIS] Exit(SH3
If you have made a mistake
Press ^ to return to the previous
position.
To erase the settings
Press RESET while the FAVORITE
CHANNEL menu is displayed.
4 Press SELECT to set the mode.
The MODE position turns red.
FAVORITE CHANNEL
MODE: AUTO
1.125
2. 7
3. 28
4. 46
5. 31
Se(ect@^!i
Select "AUTO" or "MANUAL" with + O or - -O and press SELECT.
If you select AUTO, skip steps 6 through 8. The last five channels you
selected with the 0-9 buttons are automatically set as your favorite
channels.
If you select MANUAL, the favorite channel numbers become white,
indicating that favorite channels can be entered.
Move the cursor (►) with + O or - O- to select a channel and press SELECT.
The selected position turns red.
FAVORITE CHANNEL
MODE; MANUAL
1.125
2. 7
3. 26
4. 46
5. 31
9MENU
Select a channel
MoveSXS SeiecISSD ExItSBd
42 I Additional Operations
Page 43

7 Using + Oor - 0, select the channel that you want to set as your favorite
channel and press SELECT.
FAVORITE CHANNEL
MODE: MANUAL
1.125
►2. 15
3. 26
4. 46
5. 31
MENU
Select a position
MoveQX!] SelectiSL££S Exitagia
8 Repeat steps 6 and 7 to set the other favorite channels.
9 Press MENU to return to the original screen.
Selecting your favorite channels
1 Press SELECT.
The favorite channels menu appears.
2 Move the cursor (►) with + O or - O to select the channel you want to
watch and press SELECT.
The selected channel will appear on the screen.
To exit the favorite channel menu
Press + 0 or - 0 to select "Exit" and press SELECT.
Additional Operations I 43
Page 44

Searching Using the Index Function
The Video/TV automatically marks the tape with an index signal at the
jjoint where each recording begins. These signals can be used to find a
specific recording.
Playing back to the beginning of each program - Index Scan
1 Insert a tape with index signals.
2 Press INDEX once during playback.
3 Press ►► FF or ◄◄ REW to search for individual programs ahead or
behind the current position.
The tape rewinds or rapidly advances to the next index signal.
Each time an index signal is detected, the index scan number appears and
the tape plays for about 5 seconds, then rewinds or rapidly advances to the
next index signal.
To stop searching
Press STOP ■.
4 Press PLAY O at the desired program.
Locating the desired program
- Index Search
You can locate a desired program and play it back by designating how
many index signals to skip ahead or behind the current position.
1 Insert a cassette with index signals.
2 Press INDEX.
3 Using the 0-9 buttons, enter the number of index signals you want to skip.
For example, if the tape at INDEX 02 and you want to locate INDEX 05,
press 0 and 3.
4 Press ►► FF or REW to begin the search for the program ahead or
behind the current position.
"INDEX SEARCH 03" appears on the screen. When the desired signal is
found, playback begins automatically.
44 Additional Operations
Page 45

Enhancing Video Picture Quality
c
( EJECT
V—>. MUTING DISPLAY y-—
POWER 1
0 CD CD©
INPUT
CD
TOCRONSCREEN > - MENU »
CD
CD cacD
CD CD LU CD
CD © © ©
® ® ©
COUfiTER/
REMAIN
Q © ©
COUNTER
JU^
U«DIVtr C.l'l I cn
i© © o
CD
TAPE SPEED
CD
•
-----
I»SLOW
-------
«►
o CD CD
X2 PAUSE
Q^^^JEAROI 0
Adjusting the tracking automatically
The tracking condition is automatically adjusted on this Video/TV. The
AUTO TRACKING indicator will appear for three seconds while the
Video/TV is searching for the best tracking condition.
Adjusting the tracking manually
If streaks or snow noise appear on the screen during normal playback or
slow picture, adjust the picture tracking condition manually.
1 Press MENU to display the main menu.
2 Move the cursor (►) to "TAPE" with + O or - O and press SELECT.
The TAPE menu appears.
TAPE
► TAPE REMAIN: T-120
AUTO REPEAT: OFF
NOISE REDUCTION: OFF
TRACKING
^ENU
To return to automatic
tracking
Set AUTO to ON in the TRACKING
menu with + <i or - 0 and press
SELECT.
MovefDd) SelectlSfSD Exitigd
3 Mov^e the cursor (►) to "TRACKING" with + O or - 0 and press SELECT.
The TRACKING menu appears.
TRACKING
►AUTO:ON
TRACKING ADJUST
PMENU
MovefSIS Selects^ ExitiBSi
4 Select "TRACKING ADJUST" with + O or - and press SELECT.
The tracking meter appears.
TRACKING ADJUST
NORMAL TRACKING
5 Using + Oor - O, adjust the tracking until the picture is dear.
6 Press SELECT.
The TRACKING menu reappears.
7 Press MENU to return to the original screen.
Additional Operations I 45
Page 46

Reducing the Picture Noise
You can automatically reduce the picture noise on the video playback
picture by setting NOISE REDUCTION to ON. Use this feature when you
are playing a well-worn or old video, such as a rental video.
1 Press MENU to display the main menu.
2 Move the cursor (►) to "TAPE" with + 0 or --0 and press SELECT.
The TAPE menu appears.
TAPE
► TAPE REMAIN; T-120
AUTO REPEAT: OFF
NOISE REDUCTION: OFF
TRACKING
PMENU
MoveSKS SelectlSBD ExitSS
3 Move the cursor (►) to "NOISE REDUCTION" with + or - O and press
SELECT.
The selected position turns red.
TAPE
TAPE REMAIN: T-120
AUTO REPEAT: OFF
NOISE REDUCTION: OFF
TRACKING
PMENU
MoveOJS Selects
4 Using + O or - 0, select '"ON" and press SELECT.
The picture noise is reduced.
TAPE
TAPE REMAIN: T-120
AUTO REPEAT: OFF
► NOISE REDUCTION; ON
TRACKING
PMENU
MoveQXS SelectSSD ExItSS
5 Press MENU to return to the original screen.
46 Additional Operations
Page 47

Connecting Optional Equipment
Watching the picture input from
optional equipment
To connect a video camera
Front Front (KV-20VS40 only) ,
or
-
......
- i.l
II
to VIDEO/AUDIO
jacks
to LINE IN (VIDEO/AUDIO L
(MONO)/R) jacks
to video/audio outputs
To connect a VCR without a cable box
Rear
Rear (KV-20VS40 only)
To connect a VCR with a cable box
Rear Rear (KV-20VS40 only)
Notes
• When connecting optional
equipment, such as videogames,
please use the connecting cables
recommended by the equipment's
manufacturer.
• To connect monaural video
equipment, connect the audio
output of the video equipment to
AUDIO
L (MONO) of the video
TV (KV-20VS40 only).
Press INPUT SELECT so that "LINE" appears on the screen.
Additional Operations I 47
Page 48

Additional Information
Troubleshooting
Function
TV reception
Clock and
timer
Playback
Problems
No picture (screen ii^
dark), no sound
Good picture but no
sound
No color or poor color
(screen is dark) for
color programs, but
good sound.
No picture, no sound
from video input
source
Cannot receive VHP or
UHF channels when
using an antenna.
TV is fixed to one
channel
The clock has stopped
and " is
displayed.
Power is on, but the
tape does not run.
Poor playback picture
Possible causes and remedies
• The AC power cord is disconnected.
■♦Connect the AC power cord.
• The Video/TV is switched off.
•♦Press POWER.
• The headphones are connected to the 0 jack.
^ Disconnect the headphones.
• MUTING is displayed on the screen.
■♦Press MUTING.
• Verify your audio mode (KV-20VS40 only).
■♦Check the MTS setting in the AUDIO menu.
• Press VOL+.
• Check antenna/cable connections, (page 5)
• Adjust "PICTURE," "BRIGHTNESS," "COLOR," "HUE," and "SHARPNESS"
in the VIDEO menu, (page 19)
• The connecting cord between the Video/TV and the input source is
disconnected.
^Connect it firmly.
• Input is not selected correctly.
^Press INPUT SELECT until the desired input indicator appears, (page 47)
• Cable setting is not correct.
-♦■Set CABLE to OEF.
• Cable setting is not correct.
■♦Set CHANNEL EIX to OEE.
• The power has been interrupted or the AC power cord is disconnected for
more than 30 minutes.
^Re-set the clock and timer settings if necessary, (pages 15, 30)
• Moisture has condensed in the Video/TV.
■♦Turn the power off, unplug the AC power cord and leave the Video/TV
for about one hour.
• Adjust the tracking, (page 45)
• The video heads are dirty.
^The video heads are dirty (see below). Clean the video heads using a Sony
video head cleaning cassette. If Sony cleaning cassettes are not available in
your area, have the heads cleaned at your nearest Sony service facility (a
standard service charge will be required). Do not use a commercially
available liquid type cleaning cassette other than Sony's, as they may
damage the video heads.
^The video heads may have to be replaced. Consult your local Sony dealer
for more information.
Symptoms caused by contaminated video heads
• Normal picture • Rough picture • Unclear picture No picture (or
initial
Additional Information
48
contamination
black& white
screen appears)
terminal
Page 49

Function
Playback
Recording
Problems
The sound drops out.
The cassette is ejected
when you press
REC«.
Recording does not
function.
Timer
recording
Timer settings cannot
be made.
The cassette is ejected
when you press
POWER to set the
timer.
The TIMER REC lamp
does not light up even
though you press
POWER to set the
timer.
Timer recording was
not made.
No sound is recorded
on the audio track.
Others A cassette cannot be
inserted.
The remote control
does not work.
The VCR does not
operate.
Possible causes and remedies
• Xhe tape is defective.
Use a new tape.
• The safety tab of the cassette has been removed.
■♦Cover the tab hole with adhesive tape, or use another cassette
with a safety tab. (page 25)
• No cassette has been inserted.
■♦Insert a cassette with the safety tab.
• The tape is at its end.
^ Rewind the tape.
• The clock has not been set.
^Set the current time and date, (page 12)
• You made a mistake when setting the timer.
■♦Check the setting steps, (pages 30 through 32)
• The safety tab of the cassette has been removed.
■♦Cover the tab hole with adhesive tape, or use another cassette
with a safety tab.
• No cassette has been inserted.
■♦Insert a cassette with its safety tab.
• No setting was made for the timer.
^Set the timer to record a program, (pages 30 through 32)
• You did not press POWER to turn off the Video/TV and set the timer.
• There has been a power interruption lasting more than 30 minutes.
• The Multichannel TV Sound feature was set to SAP but a SAP program was
not being broadcast. (KV-20VS40 only)
^Set the MTS setting to STEREO or MONO.
• Another cassette is already inserted.
^Press EJECT ^ to eject the cassette.
• The batteries are low.
■♦Replace the batteries, (page 4)
• The batteries are installed incorrectly.
^Install the batteries with correct polarities, (page 4)
• Moisture condensation occured.
^Tum the power off, unplug the AC power cord and leave the Video/TV
to dry for over one hour.
Additional Information I 49
Page 50

Specifications
TV Section
Television system American TV Standard
Channel coverage VHP: 2-13/Urit':14-69/
CATV: 1-125
Picture tube KV-13VM40/41; Microblack™
Trinitron® tube
KV-20VM40: Trinitron® Tube
20-inch picture measured
diagonally
KV-20VS40: Trinitron® Tube
20-inch picture measured
diagonally
Screen size KV-13VM40/41:13-inch
picture measured diagonally
KV-20VM40/KV-20VS40:
20-inch picture measured
diagonally
Antenna 75-ohm external antenna
terminal for VHF/UHF
Video Section
Format
VCR system
Audio recording system
Video signal NTSC color, EIA standards
Tape speed SP: 33.35 mm/s (1 ^/s inches/s)
Maximum recording time
Inputs KV-13VM40/KV-13VM41/KV-
VHS NTSC standard
KV-13VM40/KV-13VM41 /KV-
20VM40: Rotary 4-head
helical scanning monaural
, system
KV-20VS40: Rotary 4-head
helical scanning Hi-Fi stereo
system
KV-13VM40/KV-13VM41 /
KV-20VM40: Monaural
KV-20VS40: HiFi Stereo
EP: 11.11 mm/s C/i6 inches/s)
LP; 16.67 mm/s ("/i6 inches/s),
playback only
8 hours in EP mode (with T-160
tape)
20VM40
VIDEO IN: phono jack (2)
Input level; 1 Vp-p, 75 ohms,
unbalanced, sync negative
KV-20VS40
VIDEO IN; phono jack (2)
Input level: 1 Vp-p, 75 ohms,
unbalanced, sync negative
KV-13VM40/KV-13VM41 /
KV-20VM40
AUDIO IN: phono jack (2)
Input level: 500 mVrms
Input impedance: 47 kilohms
KV-20VS40
AUDIO IN: phono jack (4)
Input level: 500 mVrms
Input impedance: 47 kilohms
Headphones jack KV-20VS40: Stereo minijack
KV-13VM40/KV-13VM41 /
KV-20VM40: Mono minijack
General
Clock Quartz locked
Clock back up Approx. 30 minutes min.
Power requirements
120 V AC, 60 Hz
Power consumption
TV power ON
K V-13 VM40/ KV-13VM41:
69 W
KV-20VM40: 88 W
KV-20VS40: 89 W
Standby
KV-13VM40/KV-13VM41 /KV20VM40/KV-20VS40: 2.9 W
Operating temperature
5°C to 40°C (41 °F tol04°F)
Storage temperature
-20°C to 60°C (-4°F to 140°F)
Dimensions KV-13VM40/KV-13VM41;
Approx. 375 X 399 x 408 mm
(w/h/d) (14 ^/4 X 15 -'’/4 X
16 Vs inches)
KV-20VM40/KV-20VS40:
Approx. 506 X 514 X 476 mm
(w/h/d) (19 ^/10 X 20 ’/4 X
18 ^/4 inches)
Mass KV-13VM40/KV-13VM41;
Approx. 14.5 kg (31 lbs. 16
oz)
KV-20VM40/ KV-20VS40:
Approx. 26 kg (57 lbs. 5 oz)
Accessories supplied
Remote control (1)
R6 (size AA) batteries (2)
Design and specifications are subject to change
without notice.
Additional Information
50
Page 51

Index to Parts and Controls
Video/TV set—front
This section briefly describes the buttons and controls on the Video/TV set and on the remote control.
For more information, refer to the pages next to each description.
KV-13VM40, KV-13VM41
KV-20VM40, KV-20VS40
[U POWER button (pages 6,12,18)
Lamps
S/STANDBY (page 18)
REC (recording) (page 29)
TIMER REC (recording) (pages 32, 35)
[3] EJECT ± button (page 25)
[4] Cl (headphones) jack (page 24)
[5] VIDEO/AUDIO L(MONO)/R jacks (KV-20VS40
only) (page 47)
VIDEO/AUDIO jacks (KV-13VM40, KV-
13VM41, and KV-20VM40 only) (page 47)
[6] Tape transport buttons (page 26)
[tI Cassette compartment (page 25)
[S] REC (recording) # button (page 29)
Remote sensor
03 QUICK TIMER REC button (page 34)
0 CHANNEL +/- buttons (pages 18,29)
01 VOL (volume) +/- buttons (page 18)
01 INPUT SELECT button (pages 24,29,47)
Additional Information I 51
Page 52

Remote control
m MUTING (muting) button (page 18)
[2] EJECT ^ button (page 25)
[3] INPUT SELECT button (pages 24, 29,47)
g] TIMER ON SCREEN (pages 30,32, 33)
VCR Plus button (page 35)
¡6} COUNTER/REMAIN button (page 28)
[7] COUNTER RESET button (pages 25, 28)
[8] JUMP button (page 18)
INDEX button (page 44)
m TAPE SPEED button (pages 29, 35)
ill] SLOW !► +/-buttons (page26)
[1^ REC (recording) • button (page 29)
|l^ X2 button (page 26)
M SEARCH ◄◄/►►button (page26)
[T^ REW (rewind) ◄◄ button (pages 26, 44)
ITSi STOP ■ button (page 26)
[ITI display button (pages 24, 28)
51 POWER button (pages 6,12,18)
01 SLEEP button (page 37)
I20I Menu operation buttons (pages 7,19, 36)
MENU
SELECT
+ 0/-0
RESET button
(back space button)
^ 0-9 buttons (pages 18,29,35)
1^ ENTER button (page 17)
m CH (channel) +/- buttons (pages 18,29)
I24I VOL (volume)+/-buttons (page 18)
m !!► (frame) button (page 26)
HI PAUSE II button (pages 26,29)
iZi PLAY O button (page 26)
H FF (fast forward) button (pages 26, 44)
52 Additional Information
 Loading...