

Page 1

i-Manual online
1
“BRAVIA” TV Features
Watching TV
Using the Home Menu
Print Font Size
Top Page
Fun Features with
Connected Equipment
Parts Description
Troubleshooting
Index
i-Manual online map
Copyright 2010 Sony Corporation
NX71x
Trademark information
Page 2
i-Manual online
2
“BRAVIA” TV Features
“BRAVIA” TV Features
Print Font Size
Top Page > “BRAVIA” TV Features
Watching TV
Using the Home Menu
Fun Features with
Connected Equipment
Parts Description
Troubleshooting
Index
i-Manual online map
Copyright 2010 Sony Corporation
3D Feature
Motionflow
“BRAVIA” Internet Video
“BRAVIA” Internet Widgets
Built-in Wireless LAN
Playback via USB
“BRAVIA” Sync with Control for HDMI
Favorites
Return to Top
Page 3
i-Manual online
3
“BRAVIA” TV Features
Watching TV
Print Font Size
Top Page > Watching TV
Watching TV
Using the Home Menu
Fun Features with
Connected Equipment
Parts Description
Troubleshooting
Index
i-Manual online map
Copyright 2010 Sony Corporation
TV Guide On Screen®
Favorites
Wide Mode
Picture in Picture (PIP)
Angle Adjustment (Swivel)
Return to Top
Page 4
i-Manual online
4
“BRAVIA” TV Features
Using the Home Menu
Print Font Size
Top Page > Using the Home Menu
Watching TV
Using the Home Menu
Fun Features with
Connected Equipment
Parts Description
Troubleshooting
Index
i-Manual online map
Copyright 2010 Sony Corporation
About the Home Menu
Product Support
Preferences
Picture & Display
Sound
Channels & Inputs
Network
Return to Top
Page 5
i-Manual online
5
“BRAVIA” TV Features
Top Page > Fun Features with Connected Equipment
Fun Features with Connected Equipment
Print Font Size
Watching TV
Using the Home Menu
Fun Features with
Connected Equipment
Parts Description
Troubleshooting
Index
i-Manual online map
Copyright 2010 Sony Corporation
VCR/DVD Player
Audio System
Digital Still Camera
HDMI Equipment
Internet
Settings
“BRAVIA” Internet Video
“BRAVIA” Internet Widgets
Photomap
Home Network
PC
Programming the Remote Control
Return to Top
Page 6
i-Manual online
6
“BRAVIA” TV Features
Parts Description
Print Font Size
Top Page > Parts Description
Watching TV
Using the Home Menu
Fun Features with
Connected Equipment
Parts Description
Troubleshooting
Index
i-Manual online map
Copyright 2010 Sony Corporation
Remote Control
Top
Upper
Middle
Lower
Bottom
Back
TV Controls and Indicators
Front
Right
Terminals
Back
Right
Return to Top
Page 7
i-Manual online
7
“BRAVIA” TV Features
Troubleshooting
Print Font Size
Top Page > Troubleshooting
Watching TV
Using the Home Menu
Fun Features with
Connected Equipment
Parts Description
Troubleshooting
Index
i-Manual online map
Copyright 2010 Sony Corporation
Picture
Sound
Channels
Home Network
Remote Control
General
Return to Top
Page 8
i-Manual online
8
Print Font Size
Top Page > Index
3
3D Glasses
3D Menu
A
Add Digital Channels
Adding/Removing Favorites
Advanced Settings
Age Restriction
Analog CC
Analog Channel Tuning
B
Bilingual Settings
Broadcaster
C
Cable/Antenna Selection
Camcorder (Connected Equipment)
CC Display
Channel Labels
CineMotion
Clock/Timers
3D Signal
3D Sync Transmitter
Angle Adjustment (Swivel)
ARC
Artifacts Reduction
Audio system (Connected Equipment)
Auto SAP
Built-in Wireless LAN Device
“BRAVIA” Sync-Compatible Equipment
Component
Composite
Contact Information
Control for HDMI
Cursor Speed
D
DIGITAL AUDIO OUT
Digital Camera (Connected Equipment)
Digital CC
DLNA Certified Media Server
E
Eco Settings External Equipment Display
F
Favorite Items Fine Tuning
G
GPS
Page 9

H
9
HDMI CEC
HDMI Device Selection
HDMI Equipment
I
Info Banner
Initial Settings
Internet Settings
K
Key Tone
L
Language Selection
M
Manufacturer’s Codes
Media Server Troubleshooting
Motionflow Settings
HDMI Settings
High-Frame Rate
HOME
Internet Video
IP Address
MTS
My TV
N
Network Diagnostics
Network Settings
O
On Screen Manual
P
Panel Illumination
Password
PC connection
Photo with Map
Photo/Music/Video Playback
Picture Adjustments Lock
Q
Quick Start
Network Setup
Picture Frame
Picture Mode
Picture Settings
Power Saving
Program Information Source
R
Rating
Recently Viewed Content
Remote Control Buttons (Lower Part)
Remote Control Buttons (Middle Part)
Page 10
Recommendation
Recommendation Settings
Remote Control Buttons (Top Part)
10
Region Selection
Remote Control Buttons (Back Part)
Remote Control Buttons (Bottom Part)
S
Remote Control Buttons (Upper Part)
Remote Control Settings
Renderer
Renderer Settings
Scene Selection
Screen Settings (for PC Input)
Screen Settings (Other Than PC Input)
Screen Types/Sizes
Server List
Settings Menu
Show/Hide Channels
Show/Hide Media Servers
Signal Information
T
Terminals (Back)
Terminals (Right)
Three-Dimensional Picture
Thumbnail View
Troubleshooting (Picture)
Troubleshooting (Remote Control)
TV Controls and Indicators (Front Part)
Slideshow
Snippets
Software Update
Sound Mode
Sound Settings
Speaker Integrated Stand Settings
Speaker Settings
SYNC MENU
TV Controls and Indicators (Right Part)
TV Guide
TV Guide On Screen®
TV Position
TV start-up sound
Two-Picture Display
U
Update on Internet Content
USB Auto Start
V
VCR/DVD player (Connected Equipment)
Video 2/Component
W
Widget Gallery
Widgets
Wireless Emission
X
XMB (XrossMediaBar)
USB Devices
Volume for Audio System
Wireless LAN Connection (Built-in)
Wireless LAN router (Internet Settings)
WPS
Return to Top
Page 11

Copyright 2010 Sony Corporation
11
Page 12
i-Manual online
12
“BRAVIA” TV Features
3D Feature
Motionflow
“BRAVIA” Internet Video
“BRAVIA” Internet Widgets
Built-in Wireless LAN
Playback via USB
“BRAVIA” Sync with Control for HDMI
Favorites
Print Font Size
Top Page > i-Manual online map
Watching TV
TV Guide On Screen®
Favorites
Wide Mode
Picture in Picture (PIP)
Angle Adjustment (Swivel)
Using the Home Menu
About the Home Menu
Product Support
i-Manual
Contact Sony
Signal Diagnostics
Automatic Software Update
Preferences
Scene Select
Eco
Clock/Timers
Language
Region
Closed Captions (CC)
Parental Lock
Info Banner
Front Panel Illumination
Home Menu Scrolling
Recommendation
Quick Start
Picture Adjustments Lock
Initial Setup
Return to Top
Return to Top
Page 13

Picture & Display
Picture Adjustments
13
3D Settings
Screen (for inputs other than a PC)
Screen (for PC input)
Sound
Sound Adjustments
Speaker Integrated Stand Settings
MTS Audio
Speakers
TV Position
Audio Out
Key Tone
Channels & Inputs
Manage Inputs
Cable/Antenna
Auto Program
Add Digital Channels
Show/Hide Channels
Edit Channel Labels
Program Information Source
Analog Fine Tune
Video 2/Component Selection
HDMI Settings
USB Auto Start
Network
Network Setup (Follow Wired Setup > Custom.)
Built-in Wireless LAN
Refresh Internet Content
Show/Hide Media Servers
Media Server Troubleshooting
Renderer
Fun Features with Connected Equipment
VCR/DVD Player
Audio System
Digital Still Camera
HDMI Equipment
Internet
Settings
“BRAVIA” Internet Video
“BRAVIA” Internet Widgets
Photomap
Home Network
PC
Programming the Remote Control
Parts Description
Return to Top
Return to Top
Page 14

Remote Control
14
Top
Upper
Middle
Lower
Bottom
Back
TV Controls and Indicators
Front
Right
Terminals
Back
Right
Troubleshooting
Picture
Sound
Channels
Home Network
Remote Control
General
Copyright 2010 Sony Corporation
Return to Top
Return to Top
Page 15
i-Manual online
15
Print Font Size
Top Page > Trademark information
Trademark information
Macintosh is a trademark of Apple Inc.,registered in the U.S. and other countries.
HDMI, the HDMI logo and High-Definition Multimedia Interface are trademarks or registered trademarks of HDMI Licensing, LLC.
Fergason Patent Properties, LLC:
U.S. Patent No. 5,717,422
U.S. Patent No. 6,816,141
Manufactured under license from Dolby Laboratories. Dolby and the double-D symbol are trademarks of Dolby Laboratories.
In the United States, TV Guide and TV Guide On Screen are registered trademarks of TV Guide Entertainment Group, Inc. and/or its
subsidiaries or affiliates, and are used under a license by Gemstar-TV Guide International, Inc. and/or its subsidiaries. In Canada, TV
Guide is a registered mark of Transcontinental Inc., and is used under a license by Gemstar-TV Guide International, Inc. and/or its
subsidiaries.
The TV Guide On Screen system is manufactured under license from Gemstar- TV Guide International, Inc. and/or its subsidiaries.
The TV Guide On Screen system is protected by one or more of the following United States patents 6,498,895; 6,850,693;
6,396,546;5,940,073; 6,239,794 to Gemstar-TV Guide International, Inc. and/or its subsidiaries.
Gemstar-TV Guide International, Inc. and/or its related affiliates are not in any way liable for the accuracy or availability of the program
schedule information or other data in the TV Guide On Screen system and cannot guarantee service availability in your area. In no
event shall Gemstar-TV Guide International, Inc. and/or its related affiliates be liable for any damages in connection with the accuracy
or availability of the program schedule information or other data in the TV Guide On Screen system.
Blu-ray Disc is a trademark.
“BRAVIA” and
, S-Force, Motionflow, BRAVIA Sync, and are trademarks or registered marks of Sony Corporation.
“XMB™”and “xross media bar” are trademarks of Sony Corporation and Sony Computer Entertainment Inc.
“PlayStation” is a registered trademark and “PS3” is a trademark of Sony Computer Entertainment Inc.
DLNA®, the DLNA Logo and DLNA CERTIFIED® are trademarks, service marks, or certification marks of the Digital Living Network
Alliance.
“FACE DETECTION” logo is trademark of Sony Corporation.
“Blu-ray Disc”, “Blu-ray” and “Blu-ray Disc” logo are trademarks of Blu-ray Disc Association.
Page 16

is a trademark of DVD Format/Logo Licensing Corporation.
16
“AVCHD” and the “AVCHD” logo are trademarks of Panasonic Corporation and Sony Corporation.
Java and all Java-based trademarks and logos are trademarks or registered trademarks of Sun Microsystems, Inc. in the U.S. and
other countries.
“BD-LIVE,” “BD-LIVE” logo, and “BONUSVIEW” are trademarks of Blu-ray Disc Association.
Manufactured under license under U.S. Patent #’s: 5,451,942; 5,956,674; 5,974,380; 5,978,762; 6,487,535 & other U.S. and worldwide
patents issued & pending. DTS and DTS 2.0 + Digital Out are registered trademarks and the DTS logos and Symbol are trademarks of
DTS, Inc. © 1996-2008 DTS, Inc. All Rights Reserved.
Page 17
Applicable trademark information depends on your TV model/region/country.
17
Copyright 2010 Sony Corporation
Return to Top
Page 18
i-Manual online
18
Print Font Size
Top Page > “BRAVIA” TV Features > 3D Feature
“BRAVIA” TV Features
Watching TV
Using the Home Menu
Fun Features with
Connected Equipment
Parts Description
Troubleshooting
Index
i-Manual online map
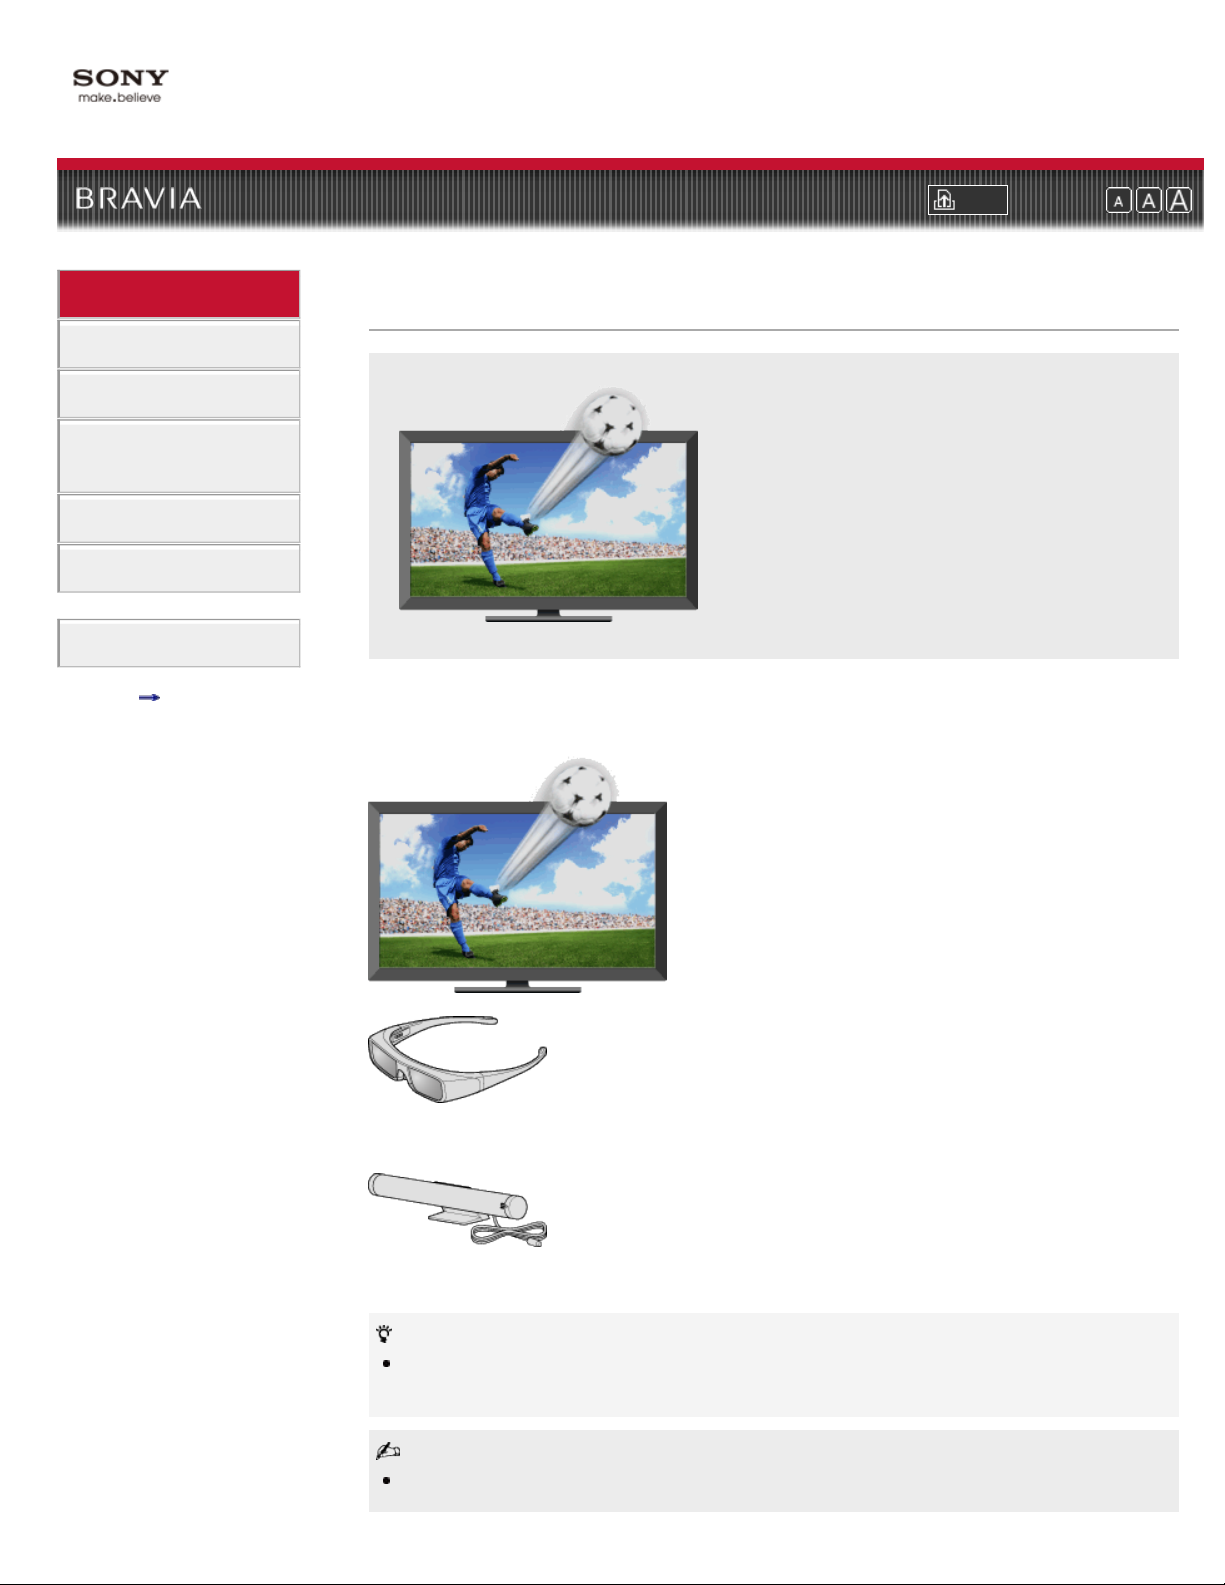
3D Feature
Lets you enjoy 3D (three-dimensional) pictures
and graphics using optional: 3D Glasses and 3D
Sync Transmitter.
Enjoy 3D (three-dimensional) content using 3D Glasses and 3D Sync Transmitter. With this
feature, you can enjoy a powerful 3D experience of entertainment, such as 3D video games and
3D Blu-ray Discs.
3D Glasses
TDG-BR100
3D Sync Transmitter
TMR-BR100
Using optional 3D Glasses, additional viewers can enjoy 3D content. (The illustration shows TDGBR100.)
The 3D Glasses and 3D Sync Transmitter are supplied or available as optional accessories,
Page 19
depending on your TV model. In some regions/countries, the 3D Glasses and 3D Sync
Transmitter may not be available.
19
Watching 3D Content
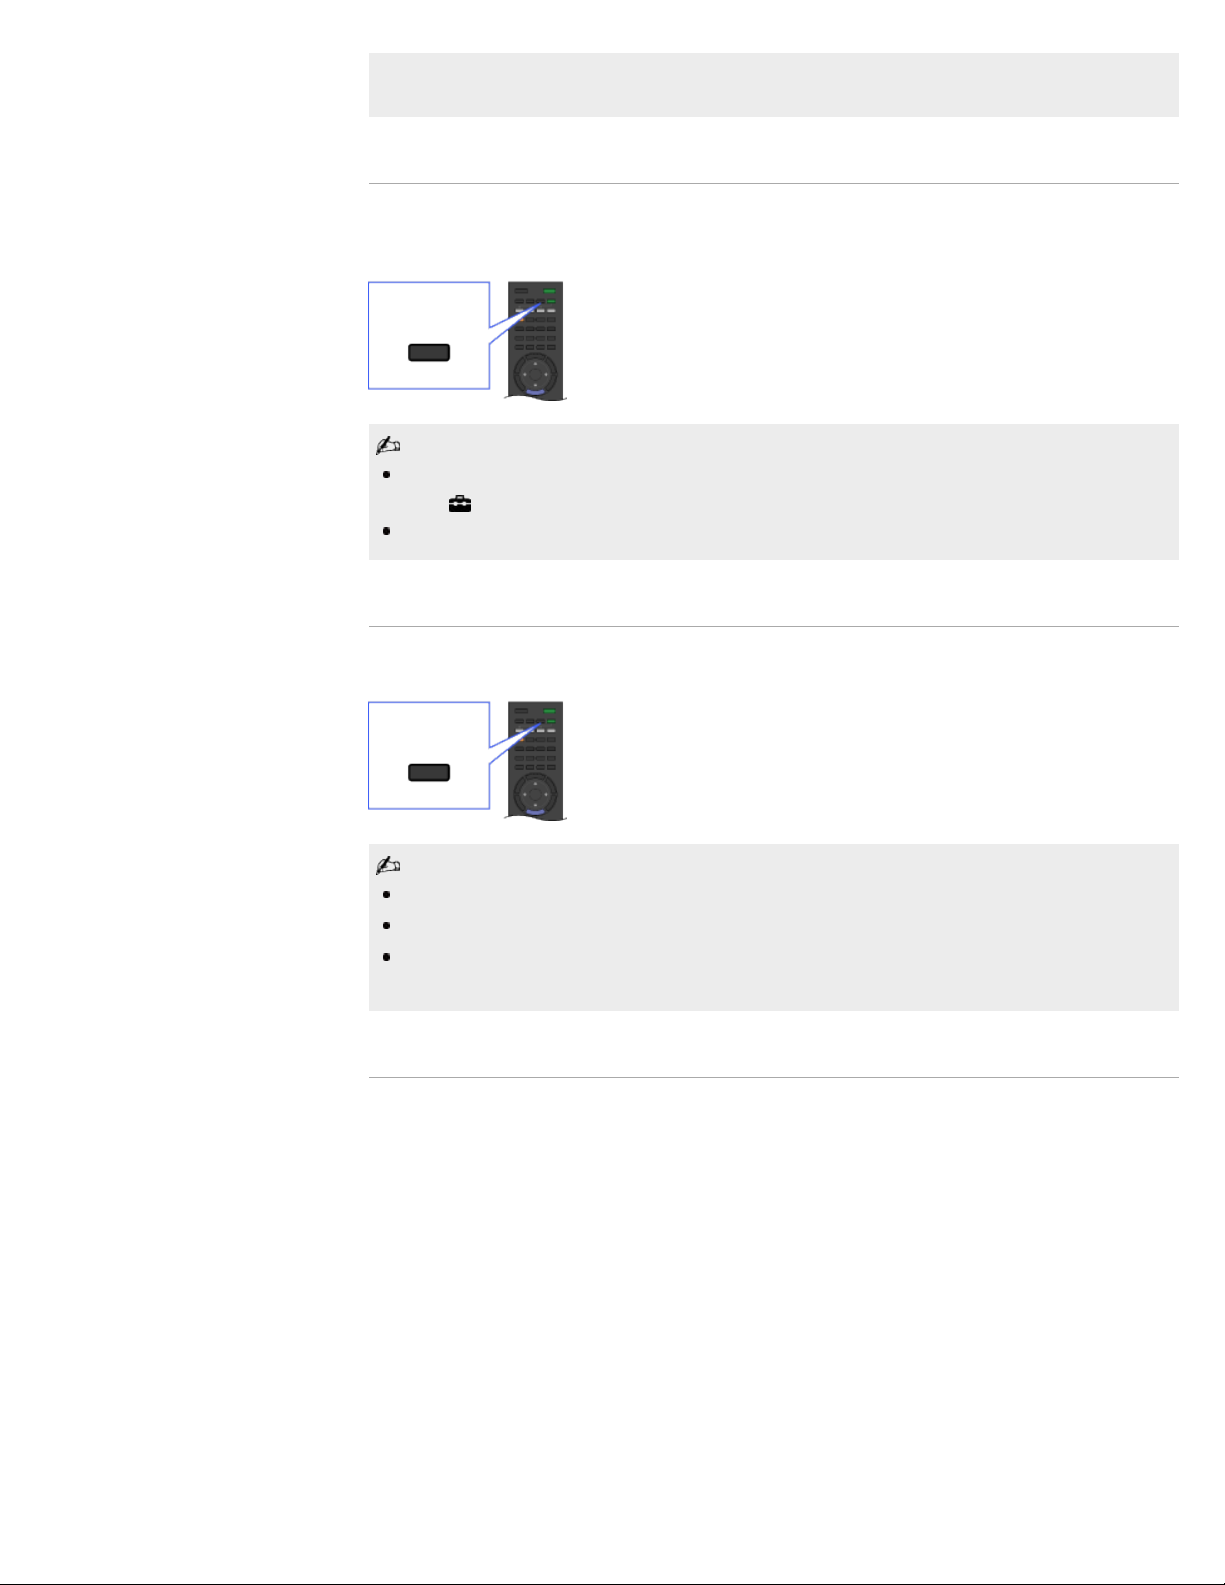
The 3D display mode is automatically selected when a 3D signal is detected. Pressing the 3D
button toggles between 3D display mode and 2D display mode.
3D
Select “Off” from “Auto 3D” to manually turn the 3D display mode on or off. Press HOME, then
select
3D effect is provided only when pictures are displayed in full screen.
> Picture & Display > 3D Settings.
Enjoying Simulated 3D Effect
Pressing the 3D button while watching 2D content provides a simulated 3D effect for 2D pictures.
3D
3D effect may be less pronounced with some picture sources.
Perceived 3D effect may vary from person to person.
Simulated 3D display mode automatically switches back to 2D display mode an hour after its
activation.
3D Sync Transmitter and 3D Glasses Communication Range
The recommended viewing angle and distance are shown in the illustrations. To enjoy the best
3D effect, the preferred viewing position needs to be kept within the range where the 3D Sync
Transmitter works.
Side View
3D Sync
Transmitter
Overhead View
Page 20
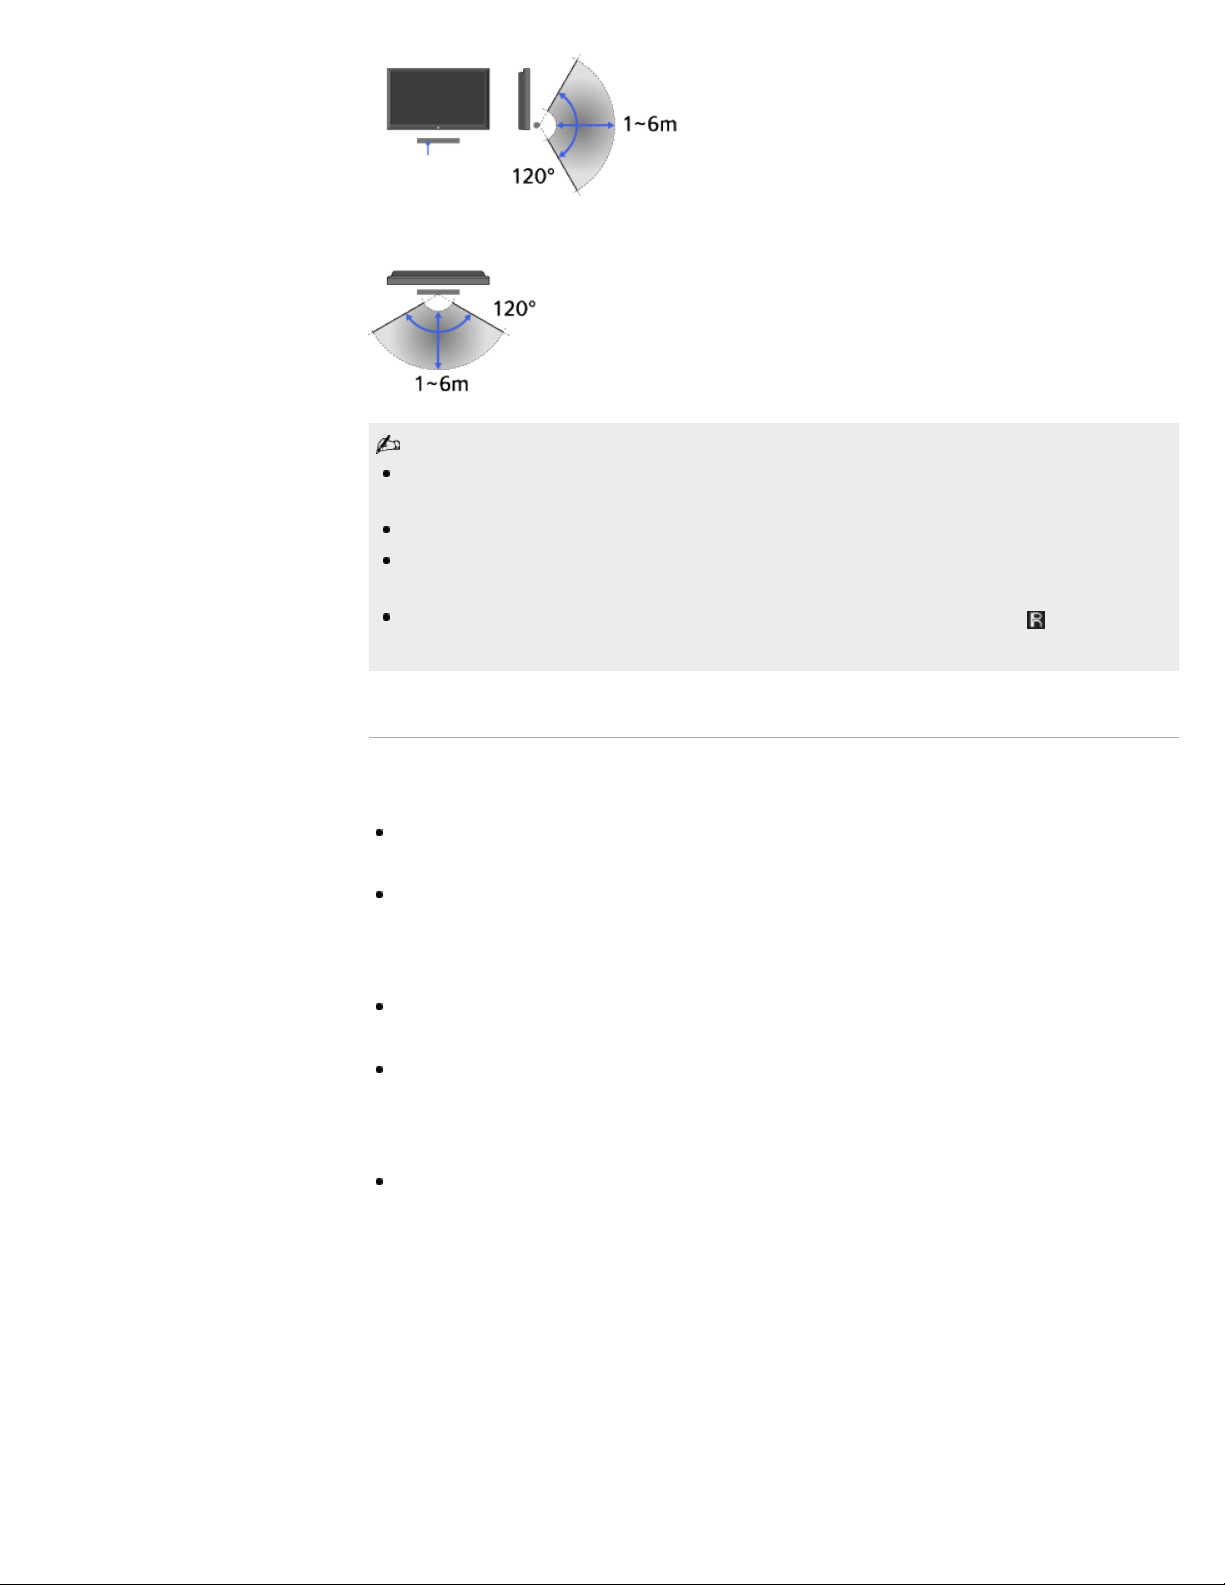
Recommended viewing angle and distance may vary depending on the TV’s location and room
20
conditions.
Do not put anything in front of the 3D Sync Transmitter, doing so may affect its function.
Signals between the 3D Sync Transmitter and 3D Glasses may be interrupted if an infrared device
is used near the TV.
Do not place the 3D Sync Transmitter near the TV's front remote control sensor
transmitter signal may interfere with infrared remote operation.
. The
3D Menu
You can adjust the following settings by pressing OPTIONS on the remote control and selecting
“3D Menu” from the menu list.
3D Display
- For switching between the 3D and 2D display mode.
3D Depth Adjustment
- For adjusting the depth of 3D pictures on the screen. Available only for content with 3D signals.
Selecting “0” is recommended for normal use. 3D effect may be less pronounced depending on the
settings.
Simulated 3D Effect
- Use to heighten or lessen the 3D effect when you display 2D pictures in simulated 3D.
3D Glasses Brightness
- For setting the image brightness when using 3D display mode. By selecting “Auto,” image
brightness through the 3D Glasses is automatically adjusted in conjunction with the “Scene Select”
setting.
3D Format
Simulated 3D: For viewing regular 2D pictures in simulated 3D.
Side-by-Side: For displaying 3D content in the Side- by-Side format. Selecting this displays two
near-identical pictures side-by-side for 3D viewing. Wear the 3D Glasses before setting “3D Format”
as the instructions will otherwise be unreadable because of doubly-blurred letters on the screen.
Over-Under: For displaying 3D content in the Over-Under format. Selecting this displays two nearidentical pictures one above the other for 3D viewing. Wear the 3D Glasses before setting “3D
Format” as the instructions will otherwise be unreadable because of doubly-blurred letters on the
screen.
Page 21

Copyright 2010 Sony Corporation
21
Return to Top
Page 22
i-Manual online
22
Print Font Size
Top Page > “BRAVIA” TV Features > Motionflow
“BRAVIA” TV Features
Watching TV
Using the Home Menu
Fun Features with
Connected Equipment
Parts Description
Troubleshooting
Index
i-Manual online map
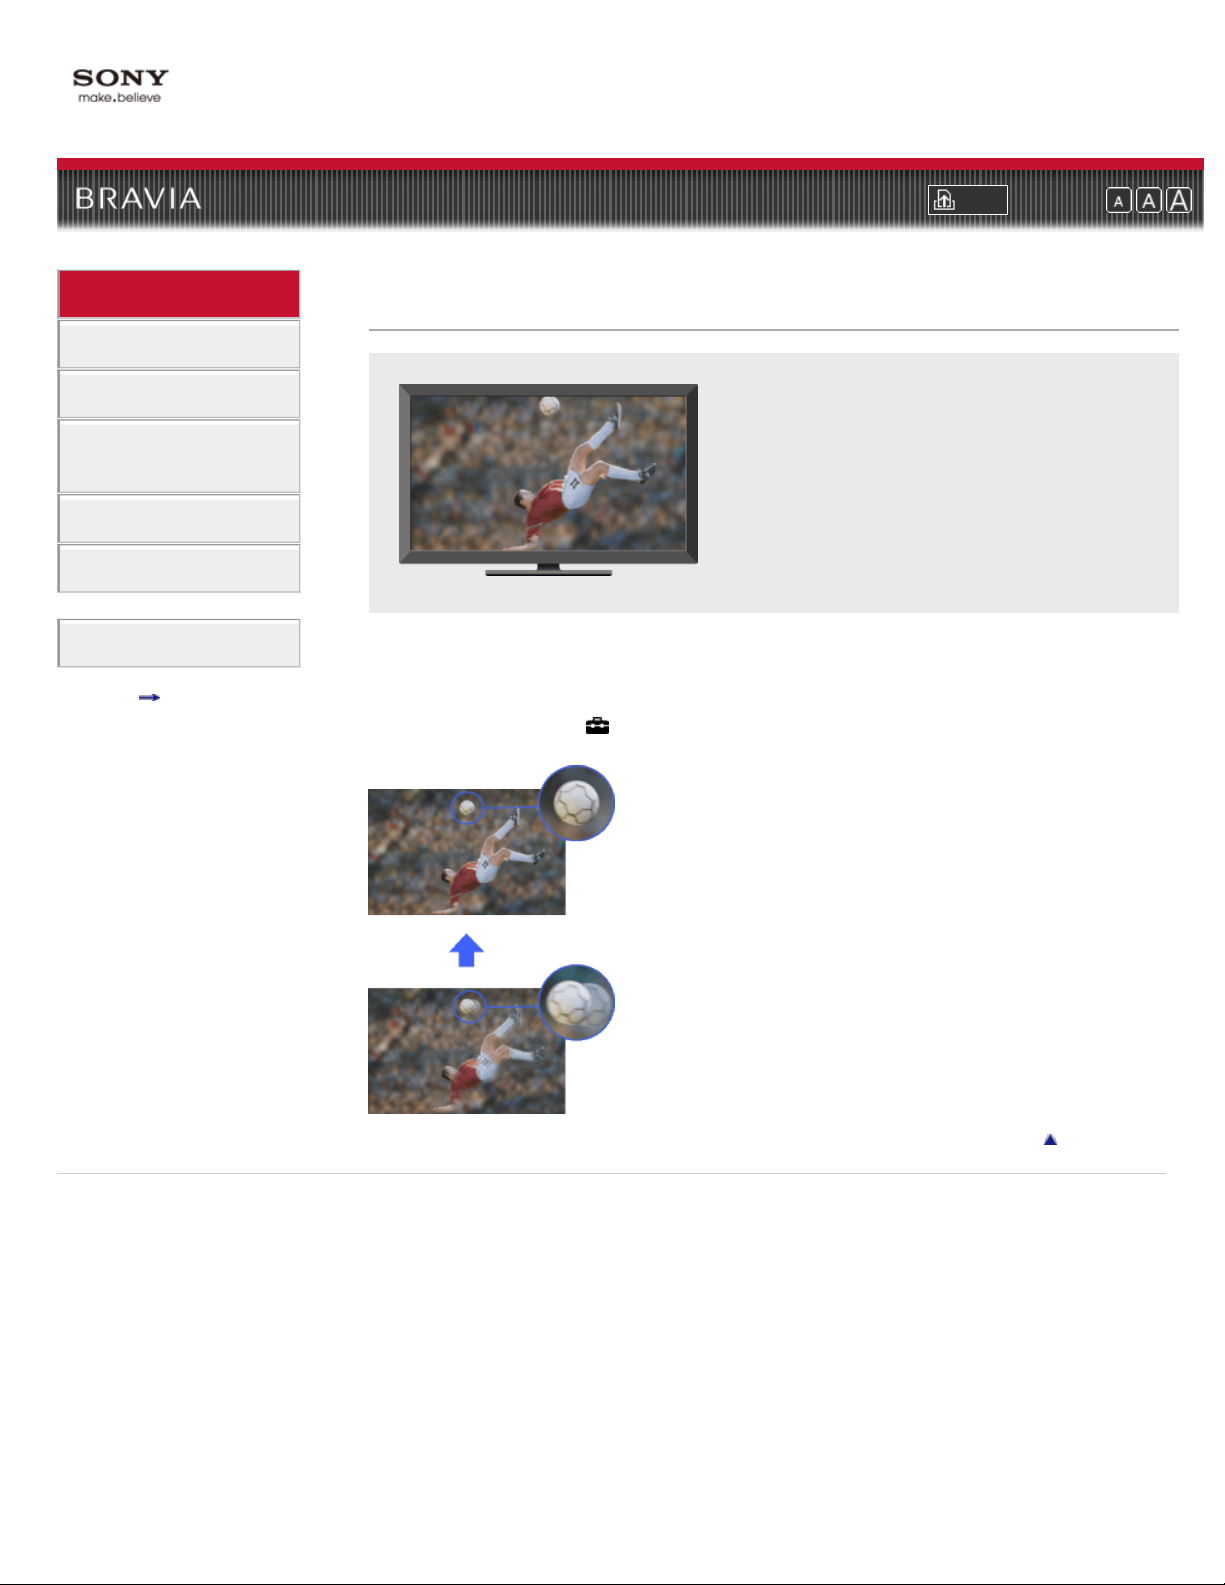
Motionflow
Enhances the smoothness of picture movement
and reduces blur.
“Motionflow” is a proprietary technology that displays TV broadcasts at outstandingly a highframe rate. By displaying pictures at higher frame rate than standard, Motionflow reduces motion
artifacts in high-speed sports footage for smooth, natural motion reproduction.
Press HOME, then select
desired option.
> Picture & Display > Picture Adjustments > Motionflow > the
Copyright 2010 Sony Corporation
Return to Top
Page 23
i-Manual online
23
Print Font Size
Top Page > “BRAVIA” TV Features > “BRAVIA” Internet Video
“BRAVIA” TV Features
Watching TV
Using the Home Menu
Fun Features with
Connected Equipment
Parts Description
Troubleshooting
Index
i-Manual online map
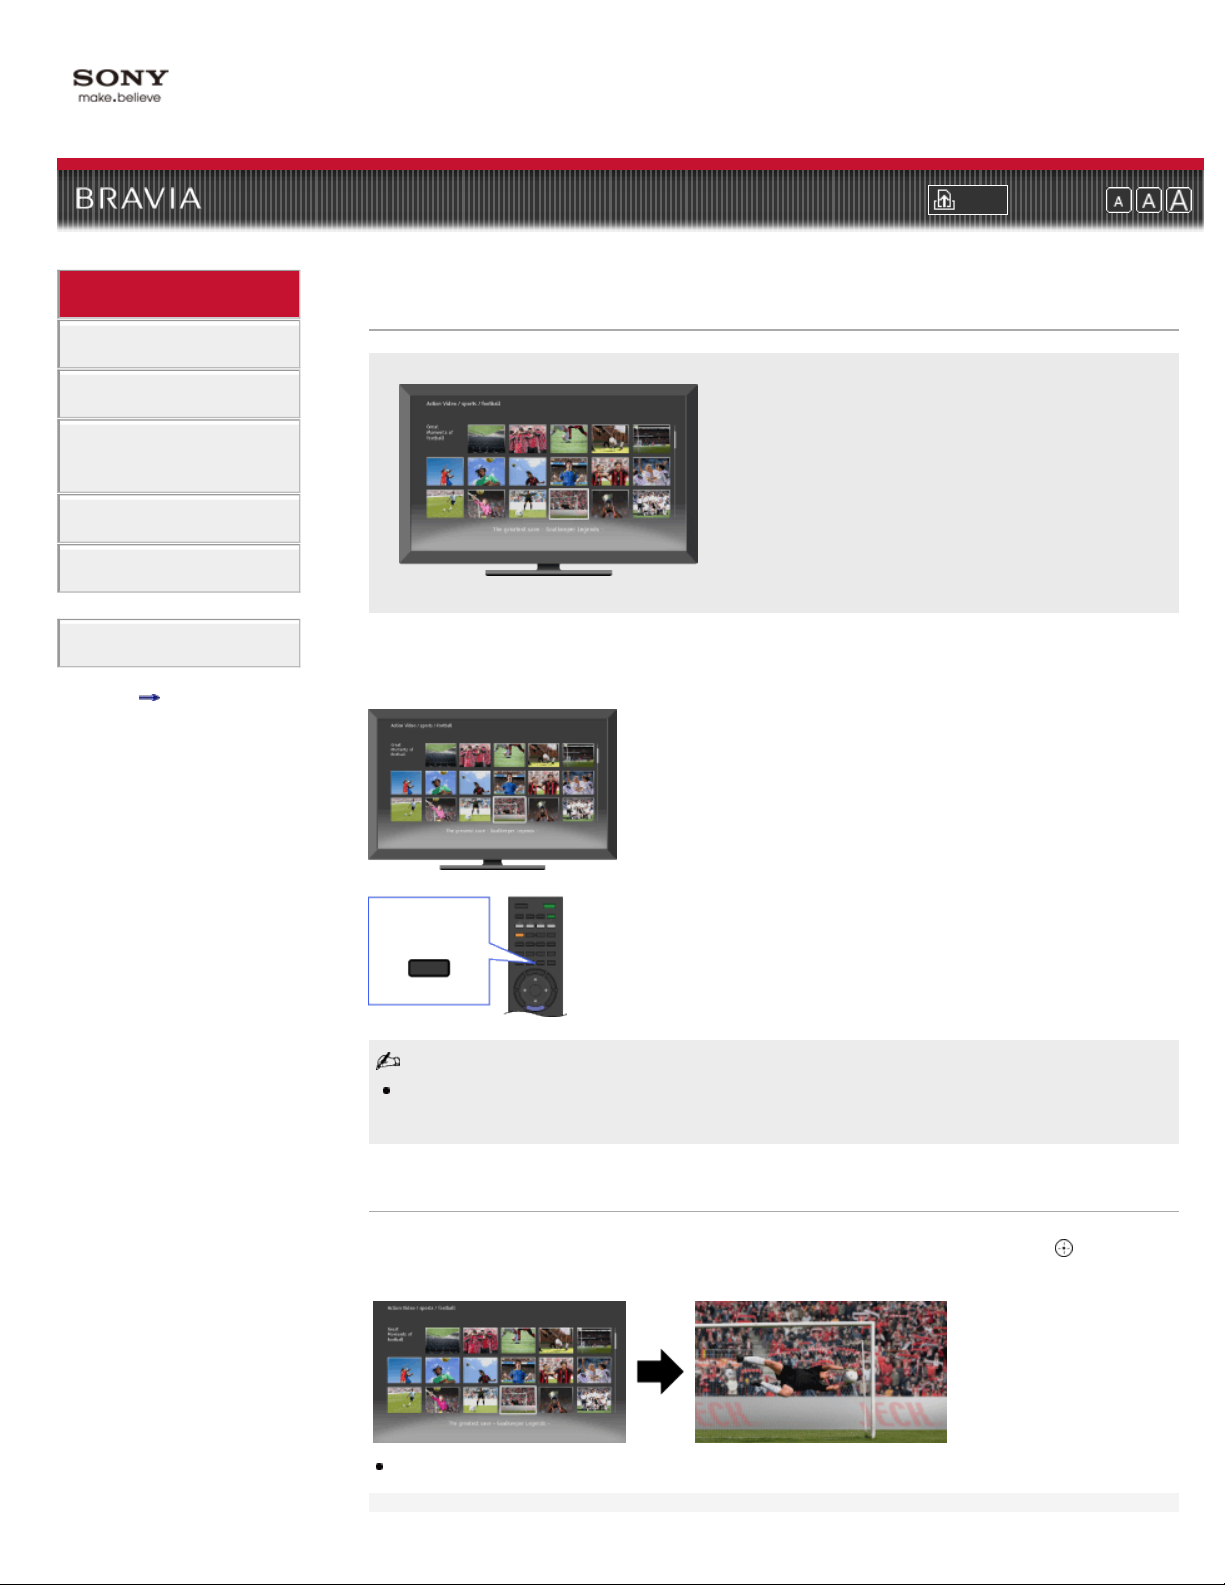
“BRAVIA” Internet Video
Brings videos, movies and much more through the
broadband Internet connection to your TV.
“BRAVIA” Internet Video serves as a gateway to Internet content, delivering a variety of ondemand entertainment straight to your TV. By making a broadband Internet connection, you can
enjoy video content, including movies and cartoons.
INTERNET
VIDEO
Be sure to connect your TV to the broadband Internet and complete the initial setup and “Network
Setup.”
Selecting the “BRAVIA” Internet Video
Highlight the video icon you want to watch by using the remote control, then press to make a
selection.
Information about the highlighted icon appears in the information banner.
Page 24
The interface to Internet content depends on the Internet content providers.
24
Services block video content based on the “Parental Lock” setting of the TV. Some service
providers do not support this function.
To update “BRAVIA” Internet Video content services, press HOME, then select
Refresh Internet Content.
> Network >
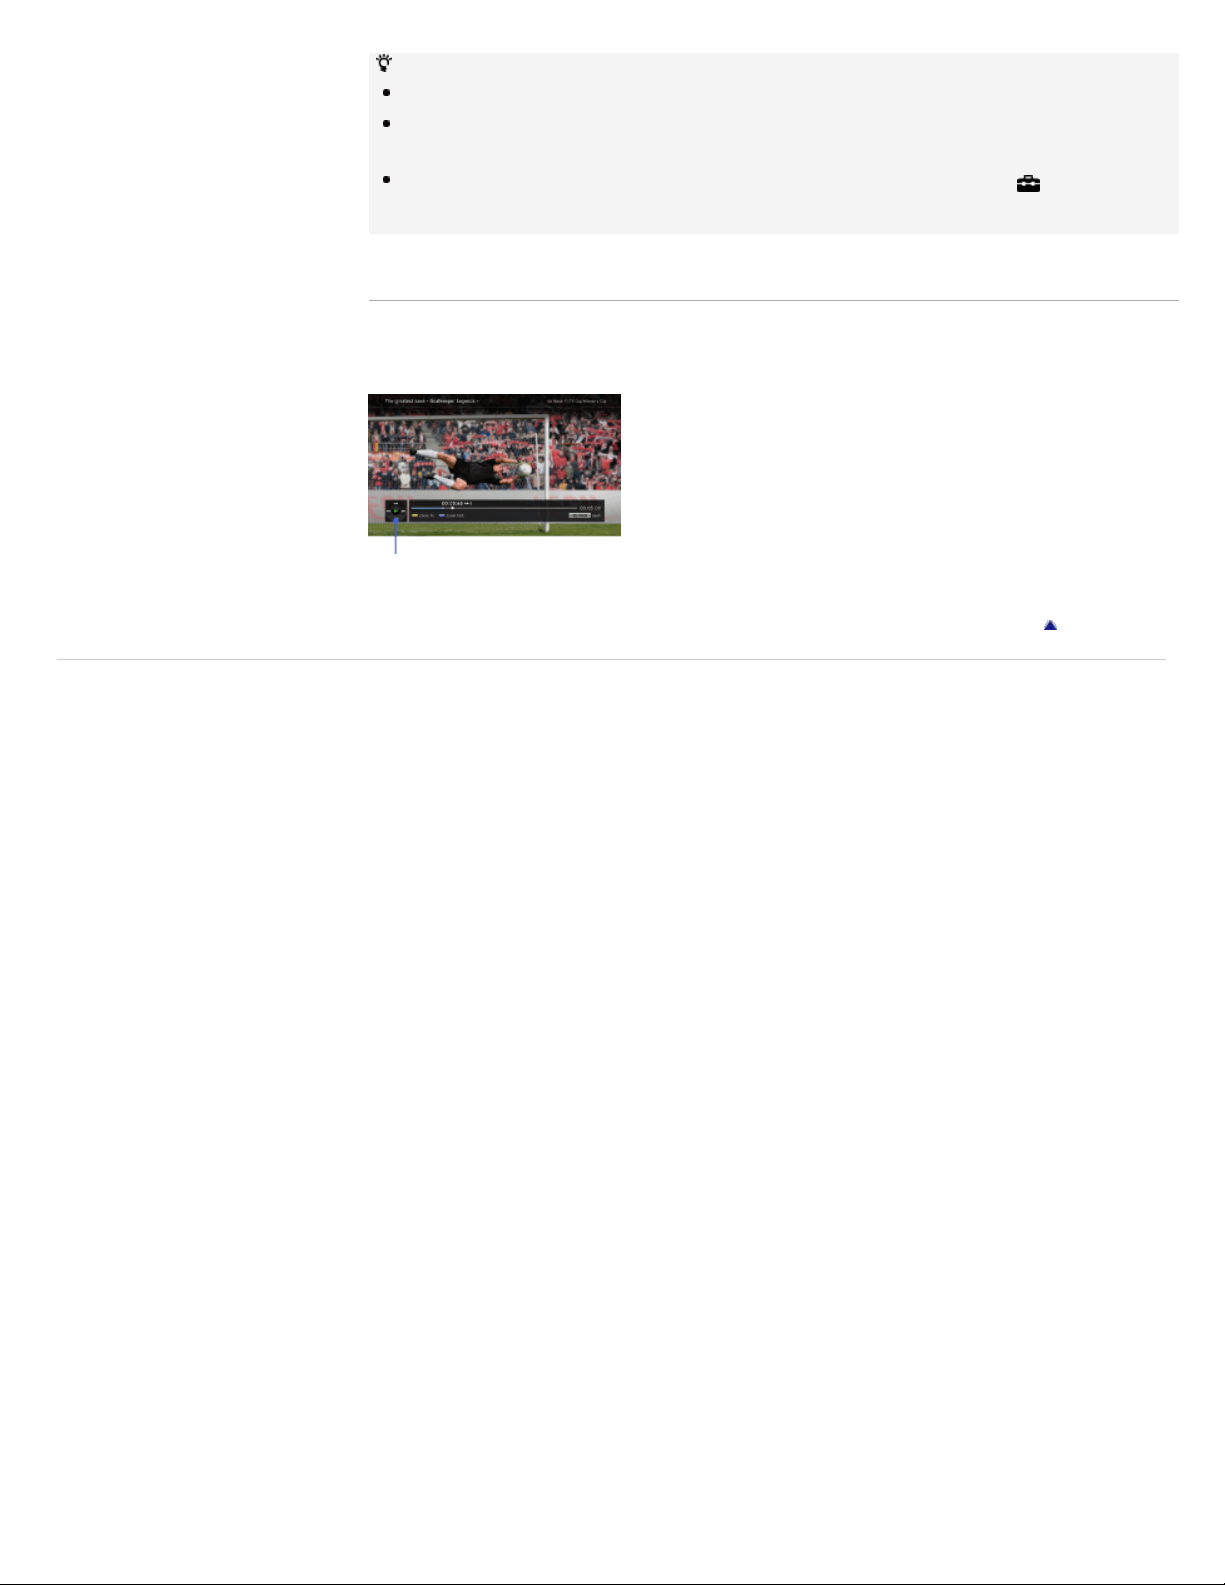
Using the Internet Video
You can seek forward or seek backward in the video content. (This feature is available
depending on Internet content services.)
Press the corresponding buttons on your remote control.
Return to Top
Copyright 2010 Sony Corporation
Page 25
i-Manual online
25
Print Font Size
Top Page > “BRAVIA” TV Features > “BRAVIA” Internet Widgets
“BRAVIA” TV Features
Watching TV
Using the Home Menu
Fun Features with
Connected Equipment
Parts Description
Troubleshooting
Index
i-Manual online map
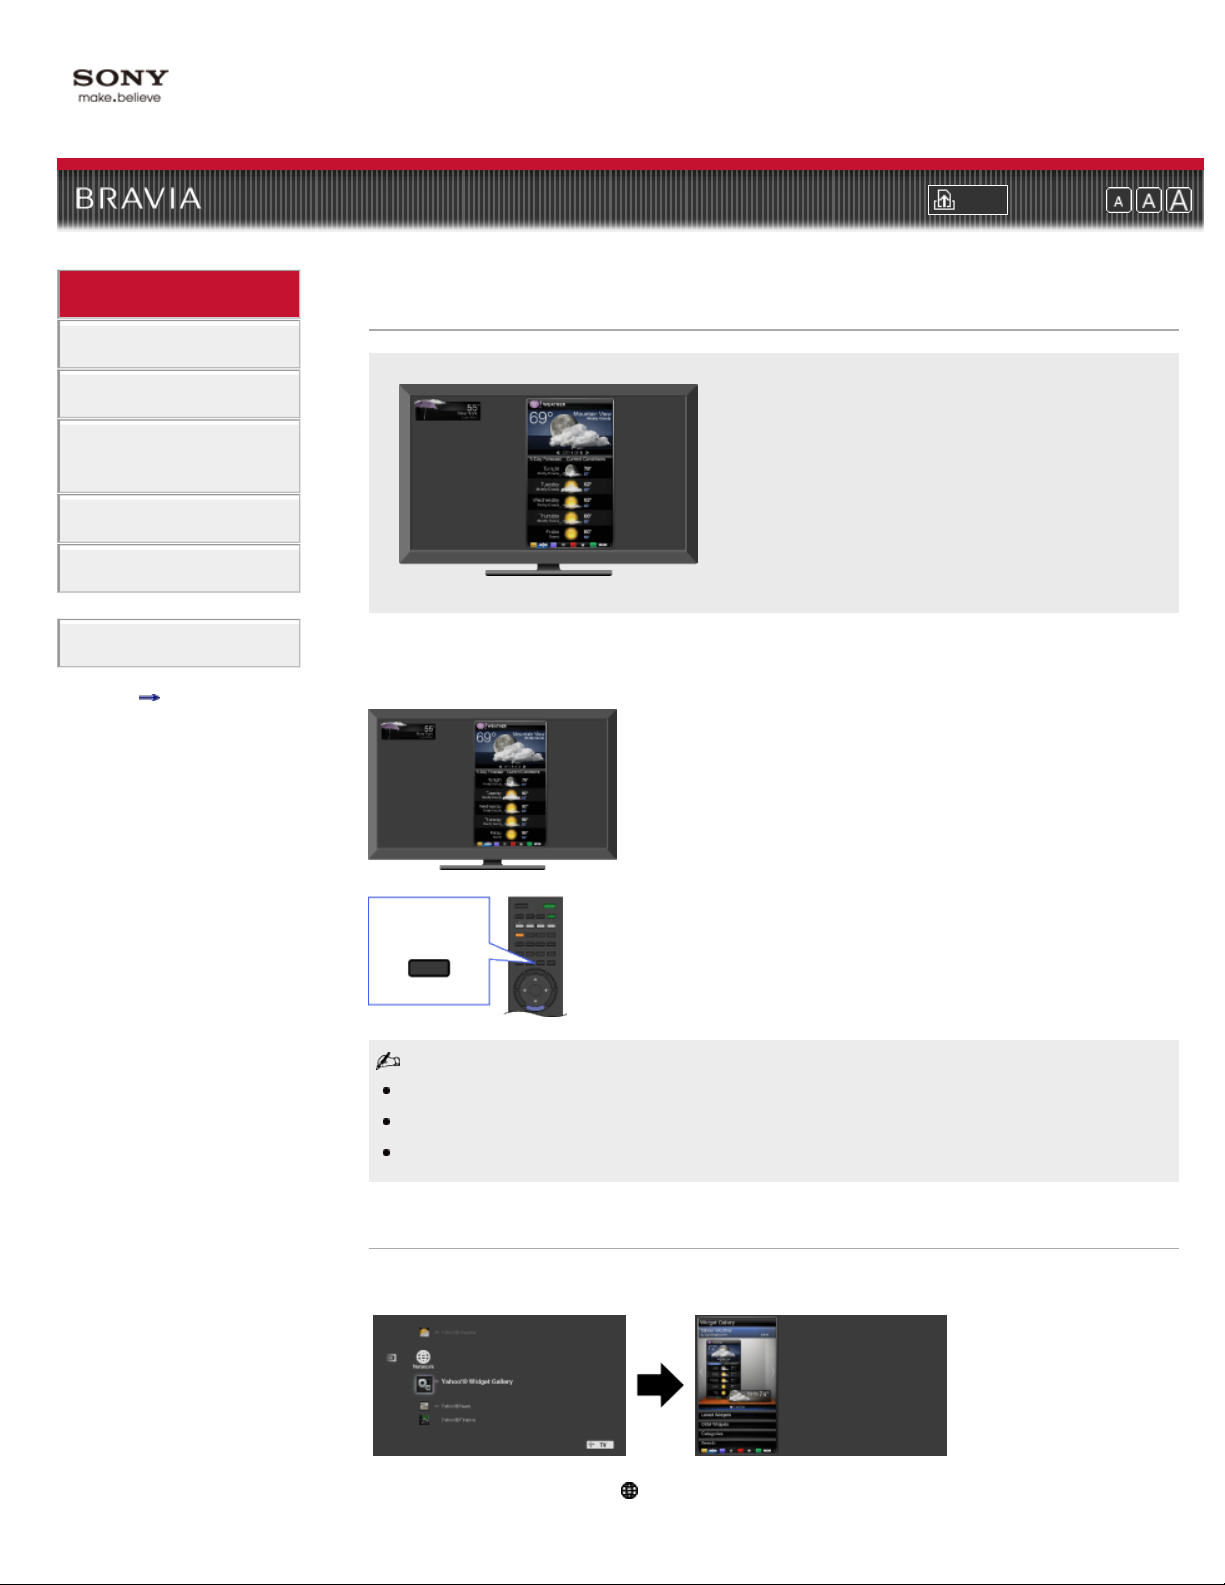
“BRAVIA” Internet Widgets
Delivers interactive content when your TV is
connected to the Internet.
With the Widgets feature, you can display a variety of information on the screen. Widgets are
small downloadable applications that provide easy access to interactive content when your TV is
connected to the Internet.
INTERNET
WIDGETS
Be sure to connect your TV to the Internet, and complete the initial setup and “Network Setup.”
This feature may not be available in some regions/countries.
Available Widgets depend on your region/country.
Installing Widgets
You can install Widgets using the “Widget Gallery” under the “Network” category in the “XMB.”
1. Press HOME, then select > Widget Gallery.
Page 26
2.
Select the desired Widget to install.
26
To delete Widgets, highlight a Widget in the “XMB,” press OPTIONS, then select “Delete.”
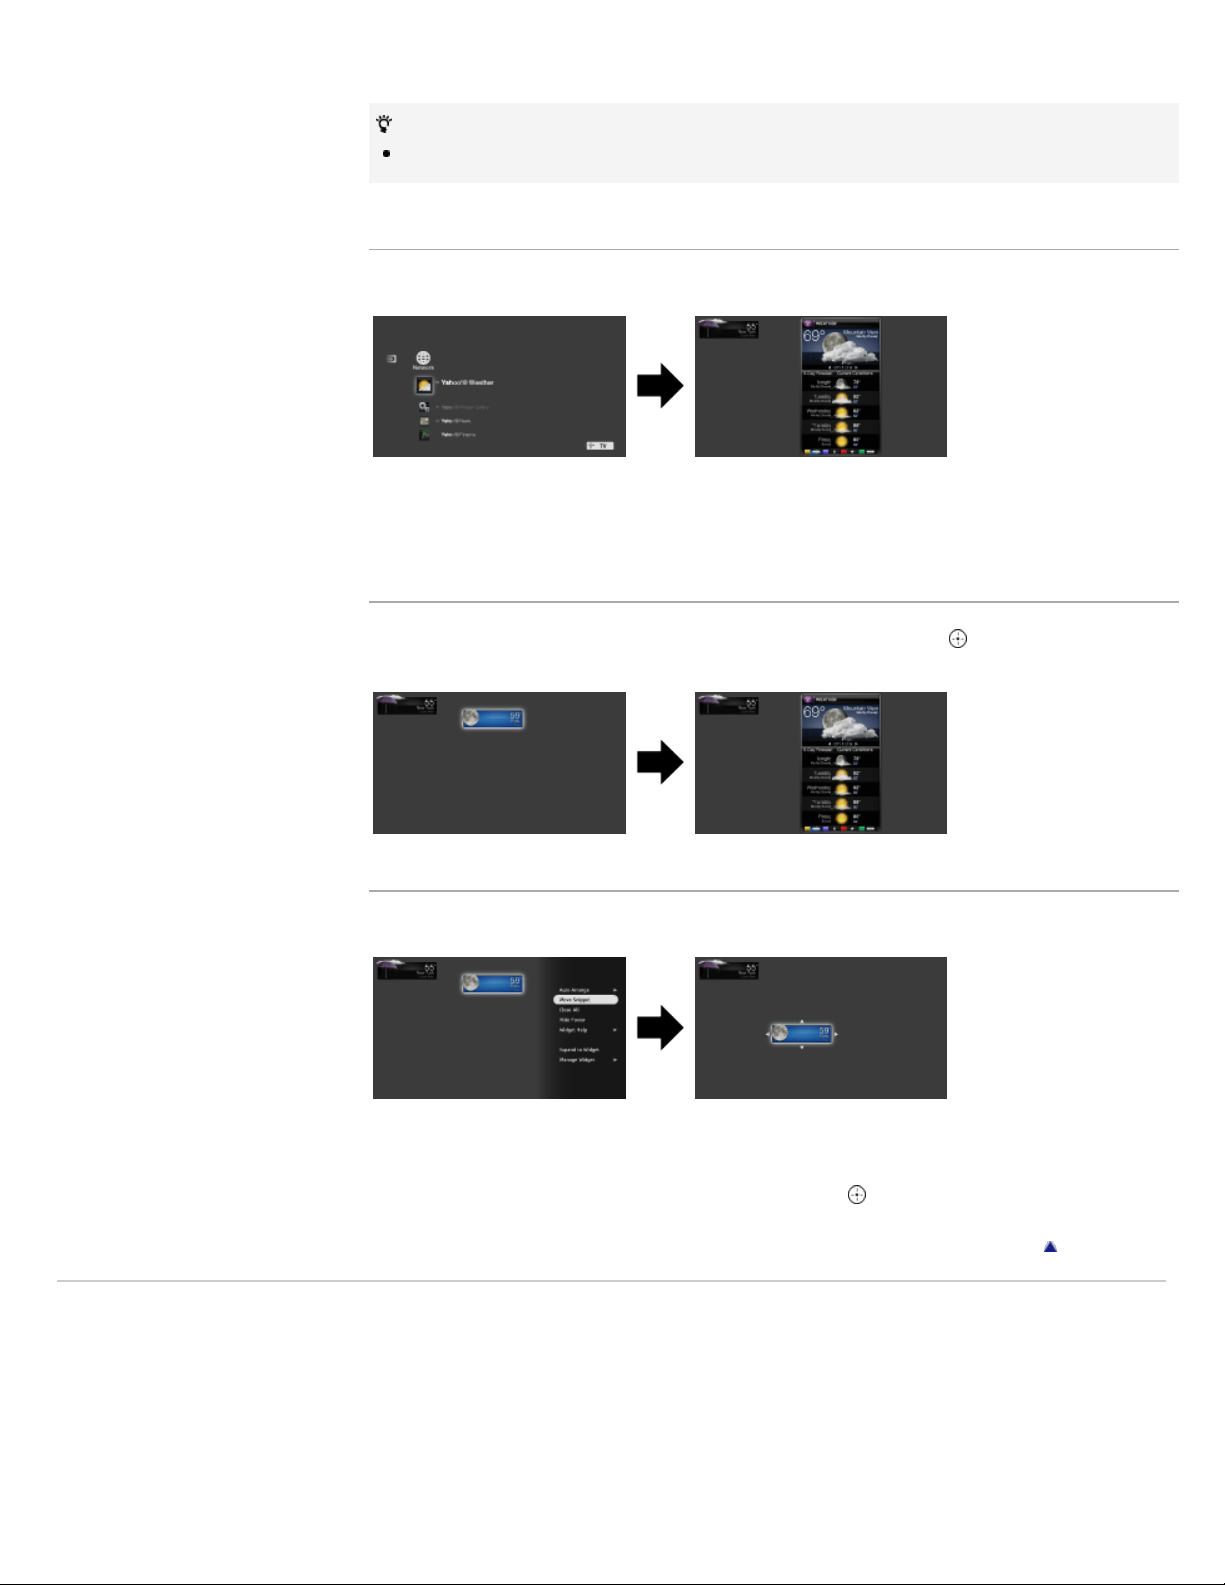
Launching Widgets
Hidden or closed Widgets can be launched from the “Network” category in the “XMB.”
1. Press HOME to display the “XMB.”
2. Select the desired Widget icon listed in the “Network” category.
Expanding Snippet to Widget
Highlight a minimized view of a Widget, called a “Snippet”, and press to expand it into a
Widget.
Copyright 2010 Sony Corporation
Moving Snippets on the Screen
Move Snippets by using the remote control and set them in your preferred position on the screen.
1. Press OPTIONS after highlighting the Snippet you want to move.
2. Select “Move Snippet” from the OPTIONS Menu list.
3. Set the Snippet in your preferred position, then press .
Return to Top
Page 27
i-Manual online
27
“BRAVIA” TV Features
Watching TV
Built-in Wireless LAN
Print Font Size
Top Page > “BRAVIA” TV Features > Built-in Wireless LAN
Using the Home Menu
Fun Features with
Connected Equipment
Parts Description
Troubleshooting
Index
i-Manual online map
Provides a wireless network connection for your TV with
easy and quick setup.
The built-in Wireless LAN device allows you to access the Internet and your home network. With
this feature, you can easily connect to a wireless LAN and enjoy the benefits of networking in a
cable-free environment.
Before setting up the wireless LAN function of the TV, be sure to set up a wireless LAN router.
Connecting to Your Wireless LAN
Using the Built-in Wireless LAN feature you can connect the TV to your wireless LAN. The setup
procedure differs depending on the type of wireless LAN and wireless LAN router.
Before setting up a wireless LAN, check your wireless LAN environment using the following
chart.
Secure wireless
LAN?
YES
NO
Follow the configuration for “Network Setup” and “Secured Network with Wi-Fi Protected
(1)
Do you use a wireless LAN router
compatible with Wi - Fi Protected Setup
(WPS)?
(1)
(2)(3)
Setup (WPS).”
Follow the configuration for “Network Setup” and “Secured Network without Wi-Fi
(2)
Protected Setup (WPS).”
Follow the configuration for “Network Setup” and “Unsecured Network with Any Type of
(3)
Wireless LAN Router.”
Network Setup
“Network Setup” helps you configure network settings with the settings wizard. Follow the
instructions on the screen.
Page 28
Press HOME, then select > Network > Network Setup.
28
The start-up screen allows you to select a setting procedure according to your network
environment.
“View Network Status”: Select to confirm your network status.
“Wired Setup”: Use to connect to a wired network.
“Wireless Setup”: Use to connect to a wireless network.
Secured Network with Wi-Fi Protected Setup (WPS)
The WPS standard makes setup of a secure wireless home network as simple as pressing the
WPS button on the wireless LAN router. Before setting up a wireless LAN, check the location of
the WPS button on the router and verify how to use it.
1. Select “Wireless Setup” from the “Network Setup” start-up screen.
2. Select “WPS (Push Button)” for Push Button method or “WPS (PIN)” for PIN method.
3. Follow the instructions that appear on the setup screen.
To connect to a wireless LAN with WPS, your wireless LAN router needs to support the WPS
standard.
Secured Network without Wi - Fi Protected Setup (WPS)
For setting up a wireless LAN, SSID (wireless network name) and security key (WEP or WPA
key) will be required. If you do not know them, consult the instruction manual of your router.
Copyright 2010 Sony Corporation
1. Select “Wireless Setup” from the “Network Setup” start-up screen.
2. Select “Scan,” then select a network from the list of scanned wireless networks.
3. Follow the instructions that appear on the setup screen.
Unsecured Network with Any Type of Wireless LAN Router
For setting up a wireless LAN, SSID (wireless network name) will be required. Security key
(WEP or WPA key) will not be required because you need to select no security method in this
procedure.
1. Select “Wireless Setup” from the “Network Setup” start-up screen.
2. Select “Scan,” then select a network from the list of scanned wireless networks.
3. Follow the instructions that appear on the setup screen.
Return to Top
Page 29
i-Manual online
29
Print Font Size
Top Page > “BRAVIA” TV Features > Playback via USB
“BRAVIA” TV Features
Watching TV
Using the Home Menu
Fun Features with
Connected Equipment
Parts Description
Troubleshooting
Index
i-Manual online map
Playback via USB
Plays back photos, music and videos on the
TV screen by connecting a Sony digital still
camera or other USB-compatible device.
You can enjoy photo, music and video files stored in a Sony digital still camera, camcorder or
USB storage device by connecting the device via a USB cable.
Photo playback automatically starts when you connect a USB storage device after turning on the
TV, and “Slideshow” or “Thumbnail View” is selected in the “USB Auto Start” settings.
When connecting a Sony digital camera to the TV with a USB cable, USB connection settings on
your camera need to be set to “Auto” or “Mass Storage” mode.
Files from a USB device need to be compatible with the following file formats.
- Still images: JPEG format or RAW format (preview only)
- Music: MP3 format
- Video: AVCHD, MP4 (AVC) or MPEG1 format (not playable in some cases)
Video files are located in the following folder structure (hierarchal position):
/AVCHD/BDMV/STREAM/00000.MTS/PRIVATE/AVCHD/BDMV/STREAM/00000.MTS
/MP_ROOT/100ANV01/MAHA0001.MP4
Avoid losing your files by backing up all your media files stored on a USB device. Sony cannot
accept responsibility for lost or damaged data stored on a USB device.
Check the website below for updated information about compatible USB devices.
http://sony.com/tvsupport
For Canadian models
http://sony.ca/support
Picture Frame – Displaying a Photograph
“Picture Frame” displays a photo for a selected period of time. You can select a photo from the
connected USB device or preset picture folder.
Page 30

1.
Copyright 2010 Sony Corporation
30
While the desired photo is displayed, press OPTIONS, then select File Actions > Picture
Frame.
2. Press HOME, then select > Picture Frame.
Return to Top
Page 31

i-Manual online
31
Print Font Size
Top Page > “BRAVIA” TV Features > “BRAVIA” Sync with Control for HDMI
“BRAVIA” TV Features
Watching TV
Using the Home Menu
Fun Features with
Connected Equipment
Parts Description
Troubleshooting
Index
i-Manual online map
“BRAVIA” Sync with Control for HDMI
Helps you connect compatible HDMI
equipment, such as a BD player or AV
amplifier, to your TV and you can control
the external equipment using the TV’s
remote control.
With the “Control for HDMI” function, “BRAVIA” Sync helps to communicate with “BRAVIA” Synccompatible equipment using HDMI CEC (Consumer Electronics Control). Use the following
settings and tips to help unify control of your connected equipment.
Press HOME, then select
“Control for HDMI” (“BRAVIA” Sync) is only available for the connected Sony equipment that has
the “BRAVIA” Sync logo or is compatible with “Control for HDMI.”
The “Control for HDMI” settings must be set on both the TV and connected equipment. For
settings on the connected equipment, refer to their instruction manuals.
When specific Sony equipment compatible with “Control for HDMI” (“BRAVIA” Sync) is connected,
“BRAVIA” sync is automatically activated on the equipment.
> Channels & Inputs > HDMI Settings > Control for HDMI > On.
Controlling “BRAVIA” Sync- Compatible Equipment
“BRAVIA” Sync-compatible equipment is listed as a new input source under (External Inputs)
in the Home Menu. To control the equipment by using the remote control, press SYNC MENU
and select the desired equipment from “HDMI Device Selection.”
BD/DVD Player
Page 32

Automatically turns the “BRAVIA” Sync-compatible equipment on and switches the input to that
32
equipment when you select it from the Home Menu or Sync Menu.
Automatically turns the TV on and switches the input to the connected equipment when the
equipment starts to play.
Automatically turns the connected equipment off when you switch the TV to standby mode.
AV Amplifier
Automatically turns the connected AV amplifier on and switches the sound output from the TV
speaker to the audio system when you turn the TV on. This function is only available if you have
previously used the AV amplifier to output TV sound.
Automatically switches the sound output to the AV amplifier by turning the AV amplifier on when the
TV is turned on.
Automatically turns the connected AV amplifier off when you switch the TV to standby mode.
Adjusts the volume (VOL +/-) and mutes the sound (MUTING) of the connected AV amplifier
through the TV’s remote control.
When connecting a digital audio system that is compatible with Audio Return Channel (ARC)
technology, connect to HDMI IN 1 with an HDMI cable. If connecting a system that is incompatible
with “Control for HDMI” or Audio Return Channel, an additional audio connection via DIGITAL
AUDIO OUT (OPTICAL) is necessary.
Copyright 2010 Sony Corporation
Video Camera
Automatically turns the TV on and switches the input to the connected video camera when the
connected video camera is turned on.
Automatically turns the connected video camera off when you switch the TV to standby mode.
Return to Top
Page 33

i-Manual online
33
Print Font Size
Top Page > “BRAVIA” TV Features > Favorites
“BRAVIA” TV Features
Watching TV
Using the Home Menu
Fun Features with
Connected Equipment
Parts Description
Troubleshooting
Index
i-Manual online map
Favorites
Manages your preferred TV channels, photos,
music, video content and external inputs for quick
and easy access.
The “Favorites” feature provides quick access to your frequently used items, such as preferred
TV channels or external inputs (e.g. game console, DVD player). In addition, your favorite media
files, Internet content and Widgets can be shown in the “Favorites” screen.
The “Favorites” feature provides quick access to your frequently used items, such as preferred
TV channels or external inputs (e.g. game console, DVD player). In addition, your favorite media
files and Internet content can be shown in the “Favorites” screen.
FAVORITES
Internet content (e.g. Internet Video, Internet Widgets) may not be available in some
regions/countries.
Internet content (e.g. Internet Video) may not be available in some regions/countries.
Displaying Your Favorites
Select the desired icon listed at the bottom of the screen by using the remote control, and press
to expand it into a full view.
Page 34

Items in your “Favorites” are displayed as icons.
34
A slideshow automatically starts when a folder of photos is selected.
Displaying Your Recently Viewed Items
By selecting the “Recently Viewed” stack of items in the “Favorites” screen, you can display a
history of content you have recently viewed. The “Recently Viewed” list is erased whenever the
TV is powered off.
“Recently Viewed” items are displayed in a stack list. Press / to move between the items.
Recommendations
The “Recommendations” feature automatically analyzes your interests by referencing your
viewing history to find programs and items you may like, and presents them in the “Favorites”
menu.
Press HOME, then select
> Preferences > Recommendation > On.
The “Recommendations” feature may not be available depending on your region, country and
broadcasting conditions.
Recommended programs that are currently being broadcast are displayed in a stack list of items.
Press
to expand the selected item into a full view.
Adding/Removing Favorites
You can add/remove your favorite items through the “XMB” or while you are displaying content
on the screen.
1. Press OPTIONS after selecting the desired item on the “XMB.”
2. Select “Add to Favorites” or “Remove from Favorites.”
Return to Top
Page 35

Copyright 2010 Sony Corporation
35
Page 36

i-Manual online
36
Print Font Size
Top Page > Watching TV > TV Guide On Screen®
“BRAVIA” TV Features
Watching TV
Using the Home Menu
Fun Features with
Connected Equipment
Parts Description
Troubleshooting
Index
i-Manual online map
TV Guide On Screen®
Provides program information for up to two days.
With easy-to-use functions, you can personalize
the program listings.
TV Guide On Screen provides up to two days of program information and customizes the
program listings to your preference. With this feature, you can search for programs by categories
and keywords as well as customize your favorite channels or favorite keywords.
GUIDE
To change the information source for program information (to Broadcaster or to TV Guide), press
HOME and select
When “Broadcaster” is selected for the source of program information, the TV will not display a
program guide, but each individual program will have program information shown onscreen when
the channel is tuned.
TV Guide is available with connection to your cable service or with over-the-air antenna signal.
You must connect your signal directly to the TV’s CABLE or ANTENNA input without using a cable
box.
Be sure to complete the initial setup to use this feature.
DAM (Download Acquisition Mode) is used for software updates and/or collecting data for TV
Guide. When DAM is activated, power consumption may increase.
> Channels & Inputs > Program Information Source > the desired setting.
Page 37

TV Guide Menu Area
37
Select from the following features:
“TV Listings”: Up to 24 hours of program listings are available. You can also
organize the program listings by categories.
“Browse/Search”: Search for programs by browsing through categories or by
entering a keyword or title.
“Ads”: Provides advertisements from TV Guide sponsors.
“Settings”: Adjust the settings for the TV Guide.
“My TV”: Allows you to organize the program listings.
Video Preview Window
Displays the last viewed program before you entered the guide. You can also set
this to preview the program that is selected within the TV Guide listings.
Information Box
Shows program information in details.
Listings Grid
Select a program to watch or to obtain program information.
Channel logo
Display the broadcaster’s channel logo.
Ad panels
Provides advertisements from TV Guide sponsors.
Copyright 2010 Sony Corporation
Using the My TV Feature
The “My TV” feature allows you to organize the program listings by profiles such as Movie, Sport
or Kids. You can also create your own profile to organize your favorite programs, channels or
keywords.
Select “My TV” from the menu area to launch the “My TV” screen.
Channels you add to the main profile of “My TV” will automatically appear as your favorite channels
in “Favorites.”
Return to Top
Page 38

i-Manual online
38
Print Font Size
Top Page > Watching TV > Favorites
“BRAVIA” TV Features
Watching TV
Using the Home Menu
Fun Features with
Connected Equipment
Parts Description
Troubleshooting
Index
i-Manual online map
Favorites
Manages your preferred TV channels, photos,
music, video content and external inputs for quick
and easy access.
The “Favorites” feature provides quick access to your frequently used items, such as preferred
TV channels or external inputs (e.g. game console, DVD player). In addition, your favorite media
files, Internet content and Widgets can be shown in the “Favorites” screen.
The “Favorites” feature provides quick access to your frequently used items, such as preferred
TV channels or external inputs (e.g. game console, DVD player). In addition, your favorite media
files and Internet content can be shown in the “Favorites” screen.
FAVORITES
Internet content (e.g. Internet Video, Internet Widgets) may not be available in some
regions/countries.
Internet content (e.g. Internet Video) may not be available in some regions/countries.
Displaying Your Favorites
Select the desired icon listed at the bottom of the screen by using the remote control, and press
to expand it into a full view.
Page 39

Items in your “Favorites” are displayed as icons.
39
A slideshow automatically starts when a folder of photos is selected.
Displaying Your Recently Viewed Items
By selecting the “Recently Viewed” stack of items in the “Favorites” screen, you can display a
history of content you have recently viewed. The “Recently Viewed” list is erased whenever the
TV is powered off.
“Recently Viewed” items are displayed in a stack list. Press / to move between the items.
Recommendations
The “Recommendations” feature automatically analyzes your interests by referencing your
viewing history to find programs and items you may like, and presents them in the “Favorites”
menu.
Press HOME, then select
> Preferences > Recommendation > On.
The “Recommendations” feature may not be available depending on your region, country and
broadcasting conditions.
Recommended programs that are currently being broadcast are displayed in a stack list of items.
Press
to expand the selected item into a full view.
Adding/Removing Favorites
You can add/remove your favorite items through the “XMB” or while you are displaying content
on the screen.
1. Press OPTIONS after selecting the desired item on the “XMB.”
2. Select “Add to Favorites” or “Remove from Favorites.”
Return to Top
Page 40

Copyright 2010 Sony Corporation
40
Page 41

i-Manual online
41
Print Font Size
Top Page > Watching TV > Wide Mode
“BRAVIA” TV Features
Watching TV
Using the Home Menu
Fun Features with
Connected Equipment
Parts Description
Troubleshooting
Index
i-Manual online map
Wide Mode
Selects a screen format from a range of
screen types according to your preferences.
“Wide Mode” allows you to select a screen format to better fit content you are viewing. Based on
the original signal source, a black frame or black bars may surround the picture.
WIDE
Changing the Wide Mode from 4:3 Original Source
Wide Zoom Enlarges the picture to fill a 16:9 screen, preserving the original
picture as much as possible.
Normal Displays a 4:3 picture in its original size. Side bars are shown to fill
the 16:9 screen.
Full Stretches the 4:3 picture horizontally, to fill the 16:9 screen.
Zoom Displays the cinemascopic (letter box format) picture in the correct
proportion.
Changing the Wide Mode from 16:9 Original Source
Wide Zoom Enlarges the picture to fill a 16:9 screen,
preserving the original picture as much as
possible.
Full Displays a 16:9 picture in its original size.
Page 42

H Stretch* Stretches the picture horizontally keeping the
42
vertical size in its original. This is only available
with 720p, 1080i, 1080p and 1080/24p sources.
Zoom Displays the cinemascopic (letter box format)
picture in the correct proportion.
* This Wide Mode is only available depending on your TV model/region/country.
Changing the Wide Screen Mode for PC Timing
800 x 600 Normal Full 1 Full 2
1,280 x 768 Normal Full 1 Full 2
Return to Top
Copyright 2010 Sony Corporation
Page 43

i-Manual online
43
Print Font Size
Top Page > Watching TV > Picture in Picture (PIP)
“BRAVIA” TV Features
Watching TV
Using the Home Menu
Fun Features with
Connected Equipment
Parts Description
Troubleshooting
Index
i-Manual online map
Picture in Picture (PIP)
Displays two pictures (PC input and TV
program/composite video) on the screen
simultaneously.
“PIP” displays a picture from the connected PC in the full screen, and a TV program or
composite video in an inset window. This feature is available when a PC is connected with an
HDMI cable. Available inputs may vary depending on the TV model.
1. Press OPTIONS and select the “PIP” from the OPTIONS Menu.
2. Use the OPTIONS Menu to switch audio output between the two pictures.
Copyright 2010 Sony Corporation
Return to Top
Page 44

i-Manual online
44
Print Font Size
Top Page > Watching TV > Angle Adjustment (Swivel)
“BRAVIA” TV Features
Watching TV
Using the Home Menu
Fun Features with
Connected Equipment
Parts Description
Troubleshooting
Index
i-Manual online map
Copyright 2010 Sony Corporation
Angle Adjustment (Swivel)
Adjust the viewing angle left and right as shown in
the illustration.
Adjust the viewing angle left and right as shown in the illustration.
Swivel is available depending on the TV size.
When adjusting the angle, hold the stand with one hand to avoid having the stand slip or tip over.
Return to Top
Page 45

i-Manual online
45
Print Font Size
Top Page > Using the Home Menu > About the Home Menu
“BRAVIA” TV Features
Watching TV
Using the Home Menu
Fun Features with
Connected Equipment
Parts Description
Troubleshooting
Index
i-Manual online map
About the Home Menu
The Home Menu of the “XMB” (XrossMediaBar)
provides quick access to program listings, input
sources, the settings menu of your TV and more.
With the Home Menu (“XMB”), you can customize your TV settings. The Home Menu also
provides you access to TV channels, media files (e.g. photos, music, videos), “BRAVIA” Internet
Widgets, and external input sources.
With the Home Menu (“XMB”), you can customize your TV settings. The Home Menu also
provides you access to TV channels, media files (e.g. photos, music, videos), and external input
sources.
HOME
Select a category from the Media Category Bar using the /
buttons.
Select an item from the Category Object Bar using the
buttons.
Media Category Bar
/
Page 46

The category icons organize your TV settings and TV features for quick and easy access.
Settings Contains all of the necessary configurations to customize your TV
46
settings.
Photo Enjoy photo content via USB devices or your home network, including
Internet content services.
Music Enjoy music content via USB devices or your home network, including
Internet content services.
Video Enjoy video content via USB devices or your home network, including
Internet content services.
TV Select a channel or display the TV Guide.
TV Guide is available depending on your region.
External Inputs Select equipment connected to the TV.
Network Enjoy “BRAVIA” Internet Widgets. You can access the “Widget Gallery”
and downloaded Widgets. (“BRAVIA” Internet Widgets is available
depending on your region/country.)
Qriocity Access “Qriocity” online service.
Copyright 2010 Sony Corporation
This function is available depending on your region.
The options you can select may vary depending on the situation.
Unavailable options are grayed out or not displayed.
Return to Top
Page 47

i-Manual online
47
“BRAVIA” TV Features
Product Support
Print Font Size
Top Page > Using the Home Menu > Product Support
Watching TV
Using the Home Menu
Fun Features with
Connected Equipment
Parts Description
Troubleshooting
Index
i-Manual online map
Copyright 2010 Sony Corporation
i-Manual
Contact Sony
Signal Diagnostics
Automatic Software Update
Return to Top
Page 48

i-Manual online
48
“BRAVIA” TV Features
Preferences
Print Font Size
Top Page > Using the Home Menu > Preferences
Watching TV
Using the Home Menu
Fun Features with
Connected Equipment
Parts Description
Troubleshooting
Index
i-Manual online map
Copyright 2010 Sony Corporation
Scene Select
Eco
Clock/Timers
Language
Region
Closed Captions (CC)
Parental Lock
Info Banner
Front Panel Illumination
Home Menu Scrolling
Recommendation
Quick Start
Picture Adjustments Lock
Initial Setup
Return to Top
Page 49

i-Manual online
49
“BRAVIA” TV Features
Picture & Display
Print Font Size
Top Page > Using the Home Menu > Picture & Display
Watching TV
Using the Home Menu
Fun Features with
Connected Equipment
Parts Description
Troubleshooting
Index
i-Manual online map
Copyright 2010 Sony Corporation
Picture Adjustments
3D Settings
Screen (for inputs other than a PC)
Screen (for PC input)
Return to Top
Page 50

i-Manual online
50
“BRAVIA” TV Features
Sound
Print Font Size
Top Page > Using the Home Menu > Sound
Watching TV
Using the Home Menu
Fun Features with
Connected Equipment
Parts Description
Troubleshooting
Index
i-Manual online map
Copyright 2010 Sony Corporation
Sound Adjustments
Speaker Integrated Stand Settings
MTS Audio
Speakers
TV Position
Audio Out
Key Tone
Return to Top
Page 51

i-Manual online
51
“BRAVIA” TV Features
Channels & Inputs
Print Font Size
Top Page > Using the Home Menu > Channels & Inputs
Watching TV
Using the Home Menu
Fun Features with
Connected Equipment
Parts Description
Troubleshooting
Index
i-Manual online map
Copyright 2010 Sony Corporation
Manage Inputs
Cable/Antenna
Auto Program
Add Digital Channels
Show/Hide Channels
Edit Channel Labels
Program Information Source
Analog Fine Tune
Video 2/Component Selection
HDMI Settings
USB Auto Start
Return to Top
Page 52

i-Manual online
52
“BRAVIA” TV Features
Network
Print Font Size
Top Page > Using the Home Menu > Network
Watching TV
Using the Home Menu
Fun Features with
Connected Equipment
Parts Description
Troubleshooting
Index
i-Manual online map
Copyright 2010 Sony Corporation
Network Setup (Follow Wired Setup > Custom.)
Built-in Wireless LAN
Refresh Internet Content
Show/Hide Media Servers
Media Server Troubleshooting
Renderer
Return to Top
Page 53

i-Manual online
53
Print Font Size
Top Page > Fun Features with Connected Equipment > VCR/DVD Player
“BRAVIA” TV Features
Watching TV
Using the Home Menu
Fun Features with
Connected Equipment
Parts Description
Troubleshooting
Index
i-Manual online map
VCR/DVD Player
Connect a VCR or DVD player to your TV.
The type of cable depends on your player’s
output.
VCR/DVD Player with HDMI Connection
TV
VCR/DVD Player
HDMI cable (not supplied)
HDMI connection is recommended for optimum picture quality.
VCR/DVD Player with Component Video Connection
TV
VCR/DVD Player
Component
Video cable (not
supplied)
Audio cable (not supplied)
VCR/DVD Player with Composite Connection
Page 54

TV
54
VCR/DVD Player
Composite Video/Audio
cable (not supplied)
Viewing Pictures from Connected Equipment
INPUT
1. Turn on the connected equipment.
2. Press INPUT and select the desired input source.
Return to Top
Copyright 2010 Sony Corporation
Page 55

i-Manual online
55
Print Font Size
Top Page > Fun Features with Connected Equipment > Audio System
“BRAVIA” TV Features
Watching TV
Using the Home Menu
Fun Features with
Connected Equipment
Parts Description
Troubleshooting
Index
i-Manual online map
Audio System
Connect an audio amplifier or home theater
system with digital input to your TV.
Audio System with Optical Audio Cable
TV
Audio System
Optical Audio cable (not
supplied)
Audio System with HDMI Cable
TV
Audio System
HDMI cable (not supplied)
When connecting a digital audio system that is compatible with “Control for HDMI” (“BRAVIA”
Sync) and Audio Return Channel (ARC) technology, connect to HDMI IN 1 with an HDMI cable. If
connecting a system that is incompatible with “Control for HDMI” or Audio Return Channel, an
additional audio connection via DIGITAL AUDIO OUT (OPTICAL) is necessary.
Audio System with Audio Cable
TV
Audio System
Page 56

Copyright 2010 Sony Corporation
56
Audio cable (not supplied)
When using an external audio system, audio out of the TV can be controlled using the TV’s
remote control.
Return to Top
Page 57

i-Manual online
57
Print Font Size
Top Page > Fun Features with Connected Equipment > Digital Still Camera
“BRAVIA” TV Features
Watching TV
Using the Home Menu
Fun Features with
Connected Equipment
Parts Description
Troubleshooting
Index
i-Manual online map
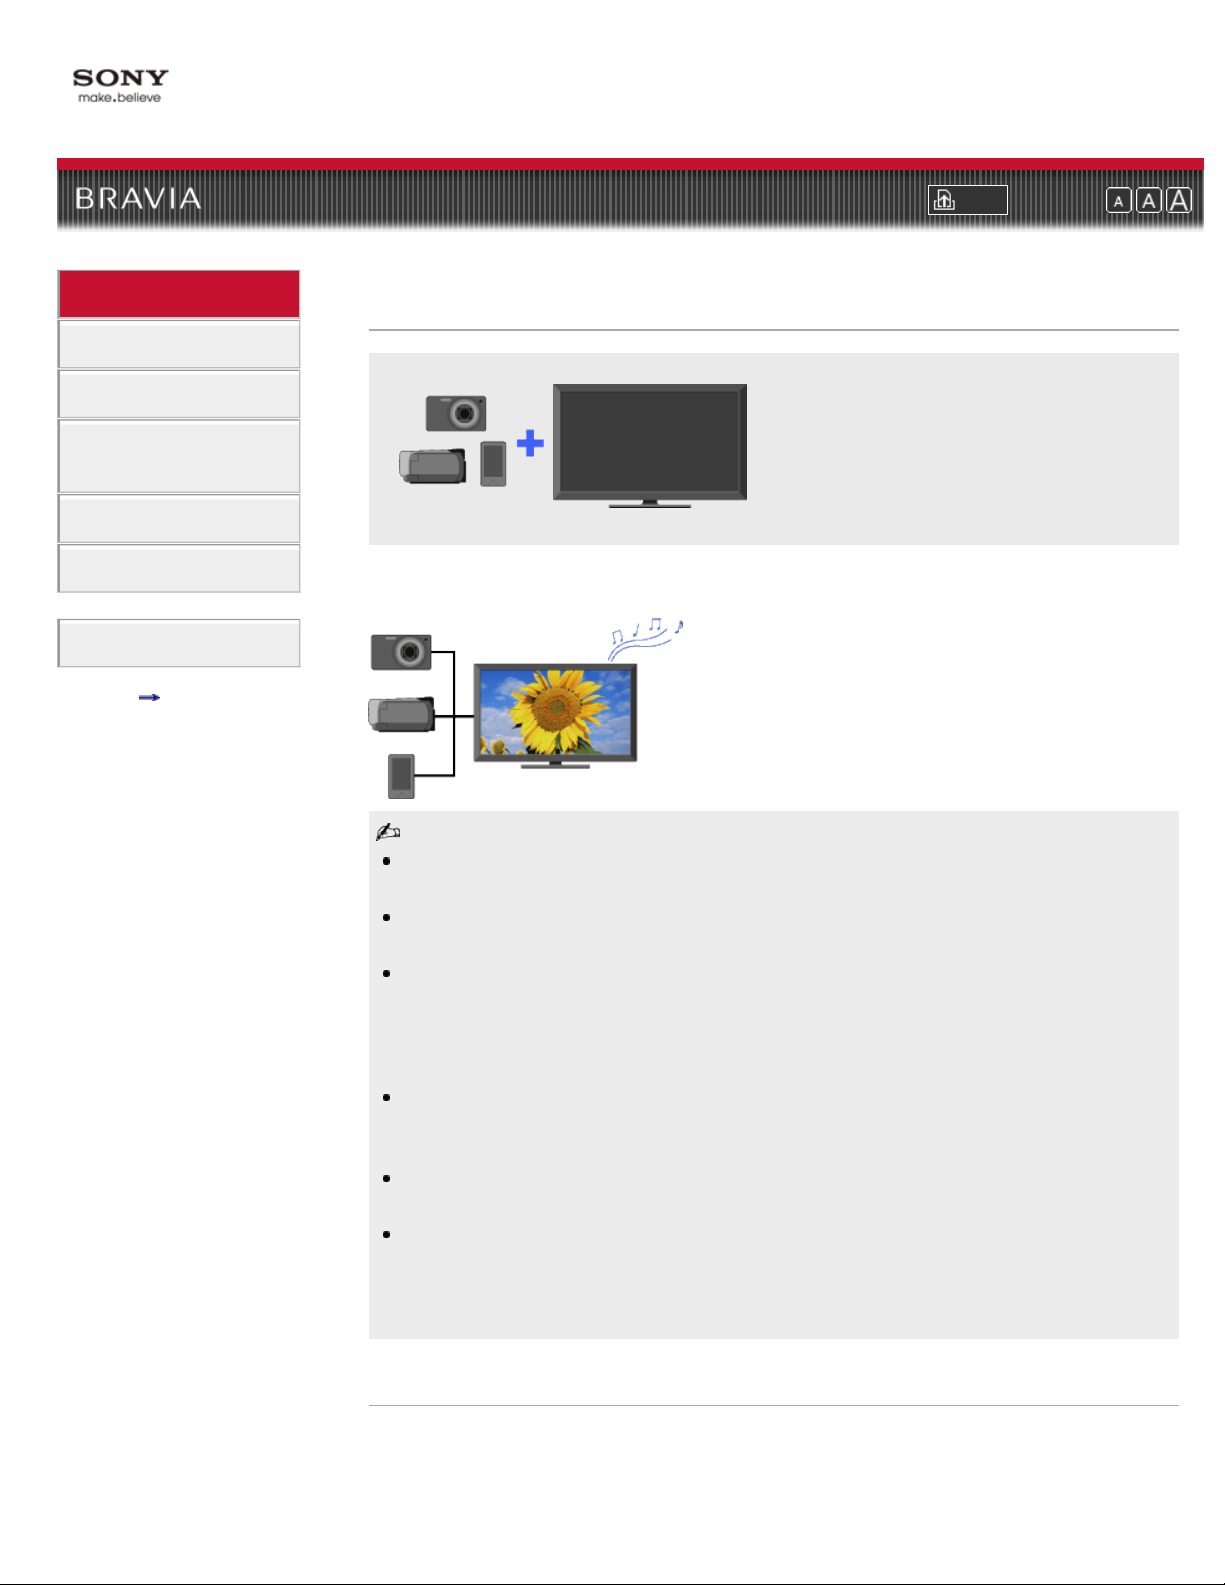
Digital Still Camera
Play back photos, music and videos on the TV
screen by connecting a Sony digital still camera
or camcorder that has a USB interface.
TV
Digital Still Camera
USB cable (not supplied)
Photo playback automatically starts when you connect a USB storage device after turning on the
TV, and “Slideshow” or “Thumbnail View” is selected in the “USB Auto Start” settings.
When connecting a Sony digital camera to the TV with a USB cable, USB connection settings on
your camera need to be set to “Auto” or “Mass Storage” mode.
Photo/Music/Video Playback
Enjoy photo/music/video files stored in a Sony digital still camera or camcorder through a USB
cable, or USB storage media.
1. Press HOME and select the listed USB devices under the “Photo,” “Music” or “Video”
category.
2. Select files or folders to play from the list on the selected USB device.
USB Photo Viewer supports FAT12, FAT16 and FAT32 file systems.
USB playback of the following photo file formats is available:
- JPEG (JPEG format files with the extension “.jpg” and conforming to DCF or Exif)
- RAW (ARW/ARW 2.0 format files with the extension “.arw”) (For preview only.)
USB playback is supported for the following music file format:
- MP3 (files with the extension “.mp3” that have not been copyrighted)
USB playback is supported for the following video file format:
- AVCHD (files with the extension “.mts” or “.m2ts”)
- MP4 (AVC) (files with the extension “.mp4”)
Page 58

- MPEG1 (files with the extension “.mpg”)
Copyright 2010 Sony Corporation
58
Avoid losing your files by backing up all your media files stored on a USB device. Sony cannot
accept responsibility for lost or damaged data stored on a USB device.
Picture Frame – Displaying a Photograph
“Picture Frame” displays a photo for a selected period of time. You can select a photo from the
connected USB device or preset picture folder.
1. While the desired photo is displayed, press OPTIONS, then select File Actions > Picture
Frame.
2. Press HOME, then select > Picture Frame.
Return to Top
Page 59

i-Manual online
59
Print Font Size
Top Page > Fun Features with Connected Equipment > HDMI Equipment
“BRAVIA” TV Features
Watching TV
Using the Home Menu
Fun Features with
Connected Equipment
Parts Description
Troubleshooting
Index
i-Manual online map
HDMI Equipment
Connect HDMI equipment, such as a BD
player or AV amplifier, to your TV. You can
control the equipment by using the TV’s
remote control.
HDMI (High-Definition Multimedia Interface) Equipment
TV
VCR/DVD Player
HDMI cable (not supplied)
Viewing Pictures from Connected HDMI Equipment
HDMI is an uncompressed all-digital audio/video interface between the TV and any HDMIcompatible A/V equipment. In addition, if you connect equipment that is compatible with “Control
for HDMI,” you can control it by simply using the TV’s remote control.
INPUT
1. Turn on the connected equipment.
2. Press INPUT and select the desired input source.
Be sure to use an authorized HDMI cable bearing the HDMI logo.
If the equipment has a DVI jack, connect it to the HDMI (with AUDIO IN) port through a DVI -
HDMI adapter interface (not supplied), and connect the equipment’s audio out jacks to the AUDIO
IN on the HDMI (with AUDIO IN) port.
Page 60

Using “BRAVIA” Sync with Control for HDMI
60
With the “Control for HDMI” function, “BRAVIA” Sync helps to communicate with “BRAVIA” Synccompatible equipment using HDMI CEC (Consumer Electronics Control). Use the following
settings and tips to help unify control of your connected equipment.
Press HOME, then select
“Control for HDMI” (“BRAVIA” Sync) is only available for the connected Sony equipment that has
the “BRAVIA” Sync logo or is compatible with “Control for HDMI.”
The “Control for HDMI” settings must be set on both the TV and connected equipment. For
settings on the connected equipment, refer to their instruction manuals.
When specific Sony equipment compatible with “Control for HDMI” (“BRAVIA” Sync) is connected,
“BRAVIA” sync is automatically activated on the equipment.
> Channels & Inputs > HDMI Settings > Control for HDMI > On.
Controlling “BRAVIA” Sync- Compatible Equipment
“BRAVIA” Sync-compatible equipment is listed as a new input source under (External Inputs)
in the Home Menu. To control the equipment by using the remote control, press SYNC MENU
and select the desired equipment from “HDMI Device Selection.”
BD/DVD Player
Automatically turns the “BRAVIA” Sync-compatible equipment on and switches the input to that
equipment when you select it from the Home Menu or Sync Menu.
Automatically turns the TV on and switches the input to the connected equipment when the
equipment starts to play.
Automatically turns the connected equipment off when you switch the TV to standby mode.
AV Amplifier
Automatically turns the connected AV amplifier on and switches the sound output from the TV
speaker to the audio system when you turn the TV on. This function is only available if you have
previously used the AV amplifier to output TV sound.
Automatically switches the sound output to the AV amplifier by turning the AV amplifier on when the
TV is turned on.
Automatically turns the connected AV amplifier off when you switch the TV to standby mode.
Adjusts the volume (VOL +/-) and mutes the sound (MUTING) of the connected AV amplifier
through the TV’s remote control.
Page 61

When connecting a digital audio system that is compatible with Audio Return Channel (ARC)
Copyright 2010 Sony Corporation
61
technology, connect to HDMI IN 1 with an HDMI cable. If connecting a system that is incompatible
with “Control for HDMI” or Audio Return Channel, an additional audio connection via DIGITAL
AUDIO OUT (OPTICAL) is necessary.
Video Camera
Automatically turns the TV on and switches the input to the connected video camera when the
connected video camera is turned on.
Automatically turns the connected video camera off when you switch the TV to standby mode.
Return to Top
Page 62

i-Manual online
62
“BRAVIA” TV Features
Watching TV
Settings
Print Font Size
Top Page > Fun Features with Connected Equipment > Settings
Using the Home Menu
Fun Features with
Connected Equipment
Parts Description
Troubleshooting
Index
i-Manual online map
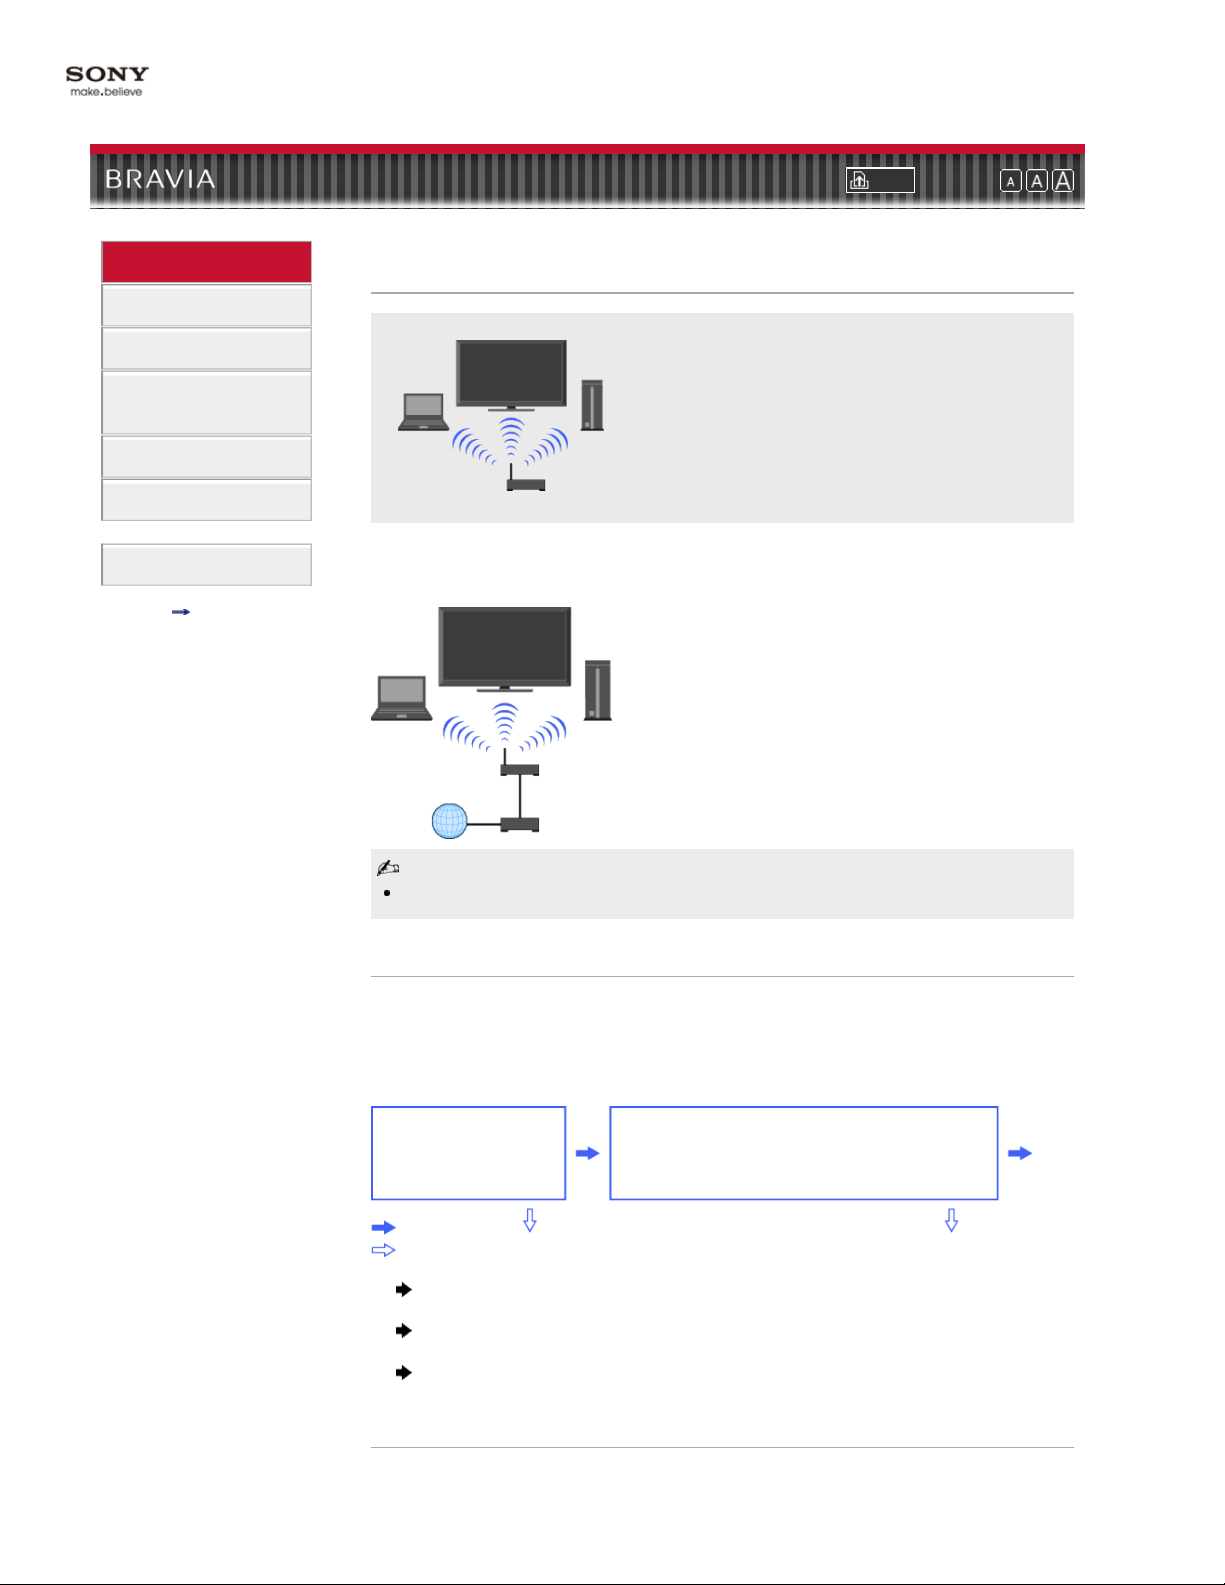
Connect a LAN cable or add your TV to a
wireless LAN to enjoy “BRAVIA” Internet
features.
Internet Settings
TV
Internet
Modem with Router Functions
Connecting to the Internet
Using the network feature you can connect the TV to the Internet. The setup procedure differs
depending on the type of network and LAN router.
Before setting up the Internet connection:
- Be sure to set up a LAN router.
- Check your wireless LAN environment using the following chart. If you have a wired
network environment, directly refer to (4).
Secure wireless
LAN?
YES
NO
Do you use a wireless LAN router
compatible with Wi - Fi Protected Setup
(WPS)?
(2)(3)
(1) Follow the configuration for “Network Setup” and “Secured Network with Wi-Fi Protected
Setup (WPS).”
Follow the configuration for “Network Setup” and “Secured Network without Wi-Fi
(2)
Protected Setup (WPS).”
Follow the configuration for “Network Setup” and “Unsecured Network with Any Type of
(3)
Wireless LAN Router.”
Refer to “Network Setup” and follow the instructions that appear on the screen.
(4)
Network Setup
“Network Setup” helps you configure network settings with the settings wizard. Follow the
instructions on the screen.
Press HOME, then select
The start-up screen allows you to select a setting procedure according to your network
environment.
“View Network Status”: Select to confirm your network status.
“Wired Setup”: Use to connect to a wired network.
“Wireless Setup”: Use to connect to a wireless network.
> Network > Network Setup.
(1)
Page 63

Secured Network with Wi-Fi Protected Setup (WPS)
63
The WPS standard makes setup of a secure wireless home network as simple as pressing the
WPS button on the wireless LAN router. Before setting up a wireless LAN, check the location of
the WPS button on the router and verify how to use it.
1. Select “Wireless Setup” from the “Network Setup” start-up screen.
2. Select “WPS (Push Button)” for Push Button method or “WPS (PIN)” for PIN method.
3. Follow the instructions that appear on the setup screen.
To connect to a wireless LAN with WPS, your wireless LAN router needs to support the WPS
standard.
Secured Network without Wi - Fi Protected Setup (WPS)
For setting up a wireless LAN, SSID (wireless network name) and security key (WEP or WPA
key) will be required. If you do not know them, consult the instruction manual of your router.
1. Select “Wireless Setup” from the “Network Setup” start-up screen.
2. Select “Scan,” then select a network from the list of scanned wireless networks.
3. Follow the instructions that appear on the setup screen.
Unsecured Network with Any Type of Wireless LAN Router
Copyright 2010 Sony Corporation
For setting up a wireless LAN, SSID (wireless network name) will be required. Security key
(WEP or WPA key) will not be required because you need to select no security method in this
procedure.
1. Select “Wireless Setup” from the “Network Setup” start-up screen.
2. Select “Scan,” then select a network from the list of scanned wireless networks.
3. Follow the instructions that appear on the setup screen.
Checking the Network Connection
Enter the respective alphanumeric values for your router if necessary. The items that need to be
set (e.g. IP Address, Subnet Mask, DHCP) may differ depending on the Internet service provider
or router. For details, refer to the instruction manuals provided by your Internet service provider,
or those supplied with the router.
1. Select “Auto” to set the IP Address and proxy server automatically, or “Custom” to set them
manually.
2. Follow the instructions that appear on the setup screen.
Return to Top
Page 64

i-Manual online
64
Print Font Size
Top Page > Fun Features with Connected Equipment > “BRAVIA” Internet Video
“BRAVIA” TV Features
Watching TV
Using the Home Menu
Fun Features with
Connected Equipment
Parts Description
Troubleshooting
Index
i-Manual online map
“BRAVIA” Internet Video
Brings videos, movies and much more through the
broadband Internet connection to your TV.
“BRAVIA” Internet Video serves as a gateway to Internet content, delivering a variety of ondemand entertainment straight to your TV. By making a broadband Internet connection, you can
enjoy video content, including movies and cartoons.
INTERNET
VIDEO
Be sure to connect your TV to the broadband Internet and complete the initial setup and “Network
Setup.”
Selecting the “BRAVIA” Internet Video
Highlight the video icon you want to watch by using the remote control, then press to make a
selection.
Information about the highlighted icon appears in the information banner.
Page 65

The interface to Internet content depends on the Internet content providers.
65
Services block video content based on the “Parental Lock” setting of the TV. Some service
providers do not support this function.
To update “BRAVIA” Internet Video content services, press HOME, then select
Refresh Internet Content.
> Network >
Using the Internet Video
You can seek forward or seek backward in the video content. (This feature is available
depending on Internet content services.)
Press the corresponding buttons on your remote control.
Return to Top
Copyright 2010 Sony Corporation
Page 66

i-Manual online
66
Print Font Size
Top Page > Fun Features with Connected Equipment > “BRAVIA” Internet Widgets
“BRAVIA” TV Features
Watching TV
Using the Home Menu
Fun Features with
Connected Equipment
Parts Description
Troubleshooting
Index
i-Manual online map
“BRAVIA” Internet Widgets
Delivers interactive content when your TV is
connected to the Internet.
With the Widgets feature, you can display a variety of information on the screen. Widgets are
small downloadable applications that provide easy access to interactive content when your TV is
connected to the Internet.
INTERNET
WIDGETS
Be sure to connect your TV to the Internet, and complete the initial setup and “Network Setup.”
This feature may not be available in some regions/countries.
Available Widgets depend on your region/country.
Installing Widgets
You can install Widgets using the “Widget Gallery” under the “Network” category in the “XMB.”
1. Press HOME, then select > Widget Gallery.
Page 67

2.
Select the desired Widget to install.
67
To delete Widgets, highlight a Widget in the “XMB,” press OPTIONS, then select “Delete.”
Launching Widgets
Hidden or closed Widgets can be launched from the “Network” category in the “XMB.”
1. Press HOME to display the “XMB.”
2. Select the desired Widget icon listed in the “Network” category.
Expanding Snippet to Widget
Highlight a minimized view of a Widget, called a “Snippet”, and press to expand it into a
Widget.
Copyright 2010 Sony Corporation
Moving Snippets on the Screen
Move Snippets by using the remote control and set them in your preferred position on the screen.
1. Press OPTIONS after highlighting the Snippet you want to move.
2. Select “Move Snippet” from the OPTIONS Menu list.
3. Set the Snippet in your preferred position, then press .
Return to Top
Page 68

i-Manual online
68
Print Font Size
Top Page > Fun Features with Connected Equipment > Photomap
“BRAVIA” TV Features
Watching TV
Using the Home Menu
Fun Features with
Connected Equipment
Parts Description
Troubleshooting
Index
i-Manual online map
Photomap
Displays a map of the location where a photo was
shot along with the photo itself.
By connecting a digital still camera with GPS function, you can display a photo with a map of the
location where the photo was taken. To use this feature, the TV has to be connected to the
Internet to download map information.
1. Select a photo by using the “XMB.”
2. Press the / buttons to zoom in/out on the map.
3. Press the far left colored button repeatedly to change the display position of the map.
Copyright 2010 Sony Corporation
Only a large-scale map that cannot be zoomed in or out is displayed if the TV is not connected to
the Internet or the online map service is terminated.
The position indicated on the map may differ depending on the image capture device.
The Internet online map service is provided by a third party. For this reason, service may be
changed or terminated without prior notification.
Return to Top
Page 69

i-Manual online
69
Print Font Size
Top Page > Fun Features with Connected Equipment > Home Network
“BRAVIA” TV Features
Watching TV
Using the Home Menu
Fun Features with
Connected Equipment
Parts Description
Troubleshooting
Index
i-Manual online map
Home Network
Connect a LAN cable or add your TV to a
wireless LAN to enjoy “BRAVIA” home
network features.
Network Devices
(DLNA Certified
Media Server)
DSL Modem/Cable
Modem
Internet
Router
TV
Enjoying Photo/Music/Video Files via the Network
Enjoy various content, such as photo/music/video files, stored in DLNA Certified media server on
your home network. With the home network feature, you can enjoy network content on the TV
even in other rooms. To enjoy your home network, DLNA Certified media server is required.
1. Press HOME and select the listed media servers under the “Photo,” “Music” or “Video”
category.
2. Select files or folders to play from the list on the selected media server.
Files from a network device need to be compatible with the following file formats.
- Still images: JPEG format
- Music: MP3 format or linear PCM format
- Video: AVCHD or MPEG2 format (not playable in some cases)
Renderer
You can play back photo, music and video files stored in network devices (e.g. digital still
cameras, mobile phones) on the TV screen by directly operating the target device. The network
device should also be renderer-compatible.
To set a renderer, press HOME then select
> Network > Renderer > the desired settings.
Page 70

Copyright 2010 Sony Corporation
70
Play back media files by using the network devices.
Adjusting Display Settings for Media Server
Select home network servers to be displayed in the Home Menu. Up to 10 servers can be
displayed in the Home Menu automatically.
1. Press HOME, then select > Network > Show/Hide Media Servers.
2. Select the server you want to display on the Home Menu and adjust the settings.
Media Server Troubleshooting
The TV detects if the server is being correctly recognized when you cannot connect it to your
home network. If the diagnostic results indicate a failure, check possible causes, and network
connections and settings.
1. Press HOME, then select > Network > Media Server Troubleshooting.
2. The diagnostic result list appears when the detection is complete.
Return to Top
Page 71

i-Manual online
71
Print Font Size
Top Page > Fun Features with Connected Equipment > PC
“BRAVIA” TV Features
Watching TV
Using the Home Menu
Fun Features with
Connected Equipment
Parts Description
Troubleshooting
Index
i-Manual online map
PC
Enjoy music, pictures and other content from
your PC by connecting it with dedicated cables.
TV
PC
Audio cable (not
supplied)
D-sub 15 cable (not supplied)
For some Apple Macintosh computers, it may be necessary to use an adapter (not supplied). If an
adapter is used, connect the adapter to the computer before connecting the HD15-HD15 cable.
You can connect an HDMI-compatible PC with an HDMI cable.
PC Input Signal Reference Chart
VGA
- Horizontal (Pixel)/Vertical (Line): 640/480
- Horizontal frequency (kHz)/Vertical frequency (Hz): 31.5/60
- Standard: VGA
SVGA
- Horizontal (Pixel)/Vertical (Line): 800/600
- Horizontal frequency (kHz)/Vertical frequency (Hz): 37.9/60
- Standard: VESA Guidelines
XGA
- Horizontal (Pixel)/Vertical (Line): 1024/768
- Horizontal frequency (kHz)/Vertical frequency (Hz): 48.4/60
- Standard: VESA Guidelines
WXGA
- Horizontal (Pixel)/Vertical (Line): 1280/768, 1280/768, 1360/768
- Horizontal frequency (kHz)/Vertical frequency (Hz): 47.4/60, 47.8/60, 47.7/60
Page 72

- Standard: VESA
SXGA (Full HD model only)
72
- Horizontal (Pixel)/Vertical (Line): 1280/1024
- Horizontal frequency (kHz)/Vertical frequency (Hz): 64.0/60
- Standard: VESA
HDTV* (Full HD model only)
- Horizontal (Pixel)/Vertical (Line): 1920/1080
- Horizontal frequency (kHz)/Vertical frequency (Hz): 67.5/60
- Standard: CEA- 861*
This TV’s PC input does not support Sync on Green or Composite Sync.
This TV’s PC VGA input does not support interlaced signals.
For optimum picture quality, it is recommended to use the signals in the chart. In plug and play,
signals with a 60 Hz vertical frequency will be detected automatically. (PC reboot may be
necessary.)
* The 1080p timing when applied to the HDMI input will be treated as a video timing and not PC
timing. This will affect “Preferences” and “Picture & Display” settings. To view PC content, set
“Scene Select” to “Graphics,” “Wide Mode” to “Full,” and “Display Area” to “Full Pixel.”
Return to Top
Copyright 2010 Sony Corporation
Page 73

i-Manual online
73
Print Font Size
Top Page > Fun Features with Connected Equipment > Programming the Remote Control
“BRAVIA” TV Features
Watching TV
Using the Home Menu
Fun Features with
Connected Equipment
Parts Description
Troubleshooting
Index
i-Manual online map
Programming the Remote Control
Program the remote control so as to control other
manufacturers’ equipment connected to the TV.
Your remote control is preset to operate Sony TVs, and most Sony BD players, DVD players,
DVD/HDD recorders, and audio systems (Home Theater, etc.). To control equipment made by
other manufacturers (and some other Sony models), program the remote control.
1. Check the manufacturer’s codes you may need from the following list.
2. Press and hold the DVD, AMP, or STB button you want to program, then press INPUT.
3. Enter the manufacturer’s code number when the function button flashes, then press .
Sony Equipment Codes
A/V Receiver:
- 52172
Blu- ray Disc (BD) Player:
- 41516, 42178, 42180
Cable –Digital:
- 02177
DVD A/V System:
- 51622, 51558, 51658, 51858
DVD Changers:
- 31633
DVD Player:
- 31033, 31069, 31070
DVD/HDD Combo Player:
- 31033, 31069, 31070
DVD/VCR Combo Player:
Page 74

- 30864
DVR /HDD Player:
74
- 22181, 22182, 22183
Satellite:
- 01639
VCR:
- 21232, 21546, 22184
Other Manufacturer Equipment Codes
HD Blu-ray Disc (BD) Players
- LG: 40741
- Panasonic: 41641
- Philips: 42084
- Pioneer: 40142
- Samsung: 40199
DVD Player
- Coby: 30778, 30852, 31077, 31086, 31107, 31165, 31177, 31351, 31628
- Cyberhome: 30816, 30874, 31023, 31024, 31117, 31129, 31502, 31537
- GPX: 30699
- JVC: 30558, 30623, 30867, 31164, 31550, 31602
- Koss: 30651, 30896, 31061, 31423
- Memorex: 30695, 30831, 31270
- Panasonic: 30490, 30503, 30571, 30703, 31762
- Philips: 30503, 30539, 30646, 30675, 31267, 31354, 32056
- RCA: 30522, 30571, 30717, 30790, 30822, 31022
- Samsung: 30490, 30573, 30744, 31044, 31075, 31470
- Sylvania: 30675, 31268
- Toshiba: 30503, 30539, 30573, 30695, 31154, 31503, 31588, 31608, 31854
DVD Changers
- Sylvania: 30675
- Techwood: 30692
- Toshiba: 30503, 31154
- Yamaha: 30497, 30545
- Zenith: 30741
DVD Recorder
- Cyberhome: 31129, 31502
- JVC: 31164
- LG: 30741
- Lite- On: 31158, 31416, 31440
- Panasonic: 30490
- Philips: 30646
- Samsung: 30490, 31470
- Sylvania: 30675
- Toshiba: 31588
DVD/VCR Combo Units
- JVC: 30867, 31164, 31550, 31602
Page 75

- Broksonic: 30695, 31419
- Panasonic: 31762
75
- Toshiba: 30503, 31854
- Zenith: 30741, 30869
VCR’s
- Daewoo: 20037, 20045, 20046, 20278, 21137
- JVC: 20041, 20067, 21162
- Panasonic: 20035, 20162, 20225, 20614, 20616, 21062, 21162, 21262
- Philips: 20035, 20045, 20048, 20081, 20162, 20209, 20616, 20618, 20739, 21081, 21181
- Sylvania: 20035, 20043, 20081, 20593, 21593
A/V Receiver/Home Theater Systems
- Audiovox: 30790, 51390
- Bose: 50674, 51229, 51933
- Denon: 50121, 51142, 51306, 51360, 52857
- Emerson: 50531
- JVC: 50331, 51495
- LG: 51293
- Onkyo: 51298, 51320, 51805
- Panasonic: 50308, 51288, 51308, 51316, 51548, 51633, 51763, 51764
- Philips: 31267, 51189, 51266, 51269
- Pioneer: 50150, 50531, 50630, 50823, 51023, 51384
- RCA: 30790, 50531, 50823, 51023, 51254, 51390, 51511, 51609
- Samsung: 51295, 51500
- Sherwood: 31077, 51077, 51517, 51653
- Yamaha: 30497, 50176, 50354, 51023, 51276, 51331, 51376, 51815
- Zenith: 51293
Digital Video Recorders
- TiVo: 01442, 01443, 01444, 20618, 20636, 20739
Satellite
- DirecTV: 00099, 00247, 00392, 00566, 00639, 00749, 00819, 01076, 01108, 01109, 01142, 01377,
01392, 01414, 01442, 01442, 01443, 01444, 01609, 01639, 01640, 01749, 01856, 20739
- Dish Network System: 00775, 01170, 01505, 01775
- Echostar: 00775, 01170, 01505, 01775
- Funai: 01377
- GE: 00392, 00566
- Hitachi: 00749, 00819, 01250
- Hughes: 00749, 01142, 01443, 01444, 01749, 20739
- Humax: 01790, 20739, 21797, 21988
- JVC: 00775, 01170, 01775
- LG: 01226, 01414, 22010
- Panasonic: 00247, 00701, 20614, 20616
- Philips: 00099, 00722, 00749, 00775, 00819, 01076, 01142, 01749, 20618, 20739
- RCA: 00143, 00392, 00566, 00775, 00855, 01142, 01392, 01442, 20880
- Samsung: 01108, 01109, 01142, 01276, 01377, 01442, 01609, 20739
- TiVo: 01442, 01443, 01444, 20618, 20636, 20739
Cable Box
- AT & T: 00858, 02045
Page 76

- Jerrold/General Inst./Motorola: 00003, 00276, 00476, 00810, 00858, 01187, 01254, 01376, 02045
Copyright 2010 Sony Corporation
76
- Pace: 00008, 00237, 00877, 01877
- Panasonic: 00000, 00008, 00107, 00144
- Pioneer: 00144, 00533, 00877, 01877
- Scientific Atlanta: 00000, 00003, 00008, 00237, 00477, 00877, 01877
- Zenith: 00000, 00525, 00899
Return to Top
Page 77

i-Manual online
77
Print Font Size
Top Page > Parts Description > Top
“BRAVIA” TV Features
Watching TV
Using the Home Menu
Fun Features with
Connected Equipment
Parts Description
Troubleshooting
Index
i-Manual online map
Top
INPUT
(TV POWER)
TV
LIGHT
WIDE
3D
POWER
Function buttons
INPUT
Press to display a list of inputs.
TV (TV POWER)
Press to turn on the TV or to enter standby mode.
LIGHT
Press to illuminate the buttons on the remote control so that you can see them
easily even if the room is dark.
WIDE
Press to change the wide mode.
3D
Press to turn 3D display mode on or off.
Page 78

Copyright 2010 Sony Corporation
78
POWER
Press to turn on or off the optional equipment you have selected with the
function buttons.
Function buttons
Operate the corresponding equipment.
Return to Top
Page 79

i-Manual online
79
Print Font Size
Top Page > Parts Description > Upper
“BRAVIA” TV Features
Watching TV
Using the Home Menu
Fun Features with
Connected Equipment
Parts Description
Troubleshooting
Index
i-Manual online map
Upper
THEATER
BD/DVD buttons
SYNC MENU
i-MANUAL
SCENE
BD/DVD TOP MENU
BD/DVD MENU
CC/SUBTITLE
INTERNET WIDGETS
INTERNET VIDEO
QRIOCITY
THEATER
Set “Theater Mode” to on for optimum picture and sound quality of film -based
content.
If you turn the TV off, “Theater Mode” is also turned off.
When you change the “Scene Select” setting, “Theater Mode” turns off
automatically.
“Control for HDMI” (“BRAVIA” Sync) is only available for the connected
Sony equipment that has the “BRAVIA” Sync logo or is compatible with
“Control for HDMI.”
Page 80

BD/DVD operating buttons
80
/ : Fast reverse/fast forward the disc when pressed during playback.
/ : Go to the beginning of the previous/next title/chapter/scene/track.
: Play a disc at normal speed.
: Stop the playback.
SYNC MENU
Press to display the “BRAVIA” Sync Menu and then select connected HDMI
equipment from “HDMI Device Selection.”
“Control for HDMI” (“BRAVIA” Sync) is only available for the connected
Sony equipment that has the “BRAVIA” Sync logo or is compatible with
“Control for HDMI.”
i-MANUAL
Press to display the on-screen instruction manual (this manual).
SCENE
Press to display the “Scene Select” menu. Select the desired scene option for
optimum sound and picture quality.
BD/DVD TOP MENU
Press to display the top menu of the BD/DVD disc.
BD/DVD MENU
Press to display the BD/DVD disc menu.
CC/SUBTITLE
Press to turn closed captions/subtitles on or off (when the feature is available).
INTERNET WIDGETS
Press to display the “BRAVIA” Internet Widgets.
“BRAVIA” Internet Widgets is available depending on your region/country.
INTERNET VIDEO
Press to access Internet content on the “XMB.”
QRIOCITY
Press to access “Qriocity” online service.
This feature (button) may not be available in some regions/countries.
Return to Top
Copyright 2010 Sony Corporation
Page 81

i-Manual online
81
Print Font Size
Top Page > Parts Description > Middle
“BRAVIA” TV Features
Watching TV
Using the Home Menu
Fun Features with
Connected Equipment
Parts Description
Troubleshooting
Index
i-Manual online map
Middle
FAVORITES
GUIDE
DISPLAY
/ / / /
RETURN
OPTIONS
HOME
FAVORITES
Press to display the “Favorites” menu.
GUIDE
Press to display the program guide.
The Guide feature is available depending on your region/country.
DISPLAY
Press once to display information about the channel/program/input you are
viewing. The information will time out in a few seconds or press again to exit.
/ / / /
Press / / / to move the on -screen cursor. Press to select/confirm a
Page 82

highlighted item.
Copyright 2010 Sony Corporation
82
RETURN
Press to return to the previous screen or exit from the menu.
OPTIONS
Press to display a list of convenient functions and menu shortcuts. The menu
items vary based on the current input and/or content.
HOME
Press to display the TV Home Menu.
Return to Top
Page 83

i-Manual online
83
Print Font Size
Top Page > Parts Description > Lower
“BRAVIA” TV Features
Watching TV
Using the Home Menu
Fun Features with
Connected Equipment
Parts Description
Troubleshooting
Index
i-Manual online map
Lower
Colored buttons
0-9 ENT
Copyright 2010 Sony Corporation
Colored buttons
When the colored buttons are available, an operation guide appears on the
screen.
0-9 ENT
Press 0-9 to select a channel. Press ENT to change channels immediately.
Use with 0-9 and ENT to select digital channels. For example, to enter 2.1, press
, 1 and ENT.
2,
Return to Top
Page 84

84
Page 85

i-Manual online
85
Print Font Size
Top Page > Parts Description > Bottom
“BRAVIA” TV Features
Watching TV
Using the Home Menu
Fun Features with
Connected Equipment
Parts Description
Troubleshooting
Index
i-Manual online map
Bottom
VOL +/–
CH +/–
MUTING
JUMP
VOL +/–
Press to adjust the volume.
CH +/–
Press to select the next (+) or previous (–) channel.
MUTING
Press to mute the sound. Press again to restore the sound.
JUMP
Press to jump back and forth between two channels or inputs. The TV alternates
between the current channel or input and the last channel or input that was
selected.
Return to Top
Page 86

Copyright 2010 Sony Corporation
86
Page 87

i-Manual online
87
Print Font Size
Top Page > Parts Description > Back
“BRAVIA” TV Features
Watching TV
Using the Home Menu
Fun Features with
Connected Equipment
Parts Description
Troubleshooting
Index
i-Manual online map
Back
TV (TV POWER)
Copyright 2010 Sony Corporation
TV (TV POWER)
Press to turn on the TV or to enter standby mode.
Return to Top
Page 88

i-Manual online
88
Print Font Size
Top Page > Parts Description > Front
“BRAVIA” TV Features
Watching TV
Using the Home Menu
Fun Features with
Connected Equipment
Parts Description
Troubleshooting
Index
i-Manual online map
Front
Light sensor
Remote control sensor
(PIC OFF/TIMER)
(STANDBY)
I (POWER)
Copyright 2010 Sony Corporation
Light sensor
Senses room light level and adjusts the screen brightness accordingly.
Do not put anything near the sensor, doing so may affect its function.
Remote control sensor
Receives signals from the remote control.
Do not put anything near the sensor, doing so may affect its function.
(PIC OFF/TIMER)
Lights up in green when you select “Picture Off.”
Lights up in orange when you set the timer.
Lights up and/or blinks in orange during a software upgrade.
(STANDBY)
Lights up in red when your TV is in standby mode, PC power saving mode or
during a software upgrade.
I (POWER)
Lights up in green when the TV is on.
Return to Top
Page 89

i-Manual online
89
Print Font Size
Top Page > Parts Description > Right
“BRAVIA” TV Features
Watching TV
Using the Home Menu
Fun Features with
Connected Equipment
Parts Description
Troubleshooting
Index
i-Manual online map
Right
POWER
CHANNEL +/–
VOLUME +/–
INPUT
HOME
ENERGY SAVING SWITCH
POWER
Press to turn on the TV or to enter standby mode.
When ENERGY SAVING SWITCH on the right side bottom of the TV is
off, the TV cannot be turned on.
CHANNEL +/–
Press to select the next (+) or previous (–) channel.
In the TV menu, these buttons will work as / .
VOLUME +/–
Press to adjust the volume.
In the TV menu, these buttons will work as / .
Page 90

INPUT
Copyright 2010 Sony Corporation
90
Press to display a list of inputs.
In the TV menu, this button will work as .
HOME
Press to display the TV Home Menu.
ENERGY SAVING SWITCH
Press to turn the TV on or off. When ENERGY SAVING SWITCH is switched off,
power consumption is reduced.
When ENERGY SAVING SWITCH is switched off, you will not be able to
perform functions such as saving clock settings.
Return to Top
Page 91

i-Manual online
91
Print Font Size
Top Page > Parts Description > Back
“BRAVIA” TV Features
Watching TV
Using the Home Menu
Fun Features with
Connected Equipment
Parts Description
Troubleshooting
Index
i-Manual online map
Back
3D SYNC
LAN
HDMI IN 1/4
VIDEO IN 1
AUDIO OUT (VAR/FIX)
DIGITAL AUDIO OUT (OPTICAL)
CABLE/ANTENNA
3D SYNC
Connects to the 3D Sync Transmitter that is sold separately.
LAN
Connects to an existing network using an Ethernet cable.
HDMI IN 1/4
HDMI (High- Definition Multimedia Interface) provides an uncompressed, alldigital audio/video interface between this TV and any HDMI-equipped audio/video
equipment. In addition, when you connect the equipment that is compatible with
“Control for HDMI,” communication with the connected equipment is supported.
Be sure to use only an authorized HDMI cable bearing the HDMI logo.
If connecting a digital audio system that is compatible with Audio Return
Channel (ARC) technology, use the HDMI IN 1. If not, an additional
connection with DIGITAL AUDIO OUT (OPTICAL) is necessary.
If the equipment has a DVI jack, connect it to the HDMI IN 2 on the side of
the TV through a DVI - HDMI adapter interface (not supplied), and connect
the equipment’s audio out jacks to the PC/HDMI 2 AUDIO IN which is
Page 92

Copyright 2010 Sony Corporation
92
located in the PC IN.
VIDEO IN 1
Connect with a composite video cable. When connecting mono equipment,
connect to the L (MONO) audio jack.
AUDIO OUT (VAR/FIX)
Connects to the left and right audio input jacks of your analog audio equipment.
You can use these outputs to listen to your TV’s audio through your stereo
system.
DIGITAL AUDIO OUT (OPTICAL)
Connects to the optical audio input of digital audio equipment that is PCM/Dolby
Digital compatible.
CABLE/ANTENNA
RF input that connects to your cable or over-the-air antenna.
Return to Top
Page 93

i-Manual online
93
Print Font Size
Top Page > Parts Description > Right
“BRAVIA” TV Features
Watching TV
Using the Home Menu
Fun Features with
Connected Equipment
Parts Description
Troubleshooting
Index
i-Manual online map
Right
USB
PC IN
HDMI IN 2/3
VIDEO IN 2, COMPONENT IN
USB
You can enjoy photo, music, video files stored on a USB device.
PC IN
Connects to a personal computer’s video and audio output connector. Can also
be connected to other analog RGB equipment.
For some Apple Macintosh computers, it may be necessary to use an
adapter (not supplied). If this is the case, connect the adapter to the
computer before connecting the HD15-HD15 cable.
It is indispensable to use a PC cable with ferrite cores.
HDMI IN 2/3
HDMI (High- Definition Multimedia Interface) provides an uncompressed, alldigital audio/video interface between this TV and any HDMI-equipped audio/video
equipment. In addition, when you connect the equipment that is compatible with
“Control for HDMI,” communication with the connected equipment is supported.
Be sure to use only an authorized HDMI cable bearing the HDMI logo.
If connecting a digital audio system that is compatible with Audio Return
Channel (ARC) technology, use the HDMI IN 1 on the rear of the TV. If
Page 94

not, an additional connection with DIGITAL AUDIO OUT (OPTICAL) is
Copyright 2010 Sony Corporation
94
necessary.
If the equipment has a DVI jack, connect it to the HDMI IN 2 through a DVI
- HDMI adapter interface (not supplied), and connect the equipment’s
audio out jacks to the PC/HDMI 2 AUDIO IN which is located in the PC IN.
VIDEO IN 2, COMPONENT IN (1080p/1080i/720p/480p/480i)
This input can be used as a composite video input or as a component video
input.
For composite use, connect to VIDEO IN 2 for video, and to AUDIO (L/R) of
COMPONENT IN for audio signals.
For component connection, use Y, PB, PR for video signals and also connect to
AUDIO (L/R) for audio signals.
The TV will automatically detect and switch between VIDEO IN 2 and
COMPONENT IN. To manually set the input type, press HOME, select
> Channels & Inputs > Video 2/Component Selection.
Return to Top
Page 95

i-Manual online
95
Print Font Size
Top Page > Troubleshooting > Picture
“BRAVIA” TV Features
Watching TV
Using the Home Menu
Fun Features with
Connected Equipment
Parts Description
Troubleshooting
Index
i-Manual online map
Picture
You cannot receive any channels.
TV is locked to one channel.
You cannot receive or select channels.
TV turns off automatically.
No picture from some video sources.
Picture quality is not as good as viewed at the store.
Broadcast HD formats have poor quality.
Double images or ghosts appear.
Only snow and noise appear on the screen.
Dotted lines or stripes appear.
You cannot receive any channels.
Make sure the “Cable/Antenna” setting is correct for your TV signal source.
TV is locked to one channel.
Perform “Auto Program” to add receivable channels that are not present in the TV’s memory.
You cannot receive or select channels.
Perform “Auto Program” to add receivable channels that are not present in the TV’s memory.
To receive or select cable channels, make sure that signal type in the channel settings is set to
“Cable.”
To receive or select UHF channels over an antenna, make sure signal type is set to “Antenna.”
TV turns off automatically.
Check if “Sleep Timer” is activated.
Check if “Auto Shut-off” in “Eco” is activated.
No picture from some video sources.
Press INPUT on the remote control.
Press HOME on the remote control. Select the desired input from the
.
Picture quality is not as good as viewed at the store.
Picture quality depends on the signal content. See the specifications to display the best possible
picture for that signal.
Broadcast HD formats have poor quality.
Page 96

Content and signal quality are regulated by the signal provider. Many HD channels and content are
actually upscaled versions of standard -definition broadcasts. The picture is affected by the quality of
96
the signal received, which varies between channel and program.
Double images or ghosts appear.
Check cable or antenna connections.
Check the antenna location and direction.
Only snow and noise appear on the screen.
Check if the antenna is broken or bent.
Check if the antenna has reached the end of its serviceable life (3 -5 years in normal use, 1 -2 years at
the seaside).
Dotted lines or stripes appear.
Keep the TV away from noise sources such as cars, motorcycles, or hair-dryers.
If using the 300 - ohm twin lead, move the excess lead away from the TV or try using the 75-ohm
coaxial cable (not supplied) instead.
No color/Dark picture/Color is not correct/Picture is too bright.
Press OPTIONS then select “Picture Adjustments” to make adjustments.
Adjust the “Picture Mode” in “Picture Adjustments.”
If you set the “Power Saving” mode to “Low” or “High,” black level will be enhanced.
Noisy picture.
Make sure that the antenna is connected using a 75 - ohm coaxial cable.
Keep the antenna cable away from other connecting cords.
To avoid TV interference, make sure to use an undamaged antenna cable.
Blurry picture or poor color.
Transporting the TV from a cold to a warm location or a sudden change in room temperature may
cause moisture condensation, resulting in a blurry picture or poor color. Turn off your TV and wait a
few hours before powering on again.
3D Glasses do not fit properly. (The following illustration shows TDG-BR100.)
Refer to the following instructions and illustration.
Set both the switches on either side for a comfortable fit. Close the temple arms slightly inwards to set
the switch. (
Bend (adjust) the temple frames for a comfortable fit. (
Adjust the nose pad for your nose. (
)
)
)
LED indicator on the 3D Glasses flashes. (The following illustration shows TDGBR100.)
Refer to the following explanations and illustration.
Flashes every 3 seconds: Indicates the glasses are powered on.
Page 97

Flashes 3 times: Indicates the glasses have been powered off. The glasses turn off if you hold the
power button down for 2 seconds, or if no signal from the 3D Sync Transmitter is detected for more
97
than 5 minutes.
Flashes 3 times every 3 seconds: Indicates the battery capacity is almost running out. Replace the
battery.
LED Indicator
You cannot turn the 3D Glasses on. (The following illustrations show TDG - BR100.)
Replace the battery referring to the following instructions and illustrations.
1: Open the battery cover using a coin, etc.
2: Push the edge of the battery and remove it at an angle.
3: Insert a battery (CR2032) with its positive (+) side facing up.
4: Close the battery cover using a coin, etc.
5: Make sure the cover is closed.
Battery (CR2032)
Coin etc.
When opening or closing the battery cover, be sure to insert a coin, etc., into the slot securely to
avoid slippage.
3D pictures are not displayed./3D effect is weak.
Check the connection between the 3D Sync Transmitter and 3D SYNC OUT (if 3D Sync Transmitter is
required to enjoy the feature). Refer to the following instructions and illustration.
- Be sure to turn the TV off before connecting the 3D Sync Transmitter.
- Make sure that “3D Menu” is displayed on the screen by pressing OPTIONS on the remote control,
after the connection has been completed.
TV
3D Sync Transmitter
3D SYNC OUT
3D Sync Transmitter is integrated depending on the TV model.
Press the 3D button on the remote control.
Replace the battery in the 3D Glasses.
Page 98

Be sure that the 3D Glasses are powered on.
Set the appropriate angle of 3D Sync Transmitter (optional) by using the angle adjustment dial or
98
adjust its installation location.
Be sure that there are no obstacles between the 3D Sync Transmitter and 3D Glasses.
When the “3D Menu” setting screen appears but 3D pictures are not displayed, turn off the device
that plays 3D content and turn it on again.
3D Sync Transmitter may not work when it is in direct sunlight.
Perceived 3D effect may vary from person to person.
3D effect may be less pronounced if ambient temperature is low.
3D effect may be less pronounced and the display color will be shifted if you lie down or lean your
head.
Black bars appear on the both sides of the screen when watching 3D pictures.
Black bars appear on the both sides of the screen in order to process 3D signals for the simulated 3D
display mode or when adjusting the depth of 3D pictures in “3D Depth Adjustment.”
3D display automatically switches on when 3D signal is detected.
Select “Off” from “Auto 3D” to manually turn the 3D display on or off. Press HOME, then select >
Picture & Display > 3D Settings.
The message “3D signal has been detected” automatically appears when 3D signal
is detected.
Select “Off” from “3D Signal Notification.” Press HOME, then select > Picture & Display > 3D
Settings.
Copyright 2010 Sony Corporation
Return to Top
Page 99

i-Manual online
99
Print Font Size
Top Page > Troubleshooting > Sound
“BRAVIA” TV Features
Watching TV
Using the Home Menu
Fun Features with
Connected Equipment
Parts Description
Troubleshooting
Index
i-Manual online map
Sound
No sound but good picture.
Audio Noise.
No audio or low audio with Home Theater System.
No sound but good picture.
Check the volume control.
Press MUTING or VOL + so that “Muting” disappears from the screen.
Set “Speakers” to “TV Speakers” in “Sound” settings. If it is set to “Audio System,” sound is not output
from the TV’s speakers regardless of the TV’s volume control.
When using HDMI input with Super Audio CD or DVD -Audio, DIGITAL AUDIO OUT (OPTICAL) may
not provide an audio signal.
Audio noise.
Make sure that the antenna is connected using a 75 - ohm coaxial cable.
Keep the antenna cable away from other connecting cords.
To avoid TV interference, make sure to use an undamaged antenna cable.
Copyright 2010 Sony Corporation
No audio or low audio with Home Theater System.
Press THEATER for “BRAVIA” Sync activated Theater System.
Set “Speakers” to “Audio System” in the “Sound” settings.
Set “Audio Out” to “Fixed” in the “Sound” settings.
Return to Top
Page 100

i-Manual online
100
Print Font Size
Top Page > Troubleshooting > Channels
“BRAVIA” TV Features
Watching TV
Using the Home Menu
Fun Features with
Connected Equipment
Parts Description
Troubleshooting
Index
i-Manual online map
Channels
You cannot select the desired channels.
Some channels are blank.
You cannot view digital channels.
You cannot select the desired channels.
Switch between digital and analog mode, and select the desired channel.
Some channels are blank.
The channel is for scrambled/subscription service only. Subscribe to a pay TV service.
The channel is used only for data (no picture or sound).
Contact the broadcaster for transmission details.
You cannot view digital channels.
Ask a local installer if digital transmissions are provided in your area.
Upgrade to a higher gain antenna.
Copyright 2010 Sony Corporation
Return to Top
 Loading...