

Page 1

R
4-094-765-11
Trinitron Digital TV
Instruction Manual
Kayttöohje
Styrfunktioner
®
GB
FI
SE
KD-32NX200E
KD-36NX200E
© 2003 by Sony Corporation
Page 2

Page 3

GB
1
Page 4
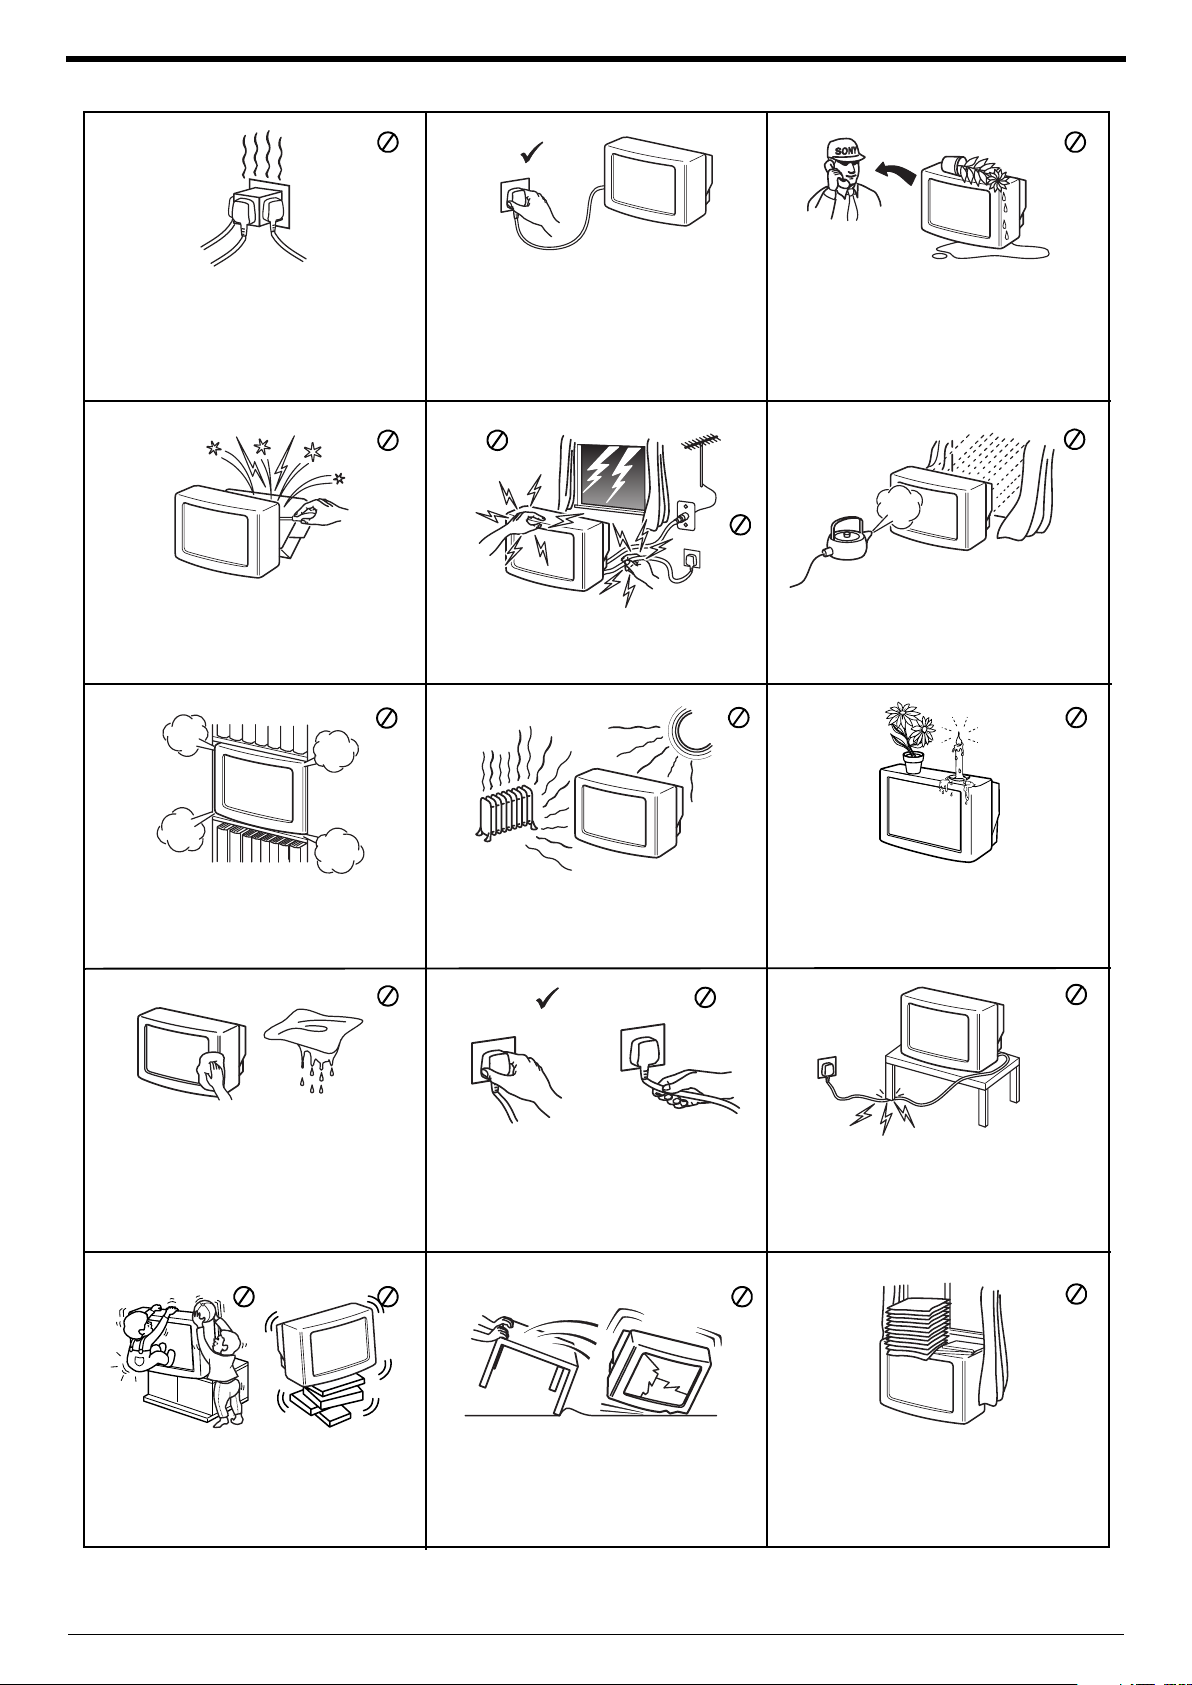
Safety information
This set is to operate on a 220-240V AC
supply only. Take care not to connect too
many appliances to the same power socket
as this could result in fire or electric shock.
Do not open the cabinet and the rear cover
of the TV. Refer to qualified service
personnel only.
For environmental and safety reasons, it is
recommended that the TV set is not left in
standby mode when not in use. Disconnect
from the mains.
For your own safety, do not touch any part
of the TV, power lead or aerial lead during
lightning storms.
Never push objects of any kind into the set
as this could result in a fire or electric shock.
Never spill liquid of any kind on the set. If
any liquid or solid object does fall through,
do not operate the TV. Have it checked
immediately by qualified personnel.
To prevent fire or shock hazard, do not
expose the TV to rain or moisture.
Do not cover the ventilation openings of the
TV. For ventilation, leave a space of at least
10cm all around the set.
Clean the TV with a soft, lightly dampened
cloth. Do not use benzine, thinner or any
other chemicals to clean the TV. Do not
scratch the TV screen. As a safety
precaution, unplug the TV before cleaning it.
Place the TV on a secure stable stand. Do
not allow children to climb on to it. Do not
place the TV on its side or face up.
Never place the TV in hot, humid or
excessively dusty places. Do not install the
TV where it may be exposed to mechanical
vibrations.
Pull out the power lead by the plug. Do not
pull on the power lead itself.
Unplug the power lead before moving the
TV. Avoid uneven surfaces, quick steps or
excessive force. If the set has been dropped
or damaged, have it checked immediately
by qualified service personnel.
Do not place any objects on the TV. To
prevent fire, keep inflammable objects or
naked lights (e.g. candles) away from the TV.
Take care not to place heavy objects on the
power lead as this could result in damage.
We recommend you wind any excess lead
around the holders provided on the rear of
the TV.
Do not cover the ventilation openings of the
TV with items such as curtains or
newspapers etc.
2
Page 5

Getting started
Checking the accessories supplied ................................................................................................ 4
Inserting batteries into the remote control ..................................................................................... 4
Connecting an aerial and a VCR to the TV..................................................................................... 5
Switching on the TV........................................................................................................................ 5
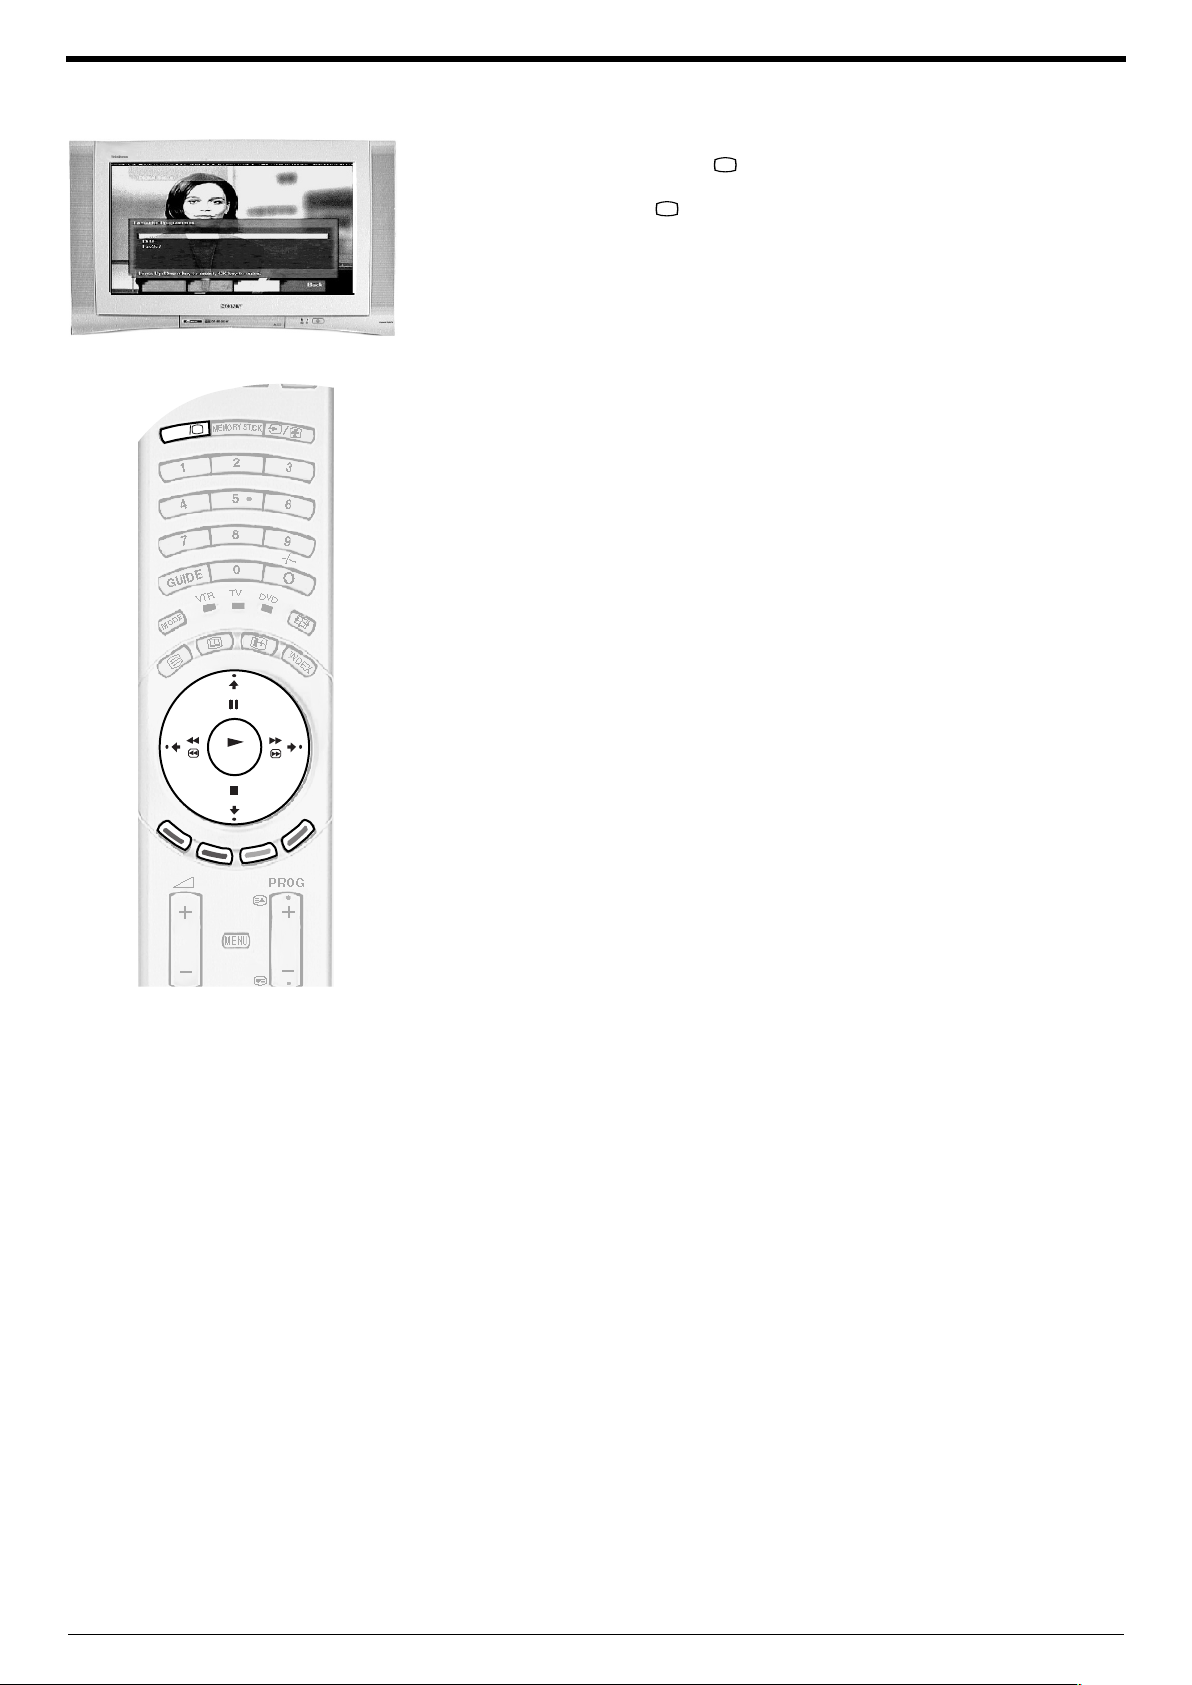
Automatically tuning the TV ............................................................................................................ 6
Switching between digital and analogue programmes.................................................................... 7
Finding your video channel ............................................................................................................ 7
Basic operation
Overview of the TV buttons............................................................................................................. 8
Overview of the remote control buttons..........................................................................................9
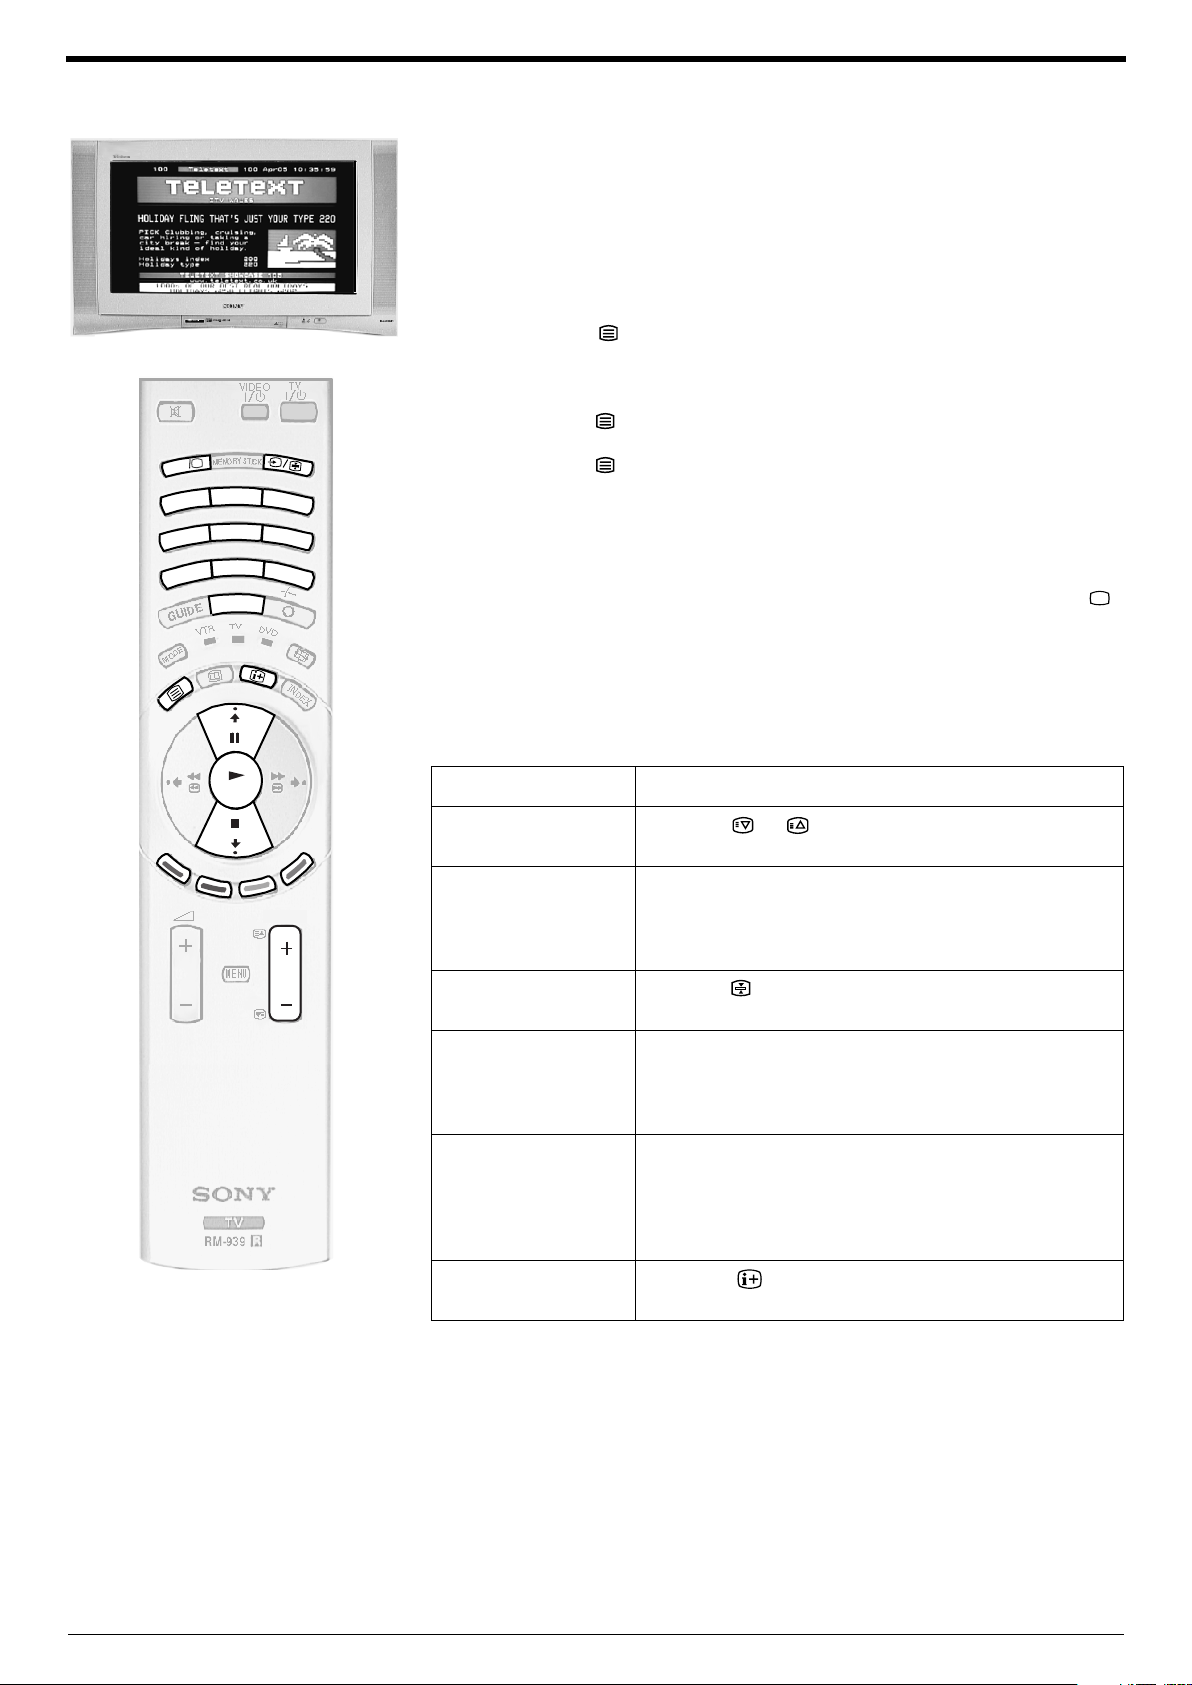
Viewing a digital text service........................................................................................................... 10
Viewing a traditional text service..................................................................................................... 11
Using the text menu........................................................................................................................ 12
Changing the screen format manually............................................................................................ 13
Digital features
The Digital Info display.................................................................................................................... 14
The Main menu............................................................................................................................... 15
Favourite Programmes............................................................................................................15
Wallpaper................................................................................................................................ 16
Parental control ....................................................................................................................... 16
Installation...............................................................................................................................17
Detailed set-up........................................................................................................................ 18
CA Set-up ...............................................................................................................................19
Personal Information............................................................................................................... 19
The Channel Index menu................................................................................................................ 20
Searching for digital channels................................................................................................. 20
To store a channel in your favourites list ................................................................................. 20
To select a category of programme......................................................................................... 20
The EPG menu............................................................................................................................... 21
Searching for digital channels................................................................................................. 21
To select a category of programme......................................................................................... 21
To select a programme for recording or timed display ............................................................ 22
Table of contents
TV menu system
Using the TV menu system............................................................................................................. 23
Picture Adjustment menu................................................................................................................ 23
Sound Adjustment menu ................................................................................................................ 24
Features menu................................................................................................................................ 25
Set Up menu................................................................................................................................... 25
Manual Set Up menu...................................................................................................................... 26
Manual Programme Preset menu................................................................................................... 27
Further Programme Preset menu...................................................................................................28
Memory Stick operation
Inserting a Memory Stick ................................................................................................................ 29
Removing a Memory Stick.............................................................................................................. 29
The Memory Stick menu................................................................................................................. 29
Memory Stick precautions .............................................................................................................. 32
Connecting Other Equipment to the TV
Connecting equipment to the rear sockets ..................................................................................... 33
Connecting equipment to the front sockets..................................................................................... 35
Using the remote control with VCR and DVD players..................................................................... 36
Additional information
Specifications.................................................................................................................................. 37
Troubleshooting............................................................................................................................... 38
3
Page 6
Getting started
Follow steps - to install your TV and view the TV programmes.
1
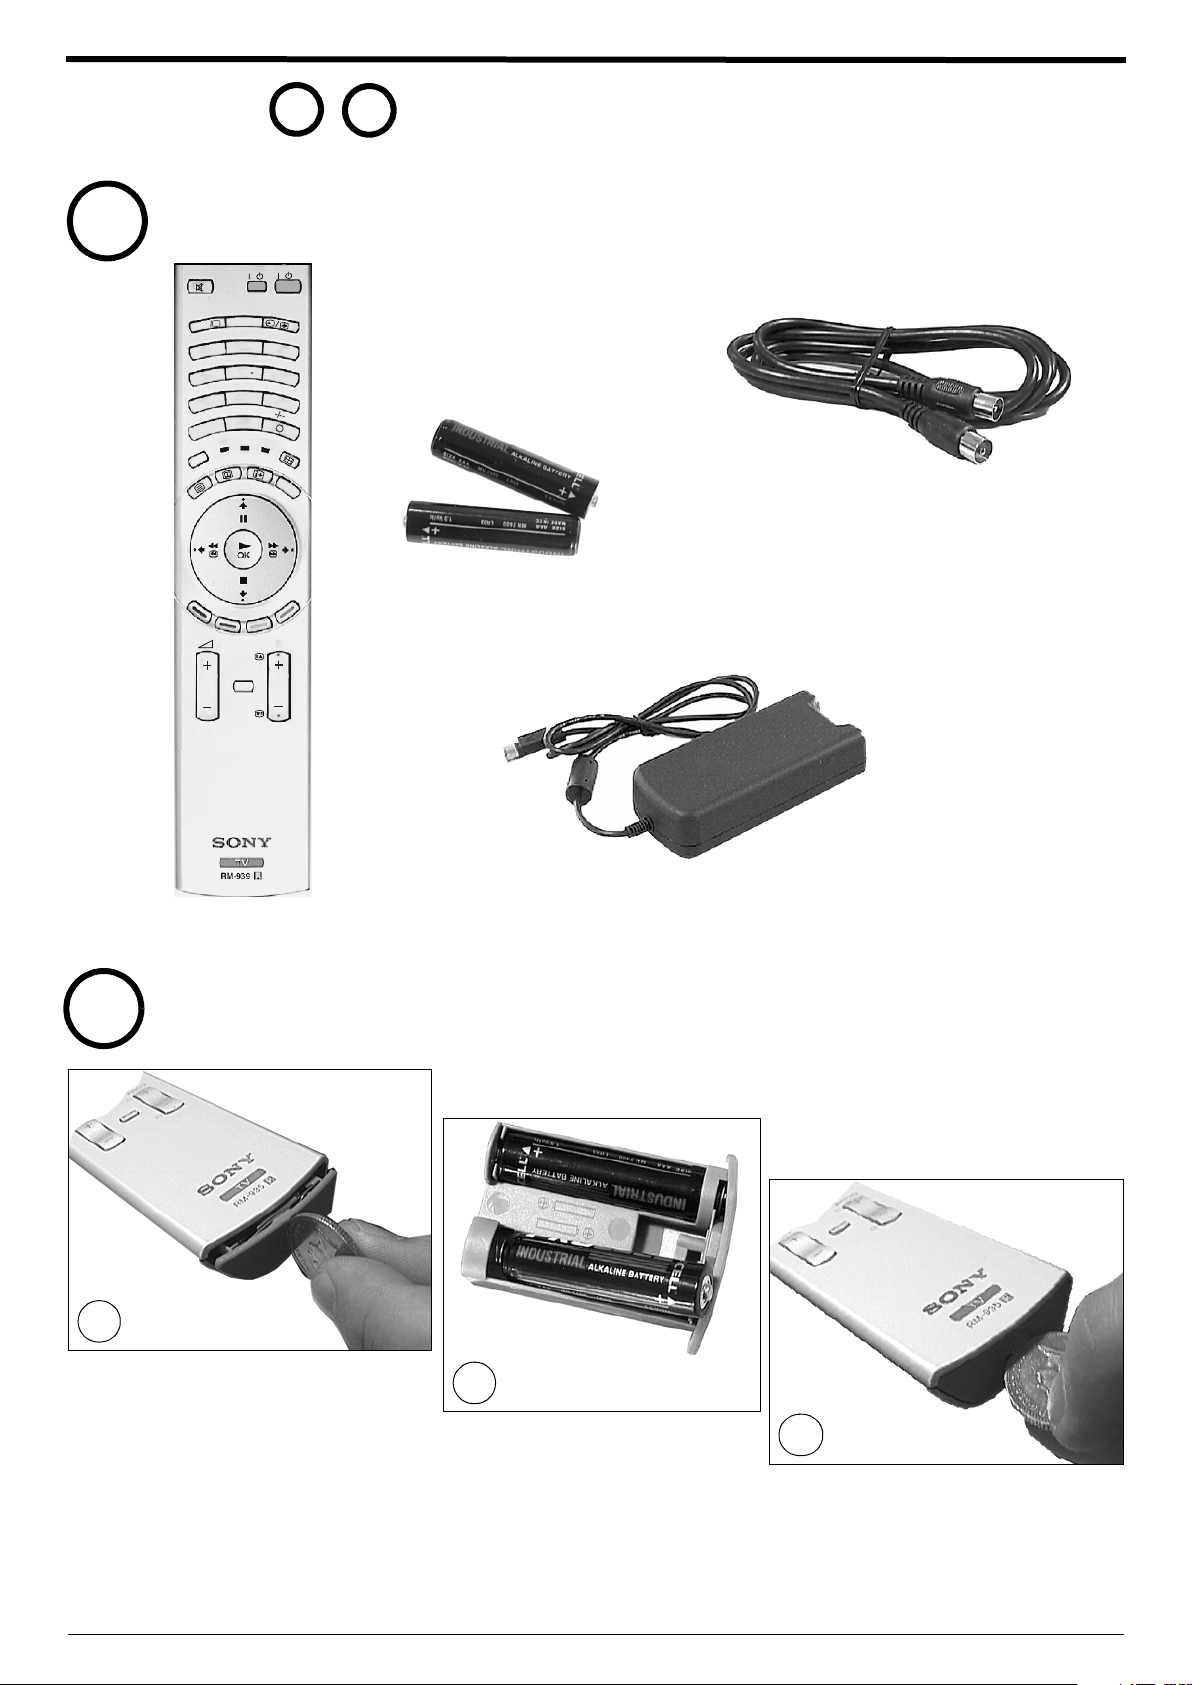
Checking the accessories supplied
M
L
A
IT
IG
D
1
4
7
UIDE
G
R
VT
E
D
O
M
1
TV
VIDEO
/
/
STICK
Y
R
O
M
E
2
3
5
6
8
9
0
TV
DV
D
INDEX
7
RF Loopthrough cable
Batteries
PROG
MENU
Remote control
2
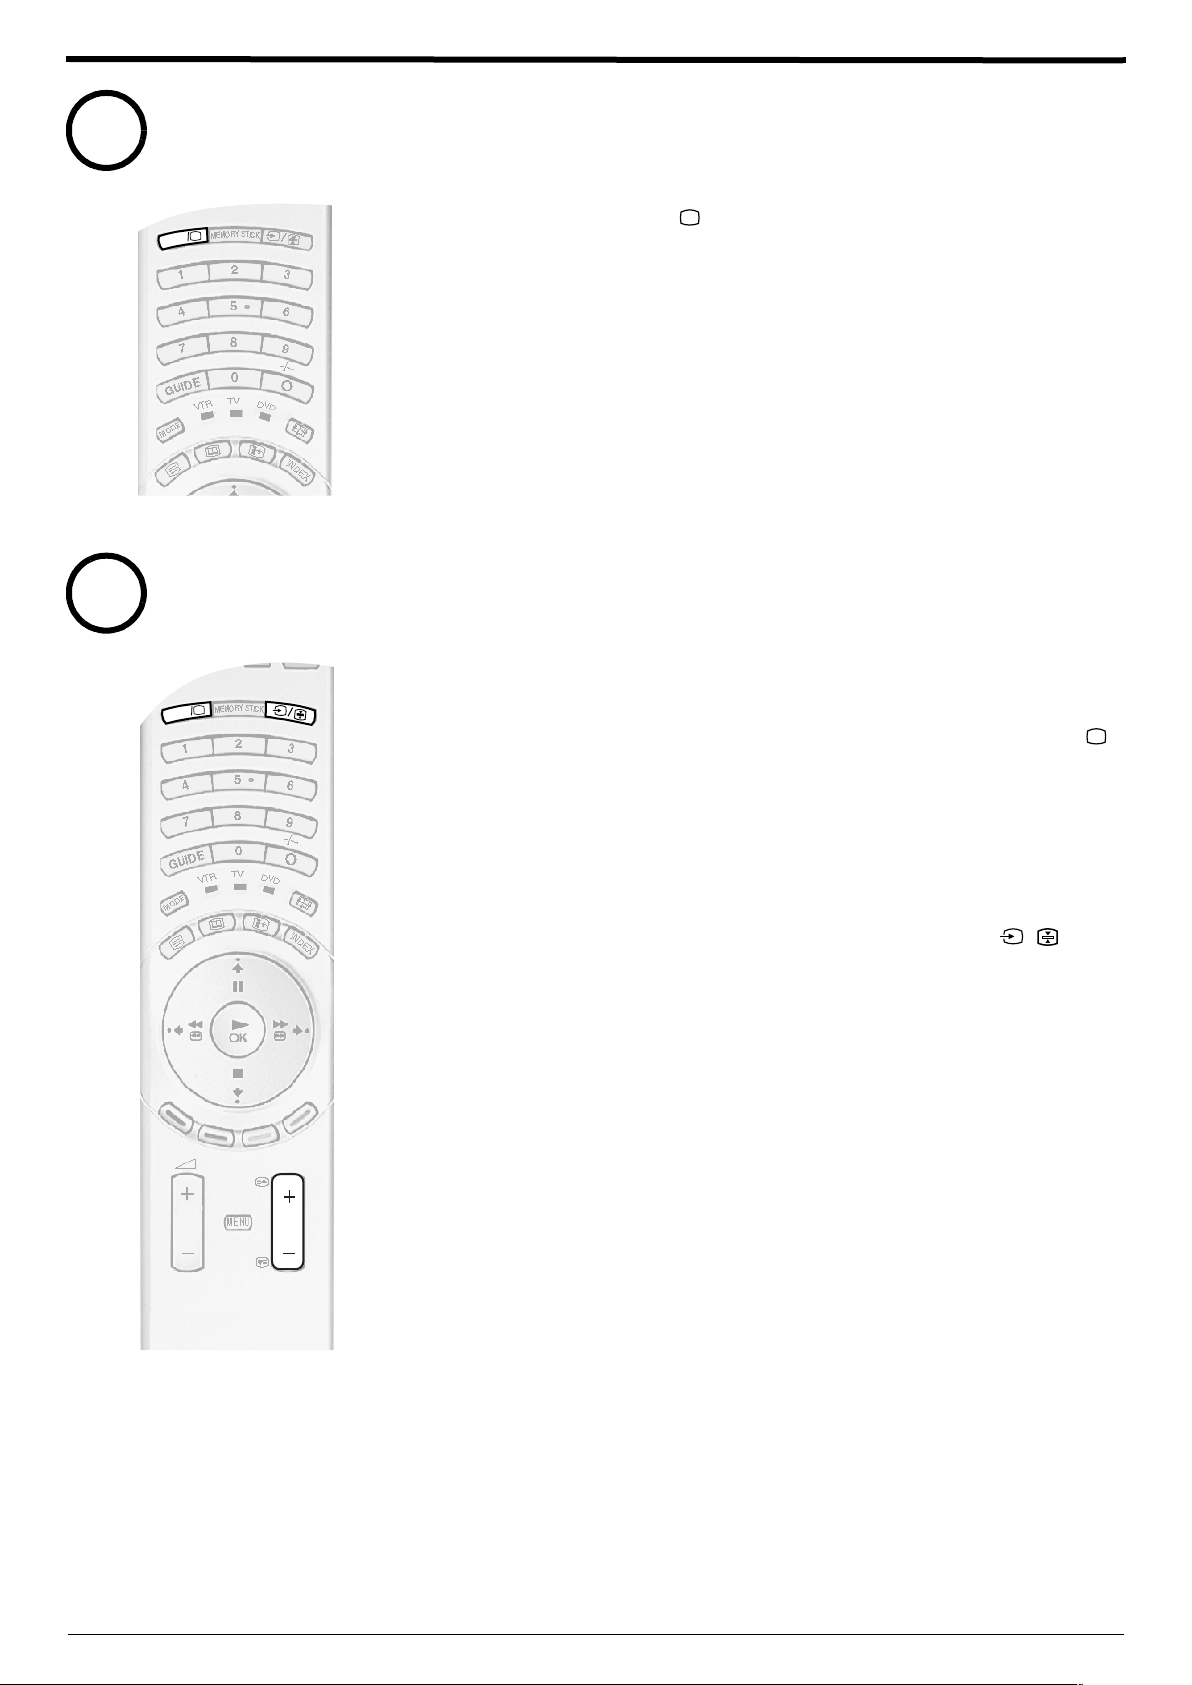
Inserting batteries into the remote control
1
Place a coin in the slot at the bottom of the
remote control. Turn anti clockwise to
release the battery compartment.
Modem
2
Insert the batteries as indicated in
battery compartment.
3
Replace the battery compartment and lock
in place by twisting the coin clockwise in the
slot.
4
Always remember to dispose of batteries in an environmentally friendly way
Page 7
Getting started
3
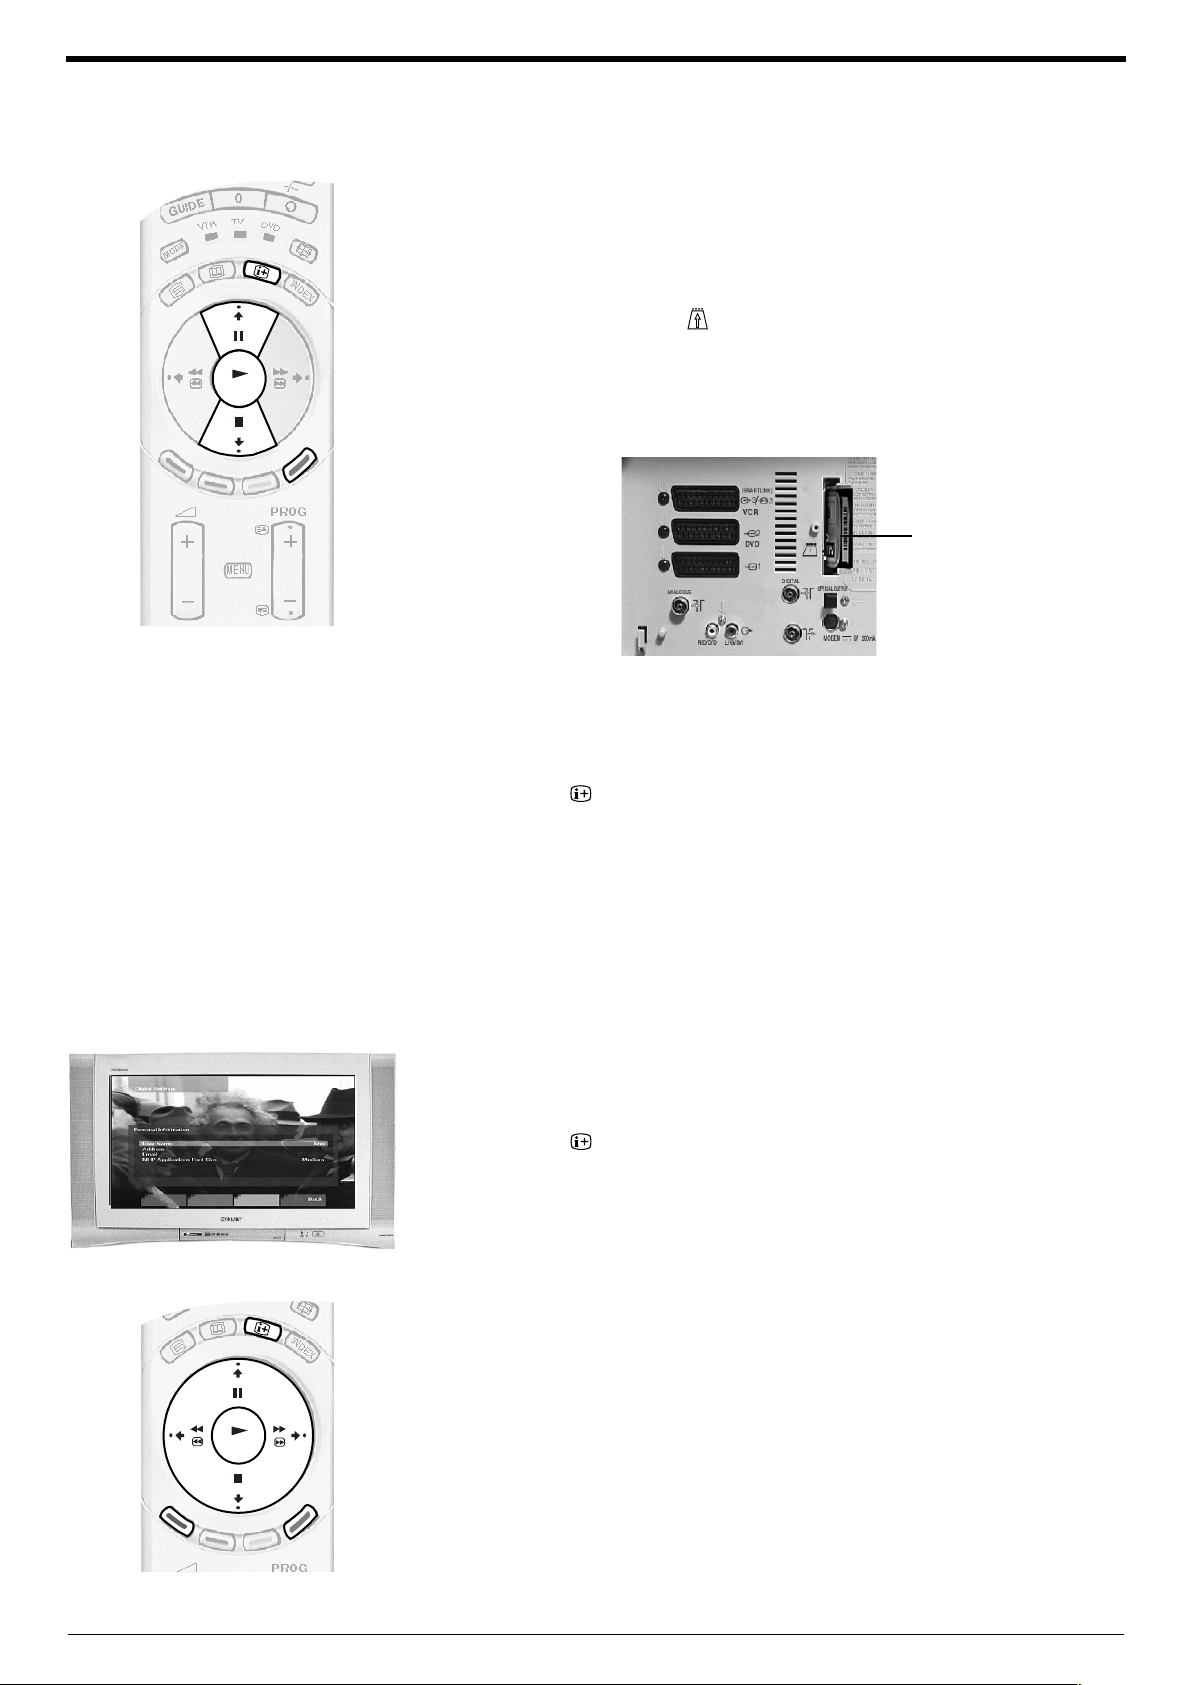
Connecting an aerial and a VCR to the TV
Connecting an aerial only
(SMARTLINK)
s
3
3
VCR
2
DVD
1
DIGITAL
OPTICAL OUTPUT
ANALOGUE
MODEM
. . .
5V 200mA
R/D/D/D
L/G/S/I
RF loopthrough
lead (supplied)
Connecting an aerial and a VCR
Existing
aerial lead
Connect your existing aerial lead to the digital
1.
socket marked on the rear of the TV as
shown.
Connect the supplied RF loopthrough cable from
2.
the socket marked to the analogue socket
marked .
Scart lead
(not supplied)
4
(SMARTLINK)
s
3
3
VCR
2
DVD
1
DIGITAL
OPTICAL OUTPUT
ANALOGUE
MODEM
. . .
5V 200mA
R/D/D/D
L/G/S/I
Switching on the TV
RF loopthrough
cable (supplied)
RF lead (not
supplied)
Connect your existing aerial lead to the digital
1.
socket marked on the rear of the TV as shown.
Connect the supplied RF loopthrough cable from
2.
the lower socket marked on the TV to the RF
IN socket on your VCR.
Connect a lead from the RF OUT socket on your
3.
VCR to the analogue socket marked on the TV.
Connect a fully wired scart lead from the
4.
3
s
socket on the rear of the TV to the scart
3
socket on your VCR (refer to your VCR instruction
manual).
Connect the VCR to the mains socket and switch
5.
on.
Insert a pre-recorded tape into the VCR and press
6.
the ‘PLAY’ button. This enables the TV to locate and
store the video channel during the ‘Automatically
tuning the TV’ procedure.
Note:
Your VCR sockets may not be labelled RF IN and RF OUT. If not,
please refer to your VCR instruction manual for guidance.
Connect the TV plug to your mains socket
1.
(220 - 240 V AC, 50 Hz).
Push in the on/off button (labelled ) on the
2.
front of the TV.
Note:
If the red indicator on the front of the TV is lit the TV is in standby
mode. Press the TV button on the remote control to switch on
the TV. Please be patient as the picture may take a few moments to
/
appear on screen.
5
Page 8
Getting started
5
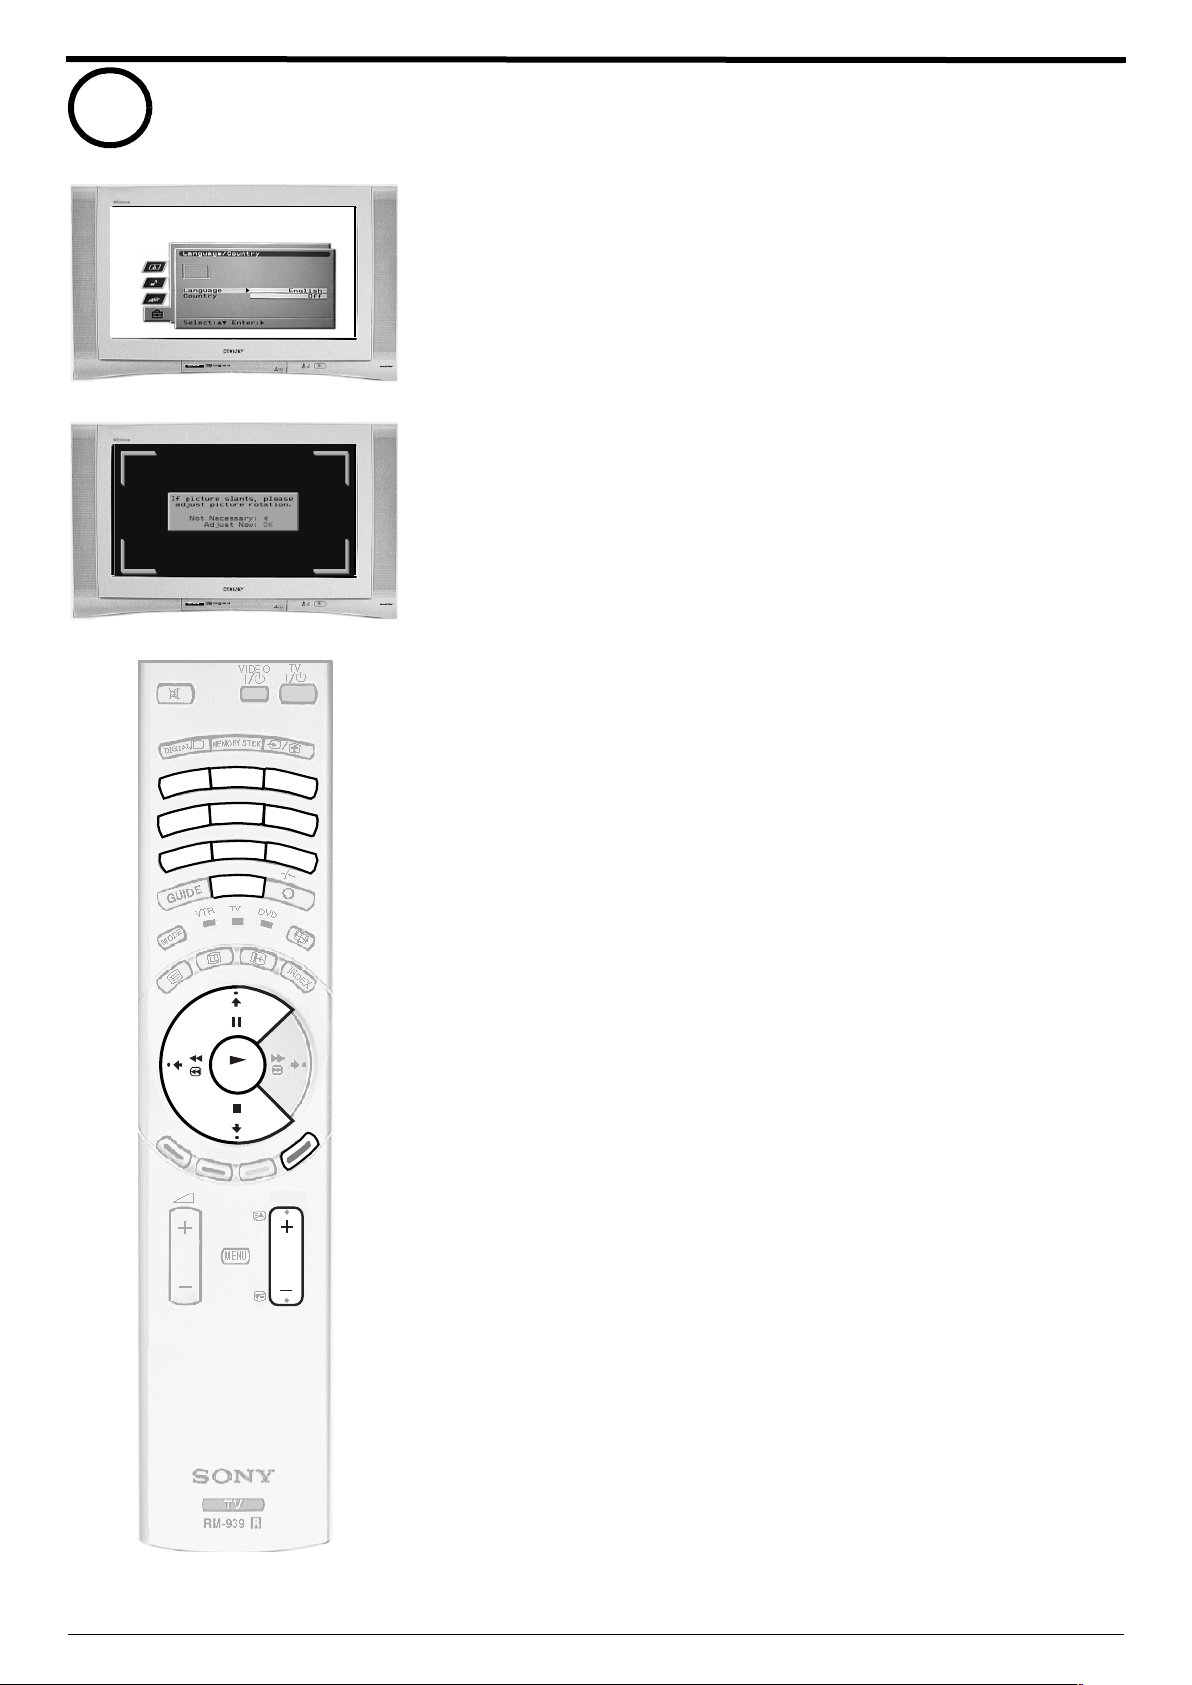
Automatically tuning the TV
When you switch on the TV for the first time, the Sony logo appears on the
1.
TV screen followed by the ‘Memory Stick’ logo, then the Language/Country
menu with the word ‘English’ highlighted. Press the V or v buttons on the
remote control to choose the language you require then press the OK
button to confirm.
The word Country is now highlighted. Press the V or v buttons to choose
2.
the country in which you wish to operate the TV, then press the OK button to
confirm.
The picture rotation prompt appears. Sometimes the Earth’s natural
magnetism can cause the screen to look tilted.
a) If no correction is required, press the B button.
b) If some correction is required, press the OK button. Press the V or v
button to rotate the picture over a range of -5 to +5. Press the OK button
to store.
An autotune prompt appears on screen. Press the OK button to select ‘Yes’.
A menu is displayed giving you two options to choose from:
Quick tuning: Tunes in the recommended signals for your location.
Full tuning: Tunes in all the available signals.
Use the V or v buttons to make your choice then press the OK button.
Note:
‘Full tuning’ may take some time to tune in all the available signals. For normal use,
we recommend you use the ‘Quick tuning’ feature.
A display appears asking you to press the OK button to begin tuning. As the
2
1
4
7
OK
3
5
6
8
9
0
PROG
digital tuning procedure may take some time, a menu is displayed to show
you the tuning progress. Please be patient and do not press any buttons
once this search and store operation has started.
When the on screen display informs you that the tuning is successfully
finished, press the BLUE button repeatedly to remove all menus from the
screen. The analogue tuning procedure then begins.
If no digital and no analogue signals are found, a display appears on screen
asking you to confirm your aerial is connected. Check your aerial is
connected then press the OK button to repeat the tuning procedure.
Once all signals have been captured and stored, the TV returns to normal
operation and displays the digital programme captured on programme
number 1.
Note:
If no digital signals are captured, then the analogue programme stored on
programme number 1 is displayed.
To view programmes, press the PROG+/- button or the numbered buttons
3.
on the remote control.
6
Page 9
Getting started
DIG
IT
AL
D
IG
ITA
L
PROG
D
IG
IT
AL
D
IG
IT
AL
6
7
Switching between digital and analogue programmes
Press the DIGITAL/ button on the remote control to switch between
1.
digital and analogue mode.
Notes:
If the TV is in digital mode an information banner appears briefly on screen when you change
channels.
If the TV is in analogue mode the channel number appears in green lettering when you change
channels.
Finding your video channel
If you connected a VCR to your TV when following the ‘Connecting an aerial and a VCR
to the TV’ instructions, you now need to find your video channel.
First ensure the TV is in analogue mode. If not press the DIGITAL/
1.
button on the remote control.
Press the PROG+/- button on the remote control until the picture from the
2.
pre-recorded tape appears on screen.
Notes:
If you wish to move your video channel to a different programme number, refer to the
‘Rearranging your channels’ section of this manual.
If you have connected your VCR using a scart lead, press the
repeatedly on the remote control until the picture from the pre-recorded tape appears
on the TV screen.
/ button
7
Page 10
Basic operation
Overview of the TV buttons
The TV buttons can be found on the control panel on the front of the TV. An expanded view is shown below.
MEMORY STICK
Note:
When the ‘Memory Stick’ is reading or
wriiting data, the memory stick indicator
lights up in red. Data stored on a
‘Memory Stick’ may become damaged or
erased if you remove the ‘Memory Stick’
during this time.
MONO
R/D/D/D
L/G/S/I
S
4
4
4
Reset button
Press to return picture and sound levels
to their factory settings.
Video input button
Press to select input signals from a
VCR etc.
Volume control buttons
Press to increase or decrease the volume.
+
P +
8
Programme Up or Down buttons
Press to move to the next or preceding
channel.
Page 11
Overview of the remote control buttons
/
Basic operation
Mute button
Press to mute the sound. Press again to
restore.
DIGITAL/ button
Press to switch between digital and
analogue mode.
MEMORY STICK button
Press to display the Memory Stick menu.
Buttons 0 - 9
Press to input the required channel
number. For numbers 10 and above,
enter the second digit within 2 seconds.
GUIDE button
Press to launch digital text or digital
interactive services.
MODE button
This remote control operates not only
Sony DVDs and VCRs, but also those
made by other manufacturers. Press this
button to select the type of equipment
you want to control. A green light appears
momentarily to indicate the mode
selected.
Note:
Before operating your VCR or DVD, you must
enter the correct configuration code. Please
refer to the section ‘Using the remote with
VCR/DVD players’.
Text button
Press to enter text mode.
EPG button
Press to display the Electronic
Programme Guide when in digital mode.
Control pad
Use these buttons to navigate through
the menu system of the TV.
Note:
When the MODE button has been set to VCR
or DVD, the control pad operates the main
functions of your VCR or DVD.
Coloured buttons
These buttons are used for the text and
digital menus. Refer to the relevant
sections in this instruction manual.
A
IT
IG
D
1
4
7
GUIDE
DE
O
M
VIDEO button
TV
VIDEO
/
/
STIC
K
MEMORY
L
2
3
5
6
8
9
0
T
V
D
V
VTR
D
Press to switch off your VCR or DVD temporarily.
Press again to return to normal operation.
TV button
/
Press to switch off your TV temporarily. The red
indicator on the front of the TV illuminates. Press
again to return to normal operation
Input button /Hold button
Press to select signals from equipment connected
to the TV sockets (refer to ‘Connecting other
equipment to the TV’).
In text mode press to keep a page on display. Press
again to cancel.
IND
EX
Previous channel button
While watching Analogue TV pressing this button
will return you to the previous channel you were
watching.
While watching Digital TV pressing this button can
also act as an ‘EXIT’ key and cancel any Digital text
application that may be running.
Screen format button
PROG
MENU
Press repeatedly to change the screen format.
Info button
Press to display the INFO menu in digital mode.
When watching analogue programmes press to
reveal information such as programme number etc.
When in text mode, press to reveal hidden
information such as answers on quiz pages. Press
once more to remove hidden information.
INDEX button
When in digital mode, press to display the Channel
Index menu.
OK button
Press to display a list of channels on screen. Press
the V or v button to scroll through the list until the
channel you wish to view is highlighted, then press
the OK button to display that channel on screen.
PROG +/- button
Press to select the next or previous programme.
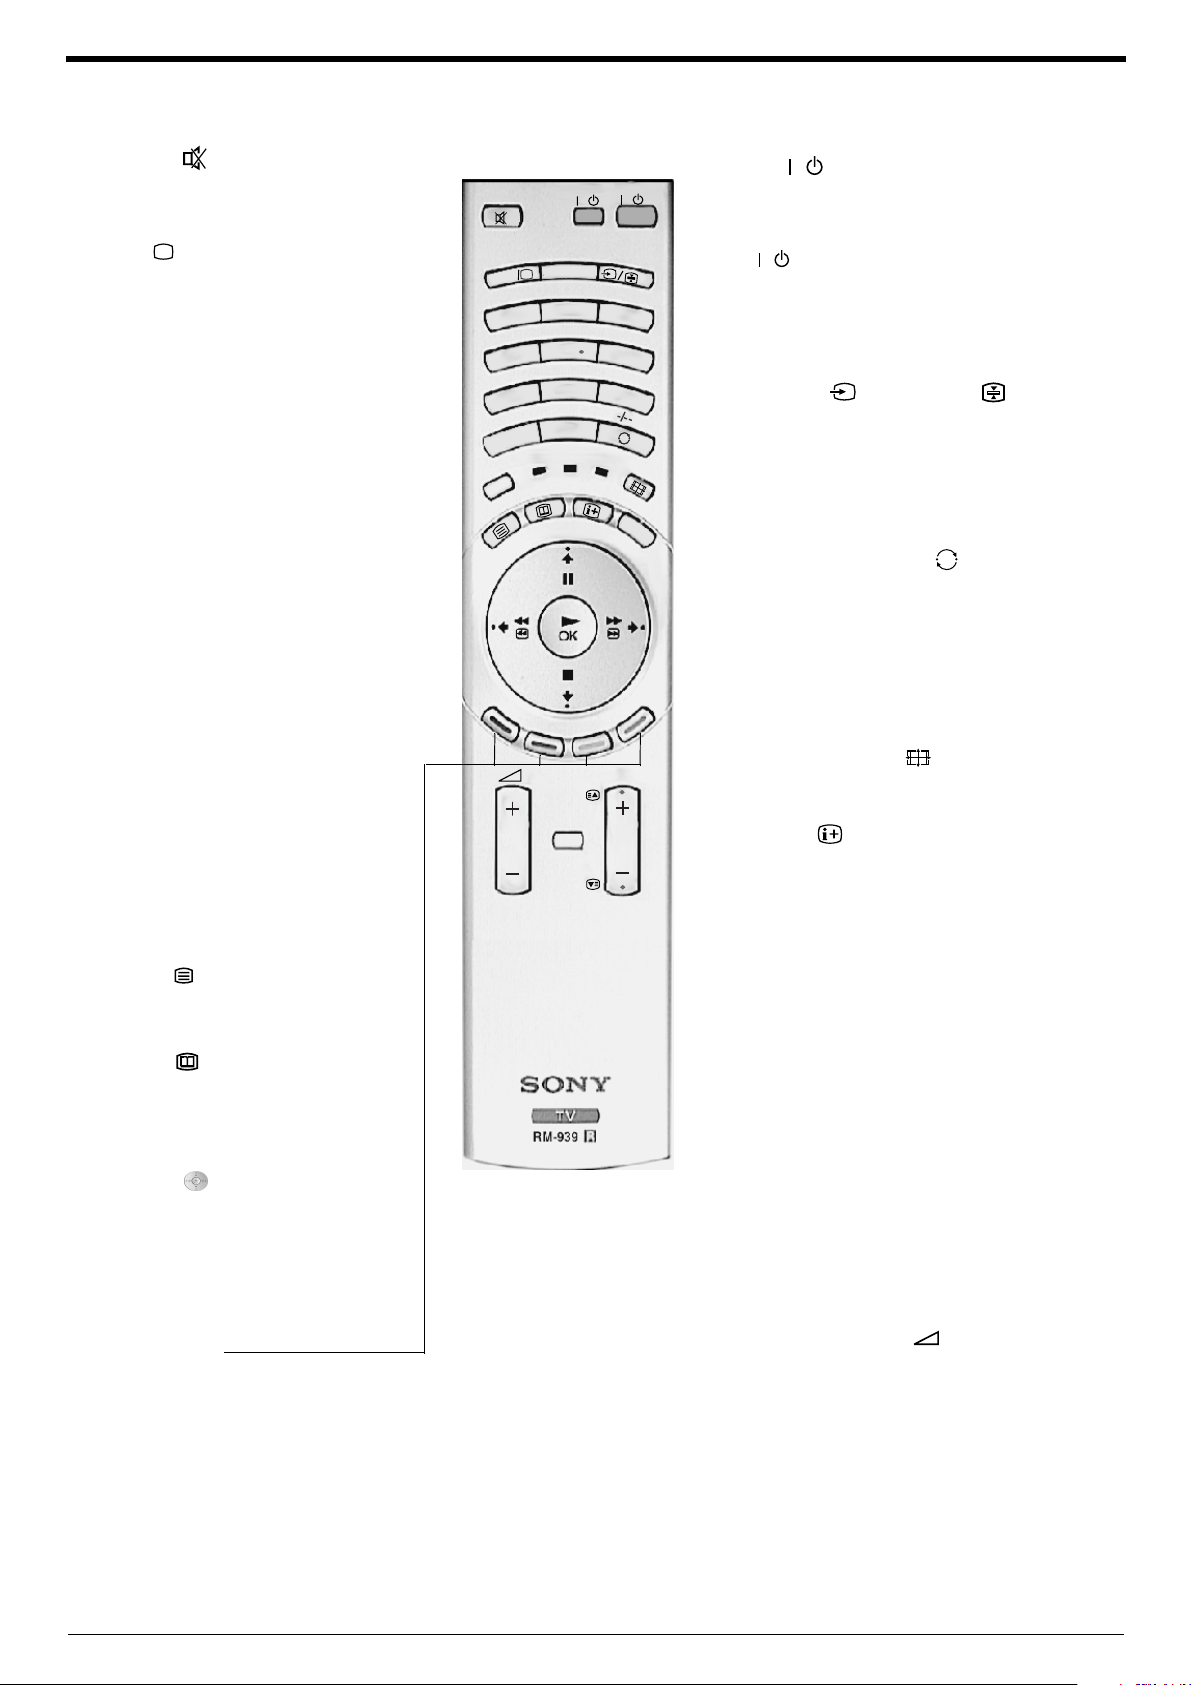
Volume + and - button
Press to adjust the volume to the desired level.
MENU button
Press to enter the menu system of this TV.
9
Page 12
Basic operation
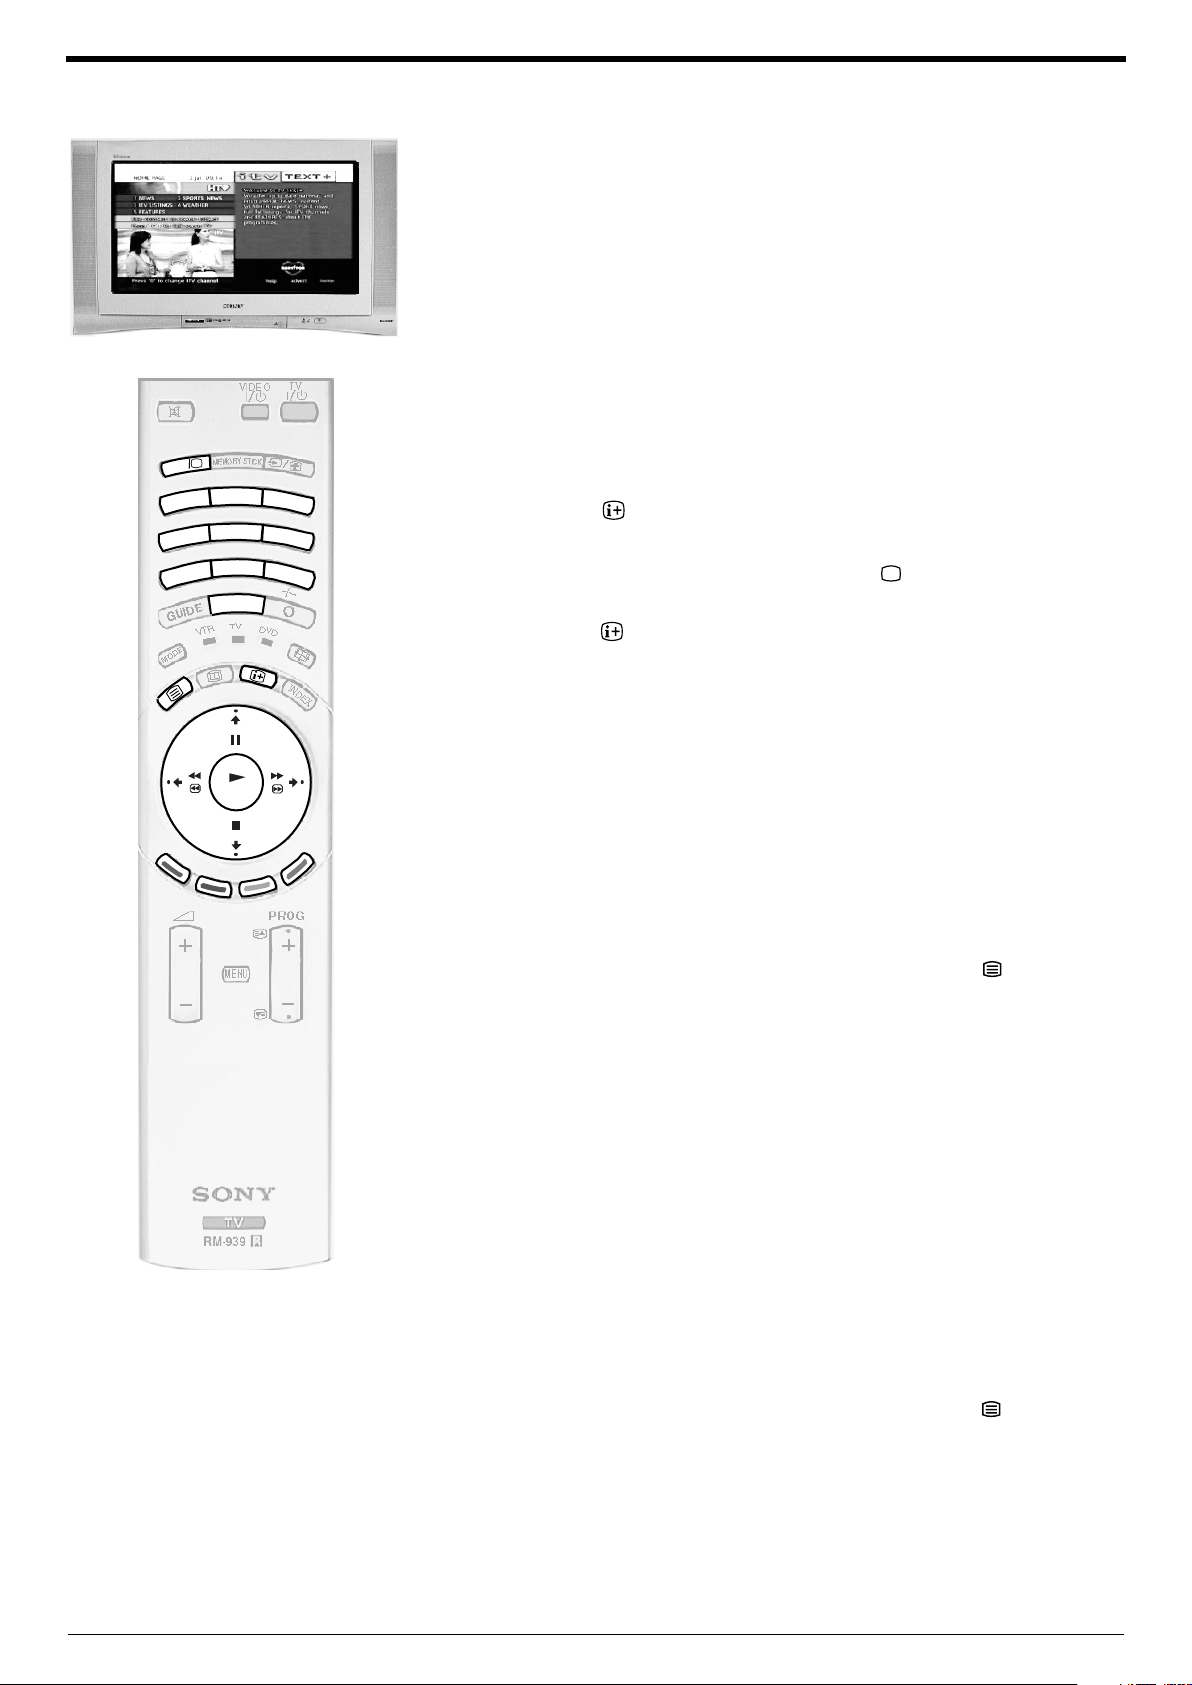
Viewing a digital text service
Most digital TV channels broadcast information via their text service. This digital service
includes high quality text and graphics along with advanced navigation options.
Additionally, this TV has access to dedicated text channels transmitted by the
broadcasting authorities. The appearance, content and navigation methods of all digital
text services are decided by the broadcaster. For example, the RTL digital text service
may look different to ZDF’s digital text. However, the digital text services currently
available use simple navigation methods based on the following buttons:
The GUIDE button to display digital text,
The V, v, B and b buttons (to move around the screen),
The OK button or the numbered buttons (to select items on screen),
The four coloured buttons (to access shortcuts).
ITAL
ITAL
IG
IG
D
D
2
1
4
7
3
5
6
8
9
0
Selecting a dedicated digital text channel
Press the button on the remote control to check if you are in digital
1.
mode. If you are watching a digital programme an Info display appears on
screen providing brief details for the current and next programme. If the
display does not appear, press the DIGITAL/ button to switch to digital
mode.
Press the button to remove the Info display from the TV screen then
2.
select the programme number that is broadcasting the dedicated digital text
channel by using the numbered buttons on the remote control. If you do not
know the channel number of a dedicated digital text channel, you can use the
‘Channel Index menu’ to find one. (Please refer to the ‘Channel index menu’
section of this manual.)
Once the text page is displayed, follow the on-screen instructions to obtain
OK
3.
your required selection.
Note:
On some pages the TV programme may also be displayed on the text screen. Onscreen instructions will inform you how to change the displayed programme.
If you are instructed to press ‘OK’ or ‘Select’ when viewing the text pages,
4.
press the OK button.
When you have finished viewing the text service, press the button to exit.
5.
Selecting a text service from other digital channels
Normal text services may also be available on other digital channels. This is sometimes
indicated by a small symbol on your TV screen, superimposed on the programme you
are watching.
Press the V, v, B, or b buttons to select the symbol, then press the OK
1.
button to display the chosen information.
Alternatively, you may be instructed to use the numbered or coloured buttons
2.
on your remote control to display the various pages of text information. If you
are instructed to press ‘OK’ or ‘Select’ when viewing the text pages, press
the OK button.
Once the text information is displayed, you can access required information
3.
by using the V, v, B, or b buttons, the coloured buttons and/or the numbered
buttons on the remote control.
When you have finished viewing the text service, press the button to exit.
4.
10
Page 13
Viewing traditional teletext
Most analogue TV channels broadcast a text service. The index page (usually page
100) provides information on how to use the service. Please ensure you are receiving a
strong signal or some text errors may occur.
Switching on the text service
1
2
L
L
A
A
IT
IT
IG
IG
D
D
2
1
4
7
3
5
6
8
9
0
3
4
5
Basic operation
Select the TV channel that carries the text service you wish to view.
Press the button to enter Picture and Text (P&T) mode. The screen is
divided into two with the Text display on the left and the TV channel in the
right corner.
Press the button a second time to enter full screen Text mode.
Press the button a third time to enter Mix mode.
Press the numbered buttons to enter a three digit number for the text page
you wish to view. Your selected page appears on screen.
Enter more 3 digit page numbers as required.
When you have finished viewing the text service, press the DIGITAL/
button to remove the text display from the screen.
OK
PROG
How to use the text features
Text Features How to select
To select the next or
preceding page
To select a sub page A text page can consist of several sub pages. In this case
To keep a page on
display
To use Fastext Fastext allows you to access pages with one button push.
To use the Page
Catching feature
Reveal Press the button to reveal hidden information on the
Press the or button.
an information box is displayed at the bottom of the screen
showing the number of sub pages available. Select the
sub pages by pressing the V or v button.
Press the button. Press again to cancel.
When Fastext is available, four coloured items appear at
the bottom of the screen. Press the corresponding
coloured button on the remote control to display the page.
Select a page that contains several page numbers (e.g.
the index page), then press the OK button. Press the V or
v button to highlight the page number required, then press
the OK button again. Your selected page appears on
screen.
page (such as answers to a quiz).
11
Page 14
Basic operation
Viewing traditional teletext
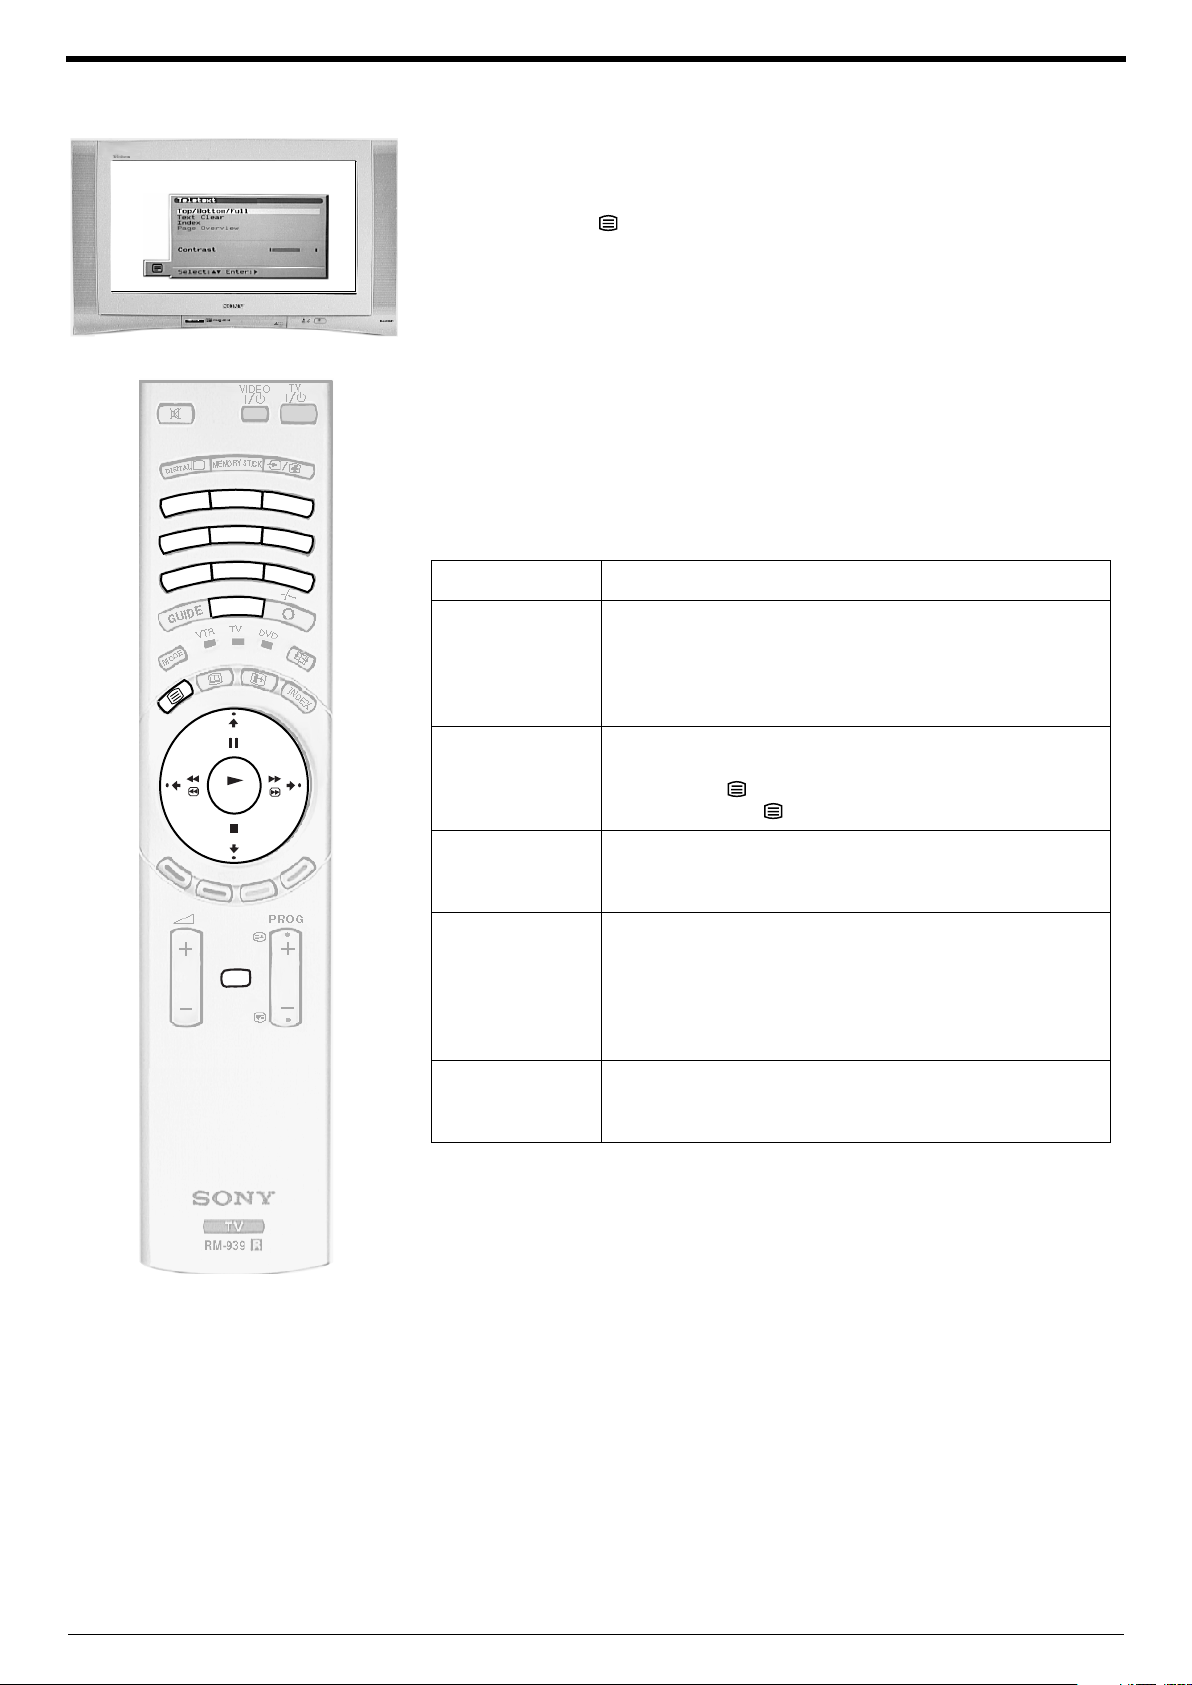
Using the text menu
You can access more features by using the text menu:
1
2
3
4
2
1
4
7
3
5
6
8
9
0
The following table explains each feature and its function:
Feature Function
Top/Bottom/Full This feature allows you to enlarge sections of the displayed
Press the button on your remote control to enter the conventional text
mode.
With the text display on screen, press the MENU button to display the
Te le t ex t ’ menu.
Press the V or v button to highlight your desired feature, then press the b
button to select.
Press the MENU button to remove the ‘Te le t ex t ’ menu from the screen.
page. Press the V button to enlarge the upper half of the
page or v to enlarge the bottom half. Press the OK button to
return the page to normal size. Press the B button to return to
the ‘Te le t ex t ’ menu.
OK
MENU
Text Clear
(not available in
P&T mode)
Index Most Text services contain an index page which lists all the
Page Overview
(Only for TOPText
broadcasts)
Contrast This feature allows you to adjust the contrast setting of Text
Use this feature to watch a TV programme when the text
service is searching for a page. Once the page has been
found, a blue symbol appears in the top left corner of the
screen. Press the button to view the page.
available pages and their 3 digit page number. Press the b
button to display the index page on screen.
TOP-Text pages are divided into two columns. The first
column shows ‘blocks’ of pages and the second shows
‘groups’ of pages. Press the b or B button to select the
desired column, then press V or v button to select the
relevant ‘group’ or ‘block’ of pages. Press the OK button to
display the chosen pages.
pages. Press the b or B button to increase or decrease the
contrast. Press the OK button to confirm.
12
Page 15
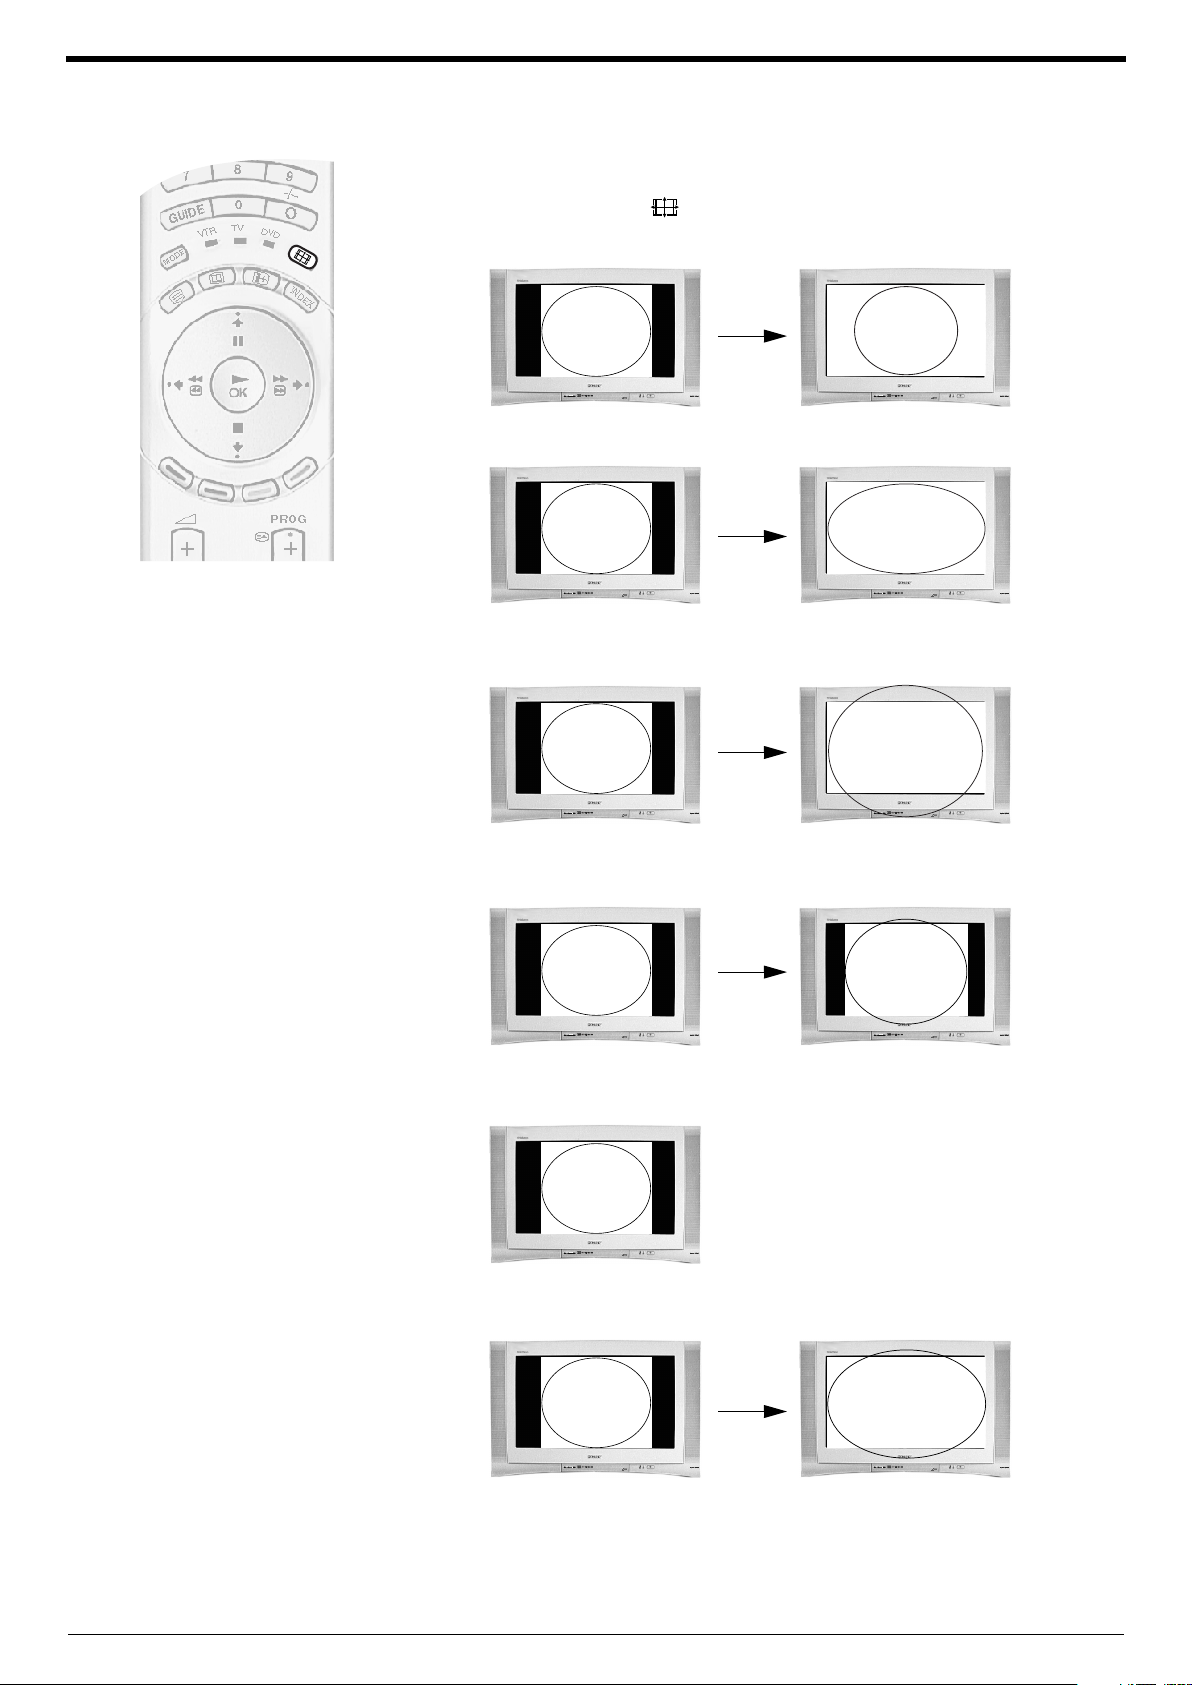
Changing the screen format manually
The broadcaster may transmit programmes in more than one format (e.g. 4:3 format or
Widescreen format). You can change the screen format manually to suit the broadcast
you are watching. Press the button on the remote control to choose one of the 5
formats listed below.
Wide-
For 16:9 broadcasts.
For 4:3 broadcasts.
Basic operation
Zoom-
14:9-
4:3-
Imitation of wide screen effect for movies broadcast in cinemascopic (letter
box) format.
Compromise between the 4:3 and 16:9 format.
Conventional screen format.
Smart-
Imitation of wide screen effect for 4:3 broadcasts.
Note:
In Smart, Zoom and 14:9 modes, parts of the top and bottom of the screen are cut off. Press the V or
v button to adjust the position of the image on screen (e.g. to read subtitles).
13
Page 16
Digital features
OK
D
IG
IT
A
L
D
IG
IT
A
L
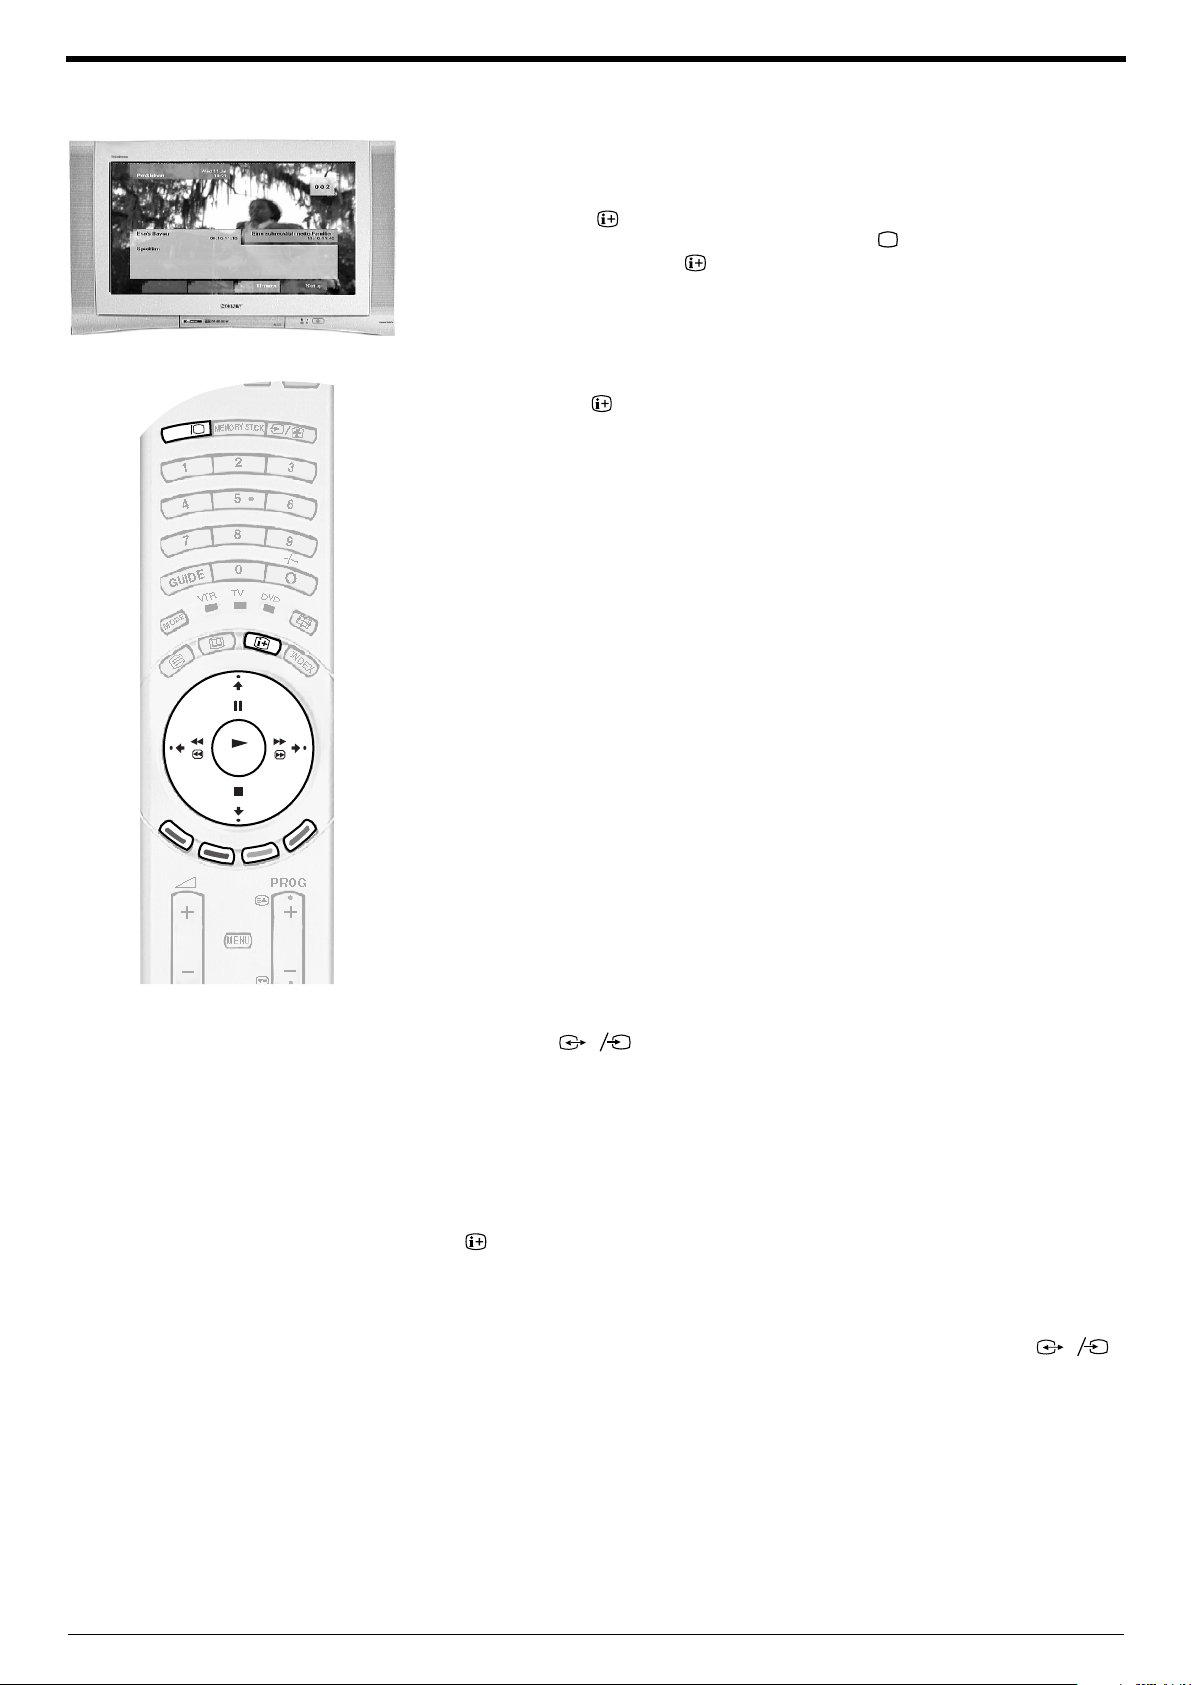
The Digital Info display
This display gives you information both on the current programme being shown and on
future programmes when available from the broadcaster (up to 24 hours ahead).
Press the button on the remote control to view the Info display. If the
1.
display does not appear, press the DIGITAL/ button to switch to digital
mode, then press the button to view the Info display.
Press the b button to obtain a brief description of the next programme in the
2.
schedule. If the programme box is blank, there is no information currently
available. To return to the starting point, press the B button repeatedly until
the description for the current programme reappears.
Press the button on the remote control at any time to exit the Info display.
3.
Using other Info features
Subtitles
This feature places digital subtitles on the screen. With the Digital Info display on screen,
press the RED button to access the ‘Subtitles’ pop-up menu. Press the V or v button to
highlight the language you wish the subtitles to appear in, then press OK to select.
Audio
When a multi language broadcast is available, this feature allows you listen to the
broadcast in your selected language. With the Digital Info display on screen, press the
GREEN button to access the ‘Audio’ pop-up menu. Press the V or v button to highlight
the language required then press OK to select.
Timers
When you highlight a current programme, the ‘Timers’ feature allows you to
automatically set your VCR to record the selected programme (only if you have a
Smartlink VCR), or you can select ‘Wake up’ to have the TV switch to the correct channel
automatically when the programme starts. Press the b button to select a future
programme from the Info display, then press the YELLOW button to display the ‘Timers’
pop-up menu.You can then choose from a) Record b) Wakeup or c) Manual.
a) Record
Highlight ‘Record’ and press OK to automatically set your VCR to record the selected
programme (this will only work if your VCR has SmartLink capability and is connected to
the AV3 socket on the rear of this TV).
b) Wakeup
Highlight ‘Wakeup’ and press OK if you wish the future programme you selected to
appear on-screen when transmission begins.
c) Manual
Highlight ‘Manual’ and press OK if you wish the TV to output a channel to your VCR for
recording. Press the V or v button to set the day of recording, then press the b button to
move to the start time. Repeat this procedure to set the start and stop times and the
channel number, then press the OK button to store and return to the Info menu. Press
the button to remove the Info menu from the screen. Unless you have a Smartlink
VCR, you must now set the timer recording function of your VCR to switch on and off to
correspond with the programme you have stored for recording.
3
3
s
s
3
3
14
Notes on recording:
The ‘Manual’ feature only works if you have connected your VCR to the AV3 socket
on the rear of the TV.
After you have programmed a recording you can put the TV into its standby mode, but do not switch
off completely or the recording will be cancelled. If you put the TV into standby mode, the standby
indicator on the front of the TV flashes green periodically to remind you a recording has been
programmed. Once a programme has started recording, do not change channels or switch to
analogue mode or the recording will be cancelled.
3
3
s
s
3
3
Set-up
Press to display the Main Menu (see next page).
Page 17
OK
D
IG
IT
A
L
D
IG
IT
A
L
The Main Menu
Digital features
The following pages explain the digital menus and their operation. To check you are in
digital mode, press the DIGITAL/ button on the remote control. An information
banner appears briefly on screen when you change channels. If the banner does not
appear, press the DIGITAL/ button.
Favourite Programmes
Use this option to create a list of your favourite programmes in one of three personal
folders, which can then be accessed using the Electronic Programme Guide (EPG) or
Channel Index feature of this TV.
With the Info display on screen, press the BLUE button on your remote
1.
control to display the Main Menu.
Press the V or v button to highlight ‘Favourite Programmes’ then press the
2.
OK button. A display appears giving you the choice of three personal folders.
Press the V or v button to select the folder you wish to use, then press OK
3.
to display the programme listing for that folder.
Press the V or v buttons to scroll through the list until the programme you
4.
wish to store as a favourite is highlighted, then press the OK button. The √
symbol appears alongside the programme to indicate it is now stored as a
favourite. Repeat this procedure to store other favourite programmes.
To deselect a favourite programme:
Highlight the programme, then press the OK button. The √ symbol disappears
from the TV screen.
To deselect all favourite programmes:
Press the YELLOW button.
To rename a favourite folder:
Press the BLUE button to return to the ‘Favourite Programmes’ display, then
press the V or v button to highlight the folder you wish to rename. Press the
YELLOW button to display an on-screen keyboard. Press the RED button to
clear the existing name, then using the V, v, B and b buttons, select the first
letter you require and press OK. The letter appears in the favourite name box.
Repeat this procedure until the name is complete, then after using the V, v,
B and b buttons to highlight DONE, press OK.
Note: If you make a mistake when renaming the folder, press the GREEN button to
return to the original name.
Press the BLUE button repeatedly to remove all menus from the TV screen.
5.
15
Page 18
Digital features
OK
OK
1
4
7
3
6
9
2
5
8
0
The Main Menu
Wallpaper
This feature allows you to customise the background pattern for all the digital menus.
Press the button, then press the BLUE button on the remote control to
1.
display the Main Menu
Press the v button to highlight ‘Wallpaper’ then press the OK button to
2.
confirm.
Press the V or v button to select your choice of wallpaper, then press OK to
3.
store.
Press the BLUE button repeatedly to remove all menus from the TV screen
4.
Parental Control
This option allows you to set an age limit above which a PIN number is required before
viewing is allowed.
Press the button, then press the BLUE button on the remote control to
1.
display the Main Menu.
Press the v button to highlight ‘Parental Control’ then press the OK button to
2.
display the Parental Control menu.
Enter your existing PIN code using the buttons 0 - 9 on the remote control.
3.
The PIN code has been preset to 1234, but you can change this as explained
later in the ‘Detailed Set-up’ menu.
The age box now becomes active. Press the V or v button to set the age limit
4.
you desire or set to ‘None’ for unrestricted viewing. Press the OK button to
confirm the setting.
Press the BLUE button repeatedly to remove all menus from the TV screen.
5.
16
Page 19
OK
1
4
7
3
6
9
2
5
8
0
The Main menu
Digital features
Installation
This option allows you to tune in programmes automatically or manually and to change
the order of the stored programmes.
Press the button, then press the BLUE button on the remote control to
1.
display the Main Menu.
Press the V or v buttons to select ‘Installation’ then press the OK button to
2.
display the Installation menu.
Press the V or v buttons to select your chosen item on the menu screen then
3.
press the OK button to display the relevant sub menu.
Quick Tuning
This option will tune in all the recommended signals for your location.
Full Tuning
This option will tune in all the signals available. As this option may take some
time a menu is displayed showing the tuning progress.
Manual Tuning
With this option you can manually add channels to your TV.
1. With the ‘Manual Tuning’ menu on display, enter the new programme
number for your chosen channel using the buttons 0 - 9. Press the OK
button to confirm.
2. The Manual Tuning programme list is displayed with your chosen
programme number highlighted. Press OK to confirm and display the
Search menu.
3. The search will begin from the channel number shown highlighted. If
you wish to change this to a channel number of your choice, press the V
or v button or enter the number directly using the buttons 0 - 9. Press
the b button to make the ‘Select Search’ box active.
4. Press the V or v button to begin the search process. ‘Searching ...’
appears alongside the word ‘Status’ to indicate searching is taking
place. If no digital services are found on your chosen channel, the
channel number changes up or down automatically and the search
continues. Once all the services allocated to the channel have been
found, they are displayed in the ‘Services Found’ box.
5. Press the V or v button to highlight the service you wish to allocate to
the programme number selected in Step 1, then press the OK button to
return to the Manual Tuning programme list display.
Note:
Manual tuning allows you to add another service from the same channel to a
different programme number. To do this, select a new programme number from
the display using the V or v button, then press the YELLOW button to display the
full service list for the channel. Press the V or v button to select the service you
require on the chosen programme number, then press the OK button to return to
the Manual Tuning programme list display.
6. If you wish to tune in more channels, highlight a new programme
number using the V or v button, then press OK. Repeat steps 3 to 5.
Programme Sorting
Use this option to change the order of the stored channels. With the
‘Programme Sorting’ menu displayed on the screen, press the V or v buttons
to highlight the channel you wish to move then press the YELLOW button.
Use the numbered buttons on your remote control to enter the new
programme number for your chosen channel then press the OK button to
confirm. Repeat this procedure to move other channels.
Once you have made all the changes you require in the Installation menu,
press the BLUE button repeatedly to remove all menus from the TV screen.
17
Page 20
Digital features
1
4
7
3
6
9
2
5
88
0
OK
The Main Menu
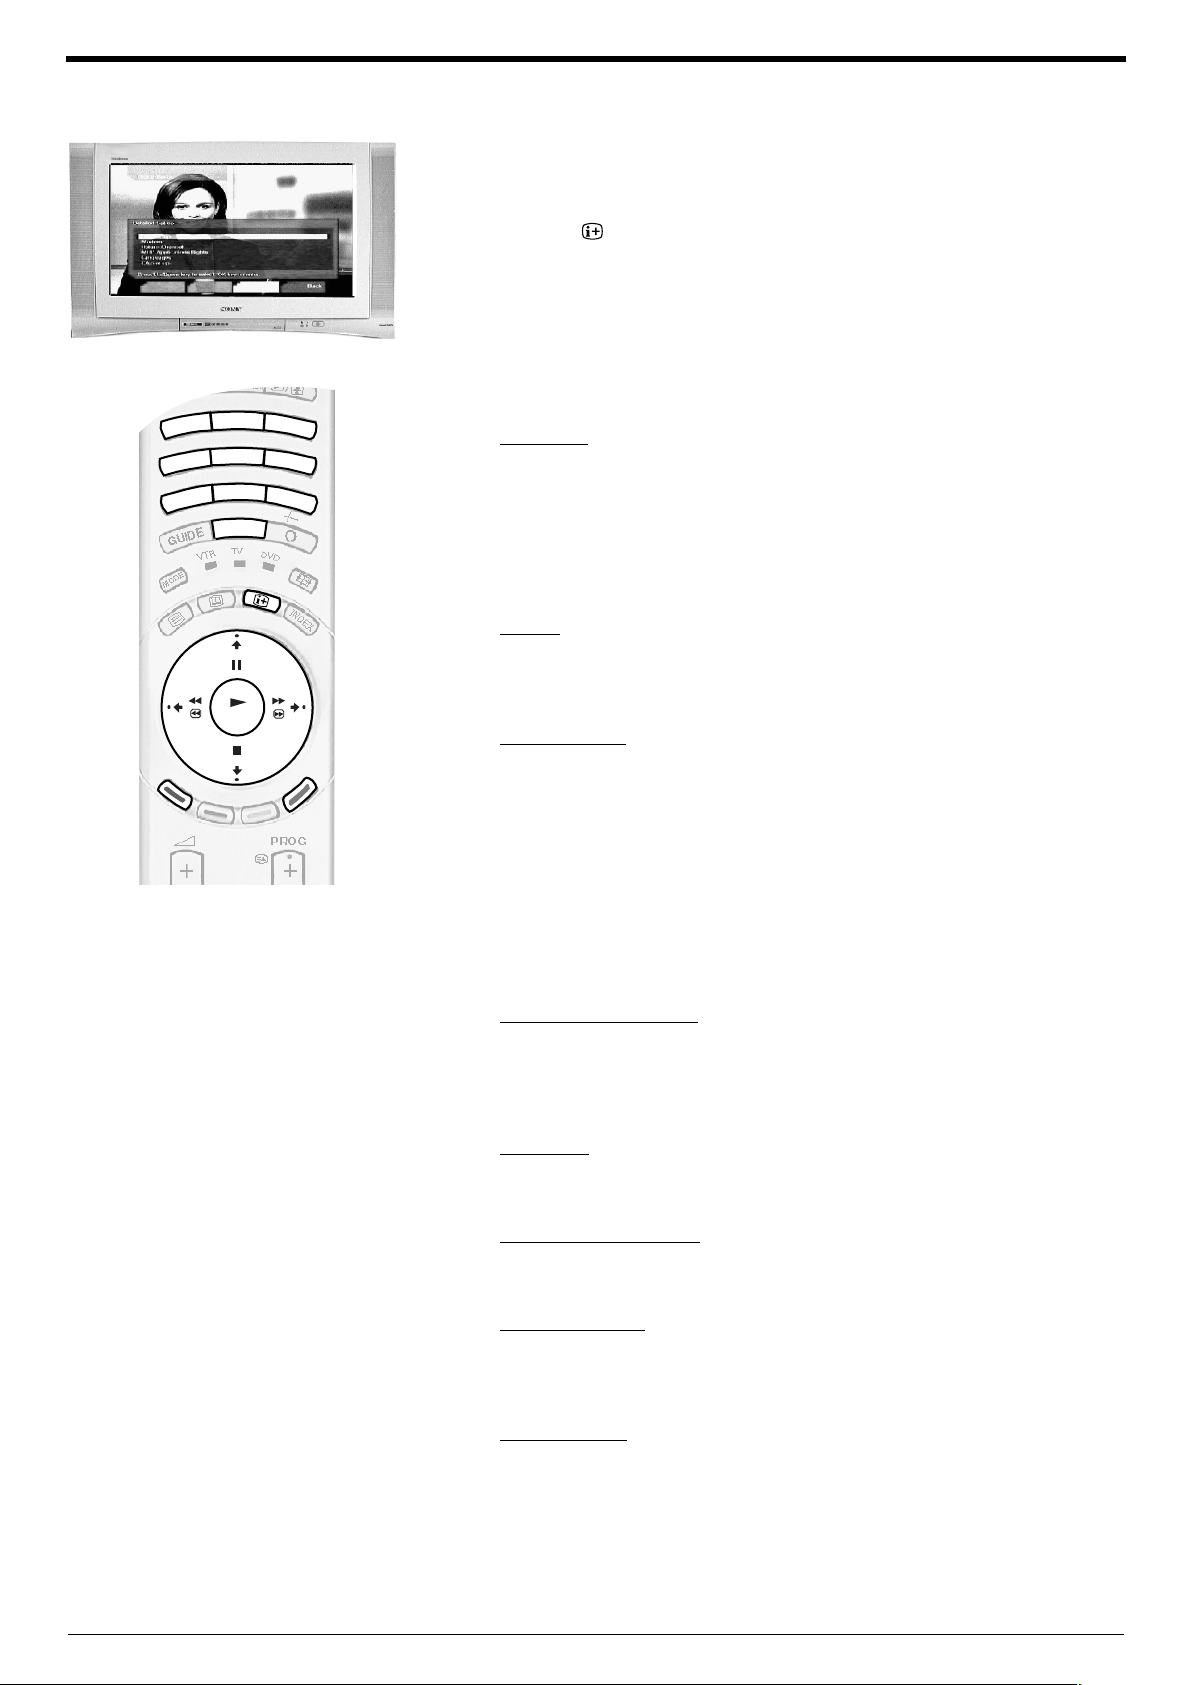
Detailed set-up
Use this option to change your PIN number, modem settings and languages etc.
Press the button, then the BLUE button on the remote control to display the
1.
Main Menu.
Press the V or v button to highlight ‘Detailed Set-up’, then press the OK button
2.
to display the Detailed Set-up menu.
If you wish to change any of the settings on the menu screen, press the V or v
3.
button to select your chosen item then press the OK button to display the
relevant sub menu.
PIN Set-up
This allows you to exercise parental control over programme viewing. Enter
your existing PIN and press OK. Use the numbered buttons on your remote
control to enter your new number, then enter again to confirm. Press the OK
button then the BLUE button to return to the Detailed Set-up menu.
Note:
If you have forgotten your PIN code, please use 9999. This PIN code will always be
accepted.
Modem
This allows you to set up the supplied modem. Press the V or v button to select
your chosen item on the screen then press the OK button to confirm. Press the
V or v button to change the setting then press the OK button to store. Press
the BLUE button to return to the Detailed Set-up menu.
Return Channel
Press the V or v buttons to select your chosen item on the menu screen then
press the OK button to display the keyboard*. Press the RED button to clear any
existing name then, using the V, v, B or b buttons, select the first letter or
number you require. Press the OK button to display the letter or number in the
name box. Repeat the procedure until the name is complete then, after using
the V, v, B or b buttons to highlight DONE, press the OK button. Finally, press
the BLUE button to return to the Detailed Set-up menu.
Note:
If you select ‘Default ISP’ or ‘DNS IP Address’ you need to use the numbered buttons on
your remote control to input your new settings. Once complete, press the OK button to
confirm.
MHP Applications Rights
This allows you to set your preferences and also limit some MHP Applications.
Press the V or v buttons to select your chosen item on the screen, then press
the OK button to confirm. Press the V or v button to change the setting as
desired, then press the OK button to store the new setting. Press the BLUE
button to return to the Detailed Set-up menu.
Languages
Press the V or v button to select the Audio Language you want, then press the
OK button to confirm and store the new setting. Press the BLUE button to return
to the Detailed Set-up menu.
Manufacturer information
This is an information screen only and confirms the signal strength and which
versions of hardware and software are available. Press the BLUE button to
return to the Detailed Set-up menu.
Software Upgrade
This allows the TV to automatically upgrade its software when a new version is
transmitted. Press the V or v buttons to set to ‘Yes’ or ‘No’ then press the OK
button to store. When set to ‘Yes’, any new operating software is automatically
downloaded when released. We recommend this option is set to ‘Yes’.
Factory settings
Press the OK button to select ‘Clear Personal Settings’ (this returns all your
digital settings to their factory pre-set levels).
18
Once you have made all the changes you require in the Detailed Set-up menu,
4.
press the BLUE button repeatedly to remove all menus from the TV screen.
Note:
The CA Set-up option is explained on the following page.
Page 21
OK
OK
The Main menu
Digital features
CA Set-up
(depending on availability of service)
This feature allows you to access a pay-TV service once you have obtained a Conditional
Access Module (CAM) with a viewing card. Please contact a pay-TV supplier for details.
Switch off the TV and unplug from the mains.
1.
Insert the CAM into the socket on the rear of the TV as shown. Take care
2.
not to damage the CAM when inserting.
Note:
A door was supplied with the stand assembly to cover the rear sockets of this TV. If you
have already attached this cover, you will have remove it to gain access to the CAM
socket.
Viewing card
and CAM
Insert your viewing card into the CAM.
3.
Connect the TV to the mains and switch on.
4.
Press the button, then the BLUE button on the remote control to display the
5.
Main Menu.
Press the V or v button to highlight ‘Detailed Set-up’, then press the OK button
6.
to display the Detailed Set-up menu.
Press the V or v button to highlight ‘CA Set-up’, then press the OK button to
7.
display the supplier’s set up menu.
For further information regarding the available services, please contact a pay-TV supplier.
Personal Information
Use this option to enter personal information such as your e-mail name and address.
Press the button, then the BLUE button on the remote control to display the
1.
Main Menu.
Press the V or v button to highlight ‘Personal Information’, then press OK to
2.
display the Personal Information menu.
If you wish to change your user name, address or e-mail, press the V or v button
3.
to highlight your chosen option then press the OK button to display a keyboard.
Press the RED button to clear the existing name or address. Press the V, v, B
and b buttons to select the letter or number you require then press the OK
button to display the letter/number in the name box. Repeat this procedure until
the new name is complete, then after using the V, v, B and b buttons to highlight
DONE, press the OK button to return to the ‘Personal Information’ menu.
If you wish to change the MHP Applications Font Size, press the V or v button
4.
to highlight ‘MHP Applications Font Size’ then press the OK button to confirm.
Press the V or v button to change the existing font size, then press the OK
button to confirm.
Press the BLUE button repeatedly to remove all menus from the TV screen.
5.
19
Page 22
Digital features
OK
D
IG
IT
A
L
D
IG
IT
A
L
INDEX
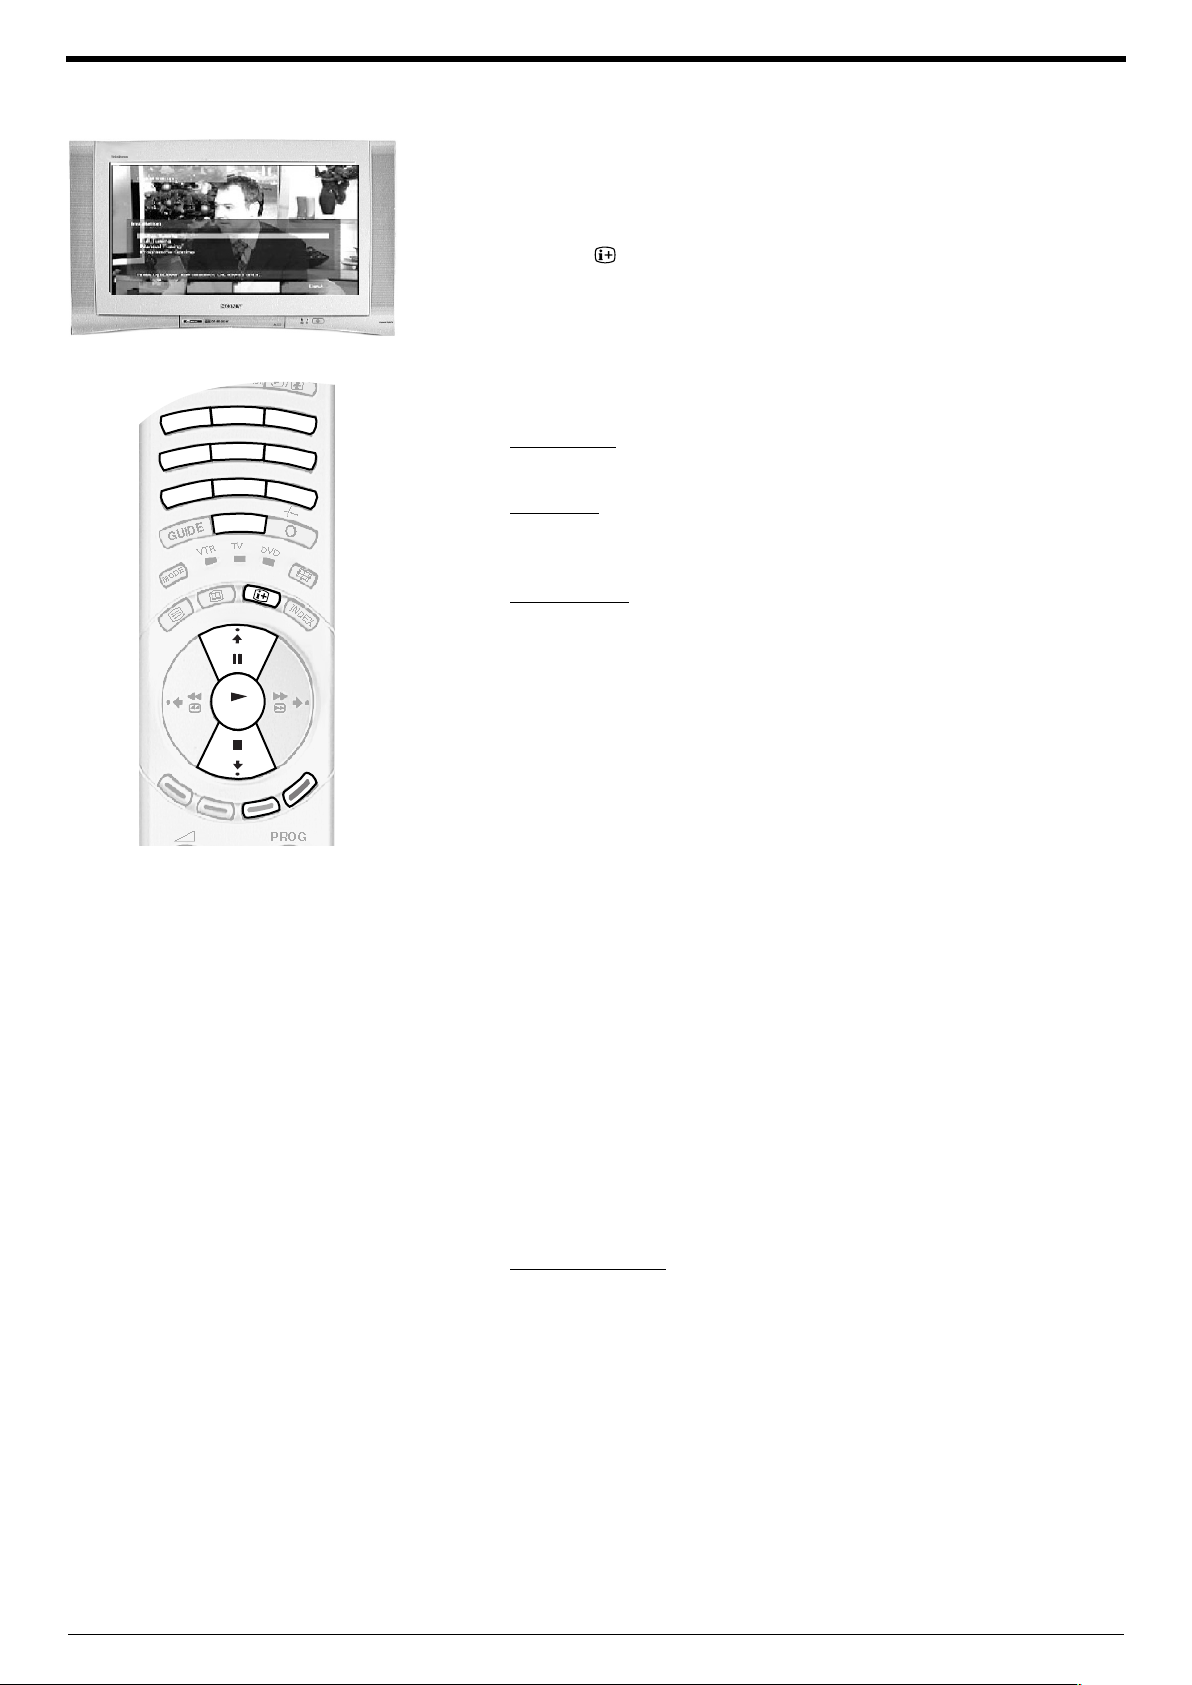
The Channel Index menu
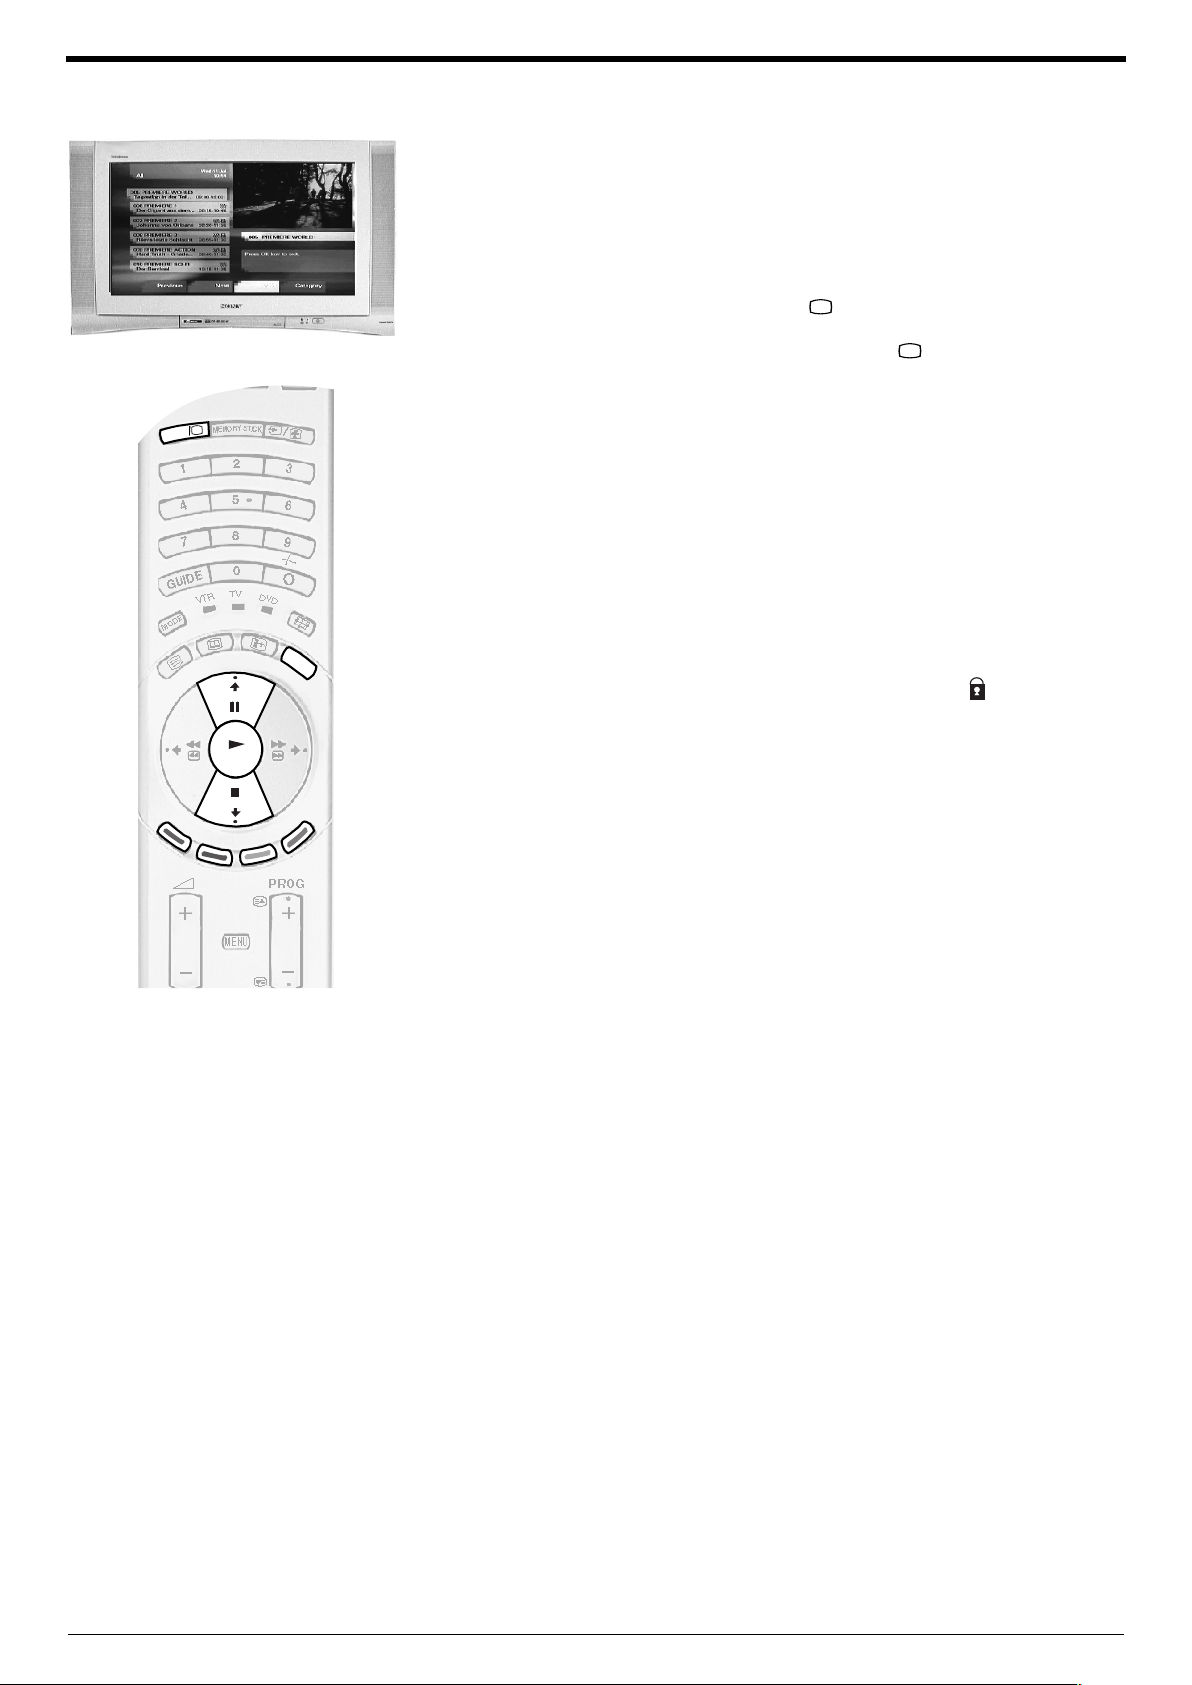
The Channel Index menu provides a quick and easy way to:
a) View a complete list of the programmes available for selection
b) Obtain a preview of the programmes currently being broadcast
c) Create a list relating to a category of programme, e.g. Sports or Movies
d) Store channels into a personal favourite list
The Channel Index menu is only available in digital mode. To check you are
1.
in digital mode, press the DIGITAL/ button on the remote control. An
information banner appears briefly on screen when you change channels. If
the banner does not appear, press the DIGITAL/ button.
Press the INDEX button to display the Channel Index menu. This menu
2.
contains a list of all available programmes. The highlighted programme is
previewed in the top right corner of the screen with its number and channel
name displayed below it.
Press the V or v buttons to move up and down the list to highlight your
3.
desired programme. If you do not wish to view one of the 6 programmes
displayed, press the RED or GREEN button to display the previous or next 6
programmes.
Once the programme you want is highlighted, press the OK button to preview
4.
the programme on screen. If however, you have previously allocated a
Parental Control age limit in the Main Menu, and the programme exceeds that
limit, you will be asked to enter your PIN before the preview is allowed.
Programmes that exceed the age limit are identified by a symbol.
Press the OK button to confirm your choice and exit the Channel Index menu.
5.
To store a channel in your favourites list
With the Channel Index menu on screen, press the V or v buttons to highlight
1.
the channel you want as a favourite.
Press the YELLOW button to display the ‘Add’ pop-up menu. Press the V or
2.
v buttons to select the personal folder in which you wish to store the channel,
then press OK to confirm.
Press the OK button to exit the Channel Index menu.
3.
To select a category of programme
With the Channel index menu on screen, press the BLUE button to display
1.
the ‘Category’ pop-up menu.
Press the V or v buttons to select a category then press the OK button to
2.
confirm. The Channel Index will now only contain programmes relating to
your chosen category.
Some examples of category types are as follows:
Choice This is a list compiled from the programmes you view most
often.
Recent Prog. This list contains the last 5 channels you have watched.
Fav1 This list contains channels you have stored in this folder
as favourites.
Movies This list contains all the movies available for viewing.
All Programmes This is a complete list of all available programmes.
20
The type of programme category you choose is displayed at the top of the
3.
list along with the date and time of day.
Press the OK button to exit the Channel Index menu.
4.
Page 23
D
IG
IT
A
L
D
IG
IT
A
L
OK
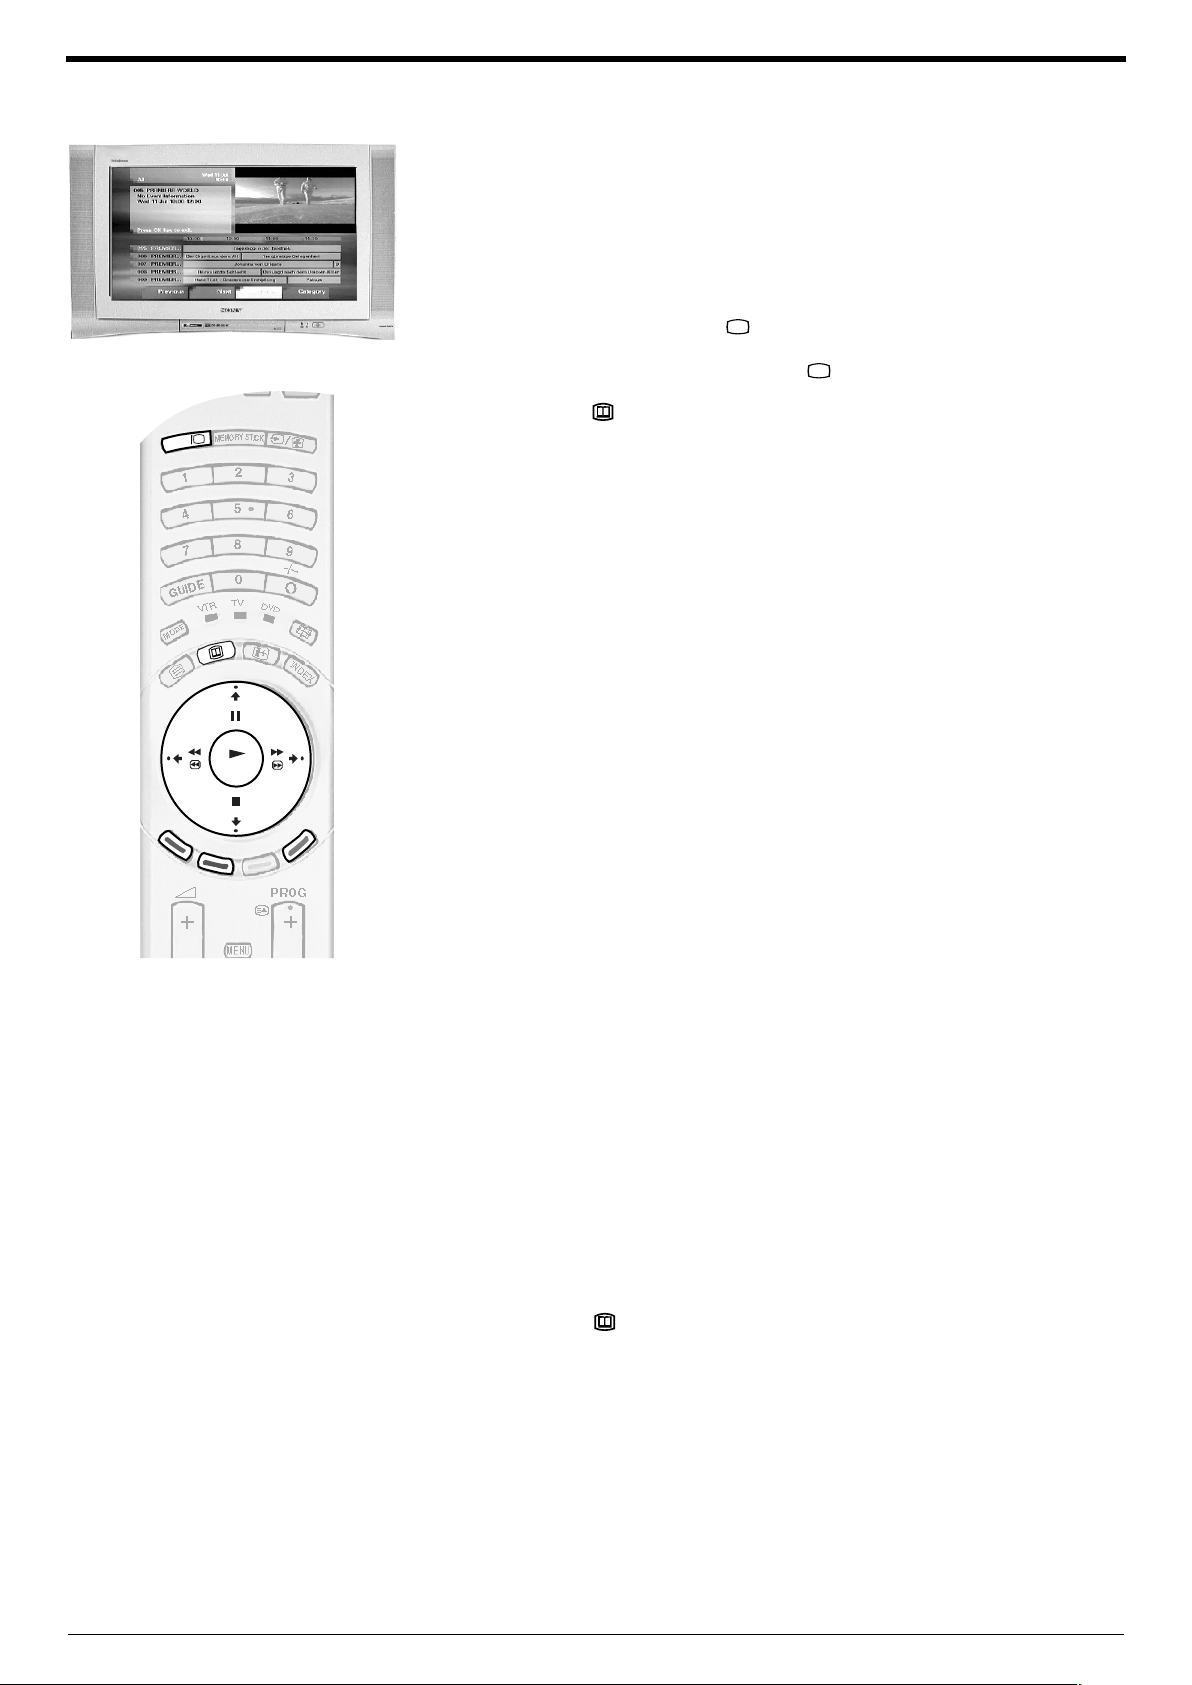
The EPG menu
Digital features
The EPG (Electronic Programme Guide) menu provides a quick and easy way to:
a) View a complete list of programmes available.
b) Obtain a preview of the programmes currently being broadcast.
c) Create a list relating to a category of programme, e.g. Sports or Movies.
d) Record programmes.
The EPG menu is only available in digital mode. To check you are in digital
1.
mode, press the DIGITAL/ button on the remote control. An information
banner appears briefly on screen when you change channels. If the banner
does not appear, press the DIGITAL/ button.
Press the button to display the EPG menu on screen. This menu consists
2.
of an event information box, a preview screen, a 2 hour timer bar (divided into
30 minute intervals) and a 5 channel programme list covering the 2 hour
period.
Press the V, v, B and b buttons to move around the list. As each programme
3.
is highlighted, a brief description of the programme appears in the event box
at the top left of the menu. If you press the b button after highlighting the last
programme on the right, the programme schedule for the next 2 hour period
is displayed. Press the RED or GREEN button when you wish to view the
previous or next 5 channels and their programmes.
If a programme you highlight is currently being broadcast, you will be
4.
prompted to press the OK button to obtain a preview. If however, you have
previously allocated a Parental Control age limit in the Main Menu, and the
programme exceeds that limit, you will be asked to enter your PIN before the
preview is allowed.
Press the OK button to confirm your choice and exit the EPG menu
5.
To select a category of programme
With the EPG menu on screen, press the BLUE button to display the
1.
‘Category’ pop-up menu.
Press the V or v buttons to highlight the category you want, then press the
2.
OK button. The EPG programme list will now only contain programmes of the
type selected.
Some examples of category types are as follows:
Choice This is a list compiled from the programmes you view most
often.
Recent Prog. This list contains the last 5 channels you have watched.
Fav1 This list contains channels you have stored in this folder
as favourites.
Movies This list contains all the movies available for viewing.
All Programmes This is a complete list of all available programmes.
Your chosen category is displayed at the top of the list along with the date
3.
and time of day.
Press the button to exit the EPG menu.
4.
21
Page 24
Digital features
OK
The EPG menu
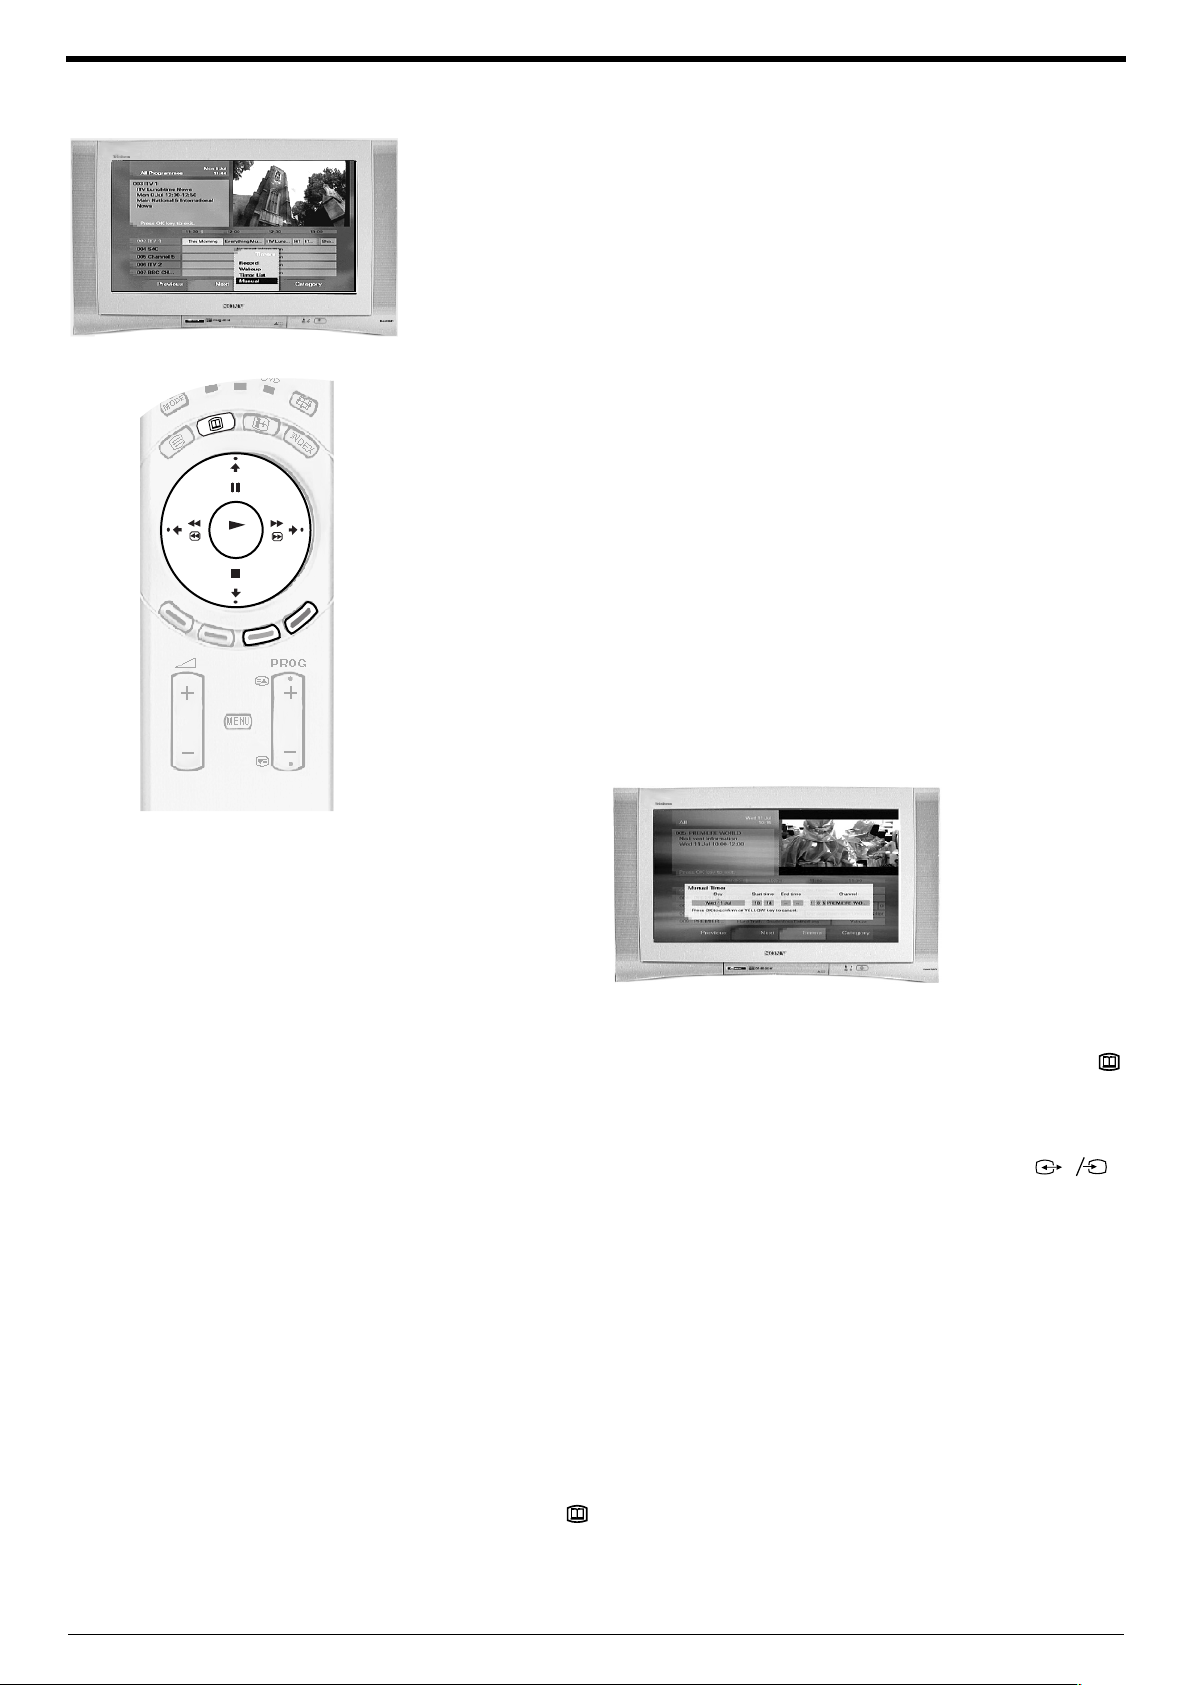
To select a programme for recording or timed display
With the EPG menu displayed press the V, v, B and b buttons to highlight a future
programme, then press the YELLOW button to display the ‘Timers’ pop-up menu. This
option allows you to choose from a) Record, b) Wakeup or c) Manual.
a) Record
Highlight ‘Record’ and press the OK button to automatically set your VCR to record the
selected programme.
Note:
This option only works if your VCR has Smartlink capability and is connected to the AV3 socket on
the rear of the TV. If you do not have a Smartlink VCR, you must now set the timer recording
function of your VCR to switch on and off to correspond with the programme you have stored for
recording.
When a programme has been set for recording, a solid red bar appears under the timer
bar in the menu. This coloured bar shows the time allocated for recording and reminds
you that you are unable to record other programmes during that time period.
b) Wake up
Highlight ‘Wake up’ and press OK if you wish the future programme you selected to
automatically appear on screen when transmission starts. When you use this option a
solid green bar appears under the timer bar in the menu. This indicates that a wake up
request has been activated. Just before transmission begins, a reminder will appear on
screen asking you if you still wish to view the programme.
c) Manual
Highlight ‘Manual’ and press OK if you wish the TV to output a channel to your VCR for
recording when the transmission begins. The following display appears.
Press the V or v button to set the day of recording, then press the b button to move to
the start time. Repeat this procedure to set the start and stop times and the channel
number, then press the OK button to store and return to the EPG menu. Press the
button to remove the EPG menu. Unless you have a Smartlink VCR, you must now set
the timer recording function of your VCR to switch on and off to correspond with the
programme you have stored for recording.
Notes on recording:
The ‘Manual’ feature only works if you have connected your VCR to the AV3 socket
on the rear of the TV. After you have programmed a recording you can put the TV into its standby
mode, but do not switch off completely or the recording will be cancelled. If you put the TV into
standby mode, the standby indicator on the front of the TV flashes green periodically to remind you
a recording has been programmed. Once a programme has started recording, do not change
channels or switch to analogue mode or the recording will be cancelled.
3
3
s
s
3
3
22
The Timers pop-up menu also has a ‘Timer List’ option. If you highlight this and press the
OK button, a screen is displayed showing all the programmes you have set for recording
or wake up. To delete one of these programmes, proceed as follows:
Press the V or v button to highlight the programme you wish to delete, then
1.
press the YELLOW button to display the ‘Timers’ pop-up menu.
Press the v button to highlight ‘Remove’, then press the OK button to confirm.
2.
Press to return to normal TV operation, or press the BLUE button to
3.
return to the EPG menu.
Page 25
TV menu system
OK
MENU
OK
The following pages explain the TV set up menus and their operation. Although most of these menus can be accessed when watching
digital programmes, we recommend you view them in analogue mode. To check which mode you are in, press the button on the
remote control. If you are watching a digital programme, an Info display appears on screen providing brief details for the current and
next programme. If this happens, press the DIGITAL/ button on the remote control to switch to analogue channels.
Using the TV menu system
This TV contains a menu system which is based on a series of on screen displays.
These displays help you get the most from your TV, from customising the picture and
sound to accessing advanced features. Use the following buttons on the remote control
to operate the TV menu system.
Press the MENU button to display the main menu.
1.
Use the following buttons to operate the menu:
2.
- Press the v or V buttons to highlight the required menu or option.
- Press the b button to enter the required menu or option.
- Press the B button to return to the last menu or option.
- Press the v, V, B or b buttons to alter the settings of the selected option.
- Press the OK button to confirm and store your selection.
Press the MENU button to remove the menu from the TV screen.
3.
Picture Adjustment menu
This menu allows you to customise the picture. Highlight the required option and press
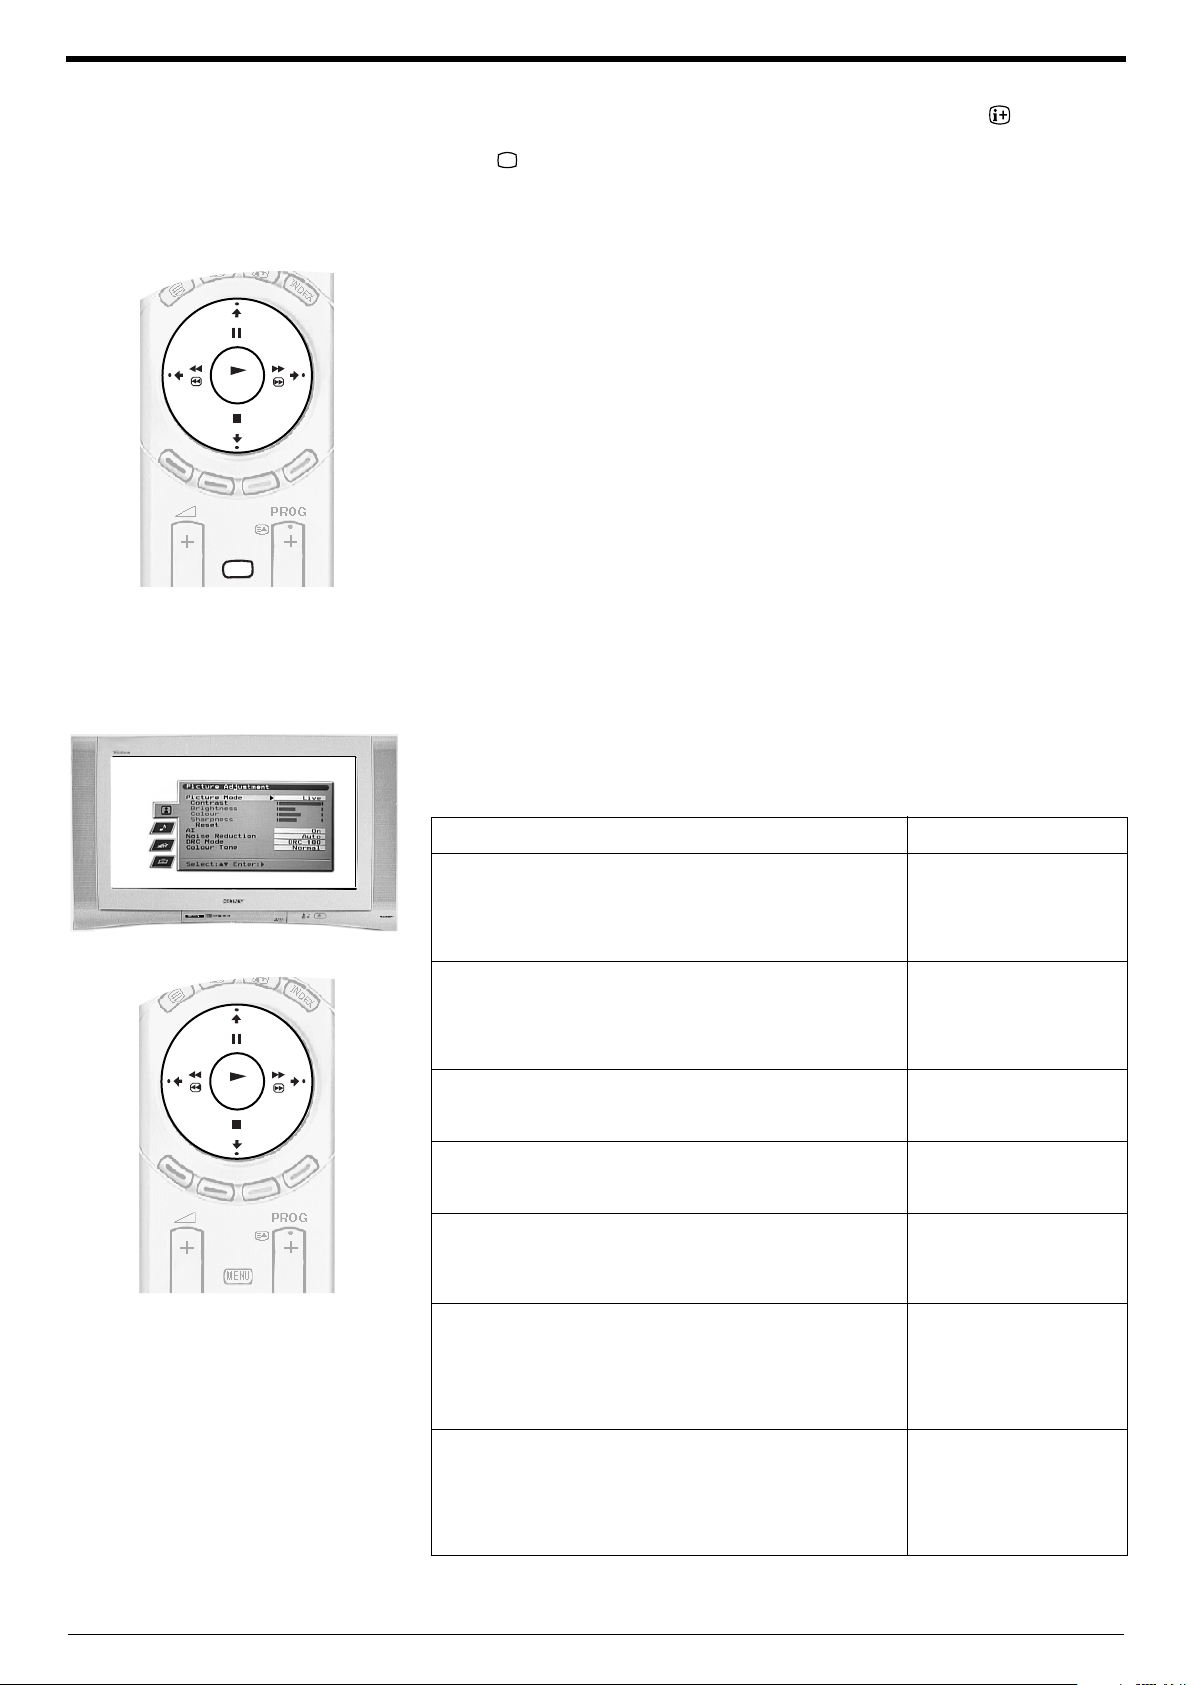
b to select. The table below explains each option and how to use it.
Option How to use
Picture Mode
This option allows you to select one of four picture modes. Live,
Movie and Game modes are preset and only Contrast can be
adjusted. The Personal mode, however, also allows you to
adjust the Brightness, Colour and Sharpness options.
Contrast, Brightness, Colour, Sharpness
These options allow you to adjust the contrast, brightness,
colour and sharpness.
Note: Brightness, Colour and Sharpness can only be
adjusted when Picture Mode is set to Personal.
Reset
This option resets all picture settings to the factory preset levels. Press b to restore default
AI (Artificial Intelligence)
This option monitors the picture and limits any sudden increases
in Brightness and Contrast.
Noise Reduction
Sometimes a weak signal can produce a snowy picture (called
Picture Noise). This option can help to reduce this effect.
Press V or v to select Live,
Personal, Movie or Game.
Press OK to confirm.
Press B or b to set the
levels. Press OK to
confirm.
picture settings.
Press V or v to select On or
Off. Press OK to confirm.
Press V or v to select High,
Mid, Low, Auto or Off.
Press OK to confirm.
DRC Mode
DRC (Digital Reality Creation) Mode allows you to enjoy higher
quality pictures. The settings available are:
Off: Basic 100Hz picture quality.
DRC 50: Improved picture resolution.
DRC 100:Optimum picture resolution
Colour Tone
This option allows you to alter the tint of the picture. The settings
available are:
Warm : Gives the white colours a red tint.
Normal: Gives the white colours a neutral tint.
Cool: Gives the white colours a blue tint.
Press V or v to select Off,
DRC 50 or DRC 100. Press
OK to confirm.
Press V or v to select
Warm, Normal or Cool.
Press OK to confirm.
23
Page 26
TV menu system
OK
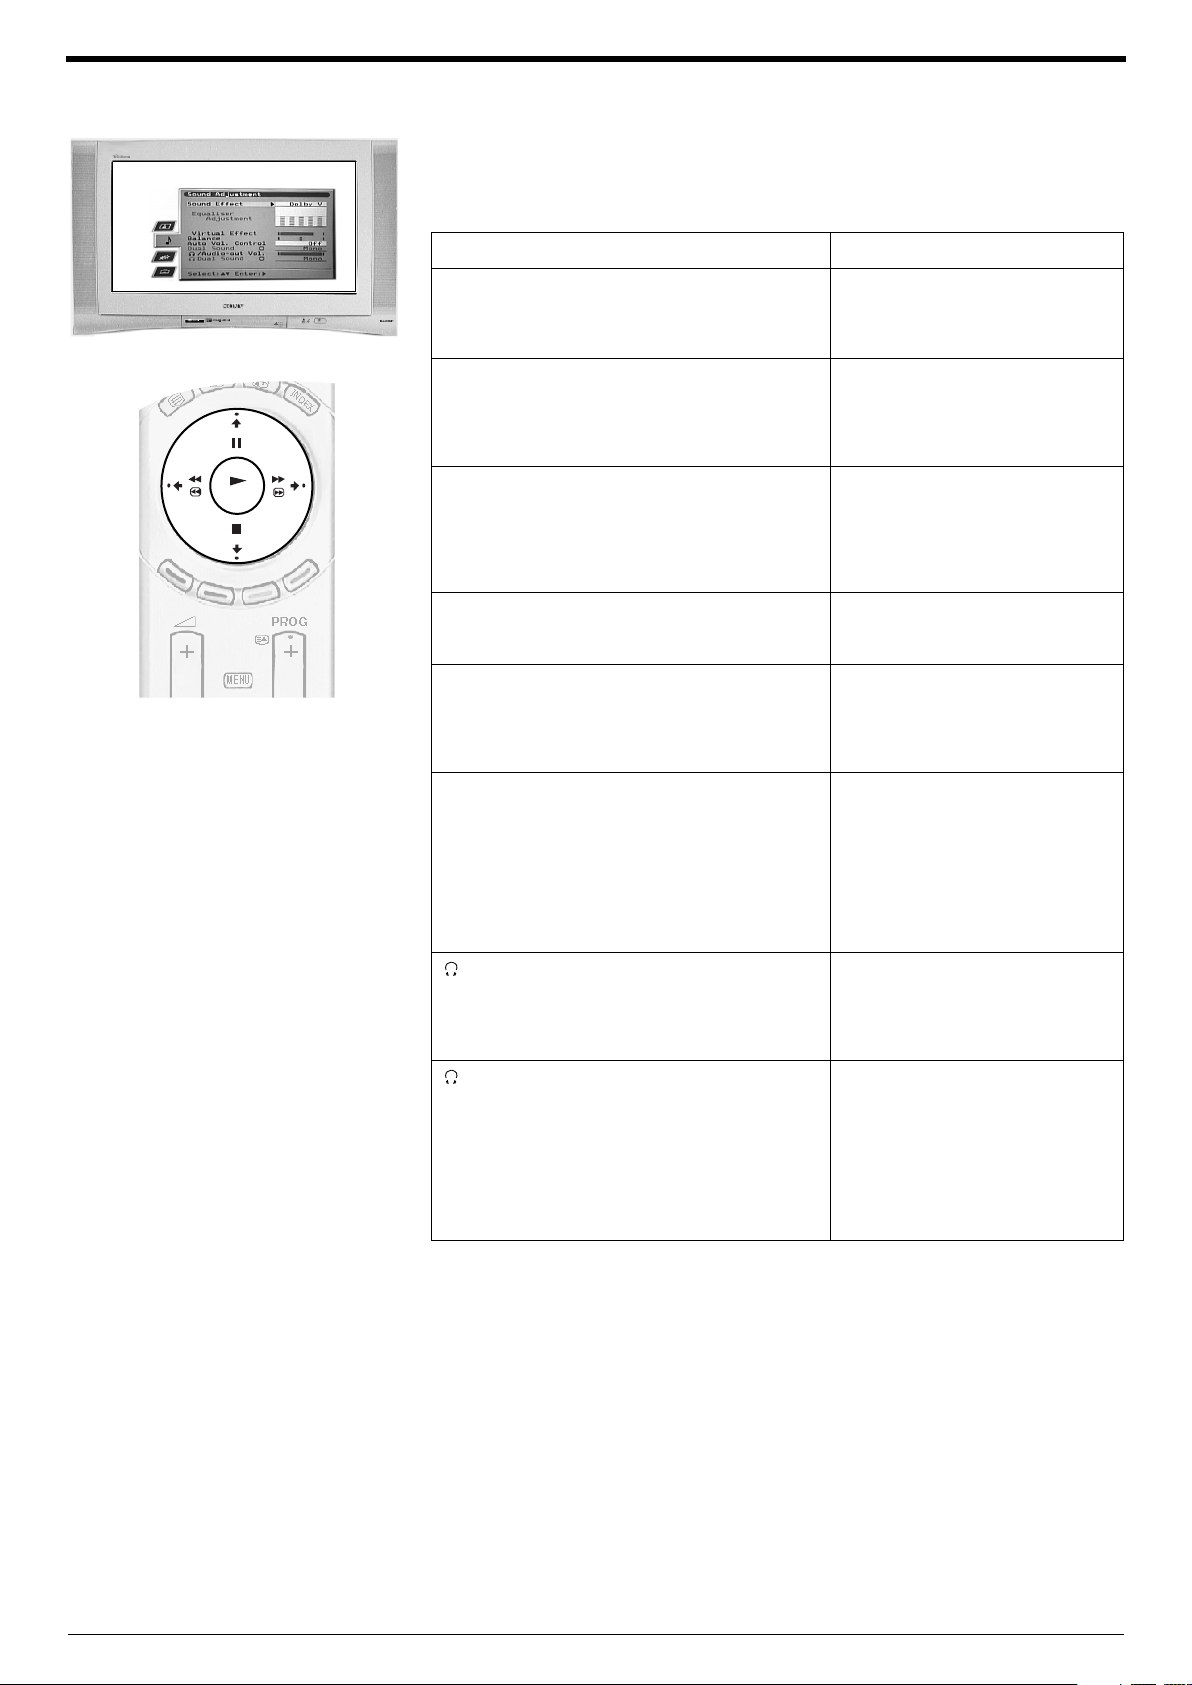
Sound Adjustment menu
This menu allows you to customise the sound. Highlight the required option and press
b to select. The table below explains each option and how to use it.
Option How to use
Sound Effect
This option allows you to select one of four sound
modes.
Press V or v to select Personal, Dolby
V*, Dynamic** or Natural**. Press OK
to confirm.
Equaliser Adjustment
This option allows you to customise the sound by
adjusting five frequency bands.
Note: This feature is only available when Sound
Effect is set to Personal.
Virtual Effect
This option allows you to adjust the level of the
surround sound effect when listening to a Dolby
surround sound broadcast.
Note: This option is only available when Sound
Effect is set to ‘Dolby V’.
Balance
This option allows you to set the balance of sound
between the left and right speakers.
Auto Vol. Control
Sometimes the broadcast volume level changes (e.g.
adverts tend to be louder than programmes). This
option allows you to cancel this effect, giving a
constant volume level.
Dual Sound
When receiving a bilingual broadcast: This option
allows you to choose which language to listen to.
When receiving a stereo broadcast: This option
allows you to choose between mono or stereo sound.
Press B or b to select the required
band. Press V or v to adjust the
frequency level. Press OK to confirm.
Press B or b to set the level of effect.
Press OK to confirm.
Press B or b to set the balance. Press
OK to confirm.
Press V or v to select Off or On.
Press OK to confirm.
Press V or v to select A to listen to the
first language or B to listen to the
second language. Press OK to
confirm.
Press V or v to select Mono or Stereo.
Press OK to confirm.
/Audio-out Vol.
This option allows you to simultaneously set the
volume level for the headphone socket and the
volume level of the Audio output sockets on the rear
of the TV.
Dual Sound
When receiving a bilingual broadcast: This option
allows you to choose which language to listen to.
When receiving a stereo broadcast: This option
allows you to choose between mono or stereo sound.
Notes:
* When ‘Dolby V’ is selected, the TV simulates the full effects of Dolby Pro Logic Surround sound
without the need for additional speakers. Manufactured under license from Dolby Laboratories.
‘Dolby’, ‘Pro Logic’ and the double D symbol are trademarks of Dolby Laboratories.
** ‘Natural’ and ‘Dynamic’ are functions of the ‘BBE High Definition Sound System’. This system
enhances clarity, detail, presence of sound and increases musical realism.
Press B or b to set the volume for the
headphone and Audio output sockets.
Press OK to confirm.
Press V or v to select A to listen to the
first language or B to listen to the
second language. Press OK to
confirm.
Press V or v to select Mono or Stereo.
Press OK to confirm.
24
Page 27

TV menu system
OK
OK
D
IG
ITA
L
D
IG
ITA
L
Features menu
This menu allows you to set the sleep timer and to set a signal to be output from the
AV3 socket. The table below explains each option and how to use it:
Auto Format
With this option switched on, the TV can automatically
adjust the picture size to suit the broadcast.
Format Correction*
(*only if ‘Auto Format’ is switched on)
When viewing 4:3 or 14:9 broadcasts there will be dark
areas visible at the edge of the screen. The settings
available are:
Off: Dark areas remain on the TV screen.
On: The TV automatically switches to Smart mode,
eliminating any dark areas on the TV screen.
Press V or v to select ‘On’ or ‘Off’.
Press OK to confirm.
Press V or v to select ‘On’ or ‘Off’.
Press OK to confirm.
Sleep Timer
This option allows you to set a period of time after which
the TV switches itself into standby mode. This can be in
10 minute intervals up to a maximum of 90 minutes.
AV3 O utp u t
This option allows you to set which signal source is
output from the AV3 scart socket (labelled ) on
the rear of the TV. If you connect a VCR to this socket
you can record from equipment connected to the other
sockets of the TV. The settings available are:
Ana. TV: Always outputs the tuned analogue TV signal.
Digi. TV: Always outputs the tuned digital TV signal.
AV1 : Outputs the signal from equipment connected
AV2 : Outputs the signal from equipment connected
AV3 : Outputs the signal from equipment connected
AV4 : Outputs the signal from equipment connected
to the socket on the rear of the TV.
to the socket on the rear of the TV.
to the socket on the rear of the TV.
to the socket on the front of the TV.
1
2
3/s 3
4/s 4
3/s 3
Press V or v to select the period of
time required. Press OK to
confirm.
Press V or v to select TV, AV1,
AV2, AV3 or AV4. Press OK to
confirm.
Set Up menu
This menu contains the following advanced features that allow you to customise the TV.
To check which mode you are in, press the button on the remote control. If you are
watching a digital programme, an Info display appears on screen providing brief details
for the current and next programme. If this happens, press the DIGITAL/ button on
the remote control to switch to analogue channels.
Auto Tuning
(for analogue channels only)
All the available channels were tuned in when the TV was first installed. The ‘Auto
Tuning’ option in the ‘Set Up’ menu allows you to repeat that process (e.g. to re-install
the TV at an alternative location or search for new channels that have been launched
by broadcasters). With the ‘Auto Tuning’ option highlighted, press b to select. The
autotune prompt appears on screen. Press OK to start the auto tuning process. When
all available channels have been tuned the TV returns to normal operation.
Programme Sorting
(for analogue channels only)
The ‘Programme Sorting’ option in the ‘Set Up’ menu allows you to change the order in
which the channels are stored on the TV. With the ‘Programme Sorting’ option
highlighted, press b to enter the ‘Programme Sorting’ menu. Press v or V to highlight
the channel you wish to move to a new position, then press b to select. Press v or V to
highlight the new position for your channel, then press OK. Your chosen channel has
now moved to the new position. Repeat to move other channels if required.
AV Preset
The ‘AV Preset’ option in the ‘Set Up’ menu allows you to assign a name to any
equipment connected to the AV sockets of the TV. The name is displayed briefly on
screen when the equipment is selected. With the ‘AV Preset’ option highlighted, press b
to enter the ‘AV Pres et’ menu. Press v or V to highlight the socket you wish to name.
Press b to select the LABEL column. Press v or V to select the first character. Press b
to confirm this character. Select the other characters in the same way (up to a
maximum of five characters). After selecting all required characters, press OK to store.
Manual Set Up
With the ‘Manual Set Up’ option highlighted, press b to enter the ‘Manual Set Up’ menu.
The ‘Manual Set Up’ menu is explained on the following page.
25
Page 28

TV menu system
OK
Manual Set Up menu
This menu gives you access to more advanced features. The options are:
Language/Country
When you first installed the TV you were asked to select your language and country.
The ‘Language/Country’ option in the ‘Manual Set Up’ menu allows you to change
these settings. With the ‘Language/Country’ option highlighted, press b to enter the
‘Language/Country’ menu. Press v or V to select ‘Language’ or ‘Country’. Press b to
select. Press v or V to highlight the required setting. Press OK to confirm.
Manual Programme Preset
With the ‘Manual Programme Preset’ option highlighted, press b to enter the ‘Manual
Programme Preset’ menu. The ‘Manual Programme Preset’ menu is explained on the
following page.
Further Programme Preset
With the ‘Further Programme Preset’ option highlighted, press b to enter the ‘Further
Programme Preset’ menu. The ‘Fur ther Programme Preset’ menu is explained on page
28.
RGB Set Up
When viewing signals from RGB equipment connected to the AV1 or AV2 sockets (e.g.
DVD player, PlayStation) the picture may need adjusting. The ‘RGB Set Up’ option in
the ‘Manual Set Up’ menu allows you to adjust the size and horizontal picture position
of signals from RGB equipment. With the ‘RGB Set Up’ option highlighted, press b to
enter the ‘RGB Set Up’ menu. Press b to select H Centre. Press v or V to centralise the
picture over a range of -10 to +10. Press OK to store. Press v to select H Size. Press v
or V to adjust the picture size over a range of -10 to +10. Press OK to store.
Note:
If there is no RGB equipment connected to either the AV1 or AV2 scart sockets the ‘RGB Set Up’
option will not be available.
Picture Rotation
Due to the Earth’s natural magnetism the picture might slant slightly. The ‘Picture
Rotation’ option in the ‘Manual Set Up’ menu allows you to cancel out this effect. With
the ‘Picture Rotation’ option highlighted, press b to select. Press v or V to rotate the
picture over a range of -5 to +5. Press OK to store.
Personal ID
The ‘Personal ID’ option in the ‘Manual Set Up’ menu allows you to enter a code which
could help to trace you should the TV be stolen and recovered. This code can only be
entered once - please make a note of it and keep it safe. With the ‘Personal ID’ option
highlighted, press b to select. Press v or V to display the first character of the code you
wish to use. Press b to select. Repeat until all characters have been entered. Press OK
to store. A confirmation screen is displayed. Press OK to confirm.
26
Page 29
TV menu system
OK
1
4
7
3
6
9
2
5
8
8
0
DIGITAL
DIGITAL
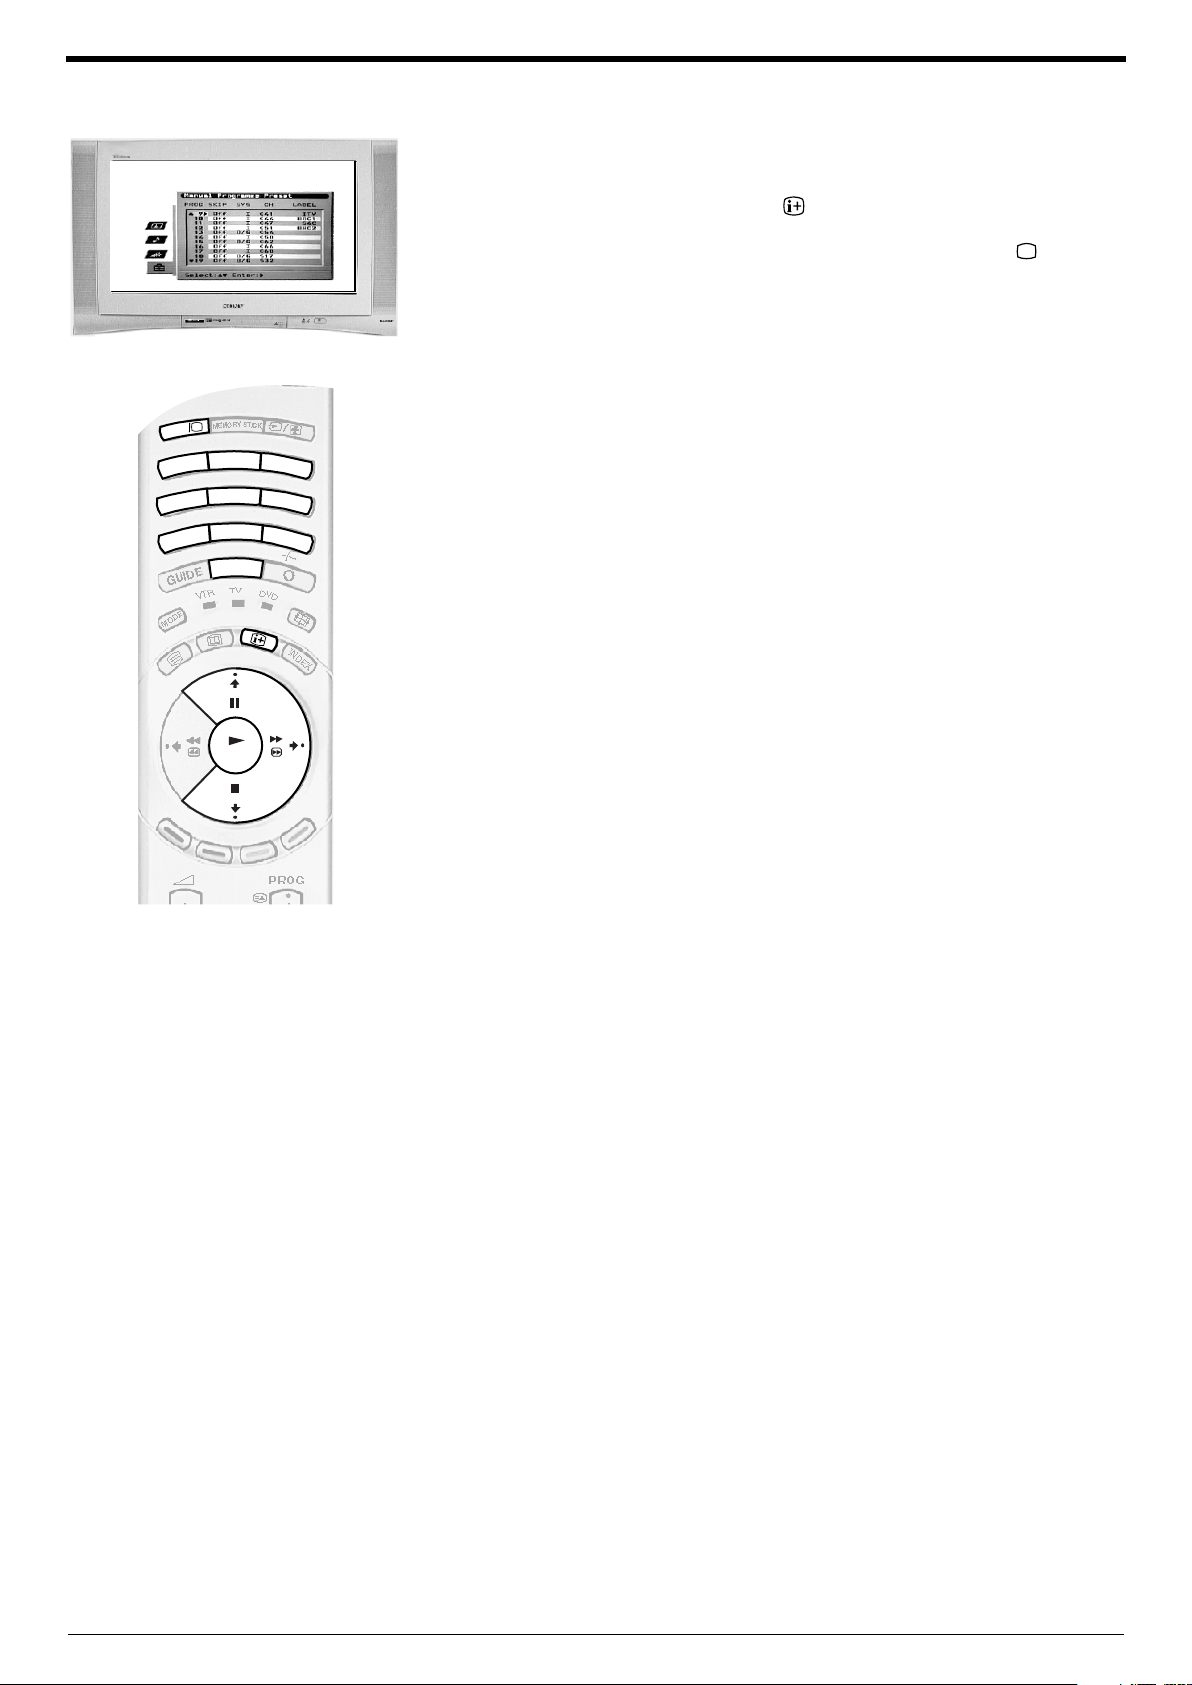
Manual Programme Preset menu
(for analogue channels only)
To check which mode you are in, press the button on the remote control. If you are
watching a digital programme, an Info display appears on screen providing brief details
for the current and next programme. If this happens, press the DIGITAL/ button on
the remote control to switch to analogue channels.
The ‘Manual Programme Preset’ option in the ‘Manual Set Up’ menu allows you to
manually tune in channels. With the ‘Manual Programme Preset’ option highlighted,
press b to enter the ‘Manual Programme Preset’ menu. Press v or V to highlight the
channel you wish to tune. Press b twice to select the SYS column. Press v or V to
select the TV broadcast system (Choose B/G or DK for TV broadcasts or EXT for an
external input source). Press b to confirm and select the CH column. Press v or V to
select the channel tuning (C for terrestrial channels, S for cable channels or F for direct
frequency input). Press b to confirm. You now need to tune the channel by one of the
following methods:
(a) If you know the channel number of the TV broadcast, the VCR test signal or the
frequency:
Press the numbered buttons on the remote control to enter the channel number.
Press OK to store.
(b) If you do not know the channel number:
Press v to select SEARCH. The TV set automatically searches for the next
available TV broadcast channel or the VCR test signal. When a channel has
been found press either OK to store or v to continue searching.
(c) For external input sources (EXT):
Press v to select AV1, AV2, AV3 or AV4 depending on which socket you have
connected your equipment to. Press OK to store.
Naming a channel
Names for channels are usually taken automatically from Teletext (if available). This
name will be displayed briefly on screen when the channel is selected. The ‘LABEL’
option in the ‘Manual Programme Preset’ menu allows you to assign a name of your
choice up to 5 characters or numbers. With the ‘Manual Programme Preset’ option
highlighted, press b to enter the ‘Manual Programme Preset’ menu. Press v or V to
highlight the channel number you require. Press b repeatedly to select the LABEL
column. Press v or V to select the first character. Press b to confirm this character.
Select the other characters in the same way. After selecting all required characters,
press OK to store.
Skipping a channel
The ‘SKIP’ option in the ‘Manual Programme Preset’ menu allows you to skip unused
channel positions when selecting channels with the PROG+/- buttons. However, you
can still select skipped channels by using the numbered buttons on the remote control.
With the ‘Manual Programme Preset’ option highlighted, press b to enter the ‘Manual
Programme Preset’ menu. Press v or V to highlight the channel number you require.
Press b to select the SKIP column. Press v to select On (select Off to remove the SKIP
feature). Press OK to store.
27
Page 30
TV menu system
OK
D
IG
IT
A
L
D
IG
IT
A
L
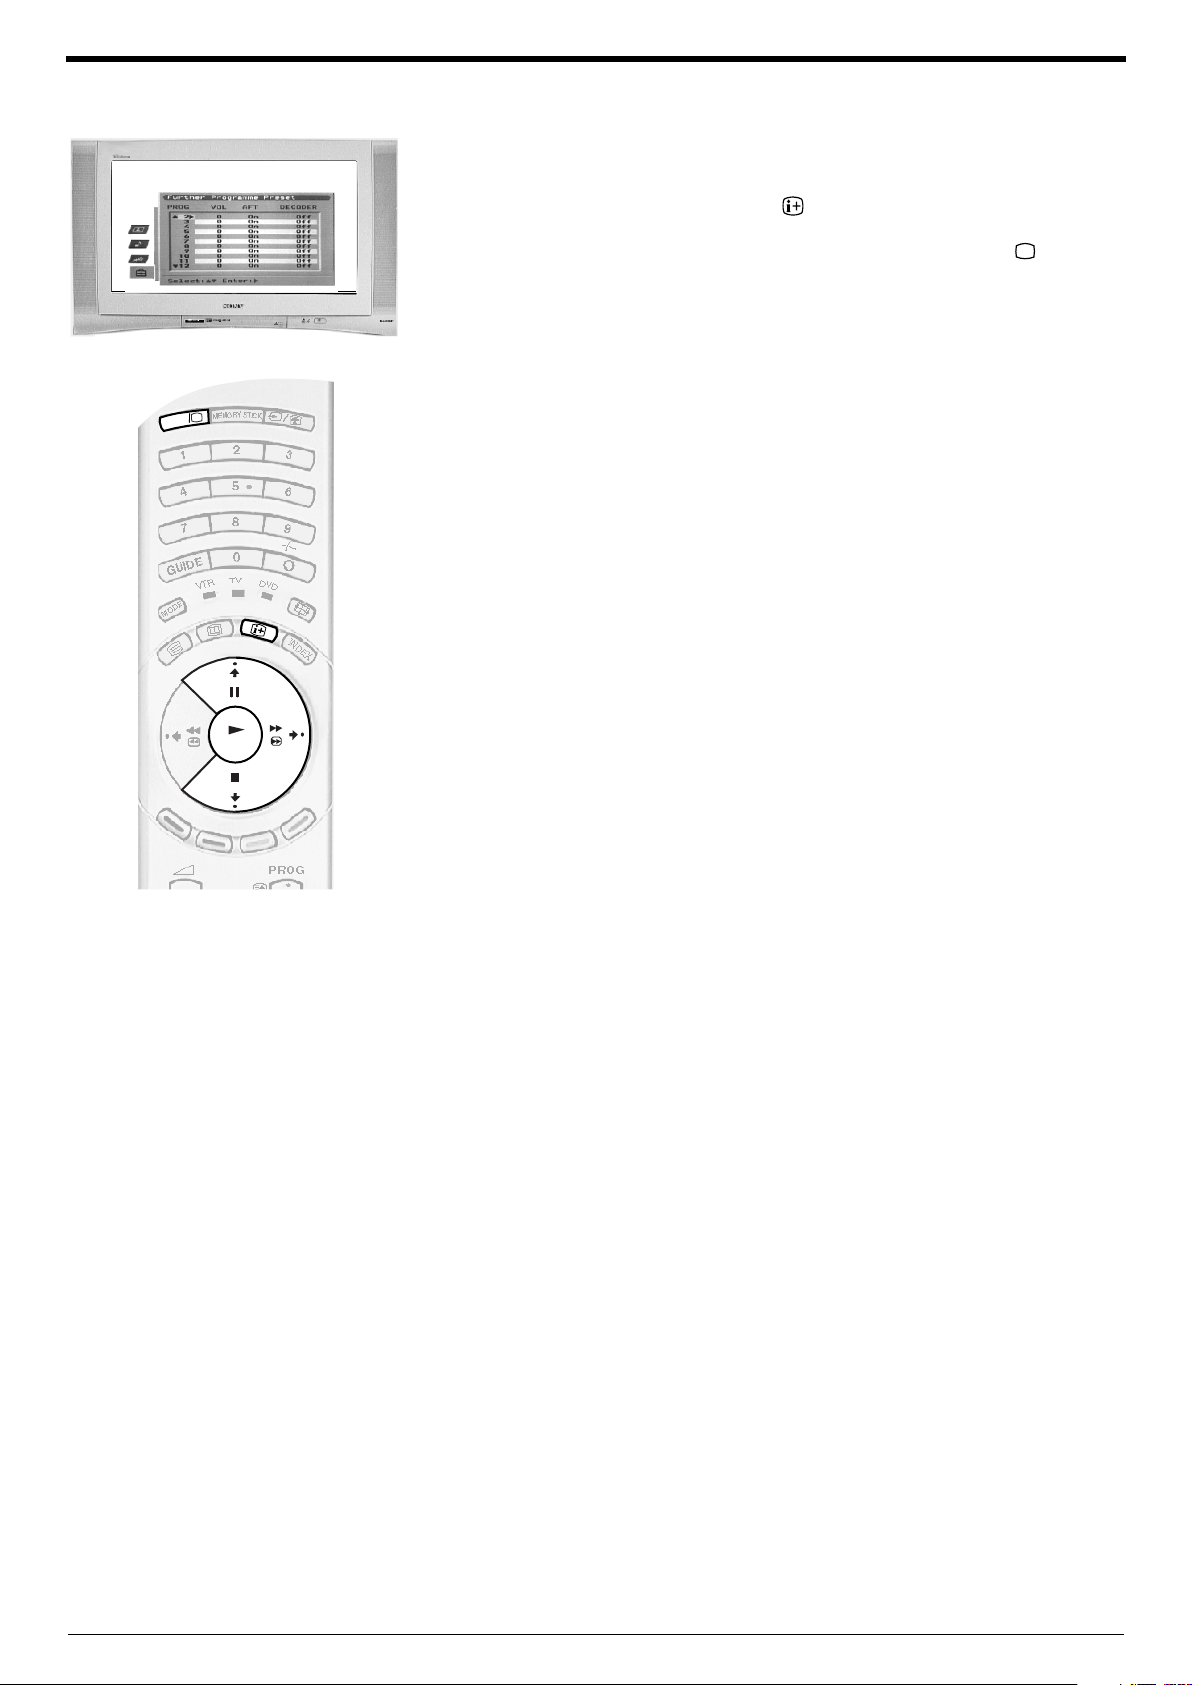
Further Programme Preset menu
(for analogue channels only)
To check which mode you are in, press the button on the remote control. If you are
watching a digital programme, an Info display appears on screen providing brief details
for the current and next programme. If this happens, press the DIGITAL/ button on
the remote control to switch to analogue channels.
The ‘Further Programme Preset’ option in the ‘Manual Set Up’ menu allows you to set
the volume level of an individual channel, fine tune the TV and set up a channel for
viewing signals from a Decoder. With the ‘Further Programme Preset’ option
highlighted, press b to enter the ‘Further Programme Preset’ menu. Press v or V to
highlight the channel number you require. Press b repeatedly to select one of the
following options:
(a) VOL (Volume Level Offset). This allows you to set the volume level for an
individual channel. Press v or V to adjust the volume level over a range of -7 to
+7. Press OK to store.
(b) AFT (Automatic Fine Tune). This allows you to fine tune a channel. Press v or V
to select On. Alternatively, press v or V to manually adjust the tuning frequency
over a range of -15 to +15. Press OK to store.
(c) DECODER. This allows you to set a channel for viewing scrambled signals (e.g.
from a pay TV decoder). Press v or V to select AV1 or AV3 depending on which
socket the equipment is connected to. Press OK to store. The unscrambled signal
now appears on the selected channel.
28
Page 31

M
EM
O
RY
STICK
Viewing Memory Stick pictures
A ‘Memory Stick’* is a new recording medium with a data capacity that exceeds a floppy
disk. It is specially designed for exchanging and sharing digital data among ‘Memory
Stick’ compatible products. Use ‘Memory Stick’ to display JPEG pictures (DCF version
1.0 format)** individually or as a slideshow presentation on the TV screen. Because it is
removable, ‘Memory Stick’ can also be used for external data storage.
Inserting a ‘Memory Stick’
Insert a memory stick into the front control panel of the TV set until it clicks into the
connector. The v symbol must be facing forwards. The red light flashes indicating that
the memory stick contents are being read.
Memory Stick operation
Removing a ‘Memory Stick’
Confirm that the red light is off. Do not pull the memory stick. You must push the
memory stick and then release. The memory stick will spring out.
Note:
*Data stored on a ‘Memory Stick’ may become damaged or erased if you remove the ‘Memory
Stick’ when it is reading or writing data.
The ‘Memory Stick’ menu
The ‘Memory Stick’ menu is displayed automatically when you insert the memory stick
into your TV set. Alternatively, if there is a memory stick already inserted, press the
MEMORY STICK button on the remote control to display the menu screen. There are 3
options available, namely ‘Index’, ‘Slideshow’ and ‘Setup’.
Notes:
Memory Stick’ and the logo are trademarks of Sony Corporation.
DCF (Design rules for Camera File systems) is a standard file name format for digital still cameras,
DV camcorders etc. It is supported by SONY and other manufacturers.
29
Page 32

Memory Stick operation
OK
D
IG
ITA
L
D
IG
ITA
L
MEMORY
STICK
D
IG
ITAL
D
IG
ITA
L
MEMORY
STICK
OK
Memory Stick Index
Page +
Page 1/3
Index
This feature enables you to view on screen the JPEG DCF format pictures from your
memory stick.
Press the MEMORY STICK button on the remote control to display the
1.
‘Memory Stick’ menu on the TV screen.
Press the V or v button to highlight ‘Index’ then press the OK button to
2.
display the ‘Memory Stick Index’ screen.
Press the v, V, B or b buttons to highlight the required picture, then press the
3.
OK button to display the picture fully on the TV screen.
Note:
Only a limited number of pictures can be displayed on the Index screen at one time. If
your required picture is not visible, highlight
view the next set of pictures. Press the v, V, B or b buttons to select your desired
picture then press the OK button to view.
Use the v, V, B or b buttons to highlight ‘Back’. Press the OK button to return
4.
to the ‘Memory Stick’ menu or press the DIGITAL/ button at any time to
return to normal TV operation.
‘Page +’ then press the OK button to
Slideshow
This feature allows you to display all the memory stick pictures as a slideshow
presentation on the TV screen.
Press the MEMORY STICK button on your remote control to display the
1.
‘Memory Stick’ menu on the TV screen.
Press the V or v button to highlight Slideshow.
2.
Press the OK button to start the slideshow. (To change the length of time an
3.
image is displayed refer to the ‘Setup’ section on the following page.)
Press the OK button during the slideshow to return to the ‘Memory Stick’
4.
menu. Press the DIGITAL/ button to return to normal TV operation.
30
Page 33

Memory Stick operation
OK
D
IG
ITA
L
D
IG
ITA
L
MEMORY
STICK
Setup
This feature allows you to (1) set the length of time for a picture to be displayed during a
slideshow, (2) set a slideshow to continuously repeat, (3) display file information and (4)
rotate a picture on screen
Press the MEMORY STICK button on the remote control to display the
1.
‘Memory Stick’ menu on the TV screen.
Press the V or v button to highlight ‘Setup’ then press the OK button to
2.
display the ‘Memory Stick Setup’ menu.
Press the v or V button to highlight the option you require. The table below
3.
explains each option and its function.
Press the DIGITAL/ button to return to normal TV operation.
4.
Option How to use
Back
Use this option to return to the
‘Memory Stick’ menu.
With ‘Back’ highlighted, press the OK button to return to
the ‘Memory Stick’ menu.
Slideshow - Interval
This option allows you to set the
length of time a picture is
displayed during a slideshow.
Slideshow - Repeat
This option allows you to set a
slideshow to continuously repeat.
File Information
This option enables you to
display information about the
picture during a slideshow.
Rotate Picture
This option allows you to rotate
the picture on screen.
With ‘Slideshow - Interval’ highlighted, press the OK
button to adjust. Press the v or V button to select 5 sec,
10 sec, 1 min, 5 min or 15 min, then press the OK button
to confirm your choice.
With ‘Slideshow - Repeat’ highlighted, press the OK
button to adjust. Press the v or V button to select ‘On’ or
‘Off’ then press the OK button to confirm.
Highlight ‘File Information’ then press the OK button to
adjust. Press the v or V button to select ‘On’ or ‘Off’ then
press the OK button to confirm your choice.
Highlight ‘Rotate Picture’ then press the OK button to
display the ‘Rotate Picture’ screen. Press the v, V, B or b
buttons to highlight the required image. Press the OK
button to rotate the picture. When ready, press the v, V, B
or b buttons to highlight ‘Back’ then press the OK button
to return to the ‘Memory Stick Setup’ menu.
31
Page 34

Memory Stick operation
D
IG
IT
A
L
D
IG
IT
A
L
OK
MENU
Adjusting settings of Memory Stick pictures
You can adjust the contrast, brightness, colour and sharpness settings of memory stick
pictures whilst they are displayed on the TV screen.
Display a memory stick picture on screen (see ‘Index’ section on page 30).
1.
Press the MENU button to display the ‘Picture Adjustment’ menu.
2.
Press the b button to enter the ‘Picture Adjustment’ menu. Press the v or V
3.
button to highlight the option you require. Press the b button to select.
Note:
Only the ‘Contrast’ ‘Sharpness’, ‘Brightness’ and ‘Colour’ options are available when
accessing the ‘Picture Adjustment’ menu whilst in Memory Stick mode.
Press the B or b button to set the level. Press the OK button to confirm.
4.
Press the MENU button to remove the ‘Picture Adjustment’ menu from the
5.
TV screen.
Press the DIGITAL/ button to return to normal TV operation.
6.
Note:
All the picture settings return to their normal levels when you press the DIGITAL/
button.
‘Memory Stick’ precautions
Label
• Do not remove the ‘Memory Stick’ while it is reading or writing data.
• We recommend that you make a backup copy of important data that you record on
the ‘Memory Stick’.
• When you set the ‘Memory Stick’ erasure prevention switch to ‘LOCK’, data cannot
be recorded, edited, or erased.
• Data may become damaged if:
- you remove the ‘Memory Stick’ or turn off the TV while it is reading or writing
data.
- you use the ‘Memory Stick’ in a location subject to the effects of static electricity
or electric noise.
• Do not attach anything other than the supplied label to the ‘Memory Stick’ labelling
position.
• Attach the label so that it does not stick out beyond the labelling position.
• Carry and store the ‘Memory Stick’ in its case.
• Do not touch the connector of the ‘Memory Stick’ with your finger or any metallic
object.
• Do not strike, bend, or drop the ‘Memory Stick’.
• Do not disassemble or modify the ‘Memory Stick’.
• Do not allow the ‘Memory Stick’ to get wet.
• Do not use or store the ‘Memory Stick’ in a location that is:
- extremely hot, such as in a car parked in the sun.
- under direct sunlight.
- very humid or subject to corrosive substances.
•‘Memory Stick’ supports JPEG DCF formatted files only. Any files not recognised
as DCF format will be displayed as “--------” . JPEG DCF formatted files that have
been created or modified on a PC may not appear correctly on the TV screen.
Erasure prevention switch
32
Page 35

D
IG
IT
A
L
D
IG
IT
A
L
Connecting Other Equipment to the TV
A wide range of equipment can be connected to the TV through the front and rear sockets.
Connecting equipment to the rear sockets
C
Connecting other equipment
B
VCR
DVD
Decoder/Set top box
(SMARTLINK)
s
3
3
VCR
2
DVD
1
DIGITAL
L/G/S/I
OPTICAL OUTPUT
MODEM
. . .
5V 200mA
D F
ANALOGUE
R/D/D/D
A
Modem
Hi-Fi
Connecting a DVD player
Connect a scart lead from the B socket of the TV to a scart socket on your
1.
DVD player (refer to your DVD instruction manual)
Insert a DVD into the DVD player, then press the ‘PLAY’ button. The picture
2.
appears automatically on the TV.
If not, press the / button on the remote control repeatedly until the
picture appears on screen.
E
MD/DAT player
Note:
Connecting cables are not supplied.
Press the DIGITAL/ button when you wish to return to normal TV
3.
operation.
Connecting a Decoder/Set top box
Connect a scart lead from the A socket of the TV to a scart socket on your
1.
set top box (refer to your set top box instruction manual).
Switch on your set top box. The picture appears automatically on the TV.
2.
If not, press the / button on the remote control repeatedly until the
picture appears on screen.
Press the DIGITAL/ button when you wish to return to normal TV
3.
operation.
Connecting a Smartlink VCR
Smartlink is a direct link between the TV and a Smartlink VCR. Ensure your Smartlink
VCR is connected to the C socket labelled (
wired 21 pin scart lead. For more information on Smartlink, refer to your Smartlink VCR
instruction manual.
SMARTLINK) i3/r3 VCR, using a fully
33
Page 36

Connecting other equipment
D
IG
IT
A
L
D
IG
IT
A
L
Connecting equipment to the rear sockets
C
B
VCR
DVD
Decoder/Set top box
(SMARTLINK)
s
3
3
VCR
2
DVD
1
DIGITAL
ANALOGUE
R/D/D/D
OPTICAL OUTPUT
MODEM
. . .
L/G/S/I
5V 200mA
A D F
Modem
Hi-Fi
Note: Connecting cables are not supplied.
Connecting a MD/DAT player
Connect a suitable optical lead from the E socket of the TV to the optical
1.
socket of your MD/DAT player.
E
MD/DAT player
Follow the instructions in your MD/DAT instruction manual if you wish to
2.
record on to your MD/DAT player.
Connecting a Hi-Fi
Connect a phono jack lead from the D sockets of the TV to your Hi-Fi (refer
1.
to your Hi-Fi instruction manual).
Use the ‘ Audio-out vol.’ feature of the TV to set the volume level (refer to
2.
the ‘Sound adjustment’ menu on page 24).
Connecting the supplied Modem
Connect your Modem to the F socket of the TV.
1.
Use the ‘Detailed set up’ menu to set up the Modem for operation (see
2.
page 18).
34
Page 37

Connecting equipment to the front sockets
D
IG
IT
A
L
D
IG
IT
A
L
Headphones
Connecting other equipment
Camcorder
MONO
R/D/D/D
L/G/S/I
S
4
MEMORY STICK
4
4
+
P +
MEMORY STICK
Note:
Connecting cables are not supplied.
I J
MONO
R/D/D/D
L/G/S/I
S
4
4
4
G H
Connecting a Playstation
Connect the lead supplied with your playstation to the sockets I (video
1.
input), and J (left and right audio input).
Switch on the PlayStation, insert a game, then press the / button on
2.
the remote control repeatedly until the picture appears on screen.
Press the DIGITAL/ button when you wish to return to normal TV
3.
operation
+
P +
PlayStation
Connecting an S-VHS/8mm/Hi8 Camcorder
Connect your camcorder to the sockets H and J or I and J as shown.
1.
Press the ‘PLAY’ button on your camcorder, then press the / button
2.
on the remote control repeatedly until the picture appears on screen.
Press the DIGITAL/ button when you wish to return to normal TV
3.
operation
Connecting headphones
Connect your headphones to the G socket on the TV.
1.
Use the ‘ Audio-out vol.’ feature of the TV to adjust the headphone volume
2.
(refer to the ‘Sound adjustment’ menu on page 24).
35
Page 38

Connecting other equipment
1
4
7
3
6
9
2
5
8
0
M
O
D
E
Using the remote control with VCR and DVD players
This remote control has been configured to operate not only Sony DVDs and VCRs but also those made by other manufacturers. To
operate other makes of DVD and VCR using this remote control, complete the following procedure:
Find the 3 digit code for your brand from the list below. If your brand has more than one code
1.
allocated to it, make a note of the first code only at this stage.
Press the MODE button on the remote control until either the VCR green light or the DVD green
2.
light illuminates.
With the required green light illuminated, press and hold down the YELLOW button for
3.
approximately 6 seconds, until the light starts to flash.
Using the numbered buttons, enter the 3 digit code for your DVD or VCR. Once a correct
4.
number has been entered, all three green lights will illuminate momentarily.
Turn on your DVD or VCR and check that the remote control operates the main functions. If not,
5.
repeat steps 2 - 4 and enter the next 3 digit code allocated to your brand of VCR or DVD.
When you wish to use the remote control to operate the TV again, press the MODE button until
6.
the TV green light illuminates. Don’t forget to select VCR or DVD using the MODE button every
time you wish to operate that equipment with this remote control.
Note:
The brand codes you set may be lost if weak batteries are not replaced immediately. Should this happen, use the
above procedure to reset the code. A small label has been attached to the inside of the battery cover for you to make
a note of your brand codes. Not all brands and models of DVDs or VCRs are covered in this list. However, Sony will
endeavour to update the software periodically, so please refer to the code table provided with your remote control.
VCR Brand List DVD Brand List
Brand Code Brand Code
SONY (VHS) 301, 302, 303, 309 SONY 001
SONY (BETA) 301, 302, 303, 309 AIWA 021
SONY (DVD) 304, 305, 306 DENON 018, 027, 020, 002
AIWA 325, 331, 351 GRUNDIG 009, 028, 023, 024, 016. 003
AKAI 326, 329, 330 HITACHI 025, 026, 015, 004
DAEWOO 342, 343 JVC 006, 017
GRUNDIG 358, 355, 360, 361, 320, 351 KENWOOD 008
HITACHI 327, 333, 334 LG 015, 014
JVC 314, 315, 322, 344, 352, 353, LOEWE 009, 028, 023, 024, 016. 003
LG 332, 338 MATSUI 013, 016
LOEWE 358, 355, 360, 361, 320, 351 ONKYO 022
MATSUI 356, 357 PANASONIC 018, 027, 020, 002
ORION 328 PHILIPS 009, 028, 023, 024, 016. 003
PANASONIC 321, 323 PIONEER 004
PHILIPS 311, 312, 313, 316, 317, 318, SAMSUNG 011, 014
SAMSUNG 339, 340, 341, 345 SANYO 007
36
SANYO 335, 336 SHARP 019, 027
SHARP 324 THOMSON 012
THOMSON 319, 350 TOSHIBA 003
TOSHIBA 337 YAMAHA 018, 027, 020, 002
Page 39

Specifications
4
Additional Information
TV System B/G/H, DK, DVB-T
Colour System PAL,SECAM
Channel Coverage See the ‘Channel Display Table’ below
Picture Tube KV-32NX200E FD Trinitron Approx. 82cm
Sound Output Left/Right: 2x20W (music power), 2x10W (RMS)
Power Consumption KV-32NX200E 154W (1w standby)
Dimensions (w x h x d) KV-32NX200E Approx. 910 x 445.5 x 590mm
Weight KV-32NX200E Approx. 67kg
Rear Terminals 21-pin Euro connector (CENELEC standard) including audio/video
NTSC 3.58, 4.43 (only Video In)
MPEG-2 MP@ML
KV-36NX200E FD Trinitron Approx. 91cm
Subwoofer: 1x30W (music power), 1x15W (RMS)
KV-36NX200E 182W (1w standby)
KV-36NX200E Approx. 1010 x 645 x 607mm
KV-36NX200E Approx. 87kg
1
2
3/s 3
input, RGB input, TV audio/video output.
21-pin Euro connector (CENELEC standard) including audio/video
input, RGB input, TV audio/video output
21-pin Euro connector (CENELEC standard) including audio/video
input, S-video input, selectable audio/video output.
Conditional Access Module
RF In
Audio output - RCA phono jacks
Front Terminals
Accessories Supplied
s
4
4
RM-939 remote control (1)
IEC designated size AAA (R03) battery (2)
RF Loopthrough cable (1)
Modem (1)
Video input - phono jack
S video input - 4 pin DIN
Audio inputs - phono jacks
Headphones jack - minijack stereo
Design and specification are subject to change without notice
Channel Display Table
Receivable Channels Channel Displays
B/G/H E2.12, 21...69 C02.C12, C21...C69
KABEL-TV (1) S1..S41 S01...S41
KABEL-TV (2) S01..S05 S42...S46
M1...M10 S01...S10
U1...U10 S11...S20
ITALIEN A, B.H, H1, H2 C13, C14.C20, C11, C12
D/K R01.R12, R21.R69 C01...C12, C21...C69
S01...S05 S42...S46
37
Page 40

Additional Information
Troubleshooting
Here are some simple solutions to problems which may affect the picture and sound.
Problem Possible causes Solutions
No picture, no sound. • Power o ff
Poor or no picture (screen is
dark), but good sound.
No picture on any channel after
digital tuning.
Some channels are blank. • Scrambled or subscription-only
• TV in standby.
• Aerial disconnected.
• Picture preset level adjustment • Select ‘Picture Adjustment’ menu then adjust adjust the
• No digital transmissions in your area.
• No digital transmissions from the
transmitter you are currently using.
• Unsuitable aerial.
• Weak signal.
channel.
• Programme used only for data (no
picture or sound).
• Plug in the TV.
• Press the
indicator is on press the button on the remote control.
• Check aerial connection
brightness, picture and colour levels.
• Tune in all the Analogue channels available using the
‘Manually tuning analogue signals’ instructions of this
manual to tune in available analogue channels, then contact
local installer to find out when digital transmissions begin in
your area.
• Contact a local installer to find out at which transmitter you
should be pointing your aerial.
• Change your aerial to cover the channels used by digital
programmes.
• Ensure aerial is correctly aligned to transmitter.
• Ensure aerial is is plugged directly into the TV (not through
other equipment).
• Upgrade to a higher gain aerial.
• Subscribe to pay-per-view broadcaster.
• See ‘Skipping a programme’ section.
• See ‘Re-arranging your channels’ section.
button on the front of the TV. If the
• Programme not being transmitted.
Standby indicator flashing. • Fault (irregular flash)
• Digital mode Timer Record active
(regular flash).
Good picture, no sound • Volume control. • Press the + button on the remote control.
Poor picture quality • Wrong external mode selected for an
No colour on colour
programmes
Remote control does not
function
Distorted picture when
changing programmes or
selecting teletext
RGB video source.
• Colour level setting. • Select ‘Picture Adjustment’ menu then adjust the colour
• Batteries low. • Replace batteries.
• Inputs from external equipment not
switched off.
• Do not open the cabinet, refer to qualified personnel.
• Contact your nearest SONY Service Centre.
• Will clear when Timer Recording stops.
• If is displayed on the screen, press the button on
the remote control.
• Press the button repeatedly until the RGB symbol
is displayed on screen.
setting.
• Switch off all additionally connected equipment.
• If you continue to have these problems, have your TV serviced by qualified personnel or you can contact the Sony
Customer Information Line on 0870 599 1999.
• NEVER open the casing yourself.
38
Page 41

FI
1
Page 42

Turvallisuusohjeet
Laite toimii 220-240V AC verkkojännitteellä.
Älä kytke montaa laitetta samaan
verkkopistokkeeseen; tulipalo ja sähköisku
riski.
Älä avaa television takakantta. Television
kannen saa avata vain valtuutettu
huoltohenkilö.
Ympäristö ja turvallisyyssyistä ei ole
suositeltavaa jättää televisiota
valmiustilaan, sammuta televisio
verkkokytkimestä.
Älä kosketa televisiota tai mitään sen osia
ukkosen aikana.
Älä koskaan laita mitään ylimääräistä
televisiota sisälle, vieraat esineet saattavat
aiheuttaa sähköisku ja tulipalovaaran. Älä
läikytä mitään nestettä television sisälle.
Mikäli nestettä joutuu television sisälle, älä
käytä televisiota. Toimita televisio
tarkastettavaksi valtuutettuun Sony
huoltoon.
Älä altista televisiota kosteudelle tai
sateelle; tulipalo ja sähköisku riski.
Älä peitä television tuuletusaukkoja. Jätä
laitteen ympärille vähintään 10cm:n vapaa
tila.
Puhdista televisio pehmeällä veteen
kostutetulla liinalla. Älä käytä television
puhdistamiseen mitään liuttimia, tinneriä tai
bensiiniä. Älä naarmuta television
kuvaruutua. Irroita television verkkojohto
ennen puhdistusta.
Sijoita televisio vain sille tarkoitetulle
jalustalle. Älä anna lapsien kiivetä television
päälle. Pidä televisio aina oikeassa
asennossa, älä laita televisiota kyljelleen tai
kuvaruutu ylöspäin.
Älä sijoita televisiota kuumaan, kosteaan tai
pölyiseen paikkaan. Älä sijoita televisiota
paikaan jossa se altistuu tärinälle.
Älä koskaan irroita verkkojohtoa vetämällä
johdosta. Irroita johto vetämällä
verkkopistokkeesta.
Irroita verkkojohto ennen television
siirtämistä. Mikäli televisio putoaa tai
kolhiintuu, tarkistuta se valtuutetussa Sony
huollossa.
Tulipalon välttämiseksi, älä sijoita television
päälle tai sen läheisyyteen tulenarkoja
esineitä tai avotulta esim. kynttilää.
Älä sijoita painavia esineitä verkkojohdon
päälle.
Suosittelemme että kiinnität verkkojohdon
vapaaksi jäävän osuuden television
takakanessa oleviin kiinnikkeisiin.
Älä peitä television tuuletusaukkoja millään
esineillä kuten verhoilla tai sanomalehdillä
jne.
2
Page 43

Näin pääset alkuun
Laitteen mukana tulevien tarvikkeiden tarkastus ............................................................................ 4
Paristojen asetus kaukosäätimeen................................................................................................. 4
Antennin ja videonauhurin liittäminen............................................................................................. 5
Television kytkeminen päälle .......................................................................................................... 5
Television automaattiviritys............................................................................................................. 6
Siirtyminen digitaalisten ja analogisten kanavien välillä ................................................................. 7
Videokanavan haku ........................................................................................................................ 7
Perustoiminnot
TV:n painikkeet ............................................................................................................................... 8
Kaukosäätimen painikkeet.............................................................................................................. 9
Digitaalisen teksti-tv:n katselu ........................................................................................................ 10
Perinteisen teksti-tv:n katselu......................................................................................................... 11
Tekstivalikon käyttö......................................................................................................................... 12
Kuvasuhteen muuttaminen manuaalisesti....................................................................................... 13
Digitaaliset toiminnot
Info-näyttö....................................................................................................................................... 14
Päävalikko....................................................................................................................................... 15
Suosikkikanavat ........................................................................................................................ 15
Taustakuva ................................................................................................................................ 16
Lapsilukko................................................................................................................................. 16
Asennus .................................................................................................................................... 17
Lisäasetukset............................................................................................................................ 18
CA-asetus ................................................................................................................................. 19
Omat tiedot................................................................................................................................ 19
Kanavahakemisto-valikko ............................................................................................................... 20
Digitaalisten kanavien haku ...................................................................................................... 20
Kanavan tallentaminen suosikkilistalle...................................................................................... 20
Ohjelmaryhmän valinta ............................................................................................................. 20
EPG-valikko.................................................................................................................................... 21
Digitaalisten kanavien haku....................................................................................................... 21
Ohjelmaryhmän valinta ............................................................................................................. 21
Nauhoitettavan ohjelman tai ajastusnäytön valinta ................................................................... 22
Sisällysluettelo
TV:n valikkojärjestelmä
Television valikkojärjestelmän käyttö .............................................................................................. 23
Kuvasäädöt-valikko......................................................................................................................... 23
Äänisäädöt-valikko.......................................................................................................................... 24
Toimintovalikko................................................................................................................................ 25
Asetusvalikko.................................................................................................................................. 25
Käsinasetusvalikko ......................................................................................................................... 26
Käsinviritysvalikko........................................................................................................................... 27
Pikavalintojen asetus ...................................................................................................................... 28
Memory Stick toiminto
Memory Stick käyttö ....................................................................................................................... 29
Memory Stick poistaminen.............................................................................................................. 29
Memory Stick valikko ...................................................................................................................... 29
Memory Stick varotoimet ................................................................................................................ 32
Lisälaitteiden kytkentä televisioon
Lisälaitteiden liittäminen takapeneliin ............................................................................................. 33
Lisälaitteiden liittäminen etupaneliin ............................................................................................... 35
Videonauhurin ja DVD soittimen käyttö kaukoohjaimella................................................................ 36
Lisätietoja
Tekniset tiedot................................................................................................................................. 37
Vianetsintä...................................................................................................................................... 38
3
Page 44

Näin pääset alkuun
Noudata ohjeita 1-7, kun asennat television ja kun haluat katsella tv-ohjelmia.
1. Laitteen mukana tulevien tarvikkeiden tarkastus
TV
VIDEO
/
/
S
Y
TIC
R
O
K
M
E
M
L
A
IT
IG
D
2
1
4
7
ID
U
G
MODE
3
5
6
8
9
0
E
T
V
D
R
V
T
D
V
INDEX
Paristot
PROG
RF-silmukkajohto
MENU
Kaukosäädin
2. Paristojen asetus kaukosäätimeen
Modeemi
1
Aseta kolikko kaukosäätimen alaosassa
olevaan uraan ja käännä sitä vastapäivään,
jolloin paristoluukku aukeaa.
4
2
Aseta paristot kuvan mukaisesti
paristotilaan.
Hävitä vanhat paristot aina ongelmajätteinä.
3
Aseta paristoluukku takaisin paikalleen ja
lukitse se kääntämällä uraa
myötäpäivään kolikolla.
Page 45

3. Antennin ja videonauhurin liittäminen
Vain antennin liittäminen
(SMARTLINK)
s
3
3
VCR
2
DVD
1
DIGITAL
OPTICAL OUTPUT
ANALOGUE
MODEM
. . .
5V 200mA
R/D/D/D
L/G/S/I
Näin pääset alkuun
1. Liitä tavallinen antennijohto television takana olevaan
digitaaliliittimeen, jossa on merkintä .
2. Kytke laitteen mukana toimitettu RF-silmukkajohto
liittimestä, jossa on merkintä , analogiseen
liittimeen, jossa on merkintä .
RF-silmukkajohto
johto (toimitetaan
laitteen mukana)
Antennin ja videonauhurin liittäminen
(SMARTLINK)
s
3
3
VCR
2
DVD
1
DIGITAL
OPTICAL OUTPUT
ANALOGUE
MODEM
. . .
5V 200mA
R/D/D/D
L/G/S/I
RF-silmukkajohto
(toimitetaan
Scart-johto (ei
toimiteta laitteen
mukana)
laitteen mukana)
Tavallinen
antenni
RF-johto (ei
toimiteta laitteen
mukana)
1. Liitä tavallinen antennijohto television takana olevaan
digitaaliseen liittimeen, jossa on merkintä .
2. Kytke laitteen mukana toimitettu RF-silmukkajohto
television alaliittimestä, jossa on merkintä ,
videonauhurin RF-tuloliittimeen.
3. Kytke johto videonauhurin RF-lähdöstä television
analogiseen liittimeen, jossa on merkintä .
4. Kytke scart-johto television takana olevasta liittimestä,
jossa on merkintä videonauhurin scart-
3
s
3
liittimeen (kasto videonauhurin käyttöohjeet).
5. Kytke videonauhuri verkkovirtaan ja kytke
videonauhuriin virta päälle.
6. Aseta nauhoitettu videokasetti videonauhuriin ja paina
PLAY-painiketta. Nyt televisio pystyy paikantamaan ja
tallentamaan videokanavan television
automaattivirityksen aikana.
4. Television kytkeminen päälle
1. Kytke tv-pistoke verkkovirtaan
(220 - 240 V AC, 50 Hz).
2. Kytke televisio päälle painamalla virtakytkintä.
Huom.
Jos television etuosassa oleva punainen merkkivalo palaa,
televisio on valmiustilassa. Kytke televisio päälle painamalla
kaukosäätimen TV -painiketta. Kuvan ilmestyminen tvruutuun voi kestää hetken aikaa.
/
5
Page 46

Näin pääset alkuun
5. Television automaattiviritys
1. Kun kytket televisiosi päälle ensimmäistä kertaa ilmestyy Sony logo
2. Nyt on korostettuna sana ‘Maa’. Valitse maa, jossa televisiota käytetään,
televisioruudulle, jonka jälkeen Memory Stick logo ja lopuksi Kieli/Maa
valikko jossa ‘English’ valittuna. Valitse haluamasi kieli painamalla
kaukosäätimen painiketta V tai v. Vahvista valinta painamalla OK. Nyt kaikki
valikot tulevat näyttöön valitsemallasi kielellä.
painamalla kaukosäätimen painiketta V tai v. Oikean maan valitseminen on
tärkeää oikean teksti-tv:n näytön takaamiseksi. Vahvista valinta painamalla
OK.
Näyttöön tulee kuvan suoristussivu. Joskus maan luonnollinen
magneettikenttä aiheuttaa kuvan kallistumista.
a) Jos korjausta ei tarvita, voit painaa kaukosäätimen painiketta B.
b) Jos kuva vaatii korjaamista, paina kaukosäätimen painiketta OK. Kierrä
kuvaa alueella -5 - +5 painamalla painiketta V tai v. Tallenna säädöt
painamalla OK.
Ruutuun tulee automaattivirityksen kehote. Valitse ‘Kyllä’ painamalla OK-
painiketta. Näyttöön tulee valikko, josta valitaan kahdesta seuraavasta
vaihtoehdosta:
Pikaviritys: virittää alueesi suositellut kanavat.
Kaikkien signaalien viritys: virittää kaikki mahdolliset kanavat.
Valitse haluamasi vaihtoehto V tai v-painikkeella, ja paina sitten OK
painiketta vahvistukseksi.
Ruutuun tulee teksti, jossa kehotetaan aloittamaan viritys painamalla OK-
2
1
4
7
3
5
6
8
9
0
painiketta. Koska viritys saattaa kestää kauan, ruudussa näkyy valikko, joka
ilmoittaa, että viritystoimenpide on käynnissä. Odota kunnes etsiminen
päättyy. Älä paina mitään painiketta etsinnän ollessa käynnissä.
Kun näyttöön tulee tieto, että viritys on suoritettu loppuun, paina SINISTÄ
painiketta toistuvasti kunnes valikko häviää näytöltä. Analogisten kanavien
viritys alkaa.
Jos digitaalisia tai analogisia signaaleja ei löydy, ruutuun tulee viesti, jossa
pyydetään vahvistamaan, että antenni on liitetty. Tarkista, että antenni on
liitetty, ja paina sitten OK-painiketta, jolloin viritys alkaa uudestaan.
Kun kaikki signaalit on haettu ja tallennettu, televisio palaa normaaliin
OK
PROG
toimintaan ja ruudussa näkyy se digitaalinen kanava, joka on tallennettu
kanavanumeron 1 kohdalle.
Huom:
Jos digitaalisia signaaleja ei löytynyt, ruudussa näkyy se analoginen ohjelma, joka on
tallennettu kanavanumeron 1 kohdalle.
3. Voit katsella eri ohjelmia painamalla kaukosäätimen painiketta PROG+/- tai
numeropainikkeita.
6
Page 47

DIG
IT
AL
D
IG
ITAL
PROG
D
IG
ITA
L
D
IG
ITA
L
6. Siirtyminen digitaalisten ja analogisten kanavien välillä
1. Paina DIGITAL/ painiketta kaukosäätimestä vaihtaaksesi digitaalisen ja
analogisen tilan välillä.
Huom:
Jos televisio on digitaali tilassa ilmestyy informaatio sarake hetkeksi ruutuun kanavia
vaihdettaessa.
Jos televisio on analogi tilassa kanavanumero ilmestyy vihreänä kanavia vaihdettaessa.
7. Videokanavan haku
Näin pääset alkuun
Jos antennin liittämisohjeiden aikana kytkit televisioosi videonauhurin, sinun on nyt
haettava videokanava.
1. Varmista ensin, että televisio on analogisessa tilassa. Jos se ei ole analogisessa
tilassa, paina kaukosäätimen DIGITAL/ -painiketta.
2. Paina kaukosäätimen painiketta PROG+/- kunnes ruutuun tulee kuva nauhoitetulta
videokasetilta.
Huom.:
Jos haluat muuttaa videokanavan numeroa, katso näiden käyttöohjeiden kohta
Kanavajärjestyksen muuttaminen.
Jos kytkit videonauhurin scart-johdon avulla, voit painaa kaukosäätimen / -painiketta
useita kertoja, kunnes tv-ruudussa näkyy kuva nauhoitetulta videokasetilta.
7
Page 48

Perustoiminnot
TV:n painikkeet
Televisio painikkeet löytyvät paneelista television edestä. Alla on suurennettu kuva painikkeista.
MEMORY STICK
Huom:
Kun ‘Memory Stick’ kirjoittaa tai lukee
tietoa, syttyy punainen memory stick
merkkivalo. Memory Stickille tallennettu
tieto voii vahingoittua tai pyyhkiintyä, jos
Memory Stick poistetaan tällä hetkellä.
MONO
R/D/D/D
L/G/S/I
S
4
4
4
Palautuspainike
Paina, kun haluat palauttaa kuva- ja
äänitasojen tehdasasetukset.
Videotulopainike
Paina, kun haluat valita tulosignaaleja
esim. videonauhurilta.
Äänenvoimakkuuspainikkeet
Paina, kun haluat lisätä tai vähentää
äänenvoimakkuutta.
+
P +
8
Kanava ylös/alas painikkeet
Paina, kun haluat siirtyä edelliseen
tai seuraavaan kanavaan.
Page 49

Kaukosäätimen painikkeet
/
Perustoiminnot
Mykistyspainike
Paina, kun haluat mykistää television äänen.
Palauta ääni painamalla painiketta uudestaan.
DIGITAL/ -painike
Paina, kun haluat vaihdella digitaalisen tilan ja
analogisen tilan välillä.
MEMORY STICK-painike
Painamalla painiketta pääset Memory Stick
valikkoon.
Painikkeet 0-9
Paina haluamasi kanavan numeroa.
Kaksinumeroiset kanavat valitaan painamalla
kyseistä kahta numeroa peräkkäin kahden
sekunnin sisällä.
GUIDE-painike
GUIDE-painike (digitaalisen tekstisivun
lataaminen).
MODE-painike
Tällä kaukosäätimellä voidaan ohjata Sonyn
DVD-soittimien ja videonauhureiden lisäksi
myös muiden valmistajien laitteita. Valitse
haluamasi laite tällä painikkeella. Vihreä valo
palaa hetken aikaa ja näyttää valitun tilan.
Huom:
Ennen kuin voit käyttää videonauhuria tai DVD-
soitinta, sinun on syötettävä oikea laitekoodi. Katso
kohta Kaukosäätimen ohjelmointi videonauhurille/
DVD-soittimelle.
Teksti-tv-painike
Siirry teksti-tv:n katseluun painamalla tätä
painiketta.
EPG-painike
Kun televisio on digitaalitilassa, paina tätä
painiketta, kun haluat tuoda ruutuun EPGohjelmaoppaan (Electronic Programme Guide).
Ohjauspainikkeet
Ohjauspainikkeita käytetään television
valikoissa liikkumiseen.
Huom.
Kun VCR- tai DVD-tila on valittu MODE-painikkeella,
käyttösäädin ohjaa videonauhurin tai DVD-soittimen
päätoimintoja.
Väripainikkeet
Näitä painikkeita käytetään digitaalisissa
valikoissa. Katso kyseiset jaksot myöhemmin
näissä käyttöohjeissa.
A
IT
IG
D
1
4
7
GUIDE
DE
O
M
VIDEO
/
TV
/
VIDEO -painike
Paina, kun haluat kytkeä videonauhurin tai DVDsoittimen pois päältä hetkeksi. Palaa normaaliin
toimintaan painamalla painiketta uudestaan.
S
TICK
MEMORY
L
TV -painike
/
Paina, kun haluat kytkeä television pois päältä
hetkeksi. Television etuosassa oleva punainen
merkkivalo syttyy. Palaa takaisin normaaliin
television katseluun painamalla painiketta
uudestaan.
Tulopainike /Pitopainike
Paina, kun haluat valita signaaleja television
VTR
2
3
5
6
8
9
0
T
V
D
V
D
liittimiin kytketyiltä laitteilta (ks. Lisälaitteiden
INDEX
liittäminen televisioon).
Kun haluat pysäyttää sivun teksti-tv:n katselun
aikana, paina tätä painiketta. Peruuta pysäytys
painamalla painiketta uudestaan.
Paluu edelliselle kanavalle
Paina, kun haluat palata edelliseen katselemaasi
kanavaan (toimii vain jos katselit kanavaa
vähintään viiden sekunnin ajan).
Kuvasuhdepainike
PROG
Paina, kun haluat muuttaa kuvasuhdetta.
Info-painike
MENU
Kun televisio on digitaalitilassa, paina tätä
painiketta, kun haluat tuoda ruutuun INFOvalikon. Kun katselet analogista kanavaa, paina
tätä painiketta, kun haluat tuoda näyttöön esim.
kanavan numeron.
Kun televisio on teksti-tv-tilassa, paina tätä
painiketta, kun haluat tuoda ruutuun piilotettuja
tietoja, esimerkiksi tietokilpailusivujen
vastauksia. Paina uudestaan, kun haluat poistaa
nämä tiedot ruudulta.
INDEX-painike
Kun televisio on digitaalitilassa, paina tätä
painiketta, kun haluat tuoda ruutuun
Kanavahakemisto-valikon.
PROG +/- -painike
Paina, kun haluat valita edellisen tai seuraavan
kanavan.
Katsellessasi teksti-tv:tä paina tätä painiketta,
kun haluat valita seuraavan tai edellisen sivun.
Äänenvoimakkuuspainikkeet + ja -
Aseta äänenvoimakkuus haluamallesi tasolle
painamalla näitä painikkeita.
MENU-painike
Paina, kun haluat siirtyä television
valikkojärjestelmään.
9
Page 50

Perustoiminnot
Digitaalisen teksti-tv:n katselu
Useimmat digitaaliset tv-kanavat lähettävät erilaisia tietoja tekstipalvelujensa kautta.
Digitaalisessa teksti-tv:ssä käytetään korkealuokkaista tekstiä ja kuvia sekä
lisäohjausvaihtoehtoja. Tällä televisiolla voidaan lisäksi vastaanottaa televisioyhtiöiden
levittämiä, pelkästään tekstiä lähettäviä kanavia. Levitysyhtiöt päättävät digitaalisten
teksti-tv-palvelujensa ulkoasun, sisällön ja ohjaustavat. Esimerkiksi MTV3:n digitaalinen
teksti-tv saattaa näyttää erilaiselta kuin YLE:n digitaalinen teksti-tv. Useimmat tällä
hetkellä saatavilla olevat digitaaliset teksti-tv-palvelut käyttävät yksinkertaisia
ohjaustapoja, jotka perustuvat seuraavien painikkeiden käyttöön:
GUIDE-painike (digitaalisen tekstisivun lataaminen),
V, v, B ja b-painikkeet (ruudun sisällä liikkuminen),
OK-painike tai numeropainikkeet (ruudun vaihtoehtojen valitseminen),
Neljä väripainiketta (pikavalintojen käyttö).
Digitaalisen tekstikanavan valinta
L
L
ITA
ITA
IG
IG
D
D
2
1
4
7
3
5
6
8
9
0
1. Varmista, että olet digitaalitilassa painamalla kaukosäätimen -painiketta. Jos
katselet digitaalista ohjelmaa, ruutuun tulee Info-näyttö, jossa on lyhyet
ohjelmatiedot sen hetkisestä ja seuraavasta ohjelmasta. Jos tämä näyttö ei tule
kuvaruutuun, siirry digitaalitilaan painamalla DIGITAL/ -painiketta.
2. Poista Info-näyttö tv-ruudusta painamalla -painiketta ja valitse sitten
kaukosäätimen numeronäppäimien avulla sen kanavan numero, joka lähettää
digitaalista teksti-tv-palvelua. Jos et tiedä digitaalisen teksti-tv-kanavan numeroa,
voit etsiä sen Kanavahakemisto-valikosta. (Katso näiden käyttöohjeiden kohta
Kanavahakemisto-valikko).
OK
3. Kun teksti-tv:n sivu tulee ruutuun, tee haluamasi valinnat näytön ohjeiden
mukaisesti.
Huom:
Joillakin teksti-tv:n sivuilla on mahdollista katsoa samalla myös tv-ohjelmaa. Näytön ohjeissa
kerrotaan, kuinka voit vaihtaa ruudussa näkyvän ohjelman.
4. Jos tekstisivuilla pyydetään painamaan OK tai Valitse, paina OK-painiketta.
5. Kun et enää halua katsella teksti-tv-kanavaa, voit poistua siitä painamalla -
painiketta.
Muiden digitaalisten kanavien tekstipalvelujen valinta
Myös muut digitaaliset kanavat saattavat lähettää tavallisia tekstipalveluja. Joskus siitä
ilmoitetaan tv-ruudussa katselemasi ohjelman päällä olevalla pienellä symbolilla.
1. Valitse tämä symboli V, v, B tai b-painikkeilla ja paina sitten OK-painiketta, jolloin
ruutuun tulee valitsemasi tieto.
2. Vaihtoehtoisesti ruudussa saatetaan kehottaa käyttämään kaukosäätimen numerotai väripainikkeita tekstitietojen katseluun. Jos tekstisivuilla pyydetään painamaan
OK tai Valitse, paina OK-painiketta.
3. Kun tekstitiedot näytetään ruudussa, voit valita haluamasi vaihtoehdon
kaukosäätimen V, v, B tai b-painikkeiden, väripainikkeiden ja/tai
numeropainikkeiden avulla.
10
4. Kun et enää halua katsella teksti-tv-kanavaa, poistu siitä painamalla -painiketta.
Page 51

Perinteisen teksti-tv:n katselu
Useimmat analogiset tv-kanavat lähettävät tekstipalveluja. Hakemistosivulla (yleensä
sivu 100) on tietoa siitä, kuinka palvelua käytetään. Varmista, että televisio vastaanottaa
vahvaa signaalia tai muutoin tekstin näytössä saattaa esiintyä virheitä.
Teksti-tv:n kytkeminen päälle
1. Valitse televisiokanava, jonka tekstin haluat nähdä.
2. Siirry Picture and Text (P&T) -tilaan painamalla kaukosäätimen painiketta .
Kuvaruutu jakautuu kahteen osaan. Vasemmalla näkyy teksti ja oikealla
televisiokanava.
Painamalla painiketta toisen kerran teksti näkyy koko kuvaruudulla.
Perustoiminnot
L
L
ITA
ITA
IG
IG
D
D
2
1
4
7
3
5
6
8
9
0
Painamalla painiketta kolmannen kerran siirryt tapaan Mix.
3. Näppäile kaukosäätimen numeropainikkeilla haluamasi sivun kolmenumeroinen
sivunumero. Sivu ilmestyy hetkessä kuvaruutuun.
4. Näppäile tarpeen vaatiessa lisää kolmenumeroisia sivunumeroita.
5. Kun et enää halua katsella tekstisivua, poista se ruudusta painamalla DIGITAL/
-painiketta.
Teksti-tv:n toimintojen käyttö
OK
PROG
Teksti-tv:n toiminto Valinta
Seuraavan tai edellisen
sivun valinta
Alasivun valinta Yksi tekstisivu voi sisältää useita alasivuja. Tällaisessa
Sivun pysäyttäminen Paina -painiketta. Peruuta painamalla painiketta
Paina tai -painiketta.
tapauksessa ruudun alareunassa olevassa laatikossa
näytetään käytössä olevien alasivujen lukumäärä. Valitse
alasivut painamalla V tai v-painiketta.
uudestaan.
Fastext-toiminnon käyttö
(ei käytössä suomessa)
Fastext-toiminnon avulla voit siirtyä tekstisivuille yhden
painikkeen painalluksella. Kun Fastext on käytössä,
ruudun alaosassa näkyy neljä väripainiketta. Tekstisivu
tuodaan ruutuun painamalla kyseistä kaukosäätimen
väripainiketta.
Sivun sieppaustoiminto Valitse sivu, jolla on useita sivunumeroita (esim.
hakemistosivu), ja paina sitten OK-painiketta. Korosta
haluamasi sivunumero V tai v-painikkeella ja paina OK-
painiketta uudestaan. Ruutuun tulee nyt valitsemasi sivu.
Piilotetun tiedon
Paina . Paina uudestaan tiedon piilottamiseksi.
kutsuminen (esim.:
vastaus
kilpailukysymykseen.
11
Page 52

Perustoiminnot
Perinteisen teksti-tv:n katselu
Tekstivalikon käyttö
Tekstivalikon kautta pääset käyttämään useita lisätoimintoja:
1. Siirry teksti-tv-tilaan painamalla kaukosäätimen -painiketta.
2. Kun tekstinäyttö on ruudussa, paina MENU-painiketta, jolloin ruutuun tulee ’Te ks t i -
tv’-valikko.
3. Korosta haluamasi toiminto V tai v-painikkeella ja valitse se painamalla b-
painiketta.
4. Poista tekstivalikko ruudulta painamalla MENU-painiketta.
Seuraavassa taulukossa on esitetty kukin toiminto ja niiden käyttö:
2
1
4
7
3
5
6
8
9
0
Toiminto Käyttö
Ylä/Ala/Koko Tämän toiminnon avulla voit laajentaa tekstisivun osia. Voit
suurentaa yläosaa painamalla V-painiketta. Voit suurentaa
alaosaa painamalla v-painiketta. Voit palauttaa sivun normaalin
kokoiseksi painamalla OK. Voit palata Teksti-TV:n valikkoon
painamalla B-painiketta.
OK
MENU
Teksti pois Käytä tätä toimintoa, kun haluat katsella tv-ohjelmaa samalla, kun
teksti-tv etsii sivua. Kun sivu löytyy, sininen symboli ilmestyy
ruudun vasempaan ylänurkkaan. Paina -painiketta, kun haluat
katsella sivua.
Hakemisto Useimmissa tekstipalveluissa on hakemistosivu, jossa näkyvät
kaikki käytettävissä olevat sivut ja niiden kolmenumeroinen
sivunumero. Tämä toiminto tuo automaattisesti näyttöön
hakemistosivun. Saat näyttöön hakemistosivun painamalla b
-painiketta.
Sivujen
yleiskatselu
(Vain TOP-Textlähetykset)
TOPText tarjoaa tekstivaihtoehdon, jossa sivut ovat kahdessa
sarakkeessa. Ensimmäisessä sarakkeessa näkyvät ‘sivujaksot’ ja
toisessa ‘sivuryhmät’. Valitse haluamasi sarake painamalla b tai
B-painiketta. Valitse haluamasi ‘jakso’ tai ‘rhymä’ painamalla V tai
v-painiketta. Saat näyttöön valitun sivun painamalla OK-
painiketta.
Kontrasti Tämän toiminnon avulla voit säätää tekstisivujen kontrastin. Voit
pienentää tai suurentaa kontrastia painamalla b- tai B -painiketta.
Vahvista valinta painamalla OK.
12
Page 53

Kuvasuhteen muuttaminen manuaalisesti
Televisioyhtiö saattaa lähettää ohjelmia useammassa kuvasuhteessa (esim. 4:3 tai
laajakuva). Voit muuttaa kuvasuhteen manuaalisesti sellaiseksi, että se on sopiva
katselemaasi lähetystä varten. Valitse yksi viidestä alla luetelluista kuvasuhteista
painamalla kaukosäätimen -painiketta.
Laajakuva
16:9-lähetykset
4:3-lähetykset
Perustoiminnot
Zoomaus
14:9-
4:3
Laajakuva-elokuvissa (cinemascope), jotka lähetetään letterbox muodossa.
4:3- ja 16:9-kuvasuhteiden välinen kompromissi.
Perinteinen kuvasuhde.
Smart
Laajakuvaesitys 4:3-lähetyksille.
Huom:
Smart-, Zoomaus- ja 14:9-tilassa, osa kuvan ylä ja alareunasta jää pois kuvasta. Kuvan asentoa
voidaan säätää ruudulla (esim. kun haluat nähdä tekstityksen) painamalla V tai v-painiketta.
13
Page 54

Digitaaliset toiminnot
OK
D
IG
IT
A
L
D
IG
IT
A
L
Info-näyttö
Info-näytössä on tietoa sekä sen hetkisestä ohjelmasta että tulevista ohjelmista (jopa 24 tuntia eteenpäin), jos televisioyhtiö näitä
tietoja lähtettää. Info-näytössä on lyhyet ohjelmatiedot sen hetkisestä ohjelmasta, kanavanumero ja ohjelman alkamis- ja
päättymisaika. Seuraavan ohjelman nimi ja alkamis- ja päättymisaika näytetään sen hetkisen ohjelman tietojen oikealla puolella
olevassa pienemmässä laatikossa.
1. Saat Info-näytön ruutuunpainamalla kaukosäätimen -painiketta. Jos Info-
näyttö ei tule ruutuun, paina DIGITAL/ -painiketta, jolloin TV siirtyy
digitaalitilaan, ja paina sitten -painiketta, jotta saat Info-näytön ruutuun.
2. Paina b näppäintä saadaksesi lyhyen kuvauksen seuraavasta ohjelmasta.
Jos ohjelmisto laatikko on tyhjä, ei seuraavasta ohjelmasta ole tietoa.
Palataaksesi lähtökohtaan, paina B näppäintä useamman kerran, kunnes
nykyisen ohjelman kuvauspalautuu.
3. Paina paineketta kaukoohjaimesta palataaksesi Info näytöstä.
Muiden Info tomintojen kaytto
Väripainikkeiden alta löytyy lisätoimintoja:
PUNAINEN painike
Tämän painikkeen painaminen tuo esiin pikavalikon, josta voit muutta tekstityksen
kielen (jos saatavana). Valitse haluamasi kieli V ja v-painikkeilla, ja paina sitten OKpainiketta vahvistukseksi. Valitse Off, kun haluat poistaa tekstityksen.
VIHREÄ painike
Tämän painikkeen painaminen tuo esiin pikavalikon, josta voit valita lähetyksen kielen
(jos saatavana). Valitse haluamasi kieli V ja v-painikkeilla, ja paina sitten OK-painiketta
vahvistukseksi.
KELTAINEN painike
Kun valitset ohjelman, tämä toiminto antaa mahdollisuuden automaatiseen ajastukseen
video nauhurillesi (vain jos käytössäsi on Smartlink videonauhuri), tai voit valita
‘Herätys’ toiminnon saadaksesi televisio vaihtamaan oikealle kanavalle automaattisesti
kun kyseinen ohjelma alkaa. Valitse myöhempi ohjelma Info-näytöstä b-painkkeilla ja
paina sitten KE LTAI STA painiketta, jotta saat ruutuun Ajastus-pikavalikon. Tästä
pikavalikosta voit sitten valita a) Nauhoitus, b) Muistutus tai c) Manuaalinen.
a) Nauhoitus
Korosta ’Nauhoitus’ ja paina OK, kun haluat asettaa videonauhurisi automaattisesti
nauhoittamaan valitun ohjelman (toimii vain, jos videonauhurissasi on SmartLink-
s
toiminto ja se on liitetty television takaosassa olevaan AV3-liittimeen ).
3
3
s
3
3
b) Muistutus
Korosta ’Muistutus’ ja paina OK, kun haluat, että valitsemasi myöhempi ohjelma tulee
kuvaruutuun silloin, kun sen lähetys alkaa.
c) Manuaalinen
Korosta ’Manuaalinen’ ja paina OK, kun haluat, että TV lähettää signaalin
nauhoitettavasta kanavasta videonauhurille. Aseta nauhoituspäivä V ja v-painikkeilla ja
paina sitten b-painiketta, jolloin kursori siirtyy alkamisajan kohdalle. Tee toimenpide
uudestaan alkamisajan ja päättymisajan sekä kanavanumeron kohdalla ja tallenna
asetukset painamalla OK-painiketta, jolloin näyttö siirtyy takaisin Info-valikkoon. Poista
Info-valikko ruudulta painamalla -painiketta. Jos videonauhurissasi ei ole SmartLinktoimintoa, sinun on ajastettava videonauhurisi nauhoituksen alkamis- ja
päättymisajankohdat vastaamaan kyseistä ohjelmaa.
14
Huomautuksia nauhoituksesta:
’Manuaalinen’ vaihtoehto toimii vain, jos videonauhuri on kytketty television takana olevaan AV3liittimeen .
Kun olet ajastanut nauhoituksen, voit asettaa television valmiustilaan, mutta älä kytke virtaa kokonaan pois päältä, sillä muutoin nauhoitus peruuntuu. Kun televisio on valmiustilassa, TV:n etuosassa oleva valmiustilaa osoittava merkkivalo vilkuttaa vihreää valoa määrätyin väliajoin merkiksi
siitä, että nauhoitus on ohjelmoitu. Älä muuta kanavanumeroa tai kytke TV:tä analogiseen tilaan
silloin, kun videonauhuri on aloittanut ohjelman nauhoituksen, tai muutoin nauhoitus peruuntuu.
3
3
s
s
3
3
SININEN painike Paina, kun haluat kuvaruutuun päävalikon (ks. seuraava sivu).
Page 55

Digitaaliset toiminnot
OK
D
IG
IT
A
L
D
IG
IT
A
L
Päävalikko
Seuraavilla sivuilla selitetään digitaaliset valikot ja niiden toiminta. Varmista, että olet digitaalitilassa painamalla kaukosäätimen
-painiketta. Tällöin ruutuun tulee Info-näyttö, jossa on lyhyet ohjelmatiedot sen hetkisestä ja seuraavasta ohjelmasta. Jos tämä näyttö
ei tule kuvaruutuun, paina kaukosäätimen DIGITAL/ -painiketta, jotta voit jatkaa.
Suosikkikanavat
Tällä toiminnolla voit luoda suosikkikanavalistan yhteen kolmesta henkilökohtaisesta
kansiosta. Listaa voidaan käyttää television EPG-ohjelmaoppaan tai
kanavahakemiston kautta.
1. Kun Info-näyttö on ruudussa, pääset päävalikkoon painamalla kaukosäätimen
SINISTÄ painiketta.
2. Korosta ’Suosikkikanavat’ painamalla V tai v-painiketta ja paina OK-painiketta.
Ruutuun tulee näyttö, josta voidaan valita kolme eri henkilökohtaista kansiota.
3. Valitse haluamasi kansio painamalla V tai v-painiketta, ja paina sitten OK-painiketta,
jolloin näyttöön tulee kyseisen kansion kanavaluettelo.
4. Selaa luetteloa V ja v-painikkeilla, kunnes korostettuna on se kanava, jonka haluat
tallentaa suosikkikanavaksi, ja paina sitten OK-painiketta. √ -symboli ilmestyy
kanavan viereen merkiksi siitä, että se on nyt tallennettuna suosikiksi. Toista tämä
toimenpide kaikille kanaville, jotka haluat tallentaa suosikeiksi.
Suosikkikanavan poistaminen:
Korosta kanava ja paina sitten OK-painiketta. √ -symboli katoaa kuvaruudulta.
Kaikkien suosikkikanavien poistaminen:
Paina KE LTAISTA painiketta.
Suosikkikansion nimeäminen:
Palaa Suosikkikanava-näyttöön painamalla SINISTÄ painiketta ja korosta sitten se
kansio, jonka haluat nimetä, painamalla V tai v-painiketta. Paina KELTAISTA
painiketta, jolloin kuvaruutuun tulee näppäimistö. Poista vanha nimi painamalla
PUNAISTA painiketta ja valitse sitten ensimmäinen tarvitsemasi kirjain V, v, B ja b -
painikkeilla. Paina sitten OK. Kirjain näkyy suosikkinimilaatikossa. Tee sama
toimenpide muiden kirjaimien kohdalla, kunnes nimi on kirjoitettu kokonaan. Korosta
DONE V, v, B ja b-painikkeiden avulla ja paina sitten OK.
Huom:
Jos teet kirjoitusvirheen kansion nimeämisen aikana, paina VIHREÄÄ painiketta, jolloin nimi
muuttuu alkuperäiseksi nimeksi.
5. Poista kaikki valikot tv-ruudusta painamalla SINISTÄ painiketta useita kertoja.
15
Page 56

Digitaaliset toiminnot
OK
OK
1
4
7
3
6
9
2
5
8
0
Päävalikko
Taustakuva
Tällä toiminnolla voit muuttaa kaikkien digitaalisten valikkojen taustakuvan
mieleiseksesi.
1. Paina -painiketta ja sitten kaukosäätimen SINISTÄ painiketta, jolloin ruutuun
tulee päävalikko.
2. Korosta ’Ta us t a ku v a’ painamalla V-painiketta ja paina OK-painiketta vahvistukseksi.
3. Valitse haluamasi taustakuva painamalla V tai v-painiketta ja tallenna se sitten
painamalla OK.
4. Poista kaikki valikot tv-ruudusta painamalla SINISTÄ painiketta useita kertoja.
Lapsilukko
Tällä toiminnolla voit asettaa ikärajan, jonka ylittyessä ohjelman katseluun tarvitaan
PIN-koodi.
1. Paina ensin -painiketta ja sitten kaukosäätimen SINISTÄ painiketta, jolloin
näyttöön tulee päävalikko.
2. Korosta ’Lapsilukko’ painamalla v-painiketta ja paina OK-painiketta, jolloin näyttöön
tulee Lapsilukko-valikko.
3. Syötä nykyinen PIN-koodisi numeronäppäimillä 0 - 9. PIN-koodin esiasetuksena on
1234, joka voidaan muuttaa myöhemmin kohdan ’Lisäasetukset’ ohjeiden
mukaisesti.
4. Nyt ikälaatikko aktivoituu. Aseta haluamasi ikäraja V ja v-painikkeilla tai valitse ’Ei
rajaa’, jolloin kaikkia ohjelmia voidaan katsoa rajoituksetta. Vahvista asetus
painamalla OK-painiketta.
5. Poista kaikki valikot tv-ruudusta painamalla SINISTÄ painiketta useita kertoja.
16
Page 57

Päävalikko
OK
1
4
7
3
6
9
2
5
8
0
Digitaaliset toiminnot
Asennus
Tällä toiminnolla voit tehdä kanavien automaatti- tai käsinvirityksen ja vaihtaa
tallennettujen kanavien järjestystä.
1. Paina ensin -painiketta ja sitten kaukosäätimen SINISTÄ painiketta, jolloin
ruutuun tulee päävalikko.
2. Valitse ’Asennus’ painamalla V tai v-painiketta ja paina sitten OK-painiketta, jolloin
ruutuun tulee Asennusvalikko.
3. Valitse haluamasi kohta valikosta painamalla V tai v-painiketta ja paina sitten OK-
painiketta, jolloin ruutuun tulee kyseinen alavalikko.
Pikaviritys
Tämä toiminto virittää kaikki alueesi suositeltavat signaalit.
Kaikkien signaalien viritys
Tämä toiminto virittää kaikki käytössä olevat signaalit. Koska tämä toiminto kestää
melko kauan, ruudussa on valikko, jossa näkyy virityksen eteneminen.
Käsinviritys
Tällä toiminnolla voit manuaalisesti lisätä kanavia televisioosi.
1. Käsiviritysvalikon ollessa näytössä, syötä uusi ohjelmanumeropaikka
valitsemallesi kanavalle, käyttämällä 0-9 painikkeita. Vahvista OK-painikkeella.
2. Valitsemasi kanava näkyy korostettuna käsiviritysnäytössä. Paina OK-painiketta
vahvistaaksesi asetuksen ja saadaksesi HAKU-valikon esille.
3. Haku alkaa, korostettuna olevan ohjelmanrivin sen hetkisestä kanavasta lähtien.
Jos haluat suoraan muuttaa kanavanumeroa, paina V tai v-painiketta tai syötä
kanavanumero suoraan 0 - 9 painikkeilla, tai paina b-paniketta aktivoidaksesi
“valitse haku” laatikon.
4. Paina V tai v-aloittaaksesi haun. “Hakee” viesti ilmestyy “Tila” otsikon viereen,
ilmoittaakseen että haku on käynnistetty. Jos Digitaalipalvelua ei löydy
valitsemaltasi kanavalta, siirtyy haku automaattisesti eteen- tai taaksepäin ja
haku jatkuu. Kun valisemaltasi kanavalta löytyneet palvelut on haettu, ne
esitetään “Löytyneet palvelut” laatikossa.
5. Paina V tai v-painiketta valitaksesi palvelu, vaiheessa 1 valitulle ohjelmapaikalle.
Paina OK palataksesi käsivirityslistaukseen.
Huom:
Käsiviritys mahdollistaa palvelujen lisäämiseen samalta kanavalta johonkin toiseen
ohjelmapaikkaan. Tämä tapahtuu, valitsemalla V
jonka jälkeen painamalla keltaista painiketta saadaan näyttöön kaikki kyseisen kanavan
palvelut. Paina V
palataksesi käsiviritysnäyttöön.
tai v -painiketta valitaksesi palvelu. Paina OK vahvistaaksesi palvelun ja
6. Jos haluat lisätä kanavia, valitse uusi ohjemapaikkanumero V tai v-painikkeella,
paina OK. Toista nyt kohdat 3-5.
tai v-painikkeella uusi ohjelmapaikka,
Ohjelmien vaihto
Tällä toiminnolla voit muuttaa tallennettujen kanavien järjestystä. Kun ’Ohjelmien
vaihto’ -valikko on ruudussa, korosta se kanava, jonka haluat muuttaa, painamalla V
tai v-painiketta ja paina sitten KE LTAI STA painiketta. Syötä uusi kanavanumero
valitsemallesi kanavalle kaukosäätimen numeropainikkeilla ja paina OK-painiketta
vahvistukseksi. Tee tämä toimenpide uudestaan kaikille kanaville, jotka haluat
muuttaa, ja poista sitten kaikki valikot tv-ruudulta painamalla SINISTÄ painiketta
useita kertoja.
Kun olet tehnyt kaikki muutokset Asennus-valikossa, poista kaikki valikot tv-ruudulta
SINISELLÄ painikkeella.
17
Page 58

Digitaaliset toiminnot
1
4
7
3
6
9
2
5
88
0
OK
Päävalikko
Lisäasetukset
Tällä toiminnolla voit muuttaa esim. PIN-koodin, modeemin asetukset ja kieliasetukset.
1. Paina -painiketta ja sitten kaukosäätimen SINISTÄ painiketta, jolloin päävalikko
tulee ruutuun.
2. Korosta ’Lisäasetukset’ painamalla V tai v-painiketta ja paina sitten OK-painiketta,
jolloin näyttöön tulee Lisäasetukset-valikko.
3. Jos haluat muuttaa joitakin valikon asetuksia, valitse haluamasi kohta painamalla V
tai v-painiketta ja paina sitten OK-painiketta, jolloin näyttöön tulee kyseinen
alavalikko.
PIN-koodin asetus
Tällä toiminnolla voit valvoa, mitä ohjelmia lapsesi katsovat. Syötä nykyinen PINkoodi ja paina OK. Syötä uusi PIN-koodi kaukosäätimen numeropainikkeiden avulla.
Syötä sama numero uudestaan vahvistukseksi. Palaa Lisäasetukset-valikkoon
painamalla OK-painiketta ja sitten SINISTÄ painiketta.
Huom:
Jos unohdat PIN-koodin, käytä numerosarjaa 9999. Laite hyväksyy aina tämän PIN-koodin.
Modeemi
Tämän toiminnon avulla voit tehdä laitteen mukana toimitetun modeemin asetukset.
Valitse haluamasi kohta ruudulta painamalla V tai v-painiketta ja paina sitten OK-
painiketta vahvistukseksi. Muuta asetus painamalla V tai v-painiketta ja tallenna
asetus painamalla OK-painiketta. Palaa Lisäasetukset-valikkoon painamalla
SINISTÄ painiketta.
Paluukanava
Valitse haluamasi kohta valikosta painamalla V tai v-painiketta ja paina sitten OKpainiketta, jolloin ruutuun tulee näppäimistö*. Poista vanha nimi painamalla
PUNAISTA painiketta ja valitse sitten ensimmäinen tarvitsemasi kirjain tai numero V,
v, B tai b -painikkeilla. Paina OK-painiketta, jolloin kirjain tai numero siirtyy
nimilaatikkoon. Tee samat toimenpiteet muiden kirjaimien/numerojen kohdalla,
kunnes nimi on kirjoitettu kokonaan. Korosta Valmis (DONE) V, v, B tai b-
painikkeiden avulla ja paina sitten OK. Palaa lopuksi Lisäasetukset-valikkoon
painamalla SINISTÄ painiketta.
Huom:
Jos valitset asetuksen ’Oletus ISP’ tai ’DNS IP -osoite’, sinun täytyy tehdä uudet asetukset kaukosäätimen numeropainikkeiden avulla. Kun asetukset on tehty, paina OK-painiketta vahvistukseksi.
MHP-sovellusoikeudet
Tällä toiminnolla voit asettaa omia asetuksia ja rajoittaa joitakin MHP-sovelluksia.
Valitse haluamasi kohta ruudulta painamalla V tai v-painiketta ja paina sitten OKpainiketta vahvistukseksi. Muuta haluamasi asetus painamalla V tai v-painiketta ja
tallenna uusi asetus painamalla OK-painiketta. Palaa Lisäasetukset-valikkoon
painamalla SINISTÄ painiketta.
Kielet
Paina V tai v-painiketta valitaksesi puhekielen, paina OK tallentaaksesi asetuksen.
Paina sinistä painiketta palataksesi lisäasetusvalikkoon.
Valmistajan tiedot
Tässä valikossa on pelkästään tietoa. Siinä ilmoitetaan signaalin voimakkuus ja
käytetyt laitteisto- ja ohjemistoversiot. Palaa Lisäasetukset-valikkoon painamalla
SINISTÄ painiketta.
Ohjelmistopäivitys
Tämä toiminto mahdollistaa automaattisen ohjelmistopäivityksen, kun sellainen on
saapuu lähetyksen mukana. Paina V tai v-painiketta valitaksesi KYLLÄ tai EI, paina
OK tallentaaksesi asetuksen. Välittömästi kun uusi päivitys on lähetyksessä,
ladataan se automaattisesti televisioon. Suositus on pitää KYLLÄ valittuna koko
ajan.
Tehdasasetukset
Valit se ’Poista omat asetukset’ painamalla OK-painiketta. Tämä palautta kaikki
digitaaliset asetukset tehdasasetustasolle.
4. Kun olet tehnyt kaikki muutokset Lisäasetukset-valikossa, poista kaikki valikot tv-
ruudulta SINISELLÄ painikkeella.
Huom:
CA-asetus on selostettu seuraavalla sivulla.
18
Page 59

OK
OK
Päävalikko
Digitaaliset toiminnot
CA-asetus
(riippuen palvelun saatavuudesta)
Tämän toiminnon ansiosta voit käyttää maksullisia palveluja sitten, kun olet hankkinut
CA-moduulin ja ohjelmakortin. Lisätietoja saat paikalliselta maksullisen palvelun
tarjoajalta.
1. Kytke TV:stä virta pois ja irrota pistoke pistorasiasta.
2. Aseta CA-moduuli TV:n takana olevaan liittimeen kuvan mukaisesti. Varo
vioittamasta CA-moduulia asettaessasi sitä paikalleen.
Huom:
TV:n mukana toimitettiin suojus, joka peittää TV:n takana olevat liittimet. Jos olet jo asentanut
tämän suojuksen, sinun on irrotettava se ensin, jotta pääset käsiksi CA-liittimeen.
CA-moduuli ja
ohjelmakortti
3. Aseta ohjelmakortti CA-moduuliin.
4. Kytke televisio verkkovirtaan ja kytke virta päälle.
5. Paina -painiketta ja sitten kaukosäätimen SINISTÄ painiketta, jolloin ruutuun
tulee päävalikko.
6. Korosta ’Lisäasetukset’ painamalla V tai v-painiketta ja paina sitten OK-painiketta,
jolloin näyttöön tulee Lisäasetukset-valikko.
7. Korosta ’CA-asetus’ painamalla V tai v-painiketta ja paina sitten OK-painiketta,
jolloin näyttöön tulee palveluntarjoajan asetusvalikko.
Lisätietoja saatavana olevista palveluista saat maksullisen palvelun tarjoajalta.
Omat tiedot
Käytä tätä toimintoa, kun haluat syöttää omia tietoja kuten sähköpostinimesi ja -
osoitteesi.
1. Paina -painiketta ja sitten kaukosäätimen SINISTÄ painiketta, jolloin ruutuun
tulee päävalikko.
2. Korosta ’Omat tiedot’ painamalla V tai v-painiketta ja paina sitten OK-painiketta,
jolloin näyttöön tulee Omat tiedot -valikko.
3. Jos haluat muuttaa käyttäjätunnustasi, osoitettasi tai sähköpostitietoja, korosta
haluamasi kohta V tai v-painikkeilla ja paina sitten OK, jolloin näyttöön tulee
näppäimistö. Poista vanha tiedot painamalla PUNAISTA painiketta. Valitse
tarvitsemasi kirjain tai numero V, v, B tai b-painikkeilla ja paina sitten OK-painiketta,
jolloin kirjain/numero siirtyy nimikenttään. Tee samat toimenpiteet muiden kirjaimien/
numerojen kohdalla, kunnes nimi on kirjoitettu kokonaan. Korosta Valmis (DONE) V,
v, B ja b-painikkeiden avulla ja paina sitten OK, jolloin näyttö siirtyy takaisin ’Omat
tiedot’ -valikkoon.
4. Jos haluat muuttaa ’MHP-sovelluksen kirjasinkokoa’, valitse kohta MHP-sovelluksen
kirjasinkoko V tai v-painikkeella ja paina sitten OK-painiketta vahvistukseksi. Muuta
kirjasinkokoa V ja v-painikkeilla, ja paina sitten OK-painiketta vahvistukseksi.
5. Poista kaikki valikot tv-ruudusta painamalla SINISTÄ painiketta useita kertoja.
19
Page 60

Digitaaliset toiminnot
OK
D
IG
IT
A
L
D
IG
IT
A
L
INDEX
Kanavahakemisto-valikko
Kanavahakemisto-valikosta pääsee helposti käyttämään seuraavia toimintoja:
a) Kokonaisten ohjelmalistojen katselu ja kohtien valinta.
b) Lähetettävien ohjelmien esikatselu.
c) Kanavien tallennus suosikkikanavalistalle.
d) Ohjelmaryhmien (esim. urheilu, elokuvat) laadinta.
1. Kanavahakemistoa voidaan käyttää ainoastaan digitaalitilassa. Varmista, että olet
2. Poista Info-näyttö ruudulta painamalla -painiketta ja paina sitten INDEX-
3. Siirry ylös- tai alaspäin V tai v-painikkeiden avulla ja korosta haluamasi ohjelma. Jos
4. Kun haluamasi ohjelma on korostettu, paina OK-painiketta, jolloin ohjelma näkyy
digitaalitilassa painamalla kaukosäätimen -painiketta. Tällöin ruutuun tulee Infonäyttö, jossa on lyhyet ohjelmatiedot sen hetkisestä ja seuraavasta ohjelmasta. Jos
tämä näyttö ei tule kuvaruutuun, paina kaukosäätimen DIGITAL/ -painiketta.
painiketta, jolloin Kanavahakemisto-valikko tulee näyttöön. Tässä valikossa on
ohjelmaluettelo ja sen hetkinen ohjelma näkyy esikatselukentässä valikon oikeassa
yläosassa.
et halua valita mitään ruudussa olevasta kuudesta ohjelmasta, paina PUNAISTA tai
VIHREÄÄ painiketta, jolloin ruutuun tulee kuusi edellistä tai seuraavaa ohjelmaa.
ruudun esikatselukentässä. Jos olet aikaisemmin päävalikossa asettanut
lapsilukkotoiminnon ikärajan ja kyseinen ohjelma ylittää ikärajan, sinun pitää syöttää
PIN-koodi, jotta esikatselu on mahdollista. Ohjelmat, jotka ylittävät ikärajan, on
merkitty -symbolilla.
5. Vahvista valintasi ja poistu Kanavahakemisto-valikosta OK-painikkeella.
Kanavan tallentaminen suosikkilistalle
1. Kun Kanavahakemisto-valikko on näytössä, valitse se kanava, jonka haluat tallentaa
suosikiksi V tai v-painikkeella.
2. Paina KELTAISTA painiketta, jotta saat näyttöön ’Lisää’-pikavalikon. Valitse se
henkilökohtainen kansio, johon haluat tallentaa kyseisen kanavan, V tai v-
painikkeella ja paina sitten OK-painiketta vahvistukseksi.
3. Poistu Kanavahakemisto-valikosta painamalla OK-painiketta.
Ohjelmaryhmän valinta
1. Kun Kanavahakemisto-valikko on ruudussa, paina SINISTÄ painiketta, jolloin
’Ryhmä’-pikavalikko tulee näyttöön.
2. Valitse ryhmä V ja v-painikkeilla ja paina sitten OK-painiketta vahvistukseksi.
Kanavahakemistossa on nyt vain sellaisia ohjelmia, jotka kuuluvat valitsemaasi
ryhmään.
Seuraavassa on lueteltu muutamia ohjelmaryhmiä:
Val inta Tällä listalla on ne ohjelmat, joita katsot useimmiten.
Viimeiset ohj. Tällä listalla on viisi viimeistä ohjelmaa, joita olet
katsonut.
Suos1 Tällä listalla on kanavat, jotka olet tallentanut tähän
kansioon suosikkikanaviksi.
Elokuvat Tällä listalla on kaikki saatavana olevat elokuvat.
Kaikki ohjelmat Tällä listalla on kaikki saatavana olevat ohjelmat.
20
3. Listan yläpuolella näkyvät ohjelmaryhmän tyyppi sekä päivämäärä ja aika.
4. Poistu Kanavahakemisto-valikosta painamalla OK-painiketta.
Page 61

D
IG
IT
A
L
D
IG
IT
A
L
OK
EPG-valikko
Digitaaliset toiminnot
EPG-ohjelmaopasvalikosta pääsee helposti seuraaviin toimintoihin:
a) Saatavilla olevien kokonaisten ohjelmalistojen katselu.
b) Lähetettävien ohjelmien esikatselu.
c) Ohjelmaryhmien (esim. urheilu, elokuvat) laadinta.
d) Ohjelmien nauhoitus.
1. EPG-valikko on käytössä ainoastaan digitaalitilassa. Tarkistaaksesi olevasi digitaali
tilassa, paina DIGITAL/ painiketta kaukosäätimestä. Informatio sarake ilmestyy
hetkeksi ruutuun kun vaihdat kanavia. Jos sarake ei ilmesty, paina DIGITAL/-
painiketta.
2. Paina -painiketta, jolloin EPG-valikko tulee näyttöön. Tässä valikossa on
tapahtumatietokenttä, esikatselukenttä, kahden tunnin ajastinpalkki (jaettu 30
minuutin jaksoihin) ja viiden kanavan ohjelmalista kahden tunnin ajalta.
3. Voit liikkua listan sisällä V, v, B ja b-painikkeiden avulla. Kun korostat ohjelman,
valikon vasemmassa yläosassa olevaan tapahtumakenttään tulee lyhyt kuvaus
ohjelmasta. Kun painat b-painiketta sen jälkeen, kun olet korostanut viimeisen
ohjelman oikealla, näyttöön tulevat ne ohjelmat, jotka näytetään seuraavan kahden
tunnin aikana. Paina PUNAISTA tai VIHREÄÄ painiketta, kun haluat katsella viittä
edellistä tai seuraavaa kanavaa ja niiden ohjelmia.
4. Jos korostamasi ohjelma lähetetään juuri sillä hetkellä, sinua kehotetaan painamaan
OK, jotta saat näyttöön esikatselun. Jos olet aikaisemmin päävalikossa asettanut
lapsilukkotoiminnon ikärajan ja kyseinen ohjelma ylittää tämän ikärajan, sinun pitää
syöttää PIN-koodi, jotta esikatselu on mahdollista.
5. Vahvista valintasi ja poistu EPG-valikosta OK-painikkeella.
Ohjelmaryhmän valinta
1. Kun EPG-valikko on ruudussa, paina SINISTÄ painiketta, jolloin ’Ryhmä’-pikavalikko
tulee näyttöön.
2. Valitse ohjelmaryhmä V ja v-painikkeilla ja paina sitten OK-painiketta
vahvistukseksi. EPG-luettelossa on nyt vain sellaisia ohjelmia, jotka kuuluvat
valitsemaasi ryhmään.
Seuraavassa on lueteltu muutamia ohjelmaryhmiä:
Val inta Tällä listalla on ne ohjelmat, joita katsot useimmiten.
Viimeiset ohj. Tällä listalla on viisi viimeistä ohjelmaa, joita olet katsonut.
Suos1 Tällä listalla on kanavat, jotka olet tallentanut tähän kansioon
suosikkikanaviksi.
Elokuvat Tällä listalla on kaikki saatavana olevat elokuvat.
Kaikki ohjelmat Tällä listalla on kaikki saatavana olevat ohjelmat.
3. Listan yläpuolella näkyvät ohjelmaryhmä sekä päivämäärä ja aika.
4. Poistu EPG-valikosta painamalla -painiketta.
21
Page 62

Digitaaliset toiminnot
OK
EPG-valikko
Nauhoitettavan ohjelman tai ajastusnäytön valinta
Kun EPG-valikko on näytössä, valitse haluamasi myöhempi ohjelma V, v, B ja b-
painikkeilla ja paina sitten KE LTAI STA painiketta, jolloin Ajastus-pikavalikko tulee
näyttöön. Tästä pikavalikosta voit valita a) Nauhoitus, b) Muistutus tai c) Manuaalinen.
a) Nauhoitus
Korosta ’Nauhoitus’ ja paina OK-painiketta, kun haluat asettaa videonauhuris
nauhoittamaan valitun ohjelman automaattisesti.
Huom:
Tämä toiminto toimii ainoastaan jos videonauhurissasi on Smartlink toiminto ja on kytkettynä AV3
liitäntään television takana. Jos videonauhurisi ei ole Smartlink yhteensopiva, joudut asettaa
videosi ajastuksen manuaalisesti nauhoittaaksesi ohjelman.
Kun jokin ohjelma on asetettu nauhoitettavaksi, valikon ajastinpalkin alapuolelle
ilmestyy kiinteä PUNAINEN palkki. Tämä värillinen palkki ilmoittaa nauhoitukseen
varatun ajan ja muistuttaa sinua, että muita ohjelmia ei voi nauhoittaa samanaikaisesti.
b) Muistutus
Korosta ’Muistutus’ ja paina OK, kun haluat, että valitsemasi myöhempi ohjelma
ilmestyy kuvaruutuun silloin, kun lähetys alkaa. Kun käytät tätä toimintoa, valikon
ajastinpalkin alle ilmestyy kiinteä vihreä palkki. Se ilmoittaa, että muistutustoiminto on
aktivoitu. Juuri ennen lähetyksen alkua kuvaruutuun ilmestyy muistutus, jossa
kysytään, haluatko yhä katsoa kyseistä ohjelmaa.
c) Manuaalinen
Korosta ’Manuaalinen’ ja paina OK, kun haluat, että televisio lähettää lähetyksen
alkaessa videonauhurille signaalin nauhoitettavasta kanavasta. Kuvaruutuun ilmestyy
seuraava näyttö:
Aseta nauhoituspäivä painamalla V tai v-painiketta ja paina sitten b-painiketta, jolloin
kursori siirtyy alkamisajan kohdalle. Tee sama toimenpide alkamisajan ja päättymisajan
sekä kanavanumeron kohdalla ja tallenna asetukset painamalla OK-painiketta, jolloin
näyttö siirtyy takaisin EPG-valikkoon. Poista EPG-valikko kuvaruudulta painamalla painiketta. Jos videonauhurissasi ei ole SmartLink-toimintoa, sinun on ajastettava
videonauhuriisi nauhoituksen alkamis- ja päättymisajankohdat vastaamaan kyseistä
ohjelmaa.
Huomautuksia nauhoituksesta:
Manuaalinen vaihtoehto toimii vain, jos videonauhuri on kytketty television takana olevaan AV3-liittimeen . Kun olet ohjelmoinut nauhoituksen, voit asettaa television valmiustilaan,
mutta älä kytke virtaa kokonaan pois päältä, sillä muutoin nauhoitus peruuntuu. Kun televisio on
valmiustilassa, television etuosassa oleva valmiustilan merkkivalo vilkuttaa vihreää valoa määrä-
tyin väliajoin merkiksi siitä, että nauhoitus on ohjelmoitu. Älä muuta kanavanumeroa tai kytke televisiota analogiseen tilaan silloin, kun videonauhuri on aloittanut ohjelman nauhoituksen, tai muutoin nauhoitus peruuntuu.
3
3
s
s
3
3
22
Ajastus-pikavalikossa on myös vaihtoehto ’Ajastuslista’. Jos korostat sen ja painat OK-
painiketta, kuvaruutuun ilmestyy näyttö, jossa on lueteltu kaikki ne ohjelmat, jotka olet
asettanut nauhoitukseen tai muistutukseen. Ohjelmien poisto listalta tapahtuu
seuraavasti:
1. Valitse poistettava ohjelma V tai v-painikeella ja paina sitten KE LTAI STA painiketta,
jolloin näyttöön tulee ’Ajastus’-pikavalikko.
2. Korosta ’Poista’ v-painikeella ja paina OK-painiketta vahvistukseksi.
3. Palaa tv:n normaaliin katseluun painamalla tai palaa EPG-valikkoon painamalla
SINISTÄ painiketta.
Page 63

TV:n valikkojärjestelmä
OK
MENU
OK
Seuraavilla sivuilla selitetään tv-asetusvalikot ja niiden toiminta. Vaikka useimpiin valikoihin päästään digitaaliohjelmien katselun
aikana, suosittelemme, että siirryt analogiseen tilaan, jotta voit käyttää kaikkia valikoita. Tarkista, missä tilassa televisio on, painamalla
kaukosäätimen -painiketta. Jos katselet digitaalista ohjelmaa, ruutuun tulee Info-näyttö, jossa on lyhyet ohjelmatiedot sen
hetkisestä ja seuraavasta ohjelmasta. Kun tämä näyttö on kuvaruussa, paina kaukosäätimen DIGITAL/ -painiketta, jolloin
television siirtyy analogiseen tilaan.
Television valikkojärjestelmän käyttö
Televisiovastaanottimessa on valikkojärjestelmä, joka perustuu sarjaan on screen näyttöjä. Näytöt auttavat käyttämään laitetta parhaalla mahdollisella tavalla kuvan ja
äänen säädöstä lisätoimintojen valintaan. Television valikkojärjestelmää käytetään
seuraavien kaukosäätimen painikkeiden avulla.
Saat näyttöön päävalikon painamalla MENU-painiketta.
1.
Valikkoa käytetään seuraavien painikkeiden avulla:
2.
- Valitse haluamasi valikko tai vaihtoehto painamalla painiketta v tai V.
- Siirry valikkoon tai vaihtoehtoon painamalla painiketta b.
- Palaa edelliseen valikkoon tai vaihtoehtoon painamalla painiketta B.
- Muuta valitun vaihtoehdon asetuksia painamalla painiketta v, V, B tai b.
- Vahvista ja tallenna valinta muistiin painamalla painiketta OK.
Poista valikko kuvaruudulta painamalla MENU-painiketta.
3.
Kuvasäädöt-valikko
Tämän valikon avulla voit asettaa kuvan mieleiseksesi. Mene valitsemasi vaihtoehdon
kohdalle ja paina b. Alla olevassa taulukossa näkyvät eri vaihtoehdot ja niiden
käyttöohjeet.
Vaihtoehto Käyttö
Kuvatila
Tämän vaihtoehdon avulla voit valita yhden neljästä eri
kuvatilasta. Live-, Elokuva- ja Pelitilat on esisäädetty ja
vain kontrastia voidaan säätää. Tilassa Omat voit
kuitenkin säätää kirkkautta, väriä ja terävyyttä.
Kontrasti, kirkkaus, väri, terävyys
Näillä voit säätää kontrastia, kirkkautta, väriä ja
terävyyttä.
Huomaa: Kirkkautta, väriä ja terävyyttä voidaan
säätää vain, kun kuva on tilassa Omat.
Palautus
Tämä vaihtoehto palauttaa kaikki kuvan asetukset
tehtaan säätöihin.
AI (Artificial Intelligence - Keinoäly)
Toiminto valvoo kuvaa ja rajoittaa äkillisiä kirkkauden
tai kontrastin muutoksia.
Kohinanvaimennus
Joskus heikko signaali aiheuttaa kuvan rakeisuutta
(kohinaa). Tämä toiminto vaimentaa kohinaa.
Valitse Live, Omat, Elokuva tai Peli
painamalla
painamalla OK.
Säädä tasot painamalla
Vahvista valinta painamalla OK.
Palauta kuvan oletusarvosäädöt
painamalla painiketta
Valitse On tai Ei painamalla
Vahvista valinta painamalla OK.
Valitse Korkea, Keski, Matala tai
Pois painamalla
valinta painamalla OK.
V tai v. Vahvista valinta
B tai b.
b.
V tai v.
V tai v. Vahvista
DRC-tila
DRC (Digital Reality Creation) -tilassa television kuva
on korkeampilaatuinen. Käytettävissä olevat asetukset
ovat:
Ei: Peruskuvalaatu 100 Hz.
DRC 50: Parempi erotusterävyys.
DRC 100: Optimaalinen erotusterävyys.
Värisävy
Tällä toiminnolla voit muuttaa kuvan värisävyä.
Käytettävissä olevat asetukset:
Lämmin: Antaa valkoiselle punaisen sävyn.
Normaali: Antaa valkoiselle neutraalin sävyn.
Kylmä: Antaa valkoiselle sinisen sävyn.
Valitse vaihtoehto Ei, DRC 50 tai
DRC 100 painamalla
Vahvista valinta painamalla OK.
Valitse vaihtoehto Lämmin,
Normaali tai Kylmä painamalla
v. Vahvista valinta painamalla OK.
V tai v.
V tai
23
Page 64

TV:n valikkojärjestelmä
OK
Äänisäädöt-valikko
Tämän valikon avulla voit asettaa äänen mieleiseksesi. Mene valitsemasi vaihtoehdon
kohdalle ja paina b. Alla olevassa taulukossa näkyvät eri vaihtoehdot ja niiden
käyttöohjeet.
Vaihtoehto Käyttö
Äänitehoste
Tämän vaihtoehdon avulla voit valita yhden neljästä
eri äänitilasta.
Taajuuskorjaimen säädöt
Tällä toiminnolla voit muuttaa ääntä viidellä eri
taajuuskaistalla.
Huomaa: Voit k äyttää tätä toimintoa vain, kun
Äänitehoste on asetettu kohtaan Omat.
Virtuaalitehoste
Tämän vaihtoehdon avulla voit säätää ympäristön
äänitehon Dolby-ympäristön lähetyksiä
kuunnellessasi.
Huomaa: Voit k äyttää tätä toimintoa vain, kun
Äänitehoste on asetettu kohtaan Dolby V.
Balanssi
Tämän vaihtoehdon avulla voit säätää äänen
balanssin vasemman ja oikean kaiuttimen välillä.
Autom. tasosäätö
Joskus lähetyksen äänenvoimakkuus muuttuu (esim.
mainokset kuuluvat usein kovempaa kuin ohjelmat).
Tämän toiminnon avulla voit poistaa eron ja saat
aikaan tasaisen äänenvoimakkuuden.
Kaksiääni
Kun vastaanotat kaksikielistä lähetystä voit valita
kumpaa kieltä haluat kuunnella.
Valitse painikkeella
Omat, Dolby V*, Voimakas** tai
Normaali**. Vahvista valinta
painamalla OK.
Valitse haluamasi kaista painamalla
tai b. Säädä taajuustaso painamalla V
tai v. Vahvista valinta painamalla OK.
Säädä taso painamalla
Vahvista valinta painamalla OK.
Aseta balanssi painamalla
Vahvista valinta painamalla OK.
Valitse Ei tai On painamalla
Vahvista valinta painamalla OK.
Valitse painikkeella
ensimmäisen kielen kuuntelu tai B
toisen kielen kuuntelu. Vahvista
valinta painamalla OK.
V tai v vaihtoehto
B tai b.
B tai b.
V tai v.
V tai v joko A
B
Kun vastaanotat stereolähetystä, voit valita mono-
tai stereoäänen.
/Ulostulo Voim.
Tämän vaihtoehdon avulla voit asettaa samalla sekä
kuulokkeiden äänenvoimakkuuden että television
takana sijaitsevien ulostuloliittimien
äänenvoimakkuuden.
Kaksiääni
Kun vastaanotat kaksikielistä lähetystä voit valita
kumpaa kieltä haluat kuunnella.
Kun vastaanotat stereolähetystä, voit valita mono-
tai stereoäänen.
Huom.:
* Kun ‘Dolby V’ on valittu, televisio simuloi kaikki Dolby Pro Logic Surround -äänen efektit ilman
lisäkaiuttimia. Valmistettu Dolby Laboratoriesin lisenssillä. ‘Dolby’, ‘Pro Logic’ ja kaksois-Dsymboli ovat Dolby Laboratoriesin tavaramerkkejä.
** Normaali’ ja ‘Voi ma kas ’ ovat ‘BBE High Definition Sound System’in toimintoja. Järjestelmä
parantaa äänen selvyyttä, yksityiskohtia ja tuottoa ja lisää musiikin todellisuudentuntua.
Valitse vaihtoehto Mono tai Stereo
painamalla
painamalla OK.
Aseta kuulokkeiden ja äänen
ulostuloliittimien äänenvoimakkuus
painikkeella
painamalla OK.
Valitse painikkeella
ensimmäisen kielen kuuntelu tai B
toisen kielen kuuntelu. Vahvista
valinta painamalla OK.
Valitse vaihtoehto Mono tai Stereo
painamalla
painamalla OK.
V tai v. Vahvista valinta
B tai b. Vahvista valinta
V tai v joko A
V tai v. Vahvista valinta
24
Page 65

TV:n valikkojärjestelmä
OK
OK
D
IG
IT
A
L
D
IG
IT
A
L
Toimintovalikko
Tämän valikon avulla voit asettaa uniajastimen ja määritellä AV3-liittimen
ulostulosignaalin. Alla olevassa taulukossa näkyvät eri vaihtoehdot ja niiden käyttöohjeet.
Auto Format
Tämän toiminnon ollessa päällä säätää televisio automaattisesti
kuvakokoa lähetykselle sopivaksi.
Kuvasuhdemuutos
(vain jos Auto Format on asetettu asentoon ‘on’)
Katsellesasi 4:3 tai 14:9 lähetystä näkyy kuvan reunoilla tummat
alueet. Valittavissa olevat vaihtoehdot:
Ei: Tummat alueet jäävät näkyviin
On: Televisio siirtyy automaattisesti Smart asentoon, poistaen
kaikki tummat alueet televisioruudulla.
Uniajastin
Tämän vaihtoehdon avulla voit asettaa ajan, jonka kuluttua
televisio kytkeytyy automaattisesti valmiustilaan. Aika voidaan
asettaa 10 minuutin välein enintään 90 minuuttiin.
AV3 lähtö
Tämän vaihtoehdon avulla voit määrittää, mikä signaalilähde tulee
television takana sijaitsevasta AV3 scart -liittimestä (merkitty
nauhoittaa muista television eri liittimiin kytketyistä laitteista.
Käytettävissä olevat asetukset:
Ana.TV: Lähettää valitun analogisen TV-signaalin AV3-liittimeen.
). Jos kytket tähän liittimeen videonauhurin, voit
3/s 3
Digi. TV: Lähettää valitun digitaalisen TV-signaalinAV3-liittimeen.
AV1 : Television takana sijaitsevaan liittimeen kytkettyjen
laitteiden signaalien lähdöt.
AV2 : Television takana sijaitsevaan liittimeen kytkettyjen
AV3 : Television takana sijaitsevaan liittimeen
laitteiden signaalien lähdöt.
kytkettyjen laitteiden signaalien lähdöt.
AV4 : Television takana sijaitsevaan liittimeen
kytkettyjen laitteiden signaalien lähdöt.
1
2
3/s 3
4/s 4
Paina V tai v valitaaksesi
‘On’ tai ‘Ei’. Paina OK
vahvistaaksesi valinnan.
Paina V tai v valitaaksesi
‘On’ tai ‘Ei’. Paina OK
vahvistaaksesi valinnan.
Valitse haluamasi aika
painamalla V tai v. Vahvista
valinta painamalla OK.
Valitse vaihtoehto TV, AV1,
AV2, AV3, tai AV4
painamalla painiketta V tai
v. Vahvista valinta
painamalla OK.
Asetusvalikko
Valikko sisältää lisätoimintoja television henkilökohtaisia asetuksia varten. Tarkista, missä
tilassa televisio on, painamalla kaukosäätimen -painiketta. Jos katselet digitaalista
ohjelmaa, ruutuun tulee Info-näyttö, jossa on lyhyet ohjelmatiedot sen hetkisestä ja
seuraavasta ohjelmasta. Kun tämä näyttö on kuvaruussa, paina kaukosäätimen DIGITAL/
-painiketta, jolloin television siirtyy analogiseen tilaan.
Automaattiviritys
(ainoastaan analogi kanaville)
Kaikki käytettävissä olevat kanavat on viritetty televisiota asennettaessa. Vaihtoehto
‘Automaattiviritys’ valikossa ‘Asetukset’ mahdollistaa toimenpiteen toistamisen (esim. jos
asennat television uuteen paikkaan tai haluat etsiä uusia kanavia). Hae vaihtoehto
‘Automaattiviritys’ ja suorita valinta painamalla b. Näyttöön tulee automaattivirityksen sivu.
Käynnistä viritys painamalla OK. Kun kaikki kanavat on viritetty, televisio palaa
normaalitoimintaan.
Ohjelmien vaihto
(ainoastaan analogi kanaville)
Vaihtoehto ‘Ohjelmien vaihto’ valikossa ‘Asetukset’ mahdollistaa kanavien televisioon
tallentamisjärjestyk-sen muuttamisen. Hae vaihtoehto ‘Ohjelman vaihto’ ja paina b, kun
haluat siirtyä valikkoon ‘Ohjelman vaihto’. Valitse haluamasi kanava painamalla painiketta
v tai V ja vahvista valinta painamalla painiketta b. Valitse kanavan uusi sijainti painamalla
painiketta v tai V ja paina sitten OK. Valitsemasi kanava siirtyy uuteen kohtaan. Toista
menettely, jos haluat vaihtaa muiden kanavien paikkoja.
AV-es ivalint a
Valikon 'Asetukset' vaihtoehdon ‘AV-esivalinta’ avulla voit antaa nimen television AVliittimiin kytketyille laitteille. Nimi tulee hetkeksi näyttöön, kun laite valitaan. Hae vaihtoehto
‘AV-esivalinta’ ja paina b, kun haluat siirtyä valikkoon ‘AV-esivali nta’. Valitse se liitin, jolle
haluat antaa nimen painamalla painiketta v tai V. Valitse sarake NIMI painamalla
painiketta b. Valitse ensimmäinen merkki painamalla painiketta v tai V. Vahvista se
painamalla b. Valitse seuraavat merkit samalla tavalla (enintään viisi merkkiä). Valittuasi
kaikki merkit vahvista painamalla OK.
Asennus
Hae vaihtoehto ‘Asennus’ ja paina b, kun haluat siirtyä valikkoon ‘Asennus’. Valikko
‘Asennus’ kuvataan seuraavalla sivulla.
25
Page 66

TV:n valikkojärjestelmä
OK
Käsinasetusvalikko
Tästä valikosta pääset eri lisätoimintoihin. Vaihtoehdot:
Kieli/Maa
Kieli ja maa on valittu television asentamisen aikana. Valikon ‘Asennus’ vaihtoehto ‘Kieli/
Maa’ mahdollistaa asetusten muuttamisen. Hae vaihtoehto ‘Kieli/Maa’ ja paina b, kun
haluat siirtyä ‘Kieli/Maa’-valikkoon. Valitse painikkeella v tai V vaihtoehto ‘Kieli’ tai ‘Maa’.
Aseta painikkeella b. Hae oikea asetus painikkeella v tai V. Vahvista painamalla OK.
Käsinviritys
Hae vaihtoehto ‘Käsinviritys’ ja paina b, kun haluat siirtyä ‘Käsinviritys’-valikkoon.
‘Käsinviritys’-valikko kuvataan seuraavalla sivulla.
Pikavalintojen asetus
Hae vaihtoehto ‘Pikavalintojen asetus’ ja paina b, kun haluat siirtyä ‘Pikavalintojen
asetus’ -valikkoon. ‘Pikavalintojen asetus’ -valikko kuvataan sivulla 28.
RGB-asetus
Kun katsot signaalia AV1- tai AV2-liittimeen kytketystä RGB-laitteesta (esim. DVD-laite,
PlayStation) kuva saattaa vaatia säätämistä. Valikon ‘Asennus’ vaihtoehdon 'RGB-
asetus' avulla voit säätää RGB-laitteiden signaalien kokoa ja kuvan vaakasuoraa
asentoa. Hae vaihtoehto ‘RGB-asetus’ ja paina b, kun haluat siirtyä valikkoon ‘RGB-
asetus’. Valitse Vaakakeskitys painamalla b. Keskitä kuvaa alueella -10 - +10
painamalla v tai V. Tallenna säädöt painamalla OK. Valitse Vaakakoko painamalla v.
Aseta kuvan koko alueella -10 - +10 painamalla v tai V. Tallenna säädöt painamalla OK.
Huomaa:
Jos RGB-laitteita ei ole kytketty AV1- tai AV2 scart -liittimiin vaihtoehto ‘RGB-asetus’ ei ole
käytettävissä.
Kuvan suoristus
Joskus maan luonnollinen magneettikenttä aiheuttaa kuvan kallistumista. Valikon
‘Asennus’ vaihtoehdon 'Kuvan suoristus' avulla voit poistaa kallistuman. Hae vaihtoehto
‘Kuvan suoristus’ ja paina b. Suorista kuva alueella -5 - +5 painamalla v tai V. Tallenna
säädöt painamalla OK.
Oma salasana
Valikon ‘Asennus’ vaihtoehdon 'Oma salasana' avulla voit antaa koodin, joka helpottaa
television tunnistamista, jos se sattumalta varastetaan ja saadaan takaisin. Koodi
voidaan antaa vain kerran - muista ottaa se talteen. Hae vaihtoehto ‘Oma salasana’ ja
paina b. Paina v tai V, kun haluat saada näyttöön haluamasi koodin ensimmäisen
merkin. Vahvista painamalla b. Jatka kunnes kaikki merkit on annettu. Tallenna säädöt
painamalla OK. Näyttöön tulee vahvistussivu. Vahvista valinta painamalla OK.
26
Page 67

TV:n valikkojärjestelmä
OK
1
4
7
3
6
9
2
5
8
0
DIGITAL
DIGITAL
Käsinviritysvalikko
(ainoastaan analogi kanaville)
Tar ki s ta , mi ss ä tilassa televisio on, painamalla kaukosäätimen -painiketta. Jos
katselet digitaalista ohjelmaa, ruutuun tulee Info-näyttö, jossa on lyhyet ohjelmatiedot
sen hetkisestä ja seuraavasta ohjelmasta. Kun tämä näyttö on kuvaruussa, paina
kaukosäätimen DIGITAL/ -painiketta, jolloin television siirtyy analogiseen tilaan.
Hae vaihtoehto ‘Käsinviritys’ ja paina b, kun haluat siirtyä valikkoon ‘Käsinviritys’. Valitse
haluamasi kanava painikkeella v tai V. Valitse sarake SYS painamalla kaksi kertaa
painiketta b. Valitse television lähetysjärjestelmä painikkeella v tai V (B/G Länsi-
Euroopan maissa, D/K Itä-Euroopan maissa tai EXT ulkopuolista lähdettä varten).
Vahvista valinta painamalla b ja valitse sarake CH. Valitse kanavan viritys painamalla v
tai V (C maakanavat, S kaapelikanavat tai F suora taajuussyöttö). Vahvista painamalla
b. Nyt kanavat on viritettävä yksi kerrallaan seuraavalla tavalla:
(a) Jos tunnet televisiolähetyksen, VCR-testisignaalin tai taajuuden kanavan
numeron, anna kanavan numero painamalla kaukosäätimen numeropainikkeita.
Tallenna säädöt painamalla OK.
(b) Ellet tunne kanavan numeroa,
valitse HAKU painamalla v. Vastaanotin hakee automaattisesti seuraavan
käytettävissä olevan TV-kanavan tai VCR-testisignaalin. Kun olet löytänyt
kanavan, tallenna se painamalla OK tai jatka hakua painamalla v.
(c) Ulkopuoliset lähteet (EXT):
Paina painiketta v, kun haluat valita vaihtoehdon AV1, AV2, AV3, tai AV4 sen
mukaan, mihin liittimeen laite on kytketty. Tallenna säädöt painamalla OK.
Kanavan nimen antaminen
Tavallisesti kanavan nimi saadaan automaattisesti teksti-tv:stä (jos palvelu on
olemassa). Nimi tulee hetkeksi näyttöön, kun kanava valitaan. Valikon ‘Käsinviritys’
vaihtoehdon 'NIMI' avulla voit antaa mieleisesi nimen, joka saa sisältää korkeintaan 5
kirjainta tai numeroa. Hae vaihtoehto ‘Käsinviritys’ ja paina b, kun haluat siirtyä
valikkoon ‘Käsinviritys’. Valitse haluamasi kanavan numero painamalla v tai V. Paina
painiketta b useita kertoja, kun haluat valita sarakkeen NIMI. Valitse ensimmäinen
merkki painamalla v tai V. Vahvista merkki painamalla b. Valitse muut merkit samalla
tavalla. Valittuasi kaikki merkit vahvista painamalla OK.
Kanavan ohittaminen
Valikon ‘Käsinviritys’ vaihtoehdon 'OHITUS' avulla voit ohittaa käyttämättömät kanavat,
kun valitset kanavia painamalla PROG+/-. Voit kuitenkin valita myös ohitetun kanavan
kaukosäätimen numeropainikkeiden avulla. Hae vaihtoehto ‘Käsinviritys’ ja paina b,
kun haluat siirtyä valikkoon ‘Käsinviritys’. Valitse haluamasi kanavan numero painamalla
v tai V. Paina painiketta b, kun haluat valita sarakkeen OHITUS. Valitse painikkeella v
tila On (valitsemalla Ei poistat OHITUS-toiminnon käytöstä). Tallenna valinta
painikkeella OK.
27
Page 68

TV:n valikkojärjestelmä
OK
DIGITAL
DIGITAL
Pikavalintojen asetus
(ainoastaan analogi kanaville)
Tar ki s ta , mi ss ä tilassa televisio on, painamalla kaukosäätimen -painiketta. Jos
katselet digitaalista ohjelmaa, ruutuun tulee Info-näyttö, jossa on lyhyet ohjelmatiedot
sen hetkisestä ja seuraavasta ohjelmasta. Kun tämä näyttö on kuvaruussa, paina
kaukosäätimen DIGITAL/ -painiketta, jolloin television siirtyy analogiseen tilaan.
‘Pikavalintojen asetus’ valikossa ‘Asennus’ mahdollistaa kuvan laadun parantamisen
häiriöiden aikana, yksittäisen kanavan äänenvoimakkuuden säätämisen, television
hienovirityksen ja kanavan asettamisen decoderin signaalien katselemista varten. Hae
vaihtoehto ‘Pikavalintojen asetus’ ja paina b, kun haluat siirtyä valikkoon ‘Pikavalintojen
asetus’. Valitse haluamasi kanavan numero painamalla v tai V. Paina useita kertoja
painiketta b, kun haluat valita jonkin seuraavista vaihtoehdoista.
(a) VOIM (Äänenvoimakkuuden tason poikkeama). Yksittäisen kanavan
äänenvoimakkuuden tason asettaminen. Aseta äänenvoimakkuus alueella -7 - +7
painamalla v tai V. Tallenna säädöt painamalla OK.
(b) AFT (Automaattinen hienosäätö). Kanavan hienosäätö. Valitse On painamalla v
tai V. Voit myös painaa v tai V, kun haluat asettaa taajuuden käsin alueella -15 -
+15. Tallenna säädöt painamalla OK.
(c) DECODER. Kanavan asettaminen salattujen signaalien katselemista varten (esim.
MaksuTV -decoderista). Paina painiketta v tai V, kun haluat valita vaihtoehdon AV1
tai AV3 sen mukaan, mihin liittimeen laite on kytketty. Tallenna säädöt painamalla
OK. Nyt valitun kanavan signaali on dekoodattu.
28
Page 69

M
EM
ORY
STICK
Memory Stick kuvien katselu
Memory Stick* on uusi tallennusmedia diskettiä suuremmalla kapasiteetillä. Se on
erityisesti suunniteltu digitaalisen datan siirtoon ja jakeluun Memory Stick
yhteensopivien tuotteiden kesken. Käytä Memory Stickiä JPEG kuvien (DCF versio 1.0
formaatti)** erikseen tai diaesitys katseluun televisioruudulla. Koska Memory Stick on
siirrettävä voidaan sitä myös käyttää ulkoisena tallennusmediana.
Memory Stick käyttö
Aseta Memory Stick etupaneelin paikkaan kunnes se niksahtaa paikalle. v symboolin
täytyy osoittaa eteenpäin. Punainen valo vilkkuu Memory Stick tietojen ladatessa.
Memory Stick toiminto
Memory Stick poistaminen
Var mista että punainen valo ei pala. Paina Memory Stickiä syvemmälle, päästä sormesi
irti ja Memory Stick hyppää ulos. Poista Memory Stick.
Huom:
Tieto voi vahingoittua jos poistat Memory Stickin tai sammutat television tietoa luettaessa tai
kirjoittaessa.
Memory Stick valikko
Memory Stick valikko tulee esiin automaattisesti kun asetat ‘Memory Stickin’
televisioon. Vaihtoehtoisesti paina MEMORY STICK painiketta jos televisiossa on jo
Memory Stick sisällä saadaksesi Memory Stick valikko esiin. Valikosta löytyy 3
vaihtoehtoa, ‘Hakemisto’, ‘Diaesitys’ ja ‘Asetukset
Huom:
Memory Stick ja logo ovat Sony Corporation rekisteröityjä tuotemerkkejä.
DCF (Design rules for Camera File systems) on tiedostonimi standardi digitaali kameroissa, DV
kameroissa jne. DCF standardia tukee SONY ja muut valmistajat.
29
Page 70

Memory Stick toiminto
OK
D
IG
ITA
L
D
IG
ITA
L
MEMORY
STICK
DIG
ITAL
D
IG
ITAL
MEMORY
STICK
OK
Takaisin
Hakemisto
Tämä toiminto antaa sinulle mahdollisuuden katsella JPEG DCF kuvia Memory
Stickiltäsi televisioruudullasi.
Paina MEMORY STICK painiketta kaukosäätimestä saadaksesi ‘Memory
1.
Stick’ valikko esiin.
Paina V tai v painiketta valitaaksesi ‘Hakemisto’ ja paina sitten OK painiketta
2.
nähdäksesi ‘Memory Stick Index’ sivun.
Paina v, V, B tai b painkkeita valitaksesi haluamasi kuva, paina OK
3.
painiketta saadaksesi kuva näkymään koko kuvaruudussa.
Huom:
Ainoastaan rajattu määrä kuvia näkyy kerralla ruudulla. Jos haluamasi kuva ei näy
ruudulla, valitse ‘Sivu +’ ja paina OK painiketta nähdäksesi seuraavat kuvat. Paina v,
V, B tai b painkkeita valitaksesi haluamasi kuva ja paina OK painiketta nähdäksesi
kuva.
Käytä v, V, B tai b painkkeita valitaksesi ‘Takaisin’. Paina OK painiketta
4.
siirtyäksesi Memory Stick valikkoon tai paina DIGITAL/ näppäintä koska
tahansa palataksesi normaaliin televisiokatseluun.
Diaesitys
Tämä toiminto antaa sinulle mahdollisuuden nähdä kaikki kuvat Memory Stickiltä
diaesityksenä television kuvaruudulta.
Paina MEMORY STICK painiketta kaukosäätimestäsi saadaksesi Memory
1.
Stick valikko esiin.
Paina V tai v painiketta valitaksesi Diaesityksen.
2.
Paina OK painiketta käynistääksesi diaesitys. (Muuttaaksesi yksittäisen
3.
kuvan esitysaikaa katso osio ‘Asetukset’ seuraavalla sivulla.)
Paina OK painiketta diaesityksen aikana päästääksesi takaisin Memory
4.
Stick valikkoon. Paina DIGITAL/ painiketta palataksesi normaaliin
televisiokatseluun.
30
Page 71

Memory Stick toiminto
OK
D
IG
IT
A
L
D
IG
IT
A
L
MEMORY
STICK
Asetukset
Tämä toiminto antaa sinulle mahdollisuuden (1) muuttaa yksittäisen kuvan esitysaikaa,
(2) asettaa diaesityksen jatkuvaan toistoon, (3) näyttämään tiedostojen tiedot ja (4)
kääntää kuvaa näytöllä.
Paina MEMORY STICK painiketta kaukosäätimestä saadaksesi ‘Memory
1.
Stick’ valikko esiin.
Paina V tai v painiketta valitaksesi ‘Asetukset’ ja paina OK painiketta
2.
saadaksesi ‘Memory Stick Asetukset’ valikko esiin.
Paina v tai V painiketta valitaksesi asetuksen jota haluat muuttaa. Alla oleva
3.
taulukko selittää jokaisen toiminnon ja toiminnan.
Paina DIGITAL/ painiketta palataksesi normaaliin televisiokatseluun.
4.
Toiminto Toiminta
Takaisin
Käytä tätä toimintoa palataksesi
takaisin ‘Memory Stick
Valikkoon
Diaesitys – esitysaika
Tämä toiminto antaa sinulle
mahdollisuuden muuttaa
yksittäisen kuvan esitysaikaa
diaesityksessä.
Diaesitys – toisto
Tämä toiminto antaa sinulle
mahdollisuuden asettaa
jatkuvan toiston diaesityksellesi.
Tiedostojen Tiedot
Käytä tätä toimintoa jos haluat
tiedostojen tiedot näkyviin
diaesityksen aikana.
Käännä kuvaa
Tämä toiminto antaa sinulle
mahdollisuuden kääntää kuvaa.
‘Takaisin’ valittuna paina OK painiketta palataksesi
Memory Stick valikkoon.
‘Diaesitys – esitysaika ’ valittuna paina OK painiketta
säätääksesi esitysaikaa. Painamalla v tai V painikkeita voit
vaihtaa 5 sekunnin, 10 sekunnin, 1 minuutin, 5 minuutin tai
15 minuutin aikavälin, painamalla OK painiketta varmistat
valintasi.
Diaesitys – toisto’ valittuna paina OK painiketta
asettaaksesi toiston. Painamalla
v tai V painikkeita valitse
‘Päällä’ tai ‘Pois’ ja paina OK varmistaaksesi valintasi.
‘Tiedostojen tiedot’ valittuna paina OK painiketta
asettaaksesi tietojen näyttäminen. Painamalla v
painikkeita
valitse ‘Päällä’ tai ‘Pois’ ja paina OK
tai V
varmistaaksesi valintasi.
‘Käännä kuvaa’ valittuna paina OK painiketta päästäksesi
‘Käännä kuvaa’ valikkoon. Paina v, V, B tai b painikkeita
valitaksesi haluamasi kuva. Paina OK painiketta
kääntääksesi kuvaa. Kun olet valmis paina
v, V, B tai b
painikkeita valitaksesi ‘Takaisin’ ja paina OK palataksesi
‘Memory Stick Asetukset’ valikkoon.
31
Page 72

Memory Stick toiminto
D
IG
IT
A
L
D
IG
IT
A
L
OK
MENU
Memory Stick kuvien asetuksien asettaminen
Voit säätää Memory Stick kuvien kontrastia, kirkautta, väriä ja terävyyttä
televisiokatselussa
Esitä Memory Stick -kuva näytöllä (katso osio ‘Hakemisto’ sivulla 30).
1.
Paina MENU painiketta saadaksesi ‘Kuva Säädöt’ valikko esiin.
2.
Paina b painiketta päästääksesi ‘Kuva Säädöt’ valikkoon. Paina v tai V
3.
valitaksesi asetuksen jota haluat säätää* ja paina b painiketta valitaksesi asetus.
Huom:
Ainoastaan ‘Kontrasti’, ‘Ter ävyys’, ‘Kirkkaus’ ja ‘Väri’ vaihtoehdot ovat valittavissa ‘Kuva
Säädöt’ valikossa Memory Stick katselussa.
Paina B tai b painiketta säätääksesi asetusta. Paina OK painiketta
4.
vahvistaaksesi asetukset.
Paina MENU painiketta päästääksesi pois ‘Kuva Säädöt’ valikosta.
5.
Paina DIGITAL/ painiketta palataksesi normaaliin televisiokatseluun.
6.
Huom:
Kaikki kuvaasetukset palautuvat normaaliin tasoon kun painat DIGITAL
/ painiketta.
Memory Stick varotoimet
Etiketti
• Suosittelemme että teette varmuuskopion tärkeästä sisällöstä jonka talletatte
Memory Stickille.
• Kun asetatte Memory Stickin kopiosuojan asentoon ‘LOCK’ dataa ei voi tallentaa,
muokata tai poistaa Memory Stickiltä.
•Älä poista Memory Stickiä dataa kirjoittaessa tai luettaessa.
• Tieto voi vahingoittua jos:
- Poistat Memory Stickin tai sammutat television tietoa luettaessa tai
kirjoittaessa..
- Jos käytät Memory Stickiä paikassa jossa memory stick altistuu staatiselle
sähkölle tai sähköiselle häiriölle.
• Käytä ainoastaan Memory Stickin omia tarroja ja kiinitä se ainoastaan siihen tarkoi-
tettuun paikkaan.
• Kiinnitä tarra niin ettei se ole sille tarkoitetun alueen ulkopuolella.
• Kuljeta ja säilytä Memory Stickiä omassa kotelossaan.
•Älä kosketa Memory Stickin liittimiin sormillasi tai metallisella esineellä.
•Älä lyö, taivuta tai pudota Memory Stickiä.
•Älä pura tai muuta Memory Stickiä.
•Älä kasta Memory Stickiä.
•Älä käytä tai säilytä Memory Stickiä seuraavanlaisissa paikoissa:
- kuumassa, kuten esim. aurinkoon pysäköidyssä autossa.
- suorassa auringonvalossa.
- kosteassa tai paikassa jossa Memory Stick altistuu hapettuville aineille.
• Televisio tukee ainoastaan JPEG DCF tiedostoja. Tiedostot joita ei tunnisteta DCF
muodossa tallennetuiksi näytetään “--------“ muodossa. JPEG DCF tiedostot jotka
ovat tietokoneella tehtyjä tai muokattuja voivat näyttää vääristyneiltä televisiossa.
Kirjoituksenestokytkin
32
Page 73

Lisälaitteiden kytkentä televisioon
D
IG
IT
A
L
D
IG
IT
A
L
Lisälaitteiden kytkentä televisioon
Seuraavassa kuvassa näkyy, miten televisiovastaanottimen taakse voidaan kytkeä useita audio- ja videolaitteita.
Lisälaitteiden liittäminen takapaneliin
C
B
VCR
DVD
Decoder/Set top box
(SMARTLINK)
s
3
3
VCR
2
DVD
1
DIGITAL
L/G/S/I
OPTICAL OUTPUT
MODEM
. . .
5V 200mA
D F
ANALOGUE
R/D/D/D
A
Modeemi
Hi-Fi
DVD soittimen liittäminen
Kytke scart-kaapeli television B liittimestä DVD soittimen scart-liitäntään
1.
(katso DVD soittimen käyttöohje).
Laita DVD levy DVD-soittimeen, paina ‘PLAY’ painiketta. Kuva ilmestyy
2.
automaattisesti televisioruudulle.
Jos ei paina / painiketta kaukoohjaimesta jatkuvasti kunnes kuva
ilmestyy ruudulle.
E
MD/DAT player
Huom.:Kytkentäkaapelit eivät kuulu varusteisiin.
Paina DIGITAL/ painiketta kun haluat palata normaaliin televisio
3.
katseluun.
Dekooderin/Set-top boxin liittäminen
Kytke scart-kaapeli television A liittimestä set-top boxin scart-liittimeen
1.
(katso set-top boxin käyttöohjeet). Kytke virta set-top boxiin.
Laita DVD levy DVD-soittimeen, paina ‘PLAY’ painiketta. Kuva ilmestyy
2.
automaattisesti televisioruudulle. Jos ei paina / painiketta
kaukoohjaimesta jatkuvasti kunnes kuva ilmestyy ruudulle.
Paina DIGITAL/ painiketta kun haluat palata normaaliin televisio
3.
katseluun.
Smartlink-videonauhurin kytkentä
Smartlink on suora yhteys television ja videonauhurin välillä. Lisätietoja Smartlinkistä
löytyy videonauhurin käyttöohjeesta. Varmista, että Smartlink-nauhurisi on kytketty
liittimeen C täydellisen 21-napaisen scart-kaapelin avulla.
33
Page 74

Lisälaitteiden kytkentä televisioon
D
IG
IT
A
L
D
IG
IT
A
L
Lisälaitteiden liittäminen takapaneliin
C
B
VCR
DVD
Decoder/Set top box
(SMARTLINK)
s
3
3
VCR
2
DVD
1
DIGITAL
L/G/S/I
OPTICAL OUTPUT
MODEM
. . .
5V 200mA
D F
ANALOGUE
R/D/D/D
A
Modeemi
Hi-Fi
MD/DAT soittimen liittäminen
Kytke sopiva optinen kaapeli television E liitännästä MD/DAT soittimen
1.
optiseen liitäntään.
E
MD/DAT player
Huom:
Kytkentäkaapelit eivät kuulu varusteisiin.
Seuratkaa MD/DAT soittimen ohjeita jos haluatte äännittää soittimelle.
2.
Hifilaitteiston liittäminen
Kytke RCA-kaapeli television D liittimestä Hifilaitteiston liittimiin (katso
1.
Hifilaitteiston käyttöohjeet).
Käytä ‘ /Audio-lähtö’ toimintoa televisiosta säätääksesi äänentasoa (katso
2.
‘Äänen säätö’ sivulla 24).
Mukanatulevan modeemin liittäminen
Kytke modeemi television F liittimeen.
1.
Käytä ‘Detailed set up’ valikkoa asettaaksesi modeemi toimintaan (katso
2.
sivu 18).
34
Page 75

Lisälaitteiden liittäminen etupaneliin
D
IG
IT
A
L
D
IG
IT
A
L
Kuulokkeiden
Lisälaitteiden kytkentä televisioon
Videokamera
MONO
R/D/D/D
L/G/S/I
S
4
MEMORY STICK
4
4
+
P +
MEMORY STICK
Huom.:
Kytkentäkaapelit eivät kuulu varusteisiin.
I J
MONO
R/D/D/D
L/G/S/I
S
4
4
4
G H
Playstationin liittäminen
Kytke playstationin mukana oleva kaapeli television I (video sisään) ja J
1.
(vasen ja oikea äänitulo) liitimiin.
Kytke virta PlayStationiin, aseta peli ja paina / painiketta
2.
kaukoohjaimesta jatkuvasti kunnes kuva ilmestyy ruutuun.
Paina DIGITAL/ painiketta kun haluat palata normaaliin televisio
3.
katseluun.
+
P +
PlayStationin
S-VHS/8mm/Hi8 videokameran liittäminen
Kytke videokamera liittimiin H ja J tai I ja J kuten kuvassa.
1.
Paina ‘PLAY’ painiketta videokamerasta, paina tämän jälkeen /
2.
painiketta kaukoohjaimesta jatkuvasti kunnes kuva ilmestyy ruutuun.
Paina DIGITAL/ painiketta kun haluat palata normaaliin televisio
3.
katseluun.
Kuulokkeiden liittäminen
Kytke kuulokkeet television G liittimeen.
1.
Käytä ‘ /Audio-lähtö’ toimintoa televisiosta säätääksesi kuulokkeiden
2.
äänenvoimakkuutta (katso ‘Äänen säätö’ sivulla 24).
35
Page 76

Lisälaitteiden kytkentä televisioon
1
4
7
3
6
9
2
5
8
0
M
O
D
E
Kaukosäätimen konfigurointi videonaurille/DVD-soittimelle
Tällä kaukosäätimellä voidaan ohjata Sonyn DVD-soittimien ja videonauhureiden lisäksi myös muiden
valmistajien laitteita. Kun haluat käyttää muun merkkisiä DVD-soittimia ja videonauhureita tällä
kaukosäätimelä, tee seuraavat toimenpiteet:
1. Etsi laitteesi merkkiä vastaava kolminumeroinen koodi alla olevasta luettelosta. Jos kyseiselle merkille
on annettu useampi kuin yksi koodi, merkitse vain ensimmäinen koodi muistiin tässä vaiheessa.
2. Paina kaukosäätimen MODE-painiketta, kunnes vihreä VCR-valo
3. Kun oikea vihreä valo palaa, paina KELTA ISTA painiketta noin kuuden sekunnin ajan, kunnes valo
alkaa vilkkua.
4. Syötä DVD-soittimen tai videonauhurin kolminumeroinen koodi. Kun olet syöttänyt oikean koodin,
kaikki kolme vihreää valoa vilkkuvat hetken aikaa.
5. Kytke DVD-soitin tai videonauhuri päälle ja tarkista, että päätoimintoja voidaan ohjata kaukosäätimellä.
Jos näin ei ole, tee vaiheet 2 - 4 uudelleen ja syötä seuraava, DVD-soittimesi tai videonauhurisi merkkiä vastaava kolminumeroinen koodi.
6. Kun haluat taas käyttää televisiota kaukosäätimellä, paina MODE-painiketta, kunnes vihreä TV-valo
vilkkuu. Muista, että sinun on MODE-painikkeella valittava VCR tai DVD aina, kun haluat käyttää
videonauhuria tai DVD-soitinta kaukosäätimen avulla.
Huom:
Tuotemerkin koodi voi kadota, jos kaukosäätimen kuluneita paristoja ei vaihdeta ajoissa. Jos koodi katoaa, yllä oleva
koodin syöttö on tehtävä uudestaan. Kaukosäätimen paristokannen sisäpuolella on pieni tarralappu, johon voit merkitä
laitteesi tuotemerkin koodin. Tässä luettelossa ei ole kaikkia DVD- tai videonauhurimalleja. Sonyn pyrkimyksenä on päi-
vittää ohjelmisto määrätyin väliajoin, joten katso kaukosäätimen mukana tuleva kooditaulukko.
tai vihreä DVD-valo palaa.
Videonauhureiden tuotemerkit Videonauhureiden tuotemerkit
Merkki Koodi Merkki Koodi
SONY (VHS) 301, 302, 303, 309 SONY 001
SONY (BETA) 301, 302, 303, 309 AIWA 021
SONY (DVD) 304, 305, 306 DENON 018, 027, 020, 002
AIWA 325, 331, 351 GRUNDIG 009, 028, 023, 024, 016. 003
AKAI 326, 329, 330 HITACHI 025, 026, 015, 004
DAEWOO 342, 343 JVC 006, 017
GRUNDIG 358, 355, 360, 361, 320, 351 KENWOOD 008
HITACHI 327, 333, 334 LG 015, 014
JVC 314, 315, 322, 344, 352, 353,
LOEWE 009, 028, 023, 024, 016. 003
354, 348, 349
LG 332, 338 MATSUI 013, 016
LOEWE 358, 355, 360, 361, 320, 351 ONKYO 022
MATSUI 356, 357 PANASONIC 018, 027, 020, 002
ORION 328 PHILIPS 009, 028, 023, 024, 016. 003
PANASONIC 321, 323 PIONEER 004
36
PHILIPS 311, 312, 313, 316, 317, 318,
SAMSUNG 011, 014
358, 359
SAMSUNG 339, 340, 341, 345 SANYO 007
SANYO 335, 336 SHARP 019, 027
SHARP 324 THOMSON 012
THOMSON 319, 350 TOSHIBA 003
TOSHIBA 337 YAMAHA 018, 027, 020, 002
Page 77

Tekniset tiedot
4
Lisätietoa
Televisiojärjestelmä B/G/H, DK, DVB-T
Värijärjestelmä PAL, S E CA M
Taajuuskaista Katso alla olevaa Kanavataulukkoa
Kuvaputki KV-32NX200E
Äänen lähtöteho Vasen/Oikea:
Virrankulutus KV-32NX200E
Mitat (l x k x s) KV-32NX200E
Paino KV-32NX200E
Liitännät takana 21-napainen euroliitin (CENELEC-standardi) sisältää audio/video
NTSC 3.58/4.43 (vain Video in)
MPEG2 MP@ML
FD Trinitron noin 82cm
KV-36NX200E
Subwoofer:
KV-36NX200E
KV-36NX200E
KV-36NX200E
1
2
3/s 3
FD Trinitron noin 91cm
2x20W (musiikkiteho), 2x10W (RMS)
1x30W (musiikkiteho), 1x15W (RMS)
154W (1w standby)
182W (1w standby)
Noin 910 x 445.5 x 590mm
Noin 1010 x 645 x 607mm
Noin 67kg
Noin 87kg
tulon, RGB-tulon, TV audio/video -lähdön.
21-napainen euroliitin (CENELEC-standardi) sisältää audio/video
tulon, RGB-tulon, TV audio/video -lähdön.
21-napainen pin euroliitin (CENELEC-standardi) sisältää audio/
video-tulon, S-videon tulon, audio/video-lähtö valittavissa.
CA-moduuli.
RF In
RCA-liittimet (säädettävä lähtö audiosignaaleille).
Liittimet sivulla videotulo - phono-liitin
Vakiovarusteet 1 kaukosäädin RM-939
s
4
4
2 kpl AAA-paristoa (IEC)
1 Modeemi
1 RF-silmukkajohto
S-videon tulo (4-napainen DIN)
audiotulot - phono-liittimet
kuulokeliitin - stereo minijakki
Rakenne ja tekniset tiedot voivat muuttua ilman eri ilmoitusta.
Kanavataulukko
Vastaanotettavat kanavat Kanavanäyttö
B/G/H E2.12, 21...69 C02.C12, C21...C69
Kaapeli-tv (1) S1..S41 S01...S41
Kaapeli-tv (2) S01..S05 S42...S46
M1...M10 S01...S10
U1...U10 S11...S20
Italia A, B.H, H1, H2 C13, C14.C20, C11, C12
D/K R01.R12, R21.R69 C01...C12, C21...C69
S01...S05 S42...S46
37
Page 78

Lisätietoa
Vianetsintä
Seuraavassa on esitetty joitakin yksinkertaisia ratkaisuja mahdollisiin kuvaan ja ääneen liittyviin ongelmiin.
Ongelma Syy Ratkaisu
Ei kuvaa eikä ääntä•Virta pois päältä.
Huono kuva tai ei kuvaa
(kuvaruutu pimeänä), mutta
ääni on hyvä.
Ei kuvaa miltään kanavalta
digitaalisten kanavien virityksen
jälkeen.
Jotkut kanavat ovat tyhjiä. • Maksullinen/tilauskanava.
• TV valmiustilassa.
• Antenni on kytketty irti.
•
Kuvan säädöt. • Valitse Ku vasäädöt-valikko ja säädä sitten kirkkautta, kuvaa
• Alueellasi ei ole digitaalisia lähetyksiä.
• Käyttämäsi lähetin ei lähetä digitaali-
sia lähetyksiä.
• Heikko signaali.
• Vääränlainen antenni.
• Kanavaa käytetään vain data-lähetykseen (ei kuvaa eikä ääntä).
• Kytke TV verkkovirtaan.
• Paina -painiketta TV:n etuseinässä. Jos -merkkivalo
palaa, paina -painiketta tai jotain kaukosäätimen
numeropainiketta.
• Tarkista antenniliitäntä.
ja värikylläisyyttä.
• Viritä saatavilla olevat analogiset kanavat näiden käyttöoh-
jeiden kohdan Analogisten signaalien käsinviritys mukaisesti. Ota yhteys paikalliseen tv-asentajaan, joka voi kertoa
sinulle, milloin digitaalilähetykset aloitetaan alueellasi.
• Selvitä paikalliselta tv-asentajalta, mitä lähetintä kohti
antenni tulee suunnata.
• Vaihda antenni sellaiseksi, joka kattaaa digitaaliohjelmien
käyttämät kanavat. (Ota yhteys paikalliseen tv-asentajaan.)
• Varmist a, e ttä antenni on suunnattu oikein lähettimeen.
• Varmist a, e ttä antenni on kytketty televisioon suoraan (sitä
ei saa kytkeä televisioon toisen laitteen välityksellä).
• Hanki antenni, jonka vahvistus on suurempi.
• Tilaa masullinen kanava.
• Katso kohta Kanavan ohitus.
• Ohjelmaa ei lähetetä.
Valmiustilan merkkivalo vilkkuu. • Vika (valo vilkkuu epäsäännöllisesti).
• Digitaalitoiminto Ajastettu nauhoitus
(normaali vilkkuminen).
Hyvä kuva, mutta ei ääntä. •Äänenvoimakkuuden säätö. • Paina kaukosäätimen + -painiketta.
Kuvanlaatu huono. • RGB-videolähteestä valittu väärä
Ei värejä värilähetyksissä. • Värien säätö. • Lisälaitteiden tuloja ei ole kytketty pois.
Kaukosäädin ei toimi. • Ty h jät paristot. • Vaihda paristot.
Vääristynyt kuva, kun
vaihdetaan kanavia tai valitaan
teksti-tv.
signaalin tila.
• Lisälaitteiden tuloja ei ole kytketty pois. • Sammuttakaa kaikki ulkoiset lisälaitteet.
• Katso kohta Kanavajärjestyksen muuttaminen.
•Älä yritä avata television koteloa itse vaan ota yhteys päte-
vään tv-asentajaan.
• Ota yhteys paikalliseen Sony-huoltoon.
• Loppuu kun Ajastettu nauhoitus alkaa.
• Jos näytössä on symboli , paina kaukosäätimen -
painiketta.
• Paina -painiketta toistuvasti, kunnes RGB-symboli
näkyy ruudulla.
• Jos ongelma ei ratkennut, anna pätevän tv-asentajan huoltaa televisiosi. Voit myös ottaa yhteyttä Sonyn
palvelupuhelimeen 09-47633318.
•ÄLÄ koskaan yritä avata koteloa itse.
38
Page 79

SE
1
Page 80

Säkerhetsinformation
Denna tv-apparat är konstruerad endast för
220-240V AC. Tänk på att inte ansluta alltför
många apparater till samma elektriska uttag,
då detta kan orsaka brand eller elektriskt
överslag.
Öppna inte höljet eller bakstycket på tv:n.
Kontakta auktoriserad service vid eventuella
fel.
Med tanke på säkerheten och miljön,
rekommenderas att tv-apparaten slås av
med huvudströmbrytaren då den inte ska
användas. Dra ut nätsladden ur uttaget om
den inte ska användas på en längre tid.
För din egen säkerhet, rör inte tv:n,
nätsladden eller antennkabeln vid
åskväder, eller vid risk för åskväder.
Stoppa aldrig in främmande föremål genom
bakstycket, då detta kan orsaka brand eller
elektriskt överslag. Spill aldrig någon vätska
in i apparaten. Om något föremål eller
någon vätska hamnat i apparaten, drag
genast ur nätsladden och kontakta
auktoriserad service.
För att förhindra brand eller elektriskt
överslag, utsätt aldrig tv:n för regn eller fukt.
Täck inte för ventilationshålen på tv:n.
Lämna minst 10 cm fritt utrymme runt tv:n för
ventilation
Rengör tv:n med en mjuk, lätt fuktad duk.
Använd inte bensin, thinner eller andra
kemikalier för rengöring av tv:n. Repa inte
höljet. Som en extra säkerhetsåtgärd, dra ur
nätsladden före rengöring.
Placera tv:n på en säker och stabil bänk. Låt
inte barn klättra på bänken eller tv:n. Placera
inte tv:n liggande eller med bildrutan uppåt.
Placera inte tv:n på varma, fuktiga eller
onormalt smutsiga platser. Installera inte
tv:n där den kan utsättas för mekaniska
vibrationer.
För att dra ur nätsladden ur uttaget, håll i
själva kontakten, inte i sladden.
Dra ur nätsladden innan du flyttar tv:n.
Undvik ojämna underlag och utsätt inte tv:n
för stötar mot andra föremål. Om tv:n har
tappats, eller blivit skadad på annat sätt, låt
en auktoriserad verkstad omedelbart
kontrollera den.
För att förhindra brand, placera inte
eldfarliga eller öppna ljus (t.ex. stearinljus)
nära tv:n.
Placera inte tunga föremål på nätsladden,
eftersom den då kan skadas och fara
uppstå.
Linda upp ev. överflödig sladdlängd på
hållarna på tv:ns bakstycke.
Täck inte för ventilationshålen på tv:n med
någonting, som t.ex. gardiner eller tidningar
etc.
2
Page 81

Tack för att du har valt en Sony-TV.
Börja med att läsa igenom den här instruktionsboken så att du känner till alla funktioner som finns tillgängliga.
Komma igång
Kontrollera de medföljande tillbehören ............................................................................................ 4
Sätta i batterier i fjärrkontrollen........................................................................................................ 4
Koppla in antennen och en videobandspelare................................................................................. 5
Slå på TV:n...................................................................................................................................... 5
Automatisk kanalinställning.............................................................................................................. 6
Byta mellan digitala och analoga program....................................................................................... 7
Hitta videokanalen........................................................................................................................... 7
Basanvändning
Översikt över TV:ns knappar........................................................................................................... 8
Översikt över fjärrkontrollens knappar ............................................................................................ 9
Text-TV på digitala kanaler ............................................................................................................. 10
Visa vanlig text-TV.......................................................................................................................... 11
Använda textmenyn ........................................................................................................................ 12
Byta bildformat manuellt ................................................................................................................. 13
Digitala funktioner
Informationsskärmen....................................................................................................................... 14
Huvudmenyn.................................................................................................................................... 15
Menyn för kanalindex....................................................................................................................... 20
EPG-menyn ..................................................................................................................................... 21
Innehåll
TV:ns menysystem
Använda TV:ns menysystem ........................................................................................................... 23
Bildjusteringsmeny .......................................................................................................................... 23
Ljudjusteringsmeny ......................................................................................................................... 24
Egenskapsmeny.............................................................................................................................. 25
Inställningsmeny.............................................................................................................................. 25
Installationsmeny ............................................................................................................................. 26
Manuell kanalinställningsmeny........................................................................................................ 27
Meny för Utvidgat kanalförval .......................................................................................................... 28
Använda Memory Stick
Sätta i ett Memory Stick................................................................................................................... 29
Ta ur ett Memory Stick..................................................................................................................... 29
MemoryStick-menyn ........................................................................................................................ 29
MemoryStick - att tänka på.............................................................................................................. 32
Ansluta extra enheter
Ansluta extrautrustning till de bakre kontakterna............................................................................ 33
Ansluta extrautrustning till de främre kontakterna .......................................................................... 34
Grundinställa fjärrkontrollen för Video/DVD.................................................................................... 35
Övriga upplysningar
Specifikationer ................................................................................................................................ 36
Felsökning....................................................................................................................................... 37
3
Page 82

Basanvändning
Följ steg - för att installera din TV och titta på TV-programmen
Kontrollera de medskickade tillbehören
1
TV
VIDEO
/
/
S
Y
T
R
IC
O
K
M
E
M
L
A
IT
IG
D
2
1
4
7
ID
U
G
DE
O
M
3
5
6
8
9
0
E
T
V
DVD
VTR
INDEX
PROG
MENU
71
Batterier
Antennsladd för genomkoppling
Fjärrkontroll
Sätta i batterier i fjärrkontrollen
2
1
Öppna batteriluckan genom att sätta
ett mynt i springan längst ner på
fjärrkontrollen och vrida det moturs.
2
Sätt i batterierna enligt
anvisningarna.
Modem
3
4
Sätt tillbaka batteriluckan och lås fast
den genom att sätta myntet i springan
och vrida det medurs .
Kom ihåg att lämna in batterierna för återvinning.
Page 83

Koppla in antennen och en videobandspelare
3
Bara koppla in antennen
Koppla in den befintliga antennsladden i det
1.
digitala uttaget märkt på TV:ns baksida enligt
bilden.
Koppla in den medföljande antennsladden från
2.
uttaget markerat till det analoga uttaget
markerat .
(SMARTLINK)
s
3
3
VCR
2
DVD
1
DIGITAL
OPTICAL OUTPUT
ANALOGUE
MODEM
. . .
5V 200mA
R/D/D/D
L/G/S/I
Komma igång
Antennsladd förf
genomkoppling (medföljer)
Befintlig
antennsladd
Koppla in antennen och en videobandspelare
(SMARTLINK)
s
3
3
VCR
2
DVD
1
DIGITAL
OPTICAL OUTPUT
ANALOGUE
MODEM
. . .
5V 200mA
R/D/D/D
L/G/S/I
Antennsladd
(skickas inte
med)
Scartsladd
(medföljer
inte)
Antennsladd för
genomkoppling
(medföljer)
Koppla in den befintliga antennen i det digitala
1.
uttaget märkt på TV:ns baksida enligt bilden.
Koppla den medföljande antennsladden från det
2.
nedre uttaget märkt på TV:n till RF IN-uttaget
på videobandspelaren.
Koppla en antennsladd från RF UT på
3.
videobandspelaren till det analoga uttaget märkt
på TV:n.
Koppla en scartsladd från uttaget märkt
4.
på TV:ns baksida till scartuttaget på
videobandspelaren (se videobandspelarens
instruktioner).
Koppla in videobandspelaren i vägguttaget och slå
5.
på den.
Sätt i en förinspelad kassett i videobandspelaren
6.
och tryck på PLAY. Genom detta kan TV:n hitta och
lagra videokanalen när du använder den
automatiska kanalinställningen.
3
s
3
Slå på TV:n
4
Koppla in TV:n i vägguttaget
1.
(220-240 V (växelström), 50 Hz).
Tryck på av/på-knappen för att slå på TV:n.
2.
Obs:
Om den röda lampan på TV:ns framsida lyser är TV:n i standbyläge. Tryck på knappen TV på fjärrkontrollen för att slå på
TV:n. Vänta lite eftersom det kan dröja en liten stund innan bilden
/
syns på skärmen.
5
Page 84

Basanvändning
.
5
Automatisk kanalinställning
När du slår på TV:n för första gången, visas en Sony logotyp på
1.
bildskärmen, och sedan en MemoryStick logotyp. Därefter visas en
språkmeny, där ”English” är markerat. Tryck på knappen V eller v på
fjärrkontrollen för att markera önskat språk. Tryck på OK-knappen för att
bekräfta det val du gjort. Hädanefter kommer alla menyer visas på det språk
du valt.
Ordet Land markeras. Tryck på knapparna V eller v för att välja vilket land du
2.
ska använda TV:n i och tryck på OK-knappen för att bekräfta.
Nu visas menyn för bildlutningsjustering. Ibland kan jordens naturliga
magnetfält göra att bilden lutar en aning.
a) 3 Om ingen korrigering krävs trycker du på B-knappen på fjärrkontrollen.
b) Om det däremot är nödvändigt att göra en korrigering trycker du på OK-
knappen på fjärrkontrollen. Tryck på knappen V eller v för att justera
bildlutningen i ett område mellan -5 och +5. Tryck på OK-knappen för att
lagra.
Ett meddelande visas på skärmen. Tryck på OK för att välja ‘Ja’. En meny
visas, där du kan välja mellan:
Snabbsökning: Söker upp de rekommenderade kanalerna för ditt område.
Full kanalsökning: Söker upp alla tillgängliga kanaler.
Använd V eller v för att välja. Tryck sedan på OK.
Du uppmanas att trycka på OK-knappen för att börja kanalinställningen.
Eftersom det kan dröja innan kanalinställningen är färdig visas en meny där
2
1
4
7
3
5
6
8
9
0
du kan se hur lång tid som återstår. Var tålmodig och tryck inte på några
knappar efter att denna söknings- och lagringsoperation har påbörjats.
När skärmen visar att kanalinställningen är avslutad, tryck på den BLÅ
knappen upprepade gånger tills menyn försvinner från skärmen. Den
analoga kanalinställningen startar.
OK
PROG
Om inga digitala eller analoga signaler hittas visas en skärm där du tillfrågas
om du har kopplat in antennen. Kontrollera att antennen är inkopplad och
tryck på OK-knappen för att göra om kanalinställningen.
När alla signaler har hittats och sparats återgår TV:n till normalläge och visar
det digitala program som sparats på programnummer 1.
Obs!
Om inga digitala signaler hittas visas det analoga program som sparats på
programnummer 1.
Om du vill visa ett program trycker du på knappen PROG+/- eller använder
3.
sifferknapparna på fjärrkontrollen.
6
Page 85

. Byta mellan digitala och analoga program
D
IG
ITA
L
D
IG
ITA
L
PROG
D
IG
IT
A
L
D
IG
ITAL
6
1. Om du vill kontrollera om du tittar på ett digitalt eller ett analogt program trycker du
på -knappen på fjärrkontrollen. Om du tittar på ett digitalt program visas ett kort
meddelande på skärmen med uppgifter om det aktuella programmet och nästa pro-
gram. Om du vill byta till analoga program trycker du på DIGITAL/ -knappen. När
du vill gå tillbaka till digitala program trycker du på DIGITAL/ -knappen igen.
Komma igång
7
Hitta videokanalen
Om du kopplade en videobandspelare till TV:n när du följde instruktionerna för hur man
kopplar in antennen måste du nu hitta videokanalen.
1. Börja med att kontrollera att TV:n är i analogläge. Om den inte är det trycker du på
DIGITAL/ -knappen på fjärrkontrollen.
2. Tryck på knappen PROG+/- på fjärrkontrollen tills bilden från den förinspelade kas-
setten visas på skärmen.
OBS!
Om du vill flytta videokanalen till ett annat programnummer tittar du i avsnittet ‘Ändra dina
kanaler’ i den här manualen.
Om du har kopplat in videobandspelaren med en scartsladd kan du trycka på
pen på fjärrkontrollen flera gånger tills bilden från den förinspelade kassetten visas på TVskärmen.
/ -knap-
7
Page 86

Basanvändning
Översikt över TV:ns knappar
Kontrollknapparna finns på TV:ns högra sida. En fullständigare bild visas nedan.
MEMORY STICK
OBS:
Under tiden som ditt Memory Stick läser
eller skriver data, lyser memory sticklampan i rött. Data som lagrats på ditt
Memory Stick kan förstöras eller raderas
om du tar ut ditt Memory Stick under den
tiden.
MONO
R/D/D/D
L/G/S/I
S
4
4
4
Normalinställningsknapp
Tryck om du vill återställa bildoch ljudinställningarna till
fabriksinställningen.
Videoingångsknapp
Tr y ck f ör att välja insignaler från
en videobandspelare o.s.v.
Volymkontrollknappar
Tr y ck f ör att höja eller sänka volymen.
+
P +
8
Program upp eller ner-knappar
Tryck om du vill gå till nästa eller
föregående kanal.
Page 87

Översikt över fjärrkontrollens knappar
/
Basanvändning
Mute-knapp
Tr y ck f ör att stänga av ljudet. Tryck en
gång till för att återställa ljudet.
DIGITAL/ -knapp
Tr y ck f ör att byta mellan digitalläge och
analogläge.
MEMORYSTICK-knapp
Tr y ck f ör att visa ”MemoryStick”-menyn.
Sifferknapparna 0-9
Tr y ck f ör att få det önskade kanalnumret.
För siffrorna 10 och uppåt måste man
trycka in den andra siffran inom 2
sekunder.
GUIDE-knapp
Tr y ck f ör att visa digital text eller digitala
interaktiva tjänster.
MODE-knapp
Den här fjärrkontrollen fungerar inte bara
på DVD-spelare och videobandspelare
från Sony, utan även på många andra
märken. Tryck på den här knappen för att
välja vilken sorts apparat du vill styra. En
grön lampa tänds en kort stund för att
visa vilket läge som valts.
Obs! Innan du kan börja styra din videobands-
pelare eller DVD-spelare måste du ange rätt
grundinställningskod. Se avsnittet ‘Grundinställning av fjärrkontrollen för video/DVD’.
L
A
IT
IG
D
1
4
7
GUIDE
DE
O
M
VTR
MEMORY
MENU
VIDEO
2
5
8
0
T
V
VIDEO -knapp
Tr y ck f ör att slå av videobandspelaren eller DVD-
TV
/
/
S
TIC
K
spelaren tillfälligt. Tryck igen för att återgå till
normalläge.
TV -knapp
/
Tr yc k f ör att slå av TV:n tillfälligt. Den röda
indikatorlampan på TV:ns framsida tänds. Tryck igen
3
6
9
för att återgå till normalläge.
Ingångs-knapp /Hold-knappen
Tryck för att välja signaler från utrustning som är
kopplad till TV-uttagen (Se avsnittet ”Koppla
extraenheter till TV:n”).
D
V
D
IN
DEX
Tryck för att stanna på en sida i textläget. Tryck igen
för att avbryta.
Knapp för Tidigare kanal
Om du tittar på en analog tv-kanal och trycker på
den här knappen, visas den kanal som du tittade på
tidigare.
Om du tittar på en digital tv-kanal, och trycker på
den här knappen, fungerar den som en "EXIT"knapp och avbryter en pågående digital textservice.
Bildformatknapp
Tr y ck fl er a g ånger för att byta bildformat.
PROG
Info-knapp
Tr y ck f ör att visa INFO-menyn i digitalläge. När du
tittar på analoga program kan du trycka för att visa
information som t.ex programnummer.
När du är i textläget trycker du på knappen för att
visa dold information som svar på frågesportsidor.
Tryck igen för att ta bort dolda uppgifter.
Textknapp
Tryck för att byta till textläget.
EPG-knapp
Tr y ck f ör att visa EPG (den elektroniska
programguiden) när du är i digitalläge.
Kontrollplatta
Använd de här knapparna för att bläddra i
TV:ns menysystem.
Obs! När MODE-knappen står på Video eller
DVD styr kontrollplattan huvudfunktionerna på
din videobandspelare eller DVD.
Färgade knappar
De här knapparna används för text- och
digitalmenyerna. Se de relevanta
avsnitten i den här manualen.
INDEX-knapp
När du är i digitalläge trycker du för att visa
kanalindexmenyn.
OK-knapp
Tryck för att visa en kanallista på skärmen.Tryck på
V eller v för att förflytta dig i listan, tills den kanal du
vill titta på, markeras. Tryck sedan på OK för att visa
den kanalen.
PROG +/- knapp
Tr y ck f ör att välja nästa eller föregående program.
När du är i textläget trycker du för att välja nästa
sida eller föregående sida.
Volym + och – knapp
Tr y ck f ör att ställa in volymen på den önskade nivån.
MENU-knapp
Tr y ck f ör att gå till TV:ns menysystem.
9
Page 88

Basanvändning
Visa text-TV på en digital kanal
De flesta digitala TV-kanaler sänder information via sina texttjänster. För den här
digitaltjänsten används text och grafik med hög upplösning tillsammans med
avancerade bläddringsalternativ. Dessutom kan den här TV:n ta emot specialinriktade
textkanaler som sänds av TV-bolagen. De sändande TV-kanalerna bestämmer
utseendet, innehållet och bläddringsmetoderna för alla digitala texttjänster. SVT:s
digitala texttjänst behöver inte likna TV4:s texttjänst till exempel. De flesta digitala
texttjänster bygger på enkla bläddringsmetoder där man använder följande knappar:
GUIDE-knappen för att se den digitala texten,
Knapparna V, v, B och b (för att flytta markören på skärmen),
OK-knappen eller sifferknapparna (för att välja saker på skärmen),
De fyra färgade knapparna (för att använda genvägar).
L
L
A
ITA
IT
IG
IG
D
D
2
1
4
7
3
5
6
8
9
0
Välja en specialinriktad digitaltextkanal
1. Tryck på knappen på fjärrkontrollen för att kontrollera om du är i digitalläge.
Om du tittar på ett digitalt program visas ett kort meddelande på skärmen med
uppgifter om det aktuella programmet och nästa program. Om meddelandet inte
visas trycker du på DIGITAL/ -knappen för att byta till digitalläge.
2. Tyck på -knappen för att ta bort informationsskärmen från TV-skärmen och
välj sedan det programnummer som sänder den specialinriktade digitala textkanalen genom att använda sifferknapparna på fjärrkontrollen. Om du inte vet vilket kanalnummer en specialinriktad digitaltextkanal har kan du använda Kanalindexmenyn för att hitta den. (Se avsnittet ”Kanalindexmenyn” i manualen.)
3. När textsidan visas följer du instruktionerna på skärmen för att göra dina val.
Obs! På vissa sidor kan TV-programmet även visas på textskärmen. Du får instruktioner på
OK
skärmen om hur du ändrar det program som visas.
4. Om du uppmanas att trycka på OK eller Select när du tittar på textsidorna trycker
du på OK-knappen.
5. När du har tittat färdigt på texttjänsten trycker du på -knappen för att avsluta.
10
Välja en texttjänst från andra digitala kanaler
Det kan även finnas vanliga texttjänster på andra digitala kanaler. Detta markeras
ibland med en liten symbol som visas på TV-skärmen.
1. Tryck på någon av knapparna V, v, B eller b för att markera symbolen och tryck på
OK-knappen för att visa den valda informationen.
2. Det kan också hända att du uppmanas att använda sifferknapparna eller de fär-
gade knapparna på fjärrkontrollen för att visa de olika sidorna med textinformation.
Om du uppmanas att trycka på OK eller Select när du tittar på textsidorna trycker
du på OK-knappen.
3. När textinformationen visas kan du använda någon av knapparna V, v, B eller b, de
färgade knapparna och/eller sifferknapparna på fjärrkontrollen för att hitta de
uppgifter du vill ha.
4. När du har tittat färdigt på texttjänsten trycker du på -knappen för att avsluta.
Page 89

Visa vanlig text-TV
L
L
A
A
IT
IT
IG
IG
D
D
2
1
4
7
3
5
6
8
9
0
Basanvändning
De flesta analoga TV-kanaler har en texttjänst. På innehållssidan (vanligen sidan 100)
finns information om hur du använder tjänsten. Se till så att du har bra signalmottagning
för att undvika fel i texten.
Aktivera text-TV
1. Välj det TV-program som har den texttjänst du vill se.
2. Tryck på knappen på fjärrkontrollen för att komma till Bild- och textläge (Picture
and Text - P&T). TV-skärmen delas upp i två delar med textfönstret till vänster och
TV-kanalen i det högra hörnet.
Tryck på knappen en andra gång för att Texten skall visas på hela TV-skärmen.
Tr y ck p å knappen en tredje gång för att komma till blandläge.
3. Ange ett tresiffrigt tal med sifferknapparna för den textsida du vill se. Den valda sidan
visas på skärmen.
4. Ange fler tresiffriga sidnummer om du vill.
5. När du har tittat färdigt på texttjänsten trycker du på DIGITAL/ -knappen för att ta
bort textskärmen.
OK
PROG
Hur du använder textfunktioner
Textfunktioner Hur du väljer
Välja nästa sida eller
föregående sida
Välja en underordnad
sida
Behålla en visad sida Tryck på -knappen. Tryck igen för att avbryta.
Använda Fastext Med Fastext kan man visa sidor med en enda
Använda Page
Catching-funktionen
Visa Tryck på för att visa dold information på sidan (som
Tr y ck p å eller -knappen.
En textsida kan bestå av flera underordnade sidor. I det här
fallet visas antalet tillgängliga underordnade sidor i en
informationsruta längst ner på skärmen. Tryck på V eller v -
knappen för att välja underordnade sidor.
knapptryckning. När det går att använda Fastext visas fyra
färgade symboler längst ner på skärmen. Tryck på
motsvarande färgad knapp på fjärrkontrollen för att visa
sidan.
Välj en sida som innehåller flera sidnummer (t.ex.
indexsidan) och tryck på OK-knappen. Tryck på V eller v-
knappen för att markera det önskade sidnumret och tryck
på OK-knappen igen. Den valda sidan visas på skärmen.
svar på en fråga).
11
Page 90

Basanvändning
Använda textmenyn
2
1
4
7
3
5
6
8
9
0
Du har tillgång till fler funktioner när du använder textmenyn:
1. Tryck på -knappen på fjärrkontrollen för att byta till textläge.
2. När textskärmen visas trycker du på MENU-knappen för att visa ’Text-tv inst.'-
menyn.
3. Tryck på V eller v-knappen för att markera den önskade funktionen och tryck på b-
knappen för att välja.
4. Tryck på MENU-knappen om du vill ta bort textmenyn från skärmen.
Den här tabellen beskriver alla funktioner och förklarar hur de fungerar.
Funktion Funktion
Överst/Nederst/
Hela
Med den här funktionen kan du förstora delar av den visade
sidan. Tryck på V-knappen för att förstora den översta halvan
av sidan eller v för att förstora den nedersta halvan. Tryck på
OK-knappen för att återställa sidan till normal storlek. Tryck på
B-knappen för att gå tillbaka till Text-tv inst.-menyn.
OK
MENU
Text bort Använd den här funktionen för att se på ett TV-program medan
text-TV söker efter en sida. När sidan har hittats visas en blå
symbol i det övre vänstra hörnet av skärmen. Tryck på
-knappen för att visa sidan.
Register De flesta Texttjänster har en registersida med en lista över alla
tillgängliga sidor och deras tresiffriga sidnummer. Denna
funktion öppnar automatiskt registersidan. Tryck på
b-knappen
om du vill att registersidan skall visas.
Sidöversikt
(Endast för
TOPTextsändningar)
TOP-Textsidor är uppdelade i två kolumner. Den första
kolumnen visar ’block’ av sidor och den andra visar ’grupper’
av sidor. Tryck på b eller B-knappen för att välja den önskade
kolumnen och tryck på V eller v-knappen för att välja en
’grupp’ eller ett ’block’ av sidor. Tryck på OK-knappen för att
visa de valda sidorna.
Kontrast Med hjälp av denna funktion kan du justera kontrasten på
textsidorna. Tryck på knappen
B eller b för att höja eller minska
kontrasten. Tryck på OK-knappen för att bekräfta ditt val
12
Page 91

Byta bildformat manuellt
TV-bolagen kan sända program i mer än ett format (t.ex. 4:3-format eller widescreenformat). Du kan ändra bildformat manuellt så att det passar den sändning du tittar på. Tryck
på -knappen på fjärrkontrollen för att välja något av de 5 nedanstående formaten.
Wide-
Basanvändning
För 16:9-sändningar.
För 4:3-sändningar.
Zoom-
14:9-
4:3-
Imiterad wide screen-effekt för filmer som sänds i Cinemascope-formatet
(letter box).
Kompromiss mellan 4:3 och 16:9-formatet.
Normalt bildformat.
Smart-
Imiterad wide screen-effekt för 4:3-sändningar.
Obs!
I Smart, Zoom och 14:9-lägena skärs delar av bildens över- och underkant bort. Tryck på V eller v-
knappen för att ändra bildens position på skärmen (t.ex. för att läsa text).
13
Page 92

Digitala funktioner
OK
D
IG
IT
A
L
D
IG
IT
A
L
Informationsskärmen
På den här skärmen får du information om både program som visas för tillfället och om
kommande program, om det finns tillgängligt från TV-bolaget (upp till 24 timmar i
förväg). Du får en kort beskrivning av det aktuella programmet, kanalnumret och startoch sluttiden. Titeln på nästa program och start- och sluttiden för programmet visas i en
mindre ruta till höger om informationen om det aktuella programmet.
Tryck på -knappen på fjärrkontrollen så visas informationsskärmen. Om
1.
skärmen inte visas byter du till digitalläge genom att trycka på knappen
DIGITAL/ och trycker sedan på -knappen så visas
informationsskärmen.
Tryck på b-knappen för att få en snabbeskrivning av nästa program. Om
2.
programrutan är tom, finns ingen programinformation för tillfället. För att
återgå till början, tryck upprepade gånger på B-knappen tills beskrivningen
för det pågående programmet åter visas.
Tryck på -knappen på fjärrkontrollen när som helst för att gå ut ur Info-
3.
menyn.
Med färgknapparna kan du göra följande inställningar:
RÖD:
En pop-up-meny öppnas där du kan välja språk för undertexterna (om det är
tillgängligt). Välj språk med V eller v och bekräfta sedan med OK-knappen. Välj ’Av’ om
du vill ta bort undertextningen.
GRÖN:
En pop-up-meny öppnas där du kan välja vilket språk du vill höra programmet på (om
det är tillgängligt). Välj språk med V eller v och bekräfta sedan med OK-knappen.
GUL:
Du kan spela in ett program från informationsskärmen eller ställa in så att ett program
automatiskt visas på skärmen när det börjar. Välj ett kommande program från
informationsskärmen med b, tryck sedan på den GULA knappen så visas pop-upmenyn Timer. Välj a) Spela in, b) Väckning eller c) Manuell.
a) Spela in
Markera ’Spela in’ och tryck på OK så ställs videon in automatiskt för att spela in det
valda programmet (det här fungerar bara om videon har en SmartLink-funktion och
s
ansluten till AV3-uttaget på baksidan av TV:n).
3
3
s
3
3
b) Väckning
Markera ’Väckning’ och tryck på OK om du vill att det program du valde ska visas när
sändningen börjar.
c) Manuell
Markera ’Manuell’ och tryck på OK om du vill ställa in en kanal på TV:n som ska spelas
in. Följande skärm visas. Med knapparna V och v ställer du in inspelningsdagen och
med knappen b ställer du in starttiden. Gör samma sak för att ställa in start- och
stopptiden och kanalnumret. Tryck sedan på OK för att lagra och gå tillbaka till
informationsmenyn. Tryck på -knappen om du vill ta bort informationsmenyn från
skärmen. Om du inte har en Smartlink-video måste du ställa in inspelningstimern på
videon så att den startar och stoppar samtidigt som programmet du har lagrat för
inspelning.
14
Anmärkningar:
Funktionen ’Manuell’ fungerar bara om du har anslutit videon till AV3-uttaget på
baksidan av TV:n.
När du har programmerat en inspelning kan du sätta TV:n i standby-läge, men stäng inte av helt
eftersom inspelningen då avbryts. Om du sätter TV:n i standby-läge blinkar standby-indikatorn på
framsidan av TV:n då och då för att påminna om att du har programmerat en inspelning. Om du
byter kanal eller till analogt läge när ett program har börjat spelas in avbryts inspelningen.
3
3
s
s
3
3
BLÅ: Huvudmenyn visas (se nästa sida).
Page 93

Huvudmenyn
OK
D
IG
IT
A
L
D
IG
IT
A
L
Digitala funktioner
På följande sidor förklaras menyerna i digitalt läge och hur de fungerar. Du kontrollerar
att du är i digitalt läge genom att trycka på knappen på fjärrkontrollen. En skärm
med kortfattad information om det aktuella programmet och nästa program visas. Om
inte skärmen visas trycker du på knappen DIGITAL/ på fjärrkontrollen innan du
fortsätter.
Favoritkanaler
Med den här funktionen kan du skapa en lista över dina favoritkanaler i en av tre
personliga mappar som du sedan kan använda genom EPG (Electronic Programme
Guide) eller kanalindexfunktionen på TV:n.
När informationsskärmen visas trycker du på den BLÅ knappen på
1.
fjärrkontrollen så visas huvudmenyn.
Markera ’Favoritkanaler’ med hjälp av V eller v och tryck sedan på OK. En
2.
skärm med tre mappar visas.
Välj den mapp du vill använda med V eller v och tryck sedan på OK så visas
3.
programlistan i den mappen.
Bläddra i listan med knapparna V och v tills det program du vill spara som
4.
favorit är markerat och tryck sedan på OK. Symbolen √ visas bredvid
programmet för att markera att det är sparat som favorit. Upprepa
proceduren om du vill spara fler favoritkanaler.
Så här tar du bort ett favoritkanaler:
Markera programmet och tryck på OK. Symbolen √ försvinner från TVskärmen.
Så här gör du om du vill ta bort alla favoritkanaler:
Tryck på den GULA knappen.
Så här gör du om du vill byta namn på en mapp med favoriter:
Tryck på den BLÅ knappen så att du kommer tillbaka till skärmen
Favoritkanaler och tryck sedan på V eller v för att markera den mapp du vill
byta namn på. Tryck på den GULA knappen så visas ett tangentbord på
skärmen. Tryck på den RÖDA knappen så tas det nuvarande namnet bort.
Välj sedan en bokstav med knapparna V, v, B och b och tryck på OK.
Bokstaven visas i namnrutan. Skriv resten av namnet, markera DONE med
knapparna V, v, B och b och tryck sedan på OK.
Obs! Om du skriver fel kan du återställa det gamla namnet genom att trycka på den
GRÖNA knappen.
Tryck på den BLÅ knappen tills alla menyer är borta från TV-skärmen.
5.
15
Page 94

Digitala funktioner
OK
OK
1
4
7
3
6
9
2
5
8
0
Huvudmenyn
Bakgrund
Med den här funktionen kan du anpassa bakgrundsmönstret för alla digitala menyer.
Tryck först på -knappen och sedan på den BLÅ knappen på
1.
fjärrkontrollen så visas huvudmenyn.
Markera ’Bakgrund’ med hjälp av v-knappen och tryck sedan på OK för att
2.
bekräfta valet.
Välj bakgrund med V eller v och tryck sedan på OK för att spara den.
3.
Tryck på den BLÅ knappen tills alla menyer är borta från TV-skärmen.
4.
Barnlås
Med den här funktionen kan du ställa in en åldersgräns för program, som du då måste
ha en PIN-kod för att kunna se på.
Tryck först på -knappen och sedan på den BLÅ knappen på
1.
fjärrkontrollen så visas huvudmenyn.
Markera ’Barnlås’ med hjälp av v-knappen och tryck sedan på OK så visas
2.
menyn Barnlås.
Ange den befintliga PIN-koden med knapparna 0–9. Pin-koden är förinställd
3.
på 1234 men du kan ändra den (se nedan) på menyn ’Detaljinställningar’.
Rutan för ålder blir aktiv. Ställ in åldersgränsen med hjälp av V och v eller
4.
ange ’Ingen’ om du inte vill ha någon åldersgräns. Bekräfta genom att trycka
på OK.
Tryck på den BLÅ knappen tills alla menyer är borta från TV-skärmen.
5.
16
Page 95

Huvudmenyn
OK
1
4
7
3
6
9
2
5
8
0
Digitala funktioner
Installation
Välj det här alternativet om du vill ställa in program automatiskt eller manuellt eller om
du vill ändra ordningen på de lagrade programmen.
Tryck först på -knappen och sedan på den BLÅ knappen på
1.
fjärrkontrollen så visas huvudmenyn.
Välj ’Installation’ med hjälp av V eller v och tryck sedan på OK så visas
2.
installationsmenyn.
Markera ditt val på menyskärmen med hjälp av V eller v och tryck sedan på
3.
OK så visas den undermenyn.
Snabbs
ökning
Med den här funktionen kan du ställa in alla rekommenderade kanaler i ditt
område.
Full kanals
ökning
Om du väljer det här alternativet ställs alla tillgängliga kanaler in. Eftersom
det kan ta en stund visas en statusindikator.
Manuell kanals
ökning
Om du väljer det här alternativet kan du lägga till fler TV-kanaler manuellt.
1. När menyn “Manuell kanalsökning” visas, välj det programnummer du
vill ge kanalen med sifferknapparna 0-9. Tryck sedan på OK för att
bekräfta.
2. Programlistan för manuell kanalsökning visas med ditt önskade
programnummer markerat. Tryck på OK för att bekräfta och välja Sök-
menyn.
3. Sökningen startas från det kanalnummer som är markerat. Om du vill
ändra det till något annat kanalnummer, tryck på V eller v eller tryck in
siffran direkt med sifferknapparna 0-9. Tryck på b så att rutan för
sökning blir aktiv.
4. Tryck på V eller v för att starta sökningen. “Söker...” visas bredvid ordet
“Status” och indikerar att sökningen pågår. Om inga digitala tjänster
hittas på den kanal du har valt, ändras kanalnumret automatiskt uppåt
eller nedåt och sökningen fortsätter. När alla tjänster har hittats på den
önskade kanalen, visas dom i rutan “Hittade tjänster”.
5. Tryck på V eller v för att markera den tjänst som du vill lägga på
programnumret du valde i steg 1, och tryck sedan på OK för att återgå
till programlistan för manuell kanalsökning.
Obs:
Med manuell kanalsökning kan du lägga till en ny tjänst från samma kanal till ett
annat programnummer. För att göra detta, välj ett nytt programnummer från listan
med V eller v, tryck sedan på den GULA knappen för att visa listan med samtliga
tjänster på den kanalen. Tryck på V eller v för att välja den tjänst du vill ha på ditt
önskade programnummer, och tryck sedan på OK för att återgå till programlistan
för manuell kanalsökning.
6. Om du vill lägga till fler kanaler, markera ett nytt programnummer med V
eller v, och tryck sedan på OK. Upprepa steg 3-5.
Kanalsortering
Med den här funktionen kan du ändra ordningen på de lagrade kanalerna.
När menyn ’Kanalsortering’ visas på skärmen trycker du på V eller v för att
markera den kanal du vill flytta. Tryck sedan på den GULA knappen. Ange
det nya programnumret för kanalen med hjälp av sifferknapparna på
fjärrkontrollen och bekräfta sedan genom att trycka på OK. Upprepa
proceduren om du vill flytta fler kanaler och tryck sedan på den blå knappen
tills alla menyer försvinner från skärmen.
När du har gjort de ändringar du vill göra på installationsmenyn trycker du
på den BLÅ knappen tills alla menyer har försvunnit från skärmen.
17
Page 96

Digitala funktioner
1
4
7
3
6
9
2
5
88
0
OK
Huvudmenyn
Detaljerad inställning
Om du väljer det här alternativet kan du ändra PIN-kod, modeminställningar, språk o.s.v.
Tr y ck f örst på -knappen och sedan på den BLÅ knappen på fjärrkontrollen
1.
så visas huvudmenyn.
Markera ’Detaljerad inställning’ med hjälp av V eller v och tryck sedan på OK
2.
så visas menyn Detaljerad inställning.
Om du vill ändra inställningarna på menyskärmen markerar du ditt val med
3.
antingen V eller v och trycker sedan på OK så visas undermenyn.
PIN- kod inställning
Med den här funktionen kan du ange restriktioner för vissa program. Ange PIN-
koden och tryck på OK. Ange den nya koden med sifferknapparna på
fjärrkontrollen. Ange den igen för att bekräfta den. Tryck på OK-knappen och
sedan på den BLÅ knappen så kommer du tillbaka till menyn Detaljerad
inställning.
OBS:
Om du har glömt din egen PIN-kod kan du istället använda 9999. Denna kod accepteras
alltid.
Modem
Välj det här alternativet om du vill installera modemet. Markera ditt val på
menyskärmen med hjälp av V eller v och bekräfta med OK. Ändra
inställningen med V eller v och spara sedan genom att trycka på OK. Tryck på
den BLÅ knappen så kommer du tillbaka till menyn Detaljerad inställning.
Returkanal
Markera ditt val på menyskärmen med hjälp av V eller v och tryck sedan på
OK så visas tangentbordet*. Tryck på den RÖDA knappen så tas det
nuvarande namnet bort. Välj sedan en bokstav eller siffra med knapparna V, v,
B eller b. Tryck på OK så visas bokstaven eller siffran i namnrutan. Skriv
resten av namnet, markera DONE med knapparna V, v, B eller b och tryck
sedan på OK. Tryck på den BLÅ knappen så kommer du tillbaka till menyn
Detaljerad inställning.
*Om du väljer ’Standard internetleverantör’ eller ’DNSP IP-adress’ måste du använda
sifferknapparna på fjärrkontrollen för att göra de nya inställningarna. Bekräfta med OK
när du är färdig.
MHP applikationsrättigheter
Om du väljer det här alternativet kan du göra inställningar och sätta
begränsningar för vissa MHP-program. Markera ditt val på menyskärmen med
hjälp av V eller v och bekräfta med OK. Ändra inställningen med V eller v och
spara sedan genom att trycka på OK. Tryck på den BLÅ knappen så kommer
du tillbaka till menyn Detaljerad inställning.
Språk
Tryck på V eller v för att välja Dialogspråk. Tryck sedan på OK för att bekräfta
och spara inställningen. Tryck på den BLÅ knappen så kommer du tillbaka till
menyn Detaljerad inställning.
Tillverkarinformation
Det här är endast en informationsskärm och visar signalstyrka och vilka
versioner av maskin- och programvara som finns tillgängliga. Tryck på den
BLÅ knappen så kommer du tillbaka till menyn Detaljerad inställning.
Uppgradering av mjukvara
Med den här funktionen kan du göra så att programvaran i TV:n uppgraderas
automatiskt när en ny version sänds ut. Tryck på V eller v för att välja Ja eller
Nej. Tryck sedan på OK för att spara inställningen. Om du anger Ja, hämtas all
ny programvara automatiskt när den kommer ut. Vi rekommenderar att du
väljer Ja för det här alternativet.
Fabriksinställningar
Tryck på OK om du vill ’Ta bort egna inställningar’. (Alla digitala inställningar
återställs till fabriksvärdena.)
När du har gjort de ändringar du vill göra på menyn Detaljerad inställning
4.
trycker du på den BLÅ knappen tills alla menyer har försvunnit från skärmen.
18
Obs!
CA-inställning förklaras på sidan.
Page 97

Huvudmenyn
OK
OK
Digitala funktioner
CA-inställning
(beroende på service-tillgänglighet)
Med den här funktionen får du tillgång till pay-per-view om du har en CAM-modul
(Conditional Access Module) med ett programkort. Kontakta en pay-per-view-leverantör
om du vill ha mer information.
Slå av TV:n och dra ur kontakten.
1.
Sätt i CAM-modulen i uttaget på baksidan av TV:n på det sätt som visas.
2.
Var försiktig så att du inte skadar CAM-modulen när du sätter i den.
Obs!
Det följde med en lucka med tv-bänken för att täcka uttagen på baksidan av TV:n. Om
du redan har satt på luckan måste du ta bort den för att komma åt CAM-uttaget.
CAM och programkort
Sätt i programkortet i CAM-modulen.
3.
Sätt i kontakten i vägguttaget och slå på TV:n.
4.
Tryck först på -knappen och sedan på den BLÅ knappen på
5.
fjärrkontrollen så visas huvudmenyn.
Markera ’Detaljerad inställning’ med hjälp av V eller v och tryck sedan på OK
6.
så visas menyn Detaljinställningar.
Markera ’CA-inställning’ med hjälp av V eller v och tryck sedan på OK så
7.
visas menyn för leverantörsinställningar.
Mer information om tillgängliga tjänster kan du få från pay-per-view-leverantören.
Personlig information
Använd det här alternativet om du vill ange dina personlig information, till exempel
namn och e-postadress.
Tryck först på -knappen och sedan på den BLÅ knappen på
1.
fjärrkontrollen så visas huvudmenyn.
Markera ’Personlig information’ med V eller v och tryck sedan på OK så
2.
visas menyn Personlig information.
Om du vill ändra användarnamn, adress eller e-postadress markerar du ett
3.
alternativ med hjälp av V eller v och trycker sedan på OK så visas
tangentbordet. Tryck på den RÖDA knappen så tas det nuvarande namnet
eller adressen bort. Markera en bokstav eller siffra med hjälp av knapparna
V, v, B och b och tryck sedan på OK så visas bokstaven eller siffran i
namnrutan. Skriv resten av namnet, markera DONE med knapparna V, v, B
och b och tryck sedan på OK så kommer du tillbaka till menyn ’Personlig
information’.
Om du vill ändra teckenstorleken för MHP-programmen markerar du ’MHP
4.
teckenstorlek’ med hjälp av V eller v och bekräftar sedan med OK. Ändra
teckenstorleken med V eller v och bekräfta sedan med OK.
Tryck på den BLÅ knappen tills alla menyer är borta från TV-skärmen.
5.
19
Page 98

Digitala funktioner
OK
D
IG
IT
A
L
D
IG
IT
A
L
INDEX
Menyn för kanalindex
På den här menyn kan du göra följande:
a) Visa en fullständig lista över alla tillgängliga program.
b) Få en förhandstitt på de program som visas för tillfället.
c) Spara kanaler i en personlig lista över favoriter.
d) Skapa en lista över program i en viss kategori, t.ex. sport eller filmer.
Kanalindexmenyn är bara tillgänglig i digitalt läge. Du kontrollerar att du är i
1.
digitalt läge genom att trycka på knappen på fjärrkontrollen. En skärm med
kortfattad information om det aktuella programmet och nästa program visas.
Om skärmen inte visas trycker du på knappen DIGITAL/ på fjärrkontrollen.
Tr y ck p å -knappen så att informationsskärmen försvinner. Tryck sedan på
2.
OK så visas menyn för kanalindex. Menyn innehåller en lista över program.
Det aktuella programmet visas i en ruta längst upp till höger på menyn.
Du markerar det program du vill ha i listan med hjälp av knapparna V eller v.
3.
Om du inte vill se något av de sex program som visas trycker du på den RÖDA
eller GRÖNA knappen så visas de sex föregående eller sex följande
programmen i listan.
När det program du vill se är markerat trycker du på OK så visas programmet
4.
på skärmen. Om du har angett en åldersgräns för programmet på
huvudmenyn måste du ange PIN-koden innan du kan visa programmet.
Program som har en åldersgräns markeras med symbolen .
Tr y ck p å OK så bekräftas valet och menyn för kanalindex stängs.
5.
Så här lagrar du en kanal som en favorit
Markera den kanal du vill ha som favorit på menyn för kanalindex med V eller v.
1.
Tr y ck p å den GULA knappen så visas pop-up-menyn ’Lägg till’. Välj vilken
2.
mapp du vill spara kanalen i med V eller v och bekräfta med OK.
Tr y ck p å OK så försvinner menyn för kanalindex.
3.
Så här väljer du en programkategori
Tryck på den BLÅ knappen när menyn för kanalindex visas på skärmen så
1.
visas pop-up-menyn ’Kategori’.
Välj en kategori med V eller v och bekräfta sedan genom att trycka på OK.
2.
Kanalindexet innehåller nu bara program i den kategori du valde.
Det här är några av kategorierna:
Val Det här är en lista över de program som du tittar mest
på.
Tidigare Kan. Det här är en lista över de fem senaste kanalerna du
har tittat på.
Favoriter Det här är en lista över de kanaler du har sparat som
favoriter i den här mappen.
Filmer Det här är en lista över alla de filmer som du har
tillgång till.
Alla Kanaler Det här är en lista över alla tillgängliga program.
20
Den programkategori du väljer visas överst i listan tillsammans med datum
3.
och tid.
Tryck på OK så försvinner menyn för kanalindex.
4.
Page 99

EPG-menyn
D
IG
IT
A
L
D
IG
IT
A
L
OK
Digitala funktioner
På EPG-menyn (Elektronisk programguide) kan du göra följande:
a) Visa en fullständig lista över alla tillgängliga program.
b) Få en förhandstitt på de program som visas för tillfället.
c) Skapa en lista över program i en viss kategori, t.ex. sport eller filmer.
d) Spela in program.
EPG-menyn är bara tillgänglig i digitalt läge. Du kontrollerar att du är i digitalt
1.
läge genom att trycka på knappen på fjärrkontrollen. En skärm med
kortfattad information om det aktuella programmet och nästa program visas.
Tryck på knappen DIGITAL/ om skärmen inte visas.
Tryck på -knappen så visas EPG-menyn på skärmen. Menyn består av
2.
en informationsruta, en ruta för förhandsvisning, en tvåtimmars timermätare
(indelad i 30-minutersintervaller) och en lista över program, på fem olika
kanaler, som visas under tvåtimmarsperioden.
Du flyttar markören i listan med hjälp av V, v, B och b. När programmen
3.
markeras visas en kort beskrivning av programmet i informationsrutan längst
upp till vänster. Om du trycker på b när det sista programmet till höger är
markerat visas programmen för nästa tvåtimmarsperiod.
Tryck på den RÖDA eller GRÖNA knappen när du vill visa programmen på
de fem föregående eller fem följande kanalerna.
Om det program du markerar precis sänds kan du trycka på OK för att få en
4.
förhandstitt. Om du har angett en åldersgräns för programmet på
huvudmenyn måste du ange PIN-koden innan du kan visa programmet.
Tryck på OK så bekräftas valet och EPG-menyn stängs.
5.
Så här väljer du en programkategori
Tryck på den BLÅ knappen när EPG-menyn visas på skärmen så visas pop-
1.
up-menyn Kategori.
Välj en kategori med V eller v och bekräfta sedan med OK-knappen. EPG-
2.
listan innehåller nu bara program i den kategori du valde.
Det här är några av kategorierna:
Val Det här är en lista över de program som du tittar mest
på.
Tidigare Kan. Det här är en lista över de fem senaste kanalerna du
har tittat på.
Favoriter Det här är en lista över de kanaler du har sparat som
favoriter i den här mappen.
Filmer Det här är en lista över alla de filmer som du har
tillgång till.
Alla Kanaler Det här är en lista över alla tillgängliga program.
Den programkategori du väljer visas överst i listan tillsammans med datum
3.
och tid.
Tryck på -knappen så försvinner EPG-menyn.
4.
21
Page 100

Digitala funktioner
OK
EPG-menyn
Välja program för inspelning eller tidsinställd visning
Markera ett program på EPG-menyn med hjälp av V, v, B och b och tryck sedan på den
GULA knappen så visas pop-up-menyn Timer. Du kan välja mellan a) Spela in, b)
Väckning och c) Manuell.
a) Spela in
Markera ’Spela in’ och tryck på OK-knappen så ställs videon in automatiskt på att spela
in det markerade programmet.
Obs! Den här funktionen fungerar bara om videon är Smartlink-kompatibel och är ansluten till AV3
uttaget på baksidan av TV:n.
När programmet har ställts in för inspelning visas ett rött fält under timermätaren på
menyn. Fältet visar hur lång tid inspelningen varar och är en påminnelse om att du inte
kan spela in andra program under den perioden.
b) Väckning
Markera ’Väckning’ och tryck på OK om du vill att det program du valde ska visas när
sändningen börjar. Om du väljer det här alternativet visas ett grönt fält under
timermätaren på menyn. Det indikerar att du har aktiverat Väckning. Precis innan
sändningen börjar visas en påminnelse på skärmen och du kan välja om du vill se
programmet.
c) Manuell
Markera ’Manuell’ och tryck på OK om du vill ställa in en kanal på TV:n som ska spelas
in när sändningen börjar. Följande skärm visas.
Med knapparna V och v ställer du in inspelningsdagen och med knappen b flyttar du
markören till starttiden. Gör samma sak för att ställa in start- och stopptiden och
kanalnumret. Tryck sedan på OK för att lagra och gå tillbaka till EPG-menyn. Tryck på
-knappen så försvinner EPG-menyn. Om du inte har en Smartlink-video måste du
ställa in inspelningstimern på videon så att den startar och stoppar samtidigt som
programmet du har lagrat för inspelning.
Anmärkningar:
Funktionen Manuell fungerar bara om du har anslutit videon till AV3-uttaget på
baksidan av TV:n. När du har programmerat en inspelning kan du sätta TV:n i standby-läge, men
stäng inte av helt eftersom inspelningen då avbryts. Om du sätter TV:n i standby-läge blinkar
standby-indikatorn på framsidan av TV:n då och då för att påminna om att du har programmerat en
inspelning. Om du byter kanal eller till analogt läge när ett program har börjat spelas in avbryts
inspelningen.
3
3
s
s
3
3
22
På Timer-menyn finns också alternativet ’Timerlista’. Om du markerar det alternativet
och trycker på OK-knappen visas alla program du har ställt in för inspelning eller
väckning. Så här gör du om du vill ta bort något av programmen:
Markera det program du vill ta bort med hjälp av V eller v och tryck sedan på
1.
den GULA knappen så visas pop-up-menyn ’Timer’.
Markera ’Ta bo r t ’ med hjälp av v-knappen och tryck sedan på OK för att
2.
bekräfta valet.
Tryck på om du vill gå tillbaka till TV-läge eller den BLÅ knappen om du
3.
vill gå tillbaka till EPG-menyn.
 Loading...