

Sony Handycam HDR-CX350, Handycam HDR-XR350V, Handycam HDR-XR350, Handycam HDR-CX370, Handycam HDR-CX350V Operating Manual
...
4-171-504-12(1)
|1/,111
Additional information on this product and
answers to frequently asked questions can
be found at our Customer Support Website.
Puede encontrar mils informaci6n sobre
este producto y respuestas alas preguntas
mils frecuentes en nuestro sitio Web de
atenci6n al cliente.
|I1,1
htt p://www.so ny.net/
o
Printed on 70_ or more recycled paper using VOC
(Volatile Organic Compound)-free vegetable oil
based ink.
Impreso en papel reciclado en un 70% o m;is
utilizando tinta hecha con aceite vegetal exento de
compuesto org_inico volfitil (COV).
Printed in Japan
IIIIIIIIIIIII
4171504120
C
m
HDR-CX300/CX350/CX350V/
CX3 70/XR3 50/XR3 50V
Digital HD Video Camera Recorder
Operating Guide
Guia de operaciones
AVCHD Hnml 1..__ _........._0
M_MORY5TICK TM _,-
F'jV' / ITII
© 2010 Sony Corporation
Owner'sRecord
The model and serial numbers are located
on the bottom. Record the serial number
in the space provided below. Refbr to these
numbers whenew, r you call upon your Sony
dealer regarding this product.
Model No. HDR-
Serial No.
Model No. AC-
Serial No.
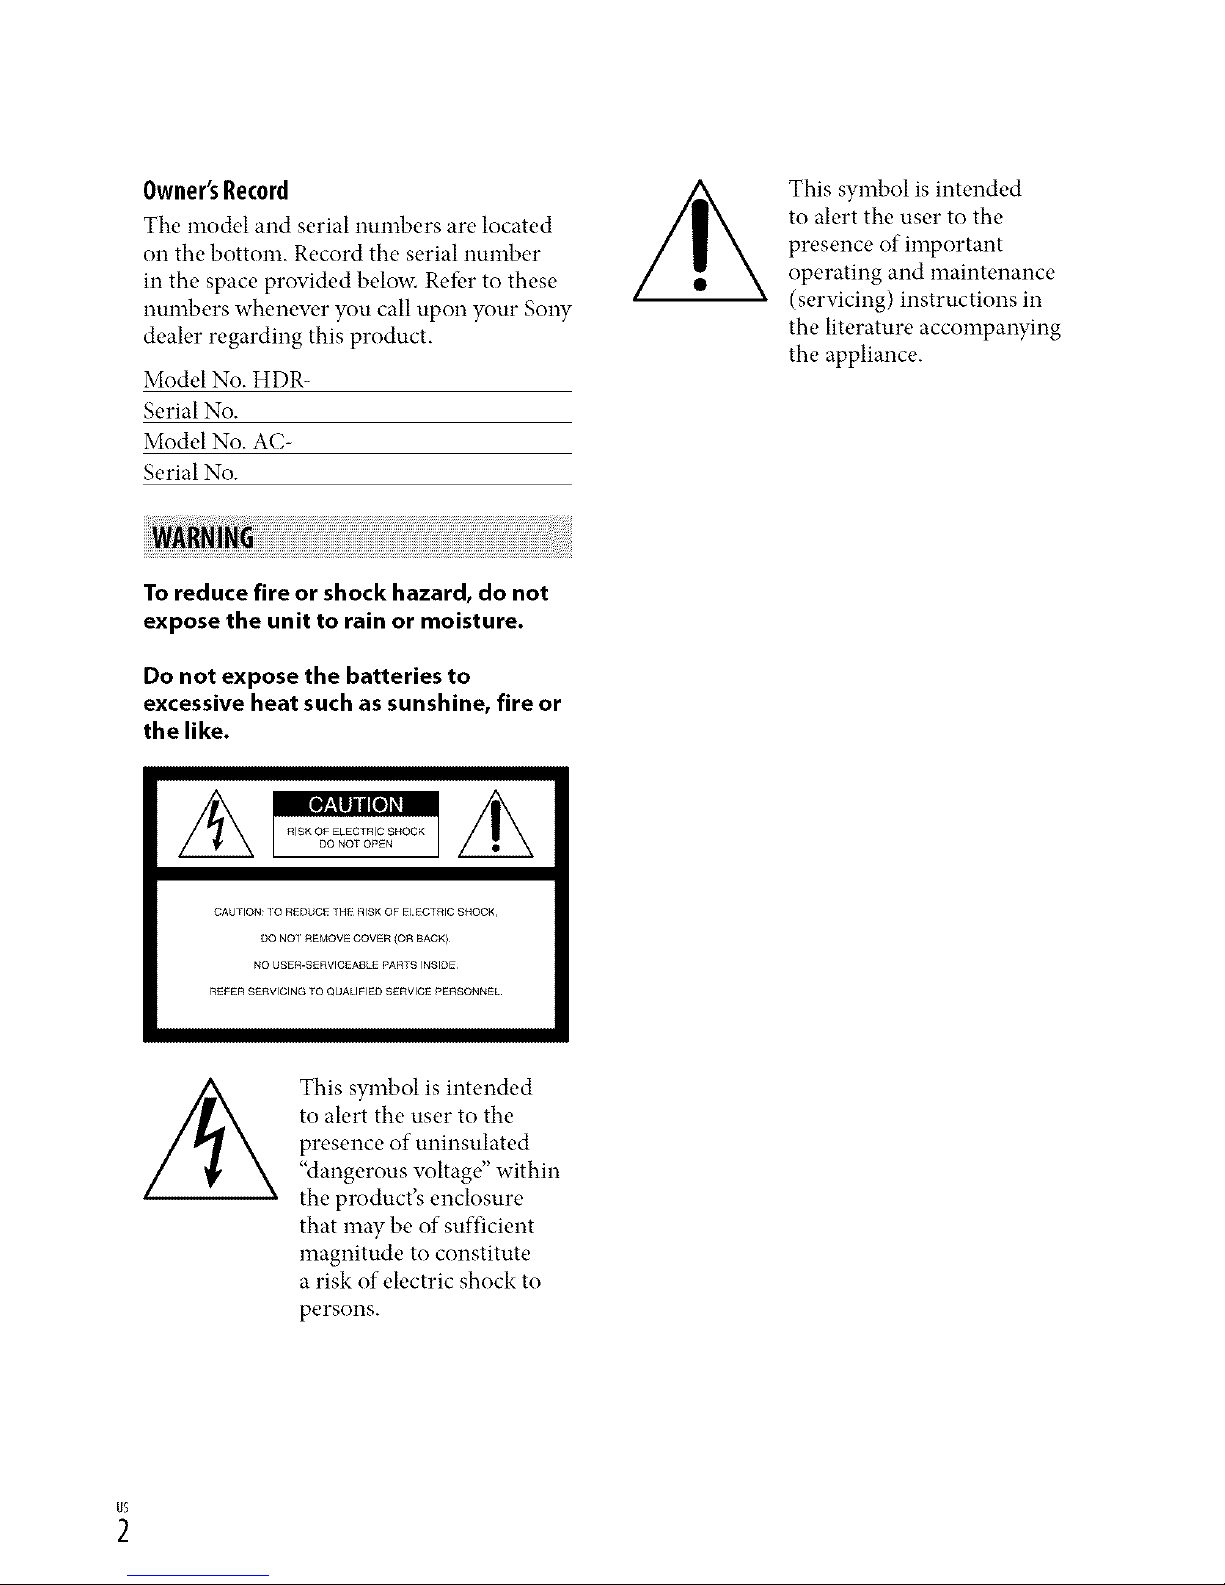
This symbol is intended
to alert the user to the
presence of important
operating and maintenance
(servicing) instructions in
the literature accompanying
the appliance.
To reduce fire or shock hazard, do not
expose the unit to rain or moisture.
Do not expose the batteries to
excessive heat such as sunshine, fire or
the like.
CAUHON:10 REDUC£_H_ RISKOFE CTRICSNOOK,
Do NOr REMOVECOVER(O_ BACK)¸
NO USE_-SERVlCEAIJLEPARRSINSIDE
rtEFERSErtVlClNGTOQUALIFIEDSERVICEPERSONNEL.
This symbol is intended
to alert the user to the
presence of uninsulated
"dangerous wfltage" within
the product's enclosure
that may be of sufficient
magnitude to constitute
a risk of electric shock to
persons.

SAVE THESE INSTRUCTIONS.
DANGER - TO REDUCE THE RISK OF FIRE
OR ELECTRIC SHOCK,
CAREFULLY FOLLOW THESE
INSTRUCTIONS.
• Read these instructions.
• Keep these instructions.
• Heed all warnings.
• Follow all instructions.
• Do not use this apparatus near water.
• Clean only with dry cloth.
• Do not block aW w.ntilation openings. Install in accordance with the manufhcturer's
instructions.
• Do not install near aW heat sources such as radiators, heat registers, stoves, or other
apparatus (including amplifiers) that produce heat.
• Do not detbat the satbty purpose of the polarized or grounding-type plug. A polarized plug
has two blades with one wider than the other. A grounding type plug has two blades and a
third grounding prong. The wide blade or the third prong are provided for your safet}: If
the provided plug does not fit into your outlet, consult an electrician for replacement of the
obsolete outlet.
• Protect the power cord from being walked on or pinched particularly at plugs, conw.nience
receptacles, and the point where they exit from the apparatus.
• Only use attachments/accessories specified by the manufacturer.
• Use only with the cart, stand, tripod, bracket, or table specified by the manufacturer, or
sold with the apparatus. When a cart is used, use caution when moving the cart/apparatus
combination to awfid injury from tip-ow.r.
m
• Unplug this apparatus during lightning storms or when unused for long periods of time.
• Refer all servicing to qualified service personnel. Servicing is required when the apparatus
has been damaged in any wa}; such as power-supply cord or plug is damaged, liquid has
been spilled or objects haw. fallen into the apparatus, the apparatus has been exposed to
rain or moisture, does not operate normall}; or has been dropped.
• If the shape of the plug does not fit the power outlet, use an attachment plug adaptor of the
proper configuration fbr the power outlet.
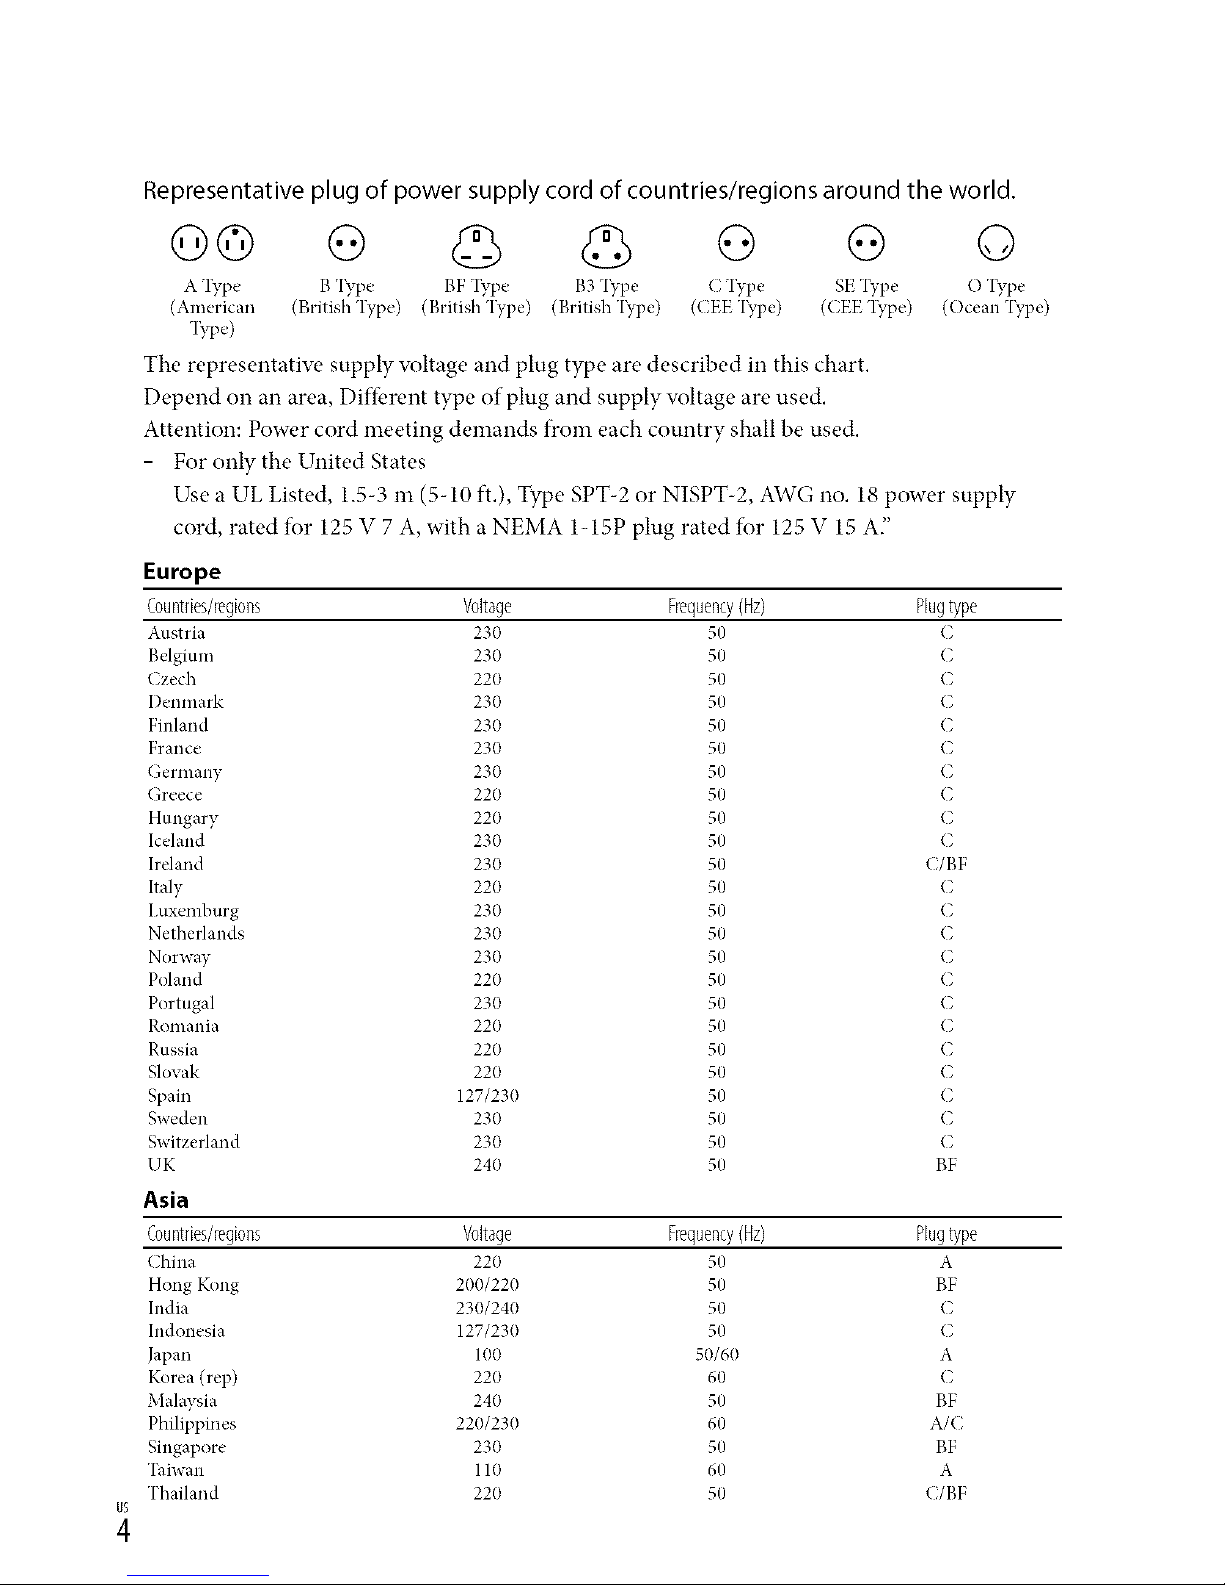
Representative plug of power supply cord of countries/regions around the world.
Go o o G o
A l_T,e B 'I_T,e BF l_T,e B3 'I?q_e C Type SE "I?q_e O "I_T,e
(American (British Type) (British Type) (British'I?_pe) ((EE'I_,pe) (CEE'I_pe) (Ocean 'I_,pe)
133,e)
The representatiw, supply voltage and plug type are described in this chart.
Depend on an area, Diffbrent type of plug and supply voltage are used.
Attention: Power cord meeting demands from each country shall be used.
- For only the United States
Use a UL Listed, 1.5-3 m (5-10 ft.), Type SPT-2 or NISPT-2, AWG no. 18 power supply
cord, rated for 125 V 7 A, with a NEMA 1-15P plug rated for 125 V 15 A"
Europe
Countries/regions Voltage Frequency(Hz) Plugtype
Austria 230 50 C
Belgium 230 50 C
Czech 220 50 C
I)enmark 230 50 C
Finland 230 50 C
France 230 50 C
Germany 230 50 C
Greece 220 50 C
Hungary 220 50 C
Iceland 230 50 C
Ireland 230 50 C/BF
Italy 220 50 C
I,uxemburg 230 50 C
Netherlands 230 50 C
Norway 230 50 C
Poland 220 50 C
Portugal 230 50 C
Romania 220 50 C
Russia 220 50 C
Slovak 220 50 C
Spain 127/230 50 C
Sweden 230 50 C
Switzerland 230 50 C
UK 240 50 BF
Asia
Countries/regions Voltage Frequency(Hz) Plugtype
China 220 50 A
Hong Kong 200/220 50 BF
India 230/240 50 C
Indonesia 127/230 50 C
Japan 100 50/60 A
Korea (rep) 220 60 C
Malaysia 240 50 BF
Philippines 220/230 60 A/C
Singapore 230 50 BF
Taiwan 110 60 A
Thailand 220 50 (/BF
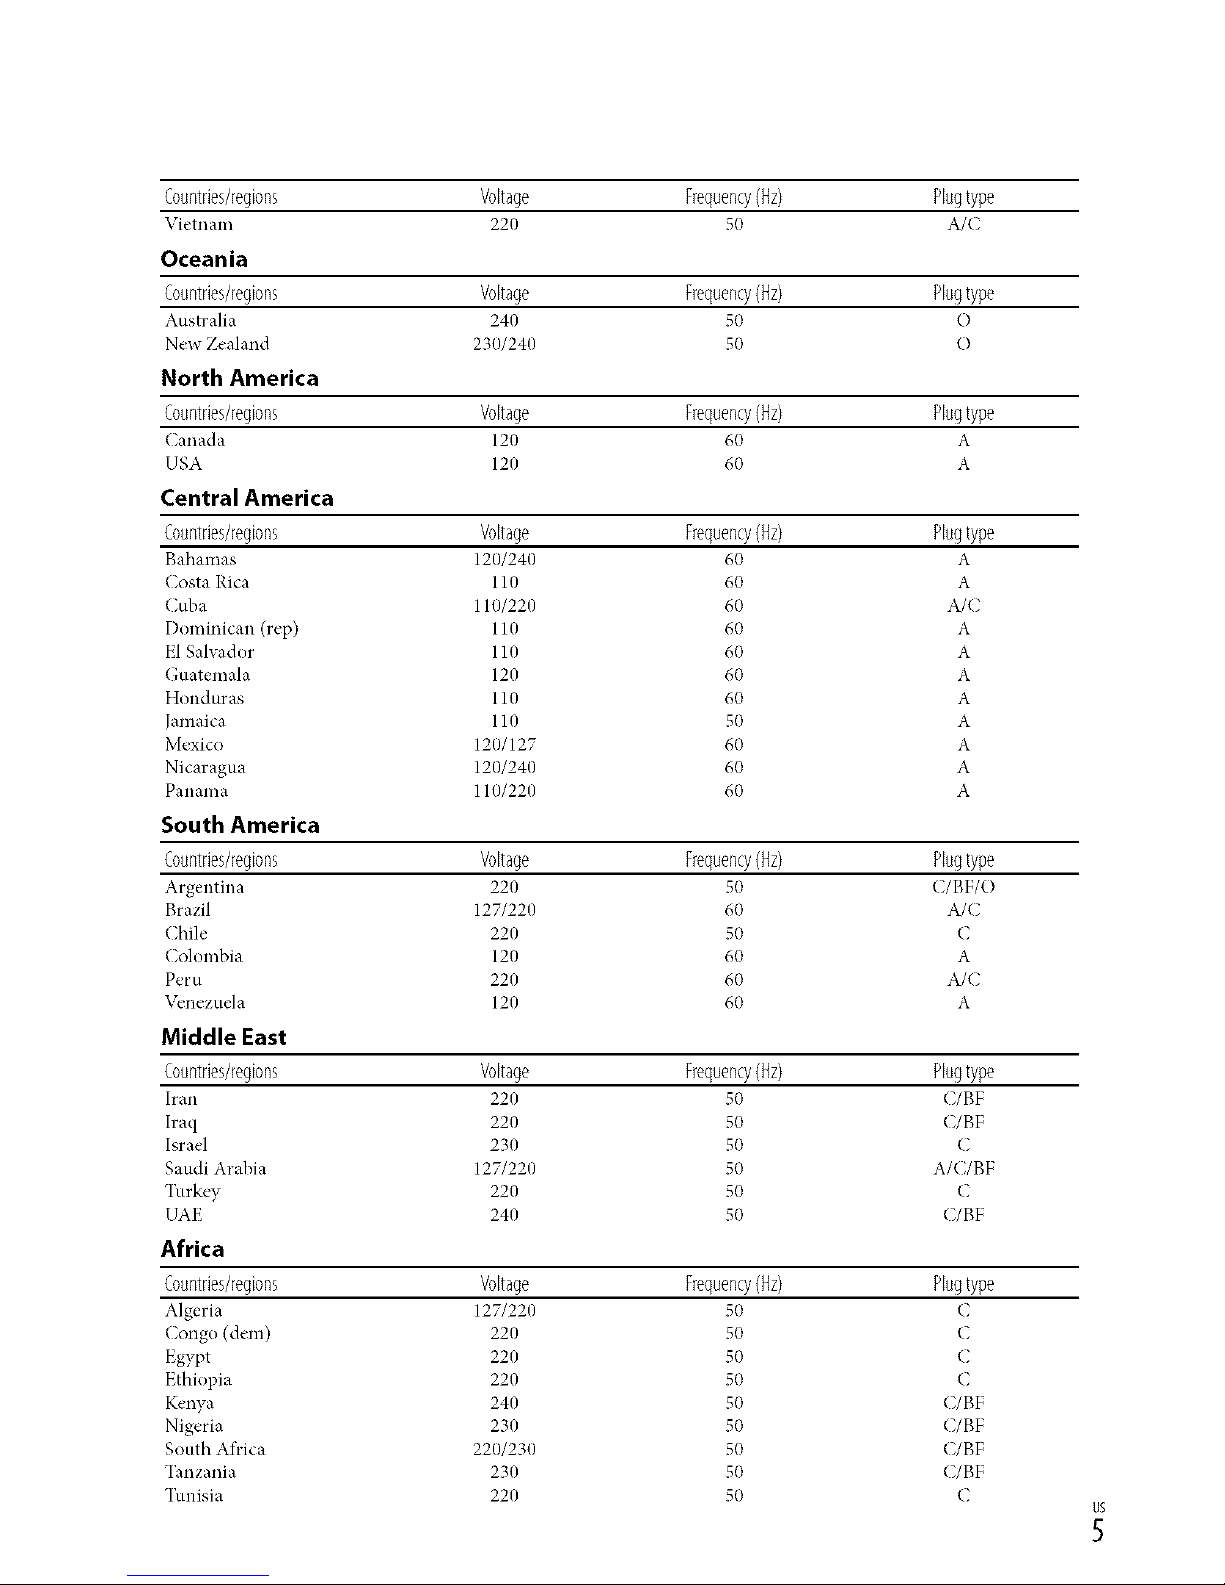
Countries/regions Voltage Frequency(Hz) Plugtype
VietllalIl 220 50 A/(
Oceania
Countries/regions Voltage Frequency(Hz) Plugtype
Australia 240 50 O
New Zealand 230/240 50 O
North America
Countries/regions Voltage Frequency(Hz) Plugtype
Canada 120 60 A
USA 120 60 A
Central America
Countries/regions Voltage Frequency(Hz) Plugtype
Bahamas 120/240 60 A
Costa Rica 110 60 A
Cuba 110/220 60 A/C
Dominican (rep) 110 60 A
El Salvador 110 60 A
Guatemala 120 60 A
Honduras 110 60 A
Jamaica 110 50 A
Mexico 120/127 60 A
Nicaragua 120/240 60 A
Panama 110/220 60 A
South America
Countries/regions Voltage Frequency(Hz) Plugtype
Argentina 220 50 (/BF/O
Brazil 127/220 60 A/C
Chile 220 50 C
Colombia 120 60 A
Peru 220 60 A/C
\_,nezuela 120 60 A
Middle East
Countries/regions Voltage Frequency(Hz) Plugtype
h'an 220 50 C/BF
Iraq 220 50 C/BF
Israel 230 50 C
Saudi Arabia 127/220 50 A/C/BF
Turkey 220 50 C
UAE 240 50 C/BF
Africa
Countries/regions Voltage Frequency(Hz) Plugtype
Algeria 127/220 50 (
Congo (dem) 220 50 C
Egypt 220 50 C
Ethiopia 220 50 C
Kenya 240 50 C/BF
Nigeria 230 50 C/BF
South Africa 220/230 50 C/BF
Tanzania 230 50 C/BF
Tunisia 220 50 C
Read this first
Betbre operating the unit, please read this
manual thoroughl?; and retain it for future
reference.
Battery pack
If the battery pack is mishandled, the
battery pack can burst, cause a fire or ew, n
chemical burns. Obserw, the fbllowing
cautions.
• Do not disassemble.
• Do not crush and do not expose the battery
pack to any shock or lbrce such as hammering,
dropping or stepping on it.
• Do not short circuit and do not allow metal
objects to come into contact with the battery
terminals.
• Do not expose to high temperature above 60°C
(140°F) such as in direct sunlight or in a car
parked in the sun.
• Do not incinerate or dispose of in fire.
• Do not handle damaged or leaking lithium ion
batteries.
• Be sure to charge the battery pack using a
genuine Sony battery charger or a device that
can charge the battery pack.
• Keep the battery pack out of the reach of small
children.
• Keep the battery pack dr3c
• Replace onlywith the same or equNalent tTpe
recommended by Son3_
• Dispose of used battery packs promptly as
described in the instructions.
Replace the battery with the specified type
onb: Otherwise, fire or injury may result.
ACAdaptor
Do not use the AC Adaptor placed in a
narrow space, such as between a wall and
furniture.
Use the nearby wall outlet (wall socket)
when using the AC Adaptor. Disconnect
the AC Adaptor from the wall outlet (wall
socket) immediately if aW malfunction
occurs while using your camcorder.
Ew,n if your camcorder is turned off., AC
power source (mains) is still supplied to
it while connected to the wall outlet (wall
socket) via the AC Adaptor.
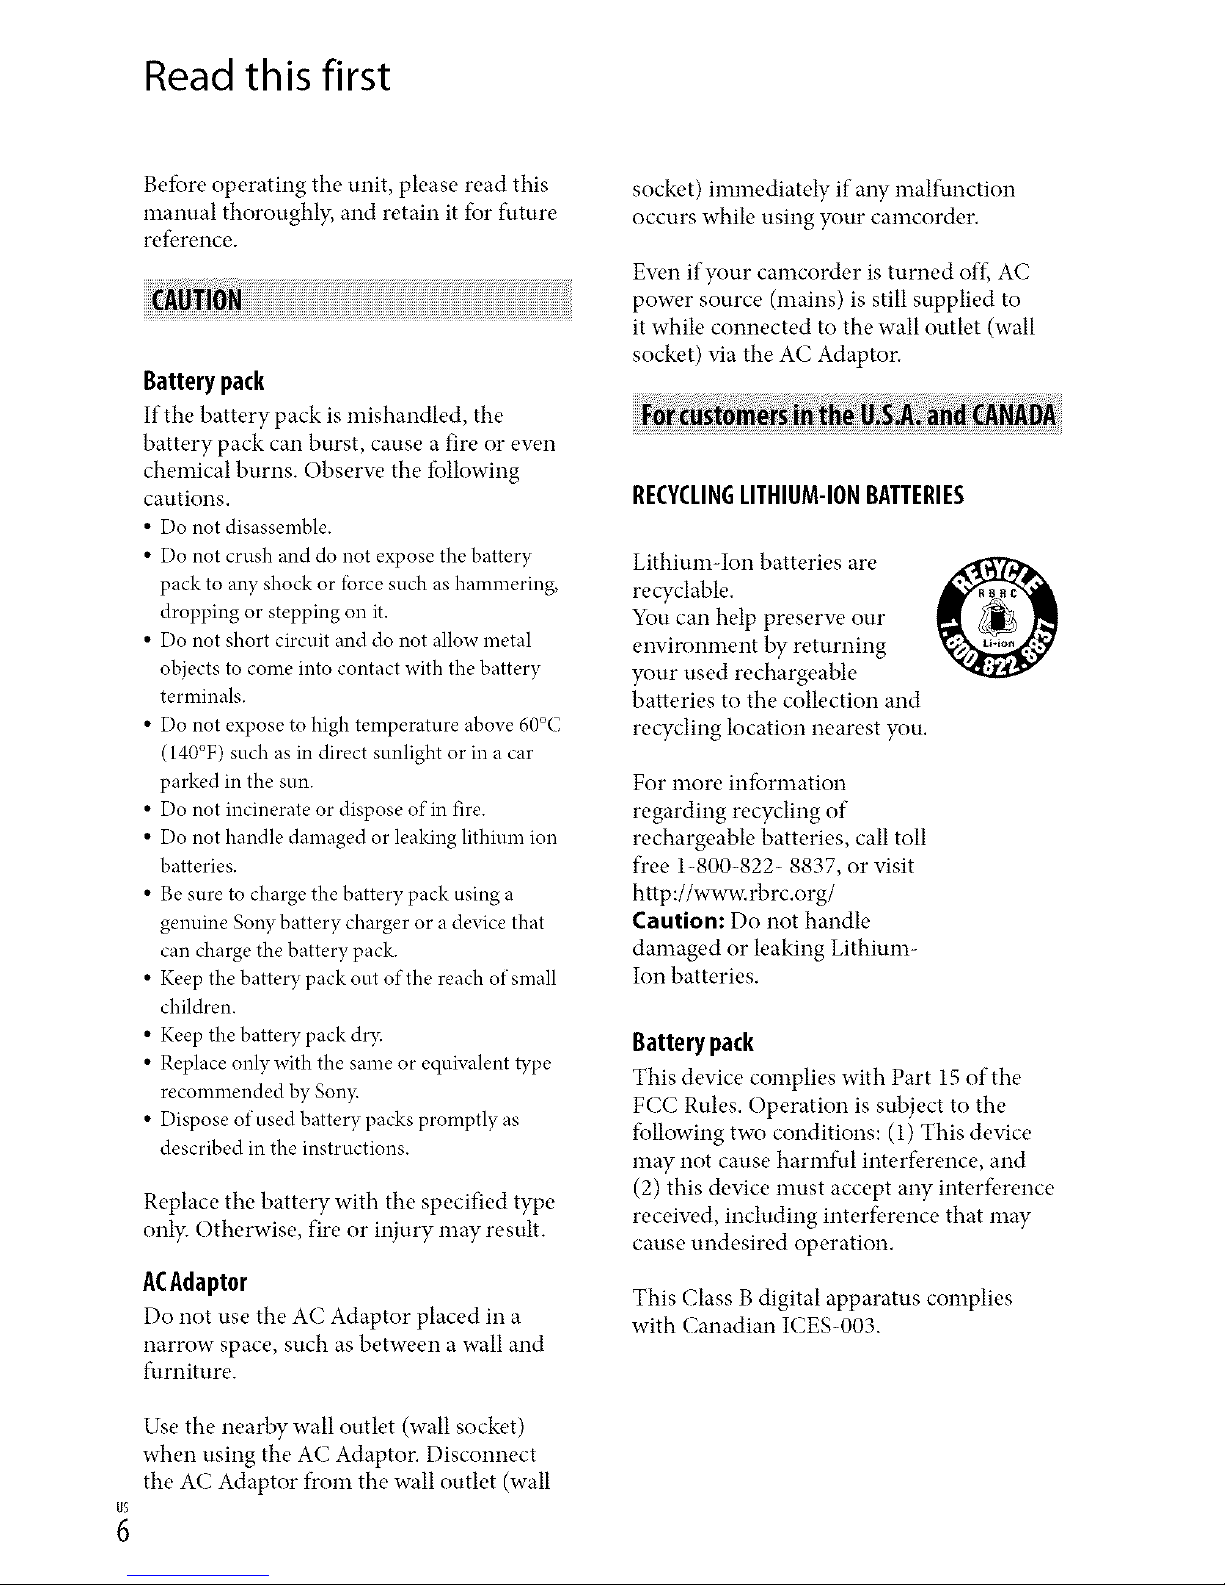
RECYCLIN6LITHIUM-IONBATTERIES
Lithium-Ion batteries are
recyclable.
You can help preserw, our
environment by returning
your used rechargeable
batteries to the collection and
recycling location nearest you.
For more infbnnation
regarding recycling of
rechargeable batteries, call toll
free 1-800-822- 8837, or visit
http://www.rbrc.org/
Caution: Do not handle
damaged or leaking Lithium-
Ion batteries.
Battery pack
This device complies with Part 15 of the
FCC Rules. Operation is subject to the
following two conditions: (1) This device
may not cause harmful interference, and
(2) this device must accept any interference
receiw, d, including interference that may
cause undesired operation.
This Class Bdigital apparatus complies
with Canadian ICES-003.
UL is an internationally recognized safety
organization.
The UL Mark on the product means it has
been UL Listed.
If you haw, aW questions about this
product, you may call:
SoW Customer Infi)rmation Center 1-800-
222-SONY (7669).
The number below is f;_rthe FCC related
matters onl}:
RegulatoryInformation
Declaration of Conformity
Trade Name: SONY
Model No.: HDR-CX300
Responsible Party: Sony Electronics Inc.
Address: 16530 Via Esprillo, San Diego,
CA 92127 U.S.A.
Telephone No.: 858-942-2230
This device complies with Part 15 of the
FCC Rules. Operation is subject to the
f;)llowing two conditions: (1) This device
may not cause harmful interference,
and (2) this device must accept any
interfk,rence receiw, d, including
interfk,rence that may cause undesired
operation.
Declaration of Conformity
Trade Name: SONY
Model No.: HDR-CX350V
Responsible Party: Sony Electronics Inc.
Address: 16530 Via Esprillo, San Diego,
CA 92127 U.S.A.
Telephone No.: 858-942-2230
This device complies with Part 15 of the
FCC Rules. Operation is subject to the
f;)llowing two conditions: (1) This device
may not cause harmful interference,
and (2) this device must accept any
interfk,rence receiw, d, including
interfk,rence that may cause undesired
operation.
Declaration of Conformity
Trade Name: SONY
Model No.: HDR-XR350V
Responsible Party: Sony Electronics Inc.
Address: 16530 Via Esprillo, San Diego,
CA 92127 U.S.A.
Telephone No.: 858-942-2230
This device complies with Part 15 of the
FCC Rules. Operation is subject to the
f_llowing two conditions: (1) This device
may not cause harmful interfk.rence,
and (2) this device must accept any
interference receiw.d, including
interference that may cause undesired
operation.
CAUTION
You are cautioned that any changes or
modifications not expressly approved in
this manual could w_id your authority to
operate this equipment.
Note
This equipment has been tested and t_mnd
to comply with the limits fi_r a Class B
digital device, pursuant to Part 15 of the
FCC Rules.
These limits are designed to provide
reasonable protection against harmful
interfk, rence in a residential installation.
This equipment generates, uses, and
can radiate radio frequency energy and,
if not installed and used in accordance
with the instructions, may cause harmful
interfk, rence to radio communications.
Howew, r, there is no guarantee that
interfk, rence will not occur in a particular
installation. If this equipment does cause
harmful interfk, rence to radio or television
reception, which can be determined by
turning the equipment off and on, the
user is encouraged to try to correct the
interference by one or more of the fi_llowing
measures:
- Reorient or relocate the receiving antenna.
- Increasetheseparationbetweenthe
equipmentandreceiver.
- Connecttheequipmentintoanoutleton
acircuitdifferentf)comthattowhichthe
receiverisconnected.
- Consultthedealeroranexperiencedradio/
TVtechnician*brhelp.
The supplied interface cable must be used
with the equipment in order to comply with
the limits for a digital device pursuant to
Subpart B of Part 15 of FCC Rules.
Forthe Stateof California,USAonly
Perchlorate Material - special handling may
applB
See
www.dt sc.ca.gov/hazardouswaste/
perchlorate
Perchlorate Material: Lithium battery
contains perchlorate.
• See page 21 fbr the memory card you can use
with this camcorder.
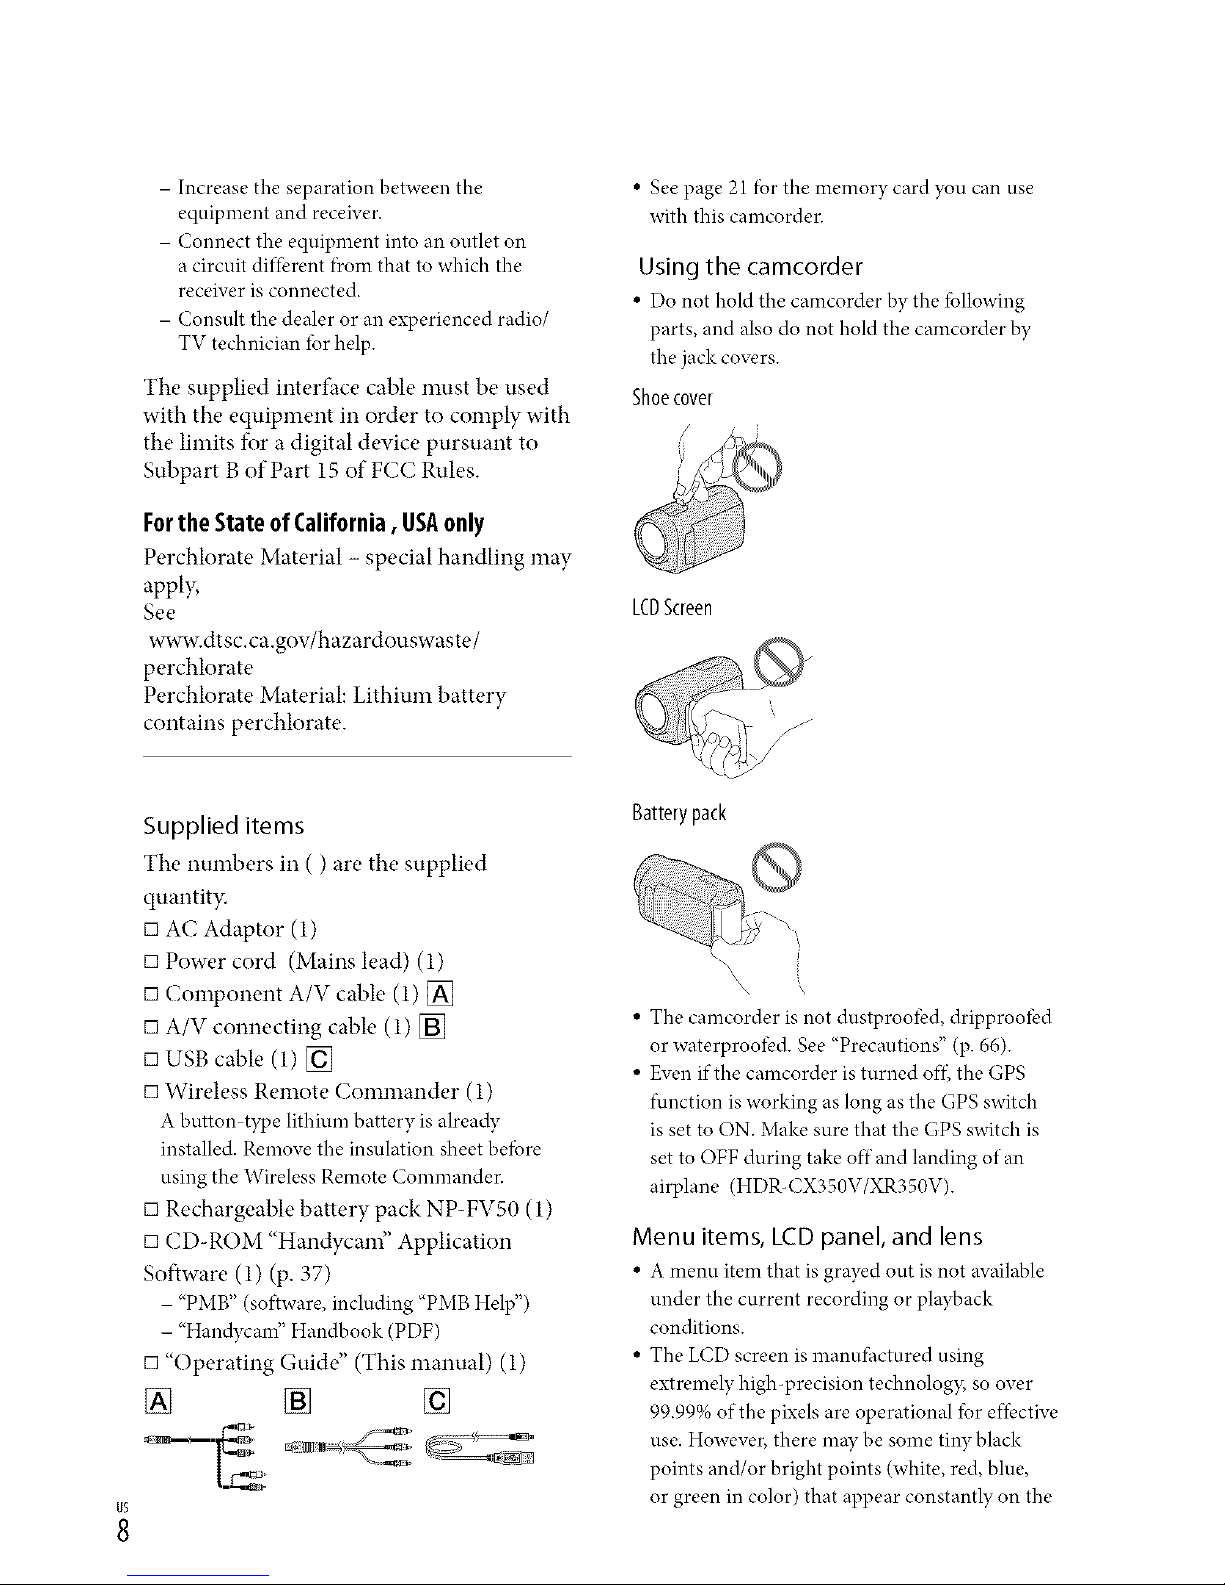
Using the camcorder
• Do not hold the camcorder hy the tbllowing
parts, and also do not hold the camcorder by
the jack covers.
Shoecover
LCDScreen
Supplied items
The numbers in ( ) are the supplied
quantity.
[] AC Adaptor (1)
[] Power cord (Mains lead) (1)
[] Component A/V cable (1) []
[] A/V connecting cable (1) []
[] USB cable (1) []
[] Wireless Remote Commander (1)
A button type lithium battery is already
installed. Remove the insulation sheet befbre
using the Wireless Remote Commander.
[] Rechargeable battery pack NP-FVSO (1)
[] CD-ROM "Handycam" Application
Software (1) (p. 37)
- "PMB" (software, including "PMB Help")
- "Handycam" Handbook (PDF)
[] "Operating Guide" (This manual) (1)
[] [] []
Batterypack
• The camcorder is not dustprool'ed, dripprool'ed
or waterprool'ed. See "Precautions" (p. 66).
• Even if the camcorder is turned off_ the GPS
function is working as long as the GPS switch
is set to ON. Make sure that the GPS switch is
set to OFF during take off"and landing of an
airplane (HDR-CX350V/XR350V).
Menu items, LCD panel, and lens
• A menu item that is grayed out is not available
under the current recording or playback
conditions.
• The LCD screen is manufhctured using
extremely high-precision technology, so over
99.99% of the pixels are operational for effective
use. However, there may be some tiny black
points and/or bright points (white, red, blue,
or green in color) that appear constantly on the
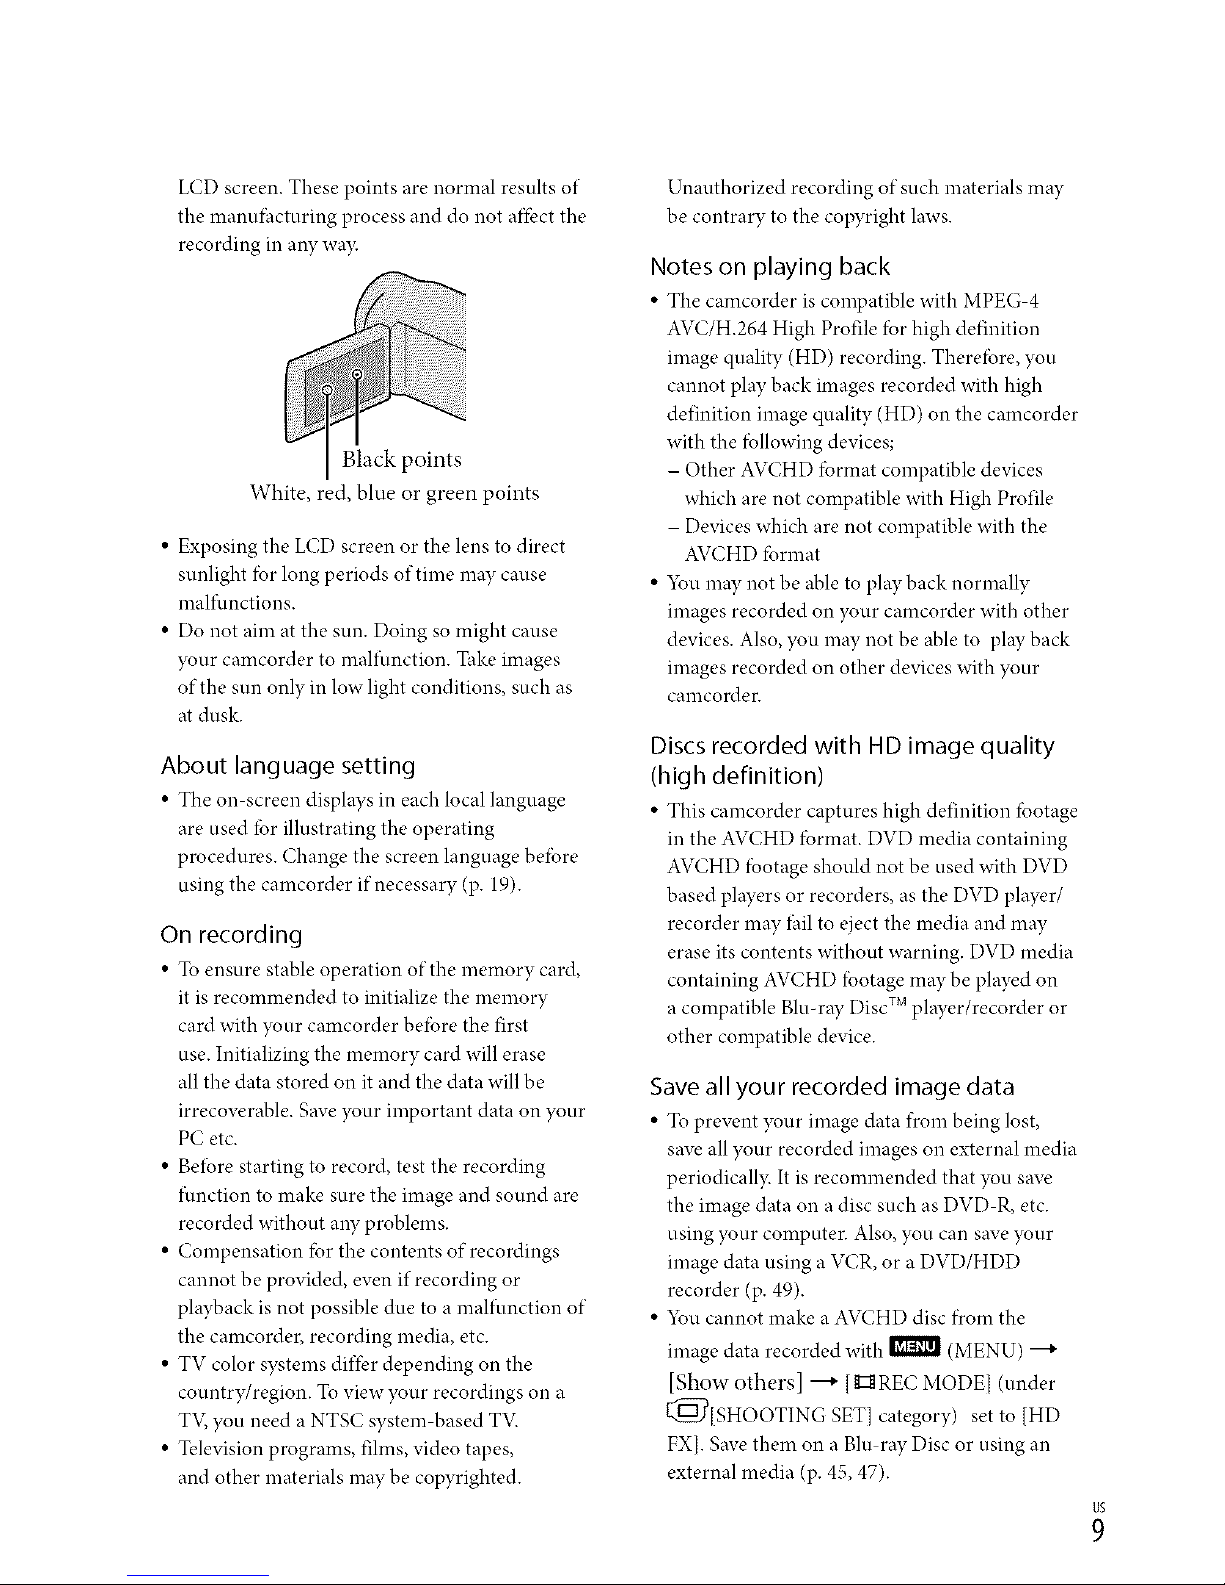
LCDscreen.Thesepointsarenormalresultsof
themanufhcturingprocessanddonotaf_-bctthe
recordinginaWwa)c
White,red,blueorgreenpoints
•ExposingtheLCDscreenorthelenstodirect
sunlightfbrlongperiodsoftimemaycause
malfunctions.
•Donotaimatthesun.Doingsomightcause
},ourcamcordertomalfunction.Takeimages
ofthesunonlyinlowlightconditions,suchas
atdusk.
About language setting
• The on screen displays in each local language
are used tbr illustrating the operating
procedures. Change the screen language befbre
using the camcorder if necessary (p. 19).
On recording
• To ensure stable operation of the memory card,
it is recommended to initialize the memory
card with },our camcorder befbre the first
use. Initializing the memory card will erase
all the data stored on it and the data will be
irrecoverable. Save your important data on your
PC etc.
• Betbre starting to record, test the recording
tunction to nlake sure the image and sound are
recorded without any problems.
• Compensation fbr the contents of recordings
cannot be provided, even if recording or
playback is not possible due to a malfunction of
the camcorder, recording media, etc.
• TV color systems differ depending on the
country/region. To view },our recordings on a
T'v; you need a NTSC system based T'_
• Television programs, films, video tapes,
and other materials may be copyrighted.
Unauthorized recording of such materials may
be contrary to the copyright laws.
Notes on playing back
• The camcorder is compatible with MPEG 4
AVC/H.264 High Profile fbr high definition
image quality (HD) recording. Theref___re,you
cannot play back images recorded with high
definition image quality (HD) on the camcorder
with the fbllowing devices;
- Other AVCHD fbrmat compatible devices
which are not compatible with High Profile
- Devices which are not compatible with the
AVCHD fbrmat
• 5_u may not be able to play back normally
images recorded on },our camcorder with other
devices. Also, you may not be able to play back
images recorded on other devices with your
canlcorder.
Discs recorded with HD image quality
(high definition)
• This camcorder captures high definition fbotage
in the AVCHD fbrmat. DVD media containing
AVCHD fbotage should not be used with DVD
based players or recorders, as the DVD player/
recorder may fhil to eject the media and may
erase its contents without warning. DVD media
containing AVCHD tbotage may be played on
a compatible Blu-ray Disc TM player/recorder or
other compatible device.
Save all your recorded image data
• To prevent your image data from being lost,
save all your recorded images on external media
periodicall> It is recommended that you save
the image data on a disc such as DVD R, etc.
using },our computer. Also, you can save },our
image data using a VCR, or a DVD/HDD
recorder (p. 49).
• 5_u cannot make a AVCHD disc f_comthe
image data recorded with _ (MENU) ---+
[Show others] ---+ [g::_REC MODEl (under
[_[SHOOTING gET] category) set to [HD
FXI. Save them on a Blu ray Disc or using an
external media (p. 45, 47).

1;
Notes on battery pack/AC Adaptor
• Be sure to remove the battery pack or the AC
Adaptor after turning oftthe camcorder.
• Disconnect the AC Adaptor fl'om the
camcorder, holding both the camcorder and the
DC plug.
Note on the camcorder/battery pack
temperature
• When the temperature of the camcorder
or battery pack becomes extremely high or
extremely low, you may not be able to record
or play back on the camcorder, due to the
protection features of the camcorder being
activated in such situations. In this case, an
indicator appears on the LCD screen.
When the camcoder is connected to a
computer or accessories
• Do not try to lbrmat the recording media of the
camcorder using a computer. If you do so, your
camcorder may not operate correctl3c
• When connecting the camcorder to another
device with communication cables, be sure to
insert the connector plug in the correct wa3c
Pushing the plug fbrcibly into the terminal
will damage the terminal and may result in a
malfunction of the camcorder.
If you cannot record/play back images,
perform [MEDIA FORMAT]
• If you repeat recording/deleting images lbr
a long time, f)cagmentation of data occurs on
the recording media. Images cannot be saved
or recorded. In such a case, save your images
on some type of external media first, and then
peribrm ]MEDIA FORMAT] by touching
! (MENU) ---+ [Show others] ---+
[MEDIA FORMAT] (under Q"_9[MANAGE
MEDIA] category) ---+ the desired medimn ---+
[YES] ---+ [YES] ---+ l'_t_.
Notes on optional accessories
• We recommend using genuine Sony accessories.
• Genuine Sony accessories may not be available
in some countries/regions.
About this manual, illustrations and
on-screen displays
• The example images used in this manual for
illustration purposes are captured using a
digital still camera, and theref___remay appear
difl-i.,rent fl'om images and screen indicators that
actually appear on your camcorder. And, the
illustrations of your camcorder and its screen
indication are exaggerated or simplified fbr
understandabilit>
• In this manual, the internal memory (HDR
CX300/CX350/CX350V/CX370) and the hard
disk (HDR-XR350/XR350V) of the camcorder
and the memory card are called "recording
mediaF
• In this manual, the DVD disc recorded with
high definition image quality (HD) is called
AVCHD disc.
• Design and specifications of your camcorder
and accessories are subject to change without
notice.
Confirm the model name of your
camcorder
• The model name is shown in this manual when
there is a difi-brence in specification between
models. Confirm the model name on the
bottom of your camcorder.
• The main differences in specification of this
series are as fbllows.
Recording Capacity USB
media of internal jack
recording
media
HI)R Internal 16 GB Input/
(X300 memory + output
-- menlory
HDR card 32 GB
CX350/
HI)R
CX350V*
HI)R 64 GB
CX370
HI)R Internal 160 GB
XR350/ hard disk
HI)R + memory
XR350V* card
The model with *is equipped with GPS.
• Do not do aW of the lbllowing. Otherwise, the
recording media may be damaged, recorded
images may be impossible to play back or may
be lost, or other malfunctions could occur.
- ejecting the memory card when the access
lamp (p. 22) is lit or flashing
- removing the battery pack or AC Adaptor
f)comthe camcorder, or applying mechanical
shock or vibration to the camcorder when the
(Movie)/O (Photo) lamps (p. 23) or the
access lamp (p. 22) are lit or flashing
• When using a shoulder belt (sold separately), do
not crash the camcorder against an object.
• Do not use your camcorder in very loud areas.
On the drop sensor (HDR-XR350/
XR350V)
• To protect the internal hard disk f)com shock
by dropping, the camcorder has a drop sensor
lunction. When a drop occurs, or under a nora
gravity condition, the block noise made when
this function is activated by the camcorder may
also be recorded. If the drop sensor catches a
drop repeatedly, recording/playback may be
stopped.
Note on using the camcorder at high
altitudes (HDR-XR350/XR350V)
• Do not turn on the camcorder in a low-pressure
area, where the altitude is more than 5,000
meters (16,000 fi:et). Doing so may damage the
internal hard disk drive of your camcorder.
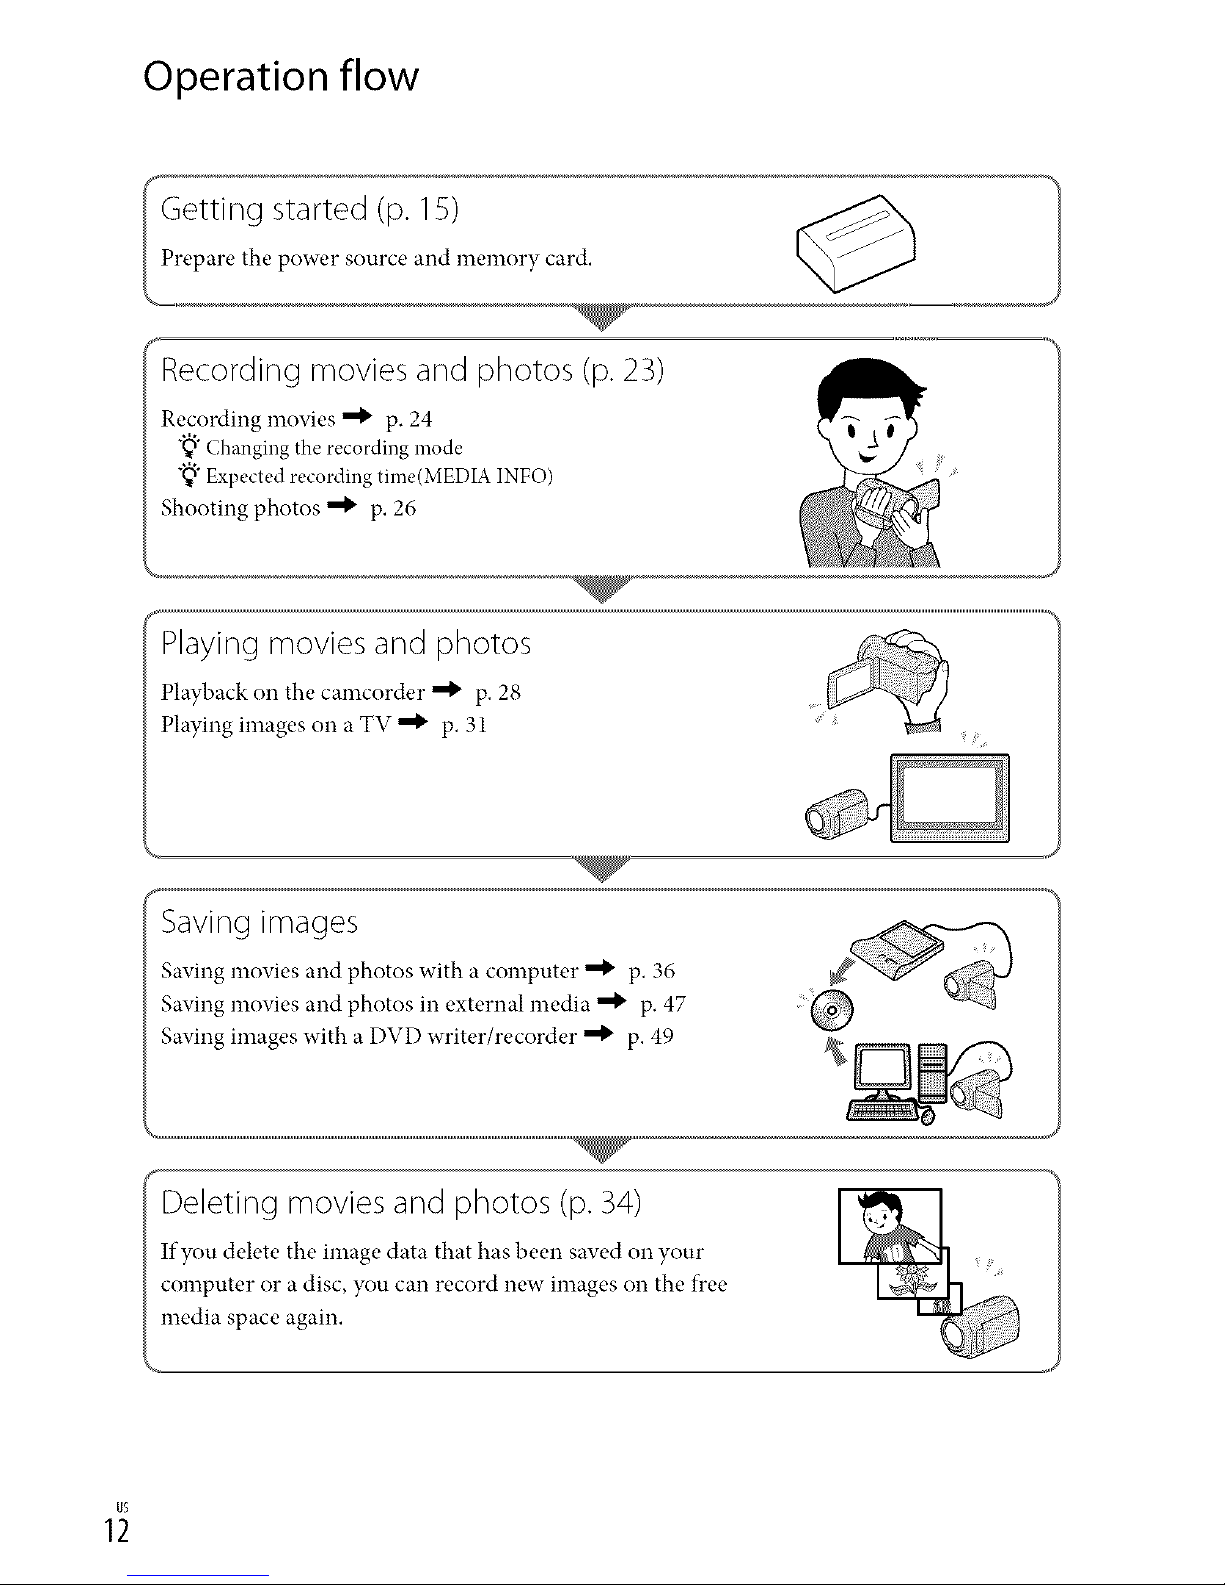
Operation flow
Getting started (p. 15)
Prepare the power source and memory card.
,o__,
Recording movies and photos (p. 23)
Recording movies _ p. 24
"_" Changing the recording mode
"_" Expected recording time(MEDIA INFO)
Shooting photos _ p. 26
Playing movies and photos
Playback on the camcorder _ p. 28
Playing images on a TV _ p. 31
Saving images
Saving movies and photos with a computer _ p. 36
Saving movies and photos in external media _ p. 47
Saving images with a DVD writer/recorder _ p. 49
#__
Deleting movies and photos (p. 34)
If you delete the image data that has been saved on your
computer or a disc, you can record new images on the flee
media space again.
%1
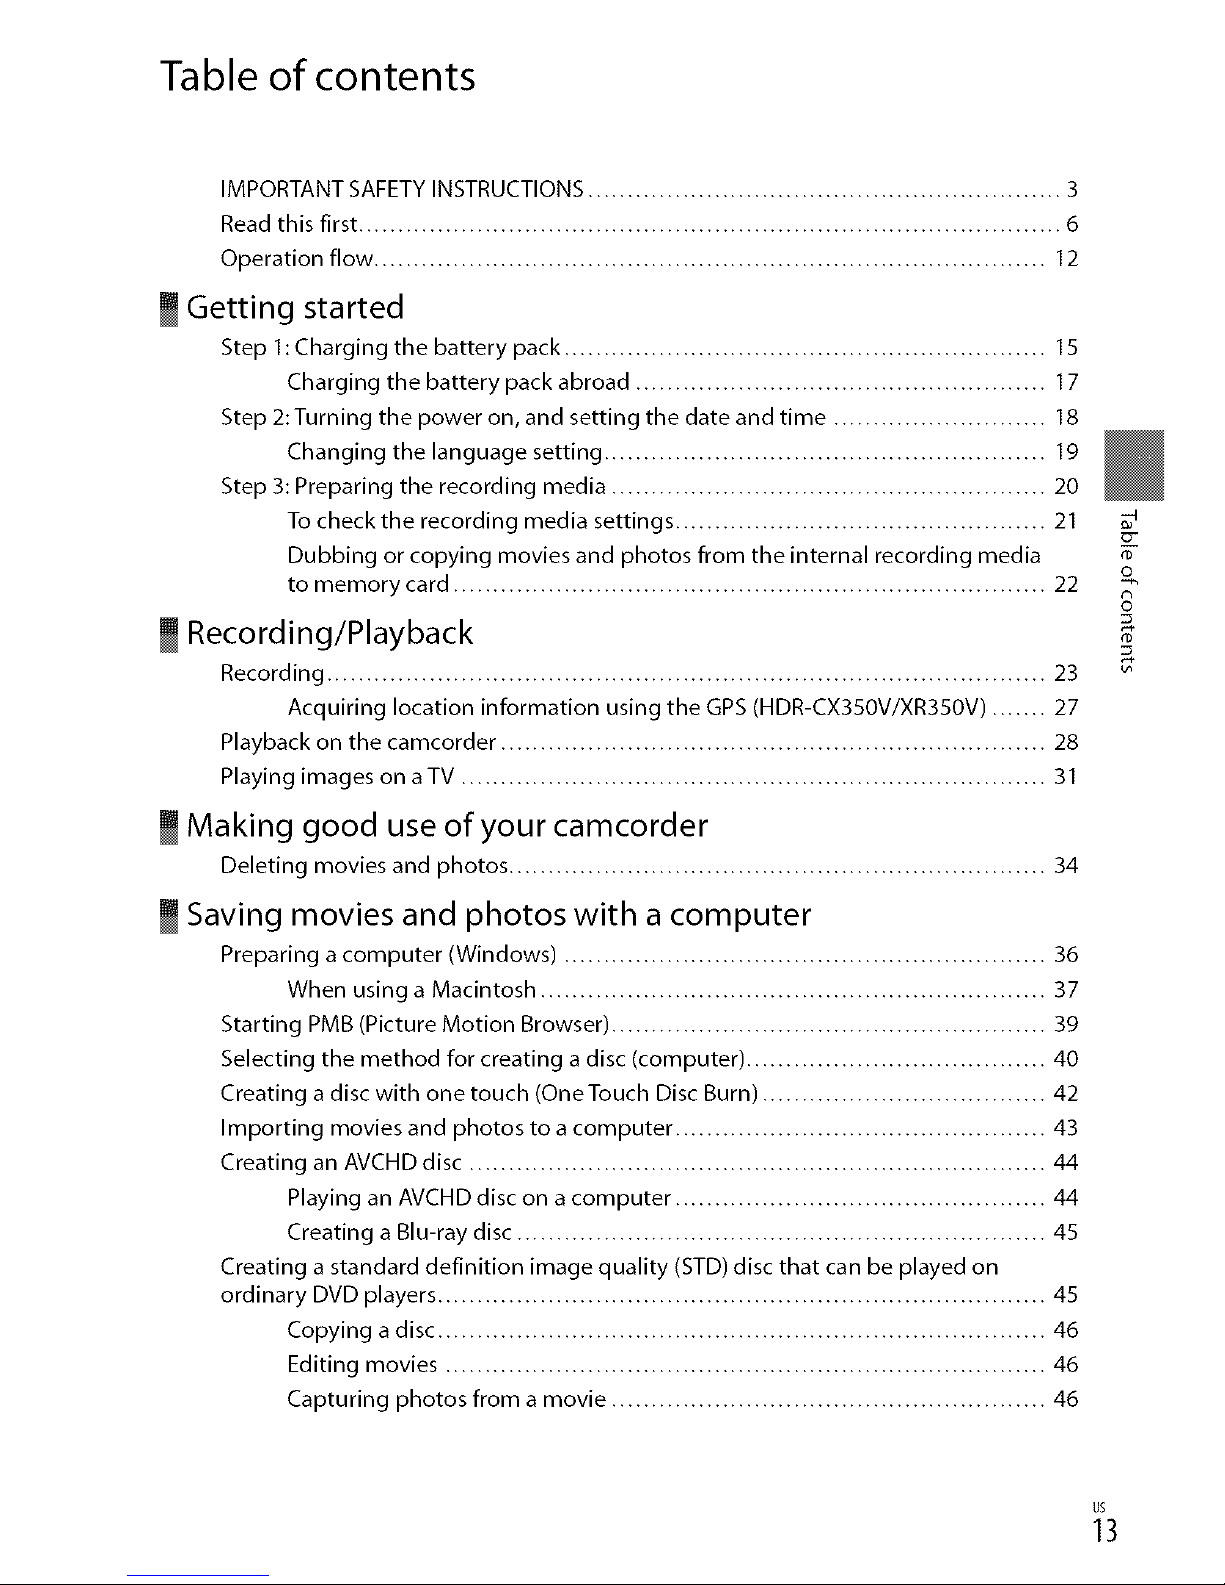
Table of contents
IMPORTANT SAFETY INSTRUCTIONS ............................................................ 3
Read this first ......................................................................................... 6
Operation flow ..................................................................................... 12
_ Getting started
Step 1: Charging the battery pack ............................................................. 15
Charging the battery pack abroad .................................................... 17
Step 2:Turning the power on, and setting the date and time ........................... 18
Changing the language setting ........................................................ 19
Step 3: Preparing the recording media ....................................................... 20
To check the recording media settings ............................................... 21
Dubbing or copying movies and photos from the internal recording media
to memory card ........................................................................... 22
_ Recording/Playback
Recording ........................................................................................... 23
Acquiring location information using the GPS (HDR-CX350V/XR350V) ....... 27
Playback on the camcorder ..................................................................... 28
Playing images on aTV .......................................................................... 31
_ Making good use of your camcorder
Deleting movies and photos .................................................................... 34
Saving movies and photos with a computer
Preparing a computer (Windows) ............................................................. 36
When using a Macintosh ................................................................ 37
Starting PMB (Picture Motion Browser) ....................................................... 39
Selecting the method for creating a disc (computer) ...................................... 40
Creating a disc with one touch (OneTouch Disc Burn) .................................... 42
Importing movies and photos to a computer ............................................... 43
Creating an AVCHD disc ......................................................................... 44
Playing an AVCHD disc on a computer ............................................... 44
Creating a Blu-ray disc ................................................................... 45
Creating a standard definition image quality (STD) disc that can be played on
ordinary DVD players ............................................................................. 45
Copying a disc ............................................................................. 46
Editing movies ............................................................................ 46
Capturing photos from a movie ....................................................... 46
n)
o
n
_3

Saving images with an external device
Saving images in external media (DIRECT COPY) ........................................... 47
Creating a disc with a DVD writer, recorder .................................................. 49
_ Customizing your camcorder
Using menus ....................................................................................... 56
Getting detailed information from the'Handycam" Handbook ......................... 63
_ Additional information
_ Troubleshooting ............................................................................... 64
Precautions ......................................................................................... 66
Specifications ...................................................................................... 68
Quick reference
Screen indicators .................................................................................. 73
Parts and controls ................................................................................. 74
Index ................................................................................................. 77
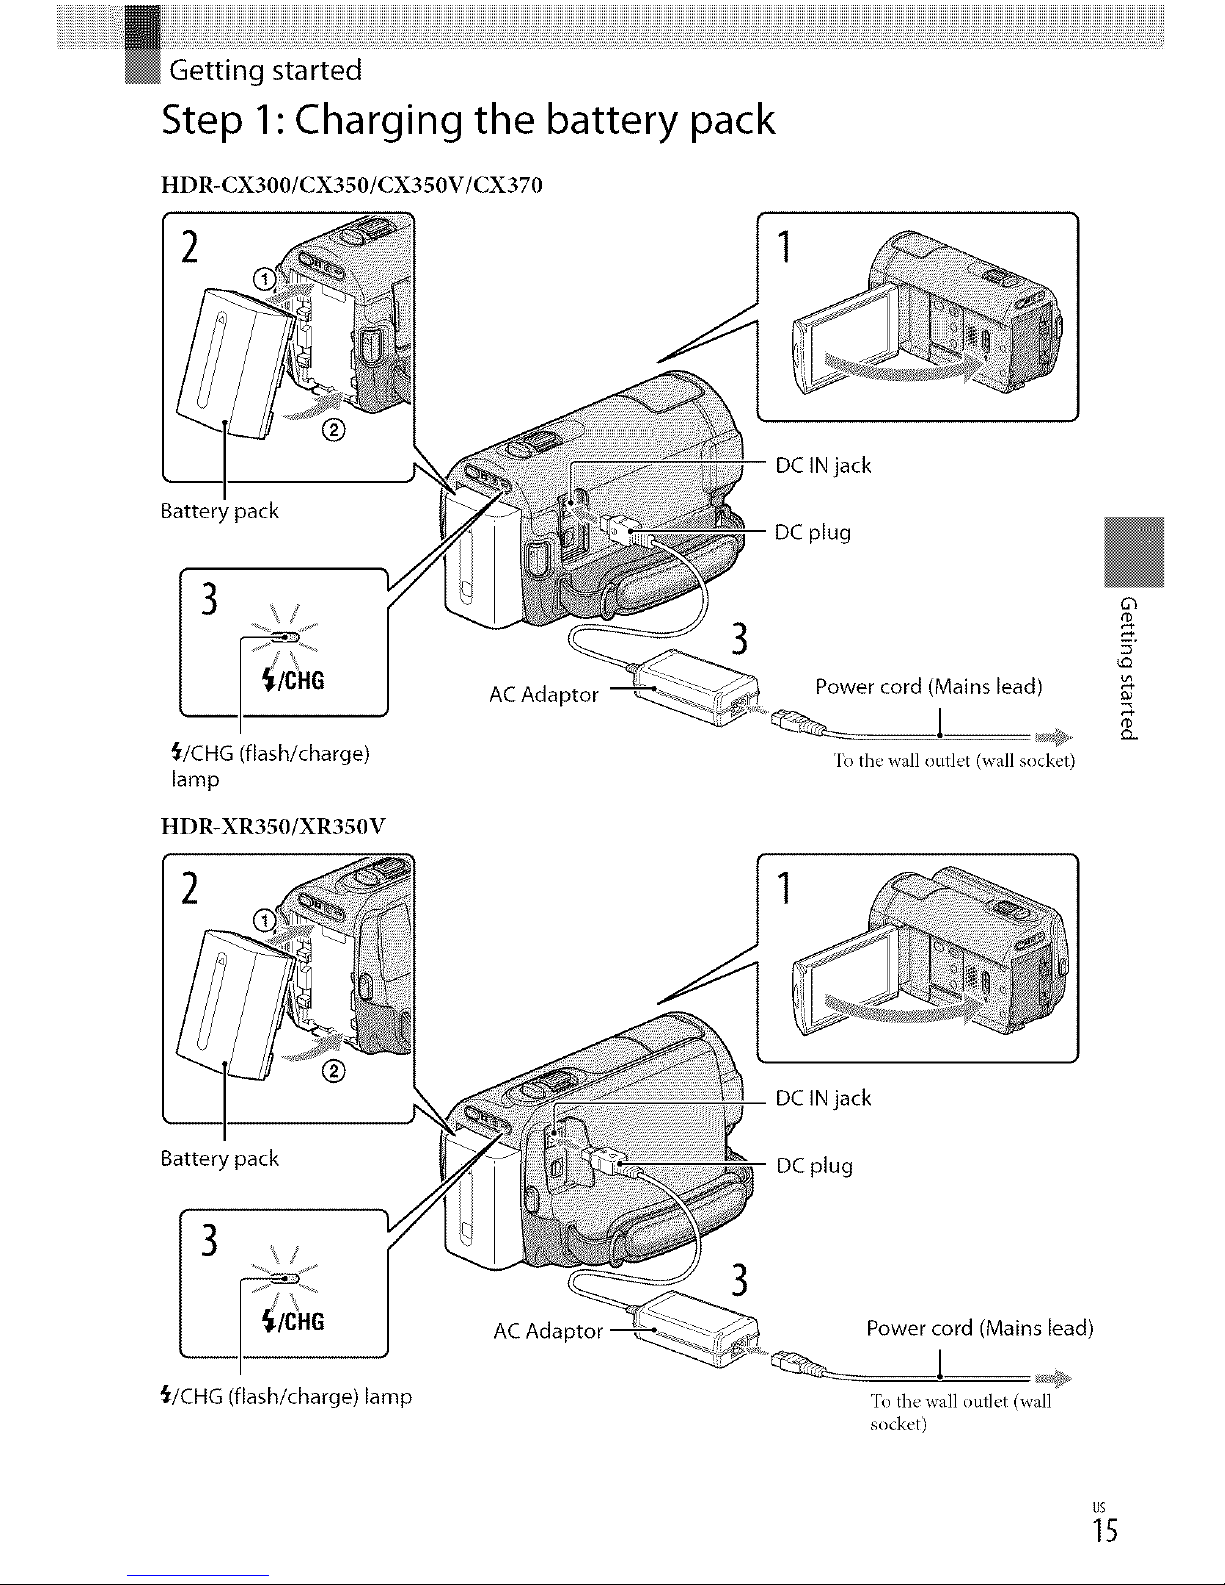
Step 1" Charging the battery pack
HDR-CX300/CX350/CX350V/CX370
1
Battery pack
3
_/CHG (flash/charge)
lamp
HDR-XR350/XR350V
AC Adaptor
DC IN jack
DC plug
Power cord (Mains lead)
To the wall outlet (wall socket)
Battery pack
3
_/CHG (flash/charge) lamp
AC Ada
DC IN jack
DC plug
Power cord (Mains lead)
"I'othe wall outlet (wall
socket)
_5
You can charge the "InfoLITHIUM" battery pack (V series) after attaching it to your
camcorder.
@ Notes
• 5_u cannot attach any"InibLITHIUM" battery pack other than the V series to your camcorder.
Turn offyour camcorder by closing the LCDscreen.
Attach the battery pack by aligning the battery terminals ((_) and
pushing the battery pack in the direction of the arrow ((]_)) until it clicks.
Connect the AC Adaptor and the power cord (mains lead) to your
camcorder and the wall outlet (wall socket).
• Alignthe • mark on the DC plug with that on the DC IN jack.
The ,_/CHG (flash/charge) lamp lights up and charging starts. The ,_/CHG (flash/charge)
lamp turns off when the battery pack is fully charged.
When the battery is charged, disconnect the ACAdaptor from the DCIN
jack of your camcorder.
OTips
• See page 70 on recording and playing time.
• \Vhen your camcorder is on, you can check the approximate amount of remaining battery power with the
remaining battery indicator at the upper left on the LCD screen.
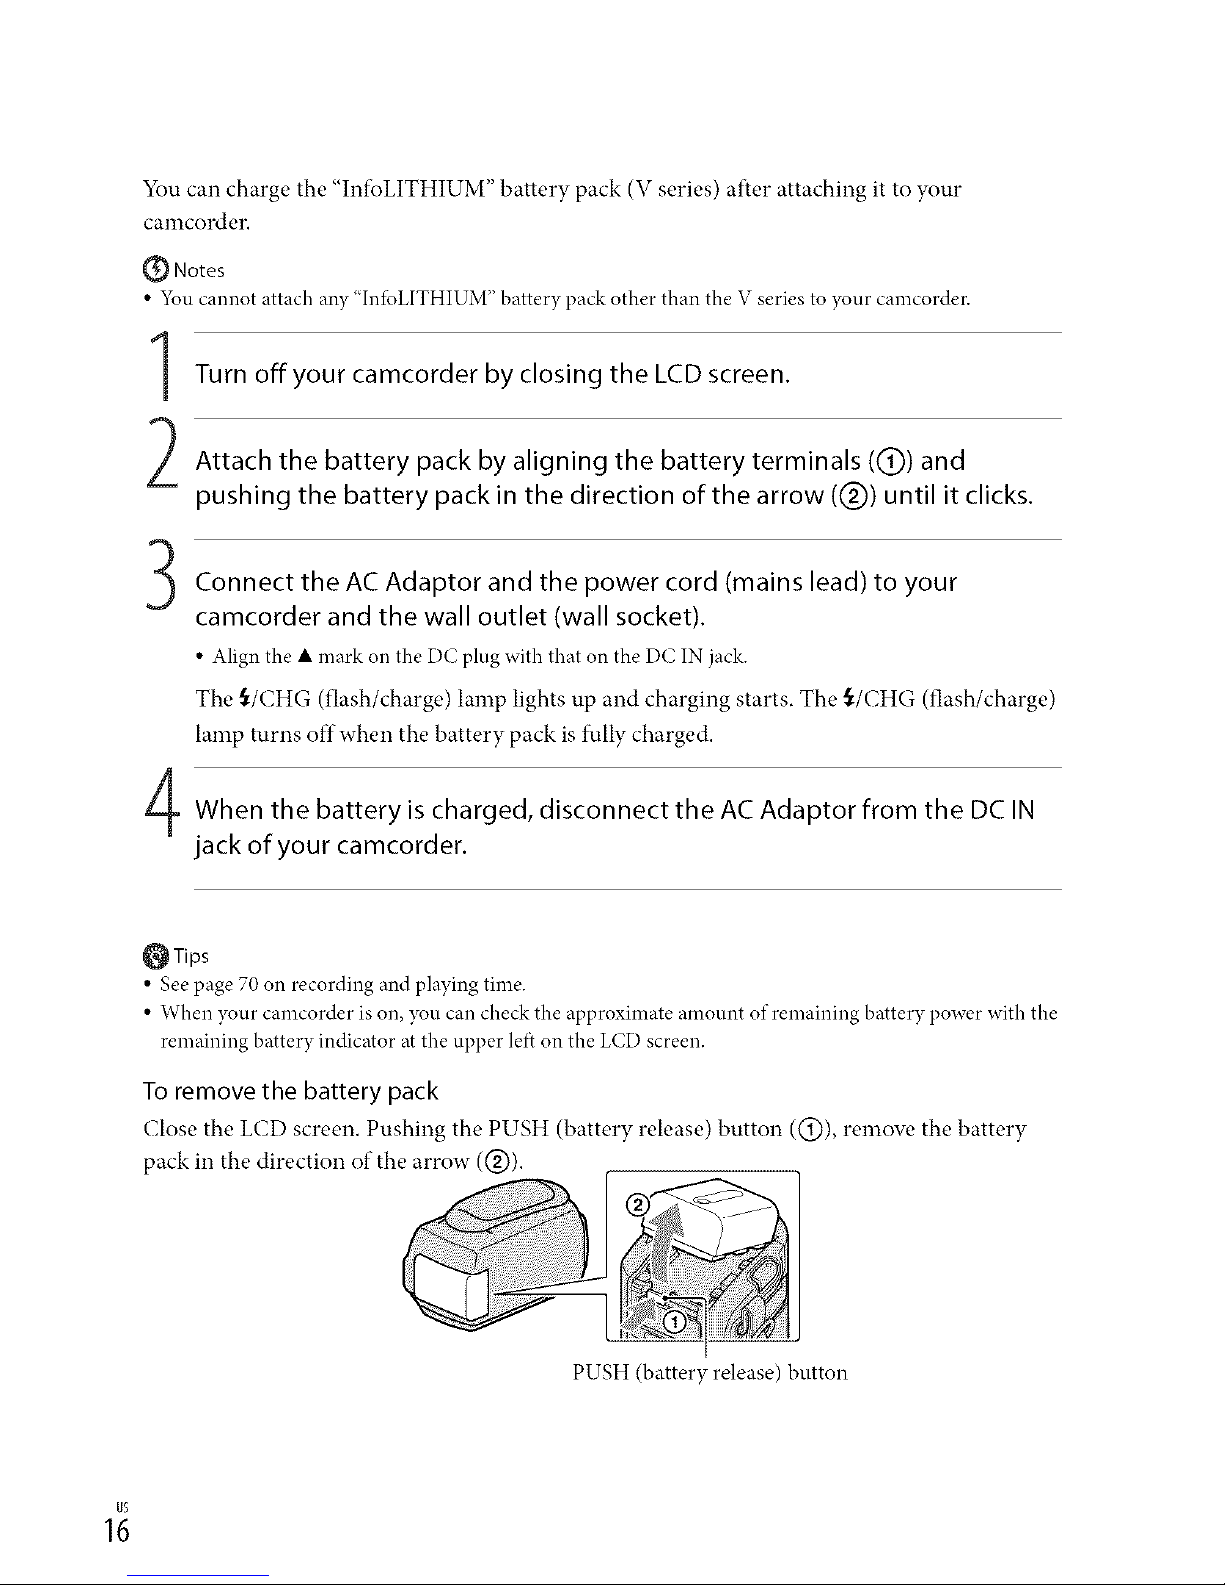
To remove the battery pack
(;lose the LCD screen. Pushing the PUSH (battery release) button ((_)), remove the battery
pack in the direction of the arrow (@).
PUSH (battery release) button

To use a wall outlet (wall socket) as a power source
Make the same connections as "Step 1: Charging the batter), pack." Even if the batter), pack is
attached, the battery pack is not discharged.
Notes on the battery pack
• When you remove the battery pack or disconnect the A(" Adaptor, close the LCD screen and make sure
that the [_ (Movie)/_ (Photo) lamps (p. 23), the access lamp (p. 22) are turned ofi-_
• The _/CHG (flash/charge) lamp flashes during charging under the fbllowing conditions:
- The battery pack is not attached correctl3c
- The battery pack is damaged.
- The temperature of the battery pack is lox_c
Remove the battery pack fl'om your camcorder and put it in a warm place.
- The temperature of the battery pack is high.
Remove the battery pack fl'om your camcorder and put it in a cool place.
• When attaching avideo light (sold separately), it is recommended that you use an NP-FV70 or NP-FVI00
battery pack.
• We do not recommend using an NP-FV30, which only allows short recording and playback times, with
your camcorder.
• In the defimlt setting, the power turns off automatically if you leave your camcorder without any
operation fbr about 5 minutes, to save battery power ([A.SHUT OFF]).
Notes on the AC Adaptor
• Use the nearby wall outlet (wall socket) when using the A(" Adaptor. Disconnect the A(" Adaptor fl'om
the wall outlet (wall socket) immediately if any malfunction occurs while using your camcorder.
• Do not use the AC Adaptor placed in a narrow space, such as between a wall and l_arniture.
• Do not short circuit the DC plug of the AC Adaptor or battery terminal with any metallic objects. This
lnay cause a malfunction.
63
You can charge the battery pack in any countries!regions using the AC Adaptor supplied with
your camcorderwithin the AC lOOV r 240 v, 50 Hz!60 Hz range.
, Do n0t use an e!ectr0nic y0!tagetransformer •
_7
Step 2:Turning the power on, and setting the
date and time
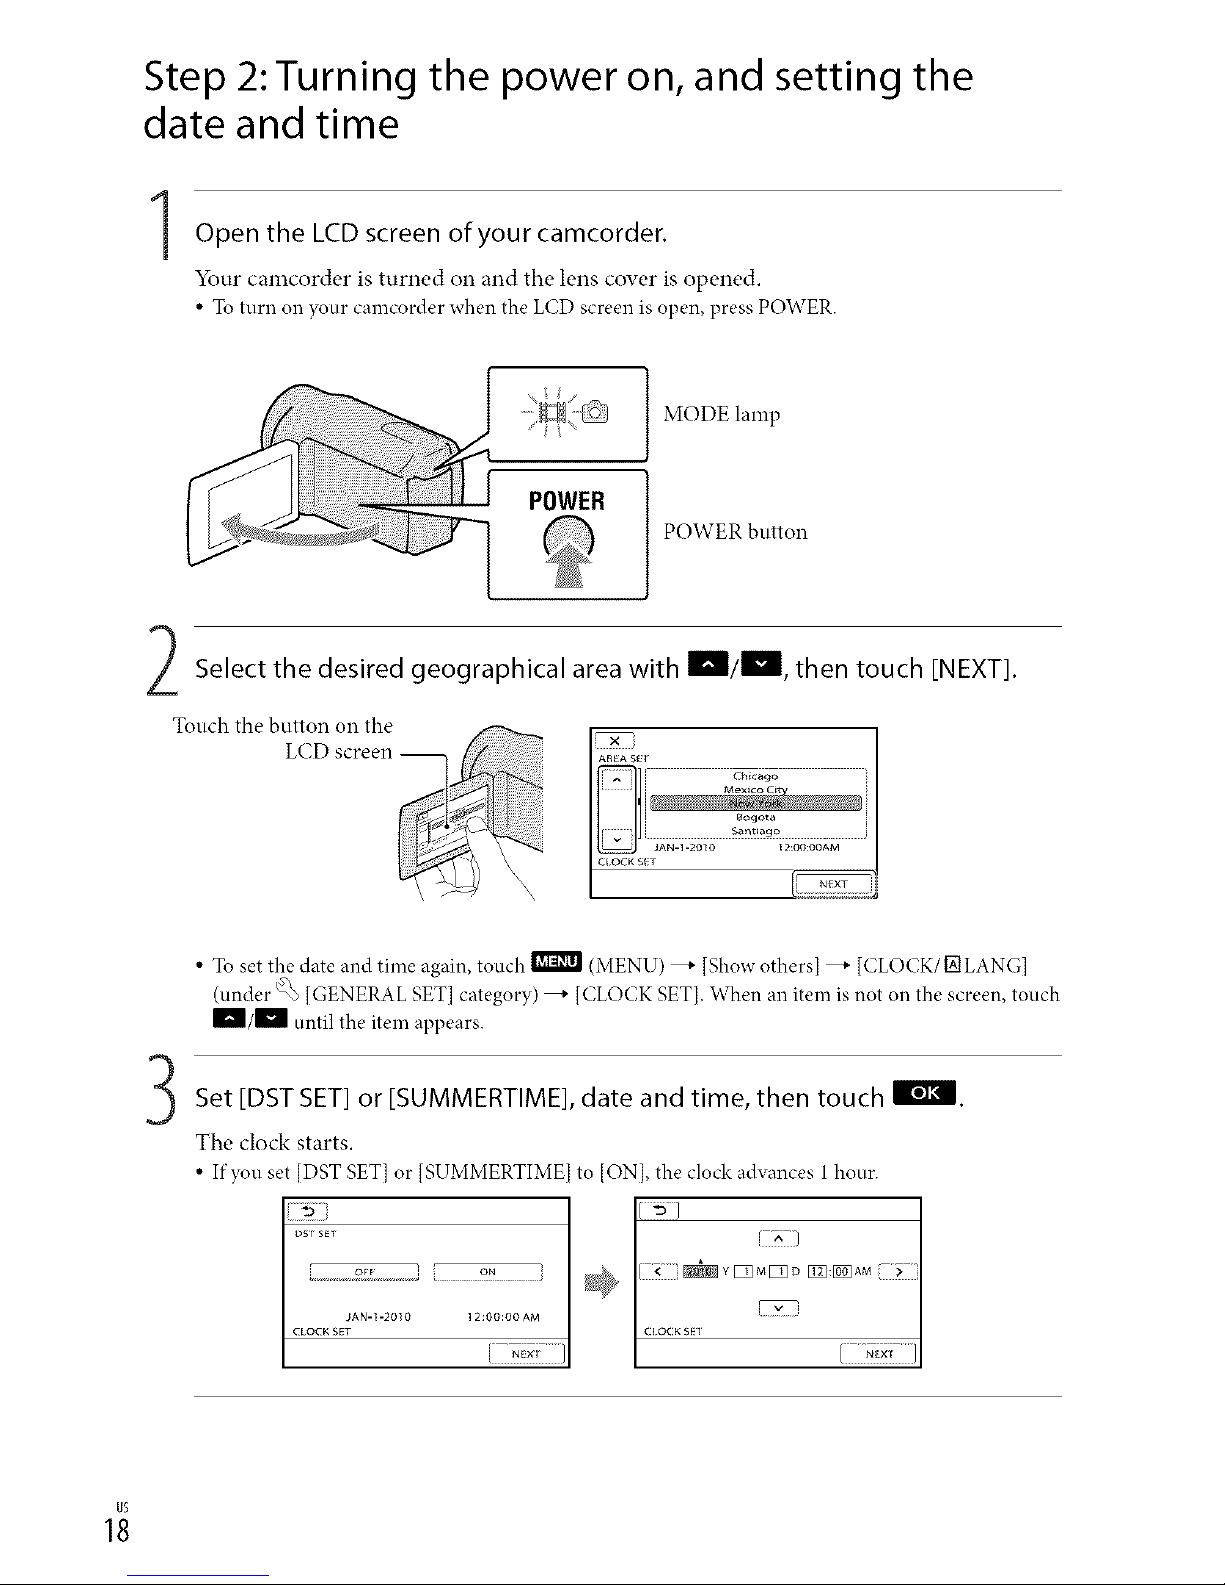
1Open the LCD screen of your camcorder.
Your camcorder is turned on and the lens cover is opened.
• To tunaon ),our camcorder when the LCDscreenis open, pressPOWER.
MODE lamp
POWER
PO\,VER button
Select the desired geographical area with _/_, then touch [NEXT].
• To set the date and time again, touch _ (MENU) _ [Show others] _ [CLOCK/[] LANG]
(under _ [GENERAL SET] category) _ [CLOCK SET[. When an item is not on the screen, touch
m/m until the item appears.
Set [DST SET] or [SUMMERTIME], date and time, then touch II_ltl.
The clock starts.
• If you set [DST SET] or [SUMMERTIME] to [ON], the clock advances 1 hour.
or q ON ? r [_ M[_ D E_:[_ AM
JAN-1-20_0 12:00:00 AM
CLOCK SET I C[OCKSEI t................
{_ Notes
• The date and time does not appear during recording, but they are automatically recorded on the
recording media, and can be displayed during playback. To display the date and time, toucb
(MENU) _ [Sbow others] _ [PLAYBACK SETi (under _ [PLAYBACKI category) _ [DATA
COg)El _ [DATE/TIME] _ | _ _ _ |.
• 5_u can turn off the operation beeps by touching _ (MENU) _ [Show othersl _ [SOUND/DISP
SET] (under <_ [GENERAL SET] category) _ [BEEP] _ [OFF] _ _ _ _ _ _'_.
• Ifthe button you touch does not react correctly, calibrate the touch panel.
• Once the clock is set, the clock time is automatically adjusted with [AUTO CLOCK ADJI and [AUTO
AREA ADI] set to [ON]. The clock may not be adjusted to the correct time automatically, depending
on the country/region selected fbr },our camcorder. In this case, set [AUTO CLOCK ADJI and [AUTO
AREA ADI] to [OFF] (HDR-CX350V/XR350V).
To turn offthe power
Close the LCD screen. The H (Movie) lamp flashes for a fbw seconds and the power is turned
off_
_Tips
• 5_u can turn off your camcorder also by pressing POWER.
• When [POWER ON BY LCD] is set to [OFF], turn offyour camcorder by pressing POWER.
63
You can change the on:screen displays to show messages in a specified language.
Touch _ (MENU) _[Show others] _ [CLOCK/_ LANG] (under % [GENERAL SET]
category) _[ [] LANGUAGE SET] _ a desired language _ _ _ _,_!1 _ _.
_9
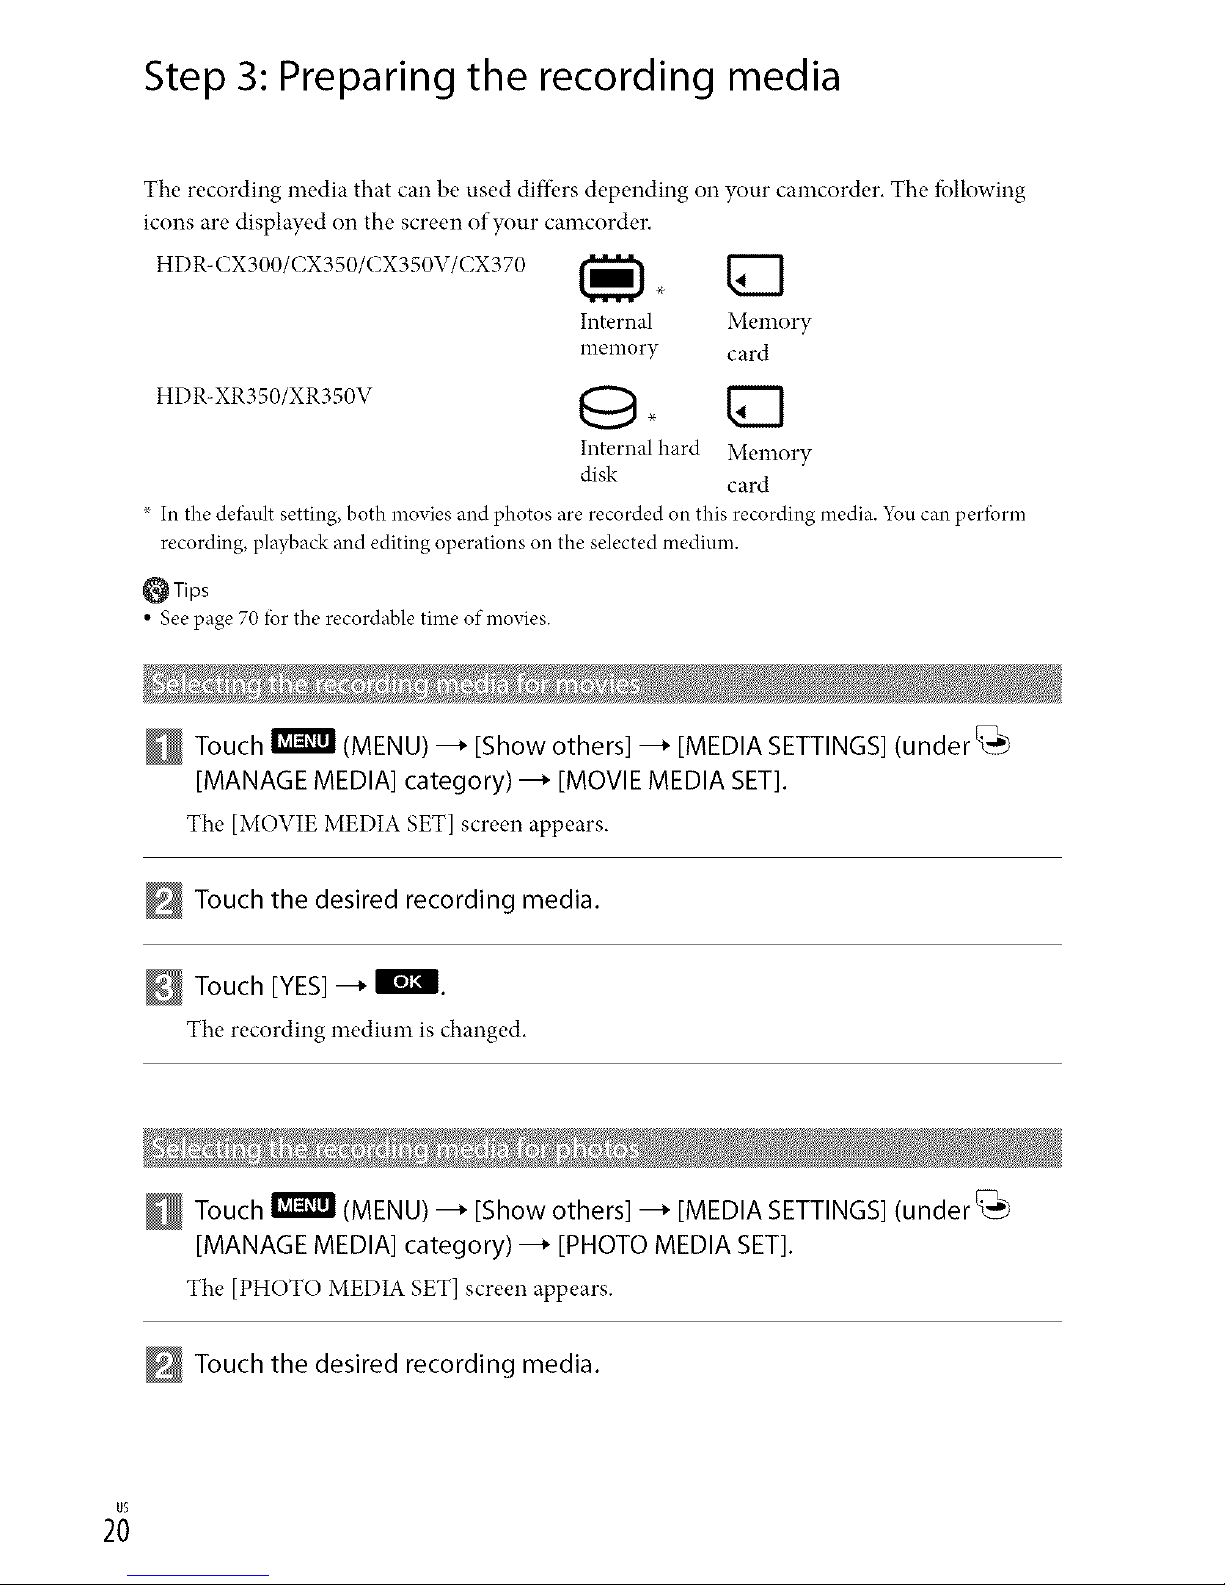
Step 3: Preparing the recording media
The recording media that can be used differs depending Oll your camcorder. The fbllowing
icons are displayed on the screen of your camcorder.
HDR-CX300/CX350/CX350V/CX370 _
Internal Memory
memory card
HDR-XR350/XR350V O" _]
Internal hard Memory
disk card
× In thedefhultsetting, both movies and photos are recorded on this recording media. 5_u can peribrm
recording, playbackand editing operations on the selected medimn.
_Tips
• See page 70 ior the recordable time of movies.
Touch _ (MENU) --_ [Show others] --_ [MEDIA SETTINGS]
(under_
[MANAGE MEDIA] category) --_ [MOVIE MEDIA SET].
The [MOVIE MEDIA SET] screen appears.
Touch the desired recording media.
Touch [YES] --_ I_J_l.
The recording medium is changed.
Touch _ (MENU) --_ [Show others] --_ [MEDIA SETTINGS]
(under_
[MANAGE MEDIA] category) --_ [PHOTO MEDIA SET].
The [PHOTO MEDIA SET] screen appears.
Touch the desired recording media.
2;
Touch EYES]-_* _.
The recording medium ischanged.
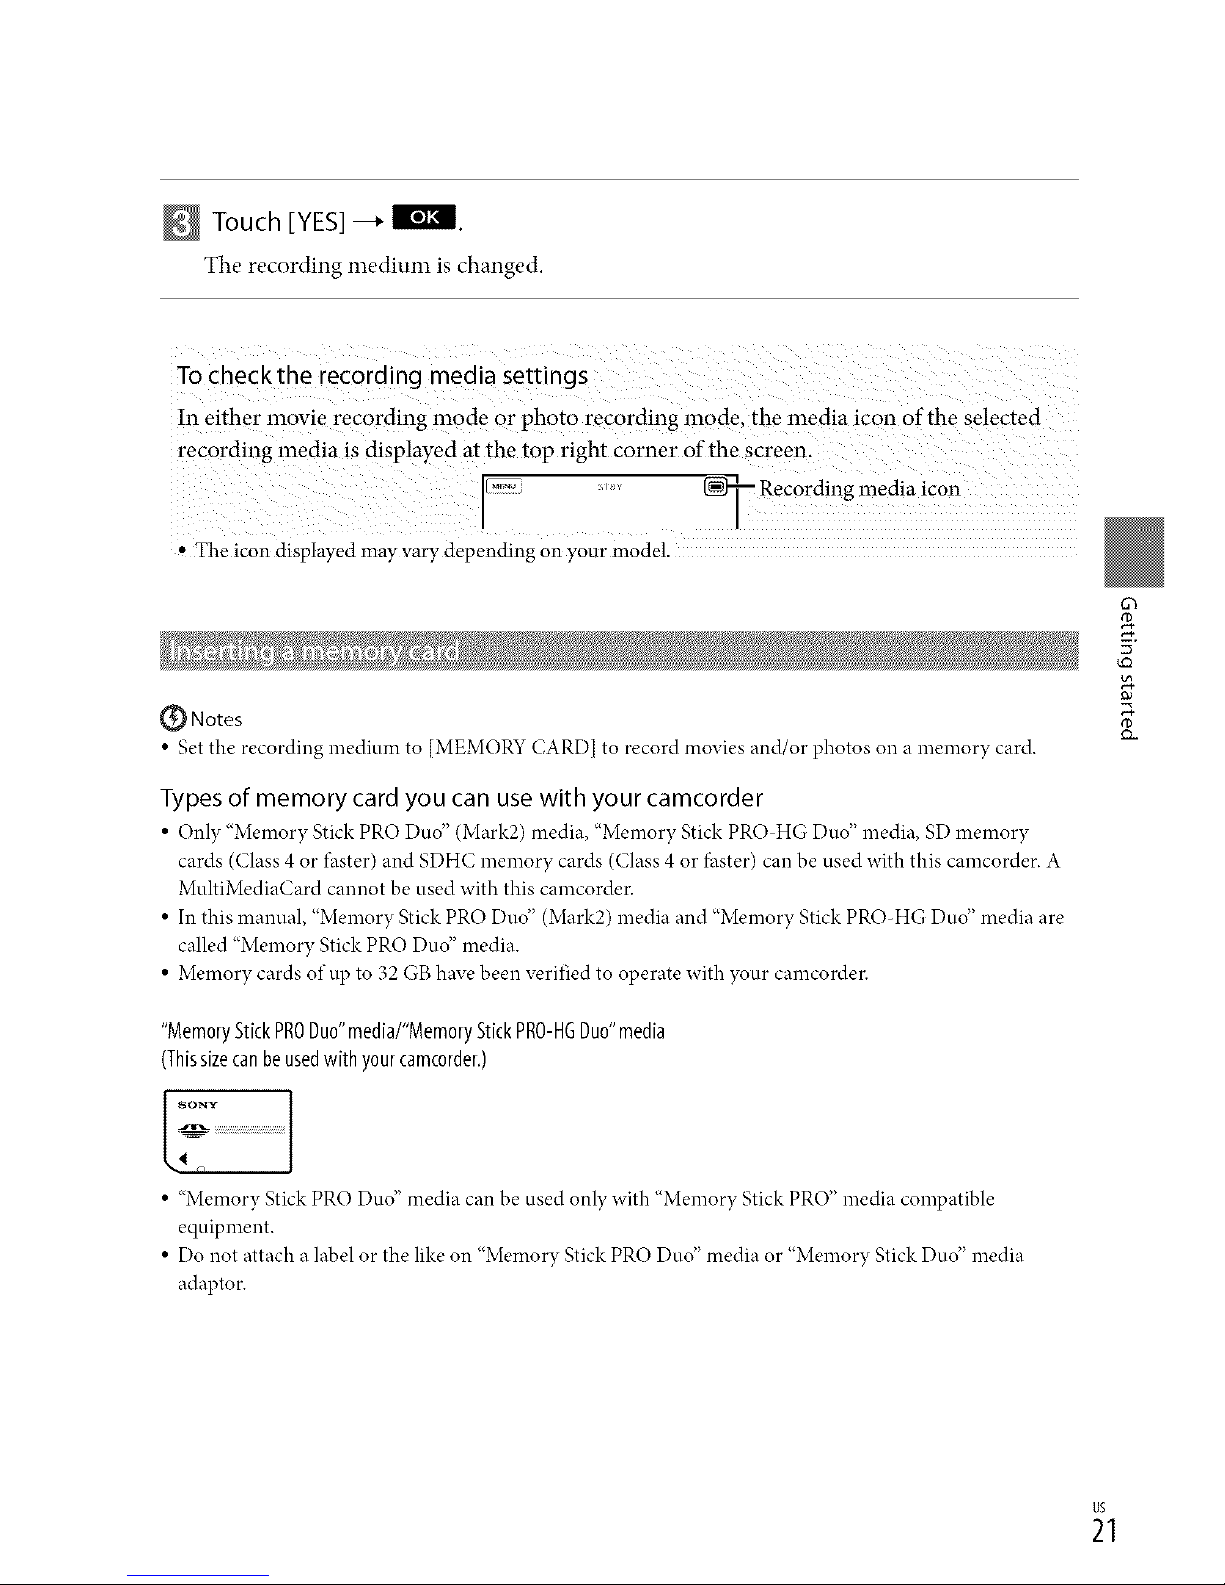
To checkthe recording media settings
!n ei ther movie recording mode or phot o recording in0de, the media icon of the Selected
recording inedia is displayed at the top right Corner Of the Screen.
..... _ Recordi!}g media icon
, The icon displayed may vary depending on your model.
(_ Notes
• Set the recording medium to [MEMORY CARD] to record movies and/or photos on a memory card.
Types of memory card you can use with your camcorder
• Only "Memory Stick PRO Duo" (Mark2) media, "Memory Stick PRO_HG Duo" media, SD memory
cards (Class 4 or *hster) and SDHC memory cards (Class 4 or fhster) can be used with this camcorder. A
MultiMediaCard cannot be used with this camcorder.
• In this manual, "Memory Stick PRO Dud' (Mark2) media and "Memory Stick PRO-HG Dud' media are
called "Memory Stick PRO Dud' media.
• Memory cards of up to 32 GB have been verified to operate with your camcorder.
"MemoryStickPRODuo"media/"MemoryStickPRO-HGDuo"media
(Thissizecanbe usedwith yourcamcorder,)
• "Memory Stick PRO Duo" media can be used only with "Memory Stick PRO" media compatible
equipment.
• Do not attach a label or the like on "Memory Stick PRO Dug' media or "Memory Stick Dug' media
adaptor.
63
2
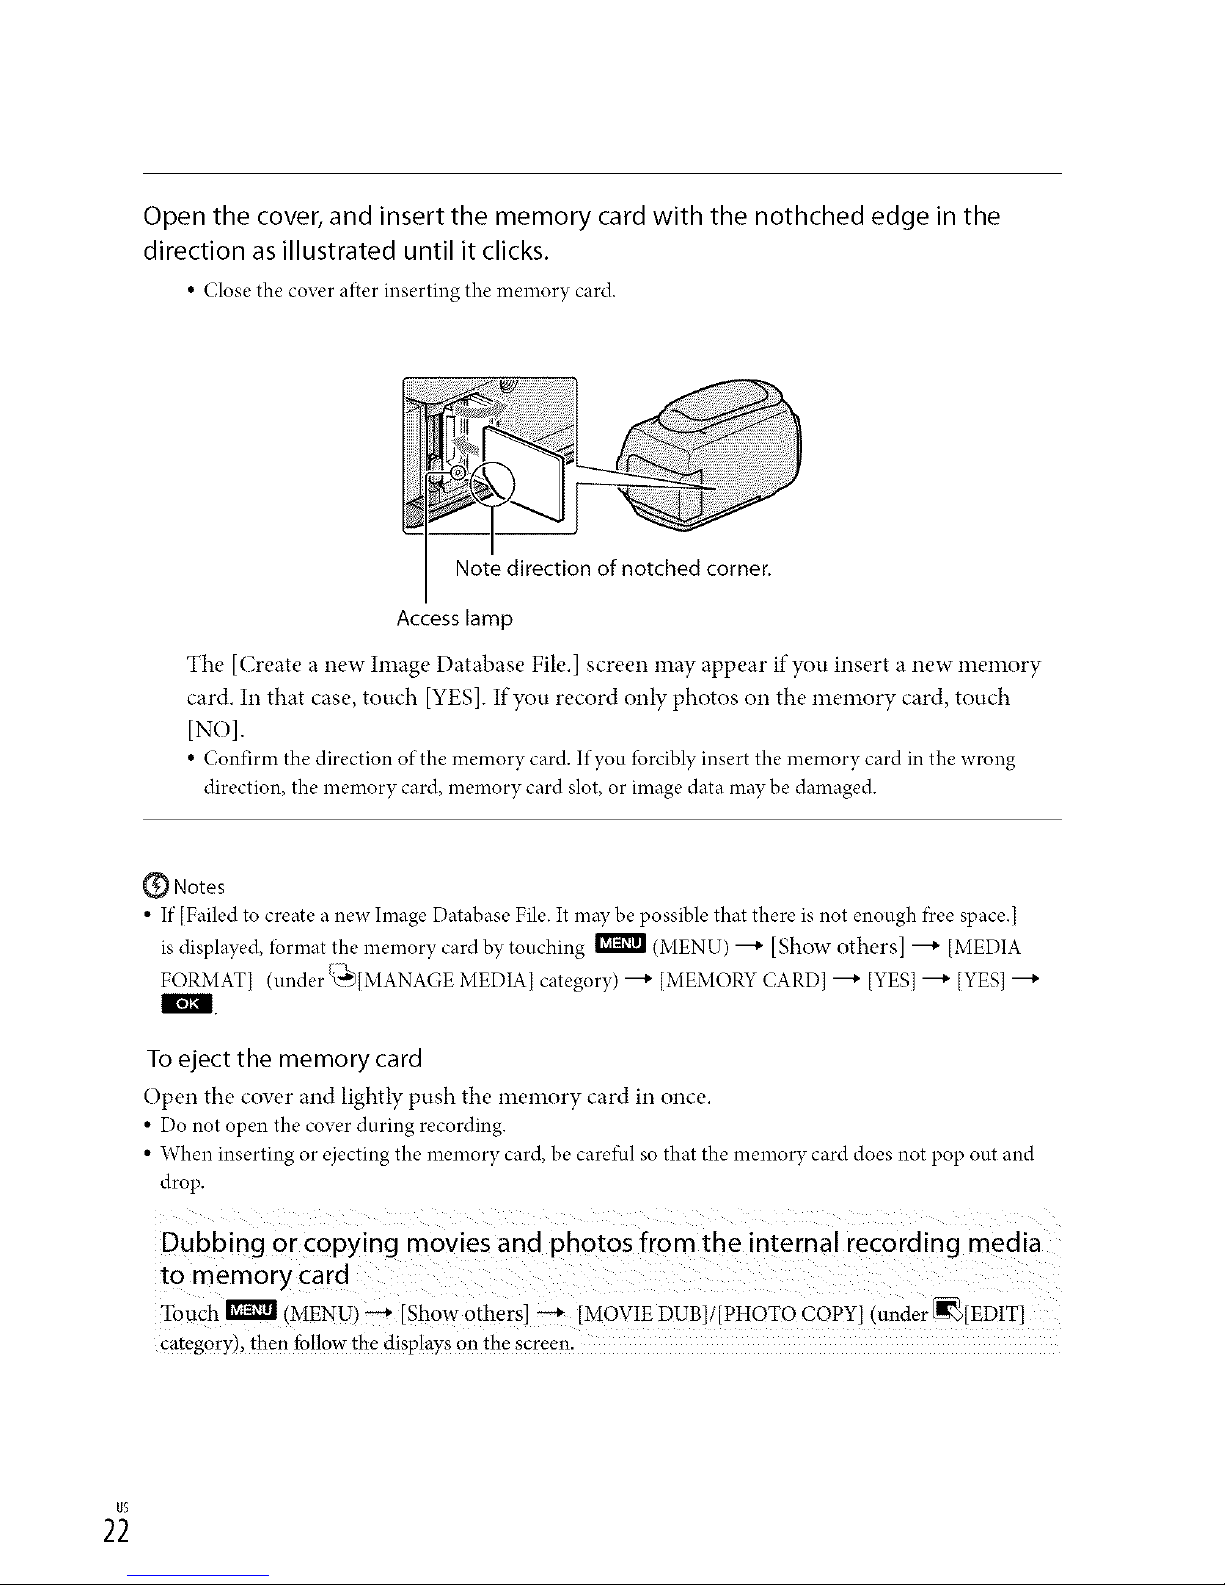
Open the cover, and insert the memory card with the nothched edge in the
direction as illustrated until it clicks.
• (;lose the cover aiter inserting the memory card.
Note direction of notched corner.
Access lamp
The [Create a new hnage Database File.] screen may appear if you insert a new memory
card. In that case, touch [YES]. Ifyou record only photos on the memory card, touch
[NO].
• Confirm the direction of the memory card. If you forciblyinsert the memory card in the wrong
direction, the memory card,memory card slot, or imagedata maybe damaged.
@ Notes
• If [Failed to create a new hnage Database File. It may be possible that there is not enough t)ceespace.]
is displayed, lbrmat the memory card by touching _ (MENU) ---+ [Show others] ---+ [MEDIA
FORMAT] (under _"_[MANAGE MEDIA] category) ---+ [MEMORY CARD] ---+ [YES] ---+ [YES] ---+
I_t,m.
To eject the memory card
Open the cow'r and lightly push the memory card in once.
• Do not open the cover during recording.
• When inserting or ejecting the memory card, be careihl so that the memory card does not pop out and
drop.
Dubbing or COpyingmovies and phOtOSfrom the internal recording media
to memory card
Touch _ (MENU) _ [ShOw otherS] _ [MOVIE DUB]/[PHOTO CopY] (under _[EDIT]
category), then follow the displays on the scree m
Recording
In the default setting, movies are recorded with high definition image quality (HD) on the
fbllowing media.
HDR-CX300/CX350/CX350V/CX370: Internal memory
HDR-XR350/XR350V: Internal hard disk
_Tips
• To change the recording media, see page 20.
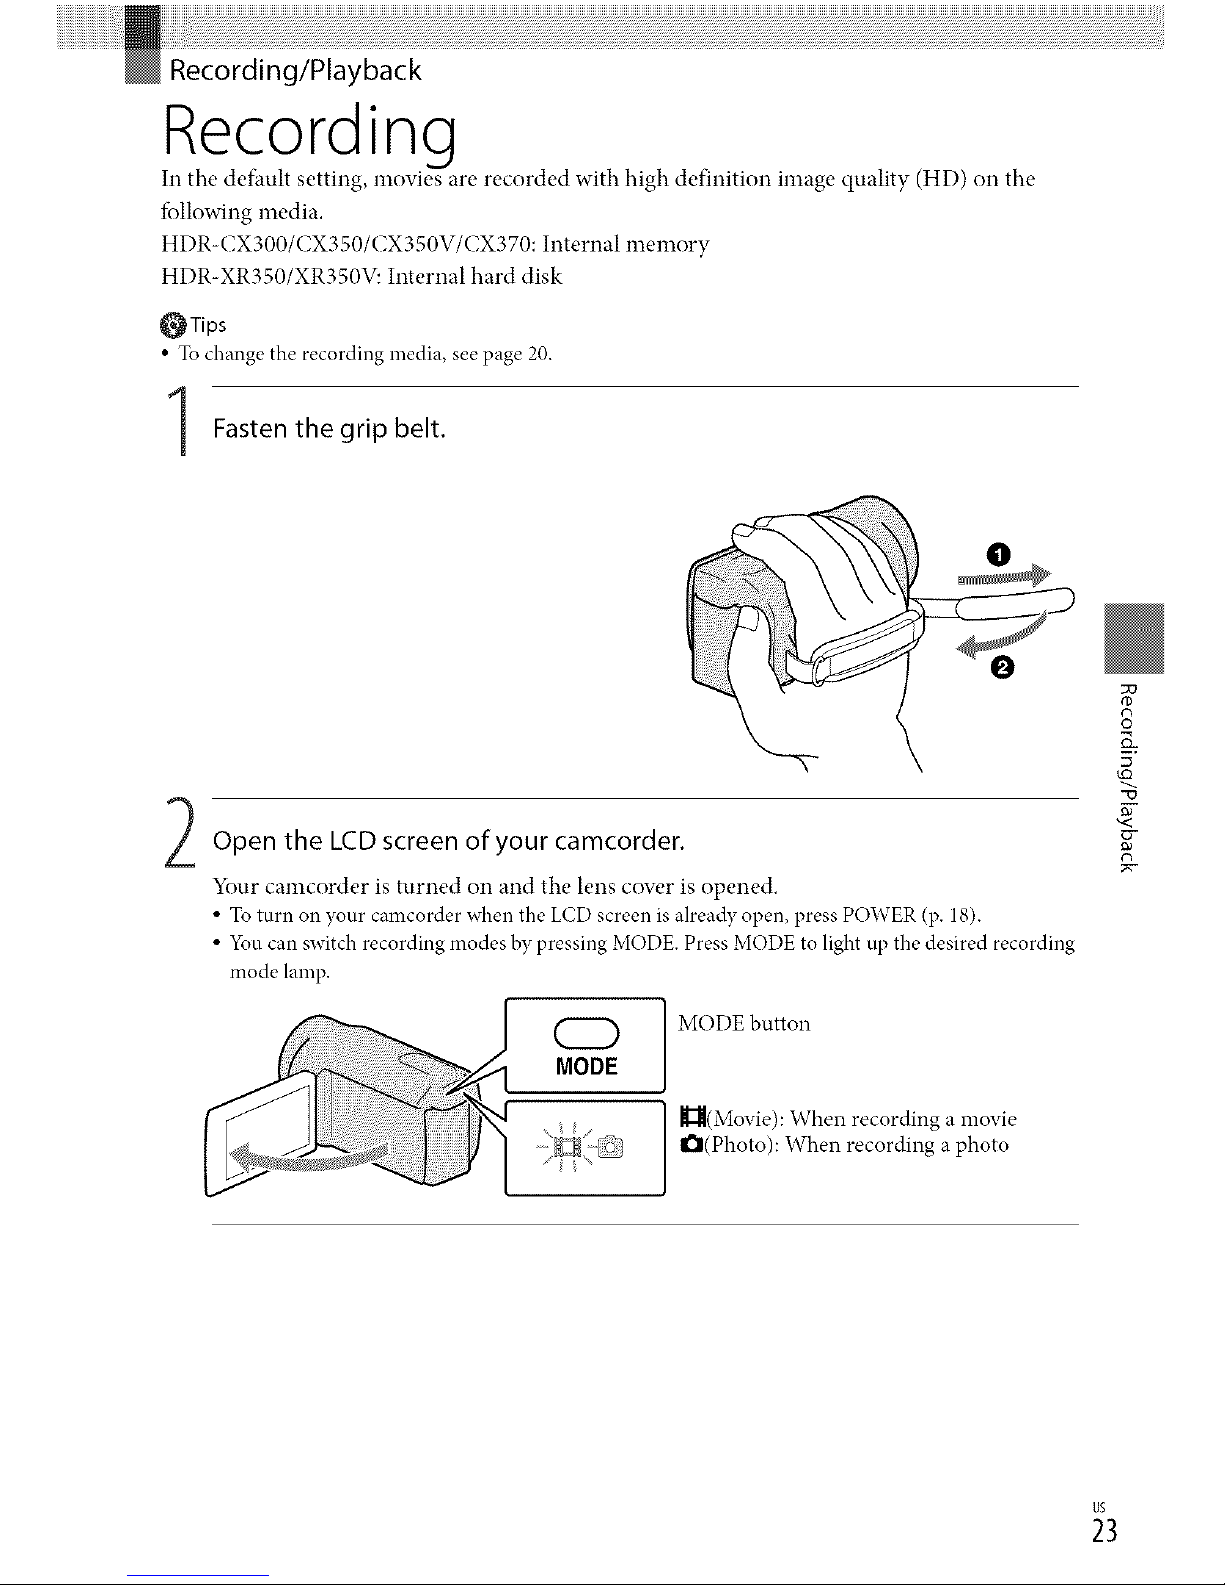
Fasten the grip belt.
Open the LCDscreen of your camcorder,
Your camcorder is turned on and the lens cower is opened.
• To turn on your camcorder when the LCD screen is already open, press POWER (p. 18).
• _\m can switch recording modes by pressing MODE. Press MODE to light up the desired recording
mode lamp.
MODE
MODE button
r
#2N(Movie): _ hen recording a movie
I_(Photo): When recording a photo
g
3
E
_3
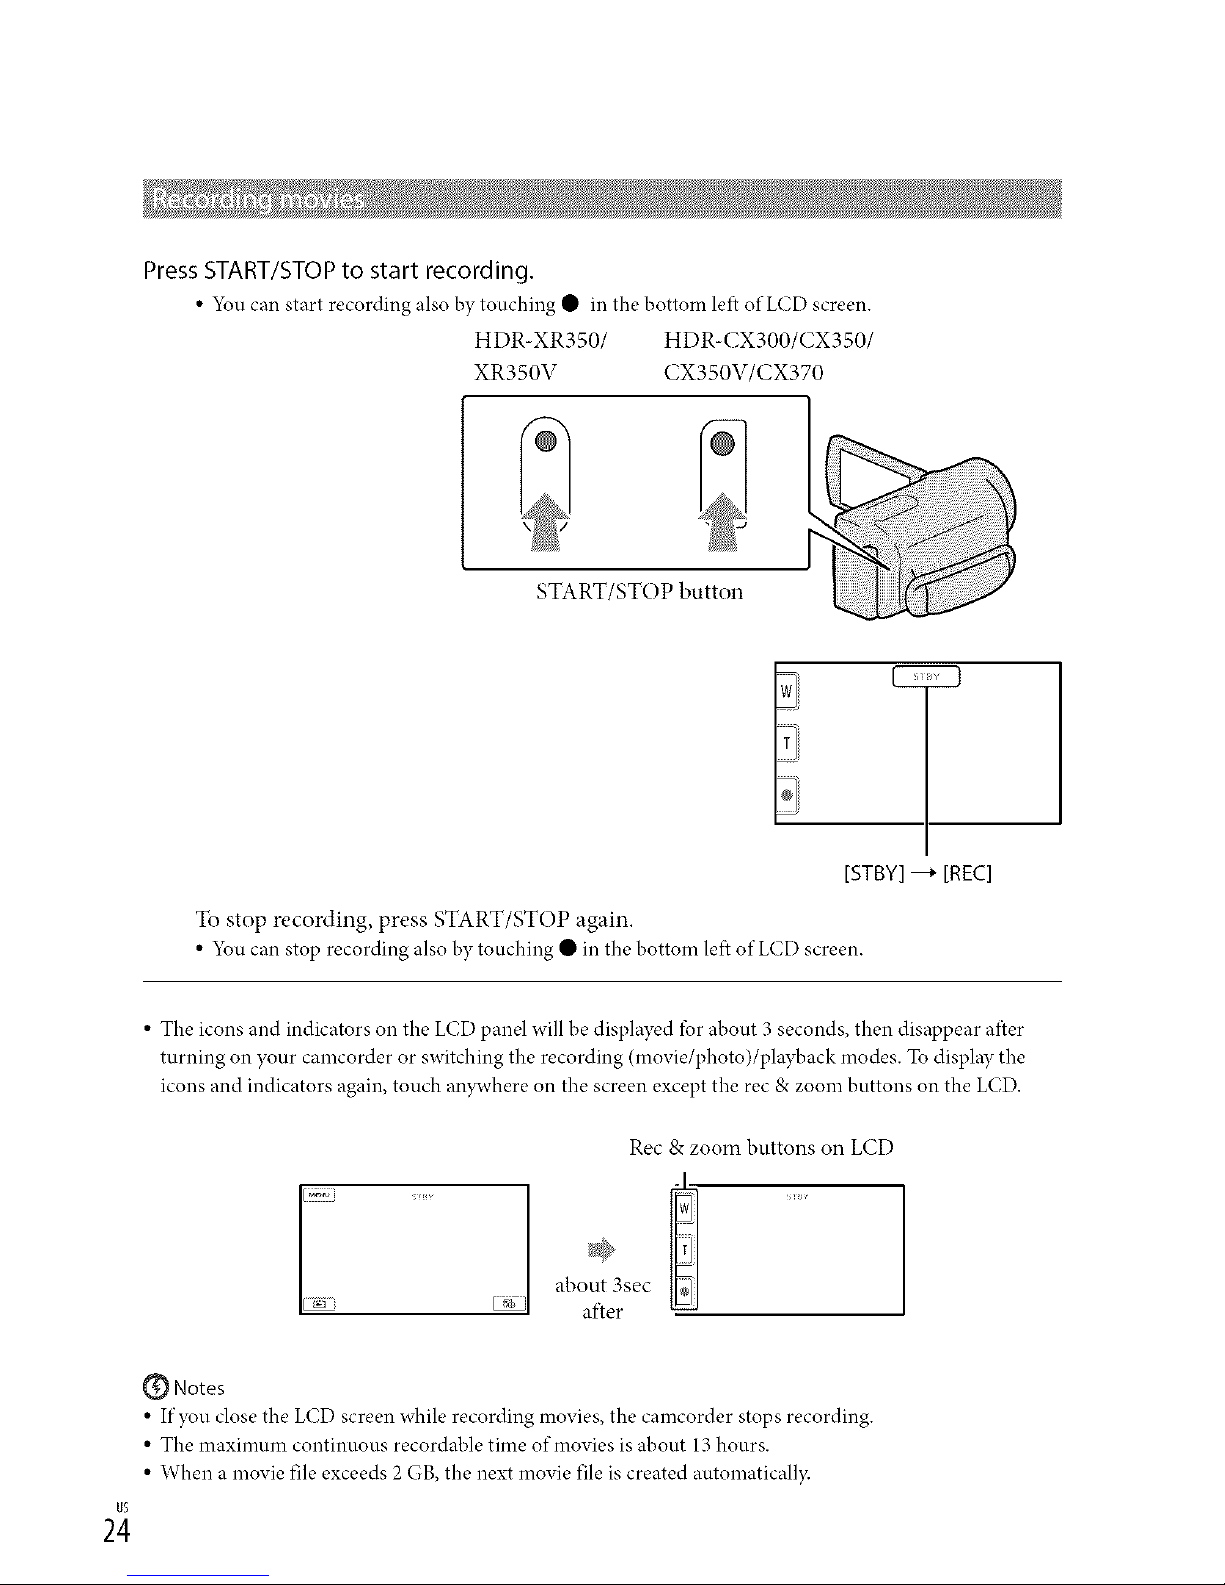
Press START/STOP to start recording.
• 5_u can start recording also by touching • in the bottom lef} of LCD screen.
HDR-XR350/ HDR-CX300/CX350/
XR350V CX350V/CX370
START/STOP button
T
[STBY] ---* [REC]
To stop recording, press START/STOP again.
• 5_u can stop recording alsoby touching • in the bottom left of LCD screen.
• The icons and indicators on the LCD panel will be displayed for about 3 seconds, then disappear after
turning on your camcorder or switching the recording (movie/photo)/playback modes. To display the
icons and indicators again, touch anDvhere on the screen except the rec & zoom buttons on the LCD.
Rec & zoom buttons on LCD
about 3sec
[ _ ' after
_ Notes
• If you close tile LCD screen while recording movies, the camcorder stops recording.
• Tile maximum continuous recordable time of movies is about 13 hours.
• When a movie file exceeds 2GB, the next movie file is created automaticall}c
 Loading...