

Sony Handycam CCD-TR350PK, Handycam CCD-TR30, Handycam CCD-TR28, Handycam CCD-TR350, Handycam RMT-708 Service Manual
CCD-TR28/TR30/TR350/TR350PK
l
ii - i
SERVICEMANUAL
RMT -708
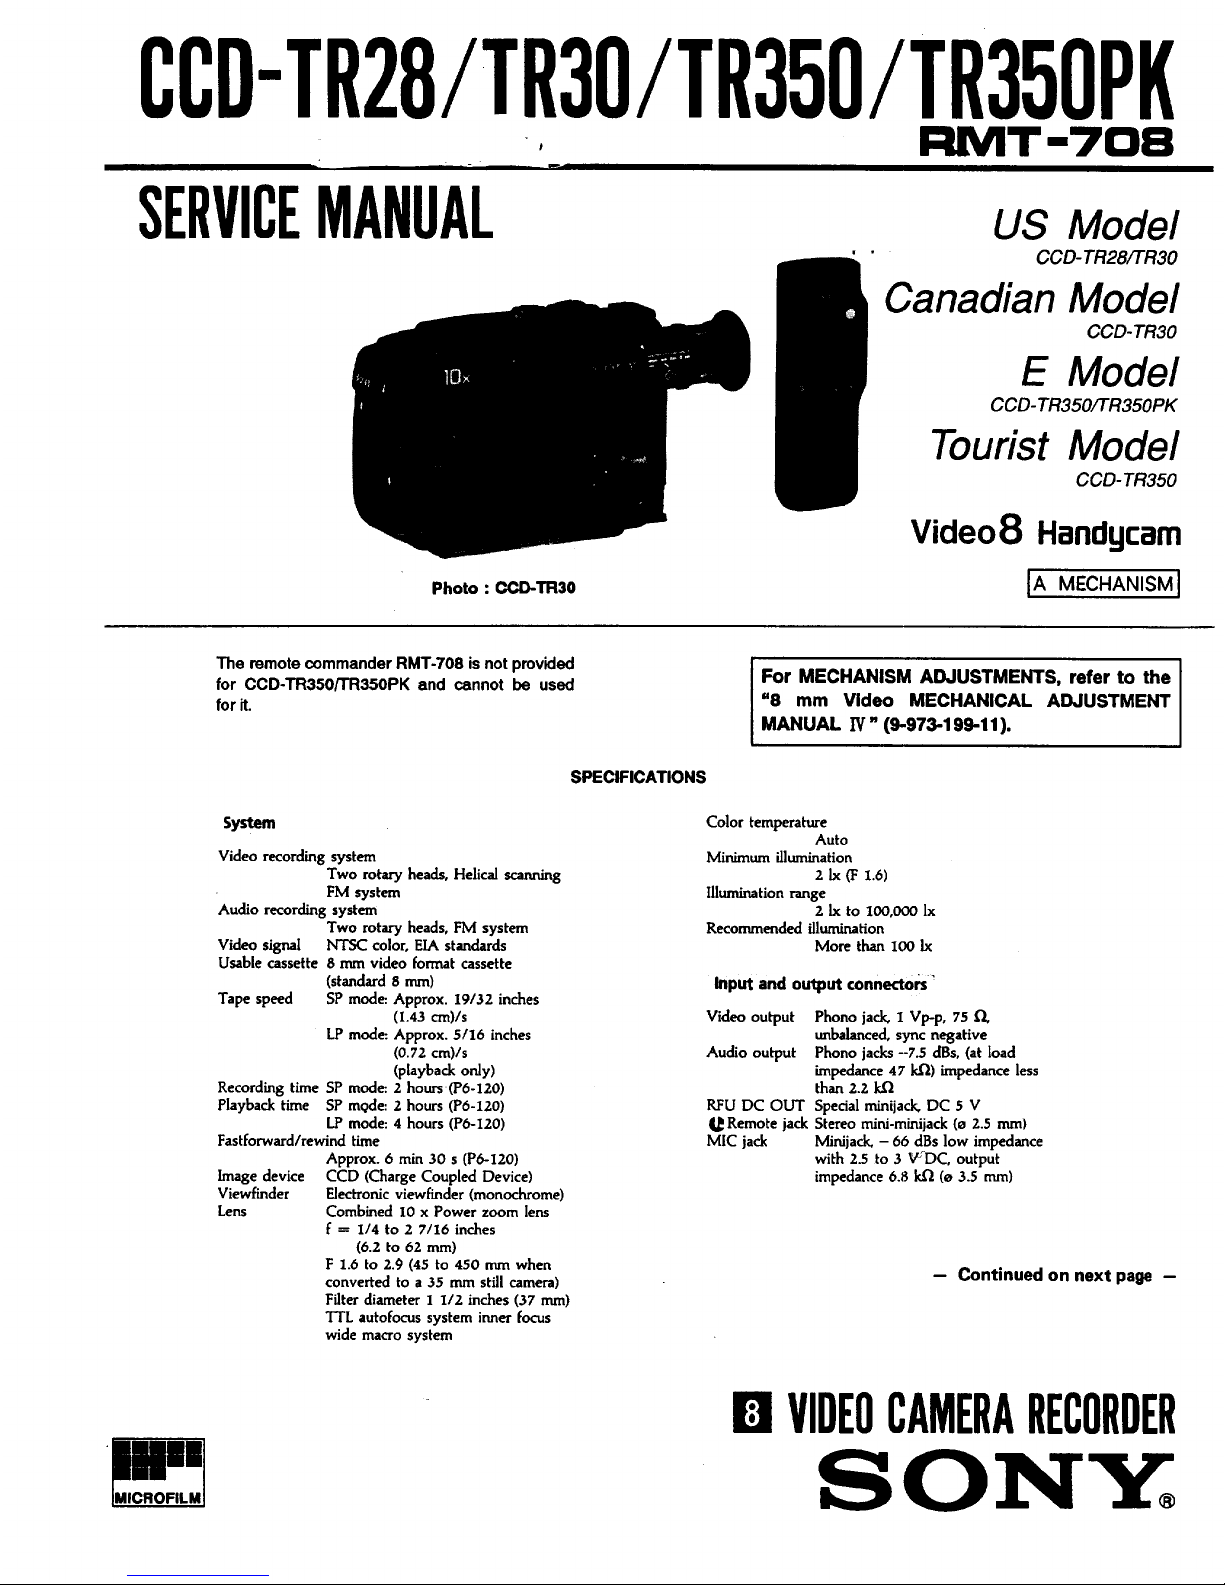
US Model
CCD- TR28/TR30
Canadian Model
CCD- TR30
E Model
CCD- TR350/-I'R350PK
Tourist Model
CCD-TR350
Photo : CCD-TR30
Video8 Handycarn
IAMECHAN'SMI
The remotecommanderRMT-708 isnotprovided
for CCD-TR350/TR350PK and cannot be used
forit.
For MECHANISM ADJUSTMENTS, refer to the
"8 mm Video MECHANICAL ADJUSTMENT
MANUAL IV" (9-973-199-1 t).
system
Video recording system
Two rotary heads, Helical scanning
FM system
Audio recording system
Two rotary heads, FM system
Video signal NTSC color, ELk standards
Usable cassette 8 mm video format cassette
(standard 8 mm)
Tape speed SP mode:. Approx. 19132 inches
(1.43 cm)/s
LP mode: Approx. 5/16 inches
(0.72 cm)/s
(playback only)
Recording time SP mode:. 2 hours (P6-120)
Playback time SP mgde: 2 hours (P6-120)
LP mode: 4 hours (P6-120)
Fastforward/rewind time
Approx. 6 min 30 s (P6-120)
image device CCD (Charge Coupled Device)
Viewfinder Electronic viewfinder (monochrome)
Lens Combined 10 x Power zoom lens
f = 1/4 to 2 7/16 inches
(6.2 to 62 mm)
F 1.6 to 2.9 (45 to 450 mm when
converted to a 35 mm still camera)
Filter diameter 1 1/2 inches (37 ram)
TTL autofocus system inner focus
wide macro system
SPECIFICATIONS
Color temperabare
Auto
Minimum illumination
2 Ix (F 1.6)
Illumination range
2 Ix to 100,000 Ix
Recommended illumination
More than 100 Ix
Input and ourtput connecto_
Video output Phono jack, 1 Vp-p, 75
unbalanced, sync negative
Audio output Phono jacks --7.,5 dBs, (at load
impedance 47 k.Q)impedance less
than 2.2 k.Q
RFU DC OUT Special minijack, DC 5 V
Remote jack Stereo mini-minijack (o 2.5 rnm)
MIC jack Minijack, - 66 dBs low impedance
with 2.5 to 3 V:DC, output
impedance 6.8 k.Q (o 3.5 mm)
-- Continued on next page -
|el,.]
[MICRORLMJ
m VIDEOCAMERARECORDER
S ON'Y
Getting Started
Before usln8 your camcorder, you first need to charge and install the battery pack. To charge the
battery pack, use the supplied AC-VZ5/V25A AC power adaptor.
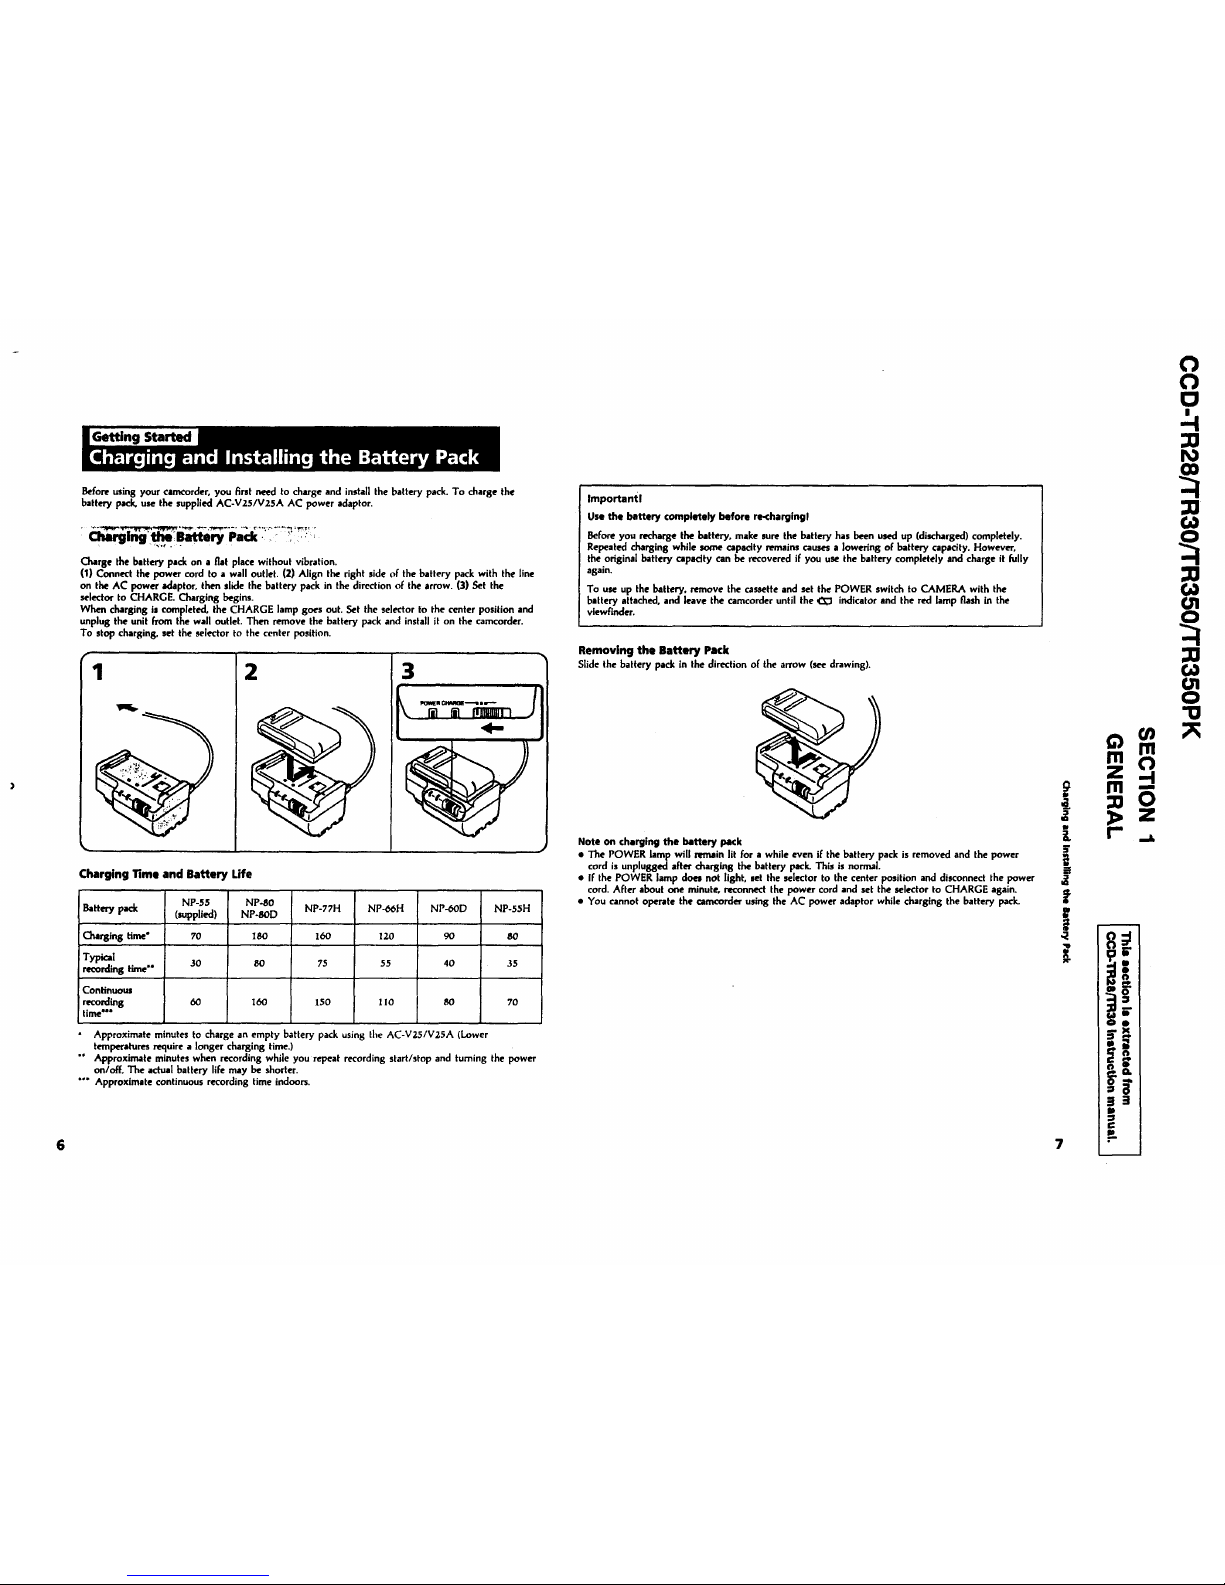
Charge the battery pack on a flat place without vibration.
(I) Conned the power cord to a wall outlet. (2) Align the right side of the battery pack with the line
on the AC power adaptor, then slide the battery pack in the direction of the arrow. (3) Set the
selector to CHARGE. Charging begins.
When charging is completed, the CHARGE lamp goes out. Set the selectorto the center position and
unplugthe unit from the wall outlet. Then remove the battery pack and install it on the camcorder.
To stop charging, set the selector to the center position.
1 2
3
.4-
J
Charging Time and Battery Life
Battery pack
Charging time"
Typical
recording time"
Continuous
recording
time_*
NP-.55 NP..80
NP-77H NP-O6H NP-60D NP-.'isH
(supplied) NP-8OD
7'0 lt;O 160 12,0 90 80
.30 80 75 55 40 35
60 160 150 It0 80 70
Approximate minutes to charge an empty battery pack using the AC-VZS/V25A (Lower
temperaturesrequirea longer chargingtime.)
"" Approximate minutes when recordingwhile you repeatrecordingstart/stop and turningthe power
on/off. The actual battery lib maybe shorter.
"'"Approximate continuous recording time indoors.
Importantl
Usethe batterycompletelybeforere-charglngl
Before you rechargethe battery, makesurethe batteryhas been mg,.dup (di_harged) completely.
Repeatedchargingwhile some capacity remainscauses a loweringof battery capacity. However,
the originalbattery capacity can he recoveredif you use the battery completely and charge it fully
again.
To use up the battery,remove the cassette and set the POWERswitch to CAMERAwith the
batteryattached, and leave the camcorder until the .C_ indicatorand the redlamp flash in the
vlewflnder.
Removing the Battery Pack
Slidethe battery packin the di_ction of the arrow(see drawing).
Note on chargingthe battery pack
• The POWERlampwill remainlitfor a whileevenif thebatterypackisremovedandthepower
cord is unpluggedafter charging thebatterypack.This is normal.
• If the POWERlampdoel not lighLset the selectorto the center position anddisconnect the power
cord. After about one minute, reconnect the power cord and set the selector to CHARGE again.
• You cannot operate the camcorder using the AC power adaptor while charging the batterypack.
o
o
c/
;:0
ro
:a0
O1
O
::0
CO
Ol
O
"10
zo
E
!
i ID

'N_n_'_'Rechargeai_le_h°tte_ Pack
The Battery Heats Up
During charging or recording, the battery pack heats up. This is caused by energy that has been
generated and a chemical change that has occurred residethe batlery pack.This is not causefor
con_'_.ll'11.
Battery Care
• Remove the battery pack from the camcorder after using the battery pack, and keep ,t in a cool
place. When the battery pack is attached to the camcorder, a small amount of cun'ent flows to the
camcorder even if the POWER switch Jsset to OFF. wh,ch shortens battery life.
• The battery packis always discharging even when it Is not ,n use after charging Therefore. you
should charge the battery right before uq,ngthe camcorder
How to Use the Switch on the Battery Pack
Th,s switch is provided so that you can mark the charged balicry. _t the switch |o ihe "no mark"
position when charging is completed..Set the switch to the "red mark" posihon when the battery is
usedup lot in wh,chever direction you want to remind yourseff).[€]
The life of the Battery Pack
"_e battery pack can be fully chargedand discharged about 500 hmes under normal temperatures. If
the battery indicator flashesrapidly just after turning on the camcorder w,th a fullycharged battery
pack.the battery packshouldbe replaced with a new fully charged one
Charging Temperature
You shouldcharge batteries at temperaturesfrom 50"F to 86"F (from iO'C to 30"C). Lower
temperaturesrequire a longer charging time.
Note on"_arging
A Brand-new Battery
A brand-new battery pack ,s not charged. Beforeusing the batlery rack. charge ,t completely.
Before Recharging a Used Battery Pack
a Make sure to use up the battery before recharging.
• If re_ding is completed before the _ indicator appears in the v,ewfinder, you should remove the
tape.setthe POWER sw,tch to CAMERA, turn STANDBY up. and leave the camcorder until the
battery indicator flashesrapidly.
• When you use the AC-S10 power adaptor, the DC_Sxocar batlery charger or BC-Sx0 portable
battery charger, you can usethe discharging funchon.
• Charging the usable battery causes a lowering of battery capacity. Battery capacity can be
recovered if you fully discharge and charge the battery _gain.
After Long Storage
Rechargethe battery pack after a long period of storage. If the battery pack is charged fully but not
usedfor a long time (about I year), at becomesdsscharged.Chargeit again, but m this casethe
battery hfe will be shorter than normal. After severalcharging and discharging cycles, the battery hfe
will recover its original capaaty.
If the terminals (metal parts on the back) are not clean, the battery duration will he shortened.
When the terminals are not clean or when the battery pack has not been used for a long time, repeat
installing and removing the battery pack. This improvesthe contact condition. Also. wipe the + and
- terminalswith a soft cloth or paper.
Be Sure to Observe the Following
• To prevent an accident caused by a short circuit, do not allow metal objects such as a
necklace to touch the battery terminals. Carry the bakery pack attaching to the terminal
cover. [d]
• Keep the battery packaway from fire.
• Keep the battery Packdry.
a Do not open nor convert the battery pack.
• Do not expose the battery pack to any mechanical shock.
!
10 11
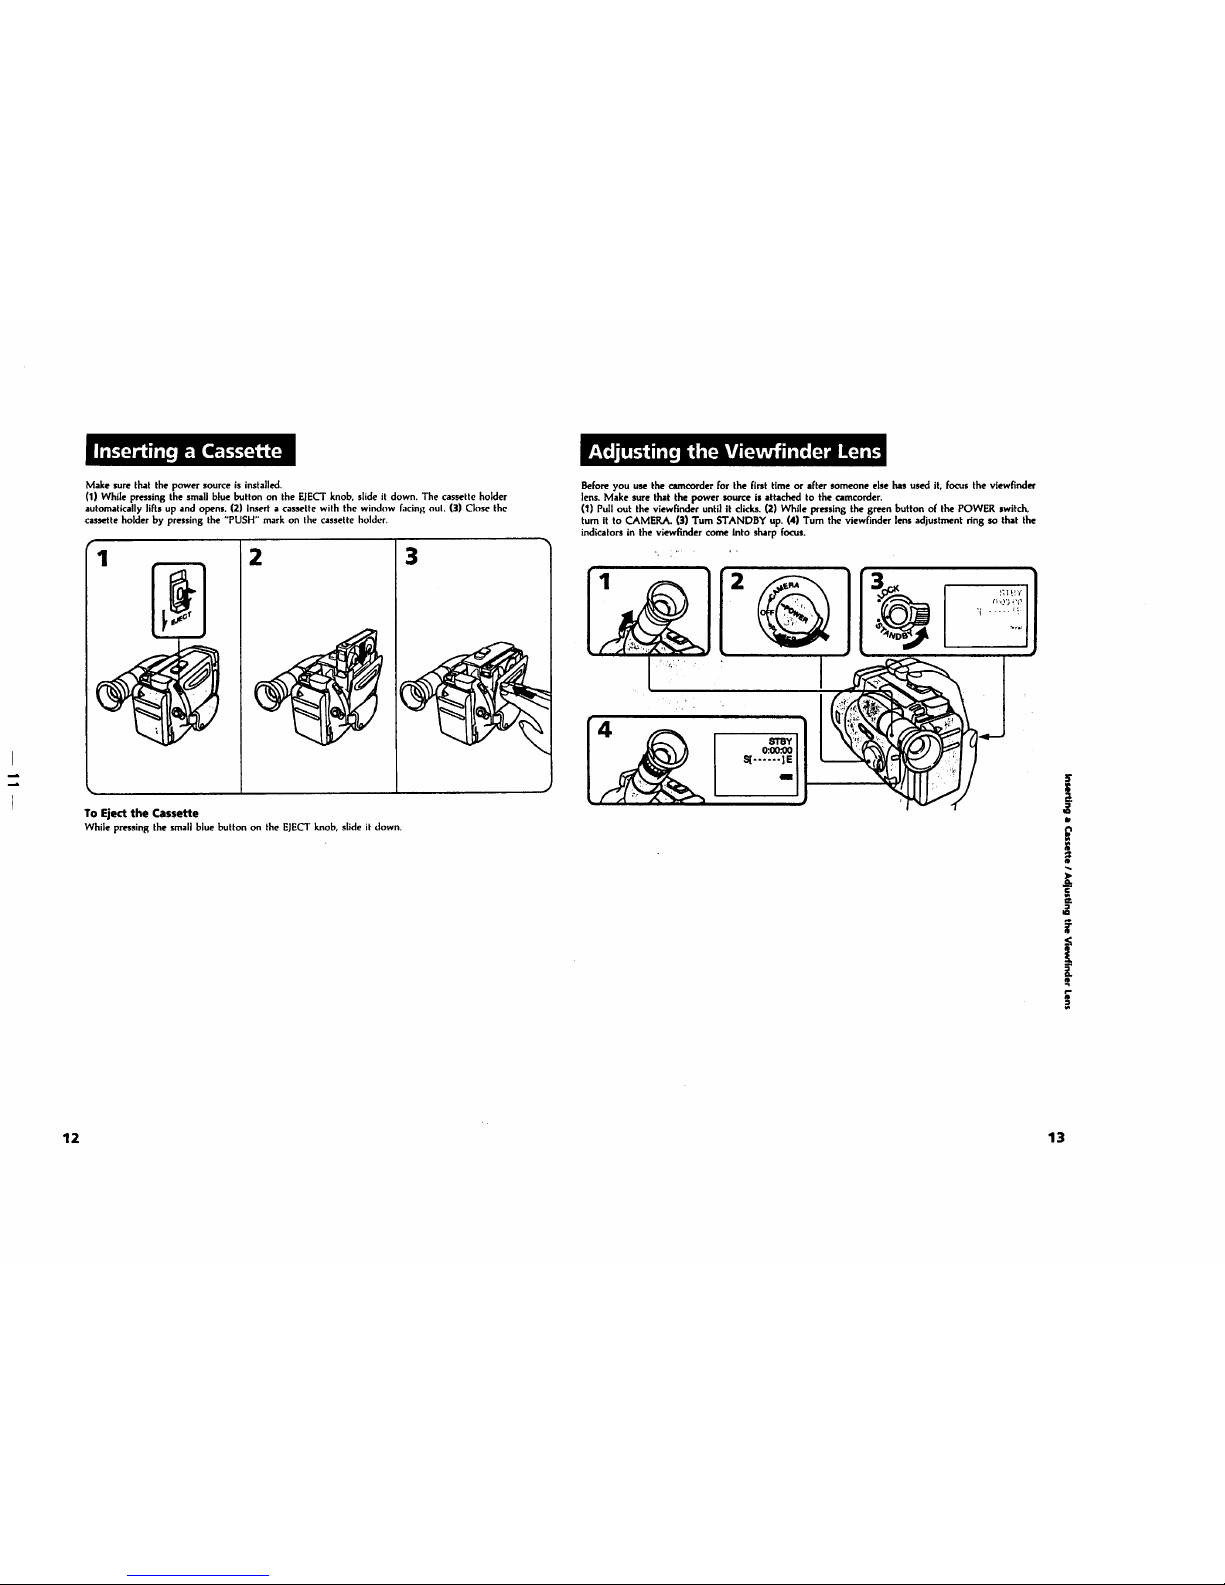
Make sure that the power source is installed.
(1) While pressin8 the small blue button on the EJECTknob. slide it down. The cassette holder
automatically lifts up and opens. (2) Insert a cassette with the window facing nul. (3) Close the
,cassette holder by pressing the "PUSH" mark on the cassette holder.
1
2
3
To Eject the Cassette
While pressing the small blue button onthe EJECTknob, slide it down.
Before you use the cameorder for the first time or after someone else has used it, focus the viewfinder
lens, Make sure that the power source is attached to the carncorder.
(I) Pull out the viewfinder until it clicks. (2) While pressing the green button of the POWER switch,
turn it to CAMERA. (3) Turn STANDBY up. (4) Turn the viewfinder lens adjustment ring so that the
indicators in the viewflnder come into sharp focus.
_r
i
Q_
I
o
12 13
I
For hand-held shots,you'll get better results by holding the camcorder according to the following
suggestions:
I
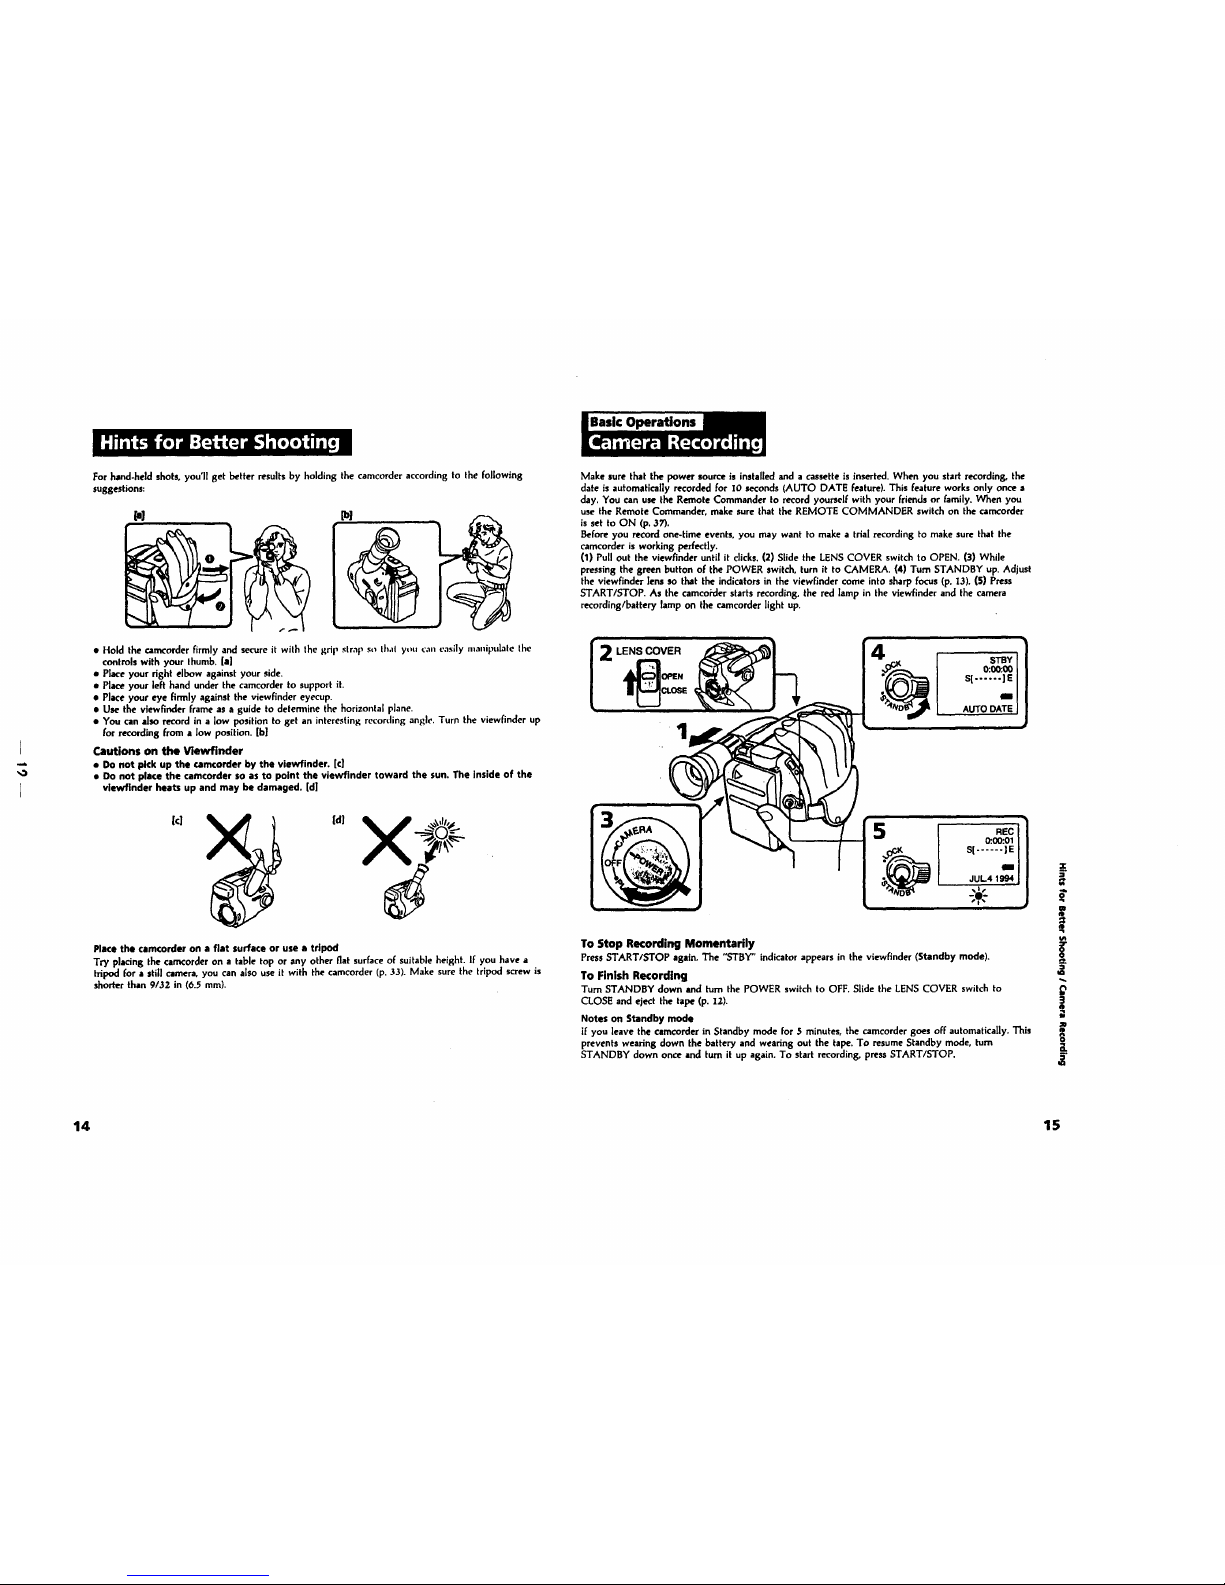
• Hold the camcorderfirmly and secureit wilh the grip ,.;trapso Ihal yo, ca, easily nla.ipulale She
controls with your Ihumb.[aS
• Place your right elbow againstyour side.
• Place your left hand under the camcorder to support it.
• Place your eye firmly againstthe viewfinder eyecup.
• Use the vlewfinder flame as a guide to determine the horizontal plane.
• You can also record in a low position to get an interesting recording angh'. Turn the viewfinder up
for recording from a low position. [b]
Cautions on the Viewfinder
• Do not pick up the camcorder by the vtawfinder. [el
• Do not place the cam(order so as to point the viewflnder toward the sun, The inside of the
vlewfinder hea_ up and may be damaged. [d]
ic]
Place the cam(order on a flat surface or use s tripod
Try placing the camcorderon a table top or any other flat surfaceof suitableheight. If you have a
tripod for a still camera, you can also useit with the camcorder (p. 33). Make sure the tripod screwis
shorter than 9/32 in (6.._ mm).
Make sure that the power souse is installedand a cassetteis inserted. When you startrecording, the
date is automaticallyrecorded for 10 seconds (AUTO DATE feature).This feature works only once a
day. You can use the Remote Commanderto recordyourself with your friendsor family. When you
use the Remote Commander, make sure that the REMOTE COMMANDER switch on the camcorder
is set to ON (p. 37).
Beforeyou record one-time events,you may want to make a trial recording to make sure that the
camcorder is working perfectly.
(1) Pull out the viewfinder until it clicks. (2) Slide the LENS COVER switch to OPEN. (3) While
pressing the green button of the POWER switch, turn it to CAMERA. (4) Turn STANDBY up.Adjust
the vlewfinder lens so that the indicatorsin the viewfinder come into sharpfocus (p. 13). (5) Press
START/STOP. As the camco;'der starts recording, the red lamp in the viewfinder and the camera
recording/battery lamp on the camcorder light up.
LENS COVER
s[ ...... ]s
II
AUTODATE
5
REC]
0:00:01l
JUL4 1994/
%11
a
To Stop Recording Momentarily
PressSTART/STOP again. The "STBY" indicator appearsin the viewfinder (Standby mode).
To Finish Recording
"rum STANDBY down and turn the POWER switch to OFF. Slide the LENS COVER switch to
CLOSE and eject the tape (p. 12).
Notes on Standby mode
if you leave the cam(order in Standby mode for .s minutes, the camcorder goes off automatically. This
prevents wearing down the battery and wearing out the tape. To resume Standby mode, turn
STANDBY down once and turn it up again. To start recording, press START/STOP.
z_
!
14 15
I
=d=
_O
J
Note on the tape counter
The tape counter indicates the recording or playback time. Use it as a guide. There will be a time lag
of several seconds from the actual time. To set the counter to zero, press COUNTER RESET,
Note on the AUTO DATE feature
• The AUTO DATE feature works once a clay. However, the date may automaticallyappear more
than oncea day when:
- you reset the date and time.
- you eject and insert the tape again.
- you stoprecording within I0 seconds.
• Once the AUTO DATE feature turns off the date display l0 seconds after the Startof recording.
the date and time are displayed as follows:
- If the date display setting has been made, the date is displayed.
- If the time display selling has been made, the time is displayed.
- If neither display setting has been made, nothing is displayett.
If you wear glasses
You can bend back the eyecup to get a better view of the viewfinder.
When moving from Indoors to outdoors (or vice versa)
Turn STANDBY up and point the camcorder at a white object for about 15 seconds so that the.white
balanceis properly adjusted.
Note on recording
When you record from the beginning of a tdpe, run the tape for about 15 seconds before starting the
actual recording. This will ensure that you won't miss any start-up scenes when you playback the tape.
You canrecord tapes in SP (standardplay) mode only.
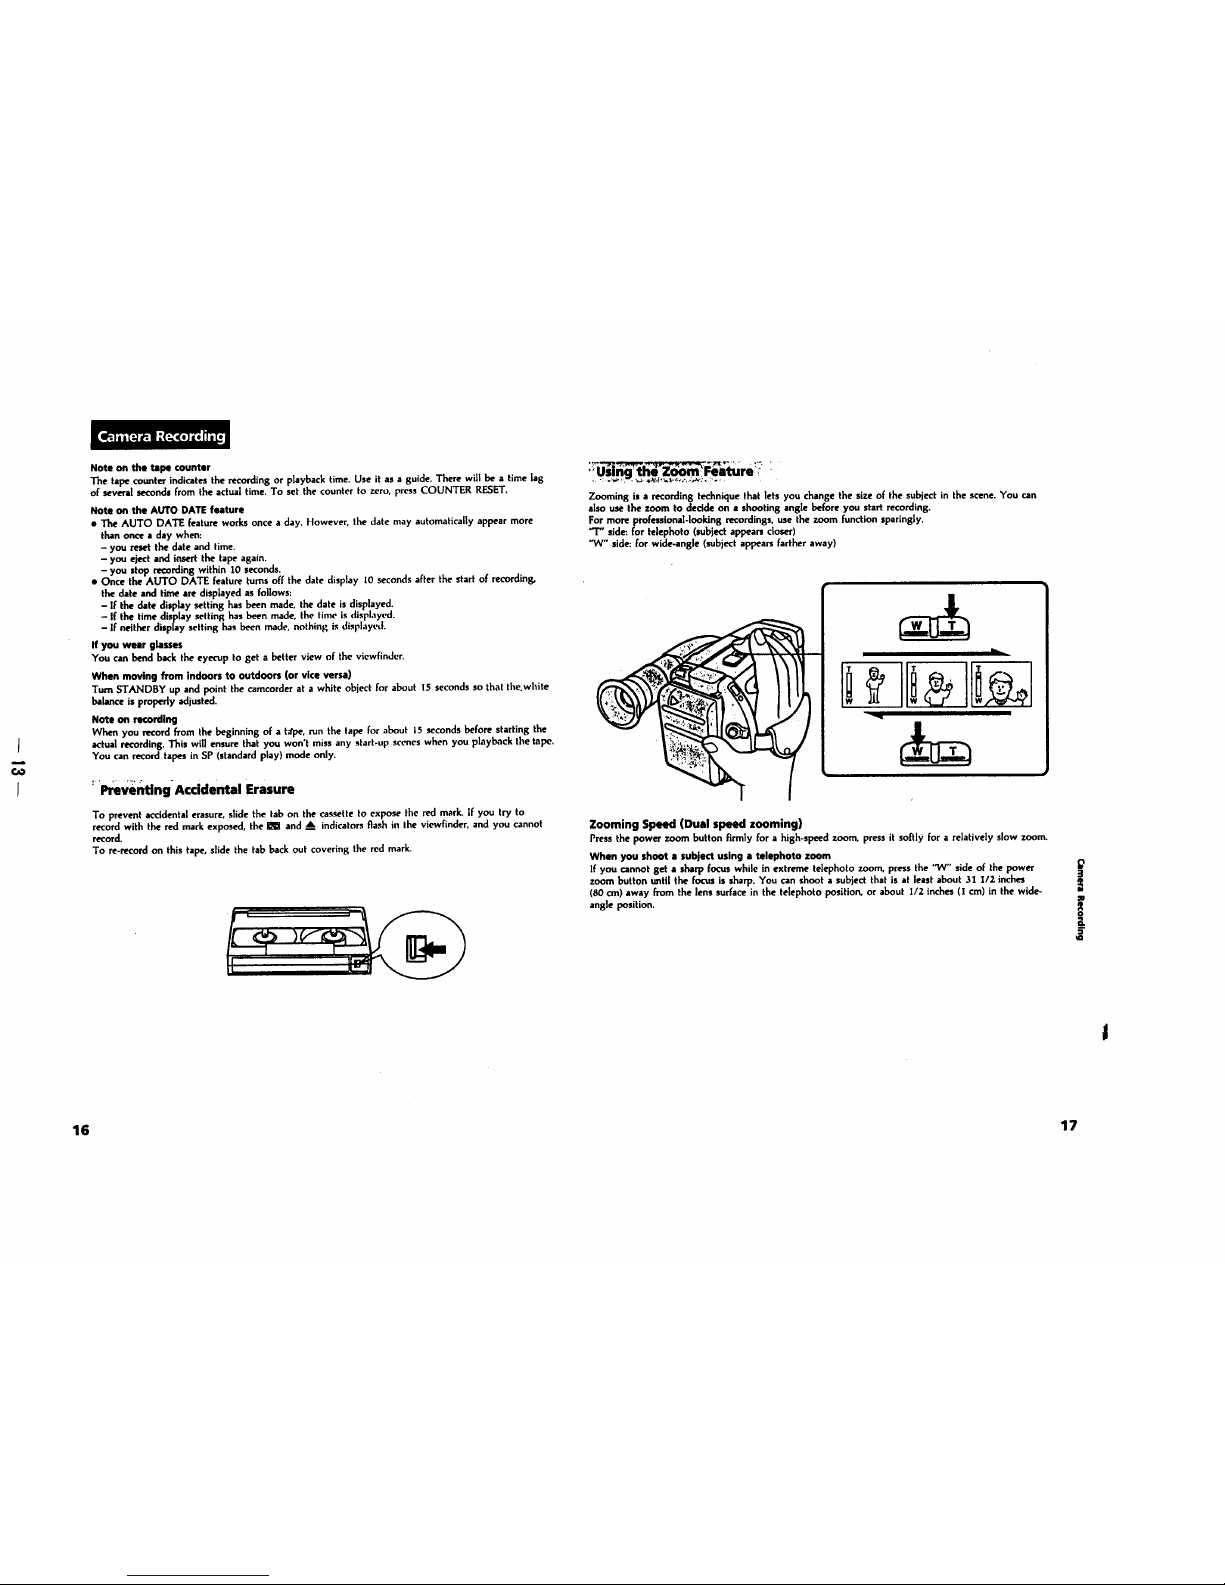
:Plreve_ting'Accidental Erasure
To prevent accidental erasure, slide the tab on the cassette to expose the red mark. If you try to
record with the red mark exposed, the I_l and __._indicators flash in the viewfinder, and you cannot
record.
To re-record on this tape, slide the tab back out covering the red mark.
"tJ"_iSng _h_ieature _
Zooming is a recording technique that lets you change the size of the subject in the scene. You can
also use the zoom to dedde on a shooting angle before you start recording.
For more professional-looking recordings, use the zoom function sparingly.
"T" side: for telephoto (subject appears closer)
"W" side: for wide-angle (subject appears farther away)
b
Zooming Speed (Dual speed zooming)
Press the power zoom button firmly for a high-speed zoom, press it softly for a relatively slow zoom.
When you shoot a subject using a telephoto zoom
If you cannot get a sharp focus while in extreme telephoto zoom, press the "3N" side of the power
zoom buttonuntil the focus is sharp. You can shoot a subject that is at least about 31 112 inches
(80 era) away from the lens surface in the telephoto position, or about 1/2 inches (I cm) in the wide-
angle position.
:1
f
3
16 17
 Loading...