

Sony FD Trinitron KV-29FX30B,FD Trinitron KV-29FX30E,FD Trinitron KV-29FX30K Service Manual
1
SERVICE MANUAL
FE-2
CHASSIS
MODEL
COMMANDER DEST CHASSIS NO.
MODEL
COMMA NDER DEST CHASSIS NO.
RM-889
KV-29FX30B
RM-887 FR SCC-Q54J-A
KV-29FX30E
RM-887 ESP SCC-Q53K-A
KV-29FX30K
RM-887 OIRT SCC-Q51L-A
20
Sub Brightness Adjustment
1. Input a Monoscope pattern.
2. Press ‘TEST’ ‘TEST’ 13 on the Remote Commander.
3. Adjust the ‘Sub-Brightness’ data so that there is barely a
difference between the 0 IRE and 10 IRE signal levels.
1. Input a video signal that contains a small 100% white area on a
black background.
2. Connect an digital voltmeter to Pin 10 of J701 [C Board].
3. Adjust the Sub-Contrast [‘TT11’] to obtain a voltage of
105 +/- 5V (KV-29FX30) or 96 +/-5V (KV-25FX30).
Sub Contrast Adjustment
4-1. Electrical Adjustments
Service adjustments to this model can be performed using the
suppliedemote Commander RM-887.
‘TT—’ will appear in the upper right corner of the screen.
Other status information will also be displayed.
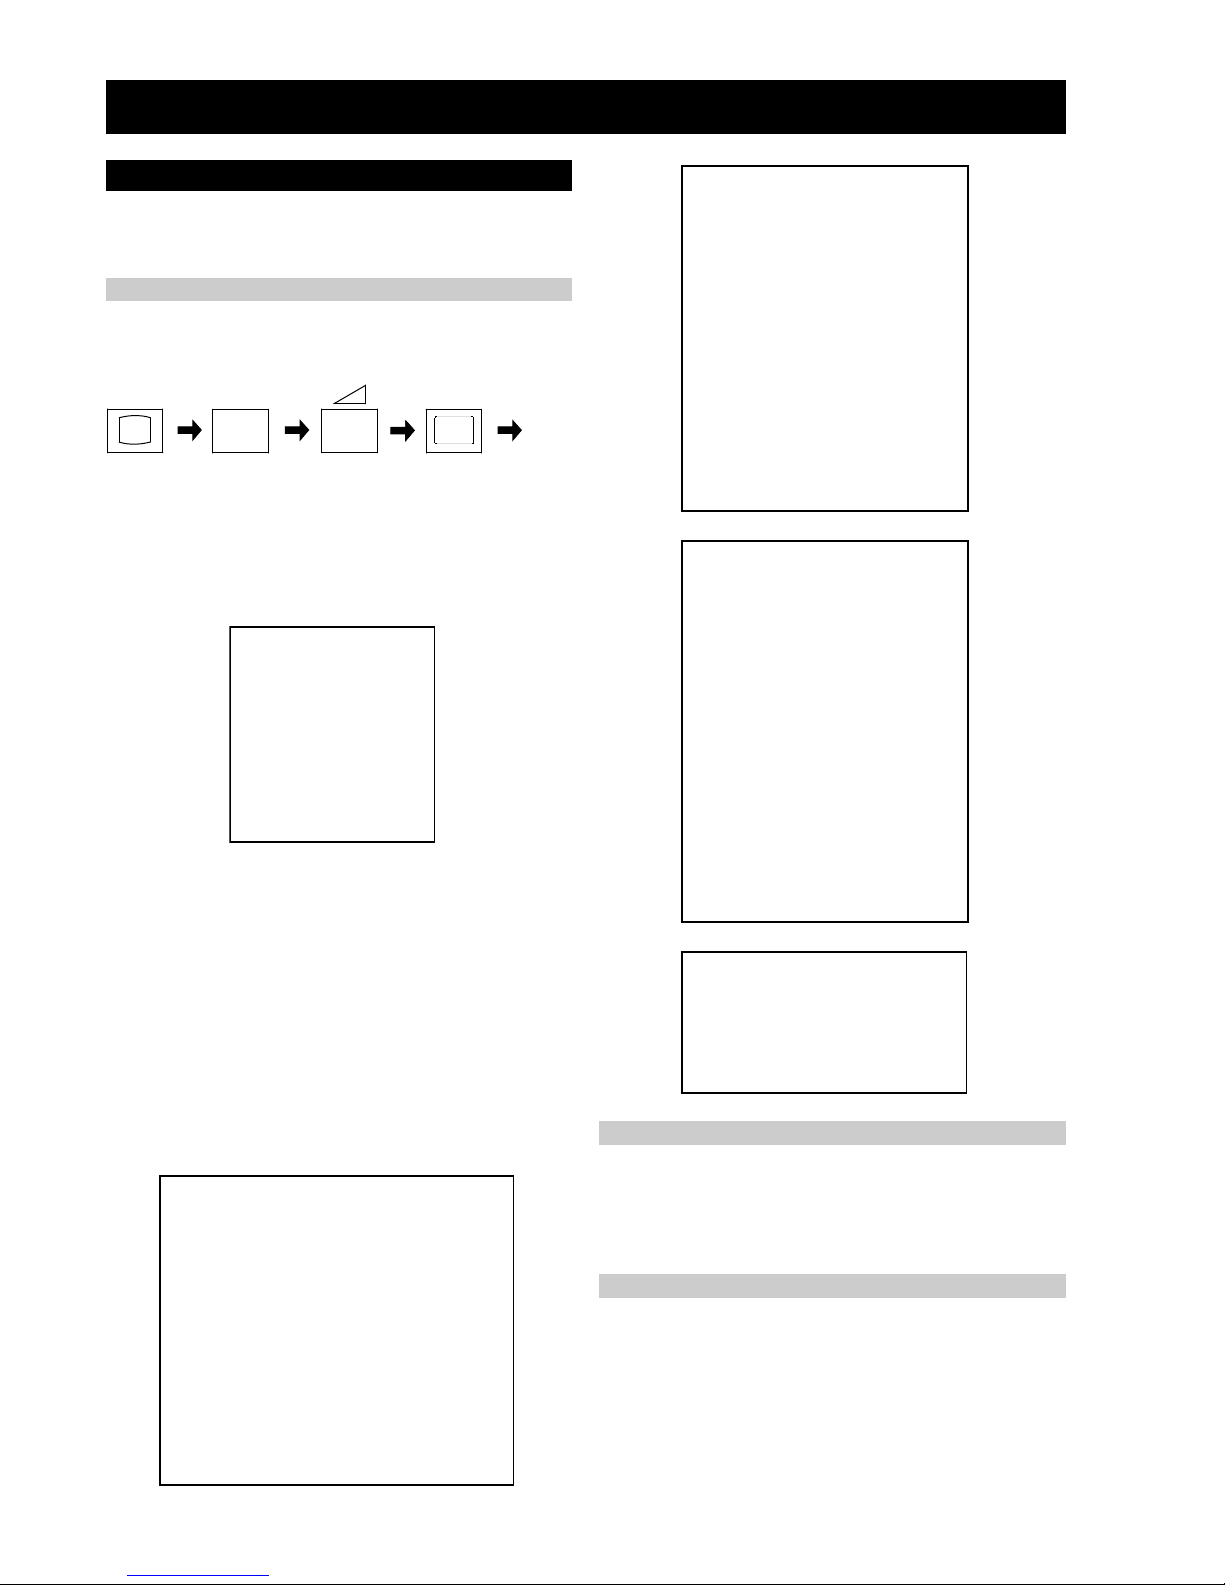
3. Press ‘MENU’ on the remote commander to obtain the following
menu on the screen.
4. Move to the corresponding adjustment item using the
up or down arrow b uttons on the Remote Commander.
5. Press the right arrow button to enter into the required menu item.
6. Press the ‘Menu’ button on the Remote Commander to quit the
Service Mode when all adjustments have been completed.
Note :
• Before performing any adjustments ensure that the correct model
has been selected in the ‘Model Setting’ menu.
• After carrying out the service adjustments, to prevent the
customer
accessing the ‘Service Menu’ switch the TV set OFF and then
ON.
i+
5
+
(ON SCREEN (DIGIT 5) (VOLUME +) (TV)
DISPLAY)
SECTION 4 CIRCUIT ADJUSTMENTS
How to enter into the Service Mode
TSUJDAFI
tsujdACGA
etumotuA
niaGoiduA
gnitaGL
)51+,61-(0+
1
0
0
yrtemoeG
ecivreS
ngiseD
sutatS
dnuoS
tsujdaFI
uneMrorrE
03.1voeretS2-EF
hFFhFFatadyrotcaF
G1143PSM:eciveDPSM
ECIVRES
R-tesffO
G-tesffO
evirD-R
evirD-G
evirD-B
qerF-kaeP
yaleD-amuL
0CS
kaeP-etihW
tnocbuS
thgirbuS
locbuS
prahsbuS
.rBffotuC
DSOrB
TXTrB
)36,0(
)36,0(
)36,0(
)36,0(
)36,0(
)3,0(
)51,0(
)3,0(
)51,0(
)51,0(
)36,0(
)36,0(
)36,0(
)36,0(
)51,0(
)51,0(
jdA
jdA
52
jdA
jdA
0
8
2
51
4
13
jdA
13
06
01
9
YRTEMOEG
ytiraeniL-V
llorcS-V
klBH-tfeL
klBH-thgiR
elgnA-V
woB-V
ertneC-H
eziS-H
pmA-niP
niP-renroC-U
niP-renroC-L
esahPniP
epolS-V
eziS-V
noitcerroC-S
ertneC-V
mooZ-V
atnegaM
)36,0(
)36,0(
)51,0(
)51,0(
)36,0(
)36,0(
)36,0(
)36,0(
)36,0(
)36,0(
)36,0(
)36,0(
)36,0(
)36,0(
)36,0(
)36,0(
)36,0(
)36,0(
jdA
23
8
6
jdA
jdA
jdA
jdA
jdA
jdA
jdA
jdA
53
jdA
jdA
jdA
32
04
1. Turn on the main power switch and enter into the stand-by mode.
2. Press the following sequence of buttons on the Remote
Commander.
UNEMRORRE
20E
30E
40E
50E
60E
70E
80E
90E
01E
11E
EMITGNIKROW
SRUOH
SETUNIM
PCO
A/NPVO
CNYSV
RKI
CII
MVN
ELGNUJ
RENUT
PDNUOS
V8
)552,0(
)552,0(
)552,0(
)552,0(
)552,0(
)552,0(
)552,0(
)552,0(
)552,0(
)552,0(
0
0
0
0
0
0
0
0
0
0
2
11
 Loading...