

Page 1

Portable
CD/DVD
Player
3-294-109-22(1)
Operating Instructions
Mode d'emploi
DVP-FX870Portable CD/DVD Player
Bedienungsanleitung
Manual de instrucciones
Istruzioni per l'uso
Gebruiksaanwijzing
GB
FR
DE
ES
IT
NL
DVP-FX870
© 2008 Sony Corporation
Page 2
WARNING
To reduce the risk of fire or
electric shock, do not expose
this apparatus to rain or
moisture.
To avoid electrical shock, do
not open the cabinet. Refer
servicing to qualified
personnel only.
The mains lead must be
changed only at a qualified
service shop.
Batteries or batteries
installed apparatus shall not
be exposed to excessive heat
such as sunshine, fire or the
like.
This label is located on the bottom
of the unit.
This appliance is classified as a
CLASS 1 LASER product. The
CLASS 1 LASER PRODUCT
MARKING is located on the
bottom of the unit.
CAUTION
• The use of optical instruments
with this product will increase
eye hazard. As the laser beam
used in this CD/DVD player is
harmful to eyes, do not attempt
to disassemble the cabinet.
Refer servicing to qualified
personnel only.
• Danger of explosion if battery is
incorrectly replaced. Replace
only with the same or equivalent
type.
Disposal of Old Electrical &
Electronic Equipment (Applicable
in the European Union and other
European countries with separate
collection systems)
This symbol on the product or on
its packaging indicates that this
product shall not be treated as
household waste. Instead it shall be
handed over to the applicable
collection point for the recyc ling of
electrical and electronic
equipment. By ensuring this
product is disposed of correctly,
you will help prevent potential
negative consequences for the
environment and human health,
which could otherwise be caused
by inappropriate waste handling of
this product. The recycling of
materials will help to conserve
natural resources. For more
detailed information about
recycling of this product, please
contact your local Civic Office,
your household waste disposal
service or the shop where you
purchased the product.
Disposal of waste batteries
(applicable in the European Union
and other European countries with
separate collection systems)
This symbol on the battery or on
the packaging indicates that the
battery provided with this product
shall not be treated as household
waste.
By ensuring these batteries are
disposed of correctly, you will help
prevent potentially negative
consequences for the environment
and human health which could
otherwise be caused by
inappropriate waste handling of the
battery. The recycling of the
materials will help to conserve
natural resources.
In case of products that for safety,
performance or data integrity
reasons require a permanent
connection with an incorporated
battery, this battery should be
replaced by qualified service staff
only.
To ensure that the battery will be
treated properly, hand over the
product at end-of-life to the
applicable collection point for the
recycling of electrical and
electronic equipment.
For all other batteries, please view
the section on how to remove the
battery from the product safely.
Hand the battery over to the
applicable collection point for the
recycling of waste batteries.
For more detailed information
about recycling of this product or
battery, please contact your local
Civic Office, your household
waste disposal service or the shop
where you purchased the product.
Precautions
• Install this system so that the
mains lead can be unplugged
from the wall socket
immediately in the event of
trouble.
• The player is not disconnected
from the AC power source
(mains) as long as it is connected
to the wall outlet, even if the
player itself has been turned off.
• To prevent fire or shock hazard,
do not place objects filled with
liquids, such as vases, on the
apparatus.
The manufacturer of this product
is Sony Corporation, 1-7-1
Konan Minato-ku Tokyo, 1080075 Japan. The Authorized
Representative for EMC and
product safety is Sony
Deutschland GmbH,
Hedelfinger Strasse 61, 70327
Stuttgart, Germany. For any
service or guarantee matters
please refer to the addresses
given in separate service or
guarantee documents.
GB
2
Page 3

• Do not drop or apply shock.
A
• Do not confine the AC adaptor in
a closed place such as a
bookshelf or an AV cabinet.
• Do not connect the AC adaptor
to a traveler’s electric
transformer, which may generate
heat and cause a malfunction.
On battery pack
• Certain countries may regulate
disposal of the battery used to
power this product. Please
consult with your local authority.
• Because of the battery’s limited
life, its capacity gradually
deteriorates over time and
repeated use. Purchase a new one
when the battery holds about
only half the normal period.
• The battery may not be charged
to its fullest capacity when
charged for the first time, or
when it has not been used for a
long time. The capacity recovers
after being charged and
discharged several times.
• Do not leave the battery pack in
a car or direct sunlight, where
temperature goes up above
60 ºC.
• Do not expose to water.
• Avoid short-circuiting the
battery connecting jacks (A)
located on the bottom of the
player and the connecting jacks
(C) on the battery pack with
metal objects such as a necklace.
• Make sure dust or sand does not
enter the battery connecting
jacks (A) and the guide holes (B)
located on the bottom of the
player, and the connecting jacks
(C) and the guide holes (D) on
the battery pack.
Bottom of the player
B
Battery pack
D
C
,continued
GB
3
GB
Precautions
Road safety
Do not use the monitor unit and
headphones while driving, cycling,
or operating any motorized
vehicle. Doing so may create a
traffic hazard and is illegal in some
areas. It can also be potentially
dangerous to play your headsets at
high volume while walking,
especially at pedestrian crossings.
You should exercise extreme
caution or discontinue use in
potentially hazardous situations.
On safety
Should any solid object or liquid
fall into the cabinet, unplug the
player and have it checked by
qualified personnel before
operating it any further.
On power sources
• The power requirements of this
unit are indicated on the AC
adaptor. Check that the unit’s
operating voltage is identical
with your local power supply.
• If you are not going to use the
player for a long time, be sure to
disconnect the player from the
wall outlet. To disconnect the
AC power cord (mains lead),
grasp the plug itself; never pull
the cord.
• Do not touch the mains lead or
the AC adaptor with wet hands.
Doing so may cause shock
hazard.
On temperature increases
Heat may build up inside the player
during charging or if it is being
used for a long time. This is not a
malfunction.
On placement
• Place the player in a location
with adequate ventilation to
prevent heat build-up in the
player.
• Do not place the player in a
confined space such as a
bookshelf or similar unit.
• Do not cover the ventilation of
the player with newspapers,
tablecloths, curtains, etc. And do
not place the player on a soft
surface, such as a rug.
• Do not place the player in a
location near heat sources, or in a
place subject to direct sunlight,
excessive dust, sand, moisture,
rain, or mechanical shock, or in a
car with its windows closed.
• Do not place the player in an
inclined position. It is designed
to be operated in a horizontal
position only.
• Keep the player and discs away
from equipment with strong
magnet, such as microwave
ovens, or large loudspeakers.
• Do not place heavy objects on
the player.
On operation
• If the player is brought directly
from a cold to a warm location,
or is placed in a very damp room,
moisture may condense on the
lenses inside the player. Should
this occur, the player may not
operate properly. In this case,
remove the disc and leave the
player turned on for about half an
hour until the moisture
evaporates.
• Keep the lens on the player clean
and do not touch it. Touching the
lens may damage the lens and
cause the player to malfunction.
Leave the disc lid closed except
when you insert or remove discs.
On Liquid Crystal Display
• Although manufactured with
high precision technology, the
LCD may occasionally display
dots of various colours. That is
not a malfunction.
• Do not wipe the LCD surface
with wet cloth. If water enters, a
malfunction may result.
• Do not place or drop any object
onto the LCD surface. Also, do
not apply pressure from hands or
elbows.
• Do not damage the LCD surface
with a sharp edged tool.
• Do not close the LCD panel with
a pen, etc., on the disc lid.
• If the player is brought directly
from a cold to a warm location,
moisture may condense over the
LCD surface. In which case,
wipe out the moisture with tissue
paper, etc., before use.
However, moisture condensation
will continue if the LCD surface
is cold. Wait until the surface
warms to room temperature.
On AC adaptor
•Use the supplied AC adaptor for
this player, as other adaptors
may cause a malfunction.
• Do not disassemble or
reverseengineer.
Page 4

On car adaptor
• Use the supplied car adaptor for
this player, as other adaptors
may cause a malfunction.
• Do not dissemble or reverseengineer.
• Do not drop or apply shock.
• Do not touch the metal parts, as
it may cause a short and damage
the car adaptor, especially if
touched by other metal objects.
• Do not place the car adaptor in a
location near heat sources, or in a
place subject to direct sunlight or
mechanical shock, or in a car
with its windows closed.
On adjusting volume
Do not turn up the volume while
listening to a section with very low
level inputs or no audio signals. If
you do, the speakers may be
damaged when a peak level section
is played.
On headphones
• Preventing hearing damage
Avoid using headphones at high
volumes. Hearing experts advice
against continuous, loud, and
extended play. If you experience a
ringing in your ears, reduce the
volume or discontinue use.
• Showing consideration for
others
Keep the volume at a moderate
level. This will allow you to hear
outside sounds and still be
considerate to the people around
you.
On cleaning
Clean the cabinet, panel, and
controls with a soft cloth slightly
moistened with a mild detergent
solution. Do not use any type of
abrasive pad, scouring powder or
solvent such as alcohol or benzine.
On cleaning discs, disc/
lens cleaners
Do not use cleaning discs or disc/
lens cleaners (including wet or
spray types). These may cause
the apparatus to malfunction.
IMPORTANT NOTICE
Caution: This player is capable
of holding a still video image or
on-screen display image on your
television screen indefinitely. If
you leave the still video image or
on-screen display image
displayed on your TV for an
extended period of time you risk
permanent damage to your
television screen. Plasma
display panel televisions and
projection televisions are
susceptible to this.
If you have any questions or
problems concerning your player,
please consult your nearest Sony
dealer.
GB
4
Page 5

Table of Contents
WARNING . . . . . . . . . . . . . . . . . . . . . . . . . . . . . . . . . . . . . . . . . . . . . . . . . . . .2
Precautions . . . . . . . . . . . . . . . . . . . . . . . . . . . . . . . . . . . . . . . . . . . . . . . . . . . 3
About This Manual . . . . . . . . . . . . . . . . . . . . . . . . . . . . . . . . . . . . . . . . . . . . . 6
This Player Can Play the Following Discs. . . . . . . . . . . . . . . . . . . . . . . . . . . . 7
Preparations . . . . . . . . . . . . . . . . . . . . . . . . . . . . . . . . . . . . . . . .9
Checking the Accessories . . . . . . . . . . . . . . . . . . . . . . . . . . . . . . . . . . . . . . . .9
Using the Remote . . . . . . . . . . . . . . . . . . . . . . . . . . . . . . . . . . . . . . . . . . . . . . 9
Using the LCD Panel . . . . . . . . . . . . . . . . . . . . . . . . . . . . . . . . . . . . . . . . . . .10
Connecting the AC Adaptor . . . . . . . . . . . . . . . . . . . . . . . . . . . . . . . . . . . . . .11
Using with the Battery Pack . . . . . . . . . . . . . . . . . . . . . . . . . . . . . . . . . . . . . .12
Using with the Car Battery Adaptor . . . . . . . . . . . . . . . . . . . . . . . . . . . . . . . .14
Playing Discs . . . . . . . . . . . . . . . . . . . . . . . . . . . . . . . . . . . . . . 15
Playing Discs. . . . . . . . . . . . . . . . . . . . . . . . . . . . . . . . . . . . . . . . . . . . . . . . . 15
Using the Playback Settings Display. . . . . . . . . . . . . . . . . . . . . . . . . . . . . . . 21
Searching for a Particular Point on a Disc (Search, Scan, Slow Play,
Repeat Play, Random Play) . . . . . . . . . . . . . . . . . . . . . . . . . . . . . . . . . . 23
Playing MP3 Audio Tracks or JPEG Image Files . . . . . . . . . . . . . . . . . . . . . 25
Adjusting the Picture Size and Quality . . . . . . . . . . . . . . . . . . . . . . . . . . . . . 28
Enjoying DivX® Videos . . . . . . . . . . . . . . . . . . . . . . . . . . . . . . . . 29
Playing DivX Video Files . . . . . . . . . . . . . . . . . . . . . . . . . . . . . . . . . . . . . . . 29
About DivX Video Files . . . . . . . . . . . . . . . . . . . . . . . . . . . . . . . . . . . . . . . . . 30
Settings and Adjustments . . . . . . . . . . . . . . . . . . . . . . . . . . . . . . 32
Using the Setup Display . . . . . . . . . . . . . . . . . . . . . . . . . . . . . . . . . . . . . . . . 32
Settings for the Display (General Setup). . . . . . . . . . . . . . . . . . . . . . . . . . . . 33
Settings for the Sound (Audio Setup) . . . . . . . . . . . . . . . . . . . . . . . . . . . . . . 34
Setting the Display or Sound Track Language (Language Setup) . . . . . . . . 35
Parental Control Settings (Parental Control). . . . . . . . . . . . . . . . . . . . . . . . . 36
Hookups . . . . . . . . . . . . . . . . . . . . . . . . . . . . . . . . . . . . . . . . . . 38
Connecting to another device . . . . . . . . . . . . . . . . . . . . . . . . . . . . . . . . . . . .38
Additional Information . . . . . . . . . . . . . . . . . . . . . . . . . . . . . . . . 41
Troubleshooting . . . . . . . . . . . . . . . . . . . . . . . . . . . . . . . . . . . . . . . . . . . . . . 41
About MP3 Audio Tracks and JPEG Image Files . . . . . . . . . . . . . . . . . . . . . 43
Notes About the Discs. . . . . . . . . . . . . . . . . . . . . . . . . . . . . . . . . . . . . . . . . . 44
Specifications . . . . . . . . . . . . . . . . . . . . . . . . . . . . . . . . . . . . . . . . . . . . . . . . .45
Index to Parts and Controls . . . . . . . . . . . . . . . . . . . . . . . . . . . . . . . . . . . . . .46
Index . . . . . . . . . . . . . . . . . . . . . . . . . . . . . . . . . . . . . . . . . . . . . . . . . . . . . . .49
GB
5
Page 6

About This Manual
• Instructions in this manual describe the controls on the remote. You can also use the
controls on the player if they have the same or similar names as those on the remote.
• “DVD” may be used as a general term for DVD VIDEOs, DVD+RWs/DVD+Rs (+VR
mode) and DVD-RWs/DVD-Rs (VR mode, video mode).
• The meaning of the icons used in this manual is described below:
Icons Meaning
Functions available for DVD VIDEOs and DVD+RWs/DVD+Rs in +VR
mode or DVD-RWs/DVD-Rs in video mode
Functions available for DVD-RWs/DVD-Rs in VR (Video Recording) mode
Functions available for VIDEO CDs (including Super VCDs or CD-Rs/CDRWs in video CD format or Super VCD format)
Functions available for music CDs or CD-Rs/CD-RWs in music CD format
Functions available for DATA CDs (CD-ROMs/CD-Rs/CD-RWs
containing MP3
Functions available for DATA DVDs (DVD-ROMs/DVD+RWs/DVD+Rs/
DVD-RWs/DVD-Rs containing MP3
*2*3
DivX
*1 MP3 (MPEG-1 Audio Layer III) is a standard format defined by ISO (International Organization for
Standardization)/IEC (International Electrotechnical Commission) MPEG which compresses audio
data.
*2 DivX® is a video file compression technology, developed by DivX, Inc.
*3 DivX, DivX Certified, and associated logos are trademarks of DivX, Inc. and are used under licence.
*1
audio tracks, JPEG image files, and DivX
*1
video files
)
audio tracks,
*2*3
video files)
JPEG image files, and
GB
6
Page 7
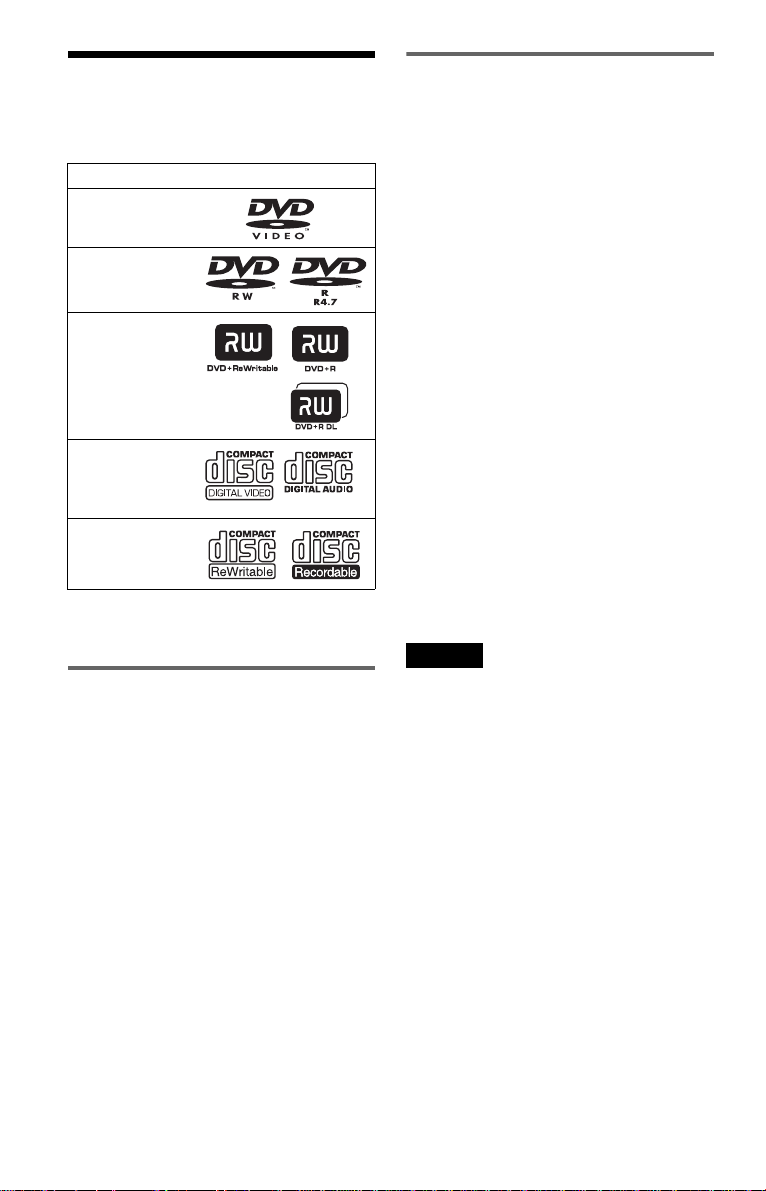
This Player Can Play the
Following Discs
Format of discs
DVD VIDEO
DVD-RW/-R
(finalized disc)
DVD+RW/+R
(finalized disc)
Example of discs that the player
cannot play
The player cannot play the following discs:
• Blu-ray discs.
• Discs recorded in AVCHD format.
• HD DVDs.
•DVD-RAMs.
• CD-ROMs/CD-Rs/CD-RWs other than
those recorded in the formats listed on this
page.
• CD-ROMs recorded in PHOTO CD format.
• Data part of CD-Extras.
• DVD Audio discs.
• DATA DVDs that do not contain MP3
audio tracks, JPEG image files, or DivX
video files.
• HD layer on Super Audio CDs.
VIDEO CD/
Music CD
CD-RW/-R
“DVD+RW,” “DVD-RW,” “DVD+R,”
“DVD-R,” “DVD VIDEO,” and “CD” logos
are trademarks.
Note about CDs/DVDs
The player can play CD-ROMs/CD-Rs/CDRWs recorded in the following formats:
– music CD format
– video CD format
– MP3 audio tracks, JPEG image files, and
DivX video files of format conforming to
ISO 9660* Level 1, or its extended format,
Joliet
– KODAK Picture CD format
* A logical format of files and folders on CD-
ROMs, defined by ISO (International
Organization for Standardization).
The player can play DVD-ROMs/
DVD+RWs/DVD-RWs/DVD+Rs/DVD-Rs
recorded in the following format:
– MP3 audio tracks, JPEG image files, and
DivX video files of format conforming to
UDF (Universal Disk Format).
Also, the player cannot play the following
discs:
• A DVD VIDEO with a different region
code.
• A disc that has a non-standard shape (e.g.,
card, heart).
• A disc with paper or stickers on it.
• A disc that has the adhesive of cellophane
tape or a sticker still left on it.
Notes
• Notes about DVD+RWs/DVD+Rs, DVD-RWs/
DVD-Rs or CD-Rs/CD-RWs
Some DVD+RWs/DVD+Rs, DVD-RWs/DVDRs, or CD-Rs/CD-RWs cannot be played on this
player due to the recording quality or physical
condition of the disc, or the characteristics of the
recording device and authoring software.
The disc will not play if it has not been
correctly finalized. For more information, refer
to the operating instructions for the recording
device. Note that some playback functions may
not work with some DVD+RWs/DVD+Rs, even
if they have been correctly finalized. In this case,
view the disc by normal playback. Also some
DATA CDs/DATA DVDs created in Packet
Write format or multiple sessions cannot be
played.
• Notes about DVD+R DLs/DVD-R DLs
DVD-R DL discs recorded in VR mode may not
be playable.
MP3 and JPEG files recorded on the second layer
of a DVD+R DL/-R DL (double layered) may not
be playable.
,continued
GB
7
Page 8

• Music discs encoded with copyright protection
technologies
This product is designed to playback discs that
conform to the Compact Disc (CD) standard.
Recently, various music discs encoded with
copyright protection technologies are marketed
by some record companies. Please be aware that
among those discs, there are some that do not
conform to the CD standard and may not be
playable by this product.
• Note on DualDiscs
A DualDisc is a two sided disc product which
mates DVD recorded material on one side with
digital audio material on the other side.
However, since the audio material side does not
conform to the Compact Disc (CD) standard,
playback on this product is not guaranteed.
Region code
It is the system that is used to protect
copyrights. The region code is shown on the
DVD VIDEO packages according to the
region of sale. DVD VIDEOs labelled “ALL”
or “2” will play on this player.
ALL
Note on playback operations of
DVDs and VIDEO CDs
Some playback operations of DVDs and
VIDEO CDs may be intentionally set by
software producers. Since this player plays
DVDs and VIDEO CDs according to the disc
contents the software producers designed,
some playback features may not be available.
Also, refer to the instructions supplied with
the DVDs or VIDEO CDs.
Trademarks
• Manufactured under license from Dolby
Laboratories.
Dolby and the double-D symbol are
trademarks of Dolby Laboratories.
• Manufactured under license under U.S.
Patent #: 5,451,942 & other U.S. and
worldwide patents issued & pending. DTS
and DTS Digital Out are registered
trademarks and the DTS logos and Symbol
are trademarks of DTS, Inc. ©1996-2007
DTS, Inc. All Rights Reserved.
Copyrights
This product incorporates copyright
protection technology that is protected by
U.S. patents and other intellectual property
rights. Use of this copyright protection
technology must be authorized by
Macrovision, and is intended for home and
other limited viewing uses only unless
otherwise authorized by Macrovision.
Reverse engineering or disassembly is
prohibited.
GB
8
Page 9

Preparations
Checking the Accessories
Check that you have the following items:
• Audio/video cord (mini plug × 2 y phono
plug × 3) (1)
• Mains lead (1)
• AC adaptor (1)
• Car battery adaptor (1)
• Battery pack (NP-FX110) (1)
• Remote (with battery) (1)
• Carry case (1)
Using the Remote
When operating, point it at the remote sensor on the player.
To replace the remote control battery
Insert a lithium battery CR2025 matching the 3 and # ends of the battery.
1 Pull out the battery holder (2) while
pressing the lock lever (1).
2 Remove the old battery.
Notes
• Do not expose the remote sensor to direct sunlight or a lighting apparatus. Doing so may cause a
malfunction.
• No button operation can be made, when the battery drains. If the remote does not work at all, change the
battery and check the status.
3 Insert the new battery in the battery
holder with the 3 side up and then push
the holder fully.
Preparations
GB
9
Page 10

Using the LCD Panel
The LCD panel of the player can rotate a maximum of 180 degrees clockwise and still be used.
After rotation of the LCD panel, it can be folded down on the main body of the player and still
function.
Rotating the LCD panel
1 Place the player on a table or other flat stable surface.
2 Push the LCD panel up with your thumbs until it is open to the vertical position.
3 Slowly rotate the LCD panel 180 degrees in the direction indicated by the arrow
(clockwise).
Rotating and folding down the LCD panel
After rotating the LCD panel 180 degrees clockwise push the LCD panel down onto the main
body of the player. In this position the panel is facing up.
To return the LCD panel to its original position
Open the LCD panel to the vertical position and rotate the LCD panel counter-clockwise slowly.
Notes
• Do not rotate the LCD panel over 180 degrees. In addition, do not rotate in the opposite direction. Doing
so will break the LCD panel.
• If the LCD panel does not fully open, do not further rotate it. The LCD panel may become damaged.
• Return the LCD panel to its original positions after use. The LCD screen can be damaged by sudden shocks
or similar treatment.
GB
10
Page 11

Connecting the AC Adaptor
Connect the AC adaptor (supplied) in the order of 1 to 3 below.
To disconnect, follow the steps in reverse order.
Preparations
PHONES
AB
AUDIO VIDEO
OPTICAL
OUT
LINE SELECT
IN OUT
DC IN
9.5V
To DC IN 9.5 V jack
DC plug
2
AC Adaptor
(supplied)
Mains lead (supplied)
1
3
To mains
Note
Stop playback before disconnecting the mains lead. Failure to do so may cause a malfunction.
11
GB
Page 12

Using with the Battery Pack
When a mains connection is not available, the player can be enjoyed with the battery pack
(supplied) installed.
Please charge the battery pack before using it.
Installing the battery pack
1 Aligning the battery pack with the lines on the player’s bottom, engage the hooks of
the battery pack in the holes on the bottom of the player.
2 Slide the battery pack in the direction of the arrow until it clicks into place.
Battery pack
Bottom of the player
To remove the battery pack
Push the release knob and slide the battery pack in the direction of the arrow.
Release knob
Notes
• Turn the player off before installing the battery pack.
• Do not remove the battery pack during playback.
• Do not touch the connecting points of the player and the battery pack. Doing so may cause a malfunction.
• Be careful not to drop the battery pack when installing and removing it.
GB
12
Page 13

Charging the battery pack
POWER CHARGE
1 Attach the battery pack to the player (page 12).
2 Connect the AC adaptor to the player, and then connect the mains lead into a mains
(page 11).
DC IN 9.5 V jack
CHARGE indicator
Preparations
HOLD
AUDIO VIDEO
PHONES
AB
Player Battery pack
LINE SELECT
OPTICAL
OUT
IN OUT
DC IN
9.5V
When charging begins, the CHARGE indicator turns on.
When charging ends, the CHARGE indicator turns off.
3 After charging is finished, disconnect the mains lead from the mains and remove the
AC adaptor.
To check the battery level
When the player is stopped, a battery indicator is displayed on the screen. Recharge the battery,
when is displayed or the CHARGE indicator flashes.
Full Exhausted
The battery indicator is not displayed when a DVD, VIDEO CD or JPEG file are being played.
Stop the player and check the battery level.
Charging time and maximum playing time
Charging time (with the player turned off) Playing time (with the display turned on)
Approx.
6 hours
* This is the indication of the longest continuous playback on the following conditions.
– normal temperature (20°C)
– Headphone Use
– Set Backlight Adjustment to the Minimum
– Set “Digital Output” to “Off” in “Audio Setup.”
Battery condition may reduce operating time.
Approx.
6 hours*
Notes
• The battery indicator does not appear on the screen when the AC adaptor is used or when inputting from
external sources.
• Charging times may differ from that indicated above due to conditions of use, environment, and other
factors. The recommended charge up surrounding temperature is in the 10-30°C range.
13
GB
Page 14
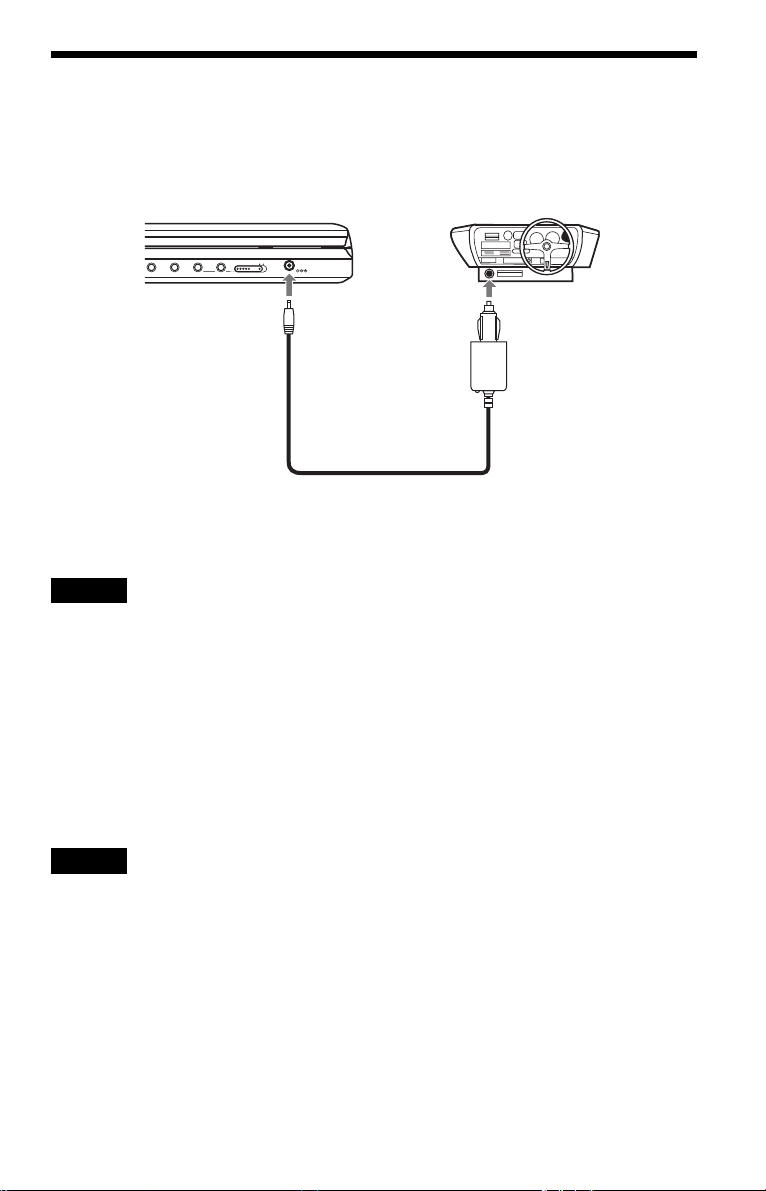
Using with the Car Battery Adaptor
Use the car battery adaptor (supplied) to supply power from the cigarette lighter socket to the
player. The adaptor is for a 12V car battery. Do not use it with a 24V car battery. The adaptor is
also for use with negatively grounded cars. Do not use it with cars grounded positively.
AUDIO VIDEO
PHONES
AB
OPTICAL
OUT
LINE SELECT
To DC IN 9.5V jack
IN OUT
DC IN
9.5V
To cigarette lighter socket
Car battery adaptor (supplied)
z Hint
If the car adaptor interferes with car operation, use a commercial cigarette lighter extension cord.
Notes
• Do not use the car adaptor if it has been dropped or damaged.
• Arrange the cord so as not to interfere with the driver. Also, do not place the LCD panel where the driver
can watch.
• If the picture is not clear, keep the player away from the car battery adaptor.
• Use the car battery adaptor with the car engine running. If it is used with the car engine off, the car battery
may become unusable.
• If the cigarette lighter socket is dirty with ash, etc, a bad connection may cause the plug to heat up. Always
clean well before use.
• The car battery adaptor may heat up while charging or after a long period of use. That is not a malfunction.
After using the car battery adaptor
After turning the player off, disconnect the car battery adaptor from the cigarette lighter socket.
Notes
• Do not turn off the car engine while the player is turned on. Doing so stops the power supply and may cause
damage to the player.
• Disconnect the car battery adaptor after use. Since some cars supply power to the cigarette lighter socket
even when the engine is turned off, the car battery may discharge over time.
• When disconnecting the car battery adaptor, hold the plug to pull it out.
• When listening to the car radio, disconnect the car battery adaptor from the cigarette lighter socket to avoid
noise.
GB
14
Page 15

Playing Discs
H
O
L
D
O
P
E
N
CHARGE
POWER
Playing Discs
Depending on the DVD or VIDEO CD, some
operations may be different or restricted.
Refer to the operating instructions supplied
with the disc.
Connect the AC adaptor or install the battery
pack.
x
2 Press [/1 on the remote or slide
the [/1/HOLD switch of the player
to “[/1.”
The player turns on and the POWER
indicator lights up in green.
3 Press OPEN to open the disc lid.
Playing Discs
4 Insert the disc to be played.
Push with the playback side down until it
clicks.
H
VOL
DISPLAY MENU RETURN OPTIONS
Playback side facing down
CHARGEPOWER
5 Push the PUSH CLOSE on the
player to shut the disc lid.
6 Press H.
OPEN \/1/HOLD
123
456
7809
\/1
H
x
1 Open the player’s LCD panel.
Set the LINE SELECT switch on the
player’s right side to “OUT”.
Playback starts.
• Some discs may start playing
automatically after the disc lid is shut.
• Depending on the disc, a menu may
appear on the screen. For DVD
VIDEOs, see page 17. For VIDEO
CDs, see page 20.
• After all titles have been played, the
player will stop itself and the display
will return to the menu screen.
Notes
• If the disc is inserted with playback side up, a “No
Disc” or “Cannot play this disc.” message
appears.
• Discs created on DVD recorders must be correctl y
finalized to play on this player. For more
information about finalizing, refer to the
operating instructions supplied with the DVD
recorder.
• The disc may be still spinning when the disc lid is
opened. Wait until the spinning stops before
removing the disc.
,continued
15
GB
Page 16

• Durin g operation, “ ” may appear on the screen.
This symbol indicates that a function explained in
this operating instruction is not available on the
current DVD VIDEO.
• Some DVD-RWs/DVD-Rs (VR mode) may take
time before starting playback because of the
recorded content.
To stop playback
Press x.
Pressing H again will start playback from
the point you stopped (Resume Play). See
page 17 for details.
To play from the beginning, press x twice,
then press H.
To turn off the power
Press the remote’s \/1 button or slide the
player’s \/1/HOLD switch to “\/1.”
To avoid accidental button operation on
the player
Set the player’s \/1/HOLD switch to
“HOLD.” All the buttons on the player are
locked, while the button on the remote
remains operable.
To play DTS sound tracks on a DVD VIDEO
• The player’s speaker does not output DTS
sound. When you play DTS sound tracks on
a DVD VIDEO, connect the player to an
AV amplifier (receiver) (page 39) and set
up “DTS” in “Audio Setup” (page 35).
• If you connect the player to audio
equipment such as an AV amplifier
(receiver) without a DTS decoder, do not set
“DTS” to “On” in “Audio Setup” (page 35).
A loud noise may come out from the
speakers, which may affect your ears or
cause speaker damage.
Additional playback operations
123
456
7809
.
X
To Operation
Stop Press x
Pause Press X
Go to the next chapter,
Press >
track, or scene in
continuous play mode
Go back to the
Press .
previous chapter,
track, or scene in
continuous play mode
Briefly fast forward
the current scene*
* DVD VIDEOs, DVD-RWs/DVD-Rs (VR mode)
only.
The above functions may not be used for some
scenes.
Press during
playback.
>
x
Notes
• A screen saver image appears when you leave the
player in pause or stop without operation for more
than 15 minutes. The image disappears when you
press H. See page 34 for details.
• The player turns off, 15 minutes after starting the
screen saver function (Auto Power Off).
GB
16
Page 17

Resuming playback from the
point where you stopped the disc
(Resume Play)
When you stop playback, the player
remembers the stop point and displays a
message on the screen. You can resume from
the same point by pressing H again. Resume
Play works even after the player is turned off,
as long as the disc lid is kept closed.
123
456
7809
H
x
1 While playing a disc, press x to stop
playback.
A message appears.
2 Press H.
The player starts playback from the point
you stopped in step 1.
z Hints
• To play from the beginning of the disc, press x
twice, then press H.
• When turning power on again after power off,
resume play starts automatically.
Notes
• Depending on the stop point, Resume play may
not start from exactly the same point.
• The point where you stopped playing is cleared
when:
– you turn off the player while playing a DVD-
RW/DVD-R (VR mode).
– you open the disc lid.
– you disconnect the battery pack and the AC
adaptor.
– you change the LINE SELECT switch setting.
Using the DVD’s menu
A DVD is divided into long sections of a
picture or a music feature called “titles.”
When you play a DVD containing several
titles, you can select the title you want using
the TOP MENU button.
When you play DVDs that allow you to select
items such as language for the sound and
subtitles, select these items using the MENU
button.
123
Number
buttons
TOP MENU
C/X/x/c
ENTER
456
7809
MENU
1 Press TOP MENU or MENU.
The disc’s menu appears on the screen.
The contents of the menu vary from disc
to disc.
2 Press C/X/x/c or the number buttons
to select the item you want to play or
change.
3 Press ENTER.
Note
Depending on the disc, you may not be able to use
C/c of the player for the disc menu. In this case, use
C/c on the remote.
Playing Discs
,continued
17
GB
Page 18

Changing the sound
When playing a DVD VIDEO recorded in
multiple audio formats (PCM, Dolby Digital,
or DTS), you can change the audio format. If
the DVD VIDEO is recorded with
multilingual tracks, you can also change the
language.
With CDs or VIDEO CDs, you can select the
sound from either the right or left channel and
listen to the sound of the selected channel
through both the right and left speakers. For
example, when playing a disc containing a
song with the vocals on the right channel and
the instruments on the left channel, you can
hear the instruments from both speakers by
selecting the left channel.
123
456
7809
AUDIO
1 Press AUDIO repeatedly to select the
desired audio signal.
The default setting is underlined.
◆ When playing a DVD VIDEO
Depending on the DVD VIDEO, the
choice of language varies.
When the same language is displayed two
or more times, the DVD VIDEO is
recorded in multiple audio formats.
◆ When playing a DVD (VR mode) disc
The types of sound tracks recorded on a
disc are displayed.
Example:
•1.Main
(main sound)
• 1.Sub (sub sound)
• 1.Main+Sub (main and sub sound)
◆ When playing a CD/VIDEO CD
•Stereo
: the standard stereo sound
• Left: the sound of the left channel
(monaural)
• Right: the sound of the right channel
(monaural)
◆ When playing a Super VCD
: the stereo sound of the audio
•Stereo
track 1
• Left: the sound of the left channel of the
audio track 1 (monaural)
• Right: the sound of the right channel of
the audio track 1 (monaural)
• Stereo 1: the stereo sound of the audio
track 2
• Left 1: the sound of the left channel of
the audio track 2 (monaural)
• Right 1: the sound of the right channel
of the audio track 2 (monaural)
z Hints
• You can check of the current audio format (Dolby
Digital, DTS, PCM, etc.) by pressing AUDIO
repeatedly while playing a DVD VIDEO.
• You ca n switch the sound in the Playback Settings
Display while playing a DVD (page 21).
Notes
• Depending on the disc, you may not be able to
change the audio format, even if it is recorded in
multiple audio formats.
• When playing a Super VCD that does not contain
audio track 2, no sound will come out if you select
“Stereo 1,” “Left 1,” or “Right 1.”
• When playing soundtracks on DVD-RW/DVD-R
(VR mode) with audio equipment such as an AV
amplifier (receiver) connected via the OPTICAL
OUT jack, set “Dolby Digital” in “Audio Setup”
to “Downmix PCM” (page 35).
• If “DTS” in “Audio Setup” is set to “Off”
(page 35), the DTS track selection option will not
appear on the screen even if the disc contains DTS
tracks.
• When playing DTS sound tracks on a CD, you
cannot change the sound.
18
GB
Page 19

Displaying the subtitles
If subtitles are recorded on the disc, you can
change the subtitles or turn them on and off
whenever you want while playing a DVD.
Changing the angles
If various angles (multi-angles) for a scene
are recorded on the DVD VIDEO, “ ”
appears on the screen. This means that you
can change the viewing angle.
123
456
7809
SUBTITLE
1 Press SUBTITLE repeatedly to select a
setting.
Depending on the disc, the choice of
language varies.
To turn off the subtitles
Select “Subtitle Off” in step 1.
z Hint
You can switch the subtitles in the Playback
Settings Display while playing a DVD (page 21).
Notes
• Depending on the DVD VIDEO, you may not be
able to change the subtitles even if multilingual
subtitles are recorded on it. You also may not be
able to turn them off.
• While you play a disc with subtitles, the subtitle
may disappear when you press .
123
456
7809
ANGLE
1 Press ANGLE repeatedly to select an
angle number.
The scene changes to the selected angle.
Notes
• Some DVD VIDEOs prohibit changing angles
even when multi-angles are recorded.
• You cannot change angles during Slow Play or
Scan Play.
• “ ” (angle mark) does not appear when
“Angle Mark” in “General Setup” is set to “Off”
(page 34).
Playing Discs
,continued
19
GB
Page 20

Selecting “Original” or “Play
List” on a DVD-RW/DVD-R
Some DVD-RWs/DVD-Rs in VR (Video
Recording) mode have two types of title for
playback: originally recorded titles
(Original), and titles that can be created on
recordable DVD players for editing (Play
List). You can select the type of title to be
played.
Playing VIDEO CDs With PBC
Functions
Some VIDEO CDs have Playback Control
(PBC) functions allowing for interactive
search or playback options.
Number
(PBC Playback)
buttons
123
456
7809
123
456
7809
TOP MENU
1 Press TOP MENU when the player is in
stop mode.
The current mode appears.
The TOP MENU button does not work
when Resume Play is activated. Cancel
the Resume Play status first by pressing
x twice, and then press TOP MENU.
2 Switch the mode by pressing TOP
MENU repeatedly.
z Hint
You can check the current mode by pressing
DISPLAY during playback. On the Playback
Settings Display (page 21), “PL” or “ORG” will be
displayed next to the title number.
Notes
• When a disc containing a Playlist title is inserted,
the player automatically starts playing the Playlist
title.
• When no Playlist title is recorded, “ORG” appears
in step 1. When you press TOP MENU once
more, “ ” appears.
ENTER
H
1 Start playing a VIDEO CD with PBC
functions.
The menu appears for your selection.
2 Press the number buttons to select the
item number you want and press
ENTER.
3 Follow the instructions on screen for
interactive operations.
Refer to the instructions supplied with the
disc, as the operating procedure may
differ depending on the VIDEO CD.
z Hint
To cancel the PBC function, set “PBC” to “Off” in
“General Setup” (page 34) and then, open and close
the disc lid.
Note
Depending on the VIDEO CD, “Press ENTER” in
step 2 may appear as “Press SELECT.” In this case,
press H.
20
GB
Page 21

Using the Playback
Settings Display
While playing a DVD, you can check the
current playback settings on the screen. The
Playback Settings Display also allows you to
change sound, subtitle, and angle or search
for a title or track by inputting numbers.
DISPLAY
O
123
456
7809
Number
buttons
C/X/x/c
ENTER
1 Press DISPLAY while playing a
DVD.
The Playback Settings Display appears.
Example: When playing a DVD VIDEO
Current playback settingsItems
Menu
Title
Chapter
Audio
Subtitle
The corresponding icon for Play, Pause,
Search, or Slow Play is displayed in the
upper right corner of the screen.
When a DVD-RW/DVD-R (VR mode) is
played, “PL” or “ORG” is displayed next
to the title number.
02/07
03/20
02 2CH DOLBY DIGITAL English
01 English
Title Elapsed 00:12:01
Elapsed or remaining timeBattery status
2 Press X/x to select the desired
item and press ENTER.
• Title
•Chapter
•Audio
• Subtitle
•Angle
•T.Time
•C.Time
•Repeat
•Time Disp.
3 Press X/x to select the setting,
and press ENTER.
To enter numbers, use the number
buttons or X/x.
Note
Depending on the disc, you may not be able to set
some options.
To turn off the display
Press DISPLAY or O RETURN.
Searching for a title/chapter,
etc.
By entering the number or the time code, you
can search a DVD by title or chapter.
1 Press X/x to select the search method
on the Playback Settings Display, and
press ENTER.
• Title
•Chapter
•T.Time*
•C.Time*
* You can search the title or chapter of a DVD
VIDEO by entering the time code.
2 Press the number buttons or X/x to
select the title or chapter number, and
press ENTER.
The player starts playback from the
selected number.
When you select “T.Time” or “C.Time” in
step 1, “00:00:00” will appear on the screen.
Enter the desired time code using the number
buttons, and press ENTER. Playback starts
from the entered time code. Elapsed or
remaining time appears on the footer of the
Playback Settings Display.
z Hints
• You can use direct search without displaying the
control menu. See page 23 for details.
,continued
21
GB
Playing Discs
Page 22

• See page 23 for details about searching for a CD
or VIDEO CD.
Notes
• The displayed title/chapter number is the same as
the number recorded on the disc.
• Chapter times are not displayed when a DVDRW/DVD-R (VR mode) is played. Chapter time
will be displayed as “--:--:--.”
• Depending on the disc, you may not be able to use
the time code.
Playing a DVD VIDEO repeatedly
(Repeat Play)
You can play all of the titles on a DVD
VIDEO, or a single title or chapter repeatedly.
1 Select “Repeat” on the Playback
Settings Display, and press ENTER.
2 Press X/x to select the setting, and
press ENTER.
• Chapter: repeats the current
chapter.
• Title: repeats the current title.
• All: repeats all of the titles.
To return to normal play
Select “Off” in step 2.
z Hint
When playing a VCD or CD repeatedly, use MENU
(page 24).
Note
Depending on the disc, the Repeat function may not
be available.
Checking the playing time and
remaining time
You can check the playing time and
remaining time of the current title or chapter.
1 Select “Time Disp.” on the Playback
Settings Display, and press ENTER.
Time Disp.
Title Elapsed
Title Remain
Chapter Elapsed
Chapter Remain
Title Elapsed 00:12:48
2 Press X/x to select the time
information setting, and press ENTER.
• Title Elapsed
• Title Remain
• Chapter Elapsed
• Chapter Remain
z Hint
See page 25 for details about displaying the elapsed
time of a CD or VIDEO CD.
Notes
• In the case of DVD-RWs/DVD-Rs (VR mode),
the playing time and remaining time of the
chapter is not displayed.
• The default setting for “Time Disp.” is “Title
Elapsed.” After selecting an other option of
“Time Disp.” and exiting from the Playback
Settings Display, the “Title Elapsed” appears
when the Playback Settings Display is re-entered.
22
GB
Page 23

Searching for a
Particular Point on a
Disc (Search, Scan, Slow Play,
Repeat Play, Random Play)
You can quickly locate a particular point on a
disc by monitoring the picture or playing back
slowly.
DISPLAY
.
Notes
• Depending on the disc, you may not be able to
perform some of the operations described.
• For DATA CDs/DATA DVDs, you c an search for
a particular point only on an MP3 audio track.
Locating a point quickly using
the ./> PREV (previous)/
NEXT buttons (Search)
During playback, press > or . to go to
the next or previous chapter/track/scene.
H
123
456
7809
MENU
>
Mm
Locating a point quickly by
playing a disc in fast forward or
fast reverse (Scan)
Press m or M to fast reverse or fast
forward during playback. To return to normal
play, press H.
Each time you press m or M during scan,
the scan speed changes.
With each press the indication changes as
shown below.
◆ Playback direction
H t 1M t 2M t 3M
◆ Opposite direction
H t 1m t 2m t 3m
The “3M”/“3m” playback speed is faster
than “2M”/“2m” and the “2M”/“2m”
playback speed is faster than “1M”/
“1m.”
z Hint
C/c on the player works the same as m/M on
the remote, and ENTER on the player works the
same as H on the remote. This function is
effective when you play back a DVD.
Notes
• No sound is output during Scan play for a DVD or
VIDEO CD.
• Scan speed differs depending on the disc type.
Playing Discs
z Hints
When you know the chapter or track number, you
can search directly by entering these numbers using
the number buttons.
– While playing a DVD VIDEO, you can search
for a title or chapter using the number buttons
and ENTER. Press C/c to switch between title
and chapter.
– While playing a CD/VIDEO CD, you can
search for a track using the number buttons and
ENTER.
,continued
23
GB
Page 24

Watching frame by frame
(Slow Play)
Press m or M when the player is in pause
mode. To return to normal speed, press H.
Each time you press m or M during Slow
Play, the playback speed changes. With each
press the indication changes as follows:
◆ Playback direction
H t 1 t 2 t 3
◆ Opposite direction (DVD only)
H t 1 t 2 t 3
The “3 ”/“3 ” playback speed is slower
than “2 ”/“2 ” and the “2 ”/“2 ”
playback speed is slower than “1 ”/“1 .”
Note
Slow speed differs depending on the disc type.
Playing CD/VIDEO CD repeatedly
or in random order (Repeat Play,
Random Play)
You can play all of the tracks on a disc, or a
single track repeatedly (Repeat Play).
Also, you can play the tracks in random order,
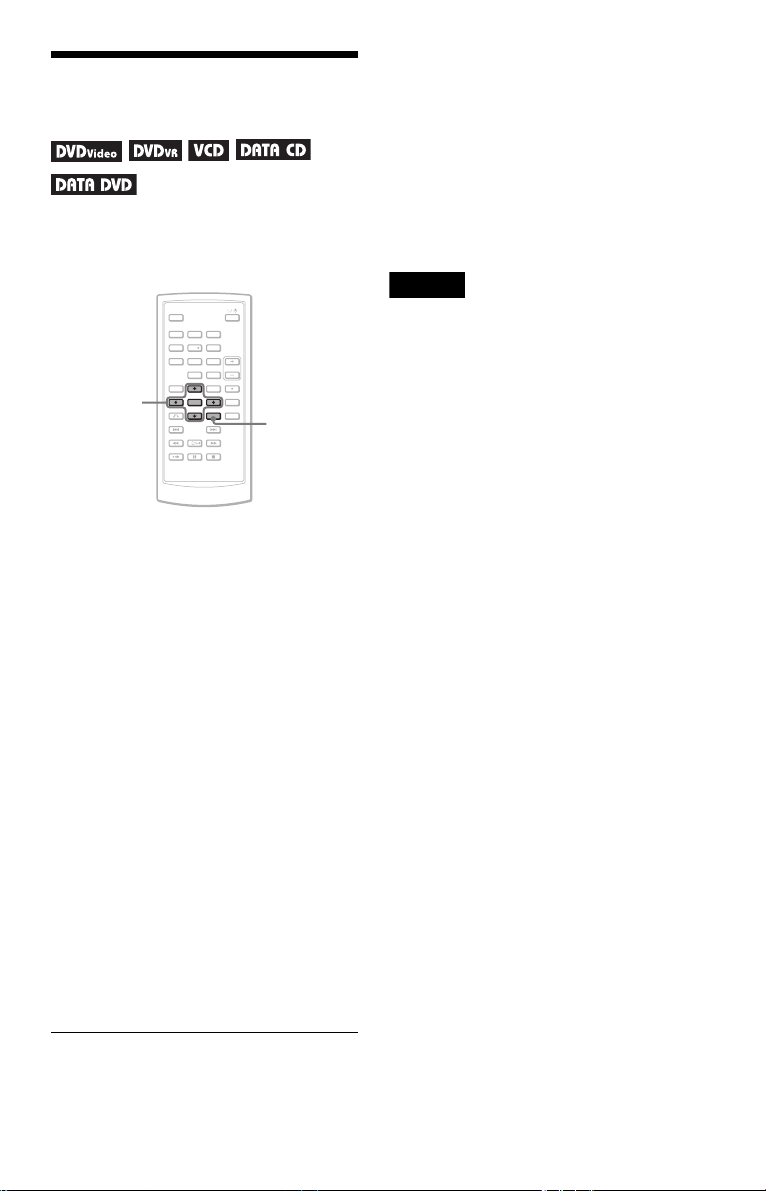
too (Random Play).
1 Press MENU repeatedly during
playback to select the playback mode.
• Track: repeats the current track.
• All: repeats all tracks on the disc.
• Random: plays all tracks on the disc
randomly.
To return to normal play
Select “ Off” in step 1.
z Hint
During Random Play, you can start playing other
randomly selected track by pressing >.
Notes
• You cannot use Repeat Play and Random Play
with VIDEO CDs or Super VCDs with PBC
playback.
• Depending on the disc, Random Play may not be
available.
• The same track may be repeated several times in
Random Play.
24
GB
Page 25

Checking the play information of
the disc
When playing a DVD
Press DISPLAY while playing a DVD, and
then use the Playback Settings Display
(page 21).
When playing a CD
Press DISPLAY.
The playing track number/the total number of
tracks and the elapsed time of the current
track appear. Press DISPLAY repeatedly to
switch the time information as below.
• Track Elapsed
• Track Remain
•Disc Elapsed
•Disc Remain
When playing a VIDEO CD
Press DISPLAY.
The player displays “PBC On” (when you set
“PBC” to “Off,” the player displays the
playing track number/the total number of
tracks), the elapsed time, and the audio mode
on the screen.
Playing MP3 Audio
Tracks or JPEG Image
Files
You can play MP3 audio tracks and JPEG
image files on DATA CDs (CD-ROMs/CDRs/CD-RWs) or DATA DVDs (DVD-ROMs/
DVD+RWs/DVD+Rs/DVD-RWs/DVD-Rs).
For playable MP3 audio files and JPEG
image files, see page 43.
When you insert DATA CDs and DATA
DVDs, the list of albums appears.
123
C/X/x/c
ENTER
.
456
7809
MENU
>
X
H
x
Playing Discs
Note
The player does not display “Disc Elapsed” or
“Disc Remain” on the screen when playing a CD in
Random Play.
Note
DATA CDs recorded in KODAK Picture CD
format automatically start playing when inserted.
,continued
25
GB
Page 26

Playing an MP3 audio track
Playing a JPEG image file
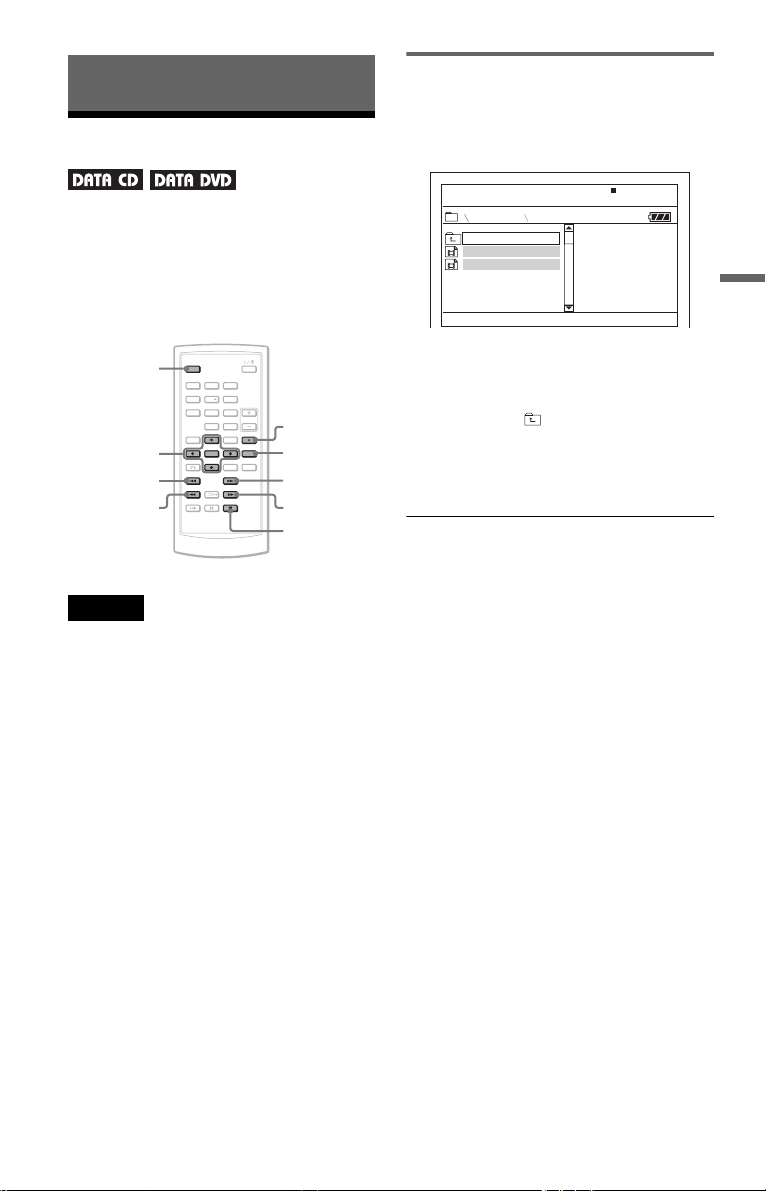
1 Press X/x to select an album on the
list, and press ENTER.
The list of tracks in the album appears.
Dir:001
MY BEST
. .
01 Stardust
02 Fire
03 Wing
• To go to the next or previous page,
press > or ..
• To return to the list of albums, press X/
x to select and press ENTER.
2 Press X/x to select the track you want
to play, and press ENTER.
Playback starts from the selected track.
To go to the next or previous MP3 audio
track
Press > or ..
To stop playback
Press x.
To pause playback
Press X.
To restart playback, press X again.
1 Press X/x to select an album on the
list, and press ENTER.
The list of files in the album appears.
Dir:001
HAWAII
. .
DSC00001
DSC00002
DSC00003
DSC00004
DSC00005
• To go to the next or previous page,
press > or ..
• To return to the list of albums, press X/
x to select and press ENTER.
2 Press X/x to select the image you
want to view, and press ENTER.
The selected image appears.
Example:
Notes
• The total albums and files the player can
recognize is about 648.
• The number of albums in a disc the player can
recognize is about 299.
GB
26
To display the list of thumbnails
Press MENU when a file is displayed on the
screen.
The image files in the album appear in 12
subscreens with the displayed file in the lead.
1234
5678
9 101112
• To move to the previous or next page of
the thumbnail list display, select
“bPrev” or “NextB” under the screen.
Page 27

• To exit the list of thumbnails, press
MENU.
To go to the next or previous JPEG image
file
Press > or ..
To rotate a JPEG image
Press C/X/x/c while viewing the image.
X: Reverses the image vertically (up and
down).
x: Reverses the image horizontally (left and
right).
c: Rotates the image 90 degrees clockwise.
C: Rotates the image 90 degrees counter
clockwise.
Note that the view also returns to normal if
you press ./> to go to the next or
previous image.
Example: when C is pressed once.
Enjoying JPEG Images as a Slide
Show
You can play JPEG image files on a DATA
CD or DATA DVD successively as a slide
show.
1 While displaying the file you want
to start a slideshow, press MENU.
The list of thumbnails appears.
1234
5678
9 101112
2 Press C/X/x/c to select “Slide
Show” at the bottom of the screen,
and press ENTER.
A slideshow starts from the displayed
file.
Playing Discs
To stop viewing the JPEG image
Press x.
The display returns to the list of files.
Notes
• Images ma y take time to appear due to the number
of recorded files or the size of the folders. If no
image appears after a few minutes, some of the
files included may be too large.
• Some JPEG files, especially progressive JPEG
files or JPEG files of 3,000,000 pixels or more,
may take longer to display than others.
• The player cannot play the JPEG image file that is
larger than 3078 (width) x 2048 (height) in
normal mode, or more than 3,300,000 pixels in
progressive JPEG. (Some progressive JPEG files
cannot be displayed even if the size is within this
specified capacity.)
• The total albums and files the player can
recognize is about 648.
• The number of albums in a disc the player can
recognize is about 299.
To pause slideshow
Press X. By pressing X again or H, you can
return to slideshow.
To stop slideshow
Press x or MENU.
GB
27
Page 28
Adjusting the Picture
Size and Quality
You can adjust the picture displayed on the
LCD screen. See “General Setup” (page 33),
when outputting the video signal to TV, etc.
123
456
7809
C/X/x/c
ENTER
OPTIONS
1 Press OPTIONS.
The Option Menu appears.
2 Press X/x to select “LCD Mode”
and press ENTER.
The items for “LCD Mode” appear.
sides. In “Full,” a 16:9 picture will be adjusted to
fill the entire screen.
To turn off the Option Menu
Press OPTIONS or O RETURN.
z Hints
• The screen turns off automatically when the LCD
panel is closed.
• You can see the settings for the display in
“General Setup” (page 33).
Note
Depending on the disc, the screen size you can
select differs.
3 Press X/x to select items and
press ENTER.
• LCD Aspect: Change the picture size.
Select “Normal” or “Full” by pressing
x
*.
• Backlight: Adjust the brightness of the
/
LCD screen by pressing C
• Contrast: Adjust the difference between
light and dark areas by pressing C
• Hue: Adjust the red and green colour
balance by pressing C
• Color: Adjust the richness of colours by
pressing C
• Default: Returns all settings to the
factory defaults.
* In “Normal,” the pictures are displayed in the
original configuration, retaining the aspect ratio.
For example, a 4:3 picture will have black bands
on both sides, and the letterbox pictures recorded
either in 16:9 or 4:3 will have black bands on all
GB
28
/
c.
c.
/
/
c.
c.
X
/
Page 29
Enjoying DivX® Videos
Playing DivX Video Files
You can play DivX video files on DATA CDs
(CD-ROMs/CD-Rs/CD-RWs) and DATA
DVDs (DVD-ROMs/DVD+RWs/DVD+Rs/
DVD-RWs/DVD-Rs).
When you insert DATA CDs and DATA
DVDs, the list of albums appears.
DISPLAY
C/X/x/c
ENTER
.
Notes
• When the selected file is not supported, “Data
Error (DivX)” displays on the screen and the file
will not be played.
• Depending on the DivX video file, the picture
may pause or be unclear. In which case, it is
recommended that you create the file at a lower
bit rate. If the sound is still noisy, MP3 is the
recommended audio format. Note, however, this
player does not conform to WMA (Windows
Media Audio) format.
• Because of the compression technology used for
DivX video files, it may take some time after you
press H (play) for the picture to appear.
• Depending on the DivX video file, the sound may
not match the pictures on the screen.
• The player’s speaker does not output DTS sound.
When you play DTS sound tracks on a DivX
video file, connect the player to an AV amplifier
(receiver) (page 39) and set up “DTS” in “Audio
Setup” (page 35).
• Depending on the DivX video file, you may not be
able to perform some operations.
m
123
456
7809
AUDIO
SUBTITLE
>
M
x
Playing a DivX video file
1 Press X/x to select an album on the
list, and press ENTER.
A list of files in the album appears.
Dir:001
MY FAVORITE
. .
01 HAWAII
02 VENUS
• To go to the next or previous page,
press > or ..
• To return to the list of albums, press X/
x to select and press ENTER.
2 Press X/x to select the file you want to
play, and press ENTER.
Playback starts from the selected file.
To go to the next or previous DivX video
file
Press > or ..
To locate a point quickly by playing DivX
video files in fast forward or fast reverse
(Scan)
Press M/m repeatedly to select the
required speed for the search mode during
playback.
To watch frame by frame (Slow Play)
Press M repeatedly in pause mode to select
the required slow motion speed.
To display the playback information
Press DISPLAY repeatedly.
The playback information changes as follow
order, “Title Elapsed,” “Title Remain,”
“Display Off,” and “Subtitle.”
To change the sound
Press AUDIO repeatedly during playback to
select the desired audio signal. If “No Audio”
appears, the player does not support the audio
signal format contained in the disc.
Enjoying DivX
®
Videos
,continued
29
GB
Page 30

To change the subtitles
Press SUBTITLE during playback.
Press X/x, and ENTER during displaying the
subtitle information.
To stop playback
Press x.
z Hint
If the number of viewing times is preset, you can
play the DivX video files as many times as the
preset number. The following occurrences are
counted:
– when the player is turned off. This includes when
the player is automatically turned off by the Auto
Power Off function. Press X instead of x to stop
viewing.
– when the disc lid is opened.
– when another file is played.
Note
The slow reverse function is prohibited.
About DivX Video Files
DivX® is a video file compression
technology, developed by DivX, Inc. This
product is an official DivX
product.
You can play DATA CDs and DATA DVDs
that contain DivX video files.
DATA CDs and DATA DVDs that
the player can play
This player only plays DATA CDs whose
logical format is ISO 9660 Level 1 or Joliet,
and DATA DVDs of Universal Disk Format
(UDF).
Refer to the instructions supplied with the
disc drives and the recording software (not
supplied) for details on the recording format.
Note
The player may not be able to play some DATA
CDs/DATA DVDs created in the Packet Write
format or multiple sessions.
DivX video files that the player
can play
The player can play data that is recorded in
DivX format, and which has the extension
“.AVI,” or “.DIVX.” The player will not play
files with the extension “.AVI” or “.DIVX” if
they do not contain a DivX video.
®
Certified
30
Notes
• The player may not play a DivX video file when
the file consists of two or more DivX video files
combined.
• The player cannot play a DivX video file of size
more than 720 (width) × 576 (height)/2 GB.
• Depending on the DivX video file, the picture
may be unclear or the sound may skip.
• The pla yer cannot play some DivX video files that
are longer than 3 hours.
• The player can display a file name up to 14
characters. Any character s after the 14th character
do not appear on the screen.
• Characters that are not displayable appear as “*.”
• Depending on the disc, a file name that is not
displayable appears as “*.”
• You cannot display correctly the CD-R/CD-RW
file names written in the UDF file system.
GB
Page 31

About playback order of DivX
video files
Note that the playback order may not be
applicable, depending on the software used
for creating the DivX video file, or if there are
more than 299 albums and 648 DivX video
files in each album. See “About playback
order of albums, tracks, and files” (page 44).
Enjoying DivX
®
Videos
31
GB
Page 32

Settings and Adjustments
Using the Setup Display
By using the Setup Display, you can make
various adjustments to items such as picture
and sound. You can also set a language for the
subtitles and the Setup Display, among other
things.
For details on each Setup Display item, see
pages from 33 to 37.
Note
Playback settings stored in the disc take priority
over the Setup Display settings, and not all of the
functions described may work.
3 Press X/x to select the desired
Setup item from: “General
Setup,” “Audio Setup,”
“Language Setup,” or “Parental
Control,” then press ENTER.
The Setup item is selected.
Example: “General Setup”
Selected item
General Setup
TV Display
Angle Mark
Screen Saver
PBC
DivX
Default
Select: Cancel:
ENTER RETURN
Setup items
16 : 9
On
On
On
123
456
7809
C/X/x/c
ENTER
OPTIONSO
x
1 Press OPTIONS when the player is
in stop mode.
The Option Menu appears.
The Setup Display does not appear if
Resume Play is activated. Cancel the
Resume Play status first by pressing x
twice, and the press OPTIONS.
2 Press X/x to select “Setup,” then
press ENTER.
The items for “Setup” appear.
General Setup
TV Display
Angle Mark
Screen Saver
PBC
DivX
Default
Select: Cancel:
ENTER RETURN
16 : 9
On
On
On
4 Press X/x to select an item, then
press ENTER.
The settings for the selected item appear.
Example: “TV Display”
General Setup
TV Display
Angle Mark
Screen Saver
PBC
DivX
Default
Select: Cancel:
ENTER RETURN
4 : 3 Pan Scan
4 : 3 Letter Box
16 : 9
On
Settings
5 Press X/x to select a setting, then
press ENTER.
The setting is selected and setup is
complete.
Example: “4:3 Pan Scan”
Selected setting
General Setup
TV Display
Angle Mark
Screen Saver
PBC
DivX
Default
Select: Cancel:
ENTER RETURN
4 : 3 Pan Scan
On
On
On
32
GB
Page 33

To turn off the Setup Display
Press OPTIONS or O RETURN twice.
Settings for the Display
(General Setup)
Choose playback display options and settings
according to the TV to be connected.
Select “General Setup” in the Setup Display.
To use the display, see “Using the Setup
Display” (page 32).
The default settings are underlined.
General Setup
TV Display
Angle Mark
Screen Saver
PBC
DivX
Default
ENTER RETURN
Select: Cancel:
◆ TV Display (DVD only)
Selects the aspect ratio of the connected TV
(4:3 standard or wide).
4:3
Pan Scan
Select this when you connect a
4:3 screen TV. Automatically
displays a wide picture on the
entire screen and cuts off the
portions that do not fit.
4:3
Letter Box
Select this when you connect a
4:3 screen TV. Displays a wide
picture with bands on the upper
and lower portions of the
screen.
16:9
Select this when you connect a
wide-screen TV or a TV with a
wide mode function.
16 : 9
On
On
On
Settings and Adjustments
4:3 Pan Scan
4:3 Letter Box
16:9
,continued
33
GB
Page 34

Note
Depending on the DVD, “4:3 Letter Box” may be
selected automatically instead of “4:3 Pan Scan” or
vice versa.
◆ Angle Mark
Displays the angle mark when you can change the
viewing angles during playback of DVDs recorded
with multi-angles.
On Display the angle mark.
Off Hide the angle mark.
◆ Screen Saver
The screen saver image appears when you
leave the player in pause or stop mode for 15
minutes. The screen saver will help prevent
your display device from becoming damaged
(ghosting). Press H to turn off the screen
saver.
On
Off Deactivates the screen saver
Activates the screen saver
function.
function.
◆ PBC
By using the PBC (Playback Control)
function, you can enjoy playing interactive
programmes and programmes with search
functions (page 20). This set up is effective
when you play back VIDEO CDs with the
PBC function. Set up becomes available by
opening and closing the disc lid after setting.
On
Off Turn off the PBC function.
By the PBC function, you can
play back VIDEO CDs via the
menu screen.
Settings for the Sound
(Audio Setup)
“Audio Setup” allows you to set the sound
according to the playback and connection
conditions.
Select “Audio Setup” in the Setup Display.
To use the display, see “Using the Setup
Display” (page 32).
The default settings are underlined.
Audio Setup
Audio DRC
Digital Output
ENTER RETURN
Select: Cancel:
◆ Audio DRC (Dynamic Range Control)
(DVD only)
Makes the sound clear when the volume is
turned down when playing a DVD that
conforms to “Audio DRC.”
This function affects the output from the
following jacks:
– AUDIO jack
– OPTICAL OUT jack only when “Dolby
Digital” is set to “Downmix PCM” (page
35).
Standard Normally, select this position.
TV Mode
Wide Range Gives you the feeling of being
Makes low sounds clear even if
you turn the volume down.
at a live performance.
TV Mode
Off
◆ DivX
Displays the registration code for this player.
For more information, go to
http://www.divx.com
on the Internet.
◆ Default
Each function returns to its original factory
settings. Note that all of your settings will be
lost.
GB
34
◆ Digital Output
Selects if audio signals are output via the
OPTICAL OUT jack.
On Normally select this position.
Off
When you select “On,” see
“Setting the digital output signal”
for further settings.
The influence of the digital circuit
upon the analog circuit is
minimal.
Page 35

Setting the digital output signal
Switches the method of outputting audio
signals when you connect an audio equipment
such as an AV amplifier (receiver) with the
OPTICAL OUT jack.
For connection details, see page 38.
After setting “Digital Output” to “On,” select
“Dolby Digital” and “DTS.”
If you connect a component that is
incompatible with the selected audio signal, a
loud noise (or no sound) may be heard from
the speakers, damaging your ears or speakers.
◆ Dolby Digital (DVD only)
Selects the type of Dolby Digital signal.
Downmix
PCM
Dolby Digital Select this when the player is
◆ MPEG (DVD only)
Selects the type of MPEG audio signal.
PCM
MPEG Select this when the player is
◆ DTS
Selects whether or not to output DTS signals.
On Select this when the player is
Off
Select this when the player is
connected to an audio
component without a built-in
Dolby Digital decoder.
connected to an audio
component with a built-in
Dolby Digital decoder.
Select this when the player is
connected to an audio
component without a built-in
MPEG decoder. If you play
multi-channel MPEG audio
sound tracks, only the Front (L)
and Front (R) signals will be
output from your two front
speakers.
connected to an audio
component with a built-in
MPEG decoder.
connected to an audio
component with a built-in DTS
decoder.
Select this when the player is
connected to an audio
component without a built-in
DTS decoder.
Setting the Display or
Sound Track Language
(Language Setup)
“Language Setup” allows you to set various
languages for the on-screen display or sound
track.
Select “Language Setup” in the Setup
Display. To use the display, see “Using the
Setup Display” (page 32).
Language Setup
OSD
Disc Menu
Subtitle
Audio
ENTER RETURN
Select: Cancel:
◆ OSD (On-Screen Display)
Switches the display language on the screen.
◆ Disc Menu (DVD VIDEO only)
Switches the language for the disc’s menu.
When you select “Original,” the language
given priority in the disc is selected.
◆ Subtitle (DVD VIDEO only)
Switches the subtitle language.
When you select “Off,” no subtitle is
displayed.
◆ Audio (DVD VIDEO only)
Switches the language of the sound track.
When you select “Original,” the language
given priority in the disc is selected.
Note
If you select a language in “Disc Menu,” “Subtitle,”
or “Audio” that is not recorded on the DVD
VIDEO, one of the recorded languages will be
automatically selected.
English
English
English
English
Settings and Adjustments
35
GB
Page 36

Parental Control
Settings (Parental Control)
Playback of some DVD VIDEOs can be
limited, by the parental control function.
Select “Parental Control” in the Setup
Display. To use the display, see “Using the
Setup Display” (page 32).
Parental Control
Password
Parental Control
ENTER RETURN
Select: Cancel:
Changing the password
1 Press X/x to select “Password” in the
Parental Control setting display, and
press ENTER.
2 Select “Change,” and press ENTER.
The display for entering the password
appears.
3 Enter your current 6-digit password in
the “Old Password” box.
4 Enter your new 6-digit password in the
“New Password” box.
5 Enter your new 6-digit password once
again in the “Verify Password” box,
then press ENTER to confirm.
◆ Password
Enter or change a password. By setting a
password, you can limit playback of a DVD
that has the parental control function. When
the Password option is first accessed, enter a
new password (you do not need to enter the
old password.).
◆ Parental Control
The lower the setting value, the stricter the
limitation.
To set the parental control, you need the
selected password in “Password,” therefore
first set the password in the set up.
If you make a mistake entering your
password
Press CLEAR, or press C to return one by one
before pressing ENTER in step 5, and then reenter the password.
Setting the parental control
(limited playback)
1 Press X/x to select “Parental Control”
in the Parental Control setting display,
and press ENTER.
The display for setting the playback
limitation level appears.
Parental Control
Password
Parental Control
Select: Cancel:
ENTER RETURN
1
2
3
4
5
6
7
8 Adult
36
GB
Page 37

2 Press X/x to select the limitation level
(1-8), and press ENTER.
The lower the value, the stricter the
limitation.
The display for entering the password
appears.
Parental Control
Password
OK
Enter password, then press .
ENTER
3 Enter or re-enter your 6-digit password
using the number buttons, then press
ENTER.
Parental Control setting is complete.
To play a disc for which Parental Control is
set
1 Insert the disc and press H.
The display for entering your password
appears.
2 Enter your 6-digit password using the
number buttons, then press ENTER.
The player starts playback.
Settings and Adjustments
If you forget your password
Remove the disc and repeat the steps outlined in
“Changing the password” (page 36). Enter
“136900” in the “Old Password” bo x, and then enter
your new 6-digit password in the “New Password”
box and “Verify Password” box.
Notes
• When you play discs which do not have the
Parental Control function, playback cannot be
limited on this player.
• Depending on the disc, you may be asked to
change the parental control level while playing
the disc. In this case, enter your password, then
change the level. If the Resume Play mode is
cancelled, the level returns to the previous level.
37
GB
Page 38

Hookups
Connecting to another device
To switch LINE SELECT (IN/OUT) switch
LINE SELECT IN: Input images or audio from an exterior device. The “Line in” message will
be displayed on the LCD screen until the signal from the exterior device
is received.
LINE SELECT OUT:Sends the playback signal from this player to a TV.
Notes
• Plug cords securely to prevent noise.
• Refer to the instructions supplied with the components to be connected.
• You cannot connect this player to a TV that does not have a video input jack.
• Be sure to disconnect the mains lead of each component before connecting.
• Connect the player to the TV directly. Image quality may suffer when the video output from the player is
passed through a video deck on to a TV.
Connecting to TV monitor
TV or monitor with audio/
video input jacks
PHONES
AB
AUDIO VIDEO
OPTICAL
OUT
LINE SELECT
IN OUT
DC IN
9.5V
To AUDIO/VIDEO
Audio/video cord (supplied)
To send the playback signal to a TV or a monitor
1 Set the LINE SELECT switch on the player’s right side to “OUT.”
GB
38
Page 39

Connecting to an AV amplifier (receiver)
Example 1
Stereo amplifier
PHONES
AB
AUDIO VIDEO
OPTICAL
OUT
LINE SELECT
IN OUT
DC IN
9.5V
To AUDIO
Audio/video cord (supplied)
To send analog audio signal to an AV amplifier (receiver)
1 Set the LINE SELECT switch on the player’s right side to “OUT.”
* The yellow plug is used for video signals (page 38).
Example 2
Amplifier with Dolby Digital
or DTS decoder
PHONES
AB
AUDIO VIDEO
OPTICAL
OUT
LINE SELECT
To OPTICAL OUT
IN OUT
DC IN
9.5V
To AUDIO input
Hookups
To AUDIO input
Optical digital cord (not supplied)
To send digital audio signal to an AV amplifier (receiver)
1 Set the LINE SELECT switch on the player’s right side to “OUT.”
2 Set “Digital Output” to “On” in “Audio Setup” (page 34).
39
GB
Page 40

Connecting to Video Player or Camcorder
Video player or camcorder
PHONES
AB
AUDIO VIDEO
OPTICAL
OUT
LINE SELECT
IN OUT
DC IN
9.5V
To AUDIO/VIDEO output
To AUDIO/VIDEO
Audio/video cord (supplied)
To receive the playback signal from a Video Player or Camcorder
1 Set the LINE SELECT switch on the player’s right side to “IN.”
Note
Set the LINE SELECT switch to “OUT” after use. You cannot play back on the player if the switch is set to
“IN.”
40
GB
Page 41

Additional Information
Troubleshooting
The picture does not fill the screen, even
though the aspect ratio is set in “TV
Display” under “General Setup.”
, The aspect ratio of the disc is fixed on your
DVD.
If you experience any of the following
difficulties while using the player, use this
troubleshooting guide to help remedy the
problem before requesting repairs. Should
any problem persist, consult your nearest
Sony dealer.
Power
The power is not turned on.
, Check that the mains lead is connected
securely.
, When using with the battery pack, check
that the battery pack is sufficiently charged.
Picture
There is no picture/picture noise appears.
, The disc is dirty or flawed.
, The brightness is set at minimum. Set the
brightness in “LCD Mode” (page 28).
, When you play discs, set the LINE SELECT
switch to “OUT.” When you send the
playback signal to other device, set the
LINE SELECT switch to “OUT.” When
you receive the playback signal from other
device, set the LINE SELECT switch to
“IN” (page 38
, Re-connect the connecting cord securely.
, The connecting cords are damaged.
, Check the connection to your TV (page 38)
and switch the input selector on your TV so
that the signal from the player appears on
the TV screen.
, The player is connected to the
COMPONENT VIDEO IN (Y, P
of high-vision TV.
, If the picture output from your player goes
through your video deck to get to your TV
or if you are connected to a combination
TV/VIDEO player, the copy-protection
signal applied to some DVD programmes
could affect picture quality.
).
B, PR) jacks
The black points appear and the red, blue,
green points remain on the LCD.
, This is a structural property of the LCD and
not mulfunction.
Sound
There is no sound.
, The player is in pause mode or in Slow Play
mode.
, The player is in fast forward or fast reverse
mode.
, While playing a Super VCD on which the
audio track 2 is not recorded, no sound will
come out when you select “Stereo 1,” “Left
1,” or “Right 1.”
, Re-connect the connecting cord securely.
, The connecting cord is damaged.
, The player is connected to the wrong input
jack on the amplifier (receiver) (page 39).
, The amplifier (receiver) input is not
correctly set.
, If the audio signal does not come through
the OPTICAL OUT jack, check the audio
settings (page 35).
The sound volume is low.
, The sound volume is low on some DVDs.
The sound volume may improve if you set
“Audio DRC” in “Audio Setup” to “TV
Mode” (page 34).
Operation
The remote does not function.
, The batteries in the remote are weak.
, There are obstacles between the remote and
the player.
, The distance between the remote and the
player is too far.
, The remote is not pointed at the remote
sensor on the player.
, Direct sunlight or strong illumination is
striking the remote sensor.
Additional Information
,continued
41
GB
Page 42

Nothing happens when buttons are
pressed.
,
The player’s \/1/HOLD switch is set on
“HOLD” (page 16).
The disc does not play.
, The disc is turned over.
Insert the disc with the playback side facing
down.
, The disc is not set correctly.
, The player cannot play certain discs
(page 7).
, The region code on the DVD does not match
the player
, Moisture has condensed inside the player
page 3).
(
, The player cannot play a recorded disc that
is not correctly finalized
, Parental Control has been set. Change the
setting.
, The LINE SELECT switch on the player’s
right side is set to “IN.”
(
page 8).
(
page 7).
The player starts playing the disc
automatically.
, The disc features an auto playback function.
Playback stops automatically.
, While playing discs with an auto pause
signal, the player stops playback at the auto
pause signal.
Some functions such as Stop, Search,
Scan, Slow Play, Repeat Play, or Random
Play cannot be performed.
, Depending on the disc, you may not be able
to do some of the operations above. Refer to
the operating instructions supplied with the
disc.
The subtitle language cannot be changed
or turned off.
, Try using the DVD’s menu instead of the
direct selection button on the remote
(page 17).
, Multilingual subtitles are not recorded on
the DVD being played.
, The DVD prohibits the changing of
subtitles.
The angles cannot be changed.
, Try using the DVD’s menu instead of the
direct selection button on the remote
(page 17).
, Multi-angles are not recorded on the DVD
being played.
, The angle can only be changed when the
“ ” indicator lights up on the screen
(page 19).
, The DVD prohibits changing of the angles.
The MP3 audio track cannot be played
(page 43).
, The DATA CD is not recorded in an MP3
format that conforms to ISO 9660 Level 1 or
Joliet.
, The DATA DVD is not recorded in MP3
format that conforms to UDF (Universal
Disk Format).
, The MP3 audio track does not have the
extension “.MP3.”
, The data is not formatted in MP3 even
though it has the extension “.MP3.”
, The data is not MPEG-1 Audio Layer III
data.
, The player cannot play audio tracks in
mp3PRO format.
, The MP3 audio track is damaged.
The language for the sound track cannot
be changed.
, Try using the DVD’s menu instead of the
direct selection button on the remote
(page 17).
, Multilingual tracks are not recorded on the
DVD being played.
, The DVD prohibits the changing of the
language for the sound track.
GB
42
Page 43

The JPEG image file cannot be played
(page 43).
, The DATA CD is not recorded in a JPEG
format that conforms to ISO 9660 Level 1 or
Joliet.
, The DATA DVD is not recorded in JPEG
format that conforms to UDF (Universal
Disk Format).
, The JPEG image file does not have the
extension “.JPG.”
, The data is not formatted in JPEG even
though it has the extension “.JPG.”
, The JPEG image file format does not
conform to DCF (page 43).
, The image is larger than 3078 (width) ×
2048 (height) in normal mode, or more than
3,300,000 pixels in progressive JPEG.
(Some progressive JPEG files cannot be
displayed even if the file size is within this
specified capacity.)
, The JPEG image file is damaged.
The DivX video file cannot be played.
, The file is not created in DivX format.
, The file has an extension other than “.AVI”
or “.DIVX.”
, The DATA CD (DivX video)/DATA DVD
(DivX video) is not created in a DivX
format that conforms to ISO 9660 Level 1 or
Joliet/UDF.
, The DivX video file is larger than 720
(width) × 576 (height).
The album/track/file names are not
displayed correctly.
, The player can only display numbers and
alphabet. Other characters are displayed as
“*.”
The disc does not start playing from the
beginning.
, Repeat Play or Random Play is selected
(pages 22 and 24).
, Resume play has taken effect (page 17).
The player does not operate properly.
, When static electricity, etc., causes the
player to operate abnormally, unplug the
player.
About MP3 Audio Tracks
and JPEG Image Files
MP3 is audio compression technology that
satisfies the ISO/IEC MPEG regulations.
JPEG is image compression technology.
You can play DATA CDs/DATA DVDs that
contain MP3 audio tracks or JPEG image
files.
DATA CDs/DATA DVDs that the
player can play
You can play back DATA CDs (CD-ROMs/
CD-Rs/CD-RWs) or DATA DVDs (DVDROMs/DVD+RWs/DVD+Rs/DVD-RWs/
DVD-Rs) recorded in MP3 (MPEG-1 Audio
Layer III) and JPEG format.
However, this player only plays DATA CDs
whose logical format is ISO 9660 Level 1 or
Joliet, and DATA DVDs of Universal Disk
Format (UDF).
Refer to the instructions supplied with the
disc drives and the recording software (not
supplied) for details on the recording format.
Note
The player may not be able to play some DATA
CDs/DATA DVDs created in the Packet Write
format or multiple sessions.
MP3 audio track or JPEG image
file that the player can play
The player can play the following tracks and
files:
• MP3 audio tracks with the extension
“.MP3.”
• JPEG image files with the extension
“.JPG.”
• JPEG image files that conform to the DCF*
image file format.
* “Design rule for Camera File system”: Image
standards for digital cameras regulated by JEITA
(Japan Electronics and Information Technology
Industries Association).
Additional Information
,continued
43
GB
Page 44

Notes
• Change the extension to “.JPG,” for files with
“.JPE” or “.JPEG” extension.
• The player will play any data with the extension
“.MP3” or “.JPG,” even if they are not in MP3 or
JPEG format. Playing this data may generate a
loud noise which could damage your speaker
system.
• The player does not conform to audio tracks in
mp3PRO format.
• Some JPEG files cannot be played.
• The player can display a file or track name up to
14 characters. Any characters after the 14th
character do not appear on the screen.
• Characters that are not displayable appear as “*.”
• Depending on the disc, a file or track name that is
not displayable appears as “*.”
• You cannot display correctly the CD-R/CD-RW
file names written in the UDF file system.
• When playing an MP3 audio track recorded in
VBR mode, you cannot display the bit rate
correctly.
About playback order of albums,
tracks, and files
Tracks and files within an album play in the
order of the recorded media (CD-R etc.).
z Hint
Since a disc with many trees takes longer to start
playback, it is recommended that you create albums
with no more than two trees.
Notes About the Discs
• To keep the disc clean, handle the disc by its
edge. Do not touch the surface.
• Do not expose the disc to direct sunlight or
heat sources such as hot air ducts, or leave it
in a car parked in direct sunlight as the
temperature may rise considerably inside
the car.
• After playing, store the disc in its case.
• Clean the disc with a cleaning cloth. Wipe
the disc from the centre out.
Notes
• The player can recognize up to 299 albums
(including albums that do not contain MP3 audio
tracks and JPEG image files). The player will not
play any albums beyond the 299th album.
• The player can recognize a combined total of up
to 648 files, tracks, and albums. The player will
not play beyond the 648th file, track or album.
• Depending on the writing condition of the disc,
the total number of files, tracks, and albums
recognizable may be fewer than 648.
• The Album List displays only the currently
playing album name. Any album located on the
upper layer is displayed as “\..\.”
GB
44
• Do not use solvents such as benzine,
thinner, disc/lens cleaners, or anti-static
spray intended for vinyl LPs.
• If you have printed the disc’s label, dry the
label before playing.
Page 45

Specifications
System
Laser: Semiconductor laser
Signal format system: PAL (NTSC)
Audio characteristics
Frequency response: DVD VIDEO (PCM
48 kHz): 20 Hz to 22 kHz/
CD: 20 Hz to 20 kHz
Harmonic distortion: 0.01 %
Dynamic range: DVD VIDEO: 90 dB/
CD: 90 dB
Wow and flutter: Less than detected value
(±0.001% W PEAK)
Inputs/Outputs
VIDEO (video input/output):
Minijack (1)
Output 1.0 Vp-p/75 ohms
AUDIO (audio input/output)/OPTICAL
OUT (optical output):
Stereo minijack/optical minijack
combined (1)
Output 2.0 Vrms/47 kilohms
Recommended load impedance over
47 kilohms
PHONES (headphones) A/B:
Stereo minijack (2)
Liquid Crystal Display
Panel size: 8 inches wide (diagonal)
Driving system: TFT active matrix
Resolution: 800 × 480 (effective pixel rate:
more than 99.99%)
General
Power requirements:
DC 9.5 V (AC Adaptor/Car battery
adaptor)
DC 7.4 V (Battery pack)
Power consumption (DVD VIDEO
Playback):
23 W (when used with a battery pack)
8.5 W (when used without a battery pack,
with a headphone)
Dimensions (approx.):
225.4 × 33.5 × 164.9 mm (width/height/
depth) incl. projecting parts
Mass (approx.): 920 g
Operating temperature: 5 °C to 35 °C
Operating humidity: 25 % to 80 %
AC Adaptor: 100-240 V AC, 50/60 Hz
Car Battery Adaptor: 12 V DC
Supplied accessories
See page 9.
Specifications and design are subject to
change without notice.
Additional Information
45
GB
Page 46

Index to Parts and Controls
For more information, see the pages indicated in parentheses.
Upper view
t
VOL
A VOL (sound volume) –/+ button*
B ./> (previous/next) buttons (16)
C x (stop) button (16)
D X (pause) button (16)
E H (play) button (15)*
F Speaker (16)
G LCD panel (10)
H DISPLAY button (21)
DISPLAY MENU RETURN OPTIONS
PUSH CLOSE
OPEN
I MENU button (17)
J RETURN button (21)
K (remote sensor) (9)
L OPTIONS button (28)
M C/X/x/c buttons, ENTER button (17)
N Disc lid (15)
O PUSH CLOSE (15)
P OPEN button (15)
* Use the tactile dot as a reference when operating
the player. The H (play) and VOL + buttons
have a tactile dot.
46
GB
Page 47

Front view
CHARGEPOWER
A POWER indicator (15)
B CHARGE indicator (13)
Right view
HOLD
A \/1 (on/standby)/HOLD switch (15)
B PHONES (headphone) jack A, B
C AUDIO (input/output) jack/OPTICAL
OUT (optical output) jack (38, 39)
PHONES
AB
AUDIO VIDEO
OPTICAL
OUT
C (remote sensor) (9)
LINE SELECT
IN OUT
DC IN
9.5V
D VIDEO (input/output) jack (38)
E LINE SELECT (IN/OUT) switch (15)
F DC IN 9.5V (AC adaptor input) jack
(11)
Additional Information
,continued
47
GB
Page 48

Remote
123
456
7809
A DISPLAY button (21)
B Number buttons (17)
*
C TOP MENU button (17)
D C/X/x/c buttons, ENTER button (17)
E O RETURN button (21)
F ./> PREV (previous)/NEXT
buttons (16)
G m/M (scan/slow) buttons (23)
H ADVANCE button (16)
I X PAUSE button (16)
J \/1 (on/standby) button (15)
K VOL (sound volume) +/– buttons
L CLEAR button (36)
M AUDIO button (18)
*
N MENU button (17)
O SUBTITLE button (19)
P ANGLE button (19)
Q OPTIONS button (28)
R H PLAY button (15)
*
S x STOP button (16)
48
* Use the tactile dot as a reference when operating
the player. The number 5 button has a tactile dot.
GB
Page 49

Index
Numerics
16:9
33
4:3 Letter Box
4:3 Pan Scan
33
A
Album
44
Angle
19
Audio
18, 35
Audio DRC
Audio Setup
34
34
B
Batteries
9
C
CD
7, 15
Connecting
38
D
DATA CD
DATA DVD
Digital output
Disc Menu
Display
DivX
Dolby Digital
DTS
DVD
DVD+RW
DVD’s menu
DVD-RW
21, 33
®
29, 30
18, 35
7, 15
7, 20
7, 30, 43
7, 30, 43
34
35
18, 35
7
17
F
Fast forward
Fast reverse
23
23
G
General Setup
33
H
Handling discs
J
JPEG
6, 43
L
Language Setup
M
MP3
6, 43
33
44
35
O
OPTICAL OUT
Original
OSD (On-Screen Display)
34
20
P
PBC Playback
Play List
20
20
R
Random Play
Remote
Repeat Play
Resume Play
24
9, 48
22, 24
17
S
Scan
23
Screen Saver
Search
Setup
Slide Show
Slow Play
Subtitle
34
23
32
27
24
19, 35
T
Top Menu
Troubleshooting
TV Display
17
41
33
U
Usable discs
7
V
VIDEO CD
7, 8, 15
35
Additional Information
49
GB
Page 50

AVERTISSEMENT
Pour réduire les risques
d'incendie ou
d'électrocution, n'exposez
pas cet appareil à la pluie ou
à l'humidité.
Pour prévenir les risques
d'électrocution, ne pas ouvrir
le boîtier. Confier la
réparation de l'appareil à un
technicien qualifié
uniquement.
Le cordon d'alimentation doit
être remplacé uniquement
dans un centre de service
après-vente agréé.
N'exposez pas des batteries
ou des appareils où sont
installées des batteries à une
chaleur excessive telle que
rayons directs du soleil, feu,
etc.
Cette étiquette se trouve sur le bas
de l’appareil.
Cet appareil entre dans la catégorie
des produits LASER de CLASSE
1. L’ETIQUETTE INDIQUANT
L’APPARTENANCE DE CE
LECTEUR A LA CLASSE 1 se
trouve sur le bas de l’appareil.
ATTENTION
• L’utilisation d’instruments
optiques avec cet appareil
augmente les risques de lésions
aux yeux. Ne tentez pas de
démonter le boîtier, car le
faisceau laser utilisé par ce
lecteur CD/DVD pourrait être
dangereux pour vos yeux.
Pour l’entretien, adressez-vous à
un personnel qualifié
uniquement.
• Il existe un danger d’explosion si
la batterie est remplacée de
manière incorrecte. Remplacer
uniquement par le même type ou
équivalent.
Traitement des appareils
électriques et électroniques en fin
de vie (Applicable dans les pays de
l'Union Européenne et aux autres
pays européens disposant de
systèmes de collecte sélective)
Ce symbole, apposé sur le produit
ou sur son emballage, indique que
ce produit ne doit pas être traité
avec les déchets ménagers. Il doit
être remis à un point de collecte
approprié pour le recyclage des
équipements électriques et
électroniques. En s'assurant que ce
produit est bien mis au rebut de
manière appropriée, vous aiderez à
prévenir les conséquences
négatives potentielles pour
l'environnement et la santé
humaine. Le recyclage des
matériaux aidera à préserver les
ressources naturelles. Pour toute
information supplémentaire au
sujet du recyclage de ce produit,
vous pouvez contacter votre
municipalité, votre déchetterie ou
le magasin où vous avez acheté le
produit.
Elimination des piles et
accumulateurs usagés (Applicable
dans les pays de l'Union
Européenne et aux autres pays
européens disposant de systèmes
de collecte sélective)
Ce symbole, apposé sur les piles et
accumulateurs ou sur les
emballages, indique que les piles et
accumulateurs fournis avec ce
produit ne doivent pas être traités
comme de simples déchets
ménagers. En vous assurant que
ces piles et accumulateurs sont mis
au rebus de façon appropriée, vous
participez activement à la
prévention des conséquences
négatives que leur mauvais
traitement pourrait provoquer sur
l'environnement et sur la santé
humaine. Le recyclage des
matériaux contribue par ailleurs à
la préservation des ressources
naturelles.
Pour les produits qui pour des
raisons de sécurité, de performance
ou d'intégrité de données
nécessitent une connexion
permanente à une pile ou à un
accumulateur, il conviendra de
vous rapprocher d'un service
technique qualifié pour effectuer
son remplacement. En rapportant
votre appareil électrique en fin de
vie à un point de collecte approprié
vous vous assurez que la pile ou
l'accumulateur incorporé sera
traitée correctement.
Pour tous les autres cas de figure et
afin d'enlever les piles ou
accumulateurs en toute sécurité de
votre appareil, reportez-vous au
manuel d'utilisation. Rapporter les
piles ou accumulateurs usagés au
point de collecte approprié pour le
recyclage.
Pour toute information
complémentaire au sujet du
recyclage de ce produit ou des piles
et accumulateurs, vous pouvez
contacter votre municipalité, votre
déchetterie locale ou le point de
vente où vous avez acheté ce
produit.
Précautions
• Installer ce système de façons à
ce que les prises principales
puissent être débranchées de la
prise murale immédiatement en
cas de problème.
• Le lecteur n’est pas déconnecté
des sources d’alimentation AC
(prises principales) tant qu’il
reste connecté à la prise murale,
cela même si le lecteur lui-même
est éteint.
• Pour éviter les risques d’incendie
et de chocs électriques, ne pas
placer d’objets remplis de
liquides, comme les vases sur
l’appareil.
Le fabricant de ce produit est
Sony Corporation, 1-7-1 Konan
Minato-ku Tokyo, 108-0075
Japon. Le représentant autorisé
pour les questions de
compatibilité électromagnétique
(EMC) et la sécurité des produits
est Sony Deutschland GmbH,
Hedelfinger Strasse 61, 70327
Stuttgart, Allemagne. Pour toute
question relative au SAV ou à la
garantie, merci de bien vouloir
vous référer aux coordonnées
contenues dans les documents
relatifs au SAV ou la garantie.
FR
2
Page 51

Précautions
Sécurité routière
N’utilisez pas le moniteur et le
casque lors de la conduite d’une
voiture, d’un vélo ou de tout
véhicule à moteur. Cela pourrait
créer un danger et constitue une
infraction dans certaines régions.
Il est également dangereux
d’utiliser un casque avec un
volume élevé lorsque vous
marchez, particulièrement sur les
passages piétons. Vous devriez
être très prudent ou interrompre
l’utilisation lors de situations
potentiellement dangereuses.
Sécurité
Si un objet ou du liquide pénètre à
l’intérieur du boîtier, débranchez le
lecteur et faites vérifier l’appareil
par un technicien qualifié avant de
le remettre en marche.
Alimentation
• Les conditions en alimentation
de cette unités sont indiquées
sous l’adaptateur AC. Assurezvous que le niveau de voltage
nécessaire à l’utilisation de
l’unité corresponde à celui de
votre alimentation électrique
locale.
• Débranchez votre lecteur de la
prise murale si vous prévoyez de
ne pas l’utiliser pendant une
période prolongée. Pour
débrancher le cordon
d’alimentation (CA), saisissez-le
au niveau de la fiche, ne tirez
jamais sur le cordon.
• Ne t ouchez pas au câble de sortie
au réseau électrique ou à
l’adaptateur avec les mains
mouillées. Ceci pourrait
provoquer un risque
d’électrocution.
Augmentation de
température
La chaleur pourrait s’accumuler
dans le lecteur durant le
chargement ou s'il est utilisé
pendant une période prolongée.
Cela ne constitue pas un
dysfonctionnement.
Installation
• Installez le lecteur dans un
endroit suffisamment ventilé
pour éviter toute surchauffe
interne.
• N’in stallez pas ce lecteur dans un
espace réduit comme une
bibliothèque ou un meuble
similaire.
• Ne pas couvrir les orifices de
ventilations du lecteur avec des
journaux, des napperons,
rideaux, etc. De même ne pas
placer le lecteur sur une surface
souple qui pourrait bloquer les
trous de ventilation comme par
exemple un tapis.
• Ne pas placer le lecteur à
proximité des sources de
chaleur,dans un endroit exposé
au soleil,à la poussière, au sable,
à l’humidité, à la pluie, aux
chocs mécaniques ou dans une
voiture dont les fenêtres sont
fermées.
• Ne pas placer le lecteur dans une
position inclinée. Cet appareil a
été conçu pour fonctionner en
position horizontale uniquement.
• Penser à maintenir le lecteur et
les disques loin d’équipements à
fort niveau magnétique comme
un four à micro-onde, ou encore
des haut-parleurs larges.
• Ne pas placer d’objets lourds sur
le lecteur.
Fonctionnement
• Si le lecteur est transporté sans
transition d’un lieu froid à un
endroit chaud ou s’il est installé
dans une pièce très humide, de la
condensation risque de se former
sur les lentilles situées à
l’intérieur du boîtier. Votre
lecteur risque alors de ne pas
fonctionner correctement. Dans
ce cas, retirez le disque et laissez
le lecteur sous tension pendant
environ trente minutes, jusqu’à
ce que l’humidité se soit
complètement évaporée.
• Veillez à garder la lentille du
lecteur propre et à ne pas la
toucher. Si vous touchez à la
lentille, cela pourrait
l’endommager et provoquer un
dysfonctionnement du lecteur.
Laissez le couvercle du lecteur
fermé, sauf lorsque vous insérez
ou enlevez un disque.
Ecran LCD
• Bien qu’il soit fabriqué à l’aide
d’une technologie de haute
précision, il est possible que
l’écran LCD affiche des points
de différentes couleurs à
l’occasion. Cela ne constitue pas
un dysfonctionnement.
• Ne pas nettoyer la surface de
l’écran LCD avec un chiffon
humide. Si de l’eau y pénètre, un
dysfonctionnement pourrait se
produire.
• Évitez de mettre ou faire tomber
un objet sur la surface de l'écran
LCD. N’appliquez pas non plus
de pression avec les mains ou les
coudes sur l’écran.
• Ne pas endommager la surface
de l’écran LCD avec un objet à
bord tranchant.
• Ne pas fermer le panneau du
LCD en laissant un stylo, etc...,
dans le plateau de disque.
• Si le lecteur est déplacé sans
transition depuis un lieu froid
vers un endroit chaud, de
l’humidité pourrait se condenser
sur la surface de l’écran LCD. Le
cas échéant, essuyez l’humidité
avec une serviette de papier, etc.,
avant de l’utiliser. L’humidité
provenant de la condensation
continuera cependant si la
surface de l’écran LCD est
froide. Attendez jusqu'à ce que la
surface se réchauffe à la
température de la pièce.
Adaptateur secteur
• Utilisez l'adaptateur secteur
fourni avec ce lecteur; les autres
adaptateurs pourraient entraîner
un fonctionnement incorrect.
• Le désassemblage ou
l’ingénierie inversée sont
interdit.
• Ne pas cogner sur l’appareil ou
le laisser tomber.
• Ne confinez pas l’adaptateur
secteur dans un espace réduit
comme une étagère ou une
armoire AV.
• Ne branchez pas l’adaptateur
secteur à un transformateur
électrique de voyage, cela
pouvant produire de la chaleur et
par là un dysfonctionnement.
Piles
• Certains pays imposent des
règles sur la décharge des piles
utilisées pour alimenter ce
produit. Veuillez consulter les
autorités locales.
• En raison de la durée de vie
limitée des piles, leur capacité se
réduit graduellement avec le
temps et les utilisations répétées.
Faites l'acquisition de nouvelles
piles lorsque celles-ci ne
fonctionnent plus qu’à moitié par
rapport à la durée normale.
• Il est possible que les piles ne se
chargent pas complètement
lorsqu'elles sont chargées pour la
première fois, ou lorsqu'elles
,Suite
FR
3
Page 52

n'ont pas été utilisées durant une
B
A
Face inférieure du disque
D
C
Piles
longue période. Cela reviendra à
la normale après plusieurs
chargements et déchargements.
• Ne laissez pas traîner les piles
dans la voiture ou directement au
soleil; lorsque la température est
supérieure à 60 °C.
• Ne pas exposer à l'eau.
• Évitez de court-circuiter les
connecteurs de la batterie (A) qui
se trouvent à la base du lecteur et
les connecteurs (C) sur la batterie
avec un objet de métal co mme un
collier.
• Assurez-vous qu’il n’y ait pas de
poussière ou de sable qui entre
dans les connecteurs de la
batterie (A) et les trous guides
(B) qui se trouvent à la base du
lecteur, et dans les connecteurs
(C) et les trous guides (D) de la
batterie.
Adaptateur auto
• Utilisez l'adaptateur auto fourni
avec ce lecteur ; les autres
adaptateurs pouvant causer un
disfonctionnement.
• Ne pas désassembler ou faire de
l’ingénierie inversée.
• Évitez les chutes et les chocs.
• Ne touchez pas aux parties
métalliques, car cela pourrait
produire un court-circuit et
endommager l’adaptateur auto;
plus particulièrement si le
contact est fait à l’aide d’autres
objets métalliques.
• Ne placez pas l’adaptateur auto à
proximité des sources de
chaleur,dans un endroit exposé
au soleil, aux chocs mécaniques
ou dans une voiture dont les
fenêtres sont fermées.
Réglage du volume
N’augmentez pas le volume
lorsque vous écoutez un passage
avec de très faibles niveaux
d’entrée ou sans signal audio. Vous
risqueriez d’endommager les
enceintes au moment d’un passage
à niveau sonore élevé.
Casques
• Prévention des dommages
auditifs
Evitez d’utiliser les casques à fort
volume. Les experts de l’audition
recommandent d’éviter des
lectures continues, bruyantes et
étendues. Si vous ressentez des
résonnements dans vos oreilles,
réduisez le volume ou arrêtez la
lecture.
• Respect des autres
Veillez maintenir le volume à un
niveau modéré. Ceci vous permet
de continuer à entendre les sons
externes et fait preuve de
courtoisie envers les autres.
Entretien
Nettoyez le boîtier, le panneau et
les commandes avec un chiffon
doux légèrement imprégné d’une
solution détergente neutre.
N’utilisez pas de tampons abrasifs,
de poudre à récurer ou de solvant
tel que l’alcool ou l’essence.
Á propos du nettoyage
des disques et des
nettoyants pour disque
ou pour lentille
N'utilisez pas de disque de
nettoyage ou de nettoyant pour
disque ou pour lentille (humide
ou en spray). Ils pourraient
provoquer des problèmes de
fonctionnement de l’appareil.
IMPORTANT
Attention : Ce lecteur est capable
de maintenir indéfiniment
l’affichage d’une image vidéo
fixe ou d’un menu sur l’écran de
votre téléviseur. En laissant une
image vidéo fixe ou un menu
écran affiché sur votre téléviseur
pendant une période prolongée,
vous risquez de provoquer des
dommages irréversibles à votre
écran. Les téléviseurs à écran à
plasma et les téléviseurs à
projection sont sensibles à ce
phénomène.
Pour toute question ou tout
problème concernant votre lecteur,
n’hésitez pas à consulter votre
revendeur Sony le plus proche.
FR
4
Page 53

Table des matières
AVERTISSEMENT . . . . . . . . . . . . . . . . . . . . . . . . . . . . . . . . . . . . . . . . . . . . . .2
Précautions . . . . . . . . . . . . . . . . . . . . . . . . . . . . . . . . . . . . . . . . . . . . . . . . . . . 3
A propos de ce Manuel . . . . . . . . . . . . . . . . . . . . . . . . . . . . . . . . . . . . . . . . . . 6
Le lecteur peut lire les disques suivants . . . . . . . . . . . . . . . . . . . . . . . . . . . . . 7
Préparations . . . . . . . . . . . . . . . . . . . . . . . . . . . . . . . . . . . . . . . .9
Vérifications des accessoires . . . . . . . . . . . . . . . . . . . . . . . . . . . . . . . . . . . . . .9
Utilisation de la télécommande . . . . . . . . . . . . . . . . . . . . . . . . . . . . . . . . . . . . 9
Utilisation du panneau LCD . . . . . . . . . . . . . . . . . . . . . . . . . . . . . . . . . . . . . .10
Connexion de l’adaptateur AC . . . . . . . . . . . . . . . . . . . . . . . . . . . . . . . . . . . .11
Utilisation du pack de piles . . . . . . . . . . . . . . . . . . . . . . . . . . . . . . . . . . . . . . .12
Utilisation d’un adaptateur piles auto . . . . . . . . . . . . . . . . . . . . . . . . . . . . . . .14
Lecture Disques . . . . . . . . . . . . . . . . . . . . . . . . . . . . . . . . . . . . 15
Lecture Disques . . . . . . . . . . . . . . . . . . . . . . . . . . . . . . . . . . . . . . . . . . . . . . 15
Utiliser l’affichage réglages lectures . . . . . . . . . . . . . . . . . . . . . . . . . . . . . . . 21
Recherche d’un moment particulier sur le disque (Lire, Balayage, Lecture
Ralenti, Lecture Répétée, lecture Aléatoire) . . . . . . . . . . . . . . . . . . . . . . 23
Lecture de pistes audio MP3 ou fichiers image JPEG . . . . . . . . . . . . . . . . . 25
Ajustement de la taille et de la qualité de l’image . . . . . . . . . . . . . . . . . . . . . 28
Apprécier des vidéos DivX® . . . . . . . . . . . . . . . . . . . . . . . . . . . . 29
Lecture de Fichiers Vidéo DivX . . . . . . . . . . . . . . . . . . . . . . . . . . . . . . . . . . 29
A propos des fichiers vidéos DivX. . . . . . . . . . . . . . . . . . . . . . . . . . . . . . . . . 30
Réglages et ajustements . . . . . . . . . . . . . . . . . . . . . . . . . . . . . . 32
Utiliser l’affichage réglages . . . . . . . . . . . . . . . . . . . . . . . . . . . . . . . . . . . . . . 32
Réglages pour l’affichage (Général) . . . . . . . . . . . . . . . . . . . . . . . . . . . . . . . 33
Réglages pour le Son (Reglage Audio). . . . . . . . . . . . . . . . . . . . . . . . . . . . . 34
Réglages pour la langue affichage ou piste sonore (Choix De La Langue) . 36
Réglages Contrôle Parental (Controle Parental). . . . . . . . . . . . . . . . . . . . . . 36
Ajouts . . . . . . . . . . . . . . . . . . . . . . . . . . . . . . . . . . . . . . . . . . . 38
Connexion à un autre appareil . . . . . . . . . . . . . . . . . . . . . . . . . . . . . . . . . . . .38
Informations supplémentaires . . . . . . . . . . . . . . . . . . . . . . . . . . . 41
Dépannage . . . . . . . . . . . . . . . . . . . . . . . . . . . . . . . . . . . . . . . . . . . . . . . . . . 41
A propos des Pistes Audio MP3 et Fichiers Image JPEG. . . . . . . . . . . . . . . 43
Notes à propos des disques . . . . . . . . . . . . . . . . . . . . . . . . . . . . . . . . . . . . . 44
Spécifications . . . . . . . . . . . . . . . . . . . . . . . . . . . . . . . . . . . . . . . . . . . . . . . . .45
Index des Parties et Contrôles . . . . . . . . . . . . . . . . . . . . . . . . . . . . . . . . . . . .46
Index . . . . . . . . . . . . . . . . . . . . . . . . . . . . . . . . . . . . . . . . . . . . . . . . . . . . . . .49
FR
5
Page 54

A propos de ce Manuel
• Les instructions de ce guide décrivent les commandes de la télécommande. Vous pouvez
également utiliser les commandes sur le lecteur si elles portent un nom identique ou
similaire à celles de la télécommande.
• « DVD » peut être utilisé comme un terme général pour désigner les DVD VIDEO,
DVD+RW/DVD+R (mode +VR) et DVD-RW/DVD-R (mode VR, mode vidéo).
• La signification des icônes utilisées dans ce guide est indiquée ci-dessous :
Icônes Signification
Fonctions disponibles pour les DVD VIDEO et les DVD+RW/DVD+R en
mode +VR ou les DVD-RW/DVD-R en mode vidéo
Fonctions disponibles pour les DVD-RW/DVD-R dans le mode VR
(enregistrement vidéo)
Fonctions disponibles pour les VIDEO CD (y compris Super VCD ou CD-R/
CD-RW au format de CD vidéo et Super VCD)
Fonctions disponibles pour les CD de musique ou les CD-R/CD-RW au
format CD de musique.
Fonctions disponibles pour les CD de DONNÉES (CD-ROM/CD-R/CD-RW
contenant des pistes audio MP3
vidéo DivX
Fonctions disponibles pour les DVD de DONNÉES (DVD-ROM/DVD+RW/
DVD+R/DVD-RW/DVD-R contenant des pistes audio MP3
JPEG et des fichiers vidéo DivX
*1 MP3 ( MPEG -1 Audio Layer 3) est un format standard défini par ISO (International Organization for
Standardization)/IEC (International Electrotechnical Commission) MPEG qui comprime les
données audio.
*2 DivX® est une technologie de compression de fichiers vidéo développée par DivX, Inc.
*3 DivX, DivX Certified et les logos y étant associés sont des marques de commerces de DivX, Inc. et
sont utilisés sous licence.
*2*3
)
*1
, des images JPEG et des fichiers
*2*3
)
*1
, des images
FR
6
Page 55

Ce lecteur peut lire les
Remarques
DVD VIDEO
DVD-RW/-R
(disque finalisé)
DVD+RW/+R
(disque finalisé)
VIDEO CD/
CD de musique
CD-RW/-R
disques suivants
Format de disque
Les logos « DVD+RW », « DVD-RW»,
« DVD+R», « DVD-R», « DVD VIDEO » et
« CD » sont des marques de commerce.
Remarque à propos des CD et
DVD
Le lecteur peut lire les CD-ROM/CD-R/
CDRW enregistrés dans les formats suivants :
– format de CD de musique
– format de CD vidéo
– Les pistes audio MP3, les images JPEG et
les fichiers vidéo DivX de format conforme
à ISO 9660* Niveau 1 ou son format étendu,
Joliet
– format de CD d’images KODAK
* Un format logique de fichiers et dossiers sur
CDROM, défini par ISO (International
Organization for Standardization).
Le lecteur peut lire les DVD-ROM/
DVD+RW/DVD-RW/DVD+R/DVD-R
enregistrés dans les formats suivants :
– Pistes audio MP3, images JPEG et fichiers
vidéo DivX d’un format conforme à l’UDF
(Universal Disk Format).
Exemple de disques que le
lecteur peut lire
Le lecteur ne peut pas lire les disques suivants :
• Blu-ray disc.
• Disques enregistrés au format AVCHD.
• HD DVD.
•DVD-RAM.
• CD-ROM/CD-R/CD-RW autres que ceux
enregistrés dans les formats énumérés sur
cette page.
• CD-ROM enregistrés au format PHOTO
CD.
• Partie de données de contenu
supplémentaire de CD.
• Disques audio DVD.
• DVD de DONNÉES qui ne contiennent pas
de piste audio MP3, d’images JPEG ou de
fichiers vidéo DivX.
• Couche HD sur les CD Super Audio.
De plus, le lecteur ne peut pas lire les disques
suivants :
• Un DVD VIDEO avec un code de région
différent.
• Un disque ayant une forme non standard (p.
ex., carte, cœur).
• Un disque avec du papier ou des
autocollants sur sa surface.
• Un disque ayant encore l'adhésif de ruban
cellophane ou un autocollant sur sa surface.
• Remarques à propos des DVD+RW/DVD+R,
DVD-RW/DVD-R ou des CD-R/CD-RW
Certains DVD+RW/DVD+R, DVD-RW/DVD-R
ou CD-R/CD-RW ne peuvent pas être lus à l'aide
de ce lecteur en raison de la qualité
d'enregistrement ou l'état physique du disque, ou
les caractéristiques du périphérique
d'enregistrement et du logiciel de création.
Le disque ne pourra être lu s’il n’a pas été
correctement finalisé. Pour de plus amples
informations, consultez les instructions
d'installation du périphérique d'enregistrement.
Notez qu’il est possible que des fonctions de
lecture ne fonctionnent pas avec certains
DVD+RW/DVD+R, même si ils ont été finalisés
correctement. Dans ce cas, afficher le disque par
lecture normale. De plus, certains CD de
DONNÉES/DVD de DONNÉES créés au format
Packet Write ou contenant plusieurs sessions ne
peuvent pas être lus.
,Suite
FR
7
Page 56

• Remarques à propos des DVD+R DL/DVD-R
ALL
DL
Les DVD-R DL enregistrés sur mode VR ne
peuvent être lus.
Les fichiers MP3 et JPEG enregistrés sur la
seconde couche d’un DVD+R DL/-R DL (double
couche) ne peuvent être lus.
• Disques de musique codés avec des
technologies de protection contre la copie
Ce produit a été conçu pour lire les disques qui
sont conforment au standard Compact Disc
(CD).Récemment, certains disques dotés de
technologies de protection contre la copie ont été
mis en vente par des sociétés de production de
disques. Veuillez noter que certains de ces
disques ne sont pas conformes au standard CD et
ne peuvent être lus par cet appareil.
• Remarque sur les Dual Disc
Un Dual Disc est un disque à deux faces qui
complémente un DVD sur un côté avec des pistes
audio numériques de l’autre.
Cependant, comme les pistes audio ne sont pas
conformes au standard compact disc (CD), la
lecture de ce produit n’est pas garantie.
Code de région
Il s’agit du système utilisé pour protéger les
copyrights. Le code de région est affiché sur
l'emballage du DVD VIDEO selon la région
où il est vendu. Les DVD VIDEO étiquetés
« ALL » ou « 2 » fonctionnent sur ce lecteur.
Droits d’auteur
Ce produit contient une technologie de
protection des droits d’auteur qui est protégée
par des brevets américains et d’autres droits
de propriété intellectuelle. L’utilisation de
cette technologie de protection des droits
d’auteur doit être autorisée par Macro vision
et est destinée à l’utilisation privée et limitées
sauf autorisée par Macro vision. Le
démontage ou la décompilation de ce produit
est interdit.
Marques de commerce
• Fabriqué sous licence depuis les
Laboratoires Dolby.
Dolby et le symbole Double-D sont des
marques enregistrées des Laboratoires
Dolby
• Fabriqué sous licence sous les brevets U.S
#5,451,942 et autres brevets U.S. et
mondiaux publiés ou en développement.
DTS et Sortie Numérique DTS sont des
marques enregistrées et les logos et
symboles DTS sont des marques déposées
par DTS, Inc. . ©1996-2007 DTS, Inc. Tout
droits réservés.
Remarque sur les opérations de
lecture des DVD et VIDEO CD
Certaines opérations de lecture des DVD et
VIDEO CD peuvent être volontairement
définies par les producteurs de logiciels.
Comme ce lecteur lit les DVD et les VIDEO
CD en fonction de leur contenu créé par les
producteurs, certaines fonctions de lecture
peuvent ne pas être disponibles. Veuillez
consulter les instructions livrées avec les
DVD ou les VIDEO CD.
FR
8
Page 57

Préparations
Remarques
Vérification des accessoires
Vérifiez que vous avez tous les éléments suivants :
• Cordon audio/vidéo (prise mini × 2 y
fiche de phonographe × 3) (1)
• Câble de sortie au réseau électrique (1)
• Adaptateur secteur (1)
• Adaptateur de batterie auto (1)
• Batterie (NP-FX110) (1)
• Télécommande (avec batterie) (1)
• Etui (1)
Utilisation de la télécommande
Lorsque vous l’utilisez, pointez le capteur infrarouge sur le lecteur.
Pour remplacer la batterie de la télécommande
Insérez une batterie au lithium CR2025 en faisant correspondre les extrémités 3 et # de la
batterie.
1 Tirez le support de batterie (2) tout en
appuyant sur le levier de verrouillage
(1).
2 Enlevez la batterie usée.
3 Insérez la nouvelle batterie dans le
support avec 3 vers le haut et puis
appuyez complètement sur le support.
Préparations
• N'exposez pas le capteur infrarouge au rayonnement solaire direct ou à un appareil d'éclairage. Ceci
pourrait provoquer un mauvais fonctionnement.
• Aucune opération par bouton ne peut être effectuée lorsque la batterie est morte. Si la télécommande ne
fonctionne pas du tout, changez la batterie et vérifiez l’état.
FR
9
Page 58

Utilisation de l’écran LCD
Remarques
L’écran LCD de ce lecteur peut pivoter au maximum à 180 degrés dans le sens des aiguilles
d’une montre et quand même être utilisé. Lorsqu’il a été tourné, l’écran LCD peut être replié sur
le corps de l’appareil et continuer à fonctionner.
Rotation de l’écran LCD
1 Placez le lecteur sur une table ou une autre surface plane et stable.
2 Levez l’écran LCD avec vos pouces jusqu’à ce qu’il soit ouvert enposition verticale.
3 Faites pivoter l’écran LCD de 180 degrés dans le sens indiqué par la flèche (dans le
sens des aiguilles d’une montre).
Rotation et repli de l’écran LCD
Après avoir fait pivoter l’écran LCD de 180 degrés dans le sens des aiguilles d’une montre, appuyez-le
vers le bas sur corps principal du lecteur. Dans cette position l’écran est orienté vers le haut.
Pour replacer le panneau LCD dans sa position initiale
Ouvrez l'écran LCD en position verticale et faites-le pivoter lentement dans le sens contraire des
aiguilles d'une montre.
• Ne faites pas pivoter l’écran LCD de plus de 180 degrés. De plus, ne le faites pas tourner dans l’autre sens.
Vous briseriez l’écran LCD.
• Si l’écran LCD n’est pas complètement ouvert, ne le faites pas pivoter. Cela pourrait l’endommager.
• Veuillez replacer l’écran LCD dans sa position d’origine après utilisation. L’écran LCD peut être
endommagé par des chocs soudains ou un traitement similaire.
FR
10
Page 59

Connexion de l’adaptateur secteur
Remarque
Prise C.C
2
Vers Connecteur DC IN 9.5V
Adaptateur
Secteur (fourni)
1
Câble de sortie au réseau
électrique (fourni)
Vers le réseau électrique
3
Branchez l’adaptateur secteur (fourni) en ordre de 1 to 3 (voir ci-dessous).
Pour le déconnecter, suivez la procédure en sens inverse.
Préparations
PHONES
AB
AUDIO VIDEO
OPTICAL
OUT
LINE SELECT
IN OUT
DC IN
9.5V
Arrêter la lecture avant de débrancher le câble de sortie au réseau électrique. Dans le contraire, un
dysfonctionnement pourrait se produire.
FR
11
Page 60

Utilisation de la batterie
Remarques
Base du lecteur
Batterie
Bouton de
déclenchement
Lorsque le branchement au réseau électrique n'est pas possible, le lecteur peut être utilisé avec
la batterie (fournie) installée.
Veuillez charger la batterie avant de l’utiliser.
Installation de la batterie
1 Alignez la batterie avec les lignes à la base du lecteur, engagez les crochets de la
pile dans les trous à la base du lecteur.
2 Faites glisser la batterie dans la direction de la flèche jusqu’au clic.
Pour enlever la batterie
Appuyez sur le bouton de déclenchement et glissez la batterie dans le sens de la flèche.
• Éteignez le lecteur avant d’installer la batterie.
• N’enlevez pas la batterie lors de la lecture.
• Ne touchez pas les points de branchement du lecteur et de la batterie. Ceci pourrait provoquer un mauvais
fonctionnement.
• Faites attention de ne pas échapper la batterie lors de son installation ou de sa dépose.
FR
12
Page 61

Charge de la batterie
Remarques
DC IN
9.5V
AUDIO VIDEO
PHONES
OPTICAL
OUT
AB
LINE SELECT
IN OUT
HOLD
POWER CHARGE
Indicateur CHARGE
Connecteur DC IN 9,5 V
Lecteur Batterie
Pleine Epuisée
1 Fixez la batterie au lecteur (page 12).
2 Branchez l’adaptateur secteur au lecteur et branchez le câble de sortie au réseau
électrique dans une prise (page 11).
Lorsque le chargement commence, l’indicateur CHARGE s’allume.
Lorsque le chargement est terminé, l’indicateur CHARGE s’éteint.
3 Lorsque le chargement est terminé, déconnectez le câble de sortie au réseau
électrique et enlevez l'adaptateur secteur.
Pour vérifier l’état de la batterie
Lorsque vous arrêtez le lecteur, un indicateur de batterie est affiché sur l’écran. Rechargez la
batterie, lorsque s’affiche ou lorsque l’indicateur CHARGE clignote.
L’indicateur n’est pas affiché lors de la lecture d’un DVD, d’un VIDEO C D ou d e fic hier s JPE G.
Arrêtez le lecteur et vérifiez l’état de la batterie.
Préparations
Durée de chargement et durée de lecture maximum
Durée de charge (lorsque le lecteur est
éteint)
Environ
6 heures
* Il s’agit d’une indication de la durée de lecture continue la plus longue dans les situations suivantes.
– température normale (20 °C)
– Utilisation d’un casque
– Rétro éclairage défini au minimum
– « Sortie numerique » définie à « Non » dans « Reglage Audio ».
L’état de la batterie peut réduire la durée de lecture.
• L’indicateur de batterie ne s’affiche pas à l’écran lorsque l’adaptateur secteur est utilisé ou lors d'une entrée
provenant de sources externes.
• La durée de chargement peut être différente des indications ci-dessus en fonction de l’environnement,
l’utilisation et d’autres facteurs. La température ambiante de charge recommandée se trouve dans la plage
entre 10 et 30 °C.
Durée de lecture (lorsque l’écran est
Allumé)
Environ
6 heures*
13
FR
Page 62

Utilisation avec l’adaptateur batterie auto
Remarques
Remarques
Vers une prise
allume-cigare
Vers prise DC IN
9,5V
Adaptateur batterie auto (fourni)
Utiliser l’adaptateur batterie auto (fourni) pour alimenter le lecteur depuis la prise de l'allumecigare. L’adaptateur est conçu pour une batterie auto de 12 V. Ne l’utilisez pas avec une batterie
auto de 24 V. De plus, l’adaptateur est conçu pour les voitures par voie terrestre négative. Ne
l’utilisez pas avec les voitures par voie terrestre positive.
PHONES
AB
AUDIO VIDEO
OPTICAL
OUT
LINE SELECT
IN OUT
DC IN
9.5V
z Suggestion
Si l’adaptateur interfère avec le fonctionnement de la voiture, utilisez une rallonge commerciale pour
allume-cigare.
• N’utilisez pas l’adaptateur s’il est tombé ou s’il est endommagé.
• Disposez le câble de façon à ce qu’il ne gène pas le conducteur. De plus, ne disposez pas l'écran LCD à un
endroit où le conducteur peut le regarder.
• Si l’image n’est pas claire, éloignez le lecteur de l’adaptateur.
• Utilisez l’adaptateur lorsque le moteur de la voiture tourne. Si vous l’utilisez lorsque le moteur est arrêté,
la batterie de la voiture peut devenir inutilisable.
• Si la prise pour allume-cigare est salie avec de la cendre, etc., la prise pourrait chauffer. Nettoyez-la
toujours avant de l’utiliser.
• L’adaptateur batterie auto peut chauffer durant la charge ou après une période d’utilisation prolongée. Cela
ne constitue pas un dysfonctionnement.
Après avoir utilisé l’adaptateur batterie auto
Après avoir éteint le lecteur, déconnecté l’adaptateur batterie auto de la prise pour allume-cigare.
• N'éteignez pas le moteur de la voiture pendant que le lecteur est allumé. Si vous le faites, l'alimentation
s'arrête et peut endommager le lecteur.
• Débranchez l’adaptateur batterie auto après l’avoir utilisé. Puisque certaines prises pour allume-cigare sont
alimentées même lorsque le moteur est arrêté, la batterie de la auto pourrait se décharger avec le temps.
• Lorsque vous déconnectez l'adaptateur batterie auto, tenez-le par la prise pour l’enlever.
• Lorsque vous écoutez la radio de la voiture, déconnectez l’adaptateur de la prise pour allume-cigare afin
d’éviter le bruit.
FR
14
Page 63

Lecture de disques
VOL
DISPLAY MENU RETURN OPTIONS
CHARGEPOWER
H
O
L
D
O
P
EN
CHARGE
POWER
x
H
OPEN
(ouverture)
[/1/HOLD
(verrouillage)
\/1
H
x
Face de lecture vers le bas
Lecture de disques
Selon qu’il s’agisse DVD ou VIDEO CD,
certaines opérations pourraient être
différentes ou restreintes.
Consultez les instructions d’utilisation
fournies avec le disque.
Connectez l’adaptateur secteur AC ou la
batterie.
2 Appuyez sur [/1 sur la
télécommande ou glissez
l’interrupteur [/1/HOLD
(verrouillage) du lecteur, sur
Le lecteur s’allume et le voyant
d’alimentation POWER tourne au vert.
3 Presser le bouton OPEN
(ouverture) pour ouvrir le
couvercle à disque.
4 Insérez le disque que vous
souhaitez lire.
Poussez jusqu’à ce que vous entendiez un
clic en vous assurant que la face de
lecture se trouve vers le bas.
« [/1 ».
Lecture de disques
1 Ouvrez l’écran LCD du lecteur
Placez l’interrupteur LINE SELECT
(sélection de ligne) du côté droit du
lecteur à la position « OUT » (sortie).
123
456
7809
5 Appuyez sur PUSH CLOSE sur le
lecteur pour fermer le couvercle
du disque.
6 Appuyez sur H.
La lecture commence.
• Il est possible que la lecture de certains
disques commence automatiquement
lorsque le couvercle a été fermé.
• En fonction du disque, un menu peut
s’afficher à l’écran. Pour les DVD
VIDEO, consultez la page 17. Pour les
VIDEO CD, consultez la page 20.
• Lorsque tous les titres ont été lus, le
lecteur s’arrête et l’affichage revient à
l’écran menu.
,Suite
15
FR
Page 64

Remarques
• Lorsq u’un disque est inséré avec la face de lecture
Remarques
123
456
7809
.
>
X
x
vers le haut, un message « Pas de disque » ou
« Lecture de ce disque impossible. » s'affiche.
• Les disques créés sur les enregistreurs de DVD
doivent être finalisés correctement pour pouvoir
être lus sur ce lecteur. Pour plus d'informations au
sujet de la finalisation, consultez les instructions
d'utilisation fournies avec l'enregistreur de DVD.
• Il est possible que le disque continue à tourner
lorsque le couvercle est ouvert. Attendez jusqu’à
ce que le disque s’arrête avant de l’enlever.
• Durant le fonctionnement, l’icône « » peut
apparaître sur l’écran LCD. Ce symbole indique
que la fonction décrite dans les présentes
instructions n’est pas disponible sur le DVD
VIDEO.
• Certains DVD-RW/DVD-R (mode VR) peuvent
prendre du temps avant de démarrer en raison du
contenu enregistré.
Pour arrêter la lecture
Appuyez sur « x ».
Si vous appuyez à nouveau sur H, la lecture
reprendra à partir du point où vous vous êtes
arrêté (Reprendre la lecture). Voir la page 17
pour de plus amples informations.
Pour lire à partir du début, appuyez sur x
deux fois, puis appuyez sur H.
« Reglage Audio » (page 36). Un bruit fort
peut sortir des haut-parleurs, affecter votre
ouïe et endommager les haut-parleurs.
• Une image d’économiseur d’écran s’affiche
lorsque vous laissez le lecteur en pause ou que
vous ne l'utilisez pas pendant plus de 15 minutes.
L’image disparaît lorsque vous appuyez sur H.
Voir la page 34 pour de plus amples informations.
• Le lecteur s’éteint 15 minutes après le démarrage
de l'économiseur d'écran (Extinction automatique).
Opérations de lecture
supplémentaires
Pour mettre hors tension
Appuyez sur le bouton \/1 de la
télécommande ou faites glisser l’interrupteur
\/1/HOLD du lecteur sur « \/1 ».
Pour éviter une utilisation accidentelle du
lecteur
Définissez l’interrupteur \/1/HOLD du
lecteur à « HOLD ». Tous les boutons du
lecteur sont verrouillés, tandis que les
boutons de la télécommande demeurent
fonctionnels.
Pour lire des bandes sonores DTS sur un
DVD VIDEO
• Les haut-parleurs du lecteur ne produisent
aucun son DTS. Lorsque vous lisez des
bandes sonores DTS sur un DVD VIDEO,
connectez le lecteur à un amplificateur
(Récepteur) (page 40) Et Configurez « DTS »
dans « Reglage Audio » (page 36).
• Si vous connectez le lecteur à un
équipement audio, comme un amplificateur
AV (récepteur) sans un décodeur DTS, ne
définissez pas « DTS » à « Oui » dans
FR
16
Pour Opération
Arrêt Appuyez sur x
Pause Appuyez sur X
Aller au chapitre, à la
Appuyez sur >
piste ou à la scène
suivante en mode de
lecture continue
Aller au chapitre, à la
Appuyez sur .
piste ou à la scène
précédente en mode
de lecture continue
Effectuer une brève avance
rapide de la scène actuelle*
* Pour les DVD VIDEO, DVD-RW/DVD-R (mode
VR) uniquement.
Il est possible que les fonctions ci-dessous ne
soient pas utilisables pour certaines scènes.
Appuyez sur
durant la lecture
Page 65

Reprendre la lecture depuis le
Remarques
Remarque
123
456
7809
H
x
123
456
7809
TOP MENU
C/X/x/c
ENTREE
MENU
Touches
numériques
point où vous avez arrêté le
disque (Reprise de la lecture)
Lorsque vous arrêtez la lecture, le lecteur se
souvient du point d’arrêt et affiche un
message à l’écran. Vous pouvez reprendre à
partir du même point si vous appuyez sur H
à nouveau. La reprise de la lecture fonctionne
même si le lecteur a été éteint, tant et aussi
longtemps que le couvercle du disque reste
fermé.
Utilisation du menu du DVD
Un DVD est divisé en longues sections d’une
image ou d'une musique appelées « titres ».
Lorsque vous lisez un DVD contenant
plusieurs titres, vous pouvez sélectionner le
titre que vous voulez utiliser à l’aide du
bouton TOP MENU.
Lorsque vous lisez des DVD qui vous
permettent de sélectionner des éléments
comme la langue pour le son et les sous-titres,
sélectionner ces éléments à l’aide du bouton
MENU.
Lecture de disques
1 Pendant la lecture du disque, appuyez
2 Appuyez sur H.
z Astuces
• Pour lire le disque à partir du début, appuyez sur
x deux fois, puis appuyez sur H.
• Lors d e la remise sous tension après une mise hors
tension, la reprise de lecture commence
automatiquement.
• Selon le point d’arrêt, il est possible que la reprise
de lecture ne commence pas exactement du même
point.
• Le point où vous avez arrêté la lecture est
supprimé lorsque :
– vous éteignez le lecteur lors de la lecture d’un
– vous ouvrez le couvercle du disque.
– vous débranchez la batterie et l’adaptateur
– vous changez la configuration de l'interrupteur
sur x pour arrêter la lecture.
Un message s’affiche.
Le lecteur commence la lecture à partir
du point où vous avez arrêté à l’étape 1.
DVD-RW/DVD-R (mode VR).
secteur.
LINE SELECT.
1 Appuyez sur TOP MENU ou MENU.
Le menu du disque s’affiche à l’écran.
Le contenu du menu varie selon les
disques.
2 Appuyez sur C/X/x/c ou les boutons
numériques pour sélectionner
l’élément que vous voulez lire ou
changer.
3 Appuyez sur ENTER.
Selon le disque, il est possible que vous ne soyez
pas en mesure d’utiliser C/c du lecteur pour le
menu disque. Si tel est le cas, utilisez C/c de la
télécommande.
,suite
17
FR
Page 66

Changement du son
Remarques
123
456
7809
AUDIO
Lors de la lecture d'un DVD VIDEO
enregistré dans plusieurs formats audio
(PCM, Dolby Digital ou DTS) vous pouvez
changer le format audio. Si le DVD VIDEO
est enregistré avec des pistes multilingues,
vous pouvez également changer la langue.
Avec le CD et le VIDEO CD, vous pouvez
sélectionner le son depuis le canal droit ou
gauche et écouter le son du canal sélectionné
depuis les haut-parleurs gauche et droite. Par
exemple, lorsque vous écoutez un disque
contenant une chanson avec la partie vocale
dans le canal droit et les instruments dans le
canal gauche, vous pouvez entendre les
instruments dans les deux haut-parleurs en
sélectionnant le canal gauche.
1 Appuyez sur AUDIO plusieurs fois pour
sélectionner le signal audio de votre
choix.
La valeur par défaut est soulignée.
◆ Lors de la lecture d’un DVD VIDEO
Selon le DVD VIDEO, le choix des
langues varie.
Lorsque la même langue est affichée
deux fois ou plus, le DVD VIDEO est
enregistré dans plusieurs formats audio.
◆ Lorsque vous lisez un disque DVD
(mode VR).
Les types de bandes sonores enregistrés
sur un disque sont affichés.
Exemple :
•1.Principal
(son principal)
• 1.Basses (son sub)
• 1.Principal+Sous (son principal et sub)
◆ Lors de la lecture d’un CD/VIDEO CD
•Stéréo :
le son stéréo standard
• Gauche : le son du canal gauche (monaural)
FR
18
• Droite : le son du canal droit (monaural)
◆ Lors de la lecture d’un Super VCD
•Stéréo :
le son stéréo de la piste audio 1
• Gauche : le son du canal gauche de la
piste audio 1 (monaural)
• Droite : le son du canal droit de la piste
audio 1 (monaural)
• Stéréo 1 : le son stéréo de la piste audio 2
• Gauche 1 : le son du canal gauche de la
piste audio 2 (monaural)
• Droite 1 : le son du canal droit de la
piste audio 2 (monaural)
z Astuces
• Vous pouvez vérifier le format audio actuel
(Dolby Digital, DTS, PCM, etc.) en appuyant sur
AUDIO plusieurs fois pendant la lecture d'un
DVD VIDEO.
• Vous pouvez changer le son dans l’écran des
paramètres de lecture pendant la lecture d’un
DVD (page 21).
• Selon le disque, vous ne serez peut-être pas en
mesure de changer le format audio, même s'il est
enregistré dans plusieurs formats audio.
• Lors de la lecture d’un Super VCD ne contenant
pas de piste audio 2, aucun son ne sera produit si
vous sélectionnez « Stéréo 1 », « Gauche 1 » ou
« Droite 1 ».
• Lors de la lecture de bandes so nores sur DVD-RW/
DVD-R (mode VR) avec un équipement audio
comme un amplificateur AV (récepteur)branché
via le connecteur OPTICAL OUT (sortie optique),
définissez « Dolby Digital » de « Reglage Audio »
à « Mixage Aval » (page 35).
• Si l’option « DTS » dans « Reglage Audio » est
définie à « Non » (page 35), l’option de sélection
de pistes DTS n’apparaîtra à l’écran même si le
disque contient des pistes DTS.
• Lors de la lecture de bandes sonores DTS sur un
CD, vous ne pouvez pas changer le son.
Page 67

Affichage des sous-titres
Remarques
Remarques
123
456
7809
SUBTITLE
123
456
7809
ANGLE
Si les sous-titres sont enregistrés sur le
disque, vous pouvez les changer, les activer
ou les désactiver comme il vous plaira, lors de
la lecture d'un DVD.
Changement des angles
Si plusieurs angles (angles multiples) sont
enregistrés pour une scène sur un DVD
VIDEO, « » s’affiche à l’écran. Ceci
signifie que vous pouvez changer l’angle de
vue.
Lecture de disques
1 Appuyez plusieurs fois sur SUBTITLE
pour sélectionner un réglage.
Selon le disque, le choix des langues
varie.
Pour désactiver les sous-titres
Sélectionner « Sous-Titre Désac. » dans
l’étape 1.
z Astuce
Vous pouvez changer les sous-titres dans l’écran
des paramètres de lecture pendant la lecture d’un
DVD (page 21).
• Selon le DVD VIDEO, il est possible que vous ne
soyez pas en mesure de changer les sous-titres,
même si des sous-titres multilingues y sont
enregistrés. Il est également possible que vous ne
soyez pas capable de les désactiver.
• Lorsque vous lisez un disque avec des sous-titres,
il est possible de faire disparaître le sous-titre en
appuyant sur .
1 Appuyez sur ANGLE plusieurs fois pour
sélectionner un numéro d’angle.
La scène change selon l’angle
sélectionné.
• Certains DVD VIDEO interdisent les
changements d’angles, même lorsque les angles
multiples sont enregistrés.
• Vous ne pouvez pas changer les angles durant la
Lecture lente ou de la Lecture de recherche.
• « » (marqueur d’angle) ne s'affiche pas
lorsque « Marque Angle » dans « Général » est
défini à « Non » (page 34).
,suite
19
FR
Page 68

Sélectionner « Original » ou
Remarques
Remarque
123
456
7809
TOP MENU
123
456
7809
ENTER
H
Touches
numériques
« Liste De Lecture » sur un
DVDRW/DVD-R
Certains DVD-RW/DVD-R en mode VR
(enregistrement vidéo) ont deux types de titre
pour la lecture : titres enregistrés à l’origine
(Original) et titres qui peuvent être créés sur
un lecteur de DVD inscriptibles pour l’édition
(Liste de lecture). Vous pouvez sélectionner
le type de titre à lire.
1 Appuyez sur TOP MENU lorsque le
lecteur est arrêté.
Le mode en cours s'affiche.
Le bouton TOP MENU ne fonctionne pas
lorsque la reprise de lecture est activée.
Annulez d’abord le statut de reprise de
lecture en appuyant sur x deux fois et
appuyez ensuite sur TOP MENU.
2 Changez de mode en appuyant sur TOP
MENU plusieurs fois.
z Astuce
Vous pouvez vérifier le mode en cours en appuyant
sur DISPLAY durant la lecture. Dans l’écran des
paramètres de lecture (page 21), « PL » ou « ORG »
s’affichera à côté du numéro de titre.
• Lorsqu’un disque contenant un titre de liste de
lecture est inséré, le lecteur commence
automatiquement à lire le titre de la liste de
lecture.
• Lorsqu’il n’y a pas de titre de liste de lecture
enregistrée, « ORG » s’affiche à l’étape 1.
Lorsque vous appuyez sur TOP MENU encore
une fois, « » s’affiche.
Lire des VIDEO CD avec les
fonctions PBC (Lecture PBC)
Certains CD VIDEO ont des fonctions de
contrôle de lecture (PBC) permettant une
recherche interactive ou des options de
lecture.
1 Démarrez la lecture d’un VIDEO CD
avec les fonctions PBC.
Le menu s’affiche pour votre sélection.
2 Appuyez sur les boutons numériques
pour sélectionner le numéro
d’élément et appuyez sur ENTER.
3 Suivez les instructions à l’écran pour
les opérations interactives.
Consultez les instructions fournies avec
le disque, car la procédure d'utilisation
peut varier en fonction du VIDEO CD.
z Astuce
Pour annuler la fonction PBC, définissez « PBC » à
« Non » dans « Général » (page 35) puis ouvrez et
fermez le couvercle du disque.
Selon le VIDEO CD, « Press ENTER » de l’étape 2
peut s’afficher comme « Press SELECT ». Dans ce
cas, appuyez sur H.
FR
20
Page 69

Utilisation de l’écran des
Remarque
Touches
Numériques
DISPLAY
C/X/x/c
ENTER
O
Paramètres de lecture actuelsEléments
Temps écoulé ou restantEtat de la batterie
paramètres de lecture
Lors de la lecture d’un DVD, vous pouvez
vérifier à l’écran les paramètres de lecture
actuels. L’écran des paramètres de lecture
vous permet également de changer le son, les
sous-titres et les angles, ou de rechercher un
titre ou une piste en entrant des numéros.
2 Appuyez sur X/x pour
sélectionner l’élément souhaité et
appuyez sur ENTER.
•Titre
•Chapitre
•Audio
• Sous-Titre
•Angle
•Durée T.
•Durée C.
• Répéter
• Affi. Durée
Lecture de disques
123
456
7809
1 Appuyez sur DISPLAY pendant la
lecture d’un DVD.
L’écran des paramètres de lecture
s’affiche.
Exemple : Lors de la lecture d’un DVD
VIDEO
Menu
Titre
Chapitre
Audio
Sous-Titre
L’icône correspondante pour Lecture,
Pause, Recherche ou Lecture lente est
affichée dans le coin supérieur gauche de
l'écran.
Lorsqu’un DVD-RW/DVD-R (mode
VR) est lu, « PL » ou « ORG » est affiché
à côté du numéro de titre.
02/07
03/20
02 2CH DOLBY DIGITAL Français
01 Français
Titre Écoulé 00:12:01
3 Appuyez sur X/x pour
sélectionner le réglage et appuyez
sur ENTER.
Pour entrer des numéros, utilisez les
boutons numériques ou X/x.
Selon le disque, il est possible que vous ne soyez
pas en mesure de définir certaines options.
Pour désactiver l’affichage
Appuyez sur DISPLAY ou sur O RETURN.
Rechercher un titre/chapitre,
etc.
En entrant le numéro ou le code temporel,
vous pouvez rechercher un DVD par titre ou
chapitre.
1 Appuyez sur X/x pour sélectionner la
méthode de recherche dans l’écran
des paramètres de lecture et appuyez
sur ENTER.
•Titre
•Chapitre
•Durée T.*
•Durée C.*
* Vous pouvez chercher le titre ou le chapitre d’un
DVD VIDEO en entrant le code temporel.
2 Appuyez sur les boutons numériques
ou sur X/x pour sélectionner le
numéro de titre ou de chapitre et
appuyez sur ENTER.
Le lecteur commence la lecture à partir
du numéro sélectionné.
21
FR
,suite
Page 70

Lorsque vous sélectionnez « Durée T. » ou
Remarques
Remarque
Remarques
Affi. Durée
Titre Écoulé
Titre Restant
Chapitre Écoulé
Chapitre Restant
Titre Écoulé 00:12:48
« Durée C. » dans l’étape 1, « 00:00:00 »
s’affichera à l’écran. Entrez le code temporel
désiré à l'aide des boutons numériques et
appuyez sur ENTER. La lecture commence
selon le code temporel entré. La durée
écoulée ou restante s’affiche dans le pied de
la page de l’écran des paramètres de lecture.
z Astuces
• Vous pouvez utiliser la recherche directe sans
afficher le menu de contrôle. Voir la page 23 pour
de plus amples informations.
• Voir en page 23 pour plus de détails concernant la
recherche d'un CD ou d'un VIDEO CD.
• Le numéro de titre/chapitre affiché est le même
que le numéro enregistré sur le disque.
• Les durées de chapitre ne sont pas affichées lors
de la lecture d’un disque DVD-RW/DVD-R
(mode VR). La durée de chapitre est affichée
comme « --:--:-- ».
• Selon le disque, il est possible que vous ne soyez
pas en mesure d’utiliser le code temporel.
Lire un DVD VIDEO de manière
répétée (Répéter la lecture)
Vous pouvez lire tous le titres sur un DVD
VIDEO, ou un seul titre ou chapitre de
manière répétée.
1 Sélectionnez « Répéter » dans l’écran
des paramètres de lecture et appuyez
sur ENTER.
2 Appuyez sur X/x pour sélectionner le
réglage et appuyez sur ENTER.
• Chapitre : répète le chapitre actuel.
• Titre : répète le titre actuel.
• Tout : répète tous les titres.
Pour revenir à la lecture normale
Sélectionner « Non » à l’étape 2.
z Astuce
Lors de la lecture d’un CD ou un VIDEO CD de
manière répétée, utilisez MENU (page 24).
Selon le type de disque, la fonction Répéter n’est
pas toujours disponible.
Vérifier la durée écoulée et la
durée restante
Vous pouvez vérifier la durée de lecture
écoulée et la durée restante du titre ou du
chapitre actuel.
1 Sélectionnez « Affi. Durée » dans
l’écran des paramètres de lecture et
appuyez sur ENTER.
2 Appuyez sur X/x pour sélectionner les
informations de la durée et appuyez
sur ENTER.
• Titre Écoulé
•Titre Restant
• Chapitre Écoulé
• Chapitre Restant
z Astuce
Voir la page 24 plus de détails concernant
l’affichage de la durée écoulée pour un CD ou un
VIDEO CD.
• En ce qui concerne les DVD-RW/DVD-R (mode
VR), la durée écoulée et la durée restante du
chapitre ne s'affichent pas.
• Le pa ramètre par défaut de l’option « Affi. Durée »
est « Titre Écoulé ». Après avoir sélectionné une
autre option pour « Affi. Durée » et être sortie de
l’écran des paramètres de lecture, le « Titre
Écoulé » s'affiche lors du retour à l'écran des
paramètres de lecture.
FR
22
Page 71

Recherche d’un élément
Remarques
Remarques
123
456
7809
Mm
>
MENU
H
.
DISPLAY
H t 1M t 2M t 3M
H t 1m t 2m t 3m
en particulier sur le
disque (Rechercher, Balayage,
Lecture lente, Répéter la lecture,
Lecture aléatoire)
Vous pouvez repérer rapidement un point en
particulier sur un disque en surveillant
l’image ou en effectuant une lecture au
ralenti.
• Selon le disque, il est possible que vous ne soyez
pas en mesure d’effectuer certaines des options
décrites.
• Pour les CD de DONNÉES/DVD de DONNÉES,
vous pouvez rechercher un point en particulier
uniquement sur une piste audio MP3.
Trouver un point rapidement à
l’aide des boutons ./>
(précédent/suivant)
(Rechercher)
Pendant la lecture, appuyez sur > ou sur
. pour passer au chapitre/piste/scène
suivant ou précédent.
z Astuces
Lorsque vous connaissez le numéro de chapitre ou
le numéro de piste, vous pouvez le rechercher
directement en entrant ces numéros à l'aide des
boutons numériques.
– Lors de la lecture d’un DVD VIDEO, vous
pouvez rechercher un titre ou un chapitre à
l’aide des boutons numériques et ensuite en
appuyant sur ENTER. Appuyez sur C/c pour
basculer de titre à chapitre.
– Lors de la lecture de CD/VIDEO CD, vous
pouvez rechercher une piste à l’aide des boutons
numériques et ensuite en appuyant sur ENTER.
Trouver un point rapidement en
effectuant la lecture d’un disque
en avance rapide ou en retour
rapide (Balayage)
Appuyez sur m ou M effectuer une
marche arrière rapide ou une avance rapide
durant la lecture. Pour retourner à la lecture
normale, appuyez sur H.
Chaque fois que vous appuyez sur m ou sur
M durant la recherche, la vitesse change.
A chaque pression, l’indication change
comme illustrée ci-dessous.
◆ Direction de lecture
◆ Direction opposée
La vitesse de lecture « 3M »/« 3m » est
plus rapide que la vitesse « 2M »/« 2m »
et la vitesse de lecture « 2M »/« 2m » est
plus rapide que la vitesse « 1M »/« 1m ».
z Astuce
C/c sur le lecteur fonctionne de la même manière
que m/M sur la télécommande. ENTER sur le
lecteur, fonctionne de la même manière que H sur
la télécommande. Cette fonction est opérationnelle
lors de la lecture d'un DVD.
• Aucun son n’est produit durant la lecture de
recherche sur un DVD ou un VIDEO CD.
• La vitesse de recherche varie selon le type de
disque.
23
FR
,suite
Lecture de disques
Page 72

Visionnement image par image
Remarque
Remarques
H t 1 t 2 t 3
H t 1 t 2 t 3
(Lecture lente)
Appuyez sur m or M lorsque le lecteur est
en mode pause. Pour retourner à la vitesse
normale, appuyez sur H.
Chaque fois que vous appuyez sur m ou sur
M durant la lecture lente, la vitesse de
lecture change. À chaque pression,
l’indication change comme illustrée cidessous :
◆ Direction de lecture
◆ Direction opposée (DVD uniquement)
Lire un CD/VIDEO CD de manière
répétée ou en ordre aléatoire
(Lecture répétée, Lecture
aléatoire)
Vous pouvez lire toutes les pistes d’un
disque, ou une seule piste de manière répétée
(Lecture répétée).
De plus, vous pouvez lire les pistes en ordre
aléatoire, (Lecture aléatoire).
1 Appuyez plusieurs fois sur MENU
durant la lecture pour sélectionner le
mode de lecture.
• Piste : répète la piste actuelle.
• Tout : répète toutes les pistes sur le
disque.
• Aléatoire : lit toutes les pistes sur le
disque de manière aléatoire.
La vitesse de lecture « 3 »/« 3 » est
plus lente que la vitesse « 2 »/« 2 » et
la vitesse de lecture « 2 »/« 2 » est plus
lente que la vitesse « 1 »/« 1 ».
La vitesse lente varie selon le type de disque.
Pour revenir à la lecture normale
Sélectionner « Non » à l’étape 1.
z Astuce
Durant la lecture aléatoire, v ous pouvez commencer
la lecture d’une autre piste sélectionnée
aléatoirement en appuyant sur >.
• Vous pouvez utiliser la lecture répétée et la
lecture aléatoire avec les VIDEO CD ou les Super
VCD à l’aide de la lecture PBC.
• En fonction du type de disque, la lecture aléatoire
n’est pas toujours disponible.
• La même piste peut être répétée plusieurs fois
dans le mode aléatoire.
FR
24
Page 73

Vérifier les informations de
Remarque
Remarque
123
456
7809
MENU
x
.
C/X/x/c
ENTER
X
H
>
lecture du disque
Lors de la lecture d’un DVD
Appuyez sur DISPLAY lors de la lecture d’un
DVD et utilisez ensuite l’écran des
paramètres de lecture (page 21).
Lors de la lecture d’un CD
Appuyez sur DISPLAY.
Le numéro de la piste lue, le nombre total de
pistes et le temps écoulé de la piste en cours
s’affichent. Appuyez sur DISPLAY de
manière répétée pour changer l’information
de la durée comme ci-dessous.
• Temps Écoulé
• Temps Restant
• Temps Total Écoulé
• Temps Total Restant
Lors de la lecture d’un VIDEO CD
Appuyez sur DISPLAY.
Le lecteur affiche « PBC Act. » (lorsque vous
définissez « PBC » à « Non », le lecteur
affiche le numéro de la piste/le nombre total
de pistes), la durée écoulée et le mode audio à
l’écran.
Lecture de pistes audio
MP3 ou d’images JPEG
Vous pouvez lire des pistes audio MP3 et des
images JPEG sur les CD de DONNÉES
(CDROM/CD-R/CD-RW) ou les DVD de
DONNÉES (DVD-ROM/DVD+RW/
DVD+R/DVD-RW/DVD-R).
Pour les fichiers audio MP3 et les images
JPEG lisibles, consultez la page 43.
Lorsque vous insérez des CD de DONNÉES
et des DVD de DONNÉES, la liste des
albums s'affiche.
Lecture de disques
Le lecteur n'affiche pas « Temps Total Écoulé » ou
« Temps Total Restant » à l'écran lors de la lecture
aléatoire d'un CD.
Pour les CD de DONNEES enregistrés sous format
image CD KODAK, la lecture démarre
immédiatement lorsque le CD est inséré.
,suite
25
FR
Page 74

Lire une piste audio MP3
Remarques
1234
5678
9 101112
Lire une image JPEG
1 Appuyez sur X/x pour sélectionner le
réglage et appuyez sur ENTER.
La liste des pistes de l’album s’affiche.
Dir:001
FAVORIS
. .
01 Poussière d’étoiles
02 Feu
03 Aile
• Pour aller à la page suivante ou
précédente, appuyez sur > ou sur
..
• Pour retourner à la liste des Dossiers,
appuyez sur X/x pour sélectionner
et appuyez sur ENTER.
2 Appuyez sur X/x pour sélectionner la
piste que vous voulez lire et appuyez
sur ENTER.
La lecture commence à la piste choisie.
Pour se rendre à la piste audio MP3
suivante ou précédente
Appuyez sur > ou sur ..
Pour arrêter la lecture
Appuyez sur x.
1 Appuyez sur X/x pour sélectionner le
réglage et appuyez sur ENTER.
La liste des fichiers de l’album s’affiche.
Dir:001
HAWAII
. .
DSC00001
DSC00002
DSC00003
DSC00004
DSC00005
• Pour aller à la page suivante ou
précédente, appuyez sur > ou sur
..
• Pour retourner à la liste des Dossiers,
appuyez sur X/x pour sélectionner
et appuyez sur ENTER.
2 Appuyez sur X/x pour sélectionner
l’image que vous voulez afficher et
appuyez sur ENTER.
L’image sélectionnée s’affiche.
Exemple :
Pour mettre la lecture en pause
Appuyez sur X.
Pour reprendre la lecture appuyez sur X de
nouveau
• Le nombre total d’albums et de fichiers que le
lecteur peut reconnaître est environ 648.
• Le nombre d’albums dans un disque que lecteur
peut reconnaître est environ 299.
FR
26
Pour afficher la liste des miniatures
Appuyez sur MENU lorsqu’un fichier est
affiché à l’écran.
L’image de l’album s’affiche parmi 12 sous
écrans et l’image affichée se trouve dans la
principale.
Page 75

• Pour se déplacer à la page précédente
Remarques
1234
5678
9101112
ou suivante de la liste de miniatures,
sélectionnez « bPrev » ou « NextB » au
bas de l’écran.
• Pour quitter la liste des miniatures,
appuyez sur MENU.
Pour se rendre à l’image JPEG suivante ou
précédente
Appuyez sur > ou sur ..
Pour faire pivoter une image JPEG
Appuyez sur C/X/x/c pendant le
visionnement de l’image.
X: Inverse l’image verticalement (de haut en
bas).
x: Inverse l’image horizontalement (de
gauche à droite).
c: Fait pivoter l’image de 90 degrés dans le
sens horaire.
C: Fait pivoter l’image de 90 degrés dans le
sens antihoraire.
Veuillez également remarquer que la vue
retourne à la normale si vous appuyez sur
./> pour aller à l’image suivante ou
précédente.
Exemple : lorsque vous appuyez sur C une
seule fois.
• Le lecteur ne peut pas lire les images JPEG d’un
format supérieur à 3078 (larg eur) x 2048(hauteur)
dans le mode normal, ou de plus de 3300 000
pixels au format JPEG progressif.(Certains JPEG
progressifs ne peuvent être affichés même si la
taille est conforme aux spécifications).
• Le nombre total d’albums et de fichiers que le
lecteur peut reconnaître est environ 648.
• Le nombre d’albums dans un disque que lecteur
peut reconnaître est environ 299.
Profiter des images JPEG sous
forme de Diaporama
Vous pouvez lire les images JPEG de manière
successive comme un diaporama sur un CD
de DONNÉES ou un DVD de DONNÉES.
1 Lors de l’affichage du fichier de
votre choix, vous pouvez démarrer
un diaporama en appuyant sur
MENU.
La liste de miniatures s'affiche.
Lecture de disques
Pour arrêter de visionner l’image JPEG
Appuyez sur x.
L’affichage retourne à la liste de fichiers.
• Il est possible que les images mettent du temps à
s'afficher en raison du nombre de fichiers
enregistrés ou de la taille des dossiers. Si aucune
image ne s’affiche après quelques minutes,
certains des fichiers inclus sont peut-être trop
volumineux.
• Certains fichiers JPEG, plus particulièrement les
fichiers JPEG progressifs ou les fichiers JPEG
de3 000 000 pixels ou plus, peuvent prendre plus
de temps à s’afficher que d’autres.
2 Appuyez sur C/X/x/c pour
sélectionner « Slide Show » au bas
de l’écran et appuyez sur ENTER.
Un diaporama commence à partir du
fichier affiché.
Pour mettre le diaporama en pause
Appuyez sur X. En appuyant sur X à
nouveau ou sur H, vous pouvez revenir au
diaporama.
Pour arrêter le diaporama
Appuyez sur x ou sur MENU.
27
FR
Page 76

Réglage de la taille et de
Remarque
C/X/x/c
ENTER
OPTIONS
la qualité de l’image
* Dans le mode « Normal », les images sont
affichées dans leur configuration originale ; avec
le même rapport d'affichage. Par exemple, une
image 4:3 aura des bandes noires des deux côtés,
et les images boîte aux lettres enregistrées dans le
rapport16:9 ou 4:3 auront des bandes noires sur
tous les côtés. Dans le mode « Plein Ecran », une
image16:9 sera ajustée pour remplir tout l'écran.
Vous pouvez ajuster l’image affichée sur
l’écran LCD. Voir « Général » (page 33), lors
de la sortie du signal vidéo vers la télévision,
etc.
123
456
7809
1 Appuyez sur OPTIONS.
Le menu Option s’affiche.
2 Appuyez sur X/x pour
sélectionner le « Mode LCD » et
appuyez sur ENTER.
Les éléments de l’option « Mode LCD »
s'affichent.
3 Appuyez sur X/x pour
sélectionner les éléments et
appuyez sur ENTER.
• Aspect LCD : Changer la taille de
l’image. Sélectionnez « Normal » ou
« Plein Ecran » en appuyant sur
• Rétro éclairage : Ajustez la luminosité
de l’écran LCD en appuyant sur C
• Contraste : Réglez le contraste entre les
zones pâles et foncées en appuyant sur
/
c.
C
• Teinte : Ajustez l’équilibre entre le
rouge et le vert appuyant sur C
• Couleur : Ajustez la richesse des
couleurs en appuyant sur C
FR
28
• Par Défaut : Réinitialisez tous les
paramètres à leur valeur par défaut.
Pour éteindre le menu Options
Appuyez sur OPTIONS ou sur O RETURN.
z Astuces
• L’écran s’éteint automatiquement lorsque le
panneau est fermé.
• Vous pouvez voir les paramètres de l’affichage
dans « Général » (page 33).
La taille de l’affichage écran disponible varie selon
le Disque.
X/x
*.
/
c.
/
c.
/
c.
Page 77

Tirer profit des vidéos DivX
Remarques
123
456
7809
C/X/x/c
ENTER
DISPLAY
>
.
M
AUDIO
SUBTITLE
x
m
MES FAVORIS
02 VENUS
01 HAWAII
. .
Dir:001
Lecture de fichiers vidéo
DivX
Vous pouvez lire les fichiers vidéo DivX sur
des CD (CD-ROM/CD-R/CD-RW) ou DVD
(DVD-ROM/DVD+RW/DVD+R/DVDRW/
DVD-R) de données.
Lorsque vous insérez des CD de DONNÉES
et des DVD de DONNÉES, la liste des
albums s'affiche.
• Lorsque le fichier sélectionné n’est pas reconnu,
le message « Erreur De Données (DivX) »
s’affiche à l’écran et le fichier n’est pas lu.
• Selon le fichier vidéo DivX, l’image peut
s’interrompre ou être floue. Dans ce cas, il est
recommandé de créer un fichier avec un taux plus
bas. Si le son est toujours de mauvaise qualité, le
format audio MP3 est recommandé. Remarquez
cependant que ce lecteur ne reconnaît pas le
format WMA (Windows Media Audio).
• En raison de la technologie de compression
utilisée pour les fichiers vidéo DivX, il faut
parfois un certain temps après avoir appuyé sur
H (Lire) pour que l’image s’affiche.
• En fonction du fichier vidéo DivX, le son risque
de ne pas correspondre aux images.
• Le haut-parleur du lecteur ne rend pas l'audio DTS.
Lors de la lecture de bandes sonores DTS sur un
fichier vidéo DivX, branchez le lecteur à un
amplificateur AV (récepteur) (page 40) et activez
« DTS » dans « Reglage Audio » (page 36).
• En fonction du fichier vidéo DivX, certaines
opérations ne seront peut-être pas disponibles.
®
Lecture d’une vidéo DivX
1 Appuyez sur X/x pour sélectionner le
réglage et appuyez sur ENTER.
Une liste de fichiers de l’album s’affiche.
Tirer profit des vidéos DivX
• Pour aller à la page suivante ou
précédente, appuyez sur > ou sur
..
• Pour retourner à la liste des Dossiers,
appuyez sur X/x pour sélectionner
et appuyez sur ENTER.
®
2 Appuyez sur X/x pour sélectionner le
fichier que vous voulez lire et appuyez
sur ENTER.
La lecture commence au fichier choisi.
Pour se rendre au fichier vidéo DivX
suivant ou précédent
Appuyez sur > ou sur ..
Pour trouver un point rapidement en
effectuant la lecture de fichiers vidéo DivX
en avance rapide ou marche arrière rapide
(Balayage)
Appuyez plusieurs fois sur M/m pour
sélectionner la vitesse pour le mode de
recherche durant la lecture.
Pour regarder image par image (Lecture
Ralentie)
Appuyez sur M plusieurs fois en mode
pause pour sélectionner la vitesse lente de
votre choix.
Pour afficher les informations de lecture
Appuyez sur DISPLAY plusieurs fois.
Les informations de lecture changent dans
l’ordre suivant, « Titre Écoulé », « Titre
Restant », « Affichage Désactivé » et
« Sous-Titre ».
29
FR
,suite
Page 78

Pour changer le son
Remarque
Remarque
Remarques
Appuyez sur AUDIO plusieurs fois durant la
lecture pour sélectionner le signal audio de
votre choix. Si l’indication « Pas De Fichier
Audio » s'affiche, le lecteur ne prend pas en
charge le format du signal audio contenu sur
le disque.
Pour changer les sous-titres
Appuyez sur SUBTITLE durant la lecture.
Appuyez sur X/x et sur ENTER durant
l’affichage des informations du sous-titre.
Pour arrêter la lecture
Appuyez sur x.
z Astuce
Si le nombre de visionnements est prédéfini, vous
pouvez lire les fichiers vidéo DivX autant de fois
que le nombre prédéfini. Les occurrences suivantes
sont comptées :
– lorsque le lecteur est éteint. Ceci inclut lorsque le
lecteur est éteint automatiquement par la fonction
d’extinction automatique. Appuyez sur X au lieu
de x pour arrêter le visionnement.
– lorsque le couvercle est ouvert.
– lorsqu’un autre fichier est lu.
La fonction de retour lent n’est pas disponible.
A propos des fichiers
vidéo DivX
DivX® est une technologie de compression
pour fichier vidéo développée par DivX, inc.
Ce produit est certifié DivX
Vous pouvez lire des CD de DONNÉES et
des DVD de DONNÉES contenant des
fichiers vidéo DivX.
CD de DONNÉES et DVD de
DONNÉES que le lecteur peut lire
Ce lecteur ne peut lire que les CD de
DONNÉES dont le format est
ISO9660Niveau 1 ou Joliet, et les DVD de
DONNÉES dont le format est UDF
(Universal Disc Format).
Veuillez consulter les instructions fournies
avec votre lecteur et logiciel d’enregistrement
(non inclus) pour plus d’informations sur les
formats d’enregistrement.
Le lecteur ne pourra pas toujours lire les CD de
DONNÉES ou DVD de DONNÉES créés au format
Packet Write ou les disques contenant plusieurs
sessions.
®
.
FR
30
Fichiers vidéo DivX lisibles
Le lecteur peut lire les données enregistrées
au format DivX et dotées de l’extension
« .AVI » ou « .DIVX ». Le lecteur ne pourra
pas lire les fichiers avec l’extension « .AVI »
ou « .DIVX » qui ne contiennent pas de vidéo
DivX.
• Il est possible que le lecteur ne lise pas un fichier
vidéo DivX lorsque le fichier est constitué de
deux fichiers vidéo DivX combinés ou plus.
• Le lecteur ne peut pas lire un fichier DivX de plus
de 720 (largeur) × 576 (hauteur)/2 Go.
• Selon le fichier vidéo DivX, l’image peut perdre
de la qualité ou le son devenir intermittent.
• Le lecteur ne peut pas lire les fichiers DivX de
plus de 3 heures.
• Le lecteur peut afficher un nom de fichier jusqu’à
concurrence de 14 caractères. Les caractères
supplémentaires ne s’affichent pas.
Page 79

• Les caractères non affichables apparaissent
comme « * ».
• Selon le disque, un nom de fichier non affichable
apparaît comme « * ».
• Vous ne pouvez pas afficher correctement les
noms de fichier de CD-R/CD-RW écrits dans le
système de fichiers UDF.
À propos de l’ordre de lecture
des fichiers vidéo DivX
Veuillez noter que l’ordre de lecture n’est pas
toujours applicable, selon le logiciel utilisé
pour créer le fichier vidéo DivX ou s’il y a
plus de 299 albums et 648 fichiers vidéo
DivX dans chaque album. Voir « À propos de
l’ordre de lecture des albums, pistes et
fichiers » (page 44).
Tirer profit des vidéos DivX
®
31
FR
Page 80

Paramètres et réglages
Remarque
123
456
7809
C/X/x/c
ENTER
OPTIONSO
x
ENTER RETURN
Général
Afficher TV
Marque Angle
16 : 9
Oui
Oui
Oui
Economiseur D'Ecran
PBC
Sélectionner: Annuler:
DivX
Par Défaut
Elément sélectionné
Elément de réglage
Réglages
Utilisation de l’écran
Réglage
À l’aide de l’écran Réglage, vous pouvez
modifier des éléments comme l’image et le
son. Vous pouvez également définir la langue
des sous-titres et du menu de configuration,
entre autres.
Pour de plus amples informations sur les
éléments de l’écran Réglage, veuillez
consulter les pages 33 à 37.
Les paramètres de lecture stockés sur le disque ont
priorité sur les paramètres de l’écran Réglage. Par
conséquent, il est possible que ce ne soit pas toutes
les fonctions décrites qui fonctionnent.
1 Appuyez sur OPTIONS lorsque le
lecteur est arrêté.
Le menu Option s’affiche.
L’écran Réglage ne s’affiche pas si la
reprise de lecture est activée. Annulez
d’abord le statut de reprise de lecture en
appuyant sur x deux fois et appuyez
ensuite sur OPTIONS.
3 Appuyez sur X/x pour
sélectionner l’élément souhaité et
appuyez sur ENTER : « Général »,
« Reglage Audio », « Choix De La
Langue » ou « Controle Parental »,
puis appuyez sur ENTER.
L’élément Réglage est sélectionné.
Exemple : « Général »
Général
Afficher TV
Marque Angle
Economiseur D'Ecran
PBC
DivX
Par Défaut
Sélectionner: Annuler:
16 : 9
Oui
Oui
Oui
ENTER RETURN
4 Appuyez sur X/x pour
sélectionner un élément et
appuyez sur ENTER.
Les paramètres pour l’élément
sélectionné s’affichent.
Exemple : « Afficher TV »
Général
Afficher TV
Marque Angle
Economiseur D'Ecran
PBC
DivX
Par Défaut
4 : 3 Pan Scan
4 : 3 Letter Box
16 : 9
Oui
2 Appuyez sur X/x pour
sélectionner « Reglage » et
appuyez sur ENTER.
Les éléments pour « Reglage »
s’affichent.
FR
32
Sélectionner: Annuler:
ENTER RETURN
Page 81

5 Appuyez sur X/x pour
Réglage Sélectionné
ENTER RETURN
Général
Afficher TV
Marque Angle
4 : 3 Pan Scan
Oui
Oui
Oui
Economiseur D'Ecran
PBC
Sélectionner: Annuler:
DivX
Par Défaut
ENTER RETURN
Général
Afficher TV
Marque Angle
16 : 9
Oui
Oui
Oui
Economiseur D'Ecran
PBC
DivX
Par Défaut
Sélectionner: Annuler:
16:9
4:3 Letter Box
4:3 Pan Scan
sélectionner un réglage et
appuyez sur ENTER.
Le réglage est sélectionné et la
configuration est terminée.
Exemple : « 4:3 Pan Scan »
Pour désactiver l’écran Réglage
Appuyez sur OPTIONS ou sur O RETURN
deux fois.
Paramètres de
l’affichage (Général)
Choisissez les options d’affichage de lecture et les
paramètres selon la télévision qui sera connectée.
Sélectionnez « Général » dans l’écran
Réglage. Pour utiliser l’écran, voir
« Utilisation de l’écran Réglage » (page 32).
Les paramètres par défaut sont soulignés.
◆ Afficher TV (DVD uniquement)
Sélectionne le rapport d’affichage de la
télévision connectée (4:3 standard ou large).
4:3
Pan Scan
4:3
Letter Box
16:9
Sélectionnez cette option lorsque
vous vous connectez à une
télévision à écran 4:3.Affiche
automatiquement une image large
sur la totalité de l’écran et découpe
les portions qui dépassent.
Sélectionnez cette option lorsque
vous vous connectez à une
télévision à écran 4:3.Affiche
l’image large avec des bandes
noires sur les parties supérieures
et inférieures de l’écran.
Sélectionnez cette option lorsque
vous vous connectez à une télévision
à écran large ou à une télévision
avec une fonction mode large.
Paramètres et réglages
,suite
33
FR
Page 82

Remarque
Selon le DVD, le format « 4:3 Letter Box » peut être
ENTER RETURN
Reglage Audio
Audio DRC
Sortie NumeriqueTVNon
Sélectionner: Annuler:
sélectionné automatiquement au lieu de « 4:3 Pan
Scan » ou vice versa.
◆ Marque Angle
Affiche la marque angle lorsque vous changez les
angles de vue durant la lecture des DVD enregistrés
avec plusieurs angles.
Oui Afficher le marqueur d’angle
Non Cacher le marqueur d’angle
◆ Economiseur D’Ecran
L’économiseur d'écran s’affiche lorsque vous
laissez le lecteur en mode Arrêt pendant
environ 15 minutes. L’économiseur d’écran
aidera à éviter que votre écran s'endommage
(effet « double/fantôme »). Appuyez sur H
pour éteindre l’économiseur d’écran.
Oui
Non Désactiver a fonction
Activer la fonction
économiseur d’écran
économiseur d’écran
◆ PBC
À l'aide de la fonction PBC (Contrôle de
lecture), vous pouvez profiter de la lecture de
programmes interactifs et de programmes
avec des fonctions de recherche (page 20).
Ce réglage est effectif lorsque vous lisez des
VIDEO CD avec la fonction PBC. Le réglage
devient disponible après avoir ouvert et fermé
le couvercle suite au réglage.
Oui
Non Désactiver la fonction PBC
Grâce à la fonction PBC, vous
pouvez lire les CD VIDEO via
l’écran menu
Paramètres du son (Reglage
Audio)
« Reglage Audio » vous permet de définir le
son selon les conditions de lecture et de
connexion.
Sélectionnez « Reglage Audio » dans l’écran
Réglage. Pour utiliser l’écran, voir
« Utilisation de l’écran Réglage » (page 32).
Les paramètres par défaut sont soulignés.
◆ Audio DRC (Dynamic Range
Control)(DVD uniquement)
Il rend le son clair lorsque le volume est
diminué lors de la lecture d’un DVD
conforme à « Audio DRC ».
Cette fonction affecte la sortie des
connecteurs suivants :
– Connecteur AUDIO
– Connecteur OPTICAL OUT uniquement
lorsque « Dolby Digital » est défini à «
Mixage Aval » (page 35).
Standard Valeur par défaut
TV
Large Plage Vous donne l’impression de
Rend les sons faibles clairs
même si le volume est bas
vivre l’évènement en direct
◆ DivX
Affiche le code d’enregistrement pour ce
lecteur. Pour plus d’informations, rendezvous sur le site Internet:
http://www.divx.com
◆ Par Défaut
Chaque fonction retrouve ses paramètres par
défaut. Veuillez noter que tous vos
paramètres seront perdus.
FR
34
◆ Sortie Numerique
Sélectionne si les signaux audio sont produits
via le connecteur OPTICAL OUT.
Oui Valeur par défaut. Lorsque vous
Non
sélectionnez « Oui », voir
« Configurer le signal de sortie
numérique » pour les paramètres
suivants.
L’influence du circuit numérique
sur le circuit analogique est
minimale.
Page 83

Configurer le signal de sortie
numérique
Change la méthode de sortie des signaux
audio lorsque vous connectez un équipement
audio comme un amplificateur AV
(récepteur) avec un connecteur OPTICAL
OUT.
Pour plus d’informations sur la connexion,
consultez la page 38.
Après avoir configuré la « Sortie Numerique » à
« Oui », sélectionnez « Dolby Digital » et « DTS ».
Si vous connectez un composant qui est
incompatible avec le signal audio sélectionné,
un bruit fort (ou aucun son) peut se faire
entendre dans les haut-parleurs,
endommageant vos oreilles et les
haut-parleurs.
◆ Dolby Digital (DVD uniquement)
Sélectionne le type de signal Dolby Digital.
Mixage Aval Sélectionnez cette option
lorsque le lecteur est connecté à
un composant audio sans un
décodeur Dolby Digital intégré.
Dolby Digital Sélectionnez cette option
lorsque le lecteur est connecté à
un composant audio avec un
décodeur Dolby Digital intégré.
◆ DTS
Permet d’activer ou de désactiver la
production des signaux DTS.
Oui Sélectionnez cette option
Non
lorsque le lecteur est connecté à
un composant audio avec un
décodeur DTS intégré.
Sélectionnez cette option
lorsque le lecteur est connecté à
un composant audio sans un
décodeur DTS intégré.
Paramètres et réglages
◆ MPEG (DVD uniquement)
Sélectionne le type de signal audio MPEG.
PCM
MPEG Sélectionnez cette option
Sélectionnez cette option
lorsque le lecteur est connecté à
un composant audio sans un
décodeur MPEG intégré. Si
vous lisez des bandes sonores
MPEG multiplex, uniquement
les signaux Avant (G) et Avant
(D) seront produits depuis les
deux haut-parleurs avant.
lorsque le lecteur est connecté à
un composant audio avec un
décodeur MPEG intégré.
35
FR
Page 84

Configuration de la
Remarque
Choix De La Langue
Affichage A L'Ecran
Menu Du Disque
Français
Français
Français
Français
Sous-Titre
Audio
ENTER RETURN
Sélectionner: Annuler:
Controle Parental
Mot de Passe
Controle Parental
ENTER RETURN
Sélectionner: Annuler:
Paramètres de contrôle
langue de l’affichage et
de la bande son
(Choix De La Langue)
« Choix De La Langue » vous permet de
définir plusieurs langues pour l’affichage à
l'écran ou la bande sonore.
Sélectionnez « Choix De La Langue » dans
l’écran Réglage. Pour utiliser l’écran, voir «
Utilisation de l’écran Réglage » (page 32).
◆ Affichage A L’Ecran
Permet de changer la langue d’affichage à
l’écran.
◆ Menu Du Disque (DVD VIDEO
uniquement)
Permet de changer la langue du menu du
disque.
Lorsque vous sélectionnez « Original », la
langue ayant la priorité pour le disque est
sélectionnée.
◆ Sous-Titre (DVD VIDEO uniquement)
Permet de changer la langue des sous-titres.
Lorsque vous sélectionnez « Non », aucun
sous-titre n’est affiché.
◆ Audio (DVD VIDEO uniquement)
Permet de changer la langue de la bande
sonore.
Lorsque vous sélectionnez « Original », la
langue ayant la priorité pour le disque est
sélectionnée.
parental (Controle Parental)
La lecture de certains DVD VIDEO peut être
limitée à l’aide de la fonction de contrôle
parental.
Sélectionnez « Controle Parental » dans
l’écran Réglage. Pour utiliser l’écran, voir
« Utilisation de l’écran Réglage » (page 32).
◆ Mot De Passe
Entrer ou changer un mot de passe. Si vous
définissez un mot de passe, vous pourrez
limiter la lecture d’un DVD possédant une
fonction de contrôle parental. Lorsque vous
accédez à l’option Mot de passe pour la
première fois, entrez un nouveau mot de
passe (vous n’avez pas besoin d’entrer
l’ancien mot de passe.).
◆ Controle Parental
Plus la valeur attribuée est basse, plus la
limitation est élevée.
Pour définir le contrôle parental, vous avez
besoin du mot de passe sélectionné dans
« Mot De Passe ». Par conséquent, vous
devez d'abord définir le mot de passe dans le
réglage.
Si vous sélectionnez une langue dans « Menu Du
Disque », « Sous-Titre » ou « Audio » qui n'a pas été
enregistrée sur le DVD VIDEO, une des langues
enregistrées sera automatiquement sélectionnée.
FR
36
Page 85

Changement du mot de passe
Remarques
1
2
3
4
5
6
7
8 Adulte
Controle Parental
Mot de Passe
Controle Parental
ENTER RETURN
Sélectionner: Annuler:
OK
Mot de Passe
Tapez le mot de passe puis appuyer sur .
ENTER
Controle Parental
1 Appuyez sur X/x pour sélectionner
« Mot De Passe » dans l’écran de
contrôle parental et appuyez sur
ENTER.
2 Sélectionnez « Changement » et
appuyez sur ENTER.
L’écran pour entrer le mot de passe
s’affiche.
3 Entrez votre mot de passe actuel à six
chiffres dans la boîte « Ancien Mot De
Passe ».
4 Entrez votre nouveau mot de passe
actuel à six chiffres dans la boîte
« Nouveau Mot De Passe ».
5 Entrez à nouveau le nouveau mot de
passe à six chiffres dans le champ
«Confirmer Mot De Passe » et appuyez
sur ENTER pour confirmer.
Si vous commettez une erreur en entrant
votre mot de passe
Appuyez sur CLEAR, ou appuyez sur C pour
effacer chaque caractère avant d’appuyer sur
ENTER comme dans l’étape 5, et entrez le
mot de passe à nouveau.
Configurer le contrôle parental
(lecture limitée)
1 Appuyez sur X/x pour sélectionner
« Controle Parental » dans l’écran de
réglage Contrôle Parental et appuyez
sur ENTER.
L’écran pour configurer le niveau de
limitation de lecture s’affiche.
2 Appuyez sur X/x pour sélectionner le
niveau de limitation (1-8), et appuyez
sur ENTER.
Plus la valeur attribuée est basse, plus la
limitation est élevée.
L’écran pour entrer le mot de passe
s’affiche.
Paramètres et réglages
3 Entrez ou ré entrez votre mot de passe
à 6 chiffres à l’aide des boutons
numériques, puis appuyez sur ENTER.
La configuration du contrôle parental est
terminée.
Pour lire un disque pour lequel le contrôle
parental a été défini
1 Insérez le disque et appuyez sur H.
L’écran pour entrer le mot de passe
s’affiche.
2 Entrez votre mot de passe à 6 chiffres à
l’aide des boutons numériques, puis
appuyez sur ENTER.
Le lecteur commence la lecture.
Si vous oubliez votre mot de passe
Enlevez le disque et répétez les étapes soulignées
dans « Changement du mot de passe » (page
37).Entrez « 136900 » dans la boîte « Ancien Mot
De Passe » et entrez ensuite votre nouveau mot de
passe à 6 chiffres dans la boîte « Nouveau Mot De
Passe »et dans la boîte « Confirmer Mot De Passe ».
• Lorsque vous lisez des disques pour lesquels la
fonction de contrôle parental n’est pas disponible,
ce lecteur ne permet pas de limiter la lecture.
• Selon le disque, on vous demandera peut-être de
changer le niveau de contrôle parental pendant
que le disque joue. Dans ce cas, entrez le mot de
passe et changez le niveau. Si le mode de reprise
de lecture est annulé, le niveau retourne au niveau
précédent.
37
FR
Page 86

Ajouts
Remarques
TV ou moniteur avec connecteurs
d’entrée audio/vidéo
Vers AUDIO/VIDEO
Câble audio/vidéo (fourni)
Connexion à un autre périphérique
Pour changer l’interrupteur LINE SELECT (IN/OUT)
LINE SELECT IN : fait entrer les images ou le son d’un périphérique externe. Le Message
« Entrée ligne » s’affiche sur l’écran LCD jusqu’à l’arrivée du signal du
LINE SELECT OUT :envoie le signal de lecture depuis le lecteur vers une télévision.
• Branchez les cordons fermement pour éviter le bruit.
• Consultez les instructions fournies avec les composants à connecter.
• Vous ne pouvez pas connecter ce lecteur à une télévision qui n'a pas de connecteur d’entrée vidéo.
• Assurez-vous de déconnecter le câble de sortie au réseau électrique pour chaque composant avant la
connexion.
• Connectez le lecteur directement à la télévision. La qualité de l'image peut diminuer lorsque la sortie vidéo
du lecteur passe par un décodeur vidéo sur la télévision.
Connexion à la télévision
périphérique externe.
PHONES
AB
AUDIO VIDEO
OPTICAL
OUT
LINE SELECT
IN OUT
DC IN
9.5V
Pour envoyer le signal de lecture à une télévision ou à un moniteur
1 Définissez l’interrupteur LINE SELECT du côté droit du lecteur à « OUT ».
FR
38
Page 87

Connexion d’un amplificateur AV (récepteur)
DC IN
9.5V
AUDIO VIDEO
PHONES
OPTICAL
OUT
AB
LINE SELECT
IN OUT
Amplificateur stéréo
Vers AUDIO
Câble audio/vidéo (fourni)
Vers entrée AUDIO
Amplificateur avec décodeur
Dolby Digital ou DTS
Vers Sortie Optique
Cordon numérique optique (non inclus)
Vers Entrée AUDIO
Exemple 1
Pour envoyer un signal audio analogique vers un amplificateur AV (récepteur)
1 Définissez l’interrupteur LINE SELECT du côté droit du lecteur à « OUT ».
* Le connecteur jaune est utilisé pour les signaux vidéo (page 38).
Exemple 2
Ajouts
PHONES
AB
AUDIO VIDEO
OPTICAL
OUT
LINE SELECT
IN OUT
DC IN
9.5V
Pour envoyer un signal audio numérique vers un amplificateur AV (récepteur)
1 Définissez l’interrupteur LINE SELECT du côté droit du lecteur à « OUT ».
2 Définissez la « Sortie Numerique » à « Oui » dans « Reglage Audio » (page 34).
39
FR
Page 88

Connexion à un magnétoscope de lecture ou à un caméscope
Remarque
Magnétoscope de
lecture ou caméscope
Vers Entrée
AUDIO/VIDEO
Câble audio/vidéo (fourni)
Vers sortie AUDIO/VIDEO
PHONES
AB
AUDIO VIDEO
OPTICAL
OUT
LINE SELECT
IN OUT
DC IN
9.5V
Pour recevoir le signal de lecture depuis un magnétoscope de lecture ou à un caméscope.
1 Définissez l’interrupteur LINE SELECT du côté droit du lecteur à « IN ».
Définissez l’interrupteur LINE SELECT à « OUT » après utilisation. Vous ne pouvez pas lire sur le lecteur
si l’interrupteur est défini à « IN ».
FR
40
Page 89

Informations supplémentaires
Dépannage
L’image ne remplit pas l’écran, même si
le rapport d’affichage est défini à
« Afficher TV » sous « Général ».
, Le rapport d’affichage du disque est inscrit
sur votre DVD.
Si vous expérimentez une des difficultés
suivantes pendant l’utilisation du lecteur,
utilisez ce guide de dépannage pour vous
aider à résoudre le problème avant de
demander une réparation. Si un problème
persiste, consultez votre revendeur Sony le
plus près.
Alimentation
L’appareil ne s’allume pas.
, Vérifiez si le câble de sortie au réseau
électrique est branché fermement.
, Lorsque vous l’utilisez avec la batterie,
vérifiez que la batterie est suffisamment
chargée.
Image
Il n’y a aucune image/l’image est floue.
, Le disque est sale ou endommagé.
, La luminosité est réglée au minimum.
Définissez la luminosité dans le « Mode
LCD » (page 28).
, Lorsque vous lisez des disques, définissez
l’interrupteur LINE SELECT à « OUT ».
Lorsque vous envoyez le signal de lecture à un
autre périphérique, définissez l’interrupteur
LINE SELECT à « OUT ». Lorsque vous
recevez le signal de lecture depuis un autre
périphérique, définissez l’interrupteur LINE
SELECT à « IN » (page 38).
, Reconnectez le cordon de connexion
fermement.
, Les cordons de connexion sont
endommagés.
, Vérifiez la connexion à votre télévision
(page 38) et changer le sélecteur de source
de votre télévision afin que le signal du
lecteur s’affiche sur l’écran de télévision.
, Le lecteur est connecté aux connecteurs
COMPONENT VIDEO IN (Y, P
d’une télévision high-vision.
, Si l’image de votre lecteur passe par un deck
vidéo pour atteindre votre télévision ou si
vous êtes connecté à une combinaison
lecteur TV/VIDEO, le signal anti-copie
appliqué à certains programmes de DVD
pourrait affecter la qualité de l’image.
, PR)
B
Les points noirs s’affichent et les points
rouges, bleus et verts restent sur le LCD.
, Il s’agit d'une propriété structurelle du LCD
et non d’un mal fonctionnement.
Son
Il n’y a pas de son.
, Le lecteur est en mode pause ou en mode
Lecture lente.
, Le lecteur est en mode avance rapide ou
marche arrière rapide.
, Lors de la lecture d’un Super VCD sur
lequel aucune piste audio 2 n’est
enregistrée, aucun son ne sera produit si
vous sélectionnez « Stéréo 1 », « Gauche 1 »
ou « Droite 1 ».
, Reconnectez le cordon de connexion
fermement.
, Le cordon de connexion est endommagé.
, Le lecteur est connecté à un mauvais
connecteur d’entrée sur l’amplificateur
(récepteur) (page 39).
, L’entrée de l’amplificateur (récepteur) n'est
pas définie correctement.
, Si les signaux audio ne sortent pas du
connecteur OPTICAL OUT, vérifiez les
paramètres audio (page 35).
Le volume sonore est bas.
, Le volume sonore est bas sur certains DVD.
Le volume sonore peut s’améliorer si vous
définissez « Audio DRC » dans « Reglage
Audio » à « TV » (page 34).
Fonctionnement
La télécommande ne fonctionne pas.
, Les batteries de la télécommande sont faibles.
, Il y a un ou plusieurs obstacles entre la
télécommande et le lecteur.
, La distance entre la télécommande et le
lecteur est trop importante.
, La télécommande n’est pas pointée sur le
capteur infrarouge du lecteur.
, La lumière du soleil ou une forte
illumination frappe directement le capteur
infrarouge.
Informations supplémentaires
41
FR
Page 90

Rien ne se produit lorsque les boutons
sont utilisés.
,
L’interrupteur \/1/HOLD du lecteur est
défini à « HOLD » (page 16).
Le disque ne joue pas.
, Le disque n’est pas du bon côté.
Insérez le disque avec la face de lecture vers
le bas.
, Le disque n’est pas installé correctement.
, Le lecteur ne peut pas lire certains disques
(page 7).
, Le code de région du DVD ne correspond
pas au lecteur (page 8).
, De l’humidité s'est condensée à l’intérieur
du lecteur (page 3).
, Le lecteur ne peut pas lire un disque enregistré
qui n'est pas correctement finalisé (page 7).
, Le contrôle parental a été défini. Changez le
paramètre.
, L’interrupteur LINE SELECT du côté droit
du lecteur à été défini à « IN ».
Le lecteur commence la lecture du disque
automatiquement.
, Le disque comporte une fonction de lecture
automatique.
La lecture s’arrête automatiquement.
, Lors de la lecture de disques avec un signal
de pause automatique, le lecteur arrête la
lecture au moment du signal de pause
automatique.
Certaines fonctions comme Arrêt,
Recherche, Balayage, Lecture lente,
Lecture répétée ou Lecture aléatoire ne
peuvent pas être effectuées.
, Selon le disque, il est possible que vous ne
soyez pas en mesure d’effectuer certaines
des opérations ci-dessus. Consultez les
instructions d’utilisation fournies avec le
disque.
La langue de sous-titre ne peut pas être
changée ou désactivée.
, Essayez d’utiliser le menu du DVD au lieu
du bouton de sélection direct de la
télécommande (page 17).
, Les sous-titres multilingues ne sont pas
enregistrés sur le DVD qui est lu.
, Le DVD interdit le changement des
sous-titres.
Les angles ne peuvent pas être changés.
, Essayez d’utiliser le menu du DVD au lieu
du bouton de sélection direct de la
télécommande (page 17).
, Les angles multiples ne sont pas enregistrés
sur le DVD qui est lu.
, L'angle peut être changé uniquement
lorsque l’indicateur « » s’allume à
l’écran (page 19).
, Le DVD interdit les changements d’angles.
La piste audio MP3 ne peut pas être lue
(page 43).
, Le CD de DONNÉES n’est pas enregistré
dans un format MP3 conforme à ISO 9660
Niveau 1 ou Joliet.
, Le DVD de DONNÉES n’est pas enregistré
dans un format MP3 conforme à UDF
(Universal Disk Format).
, La piste audio MP3 n’a pas d’extension
« .MP3 ».
, Les données ne sont pas formatées en MP3
même si elles ont l’extension « .MP3 ».
, Les données ne sont pas au format MPEG-1
Audio Layer III.
, Le lecteur ne peut pas lire des pistes audio
au format mp3PRO.
, La piste audio MP3 est endommagée.
La langue de la bande sonore ne peut pas
être changée.
, Essayez d’utiliser le menu du DVD au lieu
du bouton de sélection direct de la
télécommande (page 17).
, Les pistes multilingues ne sont pas
enregistrées sur le DVD qui est lu.
, Le DVD interdit le changement de langue
pour la bande sonore.
FR
42
Page 91

L’image JPEG ne peut pas être lue
Remarque
(page 43).
, Le CD de DONNÉES n’est pas enregistré
dans un format JPEG conforme à ISO 9660
Niveau 1 ou Joliet.
, Le DVD de DONNÉES n’est pas enregistré
dans un format JPEG conforme à UDF
(Universal Disk Format).
, L’image JPEG n’a pas d’extension
« .JPG ».
, Les données ne sont pas formatées en JPEG
même si elles ont l’extension « .JPG ».
, L’image au format JPEG n’est pas
conforme à DCF (page 43).
, L’image est plus grande que 3078 (largeur)
× 2048 (hauteur) en mode normal, ou
comporte plus de 3 300 000 pixels en JPEG
progressif. (Certains JPEG progressifs ne
peuvent être affichés même si la taille du
fichier est conforme aux spécifications).
, L’image JPEG est endommagée.
Le fichier vidéo DivX ne peut pas être lue.
, Le fichier n’a pas été créé au format DivX.
, Le fichier a une extension différente de
« .AVI » ou « .DIVX ».
, Le CD de DONNÉES (vidéo DivX)/DVD
de DONNÉES (vidéo DivX) n'a pas été créé
dans un format DivX conforme à ISO
9660Niveau 1 ou Joliet/UDF.
, Le fichier vidéo DivX est plus grand que
720 (largeur) x 576 (hauteur).
Les noms d'album/piste/fichier ne sont
pas affichés correctement.
, Le lecteur peut afficher uniquement des
caractères numériques et alphabétiques. Les
autres caractères sont affichés comme « * ».
Le disque ne commence pas la lecture à
partir du début.
, Lecture répétée ou Lecture aléatoire est
sélectionnée (pages 22 et 24).
, La reprise de lecture a pris effet (page 17).
Le lecteur ne fonctionne pas
correctement.
, Lorsque l’électricité statique, etc., fait en
sorte que le lecteur ne fonctionne pas
normalement, débranchez-le.
A propos des pistes
audio MP3 et des images
JPEG
MP3 est une technologie de compression
audio conforme aux réglementations ISO/
IEC MPEG. JPEG est une technologie de
compression de l’image.
Vous pouvez lire des CD de DONNÉES/
DVD de DONNÉES contenant des pistes
MP3 ou des images JPEG.
CD de DONNÉES/DVD de DONNÉES
que le lecteur peut lire
Vous pouvez lire des CD de DONNÉES
(CDROM/CD-R/CD-RW) ou les DVD de
DONNÉES (DVD-ROM/DVD+RW/
DVD+R/DVD-RW/DVD-R) enregistrés en
MP3 (MPEG-1 Audio Layer III) et au format
JPEG.
Ce lecteur ne peut cependant lire que les CD
de DONNÉES dont le format est ISO9660
Niveau 1 ou Joliet, et les DVD de DONNÉES
dont le format est UDF (Universal Disc
Format).
Veuillez consulter les instructions fournies
avec votre lecteur et logiciel d’enregistrement
(non inclus) pour plus d’informations sur les
formats d’enregistrement.
Le lecteur ne pourra pas toujours lire les CD de
DONNÉES ou DVD de DONNÉES créés au format
Packet Write ou les disques contenant plusieurs
sessions.
Piste audio MP3 audio et image
JPEG que ce lecteur peut lire
Le lecteur peut lire les pistes et fichiers
suivants :
• Pistes audio MP3 avec l’extension « .MP3 ».
• Les images JPEG avec l’extension « .JPG ».
• Les images JPEG conforment au format de
fichiers DCF*.
* « Design rule for Camera File system » : Normes
d'image pour les appareils photo numériques
régulées par JEITA (Japan Electronics and
Information Technology Industries Association).
Informations supplémentaires
43
FR
Page 92

Remarques
• Changez les extensions « .JPE » ou « .JPEG »
Remarques
pour l'extension « .JPG ».
• Le lecteur lira n’importe quelle donnée avec
l’extension « .MP3 » ou « .JPG », même s'ils ne
sont pas au format MP3 ou JPEG. La lecture de
ces données pourrait générer un bruit fort qui
pourrait endommager votre système de hautparleur.
• Le lecteur n’est pas conforme aux pistes audio au
format mp3PRO.
• Certains fichiers JPEG ne peuvent être lus.
• Le lecteur peut afficher un nom de fichier ou de
piste jusqu’à concurrence de 14 caractères. Les
caractères supplémentaires ne s’affichent pas.
• Les caractères non affichables apparaissent
comme « * ».
• Selon le disque, un nom de fichier ou de piste non
affichable apparaît comme « * ».
• Vous ne pouvez pas afficher correctement les
noms de fichier de CD-R/CD-RW écrits dans le
système de fichiers UDF.
• Lors de la lecture d'une piste audio MP3 en mode
VBR, vous ne pouvez pas afficher le débit binaire
correctement.
À propos de l’ordre de lecture
des albums, pistes et fichiers
Les pistes et fichiers d’un album sont lus
selon l’ordre dans lequel ils ont été
enregistrés (CD-R etc.).
z Astuce
Puisqu’un disque contenant une arborescence
complexe prend plus de temps à lire, il est
recommandé que vous créiez des albums de moins
de deux niveaux d’arborescences.
Remarques sur les
disques
• Pour que les disques restent propres,
tenez-les par les bords. Ne touchez jamais la
surface des disques.
• N’exposez pas les disques au rayonnement
direct du soleil ni à des sources de chaleur,
telles que des conduits d’air chaud, et ne les
laissez pas dans un véhicule garé en plein
soleil, car la température à l’intérieur de
l’habitacle peut augmenter
considérablement.
• Après avoir lu un disque, rangez-le dans son
boîtier.
• Nettoyez le disque avec un chiffon de
nettoyage. Essuyez le disque en partant du
centre vers l’extérieur.
• Le lecteur peut reconnaître jusqu’à 299 albums
(y compris les albums ne contenant pas de pistes
audio MP3 et d'images JPEG). Le lecteur ne lira
par les albums au-delà du 299ième.
• Le lecteur peut reconnaître un total combiné allant
jusqu'à 648 fichiers, pistes et albums. Le lecteur
ne lira pas de fichier, piste ou album au-delà du
648ième.
• En fonc tion de la condition d'écriture du disque, le
nombre total de fichiers, pistes et albums
reconnaissables peut être inférieur à 648.
• La liste d’albums n'affiche que le nom de
l’albumen cours de lecture. Les albums situés sur
la couche supérieure sont affichés comme « \..\ ».
FR
44
• N'utilisez pas de solvant (comme la
benzine), de diluant, de nettoyants pour
disque/objectif ou de vaporisateur
antistatique pour les disques de longue
durée en vinyle.
• Si vous avez imprimé l’étiquette du disque,
séchez-la avant de lire le disque.
Page 93

Spécifications
Système
Laser : Semi conducteur laser
Format de signal : PAL (NTSC)
Caractéristiques audio
Réponse en fréquence : DVD VIDEO
(PCM48 kHz): 20 Hz à 22 kHz/CD : 20
Hz à 20 kHz
Distorsion harmonique : 0,01 %
Dynamique : DVD VIDEO : 90 dB/
CD : 90 dB/
Pleurage et scintillement : Moindre que la
valeur détectée (±0,001 % W PEAK)
Entrées/Sorties
VIDEO (entrée/sortie vidéo) :
Minijack (1)
Sortie 1,0 Vp-p/75 ohms
AUDIO (entrée/sortie audio)/
OPTICALOUT (sortie optique) :
Connecteur minijack stéréo/optique
combiné (1)
Sortie 2,0 Vrms/47 kilohms
Impédance de charge recommandée
supérieure à 47 kilohms
PHONES (casque d’écoute) A/B :
Minijack stéréo (2)
Ecran LCD
Taille : 20 cm (diagonale)
Système de pilotage : Matrice active TFT
Résolution : 800 × 480 (taux de pixel effectif
:plus de 99,99 %)
Général
Conditions d'alimentation requises :
9,5 C.C. V (Adaptateur secteur/
Adaptateur batterie auto)
7,4 C.C. V (Batterie)
Puissance consommée (lecture de
DVDVIDEO) :
23 W (lors de l’utilisation avec une
batterie)
8,5 W (lors de l’utilisation sans une
batterie, avec un casque)
Dimensions (environ) :
225,4 × 33,5 × 164,9 mm (largeur/
hauteur/profondeur) incluant les pièces
de projection
Poids (environ) : 920 g
Température de fonctionnement : 5 °C à
35 °C
Humidité de fonctionnement : 25 % à 80 %
Adaptateur secteur : 100-240 V C.A., 50/
60 Hz
Adaptateur batterie auto : 12 V C.C.
Accessoires inclus
Voir page 9.
Conception et spécifications sujettes à
modifications sans notice préalable.
Informations supplémentaires
45
FR
Page 94

Index des pièces et des commandes
Pour plus d’informations, consultez les pages entre parenthèses.
Vue de haut
t
A Bouton VOL (volume sonore) -/+
B Boutons ./> (précédent/
suivant) (16)
C Bouton x (arrêt) (16)
D Bouton X (pause) (16)
E Bouton H (lecture) (15) *
F Haut-parleur (16)
G Écran LCD (10)
H Bouton DISPLAY (affichage) (21)
PUSH CLOSE
DISPLAY MENU RETURN OPTIONS
OPEN
VOL
I Bouton MENU (17)
J Bouton RETURN (21)
K (capteur infrarouge) (9)
L Bouton OPTIONS (24)
M Boutons C/X/x/c, bouton ENTER
(17)
N Couvercle du disque (15)
O PUSH CLOSE (15)
P Bouton OPEN (ouverture) (15)
* Utiliser les marquages tactiles pour repère lors de
l’ouverture du lecteur. Les touches H (lecture)
et VOL + possède un marquage tactile.
46
FR
Page 95

Vue de devant
CHARGEPOWER
A Indicateur POWER (alimentation) (15)
B Indicateur CHARGE (13)
Vue de droite
HOLD
A Interrupteur \/1 (activé/en veille)/
HOLD (verrouillage) (15)
B PHONES (casque d’écoute) prise A, B
C Connecteur AUDIO (entrée/sortie)/
connecteur OPTICAL OUT (sortie
optique) (38, 39)
PHONES
AB
AUDIO VIDEO
OPTICAL
OUT
C (capteur télécommande) (9)
LINE SELECT
IN OUT
DC IN
9.5V
D Connecteur VIDEO
(entrée/sortie) (38)
E Interrupteur LINE SELECT
(IN/OUT) (15)
F Prise DC IN 9,5 V (entrée d’adaptateur
secteur AC) (11)
Informations supplémentaires
FR
47
Page 96

Télécommande
123
456
7809
A Bouton DISPLAY (affichage) (21)
B Boutons numériques (17)*
C Bouton TOP MENU
(menu principal) (17)
D Boutons C/X/x/c,
bouton ENTER (17)
E Bouton O RETURN (21)
F Boutons ./>
(précédent/suivant) (16)
G Boutons m/M
(rechercher/lecture lente) (23)
H Bouton
ADVANCE
(avancer) (16)
I Bouton X (pause) (16)
J Bouton \/1 (activé/en attente) (15)
K Boutons VOL (volume sonore) +/-
L Bouton CLEAR (effacer) (36)
M Bouton AUDIO (18)*
N Bouton MENU (17)
O Bouton SUBTITLE (sous-titre) (19)
P Bouton ANGLE (19)
Q Bouton OPTIONS (28)
R Bouton H (lecture) (15)*
S Bouton x (arrêt) (16)
48
* Utilisez le point tactile comme une référence lors
de l'utilisation du lecteur. Le numéro 5 possède un
point tactile.
FR
Page 97

Index
Numériques
16:9
33
4:3 Boîte aux lettres
4:3 Pan Scan
33
33
A
Affichage 21, 33
Affichage TV 33
Album 44
Angle 19
Audio 18, 35
Audio DRC 34
Avance rapide 23
B
Balayage 23
Batteries 9
C
CD 7, 15
CD de DONNÉES 7, 30, 43
Choix De La Langue 36
Connexion 38
D
Dépannage 41
Diaporama 27
Disques utilisables 7
®
29, 30
DivX
Dolby Digital 18, 35
DTS 18, 35
DVD 7, 15
DVD de DONNÉES 7, 30,43
DVD-RW 7, 20
E
Economiseur d’écran 34
Écran Réglage 32
J
JPEG 6, 43
L
Lecture Aléatoire 24
Lecture lente 24
Lecture PBC 20
Liste de lecture 20
M
Manipulation des disques 44
Menu Disque 35
Menu DVD 17
MP3 6, 43
O
Original 20
OSD (Affichage à l’Ecran) 35
R
Rechercher 23
Réglages Généraux 33
Réglage audio 34
Répéter la lecture 22, 24
Reprise de la lecture 17
Retour rapide 23
S
Sortie Numérique 34
Sortie Optique 34
Sous-titrage 19, 35
T
Télécommande 9, 48
TOP MENU 17
V
VIDEO CD 7, 8, 15
Informations supplémentaires
49
FR
Page 98

ACHTUNG
Um die Gefahr eines Brands
oder elektrischen Schlags zu
reduzieren, darf dieses Gerät
weder Regen noch
Feuchtigkeit ausgesetzt
werden.
Um einen elektrischen
Schlag zu vermeiden, öffnen
Sie das Gehäuse nicht.
Überlassen Sie
Wartungsarbeiten stets nur
qualifiziertem Fachpersonal.
Das Netzkabel darf nur von
einem qualifizierten
Kundendienst ausgetauscht
werden.
Batterien oder Geräte mit
eingesetzten Batterien dürfen
keiner übermäßigen Wärme,
z. B. durch
Sonnenbestrahlung, Feuer
und dergleichen, ausgesetzt
werden.
Dieser Aufkleber befindet sich auf
der Unterseite des Geräts.
Dieses Gerät wurde als LaserGerät der Klasse 1 (CLASS 1
LASER) klassifiziert. Das
entsprechende Etikett (CLASS 1
LASER PRODUCT) befindet sich
auf der Unterseite des Geräts.
VORSICHT
• Die Verwendung optischer
Instrumente zusammen mit
diesem Produkt stellt ein
Gesundheitsrisiko für die Augen
dar. Der Laser-Strahl, den dieser
CD/DVD-Player generiert, kann
die Augen schädigen. Versuchen
Sie daher nicht, das Gerät zu
zerlegen. Überlassen Sie
Wartungsarbeiten stets nur
qualifiziertem Fachpersonal.
• Bei unsachgemäßem Ersatz der
Batterie besteht
Explosionsgefahr. Ersetzen Sie
diese nur mit dem gleichen oder
einem vergleichbarem Typ.
DE
2
Entsorgung von gebrauchten
elektrischen und elektronischen
Geräten (anzuwenden in den
Ländern der Europäischen Union
und anderen europäischen Ländern
mit einem separaten
Sammelsystem für diese Geräte)
Das Symbol auf dem Produkt oder
seiner Verpackung weist darauf hin,
dass dieses Produkt nicht als normaler
Haushaltsabfall zu behandeln ist,
sondern an einer Annahmestelle für
das Recycling von elektrischen und
elektronischen Geräten abgegeben
werden muss. Durch Ihren Beitrag
zum korrekten Entsorgen dieses
Produkts schützen Sie die Umwelt
und die Gesundheit Ihrer
Mitmenschen. Umwelt und
Gesundheit werden durch falsches
Entsorgen gefährdet.
Materialrecycling hilft, den
Verbrauch von Rohstoffen zu
verringern. Weitere Informationen
über das Recycling dieses Produkts
erhalten Sie von Ihrer Gemeinde, den
kommunalen Entsorgungsbetrieben
oder dem Geschäft, in dem Sie das
Produkt gekauft haben.
Entsorgung von gebrauchten
Batterien und Akkus (anzuwenden
in den Ländern der Europäischen
Union und anderen europäischen
Ländern mit einem separaten
Sammelsystem für diese Produkte)
Das Symbol auf der Batterie/dem
Akku oder der Verpackung weist
darauf hin, dass diese nicht als
normaler Haushaltsabfall zu
behandeln sind. Durch Ihren Beitrag
zum korrekten Entsorgen dieser
Batterien/Akkus schützen Sie die
Umwelt und die Gesundheit Ihrer
Mitmenschen. Umwelt und
Gesundheit werden durch falsches
Entsorgen gefährdet.
Materialrecycling hilft, den Verbrauch
von Rohstoffen zu verringern.
Bei Produkten, die auf Grund ihrer
Sicherheit, der Funktionalität oder
als Sicherung vor Datenverlust
eine ständige Verbindung zur
eingebauten Batterie benötigen,
sollte die Batterie nur durch
qualifiziertes Servicepersonal
ausgetauscht werden
Um sicherzustellen, dass die Batterie
korrekt entsorgt wird, geben Sie das
Produkt zwecks Entsorgung an einer
Annahmestelle für das Recycling
von elektrischen und elektronischen
Geräten ab.
Für alle anderen Batterien
entnehmen Sie die Batterie bitte
entsprechend dem Kapitel über die
sichere Entfernung der Batterie.
Geben Sie die Batterie an einer
Annahmestelle für das Recycling
von Batterien/Akkus ab.
Weitere Informationen über das
Recycling dieses Produkts oder der
Batterie erhalten Sie von Ihrer
Gemeinde, den kommunalen
Entsorgungsbetrieben oder dem
Geschäft, in dem Sie das Produkt
gekauft haben.
Entsorgungshinweis
Sie nur entladene Batterien in die
Sammelboxen beim Handel oder
den Kommunen. Entladen sind
Batterien in der Regel dann, wenn
das Gerät abschaltet und
signalisiert „Batterieleer“ oder
nach längerer Gebrauchsdauer der
Batterien „nicht mehr einwandfrei
funktioniert“. Um sicherzugehen,
kleben Sie die Batteriepole z. B.
mit einem Klebestreifen ab oder
geben Sir die Batterien einzeln in
einen Plastikbeutel.
: Bitte werfen
Vorsichtsmaßnahmen
• B ringen Sie dieses System so an,
dass das Netzkabel im Falle
eines Fehlers sofort von der
Netzsteckdose getrennt werden
kann.
• Stellen Sie, um eine Feuer- oder
Stromschlaggefahr zu
vermeiden, keine mit
Flüssigkeiten gefüllten
Gegenstände, wie z. B. Vasen,
auf das Gerät.
• Stellen Sie, um eine Feuer- oder
Stromschlaggefahr zu
vermeiden, keine mit
Flüssigkeiten gefüllten
Gegenstände, wie z. B. Vasen,
auf das Gerät.
Der Hersteller dieses Produktes
ist Sony Corporation, 1-7-1
Konan Minato-ku Tokio, 1080075 Japan. Bevollmächtigter
für EMV und Produktsicherheit
ist Sony Deutschland GmbH,
Hedelfinger Strasse 61, 70327
Stuttgart, Deutschland. Für
Kundendienst- oder
Garantieangelegenheiten
wenden Sie sich bitte an die in
Kundendienst- oder
Garantiedokumenten genannten
Adressen.
Page 99

Sicherheitsmas
nahmen
Verkehrssicherheit
Benutzen Sie den Monitor und die
Kopfhörer nicht beim Autofahren,
Radfahren oder beim Betrieb eines
motorisierten Fahrzeuges.
Hierdurch kann eine Unfallgefahr
verursacht werden und es ist in
einigen Gegenden unzulässig. Es
kann möglicherweise auch
gefährlich sein, Kopfhörer mit
hoher Lautstärke beim Gehen zu
verwenden, besonders an
Fußgängerübergängen. Sie sollten
äußerste Vorsicht anwenden oder
auf den Gebrauch in
möglicherweise gefährlichen
Situationen verzichten.
Über die Sicherheit
Sollten feste Gegenstände in das
Gehäuse fallen oder Flüssigkeit in
dieses laufen, so trennen Sie alle
Anschlüsse vom Player und lassen
Sie diesen durch qualifiziertes
Personal überprüfen, bevor Sie ihn
wieder einschalten.
Spannungsquellen
• Die Leistungsaufnahme dieses
Geräts ist auf dem Netzteil
ausgewiesen. Überprüfen Sie, ob
die Gerätebetriebsspannung mit
der örtlichen Netzspannung
überein stimmt.
• Stellen Sie sicher, dass Sie, wenn
Sie den Player für längere Zeit
nicht benutzen, das Netzkabel
aus der Steckdose ziehen.
Greifen Sie, um das Netzkabel
aus der Steckdose zu ziehen, den
Stecker selbst; ziehen Sie
niemals an dem Kabel.
• Berühren Sie das Netzkabel oder
das Netzteil nicht mit nassen
Händen. Hierdurch könnte ein
Stromschlag verursacht werden.
Bei einer Erwärmung
Im Player kann sich während des
Ladevorgangs Wärme aufstauen
oder wenn er über längere Zeit
benutzt wird. Dies ist keine
Störung.
Platzierung
• Platzieren Sie den Player an
einem Ort mit ausreichender
Lüftung, um einen Wärmestau
im Player zu verhindern.
• Stellen Sie den Player nicht in
engen Räumen wie einem
Bücherregal oder ähnlichem auf.
• Decken Sie die
Ventilationsöffnungen des
Players nicht mit Zeitungen,
Tischdecken, Vorhängen etc. ab.
Und stellen Sie den Player nicht
auf eine weiche Unterlage, wie
einen Vorleger oder Teppich.
• Platzi eren Sie den Player nicht in
einem Auto mit geschlossenen
Fenstern oder nahe einer
Wärmequelle oder an einem Ort,
der direktem Tageslicht,
übermäßigem Staub oder Sand,
Feuchtigkeit, Regen sowie
Erschütterungen ausgesetzt ist.
• Stellen Sie den Player nicht auf
eine schräge Unterlage. Der
Player wurde so gebaut, dass er
nur auf einer geraden Unterlage
funktioniert.
• Halten Sie den Player und die
Disks entfernt von Geräten mit
starken Magneten, wie
Mikrowellenherde oder große
Lautsprecher.
• Stellen Sie keine schweren
Gegenstände auf den Player.
Betrieb
• Wird der Player direkt von einem
kalten in einen warmen oder in
einen sehr feuchten Raum
gebracht, kann Feuchtigkeit
innen auf der Linse des Players
kondensieren. Tritt dieser Effekt
auf, so kann der Player
möglicherweise nicht richtig
funktionieren. Sollte dies
geschehen, so entnehmen Sie die
Disk und lassen Sie den Player für
ca. eine halbe Stunde eingeschaltet
stehen, bis die Feuchtigkeit
verdunstet ist.
• Halten Sie die Linse des Players
sauber und berühren Sie diese
nicht. Das Berühren der Linse
kann diese beschädigen und eine
Fehlfunktion des Players
verursachen. Lassen Sie die
Diskabdeckung geschlossen,
außer wenn Sie eine Disk
einlegen oder herausnehmen.
LCD-Bildschirm
• Der LCD-Bildschirm wird zwar
mit Hochpräzisionstechnologie
hergestellt, aber dennoch können
gelegentlich verschiedenfarbige
Punkte darauf zu sehen sein.
Dies ist kein Fehler.
• Wischen Sie den LCD-Bildschirm
nicht mit einem nassen Tuch ab.
Durch das Eindringen von Wasser
kann es zu Störungen kommen.
• Stellen Sie keine Gegenstände
auf den LCD-Bildschirm und
lassen Sie keine Gegenstände
darauf fallen. Üben Sie auch
keinen Druck mit Händen oder
Ellenbogen auf den LCDBildschirm aus.
• Beschädigen Sie die LCD
Oberfläche nicht mit scharfen
Gegenständen.
• Schließen Sie die LCD
Abdeckung nicht mittels eines
Stiftes etc.
• Wird der Player direkt von einem
kalten an einen warmen Ort
gebracht, so kann sich Fe uchtigkeit
auf dem LCD-Bildschirm
ansammeln. Wischen Sie in diesem
Fall alle Feuchtigkeit mit einem
Papiertuch oder ähnlichem ab,
bevor Sie den Player benutzen.
Allerdings wird weiter
Feuchtigkeit kondensiert, wenn
die LCD-Oberfläche kalt ist.
Warten Sie, bis sich die
Oberfläche auf Raumtemperatur
aufgewärmt hat.
Netzteil
• Verwenden Sie das mitgelieferte
Netzteil für diesen Player. Die
Verwendung anderer Netzteile
kann Störungen verursachen.
• Nehmen Sie es nicht
auseinander.
• Lassen Sie es nicht fallen oder
setzen Sie es Druck aus.
• Legen Sie das Netzteil nicht in
einen geschlossenen Raum wie
beispielsweise ein Bücherregal
oder einen AV-Schrank.
• Verbinden Sie das Netzteil nicht
mit einem Reisetrafo, weil
dadurch Wärme entstehen und
eine Störung verursacht werden
kann.
Akkusatz
• Bestimmte Länder können
Vorschriften für die Beseitigung
des Akkus, der dieses Gerät
versorgt, erlassen haben.
Beachten Sie bitte die
behördlichen Vorschriften.
• Wegen der begrenzten
Lebenszeit von Batterien lässt
die Batteriekapazität mit der Zeit
und dem wiederholten Gebrauch
allmählich nach. Kaufen Sie eine
neue Batterie, wenn die Batterie
nur noch etwa halb so lange hält
wie normal.
• Die Batterie wird
möglicherweise beim ersten
Aufladen nicht auf ihre volle
Kapazität aufgeladen. Dasselbe
gilt auch, wenn sie über längere
Zeit nicht benutzt wurde. Die
Batteriekapazität normalisiert
sich wieder nach einigen Aufund Entladezyklen.
• Lass en Sie den Akkusatz nicht in
einem Auto oder unter direkter
Sonneneinstrahlung liegen, wen n
die Temperatur auf über 60 °C
ansteigen kann.
• Lassen Sie die Batterie nicht mit
Wasser in Berührung kommen.
• Vermeiden Sie Kurzschlüsse der
Batterieanschlussbuchsen (A)
auf der Unterseite des Players
und der Anschlussbuchsen (C)
auf dem Akkusatz mit
Metallgegenständen wie
beispielsweise einer Kette.
• Achten Sie darauf, dass kein
Staub oder Sand in die
Batterieanschlussbuchsen (A)
und die Führungsöffnungen (B)
auf der Unterseite des Pl ayers, in
die Anschlussbuchsen (C) und
die Führungsöffnungen (D) auf
dem Akkusatz eindringen.
,Fortsetzung
DE
DE
3
Page 100

Unterseite des Players
B
A
Akkusatz
D
C
Der Autoadapter
• Verwenden Sie den
mitgelieferten Fahrzeugadapter
für diesen Player. Die
Verwendung anderer Adapter
kann Störungen verursachen.
• Zerlegen Sie den Adapter nicht
und führen Sie kein Reverse
Engineering durch.
• Lassen Sie den Adapter nicht
fallen und vermeiden Sie Stöße
und Erschütterungen.
• Berühren Sie nicht
die Metallteile. Anderenfalls
kann es zum Kurzschluss und
infolge davon zu Schäden am
Fahrzeugadapter kommen. Das gilt
vor allem für die Berührung mit
anderen Metallgegenständen.
• Legen Sie den Fahrzeugadapter
nicht in die Nähe einer
Wärmequelle auf oder an einem
Ort, der direkter
Sonneneinstrahlung oder
Erschütterungen ausgesetzt ist.
Legen Sie den Player auch nicht
in ein Auto mit geschlossenen
Fenstern.
Lautstärkeregelung
Drehen Sie die Lautstärke nicht zu
laut, wenn Sie einen Abschnitt mit
sehr niedriger Lautstärke oder
fehlendem Ton hören. Hierbei
könnten die Lautsprecher
beschädigt werden, wenn ein
Abschnitt mit Spitzenpegel
wiedergegeben wird.
Kopfhörer
• Vermeidung von Hörschäden
Vermeiden Sie eine hohe
Lauts tärke bei de r Verwendung von
Kopfhörern. Akustikexperten raten
von ununterbrochener, lauter und
langfristiger Wiedergabe ab.
Verringern Sie, wenn Sie ein
Klingeln in Ihren Ohren
wahrnehmen, die Lautstärke oder
nehmen Sie die Kopfhörer ab.
• Rücksicht auf andere
Verwenden Sie eine gemäßigte
Lautstärke. Dies ermöglicht Ihnen,
Außengeräusche und -töne zu
hören und zugleich Rücksicht auf
Ihre Umgebung zu nehmen.
Reinigung
Reinigen Sie das Gehäuse, die
Anzeige und die Bedienelemente
mit einem weichen Tuch, das
etwas mit einer milden
Reinigungslösung angefeuchtet
wird. Benutzen Sie keine kratzigen
Reinigungsschwämme, körnige
Reinigungspulver oder
Lösungsmittel wie Spiritus oder
Benzin.
Reinigung der Disks, Disk-/
Linsenreiniger
Verwenden Sie keine
Reinigungsmittel für Disks
oder für Disks/Linsen (nass
oder zum Sprühen). Diese
können eine Störung des
Gerätes verursachen.
WICHTIGER HINWEIS
Vorsicht: Dieser Player kann ein
Videostandbild oder eine
Bildschirmanzeige für
unbegrenzte Zeit auf dem
Fernsehschirm anzeigen. Wenn
ein Videostandbild oder eine
Bildschirmanzeige aber sehr
lange Zeit unverändert auf dem
Fernsehschirm angezeigt wird,
besteht die Gefahr einer
dauerhaften Schädigung der
Mattscheibe. Fernsehgeräte mit
Plasmabildschirm und
Projektionsfernsehgeräte sind in
dieser Hinsicht besonders
empfindlich.
Sollten an Ihrem Gerät Probleme
auftreten oder sollten Sie Fragen
haben, wenden Sie sich bitte an
Ihren Sony-Händler.
DE
4
 Loading...