

Page 1
PLEASE NOTE: AS PC DESIGN AND FEATURES VARY AMONG
MANUFACTURERS (AND MANUFACTURER MODELS), THIS
INSTALLATION GUIDE MAY NOT BE APPLICABLE TO YOUR PC.
ACCORDINGLY, PRIOR TO INSTALLATION, PLEASE CONSULT YOUR PC
OWNERS MANUAL.
Installation Quick Start Guide:
Hardware system requirements: Intel Pentium III 800 MHz and 256 MB memory
Installation procedure:
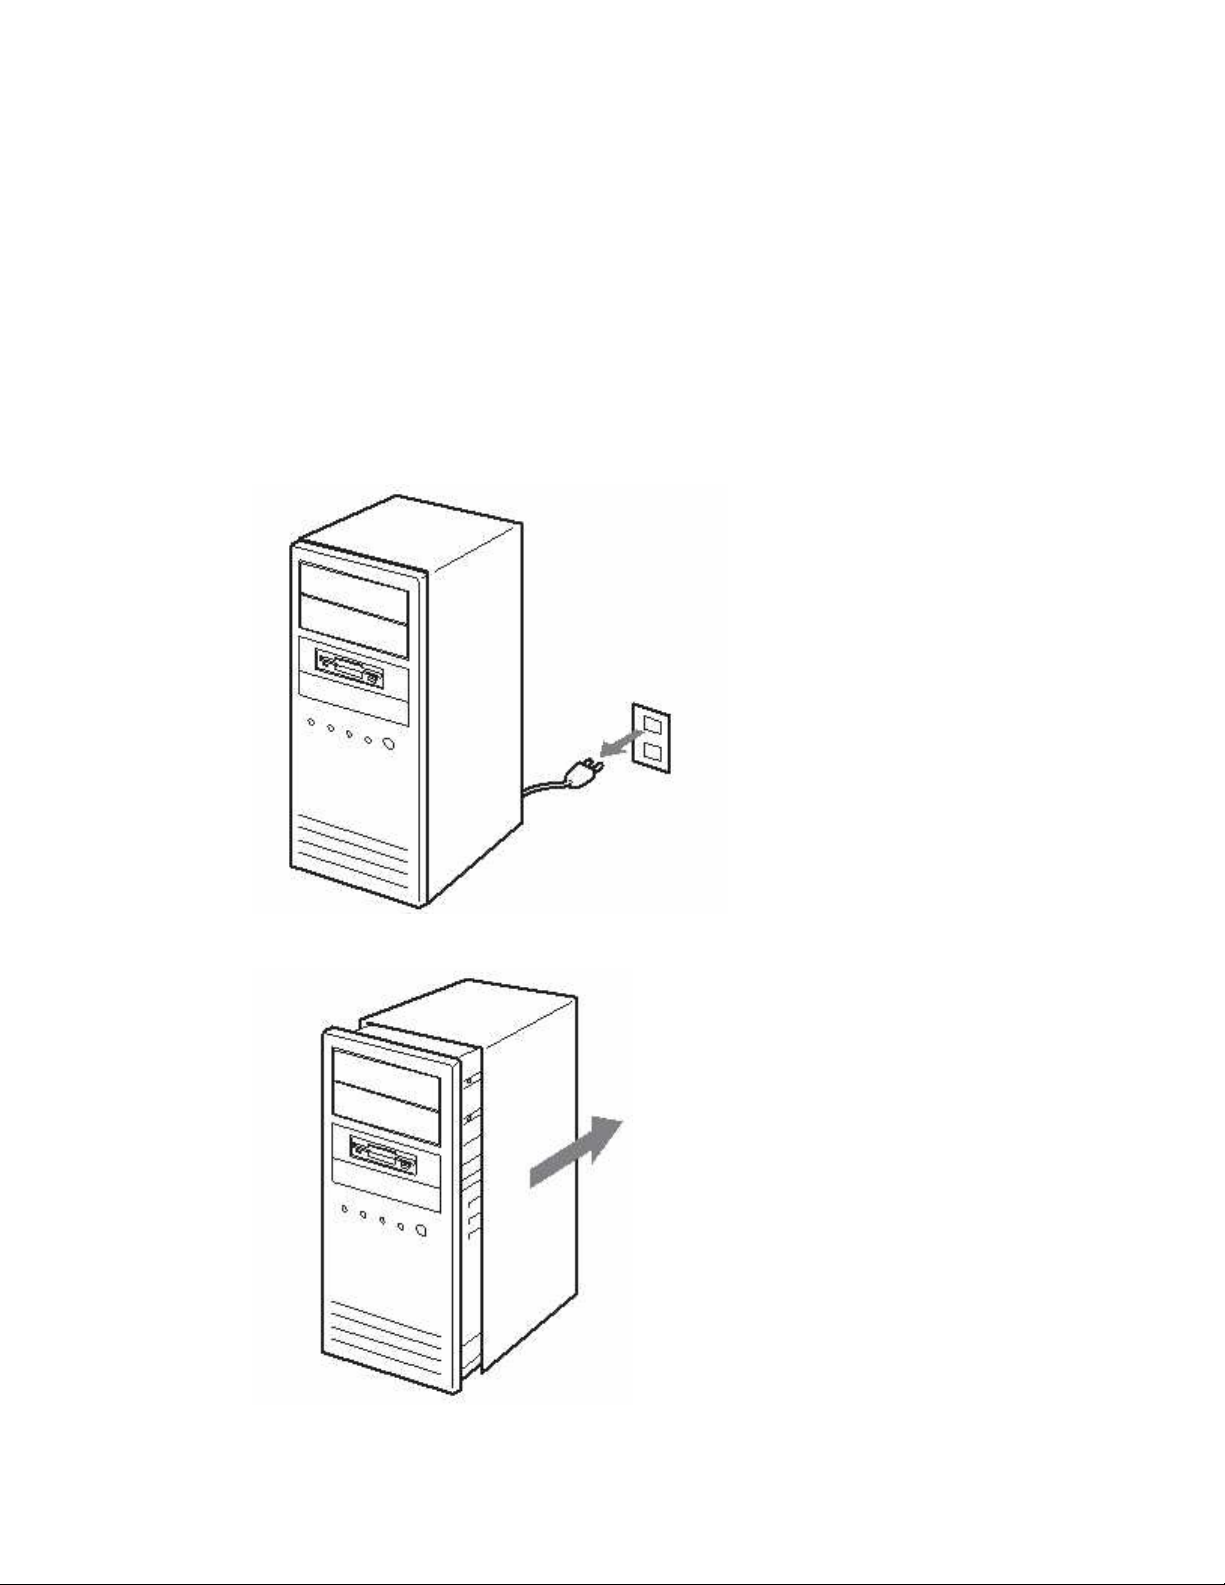
1. With the computer shut down disconnect all cables plugged into the computer.
2. Open up your computer. Remove the computer’s cover.
Page 2
3. Touch a non-painted metal surface (i.e. the power supply) to ground yourself.
You can damage the components inside the computer if you do not ground
yourself.
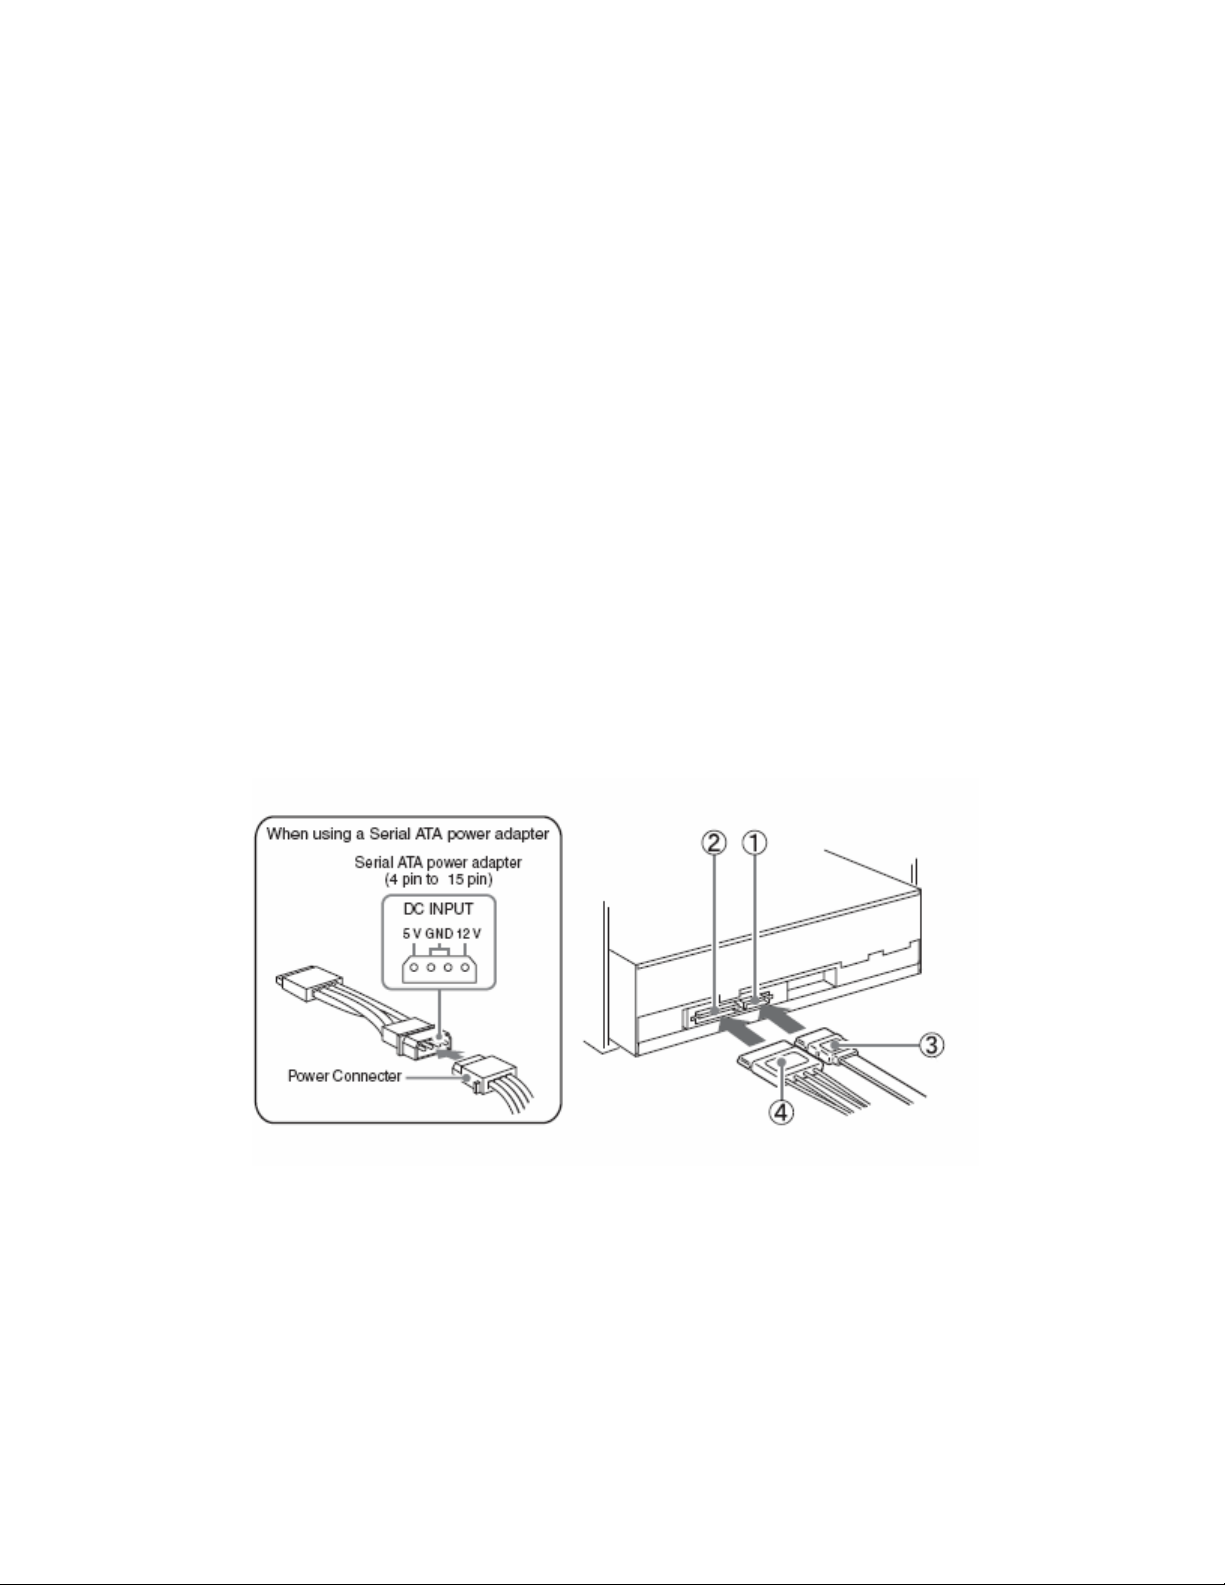
4. Connect the cables. (Make sure the shape of the connectors match.)
1) Serial ATA connector
2) Serial ATA power connector
3) Serial ATA cable
4) Serial ATA power cable
CAUTION:
Using the wrong type of cable with this product can cause it to malfunction.
Follow the instructions when connecting the product. Use only your computer’s
internal power supply.
NOTE:
If there is no Serial ATA power cable in your computer, use the supplied “Serial
ATA power adapter (4 pin to 15 pin)” To connect the cable to the adaptor, match
the diagonally cut portions on the cable to those on the adaptor.
5. Slide the optical drive into the drive bay from the front of the computer; make
sure you don’t let the drive touch any electronic components in the computer.
6. Mount the drive to your computer using the using the provided screws or
provided mounting hardware.
Page 3

7. Connect the power cable to the drive. These are the multicolored cables
extending from the power source inside the computer.
8. Check to make sure the connections between the drive and the computer are firm.
Reconnect the peripheral cables and then the power cables. Start your computer.
Page 4

9. Ensure the drive is detected by the Windows operating system.
10. Then replace the computer’s cover.
 Loading...