

Page 1

Printed in Malaysia
©2008 Sony Corporation
STR-DA6400ES
4-104-900-11(1)
Using Network Features
Multi Channel
AV Receiver
Please read the operating instructions supplied with this receiver
first.
This manual is written on the assumption that you are skilled in
the basic operation of this receiver after performing basic
connection and setup according to the operating instructions.
Page 2

About the network functions of the receiver
• The home network function of the receiver
supports the DLNA (Digital Living Network
Alliance) standard.
By configuring your home network with
DLNA-compliant devices, you can play
back analog audio signals with a DLNAcompliant device (DLNA CERTIFIED
Products) that has an authorized DLNA logo
displayed on the device, and which has
functions corresponding to those of the
receiver.
You can also enjoy content (music, photos,
and videos) which have been stored on a
DLNA-compliant device (DLNA
CERTIFIED
authorized DLNA logo displayed on the
device.
• With an Internet connection, you can listen
to Rhapsody® and SHOUTcast and upgrade
the firmware of the receiver.
™ Products) that has an
About DLNA
DLNA (Digital Living Network Alliance) is a
standards organization made up of
manufacturers of various products, such as
computers, AV components, and mobile
computing devices which exchange content
(music, photos, and videos). DLNA decides
upon standards and publishes an authorized
logo to be displayed on devices which support
DLNA standards.
™
GB
2
Page 3

What you can do with the home network function
You can do the following using the network function of the receiver.
Sharing content (music, photos, and videos) on devices on a home
network
Playing back content
You can play back music, photos, and videos stored on other devices such as a computer on your
home network using this receiver (page 12).
Delivers content
Computer
Plays back content
STR-DA6400ES
Delivering the audio of the connected components
You can play back audio from components connected to the receiver or FM/AM tuner with devices
such as a computer over your home network (page 15).
Plays back audio
Computer
Delivers the audio from the
component connected to the
receiver
STR-DA6400ES
Component connecte d
using an audio cord
(not supplied)
GB
3
Page 4

Listening to Rhapsody or SHOUTcast over the Internet
You can listen to Rhapsody or SHOUTcast using the receiver (page 18).
STR-DA6400ESInternet
Other features
Changing the settings using a computer
You can change the settings of the receiver using a computer on your home network (page 27).
Computer
ES Utility application software
STR-DA6400ES
GB
4
Page 5

Firmware Update
You can update the firmware of the receiver over the Internet (page 30).
A) Update the firmware directly over the Internet
Internet
STR-DA6400ES
B) Update the firmware using a file downloaded from the Internet via a
computer
Computer
Internet
ES Utility application software
STR-DA6400ES
GB
5
Page 6

Table of Contents
About the network functions of the
receiver ....................................................2
What you can do with the home network
function ....................................................3
Getting Started
1: Connecting the receiver to your
network ....................................................7
2: Configuring the network settings of the
receiver ....................................................9
3: Preparing content for delivery to the home
network ..................................................10
4: Preparing a computer to use as a
server .....................................................11
Sharing Content (music,
photos, and videos) on
Devices on the Home
Network
Enjoying content stored on the server ........12
Enjoying content stored on a server in
zone 2 .....................................................14
Enjoying the audio of a component connected
to the receiver using other device via the
home network ........................................15
Adjusting the Receiver
Settings Using PC
Application Software
Features of the ES Utility application
software ................................................. 25
Installing the ES Utility application software
on a computer ........................................ 25
Using Other Functions
Checking the network settings ................... 26
Changing the network settings ................... 27
Changing the settings of the home network
function of the receiver ......................... 29
Updating the firmware ............................... 30
Additional Information
Glossary ..................................................... 32
Troubleshooting ......................................... 33
Specifications ............................................. 34
End User License Agreement for Certain
Software Included in Your Sony
Receiver ................................................ 35
Copyrights .................................................. 39
Index .......................................................... 44
Listening to Rhapsody or
SHOUTcast Using the
Receiver
Supported service .......................................18
Listening to Rhapsody ................................18
Selecting a Rhapsody channel you want to
playback .................................................20
Selecting a track on Rhapsody you want to
playback .................................................21
Registering your favorite track, album, or
channel ...................................................22
Listening to SHOUTcast ............................23
GB
6
Page 7

Getting Started
1: Connecting the receiver to your network
Configuring your home network with DLNAcompliant devices.
If your computer is connected to the Internet,
you can connect this receiver to the Internet as
well, through the wired LAN connection.
Note
The method used to connect your computer to the
Internet depends on the devices, your ISP, your
computer, and the router used.
System requirements
The following system environment is required
to use the network function of the receiver.
A Broadband line connection
A Broadband line connection to the Internet is
required in order to listen to the Rhapsody or
SHOUTcast and to use the firmware update
function of the receiver.
Modem
This is the device that is connected to the
broadband line to communicate with the
Internet. Some of these devices are integrated
with the router.
LAN cable (CAT-5)
• We recommend that you use this type of
cable for a wired LAN.
Some flat-type LAN cables are easily
affected by noise. We recommend that you
use normal-type cables.
• If the receiver is used in an environment in
which there is power supply noise from
electric products or in a noisy network
environment, use a shielded-type LAN
cable.
Getting Started
Router
• Use a router compatible with 100 Mbps or
greater transmission speeds to enjoy content
on your home network.
• We recommend that you use a router
equipped with the built-in DHCP (Dynamic
Host configuration Protocol) server.
This function automatically assigns IP
addresses on the LAN.
GB
7
Page 8

Configuration example
The following illustration is a configuration example of a home network with the receiver, a
computer.
We recommend that you use a wired connection.
LAN cable
(not supplied)
Internet Modem
Computer
LAN cable
(not supplied)
Notes
• Do not connect the LAN cable for the network
connection to the ZONE 2 VIDEO OUT jack. The
receiver may malfunction if you connect the LAN
cable to the ZONE 2 VIDEO OUT jack and then
try to connect to the network.
• The audio may be interrupted when you use a
wireless connection.
Router
GB
8
Page 9

2: Configuring the network settings of the receiver
The network settings for the receiver must be
set correctly to use the network functions of
the receiver.
You can make the required network settings
for the receiver by following the instructions
provided by an initial setup wizard.
The procedure used to set up the IP address
automatically (DHCP) is explained below.
In this case, the router that is connected to the
receiver or the Internet provider must support
DHCP.
AMP
3 Press V/v repeatedly to select
“ Settings,” then press or
b.
4 Press V/v repeatedly to select
“Network,” then press or b.
5 Press V/v repeatedly to select
“Network Setup,” then press
.
“Start Network function Setup Wizard”
appears on the TV screen.
6 Press to select “Next.”
7 Press to select “Connect
Automatically (DHCP).”
“Success! Your device is now connected
to your network.” appears on the TV
screen when you have succeeded in
making a connection.
If the failure screen is displayed, perform
the process referring to “Changing the
network settings” (page 27), after you
have completed this process.
8 Press to select “Finish.”
Getting Started
1 Press AMP.
The receiver can be operated using the
remote.
2 Press MENU.
The menu is displayed on the TV screen.
V/v/b,
MENU
9 Press to select “ON.”
The setting of the server function is
turned to ON.
Select “OFF,” when you will not use the
server function.
10Press to select “Finish.”
To set the network settings
manually
Refer to “Configuring network settings
manually” (page 27).
Note
The wizard screen appears on the TV screen each
time you use the network function, until the network
function setup has been completed.
9
GB
Page 10

3: Preparing content for delivery to the home network
This receiver can deliver the audio of a component connected to the receiver using an audio cord
or audio from an FM/AM tuner over the home network.
Connecting components to the receiver using an audio cord
This receiver delivers to a device on a home network analog audio signals of a device connected to
the analog audio input jack or DMPORT jack of the receiver.
Connect the audio output of the device which stores audio you want to enjoy on the home network
to the analog audio input jack or the DMPORT jack of the receiver using an audio cord or DIGITAL
MEDIA PORT adapter.
Audio cord (not supplied)
DIGITAL MEDIA PORT adapter* (not supplied)
* The adapter form differs depending on the model.
GB
10
Page 11

4: Preparing a computer to use as a server
A server is a device which delivers content
(music, photos, and videos) to a DLNA device
on a home network.
You can play back content stored on a
computer on a home network with this receiver
via that network, after you have installed
application software such as a VAIO Media
plus which has a DLNA compliant sever
function.
Getting Started
11
GB
Page 12

Sharing Content (music, photos, and videos) on Devices on the Home Network
Enjoying content stored on the server
A server is a device which delivers content (music, photos, and videos) to a DLNA device on a
home network.
You can play back music, photos, and videos stored on the server using the receiver.
Computer STR-DA6400ES
2 Press MENU.
The menu is displayed on the TV screen.
1 Press AMP.
The receiver can be operated using the
remote.
GB
12
AMP
V/v/B/b,
MENU
3 Press V/v repeatedly to select
“ Music,” “ Photo,” or
“ Video,” then press or b.
4 Press V/v repeatedly to select
“Server,” then press .
The server list appears on the TV screen.
5 Press V/v and to select the
server which holds the content
you want to play.
The content list appears on the TV screen.
6 Press V/v/B/b and
repeatedly to select content
you want to play from the
content list.
The playback screen appears on the TV
screen, and content you selected is played
back.
Page 13

Using the remote to play back
content
You can enjoy content on the server by using
the following buttons.
Press AMP to operate the receiver using the
remote.
Content
Type Music Photo Video
Remote
button
* This button may not work depending on the
connected server.
Nz z z
xz z z
Xz z z
>z z
.z z
Mz* z*
mz* z*
Selecting the playback mode
You can select the playback mode of the Music
category.
x Shuffle
Plays all the tracks in random order.
•Off
Deactivates the shuffle play mode.
•On
Activates the shuffle play mode.
Sharing Content (music, photos, and videos) on Devices on the Home Network
1 Press OPTIONS while listening
to the music content.
2 Press V/v repeatedly to select
“Repeat,” or “Shuffle,” then
press .
3 Press V/v repeatedly to select
the mode you want to select
from the following, then press
.
x Repeat
Plays one or all the tracks repeatedly.
•Off
Deactivates the repeat play mode.
•One
Plays one track repeatedly.
•All
Plays all the tracks repeatedly.
13
GB
Page 14

Enjoying content stored on a server in zone 2
You can select and play back from zone 2
content stored on a device on the home
network by using the IR repeater (not
supplied).
?/1
ZONE
SOURCE
Playing back content in zone 2
1 Turn on the main receiver (this
receiver). If you have an
amplifier in zone 2, turn it on.
2 Press ZONE.
The remote switches to zone 2.
3 Press ?/1.
The zone function is activated.
4 Press MENU.
The menu is displayed on the TV screen.
5 Press V/v repeatedly to select
“ Music,” “ Photo,” or
“ Video,” then press or b.
6 Press V/v repeatedly to select
“Server,” then press .
The server list appears on the TV screen.
14
V/v/B/b,
server which holds the content
you want to play.
The content list appears on the TV screen.
8 Press V/v/B/b and
repeatedly to select content
you want to play from the
content list.
The playback screen appears on the TV
screen, and content you selected is played
back.
Tips
• You can enjoy content played back in the main
zone in zone 2 or zone 3 by pressing SOURCE on
the remote.
• You can control the playback operation using the
remote. For details, see “Using the remote to play
back content” (page 13).
GB
7 Press V/v and to select the
Page 15

Enjoying the audio of a component connected to the receiver using other device via the home network
The receiver can deliver the audio of a
component connected to the receiver using an
audio cord, or the audio from an FM/AM tuner
that have been converted to linear PCM format
to the devices on the home network.
Note
Digital audio signals which are input to the receiver
cannot be played back on a DLNA-compliant device
(DLNA CERTIFIED™ Products) that have an
authorized DLNA logo displayed on the device.
Moreover, some content may not be playable on a
compliant device (DLNA CERTIFIED™ Products).
Sharing Content (music, photos, and videos) on Devices on the Home Network
15
GB
Page 16
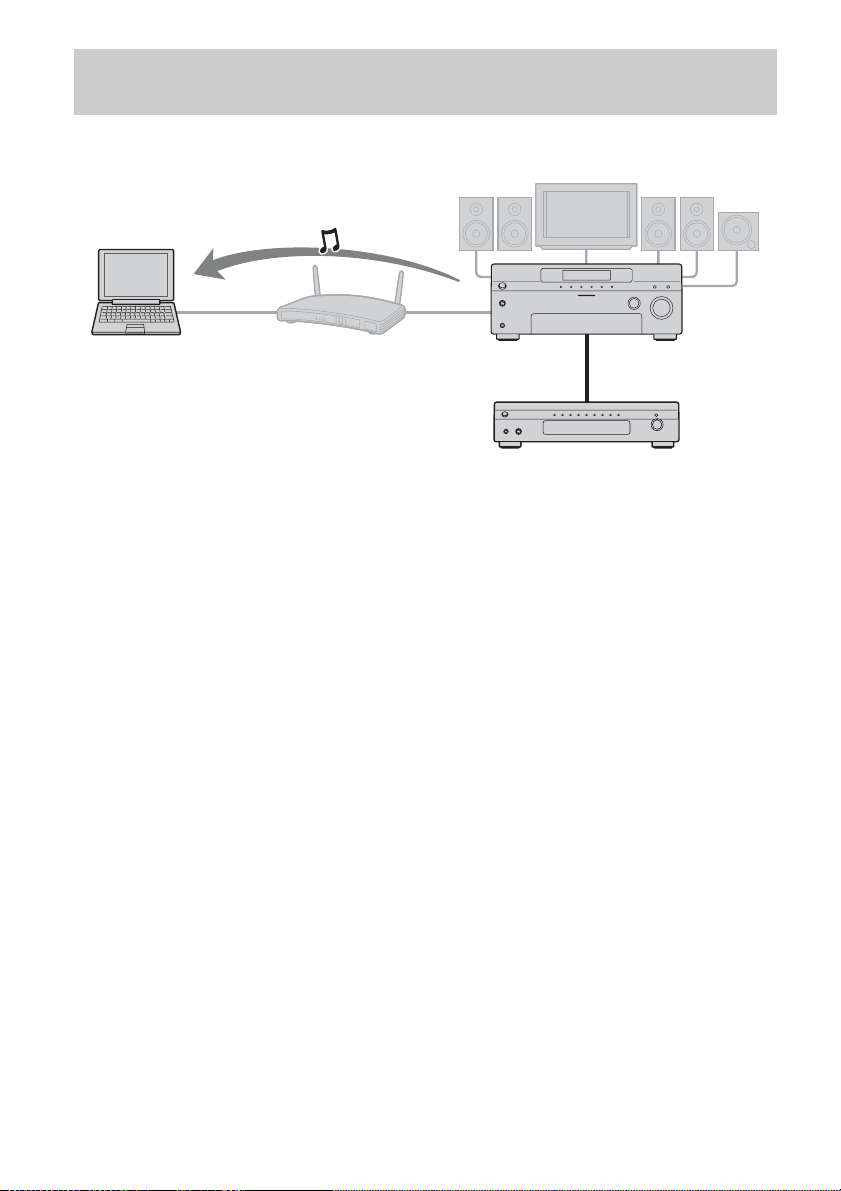
Listening to the audio of the components connected to the receiver or
the built-in FM/AM tuner on a device on your home network
The following illustration is an example of listening to the audio of a component connected to the
receiver using a computer.
Computer
1 Select the receiver as a server
using the device on the home
network.
2 Select the content you want to
play back using device on the
home network.
Refer to the operating instructions of the
device.
Notes
• You cannot play back on two or more devices on
your home network at the same time audio
delivered from the receiver. When there is a device
already playing back content of the receiver, you
cannot play back any of the content of the receiver
on another device.
• The audio is switched to the latest audio which is
selected on the receiver, even though the display of
devices on a home network does not change when
you operate the FM/AM tuner on this receiver
while listening to the FM/AM tuner on the home
network.
STR-DA6400ES
Component connected using an
audio cord (not supplied)
• Turn the server function to off, then turn it to on
again to reflect the latest setting onto the home
network after you change the following setting
items.
– input name and icon assigned that name
– preset station name on the FM/AM tuner
Refer to “Turning the server function on/off”
(page 29) for details on operations to turn on/off
the server function.
16
GB
Page 17

Content/input which can be
selected from the device on
your home network
Content which can be played
back/listened to with a device
on your home network
Content which can be played back using a
device on your home network are as follows.
Content Playback
Music (analog signal) a
Music (digital signal) ×
Photo ×
Vid eo ×
Notes
• Some content may not be able to be played back.
• The audio signals of a component connected to the
receiver using a audio cord or FM/AM tuner can be
delivered to your home network.
Audio input which can be
selected from a device on a
home network
You can select analog audio input from a
device on your home network as follows.
Input name Select
VIDEO1 a
VIDEO2 a
BD a
DVD a
SAT a
TV ×
TA PE a
MD a
SA-CD/CD a
PHONO ×
FM a
AM a
SIRIUS ×
XM ×
Input name Select
MULTI IN ×
DMPORT1 a
DMPORT2 a
HDMI1-6 ×
Server ×
Rhapsody ×
SHOUTcast ×
SOURCE a
Sharing Content (music, photos, and videos) on Devices on the Home Network
17
GB
Page 18
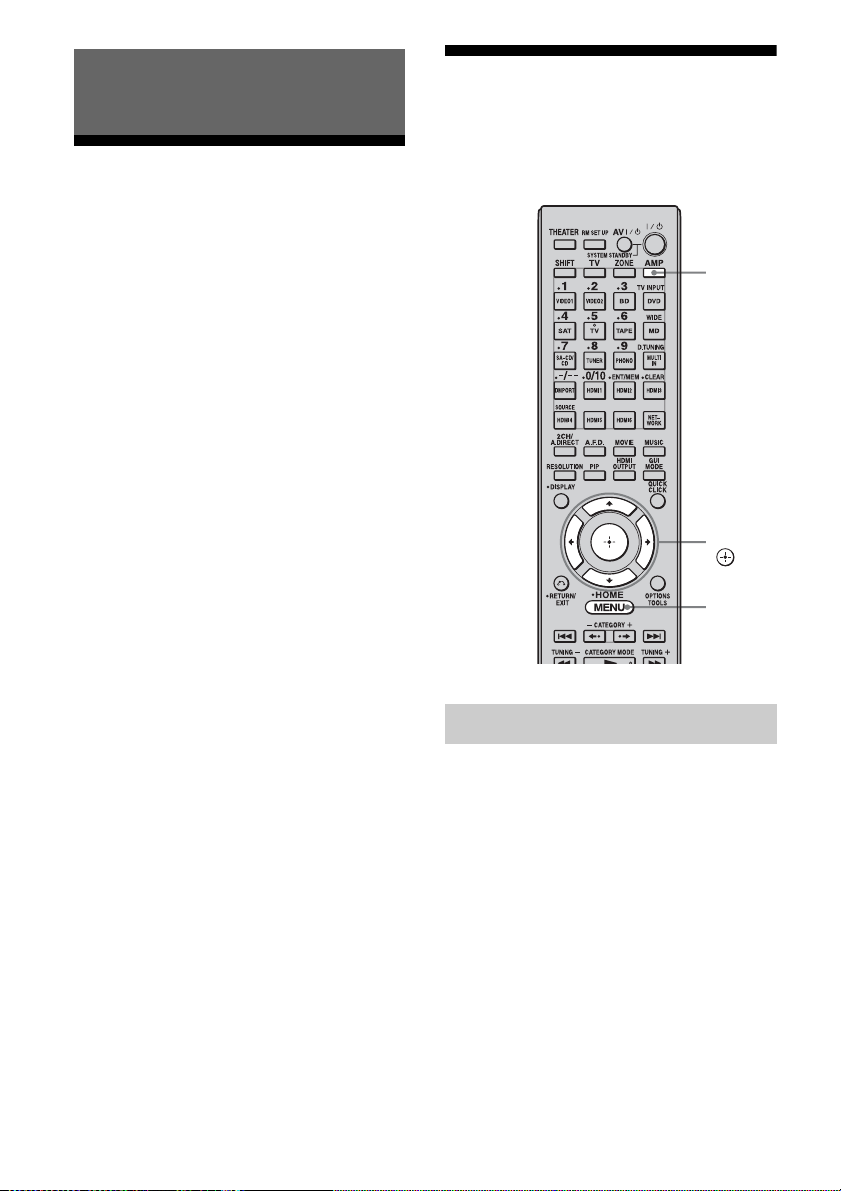
Listening to Rhapsody or SHOUTcast Using the Receiver
Supported service
Listening to Rhapsody
You can enjoy the Rhapsody Digital Music
Service, without turning on a computer, by
connecting your receiver to the internet.
Rhapsody Digital Music Service
Play all the music you want with Rhapsody
Thousands of artists. Millions of songs.
Rhapsody is the critically-acclaimed digital
music service that gives you unlimited access
to a massive music catalog of millions of songs
and thousands of artists. You’ll also get
exclusive content, personalized
recommendations, DJ/ad-free listening on
“Rhapsody Channels” and more.
Try Rhapsody Now – Free 30 day Trial
For more information go to:
www.rhapsody.com/sonystr
®
SHOUTcast Internet radio
SHOUTcast is a digital audio streaming
technology-based radio service.
SHOUTcast is a directory of internet radio
stations, allowing users to access thousands of
free online radio stations from DJs and
broadcasters around the world.
Refer to http://www.shoutcast.com for details.
AMP
V/v/B/b,
MENU
Setting an account
Before using the Rhapsody Digital Music
Service, it is necessary to register an account
using your computer.
Refer to www.rhapsody.com/sonystr for
details.
Sign in using your account on the receiver.
18
1 Press AMP.
The receiver can be operated using the
remote.
2 Press MENU.
The menu is displayed on the TV screen.
GB
Page 19
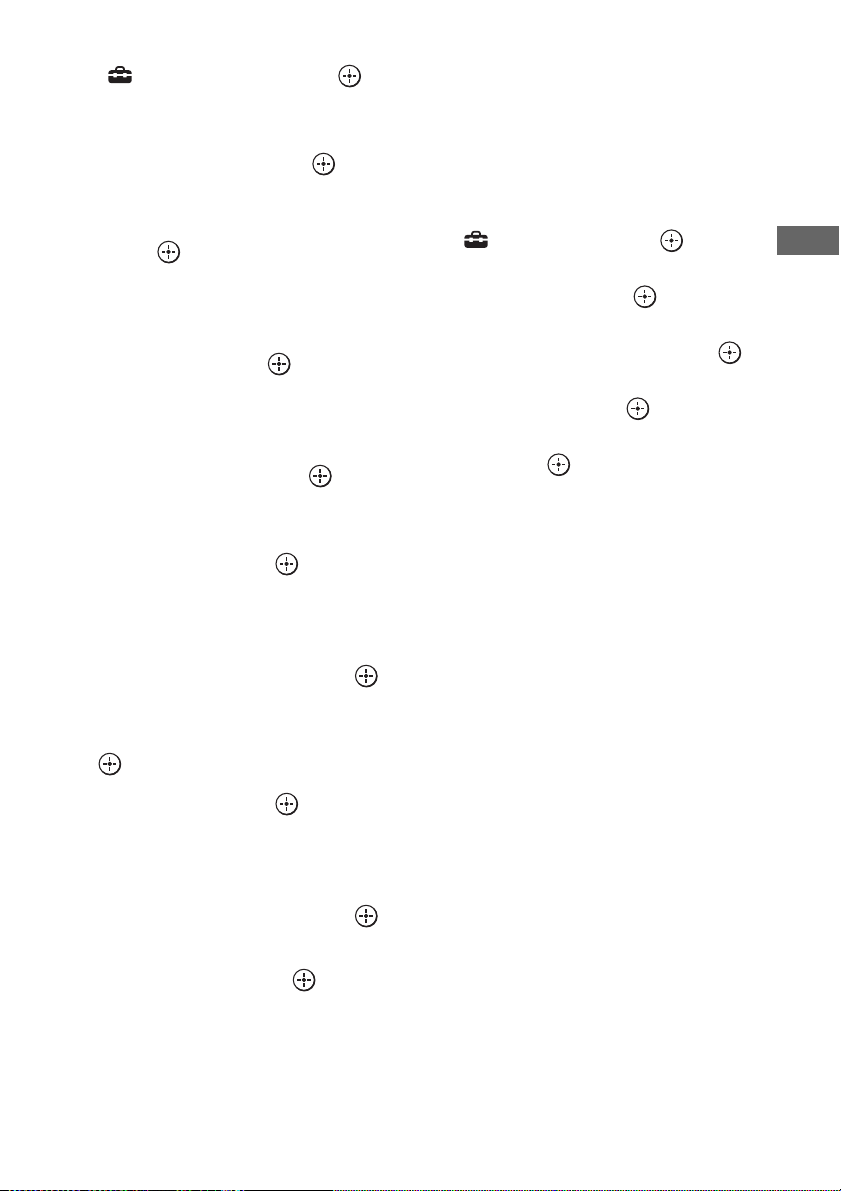
3 Press V/v repeatedly to select
“ Settings,” then press or
b.
4 Press V/v repeatedly to select
“Network,” then press or b.
5 Press V/v repeatedly to select
“Rhapsody Account,” then
press .
The confirmation screen for account input
appears on the TV screen.
6 Press B/b repeatedly to select
“Yes,” then press .
The account input screen appears on the
TV screen.
7 Press V/v to select the user
name box, then press .
The soft keyboard appears on the TV
screen.
8 Press V/v/B/b and to select
a character one by one to enter
your user name.
To delete an account
Press AMP.
1
The receiver can be operated using the
remote.
2 Press MENU.
The menu is displayed on the TV screen.
3 Press V/v repeatedly to select
“ Settings,” then press or b.
4 Press V/v repeatedly to select
“Network,” then press or b.
5 Press V/v repeatedly to select
“Rhapsody Account,” then press .
6 Press OPTIONS to select “Remove
Account,” then press .
7 Press B/b repeatedly to select “YES,”
then press .
The user name and the password are
deleted.
Listening to Rhapsody or SHOUTcast Using the Receiver
9 Press V/v/B/b repeatedly to
select “Finish,” then press .
10Press V/v repeatedly to select
the password box, then press
.
11Press V/v/B /b and to select
a character one by one to enter
your password.
12Press V/v/B /b repeatedly to
select “Finish,” then press .
13Press V/v repeatedly to select
“Finish,” then press .
Note
Repeat the process again from step 7 if the sign in
fails.
19
GB
Page 20
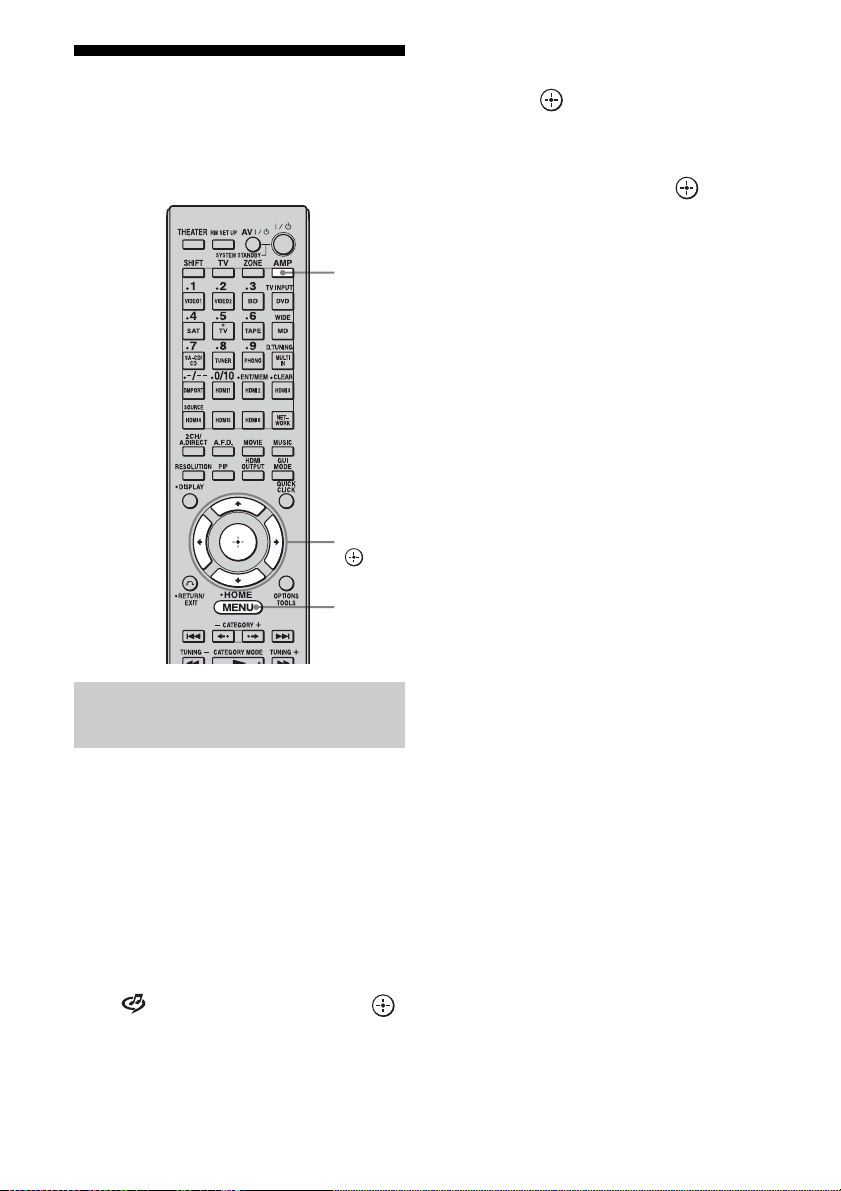
Selecting a Rhapsody channel you want to playback
AMP
V/v/b,
MENU
4 Press V/v repeatedly to select
“Rhapsody Channels,” then
press .
5 Press V/v/B/b repeatedly to
select the channel you want to
listen to, then press .
The reception screen appears on the TV
screen and the channel you selected is
received.
Note
You can listen to only the same channel in both the
main zone and the 2nd zone.
Priority is given to the channel which has most
recently been selected, even if other channel is
currently being selected in one of zones.
Selecting the channel from the
Rhapsody Channels list
You can select the channel you want to listen
using the Rhapsody Channels list.
1 Press AMP.
The receiver can be operated using the
remote.
2 Press MENU.
The menu is displayed on the TV screen.
3 Press V/v repeatedly to select
“ Rhapsody,” then press
or b.
GB
20
Page 21
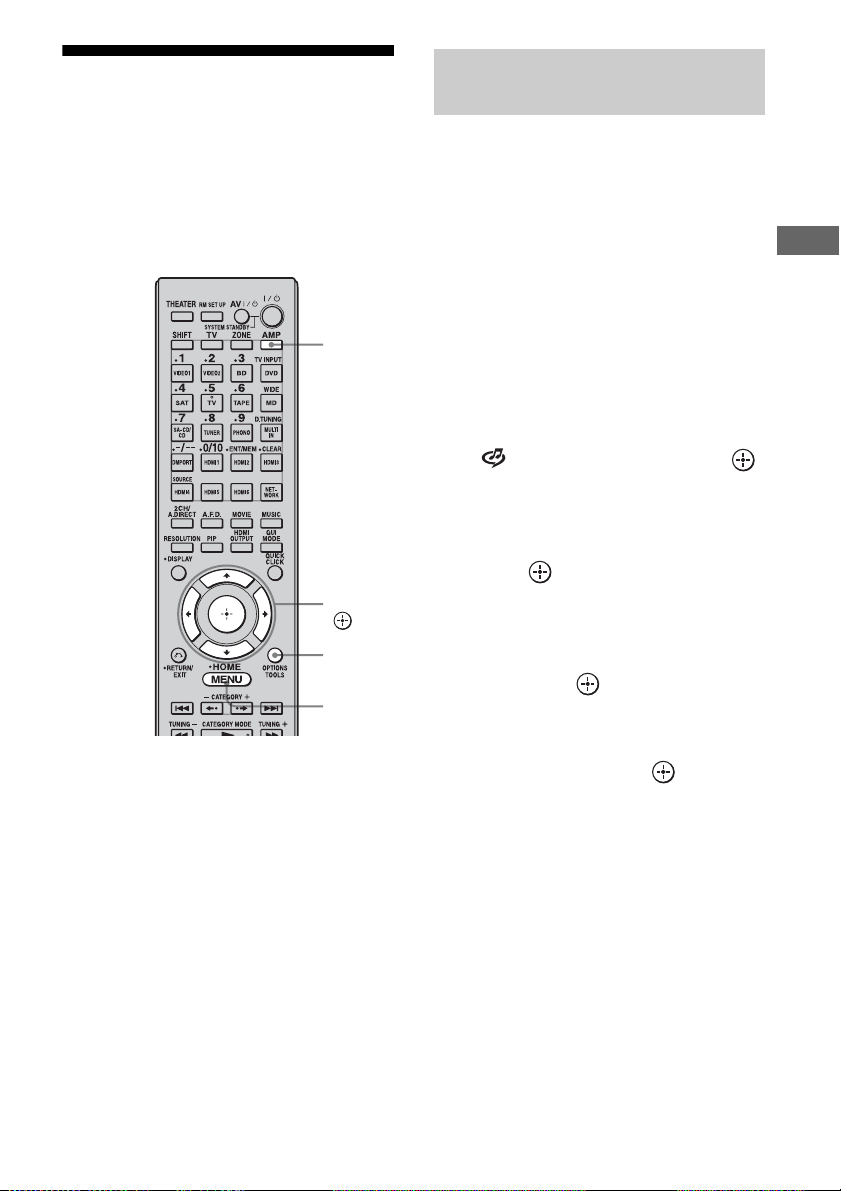
Selecting a track on Rhapsody you want to playback
You can select the track you want to listen to
using the Rhapsody Music Guide, My Library,
etc., on the Rhapsody Digital Music Service.
AMP
V/v/B/b,
OPTIONS
MENU
Note
You can listen to only the same track in both the
main zone and the 2nd zone.
Priority is given to the track which has most recently
been selected, even if other track is currently being
selected in one of zones.
Selecting the track using Music
Guide
The Music Guide displays a variety of music
selections to sample, including top tracks and
artists, and recommendations.
Select genre names, charts, and new releases
anywhere in the Music Guide pages to browse
more.
Listening to Rhapsody or SHOUTcast Using the Receiver
1 Press AMP.
The receiver can be operated using the
remote.
2 Press MENU.
The menu is displayed on the TV screen.
3 Press V/v repeatedly to select
“ Rhapsody,” then press
or b.
4 Press V/v repeatedly to select
“Rhapsody Music Guide,” then
press .
5 Press V/v repeatedly to select
Genres, Charts, New Releases
or Rhapsody Recommends,
then press .
6 Press V/v/B/b to select the
track you want to listen to from
the list, then press .
The playback screen appears on the TV
screen and the track you selected is
played back.
21
GB
Page 22
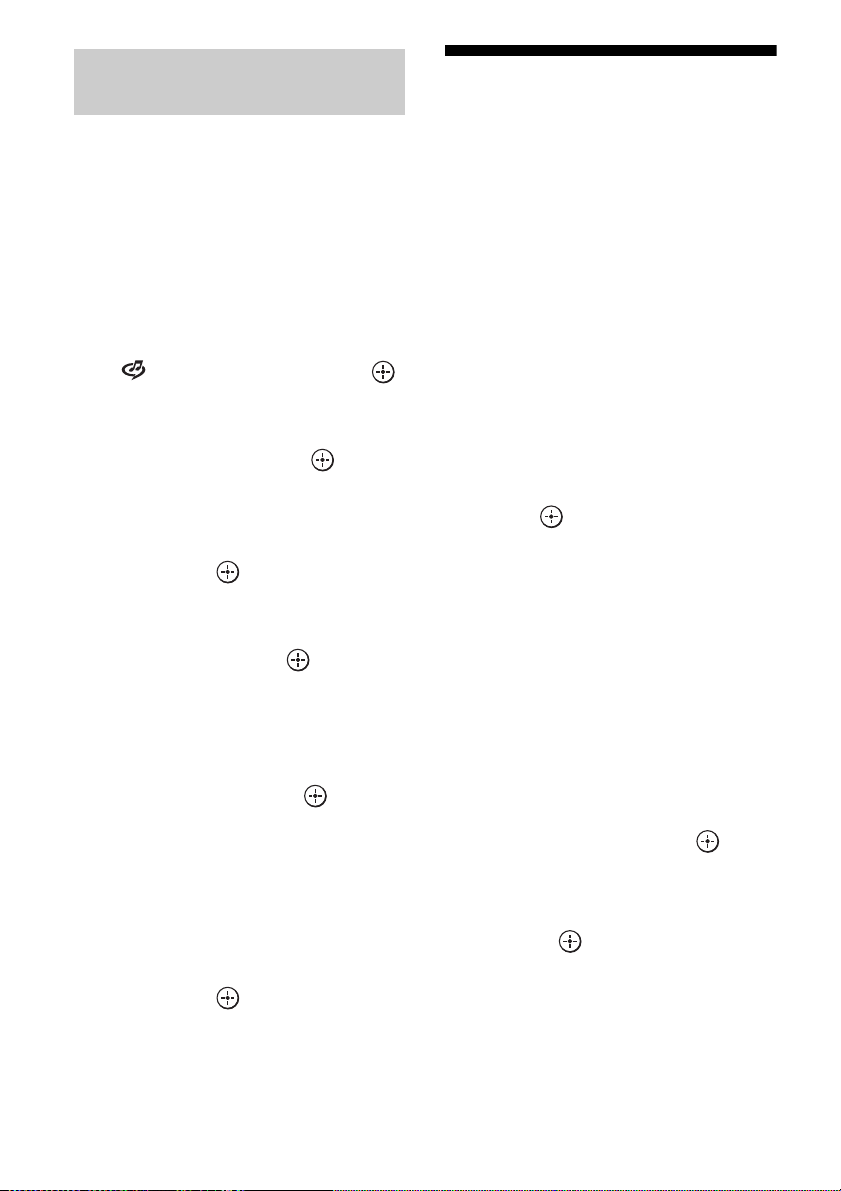
Searching for a track, album, or
artist you want to listen to
You can search for a track, album, or artist
using the search function.
1 Press AMP.
The receiver can be operated using the
remote.
2 Press MENU.
The menu is displayed on the TV screen.
3 Press V/v repeatedly to select
“ Rhapsody,” then press
or b.
4 Press V/v repeatedly to select
“Search,” then press .
5 Press V/v repeatedly to select
“Artists,” “Albums,” or
“Tracks” you want to search for,
then press .
The soft keyboard appears on the TV
screen.
6 Press V/v/B/b and to select
a character one by one to enter
the title or name you want to
search for.
7 Press V/v/B/b to select
“Finish,” then press .
Wait until the search result is displayed.
8 Press b to select the search
results.
9 Press V/v/B/b repeatedly to
select the track you want to
listen to from the search result,
then press .
The playback screen appears on the TV
screen, and track you selected is played
back.
Registering your favorite track, album, or channel
You can register your favorite track, album, or
channel in “My Library” while playing back
the track or during reception.
You can select the track, album or channel that
you registered in “My Library” from “My
Artists,” “My Albums,” “My Genres,” “My
Tracks,” “My Playlists,” or “My Channels.”
1 Press OPTIONS while a track is
playing back or you are
selecting a channel.
2 Press V/v repeatedly to select
“Add track to My Library,” “Add
album to My Library,” or “Add
channel to My Library,” then
press .
The track, album, or channel you chose
will be registered in “My Library.”
To remove a track, album, or
channel you registered
You can remove a track, album, or channel you
registered in “My Library.”
1 Press OPTIONS while a track is playing
back or you are selecting a channel.
2 Press V/v repeatedly to select “Delete
album from My Library,” “Delete track
from My Library,” or “Delete channel
from My Library,” then press .
The confirmation screen of deletion
appears on the screen.
3 Press B/b repeatedly to select “Yes,”
then press .
The deletion is completed.
22
GB
Page 23
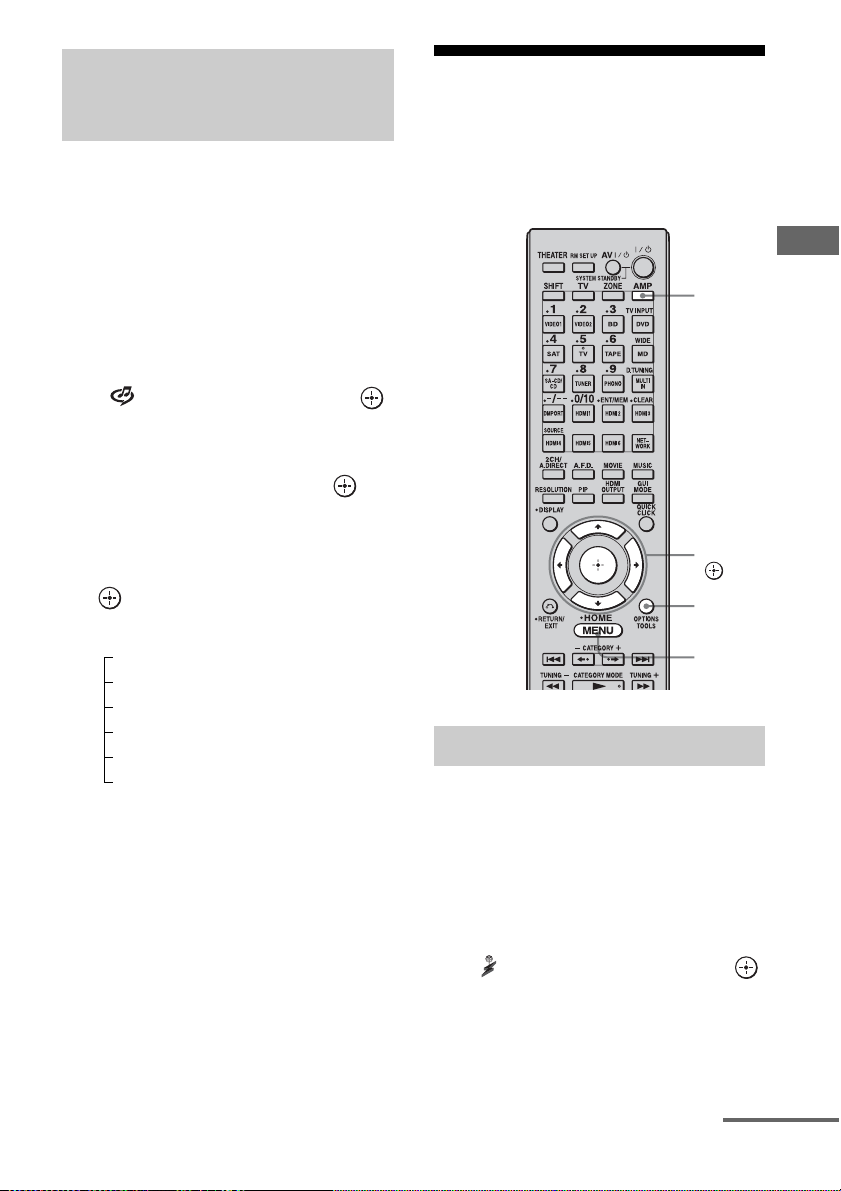
Selecting a track, playlist or
channel you registered for My
Library
You can select a track, playlist or channel you
registered in “My Library.”
1 Press AMP.
The receiver can be operated using the
remote.
2 Press MENU.
The menu is displayed on the TV screen.
3 Press V/v repeatedly to select
“ Rhapsody,” then press
or b.
4 Press V/v repeatedly to select
“My Library,” then press .
5 Press V/v/B/b to select the
track you want to listen to using
the My Library list, then press
.
My Library list
My Artists > artist(s)
My Albums > album(s)* > track(s)
My Genres > genre(s)* > artist(s)* > album(s)* > track(s)
My Tracks > track(s)
My Playlists > playlist(s)
My Channels > channel(s)
*The number of lists displayed on the screen
depends on the status of the Rhapsody Digital
Music Service you are using.
The playback screen appears on the TV
screen and the track you selected is
played back.
*
> albums(s)* > track(s)
*
*
*
*
*
Listening to SHOUTcast
You can enjoy listening to the sound of a
SHOUTcast internet radio without turning on
your computer by connecting the receiver
directly to Internet.
Listening to Rhapsody or SHOUTcast Using the Receiver
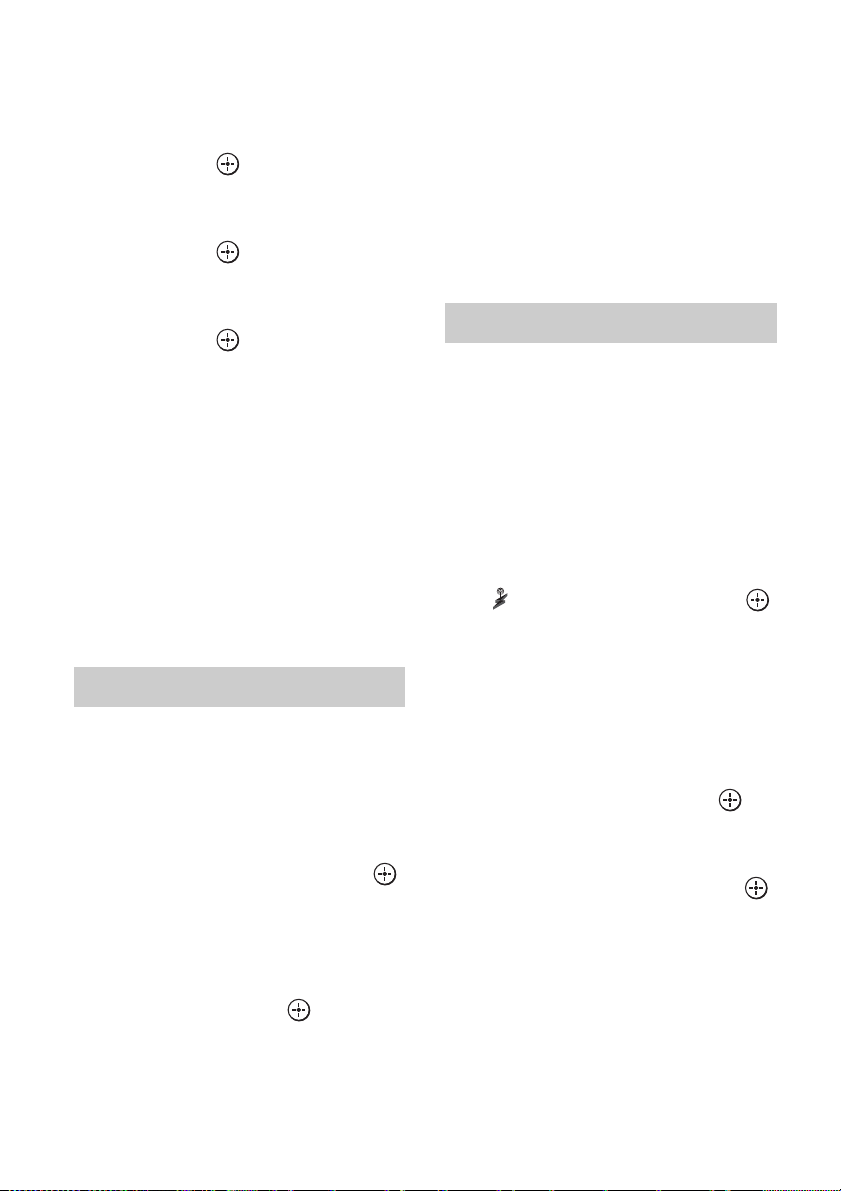
AMP
V/v/B/b,
OPTIONS
MENU
*
Selecting a SHOUTcast station
1 Press AMP.
The receiver can be operated using the
remote.
2 Press MENU.
The menu is displayed on the TV screen.
3 Press V/v repeatedly to select
“ SHOUTcast,” then press
or b.
Proceed to step 5 when you receive the
SHOUTcast on this receiver at first time.
continued
23
GB
Page 24
4 Press RETURN/EXIT O to
display SHOUTcast station list.
5 Press V/v repeatedly to select
“Preset List,” “0-9,” or A to Z,
then press .
6 Press V/v repeatedly to select
the genre you want to listen to,
then press .
7 Press V/v/B/b to select the
station you want to listen to,
then press .
The reception screen appears on the TV
screen, and the station you selected is
received.
Notes
• When the number of listeners is large, up to 100
stations can be displayed (in order) on this receiver.
• The audio supplied in a format that is not supported
by this receiver does not appear on the list.
• You can listen to only the same station in both the
main zone and the 2nd zone.
Priority is given to the station which has most
recently been selected, even if other station is
currently being selected in one of zones.
Presetting favorite stations
You can register your favorite SHOUTcast
stations on the receiver.
1 Press OPTIONS while listening
to the radio station.
2 Press V/v repeatedly to select
“Add to Preset,” then press .
The preset number list appears on the TV
screen.
3 Press V/v repeatedly to select
the preset number you want to
preset, then press .
Note
If you select a list number for which a station has
already been registered, the previously registered
station will be overwritten.
Tip
You can register one station for different list
numbers.
To return to the previous screen
Press RETURN/EXIT O.
Selecting preset stations
You can select your favorite stations from
among the stations you registered.
1 Press AMP.
The receiver can be operated using the
remote.
2 Press MENU.
The menu is displayed on the TV screen.
3 Press V/v repeatedly to select
“ SHOUTcast,” then press
or b.
Proceed to step 5 when you receive the
SHOUTcast on this receiver at first time.
4 Press RETURN/EXIT O to
display SHOUTcast station list.
5 Press V/v repeatedly to select
“Preset List,” then press .
6 Press V/v repeatedly to select
the preset number station you
want to listen to, then press .
The reception screen appears on the TV
screen, and the station you selected is
received.
24
GB
Page 25
Adjusting the Receiver Settings Using PC Application Software
Installing the ES Utility
application software on a
Features of the ES Utility application software
You can check the settings of the receiver, and
adjust those settings using your computer, as
well as using the receiver, after installing the
ES Utility application software provided on
the CD-ROM supplied with the receiver.
The following settings cannot be set using the
computer with the ES Utility application
software.
• Auto Calibration
–Quick Setup
–Enhanced Setup
• Speaker
–Test Tone
• Multi Zone
– Zone Power ON/OFF
– Zone Input Change
– Zone Volume Adjust
System Requirement
Operation System
Windows XP Home Edition/Professional/
Media Center Edition 2005 (SP3)
Windows Vista Ultimate, Business, Home
Premium, Home Basic
Computer
CPU: Celeron, Pentium III or higher
Clock Speed: 1 GHz or higher
RAM: 512 MB or more
HDD: 20 MB or more free disk space
(280 MB free disk space is required when
.NET Framework 2.0 is not installed)
Monitor: 1024 × 768, High Color
(65536 colors)
Network: 100Base-TX or higher
computer
Turn on your computer and
1
login as an administrator.
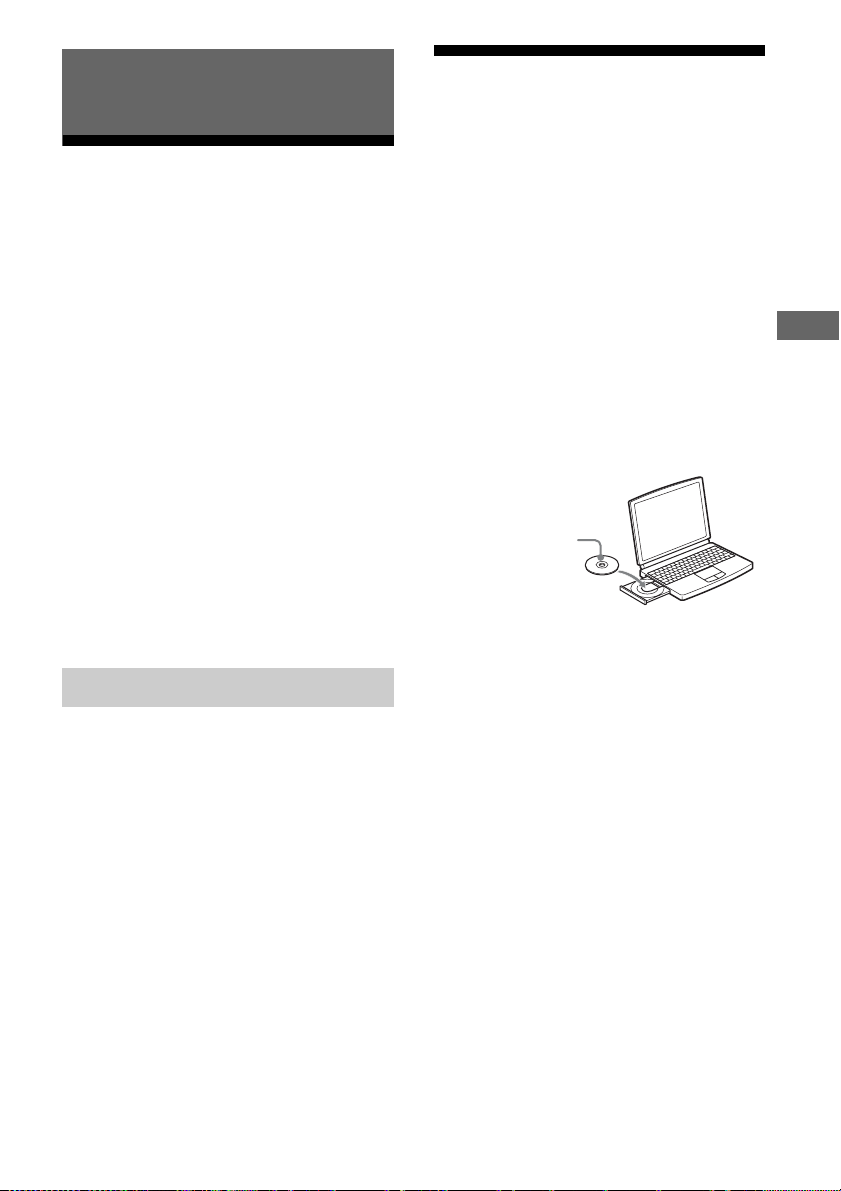
2 Insert the supplied CD-ROM
into the CD-ROM drive of your
computer.
The installation launcher starts
automatically, then a Software Setup
screen appears on the screen.
If the installation launcher does not start
automatically, double-click
“SetupLauncher.exe” on the disc.
application software
ES Utility
3 Install the ES Utility software
application following the
instructions given in the
message on the screen.
To check the HELP
When you want to check the HELP of the ES
Utility application software,
click [Start] – [All Programs] – [ES Utility] –
[Help for ES Utility], in that order.
Adjusting the Receiver Settings Using PC Application Software
25
GB
Page 26
Using Other Functions
5 Press V/v repeatedly to select
“Network Setup,” then press
.
Checking the network settings
You can check the network settings of the
receiver using the Network settings menu.
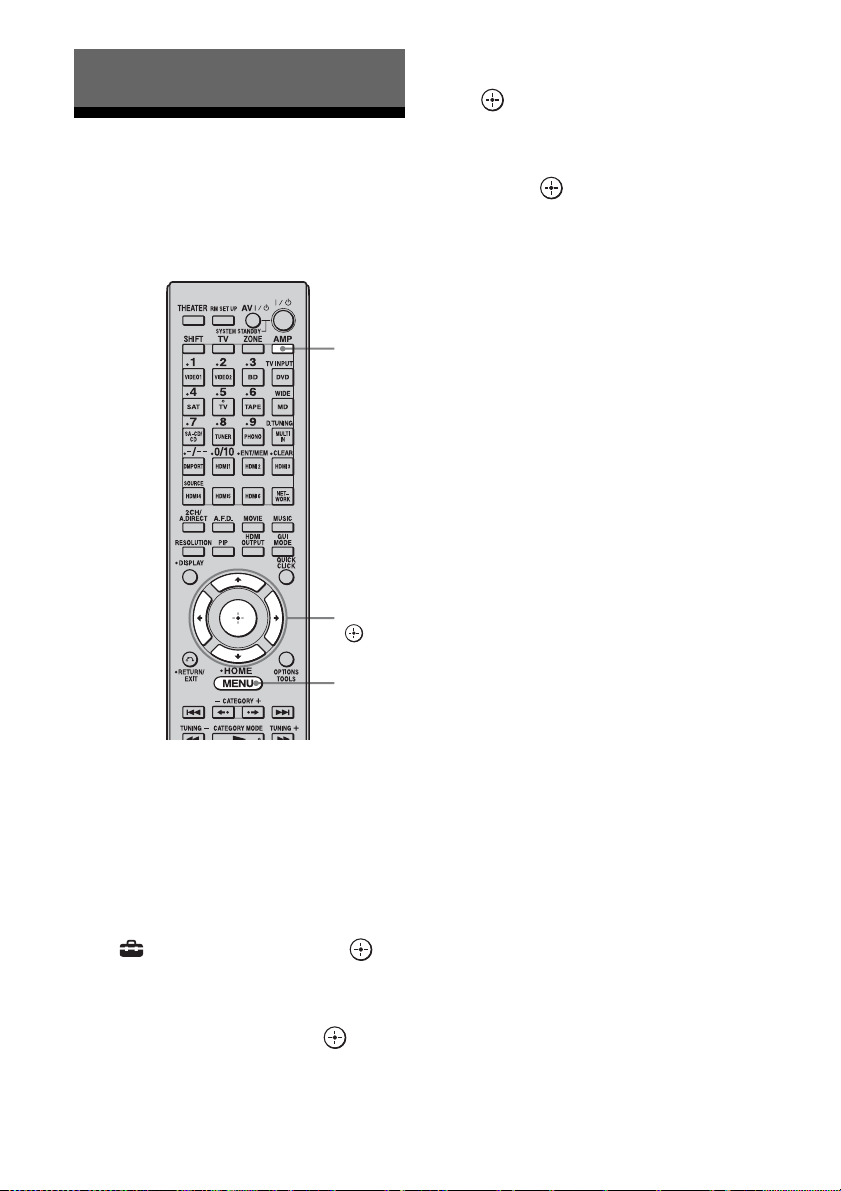
AMP
V/v/b,
MENU
6 Press V/v repeatedly to select
“Network Information,” then
press .
The network setting information of the
receiver is displayed on the TV screen.
1 Press AMP.
The receiver can be operated using the
remote.
2 Press MENU.
The menu is displayed on the TV screen.
3 Press V/v repeatedly to select
“ Settings,” then press or
b.
4 Press V/v repeatedly to select
“Network,” then press or b.
GB
26
Page 27
Changing the network settings
You can change the network settings of the
receiver using the Network settings menu.
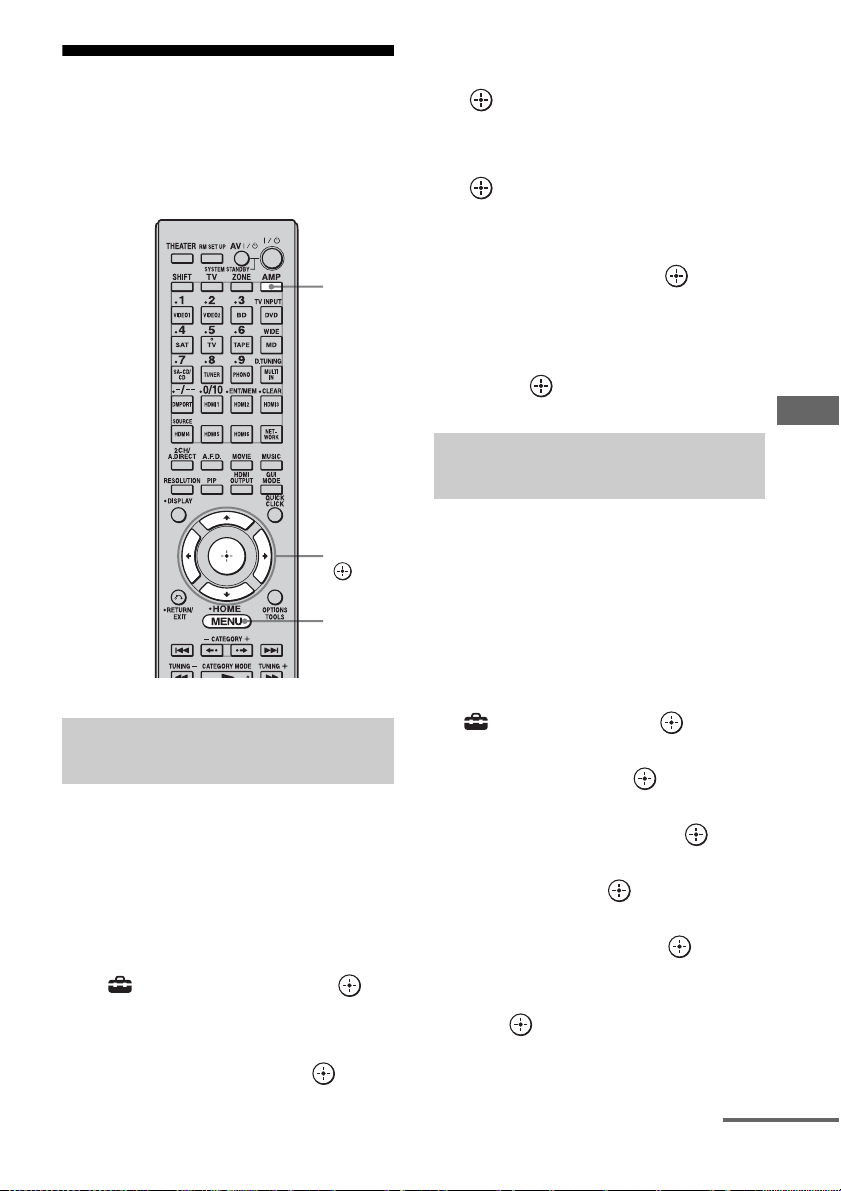
AMP
5 Press V/v repeatedly to select
“Network Setup,” then press
.
6 Press V/v repeatedly to select
“Internet Setup,” then press
.
7 Press V/v repeatedly to select
“Connect Automatically
(DHCP),” then press .
“Success! Your device is now connected
to your network.” appears on the TV
screen.
8 Press to select “Finish.”
Using Other Functions
Configuring network settings
manually
V/v/b,
MENU
Configuring network settings
automatically
1 Press AMP.
The receiver can be operated using the
remote.
2 Press MENU.
The menu is displayed on the TV screen.
3 Press V/v repeatedly to select
“ Settings,” then press or
b.
4 Press V/v repeatedly to select
“Network,” then press or b.
To set the IP address manually
Press AMP.
1
The receiver can be operated using the
remote.
2 Press MENU.
The menu is displayed on the TV screen.
3 Press V/v repeatedly to select
“ Settings,” then press or b.
4 Press V/v repeatedly to select
“Network,” then press or b.
5 Press V/v repeatedly to select
“Network Setup,” then press .
6 Press V/v repeatedly to select “Internet
Setup,” then press .
7 Press V/v repeatedly to select “Manual
Configuration,” then press .
The setting screen for the IP address
appears on the TV screen.
8 Press to select the IP address.
The soft keyboard appears on the TV
screen.
continued
27
GB
Page 28
9 Press V/v/B/b and to select a
character one by one to enter the IP
address.
10Press V/v/B/b to select “Finish,” then
press .
11Press b to display the next screen.
12Repeat the process in steps 8 to 11
again to enter the Subnet mask,
Gateway address, Primary DNS
address, and Secondary DNS address.
13Press V/v to select “Test Connection,”
then press .
“Success! Your drive is now connected to
your network.” appears on the TV screen.
14Press to select “Finish.”
To set the Proxy server
manually
Press AMP.
1
The receiver can be operated using the
remote.
2 Press MENU.
The menu is displayed on the TV screen.
10Press V/v/B/b repeatedly to select
“Finish,” then press .
11Press b to select the port number box,
then press .
The soft keyboard appears on the TV
screen.
12 Press V/v/B/b and to select a
character one by one to enter the port
number.
13Press V/v/B/b repeatedly to select
“Finish,” then press .
14Press b.
15Press V/v repeatedly to select “Finish,”
then press .
3 Press V/v repeatedly to select
“ Settings,” then press or b.
4 Press V/v repeatedly to select
“Network,” then press or b.
5 Press V/v repeatedly to select
“Network Setup” then press .
6 Press V/v repeatedly to select “Proxy
setup,” then press .
7 Press V/v repeatedly to select
“Enable,” then press .
8 Press .
The soft keyboard appears on the TV
screen.
9 Press V/v/B/b and to select a
character one by one to enter the proxy
server address.
GB
28
Page 29
Changing the settings of the home network function of the receiver
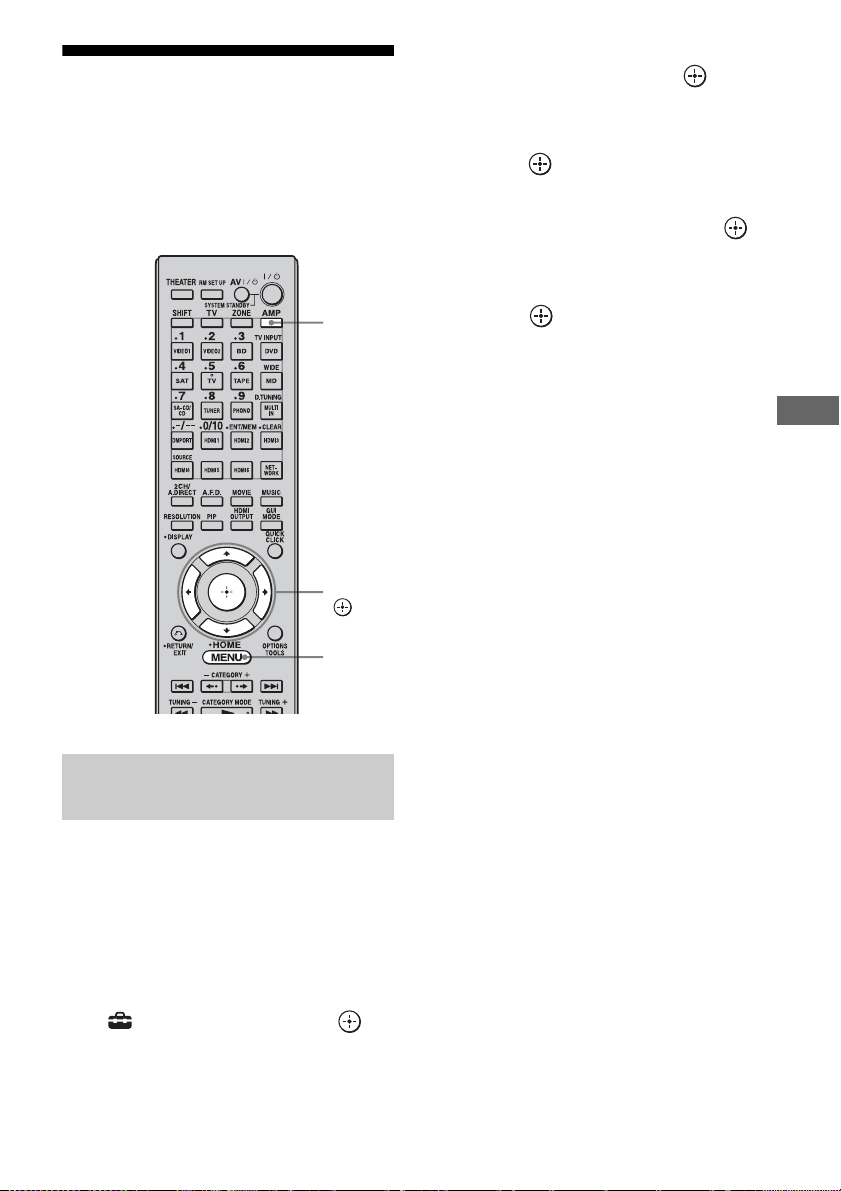
You can set up the receiver to be used as a
server.
4 Press V/v repeatedly to select
“Network,” then press or b.
5 Press V/v repeatedly to select
“Server Function Setup,” then
press .
6 Press V/v repeatedly to select
“ON” or “OFF,” then press .
A confirmation screen appears on the TV
screen
AMP
V/v/b,
MENU
Turning the server function on/
off
1 Press AMP.
The receiver can be operated using the
remote.
7 Press to select “Finish.”
Using Other Functions
2 Press MENU.
The menu is displayed on the TV screen.
3 Press V/v repeatedly to select
“ Settings,” then press or
b.
29
GB
Page 30
Updating the firmware
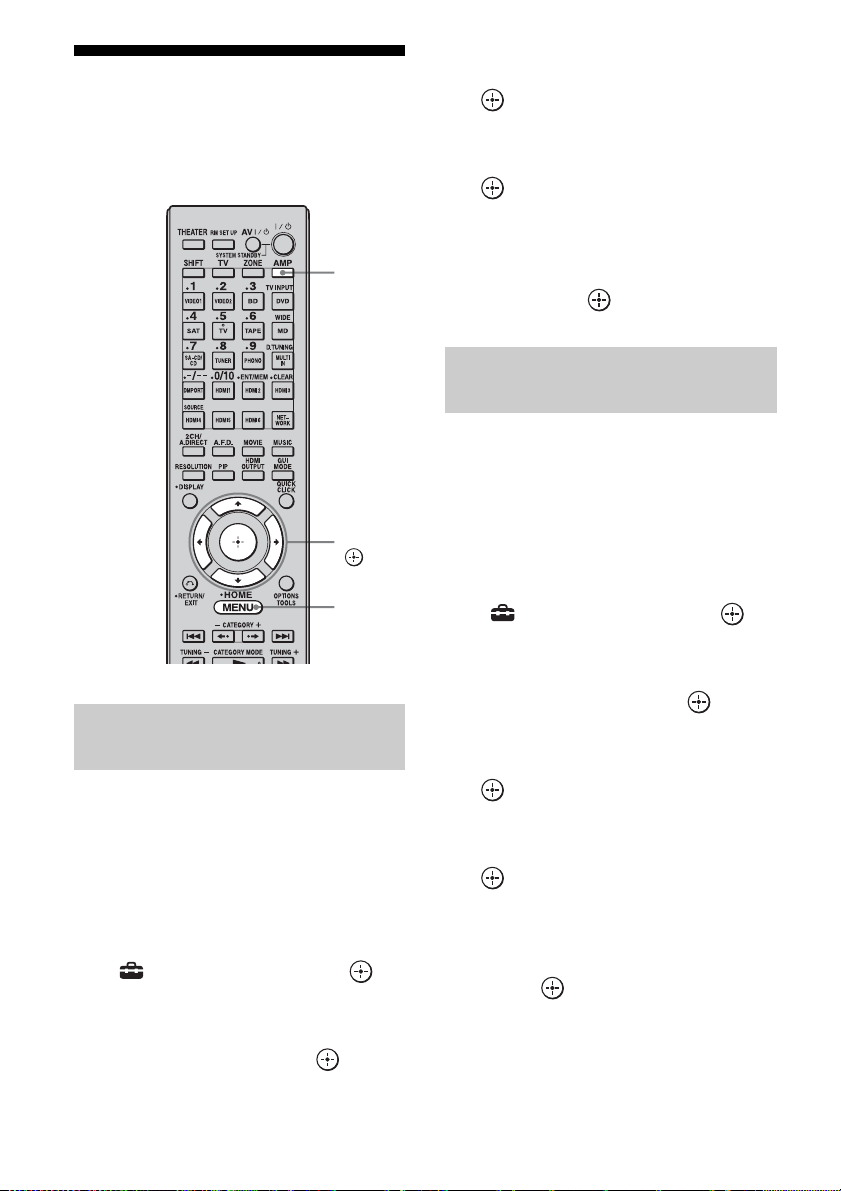
You can check the version of the firmware on
the system of the receiver, and you can also
update the firmware of the receiver.
5 Press V/v repeatedly to select
“System Update,” then press
.
6 Press V/v repeatedly to select
“Internet Update,” then press
.
The system information of the receiver
appears on the TV screen.
AMP
V/v/b,
MENU
Checking the system
information
1 Press AMP.
The receiver can be operated using the
remote.
2 Press MENU.
The menu is displayed on the TV screen.
3 Press V/v repeatedly to select
“ Settings,” then press or
b.
4 Press V/v repeatedly to select
“System,” then press or b.
7 Press B/b to select “Cancel,”
then press .
Updating the receiver using the
menu
1 Press AMP.
The receiver can be operated using the
remote.
2 Press MENU.
The menu is displayed on the TV screen.
3 Press V/v repeatedly to select
“ Settings,” then press or
b.
4 Press V/v repeatedly to select
“System,” then press or b.
5 Press V/v repeatedly to select
“System Update,” then press
.
6 Press V/v repeatedly to select
“Internet Update,” then press
.
The current system version and latest
system version are displayed on the TV
screen.
7 Press to select “Update.”
A confirmation screen appears on the TV
screen.
30
GB
Page 31
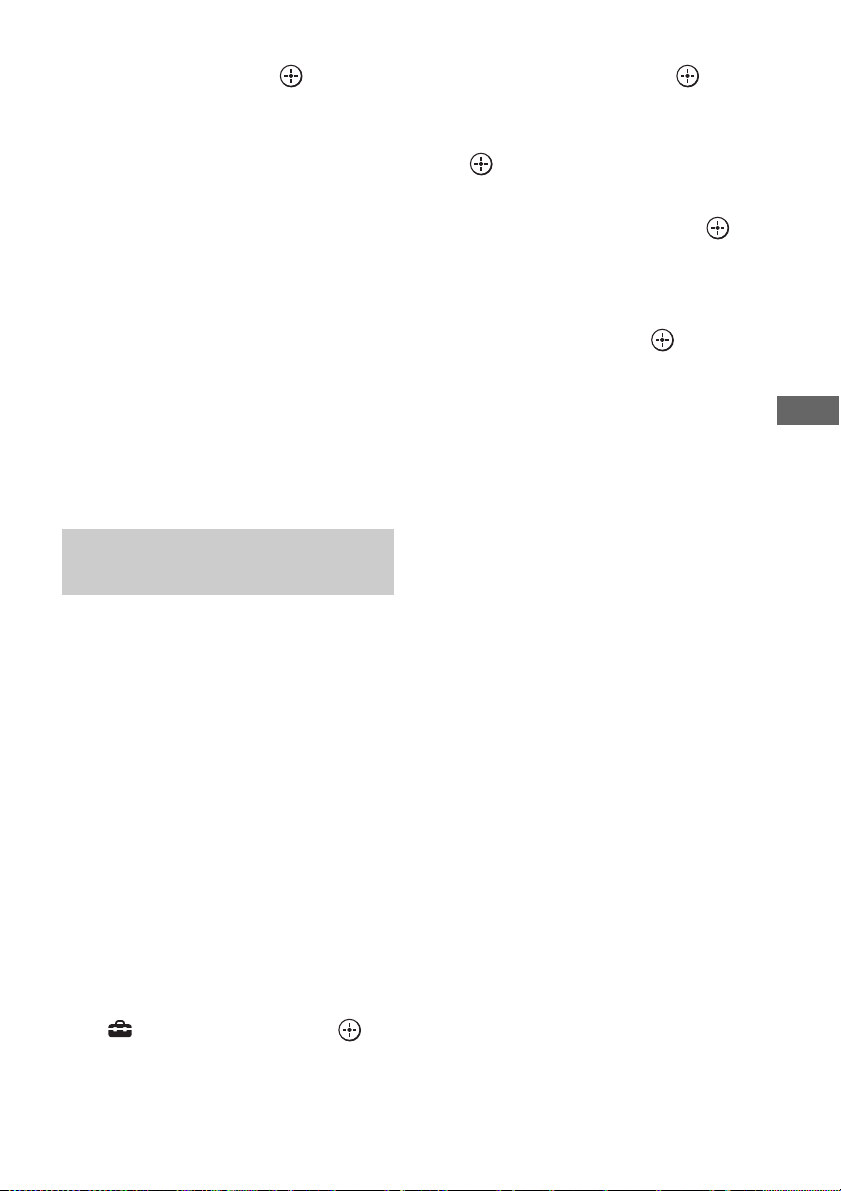
8 Press V/v repeatedly to select
“Start,” then press .
Receiver updating starts.
The MULTI CHANNEL DECODING
lamp on the front panel flashes while
updating.
When the updating complete, the receiver
will restart automatically.
Notes
• In the following cases, a message appears on the
TV screen and the update of the receiver is not
performed.
– when all versions are the latest one.
– when the receiver cannot retrieve the data, such
as when the network has not been set up, or
when the server is down, etc.
• Do not turn the receiver off or disconnect the
network cable during firmware updating. It may
cause a malfunction.
• It may take 30 minutes for the firmware updating to
complete.
Updating the receiver firmware
using the ES Utility
You can update the receiver firmware using the
ES Utility application software provided on
the CD-ROM supplied with the receiver. Refer
to the HELP of the ES Utility for details on
operations of the ES Utility.
1 Download the update program
from the support website on the
computer to which you
installed the ES Utility.
5 Press V/v repeatedly to select
“System,” then press or b.
6 Press V/v repeatedly to select
“System Update,” then press
.
7 Press V/v repeatedly to select
“PC Update,” then press .
A confirmation screen appears on the TV
screen.
8 Press V/v repeatedly to select
“Start,” then press .
The status of waiting for the data from the
PC is displayed on the TV screen.
9 Click “System” in the ES Utility
window on the computer
screen, then click “Browse...”
and specify the path of the
update program, and click
“Start Update”.
Receiver updating starts.
When updating complete, the receiver
will restart automatically.
Notes
• Do not turn the receiver off or disconnect the
network cable during firmware updating. It may
cause a malfunction.
• It may take 30 minutes for the firmware updating to
complete.
Using Other Functions
2 Press AMP.
The receiver can be operated using the
remote.
3 Press MENU.
The menu is displayed on the TV screen.
4 Press V/v repeatedly to select
“ Settings,” then press or
b.
31
GB
Page 32

Additional Information
Glossary
x Broadband
General name for communication lines that
use a broad frequency bandwidth for sending
and receiving large amounts of video or audio
data at high speed. Currently, ADSL, CATV,
FTTH and other systems are identified as
broadband.
DNS is identified by an IP address. Also called
a “DNS server.”
x Ethernet
A method of networking computers in a Local
Area Network (LAN). Developed by Xerox
Corporation, Ethernet has become a very
popular means of creating LANs.
x Gateway
An IP address of a device such as a computer
or a router, etc., which is required when the
receiver accesses the Internet or an external
network.
x Broadband router
For Internet connections through ADSL or a
cable TV line, devices called ADSL modems
or cable modems are used. However, for
Internet access from multiple terminals
connected at once, a broadband router is used.
x Client
A device which can use content and functions
that are provided from a server connected to
your network.
x DHCP
Abbreviation of Dynamic Host Configuration
Protocol.
A set of rules to automatically assign settings
necessary for network communication.
x DLNA
Abbreviation of Digital Living Network
Alliance.
An association that formulates audio/photo/
video distribution among PCs and other digital
devices in a home network environment, or the
format itself.
DLNA certified devices are interoperable with
each other, thus making them easy to
communicate on the network.
x DNS
Abbreviation of Domain Name System. A
server that translates domain names to IP
addresses, or IP addresses to domain names. A
x Internet
A communication network linking computers
around the world. The Internet supports many
services, including email and search engines.
x LAN
Abbreviation of Local Area Network.
LAN is a general name for networks set up for
communication among devices including
computers, printers, and fax machines in
relatively small areas such as offices or
buildings.
x Player
A function/device which can play back content
such as music, photos, or videos, stored on the
server on your home network.
x Router
Device that relays data flow from network to
network. Routers are usually installed between
the Internet and the home network. Some
routers are capable of connecting multiple
devices to the Internet.
x Server
A function/device which provides content
such as music, photos, or videos to clients on
your home network.
x Subnet mask
Part of an IP address that identifies the subnet,
a smaller group on the network.
32
GB
Page 33

Troubleshooting
Cannot find the server.
• Check the followings:
– Is the router is turned on?
– If there is another device between this
device and the router, check that device
is turned on.
– Are all of the cables are connected
correctly and securely?
– Is the settings to make sure that they
match the router’s settings (DHCP or
fixed IP address)?
• When using a computer, check the
following:
– the built-in firewall settings for the
computer’s operating system.
– the firewall settings of your security
software. To check the firewall settings
of your security software, refer to your
security software’s Help section.
• Register this device with the server. For
details, see the instructions supplied with
the server.
• Wait for a few moments, and then try
connecting to the server again.
– The firewall settings of your security
software. To check the firewall settings
of your security software, refer to your
security software’s Help section.
Sound is not output from the device on
your home network, or the sound cuts
off or has noise.
• Check the following:
– Is a component playing back the audio
selected?
– Is the device you selected and the audio
cord connected surely?
– Is the server function of the receiver set
to ON?
– Does the device on your home network
support “DLNA Tuner_1_0”?
Contact the manufacturer of the device
you are using to check whether or not it
supports “DLNA Tuner_1_0.”
Additional Information
If the trouble is other than the cases above and
the trouble is not solved even if you wait for a
while, press ?/1 on the remote or POWER on
the receiver to turn the receiver on again.
Content does not play back on the
device on your home network.
• Check whether or not another device on
your home network is already playing
back audio delivered from the receiver.
You cannot play back audio delivered from
the receiver on two or more devices on
your home network at the same time.
• Check whether or not the device on your
home network supports “DLNA
Tuner_1_0.” Contact the manufacturer of
the device you are using to check whether
or not it supports “DLNA Tuner_1_0.”
• When using a computer, check the
following:
– The built-in firewall settings for the
computer’s operating system.
33
GB
Page 34
Specifications
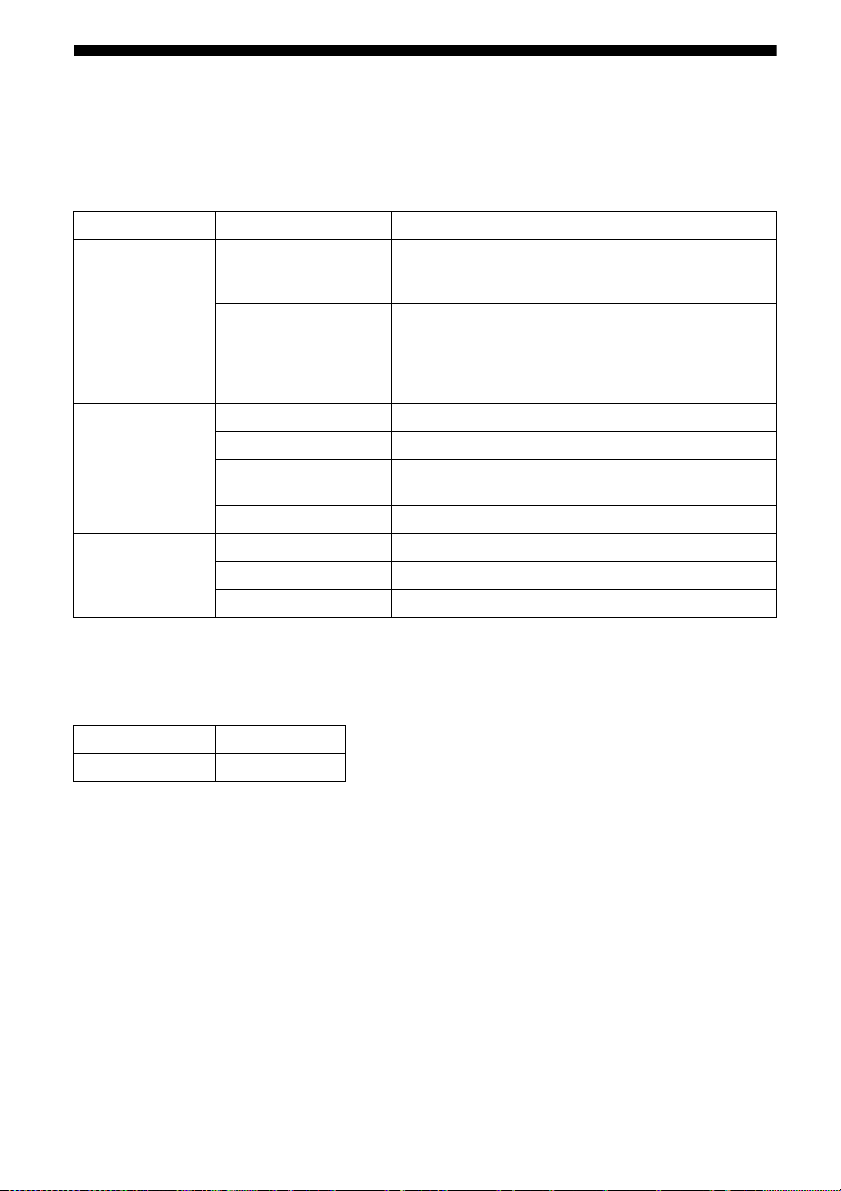
Supported playback formats
Content delivered from the device on the home network needs to support the following formats for
you to play back content on this receiver.
Type of content Format Other conditions
MPEG-2 PS
Vid eo
Windows Media Video
(WMV)
Linear PCM
MPEG-1 Layer3 (MP3)
Music
Photo
Windows Media Audio
(WMA)
AAC
JPEG
BMP
PNG
Supported formats for delivery by this receiver
This receiver converts to linear PCM the audio of a device connected to the receiver using an analog
cord, and delivers it onto a device on the home network.
Maximum resolution 720 × 480
MPEG-2 System (up to 10 Mbps) mixed with MPEG-1
Layer 1/2/3, PCM, or AC3 audio format
Maximum resolution 720 × 480
Windows Media Video 7/8/9 standard definition (up to
2 Mbps for Main profile) mixed with Windows Media
Audio 7/8/9 excludes all profile of Windows Media Audio
professional
Excludes all profile of Windows Media Audio
professional
Type of content Format
Music Linear PCM
GB
34
Page 35
End User License Agreement for Certain Software Included in Your Sony Receiver
END USER LICENSE
AGREEMENT FOR
CERTAIN SOFTWARE
INCLUDED IN YOUR
SONY RECEIVER
IMPORTANT – READ THIS
AGREEMENT BEFORE USING
YOUR SONY RECEIVER. USING
YOUR RECEIVER INDICATES
YOUR ACCEPTANCE OF THIS
AGREEMENT.
This End User License Agreement (“EULA”)
is a legal agreement between you and Sony
Electronics Inc. (“Sony”), the licensor of the
software included in this Sony Receiver and
accompanying printed or online
documentation, which shall be referred to as
the “Sony Software”. This EULA covers the
Sony Software. The Sony Software includes
software in your Sony Receiver, including
software of Sony and Sony’s third party
licensors (“Third Party Licensors”) and their
updates and upgrades provided to you by
Sony, whether stored on media, or downloaded
to the Sony Receiver via any method. By your
initial use of your Sony Receiver, you agree to
be bound by the terms of this EULA. If you do
not agree to the terms of this EULA, Sony is
unwilling to license the Sony Software to you,
and you should promptly contact Sony for
instructions on the return of the entire Sony
Receiver and included Sony Software for a
refund of the purchase price of the Sony
Receiver.
SOFTWARE LICENSE
The Sony Software is licensed, not sold. Sony
and its Third Party Licensors grant you a
personal, non-transferrable, non-exclusive and
limited license to use the Sony Software only
on the Sony Receiver. You may use the Sony
Software for personal use only. You may make
one back-up copy of the Sony Software solely
for recovery purposes. You agree not to
modify, reverse engineer, decompile,
disassemble or otherwise attempt to derive
source code from the Sony Software in whole
or in part or to use the Sony Software in whole
or in part for any purpose other than allowed
under this EULA. In addition, you may
transfer all of your rights under this EULA
only as part of a sale or transfer of the Sony
Receiver provided you retain no copies,
transfer all of the Sony Software (including all
copies, component parts, any media, printed
materials, all versions and any upgrades of the
Sony Software, and this EULA), and the
recipient agrees to the terms of this EULA.
Sony and its Third Party Licensors retain all
rights that this EULA does not expressly grant
to you.
COPYRIGHT
The Sony Software is protected by copyright
laws and international copyright treatises, as
well as other intellectual property laws and
treaties. All title and copyright and other
intellectual rights in and to the Sony Software,
and all copies of the Sony Software, are owned
by Sony or its Third Party Licensors.
Additional Information
continued
35
GB
Page 36

EXCLUSION OF WARRANTY
THE SONY SOFTWARE AND
ACCOMPANYING DOCUMENTATION
ARE FURNISHED TO YOU “AS IS” AND
WITHOUT WARRANTY OF ANY KIND.
SONY AND ITS THIRD PARTY
LICENSORS EXPRESSLY DISCLAIM ALL
WARRANTIES AND CONDITIONS,
EXPRESS OR IMPLIED, INCLUDING BUT
NOT LIMITED TO THE IMPLIED
WARRANTIES OF NON-INFRINGEMENT,
MERCHANTABILITY, AND FITNESS FOR
A PARTICULAR PURPOSE. SONY AND
ITS THIRD PARTY LICENSORS DO NOT
WARRANT THAT THE SONY SOFTWARE
OR THE ACCOMPANYING
DOCUMENTATION WILL MEET YOUR
REQUIREMENTS OR THAT THE
OPERATION OF THE SONY SOFTWARE
WILL BE UNINTERRUPTED OR ERROR
FREE. FURTHERMORE, SONY AND ITS
THIRD PARTY LICENSORS DO NOT
WARRANT OR MAKE ANY
REPRESENTATIONS REGARDING THE
USE OR THE RESULTS OF THE USE OF
THE SONY SOFTWARE IN TERMS OF ITS
CORRECTNESS, ACCURACY,
RELIABILITY OR OTHERWISE. NO
ORAL OR WRITTEN INFORMATION OR
ADVICE GIVEN BY SONY OR A SONY
AUTHORIZED REPRESENTATIVE SHALL
CREATE A WARRANTY OR IN ANY WAY
CHANGE THIS EXCLUSION OF
WARRANTY.
LIMITATION OF LIABILITY
IN NO EVENT WILL SONY OR ITS
THIRD-PARTY LICENSORS BE LIABLE
TO YOU FOR ANY SPECIAL, INDIRECT,
INCIDENTAL, PUNITIVE OR
CONSEQUENTIAL DAMAGES OF ANY
KIND, INCLUDING, BUT NOT LIMITED
TO, COMPENSATION,
REIMBURSEMENT OR DAMAGES ON
ACCOUNT OF THE LOSS OF USE OF THE
SONY RECEIVER, DOWN TIME AND
YOUR TIME, LOSS OF PRESENT OR
PROSPECTIVE PROFITS, LOSS OF DATA,
OR FOR ANY OTHER REASON
WHATSOEVER, EVEN IF SONY OR ITS
THIRD PARTY LICENSORS HAVE BEEN
ADVISED OF THE POSSIBILITY OF
SUCH DAMAGES. THE SONY
SOFTWARE AND ACCOMPANYING
DOCUMENTATION ARE FURNISHED TO
YOU FOR USE AT YOUR OWN RISK.
SONY AND ITS THIRD PARTY
LICENSORS WILL NOT BE LIABLE FOR
DAMAGES FOR BREACH OF ANY
EXPRESS OR IMPLIED WARRANTY,
BREACH OF CONTRACT, NEGLIGENCE,
STRICT LIABILITY OR ANY OTHER
LEGAL THEORY RELATED TO THE
SONY SOFTWARE.
Some jurisdictions may not allow exclusions
or limitations of incidental or consequential
damages, or allow limitations on how long an
implied warranty lasts, so the above
limitations or exclusions may not apply to you.
36
GB
Page 37
LIMITED WARRANTY ON
MEDIA
In situations where the Sony Software or any
part thereof is furnished on media, Sony
warrants that for a period of ninety (90) days
from the date of its delivery to you, the media
on which the Sony Software is furnished to
you will be free from defects in materials and
workmanship under normal use. This limited
warranty extends only to you as the original
licensee. Sony’s entire liability and your
exclusive remedy will be replacement of the
media not meeting Sony’s limited warranty.
ANY IMPLIED WARRANTIES OR
CONDITIONS ON THE MEDIA,
INCLUDING THE IMPLIED
WARRANTIES AND CONDITIONS OF
MERCHANTABILITY AND/OR FITNESS
FOR A PARTICULAR PURPOSE, ARE
LIMITED IN DURATION TO NINETY (90)
DAYS FROM THE DATE OF DELIVERY.
SOME JURISDICTIONS DO NOT ALLOW
LIMITATIONS ON HOW LONG AN
IMPLIED WARRANTY OR CONDITION
LASTS, SO THESE LIMITATIONS MAY
NOT APPLY TO YOU. THIS WARRANTY
GIVES YOU SPECIFIC LEGAL RIGHTS,
AND YOU MAY ALSO HAVE OTHER
RIGHTS WHICH VARY FROM
JURISDICTION TO JURISDICTION.
AUTOMATIC UPDATE FEATURE
From time to time, Sony or third parties may
automatically update or otherwise modify the
Sony Software, for example, but not limited to,
for purposes of error correction, improvement
of features, and enhancement of security
features. Such updates or modifications may
change or delete the nature of features or other
aspects of the Sony Software, including
features you may rely upon. You hereby agree
that such activities may occur at Sony’s sole
discretion and that Sony may condition
continued use of the Sony Software upon your
complete installation or acceptance of such
update or modifications.
SOFTWARE DATA
COLLECTION AND
MONITORING
The Sony Software contains features which
may allow Sony and/or third parties to collect
data from, control and/or monitor the Sony
Receiver and other devices running or
interacting with the Sony Software. You
hereby consent to such activities. Sony’s
current privacy policy is located at http://
products.sel.sony.com/SEL/legal/privacy.pdf.
Please contact applicable third parties for
privacy policies related to their software and
services.
HIGH RISK ACTIVITIES
The Sony Software is not fault-tolerant and is
not designed, manufactured or intended for
use or resale as on-line control equipment in
hazardous environments requiring fail-safe
performance, such as in the operation of
nuclear facilities, aircraft navigation or
communication systems, air traffic control,
direct life support machines, or weapons
systems, in which the failure of the Sony
Software could lead to death, personal injury,
or severe physical or environmental damage
(“High Risk Activities”). SONY, each of the
THIRD PARTY LICENSORS AND EACH
OF THEIR RESPECTIVE AFFILIATES
specifically disclaim any express or implied
warranty or condition of fitness for HIGH
RISK ACTIVITIES.
Additional Information
continued
37
GB
Page 38

RESTRICTIONS ON EXPORT OF
ENCRYPTION TECHNOLOGY
The Sony Software may contain encryption
technology. You acknowledge that any export
of Sony Software containing encryption
technology from the United States or
subsequent re-export of such software by a
person located outside of the United States
requires a license or other authorization from
the U.S. Department of Commerce’s Bureau
of Industry and Security. You further
acknowledge that the Sony Software
containing encryption technology and
acquired from Sony is not intended for use by
a foreign government end user. By accepting
this license agreement, you agree to abide by
all relevant U.S. export laws and regulations in
the purchase and use of the Sony product being
acquired, including, but not limited to those
regulations relating to the export control of
cryptographic items and not to transfer, or
authorize the transfer, of the Sony Software to
a prohibited country or otherwise in violation
of any such restrictions or regulations.
US GOVERNMENT
RESTRICTED RIGHTS
The Sony Software is provided with
RESTRICTED RIGHTS. Use, duplication or
disclosure by the United States Government is
subject to restrictions as set forth in
subparagraphs © (1) and © (2) of the
Commercial Computer Software clause at
FAR 52.227 19, and subparagraph © (i)(ii) of
the Rights in Technical Data and Computer
Software clause at DOD FAR 252.227-7013
and any comparable federal, state or local law
or regulation. Manufacturer is Sony
Electronics Inc., 16530 Via Esprillo, San
Diego, CA 92127.
GOVERNING LAW, VENUE,
JURY TRIAL WAIVER
This EULA will be governed by the laws of the
State of New York, United States of America,
without regards to its conflicts of laws
provision. Any dispute arising out of this
EULA shall be subject to the exclusive venue
of the state and federal courts of New York
County, New York, and the parties hereby
consent to the venue and jurisdiction of such
courts. THE PARTIES HERETO WAIVE
TRIAL BY JURY WITH RESPECT TO ANY
MATTERS ARISING UNDER OR
RELATING TO THIS EULA.
SEVERABILITY
If any part of this EULA is held invalid or
unenforceable, the other parts will remain
valid.
THIRD PARTY BENEFICIARIES
Each Third Party Licensor is an express
intended third-party beneficiary of, and shall
have the right to enforce, each provision of this
EULA with respect to the software of such
party.
CONFIDENTIALITY
You agree to keep information contained in
Sony Software which is not publicly known
confidential to yourself, and not to disclose
such information to others without Sony’s
prior written approval.
DEPENDENT SOFTWARE
The software, network services or other
products other than Sony Software upon which
the Sony Software’s performance depends
might be interrupted or discontinued at the
discretion of the suppliers (software suppliers,
service providers, or Sony). Sony and its
suppliers do not warrant that the software,
network services or other products will
continue to be available, or will operate
without interruption or modification.
38
GB
Page 39
TERM
This EULA is effective until terminated. Sony
may terminate this EULA immediately if you
fail to comply with its terms by giving you
notice. In such event, you must destroy the
Sony Software and accompanying
documentation, and all copies you have made
of them. In addition, upon termination you will
have no recourse against Sony or its licensors
for your inability to use the Sony Software or
the accompanying documentation.
Copyrights
DLNA and DLNA CERTIFIED are
trademarks and/or service marks of the Digital
Living Network Alliance.
Microsoft, Windows, Windows Vista, and
Windows Media are trademarks or registered
trademarks of Microsoft Corporation in the
United States and/or other countries.
iPod is a trademark of Apple Inc., registered in
the U.S. and other countries.
All other trademarks and registered
trademarks are of their respective holders. In
this manual, ™ and ® marks are not specified.
Rhapsody & the Rhapsody logo are
trademarks and/or registered trademarks of
RealNetworks, Inc.
®
SHOUTcast
AOL LLC.
XM Ready
Satellite Radio Inc. All rights reserved.
is a registered trademark of
®
is a registered trademark of XM
Additional Information
©2008 SIRIUS Satellite Radio Inc. “SIRIUS”
and the SIRIUS dog logo are registered
trademarks of SIRIUS Satellite Radio Inc.
The font type (Shin Go R) installed in this
receiver is provided by MORISAWA &
COMPANY LTD.
These names are the trademarks of
MORISAWA & COMPANY LTD., and the
copyright of the font also belongs to
MORISAWA & COMPANY LTD.
THIS PRODUCT IS LICENSED UNDER
THE VC-1 PATENT PORTFOLIO LICENSE
FOR THE PERSONAL AND NONCOMMERCIAL USE OF A CONSUMER
TO
(i) ENCODE VIDEO IN COMPLIANCE
WITH THE VC-1 STANDARD (“VC-1
VIDEO”)
continued
39
GB
Page 40

AND/OR
(ii) DECODE VC-1 VIDEO THAT WAS
ENCODED BY A CONSUMER ENGAGED
IN A PERSONAL AND NONCOMMERCIAL ACTIVITY AND/OR WAS
OBTAINED FROM A VIDEO PROVIDER
LICENSED TO PROVIDE VC-1 VIDEO.
libpng versions 1.0.7, July 1, 2000, through
1.2.5 - October 3, 2002, are Copyright © 20002002 Glenn Randers-Pehrson, and are
distributed according to the same disclaimer
and license as libpng-1.0.6 with the following
individuals added to the list of Contributing
Authors:
NO LICENSE IS GRANTED OR SHALL BE
IMPLIED FOR ANY OTHER USE.
ADDITIONAL INFORMATION MAY BE
OBTAINED FROM MPEG LA, L.L.C. SEE
HTTP://WWW.MPEGLA.COM
About the firmware of this
product
This product is protected by certain
intellectual property rights of Microsoft
Corporation. Use or distribution of such
technology outside of this product is
prohibited without a license from Microsoft or
an authorized Microsoft subsidiary.
Portions of the firmware of this product are
used on libpng version 1.2.8, the Independent
JPEG Group’s JPEG Software version 6b,
zlib.h -- interface of the ‘zlib’ general purpose
compression library version 1.2.2, FreeType 2
version 2.1.9 and OpenSSL version 0.9.8b.
linpng version 1.2.8
COPYRIGHT NOTICE, DISCLAIMER, and
LICENSE:
If you modify libpng you may insert additional
notices immediately following this sentence.
libpng versions 1.2.6, August 15, 2004,
through 1.2.30, August 15, 2008, are
Copyright © 2004, 2006-2008 Glenn RandersPehrson, and are distributed according to the
same disclaimer and license as libpng-1.2.5
with the following individual added to the list
of Contributing Authors:
Simon-Pierre Cadieux
Eric S. Raymond
Gilles Vollant
and with the following additions to the
disclaimer:
There is no warranty against interference with
your enjoyment of the library or against
infringement. There is no warranty that our
efforts or the library will fulfill any of your
particular purposes or needs. This library is
provided with all faults, and the entire risk of
satisfactory quality, performance, accuracy,
and effort is with the user.
libpng versions 0.97, January 1998, through
1.0.6, March 20, 2000, are Copyright © 1998,
1999 Glenn Randers-Pehrson, and are
distributed according to the same disclaimer
and license as libpng-0.96, with the following
individuals added to the list of Contributing
Authors:
Tom L a n e
Glenn Randers-Pehrson
Willem van Schaik
libpng versions 0.89, June 1996, through 0.96,
May 1997, are Copyright © 1996, 1997
Andreas Dilger Distributed according to the
same disclaimer and license as libpng-0.88,
with the following individuals added to the list
of Contributing Authors:
Cosmin Truta
GB
40
Page 41

John Bowler
Kevin Bracey
Sam Bushell
Magnus Holmgren
Greg Roelofs
Tom Tanner
libpng versions 0.5, May 1995, through 0.88,
January 1996, are Copyright © 1995, 1996
Guy Eric Schalnat, Group 42, Inc.
For the purposes of this copyright and license,
“Contributing Authors” is defined as the
following set of individuals:
Andreas Dilger
Dave Martindale
Guy Eric Schalnat
Paul Schmidt
Tim Wegner
The PNG Reference Library is supplied “AS
IS”. The Contributing Authors and Group 42,
Inc. disclaim all warranties, expressed or
implied, including, without limitation, the
warranties of merchantability and of fitness for
any purpose. The Contributing Authors and
Group 42, Inc. assume no liability for direct,
indirect, incidental, special, exemplary, or
consequential damages, which may result
from the use of the PNG Reference Library,
even if advised of the possibility of such
damage.
Permission is hereby granted to use, copy,
modify, and distribute this source code, or
portions hereof, for any purpose, without fee,
subject to the following restrictions:
1. The origin of this source code must not
be misrepresented.
2. Altered versions must be plainly
marked as such and must not be
misrepresented as being the original
source.
3. This Copyright notice may not be
removed or altered from any source or
altered source distribution.
The Contributing Authors and Group 42, Inc.
specifically permit, without fee, and
encourage the use of this source code as a
component to supporting the PNG file format
in commercial products. If you use this source
code in a product, acknowledgment is not
required but would be appreciated.
A “png_get_copyright” function is available,
for convenient use in “about” boxes and the
like:
printf(“%s”,png_get_copyright(NULL));
Also, the PNG logo (in PNG format, of course)
is supplied in the files “pngbar.png” and
“pngbar.jpg” (88x31) and “pngnow.png”
(98x31).
Libpng is OSI Certified Open Source
Software. OSI Certified Open Source is a
certification mark of the Open Source
Initiative.
Glenn Randers-Pehrson
glennrp at users.sourceforge.net
August 15, 2008
The Independent JPEG Groups’s JPEG
Software version 6b
• Portions of the firmware of this product is
used in part on The Independent JPEG
Group’s JPEG software. The Independent
JPEG Group’s JPEG software is copyright ©
1991-1998, Thomas G. Lane. All Rights
Reserved. “The Graphics Interchange
Format© is the Copyright property of
CompuServe Incorporated. GIF(sm) is a
Service Mark property of CompuServe
Incorporated.”
zlib.h -- interface of the ‘zlib’ general purpose
compression library version 1.2.2
zlib.h -- interface of the ‘zlib’ general purpose
compression library version 1.2.2, October
3rd, 2004
Copyright © 1995-2004 Jean-loup Gailly and
Mark Adler
continued
41
Additional Information
GB
Page 42

FreeType 2 version 2.1.9
Portions of this firmware of this product are
copyright © 1996-2002 The FreeTypeProject
(www.freetype.org). All rights reserved.
1. No Warranty
THE FREETYPE PROJECT IS PROVIDED
‘AS IS’ WITHOUT WARRANTY OF ANY
KIND, EITHER EXPRESS OR IMPLIED,
INCLUDING, BUT NOT LIMITED TO,
WARRANTIES OF MERCHANTABILITY
AND FITNESS FOR A PARTICULAR
PURPOSE. IN NO EVENT WILL ANY OF
THE AUTHORS OR COPYRIGHT
HOLDERS BE LIABLE FOR ANY
DAMAGES CAUSED BY THE USE OR
THE INABILITY TO USE, OF THE
FREETYPE PROJECT.
4. The names “OpenSSL Toolkit” and
“OpenSSL Project” must not be used to
endorse or promote products derived
from this software without prior written
permission. For written permission,
please contact [email protected].
5. Products derived from this software
may not be called “OpenSSL” nor may
“OpenSSL” appear in their names
without prior written permission of the
OpenSSL Project.
6. Redistributions of any form whatsoever
must retain the following
acknowledgment:
“This product includes software
developed by the OpenSSL Project for
use in the OpenSSL Toolkit (http://
www.openssl.org/)”
OpenSSL version 0.9.8b
1. OpenSSL License
Copyright © 1998-2008 The OpenSSL
Project. All rights reserved.
Redistribution and use in source and binary
forms, with or without modification, are
permitted provided that the following
conditions are met:
1. Redistributions of source code must
retain the above copyrightnotice, this list
of conditions and the following
disclaimer.
2. Redistributions in binary form must
reproduce the above copyright notice, this
list of conditions and the following
disclaimer in the documentation and/or
other materials provided with the
distribution.
3. All advertising materials mentioning
features or use of this software must
display the following acknowledgment:
“This product includes software
developed by the OpenSSL Project for
use in the OpenSSL Toolkit. (http://
www.openssl.org/)”
THIS SOFTWARE IS PROVIDED BY THE
OpenSSL PROJECT “AS IS” AND ANY
EXPRESSED OR IMPLIED WARRANTIES,
INCLUDING, BUT NOT LIMITED TO,THE
IMPLIED WARRANTIES OF
MERCHANTABILITY AND FITNESS FOR
A PARTICULAR PURPOSE ARE
DISCLAIMED. IN NO EVENT SHALL THE
OpenSSL PROJECT OR ITS
CONTRIBUTORS BE LIABLE FOR ANY
DIRECT, INDIRECT, INCIDENTAL,
SPECIAL, EXEMPLARY, OR
CONSEQUENTIAL DAMAGES
(INCLUDING, BUT NOT LIMITED TO,
PROCUREMENT OF SUBSTITUTE
GOODS OR SERVICES; LOSS OF USE,
DATA, OR PROFITS; OR BUSINESS
INTERRUPTION)
HOWEVER CAUSED AND ON ANY
THEORY OF LIABILITY, WHETHER IN
CONTRACT, STRICT LIABILITY, OR
TORT (INCLUDING NEGLIGENCE OR
OTHERWISE) ARISING IN ANY WAY OUT
OF THE USE OF THIS SOFTWARE, EVEN
IF ADVISED OF THE POSSIBILITY OF
SUCH DAMAGE.
42
GB
Page 43
2. Original Ssleat License
Copyright © 1995-1998 Eric Young
([email protected])
All rights reserved.
This package is an SSL implementation
written by Eric Young ([email protected]).
The implementation was written so as to
conform with Netscapes SSL.
This library is free for commercial and noncommercial use as long as the following
conditions are aheared to. The following
conditions apply to all code found in this
distribution, be it the RC4, RSA, lhash, DES,
etc., code; not just the SSL code. The SSL
documentation included with this distribution
is covered by the same copyright terms except
that the holder is Tim Hudson
([email protected]).
Copyright remains Eric Young’s, and as such
any Copyright notices in the code are not to be
removed.
If this package is used in a product, Eric Young
should be given attribution as the author of the
parts of the library used.
This can be in the form of a textual message at
program startup or in documentation (online
or textual) provided with the package.
Redistribution and use in source and binary
forms, with or without modification, are
permitted provided that the following
conditions are met:
1. Redistributions of source code must
retain the copyright notice, this list of
conditions and the following disclaimer.
2. Redistributions in binary form must
reproduce the above copyright notice, this
list of conditions and the following
disclaimer in the documentation and/or
other materials provided with the
distribution.
3. All advertising materials mentioning
features or use of this software must
display the following acknowledgement:
“This product includes cryptographic
software written by Eric Young
([email protected])”
The word ‘cryptographic’ can be left out
if the rouines from the library being used
are not cryptographic related :-).
4. If you include any Windows specific
code (or a derivative thereof) from the
apps directory (application code) you
must include an acknowledgement:
“This product includes software written
by Tim Hudson ([email protected])”
THIS SOFTWARE IS PROVIDED BY ERIC
YOUNG “AS IS” AND ANY EXPRESS OR
IMPLIED WARRANTIES, INCLUDING,
BUT NOT LIMITED TO, THE IMPLIED
WARRANTIES OF MERCHANTABILITY
AND FITNESS FOR A PARTICULAR
PURPOSE ARE DISCLAIMED. IN NO
EVENT SHALL THE AUTHOR OR
CONTRIBUTORS BE LIABLE FOR ANY
DIRECT, INDIRECT, INCIDENTAL,
SPECIAL, EXEMPLARY, OR
CONSEQUENTIAL DAMAGES
(INCLUDING, BUT NOT LIMITED TO,
PROCUREMENT OF SUBSTITUTE
GOODS OR SERVICES; LOSS OF USE,
DATA, OR PROFITS; OR BUSINESS
INTERRUPTION)
HOWEVER CAUSED AND ON ANY
THEORY OF LIABILITY, WHETHER IN
CONTRACT, STRICT LIABILITY, OR
TORT (INCLUDING NEGLIGENCE OR
OTHERWISE) ARISING IN ANY WAY OUT
OF THE USE OF THIS SOFTWARE, EVEN
IF ADVISED OF THE POSSIBILITY OF
SUCH DAMAGE.
The licence and distribution terms for any
publically available version or derivative of
this code cannot be changed. i.e. this code
cannot simply be copied and put under another
distribution licence [including the GNU Public
Licence.]
Additional Information
43
GB
Page 44

Index
A
Account 18
16
AM
C
Connections
Components
Network
10
7
D
DLNA 2
E
ES Utility 25
F
Favorite stations 24
Firmware
FM
30
16
H
Home network 10, 29
L
Listening 23
R
Repeat 13
Rhapsody
Account
Music Guide
My Library
Rhapsody Channels
Rhapsody Digital Music Service
Search
Rhapsody Channels
Rhapsody Digital Music Service
18
21
22, 23
20
22
20
S
Search 22
Server
Preparing 11
29
Setup
SHOUTcast
Favorite stations 24
Listening
SHOUTcast Internet radio
SHOUTcast Internet radio
Shuffle
23
18
18
13
18
18
M
Multi Zone 14
Music Guide
My Library
21
22, 23
N
Network settings
Change
27
26
Check
P
Playback
12, 15
Music
12
Photos
Videos
12
GB
44
Page 45
Additional Information
45
GB
Page 46

46
GB
 Loading...