

Page 1
Specifications
Especificaciones
4-431-660-11 (1)
XS-PKF1620
Speaker Coaxial 2-way:
Short-term Maximum Power*
Rated power 40 W*
Rated impedance 4 Ω
Output sound pressure level 91±2 dB (1 W, 1 m)*
Effective frequency range 50 – 24,000 Hz*
Mass Approx. 580 g per speaker
Supplied accessories Parts for installation
Design and specifications are subject to change without notice.
*1 “Short-term maximum power” may also be referred to as
“peak power.”
2
Testing Condition : IEC 60268-5 (2003-05)
*
Woofer 16 cm, cone type
Tweeter 3.5 cm balanced
dome type
1
2
190 W*
2
2
2
XS-PKF6920
Speaker Coaxial 2-way:
Tweeter 6.0 cm, cone type
Short-term Maximum Power *
Rated power 60 W *
Rated impedance 4 Ω
Output sound pressure level 89±2 dB (1 W, 1 m) *
Effective frequency range 27 – 22,000 Hz *
Mass Approx. 1,100 g per speaker
Supplied accessories Parts for installation
Design and specifications are subject to change without notice.
*1 “Short-term maximum power” may also be referred to
as “peak pow
2
Testing Condition : IEC 60268-5 (2003-05)
*
er.”
Woofer 16 × 24 cm, cone
type
1
2
300 W *
2
2
2
XS-PKF1620
Altavoz Coaxial de 2 vías:
Potencia de pico máximo*
Potencia nominal 40 W*
Impedancia nominal 4 Ω
Nivel de presión acústica de salida
Rango de frecuencia efectivo
Peso Aprox. 580 g por altavoz
Accesorios suministrados Componentes para la
El diseño y las especificaciones están sujetos a cambios sin previo aviso.
*1 “Potencia de pico máximo” también puede denominarse
“Potencia de pico”.
2
Condición de verificación: IEC 60268-5 (2003-05)
*
Graves 16 cm, tipo cónico
Agudos 3,5 cm, tipo BD
1
2
190 W*
2
91±2 dB (1 W, 1 m)*
50 – 24 000 Hz*
2
instalación
2
XS-PKF6920
Altavoz Coaxial de 2 vías:
Agudos de 6,0 cm, tipo
Potencia de pico máximo *
Potencia nominal 60 W *
Impedancia nominal 4 Ω
Nivel de presión acústica de salida
Rango de frecuencia efectivo
Peso Aprox. 1 100 g por altavoz
Accesorios suministrados Componentes para
El diseño y las especificaciones están sujetos a cambios sin previo aviso.
*1 “Potencia de pico máximo” también puede
denominarse “Potencia de pico”.
2
Condición de verificación : IEC 60268-5 (2003-05)
*
Graves de 16 × 24 cm, tipo
cónico
cónico
1
2
300 W *
2
89±2 dB (1 W, 1 m) *
27 – 22 000 Hz*
2
2
instalación
Car Audio System
Installation/Connections
Instalación/Conexiones
Precautions
Do not continuously use the speaker system beyond the
peak power handling capacity.
Keep recorded tapes, watches, and personal credit cards
using magnetic coding away from the speaker system to
protect them from damage caused by the magnets in
the speakers.
If you cannot find an appropriate mounting location,
consult your car dealer or your nearest Sony dealer
before mounting.
Precauciones
Evite utilizar de forma continuada el sistema de
altavoces con una potencia que sobrepase su capacidad
de potencia máxima.
Mantenga alejados del sistema de altavoces las cintas
grabadas, relojes o tarjetas de crédito con codificación
magnética para evitar daños que posiblemente causaría
el imán de los altavoces.
Si no encuentra una ubicación adecuada para el
montaje, consulte al distribuidor de su automóvil o al
distribuidor de Sony más próximo.
CXS-5216FU/CXS-5269FU/CXS-52FQU
Welcome!
The CXS-5216FU, CXS-52FQU and CXS-5269FU
packages include the following:
Check your model name, and refer to the supplied
manuals.
Model name
Modelo
CXS-5216FU CDX-GT520U XS-PKF1620*
CXS-52FQU CDX-GT520U XS-PKF1620*/XS-PKF6920*
CXS-5269FU CDX-GT520U XS-PKF6920*
* For details on how to install the speakers, see the reverse side of these instructions.
* Para obtener más información acerca de la instalación de los altavoces, consulte la contraportada de estas instrucciones.
Car audio unit
Unidad de audio para automóvil
¡Bienvenido!
Los paquetes CXS-5216FU, CXS-52FQU y CXS-5269FU
incluyen lo siguiente:
Compruebe el modelo y consulte los manuales
suministrados.
Speaker
Altavoz
XS-PKF1620XS-PKF6920
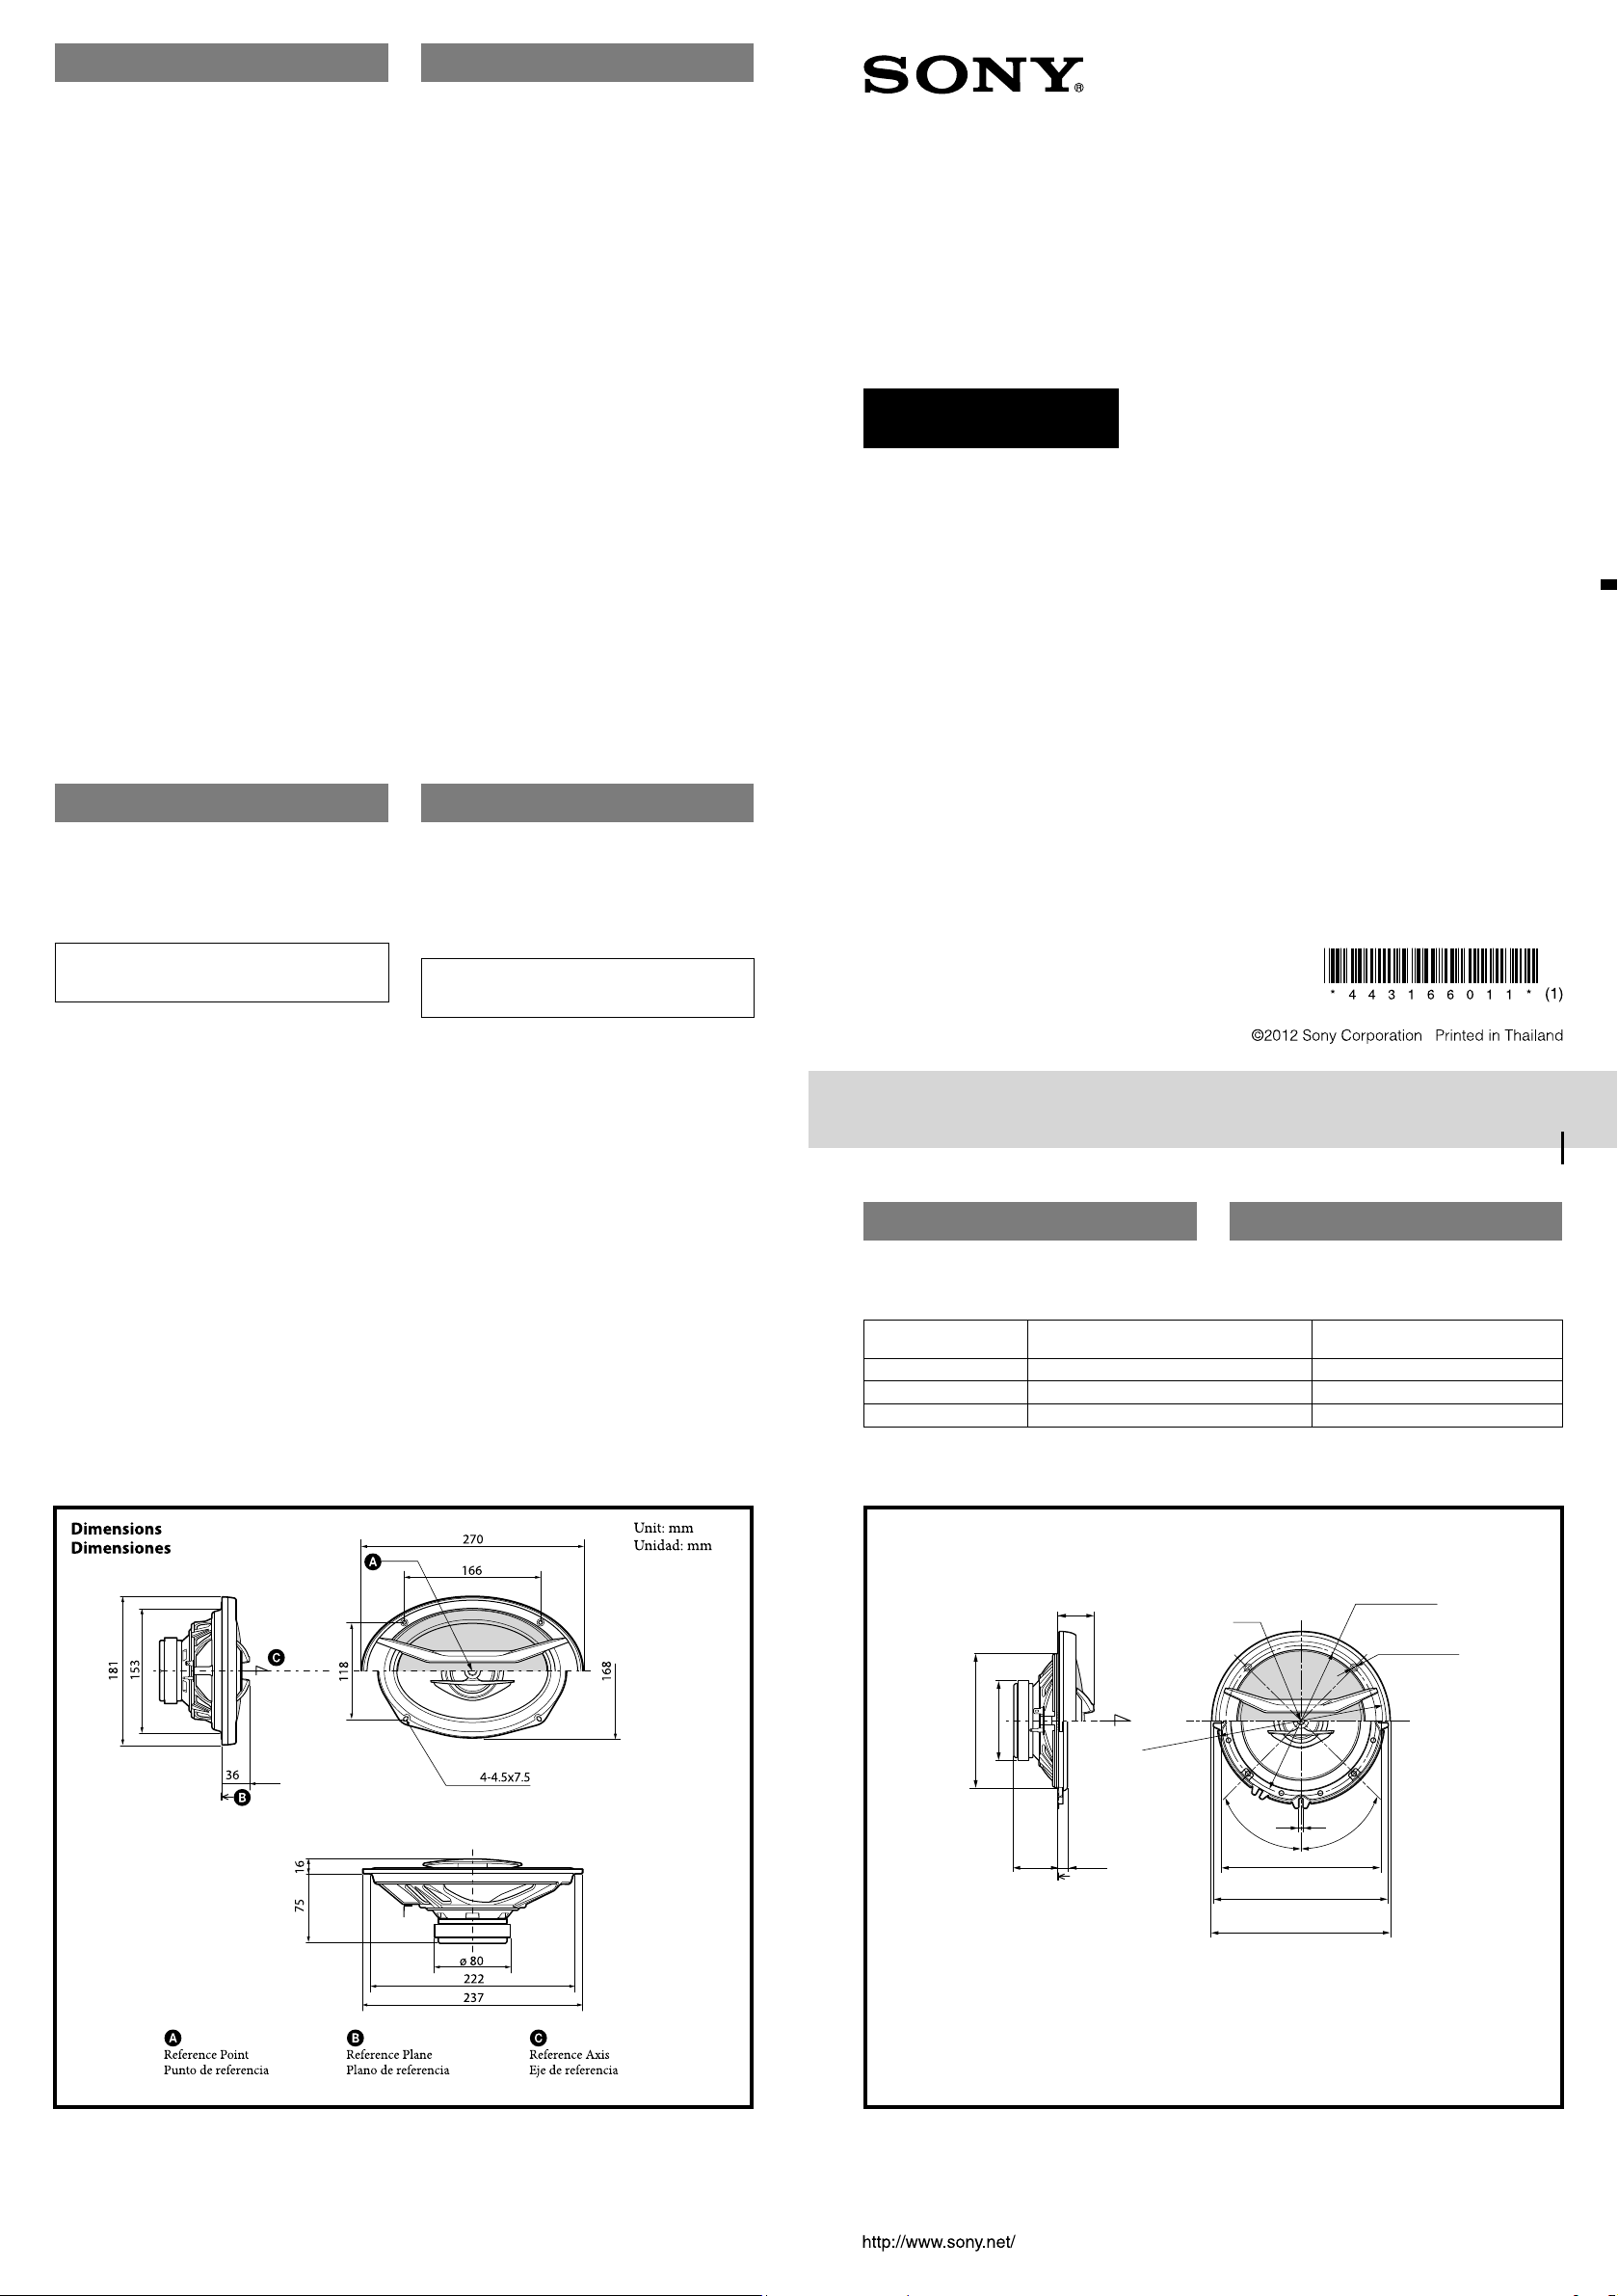
Dimensions
Dimensiones
Reference Point
Punto de referencia
ø 126
ø 75
34
42 9.2
ø 158
Reference Plane
Plano de referencia
45°
5
150
ø 166
ø 168
Reference Axis
Eje de referencia
Unit: mm
Unidad: mm
ø 142
4 - ø 4.3
45°
Page 2

Mounting/Montaje
Parts list
Lista de componentes
Before mounting
A depth of at least 42 mm (XS-PKF1620) / 73 mm
(XS-PKF6920) is required for flush mounting. Measure
the depth of the area where you are to mount the speaker,
and ensure that the speaker is not obstructing any other
components of the car. Keep the followings in mind when
choosing a mounting location:
Make sure that nothing is obstructing around the
mounting location of the door (front or rear) or the rear
tray where you are to mount the speaker.
A hole for mounting may already be cut out of the
inner panel of the door (front or rear) or the rear tray.
In this case, you need to modify the board only.
If you are to mount this speaker system in the door
(front or rear), make sure that the speaker terminals,
frame or magnet do not interfere with any inner parts,
such as the window mechanism in the door (when you
open or close the window), etc.
Also make sure that the speaker grille does not touch
any inner fittings, such as the window cranks, door
handles, arm rests, door pockets, lamps or seats etc.
If you are to mount this speaker system in the rear tray,
make sure that the speaker terminals, frame or magnet
do not touch any inner parts of the car, such as the
torsion bar springs (when you open or close the trunk
(boot) lid), etc.
Also make sure that the speaker grille does not touch
any inner fittings, such as seat belts, head rests, center
brake lights, inner covers of the rear wipers, curtains or
air purifiers, etc.
Antes del montaje
Se necesita una profundidad de, por lo menos, 42 mm
(XS-PKF1620) / 73 mm (XS-PKF6920) para el montaje
embutido. Mida la profundidad del lugar donde desea
montar el altavoz y compruebe que el altavoz no obstruya
ningún componente del automóvil. Antes de elegir el
lugar de montaje, se debe tener en cuenta lo siguiente:
Asegúrese de que no haya obstáculos en el lugar de
montaje de la puerta (delantera o posterior) ni en la
bandeja posterior donde desea instalar el altavoz.
Es posible que ya exista un orificio de montaje en el
panel interior de la puerta (delantera o posterior) o en
la bandeja posterior. En este caso, sólo debe modificar
el tablero.
Si desea montar este sistema de altavoces en la puerta
(delantera o posterior), asegúrese de que los terminales
del altavoz, el marco y el imán no interfieren con los
componentes interiores como, por ejemplo, el
mecanismo de la ventanilla de la puerta (al abrir o
cerrar la ventanilla), etc.
Asegúrese también de que la rejilla del altavoz no esté
en contacto con accesorios interiores como, por
ejemplo, la manivela de las ventanillas, el picaporte de
las puertas, los reposabrazos, los compartimientos para
guardar objetos situados en las puertas, las luces o los
asientos, etc.
Si desea montar el sistema de altavoces en la bandeja
posterior, asegúrese de que los terminales del altavoz, el
marco y el imán no están en contacto con los
componentes interiores del automóvil como, por
ejemplo, los resortes de la barra de torsión (cuando
abra o cierre el portaequipajes), etc.
Asegúrese también de que la rejilla del altavoz no esté
en contacto con accesorios interiores como, por
ejemplo, los cinturones de seguridad, los reposacabezas,
las luces de frenos centrales, las cubiertas interiores de
los limpiaparabrisas posteriores, las cortinas o
purificadores de aire, etc.
ø 4 × 30
× 2 × 8
× 8
XS-PKF6920
Mounting from the car interior
Montaje desde el interior del automóvil
DOOR (FRONT/REAR) / PUERTA (DELANTERA/POSTERIOR)
Mark the 4 bolt holes and make them 3.2 mm*1 in diameter.
1
Marque los orificios de los 4 pernos y hágalos de 3,2 mm
*1 When using : ø 5 mm
1
*
Si utiliza : ø 5 mm
223
1
*
de diámetro.
ø 3.2 *
× 2
1
XS-PKF1620
Mounting from the car interior
Montaje desde el interior del automóvil
DOOR (FRONT/REAR) / PUERTA (DELANTERA/POSTERIOR)
Mark the 4 bolt holes and make them 3.2 mm*1 in diameter.
1
Marque los orificios de los 4 pernos y hágalos de 3,2 mm
*1 When using : ø 5 mm
1
*
Si utiliza : ø 5 mm
ø 127
1
*
de diámetro.
1
ø 3.2 *
Rear tray
Bandeja trasera
2
Black-striped cord
Cable con rayas negras
154
2
*
White cord — Left speaker
Grey cord — Right speaker
2
*
Cable blanco — Altavoz izquierdo
Cable gris — Altavoz derecho
2
*
Power amplifier
Amplificador de potencia
2
Black-striped cord
Cable con rayas negras
3
*
3
2
*2*
Power amplifier
Amplificador de potencia
2
*
Note
When releasing
push down on the
3
*
White cord — Left speaker
Grey cord — Right speaker
3
*
Cable blanco — Altavoz izquierdo
Cable gris — Altavoz derecho
catch firmly and
carefully.
release
If excessive force is
used, damage to the
speaker or terminal
cable may result.
2
*
Nota
Al liberar
en el enganche con
firmeza y libere el
con cuidado.
Si utiliza una fuerza
excesiva, es posible
que el cable del
terminal o el altavoz
resulten dañados.
, presione
3
,
Parts list
Lista de componentes
× 2 × 2× 8
ø 4 × 30
× 8
 Loading...