

Page 1

3-862-046-11 (1)
Portable PCS Telephone
Operating Instructions
CM-Z100
1998 Sony Electronics Inc.
Page 2

Before operating the CM-Z100 portable PCS
telephone, please read this manual thoroughly
and retain it for future reference. If your usage
includes in-vehicle operation, it is recommended
that you refer to the Installation/Connections/
Operation manual for the optional accessory kits.
DISPOSAL OF LITHIUM ION BATTERY
LITHIUM ION BATTERY. DISPOSE OF PROPERLY.
You can return your unwanted lithium ion
batteries to your nearest Sony Service Center
or Factory Service Center.
Note: In some areas the disposal of lithium
ion batteries in household or business
trash may be prohibited.
For the Sony Service Center nearest you
call 1-800-222-SONY (United States only).
For the Sony Factory Service Center nearest you
call 416-499-SONY (Canada only).
WARNING
To prevent fire or shock hazard, do not expose
the unit to rain or moisture.
FCC CAUTION STATEMENT
You are cautioned that any changes or modifications
not expressly approved in this manual could void
your authority to operate this equipment.
Owner’s record
The model number, regulatory number, and serial
number are located on a nameplate inside the battery
compartment. Record the serial number in the space
provided below. Refer to these numbers whenever
you call your dealer regarding this product.
Model No.: CM-Z100 Serial No.: ___________
®
2
Page 3

Table of contents
Rules and regulations ....................................... 4
Safety precautions ............................................. 6
Getting Started
Unpacking your phone ................................... 11
Looking at your phone ...................................12
Charging the battery pack ..............................16
Turning the phone on...................................... 20
Using the Jog Dial™ navigator ......................21
Basic Operations
Making calls ..................................................... 23
Receiving calls ..................................................25
Quick Ways to Make Calls
Storing phone numbers in the Phone Book ... 27
Calling from the Phone Book .........................35
Searching the Phone Book ..............................38
Calling from the Calls List..............................41
Sending DTMF signals from the Phone Book ...
Advanced Features
About the Features menu ...............................44
Using the Short Messaging Service ...............46
Adjusting the volume .....................................55
Checking and setting the timers ....................60
Using the Directory ......................................... 62
Extra features ................................................... 69
Setting security options .................................. 72
Setting display options ...................................78
Adjusting network settings ............................81
Additional Information
Specifications ....................................................87
Troubleshooting ...............................................88
List of menu items ........................................... 90
Glossary ............................................................ 92
Index ..................................................................97
Basic OperationsAdvanced Features Getting Started
43
Quick Ways to Make Calls
Additional Information
3
Page 4

Rules and regulations
The U.S. Federal Communications Commission
and the Industry Canada regulate PCS telephone
service in their respective countries. It is
important for you, the PCS telephone user, to
observe the applicable regulations when
operating your PCS telephone in either country.
In addition to these U.S. and Canadian federal
regulations, you may be bound also by certain
state, provincial, territorial, and local rules and
regulations, as well as by your PCS carrier’s tariff
(the rates, terms, and conditions of its service). If
you wish to use your PCS telephone in both the
U.S. and Canada, please consult with your
System Operator.
Furthermore, you should remember that your
PCS telephone is a radiotelephone, — i.e., it
combines both wireline technology, as used in
your home or office telephone system, and radio
technology — and that the scope of regulations
and precautions is therefore broader than the
scope of regulations and precautions relating to
wireline-only telephone usage.
Some of the major points of consideration are set
out below. Please note, however, that these “Rules
and Regulations" and "Safety Precautions” sections
do not constitute legal advice, and are intended
merely for general information purposes. If you
have specific questions, please contact your PCS
carrier (System Operator).
License — If your home system is in the U.S., you
do not require a separate license to operate your
PCS telephone; obtaining a PCS telephone access
number is sufficient to register you as a user. If
your home system is in Canada, a separate license
is required; your carrier will assist you in the
licensing process. If you wish to use your PCS
telephone on both sides of the border, please
contact your PCS carrier (System Operator).
4
Page 5

Equipment modifications — The U.S. Federal
Communications Commission has type-approved
the model of PCS telephone which you have
purchased, and has allocated a specific frequency
range for PCS service. No changes or adjustments
are to be made to your PCS telephone.
The radio equipment shall be made available for
inspection upon request by representatives of the
FCC or licensees.
Denial of service — A PCS carrier may deny
service temporarily or terminate service for
violation of any government regulations or
violation of its tariff.
Privacy — As a telephone user, you have come to
assume a certain standard of privacy when you
place or receive a telephone call via the
traditional wireline systems. However, because
PCS telephones utilize radio transmissions to
effect calls, the same standard cannot always be
assured. While it is unlawful for any
unauthorized person to divulge or use any
information obtained from intercepting or
“listening in on” conversations intended for
others, you should not assume that your
conversation is completely secure. Commercially
available scanning equipment can permit a third
party to monitor the radio channels used for PCS
telephone calls.
Interference — No person shall interfere with, or
cause interference to, any radio communication
or signal.
5
Page 6

Safety precautions
IMPORTANT
For safe and efficient operation of your phone,
observe these guidelines.
Your hand-held portable PCS telephone uses
digital Code Division Multiple Access (CDMA)
technology. CDMA is a newer radio frequency
(RF) technology than the FM technology that has
been used for radio communications for decades.
Your portable PCS telephone is a radio transmitter
and receiver. When the phone is ON, it receives
and sends out radio frequency (RF) energy. The
phone operates in the frequency range of 1851
MHz to 1989 MHz. When you use your phone, the
PCS system handling your call controls the mode
of operation and the power level at which your
phone transmits. The power is transmitted as a
digitally coded waveform at a rate varying from
100 Hz to 800 Hz. The average power can range
from about 0.01 µW to about 300 mW.
Exposure to radio frequency energy
Research on health effects from RF energy has
focused for many years on FM radio technology.
That research and studies regarding newer radio
technologies, such as CDMA, have found no
credible scientific evidence that adverse health
effects result from the use of PCS telephones.
The Institute of Electrical and Electronics
Engineers (IEEE) in 1991, and The American
National Standards Institute (ANSI) in 1992,
updated the 1982 ANSI Standard for safety levels
with respect to human exposure to RF energy.
Over 120 scientists, engineers, and physicians
from universities, government health agencies,
and industry, reviewed the available research and
6
Page 7

developed this updated Standard. In March 1993,
the U.S. Federal Communications Commission
(FCC) proposed the adoption of this updated
Standard.
The design of your phone complies with this
updated Standard. Of course, if you want to limit
RF exposure even further than the updated ANSI
Standard, you may choose to control the duration
of your calls and operate your phone in the most
power efficient manner.
Efficient phone operation
For your phone to operate at the lowest power
level consistent with satisfactory call quality,
please observe the following guidelines:
Your phone has an extendable antenna; extend it
fully whenever possible for maximum efficiency.
Hold the phone as you would any other
telephone. While speaking directly into the
mouthpiece, position the antenna up and over
your shoulder. Do not hold the antenna when the
phone is in use. Holding the antenna affects call
quality and may cause the phone to operate at a
higher power level than needed.
Antenna care and replacement
Do not use the phone with a damaged antenna. If
a damaged antenna comes into contact with the
skin, a minor burn may result. Replace a
damaged antenna immediately. Take your phone
to an authorized service center for repair.
Use only the supplied or approved antenna.
Unauthorized antennas, modifications, or
attachments could impair call quality, damage
the phone, and violate FCC regulations.
7
Page 8

Driving
Check the laws and regulations on the use of
PCS telephones in the areas where you drive.
Always obey them. Also, when using your
phone while driving, please:
• pay full attention to driving;
• use hands-free operation, if available;
• pull off the road and park before making or
answering a call, if driving conditions so
require.
Electronic devices
Most modern electronic equipment is shielded
from RF energy. However, RF energy from PCS
telephones may affect some electronic equipment.
RF energy may affect improperly installed or
inadequately shielded electronic operating and
entertainment systems in motor vehicles. Check
with the manufacturer or its representative to
determine if these systems are adequately
shielded from external RF energy. You should
also check with the manufacturer of any
equipment that has been added to your vehicle.
Medical devices
Consult the manufacturer of any personal
medical devices (such as pacemakers, hearing
aids, etc.) to determine if they are adequately
shielded from external RF energy. Your physician
may be able to assist you in obtaining this
information.
Turn your phone OFF in health care facilities
when regulations posted in the areas instruct you
to do so. Hospitals or health care facilities may be
using equipment that could be sensitive to
external RF energy.
8
Page 9

Aircraft
Turn your phone OFF before boarding any
aircraft.
• Use it on the ground only with crew
permission.
• Do not use in the air.
To prevent possible interference with aircraft
systems, U.S. Federal Aviation Administration
(FAA) regulations require you to have permission
from a crew member to use your phone while the
plane is on the ground. To prevent interference
with PCS systems, FCC regulations prohibit
using your phone while the plane is in the air.
Children
Do not allow children to play with your phone. It
is not a toy. Children could hurt themselves or
others (by poking themselves or others in the eye
with the antenna, for example). Children also
could damage the phone or make calls that
increase your telephone bills.
Blasting areas
To avoid interfering with blasting operations,
turn your unit OFF when in a “blasting area” or
in areas posted: “Turn off two-way radio.”
Construction crews often use remote control RF
devices to set off explosives.
Potentially explosive atmospheres
Turn your phone OFF when in any area with a
potentially explosive atmosphere. It is rare, but
your phone or its accessories could generate
sparks. Sparks in such areas could cause an
explosion or fire resulting in bodily injury or even
death.
9
Page 10

Areas with a potentially explosive atmosphere
are often, but not always, clearly marked. They
include fueling areas such as gas stations; below
deck on boats; fuel or chemical transfer or storage
facilities; areas where the air contains chemicals
or particles, such as grain, dust, or metal
powders; and any other area where you would
normally be advised to turn off your vehicle’s
engine.
Do not transport or store flammable gas, liquid,
or explosives in the compartment of your vehicle
which contains your phone or accessories.
In the United States, vehicles using liquefied
petroleum gas (such as propane or butane) must
comply with the National Fire Protection
Standard (NFPA-58). For a copy of this standard,
contact the National Fire Protection Association,
One Batterymarch Park, Quincy, MA 02269, Attn:
Publication Sales Division.
In Canada, vehicles using liquefied petroleum gas
(such as propane or butane) must comply with
the Canadian Gas Association (CAN/CGSB149.2). For a copy of this standard, contact the
Canadian Standards Association, 178 Rexdale
Blvd., Etobicoke, ON M9W 1R3, Attn: Standard
Sales Department.
10
Page 11
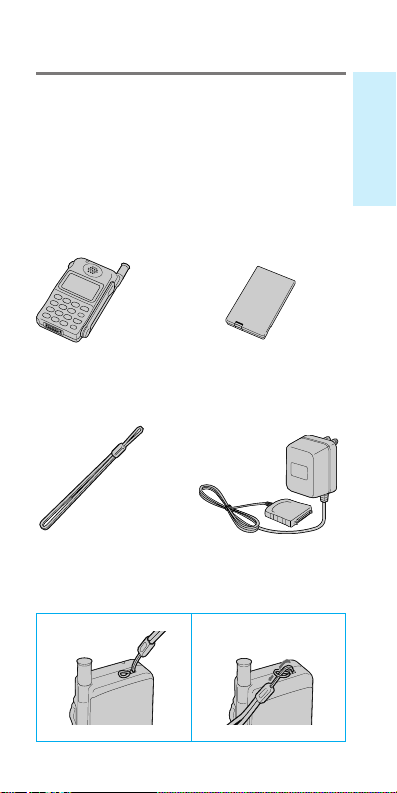
Unpacking your phone
Carefully unpack your phone and check the
contents using this list.
If there is something missing, please contact
your nearest Sony dealer.
CM-Z100 QN-029BPL
Portable PCS Li-Ion Battery
Telephone (1) Pack (1)
Hand Strap (1) QN-001AC
AC Adapter (1)
Attaching the hand strap
1 2
Getting Started
11
Page 12
NO
8
TUV
9
PWR
CLR
END
WXY
0
+
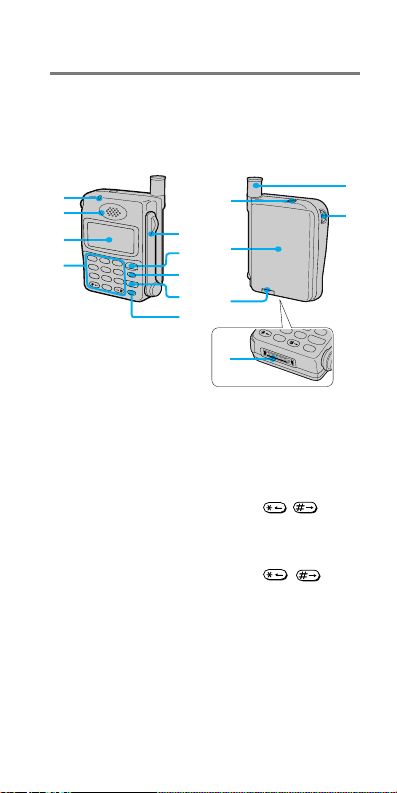
Looking at your phone
For further information, refer to the page
numbers indicated in parentheses ( ).
Telephone
1
2
3
1
ABC
2
DEF
3
SEND
GHI
4
4
JKL
5
MNO
6
CLR
PQRS
7
TUV
8
9
WXYZ
END
0
+
PWR
!º
5
!¡
6
7
8
!™
9
!∞
1 Call alert indicator (20)
Lights when there is an incoming call.
2 Earpiece
3 Display (14)
4 Number buttons, 0 to 9, and
buttons (23, 27, 37)
Use the number buttons to enter letters and
numbers. Press and hold a number button, 0
to 9, for touch dialing. Use the
buttons to move the cursor when you are
entering letters.
5 Arm microphone
Open to make/receive a call.
Close to end a call.
12
!£
!¢
/
/
Page 13

SEND
6
button (35 to 37)
Press to make outgoing calls and to receive
incoming calls when the arm microphone is
open.
CLR
(clear) button (22, 23)
7
Press to clear the last or all entered digits on
the display, or to exit the current mode of
operation.
END
button (23)
8
Press to end calls. Also cancels operations and
returns the phone to standby mode.
PWR
9
(power) button (20)
Press to turn the phone on or off.
0 Hand strap attachment (11)
!¡ Battery pack (16)
!™ Battery pack release tab (16)
Slide up to remove the battery pack.
!£ Antenna (20)
!¢ Jog Dial™ navigator (21)
Push and turn for menu navigation and for
changing settings on menus. In this manual,
icon indicates that you should push
the
the Jog Dial™ navigator in towards the center
of the phone.
!∞ Connector (17)
Use to connect the phone to either the AC
adapter, a cigarette lighter adapter, a travel
adapter, a desktop charger, or a hands-free
car kit.
Getting Started
13
Page 14
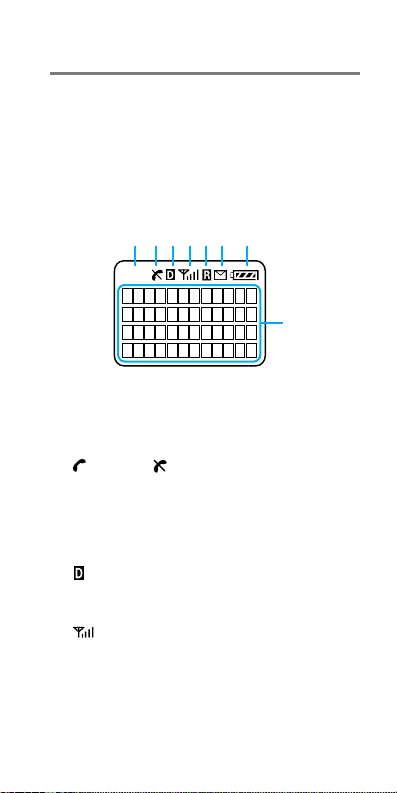
Display
The top row of the display contains icons that
inform you of the current status of your
phone. The bottom four rows of the display
are for text such as phone numbers, names,
and operational prompts. Each row displays a
maximum of 12 characters.
1 2 3 4 5 6 7
888
8
1 Short character display
Shows settings such as the number of the
currently displayed Menu, as well as Phone
Book and Calls List memory locations.
(in-use) / (out-of-service) icon
2
(21, 23, 25)
The in-use icon appears during a call. A slash
through the in-use icon appears when no
signal is received. You cannot make or receive
calls when the out-of-service icon is visible.
3
(digital) icon
Appears when your phone is receiving a
signal.
4
(signal strength) icon (20)
Tells you the approximate strength of the
signal being received.
14
Page 15

5 (roam) icon (83)
Appears when you are roaming outside your
home service area.
6
(message) icon (46)
Appears when you have new text or voice
mail messages pending. The icon flashes if the
new message is urgent.
(battery) icon (17, 19)
7
Shows the approximate amount of charge
power remaining in the battery pack.
Recharge the battery pack before it is fully
discharged.
8 Character display
Prompts various actions, and then displays
the results. It also shows phone numbers and
names.
Getting Started
15
Page 16
Charging the battery pack
Charge the battery before using the phone. A
new battery is not fully charged. To charge the
battery, attach the battery pack to the phone,
then connect the supplied AC adapter.
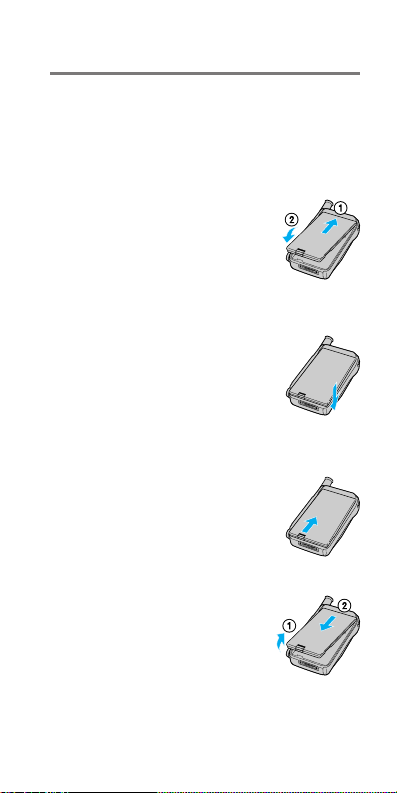
Attaching the battery pack
1 Hook the battery pack
onto the top of the
phone 1, and ease the
battery pack down 2.
2 Snap the battery pack
in place.
To remove the battery pack
1 Push the battery pack
release tab upwards.
2 Lift up the bottom of
the battery pack 1,
and pull it out 2.
16
Page 17
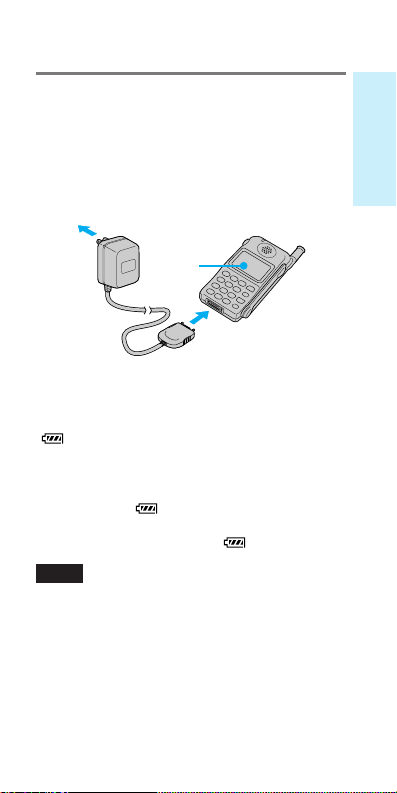
Charging the battery
Connect the AC adapter to the phone and the
other end to a standard 120V AC outlet as
illustrated below. The charging time is
approximately 3.5 hours. You can charge the
battery pack with the phone turned on, but
charging will take longer.
to an
AC
outlet
display
to the connector on the
phone (the thumb indent
should face upwards)
When the power is turned on
As the battery pack charges, the battery icon
(
) indicates that the phone is charging.
When the power is turned off
The message “Battery is Charging” is
displayed, and
pack is fully charged, the message “Charging is
Complete” is displayed, and
Notes
• If you make or receive a call when the battery
pack is not charged sufficiently, the call will be
cut off. In that case, you will hear an alarm,
indicating that the battery is low.
• You can turn on the phone without the battery
pack, but you cannot make or receive a call,
even if you connect the AC adapter to an AC
outlet.
pulses. When the battery
stops pulsing.
Getting Started
17
Page 18

Notes on charging
• When you charge the battery pack, avoid:
– charging for long periods of time, since
this reduces battery life.
– charging in temperatures below 32°F
(0°C) or over 104°F (40°C).
– charging the battery in direct sunlight or
in places with high humidity (such as a
bathroom).
• Do not use any battery pack other than the
one specified in these instructions.
• It is normal for the battery pack to become
warm during charging or after use.
• The supplied AC adapter is not intended to
be serviced. In the event of a malfunction, it
should be replaced.
Notes on the battery pack
• Do not dispose of the battery pack in a fire
or short-circuit it. Doing so may cause the
battery pack to leak or get hot, which could
cause personal injury.
• Do not try to disassemble the battery pack.
18
Page 19

Checking the battery
Battery life
In standby mode, the battery lasts
approximately 24 hours. When used
continuously, it lasts approximately 2.5 hours,
depending on network settings and signal
conditions.
Battery condition
The battery icon indicates the battery level as
follows (when the power is on):
Full
n n n
n n
Empty
Note that the battery icon displays the
approximate charge level and that the
consumption may vary depending on
conditions of use, such as ambient
temperature, network coverage, and usage
patterns.
When the battery is empty
The battery icon flashes and a warning
message is displayed. A beep sounds,
indicating that the battery is low. Shortly
thereafter, the phone turns off. Recharge the
battery as soon as possible.
Getting Started
19
Page 20
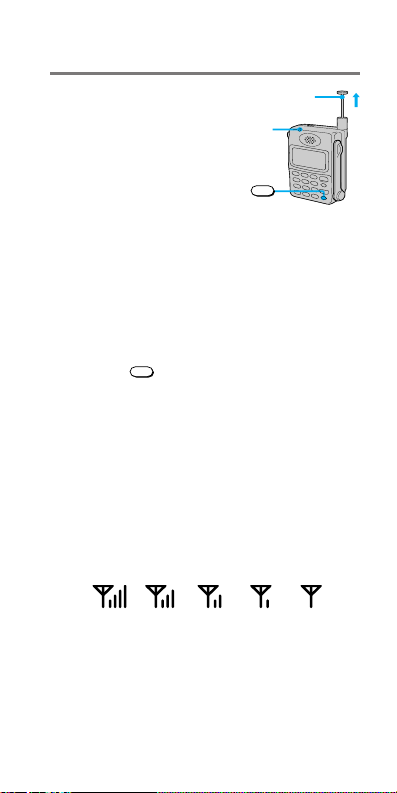
Turning the phone on
To use your phone, the
power must be turned on.
It is preferable to extend the
antenna, since this
Call
alert
Pull up
maximizes signal strength
and minimizes interference.
PWR
Extending the antenna
Hold the end of the antenna and
pull up until fully extended.
To retract the antenna
Push the antenna down until it is fully
retracted.
Turning the power on
Hold down
alert indicator lights up, a beep sounds, and the
phone starts searching for a signal. When the
phone has found a service signal, the standby
display appears and the call alert indicator
goes off. Now the phone is ready to use.
PWR
for about one second. The call
To check the signal strength
The signal strength icon indicates various
levels of signal strength. It is best to make calls
when the signal is strong, although calls can
be made when the signal strength is weak.
Strong Weak
20
Page 21
If you are out of the service area
The out-of-service icon ( ) appears, and the
phone searches for a service signal. If a signal
cannot be found, the phone enters power save
mode. It will “wake up” automatically at
intervals (based on carrier network settings) to
Getting Started
search for a service signal.
Turning the power off
Hold down
PWR
for about one second.
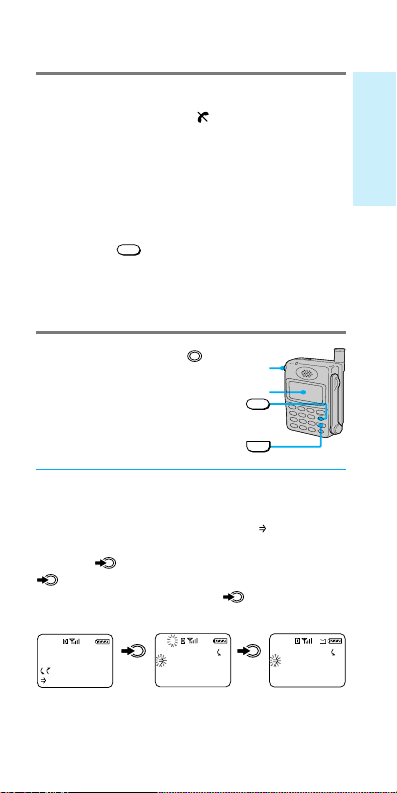
Using the Jog Dial™ navigator
The Jog Dial™
navigator makes it
easy to navigate from
one menu to another.
(Jog Dial™
navigator)
Display
CLR
END
Choosing a menu item
To choose a menu item, push the Jog Dial™
navigator in. The flashing arrow (
display indicates the item you can select by
pushing
. As illustrated below, if you push
on the standby display, you will go to the
Features menu. If you push
will go to the Message menu.
F-1
My Phone
12:34P 12/25
:Saved #s
:Features
FEATURES
Message
Sounds
Timers
) on the
again, you
MESSAGE
15 Voice
5 New Text
//
5 Old Text
21
Page 22
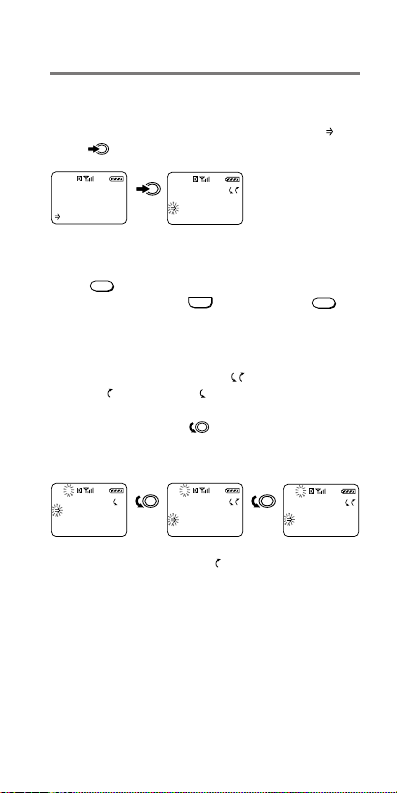
As shown below, if you enter digits on the
standby display, the word “Options” appears
at the bottom of the display, preceded by
Push
to access the Options menu.
.
123-456-7890
:Options
OPTIONS
Find Number
Send
/
Save
To go back
If you want to go back to the previous display,
CLR
press
display, either press
. If you want to return to the standby
END
or hold down
CLR
.
Scrolling through menu items
To scroll through menu items, turn the Jog
Dial™ navigator when the
The up (
) and down ( ) arrows on the display
indicate the available scrollable direction. For
example, if you turn
menu, you will scroll through the submenu
items.
F21
SOUNDS
Ringer Vol
Mute/UnMute
Keybeep Vol
F22
SOUNDS
Ringer Vol
Mute/UnMute
//
Keybeep Vol
On the leftmost display,
indicates that you cannot scroll up.
icon appears.
within the Sounds
F13
SOUNDS
Mute/UnMute
Keybeep Vol
EarpieceVol
is not shown. This
22
Page 23
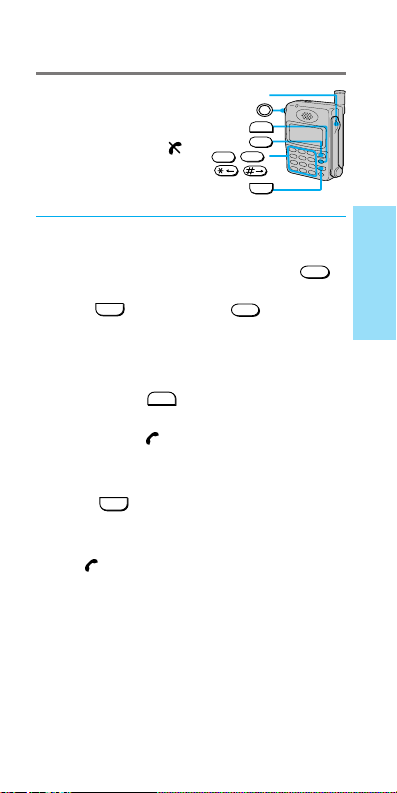
Making calls
You can call any number
up to 32 digits from
within a service area. The
out-of-service icon (
indicates that you are
outside the service area.
Arm mic
SEND
)
CLR
WX
OPER
9
YZ
0
-
,
/
END
1 Use the number buttons to enter
the number.
If you enter the wrong digit, press
to back up. To clear all entered digits,
END
press
or hold down
the standby display.
2
If the arm microphone is closed, open
it to dial. If the arm microphone is
open, press
SEND
The phone dials the number you have
entered. The
icon appears.
When the call is connected, the call timer
appears and displays the elapsed time.
3 Press
END
or close the arm
microphone to end the call when
you are finished.
The icon disappears and the final
elapsed call time flashes for 10 seconds.
The standby display automatically
reappears.
to dial.
CLR
to return to
CLR
Basic Operations
23
Page 24

Tips
When dialing, you can insert a pause to attach a
•
DTMF (Dual Tone Multiple Frequency) number
to the number you are calling (see page 30).
• If Auto-Hyphen is turned on, the phone
number is hyphenated automatically as you
enter the digits (see page 80).
• If Minute Alert is turned on, a beep sounds at
intervals (based on the setting you select)
throughout the call (see page 60).
• Enhanced voice privacy is indicated by the
message “–P–” displayed in the upper left
corner of the LCD (see page 85). This feature is
carrier-dependent.
To adjust the earpiece volume during
a call
Turn up to increase the volume.
Turn down to decrease the volume.
Tip
In addition, you can adjust the volume using the
Volume menu (see page 57).
To mute/unmute the microphone
during a call
Push and hold .
Tip
In addition, you can mute the microphone using
the Volume menu (see page 56).
To redial the last number
On the standby display, press
SEND
when the
arm microphone is open. The number you
dialed last is redialed automatically.
24
Page 25
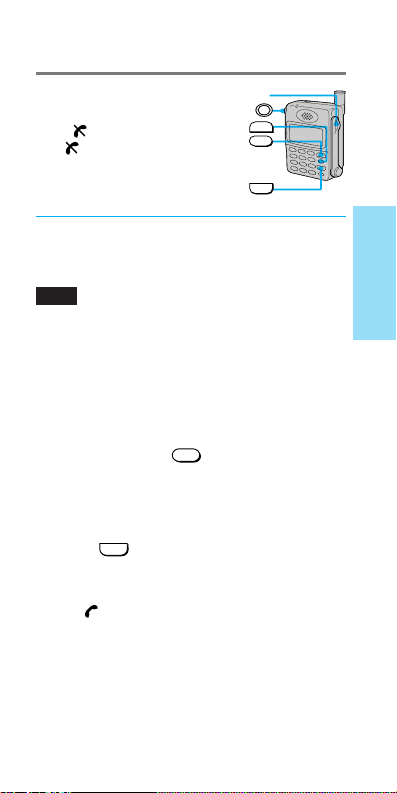
Receiving calls
You can receive calls as
long as the out-of-service
icon (
) is not displayed.
The
icon indicates that
Arm mic
SEND
CLR
you are outside the
service area.
END
When you receive a call, the ringer sounds or
the phone vibrates. “Incoming Call” flashes on
the display, and the call alert indicator lights.
Note
If you turn off the ringer volume (see page 55),
you will not hear the ringer sound. The message
“–Ringer Off–” is displayed on the standby
display.
1 If the arm microphone is closed,
open it to answer the call. If the
arm microphone is open, press any
button except
call.
When the call is connected, the call timer
appears and displays the elapsed time.
2 Press
END
microphone to end the call when
you are finished.
The icon disappears, and the final
elapsed call time flashes for 10 seconds.
The standby display automatically
reappears.
PWR
to answer the
or close the arm
Basic Operations
25
Page 26

Tips
• Using the Jog Dial™ navigator, you can adjust
the earpiece volume or mute the microphone
during a call (see pages 56 and 57).
• Enhanced voice privacy is indicated by the
message “–P–” displayed in the upper left
corner of the LCD (see page 85). This feature is
carrier-dependent.
If the caller supports caller ID
The caller’s phone number appears on the
display when you receive a call if both the
caller and the carrier support this feature.
If the caller supports caller ID and the number
matches a Phone Book entry, the name that
you stored with the number (if any) is
displayed also.
If you miss a call
If you miss an incoming call, the message
“You have missed XX calls.” appears on the
display. To return to the standby display,
either press
supported caller ID, the caller’s number is
stored in the Calls List (see page 41).
CLR
END
,
, or . If the caller
26
Page 27
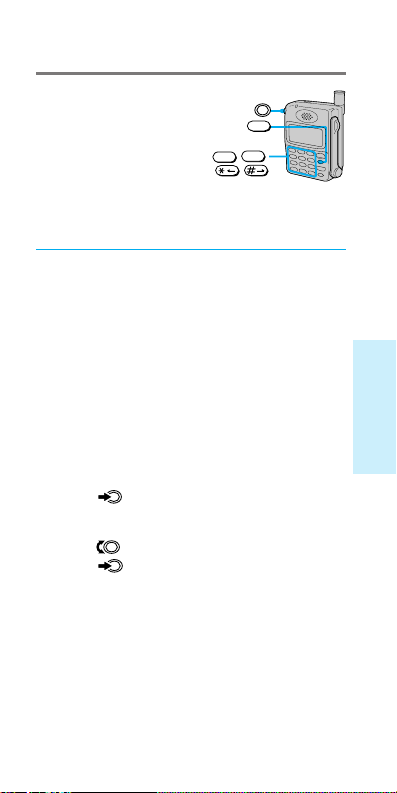
Storing phone numbers in the Phone Book
Your phone features a
built-in Phone Book
memory, in which you can
store up to 99 (01–99)
phone numbers with
names. You can dial
stored numbers quickly by
recalling them from the
Phone Book (see page 35).
Each phone number can contain up to 32
digits, and each name up to 12 characters. This
section shows how to store, edit, and erase
Phone Book numbers quickly.
1 On the standby display, use the
number buttons to enter the
number.
The number appears on the display.
In addition, you can store hyphens,
pauses, and links with your Phone Book
entries (see page 30).
2 Push .
The Options menu appears.
3 Turn to select “Save,” then
push
The message “Enter a Name” appears on
the display, prompting you for a name
to accompany the number.
.
CLR
WX
OPER
9
YZ
-
,
0
/
Quick Ways to Make Calls
27
Page 28
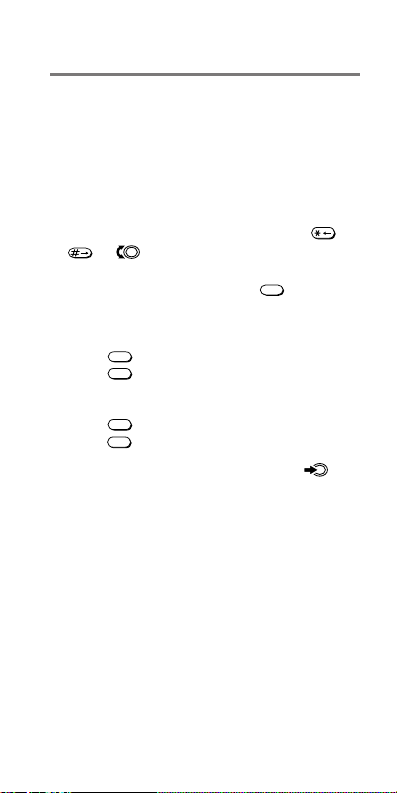
4 Use the number buttons to enter
the name.
If you press the same button in quick
succession, you will scroll through the
characters available on that button. (See
the “Alphanumeric table” on page 29.)
For the next entry, wait until the cursor
moves one step to the right or use
or to move the cursor and insert
spaces between characters. If you enter
the wrong character, press
CLR
to clear
the character highlighted by the cursor.
To enter “SONY”
PQ
7
RS
Press
Press
four times to enter an “S.”
MNO
6
three times to enter an “O.” Wait
until the cursor moves one step to the right
for the next entry.
MNO
6
Press
Press
twice to enter an “N.”
WX
9
YZ
three times to enter a “Y.”
5 When you are finished, push to
store the phone number and name.
The message “Save in location XX?”
appears on the display, indicating the
first available memory location.
/
28
Page 29
6
Push to store the new number in
the first available memory location.
If you want to store it in another
location, turn
to select the desired
location or enter the location number,
then push
. A confirmation message
appears, followed by the status of the
Phone Book.
Tip
In addition, you can use the Directory menu to
store Phone Book numbers (see page 62).
Alphanumeric table
Each time you press a number button, the
letters/numbers are cycled as follows:
Button Sequence
1
2
3
4
5
6
8
9
0
7
ABC
DEF
GHI
JKL
MNO
PQ
RS
TUV
WX
YZ
OPER
–“.‘,&():1
ABCabc2
DEFdef3
GHIghi4
JKLjkl5
MNOmno6
PQRSp qrs7
TUVtuv8
WXYZwxyz9
0
Quick Ways to Make Calls
29
Page 30

To enter a hyphen, pause, or link
In addition to digits, you can insert hyphens,
pauses, and links into the phone number of a
Phone Book entry. (See page 36 for
information on releasing a pause or link
during a call.)
Hyphens: Turn off the autohyphenation
feature (see page 80) when you want to enter a
hyphen manually instead, e.g., when you
store a foreign number. Autohyphenation will
be turned off for that number.
Pauses: When you want to send DTMF
signals (see page 43) for electronic banking,
etc., inserting a pause after the first string of
digits makes the phone pause before dialing
the second string. This ensures that your
counterpart is ready to accept that string.
Links: You can join two or more Phone Book
entries (e.g., a doctor’s phone number and
your medical record number). Once you have
specified the first entry, you insert a link. Then
you specify the second number by entering its
memory location number.
1 While entering digits, push .
The Options menu appears on the
display.
2
Turn to select which information
to enter, then push
After inserting a hyphen, pause, or link,
the display returns to number entry mode.
.
30
Page 31

To enter Select The display shows
a hard pause Hard Pause H
a time pause Time Pause T
a link Enter Link L
a hyphen Enter Hyphen –
If the Phone Book is full
If there are no memory locations available, a
message indicates that the memory is full.
After entering a name, a message prompts
you to specify a memory slot to overwrite.
To cancel, hold down or just press
CLR
.
Editing stored information
You can edit the name, phone number, and
memory location of specific entries stored in
the Phone Book.
1 On the standby display, turn
once.
The Saved #s display appears.
2 Turn down to select “Phone
Book.”
The first entry in the Phone Book
appears.
3 Turn to select the entry that
contains the information you want
to edit.
The contents of the selected memory
location are displayed.
Quick Ways to Make Calls
31
Page 32
4 Push .
The Options menu appears.
5 Turn to select “Edit,” then
push
The Edit menu appears.
.
6 Turn to select the item you want
to edit, then push
The stored information that corresponds
to the selected item appears.
To change Select
the name Name
the phone number Phone #
the memory location Location #
.
7 Enter the new information.
Enter new information the same way
you stored original information (see
page 27). The old information is
overwritten.
8 When you are finished, push .
A message confirms that your changes
have been saved.
Tip
In addition, you can use the Directory menu to
edit Phone Book numbers (see page 64).
32
Page 33

Erasing a phone number
You can erase stored Phone Book entries. If
the selected entry is restricted, you must enter
the four-digit lock code before you can erase it
(see page 74).
1 On the standby display, turn
down twice to select “Phone Book.”
The first Phone Book entry is displayed.
2 Turn to find the Phone Book
entry you want to erase.
The contents of the selected memory
location are displayed.
3 Push .
The Options menu appears.
4 Turn to select “Erase,” then
push
A message appears, prompting you to
confirm the erasure.
.
5 Push again.
The selected entry is erased. After a few
seconds, the standby display reappears.
Tips
• You can also use the Directory menu to erase
one Phone Book entry at a time (see page 64).
• Use the Security menu to erase all Phone Book
entries at once (see page 76).
Quick Ways to Make Calls
33
Page 34

Restricting Phone Book entries
You can restrict individual Phone Book entries
or the entire Phone Book so that access can be
gained only by entering a lock code (see page
74). The phone numbers of restricted entries
will not be displayed.
1 Select the Phone Book entry that
you want to restrict, then push
The Options menu appears.
2 Turn to select “Restrict,” then
push
The selected entry is displayed.
.
3 Push to restrict the selected
entry.
Now the selected entry is restricted.
After a few seconds, the standby display
reappears.
To unrestrict an entry
1 Select the Phone Book entry that
you want to unrestrict.
The message “<number is restricted>”
indicates a restricted entry.
2 Push .
The Options menu appears.
3 Turn to select “Restrict,” then
push
A message appears, prompting you to
enter the lock code. (See page 74 for
information on lock codes.)
.
.
34
Page 35
4 Use the number buttons to enter
the lock code.
Now the selected entry is unrestricted.
After a few seconds, the standby display
reappears.
Tip
You can also use the Security menu to restrict/
unrestrict Phone Book entries (see page 74).
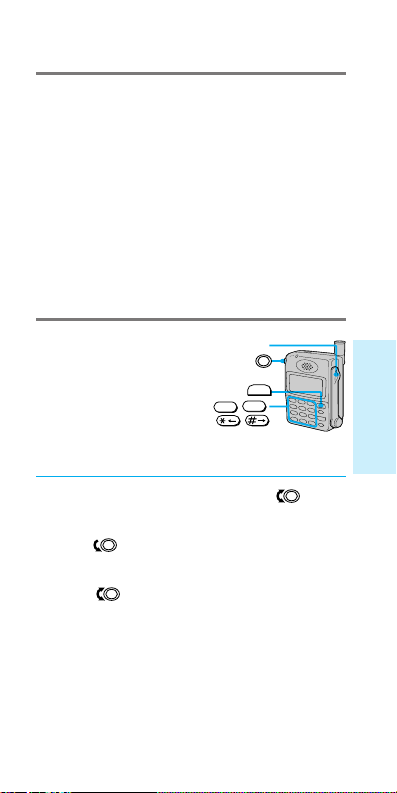
Calling from the Phone Book
You can dial frequently
used numbers quickly
from the Phone Book
using the Jog Dial™
navigator. Also, by using
speed/touch dialing, you
Arm mic
OPER
-
0
/
SEND
WX
9
YZ
,
only need to press a
few buttons to dial.
1
On the standby display, turn once.
The Saved #s display appears.
2
Turn down to select “Phone Book.”
The first entry in the Phone Book appears.
3 Turn to select the desired Phone
Book entry.
The contents of the selected entry are
displayed.
35
Quick Ways to Make Calls
Page 36

4 Open the arm microphone if it is
closed. If the arm microphone is
open, push
twice or press
The phone dials the number stored in
the selected Phone Book entry. The
icon appears.
Tips
• You can search for a phone number by name or
memory location (see pages 38 and 39).
• Whenever the phone number is displayed, you
can call it by pushing
the arm microphone.
• If the phone number of a selected Phone Book
entry is too long to fit on the screen, you can
still view the overflow digits by selecting
“View Number” on the Options menu.
or
SEND
To release a pause or link during a call
If a Phone Book entry contains hard pauses or
links, only the digits up to the first hard pause
or link are displayed. To dial the rest of the
selected entry (and release the pause or link),
push
The phone dials the rest of the entry
automatically. (See page 30 for additional
information on pauses and links.)
. For a time pause, wait two seconds.
SEND
.
or by opening
36
Page 37

Speed dialing
To dial quickly, you can enter the Phone Book
memory location numbers. The phone calls
the number stored in the corresponding
location.
1 Use the number buttons to enter
the memory location number.
2 To dial the number, open the arm
microphone. If the arm microphone
is already open, press
The phone dials the number that
corresponds to the memory location you
entered.
Touch dialing
You can dial a phone number stored in the
Phone Book without pressing
using this feature, make sure that Touch Dial
on the Extras menu is set to “on” (see page 70).
SEND
SEND
.
. Before
1 Use the number buttons to enter
the memory location number, and
hold down the last digit of the
memory location number for about
two seconds when the arm
microphone is already open.
The phone dials the number that
corresponds to the memory location you
entered.
Quick Ways to Make Calls
37
Page 38
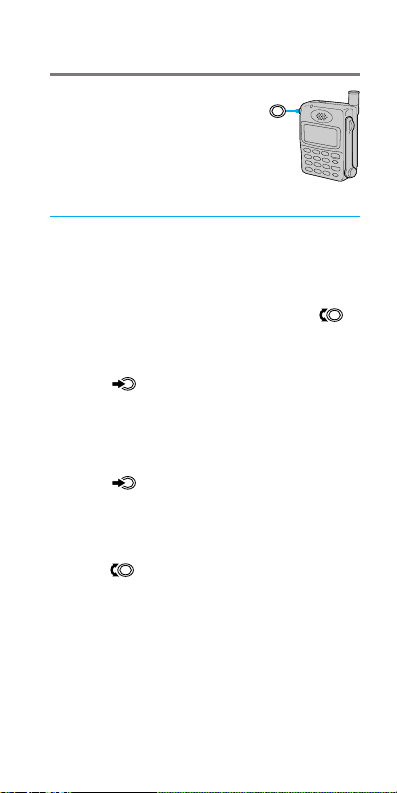
Searching the Phone Book
To locate a desired Phone
Book entry, you can search
by name, phone number, or
memory location. You can
search the Phone Book either
alphabetically or for a string
of characters.
Searching alphabetically
When you enter only one character, the phone
lists all entries that begin with the entered
character.
1 From the standby display, turn
once.
The Saved #s display appears.
2 Push .
The Search display appears.
3 Enter only the first letter of the
name you want to find.
4 Push .
All Phone Book entries that begin with
the entered character are displayed
alphabetically.
5 Turn to view the next entry.
Tip
In addition, you can use the Directory menu to
search the Phone Book by name (see page 66).
Searching for a string of characters
When you enter two or more characters, the
phone searches for entries that contain those
characters. The results are displayed starting
from the lowest memory location number.
38
Page 39

1 From the standby display, turn
once.
The Saved #s display appears.
2 Push .
The Search display appears.
3 Enter at least two characters.
4 Push .
The entries containing the selected string
are displayed starting from the lowest
memory location number.
5 Turn to view the next entry in
the search string.
Note
If the search string does not contain punctuation
or a space, the phone scans only the first
characters of the words in the matching entries.
Searching by memory location
The phone searches for a memory location
that matches the entered digit(s), and displays
a list of options.
1 On the standby display, enter the
memory location (a maximum of
two digits).
2 Push .
The Options menu appears.
Quick Ways to Make Calls
39
Page 40

3 Turn up to select “Recall Loc#,”
then push
The Phone Book entry stored in the
selected memory location is displayed.
If the entered location is empty, this is
indicated on the display. After a few
seconds, the standby display reappears.
Tip
You can also use the Directory menu to search the
Phone Book by memory location (see page 67).
Searching for a phone number
The phone lists all entries that contain the
entered digit(s).
.
1 On the standby display, enter at
least three digits of the phone
number you want to find.
2 Push .
The Options menu appears.
3 Turn up to select “Find
Number,” then push
The Phone Book lists and displays all
entries matching the entered digits.
Depending on the Sort Book setting (see
page 81), the entries are listed either
alphabetically or by memory location.
.
4 Turn to view the next entry that
contains the search string.
If a matching Phone Book entry is not
found, this is indicated on the display.
After a few seconds, the standby display
reappears.
40
Page 41
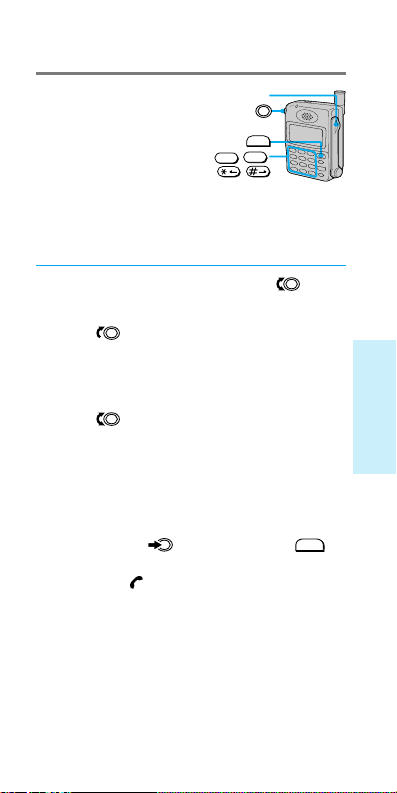
Calling from the Calls List
Information on the ten
Arm mic
most recent outgoing
calls, incoming calls,
scratch pad entries, and
missed calls are stored in
the phone’s Calls List. If
SEND
WX
OPER
9
YZ
-
,
0
/
you call the same number
twice in a row, only the
most recent call is stored
in the Calls List.
1
On the standby display, turn once.
The Saved #s display appears.
2 Turn up to go to “Calls List.”
Information on the most recent call
appears. “Calls List is empty” is
displayed if there are no entries.
3 Turn to select the entry you
want.
The contents of the selected entry are
displayed.
4 Open the arm microphone if it is
closed. If the arm microphone is
open, push
The phone dials the selected Calls List
entry. The
twice or press
icon appears.
SEND
Quick Ways to Make Calls
.
41
Page 42

Tips
• In addition, you can dial by pressing
(when the arm microphone is open) after
selecting the entry in step 3 on page 41.
• If the selected entry contains a pause or a link,
only the digits up to the pause or link are dialed.
To release pauses and links, see page 36.
• In addition, you can use the Directory menu to
view the Calls List (see page 68).
SEND
To view detailed information of Calls
List entries
In addition, you can view the digits of a phone
number that do not fit on the screen, the
duration of the call, or the time and date of the
call by using the Options menu in step 4 on
page 41.
To view Select
digits that do not View Number
fit on the screen
the duration Duration
of the call
the time and date Time/Date
of the call
To save the number to the Phone Book
Select “Save” from the Options menu (step 4
on page 41) by pushing the Jog Dial™
navigator.
42
Page 43

Sending DTMF signals from the Phone Book
You can send DTMF (Dual
Tone Multiple Frequency)
signals to access electronic
services (such as telephone
banking) when dialing
numbers from the Phone
Book.
Dual Tone Multiple Frequency is also known
as “touch-tone.” A tone is generated when
you press a telephone button (number, *, or #).
It can be used to access answering machines,
pagers, telephone banking services, data
services, and other electronic services.
1 During a call, search for the Phone
Book entry that contains the
numbers you want to send.
The selected entry is displayed. Use the
Directory menu to search for the Phone
Book entry (see pages 66 and 67).
2 Push .
The Options menu appears.
3 Turn to select “Number Tone,”
then push
A DTMF signal, containing the entered
digits, is sent in a burst.
Notes
• You can send a DTMF signal only during a call.
• To enter and send numbers one by one during
a call, use the number buttons to send the
DTMF number.
•
To change the length of the DTMF transmission,
see “Setting the keybeep length” on page 59.
.
WX
OPER
9
YZ
0
-
,
/
Quick Ways to Make Calls
43
Page 44
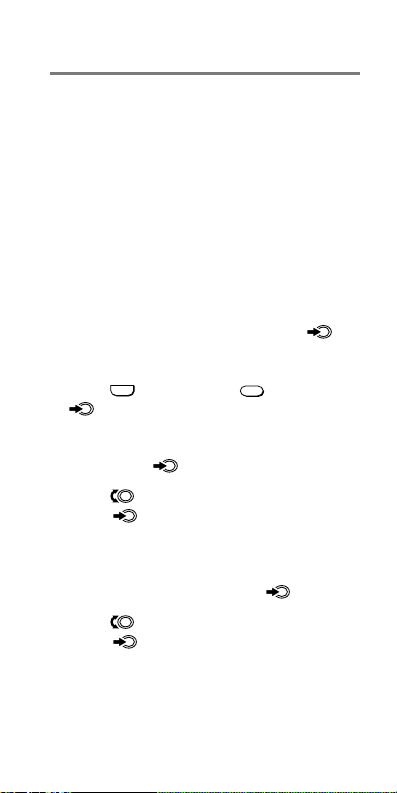
About the Features menu
CLR
You can use the Features menu to activate the
special features of your phone. For a list of
submenus and settings, see “List of menu
items” on page 90.
Viewing and selecting menu options
The Jog Dial™ navigator makes it easy to
navigate the phone’s menus. The procedure to
view and select menu options is common to
most of the Features menus (see page 21).
These menus are accessible during a call also.
The following example shows how to set the
backlight.
1 On the standby display, push to
select “Features”.
If the standby display is not shown,
END
press
arrow and the menu number flash,
indicating which menu will be selected
by pushing
2 Turn to select “Display,” then
push
The Display menu appears. The arrow
and the last digit of the submenu
number flash, indicating which submenu
will be selected by pushing
3 Turn to select “Backlight,” then
push
The Backlight menu appears. The current
setting is indicated by a check mark (✓)
and is displayed in capital letters. (See
page 79 for an additional description on
setting the backlight.)
44
or hold down
to display the Features menu. The
.
.
.
, then push
.
Page 45
4 Turn to select the setting.
The available options scroll as you turn
.
5 Push to enter the new setting.
The standby display reappears.
To exit from the Features menu
END
Press
or hold down
standby display.
To return to the previous display
CLR
Press
• If you reach the last menu item and try to turn
• The standby display automatically reappears
Tip
Each menu item can be accessed quickly from the
standby display by pushing
pushing the number of the menu item. The item
number then appears in the upper left corner of
the display in step 3. For example, you can access
the backlight setting by pushing
. To go back further, press
Notes
further, a beep indicates that you have
reached the end of the menu. To view other
menu items, turn
after 30 seconds of inactivity.
PQ
RS
and
ABC
2
.
7
CLR
to return to the
CLR
again.
in the opposite direction.
and then
followed by
Advanced Features
45
Page 46
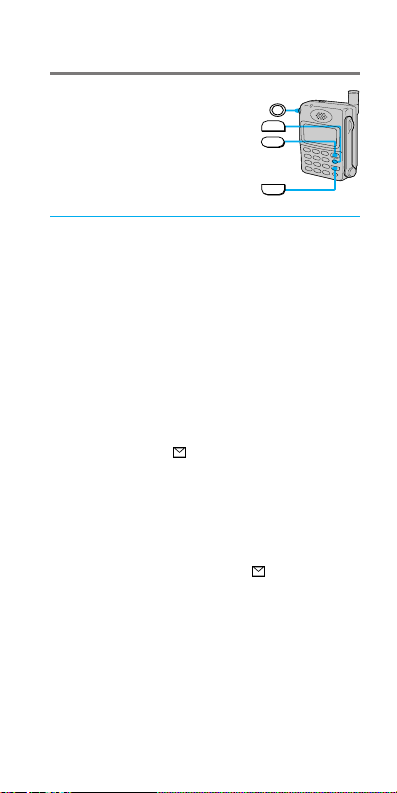
Using the Short Messaging Service
This section contains information
on the Short Messaging Service
(SMS). This feature lets you
receive “text” messages, which
are stored in your phone as long
as there are enough memory
locations available.
Contact your service provider to see if this
service is available in your area.
Receiving messages
To receive messages, the phone must be turned
on. The phone supports three types of
messages: “MESSAGE” indicates a text
message; “PAGE” typically contains only digits;
“VOICE MAIL” is a voice mail notification, and
indicates the number of new voice mail
messages stored in your voice mailbox.
When you receive a message
The message icon ( ) appears on the display
and the call alert indicator flashes,
accompanied by audible alerts. The first line
indicates message type and priority. If the
message is urgent, the message type is flanked
by asterisks (*) and followed by an exclamation
mark (!). If you press any key, this display
disappears. The message icon (
displayed as long as there are unread
messages.
Tip
If you receive duplicate messages, the phone
deletes the older one and stores the new one with
the indication “DUPLICATE.”
SEND
CLR
END
) remains
46
Page 47

WARNING
When you receive a new message and your
phone does not have enough memory to store it,
the phone automatically erases old messages that
are not locked.
Note
If the ringer volume is set to “vibration,” the
phone emits a vibration instead of an audible ring
when you receive a message.
If the memory becomes full
The phone issues a warning when the
memory is 75% full. At this point, you should
erase expendable messages (see page 54).
If the memory becomes completely full or your
phone does not have enough memory to
receive an incoming message, new messages
are rejected.
Accessing messages
1 Push twice from the standby
display.
The Message menu appears, indicating
the number of the following types of
messages, respectively:
• Voice mail messages (see page 48).
• Unread text messages and pagings
(see page 49).
• Text messages and pagings that you
have already read but are still stored in
memory (see page 51).
Advanced Features
47
Page 48

Reading voice mail notification
messages [F11]
1 Push to select “Voice” from the
Message menu.
The Voice display appears, indicating
the number of voice messages stored in
your voice mailbox. Press
to the Message menu.
CLR
to go back
2 Turn to scroll through the
message.
A hollow box ( ) indicates the end of the
message.
To dial a callback number
1 After reading a voice mail
notification message, open the arm
microphone if it is closed. If the arm
microphone is open, push
to see
the Options menu.
2 Push again to dial the callback
phone number.
The phone dials the callback phone
number which is attached to the message.
Tip
In addition, you can dial the callback number by
SEND
pressing
reading a voice mail notification message if the
arm microphone is open.
from the Messages display or when
48
Page 49
To erase a voice message
1 After reading a voice mail
notification message, push
The Options menu appears.
.
2 Turn to select “Erase Msg,” then
push
The voice mail notification message is
erased. The Message menu reappears,
indicating that there are currently no
voice mail notification messages stored
in memory.
Reading new text messages [F12]
You can read both new and old messages
stored in memory. Urgent messages are listed
above non-urgent ones, with the most recent
entries first. After reading messages, you can
protect or erase them.
.
1 Turn to select “New Text” from
the Message menu, then push
The first message is displayed. An
asterisk (*) indicates an urgent message.
If there are no new messages, this is
indicated on the display. Push
return to the Message menu.
.
to
Advanced Features
49
Page 50

2 Turn to scroll through the
message.
If you do not scroll, the display
automatically scrolls down. A hollow
box (
) indicates the end of the message.
3 To proceed to the next message,
push
the message.
The Options menu appears. To return to
the standby display, press
when you reach the end of
END
.
4 Turn to select “Next Msg,” then
push
The next message is displayed. If there
are no more messages, the Message
menu reappears.
To return to the previous message
In step 4 above, select “Prev Msg” from the
Options menu.
Note
Once you reach the end of the message and go to
the next message, the previous message is stored
as an old message.
.
50
Page 51
Reading old text messages [F13]
The most recent messages are listed first.
1 Turn to select “Old Text” from
the Message menu, then push
A list of old messages is displayed. A dot
(•) indicates the beginning of each
message. A lock icon (
the message is locked (see page 69). If a
number is too long to fit, an ellipsis (...) is
used.
) indicates that
2 Turn to scroll through the list of
old messages.
3 To read the selected message,
push
The selected message is displayed.
.
4 Turn to scroll through the
message.
If you do not scroll, the display
automatically scrolls down to the end of
the message, which is indicated with a
hollow box (
).
5 When you have read the message,
CLR
press
messages.
To read the next message, push to
go to the Options menu, then select
“Next Msg.” To read the previous
message, push
menu, then select “Prev Msg.”
to return to the list of old
to go to the Options
.
Advanced Features
51
Page 52
To protect a text message
You can lock a message to protect it from
being erased.
1 After reading a message, push .
The Options menu appears.
2 Turn to select “Lock Msg,” then
push
A message indicates that the message is
now locked.
Note
The phone does not erase locked messages
automatically. When there is not enough memory
for incoming messages, you must erase the
locked messages manually.
To respond to a text message
.
1 After reading a text message, open
the arm microphone if it is closed.
2 If the arm microphone is open, push
to see the Options menu. Turn
to select “Send,” then push .
The phone dials the callback phone
number which is attached to the
message. If a callback number is not
attached to the message, no call is made
and a message indicates that a callback
number is not available.
52
Page 53
Tip
In addition, when viewing a text message or the
list of old messages, you can dial the callback
phone number simply by opening the arm
microphone, or pressing
microphone is already open.
SEND
when the arm
To save the callback number
1 After reading a message, push .
The Options menu appears.
2 Turn to select “Save Number,”
then push
A message appears, prompting you for a
name to accompany the number.
.
3 Use the number buttons to enter
the name.
If you press the same button in quick
succession, the letter you just entered
changes. (See the “Alphanumeric table”
on page 29.) Use
/ or to move
the cursor and to insert spaces between
characters. If you enter the wrong
character, press
CLR
to clear the character
highlighted by the cursor.
4 When you are finished, push to
store the phone number and name.
A confirmation message appears.
Advanced Features
53
Page 54
5
Push to store the new number in
the first available memory location.
If you want to store it in another
location, turn
location, then push
message appears, followed by the status
of the Phone Book.
to select the desired
. A confirmation
To erase a text message
1 After reading a text message,
push
The Options menu appears.
.
2 Turn to select “Erase Msg,” then
push
The message is erased.
Erasing all old text messages [F14]
.
1 Turn down to select “Erase Old”
from the Message menu, then
push
The Erase Old menu appears.
2 Press
To go back to the Message menu without
erasing the messages, push
erase all old messages, it will be
indicated on the Message menu.
.
1
to erase all old messages.
. If you
54
Page 55

Adjusting the volume
You can adjust the volume of the ringer,
keybeep, and earpiece on the Sounds menu.
In addition, you can select the type of sounds
heard when the phone rings and when you
press buttons. (See page 21 for instructions on
how to reach the Sounds menu.)
Adjusting the ringer volume [F21]
1 Push to select “Ringer Vol” from
the Sounds menu.
The Ringer Vol. menu appears.
2 Turn up to raise the ringer
volume, and down to lower it.
You can select from six ringer volume
settings: “off,” “low,” “med.” (medium),
“high,” “escalate,” and “vibration.”
3 Push to enter the new setting.
The standby display reappears.
If you turn off the ringer volume
The message “–Ringer Off–” is displayed at
the top of the screen when the standby display
appears.
Tips
• If you set the ringer volume to “escalate,” the
telephone rings twice at a low volume, then
once at medium volume, and thereafter at a
high volume.
• If you set the ringer volume to “vibration,” the
telephone emits a vibration instead of an
audible ring.
(continues)
Advanced Features
55
Page 56

• If the telephone is used in conjunction with a
hands-free car kit or a portable hands-free car
kit, the “vibration” setting is not available.
• If the telephone is connected to a wall outlet
and the ringer volume is set to “vibration,” the
telephone emits an audible ring at the “high”
setting instead.
Muting/unmuting the microphone [F22]
You can mute/unmute the phone during a
call directly, without using the Sounds menu
by pushing and holding
can mute/unmute the microphone during a
call using the Sounds menu. This feature is
disabled in standby mode.
1 During a call,
turn
. In addition, you
to select
“Sounds” from the Features menu,
then push
The Sounds menu appears.
.
2 Push to select “Mute/UnMute.”
Now the microphone is muted.
3
To unmute the microphone, push .
The Sounds menu reappears.
4 Push to select “Mute/UnMute.”
Now the microphone is unmuted.
56
Page 57

Adjusting the keybeep volume [F23]
You can adjust the volume of the beep that
sounds when you press a button.
1
Turn to select “Keybeep Vol” from
the Sounds menu, then push
The Keybeep Vol menu appears.
.
2 Turn up to raise the keybeep
volume, and down to lower it.
You can select from four keybeep
volume settings: “off,” “low,” “med.”
(medium), and “high.”
3 Push to enter the new setting.
The standby display reappears.
Adjusting the earpiece volume [F24]
You can adjust the earpiece volume during a
call by turning
the volume as follows:
1
Turn to select “Earpiece Vol” from
the Sounds menu, then push
The Earpiece Vol menu appears.
. In addition, you can adjust
.
2 Turn up to raise the earpiece
volume, and down to lower it.
There are seven earpiece volume settings
ranging from “1” to “7.” A higher
number indicates higher volume.
3 Push to enter the new setting.
The standby display reappears.
Advanced Features
57
Page 58
Setting the ringer type [F25]
You can set the type of beep that sounds for
an incoming call.
1
Turn to select “Ringer Type” from
the Sounds menu, then push
The Ringer Type menu appears.
.
2 Turn to select the ringer type.
You can select from five different ringer
settings. The ringer sounds every time
you turn
.
3 Push to enter the new setting.
The standby display reappears.
Setting the keybeep type [F26]
You can set the beep that sounds when you
press a button to either a tone or a click. Tones
sound similar to DTMF tones, and clicks are
indicated by single beeps.
1 Turn to select “Key Sound” from
the Sounds menu, then push
The Key Sound menu appears.
.
2 Turn to select the keybeep type.
You can select “tones” or “clicks.”
3 Push to enter the new setting.
The standby display reappears.
Note
DTMF tones are sent to the other party during a
call even if you set the keybeep type to “clicks.”
58
Page 59

Setting the keybeep length [F27]
You can set the length of the beep that sounds
when you press a button. This setting affects
both the keybeep feedback and DTMF
transmission tones. The phone sends a short
DTMF burst (default) or plays every tone of
the DTMF signal as long as the key is held
down.
1 Turn to select “Beep Length”
from the Sounds menu, then
push
The Beep Length menu appears.
.
2 Turn to select the keybeep
length.
You can select “standard” or “long.”
3 Push to enter the new setting.
The standby display reappears.
Advanced Features
59
Page 60

Checking and setting the timers
You can check call durations on the Timers
menu. In addition, you can set the phone to
alert you every minute of a call, and make the
phone turn itself off automatically.
Checking the duration of all calls [F31]
You can view the total duration of all calls.
This information cannot be reset.
1 Turn to select “All Calls” from
the Timers menu, then push
The All Calls display appears.
2 Push to go back to the standby
display.
Checking and resetting the duration
of recent calls [F32]
You can view the total duration of the most
recent calls.
1
Turn to select “Recent Calls” from
the Timers menu, then push
The Recent Calls display appears.
2 Press
Setting the minute alert [F33]
You can set the phone to alert you ten seconds
before every full minute.
1
1
to reset, or hold down
to go back to the standby display.
If you choose to reset, the counter of
recent calls and the corresponding
durations are reset.
Turn to select “Minute Alert” from
the Timers menu, then push
The Minute Alert menu appears.
.
.
CLR
.
60
Page 61
2 Turn to select the desired alert
time.
You can select from four settings: “off,”
“before min,” “each min,” and “every 5
min.” If you select “before min,” the
phone alerts you 10 seconds before every
full minute.
3 Push to enter the new setting.
The standby display reappears.
Setting the phone to automatically
turn off [F34]
You can set the phone to automatically turn
itself off after a specified duration.
1 Turn to select “Auto-Off” from
the Timers menu, then push
The Auto-Off menu appears.
2
Turn to select the duration before
the phone powers off automatically.
You can select from “never,” “in 3
hours,” “in 2 hours,” “in 1 hour,” and “in
30 mins.” If you select “never,” the phone
does not turn itself off automatically.
.
3 Push to enter the new setting.
A confirmation message appears.
Notes
• If you press any button or operate the Jog
Dial™ navigator, the timer is reset and the
countdown starts over.
• The phone does not turn itself off automatically
during a call.
• If the Auto-Off timer is set, the phone turns off
after a user-specified duration and the
countdown “Off:xx:xx:xx” is displayed.
• Once the phone turns off, the setting will revert
to “never.”
61
Advanced Features
Page 62

Using the Directory
You can use the Directory menu to check your
phone number, as well as store, erase, and edit
phone numbers and names in the Phone Book.
Also, you can use this menu to view the Calls
List.
Checking your phone number [F41]
1 Push to select “My Number”
from the Directory menu.
The My Phone # display appears,
showing your phone’s number.
2 Push to exit this feature.
The standby display reappears.
Storing phone numbers [F42]
For quick and easy dialing, the Phone Book
allows you to store up to 99 phone numbers.
1 Turn to select “Save” from the
Directory menu, then push
2 Use the number buttons to enter
the phone number, then push
The Options menu appears. (See the
“Alphanumeric table” on page 29.)
3 Turn to select “Save,” then
push
A message appears, prompting you for a
name to accompany the number.
.
.
.
62
Page 63
4 Use the number buttons to enter
the name.
Use / to move the cursor or to
insert spaces between characters. If you
enter the wrong character, press
clear the character highlighted by the
cursor. (See the “Alphanumeric table” on
page 29.)
CLR
to
5 When you are finished, push to
store the phone number and name.
A message appears, prompting you to
specify the new memory location.
6
Push to store the new number in
the first available memory location.
If you want to store it in another
location, turn
location, then push
message appears, followed by the status
of the Phone Book.
Tip
In addition, you can use the Options menu to
store Phone Book numbers (see page 27).
to select the desired
. A confirmation
Advanced Features
63
Page 64

Erasing a phone number [F43]
You can erase stored Phone Book entries. If the
selected entry is restricted, you must enter the
four-digit lock code to erase it (see page 74).
1 Turn to select “Erase” from the
Directory menu, then push
A message appears, prompting you for
the Phone Book entry to be erased.
.
2 Turn to select the entry you
want to erase, then push
A message appears, prompting you to
confirm that the selected Phone Book
entry should be erased. In addition, you
can use the number buttons to select the
entry to be erased.
.
3 Push again.
The selected entry is erased. After a few
seconds, the standby display reappears.
Tips
• Also, you can use the Options menu to erase
one Phone Book entry at a time (see page 33).
• Use the Security menu to erase all Phone Book
entries at once (see page 76).
Editing stored information [F44]
You can edit the name, phone number, and
memory location of specific entries stored in
the Phone Book. If the selected entry is
restricted, you must enter the four-digit lock
code to edit it (see page 74).
64
Page 65

1 Turn to select “Edit” from the
Directory menu, then push
A message appears, prompting you for
the Phone Book entry to be edited.
.
2 Turn to select the entry that
contains the information you want
to edit.
In addition, you can use the number
buttons to select the entry to be edited.
A message appears, prompting you to
confirm that the selected Phone Book
entry should be edited.
3 Push again.
The Edit menu appears.
4 Turn to select the item you want
to change, then push
You can change the name, phone
number, or memory location by selecting
“Name,” “Phone #,” or “Location #,”
respectively. The stored information that
corresponds to the selected item appears.
.
5 Enter the new information.
The old information is overwritten.
6 When you are finished, push .
The Options menu reappears when you
edit the phone number. New
information is saved when you edit the
name or memory location.
Advanced Features
65
Page 66

7 Turn to select “Save,” then
push
A message appears, confirming that
your changes have been saved.
Tip
In addition, you can use the Options menu to edit
Phone Book entries (see page 31).
Searching the Phone Book by name [F45]
You can find name entries in the Phone Book
by searching alphabetically or for a string of
characters.
Tip
In addition, you can use the Options menu to search
the Phone Book by names (see pages 38 and 39).
To search alphabetically
When you enter only one character, the phone
lists all entries that begin with the entered
character.
.
1 Turn to select “Find Name” from
the Directory menu, then push
The Search display appears, prompting
you for a search string.
.
2 Enter only the first letter of the
name you want to find.
3 Push .
All Phone Book entries are displayed
alphabetically, starting from the ones
that begin with the entered character.
4 Turn to view the next entry.
66
Page 67

To search for a string of characters
When you enter two or more characters, the
phone searches for entries that contain the
entered string. The results are displayed starting
from the lowest memory location number.
1 Turn to select “Find Name” from
the Directory menu, then push
The Search display appears, prompting
you for a search string.
.
2 Enter at least two characters.
3 Push .
The entries containing the selected string
are displayed starting from the lowest
memory location number.
4 Turn to view the next entry.
Searching the Phone Book by
memory location [F46]
You can find memory locations easily.
1
Turn to select “Phone Book” from
the Directory menu, then push
A message appears, prompting you for a
search string.
.
2 Use the number buttons to enter
the memory location number.
The Phone Book entry that matches the
search string is displayed.
If the selected entry is empty, the display
shows the message “Phone Book storage
location XX is empty.” After a few
seconds, the standby display reappears.
Advanced Features
67
Page 68

Tips
• You can also use the Options menu to find
Phone Book memory locations (see page 39).
• You can also turn
entire Phone Book instead of entering the
memory location number in step 2.
to scroll through the
Viewing the Calls List [F47]
You can view Calls List entries easily.
1 Turn to select “Calls List” from
the Directory menu, then push
If the Calls List is empty, the display
shows the message “Calls List is empty.”
2 Turn to view the Calls List
entries.
The most recent entry is displayed first.
To view the rest of the ten most recent
entries, turn
Tip
You can also view the Calls List from the standby
display (see page 41).
To place a call
SEND
Press
go to the Options menu, then select “Send”
and push
in step 2. You can also push to
.
.
.
68
Page 69

Extra features
1
On the Extras menu, you can set the phone to
enable touch dialing, redial automatically, and
answer incoming calls automatically or at the
press of any button. Also, you can use this
menu to lock the keypad and to jot down
phone numbers.
Preventing accidental operation [F51]
When the microphone is closed, you can lock
the keypad by pushing and holding
the standby display. Locking the keypad
offers low-level security. For example, it
disables accidental dialing when you keep the
phone in your pocket.
1 Turn to select “Key Guard” from
the Extras menu, then push
A message appears, confirming that the
keypad is locked. After a few seconds, the
standby display reappears. The keypad
lock icon (
indicates that the keypad is locked.
To unlock the keypad
Open the arm microphone or press
3
and
To answer an incoming call when the
keypad is locked
Just open the arm microphone. You do not
need to unlock the keypad.
Tips
• You can lock the keypad even when the phone
itself is locked (see page 74).
• The backlight and keybeeps are turned off
when the keypad is locked.
) and the text “Keyguard On”
DEF
in quick succession.
from
.
ABC
2
,
Advanced Features
69
Page 70
Activating touch dialing [F52]
If you want to use the touch dialing feature
(see page 37), set to “on.”
1 Turn to select “Touch Dial” from
the Extras menu, then push
The Touch Dial menu appears.
.
2 Turn to select “on” or “off.”
3 Push to enter the new setting.
The standby display reappears.
Setting the phone to redial
automatically [F53]
You can set the interval for redialing. If the
attempt to dial is not successful, the phone
tries to redial it up to five times every three
seconds.
1 Turn to select “Auto-Retry” from
the Extras menu, then push
The Auto-Retry menu appears.
.
2 Turn to select “on” or “off.”
If you select “off,” the phone does not
try to redial automatically.
3 Push to enter the new setting.
The standby display reappears.
70
Page 71

Setting the phone to answer
automatically [F54]
You can set the phone to answer calls
automatically. If you turn auto-answering on,
the phone answers incoming calls on the
second ring when the phone is used in
conjunction with a hands-free car kit or a
portable hands-free car kit.
1
Turn to select “Auto-Answer”
from the Extras menu, then push
.
The Auto-Answer menu appears.
2 Turn to select “on” or “off.”
3 Push to enter the new setting.
The standby display reappears.
The message “–AutoAnswer–” is
displayed on the standby display when
you select “on” and the phone is in the
hands-free car kit.
Advanced Features
71
Page 72

Using the scratch pad [F55]
Your phone has a scratch pad feature, which is
useful for writing down phone numbers
temporarily. The phone doesn’t send DTMF
tone when you enter digits to the scratch pad.
1
Turn to select “Scratch Pad” from
the Extras menu, then push
The Scratch Pad display appears,
prompting you to enter a phone number.
.
2 Use the number buttons to enter
the digits.
3 Push .
The Options menu appears. Besides
storing digits, you can enter hyphens,
pauses, and links (see page 30).
4 Turn to select “Store&Exit,” then
push
The information is stored as a scratch
pad entry in the Calls List. When the
Calls List reaches more than 10 list items,
the oldest entries will be deleted as
needed to make room for new entries.
.
72
Page 73

Setting security options
You can restrict unauthorized access to your
phone and the information it holds. Also, on
the Security menu, you can reset menu settings
to default and store emergency numbers.
Unlike other items on the Features menu,
accessing the Security menu requires a lock
code when you select it from the menu. A
typical default lock code is either the last four
digits of your phone number or 0000.
Preventing others from using your
phone [F61]
This option lets you set when the phone will be
locked. When the phone is locked, carrying out
most operations requires entering the lock code;
you can still answer incoming calls and dial 911
or other stored emergency numbers.
1 Push to select “Lock Phone”
from the Security menu.
The Lock Phone menu appears.
2 Turn to select when the phone
will be locked.
You can select “never,” “on power-up,”
or “right now.” If you select “never,” the
phone is available for use at any time
without a lock code. If you select “on
power-up,” the phone is locked every
time you turn it on.
3 Push to enter the new setting.
The standby display reappears. The
message “ :Unlock” indicates that the
phone is locked.
To unlock the phone
On the standby display, push . When
prompted, enter the lock code.
73
Advanced Features
Page 74

Setting a new lock code [F62]
The lock code must be entered every time you
want to unlock the phone, and also when you
want to access restricted numbers.
1 Turn to select “New Code” from
the Security menu, then push
The Enter New Code display appears,
prompting you to enter a new lock code.
.
2 Use the number buttons to enter a
lock code.
The lock code must be exactly four digits
long.
3 Push to store the new lock code
in memory.
A confirmation display appears.
Note
Keep a record of your lock code. If you forget it,
contact your service provider.
Restricting a Phone Book entry [F63]
You can restrict access to individual Phone
Book entries.
1 Turn to select “Restrict #” from
the Security menu, then push
A message appears, prompting you to
specify Phone Book entry to restrict.
.
2 Turn to select the Phone Book
entry that you want to restrict.
3
Push to restrict the selected entry.
Now the selected entry is restricted.
74
Page 75

To unrestrict an entry
To select the entry you want to unrestrict,
follow the procedure above for restricting an
entry.
Notes
• The phone number of a restricted entry is not
displayed when you view the Phone Book and
make a call.
• Restricted entries are not listed or displayed
after a digit string search (see pages 39 and 67).
• Calling, editing, and erasing a restricted entry
requires the four-digit lock code.
Tip
Also, you can use the Options menu to restrict/
unrestrict Phone Book entries (see page 34).
Restricting all Phone Book entries [F64]
You can restrict access to all Phone Book
entries. All operations that involve Phone
Book entries require the four-digit lock code
(see page 74).
1 Turn to select “Restrict All” from
the Security menu, then push
The Restrict All menu appears.
.
2 Turn to set restriction of all
Phone Book entries on or off.
3 Push to enter the new setting.
The standby display reappears.
Note
If you restricted some entries by using
“Restrict #,” they are still restricted when you
turn off “Restrict All.”
Advanced Features
75
Page 76

Reverting to default settings [F65]
You can reset all menu settings to the defaults.
This does not affect Phone Book or Calls List
entries.
1
Turn to select “Master Reset” from
the Security menu, then push
The Master Reset display appears.
2 Press
1
to revert to the factory
defaults, or push
to keep the
.
current settings.
If you revert to the factory defaults, all
your custom menu settings are erased.
Erasing all Phone Book entries [F66]
You can erase all Phone Book entries at once.
1 Turn to select “Erase Book” from
the Security menu, then push
The Erase Book display appears.
2 Press
1
to erase all Phone Book
entries, or push
to quit without
erasing.
If you erase all entries, a message
appears to confirm this.
.
76
Page 77
Erasing all Calls List entries [F67]
You can erase all Calls List entries at once.
1 Turn to select “Erase Calls” from
the Security menu, then push
The Erase Calls display appears.
2
1
Press
or push
If you erase all entries, a message
appears to confirm this.
to erase all Calls List entries,
to quit without erasing.
Storing emergency numbers [F68]
You can use the Security menu to store up to
three emergency numbers other than 911
(which you cannot erase). You can call these
numbers even when the phone is locked.
1
Turn to select “Emergency #” from
the Security menu, then push
The first Emergency # display appears.
.
.
2 Turn to select the emergency
memory location, then push
A message appears, prompting you to
enter the phone number for the
emergency entry.
.
3 Use the number buttons to enter
the number.
4 Push to store the emergency
number.
The entered emergency number is stored
in memory. To store other emergency
numbers, repeat the above procedure.
To go back to the standby display, hold
CLR
down
.
77
Advanced Features
Page 78

Setting display options
You can use the features on the Display menu
to change the appearance of the on-screen
display.
Setting the banner [F71]
You can change what the banner reads.
1 Push to select “Banner” from
the Display menu.
The Banner display appears. The current
banner text is displayed.
2 Push again to start editing.
A message appears, prompting you to
enter a new banner.
3 Use the number buttons and /
or to enter the new banner text.
The banner can be up to 12 characters
long. For details on character entry, see
the “Alphanumeric table” on page 29.
4 Push to save the new banner.
The standby display reappears. Your
new banner is displayed.
78
Page 79

Setting the backlight [F72]
You can adjust the duration of the backlight
on the display and keypad.
1 Turn to select “Backlight” from
the Display menu, then push
The Backlight menu appears.
2 Turn to select how long the
backlight is on after the last press
of a button.
You can select “for 15 secs,” “for 7 secs,”
or “off.” If the phone is used in
conjunction with a hands-free car kit, a
cigarette lighter adapter, or a single- or
dual-slot battery charger, the added
option of “always on” leaves the
backlight on.
3 Push to enter the new setting.
The standby display reappears.
.
Advanced Features
79
Page 80

Setting autohyphenation [F73]
You can turn the autohyphenation feature on
and off. If you turn it on, entered numbers are
hyphenated according to the North American
Numbering Plan (eleven digits which include
a long distance identifier, an area code, a
three-digit community code, and a four-digit
location code, e.g., 9-999-999-9999).
1
Turn to select “Auto-Hyphen” from
the Display menu, then push
The Auto-Hyphen menu appears.
.
2 Turn to select “on” or “off.”
3 Push to enter the new setting.
The standby display reappears.
Note
Autohyphenation is not fully deactivated when a
pause or link is entered. All entered hyphens up
to the pause/link will remain.
80
Page 81

Sorting the Phone Book [F74]
You can determine how the Phone Book will
be displayed, and also set the phone to sort
the entries either alphabetically or by memory
location.
1 Turn to select “Sort Book” from
the Display menu, then push
The Sort Book menu appears.
.
2 Turn to set the sorting
preferences.
You can choose to sort the Phone Book
“by Loc. #” (by location) or “alphabetic”
(alphabetically).
3 Push to enter the new setting.
The standby display reappears.
Advanced Features
81
Page 82

Setting the menu length [F75]
You can set the menu length (long or short).
The short menu displays only the most
common items on the Features menu; the long
menu displays all items.
1
Turn to select “Menu Length” from
the Display menu, then push
The Menu Length menu appears.
.
2 Turn to set the menu length.
You can select “short” or “long.”
3 Push to enter the new setting.
The standby display reappears.
Items on the short menu
The short menu contains the following items:
• Message (see page 46)
• Ringer Vol. (see page 55)
• My Number (see page 62)
• Saved #s (see pages 35, 38, 41)
• Lock Phone (see page 73)
• Long Menu (see page 90)
Note
The item “Saved #s” contains the items “Find
Name” (see page 38), “Phone Book” (see page 35),
and “Calls List” (see page 41).
To return to the long menu
On the short menu, turn to select “Long
Menu,” then push
.
82
Page 83

Adjusting network settings
On the Network menu, you can set the phone
to alert you when the roaming status changes,
when a call is dropped, or when enhanced
voice privacy is lost.
Setting the roaming alert [F81]
Your phone is roaming when you use it
outside of the home area. Roaming access to a
different carrier and the types of calls you can
make varies with the agreement between your
“home” carrier and the currently serving
carrier. Check with your service provider for
details about roaming in a specific area.
1 Push to select “Roam Alert”
from the Network menu.
The Roam Alert menu appears.
2
Turn to select “on” or “off.”
3 Push to enter the new setting.
The standby display reappears.
When you enter another service area
The roaming icon (R) appears on the display.
A beep accompanies the icon if you have
turned the roam alert on.
If you leave any valid service area
A message appears, indicating that you are
outside the area serviced by your “home”
carrier or other valid service areas. The out-ofservice icon (
) also appears.
83
Advanced Features
Page 84

Setting the drop alert [F82]
If the signal fades, your phone may drop the
ongoing call. You can choose to be alerted by
an audible alarm when a call is dropped.
1 Turn to select “Drop Alert” from
the Network menu, then push
The Drop Alert menu appears.
.
2 Turn to select “on” or “off.”
3 Push to enter the new setting.
The standby display reappears.
When a call is dropped
The roaming icon (R) appears on the display.
A beep accompanies the icon if you have
turned the drop alert on.
84
Page 85

Setting the voice privacy alert [F83]
A display appears to indicate if enhanced
voice privacy is lost during a call. You can
choose to have an audible alarm accompany
this display.
1 Turn to select “Priv. Alert” from
the Network menu, then push
The Priv. Alert menu appears.
.
2 Turn to select “on” or “off.”
3 Push to enter the new setting.
The standby display reappears.
If enhanced voice privacy is lost
A message appears, and is accompanied by a
beep if you have turned on the voice privacy
alert.
When enhanced voice privacy is regained
A message appears, and is accompanied by a
beep when enhanced voice privacy is regained
and you have turned on the voice privacy
alert.
Note
The network automatically turns on enhanced
voice privacy if it is available. You do not have to
change your phone settings. For details, contact
your service provider.
Advanced Features
85
Page 86

Activating phone services (OTASP) [F84]
You can use the OTASP (Over-The-Air Service
Provision) activation feature to self-activate
your phone with a new service. Contact your
service provider to see if this service is
available in your area.
1 Turn to select “Activation” from
the Network menu, then push
The Activation menu appears.
.
2 Turn to select which system
block to activate the service on,
then push
A message appears, prompting you for
confirmation. To go back one step, press
CLR
. To cancel activation and return to
the standby display, press
3 Press
1
The phone calls up a service provider.
When a service provider is contacted,
you will be connected to an operator.
When activation is complete, the message
“Activation is complete!” appears,
followed by the standby display.
If activation fails
The message “Activation has failed” appears.
Push
to retry, or press
standby display.
.
to confirm.
END
.
END
to return to the
86
Page 87

Specifications
Frequency range
Transmit: 1851.25 to 1908.75 MHz
Receive: 1931.25 to 1988.75 MHz
Dimensions
3.6 × 2.4 × 1.0 inches (h/w/d)
(not including antenna)
(91 × 62 × 26 mm)
Mass (weight)
Approx. 5.3 oz (150 g)
(including battery)
RF power output
0.01 µW to 300 mW
Operational temperature
–22°F to +140°F
(–30°C to +60°C)
(excluding battery pack)
Supplied accessories
QN-029BPL Li-Ion Battery Pack (1)
QN-001AC AC Adapter (1)
Hand strap (1)
Optional accessories
QN-008CLA Rapid Charging Cigarette
Lighter Adapter
QN-009TA Travel Adapter
QN-012DA Data Cable
QN-020TCL Travel Adapter/Cigarette
Lighter Adapter
QN-021BCD Dual Slot Battery Charger
QN-023DCS Desktop Charger Speakerphone
QN-024HC
QN-025PHK Portable Hands-Free Car Kit
QN-026HS Phone Holster
QN-027LC Carrying Case
QN-028SKT Starter Kit
QN-029BPL Li-Ion Battery Pack
QN-030HFK Hands-Free Car Kit
Call 1-800-488-SONY (7669) to order additional
accessories (USA only).
Design and specifications are subject to change
without notice.
Auto Travel Holder
Additional Information
87
Page 88
Troubleshooting
Problem
Nothing
appears on the
display.
The out-ofservice icon (
appears.
Nothing
happens when
you press the
buttons.
The call does
not go through.
You can hear the
other party, but
the other party
cannot hear you.
You hear the
other party only
faintly.
Cause/Remedy Page
•The phone is off.
Turn the phone on.
Battery is fully discharged.
•
Recharge the battery.
•The phone is outside the
)
service area, or the signal
is too weak. Extend the
antenna fully.
•The buttons may be locked.
•The phone may be locked.
Enter the lock code to
unlock the phone.
•Check the signal strength.
•If the icon is displayed,
there is no service.
See above.
•Check the number.
SEND
•Press
•Listen for a busy signal.
•The microphone may be
muted. Unmute the
microphone.
•Adjust the earpiece volume.
If possible, also reduce the
noise around you.
.
20
17
21
69
74
20
21
23
23
—
24,
56
24,
57
88
Page 89

Problem Cause/Remedy Page
The call is cut
off (“dropped”).
You hear an
alternate high/
low tone.
You forgot the
lock code.
You hear a fast
busy tone.
You cannot
place or receive
calls.
•You could be outside the
coverage area. Redial the
number. If the problem
continues, contact your
carrier. Also see “The
out-of-service icon (
appears” on page 88.
•You are attempting to
use the phone in an area
without service.
•Extend the antenna fully.
•Let the
•Try 0000, 1234 (commonly
•See your authorized
•This can result from any
•Make sure that the phone
•Check the system settings.
icon disappear,
then try to dial.
used as defaults), or the
last four digits of your
own number.
dealer or service provider.
one of the following:
– The phone is improperly
programmed.
– The phone is out of range.
– All channels are busy.
– The antenna is broken
or damaged.
is turned on, and that the
out-of-service icon is not
displayed.
If you are roaming,
consult your service
provider concerning
roaming agreements.
)
21
21
20
21
74
—
—
21
—
20
20
83
Additional Information
89
Page 90

List of menu items
This section lists the Features menu and its
submenus. Use these to set the various
parameters that pertain to the operation of the
phone. For details on how to navigate from
one menu to another, see “About the Menu”
on page 44.
Menu Item Settings Page
F11 Voice —48
F12 New Text —49
F13 Old Text —51
F14 Erase Old —54
F21 Ringer Vol.
F22 Mute/UnMute mutes or unmutes
F23 Keybeep Vol off / low /
F24 Earpiece Vol 1 / 2 / 3 / 4 / 5 / 6 / 7 57
F25 Ringer Type standard / option 1 to 4 58
F26 Key Sound tones / clicks 58
F27 Beep Length standard / long 59
F31 All Calls total call time,
F32 Recent Calls total call time,
F33 Minute Alert off / before min. /
F34 Auto-Off never / in 3 hours /
F41 My Number —62
F42 Save —62
F43 Erase —64
off / low / medium /
high /
escalate /
vibration 55
the microphone 56
medium / high 57
number of calls 60
number of calls 60
each min. / every 5 min 60
in 2 hours / in 1 hour /
in 30 mins 61
90
Page 91

Menu Item Settings Page
F44 Edit —64
F45 Find Name —66
F46 Phone Book No default entries 67
F47 Calls List No default entries 68
F51 Key Guard —69
F52 Touch Dial on / off 70
F53 Auto-Retry on / off 70
F54 Auto-Answer on / off 71
F55 Scratch Pad —72
F61 Lock Phone never / on power-up /
F62 New Code 0000 74
F63 Restrict # No default numbers 74
F64 Restrict All on / off 75
F65 Master Reset —76
F66 Erase Book —76
F67 Erase Calls —76
F68 Emergency # No defaults for #1 to #3 77
F71 Banner No default banner 78
F72 Backlight off / for 7 secs /
F73 Auto-hyphen on / off 80
F74 Sort Book by loc. # / alphabetic 81
F75 Menu Length long / short 82
F81 Roam Alert on / off 83
F82 Drop Alert on / off 84
F83 Priv. Alert on / off 85
F84 Activation —86
right now 73
for 15 secs / always on 79
Additional Information
91
Page 92

Glossary
A
Automatic answer
Feature that automatically answers calls.
Automatic retry
Feature that automatically redials a call when a
“System Busy” indication is received.
B
Banner
Message at the top of the standby display.
C
Calls List
See “Phone Book.”
Carrier
A company that provides PCS telephone service.
CDMA
Code Division Multiple Access. A spreadspectrum approach to digital transmission. With
CDMA, each conversation is digitized, and then
tagged with a code. The mobile phone receives
only the signal with the appropriate code.
Coverage area
The geographic area covered by one carrier. If
you travel outside a carrier’s area, you cannot
receive service from that carrier. Also see
“Roam.”
92
Page 93

D
Dropped call
A call terminated because of a deep, long fade or
because the user left the coverage area.
DTMF
Dual Tone Multiple Frequency, also known as
“touch-tone.” Tone generated when you press a
telephone button (number,
to access answering machines, pagers, telephone
banking services, data services, and other
electronic services.
, or #). Can be used
*
E
ESN
Electronic Serial Number. The unique
identification number of your telephone. The
telephone transmits this number to the base
station every time a call is placed.
Emergency number
In addition to the general emergency number
(911 for the U.S.A. and Canada), three phone
numbers can be stored as emergency numbers in
your telephone. You can dial these numbers and
911 even when the phone is locked.
H
Home area
The area of the home system to which you subscribe.
I
Incoming call
A call received by your telephone.
Additional Information
93
Page 94

L
Lock
Prevents unauthorized calls by requiring the user
to enter a code to use the phone. Even if the
phone is locked, you can call any of the
emergency numbers or answer incoming calls.
M
Memory
A storage area for names and phone numbers.
Also see “Phone Book.”
Menu
The menu allows you to change or see the
settings of your phone. You can access it from the
standby display or during a call. See “List of
menu items” on page 90 for an overview of this
feature.
Minute alert
This alert beeps periodically during a call to help
you keep track of the length of the call.
N
NAM
Number Assignment Module. Portion of your
telephone’s memory programmed to contain
information about your subscription to the
carrier. Your telephone can have up to two
NAM’s.
94
Page 95

P
Pause
You can enter pause codes in the phone number
memory data. Use this feature when accessing an
answering machine, voice mail system, electronic
banking system, etc. When a pause is inserted
between two groups of digits, the phone will
pause before dialing the next set of digits,
allowing you to wait until your counterpart is
ready to accept the string.
Phone Book
You can store up to 99 numbers in Phone Book
memory, location number 01 to number 99. An
additional recent number memory (Calls List)
stores the last ten used phone numbers.
R
Roam
Your phone is roaming when you use it outside
of the home area. Availability of roaming access
to a different carrier and types of calls you can
make varies with the agreement between your
home carrier and serving carrier. Check with
your carrier for details about roaming in a
specific area.
S
Scratch pad
Allows you to enter a number and store it in the
Calls List.
Service area
Region covered by a PCS service. Also see
“Coverage area.”
Additional Information
95
Page 96

SMS
Short Messaging Service. An extended service
offered by carriers that allows you to receive text
messages on your phone. Check with your carrier
for details.
Speed dialing
Making a call using Phone Book memory
locations. Also see “Phone Book.”
T
Touch dialing
A quick way of making a call using a number
stored in a Phone Book memory location. Also
see “Speed dialing.”
Touch-tone
See “DTMF.”
V
Voice mail
An extended service, offered by carriers, that
allows you to retrieve voice mail messages stored
in your voice mailbox. Check with your carrier
for details.
Volume
You can adjust the volume of keybeep, ringer,
and earpiece.
96
Page 97

Index
A
AC adapter 11, 17
Antenna 20
Arm microphone 12
Automatic
Answer 71
Hyphenation 80
Retry 70
Redial 70
B
Backlight 79
Banner 78
Battery pack
Charging 16
Checking 19
Attaching/
removing 16
Battery charge
contacts 17
Battery pack
release tab 13
Battery icon 15, 17
C
Calling
Calls List 41, 68
Dropped call 84
Ending calls 23, 25
Making calls 23
Receiving calls 25
Recent number 41
Redialing 24, 70
Restrictions 34, 74
Roaming 83
Speed dialing 37
Touch dialing 37, 70
Carrier 83, 86
CDMA (Code Division
Multiple Access) 6
Character display 14
Clearing. See Deleting
Coverage area 83
Cursor 28, 63
D
Dialing. See Calling
Deleting
Calls List entries 77
Characters 28, 63
Message 54
Phone Book
entries 33, 64
Phone numbers
Voice mail 48
Digital icon 14
Display 14
Display settings
Accessing 44
Autohyphenation
Backlight 79
Banner 78
Time 60
Displays
Calling 23
Menu 21
Hyphens/pauses/
links 30
Menu setting 82
Security 73
Standby 21
Dropped call 84
DTMF (Dual Tone Mul-
tiple Frequency)
33, 64
80
43
E
Earpiece 24, 57
Editing
Emergency
numbers 77
Phone numbers 31, 64
Emergency
numbers 77
Additional Information
97
Page 98

Enabling
Lock 69
Touch dialing 70
Ending a call 23, 25
Entering
Hyphens 30
Links 30
Pauses 30
Erasing. See Deleting
ESN (Electronic Serial
Number) 93
Extra features
Accessing 69
Changing DTMF
transmission 58
Enabling touch
dialing 70
Muting the
microphone 56
Using the scratch
pad 71
Setting auto-answer
Setting auto-retry
F
Finding. See Searching
H
Hand strap
Attaching 11
Hyphens
Autohyphenation 80
Entering manually
I
Incoming call 25
In-use icon 23, 25
K
Keybeep 58
L
Laws
Rules and
regulations 4
Lock code 74
M
Making calls 23
Manual
Answer 25
Call 23
Hyphenation 30
Redial 24
Memory
Deleting 33, 64
Editing 31, 64
Number
searching 38, 39, 66
Storing 28, 63
Menus
Accessing 21
Message icon 46
71
Messages
70
Calling back 49
Displaying 46
Erasing 54
Locking 52
Message list 47
Receiving 46
Microphone 24, 56
Minute alert 60
Multiple city
30
registration 94
Muting the
microphone 24, 56
N
Number buttons 23, 27
98
Page 99

O
Out-of-service
icon 21, 83
Over-the-Air Service
Provision (OTASP)
Overflow digits
Viewing 42
86
P
Pause 30
Phone Book
Power
27, 35, 38, 62
Turning off 21
Turning on 20
Q
Quitting. See Power
R
Receiving
Calls 25
Messages 46
Voice mail 48
Recent number memory
Calling recent
numbers 41
Clearing call
memory 76
Redialing
Auto retry 70
Last dialed number
Restriction 34, 74
Ringer
Volume 55
Roam 83
Roam icon 83
Roaming agreement 83
Rules and regulations
24
S
Safety precautions 6
Scratch pad 72
Scrolling
Menus 22
Message 50
Message list 51
Searching
For a name 66
For a number 39, 40
For a message 51
Security functions
Accessing 73
Clearing call memory
Emergency numbers
Lock mode 73
New lock code 74
Restriction 74
Sending. See Calling
Service area 83
Signal strength icon
Special characters 29
Standby display 21
System settings
Accessing 83
Over-the-Air Service
Provision (OTASP)
T
Text Message. See
Messages
Touch dialing
Enabling 70
Troubleshooting 88
Turning phone on 20
V
Voice mail notification
Accessing 47
Receiving 48
4
Voice Privacy 85
Volume
Adjusting 55
77
77
20
86
Additional Information
99
Page 100

SONY Wireless Hotline Number
(USA only)
If you have any questions or comments,
© 1998 Sony Electronics Inc. All rights reserved.
Reproduction without written consent expressly
prohibited. Sony and Jog Dial are trademarks of
Sony. All other trademarks are the property of their
respective owners. Design and specifications are
subject to change without notice. Talk and standby
times are subject to change.
please call:
SONY WIRELESS HOTLINE
1-800-578-SONY (7669)
Printed in USA
 Loading...