

Page 1
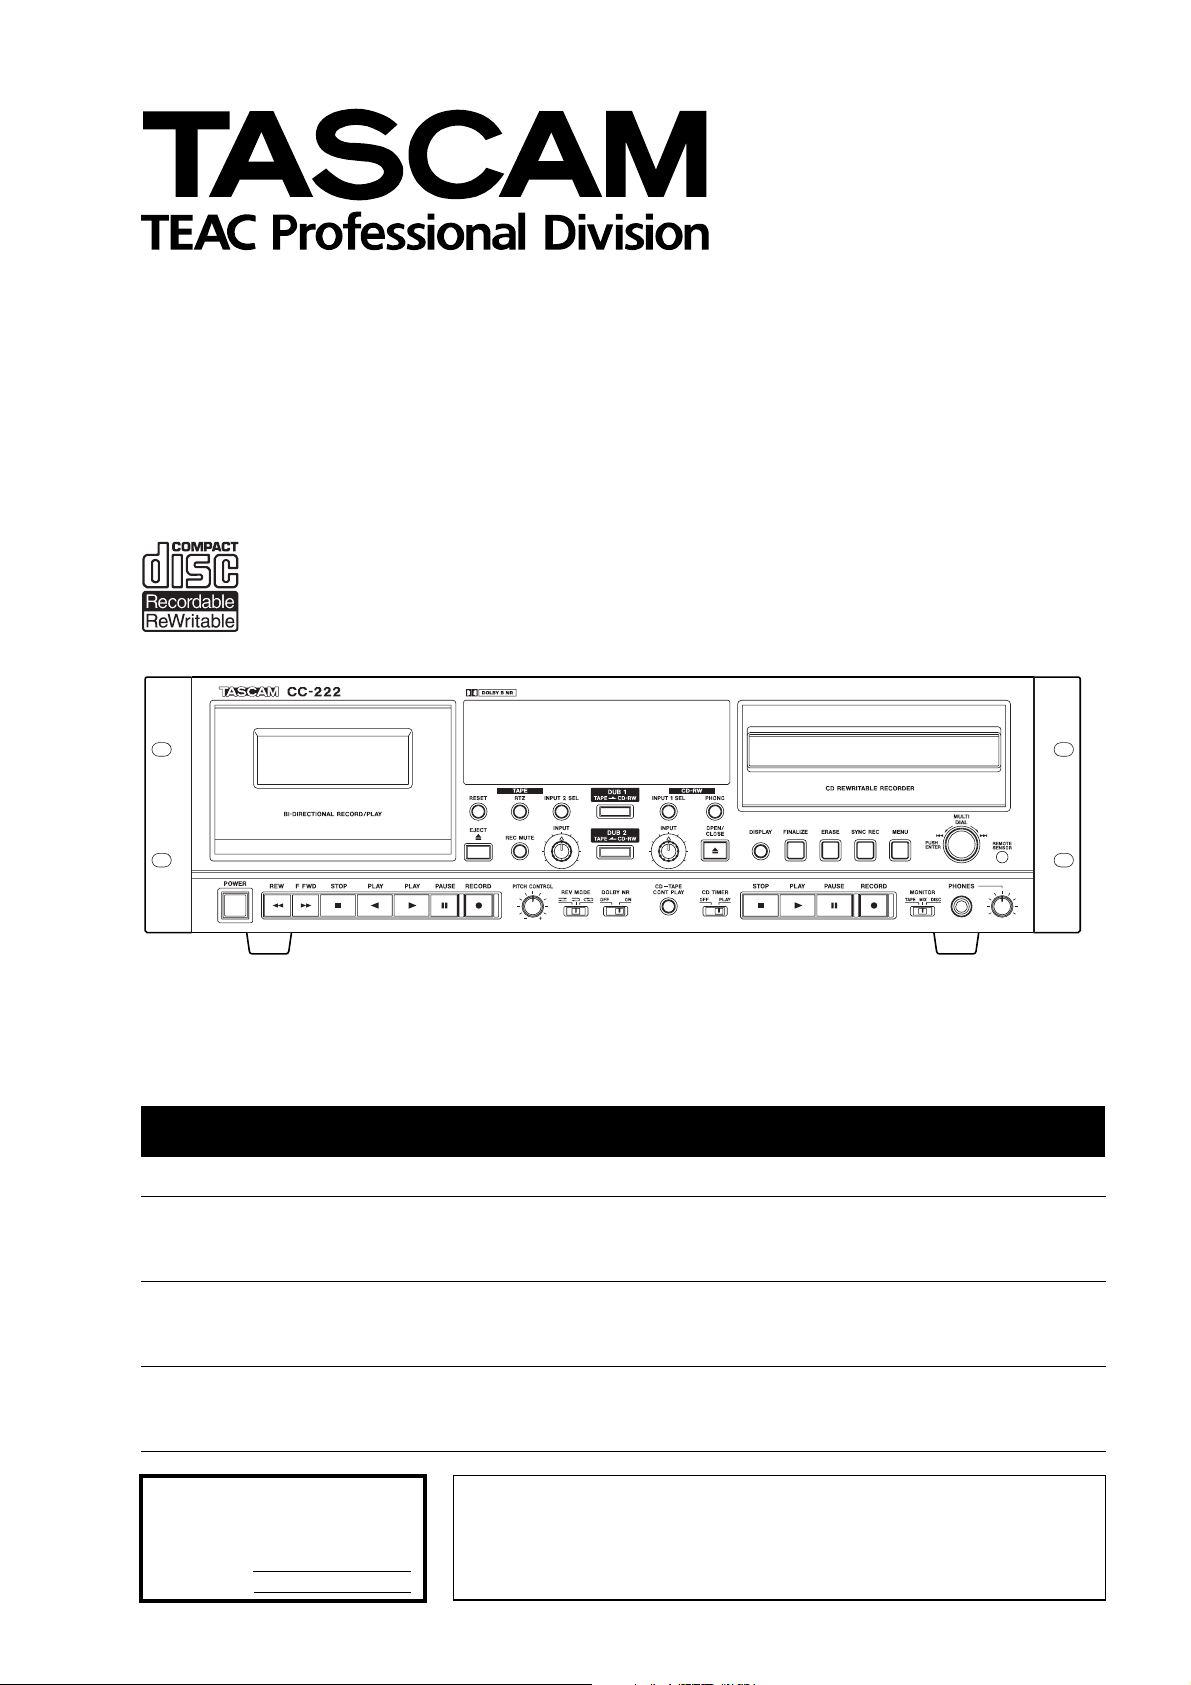
CC-222
CD Recorder/Cassette Deck
3D0050600A
OWNER’S MANUAL
Ü
The lightning flash with arrowhead symbol, within an equilateral triangle, is intended to alert
ÿ
Ÿ
This appliance has a serial number
located on the rear panel. Please record
the model number and serial number
and retain them for your records.
Model number
Serial number
the user to the presence of uninsulated “dangerous voltage” within the product’s enclosure
that may be of sufficient magnitude to constitute a risk of electric shock to persons.
The exclamation point within an equilateral triangle is intended to alert the user to the presence of important operating and maintenance (servicing) instructions in the literature
accompanying the appliance.
CAUTION: TO REDUCE THE RISK OF ELECTRIC SHOCK, DO NOT
REMOVE COVER (OR BACK). NO USER-SERVICEABLE PARTS
INSIDE. REFER SERVICING TO QUALIFIED SERVICE PERSONNEL.
WARNING: TO PREVENT FIRE OR SHOCK
HAZARD, DO NOT EXPOSE THIS
APPLIANCE TO RAIN OR MOISTURE.
Page 2

Important Safety Precautions
IMPORTANT (for U.K. Customers)
DO NOT cut off the mains plug from this equipment.
If the plug fitted is not suitable for the power points in your home or
the cable is too short to reach a power point, then obtain an
appropriate safety approved extension lead or consult your dealer.
If nonetheless the mains plug is cut off, remove th
of the plug
inadvertent connection to the mains supply.
If this product is not provided with a mains plug, or one has to be
fitted, then follow the instructions given below:
IMPORTANT: DO NOT make any connection to the larger
terminal which is marked by the letter E or by the safety earth
symbol ç
The wires in this mains lead are coloured in accordance with the
following code:
As the colours of the wires in the mains lead of this apparatus may
not correspond with the coloured markings identifying the terminals
in your plug proceed as follows:
immediately, to avoid a possible shock hazard by
or coloured GREEN or GREEN-and-YELLOW.
BLUE : NEUTRAL
BROWN : LIVE
e fuse and dispose
For U.S.A
TO THE USER
This equipment has been tested and found to
comply with the limits for a Class A digital device,
pursuant to Part 15 of the FCC Rules. These
limits are designed to provide reasonable
protection against harmful interference when the
equipment is operated in a commercial
environment. This equipment generates, uses,
and can radiate radio frequency energy and, if
not installed and used in accordance with the
instruction manual, may cause harmful
interference to radio communications.
Operation of this equipment in a residental area
is likely to cause harmful interference in which
case the user will be required to correct the
interference at his own expense.
CAUTION
Changes or modifications to this equipment not
expressly approved by TEAC CORPORATION
for compliance could void the user’s authority to
operate this equipment.
The wire which is coloured BLUE must be connected to the terminal
which is marked with the letter N or coloured BLACK.
The wire which is coloured BROWN must be connected to the
terminal which is marked with the letter L or coloured RED.
When replacing the fuse only a correctly rated approved type should
be used and be sure to re-fit the fuse cover.
IF IN DOUBT — CONSULT A COMPETENT ELECTRICIAN.
For Canada
AC POWER CORD CONNECTION
CAUTION:
TO PREVENT ELECTRIC SHOCK, MATCH
WIDE BLADE OF PLUG TO WIDE SLOT,
FULLY INSERT.
CORDE DE CONNEXION CA
ATTENTION:
POUR ÉVITER LES CHOCS ÉLECTRIQUES, INTRODUIRE LA LAME LA PLUS
LARGE DE LA FICHE DANS LA BORNE
CORRESPONDANTE DE LA PRISE ET
POUSSER JUSQU’AU FOND.
For the consumers in Europe
WARNING
This is a Class A product. In a domestic environment, this
product may cause radio interference in which case the user
may be required to take adequate measures.
Pour les utilisateurs en Europe
AVERTISSEMENT
Il s’agit d’un produit de Classe A. Dans un environnement
domestique, cet appareil peut provoquer des interférences
radio, dans ce cas l’utilisateur peut être amené à prendre
des mesures appropriées.
Für Kunden in Europa
Warnung
Dies is eine Einrichtung, welche die Funk-Entstörung nach
Klasse A besitzt. Diese Einrichtung kann im Wohnbereich
Funkstörungen versursachen ; in diesem Fall kann vom
Betrieber verlang werden, angemessene Maßnahmen
durchzuführen und dafür aufzukommen.
2 TASCAM CC-222 Owner’s Manual
Page 3
IMPORTANT SAFETY INSTRUCTIONS
CAUTION:
…Read all of these Instructions.
…Save these Instructions for later use.
…Follow all Warnings and Instructions marked on the audio
equipment.
1) Read Instructions — All the safety and operating instructions should
be read before the product is operated.
2) Retain Instructions — The safety and operating instructions should
be retained for future reference.
3) Heed Warnings — All warnings on the product and in the operating
instructions should be adhered to.
4) Follow Instructions — All operating and use instructions should be
followed.
5) Cleaning — Unplug this product from the wall outlet before cleaning.
Do not use liquid cleaners or aerosol cleaners. Use a damp cloth for cleaning.
6) Attachments — Do not use attachments not recommended by the
product manufacturer as they may cause hazards.
7) Water and Moisture — Do not use this product near water — for
example, near a bath tub, wash bowl, kitchen sink, or laundry tub; in a wet
basement; or near a swimming pool; and the like.
8) Accessories — Do not place this product on an unstable cart, stand,
tripod, bracket, or table. The product may fall, causing serious injury to a
child or adult, and serious damage to the product. Use only with a cart,
stand, tripod, bracket, or table recommended by the manufacturer, or sold
with the product. Any mounting of the product should follow the manufacturer’s instructions, and should use a mounting accessory recommended by
the manufacturer.
9) A product and cart combination should be moved with care. Quick stops,
excessive force, and uneven surfaces may cause the product and cart combination to overturn.
10) Ventila ti on — Slots and openings in the cabinet are provided for ven-
tilation and to ensure reliable operation of the product and to protect it
from overheating, and these openings must not be blocked or covered. The
openings should never be blocked by placing the product on a bed, sofa,
rug, or other similar surface. This product should not be placed in a built-in
installation such as a bookcase or rack unless proper ventilation is provided
or the manufacturer’s instructions have been adhered to.
11) Power Sources — This product should be operated only from the
type of power source indicated on the marking label. If you are not sure of
the type of power supply to your home, consult your product dealer or local
power company. For products intended to operate from battery power, or
other sources, refer to the operating instructions.
12) Grounding or Polarization — This product may be equipped with a
polarized alternating-current line plug (a plug having one blade wider than
the other). This plug will fit into the power outlet only one way. This is a
safety feature. If you are unable to insert the plug fully into the outlet, try
reversing the plug. If the plug should still fail to fit, contact your electrician
to replace your obsolete outlet. Do not defeat the safety purpose of the
polarized plug.
13) Power-Cord Protection — Power-supply cords should be routed so
that they are not likely to be walked on or pinched by items placed upon or
against them, paying particular attention to cords at plugs, convenience
receptacles, and the point where they exit from the product.
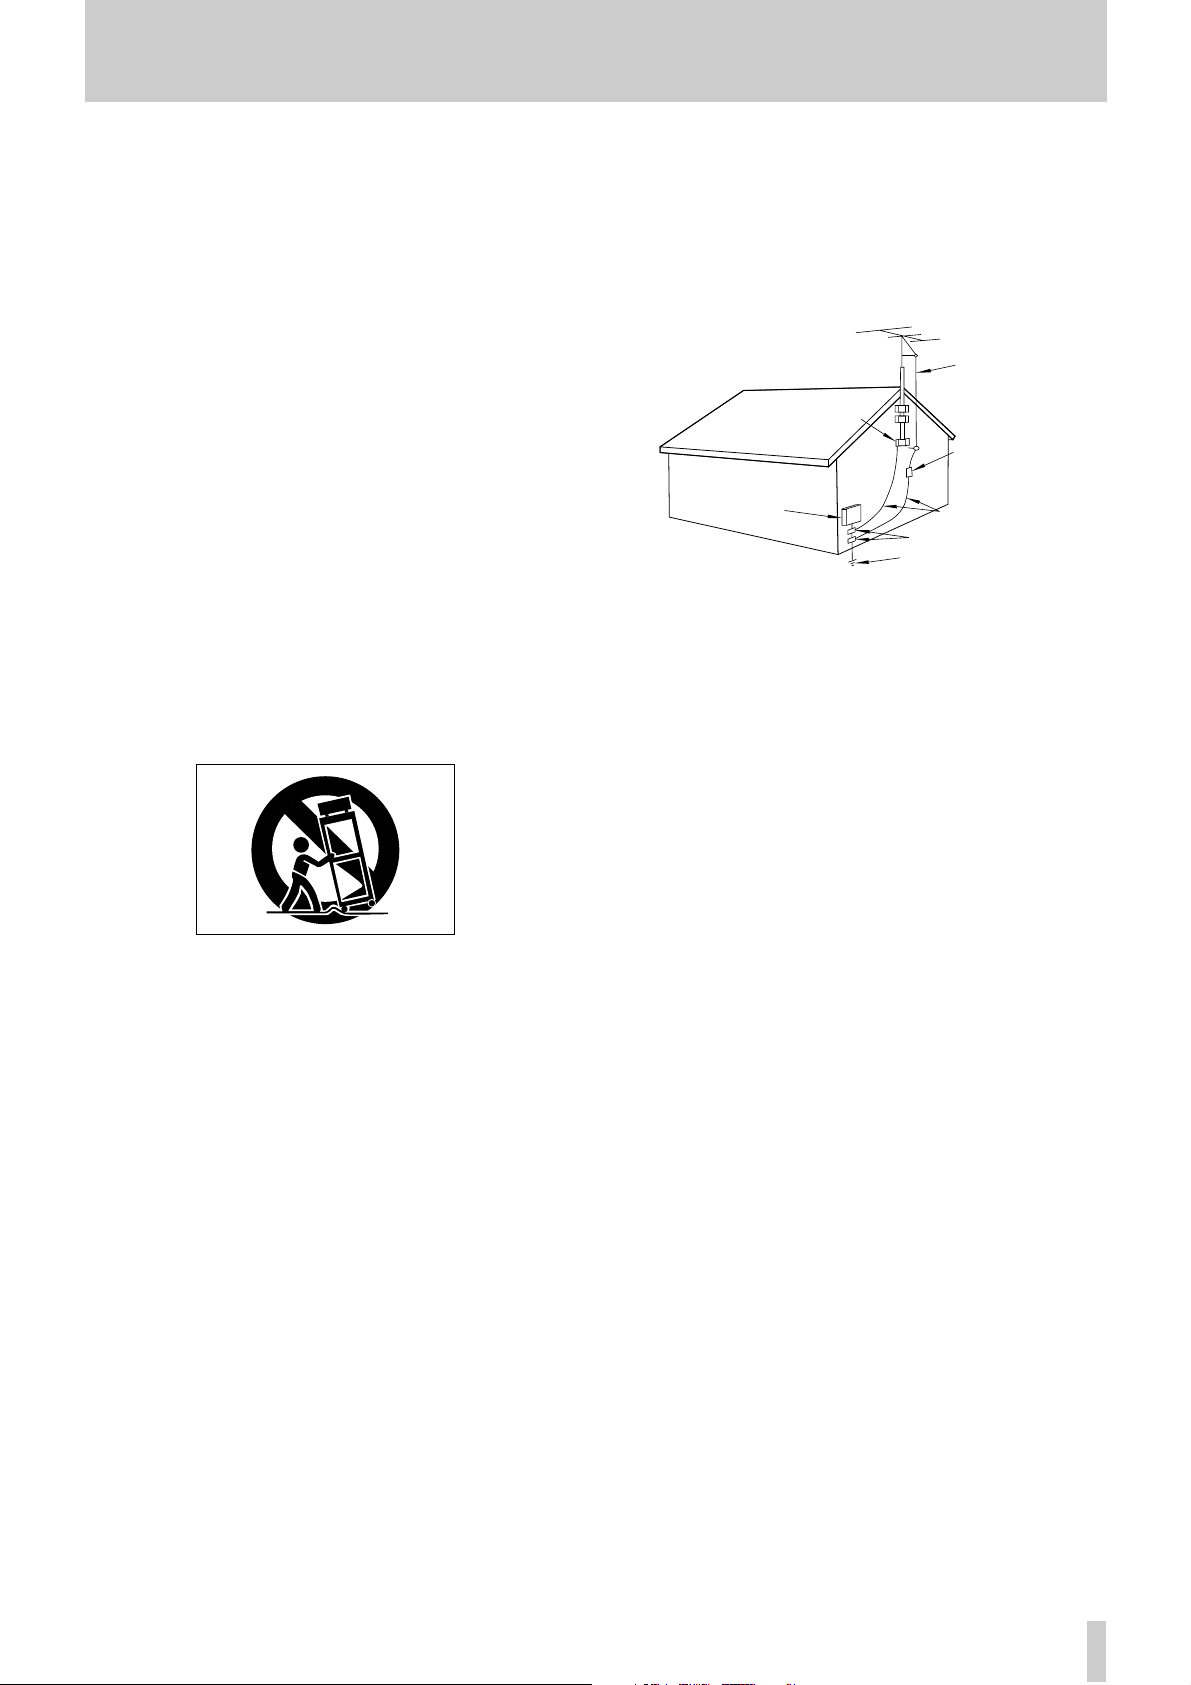
14) Outdoor Antenna Grounding — If an outside antenna or cable
system is connected to the product, be sure the antenna or cable system is
grounded so as to provide some protection against voltage surges and builtup static charges. Article 810 of the National Electrical Code, ANSI/NFPA
70, provides information with regard to proper grounding of the mast and
supporting structure, grounding of the lead-in wire to an antenna discharge
unit, size of grounding conductors, location of antenna-discharge unit, connection to grounding electrodes, and requirements for the grounding electrode.
"Note to CATV system installer:
This reminder is provided to call the CATV system installer’s attention to
Section 820-40 of the NEC which provides guidelines for proper grounding
and, in particular, specifies that the cable ground shall be connected to the
grounding system of the building, as close to the point of cable entry as
practical.
Example of Antenna Grounding as per
National Electrical Code, ANSI/NFPA 70
ANTENNA
LEAD IN
WIRE
GROUND
CLAMP
ANTENNA
DISCHARGE UNIT
(NEC SECTION 810-20)
ELECTRIC
SERVICE
EQUIPMENT
NEC - NATIONAL ELECTRICAL CODE
G
ROUNDING CONDUCTORS
(NEC SECTION 810-21)
GROUND CLAMPS
POWER SERVICE GROUNDING
ELECTRODE SYSTEM
(NEC ART 250. PART H)
15) Lightning — For added protection for this product during a lightning
storm, or when it is left unattended and unused for long periods of time,
unplug it from the wall outlet and disconnect the antenna or cable system.
This will prevent damage to the product due to lightning and power-line
surges.
16) Power Lines — An outside antenna system should not be located in
the vicinity of overhead power lines or other electric light or power circuits,
or where it can fall into such power lines or circuits. When installing an
outside antenna system, extreme care should be taken to keep from touching such power lines or circuits as contact with them might be fatal.
17) Overloading — Do not overload wall outlets, extension cords, or
integral convenience receptacles as this can result in risk of fire or electric
shock.
18) Object and Liquid Entry — Never push objects of any kind into
this product through openings as they may touch dangerous voltage points
or short-out parts that could result in a fire or electric shock. Never spill
liquid of any kind on the product.
19) Servicing — Do not attempt to service this product yourself as open-
ing or removing covers may expose you to dangerous voltage or other
hazards. Refer all servicing to qualified service personnel.
20) Damage Requiring Service — Unplug this product from the wall
outlet and refer servicing to qualified service personnel under the following
conditions:
a) when the power-supply cord or plug is damaged.
b) if liquid has been spilled, or objects have fallen into the product.
c) if the product has been exposed to rain or water.
d) if the product does not operate normally by following the operating
instructions. Adjust only those controls that are covered by the operating
instructions as an improper adjustment of other controls may result in
damage and will often require extensive work by a qualified technician to
restore the product to its normal operation.
e) if the product has been dropped or damaged in any way.
f ) when the product exhibits a distinct change in performance – this
indicates a need for service.
21) Replacement Parts — When replacement parts are required, be
sure the service technician has used replacement parts specified by the
manufacturer or have the same characteristics as the original part.
Unauthorized substitutions may result in fire, electric shock, or other
hazards.
22) Safety Check — Upon completion of any service or repairs to this
product, ask the service technician to perform safety checks to determine
that the product is in proper operating condition.
23) Wall or Ceiling Mounting — The product should be mounted to a
wall or ceiling only as recommended by the manufacturer.
24) Heat — The product should be situated away from heat sources such
as radiators, heat registers, stoves, or other products (including amplifiers)
that produce heat.
TASCAM CC-222 Owner’s Manual 3
Page 4
SAFETY INFORMATION
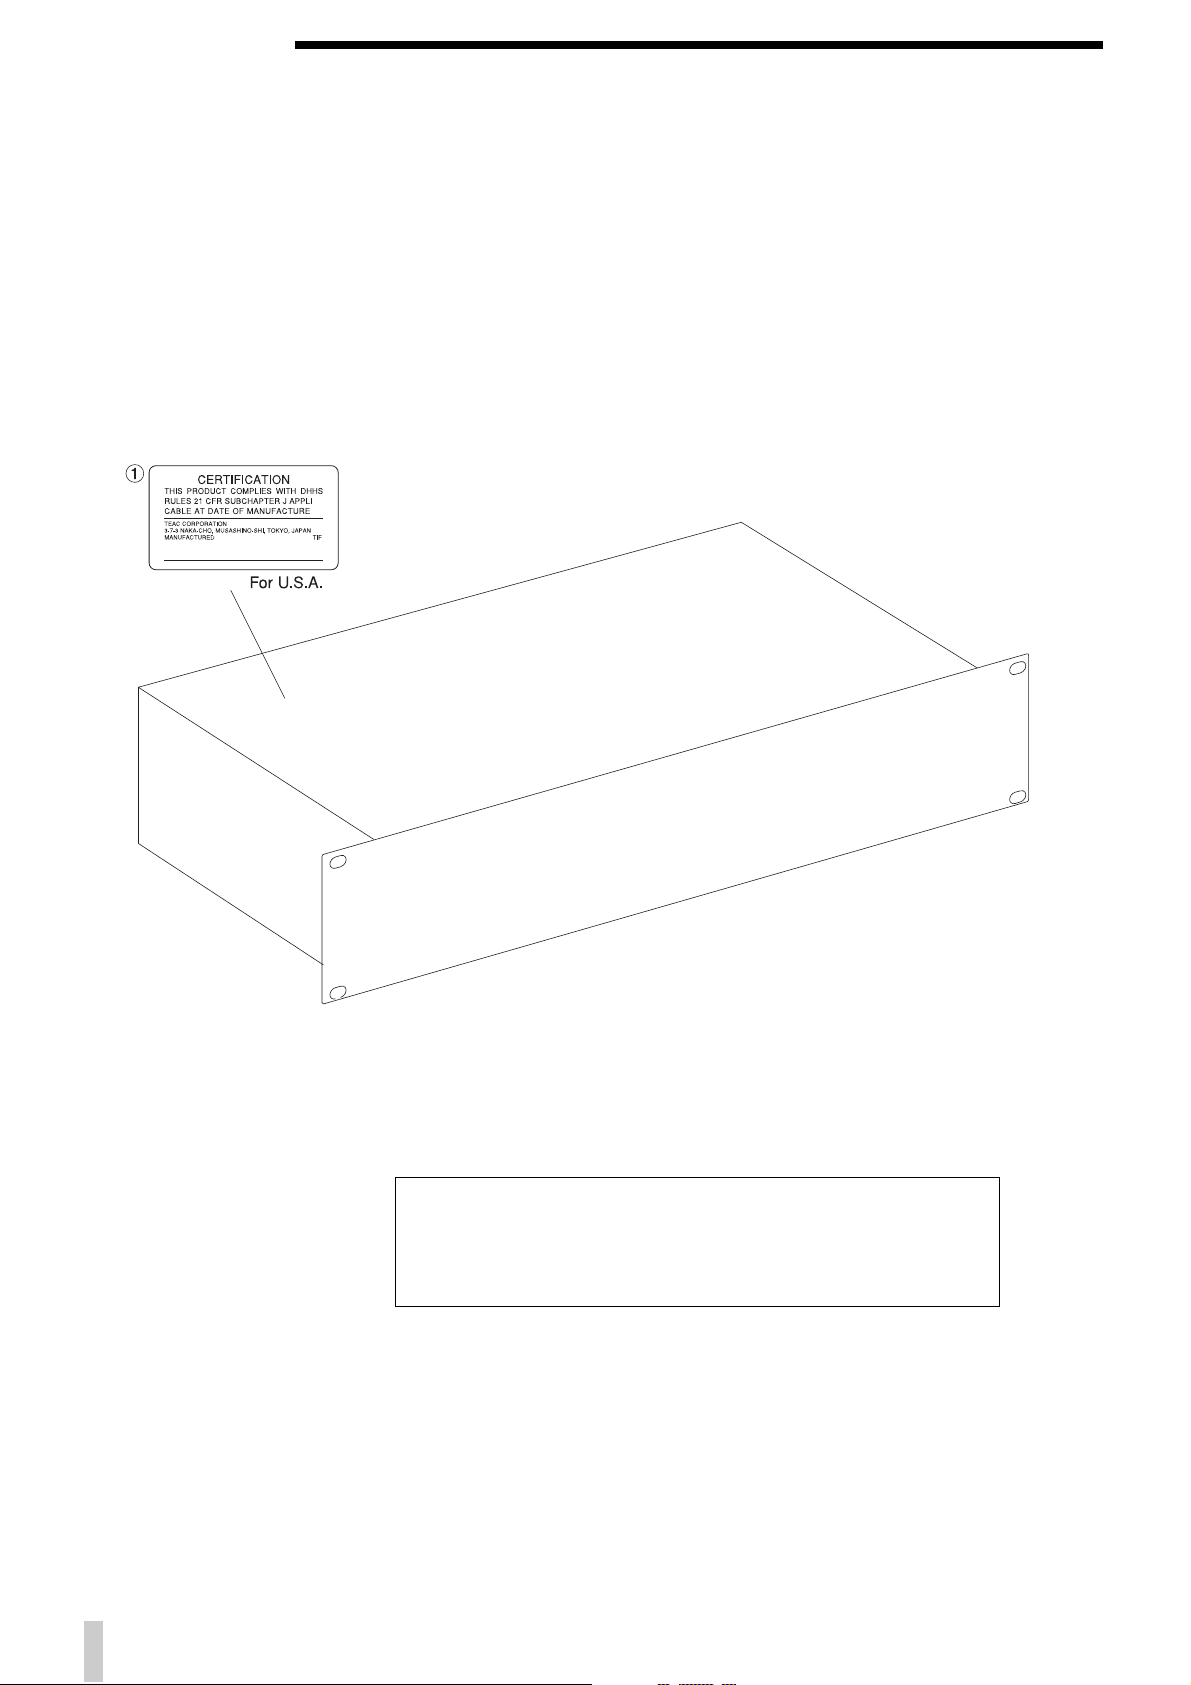
This product has been designed and manufactured according to FDA regulations "title 21, CFR, chapter 1, subchapter J, based on
the Radiation Control for Health and Safety Act of 1968", and is classified as a class 1 laser product. There is no hazardous invisible laser radiation during operation because invisible laser radiation emitted inside of this product is completely confined in the
protective housings.
The label required in this regulation is shown in 1.
CAUTION
- DO NOT REMOVE THE PROTECTIVE HOUSING USING A SCREWDRIVER.
- USE OF CONTROLS OR ADJUSTMENTS OR PERFORMANCE OF PROCEDURES OTHER THAN THOSE SPECIFIED HEREIN MAY
RESULT IN HAZARDOUS RADIATION EXPOSURE.
- IF THIS PRODUCT DEVELOPS TROUBLE, CONTACT YOUR NEAREST QUALIFIED SERVICE PERSONNEL, AND DO NOT USE THE
PRODUCT IN ITS DAMAGED STATE.
Optical pickup: Type : KRS-202A or KRS-220B
4 TASCAM CC-222 Owner’s Manual
Manufacturer : SONY Corporation
Laser output : Less than 0.1 mW (Play) and 32 mW
Laser output : (Record) on the objective lens
Wavelength : 777 - 787 nm
Page 5

Table of Contents
1 – Introduction
Supplied accessories ................................................6
Some notes and precautions .......................6
Rack-mounting the unit .......................................... 7
Environmental considerations ................................7
Beware of condensation ......................................... 7
About tapes .............................................................7
About CD-R and CD-RW discs ................................. 8
Finalizing .......................................................8
“Recordable” discs ...................................................8
Handling of compact discs ......................................9
Additional notes with regard to CD-R and
CD-RW discs .......................................................... 9
Never use a stabilizer or printable discs ................9
Recommended media ............................................10
Use of the remote control unit .............................10
About this manual ......................................10
1, “Introduction” ........................................10
2, “Features and controls” ........................ 10
3, “Cassette operations” ........................... 10
4, “CD player” ............................................10
5, “Recording CDs” ....................................10
6, “After recording” ...................................10
7, “Reference and specifications” ............. 10
2 – Features and controls
Rear panel features ....................................12
Remote control features ............................13
3 – Cassette operations
Playback operations ...................................15
Continuous tape/CD playback ..............................15
Recording operations .................................16
Dubbing tapes from the CD deck ..............16
If the tape is in stop mode ........................ 16
If the tape is in record pause mode ......... 16
Dubbing to tape from the middle of a CD ..........17
Bypassing the INPUT level for dubbing ...............17
Recording tapes from the PHONO deck ...17
Other recording features ...........................18
Recording silences between items .......................18
Erasing tapes .........................................................18
Other tape functions and features ...........18
Tape counter ..........................................................18
Pitch control ........................................................... 18
Fast forward and rewind ...................................... 19
Search keys ............................................................19
4 – CD player
Simple playback operations ......................20
Time display modes ...............................................20
Track search ...........................................................20
Playback modes .......................................... 21
Programmed order playback ............................... 21
Repeat play ................................................. 22
Setting the A and B repeat points ....................... 22
Intro check .................................................. 22
Auto spacing .............................................. 23
5 – Recording CDs
Input selection ............................................ 24
Signal volume ....................................................... 24
Input monitoring .................................................. 24
Frequency conversion .......................................... 24
Basic recording ........................................... 25
Playing back tracks ............................................... 26
Time display while recording .............................. 26
Manual track division ........................................... 26
Restricting the number of tracks ......................... 26
Full disc .................................................................. 26
Dubbing from tape to disc ........................27
Dubbing to CD from the middle of the tape ...... 27
Recording to disc from the RIAA
PHONO inputs .......................................... 27
Advanced recording ................................... 28
Setting the trigger level ....................................... 28
Using the trigger level ......................................... 29
Synchronized recording ....................................... 30
Automatic track division ...................................... 31
Digital direct ......................................................... 32
Rec mute function ................................................ 32
Fade-in and fade-out ............................................ 32
To perform a fade-in: ................................32
To perform a fade-out: ..............................32
Copy-protection ......................................... 33
6 – After recording
Finalizing .................................................... 34
Unfinalizing CD-RW discs ..................................... 34
Erasing ........................................................ 34
Erasing tracks ........................................................ 35
Erasing a whole disc ............................................. 35
Refreshing a disc ................................................... 35
7 – Reference and specifications
Troubleshooting ......................................... 37
Menu items ................................................. 38
Resetting default menu values ............................ 38
Specifications ............................................. 39
CD recorder section .............................................. 39
Cassette recorder section
Phono input and headphones ............................. 40
Dimensional drawing ................................ 41
Tape maintenance ...................................... 41
Cleaning the tape path ............................. 41
Demagnetizing heads ................................ 41
.................... 39
TASCAM CC-222 Owner’s Manual 5
Page 6

1 – Introduction
The CC-222 provides you with an advanced system
for the recording and playback of digital compact
discs and analog cassettes, providing easy duplication facilities in both directions, and combining the
most advanced technology in both fields.
Additional audio units, both analog and digital, can
be connected easily through the rear panel connections, allowing the recording of other sources.
Additionally, the CC-222 is fitted with a dedicated
phono connection, which eliminates the need for an
additional RIAA-equipped amplifier when archiving
vinyl recordings.
TASCAM’s legendary attention to detail provides a
high-quality full-featured cassette tape deck, complete with Dolby noise reduction circuitry.
1
24-bit digital-to-analog and analog-to-digital converters provide excellent recording and playback
quality for the CD recorder.
A sampling frequency convertor is incorporated,
allowing the recording of CDs from digital audio
1. Dolby noise reduction manufactured under
license from Dolby Laboratories Licensing
Corporation.
“DOLBY” and the double-D
trademarks of Dolby Laboratories Licensing
Corporation.
U symbol are
sources which are at frequencies other than the CD
standard sampling frequency of 44.1 kHz.
Disc track divisions can be entered manually, or can
produced automatically as a response to the input
signal level.
“One-touch” fade-ins and fade-outs over a specified
time allow you to edit program material to your specific requirements.
A multi-function “multi dial” is used to set and confirm parameter settings.
A convenient wireless remote control unit provides
additional functionality and permits the operation of
the unit from a distance.
NOTE
This product is designed to help you record and reproduce sound works to which you own the copyright, or
where you have obtained permission from the copyright holder or the rightful licensor. Unless you own the
copyright, or have obtained the appropriate permission
from the copyright holder or the rightful licensor, your
unauthorized recording, reproduction or distribution
thereof may result in severe criminal penalties under
copyright laws and international copyright treaties. If
you are uncertain about your rights, contact your legal
advisor. Under no circumstances will TEAC Corporation
be responsible for the consequences of any illegal copying performed using the CC-222.
Supplied accessories
As well as this manual, you should also find a RC222 remote control unit packed with the unit. Only
use this remote control unit with the CC-222.
Some notes and precautions
Treat the CC-222 as you would any other piece of
precision equipment.
Avoid exposing it to extremes of temperature and
humidity and avoid mechanical shocks and vibration.
Keep the unit away from strong magnetic fields (TV
sets, computer monitors, large electric motors, etc.).
6 TASCAM CC-222 Owner’s Manual
Page 7
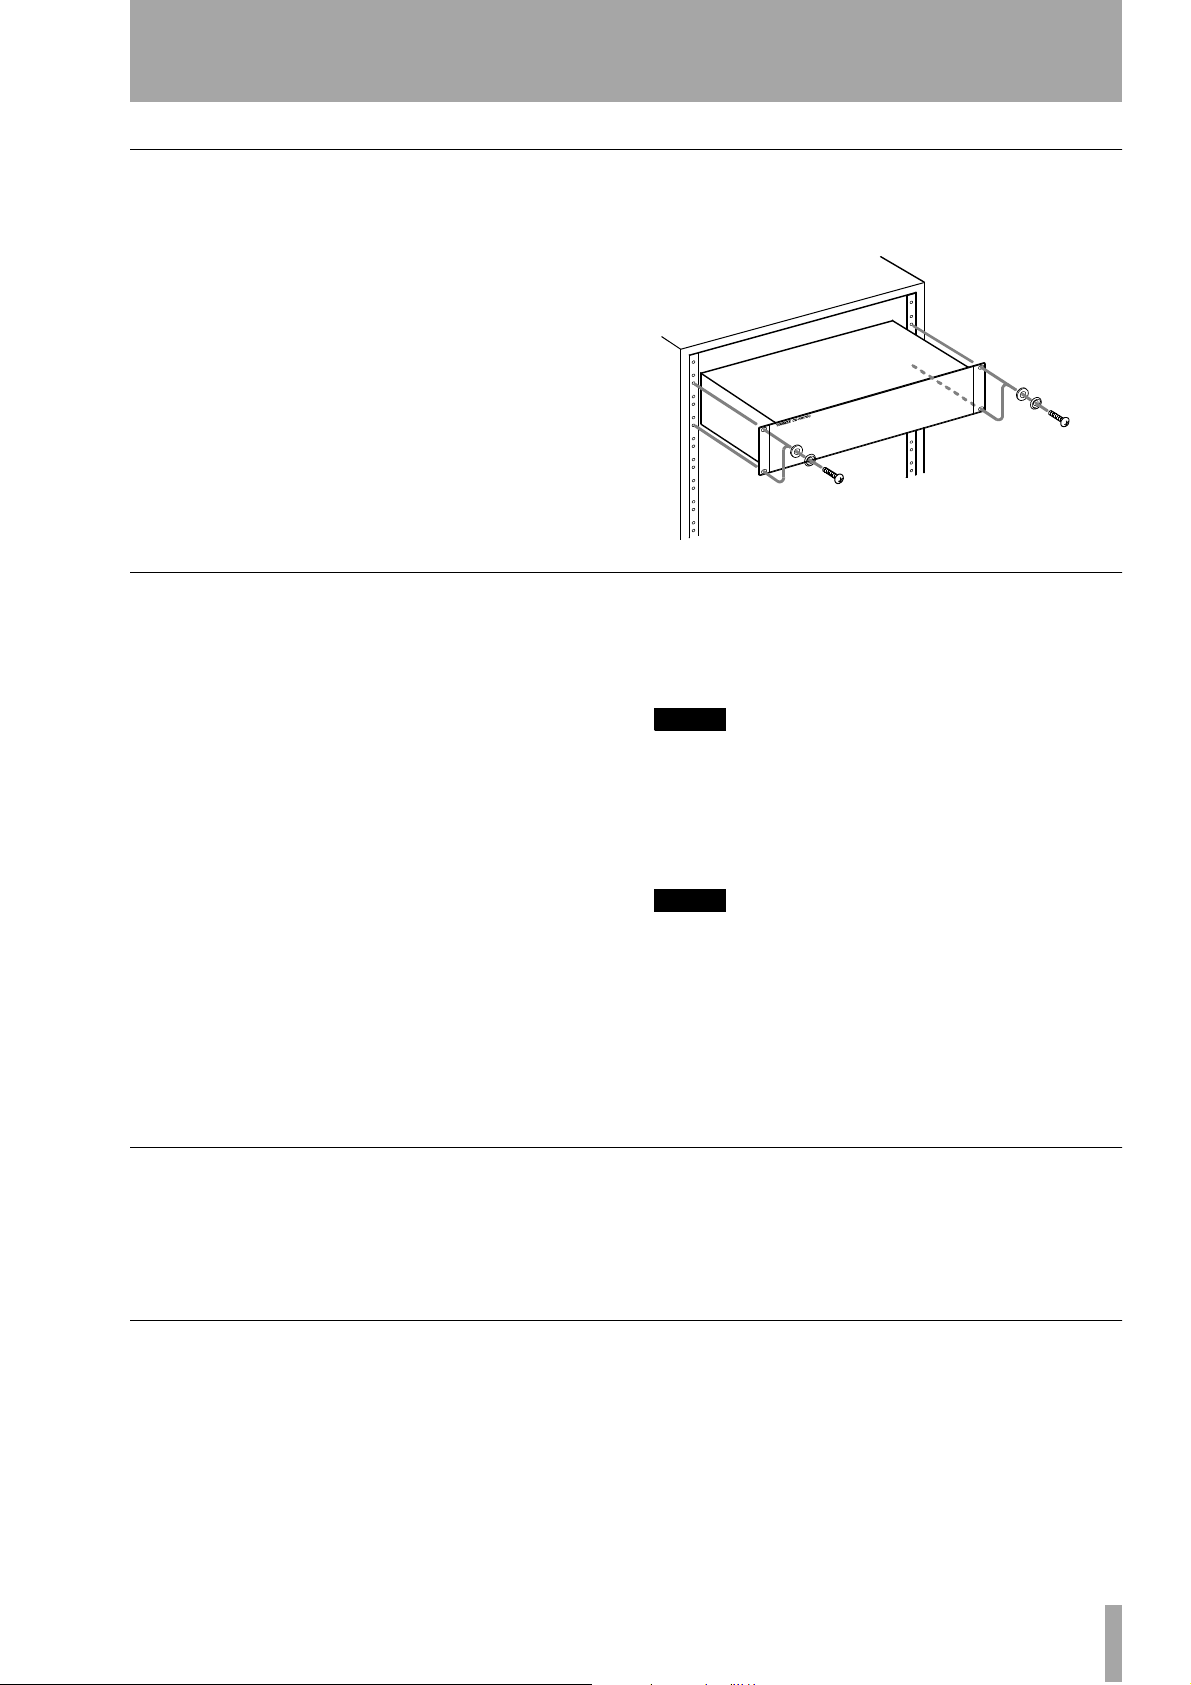
Rack-mounting the unit
1 – Introduction—Some notes and precautions
Use the rack-mounting kit to mount the unit in a standard 19-inch equipment rack, as shown below.
Remove the feet of the unit before mounting it.
Environmental considerations
The CC-222 may be used in most areas, but to maintain top performance, and prolong operating life,
observe the following environmental conditions:
The nominal temperature should be between 5°C and
35°C (41°F and 95°F). The CC-222 is more sensitive
to extremes of temperature than ordinary CD players.
Relative humidity should be 30 to 90 degrees noncondensing.
As the unit may become hot during operation, always
leave sufficient space above the unit for ventilation.
If you are mounting the unit in a rack, leave 1U of
space above it. Allow at least 10 cm (4 in) at the rear
of the unit for ventilation.
You should not place the unit on a piece of equipment generating heat, e.g. an amplifier, to avoid possible problems with overheating.
See “Environmental considerations” on page 7 below
for details of ventilation, etc.
Make sure that the unit is mounted in a level position
for correct operation. Do not mount the unit in a rack
tilted 5° or more from the vertical position.
NOTE
If the mounting surface is more than 5 degrees away
from the horizontal, the tray will not open or close.
The voltage supplied to the unit should match the
voltage as printed on the rear panel. If you are in any
doubt regarding this matter, consult an electrician.
NOTE
When transporting the unit, always use the original
packing materials. For this reason, we strongly recommend that you save all the packing materials that came
with the CC-222, in case you need to transport it in the
future.
In addition, when transporting the unit, you should
tape the disc tray closed, using an adhesive tape that
will not spoil the finish of the unit.
Beware of condensation
If the unit (or a compact disc) is moved from a cold
to a warm place, or used after a sudden temperature
change, there is a danger of condensation; vapor in
the air could condense on the internal mechanism,
About tapes
Do not store tapes in the following places:
• On top of heaters, exposed to direct sunlight, or in
any other places with high temperatures.
• Near speakers, on TV sets or amplifiers or where
they would be exposed to strong magnetic fields.
making correct operation impossible. To prevent this,
or if this occurs, leave the player for one or two hours
with the power turned on, then turn the power off and
on again.
• Where humidity is high, or in dirty, dusty places.
• Avoid dropping or subjecting cassettes to excessive
shocks.
As C-120 tapes are mechanically weak, and could
become entangled in the transport mechanism, we do
not recommend their use.
TASCAM CC-222 Owner’s Manual 7
Page 8
1 – Introduction—Finalizing
For the automatic tape selection function to work
properly, metal and high position (cobalt) tapes must
have the appropriate identification holes.
About CD-R and CD-RW discs
The CC-222 uses CD-R and CD-RW media, and can
also use CD-R and CD-RW Digital Audio media.
In this manual, when we refer to “CD-R” and CDRW” discs, we always include “CD-R Digital Audio”
and “CD-RW Digital Audio”, even when this is not
explicitly stated.
CD-R discs can be recorded once only. Once they
have been used for recording, they cannot be erased
or re-recorded. However, if space is available on the
disc, additional material can be recorded. The packaging of CD-R discs will include one of the following logos:
Note that Type I (normal), Type II (high-position/
chrome) and Type IV (metal) tapes can be played
back. Recording is possible with Type I (normal) and
Type II (high-position/chrome) tapes.
recorded can be erased before the disc has been
“finalized”, and the space on the disc can be re- used
for other recordings. The packaging of CD-RW discs
will include one of the following logos:
However, you should note that an audio CD created
using a CD-RW disc may not play back satisfactorily
on every audio CD player. It will, naturally, be playable on the CC-222. This is in no way a limitation of
the CC-222 itself, but of the difference between the
different types of media and the methods used to read
them.
By contrast, a CD-RW disc can be used in much the
same way as a CD-R disc, but the last track or tracks
Finalizing
Although audio data may be written on a CD-R or
CD-RW disc, a standard CD player will not be able
to read the data (i.e. play back the audio) until a final
table of contents (TOC) has been written at the start
of the disc.
The process of writing this table of contents is known
as “finalizing”. Once this has been done, no further
data can be written to the disk. See “Finalizing” on
page 34 for details.
“Recordable” discs
In this manual, we use the term “recordable” disc to
describe a CD-R or CD-RW disc that has not been
CD-R discs created on the CC-222, by contrast, may
be played satisfactorily on the majority of audio CD
players.
In the case of a CD-RW disc which has been finalized, the whole of the disc may be erased, or the disc
may be “refreshed”, and the disc re-used.
In addition, a CD-RW disc that has been finalized
may be “unfinalized”, i.e. the TOC is removed. This
allows further tracks to be recorded to the disc, provided that there is space on the disc.
finalized, i.e. further recording is possible on the
disc.
8 TASCAM CC-222 Owner’s Manual
Page 9
Handling of compact discs
1 – Introduction—Finalizing
Observe the following:
• Always place compact discs in the tray with their
label facing upward (compact discs can only be
played on one side).
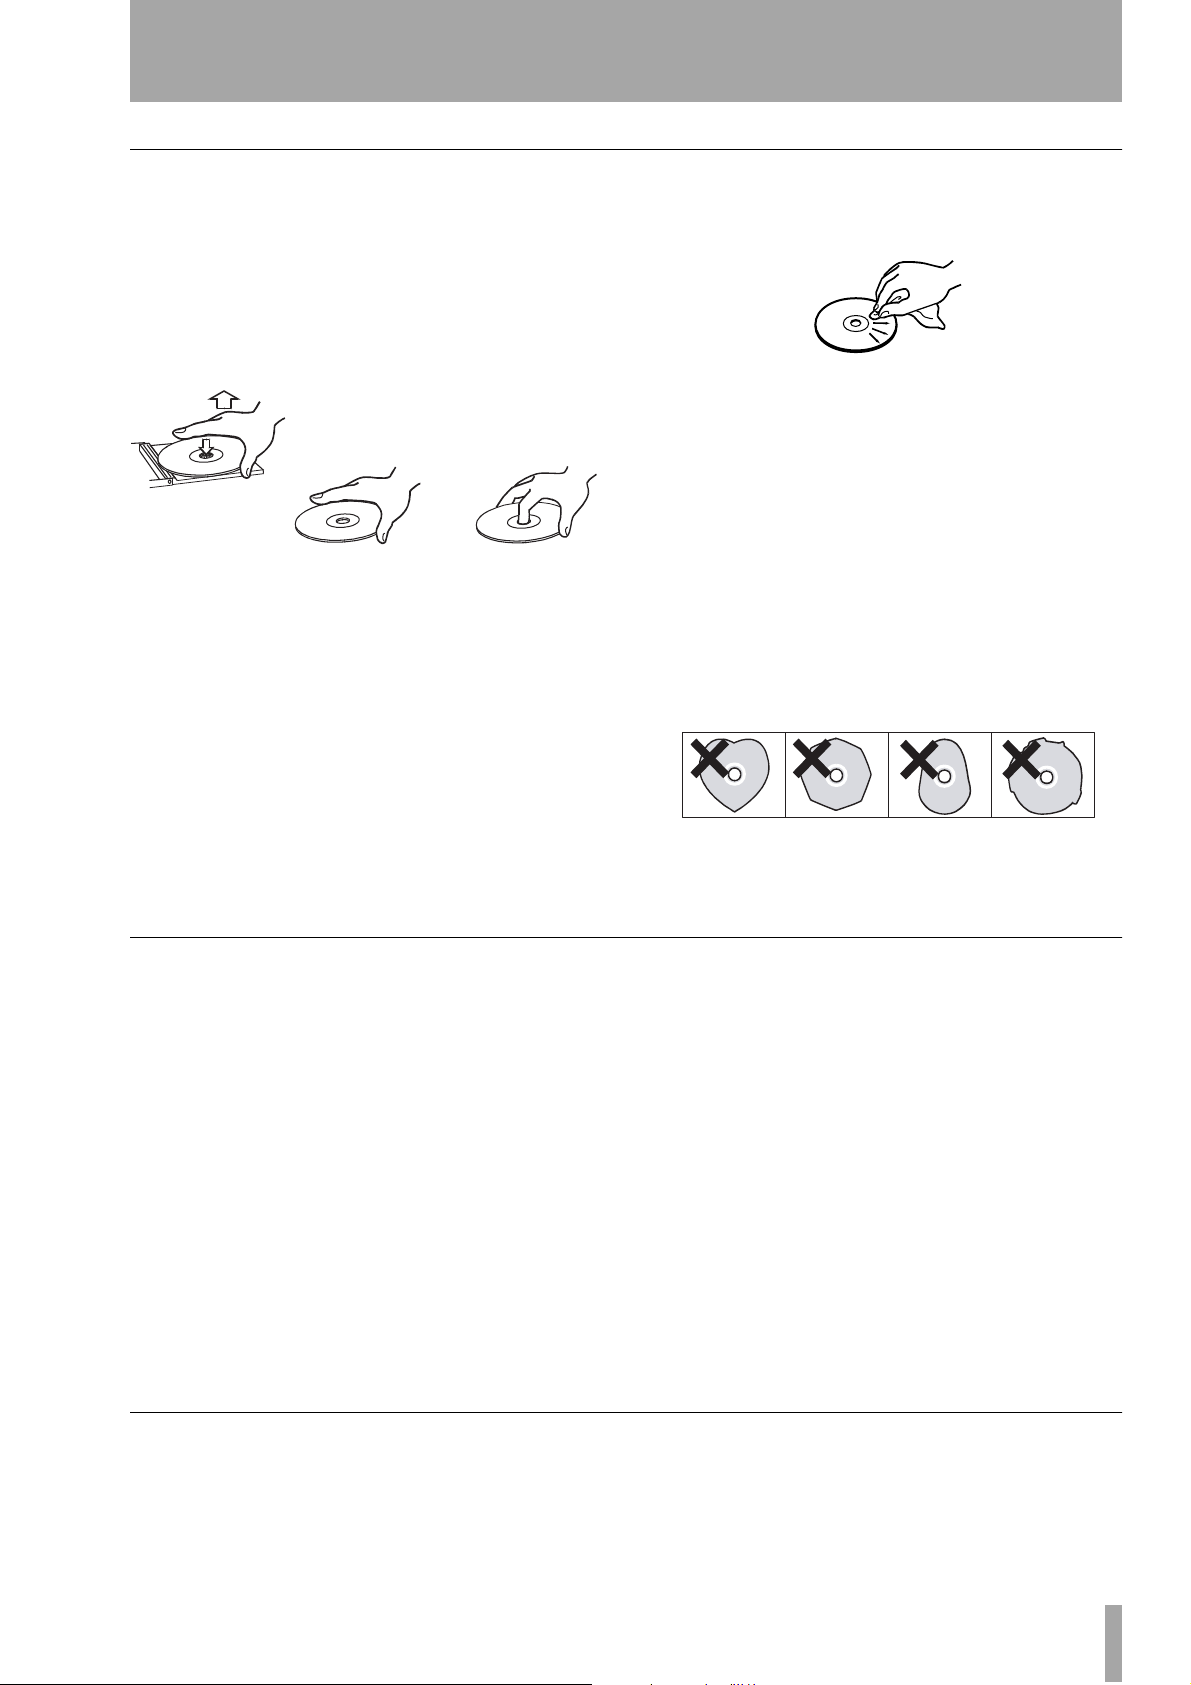
• To remove a disc from its storage case, press down
on the center of the case, and lift the disc out, holding it carefully by the edges.
• Finger marks and dust should be carefully wiped
off the disc’s recorded surface with a soft cloth.
Unlike conventional records, the compact disc has
no grooves to collect dust and microscopic debris,
so gently wiping with a soft cloth should remove
most particles.
• Wipe in a straight motion from the inside to the
outside of the disc. Small dust particles and light
stains will have absolutely no effect on reproduction quality.
• Never use such chemicals as record sprays, antistatic sprays or fluid, benzine or thinner to clean
compact discs. Such chemicals will do irreparable
damage to the disc’s plastic surface.
• Discs should be returned to their cases after use to
avoid serious scratches that could cause the laser
pickup to “skip”.
• Don’t expose discs to direct sunlight or high
humidity and temperature for extended periods.
Long exposure to high temperature can warp the
disc.
• Only use circular compact discs. Avoid using noncircular promotional, etc. discs.
• To keep the laser pickups clean, don’t touch them.
For the same reason, don’t leave the disc trays
opened unnecessarily.
Additional notes with regard to CD-R and CD-RW discs
There are additional precautions that you should take
when handling CD-R and CD-RW discs, that are different to those that you should take when handling
ordinary CDs.
• Avoid touching the recording (non-label) side of a
disc on which you will be recording. Recording on
a disc requires a cleaner surface than playing back,
and fingerprints, grease, etc. can cause errors in the
recording process.
• CD-R discs are more sensitive to the effects of heat
and ultraviolet rays than ordinary CDs. It is important that they are not stored in a location where
direct sunlight will fall on them, and which is away
from sources of heat such as radiators or heat-generating electrical devices.
• Always store CD-R discs in their “jewel cases” to
avoid dirt and dust accumulating on their surfaces.
• Do not put labels or protective sheets on the discs
and do not use any protective coating spray.
• When labeling CD-R discs, always use a soft oilbased felt-tipped pen to write the information.
Never use a ball-point or hard-tipped pen, as this
may cause damage to the recorded side.
• Dirty discs may be cleaned using a soft dry cloth
and/or a commercial CD cleaning fluid or ethyl
alcohol. Do not use thinner, gasoline, benzene or
LP cleaning fluid, as these will damage the disc.
• If you are in any doubt as to the care and handling
of a CD-R disc, read the precautions supplied with
the disc, or contact the disc manufacturer directly.
Never use a stabilizer or printable discs
Using commercially available CD stabilizers or
printable recordable discs with this player will damage the mechanism and cause it to malfunction.
TASCAM CC-222 Owner’s Manual 9
Page 10
1 – Introduction—About this manual
NOTE
Never use a disc that has had a stabilizer mounted to it.
The residual adhesive may cause the disc to stick to the
mechanism of the CC-222. If it sticks to the mechanism,
you will need a technician to get it out.
Recommended media
An up-to-date list of manufacturers who produce
media suitable for use in the CC-222 can be obtained
from your TASCAM dealer.
Use of the remote control unit
When using the remote control unit, make sure:
• There is a clear unobstructed path between the
remote control unit and the remote sensor on the
main unit.
• The remote control unit is located within 5 m
(15 ft.) of the main unit, and is pointing at approximately right angles (±30°) to the front panel.
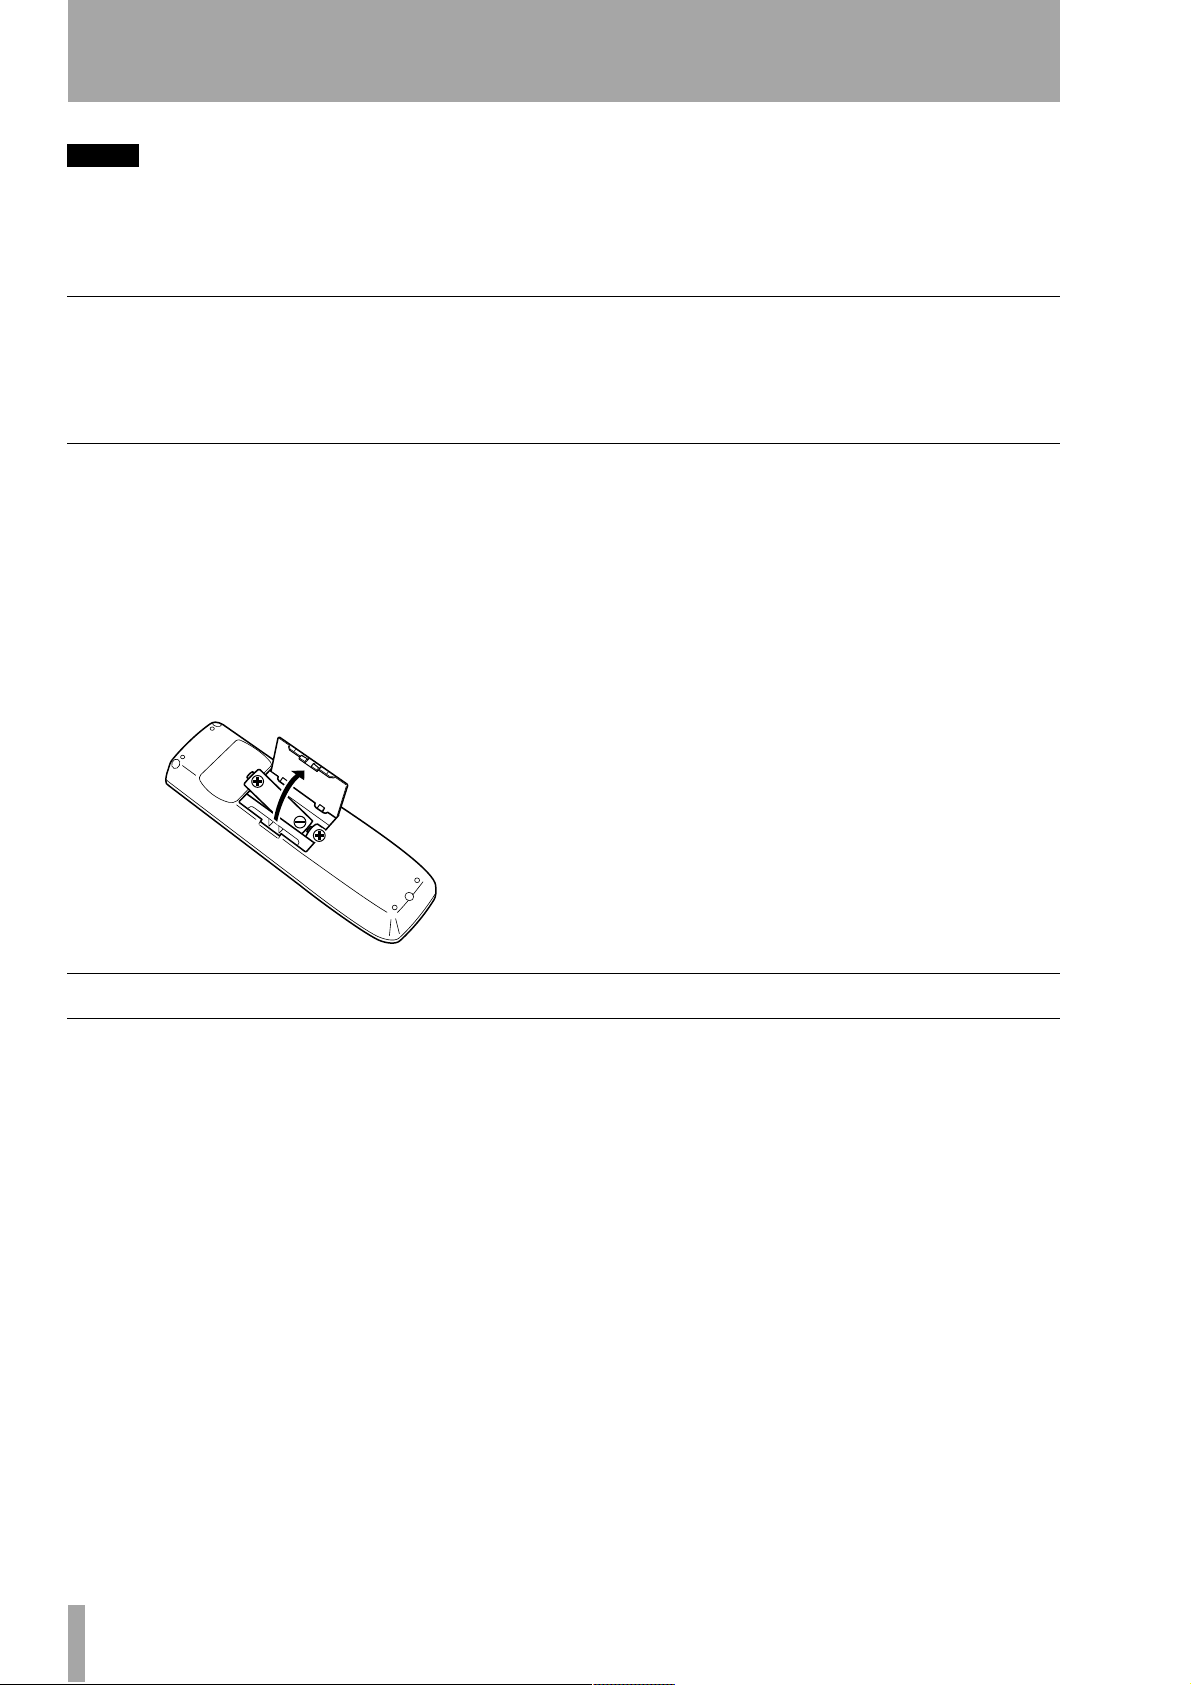
When fitting or replacing the batteries:
About this manual
In this manual, we use the following conventions:
• The names of keys and controls are given in the
following typeface:
• When the alphanumeric portion of the display
shows a message, this is shown in the following
typeface:
• If a preset indicator in the display (i.e. one which
cannot change, but is either on or off) is shown, this
is shown as follows:
Welcome.
ERASE.
RANDOM
.
• Always make sure that both batteries are replaced
together. Do not mix old and new batteries.
• Do not mix batteries of different types.
• Always make sure that the batteries are located
with the correct polarity (the positive terminals of
the batteries should match the
the battery compartment, and the negative terminals should match the
• If you are not going to use the remote control unit
for an extended period of time, remove the batteries. Old batteries can leak, casing damage to the
remote control unit.
• Always dispose of old batteries in the way recommended by your local garbage disposal authorities.
– markings).
+ markings inside
3, “Cassette operations” Includes dubbing to
cassette from CD as well as other cassette-based
playback and recording operations.
4, “CD player” About CD playback, including
programmed and repeat playback functions
5, “Recording CDs” About recording CDs,
including dubbing from cassette to disc, as well as
other CD recording functions.
The sections of this manual are arranged as follows:
1, “Introduction” This section, introducing the
features and concepts of the CC-222.
2, “Features and controls” The front and rear
panel controls, indicators and connections, as well as
a description of the remote control unit.
10 TASCAM CC-222 Owner’s Manual
6, “After recording” More information regard-
ing the finalizing of discs and the erasing and refreshing of CD-RW media.
7, “Reference and specifications” Some
troubleshooting tips, together with menu default settings, and the facts and figures about the CC-222.
Page 11
2 – Features and controls
This is not a comprehensive explanation of the meaning and functions of all of the controls. These are
described more comprehensively in other parts of the
manual, but this section provides a brief reminder of
the functions provided by these controls.
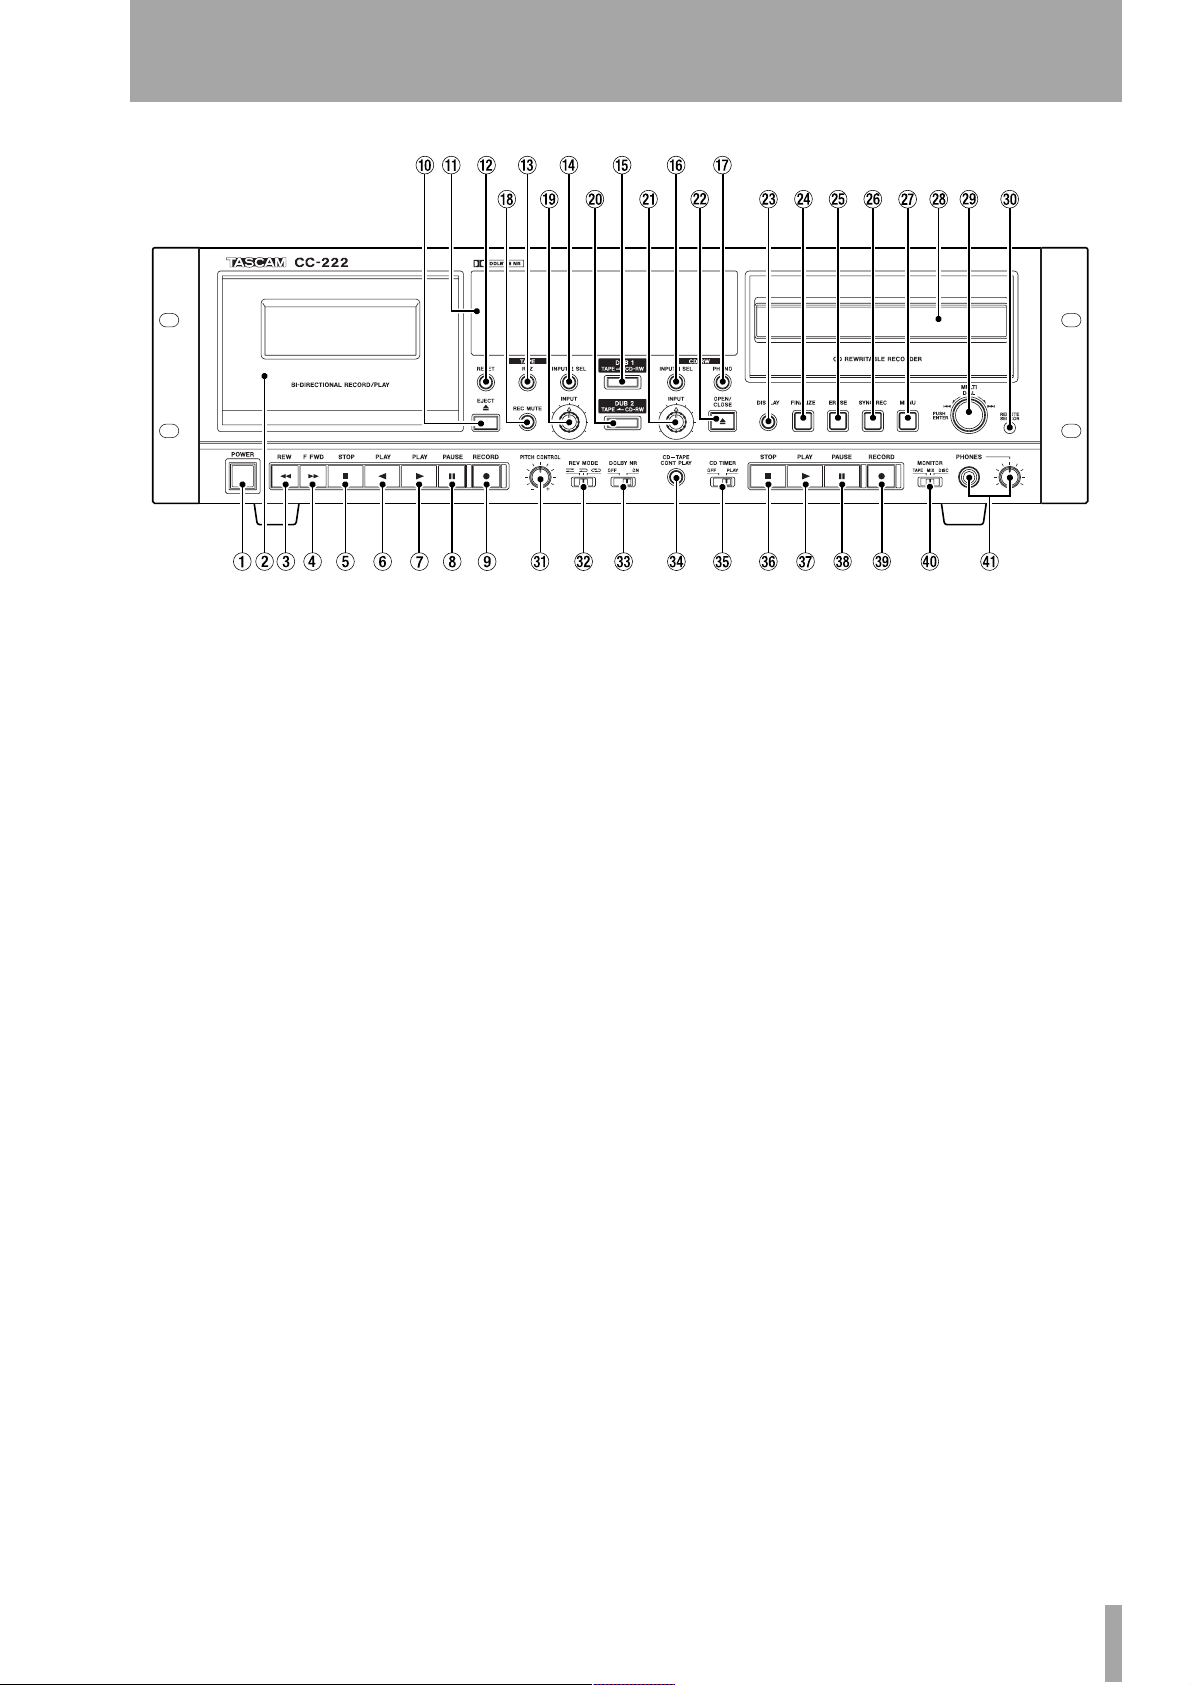
1 Power switch (POWER) Push to turn on,
and push again to turn the unit off.
2 Cassette holder Open this holder using the
EJECT key. Insert cassettes tape side downwards,
and close the holder by hand.
3 REW key Starts the tape moving fast in the
right-to-left direction. If the tape is already in play
mode, it acts as a search key.
4 FFWD key Starts the tape moving fast in the
left-to-right direction. If the tape is already in play
mode, it acts as a search key.
5 Tape STOP key Stops the current tape
transport operation.
6 Tape PLAY key (h) Starts tape playback,
or recording from record pause, from right to left.
7 Tape PLAY key (y) Starts tape playback,
or recording from record pause, from left to right.
8 Tape PAUSE key Pauses tape playback or
recording.
9 Tape RECORD key Goes from tape stop to
tape record pause mode.
A Tape EJECT key Opens the cassette holder.
B Display Provides information on the status of
the cassette and disc transport and the selected input
sources, etc.
C RESET key Resets the tape counter to zero.
D RTZ key Returns the tape to the zero position.
E INPUT 2 SEL key Repeated presses of this
key cycle between the different sources available for
the cassette recorder:
LINE2, and DISC.
F DUB 1 TAPE>CD-RW key Starts the
process of automatic recording from the cassette to a
recordable disc. See the section on recording to disc
for full details.
G INPUT 1 SEL key Repeated presses of this
key cycle between the different sources available for
the CD-RW drive:
OPTICAL, and COAXIAL
LINE1, PHONO, TAPE,
H PHONO key Starts recording from the phono
source to the cassette or disc recorder, depending on
the selection made in the menu system. See the
appropriate sections on recording to either tape or
disc.
I REC MUTE key When recording to cassette
and this key is pressed, the sound is muted for about
four seconds, and the unit enters record pause mode.
J INPUT (cassette) control This rotary
control affects the level fed to the cassette. Note that
it has no effect during automatic disc-to-tape dubbing
if the menu item bypassing the volume during dubbing is set to “through”.
K DUB 2 TAPE<CD-RW key Starts the
process of automatic recording from the disc to tape.
See the section on recording to tape for full details.
L INPUT (CD) control This rotary control
affects the level fed to the disc. Note that it has no
effect during automatic tape-to-disc dubbing if the
menu item bypassing the volume during dubbing is
set to “through”.
TASCAM CC-222 Owner’s Manual 11
Page 12
2 – Features and controls—Rear panel features
M OPEN/CLOSE key Opens and closes the
disc tray.
N DISPLAY key Changes the time display for
the disc recording and playback.
O FINALIZE key Used when finalizing record-
able discs.
P ERASE key Used when erasing data from
CD-RW discs.
Q SYNC REC key Turns synchronized record-
ing of the disc recorder on and off.
R MENU key Repeated presses of this key cycle
through the different menu options.
S MULTI DIAL Used to select and confirm
menu settings etc. (turn to make the setting, push to
confirm), and also as a track search facility when
playing back discs.
T Disc tray Open and close this tray with the
OPENCLOSE key M to load and unload discs.
U REMOTE SENSOR window Receives the
infra-red signals from the remote control unit. Do not
block this window if you are using the remote control
unit.
V PITCH CONTROL knob This is a center-
detented knob which allows the tape speed (and
therefore the pitch) to be changed by ±12%.
W REV MODE switch This three-position
switch allows the choice of single-side or bidirec-
tional playback and recording (Ä or Ê), or (ä)
continuous playback only (not recording).
X Dolby NR (OFF/ON) switch Use this
switch to turn the Dolby noise reduction off and on
for the cassette deck.
Y CD-TAPE CONT PLAY switch Use this
to turn continuous playback (alternating between
disc and cassette) on and off.
Z CD TIMER (OFF/PLAY) switch Use this
switch to turn the CD timer option on or off (when
this is in the
with a disc inserted will automatically start playback.
PLAY position, turning on the machine
a CD STOP key Stops CD playback or disc
recording,
b CD PLAY key Starts CD playback or record-
ing (from record ready mode).
c CD PAUSE key Pauses or unpauses CD
playback or recording (starts recording from record
pause mode).
d CD RECORD key places the disc in record
ready mode and performs manual track incrementing
while recording.
e MONITOR (TAPE 1/1+2/2 DISC)
switch
phone outputs as either the cassette deck, the disc
recorder, or a mixture of both.
This switch selects the source for the head-
f PHONES jack and volume control
Connect a standard pair of stereo headphones to this
1/4” jack, and adjust the level with the control.
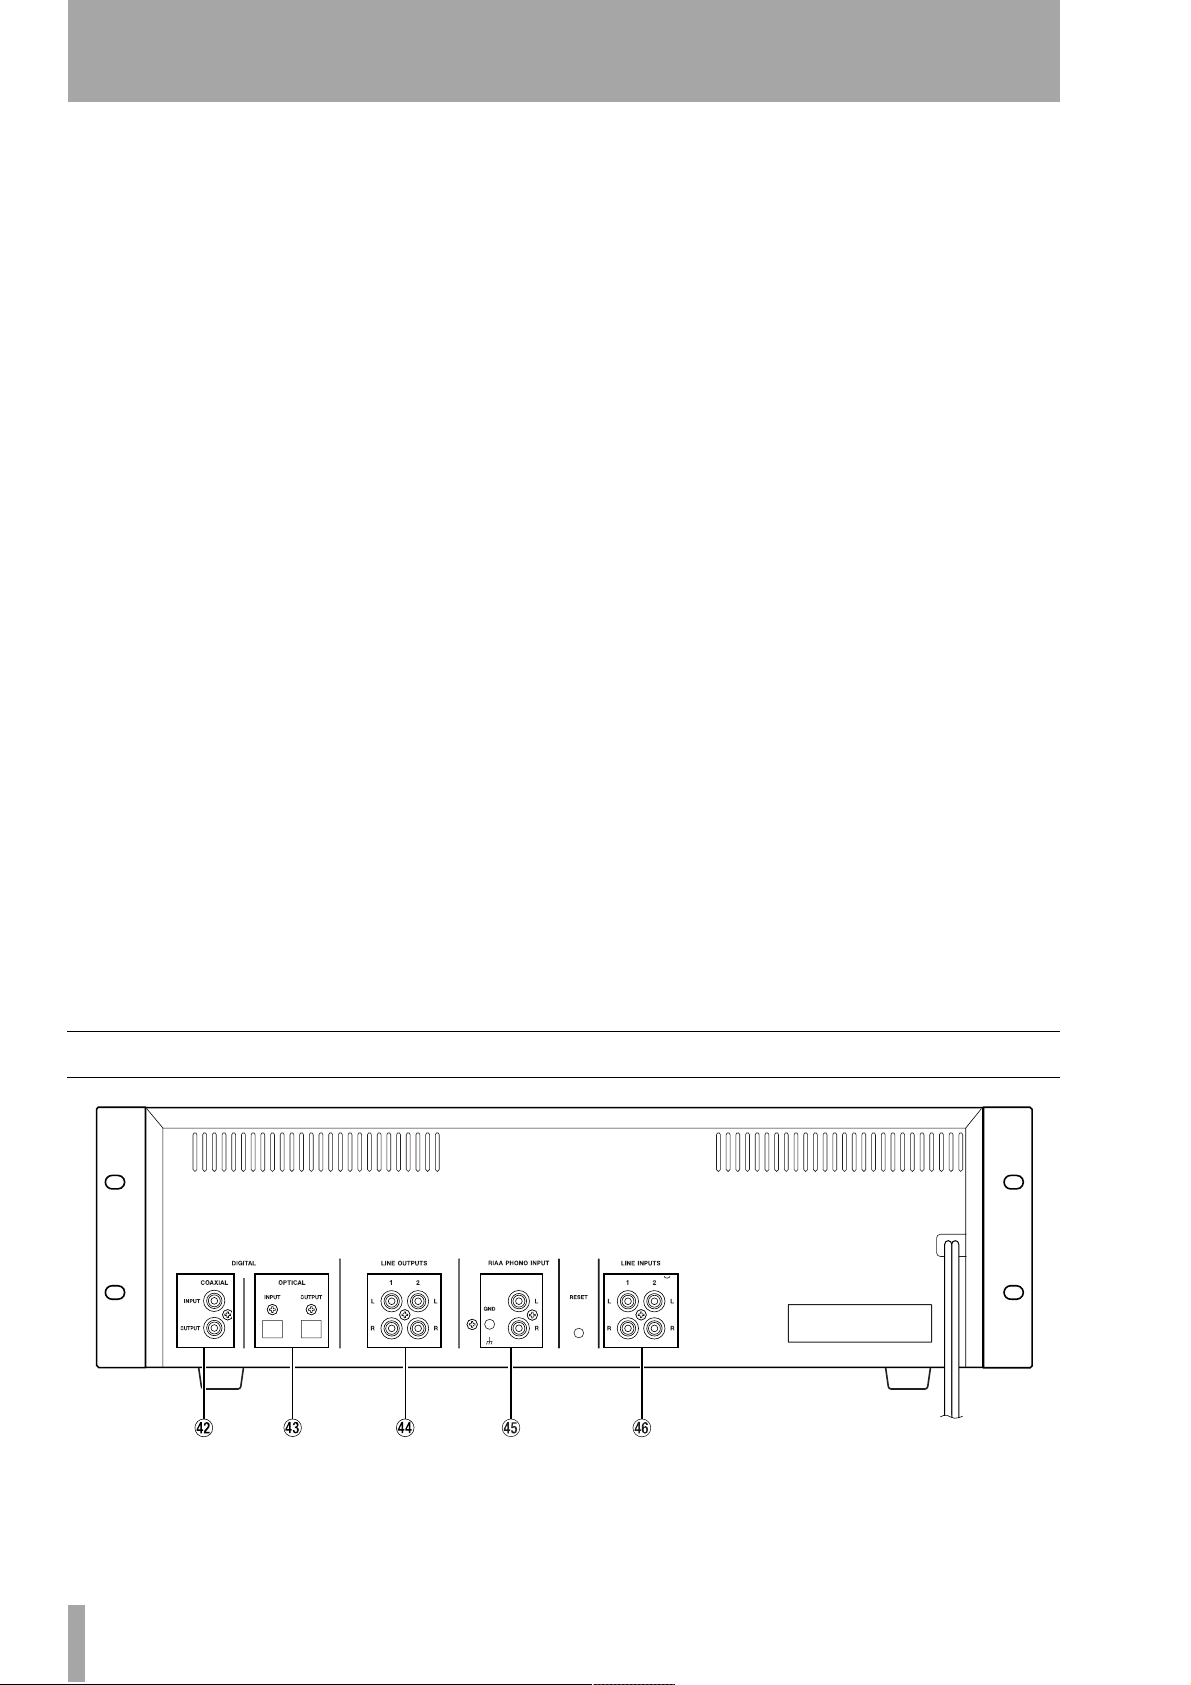
Rear panel features
The CC-222 line analog inputs and outputs all operate at the –10dBV level. For details of input and out-
12 TASCAM CC-222 Owner’s Manual
put impedances, etc., consult the specifications.
Page 13
2 – Features and controls—Remote control features
g DIGITAL COAXIAL (INPUT and
OUTPUT) jacks
(
INPUT) and transmit (OUTPUT) SPDIF digital
audio data to and from the disc recorder.
Digital audio data received can be at any sampling
frequency between 32 kHz and 48kHz. The output is
always 44.1kHz.
These RCA jacks accept
h DIGITAL OPTICAL (INPUT and
OUTPUT) jacks
connectors accept (INPUT) and transmit (OUTPUT)
SPDIF digital audio data to and from the disc
recorder.
Digital audio data received can be at any sampling
frequency between 32 kHz and 48kHz. The output is
always 44.1kHz.
These TOSLINK-compatible
i LINE OUTPUTS (1, 2) (L, R) Use these
connectors to connect the amplifier to the analog outputs of the disc recorder (
sette deck (
2).
1) or the outputs of the cas-
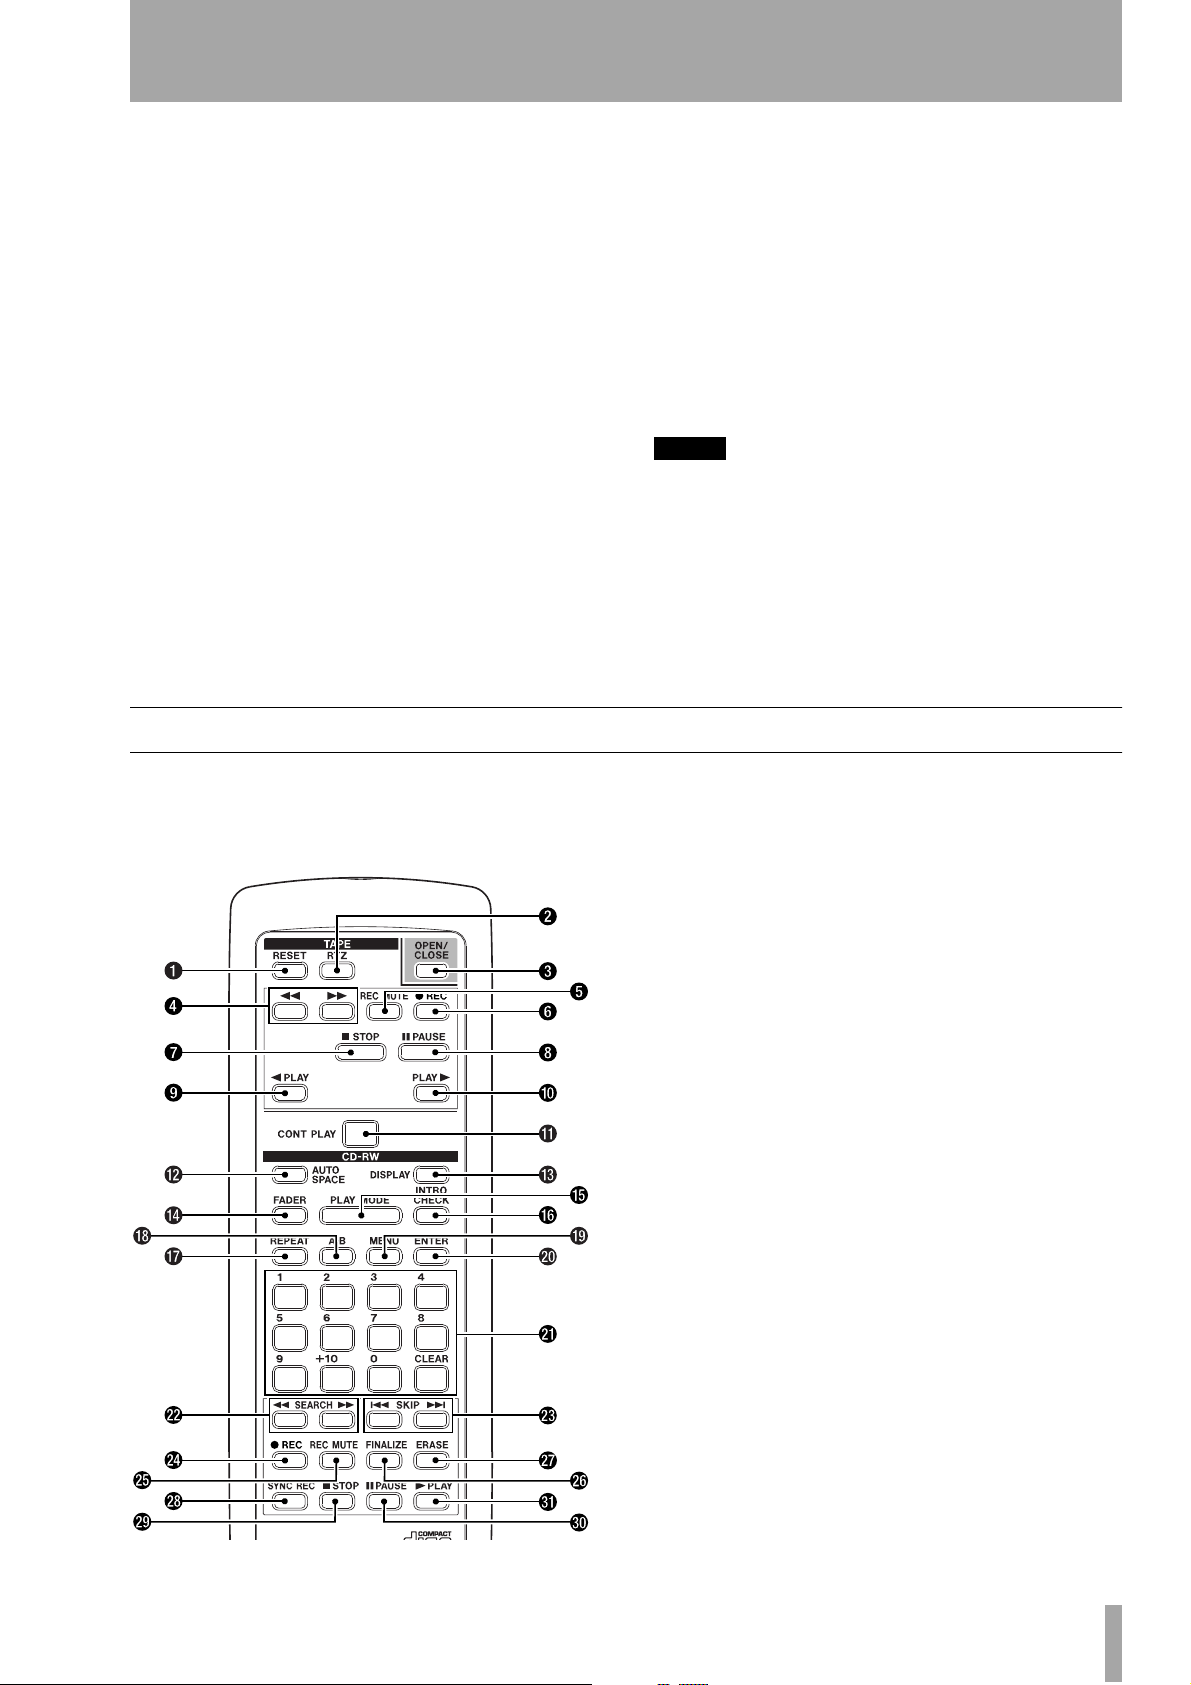
Remote control features
LINE OUTPUTS 2 output both the signals from the
disc recorder and the cassette deck. However, if both
are playing, the cassette deck takes priority (the disc
recorder will not be heard).
j RIAA PHONO INPUT (L, R) and GND
terminal
deck to the CC-222. The destination of the signal is
determined by a menu item.
Connect the earth (grounding) wire of the record
deck to the
NOTE
It
Do not connect a record deck to the
do not connect any other equipment to these jacks.
Use these connectors to connect a record
GND terminal.
LINE
inputs and
k LINE INPUTS (1, 2) (L, R) Use these con-
nectors to connect signal sources to the analog inputs
of the disc recorder (
deck (
2).
1) or the inputs of the cassette
For the most part, the remote control unit duplicates
the front panel controls, with a few differences, as
explained here:
1 RESET key Performs the same function as
C
2 RTZ key
Performs the same function as D.
3 OPEN/CLOSE key Performs the same
function as A.
4 Wind/search keys (m, ,) Perform
the same functions as 3 and 4.
5 REC MUTE key Performs the same func-
tions as I.
6 REC key Performs the same functions as 9.
7 STOP key Performs the same functions as
5.
8 PAUSE key Performs the same functions as
8.
9 PLAY key (h) Performs the same functions
as
6.
A PLAY key (y) Performs the same functions
as 7.
B CONT PLAY key Performs the same func-
tions as Y.
C AUTO SPACE Automatically adds a space of
about four seconds between disc tracks on playback.
D DISPLAY key Performs the same functions
as
N.
TASCAM CC-222 Owner’s Manual 13
Page 14

2 – Features and controls—Remote control features
E FADE R key Used to perform automated
fade-in and fade-out when recording to disc. The
time is set using menu items.
F PLAY MODE key Allows the selection of
either normal, single, programmed or random playback.
G INTRO CHECK Allows the first 10 seconds
of every track on a disc to be played before automatically moving on to the next track to be played.
H REPEAT key Enables or disables repeat
mode (single track, or disc repeat playback) of the
CD.
I A-B key Used to set the start and end points of
a repeat loop and to cancel such a loop.
J MENU key Performs the same functions as
R.
K ENTER key Performs the same functions as
pushing the
MULTI DIAL (S).
L Number keys (0 through 10, +10, and
CLEAR)
disc playback.
Used for entering track numbers for
M SEARCH keys Used for “fast forward” and
“fast reverse” through a disc.
N SKIP keys Perform the same functions as
turning the
selecting menu parameter values).
MULTI DIAL S (selecting tracks and
O REC key Performs the same function as d.
P REC MUTE key Inserts a silence of about
four seconds and pauses recording when recording to
disc.
Q FINALIZE key Performs the same functions
as
O.
R ERASE key Performs the same functions as
P.
S SYNC REC key Performs the same func-
tions as
Q.
T STOP key Performs the same functions as
a.
U PAUSE key Performs the same functions as
c.
V PLAY key Performs the same functions as b.
14 TASCAM CC-222 Owner’s Manual
Page 15

Note the following when loading tapes:
1 Use your finger or a pencil to turn the cas-
sette's hub and take up any slack tape.
Playback operations
3 – Cassette operations
NOTE
Avoid touching the tape. Fingerprints attract dust and
dirt.
2 Press the EJECT key to open the cassette
compartment door.
3 Load the cassette tape with its open edge fac-
ing down.
4 Gently close the compartment door.
NOTE
*Notes:
The cassette holder cannot be opened during recording
or playback.
If the power has been switched off during play or
recording, ejecting the cassette may be impossible. In
such a case, switch the power on and press the
key again.
EJECT
1 With the power on, set the REV MODE switch
to the required tape mode.
u
j
p
Single-sided playback
One side, then the other side, then stop
One side, then the other side, then the first side again,
etc.
Continuous tape/CD playback
1 Load the tape (as described above) to be
played back into the unit. Load the disc (use
the
OPEN/CLOSE key and load the disc
recorded side downwards and close the tray).
2 Press the
3 Press either of the
deck, or the
Playback will start on the appropriate unit.
When playback reaches the end of the disc,
or the end of the tape (either one side or two
CD-TAPE CONT PLAY key.
PLAY keys of the tape
PLAY key of the CD deck.
2 Load a pre-recorded cassette with its open
edge facing down and side A facing toward
you.
3 Set the Dolby NR system on or off.
4 Press either
PLAY key to start playback.
5 Adjust the volume with the amplifier's vol-
ume control.
6 To stop playback, press the
sides, as determined by the
STOP key.
REV MODE set-
ting), playback starts on the other unit.
Media (tape or disc) can be changed in the unit that is
not playing.
NOTE
The cassette deck and CD deck can be used to play back
through different outputs, or the
jacks can be used for both disc and tape playback. However, note that if both are playing, the cassette takes
priority (the disc will not be heard through these outputs). Disc playback is always through the
OUTPUTS 1
jacks.
LINE OUTPUTS 2
LINE
TASCAM CC-222 Owner’s Manual 15
Page 16

3 – Cassette operations—Recording operations
Recording operations
NOTE
CAUTION
Recording pre-recorded tapes, records, or
lished or broadcast material may infringe copyright laws.
Check before recording.
other pub-
1 With the power on, set the REV MODE
.
switch
If you want to make a bi-directional recording, set the
REV MODE switch to the j or
p position.
Set to the u (single side) position if recording is to be made on a single side of the tape.
2 Load a recordable cassette. Check that the
safety tabs on the spine of the cassette are in
place. If they have been broken off, block the
holes with adhesive tape.
3 Press the
source (either
When
INPUT 2 SEL key to select the
LINE2 or DISC).
DISC is selected, the built-in CD
player's output is selected as a source.
When
LINE2 is selected, the external signal
from the
LINE 2 jacks is selected as a source.
4 Set the Dolby NR system on or off.
5 Press the
RECORD key. The deck enters
record pause mode (the display indicators
light).
6 Play back the source, and adjust the record-
ing level with the
INPUT level control so that
the loudest sound to be recorded just makes
the meters briefly reach around the “0 dB”
point for normal or high-position tapes
(recording is not possible with metal tapes).
7 Press either the PAU SE or PLAY key to start
recording.
To stop recording temporarily, press the
PAU SE key. To restart the tape, press either
the PAU SE key or either of the PLAY keys.
When the unit is in record pause mode, if the
PLAY key whose indicator is lit is pressed
recording will restart. If the PLAY key whose
indicator is unlit is pressed, the recording
direction will reverse, and the
PLAY key must
be pressed again to restart recording.
To stop recording, press the
STOP key.
Dubbing tapes from the CD deck
To record from the internal CD deck:
1 Prepare for recording as described above
(load a tape, set the
2 Load the source CD disc (press
CLOSE
, put the disc in the tray, recorded
side downwards, and close the tray).
3 Use the
to
MENU key to set the dubbing volume
THRU to bypass the input level control
(see “Bypassing the INPUT level for dubbing” on page 17).
NOTE
If you want to record the tracks on the tape in a different order from those on the disc, use the programmed
playback mode to rearrange the tracks (“Programmed
order playback” on page 21). Leave the disc in stop
mode when you have finished programming the order.
4 Press the DUB 2 key.
REV MODE, etc.).
OPEN/
If the tape is in stop mode If the tape is in
stop mode, the tape rewinds to the beginning of the
current side.
At the start of the tape, recording starts, but the CD
does not start playback for eight seconds (this is to
allow for the leader tape at the start of a cassette).
DUB
The
indicator flashes.
The CD starts playback after the eight seconds at the
DUB
start of the cassette. The
indicator lights steadily.
If the tape is in record pause mode If the
tape is in record pause mode, recording starts immediately, and the CD starts playback immediately. The
DUB
indicator lights.
If you want to adjust the input volume, set
DUB>VOL menu to ON and use the left
the
(tape)
INPUT control to adjust the level of sig-
nals fed to the tape from the CD player.
16 TASCAM CC-222 Owner’s Manual
Page 17

3 – Cassette operations—Recording tapes from the PHONO deck
The dubbing stops when playback reaches the end of
the CD, or when the tape reaches the end of its run
(one side in the case of single-sided (u) reverse
mode, both sides in the j reverse mode), whichever comes first.
Note that if the tape is set to auto-reverse, and the last
item recorded on one side of a tape was not completely recorded before the tape was reversed, that
item will be automatically repeated.
Also note that when the tape automatically reverses,
eight seconds are used as non-recorded time at the
beginning of the second side (the tape is in record
Dubbing to tape from the middle of a CD
The above procedure describes the playback and
recording from the start of a disc (or the start of a
programmed playback list).
To record from a point other than the ones above:
1 Locate the disc to the point where the play-
back is to start.
2 Press the disc
at the point where the playback is to start.
PAU SE key to pause playback
mode, but the CD does not play back), again to allow
for leader tape at the start of the cassette.
The dubbing process can also be stopped manually
with the
STOP key of the cassette deck or the CD
deck. All other transport keys are disabled.
NOTE
Dubbing is not possible if: a cassette is not loaded, or a
CD is not loaded. It is not possible if the cassette is
write-protected, or if the CD is a recordable disc which
does not currently have any material recorded on it.
It is also not possible to enter the dubbing mode if the
tape is not in stop or record ready mode, or if the CD is
not in stop or pause mode.
3 If recording is to start at the beginning of the
cassette, make sure the cassette is stopped,
otherwise, locate the cassette to the appropriate position where recording is to start, and
enter record ready mode.
Using the headphones with the
to
1+2
will help here.
MONITOR
switch set
4 Press the DUB 2 key. Playback starts on the
disc, and recording starts on the cassette.
Bypassing the INPUT level for dubbing
The INPUT control can be bypassed so that it has no
effect when dubbing, in the following way:
1 Press the
MENU key until the DUB>VOL
item appears.
2 Turn the dial to select either
THRU (the con-
trol is bypassed and disabled) or ON (the
control is enabled).
Recording tapes from the PHONO deck
To record from an external record deck connected
through the
1 Prepare for recording as described above
(load a tape, set the
2 Press the
xxxx menu item is shown.
If the display does not show
TAPE
SKIP keys on the remote control) until it does
and press the MULTI DIAL (or ENTER on the
remote control unit).
RIAA PHONO inputs:
REV MODE, etc.).
MENU key until the PHONO >
PHONO >
, turn the MULTI DIAL (or press the
NOTE
This setting applies only to dubbing procedures, not to
other recordings.
It is not possible to make this menu setting (or any
other menu settings) when dubbing is actually taking
place.
3 Press the
PHONO key H. The
PHONO
indica-
tor lights on the display.
If the tape is currently in stop mode, the tape
rewinds, and the deck enters record ready
mode (about eight seconds from the start of
the cassette, to allow for leader tape).
If the tape deck is already in record ready
mode, it will remain in record ready mode.
4 Start playback of the record.
5 Start recording with either the PLAY or
PAUSE key.
TASCAM CC-222 Owner’s Manual 17
Page 18

3 – Cassette operations—Other recording features
Press STOP (cassette deck) to stop the
recording. The
STOP key is the only key
which is enabled during phono recording.
After the phono recording has finished, the
original tape signal source is restored.
NOTE
It is not possible to perform phono recording as
described above under the following circumstances: a
Other recording features
Recording silences between items
At least four seconds of silence must be recorded
between items on tape when using the search functions (“Search keys” on page 19).
When recording, press and release either of the
keys (main or remote). With the tape moving,
MUTE
the record source is muted for about four seconds
(the display record indicator flashes), and the deck
then enters record pause mode. Press
PLAY to re-start recording.
PAU SE or
REC
tape is not loaded or the tape is write-protected (the
phono to tape function is disabled with no recordable
tape inserted), or the tape is not either stopped or in
record ready mode.
Only recording as described above is possible from the
RIAA PHONO
possible.
REC MUTE key is pressed while the deck is in
If the
sources to tape. Manual recording is not
record pause mode, four seconds of silence will be
recorded on the tape, and the deck will return to
record pause mode.
REC MUTE key is held and pressed for longer
If the
than four seconds while recording is in progress,
silence is recorded on the tape while the key is held
down. The deck enters record pause mode when the
key is released.
Erasing tapes
Anything previously recorded on the tape will automatically be erased when you make a new recording
Other tape functions and features
Tape counter
The tape counter value is incremented when the tape
is moving from left to right, and decremented when it
moves from right to left.
Use either of the
reset the value to 0000.
When the counter has been set to 0000, this position
can be reached easily by pressing either of the RTZ
Pitch control
The tape speed can be controlled using
the
PITCH CONTROL.
Turning this to the right of the center position results
in faster tape speed (higher pitch) and turning it to
the left of the center position results in slower tape
RESET keys (main or remote) to
on it. It can also be erased by “recording” on it with
the INPUT level control set to “0”.
keys (main or remote). The tape fast forwards or fast
rewinds to the 0000 mark.
NOTE
If the current tape position is too close to the 0000 mark
(greater than 9995 or less than 0005), this function does
not work.
speed (lower pitch). The maximum is 12% away
from normal.
The center “neutral” position is marked by a click
detent.
18 TASCAM CC-222 Owner’s Manual
Page 19

3 – Cassette operations—Other tape functions and features
Fast forward and rewind
The REW and FFWD keys (and their remote control
equivalents) act as ordinary fast forward and rewind
Search keys
When the unit is playing back, the wind keys mentioned above act as Computer-controlled Program
Search (CPS) keys, moving to the next (or previous)
recorded item. To locate items correctly, there must
be at least four seconds of silence between these
items (see “Recording silences between items” on
page 18).
Repeated presses of these keys will search forward or
backward by the appropriate number of items. The
tape counter value is replaced by CPxx if searching
forward, and CP–xx when searching backwards.
Note that the terms “forwards” and “backwards” here
are relative to the currently-selected play position.
keys when pressed when the unit is stopped or
paused.
When the item is reached, playback starts. When the
end of the tape is reached, the transport stops.
If a key are pressed too many times, so that a search
is being made for the wrong item, pressing the
“opposite” key corrects the mistake.
NOTE
This function depends on the presence of 4-second
silent intervals on tape. If these intervals are too short,
or not truly silent, the search function will not work
properly. Also note that this function can be “confused”
by the presence of longer quiet or select passages in
programs (e.g. spoken word drama or classical music).
TASCAM CC-222 Owner’s Manual 19
Page 20

4 – CD player
The CC-222 can be used to play back CDs (including
CD-R and CD-RW discs that have been recorded and
finalized on other types of recorder), as well as CD-R
Simple playback operations
1 Press the OPEN/CLOSE key to open the disc
tray.
2 Discs should be inserted in the tray with the
label uppermost.
3 Press the
again.
When a disc is loaded into the unit, the display
briefly shows
period following the word “Reading” as the unit
determines the contents of the disc. When the TOC
has been read, the display shows (at the left of the
display) one of the following:
OPEN/CLOSE key to close the tray
TOC Reading., with a flashing
discs and CD-RW discs that have been recorded on
the unit.
CD A commercial pre-recorded CD or a
finalized CD-R
CD-R, NO TOC
CD-RW, NO TOC
CD-RW
[blank]
1 Press the
2 Press the
3 Press the
A CD-R which has yet to be finalized
A CD-RW which has yet to be finalized
A finalized CD-RW (this differs from a CD,
as it may be unfinalized and erased)
Unusable or unreadable disc or no disc
PLAY key to start playback
STOP key to stop playback
PAU SE key to pause playback
temporarily.
The track number indicators at the bottom of the display light, to show the available unplayed tracks. If
there are thirteen tracks on the disc, for example,
1
indicators
than 20 tracks on a disc, the track number
through 13 will light. If there are more
OVER
indi-
cator (at the bottom of the display) will light.
Time display modes
When playing back a CD (or when in pause mode),
there are four different time display modes.
In each mode, the current track number is given, followed by the time, as given below, e.g.
10Tr 0:48
Press the DISPLAY key to cycle through these time
display modes, as described here:
Track search
Use the MULTI DIAL (or the SKIP keys on the
remote control unit) to jump forward or backward by
one track at a time, as shown on the display.
Note that going forward from the last track of the
disc will “wrap round” to track 1, and going backward from the first track of the disc will “wrap
round” to the last track of the disc.
Display shows Meaning
TOTAL
[blank]
TOTAL REMAIN
REMAIN
NOTE
If programmed playback has been selected (“Programmed order playback” on page 21), the elapsed
time and total remaining time refer to the programmed
material, not the whole disc.
Total elapsed time of the disc
Elapsed time of the current track
Time remaining of the current disc
Time remaining of the current track
The track number indicators at the bottom of the display shows the selected track (the lit indicator at the
left of the row of indicators).
It is also possible to use the number keys on the
remote control unit to jump directly to a particular
track:
1 To play tracks 1 through 9, simply press the
appropriate key (
1 through 9).
20 TASCAM CC-222 Owner’s Manual
Page 21

4 – CD player—Playback modes
2 To play a track whose number is higher than
9, press the
+10 key an appropriate number
of times to set the “tens” digit of the track
number, followed by a single key to set the
“units” digit. For example:
Track 13 =
+10, 3
Playback modes
The unit can be set to play back a single track, the
whole disc in the order in which it was created, the
tracks of the disc in a random (shuffled) order, or a
programmed order.
NOTE
Selecting the playback mode is only possible using the
remote control unit. It is not possible to select the playback mode using the main unit alone.
1 Press the PLAY MODE key repeatedly to cycle
the display through the following:
Continue. Normal playback mode. Program-
•
ming is cancelled, and playback continues in the
normal order.
•
Single. The currently selected track is played
and then playback stops. The
lights in this mode.
•
Random (random track order). In this mode,
each track is played once before the disc repeats.
SINGLE
indicator
Track 30 = +10, +10, +10, 0
NOTE
On the remote control unit only, the search keys can be
used to “fast-forward” and “fast-rewind” through the
disc.
Using the track search functions will move backwards or forwards through the random order, e.g. if
track 7 is followed by track 10, it is possible to use
the track search keys to go back to track 7, which is
remembered as being before immediately before
track 10. The red
RANDOM
display indicator lights
in this mode.
•
Program (see “Programmed order playback”
on page 21 below). The red
PROGRAM
display indi-
cator lights in this mode.
The selected mode is shown in large characters disappears from the display a few seconds after selecting the mode, and the display returns to its previous
mode.
Changing to programmed play mode is not possible
when playback is taking place. This change must be
made while the tape is stopped.
Programmed order playback
The steps to set up to 25 program steps (tracks) to be
played back in a specified order are as follows:
1 Press the
shows
2 The display changes to show
0
Tr
meaning that no program steps have yet had
tracks assigned to them.
3 Use the number keys on the remote control to
enter a track number (including the +10 key
to enter values greater than 9, as described
above). There is no need to press
The track entered is assigned to the program
step, and the display changes, showing the
track number, the total time of the program
so far, and the step number, e.g.
2Tr14:56 03.
4 The next program step can then be entered.
PLAY MODE key until the display
Program.
00:00 00,
ENTER.
NOTE
Steps 3 and 4 above can also be carried out from the
main unit by turning and pushing the
MULTI DIAL
.
5 Repeat steps 3 and 4 above until the program
is complete.
6 Press the
PLAY key to start playback at the
first program step.
The display shows the track, the current time
display, and the program step number.
While in programmed playback mode, using
the
SKIP keys or the MULTI DIAL moves back-
wards and forwards in the order set in the program.
Use the
the
If the
PAU SE key to halt playback temporarily or
STOP key to stop playback of the program.
STOP key is used, when playback is restarted,
it starts from the first program step.
TASCAM CC-222 Owner’s Manual 21
Page 22

4 – CD player—Repeat play
Clear the program by pressing PLAY MODE until the
display shows
cleared when the disc tray is opened, and if the
Continue. The program is also
STOP
key is pressed when playback is stopped in programmed order mode.
Repeat play
The unit can repeat the whole of the disc (or program), an A–B portion set as described here, or the
current track only.
NOTE
Selecting the repeat mode is only possible using the
remote control unit. It is not possible to select the
repeat mode using the main unit alone.
1 The unit should be in playback, pause or stop
mode.
Continue to press the
display shows
Repeat 1 (the
REPEAT key so that the
REPEAT 1
The programmed play order is not memorized when
power is turned off.
If an attempt is made to enter more than 25 program
steps, the message
PGM Full ! appears on the
display.
indicator lights) to repeat one track,
Repeat ALL (the
REPEAT ALL
indicator
lights) to repeat the whole disc or program,
Repeat A-B (the
REPEAT A-B
indicator
lights) to repeat between two points as
explained below.
2 If playback has not started, restart it.
To cancel repeat mode, press the
the display shows
Repeat OFF and the
indicator goes out. Pressing
REPEAT key so that
REPEAT
STOP also cancels
repeat mode.
Setting the A and B repeat points
While the
points between which playback should loop.
1 Start playback before the point where you
2 Press the A-B key (remote control) at the
3 Press the A-B key once more at the point at
REPEAT A-B
indicator is lit, you can set the
want the loop to start.
point where the loop is to start.
where the loop is to end.
Playback jumps back to the first (A) point
and continues to the second (B) point and
Intro check
This is a useful facility to skip through the first 10
seconds of all the tracks on a CD to refresh your
memory of the contents of the CD.
1 With the disc stopped, press the
CHECK
key.
The first 10 seconds of each track on the disc
will be played. Press
STOP to stop this play-
back process.
INTRO
then returns to the A point again, repeating
the loop.
Cancel the A-B repeat mode by pressing the
NOTE
If the A and B points are too close together, A-B looping
is not possible.
The A and B points can be on either side of a track division, but there may be a gap in the loop during playback in this case.
Pressing
INTRO CHECK again cancels the mode and
A-B key.
returns to normal playback.
NOTE
This function is only available from the remote control
unit. It is not possible to use this function with the main
unit only.
22 TASCAM CC-222 Owner’s Manual
Page 23

Auto spacing
4 – CD player—Auto spacing
This function inserts a gap of about four seconds
between tracks on playback. This can be useful when
recording to tape, so that automatic searching can
take place more easily on tapes recorded from disc
(see “Search keys” on page 19).
NOTE
This function is only available from the remote control
unit. It is not possible to use this function with the main
unit only.
If you press the AUTO SPACE key while the playback is automatically paused between tracks as a
result of the auto space function being enabled, the
unit remains in pause mode, and playback will not
restart after the auto pause time is elapsed.
If you press the
taking place, and the auto space function is enabled,
the auto space function is then cancelled.
AUTO SPACE key while playback is
TASCAM CC-222 Owner’s Manual 23
Page 24

5 – Recording CDs
Before you start recording using the CC-222, make
sure that you understand the following key points:
• Once you have recorded on a CD-R disc, the data
cannot be erased from it.
Input selection
To select the input to be recorded, press the INPUT 1
key on the main unit.
SEL
Repeated presses of the key cycle through the following options:
OPTICAL
COAXIAL
LINE1
PHONO
TAPE
Signal volume
• The analog signals received at the LINE 1 jacks, the
RIAA PHONO jacks and the tape (if the input vol-
ume is not being bypassed—see below) are controlled with the CD deck’s
this control is at the 12 o’clock position, the signal
is neither cut nor boosted.
• The level of the digital inputs may be controlled
using the digital volume menu, as described below.
1 Press the
record ready mode.
Optical digital in
Coaxial digital in
Analog in (LINE 1)
Phono inputs
The CC-222 cassette deck
INPUT control. When
RECORD key to place the unit in
• You can add tracks to an unfinalized recordable
disc. Once finalized, a CD-R disc is “fixed” and
behaves in the same way as a pre-recorded disc.
Finalized CD-RW discs, however, can be erased,
refreshed and re-recorded.
In the case of either the coaxial or optical inputs
being selected, the appropriate indicator:
OPTICAL
, lights on the display.
If any of the analog signals is selected, the
TAPE
indicator lights on the display.
3 Use the
MULTI DIAL or the SKIP keys to
COAXIAL
LINE 1
or
or
adjust the input level. The maximum boost is
+18db (relative to the original input level),
and the signal may be cut by up to 60dB.
There is also a
---- setting which repre-
sents a complete signal cut.
NOTE
If digital direct is selected, as described below (“Digital
direct” on page 32), the digital volume is bypassed and
the menu item does not appear.
2 Repeatedly press the
play shows
VOLUME XXXdB where XXX
MENU key until the dis-
is the current setting.
Input monitoring
When the unit is in record ready, or record mode, the
input signal is output from the
OUT jacks (digital and
analog), allowing you to hear the input signal.
The meters also show the current signal level.
However, it is only possible to record, or to enter
record ready mode, when a recordable disc is
inserted. To allow monitoring of the input signal at
other times, or when the unit is stopped, use the
RECORD key on the main unit or remote control to
Frequency conversion
The sampling frequency for CDs is 44.1 kHz. The
CC-222 will always record (and play back) CDs at
this frequency.
enter monitor mode from stop mode when there is no
recordable disc in the unit (when there is a recordable
disc in the unit, pressing the
RECORD key enters
record ready mode).
The word
MONITOR appears on the display to
show that the output signal is an echo of the input
signal(s). The meters show the current input level.
Exit the monitor mode by using the
STOP key.
However, if recording through a digital connection
(either coaxial or optical) and the source has been
recorded at a frequency other than 44.1 kHz, or is
24 TASCAM CC-222 Owner’s Manual
Page 25

5 – Recording CDs—Basic recording
being played back at a non-standard speed using a
varispeed unit (more than 1% away from the standard), the CC-222’s internal frequency converter will
automatically convert the incoming frequency to
44.1 kHz.
Basic recording
NOTE
According to the “Red Book” (the specification for
audio CDs), a track cannot be less than four seconds in
length, and there can be a maximum of 99 tracks on an
audio CD. Bear these limitations in mind when recording.
If you press either the
four seconds of starting recording, the unit will continue recording until four seconds have elapsed (since
the start of recording) and then stop or pause as appropriate.
STOP
or the
PAU SE
key within
NOTE
If digital direct is selected, as described below (“Digital
direct” on page 32), the frequency convertor is
bypassed. In this case, recording from digitally-connected devices is only possible when the source frequency is 44.1 kHz. If an attempt is made to record from
a digitally-connected source at a different frequency,
the error message
Not Fs44.1k!
is displayed.
An analog signal input at nominal level, with no cut
or boost from the volume controls, is equivalent to a
reading of –16 dB on the meters (on other words, 0 is
equivalent to 16 dBFS).
4 Press the
PLAY key or the PAU SE key to start
recording.
Note that there is no need to “cue up” the
recording position—the unit always finds the
next available location on the disc and start
recording to it.
After selecting the input source(s) (, “Input selection”), it is possible to start recording.
The basic record procedure is as follows:
1 Load a recordable disc is into the unit. As the
disc is loaded, the display shows
Reading
.
TOC
When the disc has been loaded, the display
indicators show
TOC
, as appropriate.
2 Press the
RECORD key. The unit enters
CD-R, NO TOC
record ready mode, as shown by the
, or
CD-RW, NO
REC
and
pause indicators on the display. As the unit
enters record ready mode, the display shows
Now OPC (Optimum Power Control), as
the unit prepares to record on the disc.
3 Adjust the level of the source(s), following the
guidelines in “Signal volume” on page 24.
NOTE
The red
light. Unlike analog equipment, digital audio units produce extremely unpleasant sounds when distorted, and
there is no “headroom” after the
digitally from a commercially-produced CD, the volume
set in the menu should be
the dynamic range of the source CD without clipping.
Only boost the signal if the source is exceptionally
quiet.
OVER
indicators on the meters should never
0
mark. If recording
0dB
. This will maintain all
5 Press the
PAU SE key to pause recording tem-
porarily. The pause indicator on the display
shows this.
Pressing
PAU SE or PLAY again restarts
recording with a new track number.
6 Press
STOP to stop recording. When record-
ing stops, the display shows
Writing
the
REC
(Program Memory Area) and
indicator flashes for a few seconds as
PMA
the unit writes to the disc.
NOTE
While the “PMA Writing” message is displayed, all keys
are disabled, and the unit is actually writing to disc. Do
not disconnect the power or subject the unit to severe
vibration or shocks at this time, as this will prevent
proper recording of the information.
7 When this message disappears, you must
press the
RECORD key (step 2) before
restarting the recording. Recording restarts
with a new track number.
NOTE
Remember that every time recording is paused or
stopped, when recording is restarted, a new track will
always be started. It is not possible to record in two
“stages” within one track.
TASCAM CC-222 Owner’s Manual 25
Page 26

5 – Recording CDs—Basic recording
Playing back tracks
Although an unfinalized disc cannot be played back
on an ordinary CD player, the CC-222 can play back
tracks that have been recorded.
Time display while recording
While a recordable disc is being played back, the
four time display modes available in normal playback as described in , “Time display modes”:
TOTAL REMAIN
, track
REMAIN
and elapsed track time.
TOTAL
,
However, during recording there are fewer options
available (obviously, the unit cannot see into the
future and know how much time remains of the track
which is being currently recorded!).
Manual track division
It is possible to divide the recording into tracks “on
the fly” while recording.
While recording is taking place, press the
key. The current track number is incremented by one.
For details of automatic track division while recording, see “Automatic track division” on page 31.
RECORD
Use the MULTI DIAL control or the SKIP keys to
select a track for playback.
When in record or record ready mode, repeated
presses of the
DISPLAY key cycle between display-
ing the remaining time left for recording on the disc
(
TOTAL REMAIN
) and the elapsed time of the track cur-
rently being recorded (no indicator lit).
When playback is stopped at the start of a recordable
disc, there are only two options available:
total time recorded so far on the disc) and
REMAIN
(the total time available on the disc for further
TOTAL
TOTAL
(the
recording).
NOTE
According to the “Red Book” (the specification for
audio CDs), a track cannot be less than four seconds in
length, and there can be a maximum of 99 tracks on an
audio CD. Bear these limitations in mind when adding
track divisions.
Restricting the number of tracks
When making a recording using the CC-222, it is
possible to restrict the number of tracks that may be
recorded at one time. This applies whether the tracks
are being divided manually, as described above
(“Manual track division” on page 26) or being
divided automatically (“Automatic track division” on
page 31).
At any time within record or record ready mode, turn
the
MULTI DIAL control or use the SKIP keys.
This sets the number of remaining tracks, as shown
to the right of the time display. The maximum number here is limited by the standard limit of 99 tracks,
and the number of tracks currently recorded. In other
Full disc
If recording a long program, and the number of
tracks has not been restricted, when there is no space
remaining on the disc for recording, as shown by the
time display (see “Time display while recording” on
page 26), just before the end of the disc is reached,
words, if 8 tracks have already been recorded on the
disc, the maximum value that can be set here is 91
(91+8=99). If 49 tracks have already been recorded
on the disc, the maximum value that can be set here
is
50 (49+50=99).
Every time a track division is made, the number
shown at the right of the display goes down by one.
When the number shown is
made, the display shows
1, and a track division is
PMA Writing and the
unit enters stop mode.
The number of remaining tracks can be changed during recording using the
MULTI DIAL control.
the unit starts a fade-out over a few seconds (the display shows
FADE OUT).
When the fade-out has finished, the display shows
Disc Full!! for a few seconds, and the unit
then goes into stop mode (the display shows PMA
Writing
).
26 TASCAM CC-222 Owner’s Manual
Page 27

5 – Recording CDs—Dubbing from tape to disc
If the disc is a CD-RW, the final track can be erased,
if required (see “Erasing tracks” on page 35) and the
Dubbing from tape to disc
When dubbing from tape to disc, follow the instructions here.
1 Load the tape with the side that will be
recorded first to be played first. Set the
Dolby, etc. as well as the reverse mode.
2 Load a recordable disc.
3 Use the
to
(see “Bypassing the INPUT level for dubbing” on page 17).
NOTE
Note that while dubbing with auto track enabled, the
start trigger level (see “Synchronized recording” on
page 30) is set to –36dB.
4 Press the DUB 1 key.
The CD goes into record ready The tape
rewinds to the start of the tape and starts
playing back. The CD recorder starts recording.
MENU key to set the dubbing volume
THRU to bypass the input level control
disc then finalized. If the disc is a CD-R, it must be
finalized prior to use (see “Finalizing” on page 34).
5 When the available recording time on the
disc is finished, or the tape has stopped playing according to the reverse mode setting,
whichever is the earliest, the tape will stop,
and recording will stop on the disc.
If you want to adjust the input volume, set
DUB>VOL menu to ON and use the
the
right (CD-RW)
INPUT control to adjust the
level of signals fed to the disc from the tape
deck. If you wish to adjust the volume before
recording starts, put the CD-RW into record
ready or monitor mode and use the
key to select TAPE.
SEL
INPUT 1
You can also stop the dubbing process by
pressing either of the
STOP keys (these are
the only keys which will work in dubbing
mode).
NOTE
A recordable disc must be loaded in the drive, and a cassette in the tape deck for the dubbing to work. The
DUB 1
key is disabled if the media are not loaded, and
if the drives are in any mode other than stop.
Dubbing to CD from the middle of the tape
The previous instructions refer to recording from the
start of the tape.
1 To record from the middle of the tape, set
noise reduction, reverse mode, etc. and locate
the tape to the position where playback will
start.
2 Press the tape
PAU SE key to leave the tape in
paused mode.
3 With a recordable disc in the drive, press the
DUB 1 key. The tape will start playing back,
and the disc will start recording.
Recording stops under the same circumstances as for the whole tape (end of tape,
end of disc or either
Recording to disc from the RIAA PHONO inputs
NOTE
Because of the background noise often experienced
when playing back analog vinyl recordings, although
the following features are enabled in the phono recording mode: trigger level, sync recording and automatic
track division, the use of them is not recommended.
To record to disc from an external record player connected to the
RIAA PHONO jacks:
1 Load a recordable disc and put the unit in
stop mode.
2 Press the
xxxx menu item is shown.
If the display does not show
DISC
SKIP keys on the remote control) until it does
and press the
STOP key pressed).
MENU key until the PHONO >
PHONO >
, turn the MULTI DIAL (or press the
MULTI DIAL (or ENTER on the
TASCAM CC-222 Owner’s Manual 27
Page 28

5 – Recording CDs—Advanced recording
remote control unit). Prepare to play the
record on the external record player.
3 Press the
the RIAA PHONO input (the
PHONO key. The input changes to
INPUT 1 PHONO
indicator lights on the display), and the disc
recorder enters record ready mode.
4 Start playing back the record.
5 Start recording on the disc by pressing the
PLAY key.
disc
The level can be adjusted using the CD
INPUT control.
Recording will stop when the recording time
on the disc ends, or when the disc
STOP key
is pressed. The input source returns to the
previously-selected key.
NOTE
No keys are enabled in this phono recording mode,
except for the disc
STOP
key. This includes the
RECORD
manual track increments (“Manual track division” on
page 26). If you want to use manual track division, use
the normal recording procedure, with the phono inputs
selected as the source.
During dubbing with auto track enabled, the trigger
level (“Setting the trigger level” on page 28) is fixed at
–24 dB and cannot be changed.
This mode cannot be entered if a recordable disc is not
loaded in the drive.
key, which can therefore not be used for
It is also possible to perform manual recording to
disc from the
RIAA PHONO source. This is the same
as the standard manual recording procedure (“Basic
recording” on page 25), except that the
option should be selected (
INPUT 1 SEL key) before
PHONO
input
recording starts.
NOTE
It is not possible to make manual recordings from the
RIAA PHONO
source to tape.
Advanced recording
These sections cover more advanced recording
techniques.
Setting the trigger level
The signal level which may be used with synchronized recording operations (here called the “trigger
level” or “threshold”) is set as below:
1 With a recordable disc loaded, press the
key until the display shows:
xxdB
2 Turn t he
, where xx is the current value.
MULTI JOG control or use the SKIP
S_LVL>>
keys to change the value between -24, -30,
-36, -42, -48, -54, -60, -66, and
-72 dB. (-60, -66 and -72 are only for digital).
Low numerical values of this setting (towards –24)
mean that it takes a louder signal to trigger the start
MENU
of the synchronized recording. A high numerical
value (towards –72) means that a relatively quiet signal will trigger the start of recording.
When a digital source is selected, there is another
option,
DD, which means that any digital signal
above the zero level will trigger the recording.
NOTE
When dubbing from tape to disc (“Dubbing from tape
to disc” on page 27) and auto track enabled, this level is
fixed at –36 dB. When dubbing from a
source with auto track on, the level is fixed at –24 dB.
RIAA PHONO
28 TASCAM CC-222 Owner’s Manual
Page 29

Using the trigger level
5 – Recording CDs—Advanced recording
The conditions under which an input signal is used as
the trigger to start recording are:
• when recording digitally, a digital start signal is
detected, and audio is subsequently detected
level
S_LVL
Track start signal
received
Start of recording
time
or
• the sound level rises above the threshold (see
below) after having been below the threshold for
one second or more. Note that the diagram below
represents a special case (the source is stopped or
paused) of the more general condition, as explained
later:
level
Start of recording
record ready mode immediately (note that the trigger level is not used here):
level
level
CD stop
2
seconds
MD stop
REC pause
REC pause
time
time
or
• the sound level drops below the threshold level for
five seconds
S_LVL
noise
level
time
To start synchronized recording when the source is
stopped or in pause mode:
1 The unit must be in record ready mode, and
the
SYNC
indicator in the display must be lit,
as explained above.
2 Start playing the source. The pause indicator
disappears from the display, and the unit
starts recording.
The conditions under which synchronized recording
stops are:
• when recording digitally, an appropriate digital signal is detected. If the signal is detected from a CD,
the unit enters record ready mode after 2 seconds.
If the signal is detected from an MD, the unit enters
level
5 seconds
S_LVL
REC pause
time
If you set the threshold value so that only high-level
signals trigger recording, remember that this will not
record the start of a piece with a slow fade-in:
level
S_LVL
This part of the
track is not
recorded
Recording
starts
time
Also remember that when recording from an analog
source, the threshold should be set so that it is higher
than the “noise floor” (the base level of hiss, pops
and crackles which may come from an older vinyl
recording, for example).
TASCAM CC-222 Owner’s Manual 29
Page 30

5 – Recording CDs—Advanced recording
If the “noise floor” is higher than the threshold, synchronized recording will not take place (but remember that synchronized recording is not recommended
with the
PHONO mode — see “Recording to disc
from the RIAA PHONO inputs” on page 27):
level
Noise is higher
than threshold
S_LVL
Start of track is not registered
time
Because synchronized recording can be turned on
and off while recording is taking place, it is therefore
possible to record with a synchronized automatic
start, and a manual end, or vice versa.
When the source material is being played back
before synchronized recording is enabled, the conditions under which synchronized recording will start
(after synchronized recording has been enabled) are:
When the signal drops below the threshold for one
second or more and then rises above the threshold
again (this is the general condition, of which starting
synchronized recording from a stopped or paused
source is a special case):
Recording
starts
level
S_LVL
At least 1
second
Alternatively, when recording digitally from sources
(MD, CD and DAT) which output track divisions,
synchronized recording starts when a track division
is received, regardless of the level:
Track signal from source
starts recording
level
S_LVL
time
To stop synchronized recording:
1 The unit must be in record mode, and the
SYNC
indicator in the display must be lit.
2 Stop the source. After a few seconds, the unit
enters record ready mode. The time between
the stopping of the source and entering
record ready mode is used to record a gap at
the end of the track.
3 If no changes are made to the unit’s controls,
restarting the source restarts recording, as
the unit is still in sync mode and will start
recording again when the source is detected.
NOTE
When recording in sync mode, you may notice a slight
delay between starting the source, and the CC-222
responding. This is due to the way in which the unit
works, storing the data in a memory buffer before writing it to the disc. The resulting delay is therefore not a
cause for concern—all audio data received between the
start and end points will be recorded.
time
Synchronized recording
Synchronized recording means that recording will
begin automatically when a signal is received, and
will stop when the signal ends.
To enable or disable synchronized recording:
1 A recordable disc must be loaded.
2 With the unit in record ready or record mode,
press the
SYNC REC key.
30 TASCAM CC-222 Owner’s Manual
The display shows
SYNC ON briefly, and
then changes to the track and time display.
When synchronized recording is enabled, the
SYNC
indicator lights in the display.
SYNC REC key is also used to turn off syn-
The
chronized recording (the display briefly shows
SYNC OFF and then returns to the track
and time display).
Page 31

Automatic track division
5 – Recording CDs—Advanced recording
The trigger level, as set above (“Synchronized
recording” on page 30) can also be used to divide
tracks if the A-TRACK (auto track) function is
enabled.
When this function is enabled, the unit automatically
inserts a track division in the recorded material when:
• recording digitally from MD, CD or DAT, an increment signal is detected and the sound level rises
above the threshold:
CD-RW
increments
track
time
level
S_LVL
Track increment
from source
or
• increment signals are unavailable (e.g. analog
recording or digital sources other than MD. CD or
DAT) and the sound level has dropped below the
threshold for more than two seconds, and sound
has re-started
Track
increment
level
At least 2
seconds
NOTE
When recording certain types of material (e.g. certain
types of classical music or spoken word) through the
analog connections, since the track divisions are determined by relative silence, it is possible that spurious
track divisions will be inserted. Under these conditions,
it may be better to use manual track division (“Manual
track division” on page 26).
However, if recording through a digital connection, the
track number will be incremented only when a track
division signal is received, followed by a rise in volume.
Track start signal
level
received
Track incremented
S_LVL
time
A fall and subsequent rise in volume alone when
recording digitally from CD, MD or DAT is not sufficient
to trigger an automatic track increment.
level
S_LVL
Digital recording from CD, MD and DAT
Long "pause"
in signal, but
track is not
incremented
S_LVL
time
To enable or disable automatic track division:
1 With a recordable disc inserted, and with the
unit in record ready mode, press the
key repeatedly until
A_TRACK>XX is
MENU
shown, where XX may be ON or OFF.
2 Turn t he
MULTI DIAL or use the SKIP keys to
change the value as required.
The
A-TRACK
indicator at the top right of the
display lights when the auto track function is
enabled.
time
You may find it helpful to use the track restriction
facility (see “Restricting the number of tracks” on
page 26) together with the automatic track division.
For instance, if you have recorded two albums on one
DAT tape, and you wish to make two separate CDs
from this tape, you can use the
MULTI DIAL to set the
number of tracks to the number of tracks comprising
the first album.
When the final track of the first album has been
recorded, the unit automatically performs the PMA
writing procedure and enters stop mode.
TASCAM CC-222 Owner’s Manual 31
Page 32

5 – Recording CDs—Advanced recording
Digital direct
As mentioned earlier, the digital direct mode
bypasses some of the input circuitry of the CC-222
(the frequency convertor and the digital level control)
to write directly to the disc.
To enable or disable digital direct recording:
1 Ensure that the input source is set to
(either
COAXIAL
or
OPTICAL
).
DIGITAL
Rec mute function
The rec mute function allows instant cut-off of the
input signal, and records four seconds of silence on
the disc.
1 While recording is in progress, press the
key.
MUTE
The display shows
REC MUTE, the meters
stop displaying the current level and the
monitored sound is cut.
REC
2 Press the
D_DIRECT>XXX where XXX is either
ON or OFF.
3 Tu r n th e
MENU key until the display shows
MULTI DIAL or use the SKIP keys to
turn this setting on or off.
NOTE
As mentioned earlier, the digital direct feature bypasses
the frequency convertor. Recording is therefore only
possible from sources recorded with 44.1 kHz sampling
frequency.
2 After about four seconds, the unit enters
record ready mode.
NOTE
This function is only available from the remote control
unit. It is not possible to use this function with the main
unit only.
Fade-in and fade-out
To provide smooth beginnings and endings to
recorded tracks, the unit provides fade facilities.
Fade-ins are from –∞ (silence) to the set input level
(“Signal volume” on page 24) and fade-outs go from
the current input volume to silence.
The fade-in and fade-out times can be set independently in increments of one second, from 1 second to
24 seconds.
To set the fade times:
1 Press the
play shows
is the current fade-in time, in seconds.
2 Tu r n th e
change the value of the fade-in time.
3 Press the
shows
the current fade-out time, in seconds.
4 Tu r n th e
change the value of the fade-out time.
MENU key repeatedly until the dis-
FADE IN > XXS, where XX
MULTI DIAL or use the SKIP keys to
MENU key again so that the display
FADE OUT> XXS, where XX is
MULTI DIAL or use the SKIP keys to
To perform a fade-in:
1 With a recordable disc loaded, press the
RECORD key so that the unit enters record
ready mode.
2 Start the source material, and press the
FADER key.
The display shows
FADE IN for the time
specified in the menu item above.
As the fade progresses, the monitored signal
gradually becomes louder, reflecting the level
recorded on disc.
To perform a fade-out:
1 While recording, press the FADER key.
The display shows
specified in the menu above.
As the fade progresses, the monitored signal
gradually becomes quieter, reflecting the
level recorded on disc.
FADE OUT for the time
It is possible to set the fade-in time only (perform step 5 after step 2) or the fade-out time
only (in step 1, press the
MENU key until the
fade-out time menu item is shown).
32 TASCAM CC-222 Owner’s Manual
2 When the end of the fade-out time is reached,
the unit goes into record ready mode.
Recording can be restarted with the
key or the
PLAY or PAU SE keys.
FADER
Page 33

5 – Recording CDs—Copy-protection
The fade-in and fade-out times can be reset to new
values while recording is in progress.
Copy-protection
The CC-222 allows copy-protection to be applied to
the discs produced. Naturally, the copy-protection
applies only to digital-to-digital copies.
There are three settings:
•
FREE (may be freely copied), where no copy-pro-
tection is applied to the recorded disc.
•
1GEN (single-generation copying), where one
digital copy (“child”) can be made from the
recorded disc, but no digital copies (“grandchil-
dren”) can be made from the child.
•
PROH (copy prohibited) which prevents any digi-
tal copies being made from the recorded disc
1 Press the
play shows COPY ID>XXXX, where
MENU key repeatedly until the dis-
Fades are also possible in digital direct mode (“Digi-
tal direct” on page 32).
XXXX is the current setting for copy-protec-
tion as shown above.
2 Tu r n th e
MULTI DIAL or use the SKIP keys to
change the copy-protection setting.
NOTE
Copy-protection applies on a ““per-track”, not a per-
disc basis. This means that you can apply different copyprotection levels to different tracks (but you can’t apply
different copy-protection levels to different parts of the
same track). If copy-protection is important to your
work, you may want to check this setting every time
you make a recording, to ensure that you have the protection level that you want.
TASCAM CC-222 Owner’s Manual 33
Page 34

6 – After recording
This section deals with the actions taken after recording: finalizing for CD-R and CD-RW discs, and erase
operations for CD-RW discs.
Once finalized, CD-R discs are truly final—no more
can be recorded on them. By contrast, CD-RW discs
Finalizing
As has been explained earlier (“Finalizing” on
page 8), in order for a disc to become a standard CD,
it must have a Table of Contents (TOC) written to it.
This process is known as finalizing.
An unfinalized disc can always be distinguished on
the CC-222 by the
NO TOC
type on the display being lit when the disc is inserted.
To finalize a disc:
1 With the unfinalized (recordable) disc
loaded, and the unit in stop mode, press the
FINALIZE key.
The display shows
2 To start the finalizing process, press the
MULTI DIAL or press the ENTER key.
indicator under the disc
Finalize OK?.
can be “unfinalized” using the CC-222, that is, their
TOC can be deleted, and if there is space, further
material can be recorded on them. Even if the disc is
full, tracks can be erased following the unfinalize
process, and new material can be recorded.
If you do not want to proceed with the finalizing process, press any other key (such as
the
STOP key).
If finalization has been chosen, the display
changes. The
NO TOC
the word TOC and the
indicator goes out, and
REC
indicator flash in
the display. The unit starts counting down
from a time shown on the display (about 1
minute 10 seconds).
After finalization, a
CD-RW
and a
NOTE
Although CD-R discs finalized on the CC-222 may be
replayed on ordinary CD players, remember that finalized CD-RW discs may not play on CD players.
CD-R NO TOC
CD-RW NO TOC
changes to a CD.
changes to
Unfinalizing CD-RW discs
If a CD-RW disc has been finalized, it is possible to
erase the Table of Contents in the following way:
1 With the finalized disc loaded and the unit in
stop mode, press the
ERASE key.
2 If the display does not show the word
Unfinalize?, turn the MULTI DIAL or
use the
SKIP keys until it is displayed.
3 To start the unfinalizing process, press the
MULTI DIAL control or press the ENTER key.
Erasing
Unfinalizing (described above) is a special case of
erasing a disc. It is also possible to erase a track or
tracks, starting with the last-recorded track, a whole
disc, or to “refresh” a disc.
If you do not want to proceed with the unfinalizing process, press any other key (such as
the STOP key).
If unfinalization has been chosen, the
NO TOC
indicator starts flashing in the display, and
the word
ERASE also starts flashing. The
unit starts counting down from a time shown
on the display (depending on the disc and
material, this value will be between 50 seconds and 1 minute 30 seconds).
CD-RW
After unfinalization, a
changes to a
NOTE
Erase procedures are possible only on a CD-RW disc.
Even if a CD-RW disc has been finalized, selecting an
erase procedure will automatically unfinalize it prior to
erasure. The disc may then have to be re-finalized.
Remember that it is not possible to perform any erase
procedures on a CD-R disc.
CD-RW NO TOC
indicator
indicator.
34 TASCAM CC-222 Owner’s Manual
Page 35

Erasing tracks
6 – After recording—Erasing
It is possible to erase the last recorded track, the last
two recorded tracks, the last three recorded tracks,
etc. It is not, however, possible to erase tracks in the
“middle” of the disc.
1 With the disc loaded, and the unit in stop
mode, press the
2 If the display does not show
XX?
, where XX is the number of the last
track recorded on the disc, turn the
or use the SKIP keys until it is
DIAL
ERASE key.
ERASE XX-
MULTI
displayed.
3 Tu r n th e
MULTI DIAL or use the SKIP keys to
change the number of the first track to be
erased. The highest value that this number
can take is the last track recorded (for example, if 17 tracks have been recorded on the
disc,
17-17 means that the last track only,
number 17, will be erased). The lowest value
that this number can take is
ber was
1, the whole disc would be erased, as
2 (if this num-
described below).
If you do not want to proceed with the erase
operation, press any other key (such as the
STOP key).
NOTE
If only one track has been recorded on the disc, only the
“erase disc” option (, “Erasing a whole disc”) is avail-
able.
4 When the range of tracks to be erased has
been selected, press the
ENTER key.
NOTE
This operation cannot be undone. If you are going to
erase a track or tracks, make sure that they are recordings that you really want to erase!
MULTI DIAL or the
If the erase operation has been selected, the
word
ERASE flashes on the display, and the
timer starts counting down.
At the end of the countdown period, the word
Complete appears briefly on the display,
and the display returns to the track/time
display.
Erasing a whole disc
When you want to erase a whole disc (all the tracks
on a disc), follow the procedure below:
1 With the disc loaded, and the unit in stop
mode, press the
2 Tu r n th e
MULTI DIAL or use the SKIP keys
until the display shows
ERASE key.
ERASE DISC?.
If you do not want to proceed with the erase
operation, press any other key (such as the
STOP key).
3 To erase the contents of the disc, press the
MULTI DIAL or the ENTER key.
Refreshing a disc
If a CD-RW disc has been corrupted at any point (e.g.
power has been cut off in the middle of a finalize
operation, etc.), or has been used in a computer or
another piece of equipment that makes it unreadable,
it is possible to “refresh” the disc to make it usable
again. This is equivalent to formatting a disk on a
computer to prepare it for use. This operation
destroys all data on the disc.
NOTE
This operation cannot be undone. If you are going to
erase a disc, make sure that it contains only recordings
that you really want to erase!
If the erase operation has been selected, the
word
ERASE flashes on the display, and the
timer starts counting down a time value
shown on the display.
At the end of the countdown period, the word
Complete appears briefly on the display,
and the display returns to the track/time
display.
1 With the disc loaded, and the unit in stop
mode, press the
2 Tu r n th e
MULTI DIAL or use the SKIP keys
until the display shows
3 To refresh the disc, press the
the
ENTER key.
ERASE key.
DISC REFRESH.
MULTI DIAL or
TASCAM CC-222 Owner’s Manual 35
Page 36

6 – After recording—Erasing
If you do not want to proceed with the
refresh operation, press any other key (such
as the
NOTE
This operation cannot be undone. If you are going to
refresh a disc, make sure that it contains only recordings
that you really want to erase!
STOP key).
If the refresh operation has been selected, the
words
ERASE XX:XX are shown on the
display, and the timer starts counting down
XX:XX).
(
At the end of the countdown period, the word
Complete appears briefly on the display,
and the display returns to the track/time
display (of course, there are no tracks, and
the disc is at the start, with the total time of
the disc available for recording).
36 TASCAM CC-222 Owner’s Manual
Page 37

7 – Reference and specifications
Troubleshooting
Symptom Possible cause and remedy
No power when
Hum on playback Audio connections not made properly. Check the connections
No audio output The external amplifier is no properly connected, or the wrong set of inputs connected to
The remote control does not seem to work Is the power on? Are the batteries in the remote control dead? Is the remote control unit
Low sound quality when playing back a tape The heads are dirty or magnetized. See “Tape maintenance” on page 41.
Sound is odd when playing back. a tape Pitch control may be off center (“Pitch control” on page 18)
Tape recording cannot be carried out The write-protect tabs have been broken off the cassette, the heads are dirty, or the
Hum appears at the
No sound on playback (the disc is playing and
the time display is incrementing)
No meter indication when a source is input Analog and/or digital volume (“Signal volume” on page 24) is set too low. The signal is
There is a gap in the A-B loop when played
back
The unit is in AUTO SPACE mode and is not
playing (it is paused)
D-IN UNLOCK! A digital input source has been selected for CD recording, but the source is not connected
Cannot record on a disc (pressing
shows MONITOR)
The recording level suddenly jumps (up or
down) when switching to or from digital direct
mode
PGM Full ! An attempt has been made to create more than 25 program steps.
Disc Full!
or Cannot Rec!
Not FS 44.1k! You are trying to do digital direct recording from a source which has not been recorded at
Disc Error The disc is bad. If it is a CD-RW disc, you may refresh it (“Refreshing a disc” on page 35),
Erase Error! An error has occurred while trying to erase the disc.
The display suddenly shows PMA Writing Either the disc is full (this message will be prefaced by
Rec Error General recording error. This may be caused by vibration or a shock during recording, for
No OPC Area! Appears only with CD-R discs. The OPC area is full, and no further recording is possible
OPC Area CLR Seen when a CD-RW disc OPC area is full, and the CC-222 automatically cleans up the
Need Repair! Current disc needs repair. Refresh the CD-RW disc using the procedure described in
System Err! System error.
POWER
PHONO
is pressed
input
RECORD
The power cord is not inserted properly. Check and correct this.
the active
too far away or at the wrong angle for correct operation (“Use of the remote control unit” on
page 10)?
recording level is set too low.
The grounding wire is not connected from the record deck to the CC-222.
The connections from the CC-222 to the amplifier system have not been made properly, or
the input source selector is not at the correct position.
being input through an unselected input source (“Input selection” on page 24)
or
The input selection is not made correctly (“Recording operations” on page 16 (tape) or
“Input selection” on page 24 (disc).
The A and B points are in different tracks.
When the unit is automatically paused as a result of the auto space mode, pressing the
AUTO SPACE key puts the unit into pause mode, and playback does not resume automatically after the auto pause time is elapsed (see “Auto spacing” on page 23).
or is not switched on.
A finalized disc has been inserted. Use an unfinalized recordable disc.
When recording from digital sources, the digital direct mode bypasses the digital level
(“Signal volume” on page 24), so that if this has been set to a non-zero value, the level will
be different. See “Digital direct” on page 32.
There is no space on the disc, or no tracks are available, or a general recording error has
occurred.
44.1 kHz (“Digital direct” on page 32).
otherwise replace the disc.
disc” on page 26) or an attempt has been mode to write more than 99 tracks.
example, or may be the result of a bad disc. Try recording again with the same disc. If the
message appears again, try a different disc.
on this disc. Finalize the disc.
OPC area for further recording.
“Refreshing a disc” on page 35.
LINE OUTPUT
s has been selected on the amplifier. Check and correct.
Disc Full!!
(“Full
TASCAM CC-222 Owner’s Manual 37
Page 38

7 – Reference and specifications—Menu items
Symptom Possible cause and remedy
Tray Error! Error in the CD tray mechanism.
Drive Error! Error in the CD drive mechanism.
Menu items
The following are the menu items that can be set
using the
MENU key. The majority of them affect
disc recording.
Pressing the
MENU key repeatedly cycles through the
menu items. Not every menu item is available in
every situation (for instance, if a digital input is not
Turn the
Press the
MULTI DIAL to change a value.
MULTI DIAL to confirm the change and exit
the menu system.
Alternatively, keep pressing the
normal time counter is displayed.
MENU key until the
selected, the digital direct option is not shown).
Menu displayed Meaning Described in: Default (factory) value
A-TRACK Automatic track increment “Automatic track division” on page 31 ON
S-LVL Sound (trigger) level for track increment “Setting the trigger level” on page 28 and
“Using the trigger level” on page 29
COPY ID Copy-protection on recorded discs “Copy-protection” on page 33 1 GEN
FADE IN Allows fade in of recorded discs “Fade-in and fade-out” on page 32 3s
FADE OUT Allows fade out of recorded discs “Fade-in and fade-out” on page 32 3s
DUB>VOL Bypasses (THRU) or enables (ON) the
internal volume when dubbing from tape to
disc or disc to tape
PHONO Sends the PHONO inputs to DISC or
TAPE
D_DIRECT Records directly from the digital source to
disc
VOLUME Digital volume control “Signal volume” on page 24 0dB
“Dubbing tapes from the CD deck” on
page 16 and “Dubbing from tape to disc”
on page 27
“Recording tapes from the PHONO deck”
on page 17 and “Recording to disc from
the RIAA PHONO inputs” on page 27
“Digital direct” on page 32 OFF
–54dB
THRU
DISC
Resetting default menu values
User settings and the values of the input selection for
1 and 2 are stored in memory, and are retained when
the power is turned off.
To restore these settings to the factory defaults as in
the table above, use a ballpoint pen or similar to hold
down the
RESET button on the rear panel:
RESET
While holding down the button, turn on the power to
the unit and keep the
RESET button pressed for at
least two seconds after turning on the power. The
menu values will be reset. The values for
and
INPUT 2 are set to LINE 1 and LINE 2
INPUT 1
respectively.
38 TASCAM CC-222 Owner’s Manual
Page 39

7 – Reference and specifications—Specifications
Specifications
CD recorder section
Recording media type CD-R, CD-RW, CD-RDA, CD-RWDA
Recording resolution 16-bit linear
Recording sampling frequency 44.1 kHz
Frequency response 20 Hz — 20 kHz (playback ±0.5 dB, recording ±1 dB)
S/N ratio > 88 dB (playback)
> 83 dB (recording)
Dynamic range > 88 dB (playback)
> 83 dB (recording)
Total harmonic distortion < 0.012% (playback)
< 0.015% (recording)
Channel separation 80 dB (playback: 1 kHz)
75 dB (recording: 1 kHz)
Wow & flutter Unmeasurable (< 0.001%)
Digital inputs
COAXIAL
OPTICAL
Digital outputs
COAXIAL
OPTICAL
LINE INPUTS 1
Nominal input level –10 dBV (6dBV –16 dB)
Maximum input level + 6dBV
Input impedance 10 k
LINE OUTPUTS 1
Nominal output level –10 dBV (FS –16 dB)
Maximum output level +6 dBV
Output impedance 1 k
RCA pin, IEC60958 TYPE II
TOSLINK, IEC60958 TYPE II
RCA pin, IEC60958 TYPE II
TOSLINK, IEC60958 TYPE II
Unbalanced RCA
Ω
Unbalanced RCA
Ω
(unbalanced)
Cassette recorder section
Number of channels 4-track, 2-channel stereo
Heads Record/playback x 1 (rotary reverse), erase x 1
Type of tape Compact Cassette C-60, C-90 (Type I (normal), Type II (high-position/chrome)
–recording and playback; Type IV (metal)–playback only)
Tape speed 4.76 cm/s (1 7/8 ips)
Motor DC servo motor (x 1)
Wow and flutter 0.19% (W. RMS)
Frequency response (overall) 50 Hz — 12.5kHz ±3dB (high position)
50Hz — 10kHz ±3dB (normal)
Signal-to-noise ratio (overall) 46dB (Dolby NR off)
52dB (Dolby NR on)
Fast winding time About 120 seconds (C-60)
TASCAM CC-222 Owner’s Manual 39
Page 40

7 – Reference and specifications—Specifications
LINE INPUTS 2
Nominal input level Nominal input level 0.28V (–11 dBV)
Input impedance 50 k
LINE OUTPUTS 2
Nominal output level 0.46V (–6.7 dBV)
Output impedance 50 k
Unbalanced RCA
Ω
Unbalanced RCA
Ω
Phono input and headphones
RIAA PHONO INPUT
Cartridge type MM (moving magnet)
Input signal level 5.6mV
Input impedance
Signal-to-noise ratio 60 dB
PHONES
(headphone output)
Output level 10 mW + 10 mW (into 32
Unbalanced RCA (with ground)
Ω
47 k
6 mm (1/4”) stereo
Ω
)
General specifications
Voltage requirements USA/Canada 120 VAC, 60 Hz
U.K./Europe 230 VAC, 50 Hz
Australia 240 VAC, 50 Hz
General export 120/230 VAC, 60 Hz
Power consumption 30 W
Applicable electromagnetic environment E4
Peak inrush current 1.2 A
Dimensions 483 x 138 x 295 (mm)
19 x 5.4 x 11.6 (in)
Weight 8 kg (17.6 lbs)
Operating temperature 5°C to 35°C (41°F to 95°F)
Supplied accessories RC-222 remote control unit
40 TASCAM CC-222 Owner’s Manual
Page 41

7 – Reference and specifications—Dimensional drawing
m
4
Dimensional drawing
483 mm (19.0")
466 m (18.4")
435mm (17.1")
Tape maintenance
The heads and tape path should be cleaned and
demagnetized periodically.
Cleaning the tape path Apply head cleaning
fluid to a cotton bud or soft cloth, and lightly rub the
heads, capstan and all metal parts in the tape path.
Also clean the pinch roller using rubber cleaning
fluid.
(2.25")
57.2 mm
132.5 mm (5.2")
15 mm
(0.6")
138 mm (5.4")
270 mm (10.6")
10
(0.
For details of its use, read the instructions supplied
with the demagnetizer and make sure you understand
them thoroughly before attempting this operation.
Pinch Roller
Capstan
Both fluids are available in TEAC Tape Cleaning
Kits HC-2 and RC-2 in the U.S.A. or TZ-261 in other
areas.
Demagnetizing heads Be sure that the power is
off, then demagnetize the heads using a TEAC E-3
demagnetizer.
Erase Head
Record/Play Head
TASCAM CC-222 Owner’s Manual 41
Page 42

»
CC-222
TEAC CORPORATION
Phone: (0422) 52-5082 3-7-3, Nakacho, Musashino-shi, Tokyo 180-8550, Japan
TEAC AMERICA, INC.
Phone: (323) 726-0303 7733 Telegraph Road, Montebello, California 90640
TEAC CANADA LTD.
Phone: 905-890-8008 Facsimile: 905-890-9888 5939 Wallace Street, Mississauga, Ontario L4Z 1Z8, Canada
TEAC MEXICO, S.A. De C.V
Phone: 5-851-5500 Campesinos No. 184, Colonia Granjes Esmeralda, Delegaacion Iztapalapa CP 09810, Mexico DF
TEAC UK LIMITED
Phone: 01923-819699 5 Marlin House, Croxley Business Park, Watford, Hertfordshire. WD1 8TE, U.K.
TEAC DEUTSCHLAND GmbH
Phone: 0611-71580 Bahnstrasse 12, 65205 Wiesbaden-Erbenheim, Germany
TEAC FRANCE S. A.
Phone: 01.42.37.01.02 17 Rue Alexis-de-Tocqueville, CE 005 92182 Antony Cedex, France
TEAC BELGIUM NV/SA
Phone: 0031-162-510210 Oeverkruid 15, NL-4941 VV Raamsdonksveer, Netherlands
TEAC NEDERLAND BV
Phone: 0162-510210 Oeverkruid 15, NL-4941 VV Raamsdonksveer, Netherlands
TEAC AUSTRALIA PTY.,LTD. A.B.N. 80 005 408 462
Phone: (03) 9672-2400 Facsimile: (03)9672-2249 280 William Street, Port Melbourne, Victoria 3000, Australia
TEAC ITALIANA S.p.A.
Phone: 02-66010500 Via C. Cantù 11, 20092 Cinisello Balsamo, Milano, Italy
Printed In China MA-0557
 Loading...