

Page 1
FM/MW/LW
Cassette Car
Stereo
3-861-514-31 (1)
Operating Instructions
Instrukcje Obsługi
Návod k obsluze
Οδηγίεσ Λειτουργίασ
Kullanım kılavuzu
For installation and connections, see the supplied installation/connections
manual.
Szczegóły dotyczące instalacji i podłączeń, proszę sprawdzić w dostarczonym,
osobnym podręczniku
Informace o instalaci a zapojení naleznete v přiložené příručce Instalace /
zapojení.
Για την εγκατάσταση και τισ συνδέσεισ, δείτε το συνοδευτικ εγχειρίδιο
Εγκατάσταση/Συνδέσεισ.
Kurma ve bağlantı işlemleri için ünite beraberindeki Kurma/Bağlantılar kılavuzuna
bakınız.
EN
PL
CZ
GR
TU
XR-4790
1998 by Sony Corporation
Page 2

EN
Welcome!
Thank you for purchasing the Sony Cassette
Car Stereo. This unit lets you enjoy a variety of
features by using an optional rotary
commander.
2
Page 3

Table of contents
Getting Started
Resetting the unit ................................................ 4
Detaching the front panel .................................. 4
Setting the clock .................................................. 5
Cassette Player
Listening to a tape ............................................... 5
Radio
Memorising stations automatically
— Best Tuning Memory (BTM) ................... 6
Memorising only the desired stations.............. 7
Receiving the Memorised stations.................... 7
Other Functions
Adjusting the sound characteristics ................. 8
Attenuating the sound ....................................... 8
Changing the sound and beep tone ................. 8
Additional Information
Precautions ........................................................... 9
Maintenance ....................................................... 10
Dismounting the unit ....................................... 10
The rotary commander labels ......................... 11
Location of controls .......................................... 12
Specifications ..................................................... 13
Troubleshooting guide ..................................... 14
Index ................................................................... 15
EN
3
Page 4
Getting Started
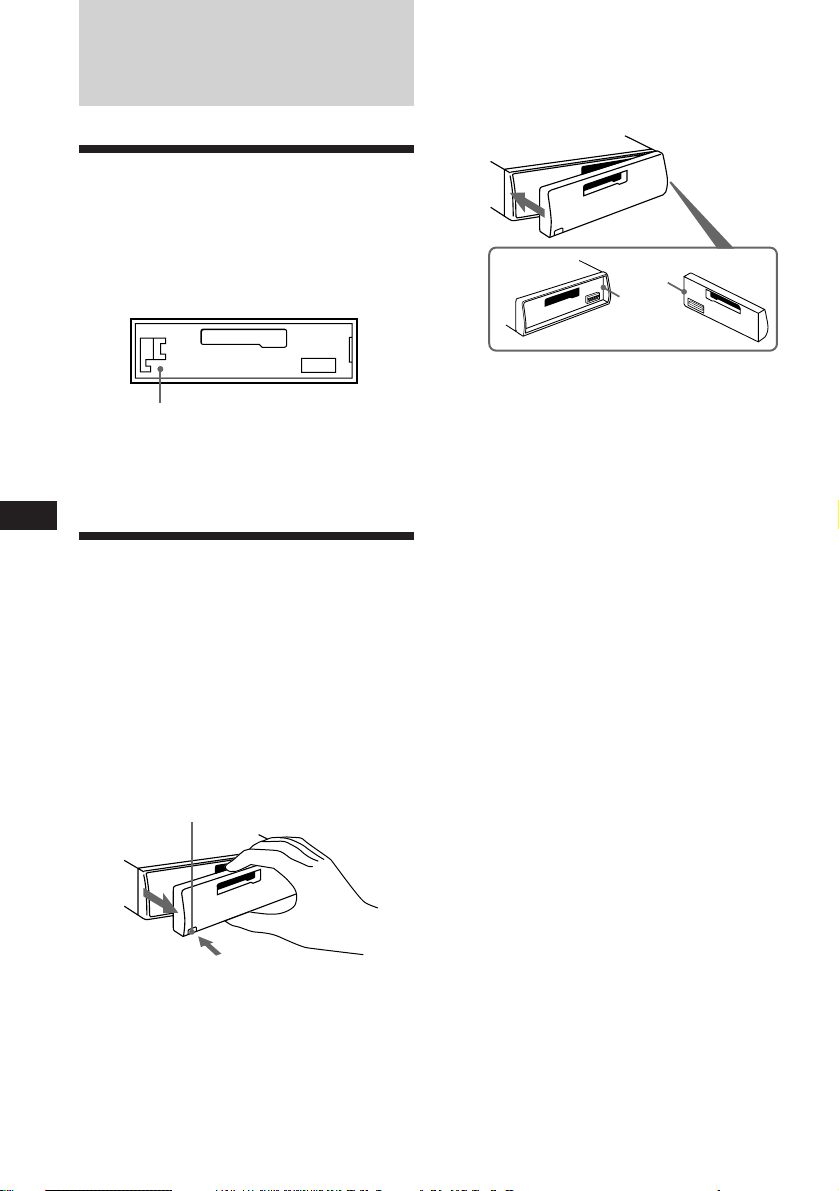
Resetting the unit
Before operating the unit for the first time or
after replacing the car battery, you must reset
the unit.
Press the reset button with a pointed object,
such as a ballpoint pen.
Reset button
Note
Pressing the reset button will erase all the Memorised
programme and memory functions.
EN
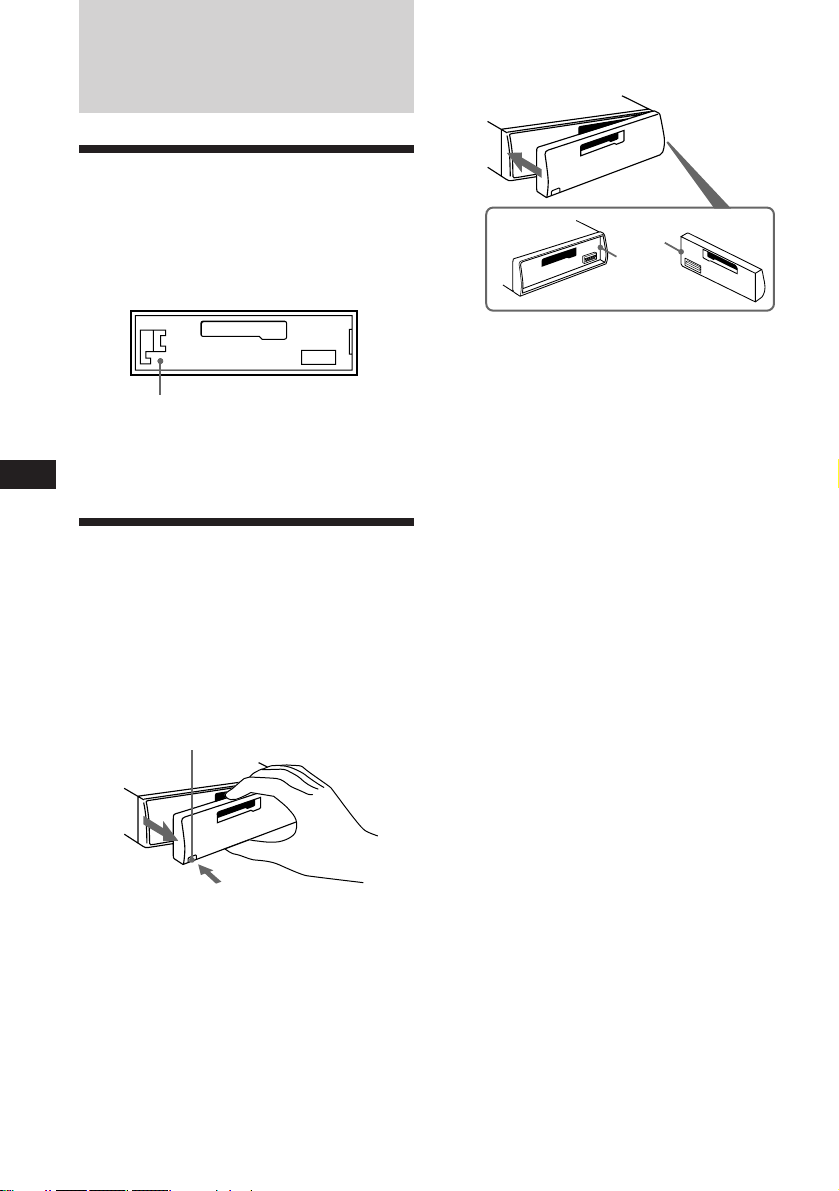
Detaching the front panel
The front panel of this unit can be detached to
prevent the unit from being stolen.
1 Press (OFF).
2 Press (RELEASE) to detach the front
panel then gently pull it out.
(RELEASE)
Attaching the front panel
Attach part A of the front panel to part B of
the unit as illustrated and push until it clicks.
A
B
Notes
• Make sure the front panel is right side up when attaching
it to the unit as it cannot be attached upside down.
• Do not press the front panel too hard when attaching it
to the unit. It can easily be attached by pressing it lightly
against the unit.
• When you carry the front panel with you, keep it in the
supplied front panel case.
• Do not press hard or put excessive pressure on the
display windows of the front panel.
• Do not expose the front panel to direct sunlight, heat
sources such as hot air ducts or leave it in a humid place.
Never leave it on the dashboard etc. of a car parked in
direct sunlight where there may be a considerable rise in
temperature inside the car.
Caution alarm
If you turn the ignition key to the OFF position
without removing the front panel, the caution
alarm will beep for a few seconds (only when
the POWER SELECT switch is set to the A
position).
Notes
• Be sure not to drop the panel when detaching it from the
unit.
• If you press (RELEASE) to detach the panel while the
unit is still turned on, the power will automatically turn
off to protect the speakers from being damaged.
4
Page 5
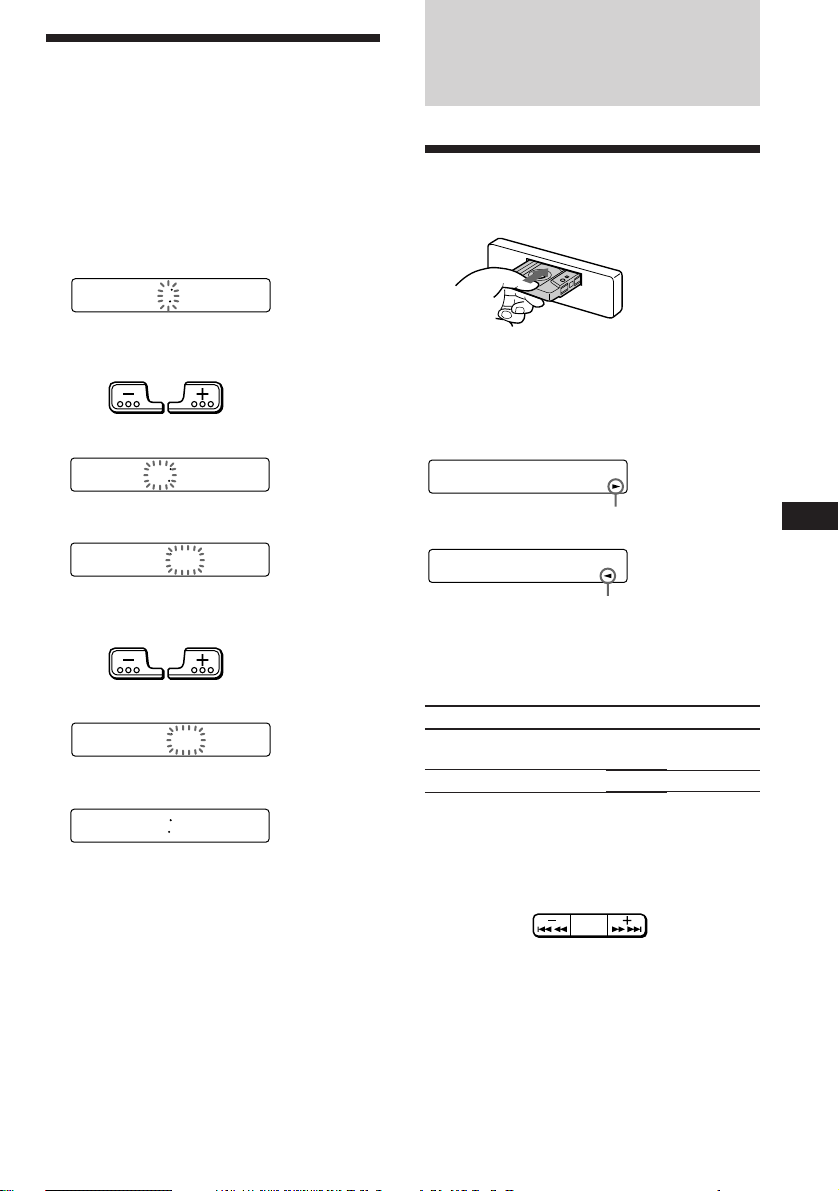
Setting the clock
The clock has a 24-hour digital indication.
For example, setting it to 10:08
Cassette Player
1 Press (OFF) or (DSPL) during operation.
2 Press (DSPL) for two seconds.
100
The hour digit flashes.
1 Set the hour digits.
To go
backward
1000
2 Press (SEL) momentarily.
1000
The minute digits flashes.
3 Set the minute digits.
To go
backward
1008
To go
forward
To go
forward
3 Press (DSPL) momentarily.
1008
The clock starts.
Note
If the POWER SELECT switch on the top of the unit is set
to the B position, the clock cannot be set unless the power
is turned on. Set the clock after you have turned on the
radio.
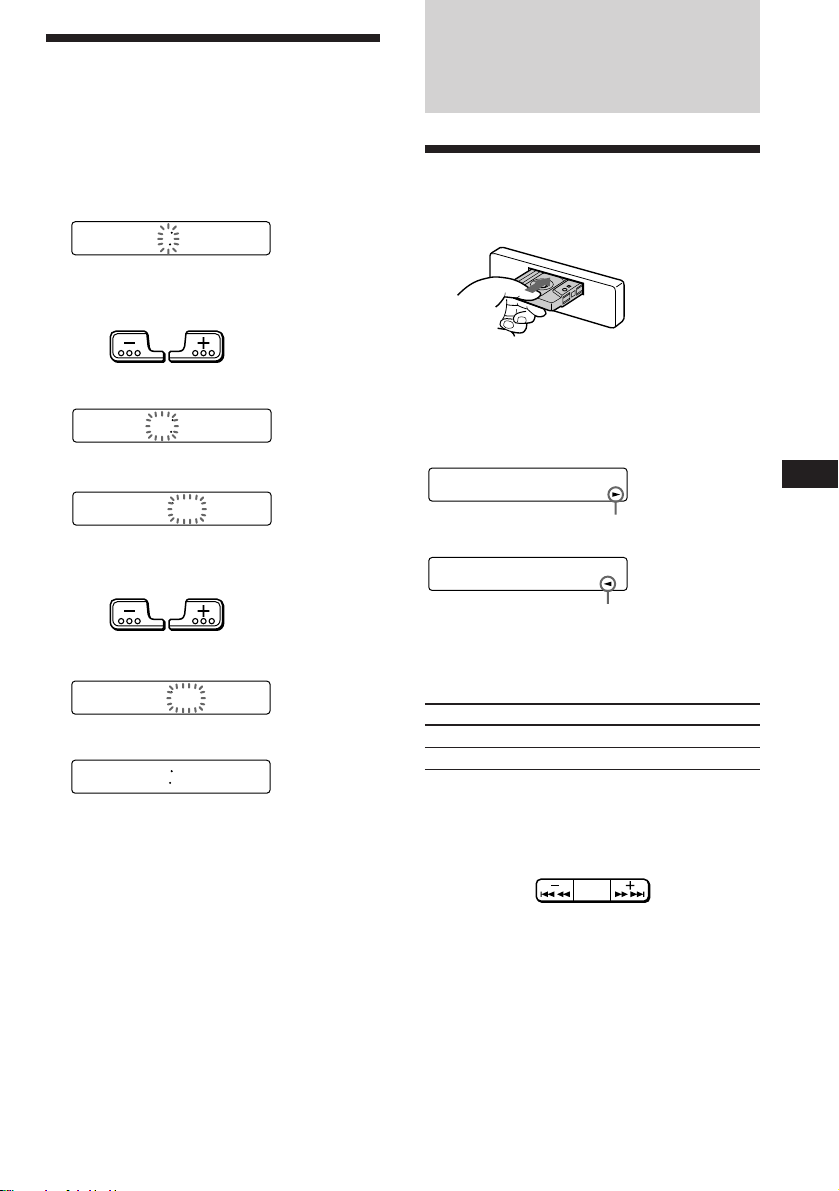
Listening to a tape
Insert a cassette.
Playback will start automatically.
If a cassette is already inserted, press
(SOURCE) repeatedly until “TAPE” is
displayed.
TAPE
The side facing up is being played.
TAPE
The side facing down is being played.
Tip
To change the tape transport direction, press (MODE)
(*) during tape playback.
To
Stop playback
Eject the cassette
Fast-winding the tape
During playback, press either side of
(SEEK/AMS) for two seconds.
Press
(OFF)
6
SEEK
AMS
Fast-forwardRewind
EN
Getting Started/Cassette Player
To start playback during fast-forwarding or
rewinding, press (MODE) (*).
5
Page 6
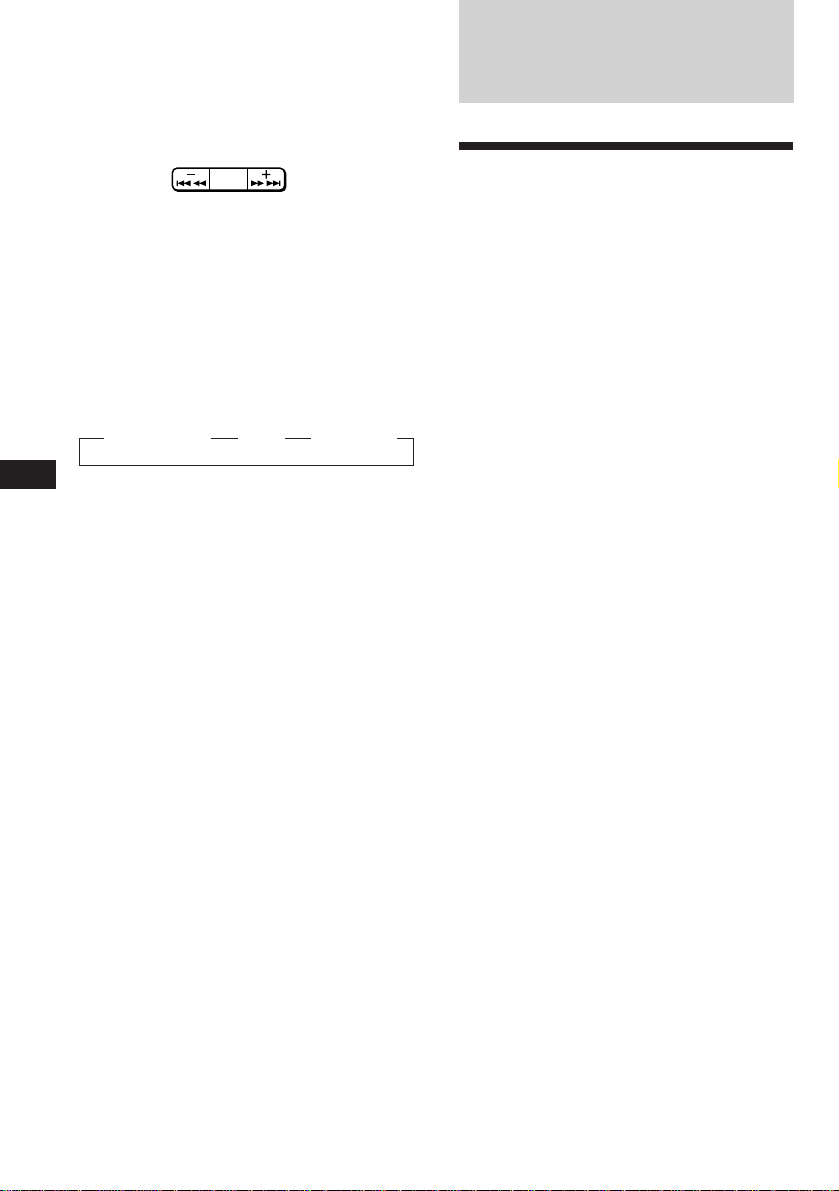
Locating the beginning of a track
— Automatic Music Sensor (AMS)
You can skip up to nine tracks at one time.
During playback, press either side of
(SEEK/AMS) momentarily.
SEEK
AMS
To locate the
preceding tracks
Note
The AMS function may not work when :
• the blanks between tracks are shorter than 4 seconds
• there is noise between tracks
• there are long sections of low volume or quiet sections.
To locate the
succeeding tracks
Changing the displayed items
Each time you press (DSPL) momentarilly
during tape playback, the displayed item
changes as follows:
z Tape playback z Clock z Frequency*
EN
* While the ATA function is activated.
Switching to the radio while fastwinding a tape
— Automatic Tuner Activation (ATA)
Press (5) during playback.
“ATA” appears on the display.
When fast-forwarding or rewinding with
(SEEK/AMS) for two seconds, the tuner will
turn on automatically.
Radio
Memorising stations
automatically
— Best Tuning Memory (BTM)
This function selects from the currently
received band the stations with the strongest
signals and Memorises them in order of their
frequency.
PREVENTING ACCIDENTS!
When tuning in while driving, use the
automatic tuning or memory preset search
function instead of manual tuning.
1 Press (SOURCE) repeatedly to select the
tuner.
Each time you press (SOURCE), the source
changes as follows:
TAPE ˜ TUNER
2 Press (MODE) repeatedly to select the
band.
Each time you press (MODE), the band
changes as follows:
FM1 n FM2 n FM3 n MW n LW
3 Press (BTM) for two seconds.
To cancel this function, press (5) again.
6
Notes
• The unit will not store stations with weak signals on the
preset number buttons. If there are only a few stations
received, some preset number buttons will remain empty.
• When a preset number indicated on the display, the unit
starts storing station from the one currently display.
Page 7

Memorising only the
desired stations
Up to 6 stations on each band (FM1, FM2, FM3,
MW and LW) can be stored on the preset
number buttons in the order of your choice.
Therefore, 18 FM stations can be Memorised.
If you try to store another station on the same
preset number button, the most recently stored
station will be erased.
1 Press (SOURCE) repeatedly to select the
tuner.
2 Press (MODE) repeatedly to select the
band.
3 Press (SEEK/AMS) to search for the
station you wish to store on a preset
number button.
4 Press the desired preset number button
((1) to (6)) for two seconds.
The number of the selected preset number
button appears on the display.
Changing the displayed items
Each time you press (DSPL), the display
changes between the frequency and the clock.
If you cannot tune in a preset
station
Press either side of (SEEK/AMS)
momentarily to search for the station
(automatic tuning).
Scanning stops when a station is received.
Press either side of (SEEK/AMS) repeatedly
until the desired station is received.
Note
If the automatic tuning stops too frequently, press
(LCL) to light up “LCL” on the display (local seek mode).
Only the stations with relatively strong signals are tuned
in.
Tip
If you know the frequency, press and hold either side of
(SEEK/AMS) until the desired station is received (manual
tuning).
EN
Cassette Player/Radio
Receiving the Memorised
stations
1 Press (SOURCE) repeatedly to select the
tuner.
2 Press (MODE) repeatedly to select the
band.
3 Press the preset number button
momentarily ((1) to (6)) on which the
desired station is stored.
Tip
Press either side of (PRST) to receive in order the stations
stored in the memory (Preset Search Function).
7
Page 8
Other Functions
Adjusting the bass curve
Turn the D-BASS control to adjust the
bass level (1, 2 or 3).
“D-BASS” appears in the display.
To cancel, turn the control to the OFF position.
Adjusting the sound
characteristics
1 Select the item you want to adjust by
pressing (SEL) repeatedly.
VOL (volume) n BAS (bass) n TRE
(treble) n BAL (left-right) n FAD
(front-rear)
2 Adjust the selected item by pressing
either (+) or (–).
Adjust within three seconds after selecting.
(After three seconds the button will again
serve as the volume control button.)
EN
Attenuating the sound
Press (ATT).
The “ATT” indication flashes.
To restore the previous volume level, press
again.
Note
If the bass sound becomes distorted, adjust the D-BASS
control or the volume button.
Attenuating the beep tone
Press (6) while pressing (SEL).
To obtain the beep tone again, press these
buttons again.
Changing the sound and
beep tone
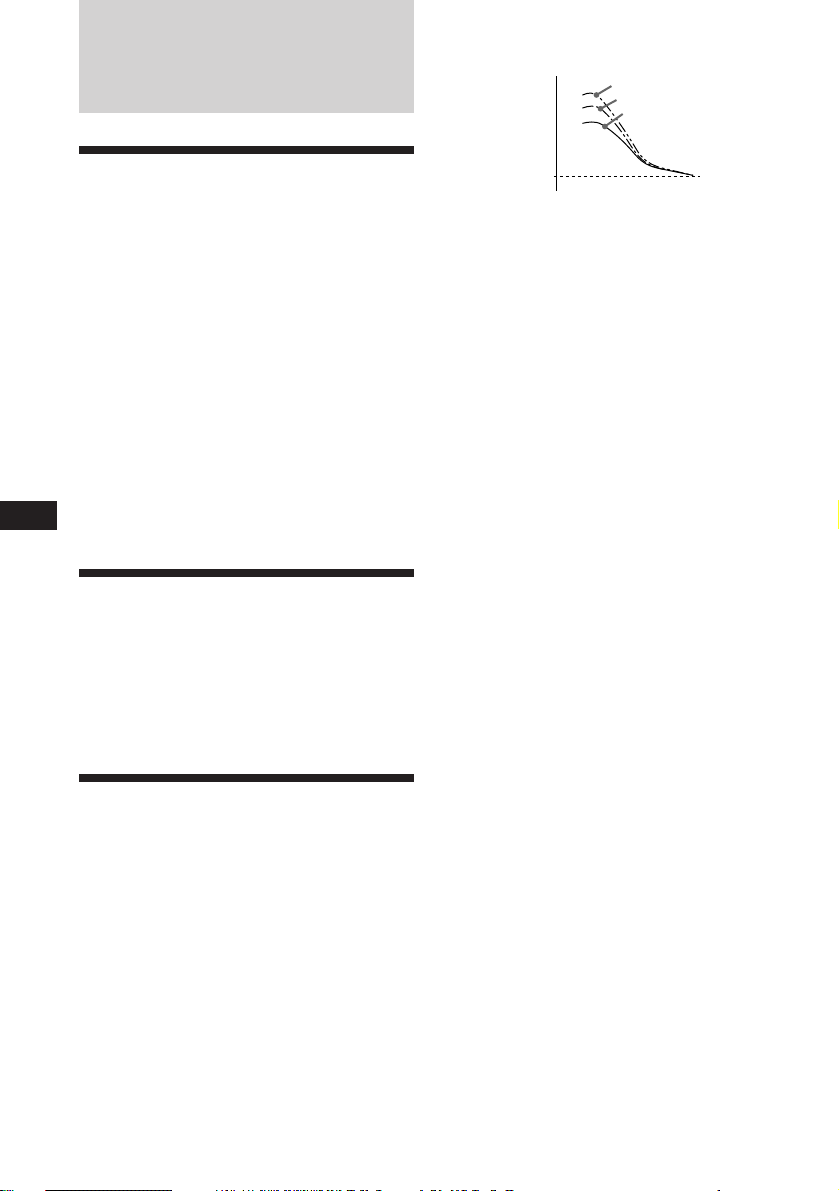
Boosting the bass sound — D-Bass
To enjoy clear and powerful bass sound, you
can boost only the low frequency signal with a
sharp curve. This is the effect you get when
use an optional subwoofer system.
For example, you can hear the bass line more
clearly even if the vocal volume remains the
same. You can emphasize and adjust the bass
sound easily with the D-BASS control.
Analog D-BASS
D-BASS 3
Level
0dB
8
D-BASS 2
D-BASS 1
Frequency (Hz)
Page 9
Additional
Information
Precautions
• If your car was parked in direct sunlight
resulting in a considerable rise in
temperature inside the car, allow the unit to
cool off before operating it.
• If no power is being supplied to the unit,
check the connections first. If everything is in
order, check the fuse.
• If no sound comes from the speakers of a
2-speaker system, set the fader control to the
center position.
• When the tape is played back for a long
period, the cassette may become warm
because of the built-in power amplifier.
However, this is not a sign of malfunction.
If you have any questions or problems
concerning your unit that are not covered in
this manual, please consult your nearest Sony
dealer.
To maintain high quality sound
If you have drink holders near your audio
equipment, be careful not to splash juice or
other soft drinks onto the car audio. Sugary
residues on this unit or cassette tapes may
contaminate the playback heads, reduce the
sound quality, or prevent sound reproduction
altogether.
Cassette cleaning kits cannot remove sugar
from the tape heads.
Notes on Cassettes
Cassette care
• Do not touch the tape surface of a cassette, as
any dirt or dust will contaminate the heads.
• Keep cassettes away from equipment with
built-in magnets such as speakers and
amplifiers, as erasure or distortion on the
recorded tape could occur.
• Do not expose cassettes to direct sunlight,
extremely cold temperatures or moisture.
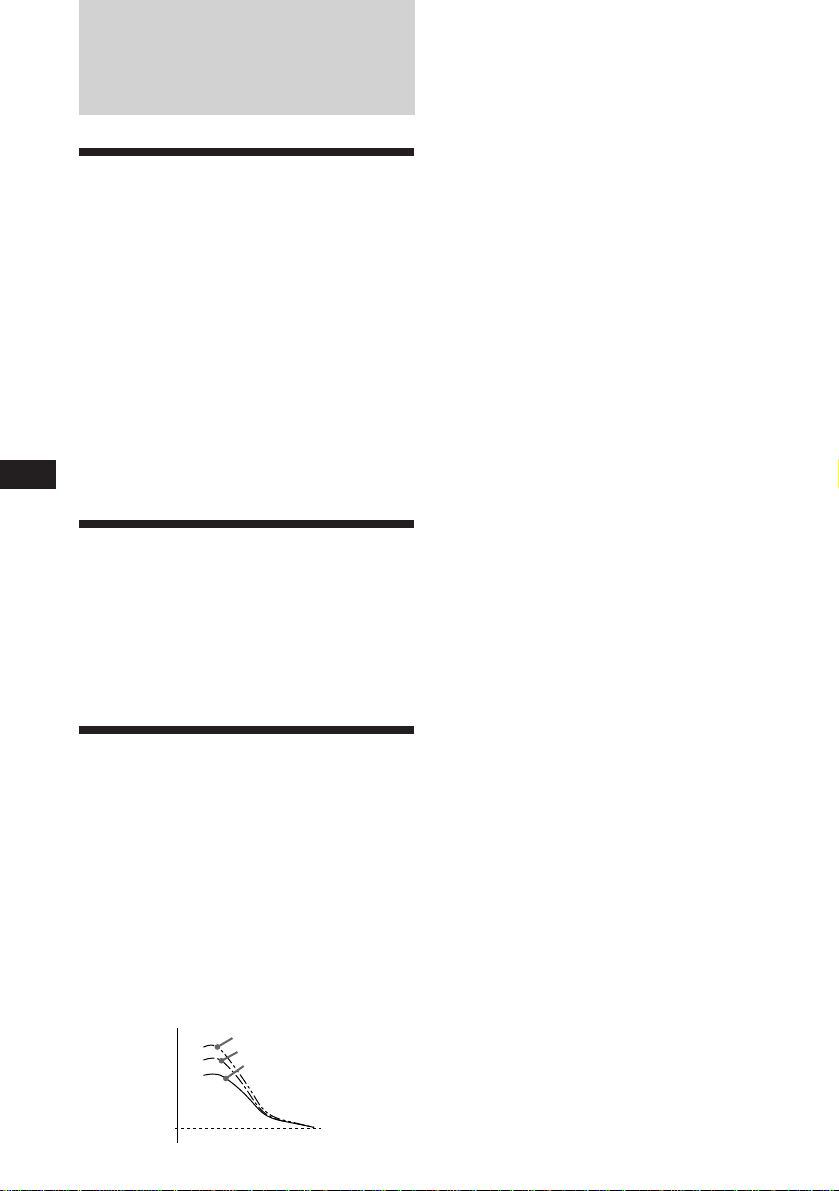
• Slack in the tape may cause the tape to be
caught in the machine. Before you insert the
tape, use a pencil or similar object to turn the
reel and take up any slack.
Slack
• Distorted cassettes and loose labels can cause
problems when inserting or ejecting tapes.
Remove or replace loose labels.
Cassettes longer than 90 minutes
The use of cassettes longer than 90 minutes is
not recommended except for long continuous
play. The tapes used for these cassettes are
very thin and tend to be stretched easily.
Frequent playing and stopping of these tapes
may cause them to be pulled into the cassette
deck mechanism.
EN
Other Functions/Additional Information
9
Page 10
Maintenance
Fuse Replacement
When replacing the fuse, be sure to use one
matching the amperage rating stated on the
original fuse. If the fuse blows, check the
power connection and replace the fuse. If the
fuse blows again after replacement, there may
be an internal malfunction. In such a case,
consult your nearest Sony dealer.
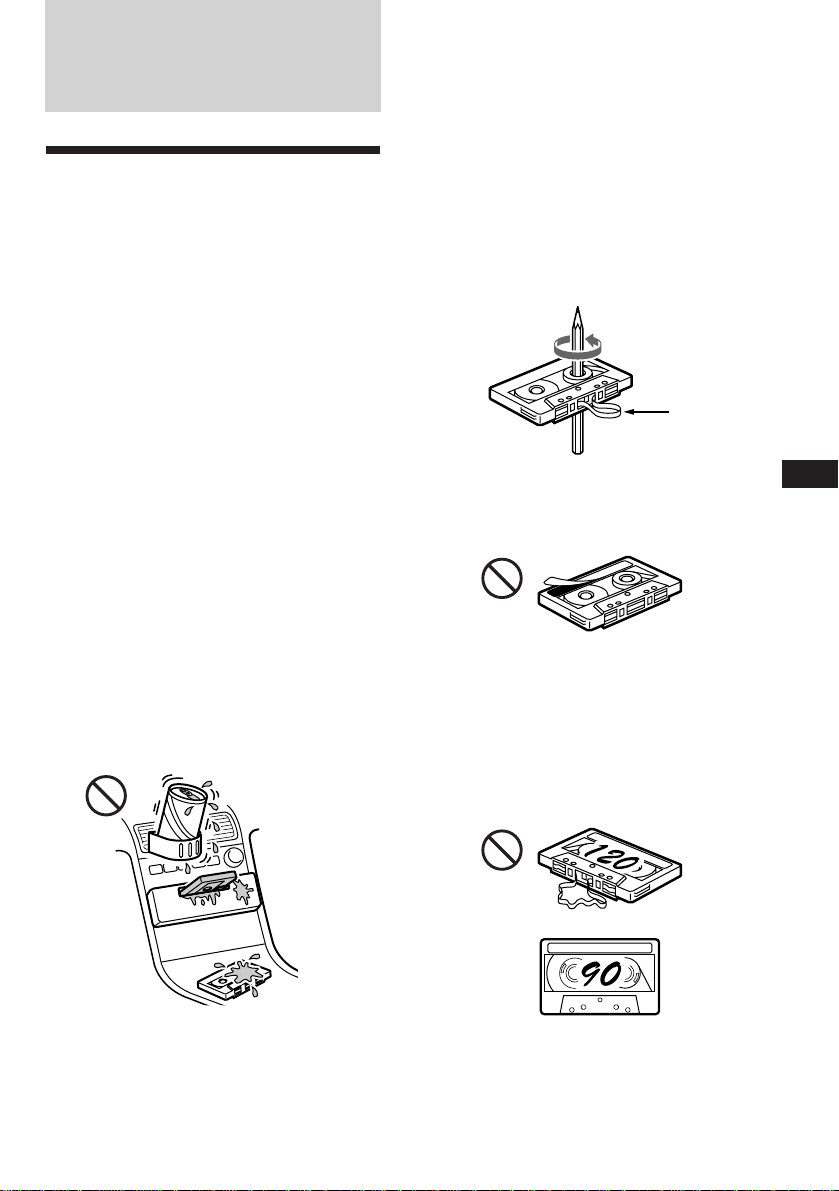
Dismounting the unit
1
Release key (supplied)
2
Fuse (10 A)
Warning
Never use a fuse with an amperage rating
exceeding the one supplied with the unit as
EN
this could damage the unit.
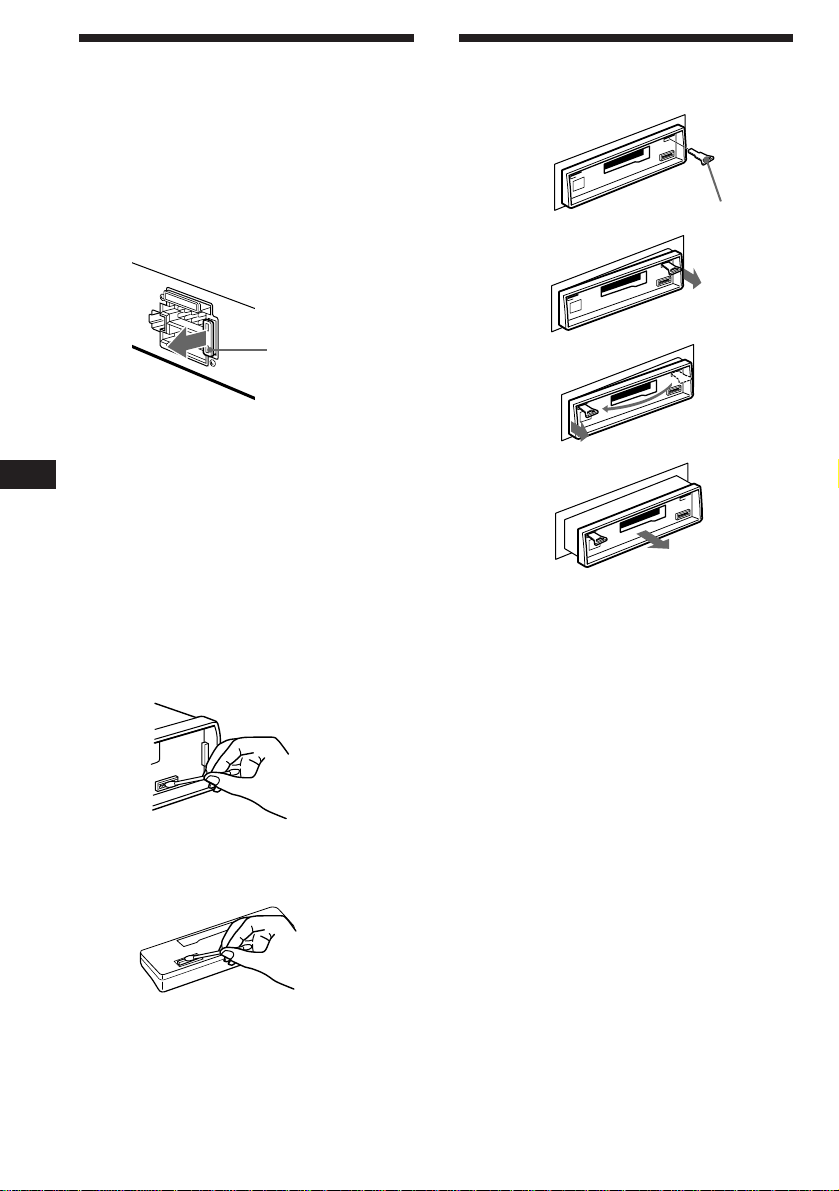
Cleaning the Connectors
The unit may not function properly if the
connectors between the unit and the front
panel are not clean. In order to prevent this,
open the front panel by pressing (RELEASE),
then detach it and clean the connectors with a
cotton swab dipped in alcohol. Do not apply
too much force. Otherwise, the connectors may
be damaged.
Main unit
3
4
10
Back of the front panel
Page 11
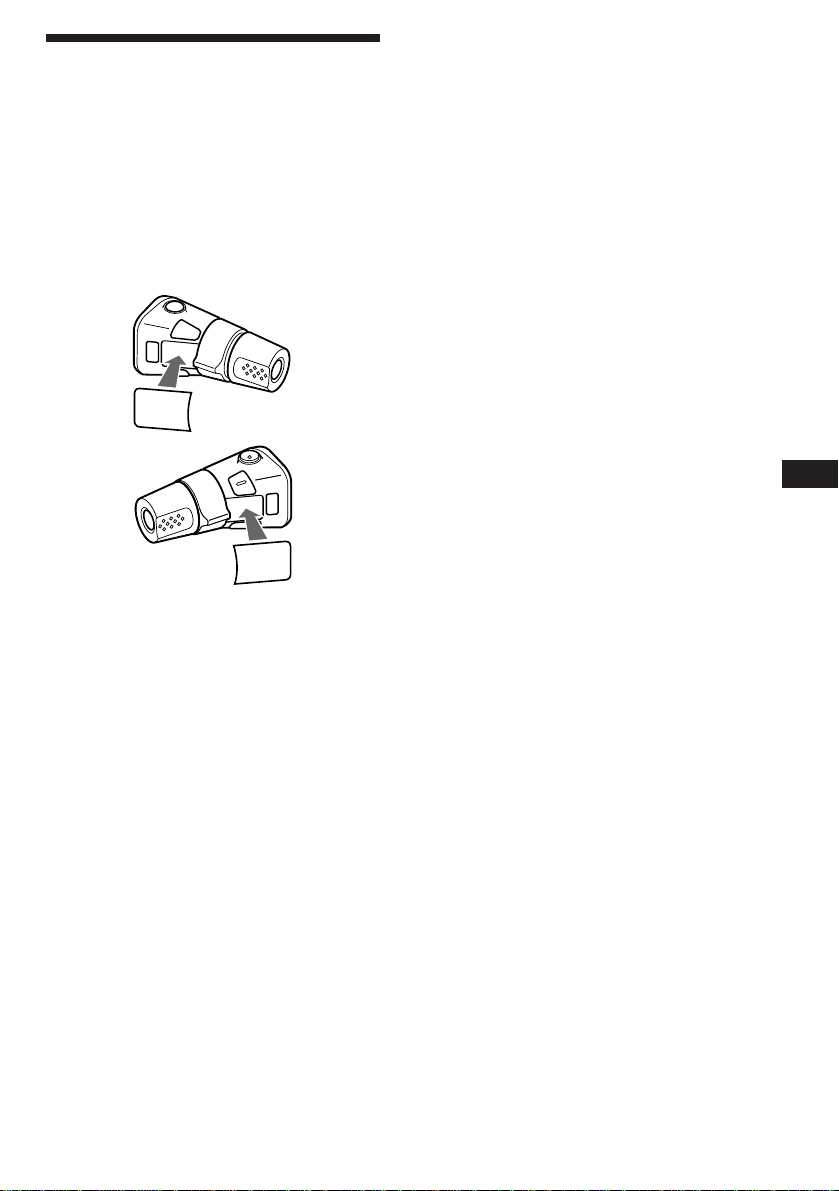
The rotary commander
labels
You can control this unit with the optional
rotary commander (RM-X4S).
Some labels are supplied with the rotary
commander. Attach that label which matches
the functions of the master unit and the
mounting position of the rotary commander.
When you mount the rotary commander,
attach the appropriate label, as in the
illustration below.
DSPL
MODE
SEL
SEL
MODE
DSPL
EN
Additional Information
11
Page 12
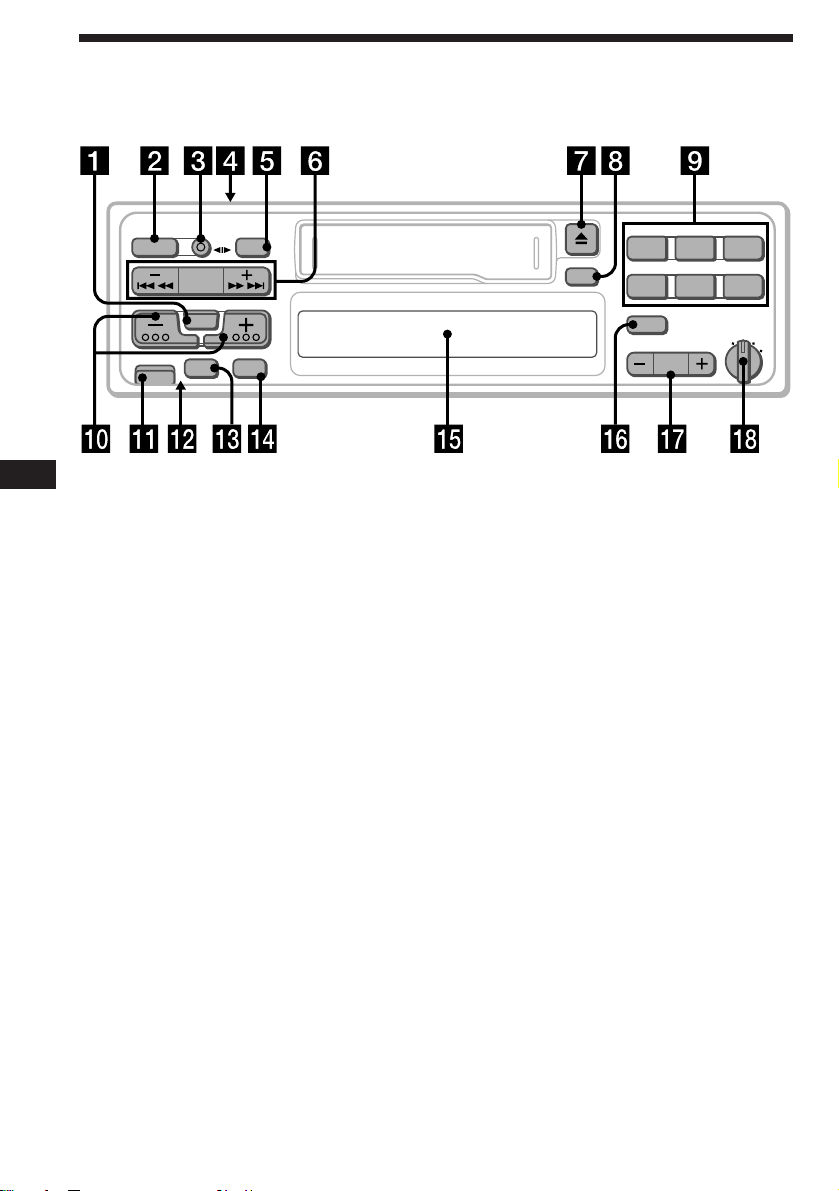
Location of controls
SEEK
AMS
SEL
ATT
MODE
OFF
BTM
SOURCE
RELEASE
EN
Refer to the pages for further details.
1 SEL (control mode select) button 5, 8
2 SOURCE button (TAPE/TUNER) 5, 6, 7
3 MODE (*) button
During tuner reception:
BAND select 6, 7
During tape playback:
Transport direction change 5
4 POWER SELECT switch (located on the
top of the unit)
See “POWER SELECT Switch” in the
Installation/Connections manual.
5 OFF button 4, 5
6 SEEK/AMS button 5, 6, 7
7 6 (Eject) button 5
8 DSPL (display mode change/time set)
button 5, 6, 7
9 During radio reception:
Preset number buttons 7
During tape playback:
(5) ATA (Automatic Tuner
Activation) button 6
231
LCL
PRST
ATA
564
D-BASS
1
OFF
2
3
DSPL
!º (+)(–) (volume/bass/treble/left-right/
front-rear control) button 5, 8
!¡ RELEASE (front panel release) button
4, 10
!™ Reset button (located on the front side
of the unit hidden by the front panel)
Press this button when you use this unit
for the first time, when you have changed
the car battery, or when the buttons of this
unit do not function properly.
!£ ATT button 8
!¢ BTM (Best tuning memory) button 6
!∞ Display window
!§ LCL button 7
!¶ PRST button 7
!• D-BASS control 8
12
Page 13

Specifications
Cassette player section
Tape track 4-track 2-channel stereo
Wow and flutter 0.08 % (WRMS)
Frequency response 30 – 18,000 Hz
Signal-to-noise ratio 58 dB
Tuner section
FM
Tuning range 87.5 – 108.0 MHz
Antenna terminal External antenna connector
Intermediate frequency 10.7 MHz
Usable sensitivity 8 dBf
Selectivity 75 dB at 400 kHz
Signal-to-noise ratio 65 dB (stereo),
68 dB (mono)
Harmonic distortion at 1 kHz
0.5 % (stereo),
0.3 % (mono)
Separation 35 dB at 1 kHz
Frequency response 30 – 15,000 Hz
Capture ratio 2 dB
MW/LW
Tuning range MW: 531 – 1,602 kHz
LW: 153 – 281 kHz
Antenna terminal External antenna connector
Intermediate frequency 10.71 MHz/450kHz
Sensitivity MW: 30 µV
LW: 50 µV
Power amplifier section
Outputs Speaker outputs
(sure seal connectors)
Speaker impedance 4 – 8 ohms
Maximum power output 35 W × 4 (at 4 ohms)
General
Tone controls Bass ±8 dB at 100 Hz
Power requirements 12 V DC car battery
Dimensions Approx. 188 × 58 × 181
Mounting dimensions Approx. 182 × 53 × 164 mm
Mass Approx. 1.2 kg
Supplied accessories Parts for installation and
Optional accessories Rotary commander
Design and specifications are subject to change without
notice.
Treble ±8 dB at 10 kHz
(negative ground)
mm (w/h/d)
(w/h/d)
connections (1 set)
Front panel case (1)
RM-X4S
EN
Additional Information
13
Page 14
Troubleshooting guide
The following checklist will assist in the correction of most problems you may encounter with your
unit.
Before going through the checklist below, refer to the operating procedures.
General
Problem
No sound.
Indications do not appear on
the display.
No beep tone.
Tape playback
Problem
Playback sound is distorted.
EN
The AMS does not operate
correctly.
Cause/Solution
• Adjust the volume with (+).
• Set the fader control to the center position for 2-speaker
systems.
Remove the front panel and clean the connectors. See “Cleaning
the Connectors” in “Maintenance” for details.
The beep tone is attenuated.
Cause/Solution
Contamination of the tape head. n Clean the head.
• There is noise in the space between tracks.
• A blank space is too short (less than four seconds).
• + on (SEEK/AMS) is pressed immediately before the
following track.
• = on (SEEK/AMS) is pressed immediately after the track
starts.
• A long pause, or a passage of low frequencies or very low
sound level is treated as a blank space.
Radio reception
Problem
Preset tuning is not possible.
Automatic tuning is not possible.
If the above-mentioned solutions do not help to improve the situation, consult your nearest Sony
dealer.
Cause/Solution
• Store the correct frequency.
• The broadcast is too weak.
The broadcast is too weak. n Use manual tuning.
14
Page 15

Index
A
ATT 8
Automatic Music Sensor (AMS) 6
Automatic tuning 7
Automatic Tuner Activation (ATA) 6
B
BAL (left-right) 8
BAS (bass) 8
Best Tuning Memory (BTM) 6
C
Caution alarm 4
Clock 5
D, E
D-BASS (D-Bass) 8
Display 6
F, G, H, I, J, K
FAD (front-rear) 8
Fast-forward 5
Front panel 4
Fuse 10
L
Local seek mode (LCL) 7
M, N, O
Manual tuning 7
P, Q
Preset search 7
R, S
Radio 6
Reset 4
Rewind 5
Rotary commander 11
EN
Additional Information
T, U, V, W, X, Y, Z
Tape playback 5
TRE (treble) 8
15
Page 16

PL
Witamy!
Dziękujemy za zakupienie Stereofonicznego
Radio-Magnetofonu Kasetowego Sony.
Sterowanie rotacyjnym pilotem, przyczynia się
do zwiększenia przyjemności korzystanie z
wielu walorów, nabytego przez Państwa
sprzętu.
2
Page 17

Indice
Przygotowania wstępne
Wyzerowanie sprzętu......................................4
Zdejmowanie przedniego panelu....................4
Nastawianie zegara......................................... 5
Magnetofon
Odtwarzanie taśmy .........................................5
Radio
Automatyczne kodowanie stacji nadawczych
w pamięci sprzętu
— tryb Best Tuning Memory
(BTM = pamięć najlepszego strojenia) ... 6
Kodowanie wyłącznie wybranych stacji
nadawczych ............................................... 7
Odbiór zapisanych w pamięci stacji
nadawczych ............................................... 7
Pozostałe funkcje
Regulacja charakterystyk dźwięku ................. 8
Wyciszanie dźwięku ........................................ 8
Zmienianie nastawionych charakterystyk
dźwięku i sygnałów akustycznych ............. 8
Informacje dodatkowe
Środki Ostrożności ......................................... 9
Konserwacja .................................................10
Wymontowanie sprzętu ................................ 10
Etykietki przeznaczone dla rotycyjnego
pilota zdalnego sterowania ...................... 11
Umiejscowienie kontrolek .............................12
Dane techniczne ........................................... 13
Przewodnik usuwania usterek ...................... 14
Indeks ........................................................... 15
PL
3
Page 18
Przygotowania
wstępne
Wyzerowanie sprzętu
Sprzęt należy wyzerować przed rozpoczęciem
eksploatacji poraz pierwszy lub po wymianie
akumulatora pojazdu.
Proszę nacisnąć przycisk zerowania (reset)
przy pomocy szpiczasto zakończonego
przedmiotu, takiego jak np. długopis.
Przycisk “Reset” (zerowanie)
Uwaga
Naciśnięcie przycisku zerowania spowoduje
wymazanie wszystkich funkcji pamięci i programów.
PL
Zdejmowanie
przedniego panelu
Przedni panel sprzętu można usunąć,
zapobiegając w ten sposób ewentualnej
kradzieży urządzenia.
1 Proszę nacisnąć (OFF).
2 Proszę nacisnąć (RELEASE) aby
odłączyć przedni panel i zdjąć przez
lekkie pociągnięcie.
(RELEASE)
Zakładanie przedniego panela
Część oznaczoną A na ilustracji, należy
połączyć z częścią oznaczoną B, na głównym
korpusie sprzętu, a następnie pchnąć do
zaskoczenia.
A
B
Uwagi
•
Panelu nie będzie można umocować, jeżeli
zostanie on założony odwrotnie.
•
Przy zakładaniu, nie dopychać przedniego panelu
na siłę do głównego korpusu sprzętu. Wystarczy
lekki nacisk.
•
Zabierając przedni panel ze sobą, proszę umieścić
go w przeznaczonym do tego celu etui.
•
Należy unikać wywierania nacisku na wyświetlacz
umieszczony na przednim panelu.
•
Należy unikać narażania przedniego panelu na
nadmierne działanie promieni słonecznych,
ciepłego powietrza pochodzącego z systemu
ogrzewczego pojazdu, lub na działanie wilgoci. Nie
należy też pozostawiać go na desce rozdzielczej
lub gdziekolwiek w samochodzie zaparkowanym
na nasłonecznionym miejscu powodującym
znaczny wzrost temperatury wewnątrz pojazdu.
Alarm ostrzegawczy
Po warunkiem, że uprzednio nie usunięto
przedniego panela, alarm ostrzegawczy włączy
się na parę sekund po przełączeniu kluczyka
zapłonu na pozycję OFF (wyłączenie) (tylko w
przypadku kiedy przełącznik źródła zasilania
“POWER SELECT” znajduje się w pozycji A).
Uwagi
•
Proszę uważać by przy zdejmowaniu nie upuścić
panela.
•
Aby zapobiec uszkodzeniu głośników przy
zdejmowaniu panela, zasilanie zostaje
automatycznie wyłączone w momencie naciśnięcia
przycisku
(RELEASE)
.
4
Page 19
Nastawianie zegara
Zegar działa w cyfrowym systemie 24godzinnym.
Na przykład, nastawianie godziny 10:08
Magnetofon
1 Podczas operacji zegara, proszę
nacisnąć (OFF) lub (DSPL).
2 Proszę przez dwie sekundy naciskać
(DSPL)
Aby
cofnąć
Aby
cofnąć
100
Wskaźnik godziny miga.
1 Nastawić cyfry oznaczające godzinę.
Aby przesunąć
do przodu
1000
2 Proszę krótko nacisnąć (SEL).
1000
Wskaźniki minut migają.
3 Nastawić cyfry oznaczające minuty.
Aby przesunąć
do przodu
1008
3 Proszę krótko nacisnąć (DSPL).
Odtwarzanie taśmy
Proszę wsunąć kasetę.
Odtwarzanie rozpoczyna się
automatycznie.
Jeżeli kaseta została uprzednio wsunięta,
proszę kilkakrotnie nacisnąć (SOURCE) do
wyświetlenia wskaźnika “TAPE”.
TAPE
Odtwarzana jest strona taśmy skierowana ku
górze.
TAPE
Odtwarzana jest strona taśmy skierowana ku
dołowi.
Wskazówka
Aby zmienić kierunek transportu taśmy, proszę w
trybie odtwarzania nacisnąć
Aby
Wstrzymać
odtwarzanie
Wysunąć kasetę
(MODE) (*
Proszę nacisnąć
(OFF)
6
).
PL
Przygotowania wstępne/Magnetofon
1008
Zegar został uaktywniony.
Uwaga
Jeżeli przełącznik zasilania POWER SELECT,
umieszczony na górnej powierzchni sprzętu,
znajduje się w pozycji
rozpoczęciem nastawiania zegara, włączyć zasilanie
sprzętu. Proszę nastawić zegar po włączeniu radia.
B
, proszę przed
Szybkie przesuwanie taśmy
W trybie odtwarzania, przez ponad dwie
sekundy naciskać jedną ze stron
przycisku (SEEK/AMS).
SEEK
AMS
Cofanie
Aby rozpocząć odtwarzanie podczas
szybkiego przesuwania do przodu lub
podczas cofania, proszę nacisnąć przycisk
(MODE) (*).
Szybki przesów
do przodu
5
Page 20
Zlokalizowanie początku nagrania
— Automatic Music Sensor (AMS) =
automatyczny czujnik muzyki
Każdorazowo można pominąć maksymalnie
dziewięć tytułów.
Radio
W trybie odtwarzania, krótko nacisnąć
jedną ze stron przycisku (SEEK/AMS).
SEEK
AMS
Aby zlokalizować
poprzednie tytuły
Uwaga
Funkcja AMS może nie działać, jeżeli :
•
odstępy między tytułami wynoszą mniej niż 4
sekundy
•
między poszczególnymi tytułami występują dźwięki
zakłócające
•
występują długie odcinki niskiego poziomu
głośności lub bardzo spokojnej muzyki.
Aby zlokalizować
następne tytuły
Zmienianie się wskaźników świetlnych
Każdorazowe naciśnięcie przycisku (DSPL) w
trybie odtwarzania taśmy, zmienia
wyświetlanie wskaźników w następującej
kolejności:
PL
” Odtwarzanie taśmy ” Zegar
Częstotliwość* “
*
Jeżeli uaktywniono funkcję ATA.
Włączenie radia podczas szybkiego
przewijania taśmy
— Automatic Tuner Activation
(ATA=automatyczne uaktywnianie
tunera)
W trybie odtwarzania, proszę nacisnąć
(5).
Ukazuje się wskaźnik “ATA”.
Tuner zostanie automatycznie włączony, jeżeli
trwające dwie sekundy, szybkie przesuwanie
lub cofanie taśmy, zostało uaktywnione przez
naciśnięcie przycisku (SEEK/AMS).
Wyłączyć funkcję przez naciśnięcie przycisku
(5).
Automatyczne kodowanie
stacji nadawczych w
pamięci sprzętu
— tryb Best Tuning Memory
(BTM = pamięć najlepszego strojenia)
Funkcja wybierania radiowych stacji
nadawczych o najsilniejszych sygnałach emisji
z aktualnie odbieranego pasma i kodowania w
pamięci sprzętu, według ich częstotliwości.
ZAPOBIEGANIE WYPADKOM DROGOWYM!
Strojąc radio podczas prowadzenia pojazdu,
proszę raczej korzystać z trybu
automatycznego strojenia lub z funkcji
zakodowanego w pamięci sprzętu
poszukiwania stacji, zamiast manualnego
nastawiania stacji nadawczych.
1 Proszę kilkakrotnie nacisnąć (SOURCE) i
wybrać pozycję “tuner”.
Każdorazowe naciśnięcie przycisku
(SOURCE), zmienia kolejność wyświetlania
wskaźników źródła odtwarzania w
następujący sposób:
TAPE (taśma) ˜ TUNER
2 Proszę kilkakrotnie nacisnąć przycisk
(MODE) celem wybrania pasma.
Każdorazowe naciśnięcie przycisku
(MODE), zmienia kolejność wyświetlania
wskaźników pasm w następujący sposób:
FM1 n FM2 n FM3 n MW n LW
3 Proszę przez dwie sekundy naciskać
przycisk (BTM).
Uwagi
•
Stacje nadawcze o słabym sygnale emisji nie
zostaną zapisane w pamięci sprzętu. Jeżeli sprzęt
odbiera tylko kilka radiowych stacji nadawczych,
niektóre przyciski numeryczne nie będą
wykorzystane.
•
Jeżeli na wyświetlaczu widoczny jest wskaźnik
numeryczny, sprzęt automatycznie zakoduje w
pamięci dalsze radiowe stacje nadawcze pod
przyciskami numerycznymi, zaczynając od
aktualnie wyświetlanego numeru.
6
Page 21

Kodowanie wyłącznie
wybranych stacji
nadawczych
Pod przyciskami numerycznymi można
zakodować, w dowolnej kolejności,
maksymalnie 6 stacji nadawczych dla każdego
z pasm (FM1, FM2, FM3, MW oraz LW). W
sumie więc, w pamięci sprzętu można
zakodować 18 stacji nadawczych pasma FM.
Zakodowana stacja nadawcza zostanie
wymazana przez zapisanie nowej stacji pod
tym samym przyciskiem numerycznym.
1 Proszę kilkakrotnie nacisnąć przycisk
(SOURCE) i wybrać nastaw tuner.
2 Proszę kilkakrotnie nacisnąć przycisk
(MODE) i wybrać odpowiednie pasmo.
3 Proszę nacisnąć przycisk (SEEK/AMS)
celem odszukania wybranej stacji
nadawczej i jej zakodowania pod
odpowiednim przyciskiem
numerycznym.
4 Proszę przez dwie sekundy naciskać
wybrany przycisk numeryczny od ((1)
do (6)).
Cyfra odpowiadająca wybranemu przyciskowi
numerycznemu zostaje wyświetlona.
Odbiór zapisanych w
pamięci stacji
nadawczych
1 Proszę kilkakrotnie nacisnąć przycisk
(SOURCE) i wybrać pozycję tuner.
2 Proszę kilkakrotnie nacisnąć przycisk
(MODE) i wybrać pasmo.
3 Proszę krótko nacisnąć przycisk
numeryczny od ((1) do (6)) pod którym
zapisano poszukiwaną stację nadawczą
Wskazówka
Proszę nacisnąć jedną ze stron przycisku
aby umożliwić odbiór stacji nadawczych w
kolejności, w której zostały one zakodowane w
pamięci (Preset Search Function = funkcja
przeszukiwania zakodowanych danych).
Zmienianie wyświetlonych
wskaźników
Każdorazowe naciśnięcie przycisku (DSPL),
powoduje wyświetlanie wskaźników
częstotliwości i zegara, na zmianę.
W przypadku trudności z dostrojeniem
zakodowanej stacji nadawczej
Proszę krótko nacisnąć jedną ze stron
przycisku celem włączenia trybu
poszukiwania stacji (SEEK/AMS)
(automatyczne strojenie).
Poszukiwanie zostanie zakończone w
momencie odebrania sygnałów stacji
nadawczej. Proszę kilkakrotnie nacisnąć
jedną ze stron przycisku (SEEK/AMS) do
momentu uzyskania odbioru poszukiwanej
stacji nadawczej.
(PRST)
PL
Magnetofon/Radio
Uwaga
Jeżeli automatyczne strojenie jest zbyt często
przerywane, proszę nacisnąć przycisk
wyświetlenia wskaźnika “LCL” (local seek mode=tryb
przeszukiwania lokalnego). Dostrojone zostaną
wyłącznie te stacje nadawcze, które emitują
relatywnie silny sygnał.
Wskazówka
Jeżeli znana jest częstotliwość wybranej stacji,
proszę nacisnąć i przytrzymać jedną ze stron
przycisku
poszukiwanej stacji nadawczej (strojenie manualne).
(SEEK/AMS)
do momentu odebrania
(LCL)
do
7
Page 22
Pozostałe funkcje
0dB
D-BASS 3
D-BASS 2
D-BASS 1
Analogowo
sterowany D-BASS
Poziom
Regulacja
charakterystyk dźwięku
1 Przez kilkakrotne naciskanie przycisku
(SEL), wybrać element do
wyregulowania.
VOL (głośność) n BAS (basy) n TRE
(tony wysokie) n BAL (równowaga lewyprawy) n FAD (przedni-tylny)
2 Wyregulować wybrany element przez
naciskanie (+) lub (–).
Regulację proszę przeprowadzić w przeciągu
trzech sekund od dokonania wyboru
elementu. (Po upływie tego czasu, przycisk
będzie ponownie służył regulacji poziomu
głośności.)
PL
Wyciszanie dźwięku
Proszę nacisnąć przycisk (ATT).
Miga wskaźnik “ATT”.
Aby przywrócić poprzedni poziom głośności,
proszę ponwnie nacisnąć.
Częstotliwość (Hz)
Regulacja korektora graficznego tonów
niskich
Proszę przekręcić kontrolkę D-BASS
aby wyrównać poziom tonów niskich (1,
2 lub 3).
Wskaźnik “D-BASS” zostaje wyświetlony.
Aby wyłączyć funkcję, proszę przekręcić
kontrolkę na pozycję OFF.
Uwaga
Jeżeli basy zostaną zniekształcone, proszę
wyregulować gałką D-BASS lub przyciskiem
“volume” (poziom głośności).
Wyciszanie sygnału akustycznego
Naciskając przycisk (SEL), proszę
jednocześnie nacisnąć (6).
Aby przywrócić sygnał akustyczny, proszę
ponownie nacisnąć te same przyciski.
Zmienianie nastawionych
charakterystyk dźwięku i
sygnałów akustycznych
Wspomaganie tonów niskich (basów) funkcja — D-Bass
Aby otrzymać czysty i silny dźwięku tonów
niskich (basów), można przy pomocy ostrej,
krzywej graficznej, uwydatnić sygnały
wyłącznie o niskiej częstotliwości. Otrzymuje
się więc ten sam efekt jak przez podłączenie
opcjonalnego sub-systemu tonów niskich
(subwoofer).
Na przykład, wyraźniejszy odbiór tonów
niskich przy niezmienionym poziomie
głośności dźwięków wokalnych. Kontrolka DBASS ułatwia uwydatnianie i regulację tonów
niskich.
8
Page 23

Informacje
dodatkowe
Środki Ostrożności
•Jeżeli pojazd był zaparkowany w
nasłonecznionym miejscu, co mogło
spowodować znaczny wzrost temperatury w
jego wnętrzu, należy przed rozpoczęciem
użytkowania, odczekać by sprzęt uległ
schłodzeniu.
•Jeżeli do sprzętu nie dochodzi zasilanie,
należy przede wszystkim sprawdzić łącza.
Jeżeli są one prawidłowo podłączone,
proszę sprawdzić bezpiecznik.
•W przypadku braku dźwięku z głośników w
systemie 2-głośnikowym, proszę ustawić
kontrolkę funkcji “fader” (zanik) w pozycji
środkowej.
•Sprzęt jest wyposażony we własny
wzmacniacz mocy, co może spowodować
nagrzanie się kasety, odtwarzanej przez
dłuższy czas. Ten objaw nie jest sygnałem
defektu sprzętu.
Z ewentualnymi pytaniami lub niejasnościami
związanymi z użytkowaniem zakupionego
sprzętu, które nie zostały omówione w
instrukcji obsługi, należy zwrócić się do
fachowców najbliższego punktu sprzedaży
produktów firmy Sony.
Uwagi dotyczące Kaset
Środki ostrożności dotyczące kaset
•Nie dotykać powierzchni taśmy, brud lub
kurz mogą zanieczyścić głowice
odtwarzające.
•Kasety należy przechowywać z dala od
sprzętu wyposażonego w magnesy, takiego
jak np. głośniki lub wzmacniacze mocy,
gdyż mogą one spowodować wymazanie
nagrania lub zniekształcenie dźwięku.
•Nie narażać kaset na bezpośrednie działanie
słońca, bardzo niskich temperatur lub
wilgoci.
•Rozciągnięte taśmy mogą zostać wciągnięte
przez mechanizm odtwarzacza. Przed
wsunięciem kasety, proszę przy pomocy
ołówka lub innego, podobnego przedmiotu,
przekręcić rolkę aby zlikwidować luz taśmy.
Luz taśmy
•Zniekształcona kaseta i odstające etykiety
mogą spowodować komplikacje przy
wsuwaniu i wysuwaniu kaset. Proszę usunąć
lub wymienić luźne etykietki.
PL
Pozostałe funkcje/Informacje dodatkowe
Utrzymanie wysokiej jakości
odtwarzanego dźwięku
Jeżeli pojazd jest wyposażony w umieszczone
w pobliżu sprzętu obsady do przechowywania
pojemników napoji, proszę uważać by na
sprzęt nie wylać soków itp. Większość tego
rodzaju napoji zawiera cukier, którego resztki
mogą spowodować zanieczyszczenie kaset i
tym sposobem głowic odtwarzających,
redukujących jakość dźwięku lub jego
kompletny zanik.
Zestawy czyszczące nie są w stanie usunąć
lepkich zanieczyszczeń z głowic
odtwarzających.
Kasety o dłuższym niż 90 minut czasie
odtwarzania
Nie zaleca się korzystania z kaset o czasie
odtwarzania dłuższym niż 90 minut, poza
trybem ciągłego odtwarzania. Taśmy takich
kaset są bardzo cienkie i łatwiej rozciągają się.
Częste odtwarzanie i zatrzymywanie, może
spowodować wciągnięcie taśmy przez
mechanizm magnetofonu.
9
Page 24

Wymiania Bezpiecznika
Przed wymianą bezpiecznika, należy
sprawdzić czy ilość amperów odpowiada
ilości podanej na starym bezpieczniku. Jeżeli
bezpiecznik przepalił się, należy sprawdzić
podłączenie zasilania i wymienić bezpiecznik.
Jeżeli bezpiecznik ponownie przepali się,
może być to sygnałem wewnętrznego defektu
sprzętu. W takim wypadku, proszę
skonsultować się z najbliższym punktem
obsługi firmy Sony.
Wymontowanie sprzętuKonserwacja
1
Klucz zwalniający
(dostarczony)
2
Bezpiecznik (10 A)
Ostrzeżenie
Nie należy nigdy korzystać z bezpiecznika o
wartości znamionowej amperów wyższej od
PL
wartości podanej na dostarczonym ze
sprzętem bezpieczniku, taki bezpiecznik może
spowodować uszkodzenie sprzętu.
Oczyszczanie Łączy
Sprzęt może nie działać prawidłowo jeżeli
łącza pomiędzy panelem a głównym
korpusem sprzętu są zanieczyszczone. Aby
zapobiec nieprawidłowemu działaniu sprzętu,
należy otworzyć przedni panel przez lekkie
naciśnięcie w miejscu oznaczonym
(RELEASE), zdjąć panel i wyczyścić łącza
wacikiem, lekko zwilżonym alkoholem. Nie
należy wywierać nacisku. W przeciwnym
wypadku można uszkodzić łącza.
Główny korpus sprzętu
3
4
10
Wewnętrzna powierzchnia
przedniego panelu
Page 25

Etykietki przeznaczone
dla rotycyjnego pilota
zdalnego sterowania
Pracą sprzętu można sterować przy pomocy
rotacyjnego pilota zdalnego sterowania
(RM-X4S).
Wraz z pilotem rotacyjnym dostarczono
również część etykietek. Proszę nakleić
etykietki odpowiadające funkcjom głównego
sprzętu oraz pozycji umocowania pilota
rotycyjnego.
Po umocowaniu pilota, proszę nakleić
odpowiednie etykietki, jak na ilustracji poniżej.
DSPL
MODE
SEL
SEL
MODE
DSPL
PL
Informacje dodatkowe
11
Page 26

Umiejscowienie kontrolek
SEEK
AMS
SEL
ATT
MODE
OFF
BTM
SOURCE
RELEASE
Szczegóły podano na oznaczonych stronach.
PL
1 Przycisk SEL (wybór trybu sterowania)
5, 8
2 Przycisk SOURCE (źródło) (TAPE/
TUNER) 5, 6, 7
3 Przycisk MODE (*)
Podczas pracy tunera:
Wybór pasma BAND 6, 7
Podczas odtwarzania taśmy:
Zmiana kierunku transportu taśmy 5
4 Przełącznik POWER SELECT
(umieszczony na górnej powierzchni
sprzętu)
Patrz “Przełącznik POWER SELECT” w
Instrukcjach Instalacji/Podłączeń.
5 Przycisk OFF 4, 5
6 Przycisk SEEK/AMS 5, 6, 7
7 Przycisk 6 (eject = wysów kasety) 5
8 Przycisk DSPL (zmiana trybu
wyświetlania/nastaw godziny) 5, 6, 7
9 Podczas odbioru stacji radiowych:
Przyciski numeryczne zapisu stacji
nadawczych 7
Podczas odtwarzania taśmy:
(5) Przycisk ATA (Automatic Tuner
Activation= automatyczne
uaktywnienie tunera) 6
231
LCL
PRST
ATA
564
D-BASS
1
OFF
2
DSPL
!º Przycisk (+) (–) (głośność/basy/tony
wysokie/równowaga lewy-prawy/
przedni-tylny) 5, 8
!¡ Przycisk RELEASE (zwolnienie
przedniego panela) 4,10
!™ Przycisk zerowania “Reset”
(umieszczony z przodu sprzętu, zakryty
przez przedni panel)
Przycisk proszę nacisnąć przed
pierwszym uruchomieniem sprzętu, po
każdorazowej wymianie akumulatora, lub
w przypadku gdy przyciski funkcji sprzętu
nie działają prawidłowo.
!£ Przycisk ATT 8
!¢ Przycisk BTM (Best tuning memory =
pamięć optymalnego strojenia) 6
!∞ Wyświetlanie wskaźników
!§ Przycisk LCL 7
!¶ Przycisk PRST 7
!• Kontrolka D-BASS 8
3
12
Page 27

Dane techniczne
Magnetofon kasetowy
Ścieżka taśmy 4-ścieżkowy 2-kanałowy
stereo
Kołysanie i drżenie dźwięku
0,08 % (WRMS)
Odpowiedź częstotliwościowa
30 – 18.000 Hz
Odstęp psofometryczny 58 dB
Tuner
FM
Zakres strojenia 87,5 – 108,0 MHz
Gniazdko antenowe Łącze zewnętrznej anteny
Częstotliwość pośrednia 10,7 MHz
Czułość używalna 8 dBf
Wyborczość 75 dB at 400 kHz
Odstęp psofometryczny 65 dB (stereo),
68 dB (mono)
Harmoniczne zniekształcenie przy 1 kHz
0,5 % (stereo),
0,3 % (mono)
Rozdzielczość 35 dB at 1 kHz
Odpowiedź częstotliwościowa
30 – 15.000 Hz
Współczynnik przechwytu
2 dB
MW/LW
Zakres strojenia MW: 531 – 1.602 kHz
LW: 153 – 281 kHz
Gniazdko antenowe Łącze zewnętrznej anteny
Częstotliwość pośrednia 10,71 MHz/450kHz
Czułość MW: 30 µV
LW: 50 µV
Ogólne
Kontrolki dźwięku Basy ± 8 dB przy 100 Hz
Tony wysokie ± 8 dB przy
10 kHz
Zapotrzebowanie mocy akumulator
samochodowy12 V DC
(uziemienie ujemne)
Wymiary Około 188 × 58 × 181 mm
(szer./wys./gł.)
Wymiary montażowe Około 182 × 53 × 164 mm
(szer./wys./gł.)
Waga Około 1,2 kg
Dostarczony osprzęt Części instalacyjne i
łączeniowe (1 zestaw)
Etui na przedni panel (1)
Opcjonalny osprzęt Rotacyjny pilot zdalnego
sterowania RM-X4S
Wygląd oraz dane techniczne mogą ulec zmianie bez
uprzedzenia.
PL
Informacje dodatkowe
Wzmacniacz mocy
Wyjścia Wyjścia głośnikowe
(złączniki szczelne)
Impedancja głośnika 4 – 8 ohmów
Maksymalna moc na wyjściu
35 W × 4 (przy 4 ohmach)
13
Page 28

Przewodnik usuwania usterek
Niżej podana lista kontrolna posłuży jako pomoc w usuwaniu ewentualnych usterek , które mogą
wystąpić podczas eksploatacji sprzętu.
Przed skorzystaniem z listy kontrolnej, zaleca się sprawdzenie instrukcji operacji sprzętu.
Ogólne
Usterka
Brak dźwięku.
Brak wskaźników na
wyświetlaczu.
Brak sygnału akustycznego.
Odtwarzanie taśmy
Usterka
Zniekształcenia odtwarzanego
dźwięku.
Funkcja AMS nie działa
PL
prawidłowo.
Przyczyna/Sposób usunięcia usterki
• Wyregulować poziom głośności kontrolką (+).
• Kontrolkę wyciszania “fader” ustawić w pozycji środkowej dla
systemów 2-głośnikowych.
Proszę zdjąć przedni panel i oczyścić złącza. Szczegóły, patrz
dział “Oczyszczanie Łączy” w rozdziale “Konserwacja”
Sygnał akustyczny został wyciszony.
Przyczyna/ Sposób usunięcia usterki
Zanieczyszczenie głowicy odtwarzającej.
n Proszę oczyścić głowicę.
• Szmery w przerwach między tytułami.
• Przerwa między tytułami jest za krótka (poniżej czterech
sekund).
• + na przycisku (SEEK/AMS) został naciśnięty bezpośrednio
przed przed odtworzeniem następnego tytułu.
• = na (SEEK/AMS) został naciśnięty natychmiast po
rozpoczęciu odtwarzania.
• Długa przerwa lub część nagrania o niskiej częstotliwości lub
bardzo niskim poziomie dźwięku, jest traktowana przez sprzęt
jako przerwa w nagraniu.
Odbiór audycji radiowych
Usterka
Zaprogramowane strojenie nie
działa.
Automatyczne strojenie nie
funkcjonuje.
Jeżeli wyżej podane wskazówki nie pomogą w usunięciu usterki, należy skonsultować się z
najbliższym punktem obsługi lub sprzedaży produktów firmy Sony.
Przyczyna/ Sposób usunięcia usterki
• Proszę zakodować prawidłową częstotliwość.
• Sygnał emitowanej audycji jest za słaby.
Sygnał emitowanej audycji jest za słaby.
n Proszę dostroić manualnie.
14
Page 29

Indeks
A
Alarm ostrzegawczy 4
(AMS) - Automatyczny czujnik muzyki 6
Automatyczne strojenie stacji nadawczych 7
(ATA) - Automatyczne uaktywnienie tunera 6
B
BAL (lewy-prawy) 8
BAS (basy) 8
Bezpiecznik 10
(BTM) - Pamięć optymalnego strojenia stacji
nadawcuych 6
C
Cofanie 5
D, E
D-BASS (D-Basy) 8
F, G, H, I, J, K
FAD (przedni-tylny) 8
Funkcja wyciszania dla rozmów telefonicznych
ATT 8
L
(LCL) - Tryb poszukiwania lokalnych stacji
nadawczych 7
R
Radio 6
S
Szybkie przesuwanie taśmy 5
T, U, V
TRE (tony wysokie) 8
W, X, Y
Wyświetlanie wskaźników 6
Z
Zegar 5
Zerowanie 4
PL
Informacje dodatkowe
M, N
Manualne strojenie 7
O
Odtwarzanie taśmy 5
P, Q
Pilot zdalnego sterowania 11
Poszukiwanie zakodowanych stacji
nadawczych 7
Przedni panel 4
15
Page 30

CZ
Vítejte!
Děkujeme vám, že jste se rozhodli pro koupi
stereofonního autorádia s magnetofonem
Sony. U tohoto přístroje můžete ovládat celou
řadu funkcí za pomoci přídavného dálkového
ovládače.
2
Page 31

Obsah
Uvedení do provozu
Vynulování přístroje ........................................ 4
Odstranění předního panelu ........................... 4
Nastavení hodin ..............................................5
Přehrávač kazet
Poslech pásku ................................................ 5
Rádio
Automatické ukládání stanic do paměti
— Best Tuning Memory (BTM) - pamě»
ladění .....................................................6
Ukládání pouze požadovaných stanic ............ 7
Vyvolávání stanic, uložených do paměti ......... 7
Další funkce
Nastavení zabarvení zvuku ............................. 8
Ztlumení zvuku................................................8
Změna zabarvení zvuku a pípání .................... 8
Dodatečné informace
Bezpečnostní opatření ....................................9
Údržba .......................................................... 10
Demontáž přístroje ....................................... 10
Nálepky na dálkový ovladač .........................11
Popis tlačítek ................................................ 12
Technické údaje ............................................13
Odstranění drobných závad .........................14
Rejstřík ..........................................................15
CZ
3
Page 32

Uvedení do provozu
Vynulování přístroje
Než začnete s tímto přístrojem poprvé
pracovat nebo po každé výměně autobaterie
musíte přístroj vynulovat.
Stiskněte tlačítko pro vynulování špičatým
nástrojem jako např. tužkou.
Tlačítko Reset - vynulování
Poznámka
Stisknutím tlačítka reset budou vymazány všechny
programy, uložené do paměti, a všechny funkce
paměti.
CZ
Odstranění předního
panelu
Máte možnost odstranit přední panel tohoto
přístroje, abyste tak zabránili jeho odcizení.
1 Stiskněte (OFF).
2 Stiskněte (RELEASE) abyste přední panel
uvolnili a sejměte ho lehkým tahem
směrem k sobě.
(RELEASE)
Nasazení předního panelu
Nasaïte část A předního panelu na část B
na přístroji podle ilustrace a zatlačte na panel,
až zaklapne.
A
B
Poznámky
•
Přesvědčte se, abyste přední panel nasadili do
správné výšky, protože s ním nelze pohybovat
nahoru ani dolů.
•
Při nasazování není třeba tlačit na přední panel
příliš silně. Lze ho nasadit lehkým zatlačením
směrem k přístroji.
•
Jestliže chcete nosit přední panel s sebou,
ukládejte ho vždy do příslušného pouzdra, které je
součástí příslušenství.
•
Netlačte silně ani nenarážejte ničím na displej na
předním panelu.
•
Nevystavujte přední panel přímému slunečnímu
záření, zdrojům tepla jako např. vedení teplého
vzduchu, ani ho nenechávejte ve vlhkém prostředí.
Nikdy ho nenechávejte na přístrojové desce apod.
auta zaparkovaného na slunci, kdy by mohla
teplota uvnitř auta nepřiměřeně stoupnout.
Bezpečnostní upozornění
Jestliže vypnete klíček od zapalování, aniž
byste odstranili přední panel, začne na několik
vteřin pípat bezpečnostní alarm (pouze jestliže
je spínač POWER SELECT - volba napětí
přepnut do polohy A).
Poznámky
•
Dbejte na to, aby vám panel při snímání nevypadl z
ruky.
•
Jestliže stisknete tlačítko
přístroj přitom ještě v provozu, vypne se
automaticky, aby nedošlo k poškození
reproduktorů.
(RELEASE)
4
a bude-li
Page 33

Nastavení hodin
Hodiny mají 24-hodinový ukazatel.
Nastavení například na 10:08
Přehrávač kazet
1 Stiskněte (OFF) nebo (DSPL) během
provozu.
2 Stiskněte (DSPL) na 2 sekundy.
100
Číslice pro hodinu začnou blikat.
1 Nastavte číslice pro hodinu.
Dozadu Dopředu
1000
2 Stiskněte krátce (SEL).
1000
Číslice pro minuty začnou blikat.
3 Nastavte číslice pro minuty.
Dozadu Dopředu
1008
3 Stiskněte krátce (DSPL).
1008
Hodiny se rozejdou.
Poznámka
Jestliže je spínač POWER SELECT v horní části
přístroje nastaven do polohy
hodiny, dokud nebude zapnutý proud. Před
nastavováním hodin musíte zapnout rádio.
B
, nelze nastavit
Poslech pásku
Vložte kazetu.
Přehrávání se spustí automaticky.
Jestliže je kazeta již vložená, tiskněte
opakovaně tlačítko (SOURCE), dokud se na
displeji neobjeví “TAPE” (přehrávání).
TAPE
Přehrávání horní strany kazety
TAPE
Přehrávání dolní strany kazety
Tip
Chcete-li změnit směr přehrávání kazety, stiskněte
(MODE) (*
tlačítko
Funkce
Zastavení přehrávání
Vysunutí kazety
Rychlé přetáčení pásku
Během přehrávání stiskněte jednu ze
stran (SEEK/AMS) na dvě sekundy.
Chcete-li během rychlého převíjení dopředu
nebo dozadu začít s poslechem, stiskněte
tlačítko (MODE) (*).
) během přehrávání pásku.
Tlačítko
(OFF)
6
SEEK
AMS
Rychle dopředuDozadu
CZ
Uvedení do provozu/Přehrávač kazet
5
Page 34

Vyhledávání začátku skladby
— Automatic Music Sensor (AMS)
(automatický hudební senzor)
Můžete najednou přeskočit až devět skladeb.
Během přehrávání stiskněte krátce
jednu ze stran (SEEK/AMS).
SEEK
AMS
Vyhledávání
předešlých skladeb
Poznámka
Funkce AMS nefunguje, jestliže:
•
jsou nenahrané úseky mezi skladbami kratší než 4
sekundy
•
jsou mezi skladbami nahrané šumy
•
jsou na kazetě dlouhé tiché pasáže.
Vyhledávání následujících
skladeb
Změna položek na displeji
Při každém stisknutí tlačítka (DSPL) během
přehrávání se budou měnit položky na displeji
následovně:
z Tape playback (přehrávání pásku) z hodiny
frekvence* Z
Když je aktivována funkce ATA.
*
CZ
Přepnutí na rádio během rychlého
přetáčení pásku
— Automatic Tuner Activation (ATA) -
automatická aktivace přijímače
Stiskněte (5) během přehrávání.
Na displeji se objeví “ATA”.
Jestliže rychlé přetáčení dopředu nebo
dozadu s (SEEK/AMS) trvá déle než 2
sekundy, zapne se přijímač automaticky.
Chcete-li tuto funkci zrušit, stiskněte opět (5).
Rádio
Automatické ukládání
stanic do paměti
— Best Tuning Memory (BTM) - pamě»
ladění
Tato funkce vybírá z právě naladěného pásma
stanice s nejsilnějším signálem a ukládá je do
paměti v pořadí jejich frekvencí.
OCHRANA PŘED NEHODAMI!
Jestliže ladíte během řízení, používejte funkci
automatického ladění nebo funkci
automatického ukládání stanic do paměti
namísto manuálního ladění.
1 Tiskněte opakovaně (SOURCE), abyste
zadali přijímač.
Při každém stisknutí tlačítka (SOURCE), se
zdroje mění v následujícím pořadí:
TAPE (pásek) ˜ TUNER (přijímač)
2 Tiskněte opakovaně (MODE), abyste
zadali pásmo.
Při každém stisknutí tlačítka (MODE), se
pásma mění v následujícím pořadí:
FM1 n FM2 n FM3 n MW n LW
3 Stiskněte (BTM) na dvě sekundy.
Poznámky
•
Přístroj neuloží do paměti k příslušným tlačítkům
stanice s přiliš slabým signálem. Jestliže lze naladit
pouze několik stanic, zůstanou některá tlačítka
neobsazená.
•
Jestliže je na displeji znázorněné číslo stanice,
bude přístroj ukládat stanice do paměti počínajíce
od znázorněného čísla.
6
Page 35

Ukládání pouze
požadovaných stanic
Pro každé pásmo (FM1, FM2, FM3, MW a LW)
může být do paměti uloženo až 6 stanic - ty
mohou být přiřazeny číselným tlačítkům podle
vašeho přání. Je tedy možné uložit do paměti
celkem 18 stanic pro pásmo FM.
Jestliže se pokusíte uložit na již obsazené
tlačítko další stanici, dojde k vymazání
původně uložené stanice.
1 Tiskněte opakovaně (SOURCE), abyste
zadali přijímač.
2 Tiskněte opakovaně (MODE), abyste
zadali pásmo.
3 Stiskněte (SEEK/AMS), abyste naladili
stanici, kterou chcete uložit do paměti a
přiřadit ji danému tlačítku.
4 Stiskněte požadované číselné tlačítko
((1) až (6)) na dvě sekundy.
Číslo zadaného čísleného tlačítka se objeví na
displeji.
Změna položek na displeji
Při každém stisknutí tlačítka (DSPL), se na
displeji bude měnit frekvence a hodiny.
Jestliže nemůžete naladit
přednastavenou stanici
Stiskněte krátce jednu ze stran
(SEEK/AMS), abyste vyhledali jinou
stanici (automatické ladění).
Vyhledávání se zastaví, jakmile je stanice
naladěna. Tiskněte opakovaně jednu ze
stran stran (SEEK/AMS), dokud nenaladíte
požadovanou stanici.
Poznámka
Jestliže se automatické ladění zastavuje příliš často,
stiskněte
(local seek mode - režim lokálního vyhledávání). Nyní
budou vyhledávány pouze stanice s relativně silným
signálem.
Tip
Jestliže znáte frekvenci stanice, stiskněte a držte
jednu ze stran
požadovanou stanici (manuální ladění).
(LCL)
, aby se na displeji rozsvítilo “LCL
(SEEK/AMS)
, dokud nenaladíte
”
CZ
Přehrávač kazet/Rádio
Vyvolávání stanic,
uložených do paměti
1 Tiskněte opakovaně (SOURCE), abyste
zadali přijímač.
2 Tiskněte opakovaně (MODE), abyste
zadali pásmo.
3 Stiskněte krátce číselné tlačítko ((1) až
(6)), ke kterému chcete požadovanou
stanici přiřadit.
Tip
Stiskněte jednu ze stran
pořadí, ve kterém jsou stanice uloženy do paměti
(Preset Search Function - funkce vyhledávání
přednastavení).
(PRST)
, aby se znázornilo
7
Page 36

Analogový D-Bass
0dB
D-BASS 3
D-BASS 2
D-BASS 1
Další funkce
Nastavení zabarvení
zvuku
1 Zadejte položku, kterou chcete nastavit,
opakovaným tisknutím tlačítka (SEL).
VOL (hlasitost) n BAS (basy) n TRE
(výšky) n BAL (vlevo-vpravo) n FAD
(vepředu-vzadu)
2 Zadanou položku nastavte tisknutím (+)
nebo (–).
Položku nastavte do tří sekund po jejím
zadání. (Po třech sekundách bude knoflík opět
fungovat jako knoflík pro ovládání hlasitosti.)
Ztlumení zvuku
CZ
Stiskněte (ATT).
Na displeji se objeví indikace “ATT”.
Chcete-li nastavit zpět původní hlasitost,
stiskněte opět dané tlačítko.
Úroveň
Frekvence (Hz)
Nastavení křivky basů
Otáčejte knoflíkem D-BASS, abyste
nastavili úroveň basů (1, 2 nebo 3).
Na displeji se objeví “D-BASS”.
Chcete-li nastavení zrušit, otočte knoflík na
OFF - vypnuto.
Poznámka
Jsou-li basy rušené, nastavte je za pomoci tlačítka DBASS nebo tlačítka pro nastavení hlasitosti.
Ztlumení pípání
Stiskněte zároveň (6) a (SEL).
Chcete-li pípání opět zapnout, stiskněte
znovu daná tlačítka.
Změna zabarvení zvuku
a pípání
Zvýraznění basů — D-bass
Chcete-li poslouchat jasné a silné basy,
můžete zesílit pouze signály s nižšími
frekvencemi s ostřejší křivkou. To je efekt,
jakého dosáhnete zapojením přídavným
systémem subwooferu.
Basy uslyšíte například mnohem jasněji, i když
budou vokály nastaveny na stejnou hlasitost.
Basy můžete zvýraznit a nastavit snadno za
pomoci knoflíku D-BASS.
8
Page 37

Dodatečné
informace
Bezpečnostní opatření
•Bylo-li vaše auto zaparkováno na přímém
slunci a došlo-li k velkému zvýšení teploty
uvnitř auta, nechte přístroj vychladnout, než
ho uvedete do provozu.
•Není-li přístroj pod proudem, zkontrolujte
napřed jeho zapojení. Je-li vše v pořádku,
zkontrolujte pojistku.
•Jestliže se z reproduktorů neozývá žádný
zvuk, když jsou zapojené 2 reproduktory,
nastavte vyvážení reproduktorů do středové
polohy.
•Jestliže delší dobu posloucháte kazetu,
může se stát, že se zahřeje od
zabudovaného zesilovače. Není to však
znakem poruchy.
Vyskytnou-li se další otázky nebo problémy
týkající se vašeho přístroje, které nejsou
popsány v tomto návodu k použití, obra»te se
na nejbližší zastoupení firmy Sony.
Udržení vysoké kvality zvuku
Jestliže jsou v blízkosti vašeho rádia umístěné
držáky na nápoje, dbejte na to, aby se do
vašeho autorádia nedostaly ovocné š»ávy, ani
jiné nápoje. Zbytky cukru na tomto přístroji
nebo na kazetách by mohly zašpinit hlavy pro
přehrávání, snížit kvalitu zvuku nebo
všeobecně zhoršit reprodukci zvuku.
Soupravy na čistění kazet nemohou odstranit
cukr z hlav na přehrávání.
Poznámky ke kazetám
Péče o kazety
•Nedotýkejte se povrchu pásku v kazetě,
protože by případné nečistoty nebo vlhkost
zašpinily hlavy.
•Nepřibližujte kazety do blízkosti zařízení se
silnými zabudovanými magnety jako jsou
reproudktory a zesilovače, protože by mohlo
dojít k vymazání nebo poškození nahrávky
na nahraném pásku.
•Nevystavujte kazety přímému slunečnímu
záření, extrémně nízkým teplotám, ani
vlhkosti.
•Případné smyčky na pásku by mohly
způsobit zamotání pásku v přístroji. Než
vložíte kazetu, napněte pásek za pomoci
tužky nebo podobného předmětu - otáčením
jednoho z koleček.
Smyčka
•Zdeformované kazety nebo částečně
odlepené nálepky mohou způsobovat
problémy při zasouvání a vysouvání kazet.
Odstraňte, příp. nahraïte uvolněné nálepky.
Kazety delší než 90 minut
Nedoporučujeme přehrávání kazet delších než
90 minut s vyjímkou dlouhého souvislého
přehrávání. Pásky užívané pro tyto kazety jsou
velmi slabé, proto může snadno dojít k jejich
natažení. Jejich časté přehrávání a
zastavování může vést k tomu, že se navinou
na hlavy mechaniky.
CZ
Další funkce/Dodatečné informace
9
Page 38

Údržba
Výměna pojistky
Při výměně pojistky se ujistěte, abyste užili
pojistku se správnou hodnotou, která je
uvedena na jejím povrchu. Jestliže pojistka
praskne, zkontrolujte zapojení proudu a
pojistku vyměňte. Jestliže pojistka po výměně
opět praskne, může to být v důsledku poruchy
přístroje. V tom případě se obra»te na nejbližší
zastoupení Sony.
Demontáž přístroje
1
Uvolňovací klíč
2
(součást příslušenství)
Pojistka (10 A)
Upozornění
Nikdy nepoužívejte pojistky s vyšší ampérovou
hodnotou, než jaké jsou v přístroji, protože by
to mohlo způsobit poškození přístroje.
Čistění konektorů
Jestliže jsou konektory mezi přístrojem a
CZ
předním panelem znečistěné, nebude přístroj
fungovat řádně. Abyste tomu předešli,
uvolněte přední panel stisknutím tlačítka
(RELEASE), sejměte ho a potom vyčistěte
konektory smotkem bavlněného hadříku
navlhčeného v alkoholu. Na kontakty přitom
příliš netlačte, abyste je nepoškodili.
Hlavní přístroj
3
4
10
Zadní strana předního panelu
Page 39

Nálepky na dálkový
ovladač
Tento přístroj můžete ovládat přídavným
dálkovým ovladačem (RM-X4S).
S dálkovým ovladačem jsou dodávány také
příslušné nálepky. Použijte ty nálepky, které
odpovídají funkcím hlavního přístroje a poloze
dálkového ovladače.
Při montáži dálkového ovladače nalepte
příslušné nálepky podle ilustrace níže.
DSPL
MODE
SEL
SEL
MODE
DSPL
CZ
Dodatečné informace
11
Page 40

Popis tlačítek
SEEK
AMS
SEL
ATT
MODE
OFF
BTM
SOURCE
RELEASE
Na uvedených stránkách jsou uvedeny další podrobné informace.
CZ
1 Tlačítko SEL (volba režimu) 5, 8
2 Tlačítko SOURCE - zdroj (TAPE/TUNER)
5, 6, 7
3 Tlačítko MODE - režim (*)
Během poslechu rádia:
Volba pásma BAND 6, 7
Během přehrávání pásku:
Změna směru převíjení pásku 5
4 Hlavní vypínač POWER SELECT
(umístěný na horní straně přístroje)
Viz “Hlavní vypínač POWER SELECT” v
návodu k instalaci /zapojení.
5 Tlačítko OFF - vypínání 4, 5
6 Tlačítko SEEK/AMS - vyhledávání 5, 6, 7
7 Tlačítko 6 (vysunutí) 5
8 Tlačítko DSPL (změna režimu displeje /
nastavení času) 5, 6, 7
9 Během poslechu rádia:
Číselná tlačítka 7
Během přehrávání pásku:
(5) Tlačítko ATA (Automatická
aktivace tuneru) 6
231
LCL
PRST
ATA
564
D-BASS
1
OFF
2
3
DSPL
!º Tlačítko (+)(–) (vyvážení hlasitost/
basy/výšky/vlevo-vpravo/vepředuvzadu) 5, 8
!¡ Tlačítko RELEASE (uvolňování předního
panelu) 4,10
!™ Tlačítko Reset (umístěné na přední
straně přístroje, schované za předním
panelem)
Stiskněte toto tlačítko, jestliže tento
přístroj používáte poprvé, jestliže jste
vyměnili autobaterii nebo jestliže tlačítka
na tomto přístroji nefungují řádně.
!£ Tlačítko ATT 8
!¢ Tlačítko BTM (Pamě» ladění) 6
!∞ Displej
!§ Tlačítko LCL 7
!¶ Tlačítko PRST 7
!• Tlačítko D-BASS 8
12
Page 41

Technické údaje
Magnetofon
Stopy na pásku 4 stopy, 2-kanálový
stereofonní zvuk
Kolísání a odchylka 0,08 % (WRMS)
Frekvence 30 – 18.000 Hz
Odstup signálu od šumu 58 dB
Rádio
FM
Kmitočtový rozsah 87,5 – 108,0 MHz
Připojení antény Externí zdířka pro napojení
antény
Mezifrekvenční kmitočet 10,7 MHz
Citlivost 8 dBf
Selektivita 75 dB at 400 kHz
Odstup signálu od šumu 65 dB (stereo),
68 dB (mono)
Harmonická distorze při 1 kHz
0,5 % (stereo),
0,3 % (mono)
Rozlišení 35 dB at 1 kHz
Frekvence 30 – 15.000 Hz
Výstupní hladina 2 dB
MW/LW (SV/DV)
Kmitočtový rozsah MW: 531 – 1.602 kHz
LW: 153 – 281 kHz
Připojení amtény Externí zdířka pro napojení
antény
Mezifrekvenční kmitočet 10.71 MHz/450kHz
Citlivost MW: 30 µV
LW: 50 µV
Zesilovač
Výstupy Výstupy pro reproduktory
(bezpečnostní konektory)
Impedance reproduktorů 4 – 8 ohmů
Maximální výstup 35 W × 4 (při 4 ohmech)
Všeobecně
Ovládání zvuku Basy ±8 dB při 100 Hz
Výšky ±8 dB při 10 kHz
Napájení autobaterie - stejnosměrný
proud 12 V
(záporné ukostření)
Rozměry Přibl. 188 × 58 × 181 mm
(š/v/h)
Rozměry pro montáž Přibl. 182 × 53 × 164 mm
(š/v/h)
Hmotnost Přibl. 1,2 kg
Dodávané příslušenství 1 souprava pro montáž a
zapojení
Pouzdro na přední panel
(1)
Doplňky, které lze dokoupit
Otočný dálkový ovladač
RM-X4S
Design a technické parametry mohou být změněny
bez předchozího upozornění.
CZ
Dodatečné informace
13
Page 42

Odstranění drobných závad
Následující přehled vám pomůže odstranit většinu závad, se kterými se při obsluze vašeho přístroje
případně setkáte.
Než si přečtete následující přehled, seznamte se s instrukcemi pro napojení a obsluhu.
Všeobecně
Problém
Žádný zvuk.
Na displeji nesvítí žádné
indikace.
Není slyšet pípání.
Přehrávání pásku
Problém
Zvuk při přehrávání je rušený.
AMS řádně nefunguje.
CZ
Příčina/odstranění
•Nastavte hlasitost tlačítkem (+).
•Nastavte kontrolu vyvážení do středové polohy při systému 2
reproduktorů.
Sejměte přední panel a vyčistěte konektory. Podrobnosti viz
“Čistění konektorů” v kapitole “Údržba”.
Pípání je vypnuté.
Příčina/odstranění
Znečistěné hlavy magnetofonu. n Vyčistěte hlavy.
•Mezi jednotlivými skladbami se ozývají šumy.
•Nenahraná místa jsou příliš krátká (méně než čtyři sekundy).
•+ na (SEEK/AMS) bylo stisknuté bezprostředně před
následující skladbou.
•= na (SEEK/AMS) bylo stisknuté bezprostředně po začátku
skladby.
•Dlouhé pauzy nebo pasáže s nízkofrekvenčními zvuky nebo
velmi tiché pasáže jsou považovány za mezery.
Poslech rádia
Problém
Není možné naladit stanici
uloženou v paměti.
Automatické ladění nefunguje.
Nepodaří-li se Vám odstranit závadu na základě uvedených postupů, obra»te se na nejbližší
zastoupení firmy Sony.
Příčina/odstranění
•Zadejte správnou frekvenci.
•Vysílání je příliš slabé.
Vysílání je příliš slabé. n Nalaïte stanici ručně.
14
Page 43

Rejstřík
A
ATT 8
Automatická aktivace přijímače (ATA) 6
Automatické ladění 7
Automatický hudební senzor (AMS) 6
B, C
BAL (vlevo-vpravo) 8
BAS (basy) 8
Best Tuning Memory (BTM) - pamě» ladění 6
Bezpečnostní upozornění 4
D, E
D-BASS 8
Dálkový ovladač 11
Displej 6
Dozadu 5
F, G
FAD (vepředu-vzadu) 8
H, I, J, K, K, L
Hodiny 5
CZ
Dodatečné informace
M, N, O
Manuální ladění 7
P, Q
Pojistka 10
Přední panel 4
Přehrávání pásku 5
R, S
Rádio 6
Režim lokálního vyhledávání (LCL) 7
Rychlé převíjení dopředu 5
T, U
TRE (výšky) 8
V, W, X, Y, Z
Vyhledávání přednastavených programů 7
Vynulování 4
15
Page 44

GR
Καλώσ ήρθατε!
Σασ ευχαριστούµε που αγοράσατε αυτ το
Στερεοφωνικ Κασετφωνο Αυτοκινήτου
Sony. Η συσκευή αυτή σασ επιτρέπει να
χαρείτε µια ποικιλία χαρακτηριστικών,
χρησιµοποιώντασ ένα πpoaιpετlκ
περιστροφικ χειριστήριο.
2
Page 45

Περιεχµενα
Ξεκινώντασ
Επαναρύθµιση τησ συσκευήσ ...................... 4
Απσπαση τησ πρσοψησ ............................ 4
Ρύθµιση του ρολογιού ................................. 5
Κασετφωνο
Ακραση µιασ κασέτασ ................................. 5
Ραδιφωνο
Αυτµατη καταχώρηση σταθµών στη µνήµη
— Μνήµη Ισχυρτερων Σταθµών
(BTM=Best Tuning Memory) ............... 6
Καταχώρηση στη µνήµη µνο των
επιθυµητών σταθµών .............................. 7
Λήψη των σταθµών που είναι
καταχωρηµένοι στη µνήµη ..................... 7
Αλλεσ Λειτουργίεσ
Ρύθµιση των χαρακτηριστικών του ήχου ... 8
Εξασθένηση του ήχου .................................. 8
Αλλαγή του τνου του ήχου και του
προειδοποιητικού ήχου ...........................8
Πρσθετεσ Πληροφορίεσ
Προφυλάξεισ ................................................. 9
Συντήρηση ...................................................10
Αφαίρεση τησ συσκευήσ ............................ 10
Οι ετικέτεσ του περιστροφικού
χειριστηρίου ........................................... 11
Θέση χειριστηρίων .....................................12
Τεχνικά Χαρακτηριστικά ............................ 13
Οδηγσ Αντιµετώπισησ προβληµάτων ..... 14
Ευρετήριο ....................................................15
GR
3
Page 46

Ξεκινώντασ
Σηµειώσεισ
• Προσέξτε να µη σασ πέσει η πρσοψη κατά την
απσπασή τησ απ τη συσκευή.
• Εάν πατήσετε το (RELEASE) για να αποσπάσετε
την πρσοψη ενώ η συσκευή είναι ακµη
αναµµένη, η ισχύσ κβεται αυτµατα για να µην
πάθουν ζηµιά τα ηχεία.
Επαναρύθµιση τησ
συσκευήσ
Πριν θέσετε τη συσκευή σε λειτουργία για
πρώτη φορά ή αφού αντικαταστήσετε την
µπαταρία του αυτοκινήτου, θα πρέπει να
επαναρυθµίσετε τη συσκευή.
Πιέστε το πλήκτρο επαναρύθµισησ µε ένα
αιχµηρ αντικείµενο, πωσ ένα στυλ για
παράδειγµα.
Πλήκτρο επαναρύθµισησ
Σηµείωση
Το πάτηµα του πλήκτρου επαναρύθµισησ
διαγράφει λα τα καταχωρηµένα στη µνήµη
προγράµµατα και τισ λειτουργίεσ µνήµησ.
GR
Απσπαση τησ
πρσοψησ
Η πρσοψη αυτήσ τησ συσκευήσ µπορεί να
αποσπαστεί για να αποφευχθεί η κλοπή τησ
συσκευήσ.
1 Πατήστε το (OFF).
2 Πατήστε το (RELEASE) για να
απελευθερώσετε την πρσοψη, και
αποσπάστε την τραβώντασ την απαλά
προσ τα έξω.
(RELEASE)
Τοποθέτηση τησ πρσοψησ
Τοποθετήστε το τµήµα A τησ πρσοψησ στο
τµήµα B τησ συσκευήσ, πωσ φαίνεται στην
εικνα, και πιέστε µέχρι αυτή να κουµπώσει.
A
B
Σηµειώσεισ
• Βεβαιωθείτε τι κατά την τοποθέτηση το επάνω
µέροσ τησ πρσοψησ τοποθετείται προσ τα
επάνω, εφσον δεν µπορεί να τοποθετηθεί
ανάποδα.
• Μην πιέζετε µε δύναµη την πρσοψη κατά την
τοποθέτησή τησ στη συσκευή. Μπορεί να
τοποθετηθεί εύκολα πιέζοντάσ την ελαφρά
προσ τη συσκευή.
• ταν µεταφέρετε την πρσοψη µαζί σασ, να την
τοποθετείτε στη θήκη τησ πρσοψησ που τη
συνοδεύει.
• Μην πιέζετε µε δύναµη ή µην εξασκείτε
ιδιαίτερη πίεση στην οθνη τησ πρσοψησ.
• Μην εκθέτετε την πρσοψη στον ήλιο, σε πηγέσ
θερµτητασ πωσ σε αγωγούσ ζεστού αέρα ή
µην την αφήνετε σε µέρη µε υγρασία. Ποτέ µην
την αφήσετε επάνω στο ταµπλ κλπ. ενσ
αυτοκινήτου που είναι παρκαρισµένο στον
ήλιο, εντσ του οποίου προβλέπεται τι η
θερµοκρασία θα ανέβει σηµαντικά.
Συναγερµσ υπενθύµισησ
Εάν γυρίσετε το κλειδί τησ ανάφλεξησ στη
θέση OFF χωρίσ να έχετε αφαιρέσει την
πρσοψη, ο συναγερµσ υπενθύµισησ ηχεί
για λίγα δευτερλεπτα (µνο εάν ο
διακπτησ POWER SELECT βρίσκεται στη
θέση A).
4
Page 47

Ρύθµιση του ρολογιού
Το ρολι διαθέτει ψηφιακή ένδειξη 24-ωρών.
Για παράδειγµα, ρύθµιση τησ ώρασ στισ 10:08
Κασετφωνο
1 Πατήστε το (OFF) ή το (DSPL) κατά τη
λειτουργία.
2 Πατήστε το (DSPL) για δύο
δευτερλεπτα.
100
Αναβοσβήνει το ψηφίο των ωρών.
1 Ρυθµίστε τα ψηφία τησ ώρασ.
για να
αυξήσετε
1000
2 Πατήστε στιγµιαία το (SEL).
1000
Αναβοσβήνει το ψηφίο των λεπτών.
3 Ρυθµίστε τα ψηφία των λεπτών.
για να
αυξήσετε
1008
για να
µειώσετε
για να
µειώσετε
3 Πατήστε στιγµιαία το (DSPL).
1008
Το ρολι ενεργοποιείται.
Σηµείωση
Εάν ο διακπτησ POWER SELECT στο επάνω
µέροσ τησ συσκευήσ είναι στη θέση B, το ρολι
δεν µπορεί να ρυθµιστεί εάν η ισχύσ δεν είναι
αναµµένη. Ρυθµίστε το ρολι αφού ανάψετε το
ραδιφωνο.
Ακραση µιασ κασέτασ
Εισάγετε µια κασέτα.
Η κασέτα αρχίζει να παίζει αυτµατα.
Εάν υπάρχει ήδη µια κασέτα, πατήστε
επανειληµµένα το (SOURCE) µέχρι να
εµφανιστεί το “TAPE” .
TAPE
Παίζει η πλευρά που είναι προσ τα επάνω.
TAPE
Παίζει η πλευρά που είναι προσ τα κάτω.
Υπδειξη
Για να αλλάξετε την πλευρά που παίζει η κασέτα,
πατήστε το (MODE) (*) ενώ παίζει η κασέτα.
Για να
Σταµατήσετε το
παίξιµο
Βγάλτε την κασέτα
Γρήγορη περιέλιξη τησ κασέτασ
Ενώ παίζει η κασέτα, πιέστε ένα απ τα
δύο άκρα του (SEEK/AMS) για δύο
δευτερλεπτα.
Περιέλιξη προσ
τα πίσω
Για να επιστρέψετε στο κανονικ παίξιµο
τησ κασέτασ κατά τη γρήγορη περιέλιξη
προσ τα εµπρσ ή την περιέλιξη προσ τα
πίσω, πατήστε το (MODE) (*).
Πατήστε
(OFF)
6
SEEK
AMS
Γρήγορη περιέλιξη
προσ τα εµπρσ
GR
Ξεκινώντασ/Κασετφωνο
5
Page 48

Εντοπισµσ τησ αρχήσ ενσ
κοµµατιού
— Αυτµατοσ Μουσικσ Αισθητήρασ
(AMS=Automatic Music Sensor)
Μπορείτε να προσπεράσετε µέχρι εννέα
κοµµάτια κάθε φορά.
Ενώ παίζει η κασέτα, πιέστε στιγµιαία
ένα απ τα δύο άκρα του (SEEK/AMS).
SEEK
AMS
Για να εντοπίσετε
τα προηγούµενα
κοµµάτια
Σηµείωση
Το AMS πιθαν να µη λειτουργεί ταν:
• το κεν µεταξύ των κοµµατιών είναι µικρτερο
των 4 δευτερολέπτων
• υπάρχει θρυβοσ µεταξύ των κοµµατιών
• υπάρχουν µεγάλα διαστήµατα χαµηλήσ έντασησ
ή χωρίσ ήχο.
Για να εντοπίσετε
τα επµενα
κοµµάτια
Εναλλαγή των ενδείξεων στην οθνη
Κάθε φορά που πιέζετε το (DSPL) ενώ
παίζει η κασέτα, οι ενδείξεισ στην οθνη
αλλάζουν ωσ ακολούθωσ:
” Αναπαραγωγή κασέτασ ” Ρολι
Συχντητα* “
GR
* Εάν είναι ενεργοποιηµένη η λειτουργία ATA.
Ραδιφωνο
Αυτµατη καταχώρηση
σταθµών στη µνήµη
— Μνήµη Ισχυρτερων Σταθµών
(BTM=Best Tuning Memory)
Αυτή η λειτουργία επιλέγει, απ την
επιλεγµένη µπάντα, τουσ σταθµούσ µε το
ισχυρτερο σήµα και τουσ καταχωρεί στη
µνήµη µε τη σειρά των συχνοτήτων τουσ.
ΓΙΑ ΝΑ ΑΠΟΦΥΓΕΤΕ ΤΑ ΑΤΥΧΗΜΑΤΑ!
ταν ψάχνετε σταθµούσ ενώ οδηγείτε,
αντί του χειροκίνητου συντονισµού,
χρησιµοποιείτε τον αυτµατο συντονισµ ή
τη λειτουργία αναζήτησησ
προρυθµισµένων σταθµών.
1 Για να επιλέξετε το δέκτη, πιέστε
επανειληµµένα το (SOURCE).
Κάθε φορά που πιέζετε το (SOURCE), η
πηγή αλλάζει ωσ ακολούθωσ:
TAPE ˜ TUNER
Εναλλαγή σε ραδιφωνο κατά τη
γρήγορη περιέλιξη τησ κασέτασ
— Αυτµατη Ενεργοποίηση ∆έκτη
(ATA=Automatic Tuner Activation)
Πιέστε το (5) ενώ παίζει η κασέτα.
Στην οθνη εµφανίζεται το “ATA”.
Κατά τη γρήγορη περιέλιξη προσ τα
εµπρσ ή την περιέλιξη προσ τα πίσω µε το
πλήκτρο (SEEK/AMS) για δύο
δευτερλεπτα, ο δέκτησ ανάβει αυτµατα.
Για να ακυρώσετε αυτή τη λειτουργία,
πιέστε πάλι το (5).
6
2 Πιέστε επανειληµµένα το (MODE) για να
επιλέξετε την µπάντα.
Κάθε φορά που πιέζετε το (MODE), η
µπάντα αλλάζει ωσ ακολούθωσ:
FM1 n FM2 n FM3 n MW n LW
3 Πιέστε το (BTM) για δύο δευτερλεπτα.
Σηµειώσεισ
• Η συσκευή δεν αποθηκεύει στα αριθµητικά
πλήκτρα σταθµών, σταθµούσ µε χαµηλ σήµα.
Εάν λαµβάνονται µνο λίγοι σταθµοί, κάποια
αριθµητικά πλήκτρα σταθµών θα παραµείνουν
κενά.
• Εάν εµφανίζεται στην οθνη κάποιοσ αριθµσ
προρυθµισµένου σταθµού, η συσκευή θα
αποθηκεύσει σταθµούσ σε λα τα πλήκτρα
σταθµών, ξεκινώντασ απ τον εµφανιζµενο.
Page 49

Καταχώρηση στη µνήµη
µνο των επιθυµητών
σταθµών
Σε κάθε µπάντα (FM1, FM2, FM3, MW και
LW) µπορούν να αποθηκευτούν µέχρι 6
σταθµοί στα αριθµητικά πλήκτρα σταθµών,
µε τη σειρά που εσείσ θέλετε. Εποµένωσ,
µπορούν να καταχωρηθούν στη µνήµη
µέχρι 18 σταθµοί FM.
Εάν θελήσετε να αποθηκεύσετε κάποιον
άλλο σταθµ στο ίδιο αριθµητικ πλήκτρο
σταθµών, θα διαγραφεί ο σταθµσ που
ήταν µέχρι ττε αποθηκευµένοσ εκεί.
1 Για να επιλέξετε το δέκτη, πιέστε
επανειληµµένα το (SOURCE).
2 Για να επιλέξετε την µπάντα, πιέστε
επανειληµµένα το (MODE).
Αλλαγή των ενδείξεων στην οθνη
Κάθε φορά που πιέζετε το (DSPL), στην
οθνη εναλλάσσονται η συχντητα και το
ρολι.
Εάν δεν µπορείτε να συντονιστείτε σε
κάποιον προρυθµισµένο σταθµ
Για να αναζητήσετε το σταθµ, πιέστε
στιγµιαία ένα απ τα δύο άκρα του
πλήκτρου (SEEK/AMS) (αυτµατοσ
συντονισµσ).
ταν συντονιστεί κάποιοσ σταθµσ, η
σάρωση σταµατάει. Πιέστε
επανειληµµένα ένα απ τα δύο άκρα
του πλήκτρου (SEEK/AMS) µέχρι να
συντονίσετε στο σταθµ που θέλετε.
Σηµείωση
Εάν ο αυτµατοσ συντονισµσ σταµατάει πολύ
συχνά, πιέστε το (LCL) για να εµφανιστεί στην
οθνη το “LCL (λειτουργία τοπικήσ αναζήτησησ).
Μπορείτε να συντονίσετε µνο τουσ σταθµούσ µε
σχετικά ισχυρ σήµα.
3 Για να αναζητήσετε το σταθµ που θέλετε
να αποθηκεύσετε σε κάποιο αριθµητικ
πλήκτρο, πιέστε το (SEEK/AMS).
4 Πιέστε για δύο δευτερλεπτα το
επιθυµητ αριθµητικ πλήκτρο σταθµού
((1) έωσ (6)).
Στην οθνη εµφανίζεται ο αριθµσ του
επιλεγµένου αριθµητικού πλήκτρου.
Λήψη των σταθµών που
είναι καταχωρηµένοι
στη µνήµη
1 Για να επιλέξετε το δέκτη, πιέστε
επανειληµµένα το (SOURCE).
2 Για να επιλέξετε την µπάντα, πιέστε
επανειληµµένα το (MODE).
3 Πιέστε στιγµιαία το αριθµητικ πλήκτρο
((1) έωσ (6)) στο οποίο είναι
αποθηκευµένοσ ο σταθµσ που θέλετε.
Υπδειξη
Για να ακούσετε τουσ σταθµούσ, µε τη σειρά που
είναι αποθηκευµένοι στη µνήµη, πιέστε ένα απ
τα δύο άκρα του πλήκτρου (PRST) (Preset Search
Function=Λειτουργία Αναζήτησησ
Προρυθµισµένων Σταθµών).
Υπδειξη
Εάν γνωρίζετε τη συχντητα, πιέστε και κρατήστε
πατηµένο ένα απ τα δύο άκρα του (SEEK/AMS),
µέχρι να συντονίσετε το σταθµ που θέλετε
(χειροκίνητοσ συντονισµσ).
GR
Κασετφωνο/Ραδιφωνο
7
Page 50

0dB
D-BASS 3
D-BASS 2
D-BASS 1
Αλλεσ Λειτουργίεσ
Αλλαγή του τνου του
ήχου και του
προειδοποιητικού ήχου
Ρύθµιση των
χαρακτηριστικών του
ήχου
1 Επιλέξτε το στοιχείο που θέλετε να
ρυθµίσετε, πιέζοντασ επανειληµµένα το
(SEL).
VOL (ένταση) n BAS (µπάσα ή χαµηλέσ
συχντητεσ) n TRE (πρίµα ή υψηλέσ
συχντητεσ) n BAL (αριστερά-δεξιά)
n FAD (εµπρσ-πίσω)
2 Ρυθµίστε το επιλεγµένο στοιχείο
πιέζοντασ είτε το (+) ή το (–).
Κάντε τη ρύθµιση εντσ τριών
δευτερολέπτων µετά την επιλογή. (Μετά
απ τρία δευτερλεπτα το πλήκτρο
λειτουργεί και πάλι ωσ πλήκτρο ρύθµισησ
τησ έντασησ.)
GR
Εξασθένηση του ήχου
Πιέστε το (ATT).
Η ένδειξη “ATT” αναβοσβήνει.
Για να επαναφέρετε την προηγούµενη
ένταση ήχου, πιέστε και πάλι.
Ενίσχυση των µπάσων- D-Bass
Για να χαρείτε έναν καθαρ και δυνατ ήχο
µπάσων, µπορείτε να δυναµώσετε µνο το
σήµα των χαµηλών συχνοτήτων µε µία
οξεία καµπύλη. Το αποτέλεσµα είναι
παρµοιο µε αυτ ταν χρησιµοποιείτε ένα
προαιρετικ σύστηµα subwoofer.
Για παράδειγµα, µπορείτε να ακούσετε τη
γραµµή των µπάσων πιο καθαρά ακµα και
ταν η ένταση τησ φωνήσ παραµένει η ίδια.
Με τη ρύθµιση D-BASS µπορείτε να
τονίσετε και να ρυθµίσετε εύκολα τα
µπάσα.
Analog D-BASS
Στάθµη
Συχντητα (Hz)
Ρύθµιση τησ καµπύλησ µπάσων
Γυρίστε το ρυθµιστή D-BASS για να
ρυθµίσετε τη στάθµη των µπάσων
(1, 2 ή 3).
Στην οθνη εµφανίζεται το “D-BASS”.
Για ακύρωση, γυρίστε το ρυθµιστή στη
θέση OFF.
Σηµείωση
Αν ο ήχοσ των µπάσων είναι παραµορφωµένοσ,
ρυθµίστε το D-bass ή την ένταση του ήχου
ανάλογα.
Απενεργοποίηση του
προειδοποιητικού ήχου
Πιέστε το (6) ενώ κρατάτε πατηµένο το
(SEL).
Για να ενεργοποιήσετε και πάλι τον
προειδοποιητικ ήχο, πιέστε αυτά τα
πλήκτρα και πάλι.
8
Page 51

Πρσθετεσ
Πληροφορίεσ
Προφυλάξεισ
• Εάν το αυτοκίνητ σασ παρέµεινε στον
ήλιο, µε αποτέλεσµα να ανέβει σηµαντικά
η θερµοκρασία στο εσωτερικ του,
αφήστε τη συσκευή να κρυώσει πριν τη
λειτουργήσετε.
• Εάν δεν τροφοδοτείται η συσκευή,
ελέγξτε πρώτα τισ συνδέσεισ. Εάν οι
συνδέσεισ είναι εντάξει, ελέγξτε την
ασφάλεια.
• Εάν δεν ακούγεται ήχοσ απ τα ηχεία
ενσ συστήµατοσ 2-ηχείων, ρυθµίστε την
κατανοµή ήχου εµπρσ-πίσω στην
κεντρική θέση.
• Εάν παίζετε µια κασέτα για πολύ ώρα, η
κασέτα πιθαν να ζεσταθεί απ τον
ενσωµατωµένο ενισχυτή. Ωστσο, αυτ
δεν είναι δείγµα κακήσ λειτουργίασ.
Εάν έχετε κάποιεσ απορίεσ ή προβλήµατα
µε τη συσκευή σασ, τα οποία δεν
καλύπτονται απ το παρν εγχειρίδιο,
παρακαλούµε συµβουλευτείτε το τοπικ
κατάστηµα τησ Sony.
Για να διατηρήσετε την υψηλή
ποιτητα ήχου
Εάν υπάρχουν θέσεισ ποτών κοντά στο
στερεοφωνικ σασ, προσέξτε να µη χυθεί
χυµσ ή άλλα αναψυκτικά επάνω σε αυτ.
Υπολείµµατα ζάχαρησ στη συσκευή ή στισ
κασέτεσ µπορούν να λερώσουν τισ
κεφαλέσ αναπαραγωγήσ, να αλλοιώσουν
την ποιτητα του ήχου, ή να εµποδίσουν
εντελώσ την αναπαραγωγή ήχου.
Τα κιτ κασετών καθαρισµού δεν µπορούν
να αφαιρέσουν τη ζάχαρη απ τισ κεφαλέσ
τησ συσκευήσ.
Σηµειώσεισ σχετικά µε τισ Κασέτεσ
Φροντίδα των κασετών
• Μην αγγίζετε την επιφάνεια τησ ταινίασ
µιασ κασέτασ, διτι η τυχν σκνη ή
βρωµιά θα λερώσει τισ κεφαλέσ.
• Μην αφήνετε τισ κασέτεσ κοντά σε
συσκευέσ µε ενσωµατωµένουσ µαγνήτεσ,
πωσ ηχεία και ενισχυτέσ, διτι µπορεί να
προκληθεί διαγραφή ή παραµρφωση τησ
εγγραφήσ τησ.
• Μην αφήνετε τισ κασέτεσ στον ήλιο, σε
ιδιαίτερα χαµηλέσ θερµοκρασίεσ ή σε
υγρασία.
• Εάν η ταινία τησ κασέτασ είναι χαλαρή,
αυτ µπορεί να έχει ωσ αποτέλεσµα την
εµπλοκή τησ στο µηχανισµ τησ
συσκευήσ. Πριν βάλετε µια κασέτα,
χρησιµοποιήστε ένα µολύβι ή κάποιο
παρµοιο αντικείµενο για να τεντώσετε
την ταινία.
Χαλάρωµα
• Οι παραµορφωµένεσ κασέτεσ και οι
ξεκολληµένεσ ετικέτεσ µπορεί να
προκαλέσουν προβλήµατα κατά την
εισαγωγή ή εξαγωγή µιασ κασέτασ.
Αφαιρέστε ή αντικαταστήστε τισ
ξεκολληµένεσ ετικέτεσ.
Κασέτεσ µεγαλύτερεσ απ 90 λεπτά
Η χρήση κασετών διάρκειασ µεγαλύτερησ
των 90 λεπτών δε συνιστάται, εκτσ απ
την περίπτωση συνεχούσ αναπαραγωγήσ
µεγάλησ διάρκειασ. Η ταινία που
χρησιµοποιείται για τέτοιεσ κασέτεσ είναι
πολύ λεπτή και εκτείνεται εύκολα. Η συχνή
αναπαραγωγή και το σταµάτηµα τέτοιων
κασετών µπορεί να έχει ωσ αποτέλεσµα
την εµπλοκή τησ ταινίασ τουσ στο
µηχανισµ του κασετοφώνου.
GR
Αλλεσ Λειτουργίεσ/Πρσθετεσ Πληροφορίεσ
9
Page 52

Συντήρηση
Αντικατάσταση Ασφαλειών
ταν αντικαθιστάτε µια ασφάλεια,
βεβαιωθείτε τι χρησιµοποιείτε κάποια τησ
ίδιασ έντασησ ρεύµατοσ µε την αρχική. Εάν
καεί η ασφάλεια, ελέγξτε τη σύνδεση
τροφοδοσίασ και αντικαταστήστε την
ασφάλεια. Εάν η ασφάλεια καεί και πάλι
µετά την αντικατάσταση, πιθαν να
υπάρχει κάποια εσωτερική βλάβη. Σε
τέτοια περίπτωση, συµβουλευτείτε το
τοπικ κατάστηµα τησ Sony.
Αφαίρεση τησ συσκευήσ
1
Κλειδί απελευθέρωσησ
(παρέχεται)
2
Προσοχή
Ποτέ µη χρησιµοποιείτε µια ασφάλεια για
µεγαλύτερο ρεύµα απ την αρχική, διτι
κάτι τέτοιο µπορεί να καταστρέψει τη
συσκευή.
Καθαρισµσ των Επαφών
GR
Εάν οι επαφέσ µεταξύ τησ συσκευήσ και
τησ πρσοψησ δεν είναι καθαρέσ, η
συσκευή µπορεί να µη λειτουργεί σωστά.
Για να αποφύγετε κάτι τέτοιο,
απελευθερώστε την πρσοψη πιέζοντασ το
(RELEASE), και µετά βγάλτε την και
καθαρίστε τισ επαφέσ µε µια µπατονέτα
βουτηγµένη σε οινπνευµα. Μην εξασκείτε
µεγάλη δύναµη, διτι µπορεί να
καταστρέψετε τισ επαφέσ.
Κυρίωσ συσκευή
Ασφάλεια (10 A)
3
4
10
Πίσω τµήµα τησ πρσοψησ
Page 53

Οι ετικέτεσ του
περιστροφικού
χειριστηρίου
Μπορείτε να χειριστείτε αυτή τη συσκευή
απ το προαιρετικ χειριστήριο (RM-X4S).
Μαζί µε το περιστροφικ χειριστήριο
παρέχονται και µερικέσ ετικέτεσ. Κολλήστε
την ετικέτα που ταιριάζει µε τισ
λειτουργίεσ τησ κύριασ συσκευήσ και τη
θέση τοποθέτησησ του περιστροφικού
χειριστηρίου.
Οταν τοποθετείτε το περιστροφικ
χειριστήριο, κολλήστε την κατάλληλη
ετικέτα, πωσ απεικονίζεται παρακάτω.
DSPL
MODE
SEL
SEL
MODE
DSPL
GR
Πρσθετεσ Πληροφορίεσ
11
Page 54

Θέση χειριστηρίων
SEEK
AMS
SEL
ATT
MODE
OFF
BTM
SOURCE
RELEASE
∆είτε τισ αντίστοιχεσ σελίδεσ για περαιτέρω λεπτοµέρειεσ.
1 Πλήκτρο SEL (επιλογή λειτουργίασ
ρύθµισησ) 5, 8
GR
2 Πλήκτρο SOURCE (ΤΑΡΕ/ΤUΝΕR) 5, 6,
7
3 Πλήκτρο MODE (*) (ΛΕΙΤΟΥΡΓΙΑ)
Κατά τη λειτουργία του ∆έκτη:
Επιλογή ΜΠΑΝΤΑΣ 6, 7
Κατά την αναπαραγωγή κασέτασ:
Αλλαγή Πλευράσ κασέτασ 5
4 ∆ιακπτησ POWER SELECT (ΕΠΙΛΟΓΗ
ΤΡΟΦΟ∆ΟΣΙΑΣ) (βρίσκεται στην επάνω
πλευρά τησ συσκευήσ)
∆είτε το “∆ιακπτη POWER SELECT”
στο εγχειρίδιο Εγκατάσταση/Συνδέσεισ.
5 Πλήκτρο OFF (σβήσιµο συσκευήσ) 4, 5
6 Πλήκτρο SEEK/AMS (Αναζήτηση/
Αυτµατοσ Μουσικσ Αισθητήρασ) 5, 6,
7
7 Πλήκτρο 6 (εξαγωγή κασέτασ) 5
8 Πλήκτρο DSPL (αλλαγή ενδείξεων/
ρύθµιση ώρασ) 5, 6, 7
9 Κατά τη λειτουργία του ραδιοφώνου:
Αριθµητικά πλήκτρα προρυθµισµένων
σταθµών 7
Κατά την αναπαραγωγή κασέτασ:
(5) Πλήκτρο ATA (Automatic Tuner
Activation=Αυτµατη
Ενεργοποίηση ∆έκτη) 6
231
LCL
PRST
ATA
564
D-BASS
1
OFF
2
3
DSPL
!º Πλήκτρο (+) (–) (ένταση/µπάσα/πρίµα/
αριστερ-δεξί/εµπρσ-πίσω) κουµπί 5, 8
!¡ Πλήκτρο RELEASE (απελευθέρωση
πρσοψησ) 4, 10
!™ Πλήκτρο Επαναρύθµισησ (Reset)
(βρίσκεται στην εµπρσ πλευρά τησ
συσκευήσ και κρύβεται απ την
πρσοψη)
Πιέστε αυτ το πλήκτρο ταν
χρησιµοποιείτε τη συσκευή για πρώτη
φορά, µετά την αλλαγή τησ µπαταρίασ
του αυτοκινήτου, ή ταν τα πλήκτρα
τησ συσκευήσ δε λειτουργούν σωστά.
!£ Πλήκτρο ATT (Εξασθένηση) 8
!¢ Πλήκτρο BTM (Λειτουργία µνήµησ
ισχυρτερων σταθµών) 6
!∞ Οθνη
!§ Πλήκτρο LCL (Λειτουργία τοπικήσ
αναζήτησησ) 7
!¶ Πλήκτρο PRST 7
!• Ρύθµιση D-BASS 8
12
Page 55

Τεχνικά Χαρακτηριστικά
Κασετφωνο
Κανάλι εγγραφήσ κασέτασ
Στερεοφωνικ 2καναλιών αναπαραγωγήσ
4-καναλιών εγγραφήσ
Wow & flutter 0,08 % (WRMS)
Απκριση συχντητασ 30 – 18.000 Hz
Λγοσ Σήµατοσ/Θρυβο 58 dB
∆έκτησ
FM
Περιοχή συντονισµού 87,5 – 108,0 MHz
Τερµατική επαφή κεραίασ
Υποδοχή εξωτερικήσ
κεραίασ
Ενδιάµεση συχντητα 10,7 MHz
Ωφέλιµη ευαισθησία 8 dBf
Επιλεξιµτητα 75 dB στα 400 kHz
Λγοσ Σήµατοσ/ Θρυβο
65 dB (στερεοφωνικά),
68 dB (µονοφωνικά)
Αρµονική παραµρφωση στα 1 kHz
0,5 % (στερεοφωνικά),
0,3 % (µονοφωνικά)
∆ιαχωρισµσ 35 dB στα 1 kHz
Απκριση συχντητασ 30 – 15.000 Hz
Λγοσ λήψησ σήµατοσ 2 dB
MW/LW
Περιοχή συντονισµού MW: 531 – 1.602 kHz
LW: 153 – 281 kHz
Τερµατική επαφή κεραίασ
Υποδοχή εξωτερικήσ
κεραίασ
Ενδιάµεση συχντητα 10,71 MHz/450 kHz
Ευαισθησία MW: 30 µV
LW: 50 µV
Γενικά
Ρυθµίσεισ τνου Μπάσα ±8 dB στα 100 Hz
Απαιτήσεισ ισχύοσ Μπαταρία αυτοκινήτου
∆ιαστάσεισ Περίπου 188 × 58 × 181
∆ιαστάσεισ τοποθέτησησ
Βάροσ Περίπου 1,2 kg
Συνοδευτικά εξαρτήµατα
Προαιρετικά εξαρτήµατα
Η σχεδίαση και τα χαρακτηριστικά µπορούν να
αλλάξουν χωρίσ προειδοποίηση.
Πρίµα ±8 dB στα 10 kHz
12 V DC
(αρνητική γείωση)
mm (π/υ/β)
Περίπου 182 × 53 × 164
mm (π/υ/β)
Εξαρτήµατα για την
εγκατάσταση και τισ
συνδέσεισ (1 σετ)
Θήκη πρσοψησ (1)
Περιστροφικ
χειριστήριο RM-X4S
GR
Πρσθετεσ Πληροφορίεσ
Ενισχυτήσ
Έξοδοι Έξοδοι ηχείων
(µονωµένεσ υποδοχέσ)
Σύνθετη αντίσταση ηχείων
4 – 8 ohms
Μέγιστη ισχύσ εξδου 35 W × 4 (στα 4 ohms)
13
Page 56

Οδηγσ Αντιµετώπισησ προβληµάτων
Η ακλουθη λίστα ελέγχου θα σασ βοηθήσει στην αντιµετώπιση των περισσοτέρων
προβληµάτων που πιθαν να συναντήσετε µε τη συσκευή.
Πριν µελετήσετε την παρακάτω λίστα, δείτε τισ αντίστοιχεσ λειτουργικέσ διαδικασίεσ.
Γενικά
Πρβληµα
Καθλου ήχοσ.
∆εν εµφανίζονται ενδείξεισ
στην οθνη.
∆εν ακούγεται
προειδοποιητικσ ήχοσ.
Αναπαραγωγή κασέτασ
Πρβληµα
Ο ήχοσ αναπαραγωγήσ είναι
παραµορφωµένοσ.
Ο Αυτµατοσ Μουσικσ
Αισθητήρασ δε λειτουργεί
σωστά.
GR
Αιτία/Λύση
• Ρυθµίστε την ένταση µε το (+).
• Σε συστήµατα 2-ηχείων ρυθµίστε την κατανοµή ήχου
εµπρσ-πίσω στην κεντρική θέση.
Αφαιρέστε την πρσοψη και καθαρίστε τισ επαφέσ. ∆είτε
τον “Καθαρισµσ των Επαφών” στο “Συντήρηση” για
περισστερεσ λεπτοµέρειεσ.
Ο προειδοποιητικσ ήχοσ είναι απενεργοποιηµένοσ.
Αιτία/Λύση
Λερωµένη κεφαλή κασέτασ.
n Καθαρίστε την κεφαλή.
• Υπάρχει θρυβοσ στο κεν µεταξύ των κοµµατιών.
• Κάποιο κεν είναι πολύ σύντοµο (λιγτερο απ τέσσερα
δευτερλεπτα).
• Το + στο (SEEK/AMS) πατιέται αµέσωσ πριν το επµενο
κοµµάτι.
• Το = στο (SEEK/AMS) πατιέται αµέσωσ µετά την αρχή
του κοµµατιού.
• Μια µεγάλη παύση, ή ένα πέρασµα χαµηλών συχνοτήτων
ή µια στάθµη πολύ χαµηλού ήχου λαµβάνεται ωσ κεν
στην κασέτα.
Ραδιοφωνική λήψη
Πρβληµα
Ο συντονισµσ
προρυθµισµένων σταθµών
είναι αδύνατοσ.
Ο αυτµατοσ συντονισµσ
είναι αδύνατοσ.
Εάν οι λύσεισ που αναφέρονται παραπάνω δε βοηθούν στη βελτίωση τησ κατάστασησ,
συµβουλευτείτε το τοπικ κατάστηµα τησ Sony.
Αιτία/Λύση
• Αποθηκεύστε τη σωστή συχντητα.
• Η µετάδοση είναι πολύ χαµηλή.
Η µετάδοση είναι πολύ χαµηλή.
n Χρησιµοποιήστε χειροκίνητο συντονισµ.
14
Page 57

Ευρετήριο
A
Αναπαραγωγή κασέτασ 5
Ασφάλεια 10
ATT 8
Αυτµατη Ενεργοποίηση ∆έκτη
(ATA=Automatic Tuner Activation) 6
Αυτµατοσ Μουσικσ Αισθητήρασ (AMS) 6
Αυτµατοσ συντονισµσ 7
Β
BAL (Ισορροπία αριστερ-δεξί) 8
BAS (µπάσα) 8
Γ
Γρήγορη περιέλιξη προσ τα εµπρσ 5
∆, D
D-BASS (D-Bass) 8
Ε
Επαναρύθµιση 4
F, Ζ, Η, Θ, Ι, Κ
FAD (Κατανοµή ήχου εµπρσ-πίσω) 8
Ο
Οθνη 6
Π
Περιέλιξη προσ τα πίσω 5
Περιστροφικ χειριστήριο 11
Πρσοψη 4
Ρ
Ράδιο 6
Ρολι 5
Σ
Συναγερµσ υπενθύµισησ 4
Τ, Υ, Φ
TRE (Πρίµα) 8
Χ, Ψ, Ω
Χειροκίνητοσ συντονισµσ 7
GR
Πρσθετεσ Πληροφορίεσ
Λ
Λειτουργία Αναζήτησησ Προρυθµισµένων
Σταθµών 7
Λειτουργία τοπικήσ αναζήτησησ (LCL=Local
seek mode) 7
Μ, Ν, Ξ
Μνήµη Ισχυρτερων Σταθµών (BTM=Best
Tuning Memory) 6
15
Page 58

TU
Hoşgeldiniz!
Sony Casette Car Stereo’yu satın aldığınız için
teşekkür ederiz. Bu ünite beraberindeki döner
kumanda yardımıyla bir çok müziği zevkle
dinlemenizi sağlayacaktır.
2
Page 59

İçindekiler
Başlarken
Ünitenin ayarı .................................................. 4
Ön panelin sökümü ......................................... 4
Saatin ayarlanması ......................................... 5
Kasetçalar
Kasetin dinlenmesi.......................................... 5
Radyo
İstasyonların otomatik olarak hafızaya alınması
— Best Tuning Memory (BTM) .................. 6
Yalnız arzu edilen istasyonların hafızaya
alınması ...................................................... 7
Hafızaya alınmış istasyonların dinlenmesi...... 7
Diğer Fonksiyonlar
Ses özelliklerinin ayarlanması.........................8
Sesin kısılması ................................................ 8
Sesin ve uyarı sinyalinin değiştirilmesi............ 8
Ek bilgi
Tedbirler ..........................................................9
Bakım ............................................................10
Ünitenin sökülmesi ........................................10
Döner kumandanın etiketleri .........................11
Kontrol düğmelerinin yeri .............................. 12
Özellikler ....................................................... 13
Problem arama kılavuzu ............................... 14
İndeks ........................................................... 15
TU
3
Page 60

Başlarken
Ünitenin ayarı
Üniteyi ilk bağlamanızdan önce veya
otomobilin aküsünü değiştirdikten sonra,
üniteyi ayarlamalısınız.
Ayar tuşuna tükenmez kalem gibi sivri uçlu bir
obje ile basınız.
Ayar tuşu
Not
Ayar tuşuna bastığınızda hafızadaki tüm programlar
ve fonksiyonlar silinir.
Ön panelin sökümü
Ünitenin çalınmasını önlemek için ünitenin ön
panelini sökebilirsiniz.
TU
1 (OFF) tuşuna basınız.
2 Ön paneli açmak için (RELEASE) tuşuna
basınız ve hafifçe çekerek çıkartınız.
(RELEASE)
Ön paneli takmak
Ön panelin A parçasını ünitenin B parçasına
gösterildiği üzere takınız ve klik sesi çıkana
kadar itiniz.
A
B
Notlar
• Ön paneli üniteye takarken, panelin doğru şekilde
yukarıda olduğuna emin olunuz, çünkü panel
başaşağı takılamaz.
• Ön paneli üniteye takarken üniteye doğru sert
şekilde bastırmayınız. Paneli üniteye doğru hafifçe
iterek kolayca takabilirsiniz.
• Ön paneli yanınıza alırsanız, ünite beraberindeki ön
panel çantasında taşıyınız.
• Ön panelin gösterge pencerelerini sertçe itmeyiniz
veya aşırı derecede bastırmayınız.
• Ön paneli direkt güneş ışığına, sıcak hava kanalları
gibi ısı kaynaklarına maruz bırakmayınız veya nemli
bir yere koymayınız. Paneli, otomobilin iç ısısının
önemli ölçüde artabileceği direkt güneş ışığında
parkedilmiş otomobilin kontrol panelinde v.b.
bırakmayınız.
Dikkat ikazı
Ön paneli çıkarmadan kontakt anahtarını OFF
pozisyonuna getirirseniz, bir kaç saniye için
dikkat ikazı çalar (yalnızca POWER SELECT
tuşu A pozisyonuna getirilmiş ise).
Notlar
• Paneli üniteden sökerken düşürmemeye dikkat
ediniz.
• Eğer paneli sökmek için (RELEASE) tuşuna
bastığınızda, ünite hala açıksa, hoparlörlerin zarar
görmemesi için, ünite otomatik olarak kapanır.
4
Page 61

Saatin ayarlanması
Saatin 24 saat bazında bir dijital göstergesi
vardır.
Örneğin 10:08’e ayarlamak
Kasetçalar
1 İşlemi gerçekleştirirken (OFF) veya
(DSPL) tuşuna basınız.
2 (DSPL) tuşuna iki saniye basınız.
100
Saatin rakamları yanar söner.
1 Saatin rakamlarını ayarlayınız.
geri gelmek için
1000
2 Hafifçe (SEL) tuşuna basınız.
1000
Dakika rakamları yanar söner.
3 Dakika göstergelerini ayarlayınız.
1008
ileri gitmek için
ileri gitmek içingeri gelmek için
Kasetin dinlenmesi
Bir kaset yerleştiriniz.
Kaset otomatik olarak çalmaya başlar.
Eğer kaset yerleştirilmişse, göstergede “TAPE”
yansıyıncaya kadar tekrar tekrar (SOURCE)
tuşuna basınız.
TAPE
TAPE
Önerimiz
Kasetin çalış yönünü değiştirmek için kaset çalarken
(MODE) (*) tuşuna basınız.
Fonksiyon
Kaseti durdurmak
Kaseti çıkarmak
Kasetin üst yüzü çalınıyor.
Kasetin alt yüzü çalınıyor.
Tuş
(OFF)
6
TU
Başlarken/Kasetçalar
3 Hafifçe (DSLP) tuşuna basınız.
1008
Saat çalışmaya başlar.
Not
Ünitenin üstündeki POWER SELECT tuşu, B
pozisyonunda ise, saat ünite kapalı iken ayarlanmaz.
Saati, radyoyu açtıktan sonra ayarlayınız.
Kasetin sarılması
Kaset çalarken (SEEK/AMS)’ın iki tuşuna
birden iki saniyeden uzun olmak üzere
basınız.
SEEK
AMS
Geri
İleri ya da geri sararken kasetin çalması için
(MODE) (*) tuşuna basınız.
İleri
5
Page 62

Parça başlangıcının belirlenmesi
— Automatic Music Sensor (AMS)
Bir seferde azami dokuz parça atlayabilirsiniz.
Kaset çalarken (SEEK/AMS)’ın iki tuşuna
birden hafifçe basınız.
SEEK
AMS
Önceki parçaya
dönmek için
Not
AMS fonksiyonu çalışmayabilir, eğer:
• parça aralarındaki boşluklar 4 saniyeden az ise
• Parçalar arasında ses varsa
• Kısık sesli uzun bölümler veya sessiz bölümler
varsa.
Sonraki parçaya
gelmek için
Göstergedeki işaretlerin değiştirilmesi
Kaset çalarken (DSPL) tuşuna her
bastığınızda, göstergedeki işaretler şu şekilde
değişir:
””
” Kasetçalar
””
* ATA fonksiyonu açıkken
””
” Saat
””
Kaset sarılırken radyonun açılması
— Automatic Tuner Activation (ATA)
Çalış esnasında (5) tuşuna basınız.
TU
Göstergede “ATA” görülür.
(SEEK/AMS) ile bir iki saniye için ileri ya da geri
sararsanız, radyo otomatik olarak açılır.
Bu fonksiyonu iptal etmek için (5) tuşuna
basınız.
””
” Frekans*
””
Radyo
İstasyonların otomatik
olarak hafızaya alınması
— Best Tuning Memory (BTM)
Bu fonksiyon o an alınan bandlardan en
kuvvetli sinyalleri veren istasyonları seçer ve
frekanslarını hafızasına alır.
KAZALARI ÖNLEMEK!
Otomobili sürerken manüel ayar yerine
otomatik ayar veya hafıza ayar arama
fonksiyonunu kullanınız.
1 Radyoyu seçmek için tekrar tekrar
(SOURCE) tuşuna basınız.
(SOURCE) tuşuna her basışınızda,
kaynaklar şu şekilde görülür:
˜˜
TAPE
˜ TUNER
˜˜
2 Bandı seçmek için tekrar tekrar (MODE)
tuşuna basınız.
(MODE) tuşuna her bastığınızda, bandlar
şu şekilde görülür:
nn
nn
nn
FM1
n FM2
n FM3
nn
nn
3 (BTM) tuşuna iki saniye basınız.
Notlar
• Ünite zayıf sinyal veren istasyonları ayar numara
tuşlarında hafızaya almayacaktır. Yalnız bir kaç
istasyon alınabiliyorsa, bazı ayar numara tuşları boş
kalır.
• Göstergede bir ayar numarası görülüyorsa, ünite
görülen numarayı izleyen, tüm ayar numara
tuşlarında istasyonları yükleyecektir.
n MW
nn
nn
n LW
nn
6
Page 63

Yalnız arzu edilen
istasyonların hafızaya
alınması
Dilediğiniz bandda (FM1, FM2, FM3, MW ve
LW) azami 6 istasyon olmak üzere ayar
numara tuşlarına kaydedilebilir. Bu yüzden 18
FM istasyonunu hafızaya alabilirsiniz.
Ayar numara tuşunda başka bir istasyonu
hafızaya alırsanız daha önce hafızaya alınan
istasyon silinir.
1 Radyoyu seçmek için tekrar tekrar
(SOURCE) tuşuna basınız.
2 Bandı seçmek için tekrar (MODE) tuşuna
basınız.
3 Ayar numara tuşunda hafızaya almak
istediğiniz istasyonu aramak için
(SEEK/AMS) tuşuna basınız.
4 İki saniye boyunca seçtiğiniz ayar
numara tuşuna ((1) ile (6) arası)
basınız.
Seçtiğiniz ayar numara tuşunun numarası
göstergede görülür.
Göstergedeki işaretlerin değiştirilmesi
(DSPL) tuşuna her bastığınızda, gösterge
frekans ile saat arasında değişecektir.
Daha önce ayarlanan bir istasyonu
bulamıyorsanız
İstasyonu aramak için (otomatik ayar)
hafifçe (SEEK/AMS)’ın iki tuşuna birden
basınız
Bir istasyon bulunduğunda arama sona
erecektir. Dilediğiniz istasyonu bulana
kadar (SEEK/AMS)’ın iki tuşa birden
basınız.
Not
Otomatik ayar çok sık duruyorsa, hafifçe (LCL)
tuşuna basınız. Göstergede “LCL” görülür (yerli
arama kipi).Yalnız oldukça güçlü sinyal alan
istasyonlar için ince ayar yapılabilir.
Önerimiz
Frekansı biliyorsanız, dilediğiniz istasyonu buluncaya
kadar (SEEK/AMS)’ın iki tuşuna birden basıp tutunuz.
(manüel ayar).
TU
Kasetçalar/Radyo
Hafızaya alınmış
istasyonların dinlenmesi
1 Radyoyu seçmek için tekrar tekrar
(SOURCE) tuşuna basınız.
2 Bandı seçmek için tekrar tekrar (MODE)
tuşuna basınız.
3 Hafifçe arzu edilen istasyonun
bulunduğu ayar numara tuşuna ((1) ile
(6) arası) basınız.
Önerimiz
Hafızada kayıtlı istasyonları dinlemek için (Preset
Search Function) (PRST) ’in iki tuşuna birden
basınız.
7
Page 64

Analog D-BASS
0dB
D-BASS 3
D-BASS 2
D-BASS 1
Diğer Fonksiyonlar
Ses özelliklerinin
ayarlanması
1 (SEL) tuşuna tekrar tekrar basarak
dilediğiniz işareti seçiniz.
VOL (ses) n BAS (bas) n TRE (tiz) n
BAL (sağ-sol) n FAD (ön-arka)
2 (+) veya (–) tuşuna basarak seçtiğiniz
işareti ayarlayınız.
Seçtikten 3 saniye içinde ayarlayınız. (Ses
kontrol tuşu gibi üç saniye sonra hizmete
geçecektir.)
Sesin kısılması
(ATT) tuşuna basınız.
“ATT” işareti yanıp söner.
Daha önceki ses seviyesini kaydetmek için
TU
tekrar basınız.
Seviye
Frekans (Hz)
Bas kavisinin ayarlanması
Bas seviyesini ayarlamak için D-BASS
kontrol düğmesini çeviriniz (1, 2 veya 3).
Göstergede “D-BASS” görülür.
İptal etmek için kontrol düğmesini “OFF”
pozisyonuna getiriniz.
Not
Bas kötü çıkıyorsa D-BASS düğmesini veya ses
tuşunu ayarlayınız.
Uyarı sinyalinin kısılması
(SEL) tuşuna basarak (6) tuşuna
basınız.
Uyarı sinyalinin tekrar elde etmek için
tuşlara tekrar basınız.
Sesin ve uyarı sinyalinin
değiştirilmesi
Basın yükseltilmesi — D-bass
Net ve güçlü bir bas dinlemek için yalnız alçak
frekans sinyalini sivri bir kavis ile
yükseltebilirsiniz. Ek bir Subwoofer sistemi
kullanıldığındaki etkiyi elde edersiniz.
Örneğin vokal ses aynı yükseklikte kalsa dahi
bası net şekilde duyabilirsiniz. D-BASS
kontrolü ile bası kolayca vurgulayabilir ve
ayarlayabilirsiniz.
8
Page 65

Ek bilgi
Tedbirler
• Eğer otomobilinizi direkt güneş ışığına tabi bir
yere park ettiyseniz ve otomobilin iç ısısı
önemli ölçüde arttı ise, üniteyi çalıştırmadan
önce soğumasını bekleyiniz.
• Eğer üniteye güç gitmiyorsa, önce
bağlantıları kontrol ediniz. Eğer her şey
yolunda ise sigortayı kontrol ediniz.
• İki hoparlörlü sistemin hoparlörlerinden ses
gelmiyorsa fader kontrol düğmesini orta
pozisyona getiriniz.
• Kaset uzun süre çalarsa takılı güç
amplifikatörü dolayısıyla ısınabilir. Ancak bu
fonksiyonun kusurlu olduğuna işaret etmez.
Ünite hakkında kullanım kılavuzunda yer
almayan soru ve problemleriniz olduğu
takdirde en yakın Sony bayiine danışınız.
Yüksek kaliteli ses sağlanması
Audio aletinin yanında içecek tutucuları varsa
ünitenin üzerine meyve suyu veya başka bir
içecek dökmemeye dikkat ediniz. Ünite veya
kaset üzerindeki şekerli artıklar kafaları kirletir
ve böylece ses kalitesi azalır veya ses üretimi
tamamen engellenir.
Kaset temizleme kitleri kafalardaki şekeri
temizleyemez.
Kaset notları
Kasetin bakımı
• Kasetin teyp yüzeyine dokunmayınız, her
türlü kir ve toz kafaları kirletir.
• Kasetleri hoparlör ve amplifikatör gibi
mıknatıs takılı aletlerden uzak tutunuz. Aksi
takdirde kayıtlı kasetlerde silinme veya
bozulma olabilir.
• Kasetleri direkt güneş ışığına, aşırı soğuğa
veya neme tabi bırakmayınız.
• Teypdeki gevşeklik ünitenin teybi sarmasına
yol açabilir.
Kaseti yerleştirmeden önce kurşunkalemle
veya benzeri bir obje ile makarayı çevirip
gevşekliği gideriniz.
Gevşeklik
• Bozuk kasetler ve gevşek etiketler kaseti
yerleştirirken veya çıkarırken problem
çıkarabilir. Gevşek etiketleri çıkarınız veya
yenisi ile değiştiriniz.
90 dakikadan uzun kasetler
90 dakikadan uzun kasetlerin kullanılması
uzun süreli çalınmasının dışında tavsiye
edilmez. Bu tür kasetlerde kullanılan teypler
çok ince ve kolaylıkla kopmaya meyillidir. Bu
kasetleri devamlı çalıp durdurmak kasetçalar
mekanizmasına takılmasına yol açabilir.
TU
Diğer Fonksiyonlar/Ek bilgi
9
Page 66

Bakım
Sigortanın değiştirilmesi
Sigortayı değiştirirken uygun amper gücünde
bir sigorta kullanmaya dikkat ediniz. Sigorta
attığı takdirde güç bağlantısını kontrol edip
sigortayı değiştiriniz. Sigorta değiştirildikten
sonra tekrar atarsa, bu dahili bir fonksiyon
bozukluğunu işaret eder. Böyle bir durumda en
yakın Sony bayiine danışınız.
Sigorta (10A)
Ünitenin sökülmesi
1
Release anahtarı
(üniteye dahil)
2
Uyarı
Hiçbirzaman üniteye takılı sigortanın amper
gücünden daha güçlü bir sigorta takmayınız,
aksi takdirde üniteye zarar verebilirsiniz.
Bağlantıların temizlenmesi
Ünite ile ön panel arasındaki bağlantılar temiz
değil ise, ünite tam anlamıyla çalışmayabilir.
Bunu önlemek için (RELEASE) tuşuna basarak
ön paneli açınız ve alkole batırılmış bir pamuk
çubuk ile konektörleri temizleyiniz. Fazla
kuvvet kullanmayınız. Aksi takdirde
konektörlere zarar verebilirsiniz.
TU
Ana ünite
Ön panelin arkası
3
4
10
Page 67

Döner kumandanın
etiketleri
Bu üniteyi ek bir döner kumanda ile idare
edebilirsiniz (RM-X4S).
Döner kumanda beraberinde etiketler
bulunmaktadır. Ana ünitenin fonksiyonlarına ve
döner kumandanın montaj yerine uyan
etiketleri yapıştırınız.
Döner kumandayı monte ederken aşağıda
gösterildiği üzere uygun etiketi yapıştırınız.
DSPL
MODE
SEL
SEL
MODE
DSPL
TU
Ek bilgi
11
Page 68

Kontrol düğmelerinin yeri
SEEK
AMS
SEL
ATT
MODE
OFF
BTM
SOURCE
RELEASE
Ayrıntılar için aşağıdaki sayfalara bakınız.
1 SEL (kontrol kip seçimi) tuşu 5, 8
2 SOURCE tuşu (TAPE/TUNER) 5, 6, 7
3 (MODE) (*) tuşu
Radyo yayını sırasında:
TU
BAND seçimi 6, 7
Kaset çalarken :
Kaset yönünün değiştirilmesi 5
4 POWER SELECT tuşu (ünitenin
üzerinde bulunur)
Kurma/Bağlantılar kılavuzunda “POWER
SELECT” tuşuna bakınız.
5 OFF tuşu 4, 5
6 SEEK/AMS düğmesi 5, 6, 7
7 6 (Eject) tuşu 5
8 DSPL (gösterge kip değişimi/saat ayarı)
tuşu 5, 6, 7
9 Radyo yayını sırasında
Numara tuşunu ayarlayın 7
Kaset çalarken:
(5) ATA (otomatik radyo aktivasyonu)
tuşu 6
231
LCL
PRST
ATA
564
D-BASS
1
OFF
2
3
DSPL
!º (+) (–) (ses/bas/tiz/sağ-sol/ön-arka
kontrol) tuşu 5, 8
!¡ RELEASE (Ön paneli sökme) tuşu 4, 10
!™ Ayar tuşu ( Ön panelin arkasında,
ünitenin ön yüzünde bulunmaktadır)
Ünitenin ilk kullanımında, otomobil aküsü
değiştirildiğinde veya bu ünitenin tuşları
tam anlamıyla çalışmıyorsa bu tuşa
basınız.
!£ ATT tuşu 8
!¢ BTM (Best Tuning Memory) tuşu 6
!∞ Gösterge penceresi
!§ LCL tuşu 7
!¶ PRST tuşu 7
!• D-BASS kontrolü 8
12
Page 69

Özellikler
Kasetçalar bölümü
Kaset parçaları 4-parça 2-kanal stereo
Wow and flutter 0.08 % (WRMS)
Frekans cevabı 30-18.000 Hz
Ses sinyal oranı 58 dB
Radyo bölümü
FM
Ayar sırası 87,5 – 108,0 MHz
Anten terminali Dış anten terminali
Ortalama frekans 10,7 Mhz
Kullanılabilir ince ayar 8 dBf
Seçicilik 400 kHz’de 75dB
Ses sinyal oranı 65 dB (stereo),
68dB (mono)
Harmonik bozulma 1kHz 0,5% (stereo)
0,3% (mono)
Separasyon 1kHz’de 35 dB
Frekans cevabı 30 – 15.000 Hz
Zaptetme oranı 2 dB
MW/LW
Ayar cetveli MW:531 –1,602 kHz
LW: 153 – 281 kHz
Anten terminali Harici anten konektörü
Ortalama frekans 10,71 MHz/450kHz
Duyarlılık MW:30 µV
LW: 50 µV
Güç amplifikatör bölümü
Çıkışlar Hoparlör çıkışı
(mühürlü konektörler)
Hoparlör empedansı 4 – 8 ohms
Azami güç çıkışı 35 W × 4 (4 ohm’da)
Genel
Ton kontrolleri Bas 100 Hz’de ±8 dB
Güç gereksinimi 12V DC otomobil aküsü
Boyutlar Azami 188 × 58 × 181 mm
Montaj boyutları Azami 182 × 53 × 164 mm
Ağırlık Azami 1.2 kg
Beraberindeki aksesuarlar Kurma ve bağlantı
Tercihe bağlı aksesuarlar Döner kumanda RM-X4S
Dizayn ve özellikleri değiştirilebilir.
Tiz 10 Hz’de ± 8 dB
(negatif toprak)
parçaları (1 set)
Ön panel çantası (1)
TU
Ek bilgi
13
Page 70

Problem arama kılavuzu
Aşağıdaki kontrol listesi ünitenizde karşılaşacağınız problemlerin büyük çoğunluğunun
düzeltilmesinde size yardımcı olacaktır.
Kontrol listesine bakmadan önce kullanım kılavuzuna bakınız.
Genel
Problem
Ses çıkmıyor.
Gösterge ekranında işaretler
görülmüyor.
Bip sesi çıkmıyor.
Kaset çalınması
Problem
Çalınan ses bozuk.
AMS tam anlamıyla çalışmıyor.
TU
Sebep/çözüm
• Sesi (+) tuşu ile ayarlayınız.
• Fader kontrol düğmesini çift hoparlör için orta pozisyona
getiriniz.
Ön paneli sökünüz ve konektörleri temizleyiniz. Ayrıntılı bilgi için
“Bakım”da “Bağlantıların temizlenmesi”ne bakınız.
Bip sesi kısılmış.
Sebep/çözüm
Teyp kafasının pislenmesi. n Kafayı temizleyiniz.
• Parçalar arasındaki boşluklarda ses var.
• Boşluk çok kısa (dört saniyeden daha az).
• + Bir sonraki parça başlamadan hemen önce (SEEK/AMS)
tuşuna basılmış.
• = Bir sonraki parça başladıktan hemen sonra (SEEK/AMS)
tuşuna basılmış.
• Uzun bir ara veya alçak frekanslı pasaj veya çok alçak ses
seviyesi boşluk olarak işlem görmüş.
Radyo yayını
Problem
Hafıza ayarı mümkün değil.
Otomatik ayarı mümkün değil.
Yukarıda açıklanan çözümlerden bir fayda sağlanamıyorsa, en yakın Sony bayiine başvurunuz.
Sebep/çözüm
• Doğru frekansı kaydediniz.
• Yayın çok zayıf.
Yayın ¡ok zayıf. n Manüel ayarı kullanınız.
14
Page 71

İndeks
A
ATT 8
Automatic Music Sensor (AMS) 6
Automatic Tuner Activation (ATA) 6
Ayar 4
Ayar arama 7
B, C, Ç
BAL (sağ-sol) 8
BAS (bas) 8
Best Tuning Memory (BTM) 6
D, E
D-BASS (D-Bass) 8
Dikkat ikazı 4
Döner kumanda 11
F
FAD (ön-arka) 8
G, H
Geri sarma 5
Gösterge 6
I, İ, J
İleri sarma 5
Ö
Ön Panel 4
R, S, Ş
Radyo 6
Saat 5
Sigorta 10
T, U, Ü, V, W, X, Y, Z
TRE (tiz) 8
TU
Ek bilgi
K
Kaseti çalma 5
L
Local seek mode (LCL) 7
M, N
Manüel ayar 7
O, P, Q
Otomatik ayar 7
15
Page 72

Sony Corporation Printed in Thailand.
 Loading...