How it Works
Log In / Sign Up
Buy Points
How it Works
FAQ
Contact Us
Questions and Suggestions
Users
Sony
Loading...
A
A1052041
2
A1052042
4
A1052051
2
A1052061
2
A1052091
A1052101
2
A1052121
2
A1052141
3
A1052151
A1052161
2
A1052171
A1052191
2
A1061011
A1368100A
A1368101A
A1663610A
A1833832
A1880011
3
A1880014
A1880026
3
A1880028
A1880032
A1880033
A1880034
A1ll
A200
a200,alpha 200,DSLR-A200
A230
A2302LENSBDL
2
A240P
A240P CTO
A240R
A246
A246 P2P
A290
A290L
A293
A2 H
4
A2 S
5
a300
5
A3000
A3000 series
A3022061
A3022071
A3022081
A3022082
2
A3022091
A3022101
2
A3022121
A3052021
2
A3052041
2
A3052042
A3052051
5
A3052071
3
A3052081
2
A3052091
A3052101
A3052111
2
A3052112
2
A3052121
2
A3132011
A3152021
A3252011
3
A3252012
2
A3252022
2
A3252023
2
A3252041
2
A3252051
A3252071
A3252081
A330LDVDKIT
2
A330LDVDKIT,DSLR-A330L,A330
A3352021
A3352031
2
A35
A350
5
A3500
A3624011
2
A3624021
2
a37
A3724011
2
A3802LENSBDL
5
A3880001
2
A3880002
2
A3880003
2
A3880005
2
A3880006
2
A3880008
2
A3880009
A3880010
2
A3880015
A3880016
A3880017
2
A3880020
A3880023
A3880024
A3880025
2
A3880026
A3880027
A3 K4 H
3
Loading...
Loading...
Nothing found
A3052021
User Manual
25 pgs
3.75 Mb
0
User Manual
56 pgs
3 Mb
0
Table of contents
Loading...
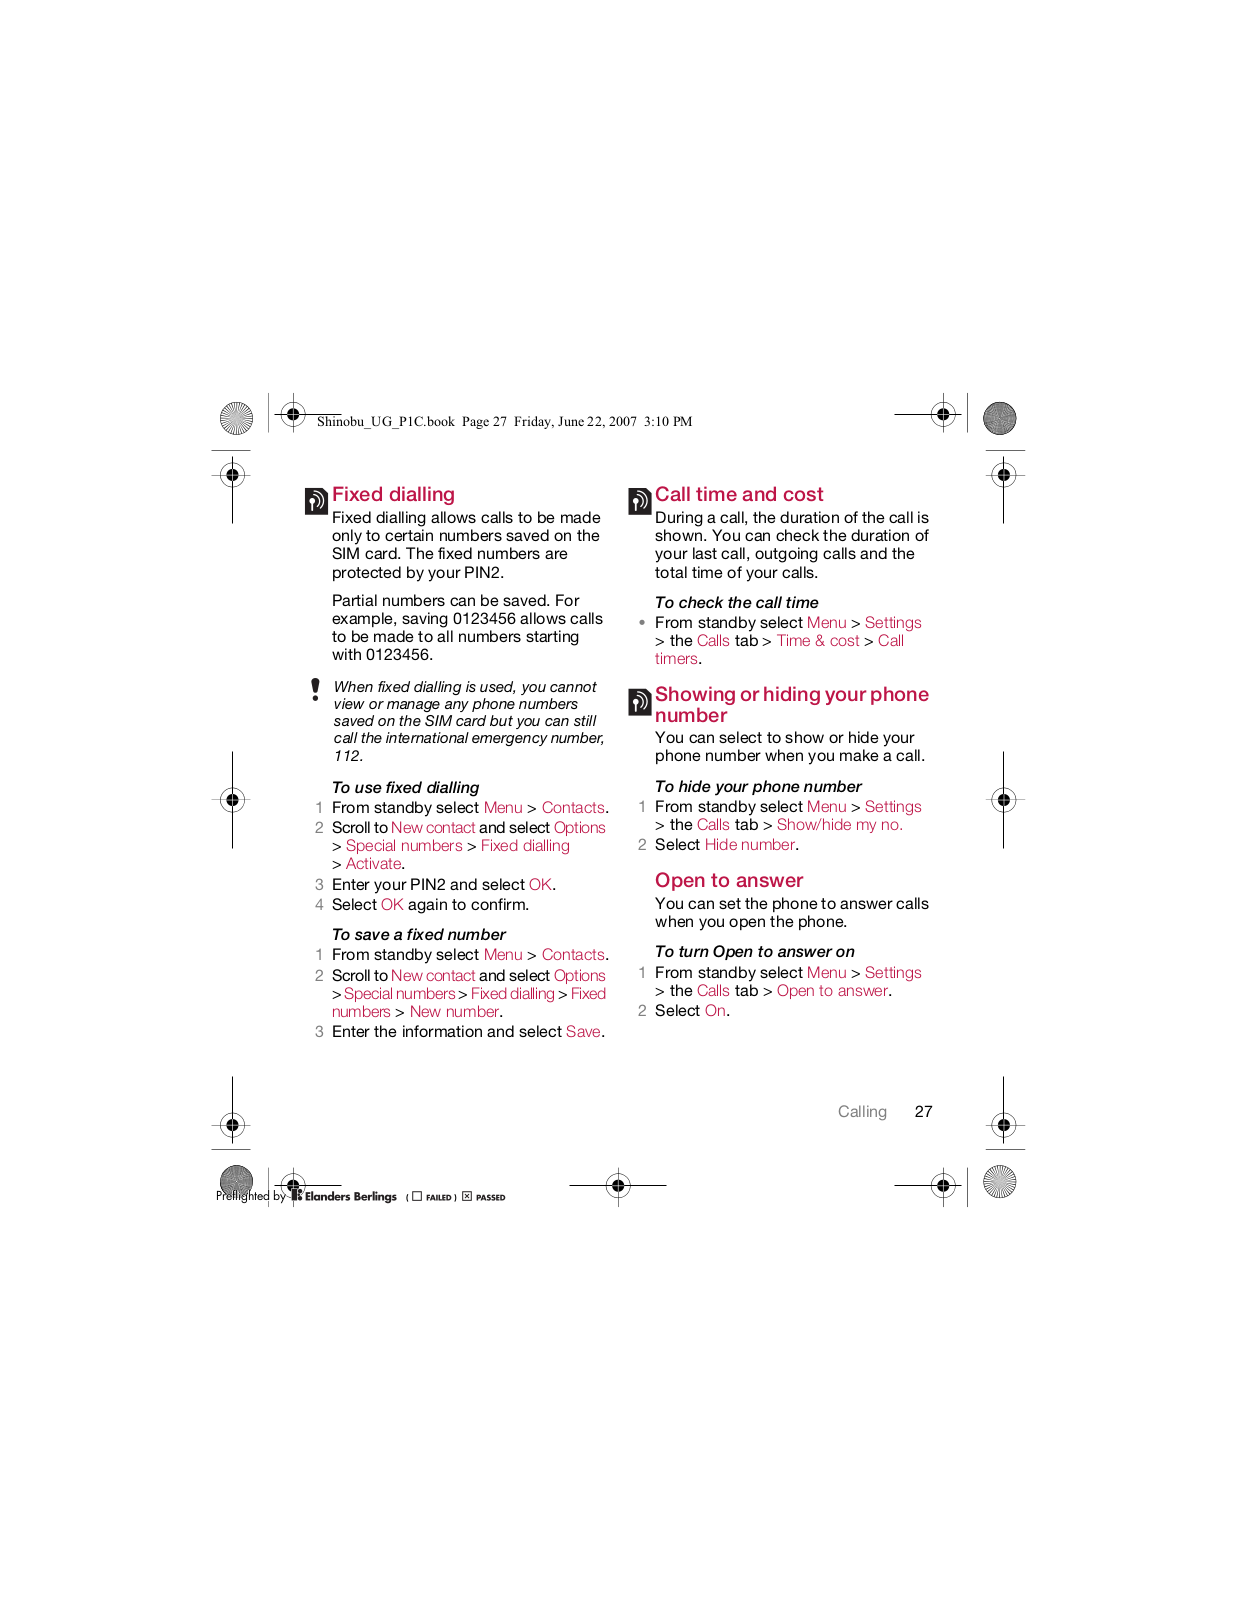
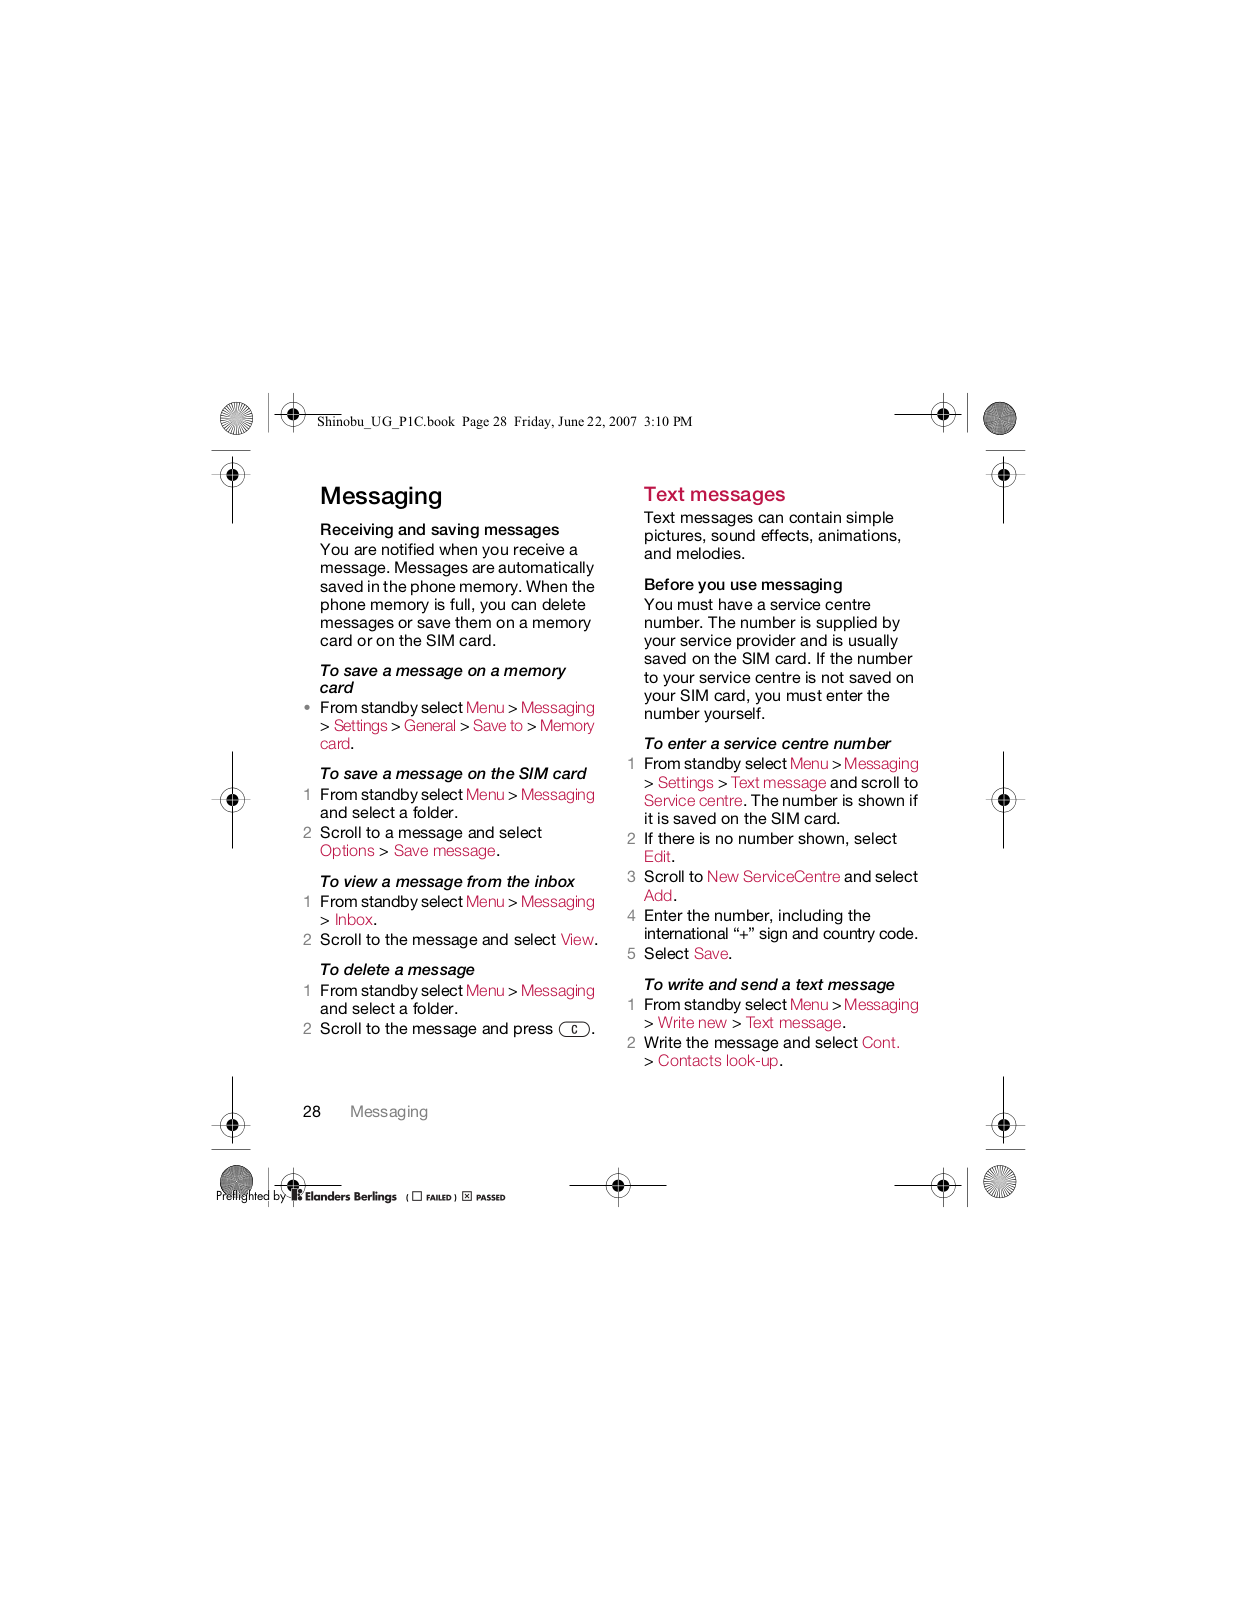
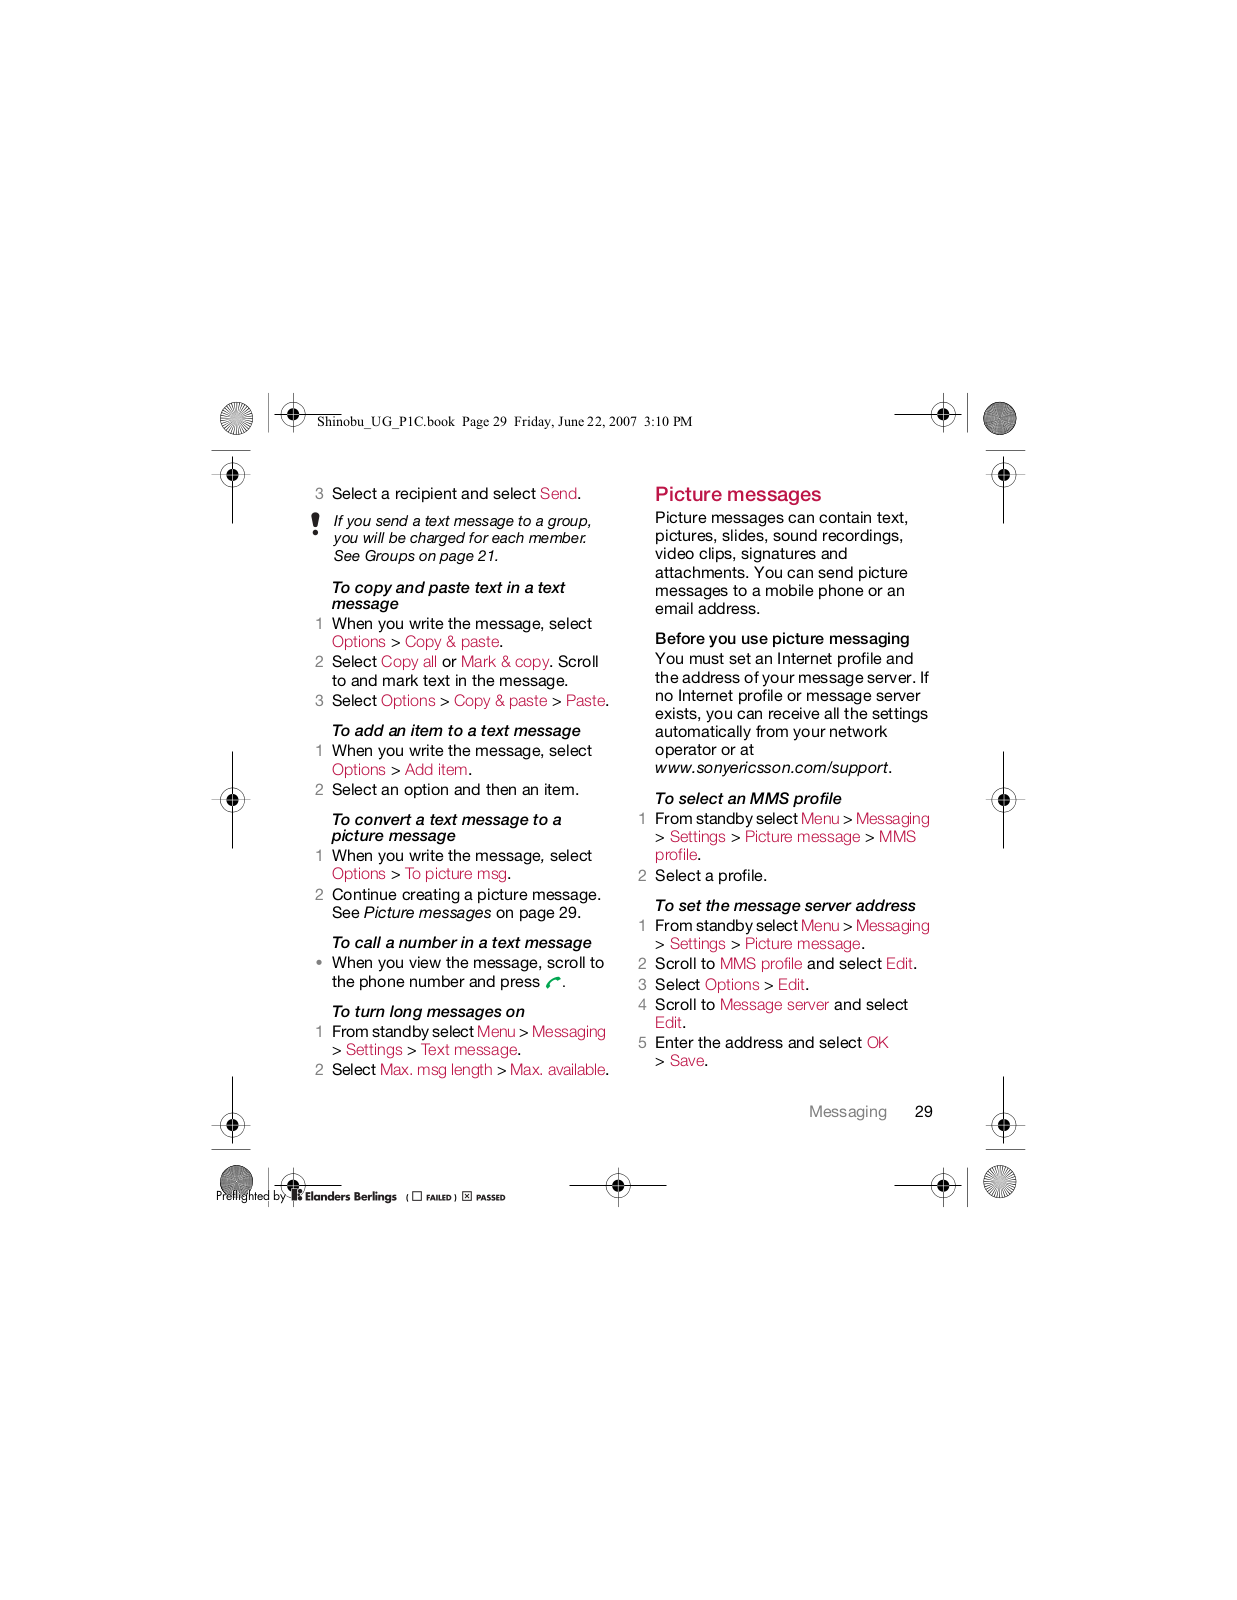
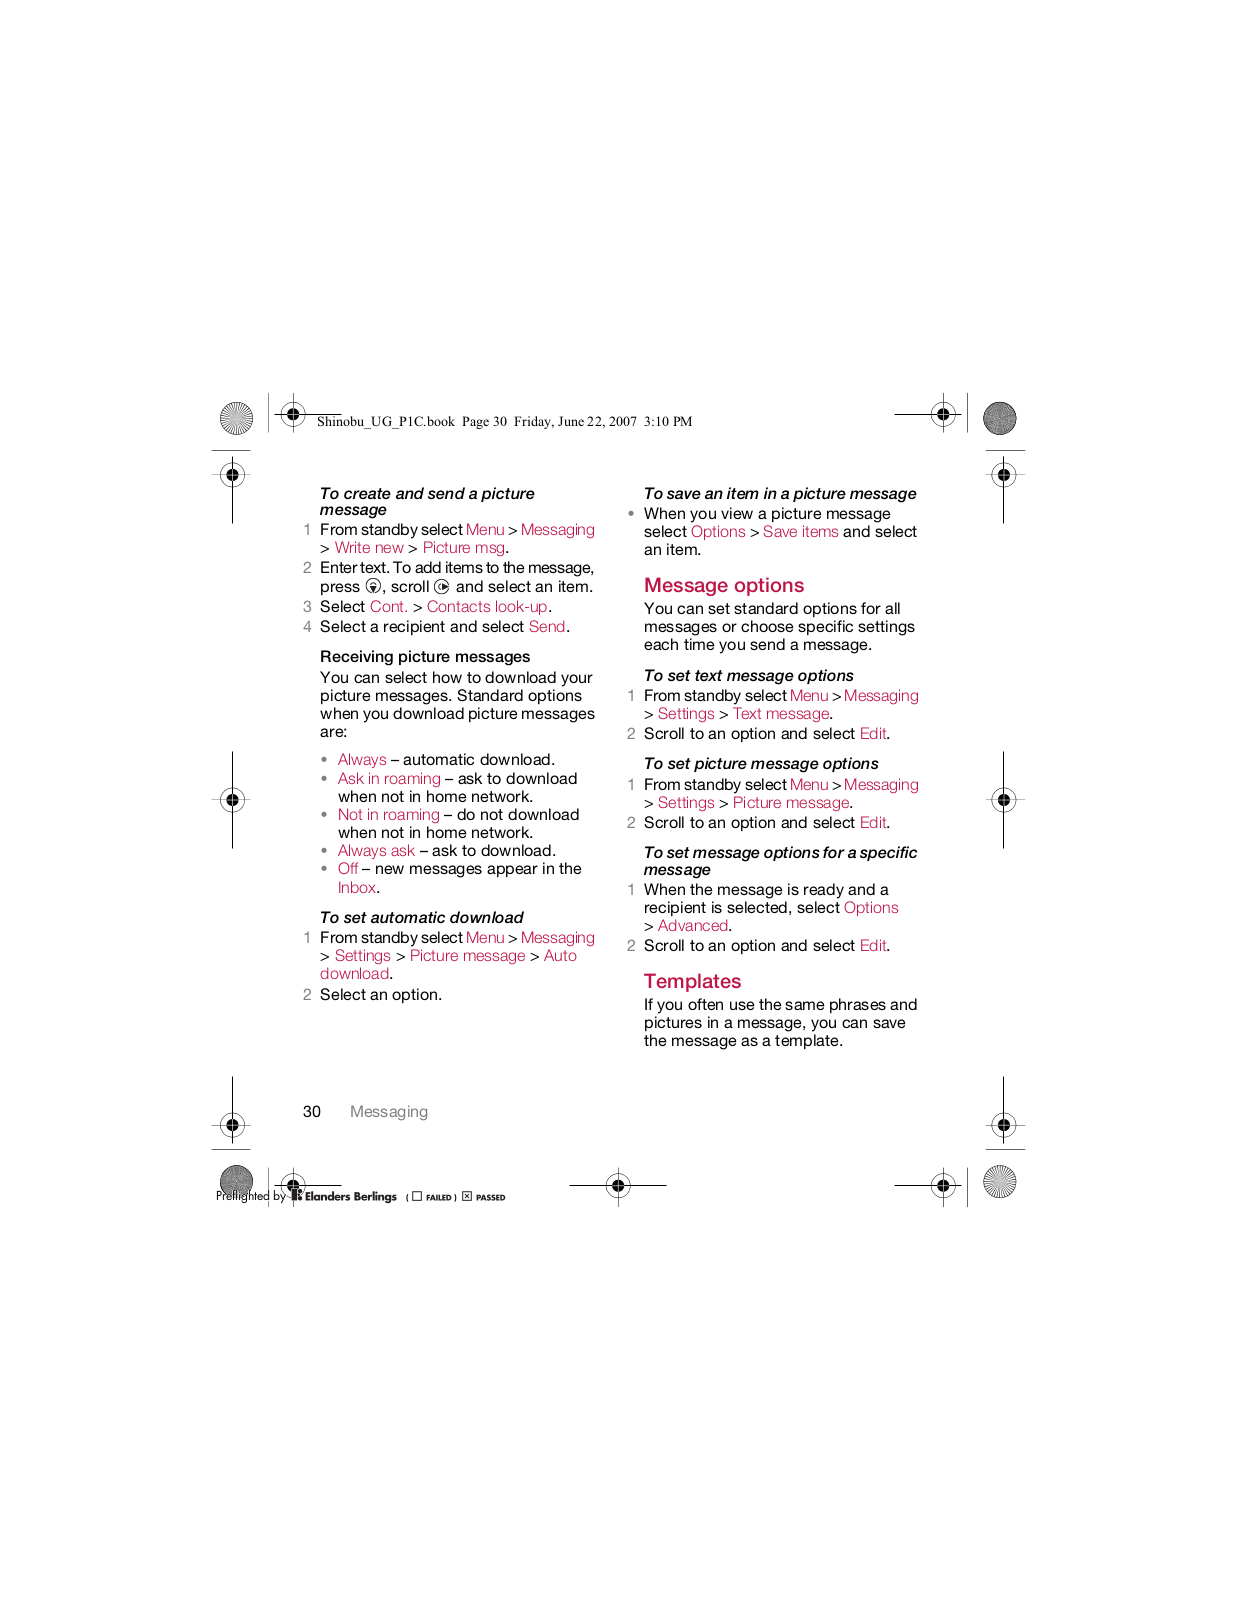
Sony A3052021 User Manual
...
Sony User Manual
Download
Specifications and Main Features
Frequently Asked Questions
User Manual
Download
Loading...
+
39
hidden pages
Unhide
You need points to download manuals.
1 point = 1 manual.
You can buy points or you can get point for every manual you upload.
Buy points
Upload your manuals
 Loading...