

Page 1
Sony Ericsson
txt pro
™
User guide
Page 2
Important information
Please read the Important information leaflet before you
use your mobile phone.
Some of the services and features described in this
User guide are not supported in all countries/regions or
by all networks and/or service providers in all areas.
Without limitation, this applies to the GSM International
Emergency Number 112. Please contact your network
operator or service provider to determine availability of
any specific service or feature and whether additional
access or usage fees apply.
Experience more. Discover
how.
Visit www.sonyericsson.com/support to get the most from
your phone.
Getting started
Some basic getting started instructions are printed on the
box supplied with your phone. Below you will also find
information to help get you started.
To insert or remove a memory card
You may have to purchase a memory card separately.
2
Page 3
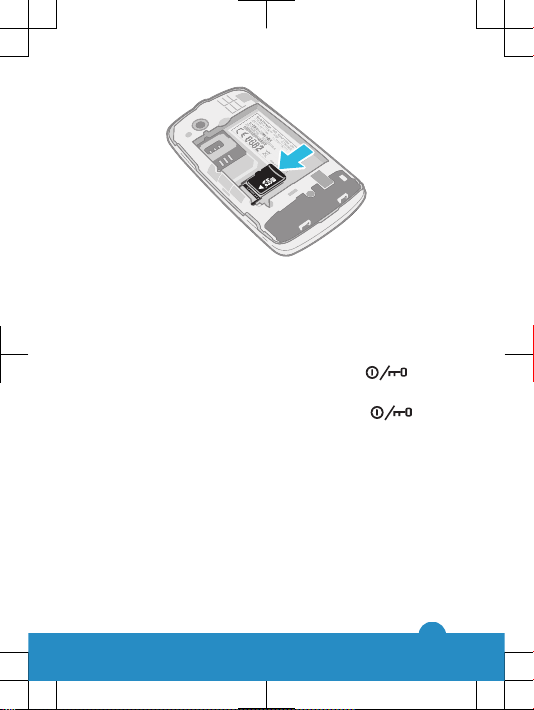
1
Insert the memory card with the gold-coloured contacts
facing down.
2
To remove the memory card, press the edge of the
memory card inwards and release it immediately.
To lock the screen
•
When the screen is active, briefly press the
key.
To unlock the screen
•
When the screen is locked, briefly press the key.
Starting your phone for the first time
The first time you start your phone, a setup guide helps you
enter essential phone settings and import contacts. You can
also access the setup guide later from the phone settings.
To set the phone language
1
When you start your phone for the first time, a list of
languages appears. Scroll through the list and select your
language.
2
Tap Done.
3
Page 4
To import contacts from a SIM card
•
When you start your phone for the first time with a SIM
card inserted, the setup guide prompts you to import your
SIM contacts. Tap Import contacts.
When you copy contacts between two phones using
your SIM card, the amount and the type of information
you can transfer for each contact is limited. To get
more help on how to copy contacts between two
phones, go to www.sonyericsson.com/support.
To set the time and date
1
When you start your phone for the first time, the setup
wizard prompts you to set the time and date. Tap Time
& date.
2
Find and tap Time.
3
Tap the hour and minute fields to adjust the time.
4
Tap Save.
5
Find and tap Date.
6
Tap the day, month and year fields to adjust the date.
7
Tap Save.
While setting the time and date, you can also select
your preferred time and date display formats. Tap
Time format or Date format to select a desired
format.
Getting to know your phone
Phone overview
4
Page 5
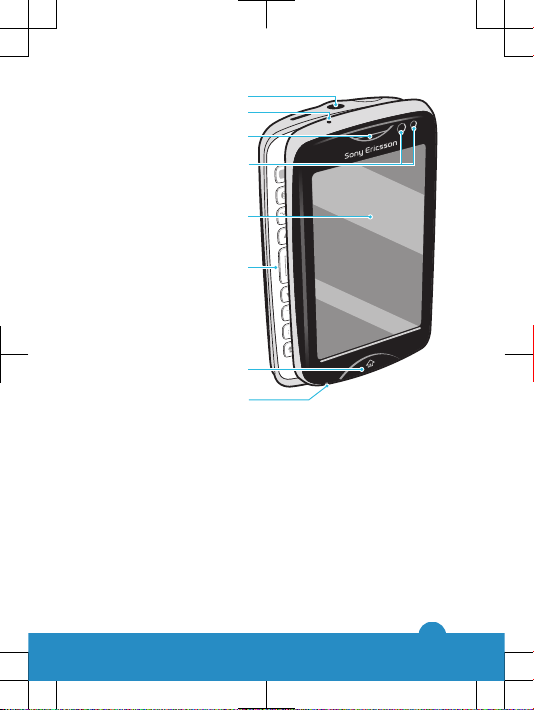
1 3.5 mm Audio Plus
connector
Q
L
;
,
.
:
)
O
K
(
I
,
P
J
#
U
M
0
H
6
Y
N
9
G
5
T
B
8
F
4
1
2
3
+
/
@
R
%
V
7
D
E
C
S
W
X
&
A
Z
!
Sym
au
1
2
4
3
5
6
7
8
2 Charging indicator
3 Ear speaker
4 Proximity sensor
5 Touch screen
6 Slideout keyboard
7 Home key
8 Microphone
5
Page 6
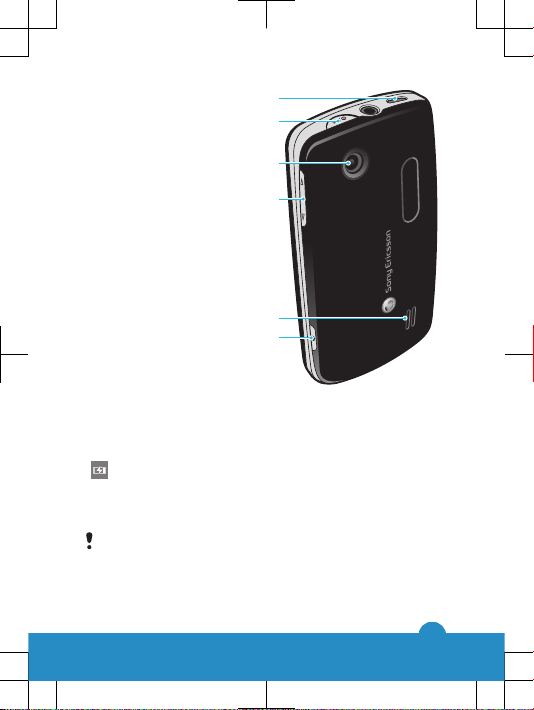
9 Connector for charger/
USB cable
9
10
11
12
14
13
10 Power key/Screen lock
11 Camera lens
12 Volume key
13 Speaker
14 Camera key
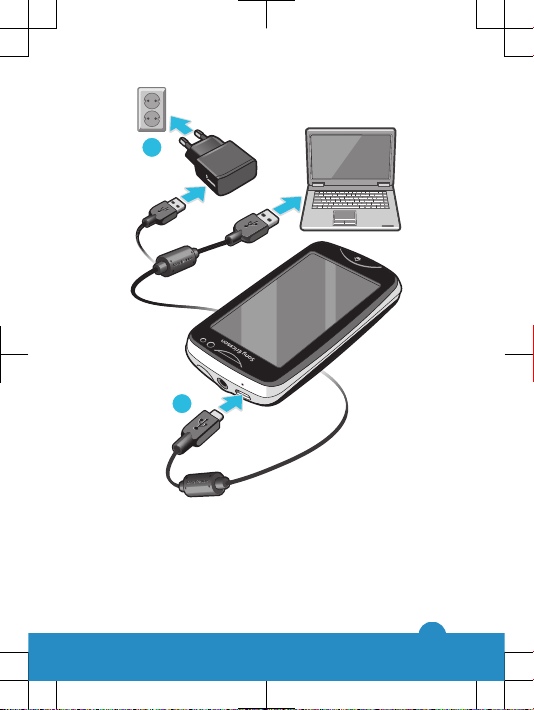
Charging the battery
Your phone battery is partly charged when you buy the
phone. It may take a few minutes before the battery icon
appears on the screen when you connect the phone
charger cable to a power source, such as a USB port or a
phone changer. You can still use your phone while it is
charging.
The battery will start to discharge a little after it is fully
charged and then charges again after a certain time.
This is to extend battery life and may result in the
charge status showing a level below 100 percent.
6
Page 7
2
1
To charge the phone using the power adapter
•
Connect the phone to a power outlet using the USB cable
and the power adapter.
7
Page 8
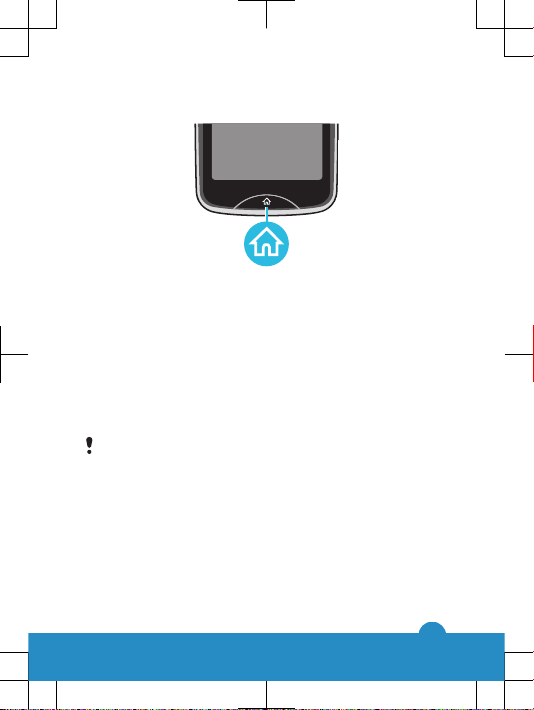
Using the home key
To go to the home screen
•
Press the home key.
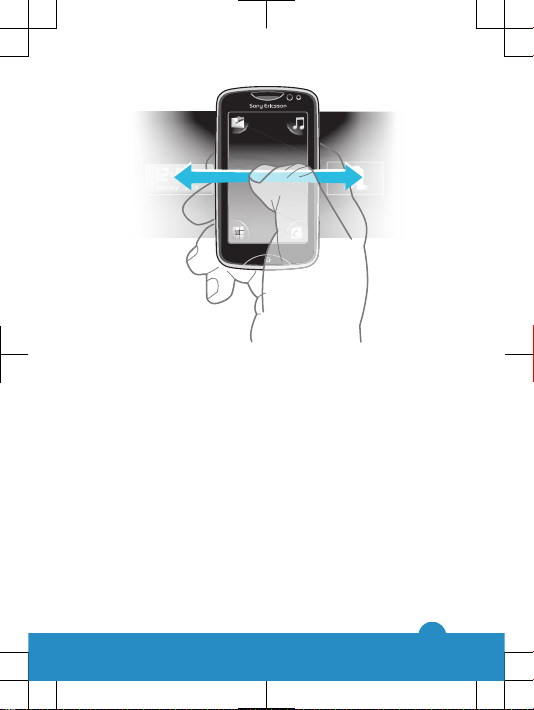
Home screen
The Home screen is your gateway to the main features in
your phone. You can customise it with different application
icons, shortcuts, wallpaper and more. The Home screen
extends beyond the regular screen display width, giving you
more room to play with.
Close your opened applications before going to the
Home screen. Otherwise, these applications may stay
running in the background and slow down your phone.
8
Page 9
Application screen
The Application screen gives you quick access to
applications in your phone. You can also customise this
screen. Remember that the Application screen extends
beyond the regular screen dimensions, so you might have
to flick left or right to see everything.
9
Page 10
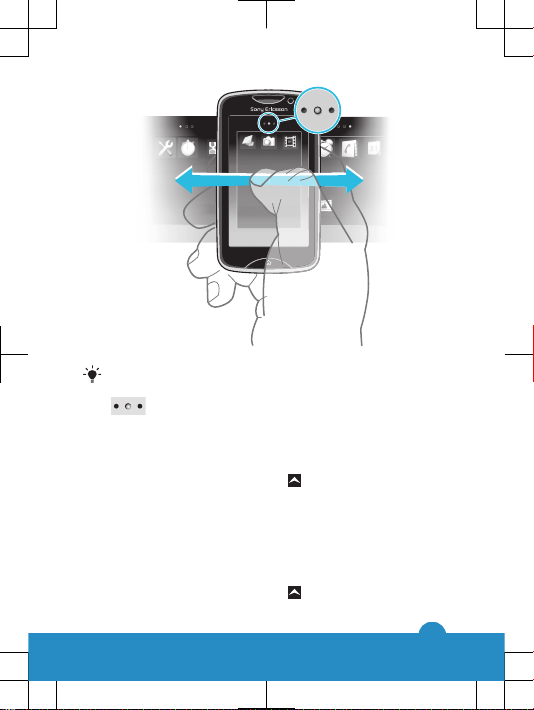
An indicator at the top of the screen shows which of
the application screen you are in. For example,
indicates you are in the middle application
screen.
To open the application screen
There are two ways to open the application screen:
•
From the Home screen, drag
upwards.
•
Flick upwards from any location on the Home screen.
To browse the application screen
•
From the application screen, flick right or left.
To move an application to one of four corners of the
Application screen
1
From the Home screen, drag
upwards.
10
Page 11
2
Touch and hold an item until application icons appear in
four corners of the screen.
3
Drag an item into one of the corners.
To move an application on the Application screen
1
From the Home screen, drag upwards.
2
Touch and hold an item until application icons appear in
four corners of the screen.
3
Drag an item beyond the current screen width to another
application screen.
The items in the application screens are the actual
applications, and are not shortcuts. So if you move an
item from one application screen to another location,
you are moving the actual application, and not
creating a shortcut.
Using the touch screen
To open or highlight an item
•
Tap the item.
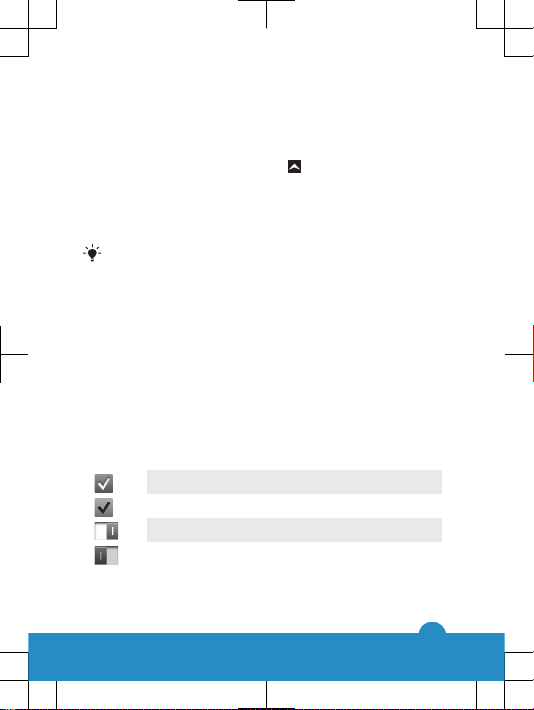
To mark or unmark options
•
Tap the relevant checkbox, or in some cases tap the
switch beside the option name.
Marked checkbox
Unmarked checkbox
Switched on
Switched off
11
Page 12
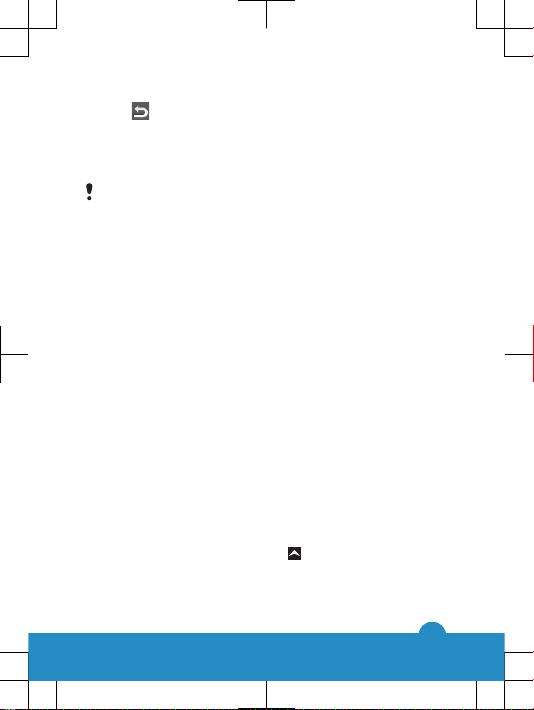
To go back to the previous screen
•
Tap , when this option is available.
Scrolling
Scroll by moving your finger up or down on the screen. On
some web pages you can also scroll to the sides.
Dragging or flicking will not activate anything on the
screen.
Internet and messaging settings
For most mobile phone networks and operators, messaging
and Internet settings come preinstalled on your phone. In
some cases the settings are downloaded the first time you
turn on the phone with your SIM card inserted.
You can manually add and change Internet and messaging
settings in your phone at any time, or you can get the
settings sent to your phone automatically. To get more help
on how to manually update the Internet and messaging
settings in your phone, go to
www.sonyericsson.com/support. Contact your network
operator if you need more information about your
subscription settings.
Phone settings overview
You can customise some phone settings to suit your
preferences. For example, you can adjust the Time &
date and Phone language settings.
To change the phone language
1
From the Home screen, drag
upwards.
2
Find and tap Settings > Language and writing > Phone
language.
12
Page 13
3
Select an option.
If you choose the wrong language and cannot read the
menu texts, go to www.sonyericsson.com/support for
help.
To turn on Flight mode
1
From the Home screen, drag upwards.
2
Find and tap Settings > General.
3
Select Flight mode.
Friends application
The Friends application collects communications with your
top five friends into one view. All communications –
Facebook or Twitter updates, text and multimedia
messages, missed calls – appear on your Home screen.
Just tap a friend’s photo on your Home screen to view all
communications with him or her.
Event filter
Use the calling tab
to:
•
View your friends’ phone numbers
•
View missed calls from your friends
•
Make calls
Use the messaging tab
to:
•
View and reply to messages from your friends
The profile tab gives you the following options:
•
Contact details – View contact details of a friend, and edit
or send contact information
•
Facebook™ account – Enter friends’ Facebook™
account details, or import them from your Facebook™
contacts list
13
Page 14
•
Twitter™ account – Enter your friends’ Twitter™ account
details, or import him/her from your Twitter™ contacts
list
•
Delete friend - Delete a friend from the Friends application
If you delete one of your five favourite friends from
Contacts, all the information related to this friend gets
deleted from the Friends application.
The Facebook™ tab gives the following options:
•
View your friends’ Facebook™ status updates,
comments, and tagged photos
•
Account management: enter a friend’s Facebook™
account details, or import him/her from your Facebook™
contacts
•
Refresh Facebook™ events
The Twitter™ tab
gives the following options:
•
Get your friends’ Twitter™ status updates, comments,
and tagged photos
•
Account management: enter a friend’s Twitter™ account
details, or import him/her from your Twitter™ contacts
•
Refresh Twitter™ events
The number of new events for each category appears
in the upper right corner of the category tab.
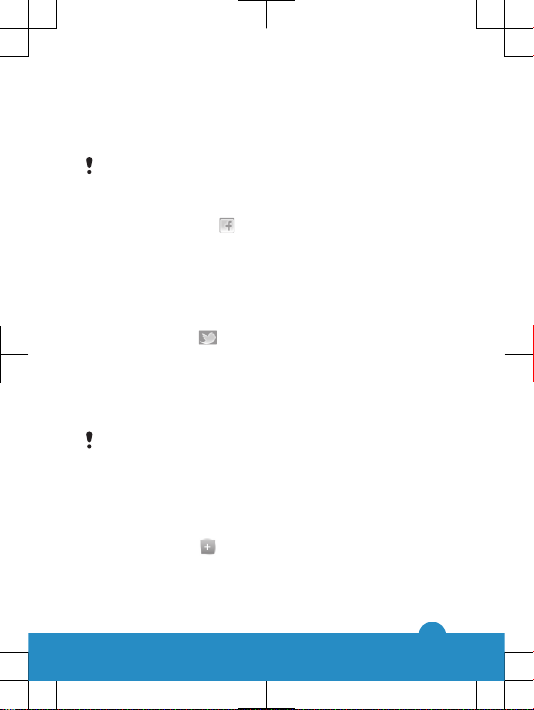
To add a friend to the Friends application
1
From the Home screen, flick left.
2
Tap the Tap here to start tile in the middle of the screen
to start the Friends application.
3
Tap the middle
button.
4
All contacts in your phone are displayed. Tap a contact
to add it as one of your five closest friends. You can add
one friend at a time.
14
Page 15
5
To add another friend, tap another button so that it
appears in the middle. Tap the middle button, then
repeat step 4.
The Friends application can use photos you have
associated with contacts. But you first need to make
sure you have saved these contacts to your phone
memory.
To adjust the update frequency
1
From the Home screen, drag
upwards.
2
Find and tap Settings > Settings > Friends
application > Update frequency.
3
Select an option.
To adjust your preferred connection method with a friend
1
From the Home screen, drag
upwards.
2
Find and tap Settings > Settings > Friends
application > Preferred connection.
3
Select an option.
To call a friend from the Friends application
1
Tap a friend's photo and then tap
.
2
Tap a number from the list that appears.
To interact with Facebook friends via the Friends application
1
Tap a friend's photo and then tap
.
2
Tap and hold an event, then select an option.
3
Follow the instructions that appear.
You can also manage Twitter™ events in a similar
way.
To open the Friends application
1
From the Home screen, drag upwards.
2
Find and tap Friends application.
15
Page 16
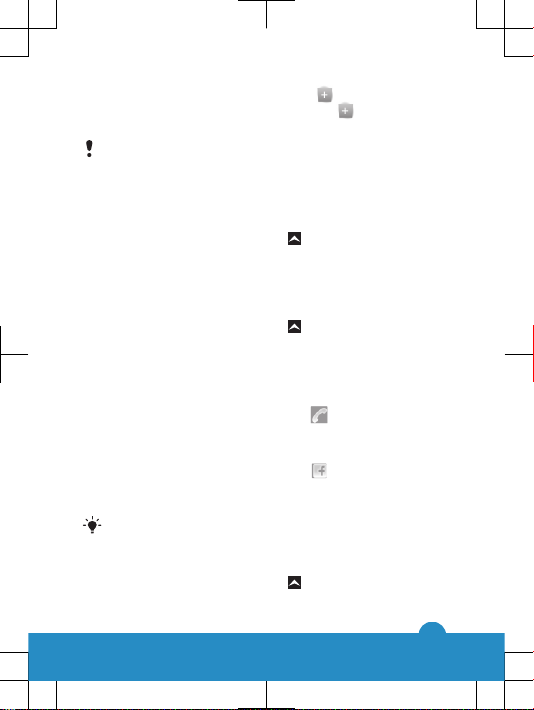
To remove Facebook updates from your Home screen
1
From the Home screen, drag upwards.
2
Find and tap Settings > Settings > Friends
application.
3
Tap beside the Facebook tab so that changes
to .
4
If you want to display Facebook™ updates on your Home
screen, tap beside the Facebook tab so that
changes to .
You can also remove Twitter™ updates from your
Home screen in a similar way.
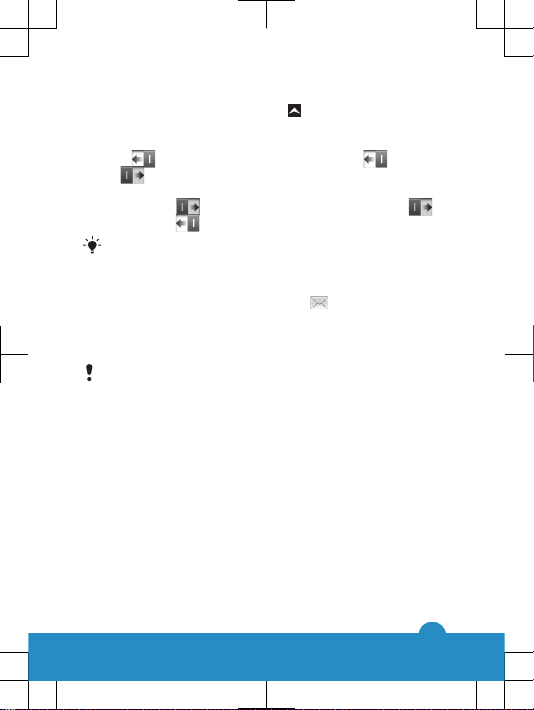
To reply to a friend’s message from the Friends application
1
Tap a friend's photo and then tap .
2
Tap Write message.
3
Enter your message text. When you are finished, tap
Send.
If you want to forward or delete a received message,
tap and hold the message and then select an option.
Messaging actions you have performed in the Friends
application are reflected in the Messaging application.
Instant messaging
Use the IM (Instant Messaging) application to chat with other
people and participate in IM groups to discuss topics that
interest you. IM service providers can vary in the features
they offer users.
Before you can use Instant messaging, you need to have
the proper settings on your phone. In some cases, the
settings may be already configured on your phone. Or you
16
Page 17
may receive the settings in the form of a configuration
message from an IM service provider.
To set up Google Talk™
If you have already set up a Google™ account in your
phone, you do not have to set up Google Talk™
separately.
1
From your Home screen, drag upwards.
2
Find and tap Talk.
3
Follow the registration wizard to create a Google™
account, or sign in if you already have an account. Your
phone is now ready to use with Gmail™ and Google
Talk™ .
4
Your phone is now ready to use with Gmail™ and Google
Talk™ .
To start Google Talk™
1
From your Home screen, drag
upwards.
2
Find and tap Talk.
Entering text
You can enter letters, numbers and special characters using
either the slideout QWERTY keyboard or the on-screen
keypad.
Using the slideout keyboard
Slide open your phone and start entering text with the
QWERTY keyboard. When using the slideout keyboard, you
can switch to using the on-screen keypad at any time.
17
Page 18

To enter an upper-case letter
•
Press briefly, then enter the letter. The keyboard
reverts to lower-case input after you enter the letter.
To turn on the caps lock
•
Before you enter text, press until appears on the
screen.
To enter a character using the mode toggle key ( )
•
Press and then press a key featuring characters of the
same colour. For example, press this key once and then
press the "T" key to enter "1".
To enter characters with the mode toggle key
locked
1
Press twice to lock the mode toggle key, and then
press associated keys featuring characters of the same
colour.
2
To unlock the mode toggle key, press it again.
To insert symbols
1
When you enter text, press
Sym
au
. A keypad with symbols
appears on the phone screen.
2
Tap the desired symbols on the screen.
To change the writing language
1
When you enter text, press
.
2
Select an option on the screen.
Using the on-screen keypad
When you start a program or select a field that requires text
or numbers, the on-screen keypad appears by default.
You can use the multitap text input method
or quick text
input method to enter text.
18
Page 19

To display the keypad and enter text
•
Tap a text field to display the keypad, then enter your text.
To shift between upper-case and lower-case letters
•
Before you enter a letter, tap to switch to upper-case
, or vice versa.
To turn on the caps lock
•
Before you type a word, tap or until appears.
To enter numbers using the keypad
•
When you enter text, tap
. A keypad with numbers
appears.
To insert symbols
•
When you enter text, tap
. A keypad with symbols
appears.
To change the writing language
1
When you enter text, tap the language icon, for example,
.
2
Select an option.
To enter text using multitap text input
1
When you enter text, tap the language icon, for example,
.
2
Tap Multitap to change to multitap input.
3
To write a word, tap the character key as many times as
needed to show the letter you want.
To enter text using quick text input
1
When you enter text, tap the language icon, for example,
.
2
Tap Quick text to change to quick text input.
3
To write a word, tap each character key only once, even
if the letter you want is not the first letter on the key.
19
Page 20

4
Tap the word that appears or tap to select a word from
the list.
5
If the word you want is not in the list, tap Spell, make any
necessary changes, and tap Save.
Contacts
Use the Contacts application to save information about the
people you know. Enter their phone numbers, email
addresses, birthdays and other details. You can keep track
of all communication with a particular contact.
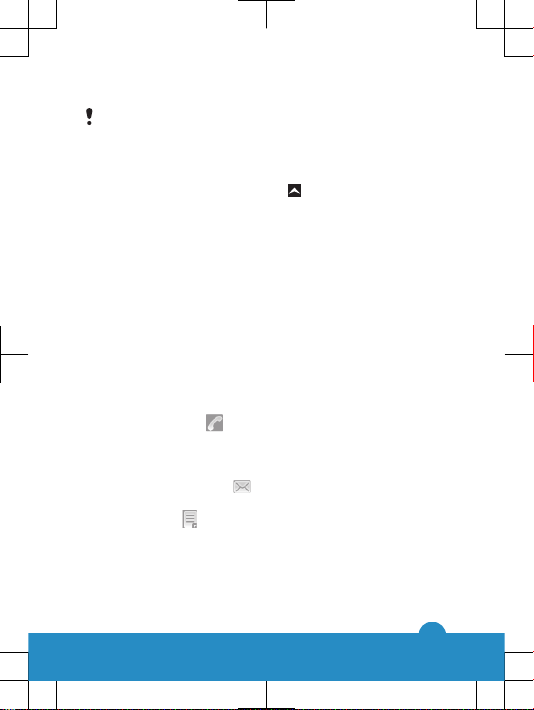
To call a contact
1
From the Home screen, tap
.
2
Tap the contact.
3
Tap the desired phone number for the contact.
To add a contact
1
From your Home screen, tap
.
2
Tap Add contact.
3
Tap Name, then enter the contact's name and tap
Done.
4
Tap Phone number, then enter the phone number and
tap Done.
5
Select the desired additional information for the contact,
then scroll up and tap Save. To add additional
information fields, tap Add more.
You can also add contacts from numbers in your call
log.
To back up contacts on a memory card
1
From the Home screen, drag upwards.
2
Tap Settings > Contacts > Back up to memory card.
20
Page 21

To restore contacts from a memory card
1
From the Home screen, drag upwards.
2
Tap Settings > Contacts > Restore from memory
card.
Calling
To make an emergency call
1
From the Home screen, tap .
2
Enter the emergency number and tap . To delete a
number, tap
.
You can make emergency calls when no SIM card is
inserted.
To make a call
1
From the Home screen, tap .
2
If the call log appears, tap
to enter the dial pad view.
3
Enter the number you want to call and tap . To delete
a number, tap .
To answer a call
•
Drag to the left until it touches .
To decline a call
•
Drag
to the right until it touches .
21
Page 22

To end a call
•
Tap .
Music
Get the most out of your music player. Listen to music,
audio books and podcasts. Manage your own playlists, and
send your favourite tunes to friends.
Install the Media Go™ application on your computer
and transfer content to and from the memory card in
your phone. Media Go™ can be downloaded from
www.sonyericsson.com/support.
22
Page 23

Music player overview
1
2
47
8
5
6
3
1 View the current play queue
2 Cover art (if available)
3 Play/Pause button
4 Go to the next track in the current play queue, or fast
forward
5 Elapsed time of current track
23
Page 24

6 Progress indicator: fast forward or rewind by
dragging or tapping
7 Go to the previous track in the current play queue,
or rewind
8 Browse the music on your memory card
To change tracks
•
In the music player, tap or .
To pause a track
•
In the music player, tap
.
To fast forward and rewind music
•
In the music player, touch and hold
or .
You can also drag the progress indicator marker right
or left.
To adjust the audio volume
•
Press the volume key.
Connecting your phone to a
computer
Connect your phone to a computer and start transferring
pictures, music and other file types.
You might not be able to transfer some copyrightprotected material between your phone and computer.
24
Page 25

Transferring and handling content using a
USB cable
The most common way to transfer files between your phone
and a computer is using a USB cable. Once the phone and
computer are connected, you can drag and drop content
from one to the other using your computer’s file explorer.
Make sure you place files in the corresponding folder
types. For example, put your music files in the Music
folder. Java application files are an exception. You
should place them in the Other folder.
To drag and drop content between your phone and a
computer
1
Connect the USB cable to the phone and the computer.
2
Phone: Select Mass storage.
3
Computer: Wait until the phone memory and memory
card appear as external disks in the file explorer.
4
Computer: On the computer desktop, double-click the
My Computer icon.
5
Computer: To view the phone memory and memory card
folders, double-click the icon representing your phone.
6
Computer: Copy and paste your file, or drag and drop it,
into a corresponding folder on your computer, in your
phone memory, or on your memory card.
You cannot use your phone while transferring files.
To disconnect the USB cable safely
Do not disconnect the USB cable while you are
transferring content as this may corrupt the content.
1
Computer: Use the Safely Remove Hardware function to
select the device you want to unplug, then click Stop.
25
Page 26

2
Disconnect the USB cable.
Computer instructions may vary depending on your
operating system. See the documentation of your
computer's operating system for more information.
Camera
Take photos, record videos, view albums and share your
favourite clips and pictures with friends – all with your
camera application.
Viewfinder and camera controls
1 2
10
3
4
5
9
8
6
7
26
Page 27

1 Zoom in and out (only available in video mode)
2 Camera key. Press to take a photo or record a video
clip.
3 Take photos
4 Exit the camera
5 Switch between still and video camera
6 Record video clips
7 Switch between still and video camera
8 View photos and video clips
9 Select video length
10 View photos and video clips
TrackID™ technology
Use the TrackID™ music recognition service to identify a
music track you hear playing in your surroundings. Just
record a short sample of the song and you’ll get artist, title
and album info within seconds. You can also purchase
tracks identified by TrackID™. For best results, use
TrackID™ technology in a quiet area. If you have problems
using this application, see I cannot use Internet-based
services on page 36.
The TrackID™ application and the TrackID™ service
are not supported in all countries/ regions, or by all
networks and/or service providers in all areas.
27
Page 28

To search for track information
1
Open the TrackID™ application and tap Record.
2
Hold your phone towards the music source. The results
are shown in the result screen.
3
Flick left or right to view previous search results.
PlayNow™
Use the PlayNow™ application in your phone to browse,
purchase and download the latest music, games, ringtones,
applications, themes and wallpapers.
PlayNow™ is not available in all countries.
To start PlayNow™
1
From the Home screen, drag upwards.
2
Find and tap .
Multimedia and text messaging
To create and send a message
1
From the Home screen, tap
.
2
Tap New message > Write message. Enter your
message text and tap .
3
To add a recipient, select a contact from the list that
appears. You can also tap the text field, enter a number
manually, and then tap Done.
4
If you want to add a photo or a video, tap
and select
an option.
5
When you are finished, tap Send.
To read a received message
1
From the Home screen, tap
.
28
Page 29

2
Tap a message thread.
3
To download a message that is not downloaded yet, tap
the message.
4
If the received message contains music or a video, tap
the item and then tap View video or Play audio.
Email
Use your phone to send and receive emails through your
regular email account. Before you get started, you need the
correct Internet settings in your phone. See Internet and
messaging settings on page 12.
To set up an email account in your phone
1
From the Home screen, drag
upwards.
2
Find and tap Email.
3
Select an email account. If the account you want to use
is not in the list, tap Other.
4
Enter your Email address and password, then tap
Continue.
5
If the phone cannot download your email account
settings automatically, enter them manually.
If you need to enter the settings manually, contact
your email service provider for the correct email
account settings. For example, you need to know if
the account type is POP3 or IMAP.
To create and send an email message
1
From the Home screen, drag upwards.
2
Find and tap Email.
3
Tap Write new.
29
Page 30

4
Tap Add recipient and enter the recipient's address,
then tap Done. You can add more recipients the same
way, or delete a recipient by tapping .
5
Tap Subject and enter the email subject.
6
Tap Write email, then enter your message text.
7
To attach a file, tap Attach, select the file type, and then
select the file you want to send.
8
Tap Send.
Bluetooth™ wireless
technology
Turn on the Bluetooth™ function in your phone and create
wireless connections to other Bluetooth™ compatible
devices such as computers, handsfree accessories, and
phones. Bluetooth™ connections work better within a 10
metre (33 feet) range, with no solid objects in between. In
some cases you have to manually pair your phone with other
Bluetooth™ devices. Remember to set your phone to visible
if you want other Bluetooth™ devices to detect it.
To turn on the Bluetooth™ function and make your phone
visible
1
From the Home screen, drag
upwards.
2
Find and tap Settings > Connectivity > Bluetooth.
3
Tap Bluetooth and tap the on/off button to turn on
Bluetooth.
appears in the status bar.
4
Tap Visibility and tap the on/off button to make your
phone visible.
30
Page 31

Wi-Fi®
Using Wi-Fi® technology you can access the Internet
wirelessly with your phone. To access the Internet using a
Wi-Fi® connection, you first need to search for and connect
to an available Wi-Fi® network. The signal strength of the
Wi-Fi® network may differ depending on your phone's
location. Moving closer to the Wi-Fi® access point may
increase the signal strength.
To turn on Wi-Fi®
1
From the Home screen, drag
upwards.
2
Find and tap Settings > Connectivity > Wi-Fi.
3
Check the Wi-Fi checkbox to turn on the Wi-Fi function.
The phone scans for available Wi-Fi® networks.
It may take a few seconds before Wi-Fi® is enabled.
To enable Wi-Fi® network notifications
1
Make sure Wi-Fi® is turned on.
2
From the Home screen, drag upwards.
3
Find and tap Settings > Connectivity > Wi-Fi.
4
Check the Network notification checkbox.
To connect to a Wi-Fi® network
1
From the Home screen, drag
upwards.
2
Find and tap Settings > Connectivity > Wi-Fi.
3
Available Wi-Fi® networks are displayed under Wi-Fi
networks. The available networks may be open or
secured. Open networks are indicated by
next to the
Wi-Fi® network name.
4
Tap a Wi-Fi® network to connect to it. If you are trying to
connect to a secured Wi-Fi® network, you are asked to
31
Page 32

enter a password. appears in the status bar once you
are connected.
Your phone remembers Wi-Fi® networks you connect
to. The next time you come within reach of a previously
connected Wi-Fi® network, your phone automatically
connects to it.
In some locations, open Wi-Fi® networks require you
to log in to a web page before you can get access to
the network. Contact the relevant Wi-Fi® network
administrator for more information.
To upload photos
1
From the Home screen, drag upwards.
2
Find and tap Album .
3
Tap a photo thumbnail.
4
Tap the screen to display the controls.
5
Tap
.
6
Select To Picasa.
Web browser
Browsing the web
View and navigate web pages, bookmark your favourites,
create shortcuts, and browse with several windows open at
the same time – all with your web browser.
To go to a web page
1
Tap
.
2
Tap the text field to activate the keypad.
3
Enter a web address.
4
Tap Go.
32
Page 33

More features
Alarms
Customise your alarm and wake up to your preferred alarm
tone or radio station. Activated alarms sound even if your
phone is turned off.
To set a new alarm
1
From the Home screen, drag upwards.
2
Find and tap Alarm.
3
Tap Add new.
4
Set an alarm time and enter the relevant details in the
Alarm text, Recurrence and Alarm signal fields, then
tap Done.
To delete an alarm
1
From the Home screen, drag
upwards.
2
Find and tap Alarm.
3
Scroll to the alarm you have set and want to delete, and
tap it.
4
Scroll down and Tap Delete.
To silence the alarm
1
When the alarm sounds, drag Slide to turn off to the right
to turn off the alarm.
2
To repeat the alarm, select Snooze.
Voicemail
If your subscription includes a voicemail service, callers can
leave voice messages for you when you can't answer calls.
Your voicemail service number is normally saved on your
SIM card. If not, you can get the number from your service
provider and enter it manually.
33
Page 34

To enter your voicemail service number
1
From the Home screen, drag upwards.
2
Select Settings > Calls > Voicemail.
3
Enter your voicemail number and tap Done.
To call your voicemail service
1
From the Home screen, drag upwards.
2
Tap Voicemail.
Locking and protecting your
phone
IMEI number
Every phone has a unique IMEI (International Mobile
Equipment Identity) number. You should keep a copy of this
number. If your phone is stolen, your network provider can
use your IMEI number to stop the phone from accessing the
network in your country.
To view the IMEI number in your phone
1
From the Home screen, drag
upwards.
2
Find and tap Settings > General > About phone.
To change your SIM card PIN
1
From the Home screen, drag
upwards.
2
Find and tap Settings > General > Security > Change
PIN, then follow the instructions.
34
Page 35

Troubleshooting
My phone is not working as expected
If you experience problems with your phone, check these
tips before you try anything else:
•
Restart your phone.
•
Remove and re-insert the battery and SIM card. Then
restart your phone.
•
Update your phone. Even if you have the latest software,
updating your phone can improve software stability and
solve other problems. By running the latest update on
your phone, you also ensure optimal performance and
get the latest enhancements.
•
Reset your phone.
Be patient while resetting your phone. Restarting the
phone during a reset procedure may damage the
phone permanently.
Resetting the phone
When you reset your phone, you delete all data, including
downloaded applications. You are basically resetting the
phone to the state it was in before you first turned it on. So
before you perform a reset, make sure to back up any
important data saved on your phone.
To reset the phone
1
From the Home screen, drag
upwards.
2
Find and tap Settings > General > Master reset > Reset
all .
3
Tap Reset.
35
Page 36

No battery charging icon appears when I
start charging the phone
It may take a few minutes before the battery icon appears
on the screen.
I cannot use Internet-based services
Make sure your subscription covers data downloads and
that the Internet settings in your phone are correct. Contact
your network operator for more information about your
subscription settings.
No network coverage
•
Your phone is in flight mode. Make sure flight mode is off.
•
Your phone is not receiving any network signal, or the
received signal is too weak. Contact your network
operator and make sure that the network has coverage
where you are.
•
The SIM card is not working properly. Insert your SIM
card in another phone. If this works, it is probably your
phone that is causing the problem. In this case, contact
the nearest Sony Ericsson service center.
Emergency calls only
You are within range of a network, but you are not allowed
to use it. However, in an emergency, some network
operators allow you to call the international emergency
number 112.
SIM locked
You have entered your PIN incorrectly three times in a row.
To unlock the phone, you need the PUK (Personal
Unblocking Key) provided by your operator.
36
Page 37

PUK blocked. Contact operator.
You have entered your PUK code incorrectly 10 times in a
row. Please contact your service provider.
Legal information
Sony Ericsson txt pro™ CK15i/CK15a
This User guide is published by Sony Ericsson Mobile Communications
AB or its local affiliated company, without any warranty. Improvements
and changes to this User guide necessitated by typographical errors,
inaccuracies of current information, or improvements to programs and/
or equipment, may be made by Sony Ericsson Mobile Communications
AB at any time and without notice. Such changes will, however, be
incorporated into new editions of this User guide.
All rights reserved.
©Sony Ericsson Mobile Communications AB, 2010
Publication number: 1244-7351.1
Attention: Some of the services and features described in this User
guide are not supported by all networks and/or service providers in all
areas. Without limitation, this applies to the GSM International
Emergency Number 112. Please contact your network operator or
service provider to determine availability of any specific service or
feature and whether additional access or usage fees apply.
Your mobile phone has the capability to download, store and forward
additional content, e.g. ringtones. The use of such content may be
restricted or prohibited by rights of third parties, including but not limited
to restriction under applicable copyright laws. You, and not
Sony Ericsson, are entirely responsible for additional content that you
download to or forward from your mobile phone. Prior to your use of any
additional content, please verify that your intended use is properly
licensed or is otherwise authorized. Sony Ericsson does not guarantee
the accuracy, integrity or quality of any additional content or any other
third party content. Under no circumstances will Sony Ericsson be liable
in any way for your improper use of additional content or other third party
content.
All product and company names mentioned herein are the trademarks or
registered trademarks of their respective owners.
37
Page 38

This User guide may reference services or applications provided by third
parties. Use of such programming or services may require separate
registration with the third party provider and may be subject to additional
terms of use. For applications accessed on or through a third-party
website, please review such websites’ terms of use and applicable
privacy policy in advance. Sony Ericsson does not warrant or guarantee
the availability or performance of any third-party websites or offered
services.
This product is protected by certain intellectual property rights of
Microsoft. Use or distribution of such technology outside of this product
is prohibited without a license from Microsoft.
Other product and company names mentioned herein may be the
trademarks of their respective owners. Any rights not expressly granted
herein are reserved. All other trademarks are property of their respective
owners.
All illustrations are for illustration only and may not accurately depict the
actual phone.
Microsoft, Windows and Vista are registered trademarks or trademarks
of Microsoft Corporation in the United States and/or other countries.
"Export Regulations: This product, including any software or technical
data contained in or accompanying the product, may be subject to import
and export regulations of the European Union, the United States and
other countries. The user and any possessor of the product agrees to
comply strictly with all such regulations and acknowledges that it is their
responsibility to obtain any required licenses to export, re-export, or
import this product. Without limiting the foregoing, and as an example,
the user and any possessor of the product: (1) must not knowingly export
or re-export Products to destinations identified pursuant to Articles in
Chapter II of European Council Regulation (EC) 428/2009; (2), must
comply with U.S. government Export Administration Regulations (“EAR”,
15 C.F.R. §§ 730-774, http://www.bis.doc.gov/ ) administered by
Department of Commerce, Bureau of Industry and Security; and (3) must
comply with economic sanctions regulations (30 C.F.R. §§ 500 et. seq.,.,
http://www.treas.gov/offices/enforcement/ofac/) administered by the
U.S. Department of Treasury, Office of Foreign Assets Control. The user
and any possessor of the product may not transport or deliver the
product, its accessories or separate software to any country, region,
entity or person prohibited by these regulations."
38
Page 39

www.sonyericsson.com
Sony Ericsson Mobile Communications AB
SE-221 88 Lund, Sweden
1244-7351.1
Page 40

FCC Statement
Declaration of Conformity
Sony Ericsson CK15a
GSM GPRS/EDGE 850/900/1800/1900
Page 41

Important Information
United States & Canada
THI S PHO NE MO DEL HAS BEEN CERTI FIE D IN COMPL IANCE
WIT H THE GOVE RNM ENT’S REQU IREME NTS FOR EXPOS URE
TO RADIO WAVE S.
The CK15 a Ser ies mobi le ph ones have been desi gned to c omply
wit h app licab le safet y req uirem ent s for expo sure to radio wave s.
You r wir eless ph one i s a r adio tra nsmit ter a nd re cei ver. It is
des igned to not exc eed t he limit s* of ex pos ure t o r adio fre quenc y
(RF ) ene rgy s et by g overn menta l a uthor ities . The se li mit s est ablis h
per mitte d lev els of R F ene rgy f or the g enera l pop ulati on. The
gui delin es ar e b ased on st andar ds that were devel oped by
int ernat ional sc ienti fic o rgani zat ions throu gh pe riodi c a nd
tho rough eval uat ion o f sci entif ic studi es. T he st andar ds inclu de a
saf ety m argin de signe d to assur e t he sa fety of al l ind ivi duals ,
reg ardle ss of ag e and heal th.
The radi o wav e e xposu re gu ideli nes empl oy a unit of
mea surem ent k now n as the Specifi c Abs orp tion Rate (S AR). Test s
for SAR are c ond ucted usin g sta nda rdize d met hods with the
pho ne tr ansmi tti ng at its highe st certi fied power leve l i n all used
fre quenc y ban ds. Whil e the re ma y b e dif feren ces b etwee n t he SA R
lev els o f var iou s pho ne mo dels, th ey ar e all desi gned to meet the
rel evant guid eli nes f or ex posur e t o rad io wa ves. For m ore
inf ormat ion o n S AR, p lease refe r t o the safe and effic ien t use
cha pter in th e U ser G uide.
The high est S AR value as r eport ed to th e aut horit ies f or this
pho ne mo del w hen test ed fo r use by the ear i s 1.0 0 W/k g*, and
whe n wor n o n the body is 0.98 W/ kg* f or speec h and 1. 21 W/ kg*
for data call s. For bo dy-wo rn op erati on, t he pho ne has been te sted
whe n pos ition ed a min imum of 15 mm from the body witho ut any
met al pa rts i n t he vi cinit y of the phone or w hen p rop erly used wi th
an appro priat e S ony E ricss on ac ces sory and w orn o n the bo dy.
For devices wh ich include “WiFi hotspot ” functi ona lity, body-wo rn
SAR meas ureme nts for opera tion of the d evice oper ating in WiFi
hot spot mode wer e tak en us ing a se parat ion d istan ce of 10 mm.
2
Page 42

Use of t hird- par ty ac cesso ries may resu lt in diff erent SA R lev els
tha n tho se re por ted.
**B efore a ph one mode l is avail abl e for sale to t he pu bli c in the
US, it m ust b e t ested and cert ified by t he Fe der al Co mmuni catio ns
Com missi on (F CC) that it d oes n ot exce ed the limit esta blish ed by
the gove rnmen t-a dopte d req uirem ent for safe expos ure *. Th e
tes ts ar e per for med i n pos ition s a nd lo catio ns (i .e. , by the ear a nd
wor n on the bo dy) as r equir ed by the FCC fo r e ach m odel. The FCC
has gran ted a n E quipm ent A uthor iza tion for this ph one m odel with
all repo rted SAR le vel s eva luate d as in complianc e wit h the FC C RF
exp osure guid eli nes. While ther e m ay be diff erenc es be twe en th e
SAR leve ls of va rious phon es, a ll mobil e pho nes g rante d a n FCC
equ ipmen t aut hor izati on me et th e g overn ment requi remen t f or
saf e exp osure . S AR in forma tion on this phone mode l is on file at
the FCC and c an be fo und u nder the Disp lay G rant secti on of
htt p://w ww.fc c.g ov/oe t/fcc id af ter sear ching on F CC
ID PY7 A1880 034. Add ition al infor mat ion o n S AR can be foun d on
the Cell ular Tel ecomm unica tions & Inter net A ssoci ation (C TIA)
web site at ht tp: //www .phon efact s.n et.
* I n the Unit ed State s and Cana da, the SAR l imit for m obi le
pho nes u sed b y t he pu blic is 1. 6 w atts/ kilog ram ( W/kg) av erage d
ove r one gram of tiss ue. T he st and ard i ncorp orate s a m arg in of
saf ety t o giv e a dditi onal prote cti on fo r the publ ic an d t o acc ount
for any varia tio ns in meas ureme nts .
**T his p aragr aph is o nly a pplic abl e to auth ori ties and custome rs
in the U nited St ates.
3
Page 43

Renseignements importants
États-Unis et Canada
CE MODÈLE DE TÉLÉ PHO NE A ÉTÉ CERTI FIÉ C ONFOR ME AUX
EXI GENCE S GOU VER NEMEN TALES RELA TIV ES À L'EX POSIT ION
AUX ONDE S RAD IOÉ LECTR IQUES .
Les télé phone s m obile s de la CK 15a ont été c onçus pour
rép ondre aux nor mes d e séc urité en vigu eur e n mat ièr e
d'e xposi tion aux onde s rad ioéle ctr iques . Vot re té lép hone sans fil
est un é mette ur et un réce pte ur ra dio. Il e st co nçu d e man ièr e à n e
pas dépa sser les limi tes* d'exp osi tion à l'é nergi e des fr équen ces
rad io (R F) ét abl ies p ar le s aut ori tés g ouver nemen tales . C es li mites
fix ent l es ni vea ux ma ximau x d'é ner gie R F aux quels pe ut êt re
sou mis l e gra nd publ ic. C es lign es di rectr ice s son t bas ées s ur des
nor mes q ui on t é té él aboré es pa r d es or ganis ation s sci ent ifiqu es
int ernat ional es par l e bia is d' éva luati ons p ériod iques et
app rofon dies des ét ude s sci ent ifiqu es. Ces nor mes prév oie nt un e
mar ge de sécu rit é vis ant à assu rer la p rotec tion de to us les
ind ividu s, pe u i mport e leu r âge et leur état de s anté.
Les lign es di rec trice s rel ative s à l'ex posit ion a ux on des
rad ioéle ctriq ues util isent une uni té de mesu re ap pelée « Taux
d'a bsorp tion spé cifiq ue » (TAS) . L es te sts d e TAS sont ef fectu és
sel on de s mét hod es st andar disée s d ans l esque lles le té lép hone
éme t dan s tou tes les bande s de fré quenc es ut ilisé es, à la plus
for te pu iss ance pour laque lle il a été hom ologu é. Bi en que l e TAS
pui sse ê tre d iff érent d'un modè le de téléphone à un autr e, to us les
app areil s son t c onçus pour resp ect er le s lig nes d irect ric es
rel ative s aux on des r adioé lectr iqu es. P our e n sav oir p lus sur le
TAS , rep ortez -vo us au chap itre sur l'ut ilisa tion effic ace et s ans
dan ger d u gui de de l' utili sateu r.
Le TAS l e p lus é levé relev é p ar le s aut orité s p our c e mod èle d e
tél éphon e est de 1.00 W/kg * lor squ 'il e st te sté e n uti lis ation près
de l'ore ille, et de 0 .98 W /kg* pou r les appe ls vo caux et de
1.2 1 W/k g* po ur les t ransm issio ns de do nnées lors qu'il es t por té
sur le c orps. En mode d’ut ilisa tio n por té su r le corps, le télé pho ne
a été t esté lor squ ’il est à au moins 15 mm du corps et à l ’écar t de
tou te pi èce e n m étal, ou l orsqu ’il est utili sé de faço n a déqua te
4
Page 44

ave c un acces soi re So ny Er icsso n e t por té su r le corps . P our l es
app areil s mun is de la fonc tionn ali té « point d'ac cès W iFi », e n
mod e d'u tilis ati on po rté s ur le co rps, les m esure s du TAS de
l'a ppare il en mo de Wi Fi on t été pr ises à une dist ance de sécur ité
de 10 mm . L'u til isati on d' acces soi res t iers peut produ ire des
niv eaux de TA S d iffér ents de ce ux relev és.
**A vant qu' un mod èle de télé phone ne soit mis en ve nte aupr ès
du publi c aux Ét ats-U nis, la Co mmi ssion fédé rale des
com munic ation s ( CFC) doit le te ste r et certi fier qu'il re spect e les
lim ites fixée s d ans l es ex igenc es gouve rneme ntale s d'e xpo sitio n
san s dan ger*. Po ur ch aque modèl e, les t ests sont effec tué s en
pos ition et a ux endro its d 'usag e ( c.-à- d. pr ès de l'or eil le et port é
sur le c orps) , t el qu e req uis p ar la CF C. La CFC a acc ord é une
aut orisa tion d'é quipe ment pour ce modèl e de télép hone, ap rès
que tous les niv eaux de TA S ind iqu és ai ent é té év alués et
con sidér és confo rme s aux ligne s d ire ctric es de la CFC en ma tière
d'e xposi tion aux radi ofréq uence s. Même s'il peut y avo ir des
dif féren ces e ntr e les nive aux d e T AS de s dif féren ts té lép hones ,
tou s les télé pho nes m obile s aux que ls la CFC a acc ordé une
aut orisa tion d'é quipe ment répon den t aux norm es
gou verne menta les en m atièr e d'e xpo sitio n san s dan ger. La CFC
con serve dans se s dos siers l'in for matio n rel ative aux TAS rele vés
pou r ce modèl e d e tél éphon e. Vo us pouve z la consu lter au
htt p://w ww.fc c.g ov/oe t/fcc id so us la ru briqu e « D ispla y G rant »,
apr ès av oir e ffe ctué une r echer che sur CFC I D PY7 A1880 034 .
Vou s tro uvere z d es re nseig nemen ts suppl ément aires conc ern ant
le TAS su r l e sit e Web de l a C ellul ar Te lecom munic ati ons & Inte rnet
Ass ociat ion ( CTI A) au http ://ww w.p honef acts. net.
* A ux Ét ats -Unis et au C ana da, l a lim ite de T AS des t élé phone s
mob iles utilisés par le pu blic est de 1, 6 wat t/kg (W/kg) en moye nne
sur un g ramme de tiss us. C ette nor me co mport e une marg e
imp ortan te de sé curit é afi n d'a ssu rer u ne pr otect ion
sup pléme ntair e e t de tenir comp te de to ute v ariat ion d ans les
mes ures.
**C e par agrap he ne c oncer ne qu e les au torit és et les clie nts d es
Éta ts-Un is.
5
Page 45

Información importante
Estados Unidos y Canadá
EST E MOD ELO D E T ELÉFO NO HA SIDO CE RTIFI CADO
CON FORME A LOS REQU ISI TOS GUBE RNAME NTA LES P ARA LA
EXP OSICI ÓN A OND AS DE RADI O.
Los telé fonos mó viles de l a Ser ie CK15a han sido diseñ ado s
seg ún lo s req uis itos de se gurid ad aplic ables para la expo sició n a
ond as de radi o. Su te léfon o ina lám brico es u n tra nsm isor y
rec eptor de r adi o. Es tá di señad o p ara n o sup erar los lími tes* de
exp osici ón a ene rgía de ra diofr ecu encia (RF) fija dos por las
aut orida des g ube rname ntale s. Es tos lími tes e stabl ece n los nive les
per mitid os de en ergía de R F par a l a pob lació n gen eral. La s
esp ecifi cacio nes se b asan en lo s e stánd ares desar rolla dos por
org aniza cione s c ientí ficas inte rna ciona les m edian te ev alu acion es
per iódic as y min ucios as de estu dio s cie ntífi cos. Los e stá ndare s
inc luyen un m arg en de segu ridad de stina do a garan tizar la
seg urida d de todas las persona s, indep end iente mente de la edad
y d e la salud .
Las espe cific aci ones de l a exp osici ón a onda s d e rad io em plean
una unid ad de me dida conoc ida c omo la T asa e specí fic a de
abs orció n (SA R, por s u sig la en in glés) . Las prue bas de S AR se
lle van a cabo me diant e el uso d e m étodo s est andar iza dos c on la
tra nsmis ión t ele fónic a al más a lto nive l de energ ía regis trado en
tod as las b and as de fr ecu encia utiliza das. Aun que es p osi ble q ue
hay a dif erenc ias entr e los nive les de S AR de los difer ent es
mod elos de t eléfo nos, todo s est án di señ ados para cump lir c on las
esp ecifi cacio nes corr espon dient es de la expo sició n a o nda s de
rad io. P ara o bte ner m ás in forma ció n sob re SA R, co nsult e e l
cap ítulo sobr e u so se guro y ef icaz que se e ncu entra en l a Guí a d el
usu ario.
Seg ún se repo rtó a la s aut orida des , el valo r m ás al to de SAR de
est e mod elo d e t eléfo no cu ando se p rob ó usá ndolo cerc a del oí do
es de 1. 00 W/ kg* y al usar lo en el cuer po es de 0 .98 W/kg * par a
hab lar y 1.21 W/ kg* p ara l lamad as de dato s. Para su u so ce rca d el
cue rpo, el telé fon o ha sido pr obado para su func ionam iento a una
dis tanci a mín ima de 1 5 mm (0,59 pu lg.) del c uerpo , s in qu e hay a
6
Page 46

pie zas m etáli cas cerc a del telé fon o o c uando se u tiliz a
cor recta mente co n el acces orio ade cuado Sony Eric sson. En lo
que resp ecta a l os di sposi tivos qu e cue ntan con l a fun cio nalid ad
“Zo na activ a W iFi ”, la s medi das SAR del us o c erc a del cuerp o del
dis posit ivo, el cual funci ona e n m odo d e zon a act iva W iFi , se
tom aron media nte el u so de una dis tanci a de separ ación de 10
mm. El u so de ac cesor ios d e ter cer os pu ede r esult ar en ni veles de
SAR dife rente s a aque llos que s e r eport aron.
**A ntes de qu e u n mod elo d e tel éfo no se encu entre disp oni ble
par a la vent a al públ ico e n los Esta dos Unid os, l a Com isión fe deral
de telec omuni cac iones (FCC ) deb e a proba rlo y cert ifica r q ue no
sup era e l lím ite esta bleci do po r e l req uisit o ado ptado po r el
gob ierno para un a exp osici ón se gur a*. L as pr uebas se l lev an a
cab o en posi cio nes y ubic acion es (e s d ecir, cerc a del oí do y cerc a
del cuer po) s egú n lo requie re la FCC para c ada mode lo. L a FCC ha
oto rgado una Autori zac ión d e equ ipo p ara este mode lo de telé fon o
con todo s los ni veles de S AR re por tados , los cual es fu ero n
eva luado s confor me a las esp eci ficac iones de ex posic ión a RF de
la FCC. Aunqu e e s pos ible que h aya dife renci as en tre l os nivel es
de SAR d e los di feren tes t eléfo nos , tod os lo s tel éfono s m óvile s
que cuen tan c on una a utori zació n d e equ ipo d e la FCC c ump len
con los requis itos gub ern ament ales par a la e xposi ción seg ura. La
inf ormac ión s obr e SAR de e ste m ode lo de telé fono está ar chiva da
en la FCC y pued e enc ontra rla e n la secció n D ispla y Gra nt (M ost rar
sub venci ón) e n h ttp:/ /www. fcc.g ov/ oet/f ccid despu és de bu scar
la ID PY 7A188 003 4 de la FC C. Pu ede enco ntrar info rma ción
adi ciona l sob re SAR e n el sitio We b de la As ociac ión de
Tel ecomu nicac ion es Ce lular es e Int ernet (CTI A) en
htt p://w ww.ph one facts .net.
* E n los Esta dos Unid os y Canad á, el lí mite de SA R de los
tel éfono s móv ile s uti lizad os po r e l púb lico es de 1. 6 wat ts/
kil ogram o (W/ kg) prom ediad os so bre un g ramo de te jid o. El
est ándar incl uye un m argen de s egu ridad para prop orc ionar le un a
pro tecci ón ad ici onal al pú blico y para tomar en c uenta cu alqui er
var iació n en las medi das.
**E ste p árr afo s e apl ica únic ament e a a uto ridad es y cli entes de
los Esta dos U nid os.
7
Page 47

Important Information
Latin & South America
Rad io wa ve ex pos ure a nd Sp ecifi c A bsorp tion Rate (SA R)
inf ormat ion
The CK15 a Ser ies mobi le ph ones have been desi gned to c omply
wit h app licab le safet y req uirem ent s for expo sure to radio wave s.
The se re quire men ts ar e bas ed on sc ienti fic g uidel ine s tha t inc lude
saf ety m argin s d esign ed to assu re the s afety of a ll perso ns,
reg ardle ss of ag e and heal th.
The radi o wav e e xposu re gu ideli nes empl oy a unit of
mea surem ent k now n as the S pecif ic Absor ption Rate , o r SAR .
Tes ts fo r SAR ar e con ducte d usi ng standardi sed m ethod s w ith t he
pho ne tr ansmi tti ng at its highe st certi fied power leve l i n all used
fre quenc y ban ds.
Whi le th ere m ay be di ffere nces bet ween the S AR le vel s of
var ious phone mo dels, they are all desi gned to me et th e r eleva nt
gui delin es fo r e xposu re to radi o w aves.
For more infor mat ion on SAR, pleas e refer to the safet y c hap ter
in the U ser G uid e.
SAR data info rma tion for r eside nts in c ountr ies t hat have
ado pted the S AR limit reco mmend ed by th e Int ernat ional
Com missi on on No n-Ion izing Radi ati on Pr otect ion ( ICNIR P), whic h
is 2 W/k g ave rag ed ov er te n (10 ) g ram o f tis sue ( for e xam ple
Eur opean Unio n, Japan , Bra zil a nd New Z ealan d):
The high est S AR value for this mod el ph one w hen t ested by
Son y Eri csson fo r use at t he ea r i s 0.6 1 W/k g (10 g).
8
Page 48

Información importante
Latinoamérica y América del Sur
Inf ormac ión a cer ca de la e xposi ció n a o ndas de ra dio y la
Tas a esp ecífi ca de ab sorci ón (S AR)
El teléf ono m óvi l CK1 5a ha sido di señad o par a cum pli r con los
req uisit os de se gurid ad ap licab les de e xposi ción a las on das d e
rad io. D ichos re quisi tos s e bas an en di rectr ices cient ífi cas q ue
est ablec en márgenes de se gurid ad con el fin d e evitar perjuic os a
tod as la s per son as, i ndepe ndien tem ente de su edad o es tad o de
sal ud.
Las dire ctric es de ex posic ión a on das d e rad io ut ili zan u na
uni dad d e med ida deno minad a coe fic iente de a bsorc ión e spe cífic a
o S AR. L as pr ueb as de SAR se lí eva n a c abo u tiliz ando mét odos
nor maliz ados, co n el teléf ono t ran smiti endo en el nive l m ás
ele vado de p otenc ia au torid ado e n t odas las banda s de frec uenci a
uti lizad as.
Aun que p uede exi stir difer encia s e ntre los n ivele s de SAR de
dif erent es mo del os de telé fono, to dos h an si do di señ ados para
cum plir las d ire ctric es pe rtine nte s sob re ex posic ión a on das d e
rad io.
Par a obt ener más inform aci ón so bre e l SAR , c onsul te el capí tul o
sob re se gurid ad en la guía del usu ario.
Inf ormac ión s obr e dat os de SAR par a res ident es de pa íses en
los que se ha ya adopt ado e l lim ite de S AR re comen dad o por la
Int ernat ional Co mmiss ion o n Non -Io nizin g Rad iatio n P rotec tion
(IC NIRP, Comisión inte rnaci ona l de p rotec ción con tra la radiaci ón
no ioniz antes (I CNIRP , Int ernat ion al Co mmiss ion o n N on-Io nizin g
Rad iatio n Pro tec tion) , es 2 W/k g p romed io po r cad a
die z (10) gramos de tejido (por ejemplo, la Un ión Europea , Japón,
Bra sil y Nuev a Z eland a):
El valor de S AR más e levad o par a e ste m odelo de t elé fono
cua ndo S ony E ric sson real izó l a pru eba p ara su u so en la o rej a era
de 0,61 W/kg (10 g).
9
Page 49

Informação importante
América do Sul e Latina
Inf ormaç ões s obr e SAR (Tax a de Abs orção Espe cífic a) e
exp osiçã o à r adi ofreq üênci a
O c elula r CK1 5a foi p rojet ado p ara cump rir o s req uisit os de
seg uranç a apl icá veis para expos içã o à r adiof reqüê nci a. Es ses
req uisit os tê m c omo b ase d iretr ize s cie ntífi cas q ue inclu em as
mar gens de se gur ança para garan tir a se guran ça de to das a s
pes soas, inde pen dente mente da i dad e e d a saú de.
As dire tri zes d e exp osiçã o à r adi ofreq üênci a usa m u ma un idade
de medi da co nhe cida como SAR ou T axa de A bsorç ão Es pec ífica .
Os testes de SAR são condu zidos po r mét odos padroniza dos c om
a t ransm issão te lefôn ica e m seu ní vel c ertif icado de e ner gia m ais
alt o em todas as faix as de freq üên cia u sadas .
Emb ora p ossa have r dif erenç as entre os n íveis de S AR de vários
mod elos de te lef one, todos fora m p rojet ados para atend er as
dir etriz es re lev antes de e xposi ção à ra diofr eqüên cia.
Par a obter mais info rma ções sob re SAR, c onsul te o c apítu lo de
seg uranç a do Gui a do Usuár io.
Inf ormaç ões sobr e os dado s de S AR para mor ado res de país es
que adot aram o l imite SAR recom end ado p elo I CNIRP
(In terna tiona l C ommis sion on No n-I onizi ng Ra diati on Pr ote ction )
que é o limite médio d e 2 W /kg em d ez (1 0) gr ama s de teci do (por
exe mplo, Uniã o E uropé ia, J apão, Br asil e Nov a Zel ândia ).
Qua ndo t estad o p ela S ony E ricss on, o va lor d e SAR mais al to
par a est e mod elo de t elefo ne pa ra uso j unto ao ou vido foi de
0,6 1 W/k g (10 g).
10
Page 50

FCC Statement
Thi s dev ice c omp lies with Part 15 of th e FCC rule s.
Ope ratio n is sub ject to th e fol low ing t wo co nditi ons: (1)
Thi s dev ice m ay not c ause harmf ul inter feren ce, a nd (2 )
Thi s dev ice m ust acce pt an y int erf erenc e rec eived , inc lud ing
int erfer ence tha t may caus e und esi red o perat ion.
Any chan ge or mo dific ation not exp ressl y app roved by S ony
Eri csson may voi d the user 's au tho rity to op erate the equ ipmen t.
Thi s equ ipmen t h as be en te sted and foun d to compl y wit h t he
lim its f or a Cla ss B digit al de vic e, pu rsuan t to Part 15 of th e FCC
Rul es. Thes e l imi ts are desi gned to pro vid e reason able pro tecti on
aga inst harmf ul inter feren ce in a resid entia l ins talla tio n. Th is
equ ipmen t gen era tes, use s a nd ca n rad iate radio freque ncy e ner gy
and , if not inst all ed an d use d i n accord ance wit h the inst ruc tions ,
may caus e har mfu l int erfer ence to radio comm unica tions .
How ever, ther e i s no guar antee that inte rfe rence will not occu r in a
par ticul ar in sta llati on.
If this equip men t doe s cau se ha rmf ul in terfe rence to r adi o or
tel evisi on re cep tion, whic h can be dete rmine d by turni ng the
equ ipmen t off and on, t he user is encour aged to try to correct the
int erfer ence by one o r mor e of the foll owing meas ures:
•
Reo rient or r elo cate the r eceiv ing ante nna.
•
Inc rease the sep arati on be tween th e equ ipmen t and rece ive r.
•
Con nect the equi pment into an outl et on a cir cuit diffe ren t fro m
tha t to which th e rec eiver is c onn ected .
•
Con sult the d eal er or an e xperi enc ed ra dio/T V tec hnici an for
hel p.
11
Page 51

Industry Canada Statement
Thi s dev ice c omp lies with RSS-2 10 of In dustr y Can ada.
Ope ratio n is sub ject to th e fol low ing t wo co nditi ons : (1) this
dev ice m ay no t c ause interf ere nce, and (2 ) t his d evice must ac cept
any inte rfere nce , inc ludin g int erf erenc e tha t may ca use u ndesi red
ope ratio n of the devi ce.
Thi s Cla ss B dig ital appar atus com plies with Cana dian
ICE S-003 .
Cet appa reil num ériqu e de la cl ass e B e st co nform e à l a n orme
NMB -003 du Ca nad a.
12
Page 52

Declaration of Conformity for CK15a
We, Sony Eric sso n Mob ile C ommun ica tions AB o f
Nya Vatt entor net
SE- 221 8 8 Lun d, Swede n
dec lare under ou r sol e res ponsi bil ity t hat o ur pr odu ct
Son y Eri csson ty pe AA B-188 0034- BV
and in c ombin ati on wi th ou r acc ess ories , to whic h t his d eclar ati on
rel ates is in co nform ity w ith t he appro priat e sta nda rds E N 301
511 :V9.0 .2, E N 3 00 32 8:V1. 7.1, EN 301 4 89-7: V1.3. 1, EN 30 1
489 -17:V 2.1.1 , a nd EN 60 9 50-1: 200 6+A11 :2009 foll owi ng th e
pro visio ns of , R adio Equip ment and Tele commu nicat ion Term inal
Equ ipmen t dir ect ive 1 999/5 /EC.
Lun d, Ma rch 2 011
Dan Redi n,
Cor porat e Vic e P resid ent, Head of Devel opmen t
We fulfi l the re quire ments of t he R&TTE Dire ctive (199 9/5 /EC).
Ce produ it es t c onfor me au x dir ect ives de R& TTE ( 1999/ 5/E C).
Cum plimo s con lo s req uisit os de la Dire ctiva R&TT E – N orm as
sob re eq uipos de term inale s de radi o y t eleco munic aci ones (1999/
5/E C).
Ate ndemo s aos re quisi tos d a Dir etr iz R& TTE ( 1999/ 5/E C).
13
Page 53

www.sonyericsson.com
Sony Ericsson Mobile Communications AB
SE-221 88 Lund, Sweden
Page 54
Important information
Sony Ericsson Consumer Web site
At www.s ony erics son.c om/ suppo rt th ere i s a s upp ort s ectio n
whe re he lp and t ips a re only a few cl icks away. He re yo u wil l f ind
the lates t computer softwa re upd ates and tips o n how to u se your
pro duct mor e eff icien tly .
Service and support
You have ac cess to a por tfoli o of exc lusiv e ser vic e adv antag es
suc h as:
•
Glo bal a nd local Web sit es pr ovidi ng suppo rt.
•
A g lobal ne twork of C ont act C enter s.
•
An exten siv e net work of Sony Erics son serv ice p art ners.
•
A w arran ty perio d. Le arn more abou t t he wa rrant y c ondit ions in
the Limit ed warra ntyse ction .
At www.s ony erics son.c om/ suppo rt, y ou ca n fin d t he la test
sup port too ls an d inf orm ation . For op erato r-spe cif ic se rvice s a nd
fea tures , p lease cont act your netw ork oper ator.
You can als o conta ct our Cont act Cen ters. If yo ur country/r egion
is not r epr esent ed in th e lis t bel ow, plea se co nta ct yo ur lo cal
dea ler. (Ca lls a re ch arg ed ac cordi ng to na tiona l r ates, incl udi ng
loc al ta xes , unl ess t he phone numb er is a toll- fre e num ber.)
If your pro duct needs se rvice , ple ase cont act t he deale r fro m
who m it was purc hased , o r one of o ur servi ce pa rtn ers. For
war ranty cl aims, save pr oof o f pur cha se.
Guidelines for Safe and Efficient Use
Ple ase follo w th ese guide lin es. Fa ilu re to do so might enta il a
pot entia l heal th ris k or prod uct malfunc tio n. If in dou bt as to
its pro per function , have the pr oduct che cked by a certifie d service
par tner bef ore c hargi ng or us ing i t.
Recommendations for care and safe use of our products
•
Han dle w ith care and kee p in a cle an and d ust-f ree plac e.
•
War ning! Ma y exp lod e if dispo sed of i n fir e.
•
Do not e xpo se to liqu id or mo istur e o r exc ess h umi dity.
•
For opti mum perf orman ce, the produ ct shoul d not be
ope rated in temp eratu res belo w -10 °C( +14°F ) or abo ve
+45 °C(+1 13° F). D o not ex pose the b att ery t o
tem perat ure s abo ve +6 0°C (+140 °F).
•
Do not e xpo se to flam es or li t tob acc o pro ducts .
•
Do not d rop , thr ow or tr y to bend the prod uct.
•
Do not p ain t or attem pt to di sasse mbl e or modif y t he
pro duct. On ly So ny Er ics son a uthor ise d per sonne l
sho uld p erf orm s ervic e.
•
Con sult wit h a uth orise d medica l s taf f and the inst ructi ons of the
med ical dev ice m anufa ctu rer b efore us ing t he pr odu ct ne ar
pac emake rs or ot her m edi cal d evice s o r equ ipmen t.
•
Dis conti nue use of el ect ronic devi ces , or disab le the r adio
tra nsmit tin g fun ction ali ty of the dev ice, where re quire d or
req ueste d t o do so.
•
Do not u se where a po ten tiall y exp los ive a tmosp her e exi sts.
•
Do not p lac e the prod uct , or insta ll wirel ess e qui pment , in the
are a abo ve an ai r bag in a ca r.
•
Cau tion: Cra cked o r brok en dis plays may cr eate s harp e dges o r
spl inter s t hat c ould be harmf ul up on conta ct.
•
Do not u se the B lueto oth Head set i n p ositi ons w her e it is
unc omfor tab le or will be subj ect t o p ressu re.
Children
War ning! Ke ep ou t o f the reac h o f chi ldren . D o not allo w
chi ldren to play with mo bile phone s o r acc essor ies . The y cou ld
hur t the mse lves or ot her s. Pr oduct s m ay co ntain sm all p arts tha t
cou ld be com e det ached an d cre ate a ch oking haza rd.
Power supply (Charger)
Con nect the charger to p ower source s as mark ed on the product.
Do not use o utdoo rs or in damp areas. Do no t alter or sub jec t the
cor d to dam age or stress. Unplu g th e unit befo re cleaning it. Neve r
alt er the plug. If it does no t fit int o the outlet, hav e a pr ope r outlet
ins talle d b y an elect ric ian. When a p ower suppl y i s con necte d
the re is a small drai n o f pow er. T o a void this sma ll en ergy was te,
dis conne ct the p ower sup ply w hen t he produ ct is fu lly c harge d.
2
3
Use of c har ging devic es that are n ot Sony Erics son bran ded m ay
pos e inc rea sed s afety ri sks.
Battery
New or idle batteri es can h ave shor t-ter m r educe d c apaci ty. Full y
cha rge th e battery before initia l use. Use for the intended purpo se
onl y. Ch arg e the batt ery in t emper atu res b etwee n + 5°C(+ 41°F)
and +45 °C(+1 13°F) . Do not put th e batte ry into you r mouth . Do not
let the bat tery conta cts touc h ano the r met al ob jec t. Tu rn of f t he
pro duct bef ore r emovi ng the b atter y. Perfo rmanc e d epend s on
tem perat ure s, si gnal str ength , usa ge patte rns, fea tures sele cte d
and voic e o r dat a tra nsm issio ns. O nly Sony Eric sso n ser vice
par tners sh ould remov e o r rep lace bui lt-in batt eri es. U se of
bat terie s t hat are not Sony Eri csson br and ed ma y p ose increas ed
saf ety r isk s. Re place th e bat tery onl y wit h ano the r Son y Eri css on
bat tery tha t has been qu alifi ed wi th the p roduc t p er th e sta nda rd
IEE E-172 5. Use of an unqua lifie d ba ttery may prese nt a risk of fire,
exp losio n, leaka ge or ot her h azard .
Personal medical devices
Mob ile p hon es ma y aff ect impl anted me dical equi pme nt. R educe
ris k of int erfer ence by keepi ng a min imum dista nce of
15 cm(6 inches ) between the phone and th e device. Use the phone
at your rig ht ea r. Do no t car ry th e p hone in yo ur breas t poc ket .
Tur n off th e pho ne if yo u sus pect int erfer ence. Fo r all medi cal
dev ices, co nsult a ph ysi cian and t he manuf actur er.
Driving
Som e veh icl e man ufact ure rs fo rbid the use of ph one s in their
veh icles un less a han dsf ree k it wi th an ex terna l a ntenn a sup por ts
the inst all ation . Che ck with the v ehi cle m anufa ctu rer's
rep resen tat ive t o be sur e tha t the mo bile phone or Blue tooth
han dsfre e w ill not affect the e lectr onic sys tem s in the vehic le. Full
att entio n shou ld be given to d rivin g at all times and local laws a nd
reg ulati ons rest ricti ng the u se of wi reles s dev ice s whi le dr ivi ng
mus t be obs erved .
4
GPS/Location based functions
Som e pro duc ts pr ovide GP S/Loc ation ba sed f uncti ons . Loc ation
det ermin ing func tiona lit y is provi ded “As is” a nd “With all fau lts”.
Son y Ericsso n does not mak e any represe ntati on or wa rrant y as to
the accu rac y of such loc ation info rma tion.
Use of l oca tion- based in forma tion by the d evice ma y not be
uni nterr upt ed or erro r f ree a nd ma y a dditi onall y b e dep enden t o n
net work ser vice avail abi lity. Plea se note that fun ction ality ma y be
red uced or preve nted in certa in en vir onmen ts su ch as bu ildin g
int erior s o r are as ad jac ent t o bui ldi ngs.
Cau tion: Do not use GPS funct ion ality in a manne r wh ich cause s
dis tract ion from driv ing .
Emergency calls
Cal ls canno t b e guaran tee d under all conditi ons. Nev er rely sol ely
upo n mobil e phone s for essentia l commu nicat ion. Ca lls may not be
pos sible in all areas , o n all netw ork s, or when ce rtain netw ork
ser vices an d/or phone fe ature s are us ed.
Antenna
Use of a nte nna d evice s n ot ma rkete d b y Son y Eri css on co uld
dam age the pho ne, reduce per forma nce , and produ ce SAR leve ls
abo ve th e e stabl ished li mits. Do n ot cover the ant enna with you r
han d as t his affects call qua lity, power levels and can shor ten talk
and stan dby time s.
Radio Frequency (RF) exposure and Specific Absorption
Rate (SAR)
Whe n the ph one o r B lueto oth h and sfree is turn ed on, i t emi ts low
lev els o f r adio frequ enc y ene rgy. Int ernat ional sa fety guide lin es
hav e been de velop ed thr oug h period ic and thoro ugh evaluat ion of
sci entif ic studi es. T hes e gui delin es estab lish per mitte d lev els of
rad io wa ve expos ure. The guid eline s i nclud e a s afe ty ma rgin
des igned to assure the saf ety of all person s and to account f or a ny
var iatio ns in me asure men ts.
Spe cific Ab sorpt ion R ate (SAR ) is use d to measu re radio
fre quenc y e nergy abso rbe d by the b ody when usin g a mobi le
pho ne. Th e SAR v alue i s dete rmi ned at the hi ghest certi fied p ower
lev el in la borat ory c ond ition s, bu t b ecaus e the ph one i s des ign ed
to use t he minim um po wer nece ssary to acce ss th e c hosen
net work, the actual SAR lev el can be well belo w this value. Ther e is
no proof of diff erenc e i n saf ety b ase d on diffe ren ce in SAR val ue.
Pro ducts with r adio t ran smitt ers so ld i n the U S must be c ertif ied
by the F ede ral C ommun ica tions Comm iss ion ( FCC). Wh en
req uired , test s are perfor med when the ph one is pl aced at t he ear
and when worn on the body. For bod y-w orn o per ation , the phone
has been te sted when pos ition ed a min imum of 15 mm from the
bod y wit hou t any meta l p arts in th e v icini ty of th e pho ne or wh en
pro perly us ed wi th an ap propr iate Son y Eri csson ac cesso ry an d
wor n on the body .
For more informat ion abou t S AR and radio frequen cy expos ure ,
go to: w ww. sonye ric sson. com /health.
Flight mode
Blu etoot h and WLAN functio nal ity, if availabl e in the device , can be
ena bled in Fli ght mode bu t may be prohib ite d onboard air craft or in
oth er ar eas wher e rad io trans missi ons are prohi bit ed. I n suc h
env ironm ent s, pl ease see k pro per a uth orisa tion bef ore e nabli ng
Blu etoot h o r WLA N fun cti onali ty ev en in Fl ight mod e.
Malware
Mal ware (sh ort f or ma lic ious softw are ) is softw are that can har m
the mobi le phone or o the r com puter s. Malwa re or ha rmful
app licat ion s can incl ude viru ses, wor ms, s pywar e, and o ther
unw anted pr ogram s. Wh ile the devic e d oes e mploy se curit y
mea sures to resi st such effor ts, Sony Ericsso n does not warrant or
rep resen t t hat t he de vic e wil l be imp ervio us to th e int roduc tio n of
mal ware. Yo u can howe ver redu ce th e r isk o f mal war e att acks by
usi ng ca re when downl oad ing c onten t o r acc eptin g a pplic ation s,
ref raini ng fro m opening or respondi ng to m essag es from unknown
sou rces, us ing t rustw ort hy se rvice s t o acc ess t he Inter net, and
onl y dow nlo ading cont ent to t he mo bil e pho ne fr om known ,
rel iable so urces .
5
6
Accessories
Use only Son y Ericsso n bran ded origina l acce ssori es and certified
ser vice par tners . Son y E ricss on do es not t est t hir d-par ty
acc essor ies . Acc essor ies may influ enc e RF expos ure , rad io
per forma nce , lou dness , e lectr ic sa fet y and othe r a reas. Thir dpar ty ac ces sorie s and pa rts m ay po se a ris k to you r hea lth o r
saf ety o r d ecrea se pe rfo rmanc e.
Accessible Solutions/Special Needs
In the U S, compa tible So ny Er icsso n p hones may off er
com patib ili ty with TTY ter minal s (with use of nece ssa ry accessory ).
For more inf orm ation call the Sony E ricss on Specia l Need s Center
on 877 8 78 1996 (TTY) or 877 207 2 056 (voi ce), or go to
www .sonyeri css on-sn c.c om.
Disposal of old electrical and electronic equipment
Ele ctron ic equip ment and batt eries sh ould not b e i nclud ed
as h ouseh old wa ste bu t should be left at an appropri ate co llect ion
poi nt fo r r ecycl ing. Thi s hel ps pr eve nt po tenti al negat ive
con seque nce s for the env ironm ent and hu man he alth. Check local
reg ulati ons by c ontac tin g you r loc al city offic e, your house hol d
was te disp osal se rvice , the shop wh ere you pur chase d the pro duct
or calli ng a Son y Eri css on Co ntact Ce nter. Do n ot attem pt to
rem ove i nte rnal bat terie s. Inter nal batt eries sh all b e r emove d o nly
by a was te treat ment fac ility or t rai ned s ervic e p rofes siona l.
Disposing of the battery
Che ck lo cal regu latio ns or ca ll a Son y Eri csson Co ntact
Cen ter f or infor matio n. Never use mun icipa l was te.
Memory card
If the product comes comple te with a re mov able memo ry card, it is
gen erall y c ompat ible wit h the hand set purc hased bu t may not be
com patib le with other de vices or t he capab iliti es of th eir m emo ry
car ds. C hec k oth er de vic es fo r com pat ibili ty be for e pur chase or
use . If the produ ct is equ ipped with a memory card reade r, che ck
mem ory c ard comp atibi lit y bef ore p urc hase or us e.
7
Mem ory c ard s are gene ral ly fo rmatt ed prior to s hip ping. To
ref ormat th e mem ory c ard , use a co mpa tible devi ce. Do n ot us e
the sta ndard operating sys tem for mat whe n forma tting the mem ory
car d on a PC. For details , refe r to th e oper ati ng ins truct ions of t he
dev ice o r c ontac t cus tom er su pport .
Warning!
If the d evi ce re quire s a n ada pter for inse rtion in to th e han dse t or
ano ther d evi ce, do not in ser t the c ard direc tly wi tho ut the requi red
ada pter.
Precautions on memory card use
•
Do not e xpo se th e mem ory card to m ois ture.
•
Do not t ouc h ter minal co nnect ions wit h you r han d o r any meta l
obj ect.
•
Do not s tri ke, b end, or drop the m emo ry ca rd.
•
Do not a tte mpt t o dis ass emble or m odi fy th e mem ory card .
•
Do not u se or st ore t he memor y car d i n hum id or co rrosi ve
loc ation s or in exc essiv e he at suc h as a c los ed car in sum mer, i n
dir ect s unl ight or ne ar a hea ter, etc .
•
Do not p res s or bend the end of th e m emory card ad apter with
exc essiv e f orce.
•
Do not let d irt, dus t, or for eign obj ects get into the insert port of
any memo ry card adapt er.
•
Che ck yo u h ave i nsert ed the m emory ca rd co rrect ly.
•
Ins ert the mem ory c ard as far as it wi ll go into any memo ry card
ada pter nee ded. The m emo ry ca rd ma y n ot op erate pr operl y
unl ess f ull y ins erted .
•
We r ecomm end th at you make a backu p copy of imp ortan t data .
We are n ot respo nsibl e f or an y los s o r dam age t o c onten t you
sto re on th e mem ory c ard .
•
Rec orded da ta ma y be dam aged or lo st when you r emo ve th e
mem ory c ard or m emory ca rd ad apter , t urn o ff th e p ower while
for matti ng, read ing o r w ritin g dat a, or us e the me mory card in
loc ation s s ubjec t to sta tic e lectr ici ty or high el ectri cal f iel d
emi ssion s.
8
Protection of personal information
Era se pe rso nal d ata b efo re di sposi ng of th e pro duc t. To dele te
dat a, pe rfo rm a maste r r eset. Dele tin g dat a fro m t he ph one
mem ory d oes not ensur e t hat i t can not be r ecove red .
Son y Eri css on do es no t w arran t aga ins t rec overy of info rmati on
and does no t ass ume r esp onsib ility fo r dis closu re of an y
inf ormat ion even afte r a mast er re set .
Loudness warning!
Avo id vo lum e lev els t hat may be ha rmf ul to your he aring .
End User Licence Agreement
Sof tware de liver ed wi th this devic e a nd it s med ia is ow ned b y
Son y Eri css on Mo bile Com munic ation s A B, an d/or its affi liate d
com panie s a nd it s sup pli ers a nd li cen sors.
Son y Ericss on gra nts you a non- exc lusiv e limited lice nce to use
the Soft war e sol ely i n c onjun ction wi th th e Dev ice on w hich it is
ins talle d o r del ivere d. Owner ship of the S oftwa re is no t sol d,
tra nsfer red or o therw ise conv eyed.
Do not u se any m eans to disco ver t he sourc e cod e o r any
com ponen t o f the Soft war e, re produ ce and d istri but e the
Sof tware , or modi fy the So ftwar e. You ar e entitled to tr ansfe r right s
and obli gat ions to th e S oftwa re to a third part y, solel y tog eth er
wit h the Devic e with wh ich you received the Sof tware , provi ded the
thi rd pa rty agre es in wr iting to b e b ound by th e t erms of th is
Lic ence.
Thi s licence exists thr ougho ut the useful life of this Dev ice. It can
be termi nat ed by tran sfe rring your ri ghts to th e D evice to a th ird
par ty in wr iting .
Fai lure to compl y wit h a ny of thes e t erms and c ond ition s wil l
ter minat e t he li cence im media tely.
Son y Eri css on an d its th ird p arty sup plier s and li censo rs re tai n
all righ ts, titl e and in teres t in and to t he So ftw are. To th e e xtent
tha t the So ftwar e con tai ns ma teria l o r cod e of a t hird party , s uch
thi rd pa rti es sh all b e b enefi ciari es of th ese t erm s.
Thi s lic enc e is gover ned by t he la ws of Sw eden. Wh en
app licab le, the foreg oin g app lies to statu tory con sumer righ ts.
In the even t Sof twa re ac com panyi ng or pr ovide d i n con jun ction
wit h your devi ce is provi ded with addit ional te rms and con dit ions,
suc h pro vis ions shall al so go vern you r pos sessi on and u sage of
the Soft war e.
Export regulations
Exp ort re gulat ions: Goods deliv ered under t his Ag reeme nt may be
the subj ect to i mport an d exp ort r egu latio ns of th e Eur opean
Uni on, t he Unite d Sta tes and other co untri es. P urc haser will
com ply w ith thes e app lic able laws and regu latio ns and w ill obta in
and main tai n any expo rt and i mport li cense requ ire d for the
del ivery of good s to Pur chase r und er this Agree men t. Wi thout
lim iting th e for egoin g, and a s an exa mple, Purc has er wi ll no t
kno wingl y e xport or r e-e xport good s t o des tinat ion s ide ntifi ed
pur suant to Arti cles in Chapt er II of Euro pean Cou ncil Regul ati on
(EC ) 428 /20 09 an d spe cif icall y, an d w ithou t lim ita tion, Purc has er
wil l als o c omply with U. S. go vernm ent Expo rt Ad min istra tion
Reg ulati ons (“EA R”, 1 5 C .F.R. §§ 7 30- 774, http: //
www .bis. doc .gov/ ) adm ini stere d by Dep artme nt of Co mmerc e,
Bur eau o f I ndust ry an d S ecuri ty an d e conom ic sa nct ions
reg ulati ons (30 C.F.R . § § 500 et. seq ., ht tp:// www .trea s.gov /
off ices/ enf orcem ent/o fac /) ad minis ter ed by the U.S . Dep artme nt
of Treas ury , Off ice o f F oreig n Ass ets Cont rol.
Limited Warranty
Son y Eri css on Mo bile Com munic ation s A B, SE -221 88 Lund,
Swe den, (So ny Er icsso n) or it s loc al affil iated co mpany , pro vid es
thi s Lim ite d War ranty fo r you r mob ile phon e, or igi nal a ccess ory
del ivere d w ith y our m obi le ph one, and /or y our m obi le co mputi ng
pro duct (he reina fter ref erred to a s “ Produ ct”).
Sho uld y our Prod uct n eed warr anty ser vice, plea se retur n it to
the deal er from whom it was p urcha sed , or conta ct your local
9
10
Son y Eri css on Co ntact Ce nter (nati ona l rat es ma y a pply) or v isi t
www .sonyeri css on.co m to get furt her info rmati on.
Our warranty
Sub ject to the c ondit ion s of this Lim ited Warra nty , Son y Eri css on
war rants th is Pr oduct to be f ree f rom defe cts i n d esign , mat eri al
and work man ship at th e t ime o f its or igina l pur cha se by a
con sumer . T his L imite d W arran ty wi ll last for a pe riod of tw o ( 2)
yea rs as from the o rig inal date of purchase of th e Product for your
mob ile phone , an d for a pe riod of one (1) year foll owi ng the origin al
pur chase da te of the Pro duct for a ll origi nal a cce ssori es (s uch as
the battery , char ger or hand sfr ee kit) whi ch may be de liver ed with
you r mob ile phon e.
What we will do
If, duri ng the w arran ty perio d, th is Produ ct fa ils to o perat e u nder
nor mal u se and s ervic e, due t o def ect s in desig n, mater ials or
wor kmans hip , Son y Eri css on au thori sed dist ribut ors or s ervic e
par tners , in the cou ntr y/reg ion * wher e yo u purch ased the Prod uct ,
wil l, at th eir o ption , e ither repa ir or re place th e Pro duct in
acc ordan ce with the t erm s and cond iti ons s tipul ate d her ein.
Son y Eri css on an d its se rvice part ner s res erve the righ t to
cha rge a handl ing fee if a retu rned Product is found not to be under
war ranty ac cordi ng to th e con ditio ns below .
Ple ase note t hat some of your p ers onal s ett ings, downl oad s and
oth er inf ormat ion may b e lost when you r Sony Ericsson Product is
rep aired or rep laced . At pr ese nt, So ny Eri csson may be preve nted
by appli cab le la w, ot her regu latio n o r tec hnica l r estri ction s f rom
mak ing a ba ckup cop y of cer tain dow nload s. So ny Erics son does
not take any respons ibi lity for any lost infor matio n of any k ind and
wil l not reimb urse you fo r a ny such los s. You shou ld alw ays m ake
bac kup copies of a ll the in forma tio n stored on you r Sony Ericsso n
Pro duct suc h as downl oad s, ca lenda r a nd co ntact s b efore
han ding in your Sony Eri csson Prod uct for repai r o r rep lacem ent .
www.sonyericsson.com
Sony Ericsson Mobile Communications AB
SE-221 88 Lund, Sweden
11
1222-9269.3
June 9, 2010 10:03:49
Page 55

Conditions
1.
Thi s Lim ite d War ranty is vali d onl y i f the orig ina l pro of of
pur chase fo r thi s Pro duc t iss ued b y a Sony Eric sso n aut horis ed
dea ler s pec ifyin g the da te of purc has e and seri al numbe r**, is
pre sente d w ith t he Pr odu ct to be r epa ired or re pla ced.
Son y Eric sso n rese rves t he r ight t o refu se w arran ty ser vic e if th is
inf ormat ion has been rem oved or ch ang ed af ter t he origi nal
pur chase of the Produ ct from the d eal er.
2.
If Sony Eri csson repa irs or r eplac es the P roduc t, the r epair fo r
the def ect con cerne d, or the rep lac ed Product sha ll be warrante d
for the remai ning time of the origin al warran ty period or for nin ety
(90 ) day s f rom t he da te of re pair, wh ichev er is lo nger. Repa ir or
rep lacem ent may invol ve the u se of fu nctio nally eq uival ent
rec ondit ion ed units . Replac ed par ts or compo nents wi ll bec ome
the prop ert y of Sony Eri csson .
3.
Thi s war ran ty do es no t c over any f ail ure o f the Pr oduct due to
nor mal we ar and tear, or due to mis use, i nclud ing but no t limi ted
to use i n o ther than the norm al an d c ustom ary m ann er, i n
acc ordan ce with the S ony Eric sson ins truct ions for use and
mai ntena nce of t he Pr odu ct. N or do es this warra nty cove r any
fai lure of the P roduc t d ue to acci den t, so ftwar e o r har dware
mod ifica tio n or adjust men t, acts of God or damage resu lting fro m
liq uid.
A r echar gea ble b atter y c an be char ged and disch arg ed mo re
tha n a hundred time s. Howe ver, it wil l eventual ly wear out – this is
not a defe ct a nd corres ponds to normal wear and t ear . When the
tal k-tim e o r sta ndby tim e is notic eab ly sh orter , i t is time to
rep lace the batt ery. Son y Eri csson re comme nds t hat you use
onl y bat ter ies a nd ch arg ers a pprov ed by So ny Er ics son.
Min or va ria tions in d isp lay b right nes s and colo ur may o ccur
bet ween pho nes. There ma y be tiny bri ght o r dar k d ots o n the
dis play. Th ese a re ca lle d def ectiv e p ixels and occ ur wh en
ind ividu al dots have malf unc tione d and ca n not be adjus ted. Two
def ectiv e p ixels are dee med a ccept abl e.
Min or va ria tions in c ame ra im age a ppe aranc e may oc cur
bet ween p hones . This is nothi ng uncomm on and is not re garde d
as a def ect ive c amera mo dule.
4.
Sin ce th e c ellul ar sy ste m on which th e Pro duct is to op erate is
pro vided by a ca rrier in depen dent fro m Son y Eri css on,
Son y Eri css on wi ll no t b e res ponsi ble for the o per ation ,
ava ilabi lit y, co verag e, servi ces o r r ange of th at syste m.
5.
Thi s war ran ty do es no t c over Produ ct failu res c aus ed by
ins talla tio ns, m odifi cat ions, or r epa ir or open ing of t he Pr odu ct
per forme d b y a n on-So ny Erics son a uth orise d per son .
6.
The warr ant y doe s not co ver P roduc t f ailur es wh ich have been
cau sed b y u se of acce sso ries or ot her peri phera l d evice s whi ch
are not S ony Eric sso n brande d orig inal acc ess ories intended for
use with th e Pro duct.
Son y Eri css on di sclai ms any a nd al l w arran ties, wh ether
exp ress or impli ed, f or failu res c aus ed to the Pro duct or
per ipher al dev ices as a resul t of v iruse s, tro jan horses, spywa re,
or other maliciou s software. Sony Ericsson stro ngl y recommends
tha t you in stall appr opr iate virus pr otect ion s oft ware on yo ur
Pro duct a nd a ny periph eral d evi ces co nne cted t o it, as av ail able,
and upda te it re gular ly, to b etter pr otect your de vice. It i s
und ersto od, howe ver, tha t suc h sof twa re wi ll ne ver full y pro tec t
you r Pro duc t or its p eri phera l dev ice s and Sony Er icsso n
dis claim s a ll wa rrant ies , whe ther exp ress or im pli ed, i n cas e o f
fai lure by such antiv iru s sof tware to fulf il it s i ntend ed pu rpo se.
7.
Tam perin g w ith a ny of th e sea ls on th e Pro duct wil l voi d the
war ranty .
8.
THE RE AR E N O EXP RESS WAR RANTI ES, W HET HER W RITTE N
OR ORAL, OT HER T HAN T HIS PRIN TED L IMI TED W ARRAN TY.
ALL IMPLI ED WAR RANTI ES, INCLUDING W ITHOU T LIMI TATIO N
THE IMPL IED WARR ANTIE S O F MER CHANT ABI LITY OR
FIT NESS FOR A PART ICULA R PURP OSE , ARE LIM ITED TO T HE
DUR ATION OF THI S LIMI TED WA RRANT Y. IN N O EV ENT SH ALL
SON Y ERI CSS ON OR ITS LIC ENSOR S BE LIA BLE F OR
INC IDENT AL OR CO NSE QUENT IAL DAMAG ES O F AN Y NATUR E
WHA TSOEV ER, INCL UDING BU T NOT LIMI TED TO L OST
PRO FITS OR COMME RCIAL LO SS TO THE FUL L EXT ENT
THO SE DA MAG ES CA N BE DIS CLAIM ED BY LA W.
Som e cou ntr ies/s tates do not allow th e exc lusio n o r lim itati on of
inc ident al or co nsequ ent ial d amage s, or li mitat ion of t he du rat ion
12
13
of impli ed warra nties , s o the prec edi ng li mitat ion s or exclu sio ns
may not app ly to you.
The warra nty provide d does not a ffe ct the co nsu mer’s statutory
rig hts u nde r app licab le legis latio n i n for ce, n or the c onsum er’ s
rig hts a gai nst t he de ale r ari sing fro m the ir sa les / pu rchas e
con tract .
*Geographical scope of the warranty
If you h ave purc hased yo ur Pr oduct in a co untry me mber of th e
Eur opean Eco nomic Area (EE A) or in Swit zerla nd or the Rep ublic of
Tur key, and such Prod uct was inten ded for sale in the E EA or in
Swi tzerl and or i n Tur key , you can hav e you r Pro duc t ser viced in
any EEA co unt ry or i n Swit zerla nd o r in Tu rkey, under the warra nty
con ditio ns pre vaili ng in the country in w hich you require ser vic ing,
pro vided th at an iden tic al Pr oduct is sold in s uch coun try b y a n
aut horis ed Sony Er icsso n dist ribut or. To find out if your Pr oduct is
sol d in the coun try y ou are i n, pl eas e cal l the lo cal S ony E ric sson
Con tact Cen ter. Pleas e o bserv e tha t c ertai n ser vic es ma y not be
ava ilabl e o utsid e the co untry of o rig inal purch ase , for exam ple ,
due to t he fact that you r Pro duct may have an i nte rior or ex ter ior
whi ch is di ffere nt fr om equiv alent mo dels sold in other coun tri es.
Ple ase n ote in a dditi on that it ma y s ometi mes n ot be po ssibl e t o
rep air S IM- locke d Pro duc ts.
** In so me count ries/ reg ions addit ion al in forma tio n (su ch as a
val id wa rra nty c ard) may be r eques ted .
Trademarks and acknowledgements
The Liqu id Ident ity l ogo and Xperi a a re tr adema rks or r egist ere d
tra demar ks of So ny Er ics son M obile Co mmuni catio ns AB.
Son y is a t radem ark o r a regi stere d t radem ark o f S ony
Cor porat ion .
Eri csson is a tr adema rk or re giste red trad emark of
Tel efona kti ebola get L M E ricss on.
Blu etoot h i s a t radem ark or a regi ste red t radem ark of B lueto oth
SIG Inc. an d any use of such mark by Sony Erics son is u nder
lic ense.
Oth er pr odu ct an d com pan y nam es me nti oned herei n m ay be the
tra demar ks of th eir r esp ectiv e own ers .
Any righ ts not e xpres sly gran ted h ere in ar e res erv ed.
14
15
Support
Ang uilla
Ant igua an d
Bar buda
Arg entina
Aus tralia
The Bahama s
Bar bados
Bel gique/
Bel gië
Bel ize
Ber muda
Bol ivia
Bra sil
Can ada
Cay man
Isl ands
Cen tral an d
Sou thern
Afr ica
Čes ká
rep ublik a
Chi le
Col ombia
1-8 00-08 0-9 518
(To ll Fr ee)
1-8 00-08 1-9 518
(To ll Fr ee)
080 0-333 -74 27
(nú mero gra tuito )
130 0 650 -05 0 (To ll
Fre e)
1-8 00-20 5-6 062
(To ll Fr ee)
1-8 00-08 2-9 518
(To ll Fr ee)
02- 0745 161 1
AN 815, PIN 5597
(To ll Fr ee)
1-8 00-08 3-9 518
(To ll Fr ee)
800 -100- 542
(nú mero gra tuito )
400 1-044 4
(li gação gr atuit a)
1 8 66 76 6 9 374
(To ll Fr ee / san s
fra is)
1-8 00-08 4-9 518
(To ll Fr ee)
+27 11 5 06 0123
844 550 055
800 -646- 425
(nú mero gra tuito )
018 00-09 66- 080
(nú mero gra tuito )
que stions. CO@su pport.s onyer icss on. com
que stions. CO@su pport.s onyer icss on. com
que stions. CO@su pport.s onyer icss on. com
que stions. AU@su pport.s onyer icss on. com
que stions. CO@su pport.s onyer icss on. com
que stions. CO@su pport.s onyer icss on. com
que stions. BE@su pport.s onyer icss on. com
que stions. CO@su pport.s onyer icss on. com
que stions. CO@su pport.s onyer icss on. com
que stions. CO@su pport.s onyer icss on. com
que stions. BR@su pport.s onyer icss on. com
que stions. CA@su pport.s onyer icss on. com
que stions. CO@su pport.s onyer icss on. com
que stions. CF@su pport.s onyer icss on. com
que stions. CZ@su pport.s onyer icss on. com
que stions. CO@su pport.s onyer icss on. com
que stions. CO@su pport.s onyer icss on. com
16
Cos ta Rica
Dan mark
Deu tschlan d
Dom inica
Ecu ador
Ees ti
Egy pt/رصم
Ελλ άδα 801 11 810 810
El Salvado r
Esp aña
Fra nce
Gua temala
Haï ti/Ayit i
Hon duras
Hon g Kon g/香港+85 2 820 3 8 863
Hrv atska
Ind ia/ê 1800 11 1 800 (Tol l
0 8 00 01 1 0 400
(nú mero gra tuito )
333 1 282 8
018 0 534 20 20
(or tsübl ich e
Geb ühren )
1-8 00-08 5-9 518
(To ll Fr ee)
1-8 00-01 02- 50
(nú mero gra tuito )
06 032 0 32
167 27
+30 210 899 19 19
(απ ό κι νητό
τηλ έφων ο)
800 -6323 (n úmero
gra tuito )
902 180 576 (tar ifa
loc al)
09 69 32 21 21
09 69 32 21 22
(Xp eria™
uni queme nt)
1-8 00-30 0-0 057
(nú mero gra tuito )
AN 193, PIN 5598
(nu méro gra tuit /
nim ewo g rat is)
AN 80001 22, PIN
559 9 (nú mer o
gra tuito )
062 000 000
Fre e)
que stions. CO@su pport.s onyer icss on. com
que stions. DK@su pport.s onyer icss on. com
que stions. DE@su pport.s onyer icss on. com
que stions. CO@su pport.s onyer icss on. com
que stions. CO@su pport.s onyer icss on. com
que stions. EE@su pport.s onyer icss on. com
que stions. EG@su pport.s onyer icss on. com
que stions. GR@su pport.s onyer icss on. com
que stions. CO@su pport.s onyer icss on. com
que stions. ES@su pport.s onyer icss on. com
que stions. FR@su pport.s onyer icss on. com
que stions. CO@su pport.s onyer icss on. com
que stions. CO@su pport.s onyer icss on. com
que stions. CO@su pport.s onyer icss on. com
que stions. HK@su pport.s onyer icss on. com
que stions. HR@su pport.s onyer icss on. com
que stions. IN@su pport.s onyer icss on. com
17
Ind onesia
Ire land
Ita lia
Jam aica
Κύπ ρος/
Kıb rıs
Lat vija
Lie tuva
Mag yarorsz ág
Mal aysia
Mar oc/
Méx ico
Ned erland
Ned erlands e
Ant illen
New Zealan d
Nic aragua
Nor ge
Öst erreich
Pak istan /
Pan amá
Par aguay
+91 (011 )
390 11111
021 2701 388
185 0 545 88 8
(Lo cal r ate )
06 48895 206
(ta riffa lo cale)
1-8 00-44 2-3 471
(To ll Fr ee)
080 0 90 909
67 21 43 01
8 7 00 55 030
01 880 4 7 4 7
180 0-88- 990 0 (Tol l
Fre e / b eba s tol )
+21 2 2 2 958 344
0 1 800 0 00 4722
(nú mero gra tuito )
090 0 899 831 8
001 -866- 509 -8660
(gr atis num mer)
080 0-100 -15 0 (Tol l
Fre e)
AN 1800- 016 6,
PIN 5600 (n úmero
gra tuito )
815 00 8 40
(lo kalta kst )
081 0 200 24 5
021 - 111 22 55 73
008 00-78 7-0 009
(nú mero gra tuito )
009 800 54 20032
(nú mero gra tuito )
que stions. ID@su pport.s onyer icss on. com
que stions. IE@su pport.s onyer icss on. com
que stions. IT@su pport.s onyer icss on. com
que stions. CO@su pport.s onyer icss on. com
que stions. CY@su pport.s onyer icss on. com
que stions. LV@su pport.s onyer icss on. com
que stions. LT@su pport.s onyer icss on. com
que stions. HU@su pport.s onyer icss on. com
que stions. MY@su pport.s onyer icss on. com
que stions. MA@su pport.s onyer icss on. com
que stions. MX@su pport.s onyer icss on. com
que stions. NL@su pport.s onyer icss on. com
que stions. CO@su pport.s onyer icss on. com
que stions. NZ@su pport.s onyer icss on. com
que stions. CO@su pport.s onyer icss on. com
que stions. NO@su pport.s onyer icss on. com
que stions. AT@su pport.s onyer icss on. com
que stions. PK@su pport.s onyer icss on. com
que stions. CO@su pport.s onyer icss on. com
que stions. CO@su pport.s onyer icss on. com
18
Per ú
Phi lippine s/
Pil ipin as
Pol ska
Por tugal
Rep ública
Dom inicana
Rom ânia
Sai nt Kitt s
and Nevis
Sai nt Vinc ent
and the
Gre nadines
Sch weiz/
Sui sse/
Svi zzera
Sin gapore
Slo venia
Slo vensko
Sou th Afri ca
Sou th
Κor ea/대한
민국
Suo mi
Sve rige
Tri nidad a nd
Tob ago
Tür kiye
Uni ted
Kin gdom
Uni ted Sta tes
Uru guay
Ven ezuela
080 0-532 -38
(nú mero gra tuito )
+63 2 78 918 60
+48 22 2 2 7 7 444
808 204 466
(ch amada lo cal)
1-8 00-75 1-3 370
(nú mero gra tuito )
+40 21 4 01 0401
1-8 00-08 7-9 518
(To ll Fr ee)
1-8 00-08 8-9 518
(To ll Fr ee)
084 8 824 04 0
+65 6744 07 33
01 600 5 000
02 5443 644 3
086 1 632 222
(+8 2) 15 88 4170
09 299 2 000
013 24 45 00 (lo kal
tax a)
1-8 00-08 0-9 521
(To ll Fr ee)
+90 212 4 73 77 77
087 05 23 7 2 37
(Lo cal r ate )
1 8 66 76 6 9 374
000 -401- 787 -013
(nú mero gra tuito )
0-8 00-1- 00- 2250
(nú mero gra tuito )
que stions. CO@su pport.s onyer icss on. com
que stions. PH@su pport.s onyer icss on. com
que stions. PL@su pport.s onyer icss on. com
que stions. PT@su pport.s onyer icss on. com
que stions. CO@su pport.s onyer icss on. com
que stions. RO@su pport.s onyer icss on. com
que stions. CO@su pport.s onyer icss on. com
que stions. CO@su pport.s onyer icss on. com
que stions. CH@su pport.s onyer icss on. com
que stions. SG@su pport.s onyer icss on. com
que stions. SI@su pport.s onyer icss on. com
que stions. SK@su pport.s onyer icss on. com
que stions. ZA@su pport.s onyer icss on. com
que stions. KO@su pport.s onyer icss on. com
que stions. FI@su pport.s onyer icss on. com
que stions. SE@su pport.s onyer icss on. com
que stions. CO@su pport.s onyer icss on. com
que stions. TR@su pport.s onyer icss on. com
que stions. GB@su pport.s onyer icss on. com
que stions. US@su pport.s onyer icss on. com
que stions. CO@su pport.s onyer icss on. com
que stions. CO@su pport.s onyer icss on. com
19
Việ t Nam 1900 1525 (m iễn
Бел арусь
Бъл га рия
Рос си я
Укр аї на
中国
台灣
ไทย
phí )
8 8 2 00 361 0001
080 0 1 8 778
+7 (495) 78 70986
(+3 80) 4 4 5 90
151 5
+97 1 4 3 919 880
+97 1 4 3 919 880
(UA E)
+97 1 4 3 919 880
800 -8200 -72 7
+86 400 810 0000
+88 6 2 2 562 5511
02 2483 030
que stion s.V N@s up por t.s on yer ics so n.c om
que stion s.B Y@s up por t.s on yer ics so n.c om
que stion s.B G@s up por t.s on yer ics so n.c om
que stion s.R U@s up por t.s on yer ics so n.c om
que stion s.U A@s up por t.s on yer ics so n.c om
que stion s.J O@s up por t.s on yer ics so n.c om
que stion s.A E@s up por t.s on yer ics so n.c om
que stion s.K W@s up por t.s on yer ics so n.c om
que stion s.S A@s up por t.s on yer ics so n.c om
que stion s.C N@s up por t.s on yer ics so n.c om
que stion s.T W@s up por t.s on yer ics so n.c om
que stion s.T H@s up por t.s on yer ics so n.c om
20
June 9, 2010 10:03:50
 Loading...