

Sony 4-185-044-11 User Manual

Contents
Table of
Home
Menu
Index
Operation Guide
NWZ-B152 / B153 / B152F / B153F
©2010 Sony Corporation
4-185-044-11(1)
2
2
Note
Depending on the country/region in which you have purchased the player, some models
may not be available.
Browsing the Operation Guide
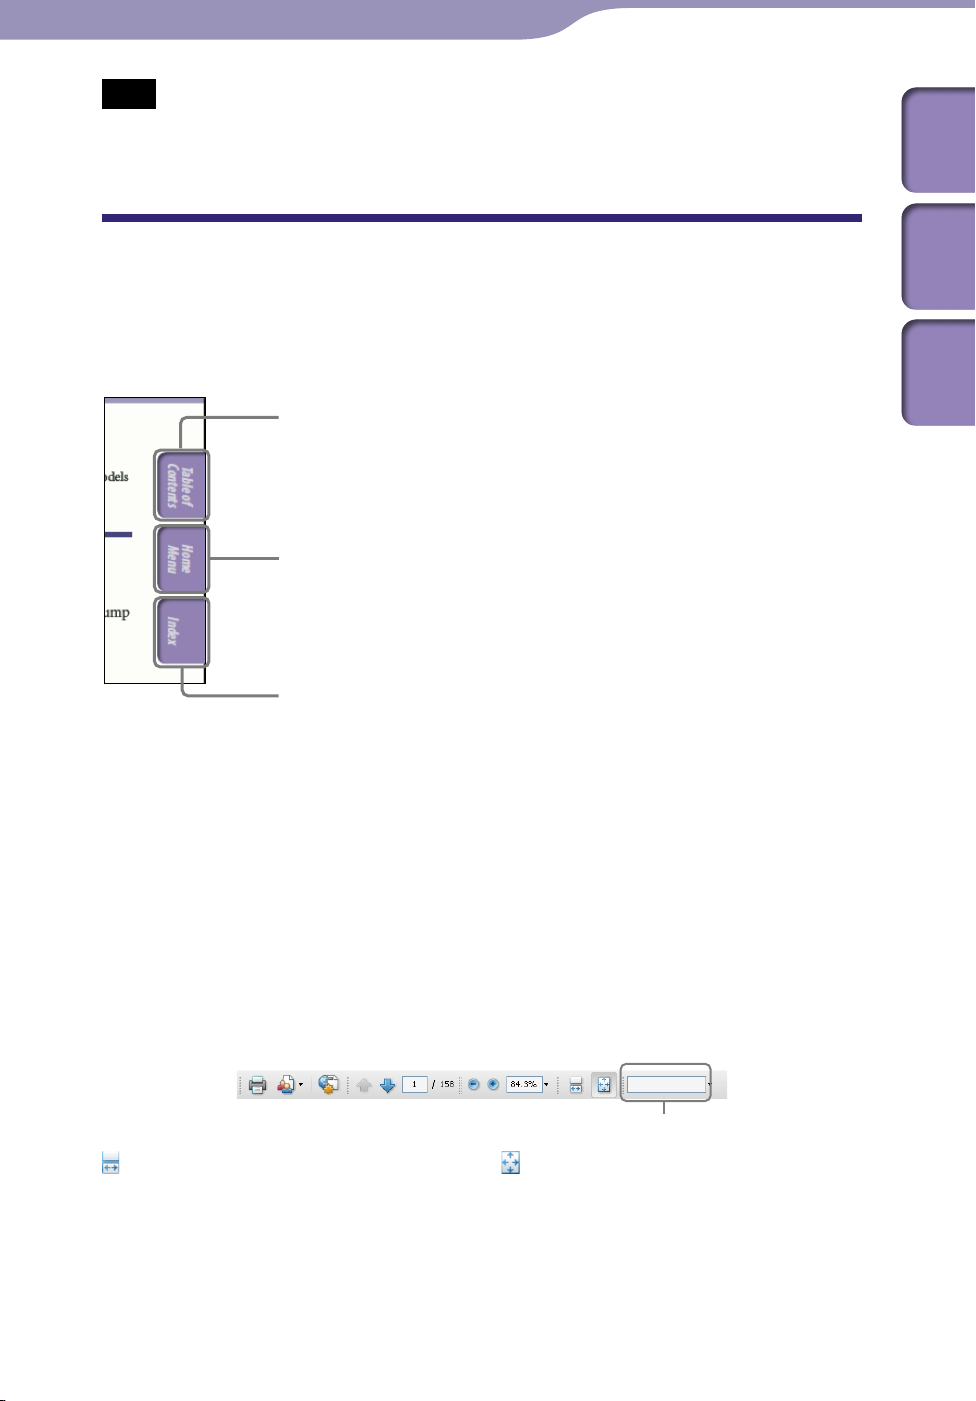
To use the buttons in the Operation Guide
Click the buttons located in the upper right of the pages of this manual to jump
to “Table of Contents,” “About the Home Menu” or “Index.”
Jumps to the table of contents
Find what you are looking for from a list of topics in the manual.
Jumps to the Home menu list
Find what you are looking for from a list of the option items in the player’s menu.
Contents
Table of
Home
Menu
Index
Jumps to the index
Find what you are looking for from a list of key words mentioned in the manual.
Hint
You can jump to the indicated page by clicking a page number in the table of contents or
in the index.
ou can jump to the indicated page by clicking a page reference indication (e.g., p
Y
on each page.
To search for a reference page by keyword, enter the keyword into the find text field on
the Adobe Reader window.
peration procedures may differ, depending on your Adobe Reader version.
O
. 5)
To change the page layout
The buttons on the Adobe Reader window enable you to select how pages are
displayed.
Text field to find text
Continuous
Pages are displayed as a continuous
roll of pages, fitting the page width
inside the window. When you scroll,
the previous or next pages scroll up
Single Page
Pages are displayed one at a time,
fitting the page into the window.
When you scroll, the display changes
to the previous or next page.
or down continuously.

3
3
Table of Contents
Contents
Table of
Basic Operations and Screens
Parts and Controls ...................................5
Playback screen ................................................8
Turning the Player On and Off ...............9
About the Home Menu ..........................10
How to Use the Home Menu .................12
Getting Started
Charging the Battery .............................14
Selecting the Display Language
[Language] ..............................................16
Setting the Date and Time .....................17
Getting Music ........................................18
Transferring Music ................................19
Playing Music
Playing Music [Music Library] ...................21
Playing Music Using ZAPPIN playback
.............................................................23
What is ZAPPIN playback? ..........................23
Changing to ZAPPIN playback ...................24
Changing the playback range of
song clips in ZAPPIN playback .................25
Searching for Songs ...............................26
Changing the Play Mode
Setting the Sound Quality .....................29
Activating the Bass function .........................29
Changing the sound quality
Deleting Songs .......................................32
[Play Mode] ......28
[Equalizer] .........30
Listening to/Recording FM Radio (NWZB152F/B153F only)
Listening to FM Radio ...........................33
Listening to FM radio ....................................33
FM radio screen .............................................34
Presetting broadcast stations automatically
[FM Auto Preset] ...............................................35
Presetting broadcast stations manually .......36
Deleting preset broadcast stations ...............36
Recording FM Radio .............................37
Deleting recorded FM radio programs .......38
Playing Back Recorded FM Radio
Programs .............................................39
Changing the FM Settings .....................40
[Scan Sensitivity] ..................................................40
Recording/Listening Voice
Recording Sound ...................................41
Deleting recorded sound files ......................42
Playing Back Recorded Sound Files ......43
Changing the Rec Settings ....................44
[Voice Record Codec] ...........................................44
Settings
Changing the Common Settings ...........45
[Set Date-Time] ...................................................45
[AVLS(Volume Limit)] ..........................................46
[Beep] .................................................................46
[Power Save Mode] ...............................................47
[LED] .................................................................47
[Contrast] ...........................................................47
Displaying the Player Information
[Information] ...........................................48
Selecting the Display Language
[Language] ..............................................49
Resetting to Factory Settings
[Reset All Settings] ....................................50
Formatting Memory
[Format] .................51
Home
Menu
Index
Continued

4
4
Useful Facts
About Battery Life .................................52
What are Format and Bit Rate? .............53
What is audio format? ...................................53
Storing Data ...........................................54
Upgrading the Player’s Firmware .........55
Troubleshooting
Troubleshooting ....................................56
Messages ................................................65
Additional Information
Precautions ............................................67
License and Trademark Notice .............75
Specifications.........................................76
Index ......................................................81
Contents
Table of
Home
Menu
Index

5
5
Basic Operations and Screens
Basic Operations and Screens
Contents
Table of
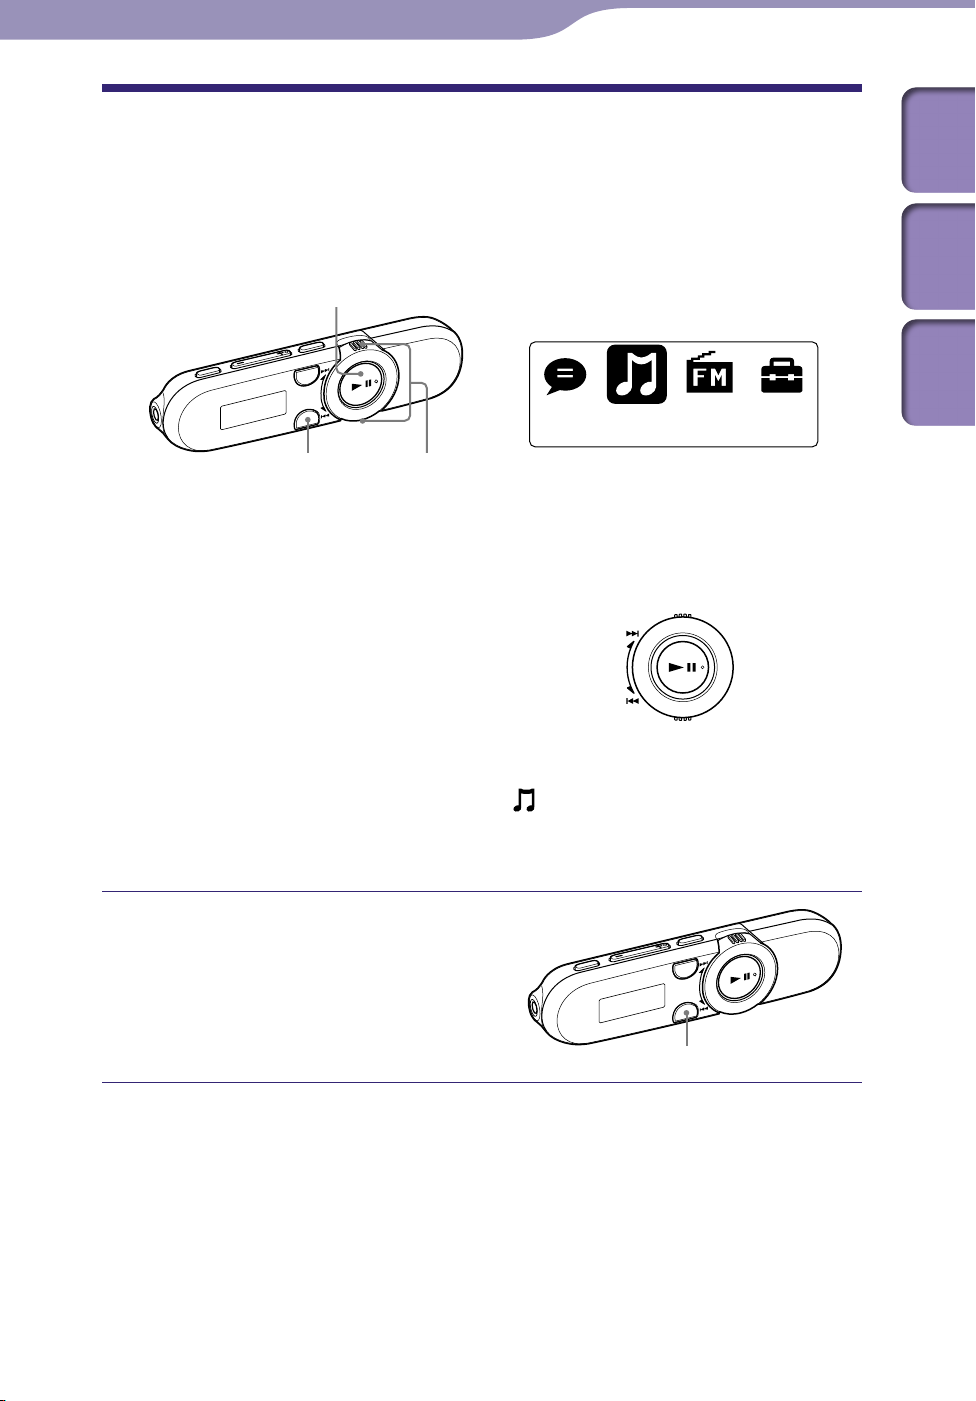
Parts and Controls
Front
Home
Menu
Index
Headphones
REC/STOP button
Starts/stops recording.
You can record sound using the
player’s built-in microphone (
. 41).
p
You can also record the currently
received FM program (NWZ-B152F/
B153F only) ( p
VOL +*
1
/– button
. 37).
Adjusts the volume.
ZAP button
Changes between normal playback
and ZAPPIN playback ( p
. 24).
You can also change the playback
range of song clips in ZAPPIN
playback ( p
. 25).
BASS/PLAY MODE
*2
button
Activates the Bass function to
emphasize the low sound range (
. 29).
p
You can also change the play mode
. 28).
( p
*
Turns on/off the player ( p
1
button
. 9).
Starts/pauses song playback (
. 21), or pauses/restarts recording
p
. 37, 41).
( p
When a menu appears on the display,
use this button to confirm a menu
item ( p
. 12).
Shuttle switch
Rotate to find the beginning of a
song, or fast-rewinds/forwards (
. 21).
p
When a menu appears on the display,
rotate to select a menu item (
. 12).
p
*1 There are tactile dots. Use them to help with
button operations.
2
The function marked with on the player
*
is activated when you press and hold the
corresponding button.
Continued

6
6
Basic Operations and Screens
Front
Headphones
(Headphone) jack
For connecting the headphones.
Insert the jack pin until it clicks into
place. If the headphones are
connected improperly, the sound
from the headphones will be
impaired.
Display
The display varies depending on the
application that is currently active
. 8, 10, 21, 33, 41, 45).
( p
BACK/HOME button
Returns to the previous menu. Press
and hold this button to display the
Home menu ( p
. 12).
Power illuminator
Illuminated by LED ( p
illumination pattern varies according
to the operation.
. 47). The
Continued
Contents
Table of
Home
Menu
Index
7
7
Basic Operations and Screens
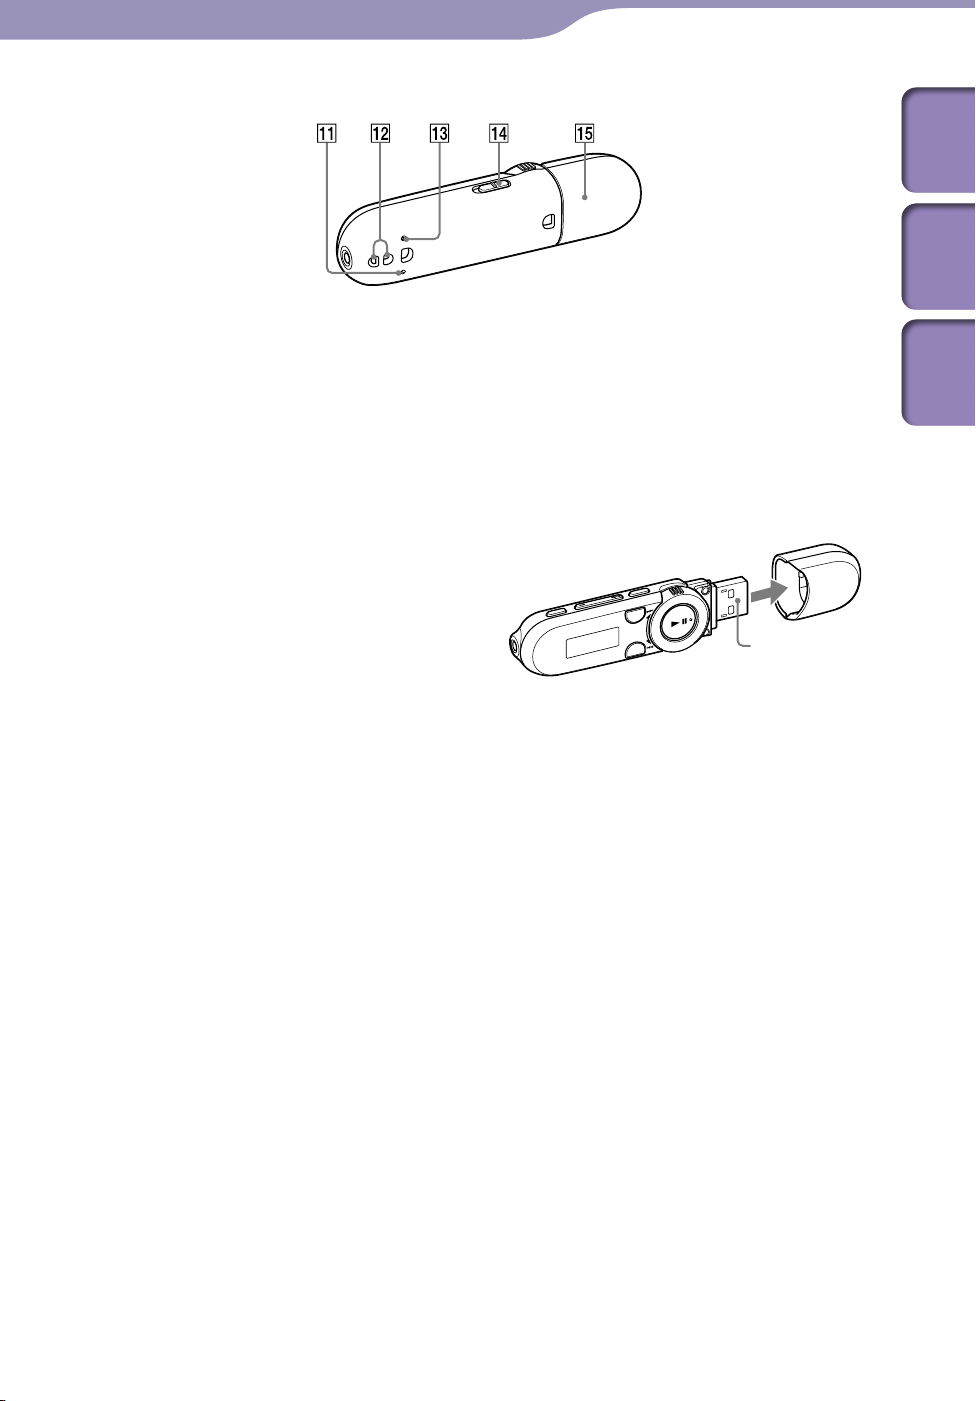
Rear
MIC (Microphone)
See p
. 41.
Strap hole
Used to attach a strap (sold
separately).
RESET button
Resets the player when you press the
RESET button with a small pin, etc
. 56).
( p
When you turn on the player after
resetting it, the player reactivates the
previously set items.
USB cap
When connecting with USB, remove
the USB cap.
To remove the USB cap
USB connector
Contents
Table of
Home
Menu
Index
HOLD switch
You can protect the player against
accidental operation while carrying
it by setting the HOLD switch.
By sliding the HOLD switch in the
direction of the arrow (), all
operation buttons are disabled. If you
press buttons while the hold function
is activated, [HOLD] appears in the
display. If you slide the HOLD switch
to the opposite position, the hold
function is released.

8
Folder 1
SHUF
012
BASS
Song 12
8
Basic Operations and Screens
Playback screen
Contents
Table of
Home
Menu
Index
Song title/File name indication
Pla
Pla
Pla
Displays the current play mode.
: playback/: pause
: fast-rewind/: fast-forward
Current song number indication
yback range indication
yback progress bar
ying status indication
Pla
Displays the current play mode icon
( p
[Normal], no icon appears.
ZAPPIN playback indication
Indicates ZAPPIN playback status
( p
Bass function/equalizer mode
Displays whether the Bass function
( p
equalizer mode is activated (
. 30).
p
Remaining battery indication
y mode indication
. 28). If the play mode is set to
. 23).
indication
. 29) is activated, or which

9
9
Basic Operations and Screens
Turning the Player On and Off
button
To turn on the player
Press the button to turn on the player. The player resumes the operation
from the point where you last turned off.
Hint
If [HOLD] appears in the display, slide the HOLD switch in the opposite direction of the
arrow () to release the hold function.
To turn off the player
Press and hold the button to turn off the player. [POWER OFF] appears.
Contents
Table of
Home
Menu
Index
Hint
If there is no operation for a certain period of time while in stop mode, the display turns
off automatically to save the battery power. If there is no operation for an extended
period, the player turns off completely. The batteries are consumed a little in this status.
ou cannot operate the player when it is connected to a computer. Disconnect the player
Y
before operating the player.
10
Music Library
10
Basic Operations and Screens
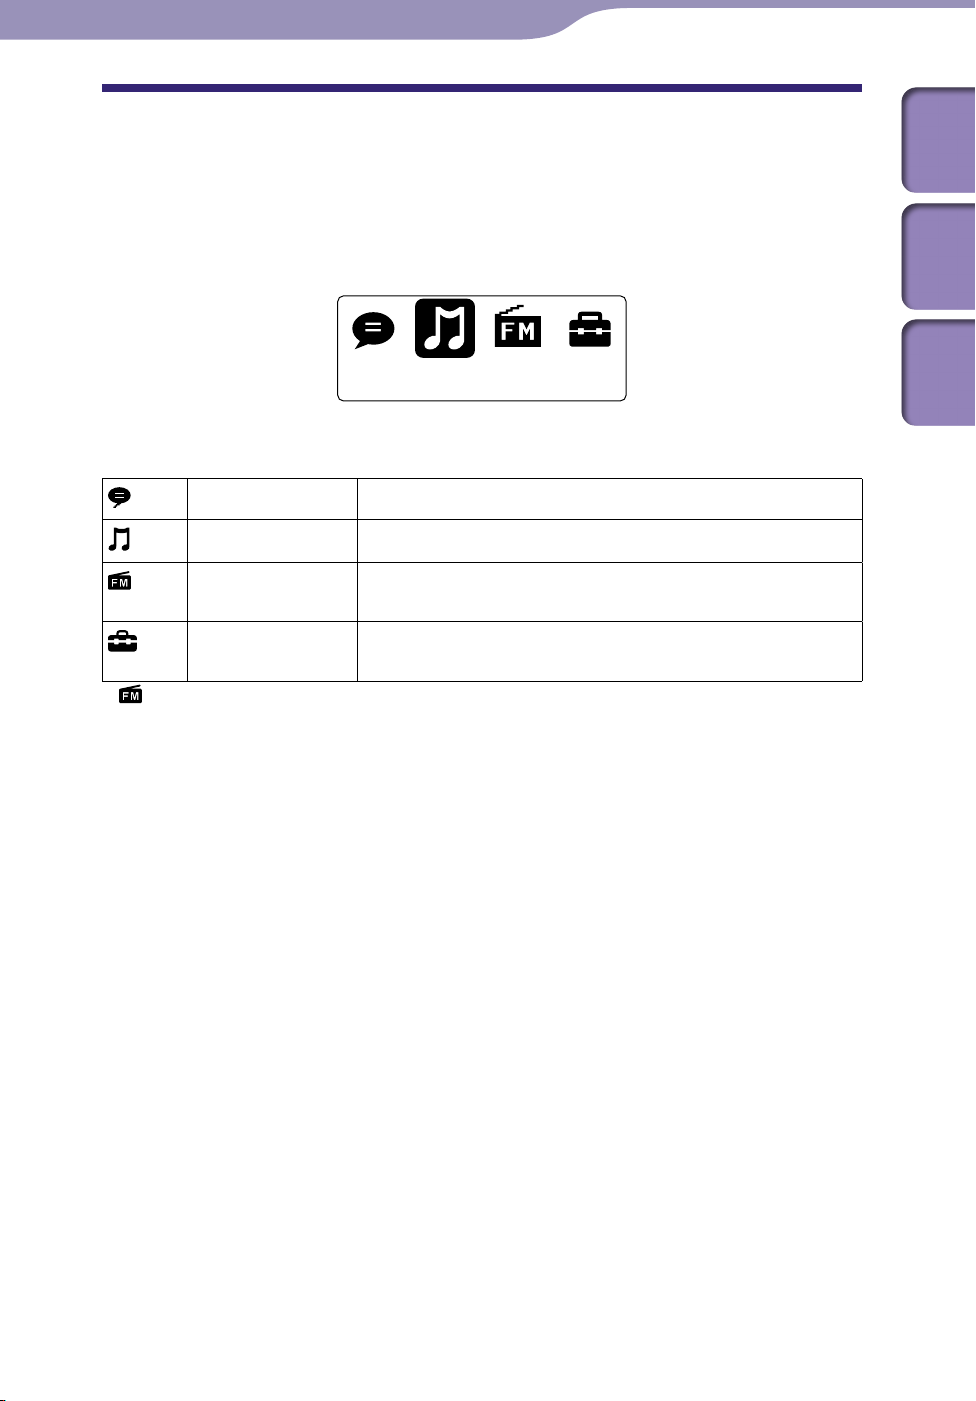
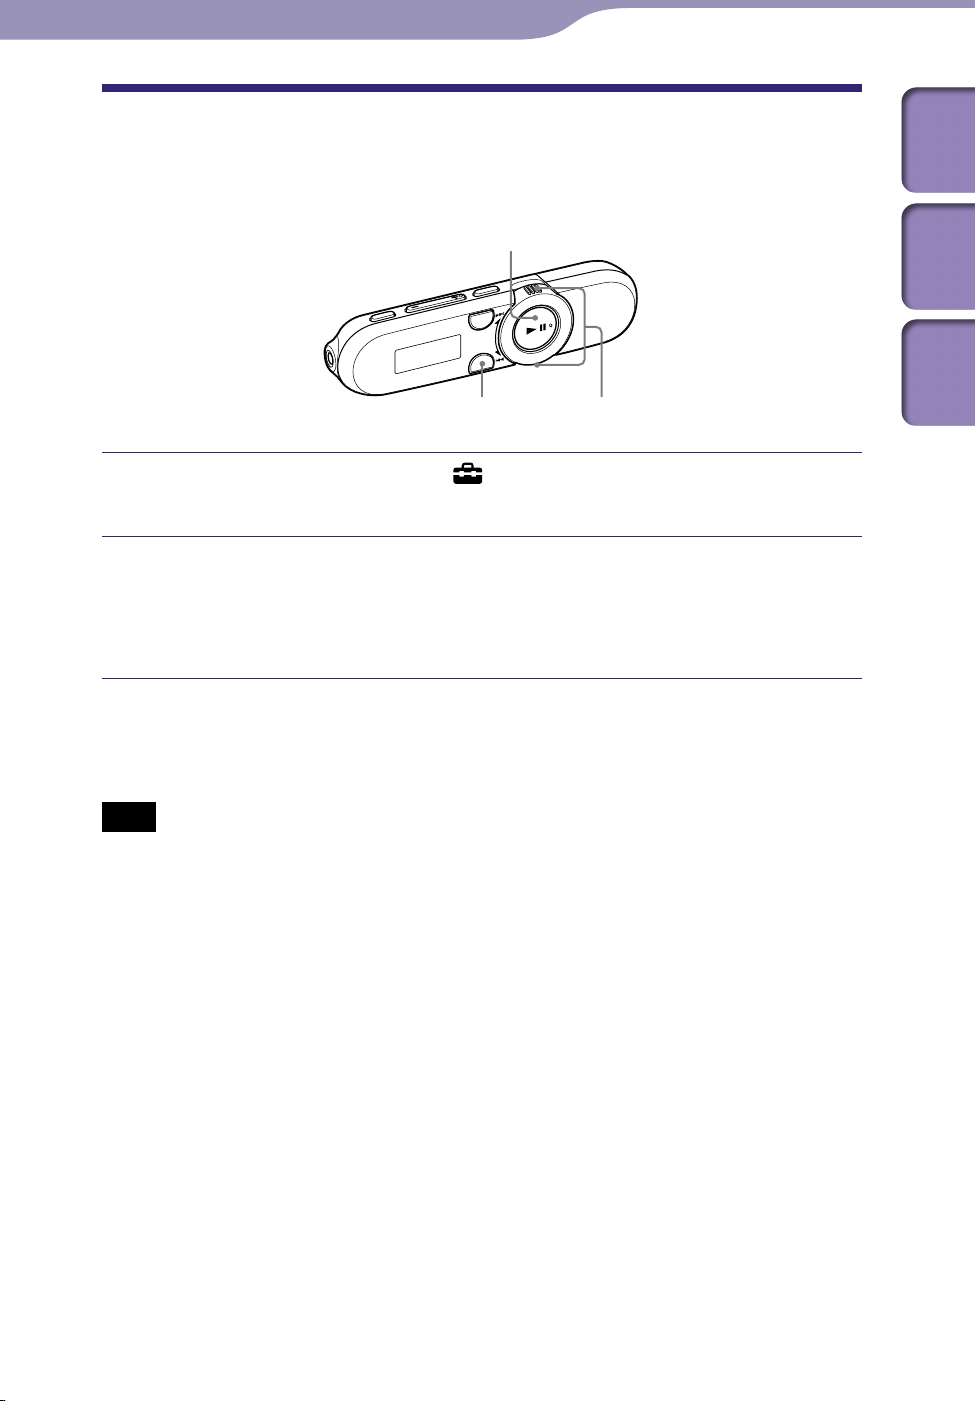
About the Home Menu
The following table shows the items of the Home menu. For details on the item
list of each menu, see p
For details about each menu item, refer to the specified reference page.
Home menu
The icons appear in the Home menu and the color of the selected icon is
inverted.
. 11.
*1
Contents
Table of
Home
Menu
Index
[Voice]
[Music Library]
1
*
*1 and items related to the [FM] function appear on NWZ-B152F/B153F only.
[FM] Plays FM radio, or plays back/deletes a recorded FM
[Settings] Sets the function for music, FM*1, voice recording, or
Plays back/deletes a recorded sound file ( p
Plays back transferred songs on the player ( p
program ( p
player settings ( p
. 33).
. 45).
. 41).
. 21).
Continued
11
11
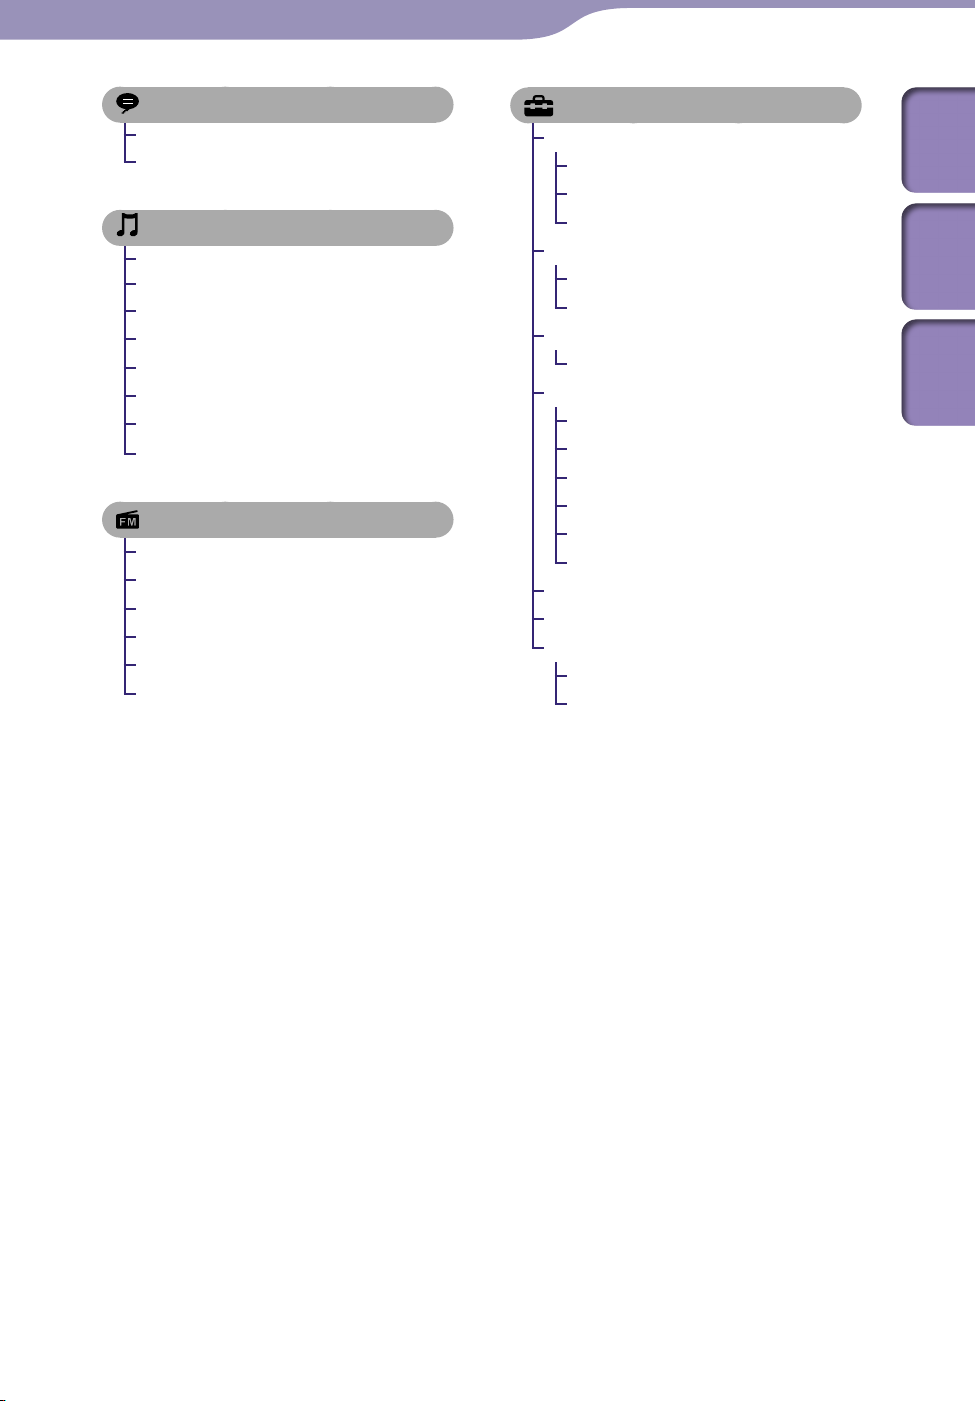
Basic Operations and Screens
[Voice] ..................................... 41
[Play Rec Data] ............................ 43
[Delete Rec Data] ........................42
[Music Library] ......................... 21
[Now Playing] ........................21, 26
[Folder] ......................................... 26
[All Songs]....................................26
[Artist] .......................................... 26
[Album] ........................................ 26
[Playlists] ...................................... 26
[Genre] ......................................... 26
[Release Year] ..............................26
[FM]*1 ...................................... 33
[Manual] ....................................... 33
[Preset] .........................................33
[Play Rec Data] ............................ 39
[Delete Rec Data] ........................38
[Add Preset] ................................. 36
[Delete Preset] .............................36
[Settings]
[Music Settings]
[Play Mode] ............................ 28
[Equalizer]............................... 30
[ZAPPIN Range] .................... 25
[FM Settings]*
[Scan Sensitivity] .................... 40
[FM Auto Preset] .................... 35
[Rec Settings]
[Voice Record Codec] ............ 44
[Common Settings]
[Set Date-Time] ................ 17, 45
[AVLS(Volume Limit)] .......... 46
[Beep] ...................................... 46
[Power Save Mode] ................ 47
[LED] ....................................... 47
[Contrast] ................................ 47
[Information] ...............................48
[Language] .............................16, 49
[Initialize]
[Reset All Settings] ................. 50
[Format] .................................. 51
*1 NWZ-B152F/B153F only
1
Contents
Table of
Home
Menu
Index
12
Music Library
12
Basic Operations and Screens
How to Use the Home Menu
The Home menu is the starting point of each application, such as searching for
songs, changing settings, etc.
You can display the Home menu by pressing and holding the BACK/HOME
button of the player.
button
BACK/HOME button Shuttle switch
From the Home menu, you can select the desired item on the screen.
Rotate the shuttle switch to / to select a menu item, and then press
1
the *
*1 There is a tactile dot. Use it to help with button operations.
button to confirm.
Contents
Table of
Home
Menu
Index
/: Selects a menu item.
button: Confirms a menu item.
In this manual, operating instructions from the Home menu are described as
below.
Example: From the Home menu, select
the desired folder
The actual operations for the example above are shown below.
the desired song.
[Music Library] [Folder]
Press and hold the BACK/HOME
button until the Home menu
appears.
The Home menu appears.
BACK/HOME button
Continued

13
Music Library
Now Playing
Folder
All Songs
Play All
Folder 1
Folder 2
Play All
Song 1
Song 2
Folder 1
012
BASS
Song 12
SHUF
13
Basic Operations and Screens
Press the button to confirm.
The Music Library menu screen
appears.
Rotate the shuttle switch to
() to select [Folder],
and then press the button
to confirm.
The Folder list screen appears.
ou can scroll the list by rotating
Y
and holding the shuttle switch to
().
Rotate the shuttle switch to
() to select the desired
folder, and then press the
button to confirm.
The song list screen of the selected
folder appears.
Contents
Table of
Home
Menu
Index
Rotate the shuttle switch to
() to select the desired
song, and then press the
button to confirm.
The music playback screen appears
and playback begins.
To return to the Home menu during operation
Press and hold the BACK/HOME button.
To return to the previous screen during operation
Press the BACK/HOME button.

14
14
Getting Started
Getting Started
Charging the Battery
The player’s battery is recharged while the player is connected to a running
computer.
Remove the USB cap and connect the USB connector to a USB connector on
your computer. When the remaining battery indication of the display shows:
, charging is completed (charging time is approx. 70 minutes).
When you use the player for the first time, or if you have not used the player
for a long time, recharge it fully (until the
battery indication is displayed).
Contents
Table of
Home
Menu
Index
About the battery indicator
The battery icon in the display shows the approximate remaining power. As
battery power is depleted, the icon shows as follows:
If [LOW BATTERY] appears, you cannot operate the player. In this case,
charge the battery by connecting to your computer. See p
duration.
. 78 on battery
Hint
When charging a depleted battery, the power illuminator blinks clockwise and nothing
appears in the display.
Continued

15
15
Getting Started
Note
If you charge the player that has not been used for a long period, your computer may not
recognize the player or nothing may appear on the display. Charge the player for about 5
minutes, and it starts operating properly.
harge the battery in an ambient temperature of between 5 ºC to 35 ºC (41 ºF to 95 ºF).
C
If you try to charge the battery in an ambient temperature outside this range, the icon
may appear, and charging cannot be performed.
f you do not intend to use the player for over half a year, charge the battery at least once
I
during this time to maintain battery performance.
The number of times the battery can be recharged before it is used up is approximately
500 times. This number may vary, depending on the conditions under which you use the
player.
ome USB devices connected to the computer may interfere with proper operation of
S
the player.
e do not guarantee operation of the player using a personally assembled/modified
W
computer.
f the computer enters a power saving mode, such as the Sleep or Hibernation mode,
I
even during USB connection, the player’s battery is not charged. Instead, the player
continues to draw power from the battery, discharging it.
o not leave the player connected for extended periods to a laptop computer that is not
D
connected to AC power, since the player may discharge the computer’s battery.
hile the player is connected to a computer, do not turn on, restart, wake up from Sleep
W
mode, or shut down the computer. These operations may cause the player to
malfunction. Disconnect the player from the computer before performing these
operations.
eat may build up while charging. This is not malfunction.
H
Contents
Table of
Home
Menu
Index

16
16
Getting Started
Selecting the Display Language
[Language]
You can select from a variety of languages for the display of menus and
messages on the player.
button
BACK/HOME button Shuttle switch
Contents
Table of
Home
Menu
Index
From the Home menu, select [Settings]
desired language setting.
Language Messages and menus are displayed in
[English] English
[Español] Spanish
[Français] French
[Português] Portuguese
[Русский] Russian
[
[
[
]
]
]
Simplified Chinese
Traditional Chinese
Korean
[Language] the
17
17
Getting Started
Setting the Date and Time
The date and time are not set by default. Set the current date and time
according to the following.
button
BACK/HOME button Shuttle switch
Contents
Table of
Home
Menu
Index
From the Home menu, select [Settings]
[Set Date-Time].
[Common Settings]
Rotate the shuttle switch to select the year, and then press the
button to confirm.
Th
e year, month, date, hour and minutes can be set. Repeat this step to
set each item.
To display the current time
While the hold function is activated, press any button.
Note
If you leave the player for a while with the battery used up, the date and time may be
reset.
f the player is not used for a long time, your settings for date and time may need to be
I
set again.
e clock may develop an inaccuracy of up to 60 seconds per month. In this case, set the
Th
current time again.
18
18
Getting Started
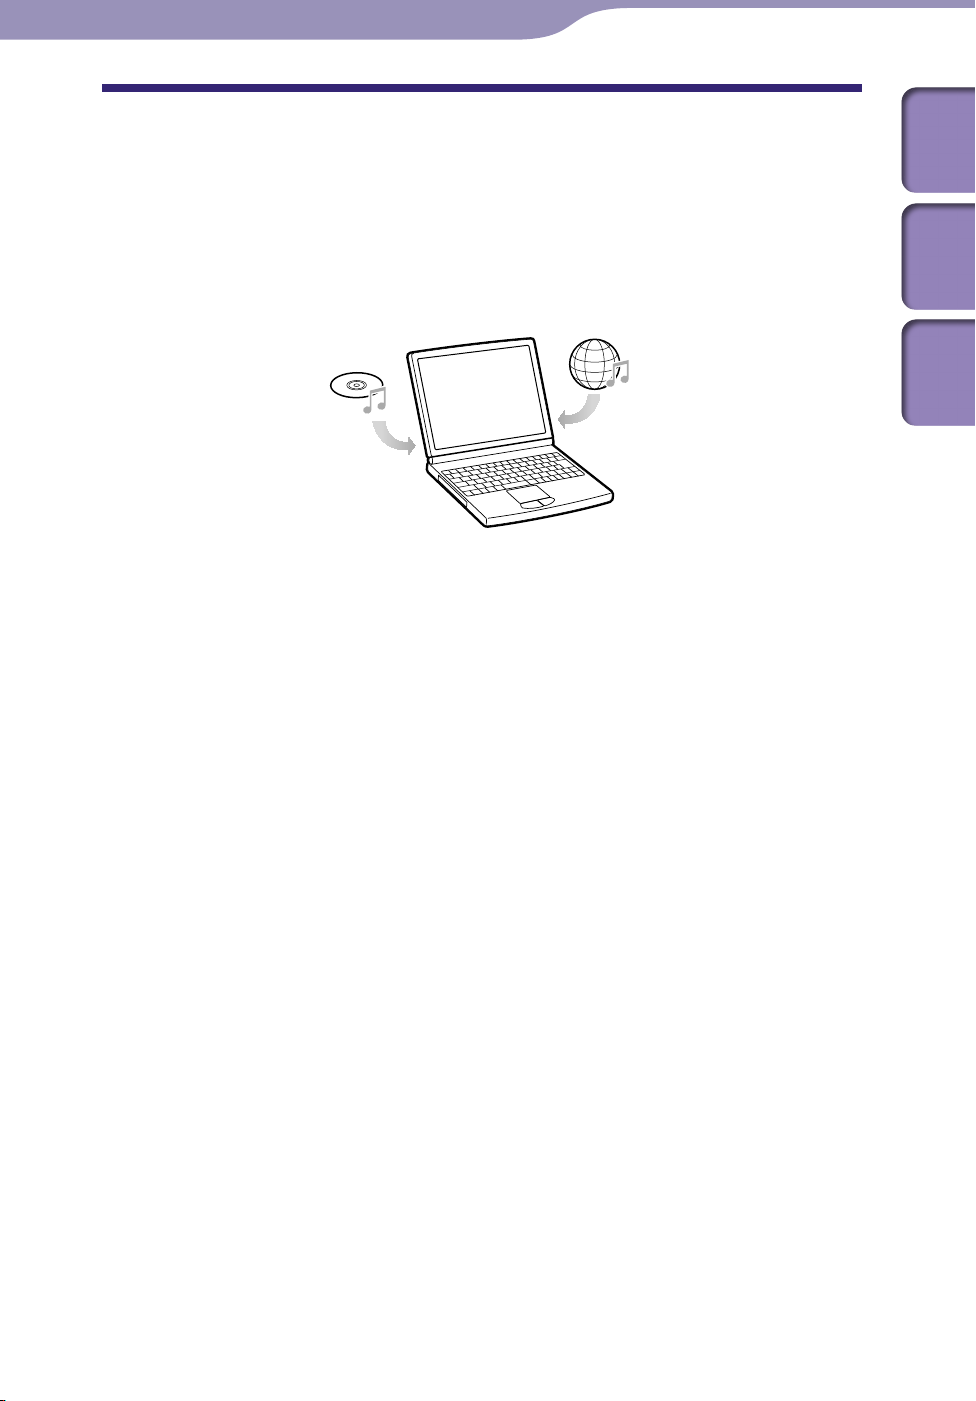
Getting Music
To enjoy music on the player, you need to prepare the data on your computer.
You can import music from audio CDs or from the Internet, etc.
To import the data into your computer, use appropriate software, such as
Windows Media Player 11 or 12. For detailed information on how to import
data, refer to the Help of each software.
For details about supported file formats, see “Supported file format” ( p
. 76).
Contents
Table of
Home
Menu
Index

19
19
Getting Started
Transferring Music
You can directly transfer data by dragging and dropping in Windows Explorer
on your computer.
Hint
You can also transfer music using Windows Media Player 11 or 12. For details about
usage, or support on Windows Media Player, refer to the Windows Media Player
information from the following web site:
http://support.microsoft.com/
Note
Only MP3/WMA files can be played on the player ( p
I
f you turn on or restart the computer while the player is connected to the computer, the
player may malfunction. In this case, press the RESET button of the player to reset it (
p. 56). Disconnect the player from the computer before turning on or restarting the
computer.
Connect the USB connector of the player to your computer.
Insert the USB connector fully.
. 76).
Contents
Table of
Home
Menu
Index
Open [My Computer] or [Computer] - [WALKMAN] - [Storage
Media], and then select the folder you want to store the audio files.
Data hierarchy may differ, depending on your computer environment.
Drag and drop the files to the selected folder.
Continued

20
20
Getting Started
Note
Be careful not to accidentally bump or put stress on the player, especially when it is
connected to your computer. It may be damaged.
o not disconnect the player while files are being transferred. If you do, the file being
D
transferred may be damaged.
f the player is disconnected while files are being transferred, unnecessary files may be
I
left in the player. In this case, transfer usable files back to the computer and format the
player ( p
S
ome files may not be played back on the player due to copyright protection.
or details on the capacity for files and folders, see “Maximum recordable number of
F
files or folders (Approx.)” ( p
D
ata hierarchy may differ, depending on your computer environment.
t may take time to start up the player or display the file/folder list when many files or
I
folders are stored on the player.
. 51).
. 77).
Contents
Table of
Home
Menu
Index
21
Music Library
01:23
03:38
012
Song 12
21
Playing Music
Playing Music
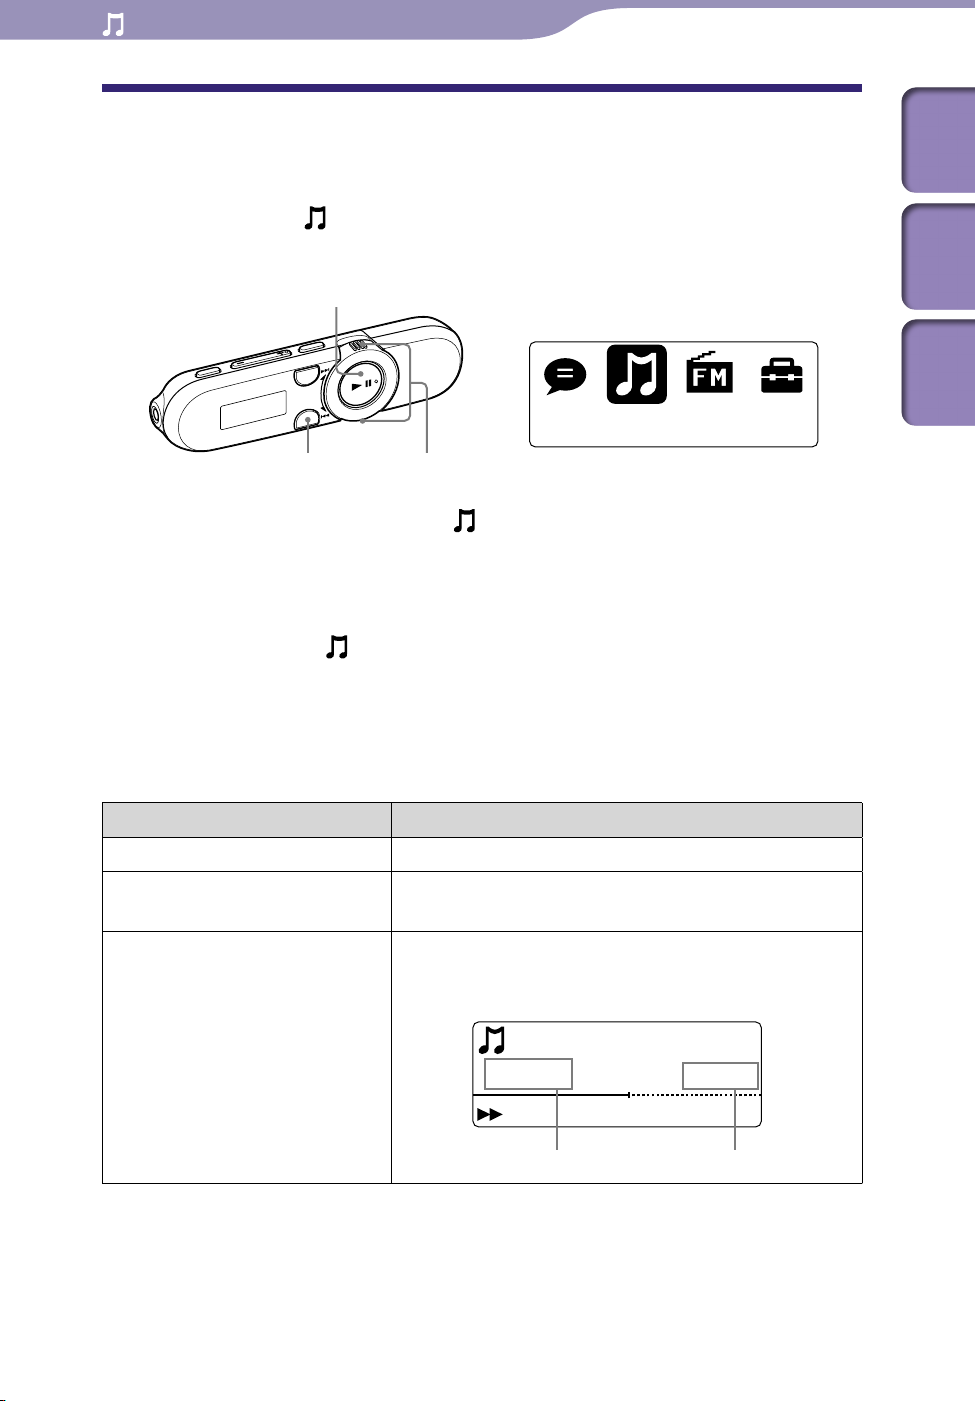
Playing Music
You can listen to transferred songs on the player. The transferred songs are
stored in [Music Library].
To play music, select
music playback screen.
BACK/HOME button Shuttle switch
[Music Library]
[Music Library] from the Home menu to display the
button
Contents
Table of
Home
Menu
Index
From the Home menu, select [Music Library]
The music playback screen appears and playback begins from the last song
you listened to.
bout the playback screen, see “Playback screen” ( p
A
hen you select [Music Library], the search menu appears. You can
W
select the desired search method to display the list screen and search for
songs. For details, see “Searching for Songs” ( p
hen the player turns off from the song playback status, you can start
W
playback of the last song you listened to by pressing the button.
To (screen indication) Do this
Play () / pause () Press the button.
Skip to the beginning of the
current song / next song
Fast-rewind () / fast-forward
() the current song
Rotate the shuttle switch to /.
Rotate and hold the shuttle switch to /
during playback and release it at the desired point.
When fast-rewind/fast-forward a song
[Now Playing].
. 8).
. 26).
Elapsed time Full length of the song/file
Continued

22
22
Playing Music
Hint
You can change the song playback from the normal playback to ZAPPIN playback (
p
. 23).
e player offers a variety of play modes, including random play and selected repeat play
Th
. 28).
( p
Y
ou can emphasize the low range (Bass function) ( p
sound quality by selecting the equalizer ( p
. 30).
. 29). You can also change the
Contents
Table of
Home
Menu
Index
23
23
Playing Music
Playing Music Using ZAPPIN playback
Contents
Table of
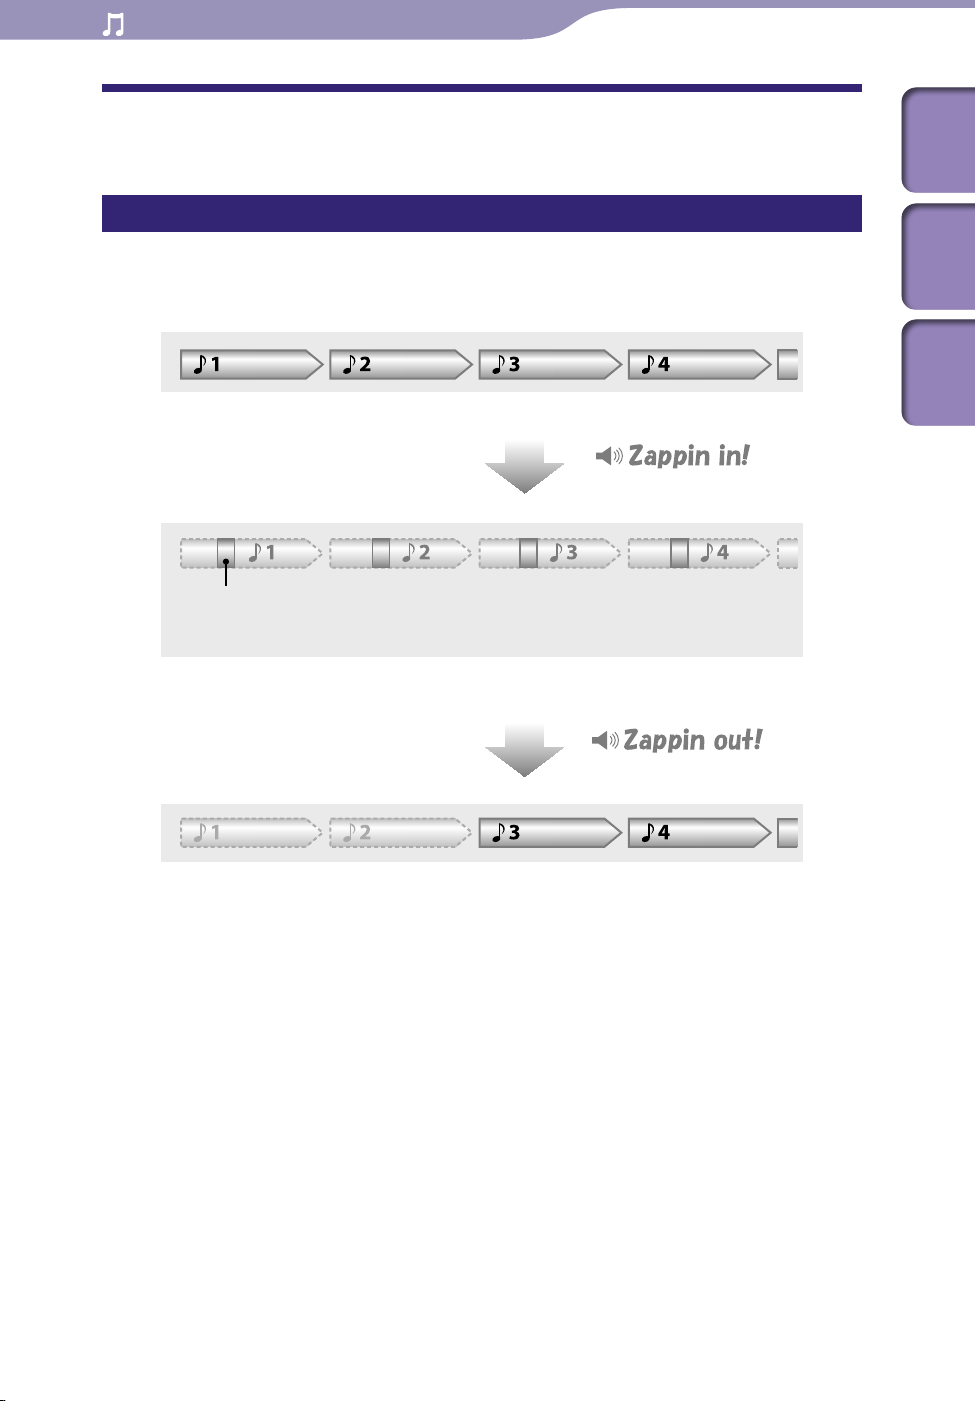
What is ZAPPIN playback?
ZAPPIN enables sequential playback of song clips at a preset duration.
Normal Playback
Changes to ZAPPIN
ZAPPIN Playback
Short, recognizable song clips (approx. 45 seconds from beginning).
The ZAPPIN playback range for song clips can be set to either [ZAPPIN Short] or [ZAPPIN Long].
Returns to normal playback and restarts playback of the
current song from the beginning.
Normal Playback
Home
Menu
Index
24
24
Playing Music
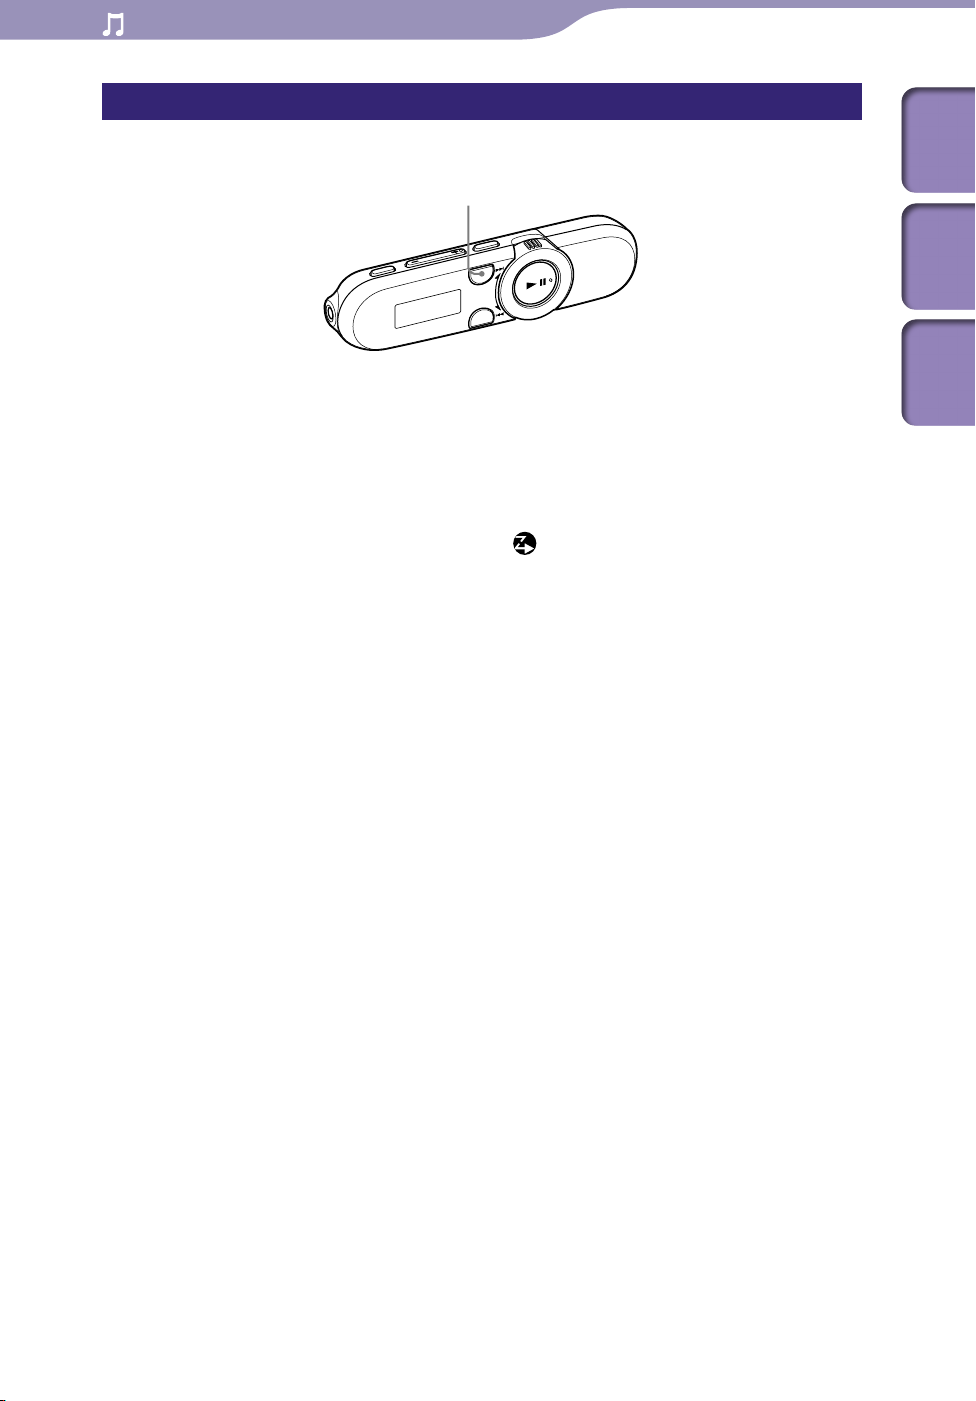
Changing to ZAPPIN playback
You can select normal playback or ZAPPIN playback.
ZAP button
During normal playback and displaying the playback screen, press
the ZAP button.
“Zappin in” is heard and ZAPPIN playback begins.
The player plays back song clips for about 4 seconds ([ZAPPIN Short]) or
15 seconds ([ZAPPIN Long]) each.
hen ZAPPIN playback is selected, is displayed on the screen.
W
e song is played back from approx. 45 seconds into the song. If the
Th
length of the song is under 45 seconds, the song is played back from
some point before the end of the song.
Contents
Table of
Home
Menu
Index
To skip to the previous/next song, or shuffle playback during ZAPPIN playback
You can move to the previous/next song, or play back songs in random order.
The method of operation is the same as normal playback.
To return to normal playback
Press the ZAP button during ZAPPIN playback when the playback screen is
displayed. When normal playback is resumed, “Zappin out” is heard.

25
25
Playing Music
Changing the playback range of song clips in ZAPPIN playback
The playback range for song clips can be set to [ZAPPIN Short] or [ZAPPIN
Long].
Contents
Table of
button
ZAP button
BACK/HOME button Shuttle switch
During ZAPPIN playback and displaying the playback screen, press
and hold the ZAP button.
The setting screen appears.
Rotate the shuttle switch to select the desired setting and press the
button to confirm.
Hint
You can select the desired setting from the Home menu, select
Settings] [ZAPPIN Range] the desired setting.
List of the [ZAPPIN Range] settings
[Settings] [Music
Home
Menu
Index
Setting item Description
[ZAPPIN Short] Plays back song clips for about 4 seconds each. (Default
setting)
[ZAPPIN Long] Plays back song clips for about 15 seconds each.
 Loading...