

Page 1

Sonoff T1 UK User Guide
Hi, welcome to use Sonoff T1 1-3 gang WiFi & RF wall touch switch!You
can touch the switch on/off, or use App eWeLink/433MHz RF Remote to
turn on/off.
1. Download “eWeLink” app
Search “eWeLink” in APP Store for iOS version or Google play for Android
version.
2. Installation
ON/OFF operating principle: The connected appliances work/stop through
the Live wire’s power on/off.
Page 2

CAUTION: Before installing the switch, make sure you have totally 100%
cut off the power supply.
2.1 If you want to connect with lights, the wiring instruction is as below.
Here we take 3 gang switch for example:
2.2 If you want to connect with the appliance with rated power lower than
600W, the wiring instruction is as below. Here we take the 1 gang switch
for example:
Page 3

The switch must be powered up through Lin (Live input) and Nin (neutral
input). While L1 out, L2 out, L3 out, L4 out are Live output for each gang.
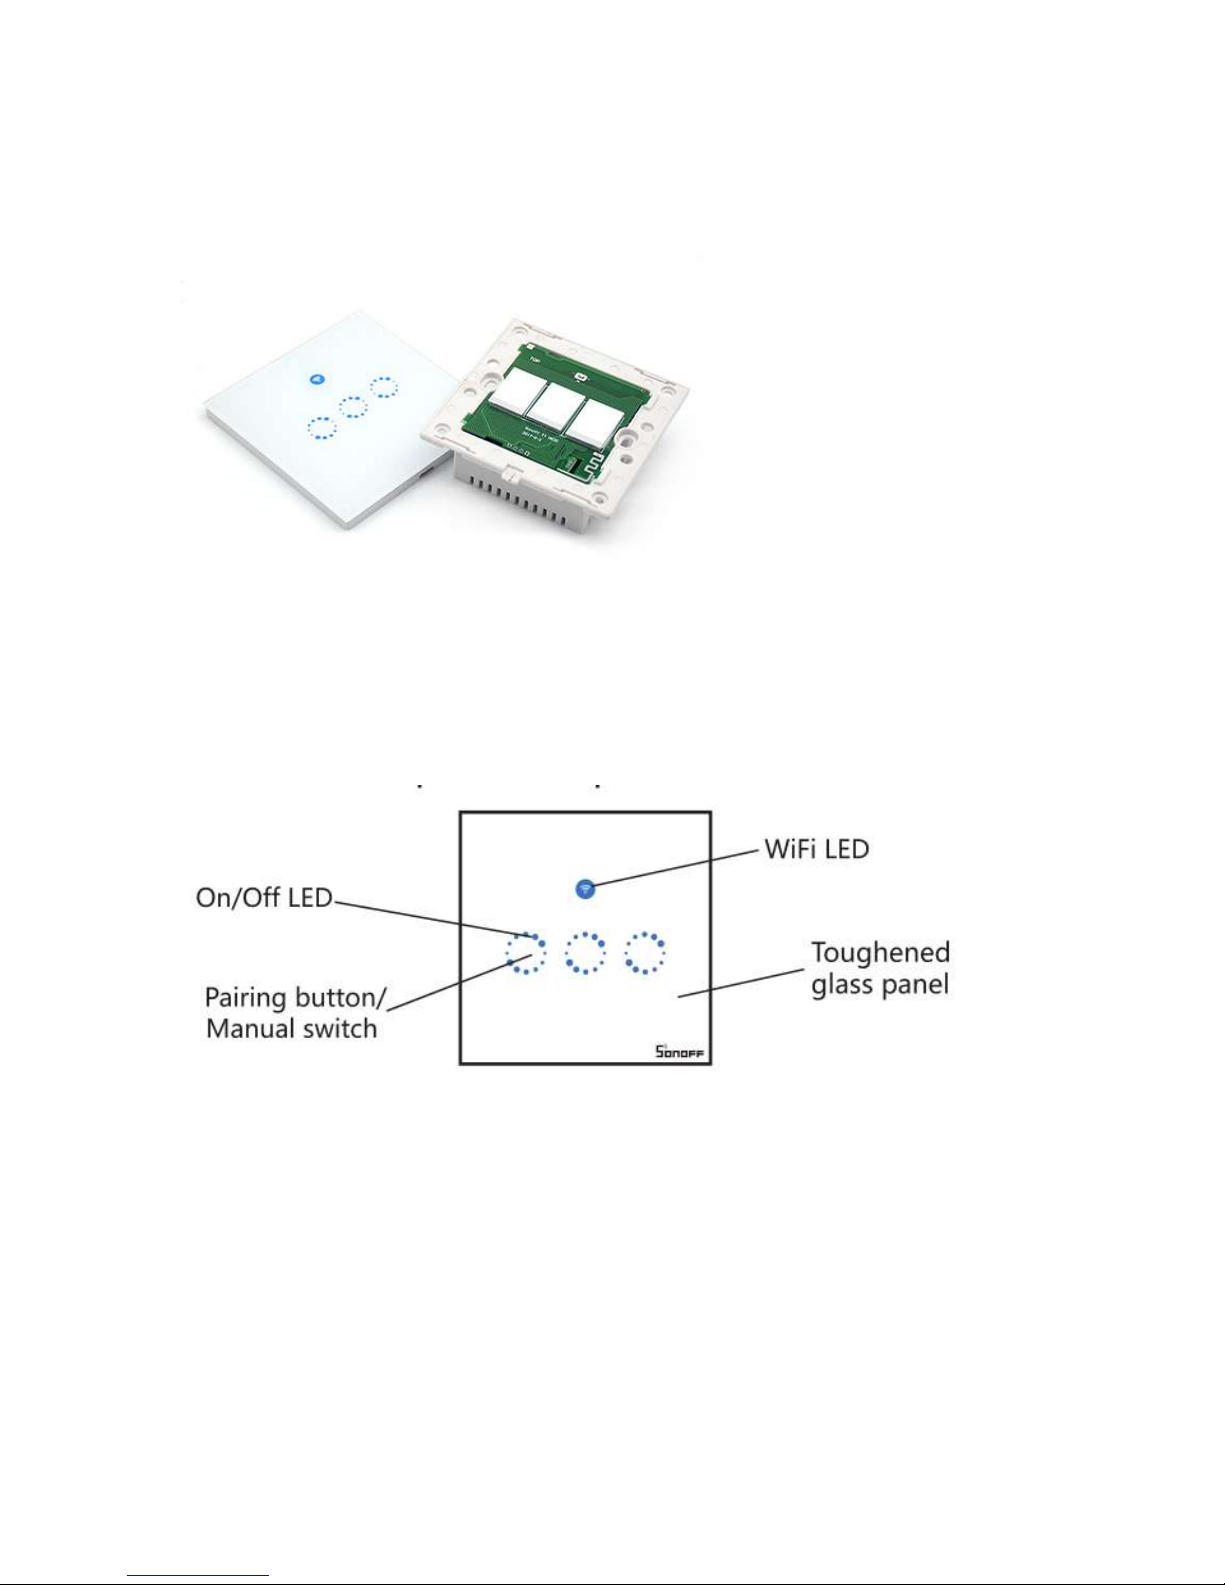
After connecting the wires, please use a screwdriver to open the panel. The
position is shown below:
Then use two screws to fix the back enclosure into the wall box. Then close
the panel.
Page 4
2. Add device
1. Power up your the wall switch.
2. Press the first button for 7 seconds until it fast blinks to enter into WiFi
pairing status.
Page 5
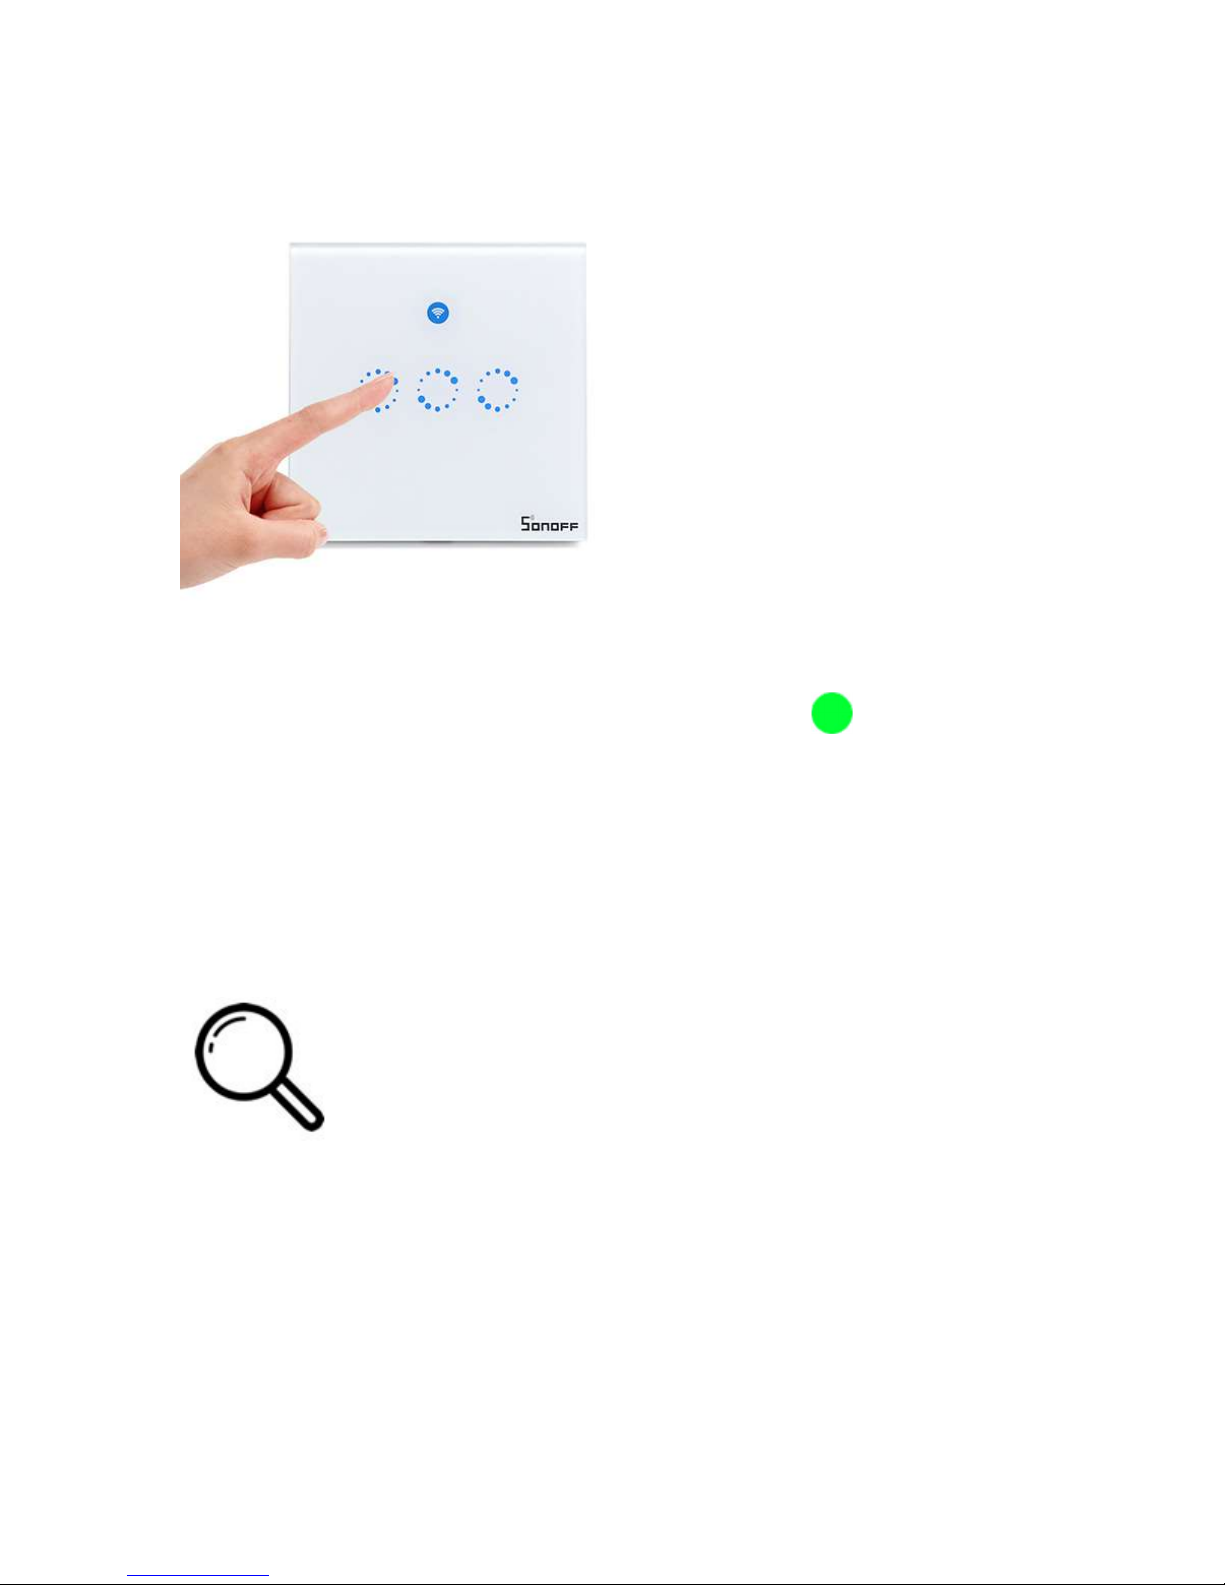
3. The blinking way is: blink 3 times and on repeatedly.
For Android users, please select the first icon and click NEXT.
For iOS users, please select the corresponding icon, click NEXT.
EWeLink will auto-search and connect to the device.
4. Input your home SSID & password:
4.1 If no password, keep it blank.
4.2 Now eWeLink only support 2.4G WiFi communication protocol, 5GWiFi is not supported.
Page 6
5. Name the device to complete.
6. Maybe the device is “Offline” on eWeLink, for the device needs 1-2
minutes to connect to your router and server. When the green LED on, the
device is “Online”, if eWeLink shows still “Offline”, please close eWeLink
and re-open.
3. RF Remote:
3.1 Pair with 433MHz RF Remote
Page 7
You’ll need to pair the 3 gangs one by one. Press and hold the touch button
of T1 until you hear a beep sound. Press a button on RF Remote. You’ll
hear a beep sound when it’s being learned successfully. Repeat above steps
to pair the other gangs with the RF Remote. One RF button can learn with
more than 1 gang. 1 gang can remember 14 RF keys.
Please note that for T433 86 type RF Remote, you’ll need to install the
battery into the RF Remote first. Then follow the above instruction to learn
433MHz codes. You can install the T433 to a 86 type wall switch box, or
just stick it to anywhere on the wall.
3.2 Clear 433MHz codes
Press and hold the touch button of T1 until you hear two beep sounds.
Press any button on the RF Remote. You’ll hear a beep sound when the
code is cleared successfully.
4. APP features
4.1 WiFi remote control and synchronous device status
Turn on/off by tapping device icon on App. Device status
always simultaneously display on APP.
4.2 Share Control
The owner can share the devices to other eWeLink accounts. While sharing
devices, both should stay online on eWeLink (keep the screen lighten).
Page 8

Because if the account you want to share is not online, he/she will not
receive the invitation message.
How to make it possible? Firstly click Share, input the eWeLink account
(phone number or email address) you want to share, tick the timer
permissions (edit/delete/change/enable) you want to give, then click Next.
The other account will receive an invitation message. Click Accept, the
device has shared successfully. The other user will have access to control
the device.
3. Timing schedules
Support max 8 enabled single/repeat/countdown timing schedules each
device.
4. Scene/Smart Scene
Scene allows triggering on/off your devices automatically. Scene Settings is
in the upper right corner of Device List. You can set up scenes or smart
scenes to trigger on/off the device.
Users should select “Click to execute” in the condition, add different
existing devices, name the scene and save it.
5. Set default device status
Page 9

In Device Setting, you can set default device status to ON or OFF when
the device is powered on.
6. Security mechanism
One device one owner. Other people can not add the devices that have
already been added. If you want to add your device to another account,
don’t forget to delete it first.
7. Update
It will auto-remind you of new firmware or version. Please update as soon
as you can.
5. Problems and solutions
Read the detailed FAQ on Itead Smart Home Forum. If below answers
can’t solve your problem, please submit a feedback on eWeLink.
1. My device has added successfully but stays “Offline”.
Answers: The newly added device need 1-2 min to connect to your router
and the Internet. If it stays offline for a long time, please judge the problem
by the green led status:
1.1. Green led quickly blinks one time and repeats, which means device
failed to connect to the router. The reason may be you have entered wrong
WiFi password or your device is too far away from the router, which causes
Page 10

a weak WiFi signal. The device can not be added to the 5G-wifi-router, only
the 2.4G-wifi is OK. At last, make sure that your router is MAC-open.
1.2. Green led slowly blinks one time and repeats, which means the device
has connected to router and server but failed to be added to the device list.
Then power on the device again, if it still not working, just add the device
again.
1.3. Green led quickly blinks twice and repeats, this means the device has
connected to the router but failed to connect to the server. Then please
confirm your WiFi router works normally.
2. Why the APP can’t find the device in pairing status?
Answers: That’s because of your phone’s cache. Please close the WLAN of
your phone then open it after a minute. At the same time, please power off
the device if you can, then power up to try again.
3. My WiFi is expired, can I connect the devices to LAN?
Answers: the Sonoff T1 doesn’t support to be controlled by LAN. You’ll
need to connect it to a WiFi with Internet.
 Loading...