

Page 1
Quick Start Guide ONLY for Encore/MDX G4 Duet 1.8 GHz
™
/
MDX G4 DUET
Dual Processor Upgrade Card for Power Mac® G4 (MDD)
and Xserve® G4 Computers
Computer and Operating System Compatibility
The Encore/MDX G4 Duet processor upgrade card is compatible only with Power
Mac G4 Mirrored Drive Doors (MDD) and Xserve G4 computers. If you own
a Power Mac G4 computer and are unsure which model you have, refer to
Apple’s online support article that describes the differences at
http://docs.info.apple.com/article.html?artnum=42739. This article lists
model numbers, and describes the physical differences of the various Power Mac
G4 models.
At this printing, this Encore/MDX G4 Duet processor upgrade is compatible with
Mac OS® 9.2 and Mac OS X Version 10.3.5 and later. For up-to-date Mac OS compatibility information, check our web site.
WARNING: If you use Mac OS X, you must ensure
that it is Version 10.3.5 or later; earlier versions
are NOT compatible. If your system does not meet this
standard, you must upgrade to the correct OS version
before installing this upgrade. Otherwise, your system will
not operate with the Duet installed. Instructions follow.
Support Notes: Please familiarize yourself with
the following instructions before beginning the
installation. If you feel you are unable to install the computer hardware, please contact a qualified computer
technician. Sonnet strongly recommends that a qualified
technician perform this installation.
Before proceeding with the installation, we recommend
that you backup important information on your hard
drive(s) prior to installing new hardware or software.
Multiple Upgrade Recommendation
If you intend to perform multiple hardware upgrades to
your computer, we recommend that you complete the
installation of the Encore/MDX G4 Duet first, and then
install the remaining upgrades; complete each upgrade
and test it before proceeding to the next.
Encore/MDX G4 Duet processor upgrades do not cause sleep issues in computers that support sleep with the original processor installed. If a computer experiences sleep issues with the original processor installed, installing this upgrade
is unlikely to change that condition. In the very rare instance where a computer begins to have sleep issues after a Duet upgrade is installed, the problem
is isolated to that specific card and can be resolved by replacing it.
You Should Have
The following items should be included in your product package:
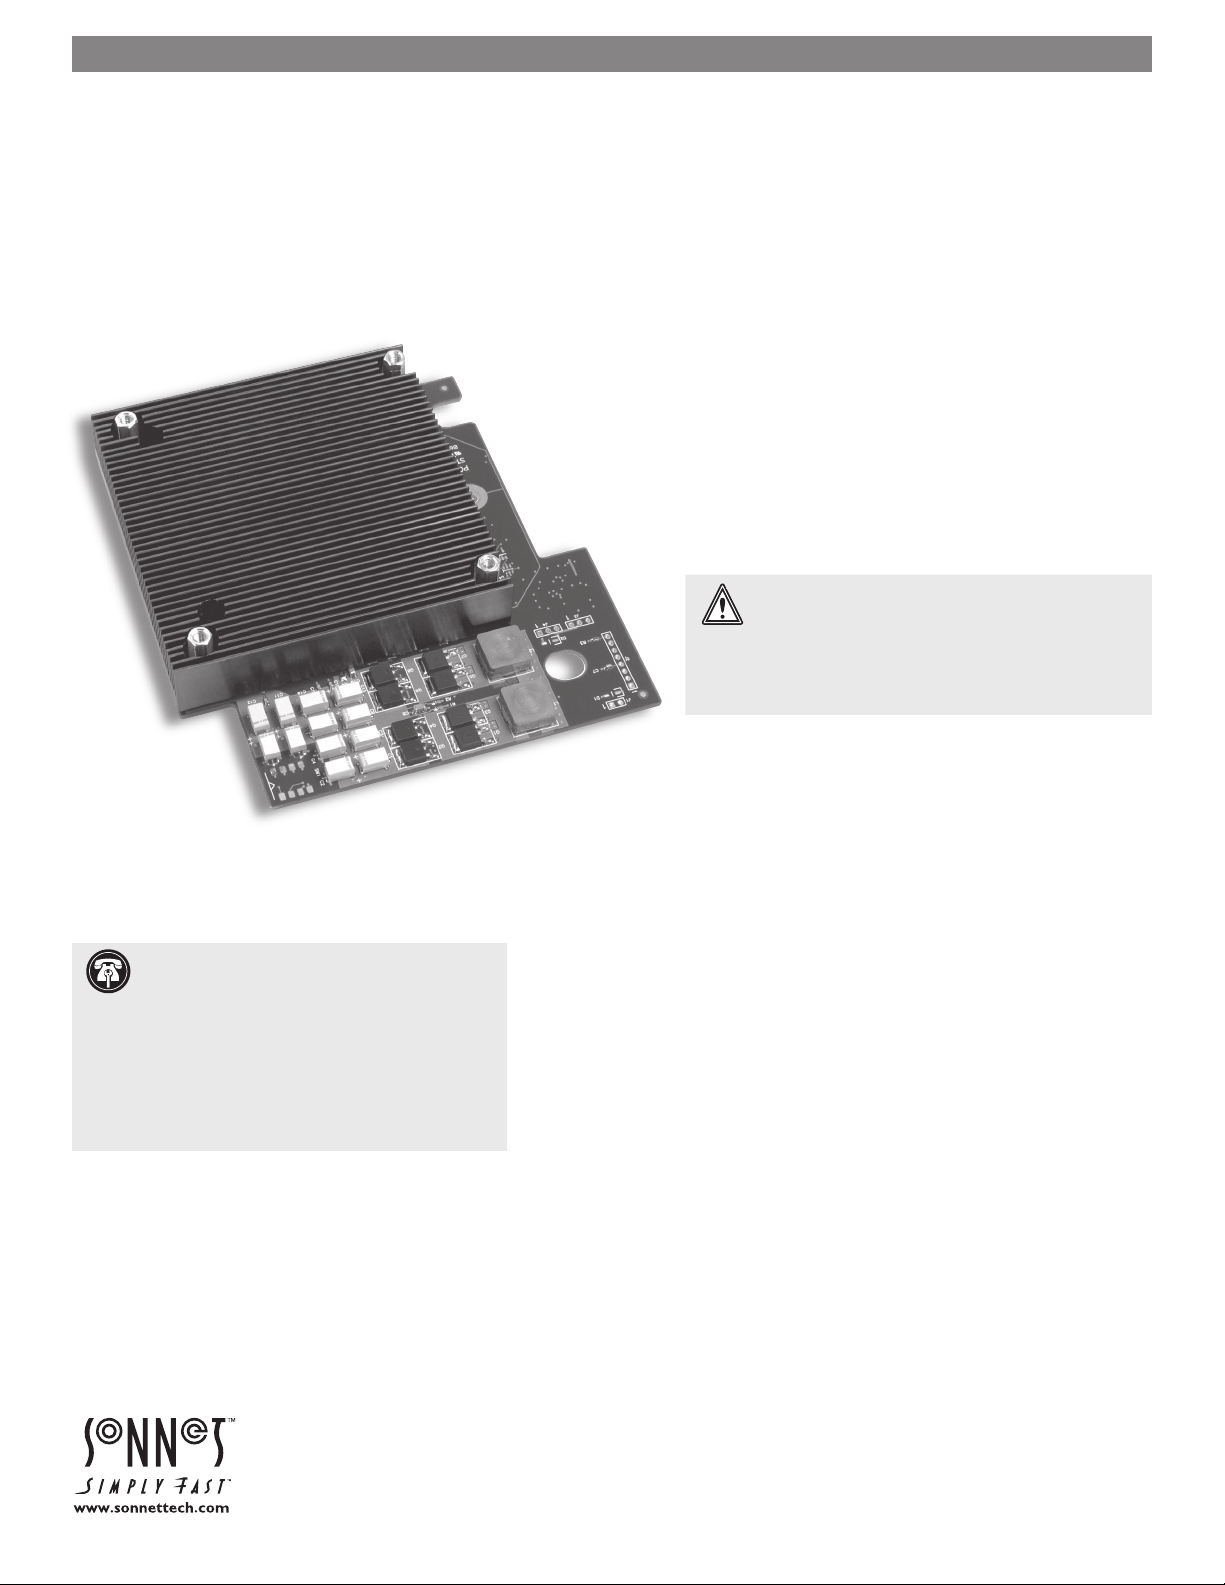
• Encore/MDX G4 Duet processor upgrade card*
• Heat sink cover for certain Xserve installations
• Mounting screws for Xserve installation
• Sonnet Installer CD
The following items are required for installation:
• Medium Phillips screwdriver
* Card shown without fan assembly.
Remember to register your product online at http://registration.sonnettech.com to be informed of future upgrades and product releases.
Software updates and links are available from the Sonnet web site at www.sonnettech.com. • Online support form available at http://supportform.sonnettech.com.
Sonnet Technologies Customer Service hours are Mon.-Fri., 8 a.m.–4 p.m. Pacific Time • Customer Service Phone: 1-949-472-2772 • E-mail: support@sonnettech.com
Sonnet Technologies, Inc., Irvine, California USA • Tel: 1-949-587-3500 Fax: 1-949-457-6350
©2006 Sonnet Technologies, Inc. All rights reserved. Sonnet, the Sonnet logotype, Simply Fast, the Simply Fast logotype, Duet and Encore are trademarks of Sonnet Technologies, Inc. Macintosh, Mac, and Xserve are trademarks
of Apple Computer, Inc., registered in the United States and other countries. Other product names are trademarks of their respective owners. Product specifications subject to change without notice. Printed in the USA.
QS-XG4D-E-A-111506
Page 2

This page left intentionally blank.
Page 3

Install Software… FIRST
A. Power Mac G4 (MDD) Users ONLY—Verify and Update
Power Mac Firmware (if Necessary)
If your computer is a Xserve G4 model, skip to section C on page 2.
Otherwise, before installing the Duet, you must ensure your system’s
firmware has been updated to version 4.4.8f2 or higher (e.g. “4.5.7f1”).
Please note, your system may need to connect to the Internet to perform
some of the steps.
1. OS X users: Open System Profiler (located within the Utilities
folder found in the Applications folder). Find the Boot ROM
information listed in the Hardware Overview pane (Figure 1).
If it reads “4.4.8f2” or higher (e.g. “4.5.7f1”), skip the rest of
the steps in this section and proceed to section C on page 2.
Otherwise, go to step 2.
OS 9 users: Select and open Apple System Profiler from the Apple
Menu. Click the triangle next to Production Information, and
find the Boot ROM version information (Figure 2). If it reads
“$0004.48f2” or higher (e.g. “4.5.7f1”), skip the rest of the steps
in this section and proceed to section C on page 2. Otherwise, go
to step 2.
2. OS X users: Log on to the Internet and type the following in your
browser window’s address bar:
http://docs.info.apple.com/article.html?artnum=120186
OS 9 users: Log on to the Internet and type the following in your
browser window’s address bar:
http://docs.info.apple.com/article.html?artnum=120171
Figure 1
firmware version
Figure 2
firmware
version
Software/Firmware Info
3. Click on the appropriate link to download the firmware.
4. Double-click the G4FWUpdate.dmg.bin or
G4FWUpdate4.4.8.smi file icon to mount the G4 Firmware
Update disk image. Double-click the disk image icon, and then
double-click the enclosed file to launch the updater application.
Print the read me file, and then following the directions on the
pages you printed, update the firmware on your system.
Mac OS X Alert: Due to technical issues that arise from
the operation of the latest G4 processors (used on this
Encore/ MDX G4 Duet card) in an older system, you must use
Mac OS X Version 10.3.5 or later to ensure compatibility; earlier
versions of Mac OS X lack the proper processor support.
B. ALL USERS—Install or Upgrade to Mac OS X Version
10.3.5 or Later, If Necessary
For Mac OS X compatibility, the Encore/MDX G4 Duet card
requires Mac OS X Version 10.3.5 or later. If you are upgrading to
Mac OS X as part of this installation, or need to update Mac OS X to
the latest version, do so now; complete the Mac OS upgrade, and then
restart your computer.
1
Page 4

Install Software… First!
C. MAC OS X USERS—Install Sonnet Firmware Patch
This section describes the installation of software required to
support this Encore/MDX G4 Duet in your computer. Please
note you MUST run the Sonnet Firmware Updater before
you install this upgrade card. If you do not run the updater,
your computer will not operate with the processor upgrade
installed.
1. Insert the Sonnet Installer CD into the CD-ROM drive.
Double-click the Sonnet Install CD icon. When the Sonnet
Install CD window appears, double-click the Mac OS X
ONLY folder.
2. Double-click the Sonnet Firmware Updater icon; Mac OS X’s
built-in Install program will launch. Follow the onscreen
directions to complete the installation of the Sonnet
Firmware Updater and Sonnet Firmware Remover applications to your Applications folder.
3. Shut down your computer.
Power Mac G4 (MDD) users: Press and hold the Power button
4.
until you hear a long tone; release the button when you hear
the tone.
Xserve G4 users: Press and hold the Power button until the
System Activity LEDs flash rapidly; release the button when
you see the LEDs flash.
5. Once the startup process is complete and you have logged
in (if necessary), go the Finder and select Go > Applications
from the Apple menu.
C. MAC OS 9 USERS—Sonnet Software Installation
This section describes the installation of software required to
support this Encore/MDX G4 Duet in your computer under
Mac OS 9.2 when it is a selectable OS in Startup Disk (in System
Preferences). Please note you MUST run the Crescendo/Encore
Installer before you install this upgrade card. If you do not
run the application, your computer will not operate with the
processor upgrade installed.
1. Start your computer under Mac OS 9.2, and then insert the
Sonnet Installer CD into its CD-ROM drive. Double-click the
Mac OS 7-9 ONLY, not Classic folder, and then double-click
the Crescendo/Encore Install icon. By default, with “Easy
Install” selected from the pop-up menu, the required software will be installed into the active System Folder on the
boot drive. If this is okay, click the Install button; otherwise,
select “Custom Install” from the pop-up menu for more
options or to select another drive to install the software.
The installer will install the appropriate software into your
computer’s System Folder.
2. If the installation was successful, a dialog box will appear;
the program will then install a firmware patch that enables
the use of the Duet in your computer. (If you ran the Sonnet
Firmware Updater application under Mac OS X, the patch was
already installed; skip to step 6.) The Sonnet firmware patch
may be uninstalled. However, doing so prevents your system
from working with the Duet. Read the instructions in the
dialog box, and click OK to shut down your computer.
3. Press and hold the Power button until you hear a long tone;
release the button when you hear the tone.
6. Locate Sonnet Firmware Updater, and then double-click its
icon to launch the application.
When the Sonnet Firmware Updater window appears, click OK.
7.
8. When the Authenticate window appears, enter the
Administrator password, and then click OK.
9. When the Wait message appears, DO NOT CLICK OK; just
wait. Clicking the OK button will cause the application to
quit. After the Wait message disappears, another message
will appear indicating that the ROM is being patched. Do
not turn the power off; this process may take several
minutes.
10. When the message stating that the ROM has been patched
appears, click OK. Shut down your computer; you may now
install the Encore/MDX G4 Duet processor upgrade card.
Support Note: After updating your system’s firmware
with the Sonnet firmware installer, you do not need to
install the other software located in the Mac OS X ONLY folder
on the Sonnet Installer CD; that software is used for other processor upgrade cards by Sonnet.
4. After releasing the Power button, a progress bar will appear
at the bottom of your display screen. Do not do anything
with your computer until after it restarts.
5. If an error occurred, a message will appear; you must rerun
the installer. Otherwise, once the firmware update is complete and your system restarts a dialog box will appear, stating it is okay to install the Duet; click OK.
6. After your system shuts down, proceed to the hardware
installation steps.
Support Note: After updating your system’s firmware
with the Sonnet firmware installer, you do not need to
install the other software located in the Mac OS X ONLY folder
on the Sonnet Installer CD; that software is used for other processor upgrade cards by Sonnet.
2
Page 5
Installation—Mirrored Drive Doors Models
This section covers the installation of the Encore/MDX G4 Duet into
all Power Mac G4 Mirrored Drive Doors (MDD) models. If you are
installing this product into an Xserve server with a tray load CD mechanism, skip to page 7. If you are installing this product into an Xserve
with a slot load CD mechanism, skip to page 10.
WARNING: When handling computer products, take care to
prevent components from being damaged by static electricity;
avoid working in carpeted areas. Handle processor upgrade cards only
by their edges and avoid touching connector traces and component
pins. Also, avoid touching the logic board and any of its components.
Shut Down and Open Computer
1. Shut down your Power Mac. If the computer has been on for a
while, allow a few minutes for it to completely cool before beginning the installation.
2. If you need to move the computer to a different area where you
can work freely, disconnect any connected cables, move the computer, then reconnect the power cord to the computer and an
electrical outlet.
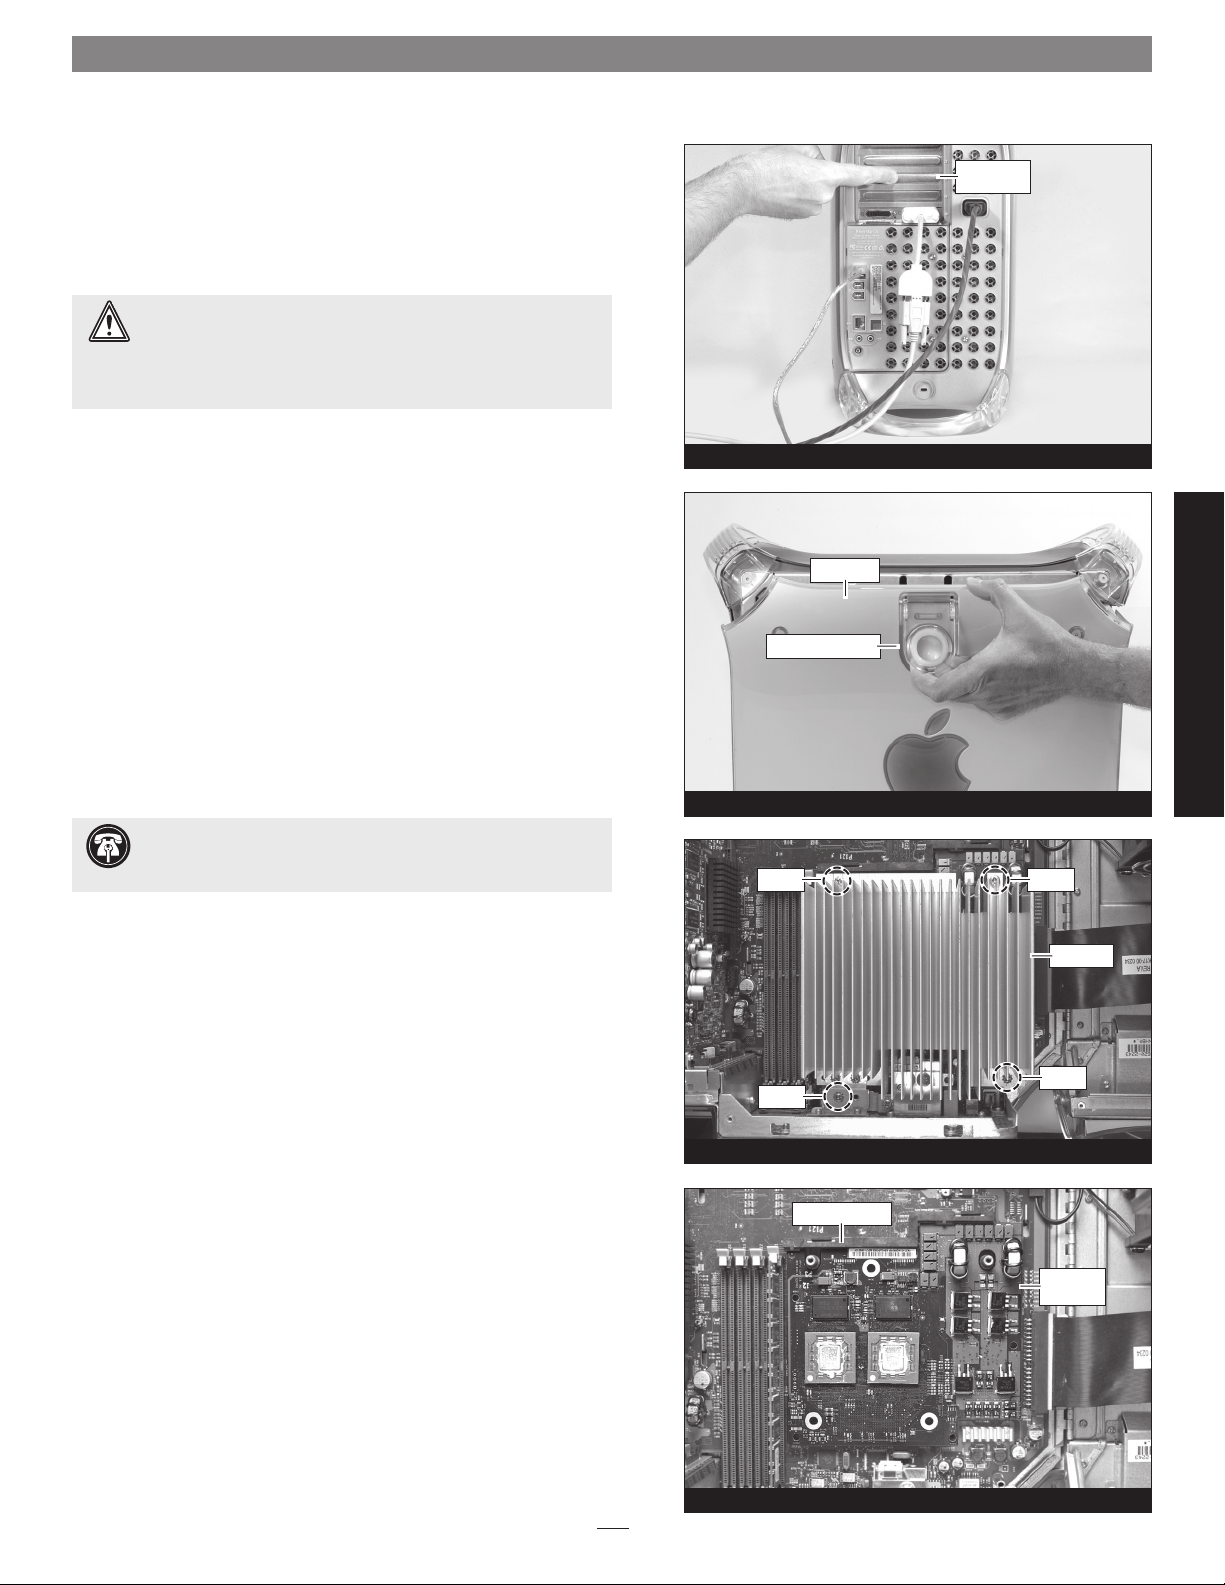
3. Touch a port access cover on the back of the computer (Figure 3)
to discharge any potentially damaging static electricity.
side panel
raise release latch
Figure 3
port access
cover
4. Disconnect the power cord, and if necessary, any remaining
cables, from the computer.
Support Note: To avoid generating a static charge in your
body, do not walk around the room until after you finish
installing the Encore card and close the computer.
5. With the right side of the case facing you, open your Power Mac
by lifting the release latch and lowering the side panel away from
the computer’s case (Figure 4).
Remove Heat Sink
1. Locate the processor heat sink on the logic board (Figure 5);
your heat sink may appear different from what is pictured.
2. Locate the four screws securing the processor heat sink in place
(Figure 5)
the screwdriver, carefully remove the screws and set them aside
for use in installing the Duet card.
3. Lift the heat sink straight up and out of the computer, taking care
not to touch the DIMMs. Set aside the heat sink with its top face
down.
4. Note how the edge of the processor card is inserted into the sup-
port bracket (Figure 6).
. Using caution to avoid touching the logic board with
Figure 4
screw screw
screw
screw
Figure 5
support bracket
processor
Power Mac G4 (MDD) Models
heat sink
card
Figure 6
3
Page 6

Installation—Mirrored Drive Doors Models
Remove Processor Card
Taking care to not touch any components in the computer, grasp
the support bracket and the edge of the processor card opposite the
bracket as shown (Figure 7). Using your thumbs, carefully pull up on
the edge of the processor card to separate it from the logic board, and
then take it out the computer. Set the card aside.
Install Encore/MDX G4 Duet Processor Upgrade Card
1. Remove the Encore/MDX G4 Duet processor upgrade card
from its anti-static package; make sure to handle the card by its
edges (Figure 8). Note: The DIP switches on the top of the card
serve no purpose when the Duet is installed into Power Mac G4
(MDD) computers; moving the switches has no effect on the
card’s operation.
support bracket
processor card
Figure 7
Encore/MDX
G4 Duet card
2. Carefully remove the cap covering the connector on the bottom
of the Duet card (Figure 9), and then place the cap on the origi-
nal processor card’s connector.
3. Place the processor card you removed from the computer into
the anti-static package, and then store it and the heat sink in a
safe place.
Support Note: Sonnet recommends that you keep the origi-
nal processor card and heat sink in case you ever need them.
4. Note the location of the processor card connector on the logic
board, and the spring clips on the support bracket (Figure 10).
support bracket
protective cap
Duet card
spring clip
Figure 8
Figure 9
spring clip
anti-static
package
connector
Figure 10
4
Page 7

Installation—Mirrored Drive Doors Models
5. Holding the Duet by its bracket, insert the edge of the card into
the support bracket between the spring clips and plastic tabs, and
lay the card down (Figure 11).
6. Verify the screw holes on the Duet’s bracket are aligned with
the mounting posts and bracket on the logic board, and confirm
the connectors on the Duet and the logic board are engaged
(Figure 12)
.
support bracket
Duet card
tab
tab
Figure 11
bracket
bracket
WARNING: The connectors are very fragile components.
Make sure the connectors on the logic board and Duet are
aligned before applying pressure to the heat sink.
7. Gently press straight down on the heat sink as shown
(Figure 13)
until the connectors snap together. Verify the connectors are completely coupled by gently pulling up on the edges
of the Duet board; the board should remain firmly in place.
8. Verify again that the screw holes on the Duet’s bracket are
aligned with the mounting posts and bracket on the logic board,
and if necessary, move the Duet’s bracket to fix the alignment.
9. Using the four screws you removed earlier, secure the Duet to the
logic board; do not overtighten the screws (Figure 14).
WARNING: When your computer is operating, the Duet’s heat
sink will become VERY hot to the touch; take care to not touch
the heat sink, or you may get burned.
side panel
Figure 12
heat sink
Figure 13
Power Mac G4 (MDD) Models
screwscrew
bracket
screw
screw
Figure 14
5
Page 8

Installation—Mirrored Drive Doors Models
Close Computer
1. Raise the side panel back into place (Figure 15).
2. Return the computer to your computing area if necessary, and
reconnect the power cord and peripheral cables to the computer.
Turn On Computer
Turn on your Power Mac; your accelerated machine should boot
normally.
side panel
Figure 15
6
Page 9

Installation—Xserve G4 with Tray Load CD-ROM
This section covers the installation of the Encore/MDX G4 Duet into
an Xserve G4 server with a tray load CD-ROM mechanism. These
models can be identified by the CD tray door on the front right corner of the server. If you are installing this product into an Xserve with
a slot load CD mechanism, go to page 10. If you are installing this
product into a Power Mac G4 Mirrored Drive Doors (MDD) model, go
back to page 3.
WARNING: When handling computer products, take care to
prevent components from being damaged by static electricity;
avoid working in carpeted areas. Handle processor upgrade cards only
by their edges and avoid touching connector traces and component
pins. Also, avoid touching the logic board and any of its components.
Shut Down and Remove Server from its Rack
1. Shut down your Xserve. If the server has been on for a while,
allow a few minutes for it to completely cool before beginning
the installation.
2. Disconnect any connected cables and remove the Xserve from
its rack. Place the Xserve on a flat, level surface, and then reconnect the power cord to the server and an electrical outlet.
release tab
(push forward)
screw
screw
shroud
Figure 16
screw
heat sink
3. Touch the metal enclosure to discharge any potential damaging
static electricity.
4. Disconnect the power cord from the Xserve.
Support Note: To avoid generating a static charge in your
body, do not walk around the room until after you finish
installing the Encore card and close the computer.
Remove Processor Card
1. Remove the plastic shroud covering the processor card’s heat sink
(Figure 16).
2. Remove the three screws securing the processor card heat sink to
the logic board (Figure 17).
3. Lift the heat sink off the processor card and set it aside
(Figure 18)
4. Grasping its edges, gently lift the side of the processor card opposite the fan to separate it from the logic board, and then carefully
lift it straight up and away (Figure 19). Set the card aside.
.
Figure 17
Figure 18
heat sink
processor card
Xserve w/Tray Load CD-ROM
processor card
Figure 19
7
Page 10

Installation—Xserve G4 with Tray Load CD-ROM
Prepare Encore/MDX G4 Duet for Installation
Before you install the Duet processor upgrade into your Xserve, you
must remove the attached fan assembly; they are not used when this
upgrade is installed in an Xserve.
1. Remove the Encore/MDX G4 Duet processor upgrade card from
its anti-static package; make sure to handle the card by its edges
(Figure 20)
2. Carefully remove the cap covering the connector on the bottom
of the Duet card (Figure 21), and then place the cap on the origi-
nal processor card’s connector.
.
Encore/MDX
G4 Duet card
Figure 20
anti-static
package
3. Place the processor card you removed from the computer into
the anti-static package, and then store it, the original heat sink,
and the screws you removed, in a safe place.
Support Note: Sonnet recommends that you keep the original
processor card, heat sink, and screws in case you ever need them.
4. Place the Duet card on a flat, level surface, with the bottom of
the card resting on the piece of foam that was in the anti-static
package. Remove the four screws securing the fan assembly to
the top of the card and set them aside (Figure 22).
5. Carefully disconnect the fan connector from the Duet card, and
then remove the fan assembly
(Figure 22)
.
WARNING: Do not change the position of the DIP switches
on the top edge of the Duet card; they must be left in the
Up position. If they are set to the down position, your Xserve will not
boot with the Duet card installed.
protective cap
connector
Duet card
screw
Figure 21
screw
Figure 22
screw
screw
Duet card
Install Encore/MDX G4 Duet Processor Upgrade Card
1. Align the connector on the bottom of the Duet card with the
connector on the logic board, and then set the card down on
top of the three threaded posts (Figure 23).
Duet card
Figure 23
8
Page 11

Installation—Xserve G4 with Tray Load CD-ROM
2. Verify the screw holes on the Duet card are aligned with the
mounting posts on the logic board, and confirm the connectors
on the Duet and the logic board are engaged (Figure 24).
WARNING: The connectors are very fragile components.
Make sure the connectors on the logic board and Duet are
aligned before applying pressure to the heat sink.
3. Gently press straight down on the Duet’s heat sink as shown
(Figure 25)
nectors are completely coupled by gently pulling up on the edges
of the Duet card; the board should remain firmly in place.
until the connectors snap together. Verify the con-
Duet card
Figure 24
heat sink
4. Using the three screws provided in the Duet package, secure the
Duet card snugly to the logic board; do not overtighten the
screws (Figure 26).
5. Replace the plastic shroud on top of the Duet card (Figure 27).
Return Server to Rack
1. Slide the Xserve back into its rack, making sure to tighten the
front thumbscrews to secure it in place.
Duet card
screw
screw
Duet card
Figure 25
Figure 26
screw
Xserve w/Tray Load CD-ROM
shroud
2. Reconnect the power cord and other cables to the server.
Turn On Server
Turn on your Xserve; your accelerated machine should boot normally.
Figure 27
9
Page 12

Installation—Xserve G4 (Slot Load) Models
This section covers the installation of the Encore/MDX G4 Duet into
an Xserve G4 (Slot Load) server. These models can be identified by the
CD slot on the front right corner of the server. If you are installing this
product into an Xserve with a tray load CD mechanism, go back to
page 7. If you are installing this product into a Power Mac G4 Mirrored
Drive Doors (MDD) model, go back to page 3.
screw
screw
WARNING: When handling computer products, take care to
prevent components from being damaged by static electricity;
avoid working in carpeted areas. Handle processor upgrade cards only
by their edges and avoid touching connector traces and component
pins. Also, avoid touching the logic board and any of its components.
Shut Down and Remove Server from its Rack
1. Shut down your Xserve. If the server has been on for a while,
allow a few minutes for it to completely cool before beginning
the installation.
2. Disconnect any connected cables and remove the Xserve from
its rack. Place the Xserve on a flat, level surface, and then reconnect the power cord to the server and an electrical outlet.
3. Touch the metal enclosure to discharge any potential damaging
static electricity.
4. Disconnect the power cord from the Xserve.
Support Note: To avoid generating a static charge in your
body, do not walk around the room until after you finish
installing the Encore card and close the computer.
Remove Processor Card Assembly
1. Remove the three screws securing the processor card assembly to
the logic board (Figure 28).
screw
Figure 28
Figure 29
Encore/MDX
G4 Duet card
processor card
assembly
processor card
assembly
2. Grasping its edges, gently lift the side of the processor card
assembly opposite the fan to separate it from the logic board, and
then carefully lift it straight up and away (Figure 29). Set the
assembly aside.
Prepare Encore/MDX G4 Duet for Installation
Before you install the Duet processor upgrade into your Xserve, you
must replace the attached fan assembly with the included heat sink
cover, and set the DIP switches on the top surface of the card to
ensure full system performance.
1. Remove the Encore/MDX G4 Duet processor upgrade card from
its anti-static package; make sure to handle the card by its edges
(Figure 30)
2. Carefully remove the cap covering the connector on the bottom
of the Duet card (Figure 31), and then place the cap on the origi-
nal processor card’s connector.
.
anti-static
package
Figure 30
protective cap
Duet card
Figure 31
10
Page 13

Installation—Xserve G4 (Slot Load) Models
3. Place the processor card you removed from the computer into
the anti-static package, and then store it and the original heat
sink in a safe place.
Support Note: Sonnet recommends that you keep the origi-
nal processor card assembly and the screws you removed in
case you ever need them.
screw
fan assembly
screw
4. Place the Duet card on a flat, level surface, with the bottom of
the card resting on the piece of foam that was in the anti-static
package. Remove the four screws securing the fan assembly to
the top of the card and set them aside (Figure 32).
5.
Carefully disconnect the fan connector from the Duet card, and
then remove the fan assembly (Figure 32).
6. Remove the included heat sink cover from its bag. Using the two
large holes in the cover and two holes in the Duet’s heat sink for
reference, place the cover on the heat sink (Figure 33).
7. Using the four screws you removed previously, attach the heat
sink cover to the heat sink (Figure 33).
WARNING: Be sure to change the position of the DIP
switches on the top edge of the Duet card as instructed
below; if they are set to the wrong position, the system bus will not oper-
ate at full speed.
connector
screw
screw
screw
screw
Figure 32
heat sink cover
screw
screw
Figure 33
8. Locate the DIP switches on the top surface of the Duet card
(Figure 34). Push both switches to the down position.
Install Encore/MDX G4 Duet Processor Upgrade Card
1. Align the connector on the bottom of the Duet card with the
connector on the logic board, and then set the card down on
top of the three threaded posts (Figure 35).
DIP switches
(push DOWN)
Figure 34
Figure 35
Duet card
Xserve G4 (Slot Load)
11
Page 14

Installation—Xserve G4 (Slot Load) Models
2. Verify the screw holes on the Duet card are aligned with the
mounting posts on the logic board, and confirm the connectors
on the Duet and the logic board are engaged (Figure 36).
WARNING: The connectors are very fragile components.
Make sure the connectors on the logic board and Duet are
aligned before applying pressure to the heat sink.
3. Gently press straight down on the Duet’s heat sink cover as
shown (Figure 37) until the connectors snap together. Verify
the connectors are completely coupled by gently pulling up on
the edges of the Duet board; the board should remain firmly in
place.
Duet card
Figure 36
heat sink cover
4. Verify the long piece of foam attached to the heat sink cover is
positioned as shown (Figure 37).
5. Using the three screws provided in the Duet package, secure the
Duet card snugly to the logic board; do not overtighten the
screws (Figure 38).
Return Server to Rack
1. Slide the Xserve back into its rack, making sure to tighten the
front thumbscrews to secure it in place.
2. Reconnect the power cord and other cables to the server.
Turn On Server
Turn on your Xserve; your accelerated machine should boot normally.
foam
screw
screw
Figure 37
screw
Duet card
Figure 38
12
 Loading...