

Page 1
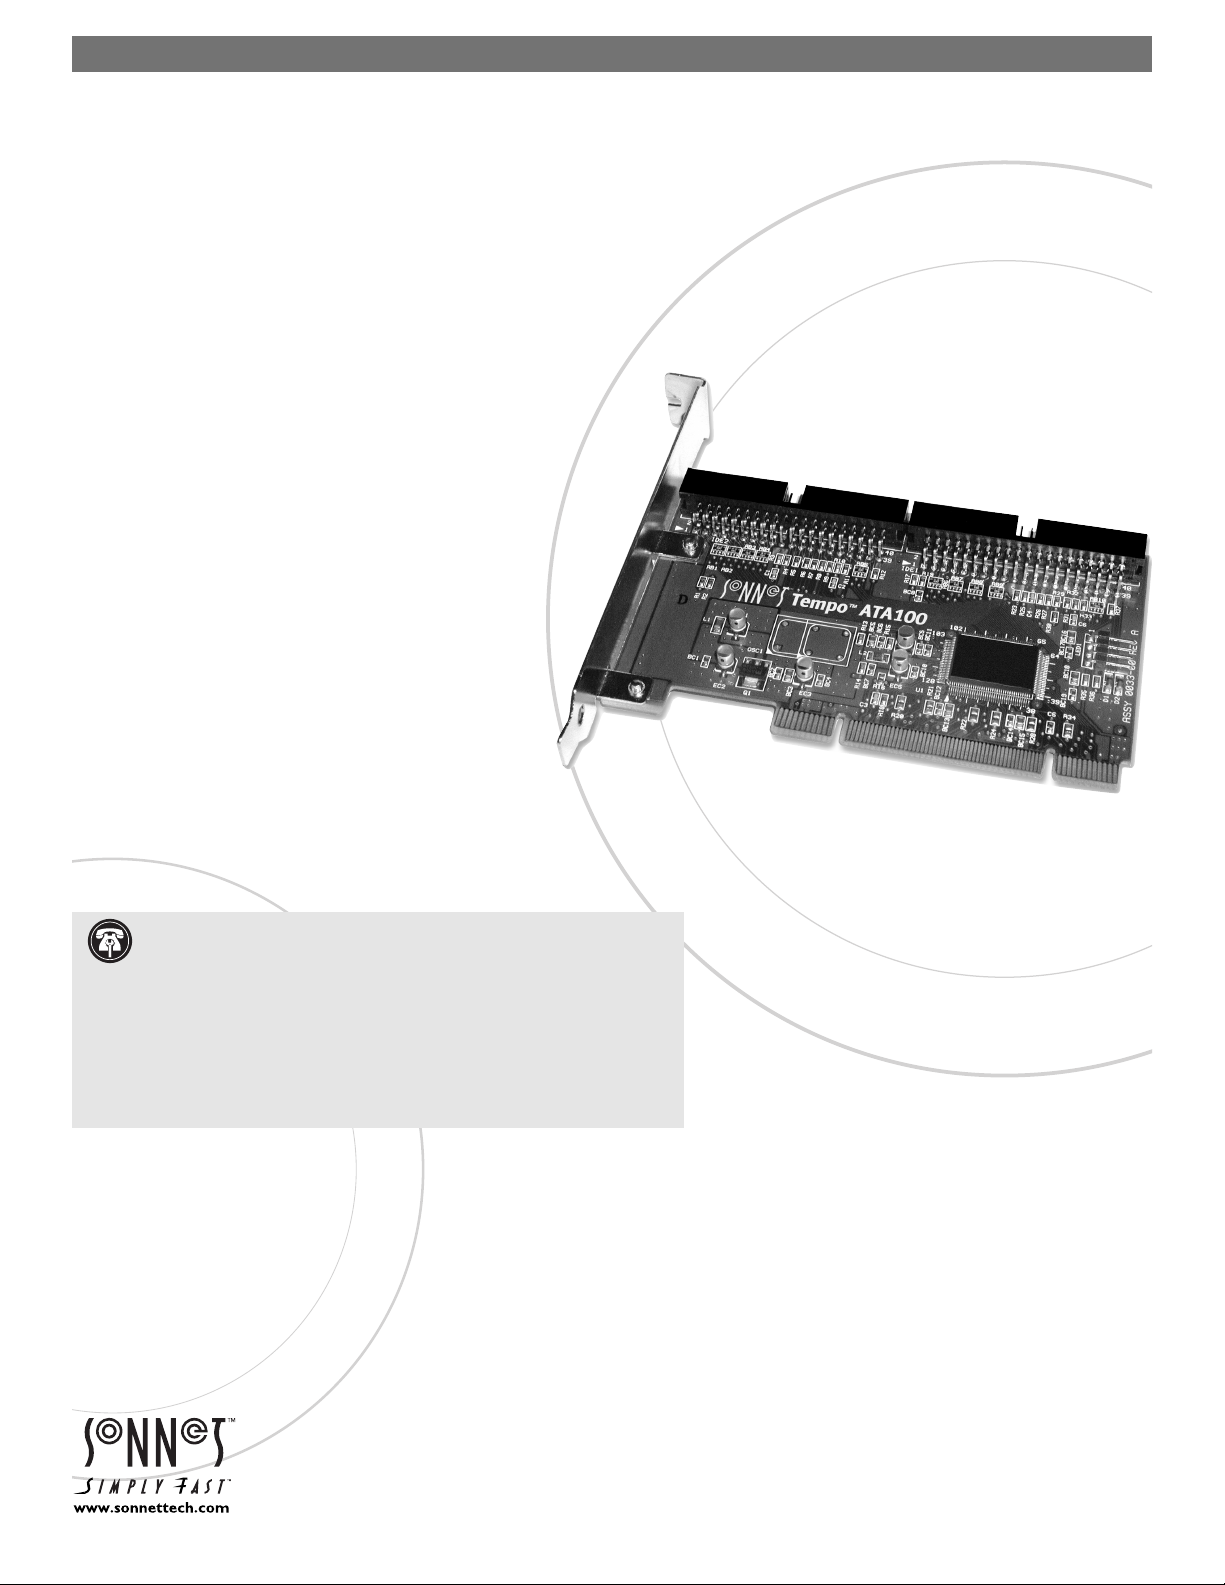
O
™
100
TEMP
ATA
Macintosh® PCI Host Adapter Card
Quick Start Guide for Tempo ATA100
You Should Have
The following items should be included in your product package:
• One Tempo ATA100 Macintosh PCI Host Adapter
• One Ultra ATA Cable (supporting two internal hard drives)
• Eight screws (for mounting hard drives)
• One Tempo AV Tool Diskette
The following items may be required for installation:
• Medium Phillips screwdriver
• Small flat blade screwdriver
• Needle nose pliers
• Drive mounting brackets/carriers or drive mounting sleds (sold
separately)
• One additional Ultra ATA Cable (sold separately)
• One or more power cable Y-adapters (sold separately)
System Requirements
The Tempo ATA100 requires the following in order to operate
in your system:
• One available PCI slot
• One or more hard drives (depending on confi guration)
• One or more available hard drive bays (depending on confi guration)
®
• Mac
OS 8.0 through OS X Version 10.2.x
Support Notes: We recommend that you make a backup of important
information on your system’s current hard drive prior to installing new
hardware or software.
When handling computer products, you must take care to prevent components
from being damaged by static electricity. Before opening your computer or
removing parts from their packages, always ground yourself first by touching
a metal part of the computer, such as a port access cover, and work in an area
free of static electricity; avoid carpeted areas. Handle all electronic components
only by their edges, and avoid touching connector traces and component pins.
Remember to register your product online at http://registration.sonnettech.com to be informed of future upgrades and product releases.
Software updates and links are available from the Sonnet web site at www.sonnettech.com. • Online support form available at http://supportform.sonnettech.com.
Sonnet Technologies Customer Service hours are Mon.-Fri., 7 a.m.–5 p.m. Pacific Time • Customer Service Phone: 1-949-472-2772 • E-mail: support@sonnettech.com
Sonnet Technologies, Inc., Irvine, California USA • Tel: 1-949-587-3500 Fax: 1-949-457-6350
©2001 Sonnet Technologies, Inc. Revised 2003. All rights reserved. Sonnet, the Sonnet logotype, Simply Fast, the Simply Fast logotype, and Tempo are trademarks of Sonnet Technologies, Inc. Tempo ATA100 includes technology by FirmTek, LLC. Macintosh and Mac are trademarks of Apple Computer, Inc., registered in the United States and other countries. Other product names are trademarks of their respective owners. Product specifications
subject to change without notice. Printed in the USA. QS-TAT-100-E-071503
Page 2
jump
Quick Start Guide for Tempo ATA100
Support Note:
the drive expansion bays in certain computer models. We recommend
you first consult your computer’s user manual. If you feel you are unable to
install the computer hardware, contact a qualified technician.
Technical knowledge may be required to gain access to
Installation Preparation
Prior to installing the Tempo ATA100 and hard drives into your system, you
should familiarize yourself with the parts to be installed. We also strongly
recommend that you read the sections in your computer’s user manual that
address hard drive and PCI card installation.
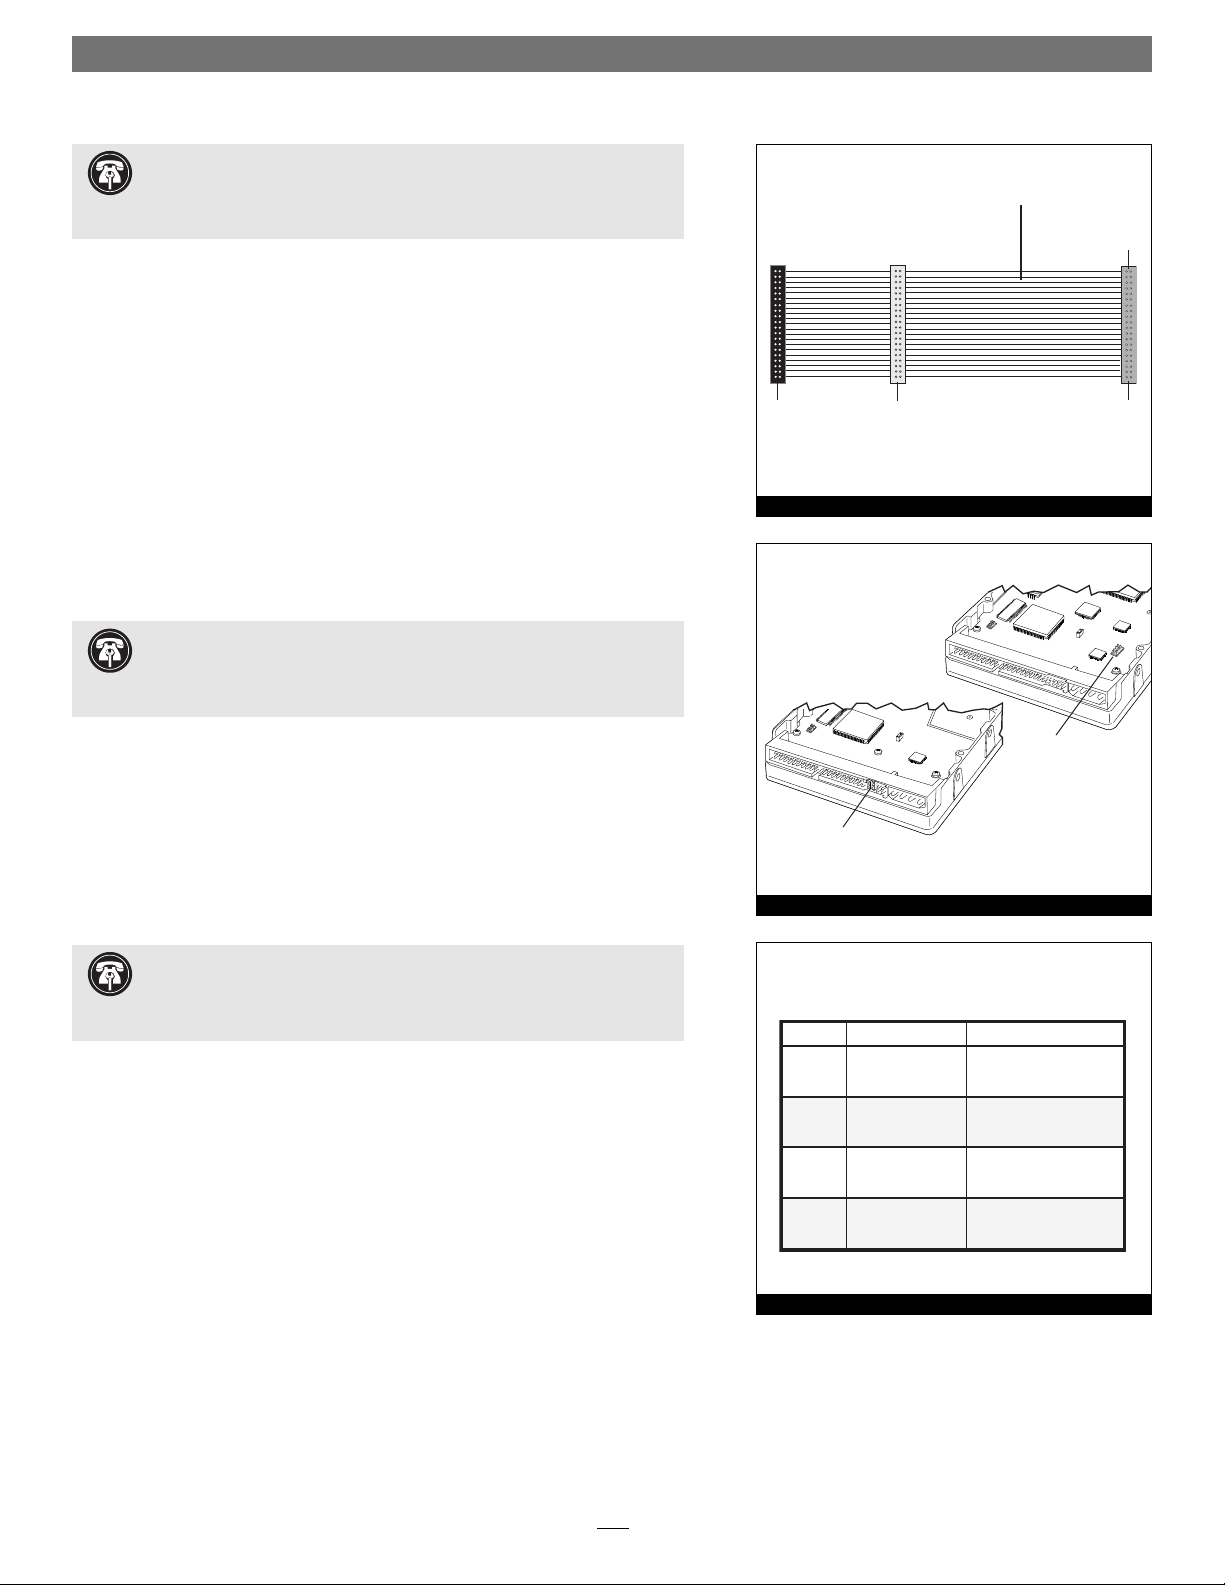
1. Identify the connectors on the included Ultra ATA cable as shown in
Figure 1; the host connector plugs into the Tempo ATA100 controller card,
while the master and slave connectors plug into the hard drives.
2. Remove the hard drive from its packaging.
3. Locate the jumper block on your hard drive. Figure 2 shows the two
most common jumper block locations.
Support Note: Most hard drives are factory preset for use as a single
or master drive. To change the setting, you will need to reconfigure the
hard drives’ jumpers. Be sure the jumpers are configured properly, otherwise,
your computer may not boot, or your new drives may not be recognized.
Hardware Installation Steps
This section covers the installation of the Tempo ATA100, and the confi guration and installation of one or more hard drives into your system.
master
connector
(black)
40-pin/80-wire Ultra ATA cable
slave
connector
(gray)
Figure 1
connects to
Tempo ATA100
host
connector
(blue)
er block
1. Shut down the computer.
2. Open your computer to access the expansion card area (PCI slots) and
drive bay(s); refer to your computer’s user manual for specifi c information.
. Support Note: Refer to the hard drive user’s manual for jumper
setting information specific to your drives. Alternately, you may find
jumper setting information printed on your hard drives’ labels. Make sure the
drives are oriented the same way as the illustration before moving jumpers.
3. Confi gure your hard drives’ jumpers as follows:
• When installing one drive, you must set its jumpers to the single set-
ting when available, or the master setting when not (Figure 3). When
connecting two drives to the supplied Ultra ATA cable, you must set the
jumpers on one drive to the master setting, and to the slave setting on
the other (Figure 3).
• When installing two drives connected to two Ultra ATA cables, you
must set the jumpers on each drive to the single setting when available,
or the master setting when not (Figure 3). When connecting three or
four drives to two Ultra ATA cables, you must set the jumpers on two
drives to the master setting, and to the slave setting on the other drive(s)
(Figure 3).
jumper block
Figure 2
Drive Jumper Settings
One Cable Two Cables
One
Drive
Two
Drives
Three
Drives
Four
Drives
single
(or master)
master, slave
—
—
Figure 3
master (or single),
master (or single)
master, master,
master, master,
slave, slave
—
slave
4. Install the hard drives into expansion bays. (Depending on your comput-
er model, drive mounting brackets/carriers or drive mounting sleds may be
required to install your hard drives. Refer to your computer’s user manual.)
2
Page 3

Quick Start Guide for Tempo ATA100
5. Using only the supplied Ultra ATA cable, you may connect one or two
drives. If you are connecting two or more drives to two Ultra ATA cables,
skip to the next step; otherwise connect the drives as follows:
• When connecting one drive, plug in the Ultra ATA cable’s master (black)
connector to it (Figure 4).
• When connecting two drives, connect the Ultra ATA cable’s master
(black) connector to the drive with jumpers set in the master setting; connect the slave (gray) connector to the drive with jumpers confi gured in
the slave setting (Figure 4).
6. Using two Ultra ATA cables, you may connect two, three, or four drives;
connect them as follows:
• When connecting two drives, plug the Ultra ATA cables’ master (black)
connectors into the drives (Figure 5).
• When connecting three or four drives, connect the Ultra ATA cables’
master (black) connectors to the drives with jumpers set in the master
setting; connect the slave (gray) connectors to the drives with jumpers set
in the slave setting (Figure 5).
7. Locate the 4-pin power connector plugged into your computer’s exist-
ing hard drive. You should fi nd at least one extra power connector near
the existing drive; if you have installed only one new drive, plug the extra
power connector into it. If you have installed more than one new drive,
or there are no additional power connectors, you must use power cable Yadapters (sold separately). Ver ify the connectors are plugged in securely.
8. Remove the Tempo ATA100 card from its packaging.
9. Locate an available PCI slot inside your computer and remove its port
access cover, if present, from the rear of the computer.
Tempo ATA100 Macintosh
PCI Host Adapter
Ultra ATA cable
slave
- jumpers
single or master*
*jumpers must be set to master setting when two drives connected
Figure 4
Tempo ATA100 Macintosh
PCI Host Adapter
Ultra ATA cable
slave
- jumpers
single (or master*)
*jumpers must be set to master setting when two drives connected to one cable
Figure 5
Ultra ATA cable
slave
single (or master*)
10. Install the Tempo card into the PCI slot; make sure the card is fi rmly
seated.
Support Note: Power Macintosh 7200, 7300, 7500, 7600 and G3
Desktop users must remove the access panel on the main chassis to
route the Ultra ATA cables from the drives to the Tempo card. You may need
tools to perform this procedure. To remove the access panel, first unlock and
tilt up the internal assembly; remember to lower the assembly support stand.
Next, firmly twist the top edge of the panel forward toward the power supply,
then lift the panel out (Figure 6). Save the panel in case you ever need to use
it again.
11. Route the Ultra ATA cable(s) to the Tempo ATA100 card; avoid the proces-
sor’s heat sink and make sure the cables will not get crushed or pinched by
any part of the case when the computer is reassembled.
Support Note: If you disconnect your computer’s original internal SCSI
hard disk drive when you install the Tempo ATA100 and one or more
drives, you must terminate the SCSI chain properly; installation of a SCSI
terminator connector may be required. Failure to properly terminate any SCSI
chain may result in system freezes and errors. Consult your computer’s user guide
or a qualified technician for more information.
3
access cover
power supply
support stand
Figure 6
Page 4

Quick Start Guide for Tempo ATA100
12. Attach the Ultra ATA cables’ host (blue) connectors to the Te mp o ATA100
card.
13. Check the cable connections; make sure all cables are connected
securely to the Tempo ATA100 and the hard drives.
14. Close the computer and carefully replace its cover; be very careful not to
crimp the cables.
WARNING: Hard drives attached to the Tempo ATA100 will not mount
(appear on the desktop) until they have been formatted; this includes
drives with data on them, previously used in other computers. Please be aware
that formatting a drive erases any data present.
Drive Formatting—Mac OS 8.0 through OS 9.x
This section describes the process of formatting (initializing) hard drives connected to the Tempo ATA100 using Apple Drive Setup under Mac OS 8.0
through Mac OS 9.x. The Drive Setup application is installed during the Mac
OS installation process and is usually located in the Utilities folder on the hard
drive containing your active System Folder. If you wish to format your drives
with Disk Utility under Mac OS X, please skip to the next section.
1. Turn on your computer.
2. Open Drive Setup (Figure 7).
Support Note: IDE hard drives attached to the Tempo ATA100 will
register as SCSI devices to the computer under Mac OS versions prior to
OS X. For example, in Figure 7 the newly installed hard drive appears as <not
initialized> under Volume Name(s) and SCSI under Type.
3. At this point, you may optionally choose to partition each drive to cre-
ate smaller “virtual” drives to store and retrieve data faster and more effi ciently; in the Drive Setup menu bar, select Functions: Volume Settings…
Partition, and set up the partitions. When ready, select the drive listed as
<not initialized>, then click Initialize… to format each of the unmounted
drives (Figure 7). For drives larger than 2 GB, you should format them as
Mac OS Extended to take full advantage of their storage capacity.
Figure 7
Figure 8
4. Name each drive or volume once it has been initialized; each volume will
appear on the desktop as a single “virtual” drive (Figure 8). You can now
use your drive(s).
Drive Formatting—Mac OS X
This section describes the process of formatting (initializing) hard drives connected to the Tempo ATA100 using Disk Utility under Mac OS X Version
10.1; the process under Version 10.2 is the same. The drive formatting utility
is installed during Mac OS X installation and is located in the Utilities folder
(within the Applications folder) on your OS X volume.
1. Turn on your computer.
2. During the boot process under Mac OS X, you may see an information
window appear stating “You have inserted a disk containing no volumes
that Mac OS X can read.” If this message appears, click the Initialize… button to launch Disk Utility (Figure 9).
4
Figure 9
Page 5

Quick Start Guide for Tempo ATA100
3. If you have not already done so, open Disk Utility (Figure 10). Note that
all attached drives appear in the Information window, regardless of being
formatted or not.
Support Note: IDE hard drives attached to the Tempo ATA100 will reg-
ister as ATA devices to the computer under Mac OS X. For example, in
Figure 10, the Connection Bus for a newly installed hard drive is listed as ATA.
4. Select the drive you want to format by single clicking the drive symbol or
the “name” of the drive (Figure 10). In the Information window, the drive
capacity and Connection ID (Master or Slave) is listed.
5. Click on the Partition tab (Figure 11). When the Partition window
appears, click on the drop down menu beneath “Volume Scheme:” and
select a number of partitions for the volume; you may optionally choose
to partition each drive to create two or more smaller “virtual” drives to
store and retrieve data faster and more effi ciently. For drives larger than 2
GB, you should format them as Mac OS Extended to take full advantage
of their storage capacity. Click OK (or Partition if you are using Mac OS X
Version 10.2) .
Figure 10
6. Name each volume; after formatting, each will appear in the Finder
window as a drive. Once you have made your name and partition choices,
click OK (Figure 12).
7. When the Warning window appears, click the Partition button
(Figure 12). If necessary, repeat steps 4–6 to partition other drives connected to the Tempo ATA100. When partitioning and formatting are complete,
close the Disk Utility application; you can now use your drive(s).
Figure 11
Figure 12
5
Page 6

Quick Start Guide for Tempo ATA100
Support Note: The Tempo AV Tool Control panel operates only
under Mac OS 8.0 through OS 9.x, and only in the following com-
puters: Power Macintosh 7200, 7215, 7220, 7300, 7500, 7600, 8200, 8500,
8515, 8600, 9500, 9515, and 9600, Workgroup Server 7250, 7350, 8550, and
9650, PowerCenter, PowerCenter Pro, PowerCurve, PowerTower, PowerTower
Pro, PowerWave, UMAX J700, and S900. Attempted use of the Tempo AV Tool
Control Panel in an unsupported system will result in an error message.
Install Tempo AV Tool Control Panel
The Tempo AV control panel enables you to select an optimized setting for the
audio or video playback from a drive connected to the Tempo ATA100 when
you encounter problems.
1. Insert the Tempo AV Tool diskette into your computer’s fl oppy disk drive.
2. Click on and drag the Tempo AV Tool Control Panel to your active
System Folder, and then release the mouse button. When the dialog box
appears, click OK; the Tempo AV Tool Control Panel will be copied from
the diskette and placed in the Control Panels folder.
Use the Tempo AV Tool Control Panel
Only use the Tempo AV Tool if you are experiencing problems with audio or
video playback from a drive connected to the Tempo ATA100. The Tempo AV
Tool resolves playback issues by slowing down the data transfer from drives
connected to the Tempo ATA100 to better match your legacy Macintosh bus
and processing limitations.
Figure 13
1. Click on the Apple Menu: Control Panels and select Tempo AV Tool; the
Tempo AV Tool control panel window will open (Figure 13).
2. Click on a radio button to make your selection, then close the window.
Note: If your initial selection does not remedy your playback issue, try other
settings on the list until all options are exhausted; different fi le formats
can exhibit different behaviors. The Tempo AV Tool cannot address video
playback issues related to insuffi cient or underpowered video support.
6
 Loading...