

Page 1
User’s Guide
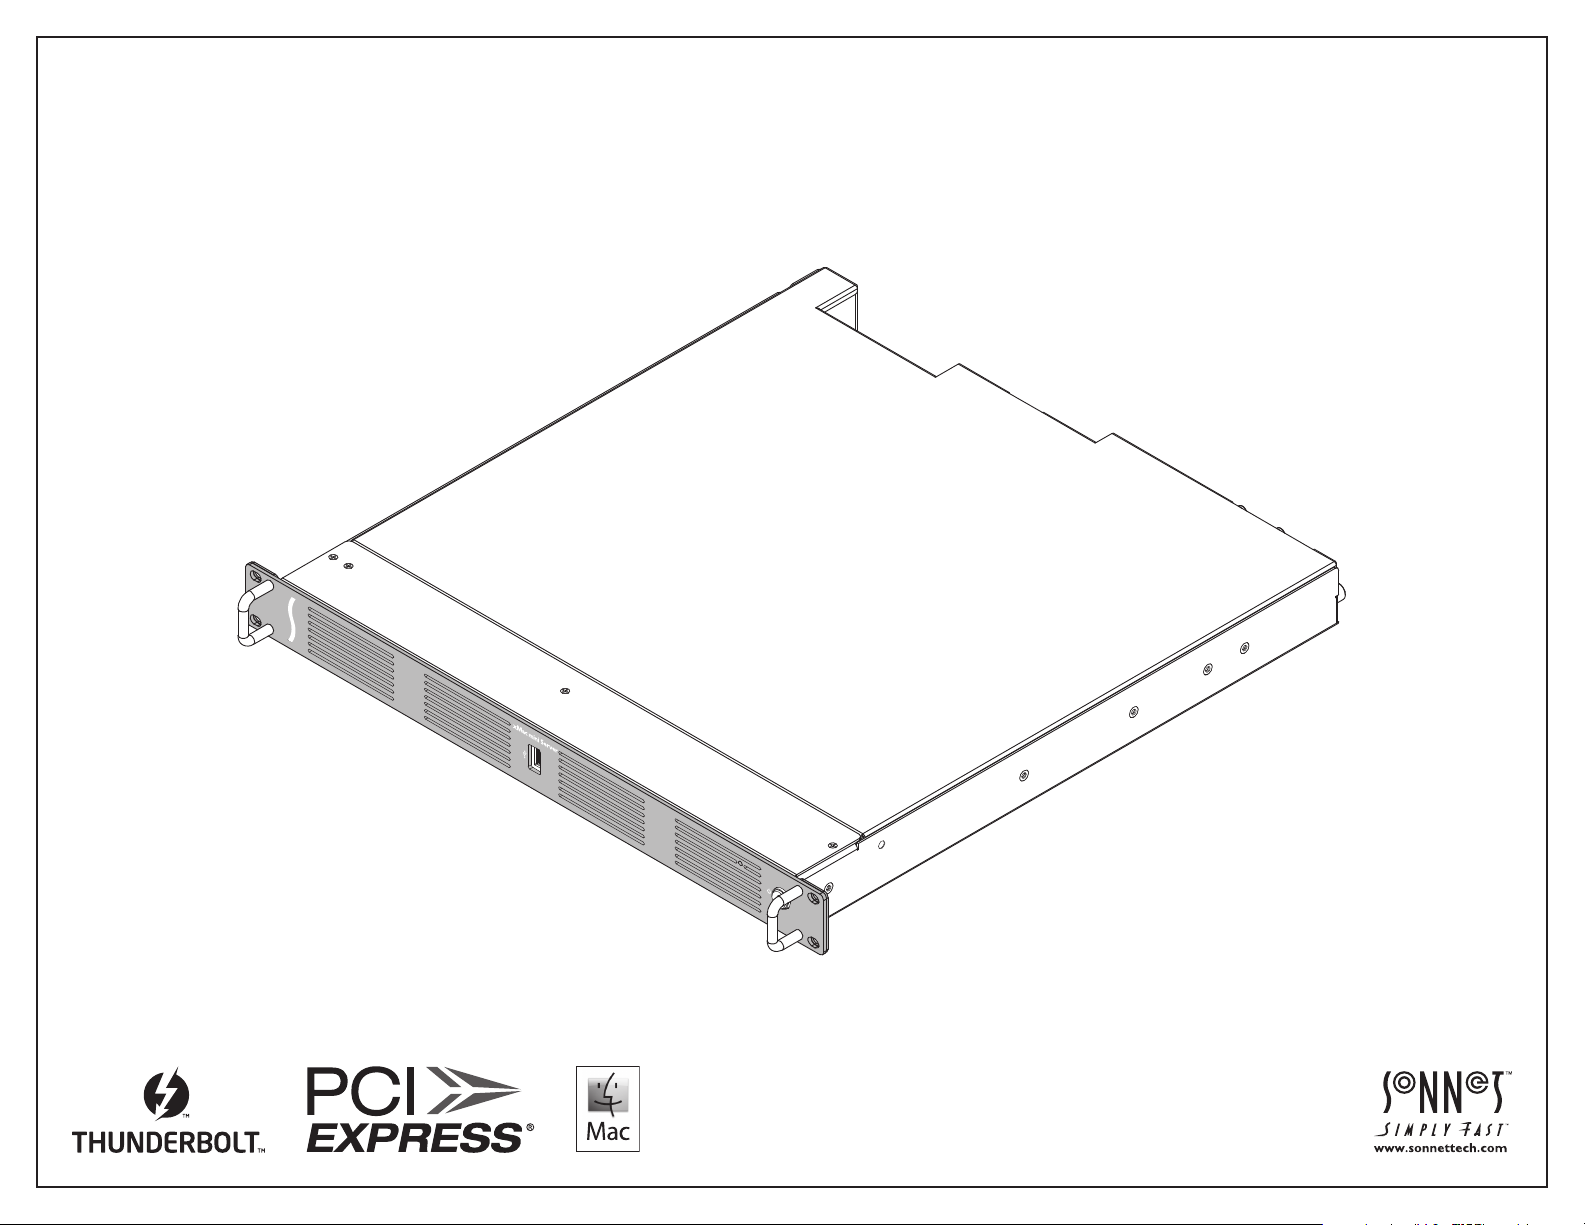
for xMac™ mini Server Thunderbolt 3 Edition
Page 2

Contents
1 Introduction 1
2 xMac mini Server Thunderbolt 3 Edition (T3E) Description 2
3 PCIe Cards, Computer, and xMac mini Server T3E Installation Steps 5
A – PCIe Cards Installation Steps
B – Mac mini Installation Steps
C – xMac mini Server T3E Rackmount Installation Information
4 Verify System and Installed Cards are Recognized 11
A – Confirm the xMac mini Server is Recognized
B – Confirm Installed Cards are Recognized
C – Install Card Drivers (If Necessary)
5 Tips and Known Issues 12
Tips
Known Issues
6 Precautions, FCC Compliance, and Support Information 13
Safety Precautions
FCC Compliance
Contacting Customer Service
Visit Our Website
Appendix A
A – Daughter Card Installation Steps
B – BNC Cable Installation
C – Fan Switch Setting Information
Page 3
Chapter 1 – Introduction
Congratulations on your purchase! xMac mini Server
Thunderbolt 3 Edition (T3E) is a Thunderbolt 3 to PCIe card
expansion system and 1U rackmount enclosure for Mac
mini with Thunderbolt 3 ports. Through its two PCIe slots,
you may connect two expansion cards to your Mac mini to
expand its connectivity and processing capabilities.
xMac mini Server T3E has numerous thoughtful design
touches. The fans are user-replaceable. The front panel
USB-A port connects to the Mac mini, enabling you
to connect a keyboard, mouse, or thumb drive to the
computer without having to access its ports from the
back. Other Mac mini interface ports are extended to the
back of the chassis and mounted on the rear panel for
convenient interfacing of 10 Gigabit (or Gigabit) Ethernet,
USB-A, and HDMI cables. The xMac mini Server's power
switch turns the computer on and off, and the PCIe slots
are powered on/off with the Mac mini for maximum
energy savings. The front panel USB-A port lights up
when the computer is powered on. There's a central power
hub for the computer and power supply for the PCIe slots,
enabling you to power everything with one power cord. A
Thunderbolt 3 connector retainer clip and holes for cable
ties enable you to secure all cables, keeping them tidy
while avoiding accidental disconnects.
While xMac mini Server T3E requires no drivers, the
expansion cards you install do; Thunderbolt-compatible
drivers to enable them to work properly through the
Thunderbolt interface are required. More information
on which cards are compatible with xMac mini Server
is available at http://sonnettech.com/support/charts/
thunderbolt/index.html
Support Note: This document was up to date at the
time of printing. However, changes to the hardware or
software may have occurred since then. Please check the Sonnet
website for the latest documentation.
1. Go to www.sonnettech.com/support/kb/kb.php
2. Click the Thunderbolt Product link.
3. Click the xMac mini Server Thunderbolt 3 Edition link, and
then click the Documentation link.
5. Click the xMac mini Server Thunderbolt 3 Edition User’s
Guide [English] link and then check the Document Version
information. If the version listed on the last page of this
manual is later than this document (revision A), click the
Download Now button for the latest version.
1
Page 4

Chapter 2 – xMac mini Server Thunderbolt 3 Edition (T3E) Description
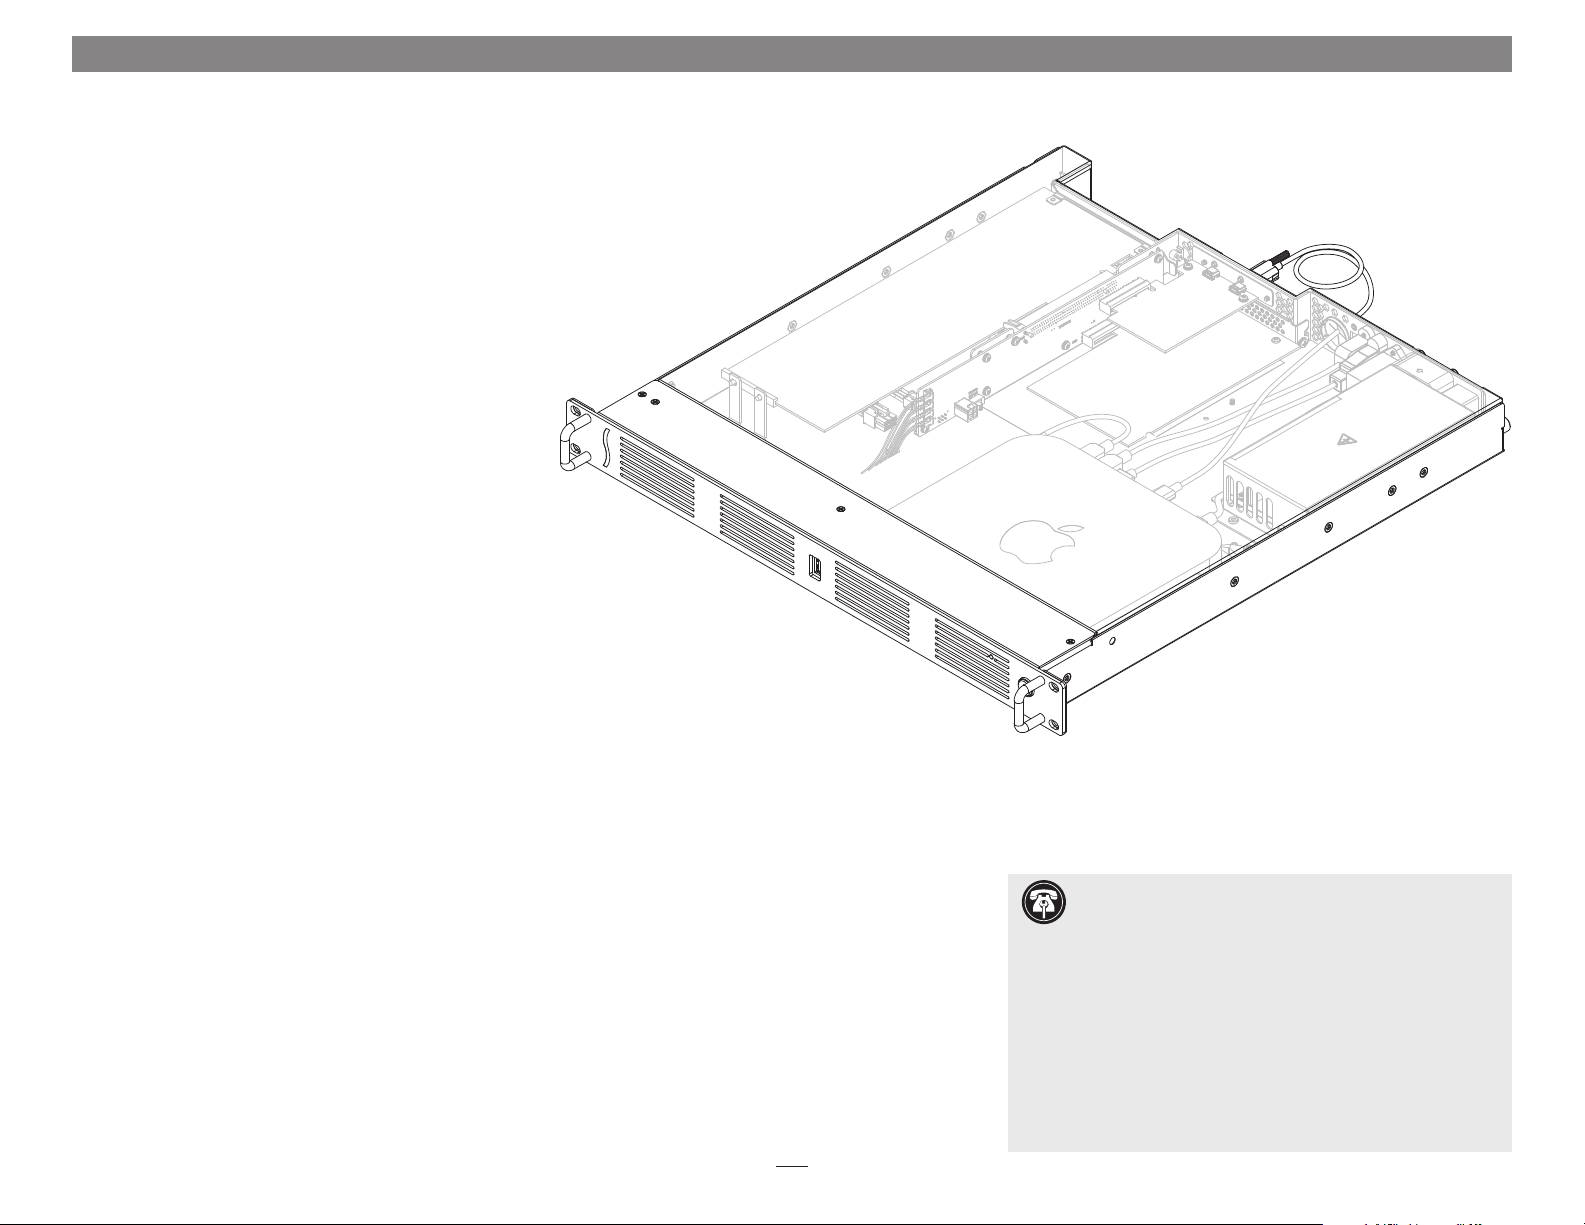
1 – USB-A Port/Power Indicator
This port connects to the Mac mini through a cable
attached to the front panel, and lights when the
computer is on.
3 – Power Input Socket
Connect the included AC power cable here.
4 – RJ45 Port (10 Gigabit or Gigabit Ethernet)
This port connects to the Mac mini through a cable
attached to the back panel.
5 – HDMI Port
This port connects to the Mac mini through a cable
attached to the back panel.
2 – Power Switch
This button activates the Mac mini’s power switch; the
xMac mini Server T3E’s PCIe slots’ power supply turns
on and off along with the computer.
7 – Top Panel Thumbscrews
Loosen these captive screws to enable the removal of
the top cover, tighten the screws to secure the top cover.
8 – External Cable Passthrough
This opening allows the connection of the included
Thunderbolt cable from the computer one of the
Thunderbolt port on the xMac mini Server’s back
panel, and the connection of other cables to the Mac
mini’s ports or user-installed PCIe cards.
9 – Thunderbolt 3 Ports
Connect the included Thunderbolt 3 cable, or
comparable Thunderbolt 3 (40Gbps) cable, between
either port and one of your computer’s Thunderbolt
ports.
The second port may be used to connect to another
Thunderbolt peripheral device, display(s), or USB
device (when connected with the proper cable or
adapter).
6 – USB-A Port
This port connects to the Mac mini through a cable
attached to the back panel.
10 – BNC Connector Mounting Holes
These holes accommodate the installation of BNC
connectors like those used for HD/SDI output for the
RED ROCKET transcoding card.
2
Page 5
Chapter 2 – xMac mini Server T3E Description
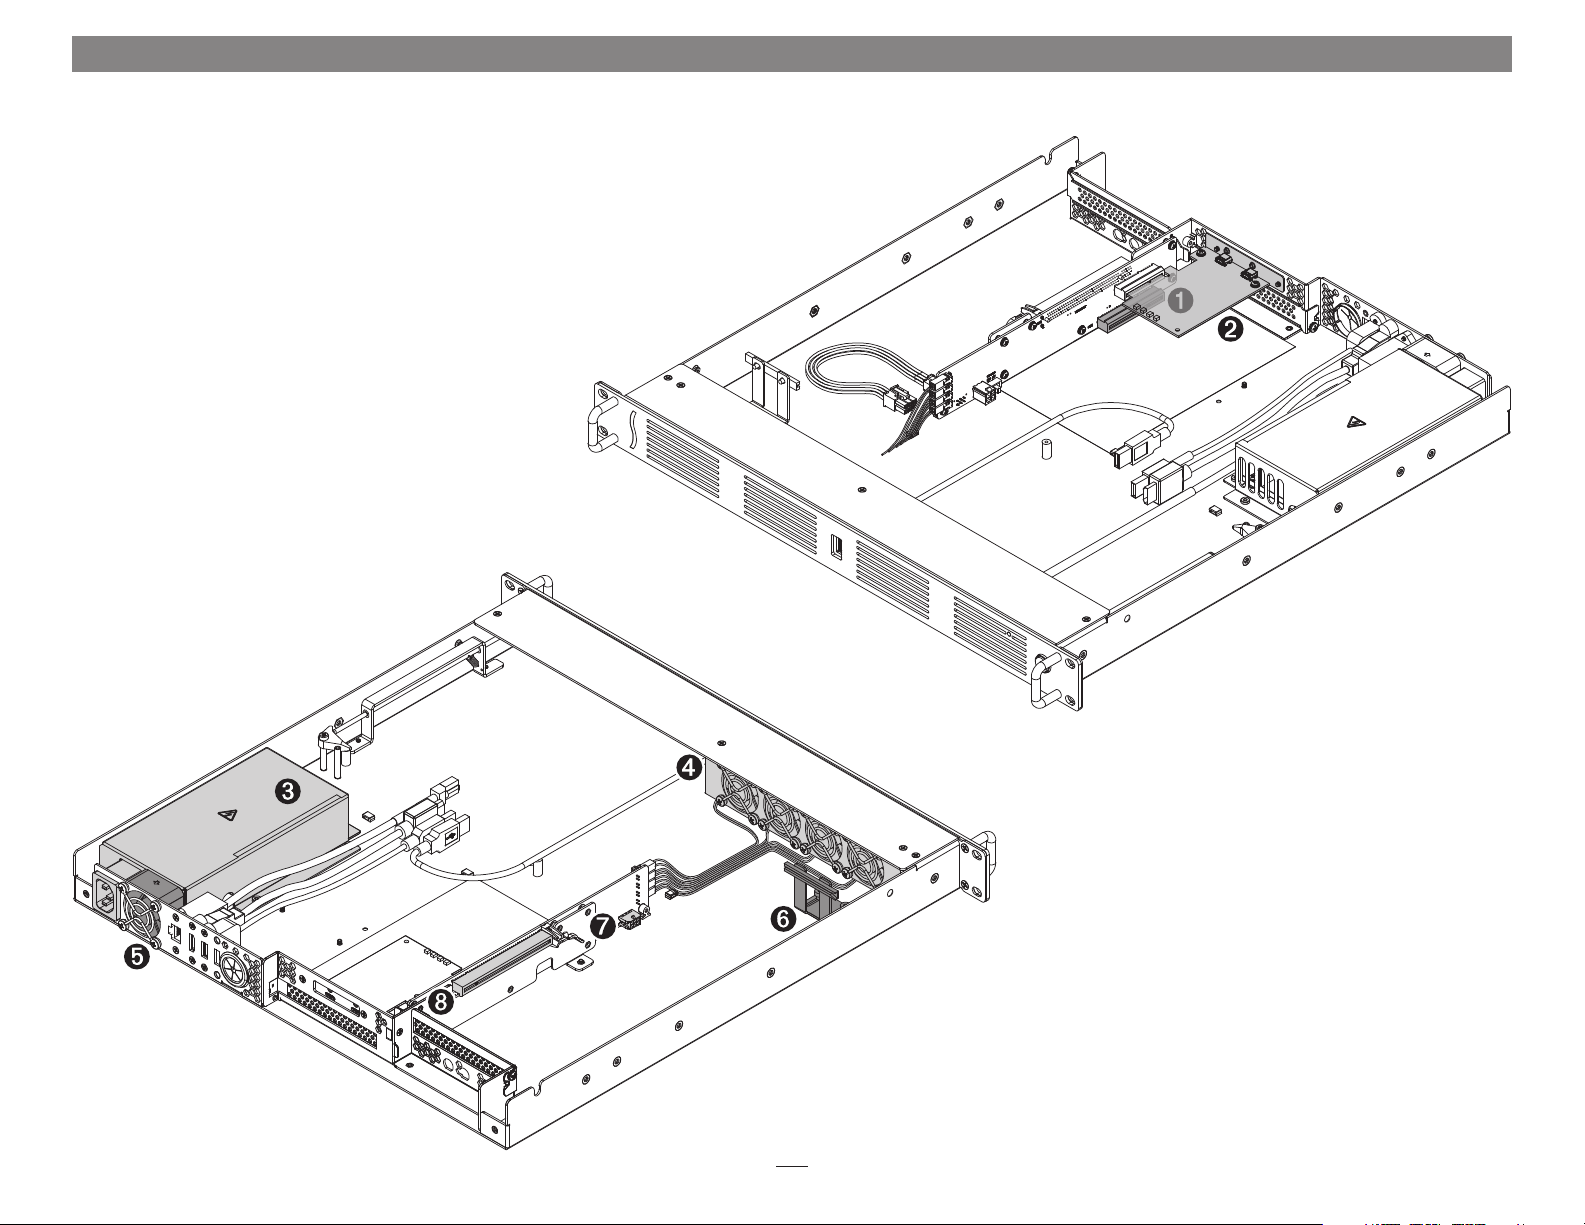
1 – PCIe Slot 1 (Hidden)
This slot accepts an x8 mechanical, half-length, fullheight PCIe card, and is compatible with PCIe 3.0, 2.0,
and 1.1 cards.
2 – Thunderbolt Interface Card
This is installed into its own slot and may not be moved
to another slot.
3 – Power Hub/Power Supply
The hub routes power to the Mac mini and to the xMac
mini Server’s power supply, while the power supply
provides power to the xMac mini Server’s PCIe slots,
fans, and assorted printed circuit boards.
4 – Main Fan Assembly
This user-replaceable part provides airflow to cool the
Mac mini, installed PCIe cards, and other
components inside the enclosure.
5 – Power Supply Fan
This fan provides airflow to cool
the xMac mini Server’s
power supp ly.
6 – PCIe Card Guide
When installing a full-length card, use this to support
and secure the card.
7 – Auxiliary Power Connector
A few PCIe cards require extra power in order to operate.
When installing such a card, connect the supplied
auxiliary power cable between this connector and the
card’s power connector.
8 – PCIe Slot 2
This slot accepts an x8 mechanical, full-length, fullheight non-GPU PCIe card, and is compatible with PCIe
3.0, 2.0, and 1.1 cards.
3
Page 6
Chapter 2 – xMac mini Server T3E Description
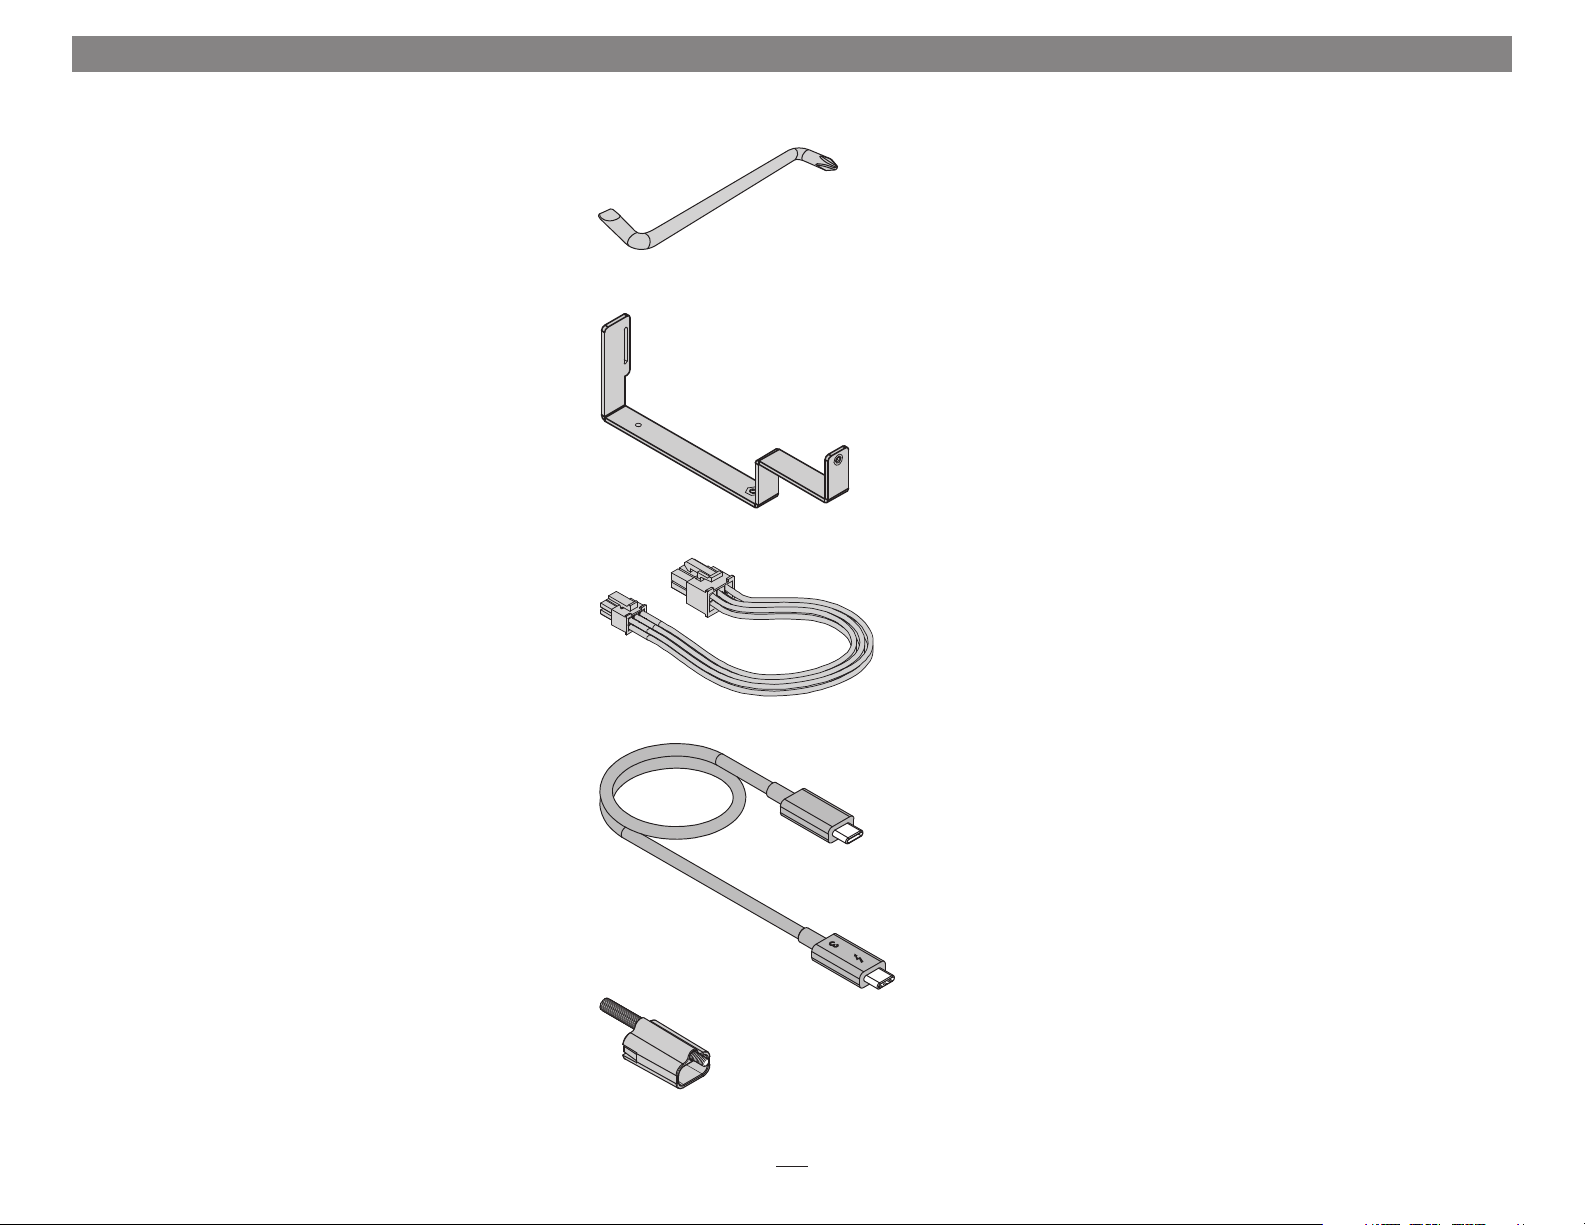
Offset Screwdriver
Use this tool to remove the screw securing the port access
cover for slot 1, and to install the screw securing the PCIe
card you install into it.
Daughter Card Mounting Bracket
This bracket supports the installation of a daughter card
that is in turn connected to the card installed into PCIe
slot 1.
Auxiliary Power Cable
This cable passes power between the xMac’s auxiliary
power connector and the PCIe power connector found on
some PCIe cards.
Thunderbolt 3 (40Gbps) Cable
Connect this cable between the xMac mini Server’s
Thunderbolt 3 port and your computer (or other
Thunderbolt device in the chain connected to the
computer).
ThunderLok 3 Thunderbolt Connector Retainer Clip
This secures a Thunderbolt 3 connector plugged into
the xMac mini Server’s Thunderbolt 3 port to prevent
accidental cable disconnection. This clip is compatible with
the included Sonnet 0.5-meter Thunderbolt 3 cable and
Sonnet 0.7-meter Thunderbolt 3 cables, but not with Sonnet
1-meter Thunderbolt 3 cables.
4
Page 7

Chapter 3 – PCIe Cards, Computer, and xMac mini Server T3E Installation Steps
A – PCIe Cards Installation Steps
1. Remove the xMac mini Server from its packaging, and then set it on a
flat, level surface.
2. Loosen the two captive thumbscrews securing the top cover to the
rest of the enclosure (Figure 1).
3. Lift the top cover up and slide it back to remove it (Figure 1).
Support Note: To avoid damaging components due to static
electricity discharge, wear an antistatic wrist strap while working
inside xMac mini Server.
Figure 1
4. Remove the strap securing the cables to the floor of xMac mini Server,
remove the loose Thunderbolt cable and set it aside, and then move
the rest of the cables aside (Figure 2).
WARNING: When handling computer products, take care to prevent
components from being damaged by static electricity; avoid working
in carpeted areas. Handle expansion cards only by their edges and avoid
touching connector traces and component pins. Also, avoid touching the
xMac mini Server’s circuit boards and any of its components.
Figure 2
5
Page 8

Chapter 3 – PCIe Cards, Computer, and xMac mini Server T3E Installation Steps
A – PCIe Cards Installation Steps (continued)
5. If you are installing a card into PCIe Slot 1, remove and set aside the
screw securing its port access cover using the supplied offset screwdriver,
and then remove the cover (Figure 3).
6. If you are installing a card into PCIe Slot 2, remove and set aside
the screw securing its port access cover, and then remove the cover
(Figure 4).
7. If you are installing a full-length card into PCIe Slot 2, loosen the
thumbscrews securing the PCIe card guide, and then slide the guide
toward the main fans (Figure 4).
Figure 3
Figure 4
6
Page 9

Chapter 3 – PCIe Cards, Computer, and xMac mini Server T3E Installation Steps
A – PCIe Cards Installation Steps (continued)
8. If you are installing a card into PCIe Slot 1, remove the card from its
packaging, handling the card by its edges and without touching any
components or gold connector pins. Otherwise, skip to step 12.
9. Line up the card’s connector with the slot, and then gently but firmly
press the card into the slot; do not rock the card or force the card
into the slot. If you encounter excessive resistance, check the card’s
connector and the slot for damage, and then try inserting the card
again (Figure 5).
10. Using the supplied offset screwdriver, secure the card using the screw
you removed previously (Figure 5).
11. If you installed a card that includes a daughter card, skip to the
appendix, page A, at the end of this document for instructions on
installing the included daughter card mounting bracket and the
daughter card. Otherwise, go to the next step.
12. If you are installing a card into PCIe Slot 2 that includes BNC
connectors, skip to the appendix, page B, at the end of this document
for instructions on installing the connectors. Otherwise, go to the
next step.
13. If you are installing a card into PCIe Slot 2, remove the card from its
packaging, handling the card by its edges and without touching any
components or gold connector pins.
14. Turn the card components side down, line up the card’s connector
with the slot, and then gently but firmly press the card into the
slot; do not rock the card or force the card into the slot. If you
encounter excessive resistance, check the card’s connector and the slot
for damage, and then try inserting the card again (Figure 6).
15. Secure the card using the screw you removed previously (Figure 6).
16. If you installed a full-length card, slide the PCIe card guide onto the
card, and then tighten the guide’s thumbscrews (Figure 6).
Figure 5
Figure 6
7
Page 10

Chapter 3 – PCIe Cards, Computer, and xMac mini Server T3E Installation Steps
A – PCIe Cards Installation Steps (continued)
Support Note: Sonnet’s ThunderLok™ 3 Thunderbolt connector
retainer clip secures the included Thunderbolt 3 (40Gbps) cable to
the xMac mini Server T3E to prevent accidental disconnects. It is compatible
with Sonnet 0.5-meter and 0.7 Thunderbolt 3 (40Gbps) cables, but not
compatible with Sonnet 1-meter Thunderbolt 3 (40Gbps) cables.
To attach the clip to the cable, remove both from their packaging, and then
insert the connector through the connector clip as shown (Figure 7). Note
that the connector will pass all the way through the clip; when you connect
the cable to the chassis, the clip will secure the connector.
Figure 7
17. Connect one end of the supplied Thunderbolt 3 cable to either one
of the xMac mini Server T3E’s Thunderbolt 3 ports, and then route
the other end of the cable through the external cable passthrough
(Figure 8). Secure the retainer clip to the xMac mini Server if you
attached it.
18. Route any external cables that need to be connected to the computer
(or PCIe cards) through the cable passthrough opening.
19. If desired, secure the cables to the bottom of the xMac mini Server with
cable ties.
Figure 8
8
Page 11

Chapter 3 – PCIe Cards, Computer, and xMac mini Server T3E Installation Steps
B – Mac mini Installation Steps
1. Remove the Mac mini from its packaging.
2. Carefully insert the Mac mini under the top edge of the enclosure, push
it against the gasket behind the enclosure’s face plate, and then lower
the computer onto the floor behind the small plastic posts (Figure 9).
3. Plug all the xMac mini Server’s cables into the back of the Mac mini,
and other cables into PCIe cards as necessary; verify the cables are
plugged in securely (Figure 9).
Figure 9
4. Insert the top cover under the top edge of the enclosure, lower the lid,
and then secure it with the captive thumbscrews (Figure 10 ).
Figure 10
9
Page 12

Chapter 3 – PCIe Cards, Computer, and xMac mini Server T3E Installation Steps
C – xMac mini Server T3E Rackmount Installation Information
You may mount xMac mini Server Thunderbolt 3 Edition into any
standard 19-inch EIA compliant equipment rack at least 19 inches deep. It
is recommended that you mount xMac mini Server using rack slides or a
rack shelf. Sonnet offers rack slide sets for purchase separately; please visit
the site at www.sonnettech.com/product/xmacminiserver-tb3.html and
click on the Accessories tab for more information.
1. Install and secure the xMac mini Server in the equipment rack.
2. Connect any necessary interface cables to the back of xMac mini
Server; verify the cables are plugged in securely.
3. Connect the supplied power cable between xMac mini Server and a
grounded wall outlet or power strip; verify the cables are plugged in
securely.
Support Note: If you haven’t set up your Mac mini, you will need
to connect a monitor, keyboard, and mouse to complete those steps.
10
Page 13

Chapter 4 – Verify System and Installed Cards are Recognized
A – Confirm the xMac mini Server is Recognized
1. Press the power button on the front panel of the xMac mini Server
T3E to turn on the Mac mini. If you haven’t yet set up the computer,
follow the onscreen directions to complete the setup process.
2. On the connected keyboard, press and hold down the Option key,
and then from the Apple menu, select System Information; a System
Information window will open.
3. In the System Information window, click Thunderbolt under the
Hardware header in the left column ( Fig ure 11).
4. In the top right column under the Thunderbolt Device Tree header,
you should see Mac mini, followed “xMac mini Server TB3 Upgrade”
(F igur e 11).
Support Note: If you do not see “xMac mini Server TB3 Upgrade”
listed, disconnect and reconnect the Thunderbolt cable between
the computer and xMac mini Server. Note that it is not necessary to shut
down the computer before disconnecting and reconnecting the cable.
B – Confirm the Installed Cards are Recognized
1. In the System Information window click PCI under the Hardware
header in the left column (Figure 12).
Figure 11
2. At the top of the right column, the installed cards are listed. You
should see “Yes” next to Driver Installed and Tunnel Compatible,
otherwise the cards or drivers may not be Thunderbolt-compatible
(Figure 12).
Support Note: While xMac mini Server T3E requires no drivers,
installed cards require Thunderbolt-compatible drivers to enable
their use with xMac mini Server.
C – Install Card Drivers (If Necessary)
1. Launch a web browser, and then go to your card manufacturer’s
website. Download and install the latest drivers according to the
manufacturer’s directions.
2. Restart your computer; your xMac mini Server is ready to use!
Figure 12
11
Page 14

Chapter 5 – Tips and Known Issues
TIPS
Cooling xMac mini Server and Everything Inside It
With its optimized airflow design and temperaturecontrolled fans providing adequate cooling at all times,
xMac mini server may be installed anywhere in a rack.
Do not block any of the vents! Otherwise, the Mac mini,
installed cards, and xMac mini Server’s components may
overheat.
Connecting Additional Thunderbolt 3 Peripheral
Devices
The xMac mini Server T3E includes two Thunderbolt 3
ports; the first is reserved for connection to your computer,
while the second supports daisy-chaining of up to five
additional Thunderbolt peripheral devices.
Using Expansion Cards Without Drivers
Some Thunderbolt-compatible expansion cards, like
Sonnet’s Allegro™ Pro USB 3.1 PCIe and Solo10G™ PCIe
card, use drivers built into the OS, and are ready to use out
of the box. Cards listed as Thunderbolt-compatible, but
stating “no drivers required” fall into this category.
Replacing Cards or Adding Cards After Initial
Installation
If you decide to replace or add a card to xMac mini server
after the initial setup installation, shut down the system
and disconnect power to it before installing a card.
xMac mini Server T3E Provides Upstream Power
For connected peripheral devices requiring extra power,
the xMac mini Server T3E provides up to 15 watts of
power to bus-powered devices through its secondary
Thunderbolt 3 port.
How to Identify Thunderbolt 3 (40Gbps) Cables
Look for the Thunderbolt icon (
on the connector housings to identify these cables. Cables
with USB-C connectors that only have the Thunderbolt
icon without the number 3 support 20Gbps speeds, and
are not recommended for PCIe cards with high bandwidth
requirements. Cables marked with the USB icon (
NOT compatible for use connecting your computer to the
xMac mini Server T3E.
) AND the number 3
) are
KNOWN ISSUES
Not all PCIe Cards Will Perform at 100%
Thunderbolt 3’s PCIe bandwidth is limited to 40Gbps.
While many cards will operate at full performance, some
may not due to the fact they require more bandwidth
than Thunderbolt 3 is capable of delivering.
OS Updates May Break Compatibility
Specific device drivers that work under one operating system
version may not work under a later version. It is even possible
that an OS update may break compatibility. Before updating
to the latest drivers or OS version, we recommend that you
contact your PCIe cards’ manufacturers to verify that the
existing drivers work, and check online forums for reports
of issues with the latest OS update.
Some Devices’ Performance May be Affected by Where
They Are Connected in a Thunderbolt Chain
However small, Thunderbolt introduces latency to a
device chain. If you expand with additional Thunderbolt
expansion chassis, you may need to experiment with
which cards work better in chassis closer or farther to the
Mac mini in the chain.
12
Page 15

Chapter 6 – Precautions, FCC Compliance, and Support Information
Safety Precautions
Please read this section carefully before proceeding.
These precautions explain the correct and safe use of this
device, thereby helping to prevent injury to you or others,
and also help you to minimize the risk of damaging the
device.
Warnings
Always follow the basic warnings listed here to avoid the
risk of serious injury or death from electrical shock, shortcircuiting, fire, and other hazards. These warnings include,
but are not limited to:
• Aside from replacing user-replaceable parts, do not
attempt to disassemble the enclosure. If this device
appears to be malfunctioning, contact your reseller or
local distributor.
• Do not drop or mishandle the product; dropping or
mishandling the product may result in a malfunction
leaving the product inoperable.
• Do not expose the device to rain, use it near water or
containers that contain liquids which might spill into
any openings, or in damp or wet conditions.
• If unusual smells, sounds, or smoke come from the
device, or if liquids enter it, switch it off immediately
and unplug it from the electrical outlet.
• Follow the instructions in this manual carefully; contact
your reseller or local distributor for additional advice not
covered in this User’s Guide.
FCC Compliance
xMac mini Server Thunderbolt 3 Edition complies with
Part 15 of the FCC Rules. Operation is subject to the
following two conditions: This device may not cause
harmful interference, AND this device must accept any
interference received, including interference that may cause
undesired operation.
Contacting Customer Service
The Sonnet Web site located at www.sonnettech.com
has the most current support information and technical
updates. Before you call Customer Service, please check
our Web site for the latest updates and online support files,
and check this User’s Guide for helpful information.
Email support requests generally receive the fastest
responses, and are usually processed within a 24-hour
period during normal business hours, excluding holidays.
When you contact Customer Service, have the following
information available so the customer service staff can
better assist you:
• Product name
• Date and place of purchase
• Computer model
• PCIe card models
• Operating system version
• Software/firmware versions
• A macOS System Report
USA Customers
If further assistance is needed, please contact Sonnet
Customer Service at:
Tel : 1-949-472-2772
(Monday–Friday, 7 a.m.–4 p.m. Pacific Time)
E-mail: support@sonnettech.com
For Customers Outside the USA
For support on this product, contact your reseller or local
distributor.
Visit Our Web Site
For the most current product information and online
support files, visit the Sonnet Web site at www.sonnettech.
com/support/. Register your product online at http://
registration.sonnettech.com to be informed of future
upgrades and product releases.
13
Page 16

Appendix
A – Daughter Card Installation Steps
1. Insert the included daughter card mounting bracket into the xMac
mini Server as shown, using the provided screws to secure the bracket
through the bottom of the chassis (Fig ure A1).
2. Remove the screw from the top of the bracket and set it aside
(Figure A1).
Figure A1
3. Remove the daughter card from its packaging, handling the card by
its edges and without touching any components.
4. Turn the daughter card components (or connectors) face up, and then
insert the bottom tip of the PCIe bracket into the slot near the power
supply, with the top of the PCIe bracket wrapped around the daughter
card bracket as shown (Figure A2).
5. Secure the card to the daughter card bracket using the screw included
with it (Figure A2).
6. If you are installing BNC cables in the xMac’s BNC connector
mounting holes, go to the next page. Otherwise, return to step 13 on
page 7, and complete the setup procedure.
Figure A2
A
Page 17

Appendix
B – BNC Cable Installation
1. Insert the BNC cables through the BNC connector mounting holes, and
then secure them as shown. (Figure A3).
2. Return to step 13 on page 7, and complete the setup procedure.
C – Fan Switch Setting Information
The xMac mini Server includes a fan speed switch which enables you to
change when the main fans’ speed increases relative to the temperature
inside the enclosure. Regardless the switch setting, the fans’ starting
speed is the same. Note that this switch does not affect the power supply’s fan
operation.
Figure A3
• In High Speed Mode (factory setting), the fans’ speed begins to increase
when the temperature inside the enclosure exceeds 25˚ C (77˚ F), and
reaches full speed at 40˚ C (104˚ F). This setting is appropriate for all
compatible cards and is the default setting.
• In Low Speed Mode, the fans’ speed begins to increase when the
temperature inside the enclosure exceeds 35˚ C (95˚ F), and will speed up
somewhat as the temperature climbs toward 40˚ C (104˚ F). This mode
is appropriate for most PCIe cards except 10 Gigabit Ethernet controllers,
Fibre Channel controllers, SAS and SATA RAID controllers.
• A quiet fan kit (Sonnet part number XMFAN-Q-A) is available for
separate purchase for customers who want even quieter operation than
possible with the standard fans. This kit is suitable for most PCIe cards
except 10 Gigabit Ethernet controllers, Fibre Channel controllers, and SAS
and SATA RAID controllers. The fan speed switch should be set only in
the High Speed Mode setting with the quiet fan kit.
Figure A4
B
Page 18

©2019 Sonnet Technologies, Inc. All rights reserved. Sonnet, the Sonnet logotype, Simply Fast, the Simply Fast logotype, Allegro, Solo10G, and xMac are trademarks of Sonnet Technologies, Inc. Mac, macOS and Mac mini are trademarks of Apple Inc., registered
in the United States and other countries. Thunderbolt and the Thunderbolt logo are trademarks of Intel Corporation in the U.S. and/or other countries. Other product names are trademarks of their respective owners. Product specifications subject to change
without notice. UG-XMAC-MS-A-TB3-E-A-050219
 Loading...