

Page 1
Quick Start Guide
For
Windows
for Fusion™ Dual
2.5
-inch SSD RAID
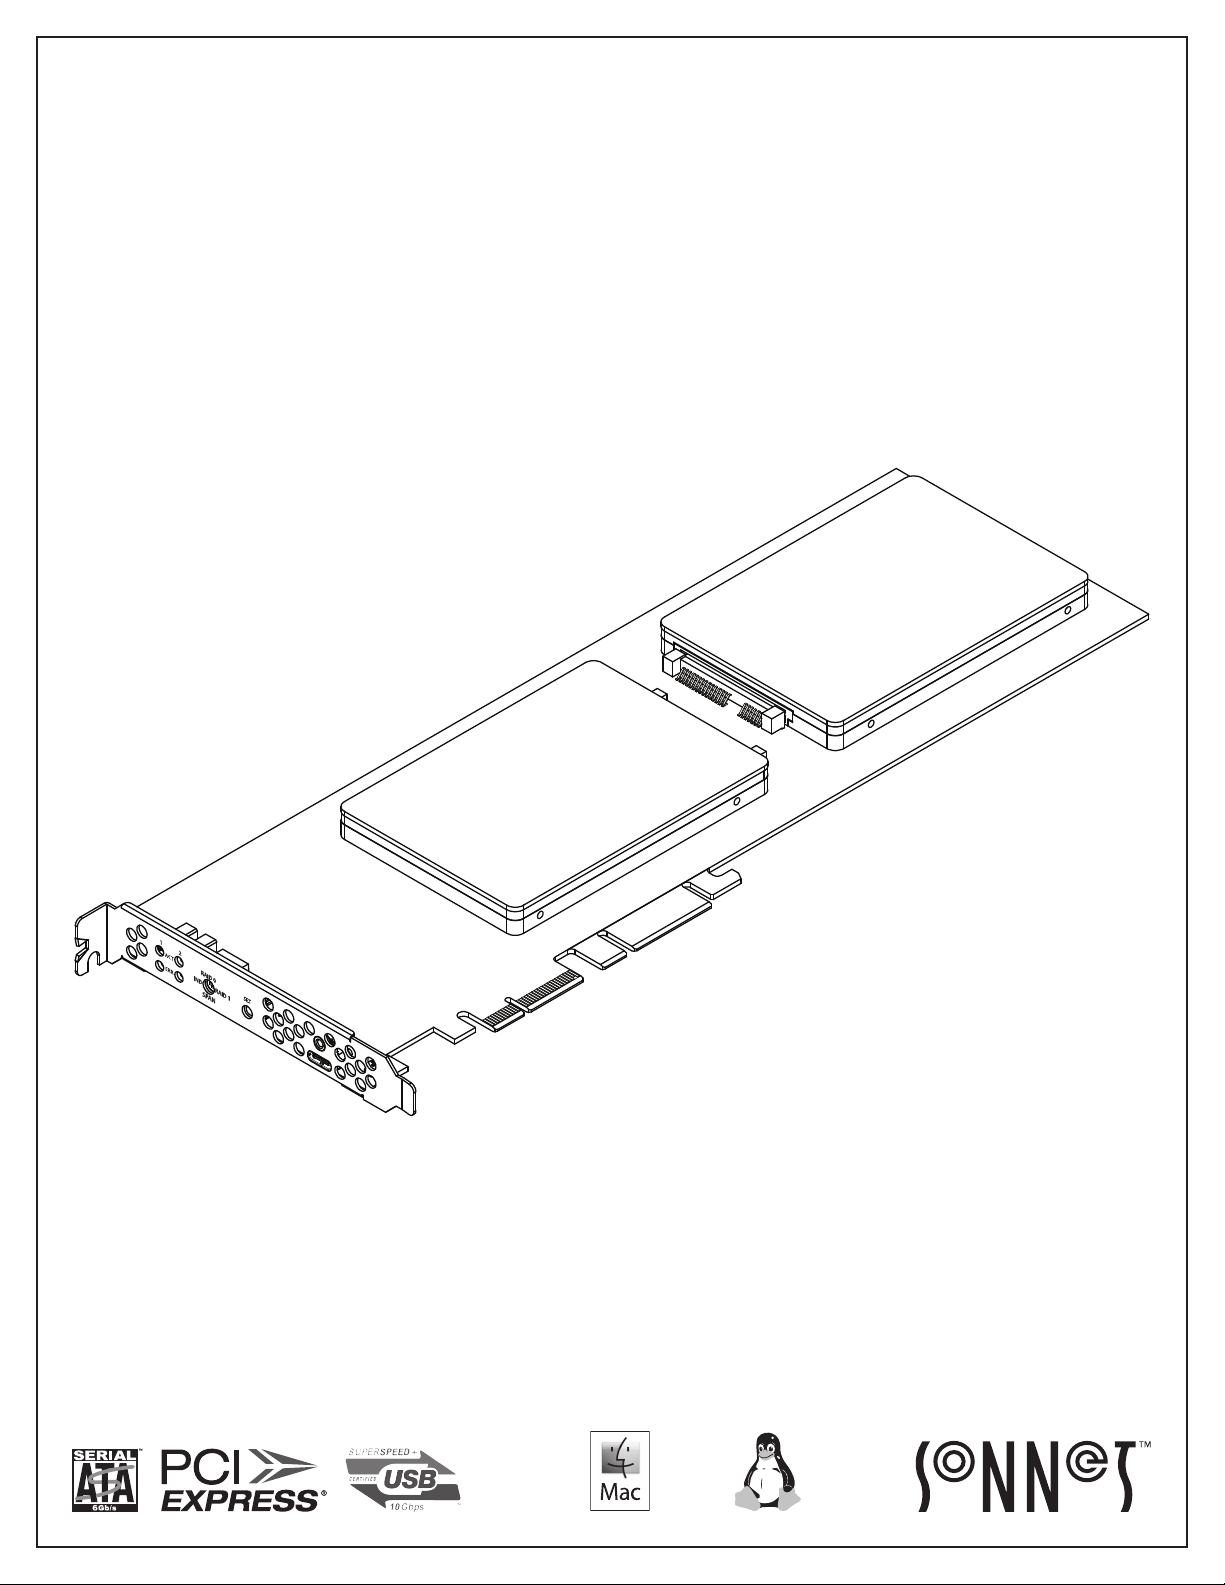
Fusion Dual 2.5-inch SSD card
illustrated with SSDs attached;
drives not included.
Page 2
Introduction, Compatibility Information, USB Driver Information
Congratulations on your purchase! The Fusion™ Dual 2.5-inch
SSD RAID card provides a handy way to install one or two 2.5-inch
SATA SSDs (or HDDs) into a PCIe slot, and connect a USB device
using a USB-C
enables you to configure attached SSDs in RAID 0, RAID 1,
Independent, and Span configurations; descriptions follow.
®
cable. The built-in hardware RAID controller
You Should Have
The following items should be included in your product package:
• One Fusion Dual 2.5-inch SSD RAID card
• Eight drive mount screws
• Quick Start Guide
The following items may be required for installation and setup:
• Medium Phillips screwdriver
• Small (1/8-inch or 3 mm) flat-head (–) screwdriver
Mac® Compatibility
• Mac Pro® (5,1, or 7,1 [2019])
• macOS 10.12.6+
Windows® Compatibility
• Computer with available full-length, full-height PCIe slot (PCIe
3.0 slot preferred)
• Windows 10
• Windows Server 2019, 2016 (64-bit editions)
Linux® Compatibility
• Computer with available full-length, full-height PCIe slot (PCIe
3.0 slot preferred)
• Linux Kernel 5.0+
USB Driver Information
For Mac users, the standard drivers that enable the Fusion card
to work in your computer or Thunderbolt expansion chassis are
installed as part of macOS 10.12.6 and later; the Fusion card is
ready to use when you power on your computer.
For Windows users, to obtain the latest drivers that enable the
Fusion card to work in your computer running supported
versions of Windows, please go to www.sonnettech.com/support/
kb/kb.php. Navigate to and click the Fusion Dual 2.5-inch SSD
RAID link, and then click the Driver link. Locate, download, and
install the appropriate drivers.
For Linux users, the drivers that enable the Fusion card to work in
your computer running Linux Kernel 5.0 and later are installed
automatically; the Fusion card is ready to use when you power on
your computer.
Support Note: This document was up to date at the
time of printing. However, changes to the hardware or
software may have occurred since then. Please check the Sonnet
Web site for the latest documentation.
1. Go to www.sonnettech.com/support/kb/kb.php
2. Navigate to and click the Fusion Dual 2.5-inch SSD RAID link.
3. Click the Manual link.
4. Click the Fusion Dual 2.5-inch SSD RAID Quick Star t Guide
[English] link, and then check the Document Version
information. If the version listed is later than this document
(revision F), click the Download Now button for the latest
version.
Thunderbolt® Compatibility
• Mac computer with Thunderbolt 3 or Thunderbolt 2 ports
via a Thunderbolt 3 or 2 to PCIe card expansion system with
available full-length PCIe slot
• Windows computer with Thunderbolt 3 ports via a
Thunderbolt 3 to PCIe card expansion system with available
full-length PCIe slot
• Linux computer with Thunderbolt 3 ports via a Thunderbolt 3 to
PCIe card expansion system with available full-length PCIe slot
Supported USB Cables
• USB-C 10Gbps
• USB-C 5Gbps
• Thunderbolt 3 (40Gbps); 0.5- or 0.7-meter only
• Thunderbolt 3 (20Gbps)
2
Page 3
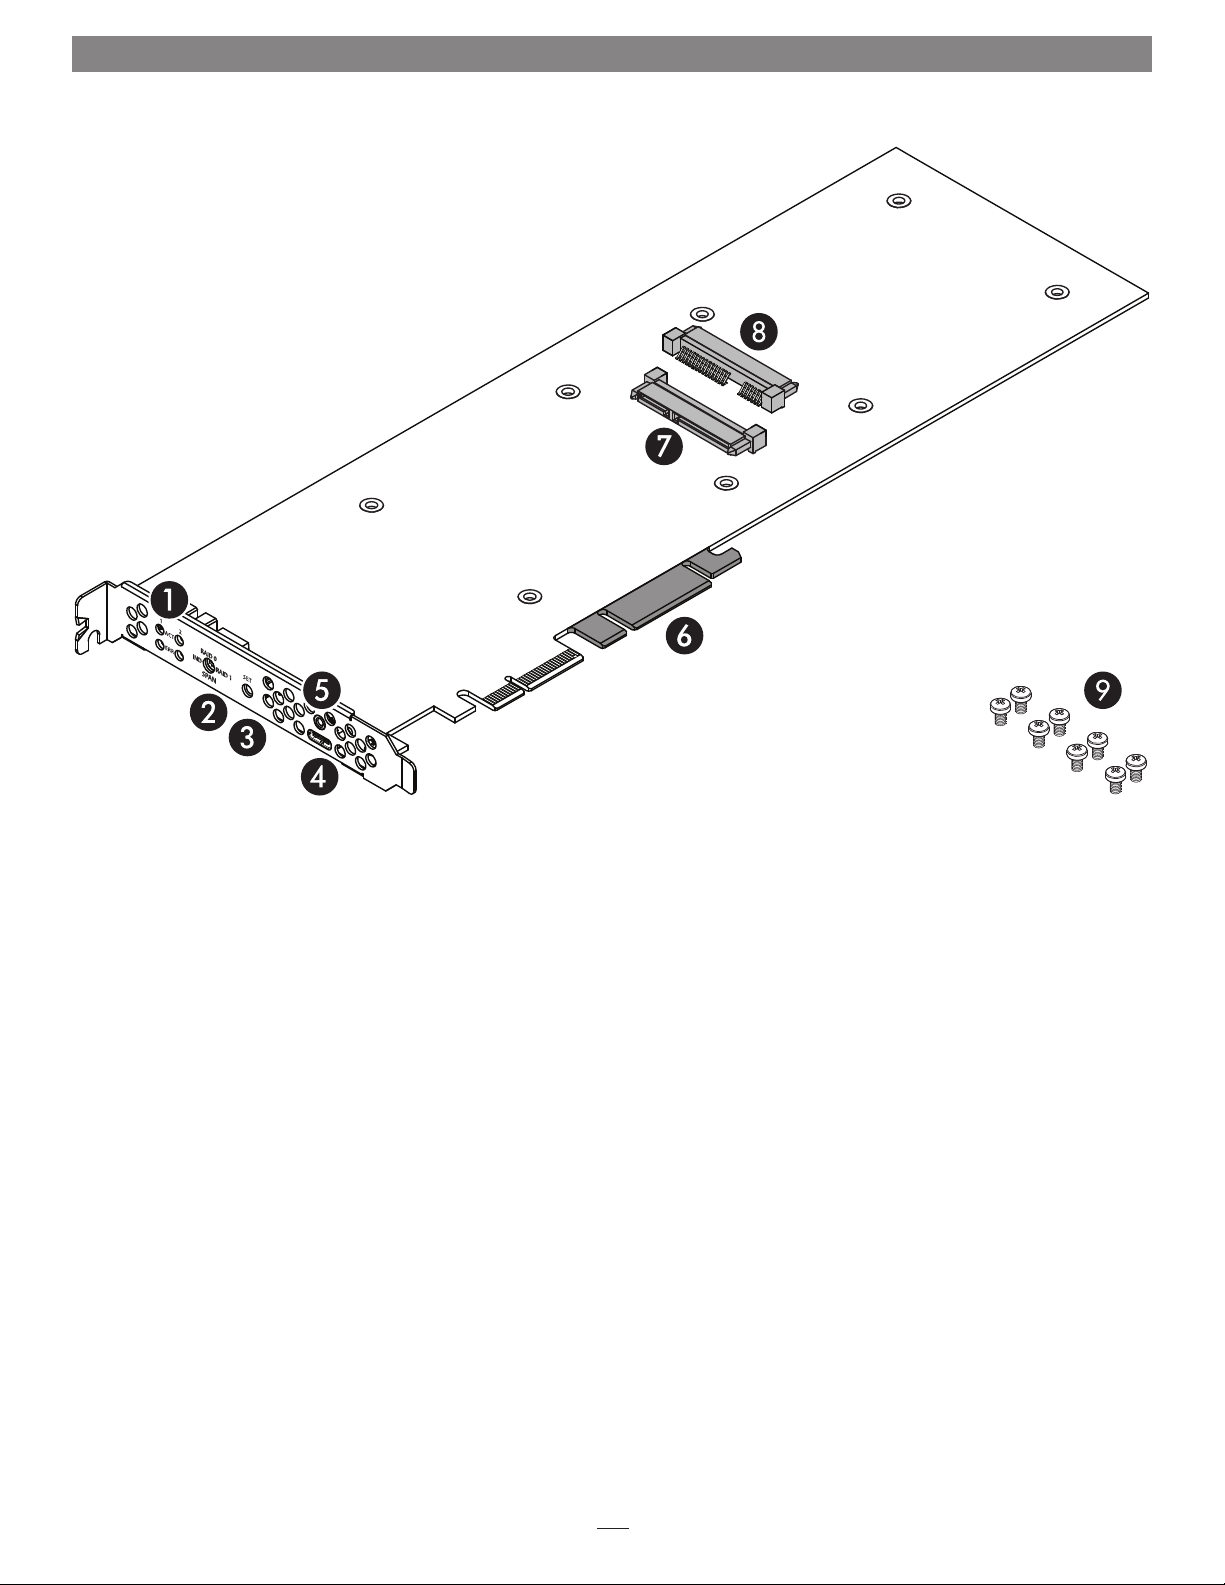
Card Description and Package Contents
1 – Drive Activity and Error LEDs
The activity (ACT) LEDs indicate the attached drives’ read and
write activity. The error (ERR) LED’s indicate a fault status.
2 – Drive Mode Selection Switch
Select the drive mode setting using this switch.
3 – Drive Configuration Set Button
This button is mounted behind the front of the PCIe bracket,
and is depressed with a paper clip or small screwdriver to set
the drive configuration.
4 – USB-C Port
Connect a USB device to this port.
5 – Threaded Nut for ThunderLok 3
When using a Sonnet 0.5- or 0.7-meter Thunderbolt 3 cable to
attach a USB-C device, you may use a Sonnet ThunderLok 3
Thunderbolt connector retainer clip to secure the cable to the
card (cables and ThunderLoks sold separately).
6 – Slot Support Tabs
In longer PCIe card slots, these tabs provide additional
support for the Fusion Dual 2.5-inch SSD RAID card. In some
installations, it may be necessary for you to snap off one or
more of the tabs to enable the card to fit properly.
7 – Drive Connector 1
Plug in a 2.5-inch SSD or hard disk drive to this connector.
8 – Drive Connector 2
Plug in a 2.5-inch SSD or hard disk drive to this connector.
9 – Drive Mount Screws
Eight screws are provided to attach SSDs to the card.
3
Page 4

SSD Installation and Card Installation Steps
Support Notes: When handling
computer products, you must take care to
prevent components from being damaged by
static electricity. Before opening your computer
or removing parts from their packages, always
ground yourself first by touching a metal part of
the computer, such as a port access cover, and
work in an area free of static electricity; avoid
carpeted areas. Handle all electronic components
by their edges, and avoid touching connector
traces and component pins.
1. Remove your SSDs from their packaging.
2. Place an SSD on top of the Fusion 2.5-
inch SSD RAID card with the SSD’s and
card’s connectors aligned with each other
(Figure 1).
3. Push the SSD’s connector into the Fusion
card’s connector until the SSD is completely
seated (Figure 1).
4. Holding the SSD firmly against the card, flip
the Fusion card over again.
Figure 1
Figure 2
5. Using four of the eight screws provided, secure
the SSD to the Fusion card; do not overtighten
the screws (Figure 2).
6. Flip the Fusion card over again, and then
place the second SSD on top of the card with
the SSD’s and card’s connectors aligned with
each other (Figure 3).
7. Push the SSD’s connector into the Fusion
card’s connector until the SSD is completely
seated (Figure 3).
8. Holding the SSD firmly against the card, flip
the Fusion card over again.
Figure 3
4
Page 5

SSD Installation and Card Installation Steps
9. Using the remaining four screws, secure the
SSD to the card; do not overtighten the screws
(Figure 4).
10. The Fusion Dual 2.5-inch SSD RAID card is
ready for installation.
Support Note: There is no need for you
to change the Drive Mode Selection
Switch setting prior to installing the Fusion card in
your computer or Thunderbolt expansion system;
you may change the switch setting after installing
the card into your system.
Card Installation Steps
1. Shut down your computer or expansion
chassis, disconnect its power cable, and then
open it to access the expansion card area (PCI
Express slots); refer to the users manual for
specific information.
2. Locate an available PCI Express slot and
remove its access cover if necessary:
Figure 4
• Mac Pro (2019), Mac Pro (Mid 2012), Mac
Pro (Mid 2010) users may install the card
into any available slot.
• Windows and Linux computer users should
install the card into a PCIe 3.0 slot when
available for best performance.
• Thunderbolt expansion chassis users may
install the card into any available slot.
Support Note: If you have a Mac Pro 5,1
(Mid 2010 or 2012) computer, you will
need to move what Apple refers to as the “PCIe
slider” in order to install the Sonnet card. Simply
press the indicated button and then move the
slider to the left (Figure 5). After installing the
card, move the slider back to the right.
3. Install the Fusion Dual 2.5-inch SSD RAID
card with attached SSDs into the slot; make
sure the card is firmly seated and secured
(use the computer’s PCIe card retaining
latch if present). If necessary, break off one
or more support tabs to allow the card to
be installed in your computer or expansion
chassis.
PCIe
slider
Figure 5
button
4. Close your computer or expansion chassis.
5. Reconnect the computer’s or expansion
chassis’ power cable and other cables if
necessary.
5
Page 6

Drive Mode Configuration Steps
When you first turn on your system after installing the Fusion
card, select a mode to configure the attached drives before using
your operating system to format and prepare them for use.
WARNING: Configuring the drives attached to your
Fusion card results in them having to be reformatted.
Reformatting the drives will erase any data on them ! If there
is any data on them, back it up first before configuring the drives
attached to the Fusion card.
1. Using a small flat-head (-) screwdriver, turn the Drive Mode
Selection switch to select a mode (Figure 5):
• RAID 0 : Striping, No Redundancy
RAID 0 (striping) is best used by applications requiring
high performance for non-critical data, with increased
performance achieved by simultaneously accessing data
across both drives. This increases data transfer rates while
reducing average access time by overlapping drive seeks;
drives are accessed alternately, as if stacked one on top of
the other. RAID 0 provides no data protection, but offers
the full capacity of the drives. If one drive fails, all data
within that set is lost.
• RAID 1: Mirror of Two Drives
RAID 1 ensures security by writing the exact same data
simultaneously to both drives. Should one drive fail, the
data is accessible on the remaining good drive. RAID 1
offers the capacity of one drive.
• Span: Concatenation, Volume Spans Both Drives
Span mode creates a single, large volume that spans both
drives, writing files to the capacity of the first drive, and
then to the second drive. Span mode provides no data
protection. Span formatting offers the full capacity of the
two drives.
• IND: Independent
IND configuration enables both drives to be available for
normal storage operations and accessed individually. IND
mode provides no data protection. IND offers the full
capacity of each drive.
2. Press and hold the Set button for six seconds (until the ACT
and ERR LEDs flash), and then release it; drive configuration
is complete (Figure 5). You may now format the drives
using your computer’s operating system drive formatting
application.
Figure 5
6
Page 7

SSD Formatting and Operation, USB, and Support Information
Formatting SSDs
Support Note: SSDs attached to the Fusion Dual 2.5-inch
SSD RAID card appear to operating systems as external
drives. Under macOS, they are identified as USB drives; under
Windows, they are identified as SCSI drives.
macOS:
Use Disk Utility (found in the Utilities folder within the
Applications folder) to format installed SSDs.
Windows:
To format installed SSDs using Disk Management, you may locate
instructions by typing “initialize disk” in Windows Help.
Linux
Use the tools or utilities you would normally use to format
internal drives.
Booting From Attached SSDs?
The Fusion Dual 2.5-inch SSD RAID card does not support booting
from attached SSDs.
Detecting and Replacing a Failed SSD in RAID 1
(Mirror) Mode
A red ERR light will flash when an SSD has failed. If the top
ERR LED (1) flashes, the SSD in connector J2 (nearer to the PCIe
bracket) needs to be replaced. It the bottom ERR LED (2) flashes,
the SSD in connector J1 (farther from the PCIe bracket) needs to
be replaced.
Known Limitations for Mac Users
• macOS 10.12 erroneously reports a 5Gbps connection when
connected at 10Gbps. macOS 10.13+ reports connections
cor rectly.
• macOS includes a power-saving specification which causes
power to be removed from PCIe cards during sleep. As a result,
SSDs connected internally (and bus-powered storage devices
connected externally) to this card lose power when the computer
is put to sleep. This power loss causes the connected SSDs and
storage devices to disconnect upon wake from sleep, and macOS
to display a Disk Not Ejected Properly message. But, because
macOS flushes all caches before entering sleep, these disconnects
should never result in any loss of data. After wake from sleep, the
connected storage devices will automatically remount.
• When this card is installed
in a 2019 Mac Pro, the cables,
adapters and thumbdrives
you can connect are limited
to those with connector
overmolds (the non-metal
part of the USB connector)
no thicker than 6.5mm. Due
to its non-conventional PCIe
backplate opening, the 2019
Mac Pro prevents connectors
with larger overmolds from
fully connecting to the USB-C port on the Sonnet card.
1. Shut down and remove card from your system.
2. Remove the faulted SSD and replace it with a new SSD. The
new SSD’s capacity must be equal to or greater than that of
the original SSD. The rebuild process will wipe out any data
on the replacement SSD.
3. Plug the card into your computer and boot.
4. The RAID volume will rebuild automatically. While the
RAID is rebuilding, the green ACT LEDs of both SSDs will
flash and the red ERR LED of the new drive will stay lit.
It may take several hours to rebuild a RAID 1 array (a rule
of thumb is an hour per TB). Do not shut down or sleep your
computer during the rebuild process.
5. When the process is complete, the red ERR light will go
out and both ACT LEDs will turn solid green, reverting to
flashing only when the SSDs are being accessed.
USB-C Port Power
The Fusion card’s USB-C port supports USB-C bus-powered SSD,
SSD RAID, and hard drive devices with up to 15W (3.0A) power.
• There is no provision in macOS to make SSDs on a PCIe card
to appear as internal and non-ejectable. If you want to prevent
accidental ejection, open a file on the volume with Text Edit.
Doing so will prevent macOS from ejecting the volume because
the file will be in use.
Known Limitations and Advice—All Users
USB peripherals have some limitations you should be aware of,
and we have listed some additional advice here. Refer to the
peripheral manufacturers’ Web sites for more information.
• USB 3.2 (formerly 3.1) devices come in two varieties, Gen 1, and
Gen 2. Gen 1 devices support data transfer speeds up to 5Gbps,
while Gen 2 devices (such as this Sonnet adapter card) support
data transfer speeds up to 10Gbps.
• The use of USB-C to USB-A cables is supported, but data transfer
speeds are limited to speeds supported by the cable and device.
• The Fusion card’s USB-C port does not support Thunderbolt 3
only peripheral devices, even though they use the same
connector. If the peripheral device only has the Thunderbolt
icon (
) next to its port(s), or on the connector of an attached
cable, it will not work with the Sonnet card.
7
Page 8

Support Information
Known Limitations and Advice—All Users
(continued)
• Many peripherals require additional drivers and application
software to operate or have full functionality. Software should
be included with the device, or available to download from the
manufacturer’s Web site. Check the peripheral’s user’s manual
for information about necessary software.
• While your computer is on, always “eject” any memory card
from the operating system before removing it from an attached
card reader, or disconnecting the reader (with the card inserted
in it) from its cable or the Sonnet card.
• While your computer is on, always “eject”, “stop”, “unplug”,
or “put away” any drive (hard drive, SSD, etc.) before
disconnecting it from its cable or the Sonnet card’s USB-C port.
• Disconnecting storage devices while they are transferring
or receiving data, may result in damage to the file(s) being
transferred or cause your system to hang.
• Although many peripherals may draw power directly from the
Sonnet card, other devices require an external power source.
Remember to use external power supplies when necessary.
• 1-meter or longer Thunderbolt 3 (40Gbps) cables DO NOT
support USB 3.2 Gen 1 (formerly USB 3.0 & 3.1 Gen 1) by design,
only Thunderbolt 3 & USB 2.0.
Contacting Customer Service
The Sonnet Web site located at www.sonnettech.com has the
most current support information and technical updates. Before
contacting Customer Service, please check our Web site for the
latest updates and online support files, and check this Quick Start
Guide for helpful information.
Email support requests generally receive the fastest responses, and
are usually processed within a 24-hour period during normal
business hours, excluding holidays. When you contact Customer
Service, have the following information available so the customer
service staff can better assist you:
• Product name
• SSD model(s)
• Computer model
• OS version
• A System Report (macOS), or a Microsoft System Information
MSINFO32 (Windows) report (Windows), along with a
description of the issue(s) you are encountering with your device
If further assistance is needed, please contact Sonnet Customer
Service at:
E-mail: support@sonnettech.com
Tel : 1-949-472-2772
(Monday–Friday, 9 a.m.–5 p.m. Pacific Time, excluding holidays)
Japan Customers
Contact Sonnet Customer Service Japan at:
E-mail: jp.support@sonnettech.com
©2020 Sonnet Technologies, Inc. All rights reserved. Sonnet, the Sonnet logotype, and Fusion are trademarks of Sonnet Technologies, Inc. Mac, the Mac logo, Mac Pro, and macOS are
trademarks of Apple Inc., registered in the United States and other countries. Thunderbolt and the Thunderbolt logo are trademarks of Intel Corporation in the U.S. and/or other countries.
Other product names are trademarks of their respective owners. Product specifications subject to change without notice. QS-FUS-SSD-2RAID-E-E-F-081320
 Loading...