

Page 1
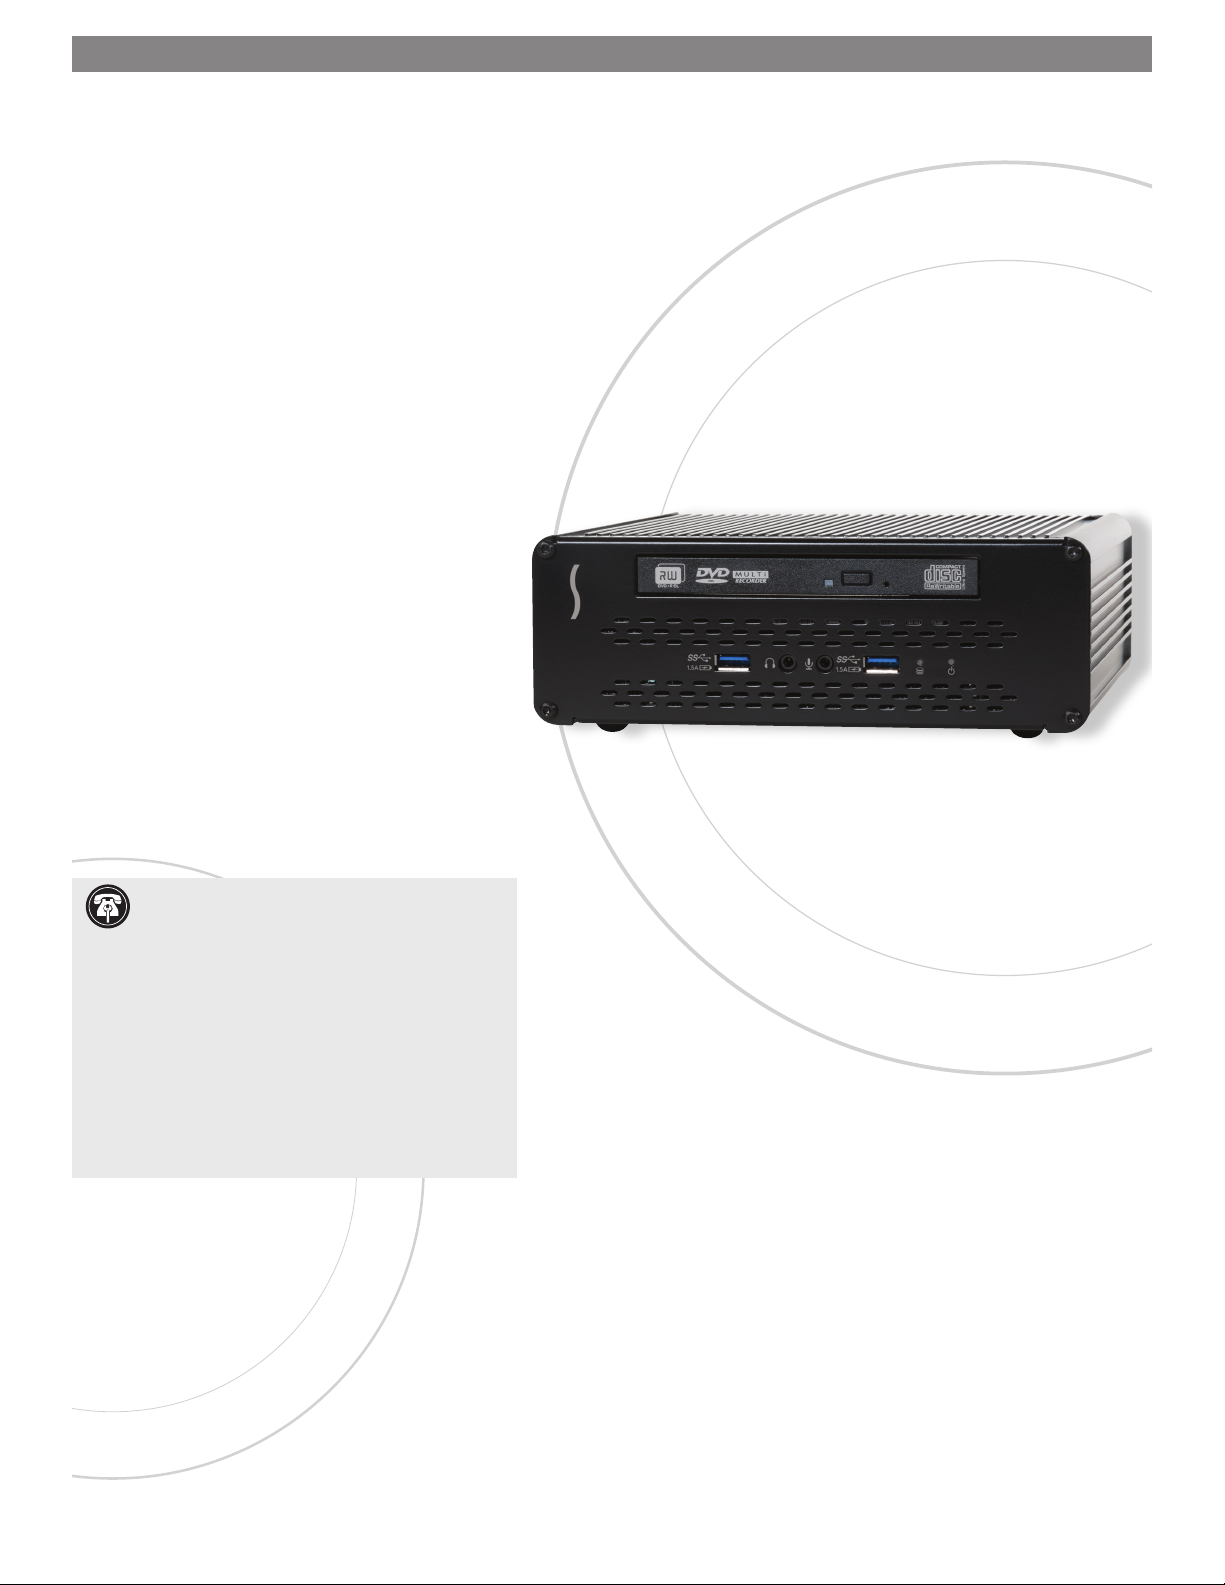
ECHO™
15
+ THUNDERBOLT™ 2 DOCK
Quick Start Guide
You Should Have
The following items should be included in your product package:
• Sonnet Echo 15+ Thunderbolt 2 Dock
• Power adapter
• Power cord
• Hard drive/SSD mounting screws (0TB models only)
• Cable ties (0TB models only)
• Torx T15 wrench (0TB models only)
System Requirements
The Echo 15+ Thunderbolt 2 dock requires the following in
order to operate with your system:
®
Mac
:
• Mac with a Thunderbolt or Thunderbolt 2 port
®
• OS X
• OS X Server 10.9.3+
• Internet access (for required driver download)
• Thunderbolt cable (not included, sold separately)
10.9.3 +
®
Windows
• Windows computer with a Thunderbolt 2 port
• Windows 10, 8, or 7
• Internet access (for required driver download)
• Thunderbolt cable (not included, sold separately)
Support Note: This document was up to date
hardware or software may have occurred since
then. Please check the Sonnet website for the latest
documentation.
1. Go to www.sonnettech.com/support/kb/kb.php
2. Click the Thunderbolt Product link.
3. Click the Echo 15+ link, and then click the
4. Click the Echo 15+ Quick Start Guide [English] link,
:
at the time of printing. However, changes to the
Documentation link.
and then check the Document Version information.
If the version listed is later than this document
(revision b), click the Download Now button for the
latest version.
Page 2

Setup Steps
The following section includes information regarding the drivers
that support the Echo 15+ Thunderbolt 2 Dock.
Driver Information—Mac Users
The primary drivers that enable the Echo 15+ to work with
your computer are installed as part of OS X. The software you
download from Sonnet’s Website enable this product to support
full iPad
box, the dock will charge iOS devices at 4.5W, and at 7.5W with
the software installed), and installs a “menulet” that enables you
to eject all storage volumes attached to the dock at once.
®
, iPhone®, and iPod® charging capabilities (out-of-the
Installation Steps—Mac Users
The following sections cover software download and installation
steps, and connection of the dock to your computer and devices.
1. Go to www.sonnettech.com/support/kb/kb.php
2. Click the Thunderbolt Product link.
3. Click the Echo 15+ link, and then click the Driver link.
4. Click the Echo 15+ Thunderbolt 2 Dock Installer (OS X)
link, and then click Download Now; the software will be
downloaded.
5. Install the software as instructed.
6. If you purchased an Echo dock without a hard drive or SSDs
pre-installed, skip to page 4 for installation instructions, and
then return to this page to complete the installation steps.
7. Connect the included power supply to the dock and
powered outlet, and connect the dock to your computer
with a Thunderbolt cable (required, sold separately). You
may connect your devices to the dock now.
Installation Steps—Windows Users
The following sections cover driver installation steps for to
support the Echo 15+ dock on a Windows computer. Follow the
instructions in order!
1 – Connecting the Dock to Your Computer For the
First Time—Windows Users
Follow these steps the first time you connect the Echo 15+ dock to
your computer, otherwise it may not be recognized properly.
1. If you purchased an Echo dock without a hard drive or SSDs
pre-installed, skip to page 4 for installation instructions, and
then return to this page to complete the installation steps.
2. Turn off your computer.
3. Connect the Echo 15+ dock to a Thunderbolt 2 port on
your computer with a Thunderbolt cable (required, sold
separately), and the included power supply between the
dock and a powered outlet.
4. Start up your computer and switch to the desktop; a New
Thunderbolt Devices Attached window will appear.
5. From the drop-down menu in the New Thunderbolt Devices
Attached window, select Always Connect, and then click OK.
2 – Installation Steps—Windows Users
1. Log onto the Internet. Go to www.sonnettech.com/support/
kb/kb.php.
2. Click the Thunderbolt Product link, and then click the Echo
15+ link.
3. Click the Driver ink, and then click and download all the
Windows drivers listed (Gigabit Ethernet, SATA, and USB 3.0).
8. When you turn on your computer, the dock’s power
indicator will light, and the fan will operate. If there is a hard
drive or SSDs installed, a dialog will appear asking you to
initialize the drives.
Formatting Drives—OS X Users
Use Disk Utility (found in the Utilities folder within the
Applications folder) to set up connected drives for use.
Enabling Audio Inputs and Outputs—OS X Users
In order to use the Echo dock’s audio input and output jacks, you
must enable them through OS X System Preferences.
1. From the Apple menu, select System Preferences.
2. In the System Preferences window, click Sound.
3. In the Sound preference window, click the Output tab, and
then select USB Advanced Audio Device. Click the Input tab,
and then select USB Advanced Audio Device.
4. Install all the drivers, and then restart your computer; the
Echo dock will be ready for use.
Formatting Drives—Windows Users
Use Windows drive formatting tools to format installed drives.
You may locate the information by using “format volume” as a
search term in Windows Help.
2
Page 3
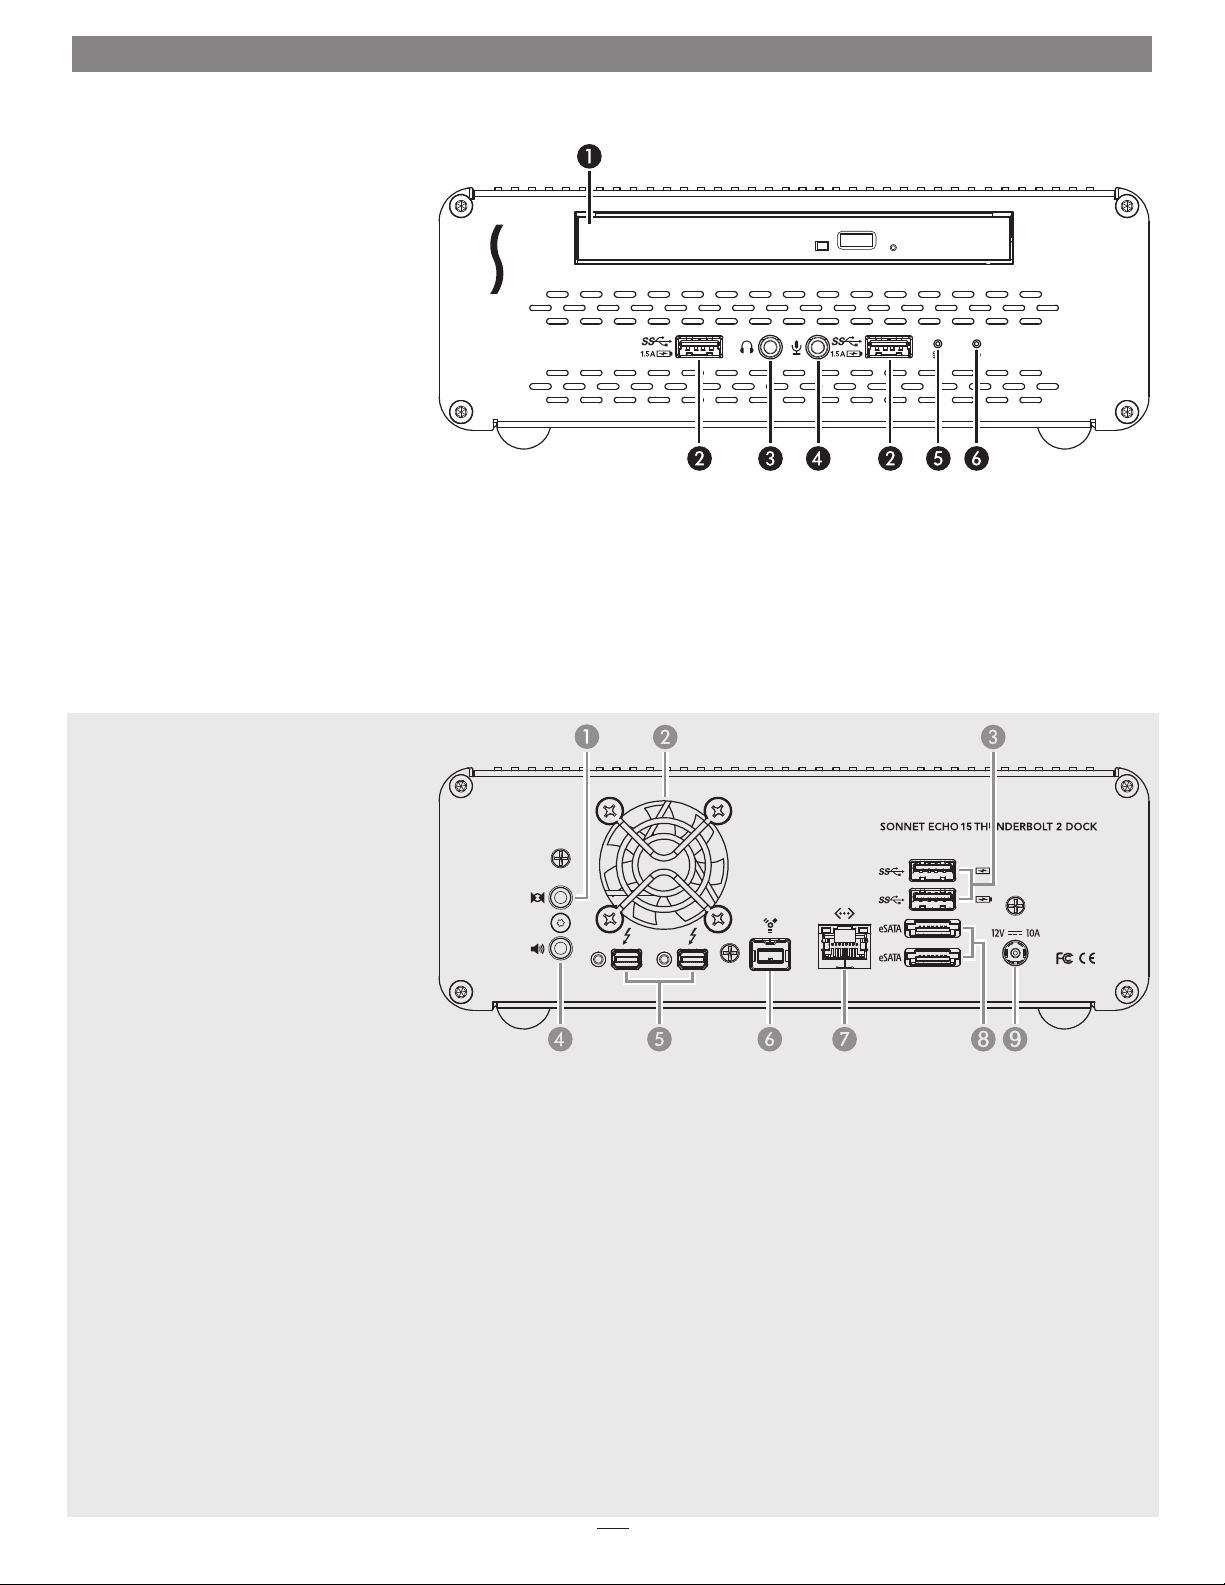
Echo 15+ Description
Echo 15+ Front Panel
1 – Optical Drive
The optical drive’s eject button and
LED placement differ depending on the
model purchased.
2 – USB 3.0 Charging Ports
You may connect and charge iOS
devices, even when the computer is off
or disconnected.
3 – Audio Out Jack
(1)
Connect headphones, or a digital audio
device with mini-TOSLINK optical
digital audio support.
4 – Audio In Jack
(1)
Connect a mono microphone.
5 – Internal Disc Acitvity Indicator
This LED lights when there is read
or write activity on a drive or drives
installed inside the dock.
Echo 15+ Back Panel
1 – Audio In Jack
(1)
Connect a stereo line level output device.
2 – Cooling Fan
The fan provides cooling for any
installed drives and the dock’s circuitry,
and operates at a constant speed. Do
not block the vent holes on the back of
the chassis to prevent overheating. Note
that the fan does not operate when
devices are being charged via the USB
3.0 ports while your computer is off,
sleeping, or disconnected.
6 – Power Indicator
This LED lights when the Echo 15+ is
powered, the Thunderbolt cable between
the dock and your computer is plugged
in securely, and the computer powered
on. Note that if the dock is connected
to another Thunderbolt device instead
of directly to the computer, any other
Thunderbolt device connected between the
computer and dock must also be powered
on before the power indicator will light up.
1.5A
3 – USB 3.0 Charging Ports
You may connect and charge iOS
devices, even when the computer is off
or disconnected.
4 – Audio Out Jack
(1)
Connect powered stereo speakers.
5 – Thunderbolt Ports
Connect a Thunderbolt cable between
either port and your computer’s
Thunderbolt port (or other Thunderbolt
6 – FireWire® 800 Port
Connect FireWire drives and other
peripherals.
7 – Gigabit Ethernet Port
Plug in any Category 5 or 6 unshielded
twisted pair (UTP) cable with RJ-45
connectors. The left (green) LED
indicates an active link, while the right
(yellow) LED indicates activity.
8 – eSATA Ports
Connect storage devices or media
readers with eSATA connectors. Note
that bare SATA drives and some old
drive enclosures use SATA I connectors;
use of these devices with the Echo 15+
requires the use of cables with SATA I
connectors on one end.
9 – Power Input Socket
Connect the included AC power cable
here.
device in the chain connected to the
computer); the other may be used to
connect to another Thunderbolt device
or adapter.
1. Mac Users: Refer to “Enabling Audio Inputs and Outputs— OS X Users” on the previous page for instructions on enabling audio throughput on the dock.
3
Page 4

Internal SATA Drive Installation Steps
WARNING: When working inside the Echo 15+ dock, make sure
nothing is connected to it. Working on the dock with the power
adapter or devices connected may result in damage to the device, and
possibly injury to you or others.
1. Remove the Echo 15+ dock from its packaging, and then set it on a
flat, level surface.
Support Note: While disassembling the Echo 15+ dock, we
recommend that you keep the screws organized and separated
by type and size to ensure that reassembling the product is easier.
2. Using a Phillips screwdriver, remove and set aside the three screws
securing the top edge of the dock’s back panel (Figure 1). Note that the
center screw is smaller than the outside screws.
3. Remove and set aside the five screws securing the top and bottom
edges of the front panel to the rest of the dock (Figure 1). Note that
the center top screw is smaller than the outside screws.
4. Using the provided Torx T15 wrench, remove and set aside the four
screws securing the front of the front panel to the rest of the
dock (Figure 1).
Figure 1
5. Remove and set aside the front panel and then the top
cover (Figure 2).
6. Carefully disconnect the connector plugged into the optical drive.
7. Remove and set aside the four screws securing the optical drive/bracket
assembly from the dock frame, and then remove the optical drive/
bracket assembly from inside the dock. (Figure 3).
Figure 2
Figure 3
4
Page 5

Internal SATA Drive Installation Steps
8. Remove and set aside the three screws securing the 2.5-inch drive
mounting bracket to the optical drive/bracket assembly (Figure 4).
9. If you are installing one or two 2.5-inch SSDs or hard drives, set aside
the optical drive/bracket assembly. If you are installing a 3.5-inch hard
drive, set aside the 2.5-inch drive mounting bracket.
WARNING: When handling computer products, take care to
prevent components from being damaged by static electricity;
avoid working in carpeted areas. Handle hard drives and SSDs only by their
edges, and avoid touching circuit boards and connector pins.
10. If you are installing a 3.5-inch hard drive, skip to step 14. Otherwise,
remove your 2.5-inch drive or drives from their packaging, and set
them label side up on a flat, level, surface.
11. Using two of the screws (for one drive) or four of the screws (for two
drives) provided in the dock’s packaging, secure the 2.5-inch drive
mounting bracket to the drive or drives as shown; do not overtighten
the screws (Figure 5).
12. Using the three screws that previously secured the 2.5-inch drive
mounting bracket to the optical drive/bracket assembly, plus another
two (one drive) or four (two drives) provided screws, secure the
assembled drive(s)/mounting bracket to the optical drive/bracket
assembly as shown; do not overtighten the screws (Figure 5).
13. Skip to step 16.
2.5-inch drive
mounting bracket
flat head
screw
optical drive/bracket
assembly
Figure 4
2.5-inch drives
14. Remove your 3.5-inch hard drive from its packaging, and set it label
side up on a flat, level surface.
15. Using four of the screws provided, secure the hard drive to the optical
drive/bracket as shown; do not overtighten the screws (Figure 6).
5
Figure 5
3.5-inch drive
Figure 6
Page 6

Internal SATA Drive Installation Steps
16. Locate the bundle of wires and cables secured to the optical drive’s
wire harness, and then remove the wire tie securing them.
17. Connect the power cable connectors to the hard drive or SSDs, and
then connect the red data cables; verify the connectors are plugged
in securely.
18. Reconnect the optical drive’s connector; verify the connector is
plugged in securely.
19. Lower the connected drives/bracket assembly into the dock, and then
using the four screws removed previously, secure the assembly as
shown (Figure 7).
20. Locate the black cable tie base attached to the drives/bracket assembly
(Figure 8). Using the supplied cable ties, secure the wires and cables
connected to the drives to the cable tie base and bracket where
indicated. Secure the cables and wire so they do not interfere with or touch
the fan.
21. Place the top cover back on the dock, sliding the back edge of the
cover beneath the top edge of the back panel, being careful to avoid
pinching any cables (Figure 9).
insert top cover under edge
of back panel
Figure 7
cable tie
base
Figure 8
22. Carefully aligning the drive activity and power
indicator light pipes (next to the right USB 3.0 port)
with their corresponding holes in the front panel,
slide the front panel back on to the dock (Figure 9).
Do NOT force the panel on; make sure both light pipes
slide into their holes in the front panel.
light
pipes
Figure 9
6
Page 7

Internal SATA Drive Installation Steps
23. Ensure that both light pipes are visible through the front panel, and
then, using the Torx wrench, secure the front panel to the dock with
the four Torx screws removed previously; don’t overtighten the
screws (Fig ure 10).
24. Using a Phillips screwdriver, secure the back panel and front panel with
the eight screws you removed previously; don’t overtighten the screws
(Figure 10). Note that the two small screws are used in the top center
holes of the front and back panels.
Figure 10
Figure 10
7
Page 8

Remember to register your product online at http://registration.sonnettech.com to be informed of future upgrades and product releases.
Software updates and links are available from the Sonnet web site at www.sonnettech.com. • Online support form available at http://supportform.sonnettech.com.
Sonnet Technologies Customer Service hours are Mon.-Fri., 7 a.m.–4 p.m. Pacific Time • Customer Support Phone: 1-949-472-2772 • E-mail: support@sonnettech.com
Sonnet Technologies, Inc., California 92618 USA • Tel: 1-949-587-3500
©2015 Sonne t Technolo gies, I nc. Al l right s reser ved. So nnet , the Son net log otype , Simp ly Fast , and the Simply F ast log otyp e, and Ec ho are tr adema rks of So nnet Techn ologie s, Inc . iPad , iPhon e, iPod , Mac, t he Mac
logo, an d OS X are tr adema rks of Ap ple Inc ., regi stere d in the Un ited St ates a nd other c ountr ies. Th under bolt 2 and t he Thun derbo lt logo ar e trade mark s of Inte l Corpor ation i n the U. S. and/o r other c ountri es.
Other p roduc t names a re trad emark s of thei r respe ctive ow ners . Produc t speci fica tions su bject t o chang e witho ut noti ce. Pri nted in t he USA . QS- ECHO-DK- E-B -102815
 Loading...