

Page 1
Page 2

Page 3
Connecting USB DEVICE
-
25
78
-
911
-
910-
11
11
11
12 15
-
12
12
13
13
14
15
15
1
6
6
6
7
8
Input Source Select
Basic buttons on the remote control
Basic OSD Menu operation
OSD On Screen Display Menu()
Video menu
Audio menu
Misc menu
TV menu
PC menu
Multimedia
Troubleshooting and Advice
Specifications
16
17 18
-
17
17
18
19 23-
19
20
20 21
-
22 23-
23
24
25
26
Page 4
234
Page 5
Page 6
Page 7
5
Page 8
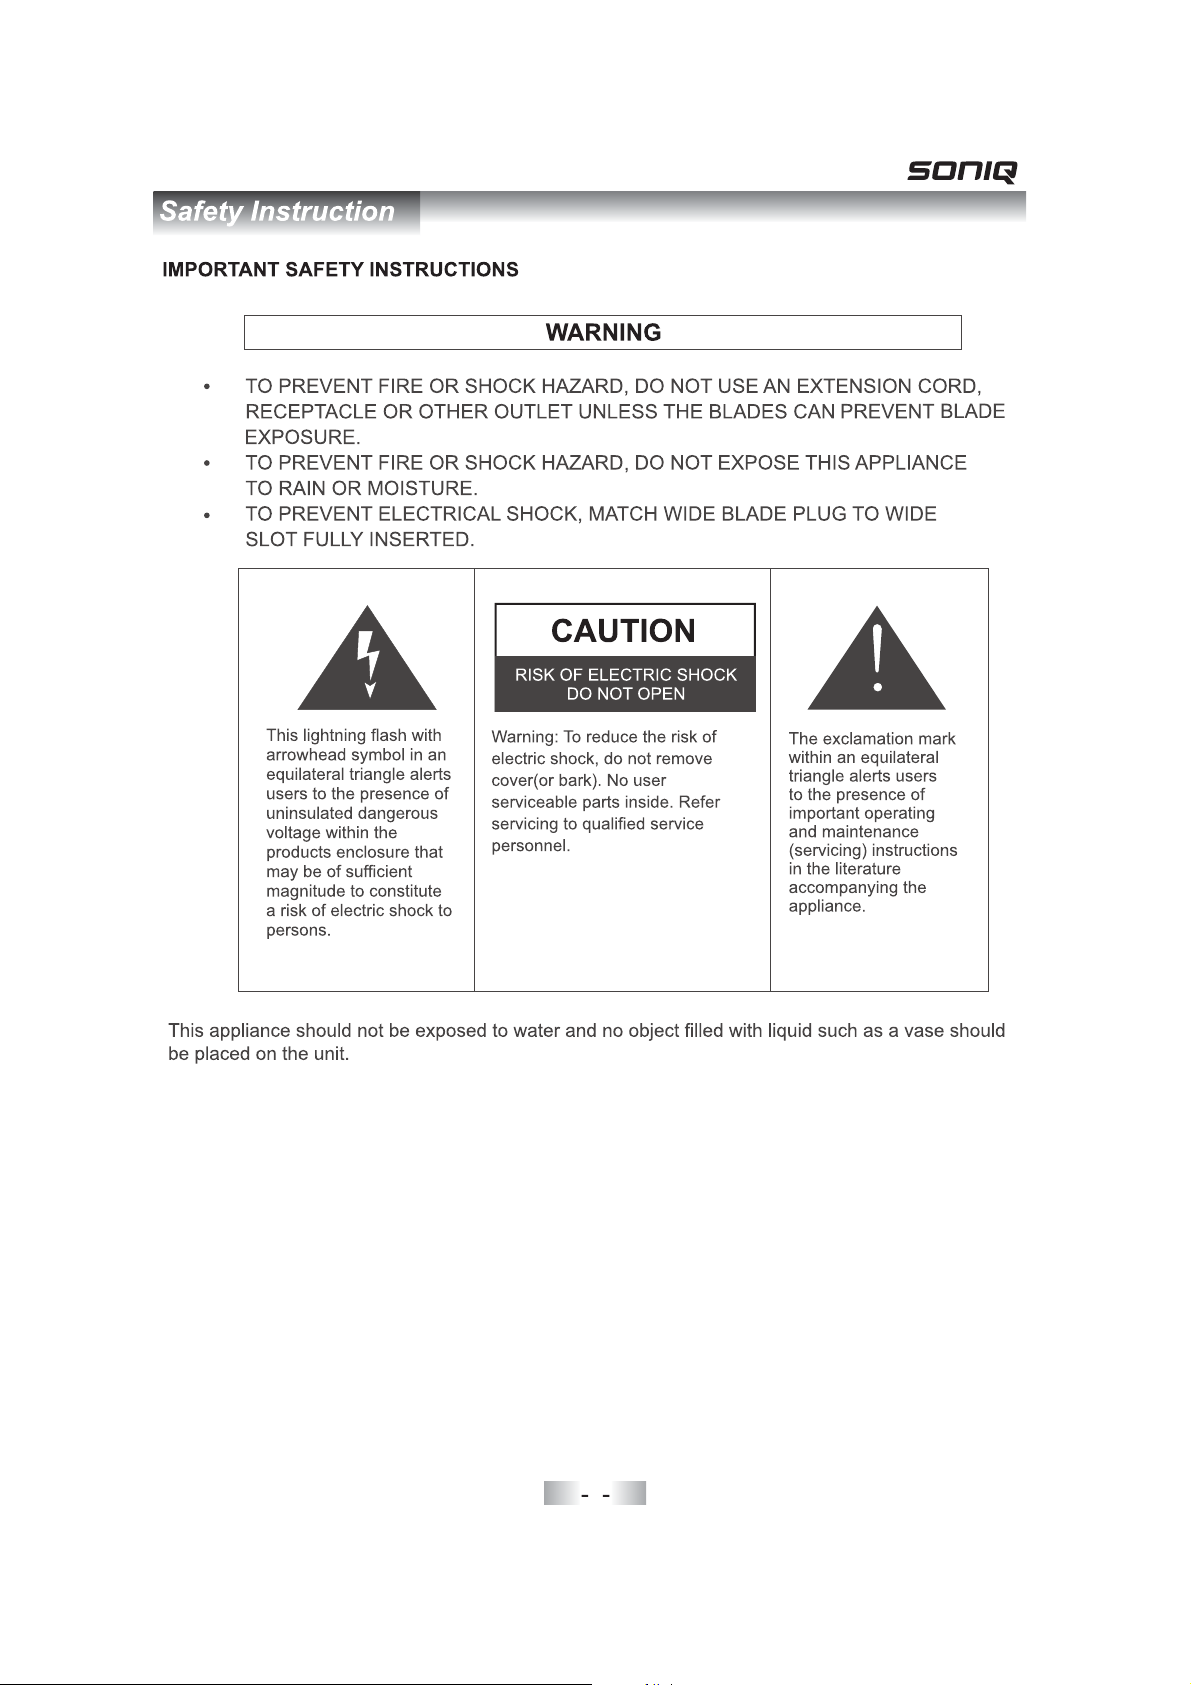
Instruction
POWER
PIP
P.SOURCE
POSITION
SWAP
SIZE
P.MODE
ASPECT
ENTER
MENU
1 234
5 678
9
0
REPEAT
CAPTURE
VOL
PROGRAM
A-B
TTX
REVEAL INDEXCHSIZE
SUBPAGE
FAV I-IIVIEWADD/DEL
POWER
MUTE
PAUSE
DISPLAY
P.SOURCE
POSITION
PIP
SIZE
P.MODE
SWAP
S.MODE
ASPECT
SOURCE
ENTER
MENU
EXIT
1234
5678
9
0
SLEEP
REPEAT
CAPTURE
VOL
PROGRAM
A-B
HOLD
TTX
SUBPAGE
REVEAL INDEXCHSIZE
FAV I-IIVIEWADD/DEL
COAX
L
OUTROUTVOUT
L
IN
RINV
IN
1
MUTE
PAUSE
DISPLAY
S.MODE
SOURCE
EXIT
SLEEP
HOLD
6
Page 9
1green
7
Page 10

L
OUTROUTVOUT
L
IN
RINV
COAX
IN
11
AC IN
USB
HDMI1/2
PC AUDIO IN
VGA
YPbPr1/YPbPr2
VIDEO
COAX
S-VIDEO
PHONE
Connect to the power cord.
Connect toPortable USB Memory .device
Connect an HDMI signal of your HDMI device.
Connect PC audio output of your personal computer.
Connect the PC VGA signal output of your personal computer.
Connect the component video output of your AV devices here.
Audio (Audio input, L/R): Connect the audio output of your AV
device here.
Connect composite Audio and Video output of your AV device.
Connect the audio amplifier.
Connect S-Video output of your AV device.
Connect to external antenna.
8
Page 11

POWER(red button): Turn the TV on/standby.
MUTE: Press to mute the sound, press again or Press VOL+
to unmute.
PAUSE: Catch the current picture.
Buttons for PIP functions
PIP: Press to turn on/off the PIP function.
POSITION: Press to change the position of the PIP window.
P.SOURCE: Press to change the input source of the current
window.
SWAP: Press to exchange between the PIP window and main
window.
SIZE: Press to change the zoom of the PIP window.
Note You can t watch programs from Multimedia1: ' " "
.source when PIP is chosen
Note You can t watch programs from two HDMI or2: '
programs from two YPbPr at the same time when PIP
.is chosen
P.MODE: Press repeatedly to cycle through the available video
picture modes.
S.MODE: Press to cycle through the different sound settings.
ASPECT: Press to change the screen display mode.
Number Buttons: Choose channel directly.
Press number buttons and press ENTER button to play the
channel.
: Return to the previous channel viewed.
DISPLAY: Display the information of current mode.
MENU: Press to display the OSD menu.
EXIT: Press to exit the OSD menu.
Thumbstick(
<>∧∨
): Allows you to navigate the on-screen
menus and adjust the system settings to your preference.
ENTER: CONFIRM button.
SLEEP: Shutdown timer.
SOURCE: Press to display the input source menu.
POWER
PIP
P.SOURCE
SWAP
SIZE
ASPECT
ENTER
MENU
1 2
5 6
9
0
REPEAT
VOL
A-B
REVEAL INDEXCHSIZE
SUBPAGE
FAV I-IIVIEWADD/DEL
POSITION
P.M O DE
3
7
CAPTURE
PROGRAM
TTX
MUTE
PAUS E
DISPLAY
S.MODE
SOURCE
EXIT
SLEEP
HOLD
4
8
9
Page 12

VOL+/-: Press to adjust the volume.
CH+/-: Press to scan through channels.
FAV: Press to display the list of the favorite channels.
ADD/DEL: Press to add or delete the current channel to the list
of the favorite channels.
VIEW: Press to view the list to the favorittechannels.
III- : TV Nicam/A2 select.III-
POWER
PIP
SWAP
ASPECT
P.SOURCE
SIZE
POSITION
P.M O DE
MUTE
PAUS E
DISPLAY
S.MODE
SOURCE
Buttons for media functions
REPEAT:
Press REPEAT to cycle through the repeat play
options.
PROGRAM: Select the program you want to copy or delete.
AB- : Select and play the preferable paragraph of the program
by pressing the button twice at the beginning and end of it.
CAPTURE: Press to Capture current screen to save the logo.
: Step forward.
: Play or pause. : Stop.
: Fast reverse. : Fast forward.
: Previous chapter. : Next chapter.
Buttons for TELETEXT functions
COLOR BUTTONS
Select 4 Preferred TELETEXT pages.
TTX
On Off teletext./
HOLD
Freeze the current page.
REVEAL
Reveal or hide the hidden words.
SUBPAGE
TELETEXT Subpage.
INDEX
Request index page when index link is valid.
SIZE
Change the picture size.
ENTER
MENU
1 2
5 6
9
0
REPEAT
VOL
A-B
REVEAL INDEXCHSIZE
SUBPAGE
FAV I-IIVIEWADD/DEL
3
7
CAPTURE
PROGRAM
TTX
EXIT
SLEEP
HOLD
4
8
10
Page 13

11
Page 14

L
OUTROUTVOUT
L
IN
RINV
COAX
IN
12
L
OUTROUTVOUT
L
IN
L
OUT
R
L
IN
COAX
RINV
IN
OUTVOUT
R
IN
V
IN
Page 15

RINV
R
INVIN
COAX
IN
L
OUTROUTVOUT
L
IN
L
IN
13
Page 16

L
OUTROUTVOUT
L
IN
RINV
COAX
IN
14
L
OUTROUTVOUT
L
IN
RINV
COAX
IN
Page 17

RINV
COAX
IN
L
OUTROUTVOUT
L
IN
Connecting USB DEVICE
Connect the USB DEVICE output terminal of your USB device to the USB PORT
terminal on the unit.
RINV
COAX
IN
USB PORT
L
OUTROUTVOUT
L
IN
USB DEVICE
Supply files format:JPEG,MPG, ,RM,RMVB.MP3
15
Page 18

L
OUTROUTVOUT
L
IN
RINV
COAX
IN
16
Page 19

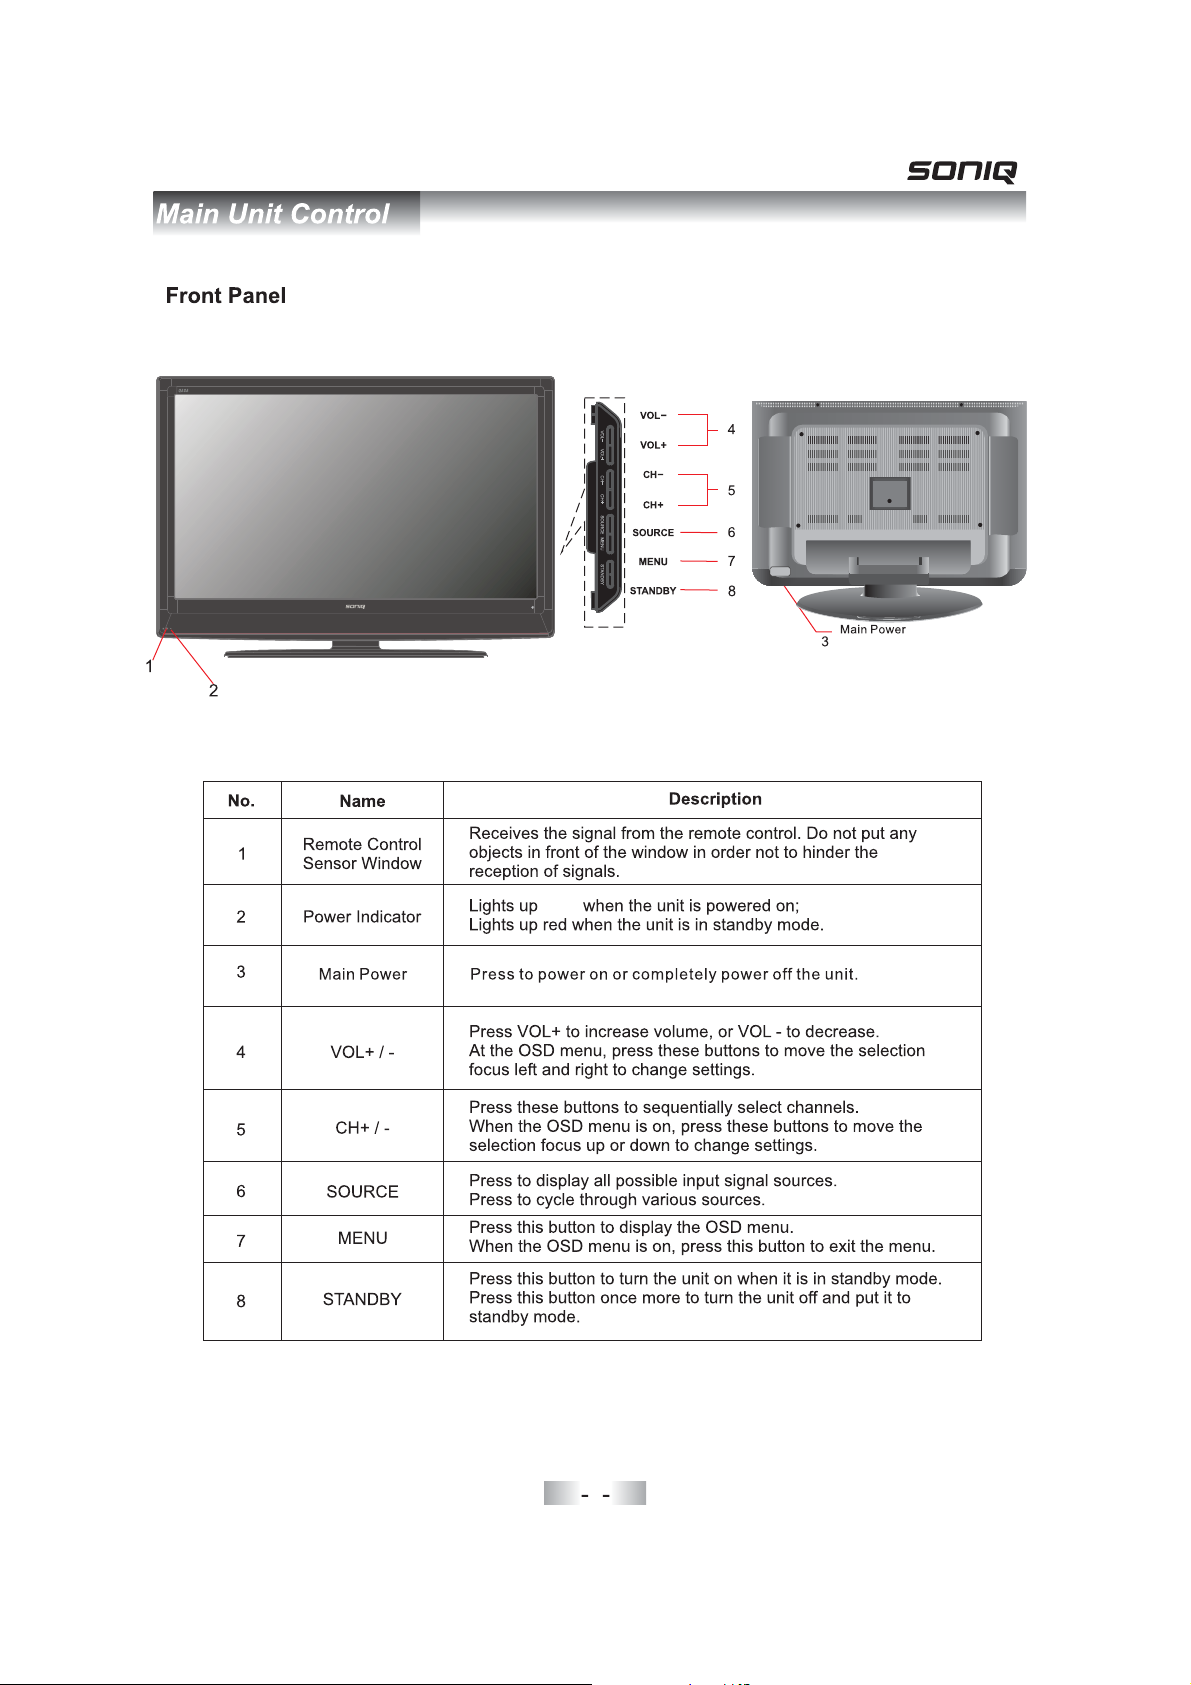
1. Connect to the power with a power code, and turn on the switch(page 6).
2.-To turn on the TV
Press POWER button on the TV or remote control.
-To turn off the TV
Press POWER button on the TV or remote control.
Main:
TV
Input Source select
Press SOURCE button on the TV set or remote control to display the input
source menu, and on the TV set or∧/∨button on remote control to select
the input source, press ENTER button on the remote control to enter.
Note Before you select the input source make sure the:,
connections are prepared.
AV
S-Video
YPbPr1
YPbPr2
HDMI1
HDMI2
VGA
Multimedia
Basic buttons on the remote control
POWER: Turn the TV on/standby.
MUTE VOL to unmute: Press to mute the sound, press again or press +.
PMODE: Press repeatedly to cycle through the available video picture modes.
SMODE: Press to cycle through the different sound settings.
PAUSE: Catch the current picture.
III- :TV
III- : TV Nicam/A2 select.
Number Buttons: Choose channel directly.
Press number buttons and press ENTER button to play the channel.
: Return to the previous channel viewed.
DISPLAY: Display the information of the current mode.
MENU: Press to display the OSD menu.
EXIT: Press to exit the OSD menu.
ASPECT: Press to change the screen display mode.
Thumbstick(
settings to your preference.
ENTER: CONFIRM button.
SLEEP: Shutdown timer.
SOURCE: Press to display the input source menu.
VOL+/-: Press to adjust the volume.
CH+/-: Press to scan through channels.
FAV: Press to display the list of the favorite channels.
ADD DEL/ : Press to add or delete the current channel to the list of the favorite channels.
VIEW:Press to view the list to the .favorite channels
<>∧∨
): Allows you to navigate the on-screen menus and adjust the system
17
Page 20

Basic OSD Menu operation
Press MENU button to display the OSD menu as below:
Vivid
65
53
72
Middle
Middle
On
/ENTER
Submenu
(Video menu
for example)
4
Main menu
Video
Audio
Misc
TV
PC
Video
Audio
Misc
TV
PC
Picture Mode
Contrast
Brightness
Saturation
Sharpness
Color Temperature
DNR
Adaptive Luma Control
Select Back Adjust
MENU
Hint---you should operate the OSD menu according to the hint.
Use∧/∨button to select the main menu, and press>button to enter the submenu(Fig.1).
In the submenu, use∧/∨button to select the function item, and you could adjust(Fig.2) or
select Fig with( .3)
</>
button, or enter the submenu(Fig.4) with>button.
* (Press MENU button to return to the upper menu.)
* (Press EXIT button to exit the menu display.)
Note Only when you input the suitable signal the relevant items can be activated1: ,
Note Please operating the OSD menu according to hint on the bottom of the banner2: .
Video
Audio
Misc
TV
PC
Video
Audio
Misc
TV
PC
Picture Mode
Contrast
Brightness
Saturation
Sharpness
Color Temperature
DNR
Adaptive Luma Control
Fig.1
Picture Mode
Contrast
Brightness
Saturation
Sharpness
Color Temperature
DNR
Adaptive Luma Control
Fig.3
User
Middle
Middle
On
User
Middle
Middle
On
65
53
72
4
Video
Audio
Misc
TV
PC
Picture Mode
Contrast
Brightness
Saturation
Sharpness
Color Temperature
DNR
Adaptive Luma Control
User
65
53
72
4
Middle
Middle
On
Fig.2
65
53
72
4
Video
Audio
Misc
TV
PC
OSD Language
Blue Back
Timer
Parental
Default
English
On
Fig.4
18
Page 21

Video menu
Video
Audio
Misc
TV
PC
Picture Mode
Contrast
Brightness
Saturation
Sharpness
Color Temperature
DNR
Adaptive Luma Control
Select Back Adjust
MENU
User
65
53
72
4
Middle
Middle
On
/ENTER
Description
Picture Mode: Select your desired picture mode.
You may select the picture mode directly by pressing the PMODE button on the remote
.control
Contrast Adjust image contrast:.
Brightness: Adjust image black level.
Saturation Adjust image saturation:.
Sharpness Adjust the sharpness:.
ColourTemperature: Select an optimum color temperature mode to suit your eyes for
viewing among User, Cool, Middle, Warm.
Note You could not operate the Contrast Brightness Saturation Sharpness and Color:,,,
,.Temperature items when you select picture mode Vivid Normal or soft
DNR: If the broadcast signal received is weak, you can select the DNR option to reduce the
video noise level between Off, Low, Mid and High.
Adaptive Luma Control Adjust the brightness automatically:.
19
Page 22

Audio menu
Video
Audio
Misc
TV
PC
Sound Mode
Volume
Bass
Treble
Balance
Surround
AV C
Equalizer
Select Back Adjust
MENU
User
50
50
50
0
Off
On
/ENTER
Description
Sound Mode: Select your desired picture mode.
You may select the sound mode directly by pressing the SMODE button on the remote
.control
Volume Adjust vollume:.
Bass Adjust the level of the lower pitched sounds:-.
Treble Adjust the level of the higherpitched sounds:.
Balance: Adjust the audio output between left and right speakers.
Surround: Turn on/off on the surround function.
AV C : Keep it on, Video adjust by itself automatically; Else, is not available.
Equalizer: Enter the Equalizer menu to adjust.
Misc menu
Video
Audio
Misc
TV
PC
OSD Language
Region Language
Blue Back
Timer
Parental
Default
Select Back Adjust
MENU
20
English
Hebrew
On
Description see next page()
/ENTER
Page 23

Description
OSD Language: Select OSD language.
Blue Back: Turn on/off the Blue Back function while no signal.
Timer: Timer settings, as the picture below.
Time
On Time
Start Channel
Start Activate
Off Time
Stop Activate
00:13:24
00:00:00
001
0ff
00:00:00
Off
Time: Display the current time.
On Time: Set the on time of the TV.
Start Channel: Select the channel when the TV
turns on at the time you set.
Start Activate Activate the on time setting:.
Off Time: Set the off time of the TV.
Stop Activate Activate the off time setting:.
Parental: Parental settings, as the picture below.
You should enter the code(Initial Password: 0000) to enter the Parental menu.
Channel Lock
Video Lock
Change Password
Clear All
1
TV
Channel Lock: Lock to playing a channel.
Video Lock: Lock to playing a input source.
Change Password Change the pssword:.
You have to enter the password to enter
Password
Confrm
the Parental menu above.
----
----
Default Reset all the Misc settings:.
21
Page 24

TV menu
Video
Audio
Misc
TV
PC
Auto Search
Manual Scam
Program Edit
Select Back Adjust
MENU
/ENTER
Auto Search: Start auto searching.
Note When the TV is auto tunning you could press MENU button to stop auto tunning and:,
return to preview menu.
Searching
46.87 MHz
Stop
0
0%
MENU
Manual Scan:.Select a channel to manual scan as the picture below
Manual Scan
PR Start
Start From
Start Search
43.00 MHz
Select Back Adjust
MENU
1
/ENTER
PR Start:.Select the channel you want to manual scan
Start From:.Select the freq. you want to start from
Start Search:.Press ENTER button to start search
22
Page 25

Program Edit:.Select a channel to manual scan as the picture below
Program Edit
Channel Freq System Name Skip
1 --- --- --- On
2 90.75 B/G --- On
3 --- --- --- On
4 --- --- --- On
5 --- --- --- On
6 --- --- --- On
7 --- --- --- On
8 --- --- --- On
Swap Insert Copy Delete
Select Back
MENU
Adjust
/ENTER
Swap: Swap two channels' position.
Select the channel, and press RED button, then select the channel you want to swap, and
press ENTER button to swap.
Insert Insert a channel:.
Select the channel, and press Green button to pick-up, then select the position you want the
channel to be inserted to, and press ENTER button.
Copy: Copy a channel.
Select the channel, and press YELLOW button to copy, then select the position you want the
channel to be copied to, and press ENTER button.
Delete Delete a channel:.
Select the channel, and press BLUE button to delete the channel.
PC menu
Video
Audio
Misc
TV
H Position 0
V Position 50
Clock 50
Phase 50
Auto Setting
PC
Select Back Adjust
MENU
/ENTER
H V Position/ : Adjust the transverse/vertical position of the screen.
Clock: Adjust the pixel clock frequency, until the image size is maximized for the screen.
Phase: Adjust the phase of theADC sampling clock relative to the sync signal, until a stable
image is obtained.
Auto Setting: Press button to setup the parameter of the screen automatically.
23
Page 26

1. Insert the a USB device.
2. Press SOURCE button to display the input source menu,
select Multimedia, and press ENTER button, the TV
will search the device automatically.
3. When it found the devices, press∧/∨button to select,
and press ENTER button to enter.
Main:
TV
AV
S-Video
YPbPr1
YPbPr2
HDMI1
HDMI2
VGA
Multimedia
Device List
Searching
Files in the device
4. Select a fle and press ENTER button to play.
5. Press SOURCE button to return and select other devices.
Buttons for media playing on remote control
REPEAT:Press REPEAT to cycle through the repeat play
options.
PROGRAM: Select the program you want to copy or delete.
AB- : Select and play the preferable paragraph of the program
by pressing the button twice at the beginning and end of it.
CAPTURE: Press to Capture current screen to save the logo.
: Step forward.
: Play or pause. : Stop.
: Fast reverse. : Fast forward.
: Previous chapter. : Next chapter.
Device
USB
External Hard Drive
Max Support
4G
240G
24
Page 27

Troubleshooting and Advice
Should your unit develop a problem, please refer to the below troubleshooting table before
requesting assistance.
Troubleshooting
No signal
No color shades
Stain show on the
screen.
Double or multiple
display image
Snow on the screen
The remote control
does not work
"Zip" noise on
coming from TV
Control
Please check that all cables are correctly plugged in.
Adjust the contrast, color and brightness
Maybe result from a lighting signal from car, motor, neon light and
other electrical devices or appliances.
Maybe the result of an electrical wave disturb from other TV,
Computer and Game machine or Radio
The cables of the antenna are not correctly plugged in.
Please check the polarity of the batteries.Check that the receiver
of the remote control is not sheltered by something.
Even if the display image is correct, the noise may come from an
unsteady fixation of the panel.
No sound
Make sure that you have not press the MUTE button on the panel
or on the remote control.
25
Page 28

Specifications
Screen Size
Display Type
Resolution(Pixel)
Aspect Ratio
AC INPUT
TV System
Video Input Format
Antenna Input
Audio Output
Video
S-Video
Input
Audio (S-Video/PC/YPbPr)
(Videos-Video-PC)
Audio
YPbPr
PC
26 Inch
TFT LCD
1366 X 768
16:9
AC110-240V 50/60Hz 120W
PAL / BG
PAL/NTSC
Standard antenna socket 75Ω
L/R W2X8
Video 0Vp-p75 RCA1. ;Ω
Y:1.0Vp-p±3db C:0.3Vp-p±3db
640 480/60Hz 800 600/60Hz 1024 768/60HzXX X
R/L 200mVrms (max3.0vp-p) 20K RCAΩ
Y: 1V p-p PB/PR: 0.7Vp-p
HDMI
Weight
Dimensions (with stand)
This manual is only for your reference, any change to the design and specification will not
be advised.
Standards TMDS Max. 1080P
14kgs
730(L)X250(W)X570(H)mm
26
Page 29

Page 30

Page 31

Page 32

 Loading...