

Page 1
Page 2
SAFETY INSTRUCTIONS
The lightning flash with an arrowhead symbol,
within the equilateral triangle, is intended to alert
the user to the presence of uninsulated "dangerous
voltage" within the product's enclosure that may be
of suffi cient magnitude to cause an electric shock.
The exclamation point within the equilateral
triangle is intended to alert the user to the
presence of important operating and maintenance
WARNING: TO REDUCE THE RISK OF ELECTRIC
SHOCK, DO NOT REMOVE COVER (OR BACK).
NO USER-SERVICEABLE PARTS INSIDE. REFER
SERVICING TO QUALIFIED SERVICE PERSONNEL.
WARNING: TO PREVENT FIRE OR SHOCK HAZARD, DO NOT EXPOSE THIS APPLIANCE TO RAIN OR MOISTURE.
(servicing) instructions in this owner's manual.
* SEE BOTTOM OF UNIT FOR
GRAPHIC SYMBOLS *
INVISIBLE LASER RADIATION WHEN OPEN
AND INTERLOCKS DEFEATED.
AVOID EXPOSURE TO BEAM
The symbol for Class II
(Double lnsulation)
This product contains a
low power laser device.
On Placement
CAUTION
• Do not use the unit in places that are extremely hot, cold, dusty, or humid.
On Safety
• When connecting or disconnecting the AC adaptor, grip the plug and not the cord itself. Pulling the cord may
damage it and create a hazard.
• When you are not going to use the unit for a long period of time, disconnect the AC adaptor.
On Condensation
• When left in a heated room where it is warm and damp, water droplets or condensation may form inside the unit.
When there is condensation inside the unit, the unit may not function normally. Let the unit stand for 1 to 2 hours
before turning the unit on, or gradually heat the room up and allow the unit to dry before use.
Ventilation Warning
• Do not block the ventilation openings or holes. (If the ventilation openings or holes are blocked by a newspaper
or cloth, etc., the heat may not be able to get out.)
• Do not operate the unit in a confi ned space, such as a bookcase or built-in cabinet, allow about 10cm of free
space all around the unit for adequate ventilation.
Rating Plate Location
• The rating plate is located on the bottom of the unit.
WARNING:
• Should any trouble occur, disconnect the AC adaptor and refer servicing to a qualifi ed technician.
• Do not allow the unit to be exposed to dripping or splashing. No objects fi lled with liquids, such as vases,
shall be placed on the unit.
• The AC adaptor is used as the disconnect device and it shall remain readily operable. If a malfunction
occurs, disconnect the AC adaptor from the wall outlet at once.
Notes on Copyright
It is forbidden by law to copy, broadcast, show, broadcast on cable, play in public, or rent copyrighted material
without permission.
Apparatus Claims of U.S. Patent Nos. 6,836,549; 6,381,747; 7,050,698; 6,516,132 and 5,583,936 licensed for
limited viewing uses only.
This product incorporates copyright protection technology that is protected by U.S. patents and other intellectual property
rights. Use of this copyright protection technology must be authorized by Macrovision, and is intended for home and other
limited viewing uses only unless otherwise authorized by Macrovision. Reverse engineering or disassembly is prohibited.
- 1 -
Page 3

IMPORTANT SAFETY INSTRUCTIONS
SAFE USE OF YOUR EQUIPMENT
Here are a few tips to help you do this:
READ this instruction manual before you attempt to use the equipment.
NEVER fi t make shift stands or legs with woodscrews. Use only approved supports and fasteners specially
designed for the equipment.
NEVER let anyone, especially children, push objects into holes, ventilation slots or any other opening; this
could result in fatal electric shock!
ALWAYS disconnect the AC adaptor when you are not going to use the unit for a long period of time.
ENSURE that all electrical connections (including the mains plug, extension leads and interconnections
between pieces of equipment) are properly made in accordance with the instructions given. Switch off the
main supply when making or changing connections.
CONSULT your dealer if you are ever in doubt about the installation, operation or safety of your equipment.
DON'T continue to operate the equipment if it is damaged in any way or if it does not function normally.
Disconnect the
DON'T leave equipment switched on when it is unattended unless it is part of it's normal function to operate
in your absence, for example a video cassette recorder with timed recording facility.
LISTEN to headphones at moderate volume levels; high volume levels can permanently damage your
hearing.
WARNING:
• AC adaptor is used as the disconnect device. It shall remain readily operable and should not be obstructed
during intended use. To be completely disconnected the apparatus from supply mains, the AC adaptor of
the apparatus shall be disconnected from the mains socket outlet completely.
• Never use an AC adaptor that is damaged, route power lead in a safe manner and make sure it is not
subjected to trapping or pinching. If the power lead is damaged refer to a qualifi ed service agent.
• Place the unit on a fl at and even surface.
• Do not restrict the air fl ow of the unit by placing it in a place with poor air fl ow, by covering it with a cloth,
or by placing it on carpeting.
• To avoid magnetized, do not place the unit near speaker or magnet.
• Do not use this unit in direct sunlight or leave the unit in a closed automobile (or yacht, etc) where it would
be exposed to high temperatures above 40°C.
• It also should not be placed in temperatures less than 5°C or greater than 35°C.
• No naked fl ame sources such as lighted candles should be placed on the AC adaptor and main unit.
AC adaptor
and consult your dealer.
- 2 -
Page 4

TABLE OF CONTENTS
Safety Instructions .................................. 1
Important Safety Instructions................. 2
Table of Contents .................................... 3
Disc Formats ............................................ 4
Accessories ............................................. 5
Remote Control ........................................5
Control Reference Guide ...................6 - 7
Power Supply ......................................8 - 9
Using the AC adaptor .................................8
Using the car power adaptor ......................8
Using the rechargeable battery ...................9
Turning on the unit ...................................... 9
Connections ........................................... 10
Connecting a TV ........................................10
Using headphones / earphones ................10
Sound System ........................................ 10
Playing a Disc .................................11 - 12
Playing a disc ............................................11
Pausing playback (still mode) .................... 11
Stopping playback ..................................... 11
Fast forward / Fast reverse ........................11
Skip (forward / reverse) .............................11
Audio selection .........................................11
Subtitle selection ....................................... 12
Angle selection .......................................... 12
Display function ......................................... 12
Adjust the LCD screen ..............................12
Locating a Desired Section ..................13
Locating a specifi c chapter / title ...............13
Locating a specifi c time .............................13
Locating a specifi c disc / track time ........... 13
Selecting a specifi c track ........................... 13
Repeat Playback ................................... 14
Repeating a chapter / title .........................14
Repeating a single track / whole disc ........14
Repeating a specifi c section ...................... 14
Programmable Memory ......................... 15
Playing titles / chapters / tracks in a favourite
order ......................................................... 15
Viewing JPEG Files ...............................15
Viewing JPEG fi les ....................................15
Customizing the Function Settings
..........................................................16 - 17
Language setup ........................................ 16
Video setup .............................................. 16
System setup ..................................... 16 - 17
Maintenance ........................................... 18
Cleaning the disc ....................................... 18
Cleaning the unit .......................................18
Important note .......................................... 18
Troubleshooting Guide ......................... 18
Carrying Bag Installation ...................... 19
- 3 -
Page 5
DISC FORMATS
The unit can playback discs bearing any of the following marks:
Region Management Information
Region Management Information: This unit is designed and manufactured to respond to the Region Management
Information that is encoded on DVDs. If the region number printed on the DVD does not correspond to the region
number of this unit, this unit cannot play that disc.
The region number of this unit is 4.
Disc Function or Operation that is Not Available
When the symbol appears on the TV screen, it indicates that the function or operation attempted is not available
at that time. This occurs because the DVD manufacturer determines the specifi c functions. Certain functions may
not be available on some discs. Be sure to read the documentation provided with the disc.
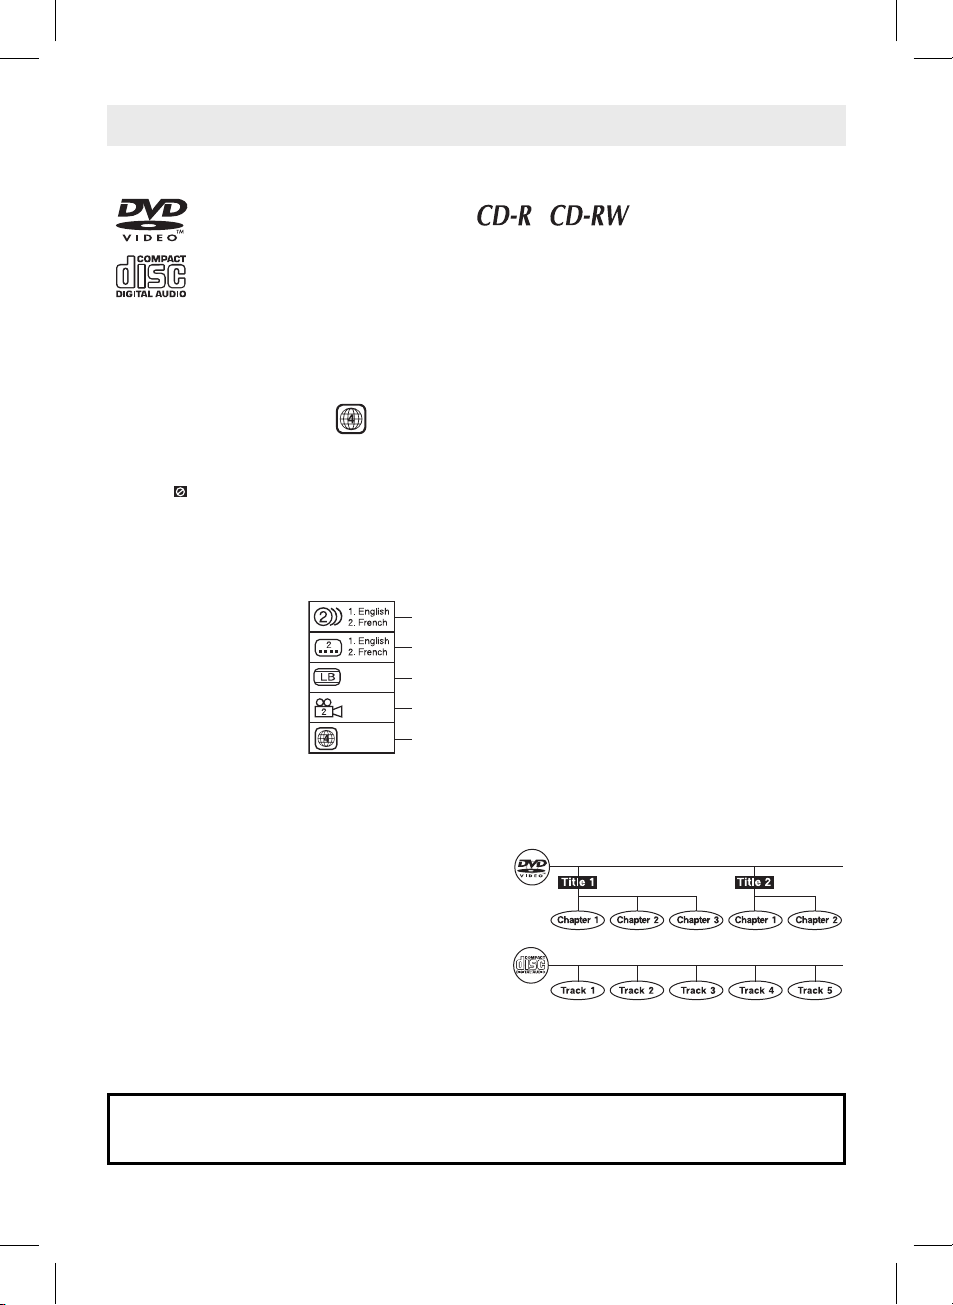
Icons Used on DVDs
Sample lcons
Note:
• When playing back a CD-G (Graphics) or CD EXTRA disc, the audio portion will be played, but the graphic
images will not be shown.
DVDs
[8cm(3")/12cm(5") disc]
Audio CDs
[8cm(3")12cm(5") disc]
Compatible
Language selections for audio
Language selections for subtitles
Screen aspect ratio
Multiple camera angles
Region code indicator
Title, Chapter and Tracks
• DVDs are divided into “titles” and “chapters”. If the
disc has more than one movie on it, each movie would
be a separate “title”. “Chapters” are sections of titles.
• Audio CDs are divided into “tracks”. A “track” is
usually one song on an Audio CD.
Note:
• Numbers identify each title, chapter, and track on a disc. Most discs have these numbers recorded on them, but
some do not.
Notes on Unauthorized Discs
You may not be able to play back some DVDs on this unit if they were purchased from outside your
geographic area or made for business purposes.
- 4 -
Page 6
ACCESSORIES
Please check and identify the supplied accessories.
Remote control (with battery) ...........................................................................................x 1
AC adaptor .......................................................................................................................x 1
Car power adaptor ...........................................................................................................x 1
Audio/Video cable ............................................................................................................x 1
Earphones .......................................................................................................................x 1
Carrying bag ....................................................................................................................x 1
REMOTE CONTROL
Using the Remote Control
• Point the remote control at the REMOTE SENSOR
located on the unit.
• When there is a strong ambient light source, the
perform ance of the infrared REMOTE SENSOR may
be degraded, causing unreliable operation.
• The recommended effective distance for remote
operation is about 16 feet (5 meters).
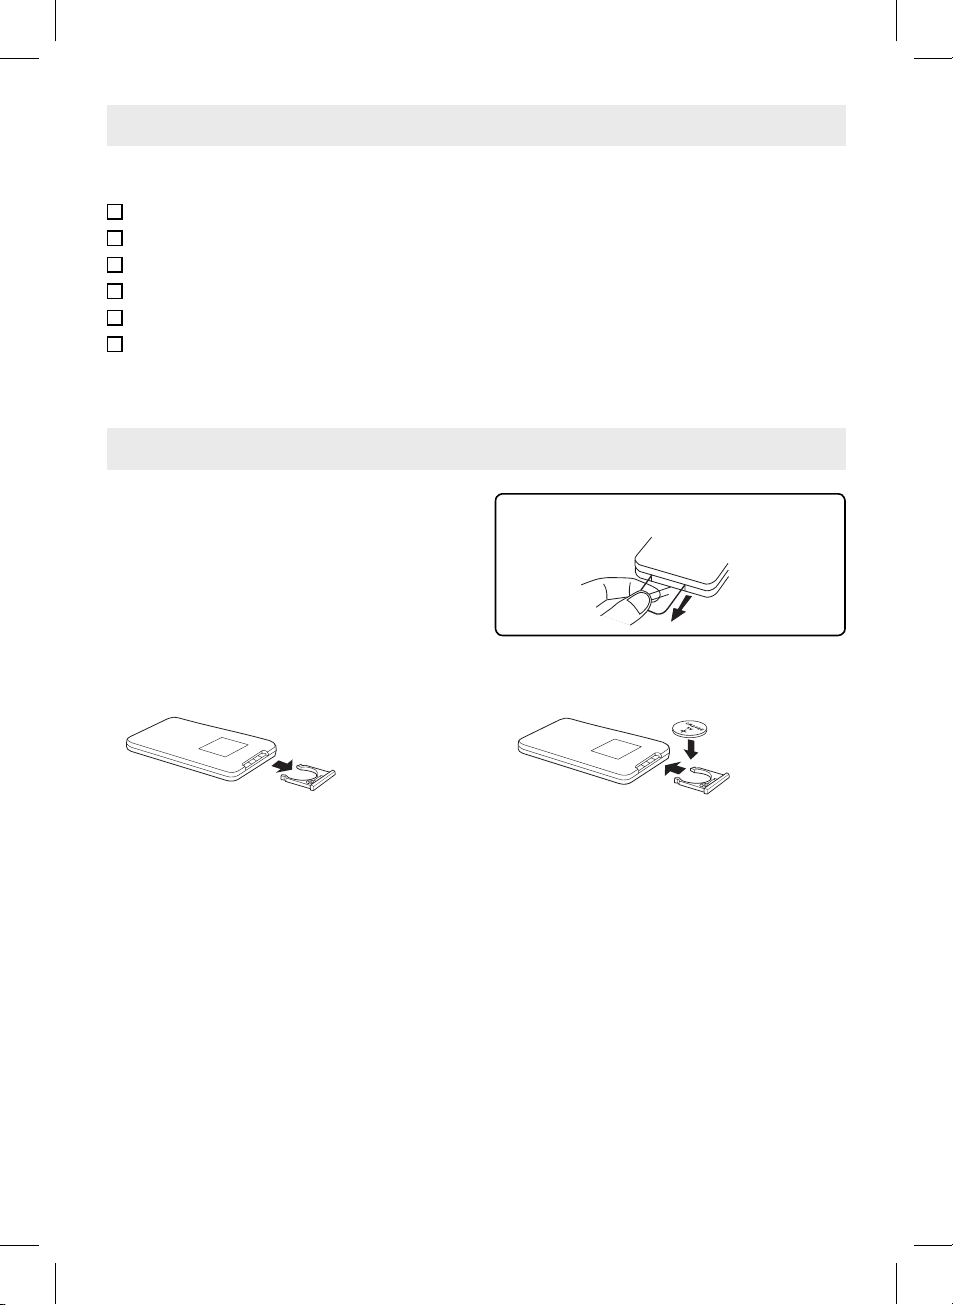
Remove the plastic sheet before operating the
remote control.
To Change Remote Battery
1. Open the battery door.
BATTERY REPLACEMENT
When the battery becomes weak, the operating distance of the remote control will be greatly reduced and you will
need to replace the battery.
Note:
• If the remote control is not going to be used for a long time, remove the battery to avoid damage caused by
battery leakage corrosion.
• Corrosion, oxidation, battery-leakage and any other gradually acidic defect of this nature will void the warranty.
• When discarding batteries, environmental problems must be considered and local rules or laws governing the
disposal of these batteries must be followed strictly.
WARNING:
• Do not dispose of battery in fi re, battery may explode or leak.
• The battery should not be exposed to excessive heat such as sunshine, fi re or the like.
CAUTION:
Danger of explosion if battery is incorrectly replaced. Replace only with the same or equivalent type.
2. Insert one CR2025 (3V) size battery.
- 5 -
Page 7

Remote Control
CONTROL REFERENCE GUIDE
1) VIDEO MODE button
Adjust Brightness, Panel Display (Wide 16:9 /
Normal 4:3) and Contrast of the LCD screen.
2) PREV button
Move back through titles, chapters or tracks on a
disc.
3) / SEARCH buttons
SEARCH: Fast reverse playback.
SEARCH: Fast forward playback.
4) GOTO button
Skip directly to a location on a DVD.
5) Cursor ( , , , ) buttons
Use to move between selections on a menu
screen and adjust certain settings.
ENTER button
Confi rm selections on a menu screen.
6) MEMORY button
Set titles/chapters in a favourite order.
7) Number (0 - 9) buttons
Use when entering password, creating programs
or locating a title/chapter/track or specifi c time.
8) REPEAT A-B button
Perform point-to-point repeat playback on a DVD
or CD.
REPEAT DISC button
Repeat a DVD chapter or title.
Repeat a CD track or the whole disc.
SETUP button
When a DVD is stopped, display the unit’s SETUP
menu.
9) SUBTITLE button
Select one of the subtitle languages programmed
on a DVD (if available).
RETURN button
Return to normal operation after using the SETUP
menu of a DVD.
10) AUDIO button
Select one of the audio sound tracks on a DVD
(if more than one is available) or select the audio
output mode on a CD.
11) ANGLE button
Switch between multiple camera angles when the
DVD you are playing has been programmed with
multiple camera angles.
12) DISPLAY button
Show status information on the screen.
13) STOP button
Stop playing a disc.
PLAY button
Start or resume playback of a disc.
PAUSE button
Press once to pause playback. Press subsequently
to advance frame by frame on a DVD.
14) NEXT button
Move forward through titles, chapters or tracks on
a disc.
15) MENU button
Enter and exit the main DVD menu.
- 6 -
Page 8

Unit
CONTROL REFERENCE GUIDE
1) LCD screen
2) DC IN 9V-12V jack
3) AUDIO & VIDEO OUT jacks
4) CHARGE / STANDBY / ON switch
5) VOLUME control
Adjust the volume.
6) Headphones / Earphones jack
NEXT button
7)
Move forward through titles, chapters or tracks
on a disc.
PREV button
Move back through titles, chapters or tracks on a
disc.
PAUSE button
Press once to pause playback. Press
subsequently to advance frame by frame on a
DVD.
PLAY button
Press to start or resume playing a disc.
STOP button
Stop playing a disc.
/ buttons
SEARCH: Fast forward playback.
SEARCH: Fast reverse playback.
8) Disc Door
Close tray by pushing the disc door.
9) Open knob
Slide the open knob rightwards to open the disc
door.
10) Remote sensor
Receive the remote control unit signals.
11) ON indicator
When the CHARGE / STANDBY / ON switch is
in the ON position, the light will illuminate.
12) CHARGING indicator
Charge the rechargeable battery before using
it for the fi rst time. The normal charging time is
approximately 4-5 hours. The charging light will
go out when the battery becomes fully charged.
- 7 -
Page 9

POWER SUPPLY
A. Using the AC Adaptor
This AC adaptor operates on AC between 100V and 240V.
• The supplied AC adaptor is suitable for use on AC mains supplies of 100-240 Volts AC and should only be
connected to a mains supply within these parameters.
AC adaptor
LEFT SIDE OF UNIT
2
To AC outlet
To DC IN 9V-12V jack
1
Cautions:
• The AC adaptor included with this unit is for its use only. Do not use it with other equipment.
• Turn off the unit before unplugging the AC adaptor from the unit so as to avoid the unit being damaged.
• When the unit is not going to be used for long time, disconnect the AC adaptor from the AC outlet.
IMPORTANT
• Be sure to use it near the wall outlet and easily accessible. If a malfunction occurs, disconnect the plug from the
wall outlet at once.
• When the AC adaptor is plugged in, the apparatus is not completely disconnected from the main power source,
even when the unit is turned off.
B. Using the Car Power Adaptor
The 12V car power adaptor is designed for use with vehicles that have a 12V, negative ground electrical system.
WARNING:
Disconnect this car power
adaptor when not in use.
Not for use in 24V vehicles.
LEFT SIDE OF UNIT
1
To the cigarette
lighter socket
To DC IN 9V-12V jack
Car power adaptor
2
Cautions:
• Use only the included 12V car power adaptor. Use of any other 12V car power adaptor could damage the unit.
• The 12V car power adaptor included is for use with this unit only. Do not use it with any other equipment.
• In the interest of traffi c safety, drivers should not operate the unit or view videos while driving.
• When the inside of the cigarette lighter socket is dirty with ashes or dust, the plug section may become hot due
to poor contact. Be sure to clean the cigarette lighter socket before use.
• After use, disconnect the car power adaptor from both the unit and cigarette lighter socket.
• If the unit is not properly attached to a vehicle, it may become airborne in the event of an accident and cause
damage, injury, or death.
• Check your local traffi c laws for rules governing the use of video devices in vehicles before using this unit in your
vehicle.
- 8 -
Page 10

POWER SUPPLY
C. Using the Built-in Battery
The unit has a built-in, non-replaceable, rechargeable battery. Charge the built-in battery before using it for the fi rst
time. The normal charging time should be completed within 4-5 hours. The charging light will go out when the builtin battery becomes fully charged.
To Recharge the Built-in Battery
To AC outlet
1
AC adaptor
To DC IN
2
9V-12V jack
Slide the switch
3
to CHARGE
Warnings:
• The built-in battery can only be recharged when the unit is in CHARGE mode while using the AC adaptor.
• The built-in battery cannot be recharged when the unit is in power ON mode.
• The unit should not be exposed to excessive heat such as sunshine, fi re or the like.
Cautions:
• The AC adaptor included with this unit is for its use only. Do not use it with other equipment.
• When the unit is not going to be used for long time, disconnect the AC adaptor from the AC outlet.
• When the AC adaptor is plugged in, the apparatus is not completely disconnected from the mains, even when
the unit is turned off.
Condition and attention:
• When the built-in battery power is low, "Battery Low" will display on the screen and the unit will stop playing.
• Recharge the built-in battery when you are ready to use it again.
• While using the built-in battery, the environmental temperature should be 5°C (41°F) to 35°C (95°F).
• To get the longest service life of the built-in battery, charge at indoor-temperature.
• The built-in battery in this device may present a risk of fi re or chemical burn if mistreated. Do not disassemble,
heat above 100°C (212°F), or incinerate.
• The unit should not be exposed to excessive heat such as sunshine, fi re or the like.
• When discarding the unit, environmental problems must be considered and local rules or laws governing the
disposal of such products must be strictly followed.
Recharging is
completed when
5
charging light
goes out
Charging light ON
4
Turning On the Unit
1. Slide the CHARGE / STANDBY / ON switch on the left side of the unit to the ON position.
2. The DVD logo (start-up picture) will appear on the screen.
3. After use, slide the CHARGE / STANDBY / ON switch to the STANDBY position.
- 9 -
Page 11

CONNECTIONS
A. Connecting a TV
If your TV has audio/video inputs, you can also connect the unit to your TV using the Audio/Video cable, and watch
DVD on your TV screen.
LEFT SIDE OF UNIT
TV
White Red Yellow
White Red Yellow
To AUDIO / VIDEO
OUT jacks
Audio/Video cable
Watching a DVD on your TV
1. Turn on the unit.
2. Turn on the TV and set its source to AV or similar (see the TV instruction manual for details).
B. Using Headphones / Earphones
• Turn down the volume before connecting, and then
adjust the level.
• When headphones / earphones are connected, no
sound will be emitted from the unit's speaker.
Caution:
• Avoid listening to sound at levels which may be harmful
to your ears.
LEFT SIDE OF UNIT
Headphones /
Earphones
(3.5mm diameter plug)
SOUND SYSTEM
Dolby Digital
Dolby Digital is a technology developed by Dolby Laboratories. Soundtracks encoded in Dolby Digital can
reproduce from one to 5.1 discrete channels of excellent quality audio.
The unit automatically recognizes the Dolby Digital bitstream and provides a downmix suitable for two-channel
listening. An additional Dolby Digital decoder is required for reproduction of the discrete multi-channel soundtracks
available on many DVDs.
Manufactured under license from Dolby Laboratories.
"Dolby" and the double-D symbol are trademarks of Dolby Laboratories.
- 10 -
Page 12

Basic playback
This owner’s manual explains the basic instructions for operating this unit. Some DVDs are produced in
a manner that allows specifi c or limited operation during playback. Therefore, this unit may not respond
to all operating commands. THIS IS NOT A DEFECT. Please refer to the instructions accompanying the
specifi c DVD in question for more information about the options available on that DVD.
” may appear on the screen during operation. A “ ” means that the desired operation is not
“
permitted by the unit or disc.
PLAYING A DISC
Playing a Disc
1. Slide the CHARGE / STANDBY / ON switch on the left side of the unit to the ON position.
See CUSTOMIZING THE FUNCTION SETTINGS before proceeding to step 2.
2. Slide the open knob rightwards to open the disc door.
3. Hold the disc by its sides and carefully place it onto the spindle with the label side
facing up, pushing gently until you hear a “click”.
4. Close the disc door. It takes a short while for your unit to load the disc. After loading, the
unit will automatically bring you to the main menu of the DVD or start playing the DVD.
5. If the unit does not automatically start playing the DVD, press the PLAY button.
Pausing Playback (Still Mode)
Press the PAUSE button. To resume normal playback, press the PLAY button.
Each time you press the
PAUSE button, the picture advances one frame.
Stopping Playback
Press the STOP button at the location where you want to interrupt playback. To resume playback at the position
where the disc was stopped, press the PLAY button.
If you press the STOP button twice, the unit’s memory will be cleared and pressing the PLAY button will reset
the DVD to the beginning.
Fast Forward / Fast Reverse
1. Press the SEARCH or SEARCH button when a disc is playing. Each time you press the SEARCH or
SEARCH button, the playback speed changes in the following sequence:
2x 4x 8x
2x 4x 8x
2x 4x 8x
2. Press the PLAY button when you reach the desired point to resume normal playback.
Notes:
• The DVD player mutes sound and subtitles during reverse and forward scan of DVDs.
• The fast playback speed may differ depending on the disc.
16x
16x
2x 4x 8x
16x
16x
Skip (Forward / Reverse)
• Press the NEXT button to advance chapters/tracks.
• Press the PREV button to go back to current or previous chapters/tracks.
• For an Audio CD, use the number buttons on the remote control to jump directly to the desired track number.
Audio Selection
On some DVDs, the sound is recorded in two or more formats. Follow the directions below to select the preferred
language and sound system.
1. While a disc is playing, press the AUD IO button to show the current audio format number.
Audio 1/3:Dolby D 2ch EnglishAudio 1/3:Dolby D 2ch English
2. Press the AUDIO button repeatedly to select the desired audio format.
Notes:
• If only one audio format is recorded on the DVD, the number does not change.
• Some DVDs allow you to change audio selections only via the disc menu. If this is the case, press the MENU
button and choose the appropriate language on the disc menu.
• You can select different audio channels (Stereo, Mono Left, Mono Right or Mix-Mono) on an Audio CD by
pressing the AUDIO button repeatedly.
- 11 -
Page 13

Basic playback
PLAYING A DISC
Subtitle Selection
1. While a DVD is playing, press the SUBTITLE button to display the current language setting, as shown in the
example.
2. Press the SUBTITLE button repeatedly to select the desired subtitle language. You can turn subtitles off by
pressing the SUBTITLE button repeatedly until the “
Notes:
• Some DVDs are set to display subtitles automatically, and you cannot turn them off even if you set the subtitle
function to off.
• During some scenes, the subtitles may not appear immediately after you select your desired scene.
• The number of subtitle languages recorded differs depending on the disc. If only one language is recorded, the
language does not change.
• This function can only be used for discs on which subtitles have been recorded in multiple languages.
• Some DVDs allow you to change subtitles only via the disc menu. If this is the case, press the MENU button
and choose the appropriate subtitle on the disc menu.
Subtitle 02/03:SpanishSubtitle 02/03:Spanish
Subtitle OffSubtitle Off
” is displayed.
Angle Selection
Some DVDs contain scenes that have been shot from a number of different angles. For these discs, the same
scene can be viewed from each of these different angles.
1. While you are playing a DVD with different angles recorded, press
the ANGLE button to view the number of current angles available.
2. Press the ANGLE button repeatedly to change the scene to the
next recorded angle.
• After approx. two seconds, playback will continue from the new
angle selected.
• If no button is pressed within 10 seconds, playback continues
without changing the current angle.
Note:
This function can only be used for discs on which scenes shot from multiple angles have been recorded.
Sequence of angle shots
/31 /32 /33
1/31/311
(Example)
Display Function
While the disc is playing, press the DISPLAY button repeatedly to display information on operation status.
Adjust the LCD Screen
You can adjust Brightness, Panel Display (Wide 16:9 / Normal 4:3) and Contrast of the LCD screen.
1. Press the VIDEO MODE button on the remote control.
2. Press the / button to select Brightness, Panel Display (Wide 16:9 / Normal 4:3) or Contrast.
3. Press the / button to change the setting.
4. Press the VIDEO MODE button to exit the menu.
- 12 -
Page 14

LOCATING A DESIRED SECTION
Locating a Specific Chapter / Title
If you know the chapter/title number for the chapter that you want to play, you can locate it by directly selecting that
number.
1. Press the GOTO button.
Title 01/03 Chapter 03/12Title 01/03 Chapter 03/12
2. Press the / button to highlight chapter/title number, press the corresponding number buttons (2 digits)
for the chapter/title you want. (For example: 02, 08, 10 or 15.) (If you press only 1 numeric button, press the
ENTER button to confi rm.)
3. Playback starts from the selected chapter/title.
Notes:
• If the chapter/title number entered is not permitted by the DVD, "
GOTO button again and re-enter correct number.
• Some discs may not respond to this process.
• This method of locating a chapter/title is available only on a DVD that contains chapter/title numbers.
Locating a Specific Time
You can move to a specifi c location by entering its corresponding time (hours, minutes, seconds).
1. Press the GOTO button two times.
Title 01/03 TimeTitle 01/03 Time ::
2. Press the corresponding number buttons (5 digits: X:XX:XX, for example: 0 30 05, 1 08 23, 1 22 56.) for the
setting point you want.
3. Playback starts from the selected section.
Notes:
• If the time entered is not permitted by the DVD, "
• Some discs may not respond to this process.
• Some scenes may not be located as precisely as you specifi ed.
• This method for accessing specifi c locations is available only within the current title of the DVD.
Title 01/03 Chapter 00/00Title 01/03 Chapter 00/00
Input invalidInput invalid
" will display. You should re-enter correct time.
Input invalidInput invalid
" will display. You should press the
Locating a Specific Disc / Track Time
You can move to a specifi c location by entering disc/track time (minutes, seconds).
1. Press the GOTO button until the below bar appears.
2. Press the corresponding number buttons (4 digits: XX:XX, for example: 30 05, 02 23) for the setting point you
want.
3. Playback starts from the selected section.
Notes:
• If the time entered is not permitted by the CD, "
Input invalidInput invalid
" will display. You should re-enter correct time.
• Some scenes may not be located as precisely as you specifi ed.
Selecting a Specific Track
1. Press the GOTO button 3 times.
2. Press the corresponding number buttons (2 digits) for the track you want. (For example: 02, 08, 10 or 15.) (If
you press only 1 numeric button, press the ENTER button to confi rm.)
3. Playback starts from the selected track.
Notes:
• If the track number entered is not permitted by the DVD, "
button again and re-enter correct number.
• You can also directly press the number buttons to select a track.
- 13 -
Input invalidInput invalid
" will display. You should press the GOTO
Page 15

REPEAT PLAYBACK
You can play a specifi c title or chapter repeatedly. (Title repeat, chapter repeat, A-B repeat)
Repeating a Chapter
1. While the DVD is playing, press the REPEAT DISC button until the “
screen. The current chapter is played repeatedly.
Repeating a Title
2. While the DVD is playing, press the REPEAT DISC button until the “
The current title is played repeatedly.
To Resume Normal Playback
3. While the DVD is playing, press the REPEAT DISC button until the “
screen.
You can play a single track or the whole disc repeatedly.
Repeating a Single Track
1. While the CD is playing, press the REPEAT DISC button until the “ ” indicator displays on the screen.
The current track is played repeatedly.
Repeating the Whole Disc
2. While the CD is playing, press the REPEAT DISC button until the “ ” indicator displays on the screen.
The whole disc is played repeatedly.
To Resume Normal Playback
3. While the CD is playing, press the REPEAT DISC button until the “
Repeat OffRepeat Off
Repeating a Specific Section
You can play a specifi c section repeatedly.
1. While the disc is playing, press the REPEAT A-B button at the beginning of the section (“
you want to play repeatedly.
2. Press the REPEAT A-B button again at the end of the section (“
3. The Unit will immediately begin replaying your selection.
To Resume Normal Playback
4. While the disc is playing, press the REPEAT A-B button until the “
(the repeat indicator disappear from the screen for a CD).
Notes:
• Some discs may not permit A-B repeat operation.
• You cannot set the A-B repeat function for a segment that includes multiple camera angles.
• You can specify a segment only within the current title or track.
• There may be a slight difference between point A and the location where playback actually resumes depending
on the disc.
ChapterChapter
” indicator displays on the
TitleTitle
” indicator displays on the screen.
Repeat OffRepeat Off
” is displayed).
ABAB
AB OFFAB OFF
” indicator displays on the
” indicator displays on the screen.
” indicator displays on the screen
AA
” is displayed)
- 14 -
Page 16

DVD PROGRAMMABLE MEMORY
Playing Titles / Chapters / Tracks in a Favourite Order
You can combine your favourite titles / chapters / tracks and play them in the order you determine.
1. Press the MEMORY button while a DVD is playing. The following display appears.
Clear: Delete all the input programs.
Exit: Exit memory menu and return to normal
Start: Start memory playback.
Next / Prev: Move to the next / previous setup page.
2. Input the title (2 digits) and chapter (2 digits) by pressing the number buttons. (For example: 01 02, 02 05, 02
11.) It will move to the next item automatically.
• You can use the Cursor buttons ( ,
chapter. (Press the NEXT / PREV to move to the next / previous setup page.)
• You can use the Cursor buttons ( , , , ) to move the highlighted bar to “Clear”, “Exit”, “Start” or “Next /
Prev”, and press the ENTER button to confi rm.
3. Press the PLAY button to start memory playback. (“
4. To resume normal playback from memory playback
1). Press the MEMORY button to display the memory menu.
2). Use the Cursor buttons ( , , , ) to move the highlighted bar to “Stop”. Press the ENTER button to
confi rm “Stop”.
3). Press the MEMORY button to resume normal playback from memory playback. (“
the screen.)
Notes:
• For a CD, you can only arrange order for tracks. The display will be a little different.
• If the title or chapter number entered is not permitted by the DVD, it will disappear. You should re-enter correct number.
• You should input items one by one following the 1, 2, 3 ... sequence.
• If the DVD contains only one title, you can only arrange order for chapters.
• Some discs may not permit memory playback operation.
• If you select repeat during memory playback, the DVD player repeats the current memory playback.
• If you press the MEMORY button while the display appears on the TV screen, the display disappears.
• The programmed selections will be cleared when you press the STOP button two times, open the disc tray or
turn off the DVD player.
, , ) to move the highlighted bar to any item, and re-enter the title and
ProgramProgram
playback.
” appears on the screen.)
ProgramProgram
” disappear from
VIEWING JPEG FILES
This unit can play JPEG fi les recorded on a CD-R or CD-ROM disc (CD-RW is not recommended).
Viewing JPEG Files
1. Slide the open knob rightwards to open the disc door.
2. Hold a JPEG file disc by its edges and gently push it
onto the spindle with the label side facing up until you
hear a “click”.
3. Close the disc door. The JPEG fi les on the disc will be
displayed automatically or a folder list appears.
4. Press the MENU or STOP button to display a folder
list. Press the / button to highlight a JPEG file to
play. Press the PLAY button to start playback.
Notes:
• You can press the
• You can press the PREV or NEXT button to change the picture.
• You can press the ANGLE button on the remote control to rotate direction of the picture by 90
• Some discs may not permit this operation.
PAUSE button to freeze the picture. Press the PLAY button to resume picture slide show.
- 15 -
o
.
Page 17

CUSTOMIZING THE FUNCTION SETTINGS
Language Setup
1. Press the SETUP button in stop mode.
2. Press the
3. Press the / button to select the option (OSD
Language, Audio, Subtitle or Disc Menu), then press
the button.
4. Press the / button to select your preferred
button to select Language Setup Page.
Language
- - Language Setup Page - -
OSD Language
Audio
Subtitle
Disc Menu
Video
Eng
Eng
Off
Eng
System
language, then press the ENTER button to confi rm.
5. Repeat steps 3 and 4 to adjust other options. Press
the button to return to the previous menu.
6. Press the SETUP or RETURN button to exit the menu.
Go To Language Setup Page
Notes:
• Some DVDs may not play in the audio language selected. A prior language may be programmed on the disc.
• Some DVDs may be set to display subtitles in a language other than the one you selected. A prior subtitle
language may be programmed on the disc.
• Some DVDs allow you to change subtitle selections only via the disc menu. If this is the case, press the MENU
button and choose the appropriate subtitle language from the selection on the disc menu.
• Some DVDs may not include your pre-selected language. In this case, the DVD player automatically displays
disc menus consistent with the disc's initial language setting.
Video Setup
1. Press the SETUP button in stop mode.
2. Press the / button to select Video Setup Page.
3. Press the / button to select the option (Brightness
or Contrast), then press the button.
Language
- - Video Setup Page - -
Brightness
Contrast
00
00
Video
System
4. Press the / button to adjust the setting, then press
the ENTER button to confi rm.
5. Repeat steps 3 and 4 to adjust other options. Press
the button to return to the previous menu.
6. Press the SETUP or RETURN button to exit the menu.
Go To Video Setup Page
System Setup
1. Press the SETUP button in stop mode.
2. Press the / button to select System Page.
3. Press the / button to select the option (TV Display,
Parental, Password or Default), then press the
button.
4. Press the /
press the ENTER button to confi rm.
5. Repeat steps 3 and 4 to adjust other options. Press
the button to return to the previous menu.
6. Press the SETUP or RETURN button to exit the menu.
button to adjust the settings, then
- 16 -
Language
- - System Page - -
Tv Display
Paren tal
Password
Default
Go To System Page
Video
Wide
No
System
(Continued on the next page.)
Page 18

CUSTOMIZING THE FUNCTION SETTINGS
TV Display
Pan Scan
• When wide-screen video is played, this mode clips the right and left sides of the
image so that it can be viewed on a conventional screen.
• Some wide-screen DVDs that do not permit Pan Scan mode playback are
automatically played in letterbox mode (black bands that appear at the top and
bottom of the screen).
Letter Box
• When wide-screen video is played in this mode on a conventional screen, black
bands appear at the top and bottom of the screen.
Wide Screen
• This is the correct mode for playing wide-screen videos on the unit screen or other
external wide-screens.
Notes:
• The displayable picture size is preset on the DVD. Therefore the playback picture of
some DVDs may not conform to the picture size selected.
• When you play DVDs recorded in the 4:3 aspect ratio, the playback picture will
always appear in the 4:3 aspect ratio regardless of the TV display setting.
• Select Wide Screen to conform the LCD screen on the unit. Always be sure that
your TV display conforms to the actual TV in use if you connect the unit to a TV.
Cut off when a wide-screen
video image is played.
Pan Scan
Letter Box
Wide Screen
Parental Lock
DVDs are rated according to their content and some are equipped with a password function. The contents allowed
by parental lock level and the way a DVD is controlled may vary from disc to disc. For example, if the disc allows,
you could lock-out violent scenes unsuitable for children or you could lock out playback of the disc altogether.
You cannot play password function equipped DVDs rated higher than the level you selected unless you
cancel the parental lock function.
The parental lock levels are equivalent to the following ratings.
1 : Kid Safe 2 : G 3 : Pg 4 : Pg 13
5 : Pg R 6 : R 7 : Nc 17 8 : Adult
Password
Use the or button to select Password, press the button to “Change”, then press the ENTER button.
Press the number buttons to input your 4-digit password until to “OK”. (If the password has not been set yet after
you purchase this unit, it is "8888").
If you forget the password, you can erase your current password by pressing the number button 8
Default
Pressing the ENTER button with this function selected resets all settings to their initial factory state, except for
parental setting and password.
Note: It takes 3-5 seconds to reset the unit to the factory default.
on the remote four times (PASSWORD : 8 8 8 8).
- 17 -
Page 19

MAINTENANCE
Cleaning the Disc
A defective or soiled disc inserted into the unit can cause sound to drop out during playback.
Handle the disc by holding its inner and outer edges.
• Do NOT touch the surface of the unlabeled side of the disc.
• Do NOT stick paper or tape on the surface.
• Do NOT expose the disc to direct sunlight or excessive heat.
• Clean the disc before playback. Wipe the disc from the centre outward with a cleaning cloth.
• NEVER use solvents such as benzine or alcohol to clean the disc.
• Do NOT use irregular shaped discs (example : heart shaped, octagonal, etc.). They may cause malfunctions.
Cleaning the Unit
• Be sure to turn the unit off and disconnect the AC adaptor before maintaining the unit.
• Wipe the unit with a dry soft cloth. If the surfaces are extremely dirty, wipe clean with a cloth that has been
dipped in a weak soap-and-water solution and wrung out thoroughly. Wipe with a dry cloth.
• Never use alcohol, benzine, thinner, cleaning fl uid or other chemicals. Do NOT use compressed air to remove dust.
Important Note
• Before transporting the unit, remove the disc from the disc compartment.
TROUBLESHOOTING GUIDE
SYMPTOM CAUSE (AND REMEDY)
No power.
The remote control
does not function.
Very little or no
sound is coming
from a DVD.
No picture.
• Ensure the AC adaptor is connected.
• Make sure that the unit is turned on.
• Make sure the infrared remote sensor is not blocked.
• Make sure the plastic sheet has been removed from the remote.
• Point the remote directly at the infrared remote sensor on the unit.
• Replace the battery in the remote with a new one.
• Make sure that ON mode is selected.
• Make sure the unit is not paused. Press the
• Make sure the unit is not in fast-forward or fast-reverse mode. Press the PLAY button.
• Make sure that AUDIO/VIDEO output connections are correct.
• The DTS DVD cannot be decoded to have speaker output.
• The unit has overheated. Shut it off for 30 minutes to allow it to cool down.
• The region number of the disc doesn't match the region number of this unit.
PLAY button.
The picture is not
clear.
Loud hum or noise
is heard.
The disc does not
play.
Specifications and external appearance are subject to change without notice.
• The DVD is dirty. Gently clean the disc.
• The disc is scratched.
• Please adjust the LCD's brightness and contrast by the VIDEO MODE button on the
remote control.
• The plugs and jacks are dirty. Wipe them with a cloth slightly moistened with alcohol.
• Clean the disc.
• There is no disc inside the unit ("No Disc" appears on the screen).
Inser t the disc correctly with the graphics facing up.
• Clean the disc.
• A non-PAL disc has been inserted, or the disc region number does not match the region
number of the unit..
• Condensation may have formed inside the unit due to a sudden change in temperature.
Wait about an hour for it to clear and try again.
- 18 -
Page 20

CARRYING BAG
CARRYING BAG INSTALLATION
SAFETY WARNING!
On no account should this unit be used
by the driver of a moving motor vehicle,
or left unsecured in the vehicle whilst
driving.
If this unit is being used by a passenger
in your vehicle, be sure that it is secured
or held safely, and does not obstruct any
safety device (i.e. airbag, seat belt etc.)
that is fi tted.
1. Insert the unit into bag as shown.
3. Strap the top strap around the car's headrest support
(ie. just below the headrest) as shown below.
5. Adjust the straps tightly so that the unit is secured.
And connect the 12V car power adaptor as shown.
2. Insert the straps on carrying bag as shown.
4. Strap the lower strap around the car seat itself, as
shown below.
CAUTION:
Using other car power adaptors could damage
the unit.
- 19 -
811-831091WXXX
 Loading...