

Page 1
Instruction Manual
MD130130-01
www.soniq.com.au
.
.
AUSTRALIA : 1300 765 663
NEW ZEALAND : 0800 100 236
HOTLINE
L32V12B-AU
www.soniq.com.au
Printed in Chin a
Printed in China
32" HD LCDTV
Page 2
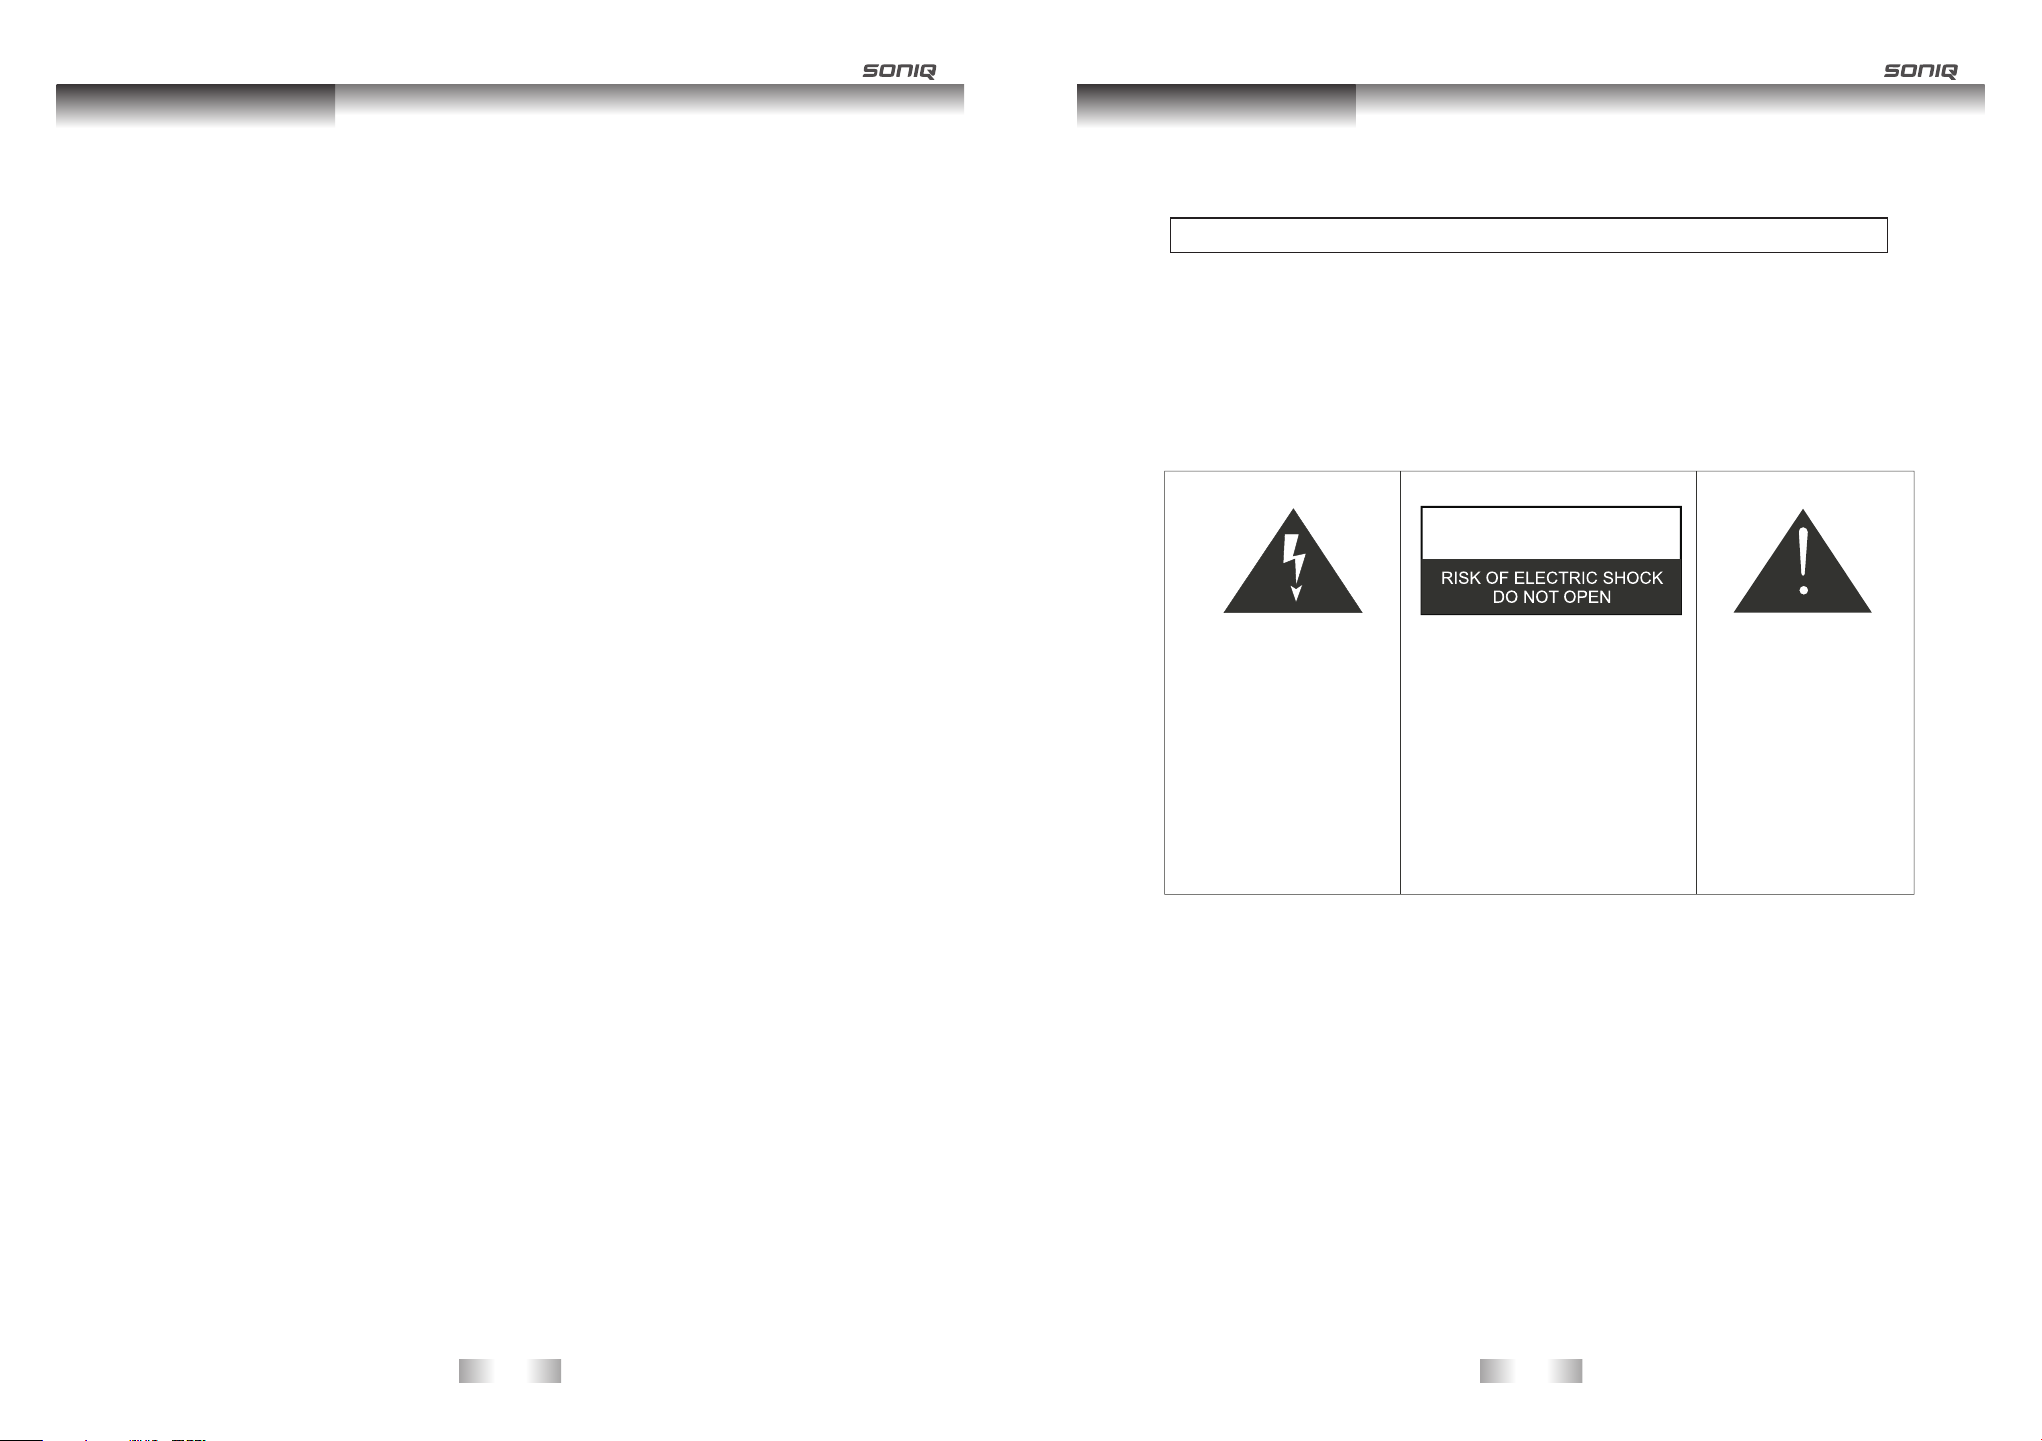
Table of Contents
Safety Instruction
Table of Conte nts
Safety Instruc tion. ..………... ..... ..... ........ ..... ..... ........ ..... ..... ........ ..... ... . . ..... . ...... . . . . . . . .........
............ ..... ............. ..... ............. ..... ............. ..... ............. .... . . . .... ......... ..... ....
3-5
Introduction …………… ………..... ..... ..... ........ ..... ..... ........ ..... ..... ........ ..... ..... ...... . ......... . .... .....
Introduction
…….........… ….... ............. ..... ............. ..... ............. ..... ............. .... .... . . .... ......... .
Package Conten ts……. ........ ..... ..... ........ ..... ..... ........ ..... ..... ...... ....... . ... ..... ............. ..... .......
Main Unit Contro l………. ...…………. ..... ..... ........ ..... ..... ........ ..... ..... ........ ..... .... . ...... . .... .... ...
7-8
Front Panel……… …………… ........ ..... ..... ........ ..... ..... ........ ..... ..... ........ ..... ...... .... . .... ...... .....
Rear Panel………… …………. ........ ..... ..... ........ ..... ..... ........ ..... ..... ........ ..... ..... ........ ... . . . ..... ..
Connection and S etup… …………………… ……... ..... ........ ..... ............. ..... ............. ..... ..........
9-12
Connecting the P ower Co rd……………… …………. ............. ..... ............. ..... ........... . . . . . . . . . .....
Connecting the U SB Devi ce...... ....… ……….………………….. ..... .............. . .... . . . . . . . . . . .... .. . . . .
Connecting wit h an HDMI t o HDMI cable ….... ............. ..... ............. ..... ............. ..... ...... . ... ....
Connecting VGA Si gnal… ……...... ..... ............. ..... ............. ..... ............. ..... ............. . . . .........
Component Comp onent Video Si gnals . ..... ........ ..... ..... ........ ..... ...... .... . .... .... .... ..... ............
Connecting Ante nna.. ........ ....… ……........... ..... ............. ..... ............. ..... ............. ..... . ........ ..
Connecting Com posit e Video S ignal s…........... ..... ............. ..... ............. ..... ............. ..... .......
Connecting OPT ICAL Signal... ..... ..... ........ ..... ..... ........ ..... ..... ........ ..... ..... ........ ..... ..... ........
Remote Co ntrol …………… ………….... ..... ............. ..... ............. ..... ............. ..... ........ . . . ...... .
13-14
Remote Control K ey Func tions……… ……... ............. ..... ............. ..... ............. ..... ............. ....
Using the Remote C ontro l....... ..... ..... ........ ..... ............. ..... ............. ..... ............. ..... ... .. . ... ...
Batteries... ..... .………………… ….... ..... ........ ..... ..... ........ ..... ..... ........ ..... ..... ........ ..... ..... ......
Notes on Using Bat terie s………………… ..... ............. ..... ............. ..... ............. ..... ............. ....
Menu Operation G uide… ……...... .………… ..... ........ ..... ..... ........ ..... ..... ........ ..... ..... ........ ...
15-28
Source Selecti on... ........ ..... ..... ........ ..... ..... ........ ..... ..... ........ ..... ..... ........ ..... ..... ........ ..... ...
Vol+/Vol-(Volum e Control)..... ..... ............. ..... ............. ..... ............. ..... ............. ..... ............. .
Menu Operation ..... ........ ..... ..... ........ ..... ..... ........ ..... ..... ........ ..... ..... ........ ..... ..... ........ ..... ...
CHANNEL MENU… …….…… …………………… ….... ..... ........ ..... .... . .... ................ ... . ..... ..
17-18
PICTURE MENU…. …………… …………………… ….... ............. ..... ............. ..... ... .... . .... . ... . . .
SOUND MENU….…… …………… ……………... ..... ..... ........ ..... ..... ........ ..... ..... ...... . ...... ........
TIME MENU…… …………… …………………………... ..... ............. ..... ............. ... .... . . . . ... ..... ...
OPTION MENU……… …………… …………………. ..... ..... ........ ..... ..... ........ ..... ......... . . . . ........
LOCK MENU…………… …………… .…...... ..... ..... ........ ..... ..... ........ ..... ..... ........ ..... .... . .... ....
PVR FUNCTION…… …………… ….…….... ..... ..... ........ ..... ..... ........ ..... ... .... . ...... . . ..... .....
Media Play F UNCTI ON…….... ..... ............. ..... ............. ..... ... .... . .... .... . . . ........ . . . . . ........ ..
Troubleshooti ng and Advice........ ..... ............. ..... ............. ..... ............. ..... ............. ..... .....
22-23
24-28
29-30
Specificatio n.... ........ ..... ..... ........ ..... ..... ........ ..... ..... ........ ..... ..... ........ ..... ..... ........ ..... ..... ......
10
10
11
11
12
12
13
14
14
14
15
16
16
19
19
20
21
21
31
1
6
6
6
7
8
9
IMPO RTANT S AF ET Y IN ST RUCTION S
WARNING
• TO PR EVENT FIRE OR SHOCK H AZ AR D, DO NOT USE AN EXTEN SI ON C ORD,
RECE PTACL E OR O TH ER OUTLET.
• TO PR EVENT FIRE OR SHOCK H AZ AR D, DO NOT EXPOSE THIS APPL IA NC E
TO RA IN OR MOISTUR E.
• TO PR EVENT ELECTRICA L SHOCK, INS ERT THE MAIN PLUG FU LLY INTO
THE SOCKET OUTLE T.
9
CAUTION
This l ig htning flas h wi th
arro wh ead symbol in a n
equi la teral trian gl e alerts
user s to t he p resence o f
unin su lated dange ro us
volt ag e within the
prod uc ts enclosur e th at
may be o f su ff ic ient
magn it ude to consti tu te
a risk o f el ec tric shoc k to
pers on s.
This a pp liancesho ul d not be expose d to w ater and no obj ec t filled with l iq uid such as a vas e sh ould be
plac ed o n the unit.
If a television is not positione d in a sufficiently stable locatio n, i t ca n be poten ti al ly h az ar do us due to fa lling.
Many injuries, parti cu la rl y to c hi ld re n, can b e av oi ded by taking simple precautions such as:
• Using cabinets or stands recommend ed b y the manu fa ct ur er o f th e te le vi si on.
• Only using furniture that can safely support the tel ev is io n.
• Ensuring the television is not overhan gi ng t he e dg e of t he s up po rt in g fu rn iture.
• Not placing the television on tall furnitu re (fo r ex am pl e, c up bo ar ds or bo okcases)
without anchoring both the furni tu re a nd t he t el ev is io n to a s ui ta bl e su pport.
• Not standing the televisions on cloth or other mater ia ls p la ce d be tw ee n th e
televisionand suppor ti ng f ur ni tu re .
• Educating children about the dange rs o f cl im bi ng o n fu rn it ur e to r ea ch t he t el evision
or its controls.
War ni ng: To reduce the ris k of
elec tr ic shock, do no t re mo ve
cove r( or back). No us er
serv ic eable parts i ns ide. Refer
serv ic ing to qualif ie d service
pers on nel.
IMPO RTANT I NF OR MATIO N
The ex cl amation mar k
with in a n equilater al
tria ng le alerts use rs
to the p re se nce of
impo rt ant operati ng
and ma in tenance
(ser vi cing) instr uc ti ons
in the l it erature
acco mp anying the
appl ia nce.
-1-
-2-
Page 3
Safety Instruction
1. Read instructions-All the safety and operating instruction s should be read befo re the appliance is operated.
2. Retain instructions-The safety and operating instructions should be retain ed for future reference.
3. Heed warnings-All warnings on the appl iance an d in the oper ating in structions should be adh ered to.
4. Follow instructions-All operating instructions should be followed.
5. Battery-Batteries shall not be exposed to excessive heat such as sunshine, fire or the like.
6. Earthing Connection-The apparatus shall be connec tsd to a MAINS socket outlet with a protective ear thing
conn ection.
7. Water and Moisture- The appliance should not be used near water.
8. Cart and St ands-The appliance should only be used with a cart or stand that is recommended by the
manufacturer.
9. Wall or Ceiling Mounting-The appliance should be mo unted to a wa ll or ceiling only as recomme nded by the
manufacturer.
10. Ventilation-The appliance should be well situated so that its location or position does not interfere with its
proper ventilation.
11. Heat-This appliance should be placed away from heat sources such as radiators, heat registers and stoves.
12. Power Sources-The applian ce shoul d only be con nected to a power sup ply as described in the operating
ins tructions or as marked on the applian ce.
13. Grounding or Polarization-P recautions should be tak en.
14. Power Cord Protection-Power suppl y cord should be loca ted so that it is not like ly to be walk ed on, or pin ched
by items placed upon it .
15. Cleaning-The appliance should be cleaned only as recommended by the manufacturer.
16. Power Lines-An outdoor antenna should be locat ed away from power li nes.
17. Outdoor Antenna Grounding-if an outside anternna is connected to the receiver, the antenna system must be
grounded so as to provide against voltages and built-uo static charges.
18. Non-use Periods-The power cord of the appliance should be unplugged from the outlet when left unused for a
long peri od pf time.
19. Objects and Liquids-Care should be taken so that obje cts do not fa ll, and liquids are not spill ed into the
enclosur e throug h openings.
20. Conditions Requiring Se rvice-The appliance should be se rviced by qualified service personnel
when:
The power-suppl y cord or the plug has bee n damaged.
Objects have fall en on or liqu id has been spilled into the appliance.
The appliance has be en exposed to rain.
The appliance does not appea r to operate normally or exhibits a marked change in performance.
21. This appliance should not be exposed to water and no objects filled with liquids such as a vase should be
placed on the unit.
Safety Instruction
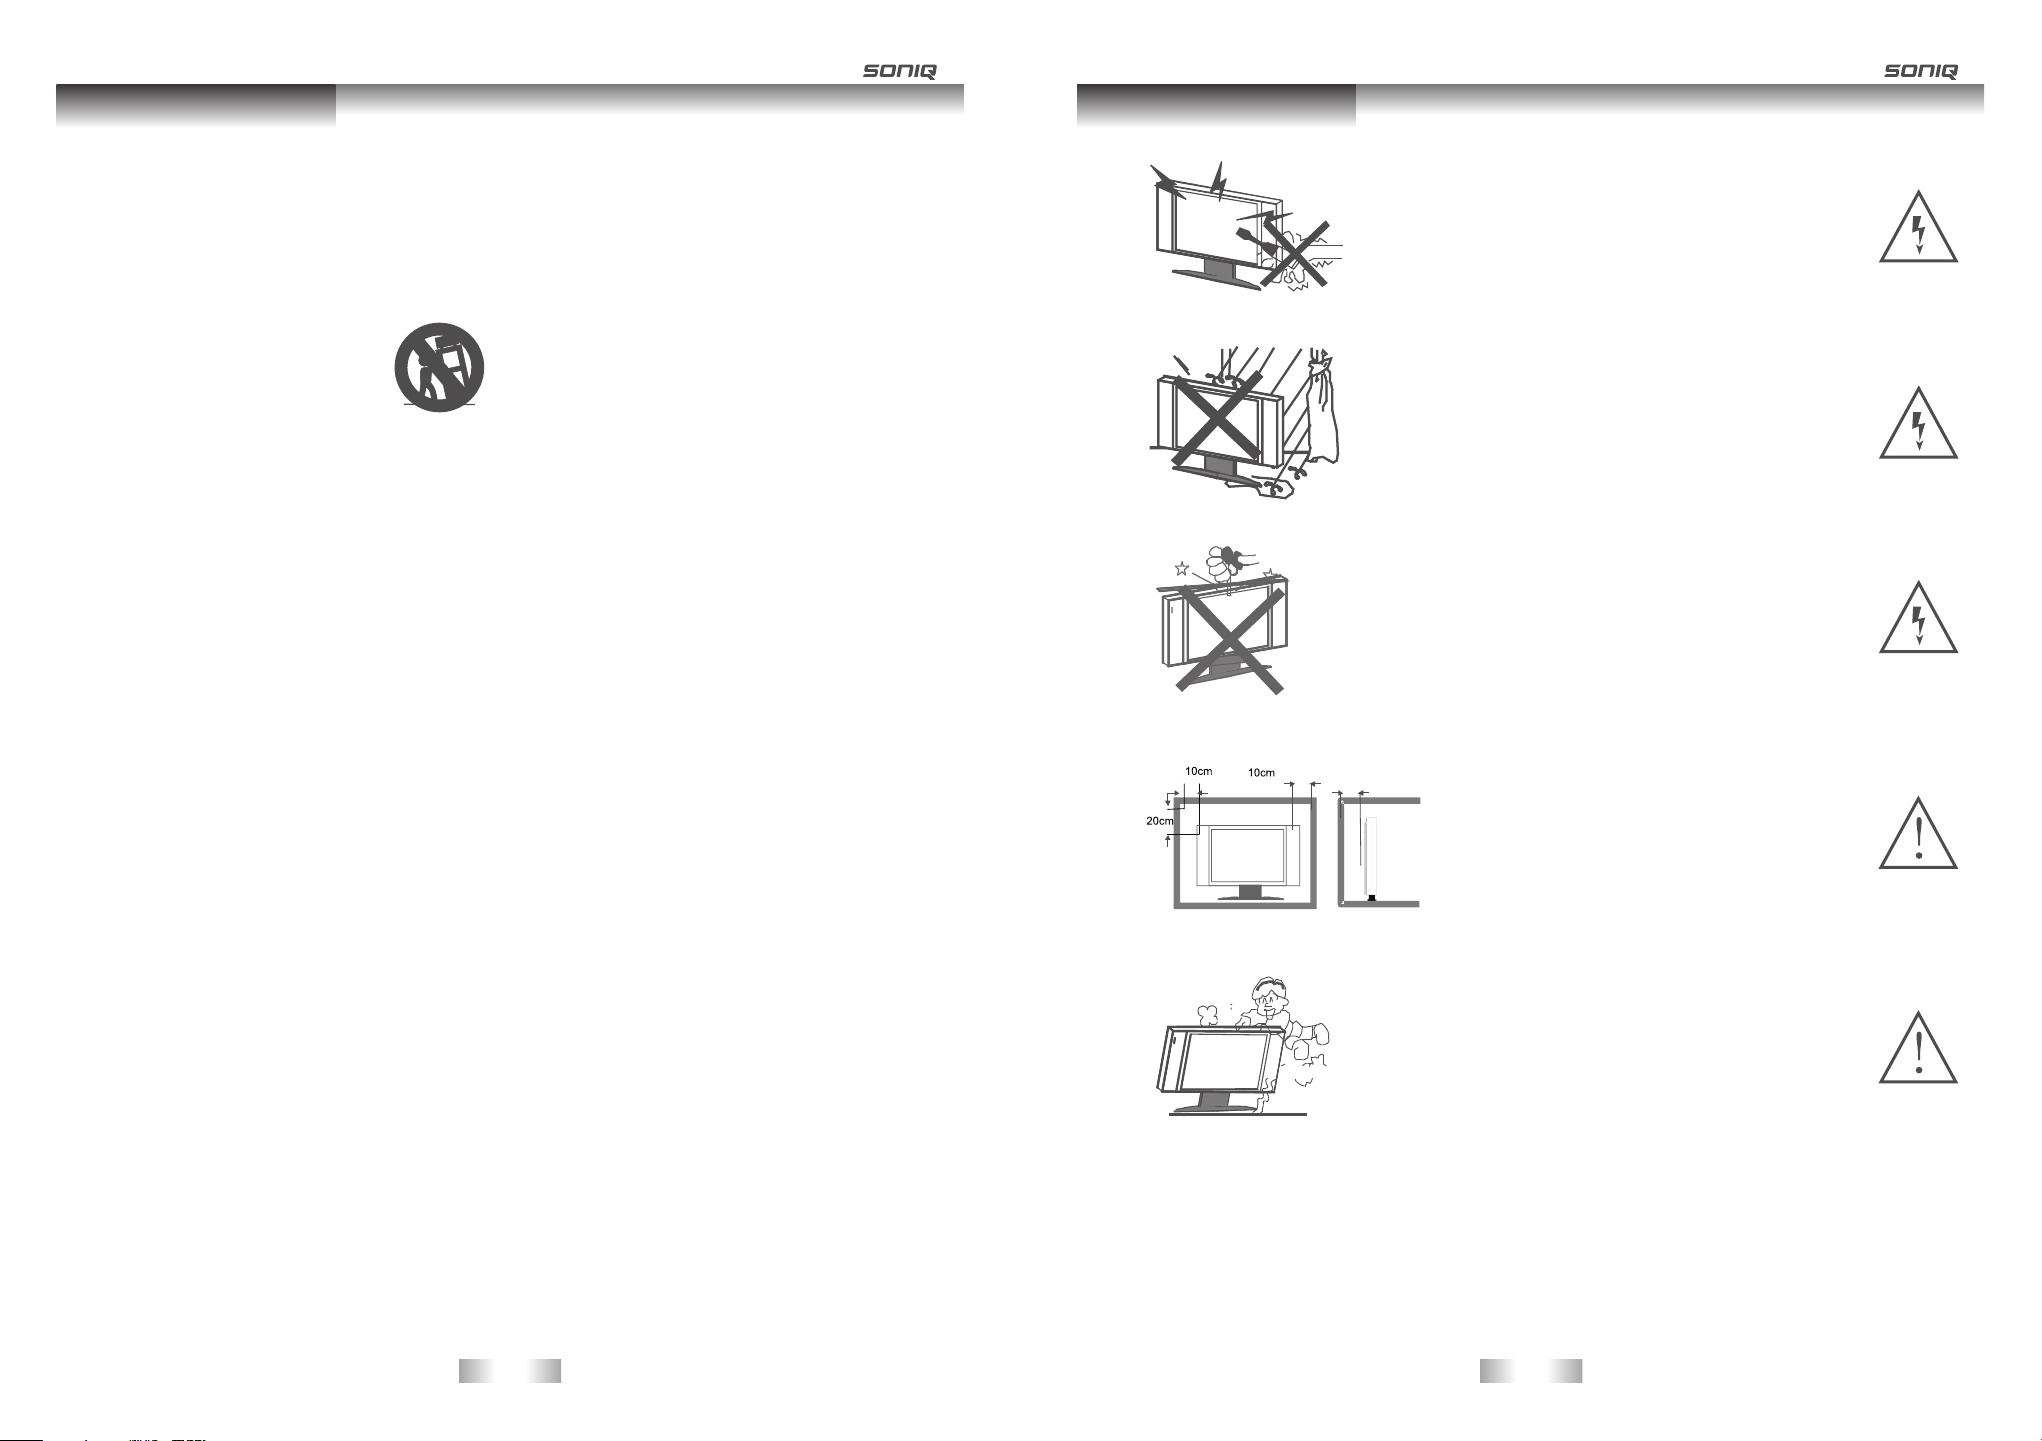
Minim um d ist an ces
3cm
Warning
High voltages are used in the operation of this product.
Do not remove the back cover of the cabinet. Refer
servicing to qualified service personnel.
Warning
To prevent fire or electrical shock hazard, do not expose
the main unit to rain or moisture.
Warning
Do not insert foreign objects into the television’s slots
or openings. Never spill any kind of liquid on the television
receiver.
Caution
If the television is placed into a confined space, ensure
that the minimum distances are observed as shown.
Heat build up can reduce the service life of your
television, and can also be dangerous.
Caution
Never stand on, lean on, push or apply force to the
product or its stand.
You should pay special attention to children.
-3-
-4-
Page 4
Safety Instruction
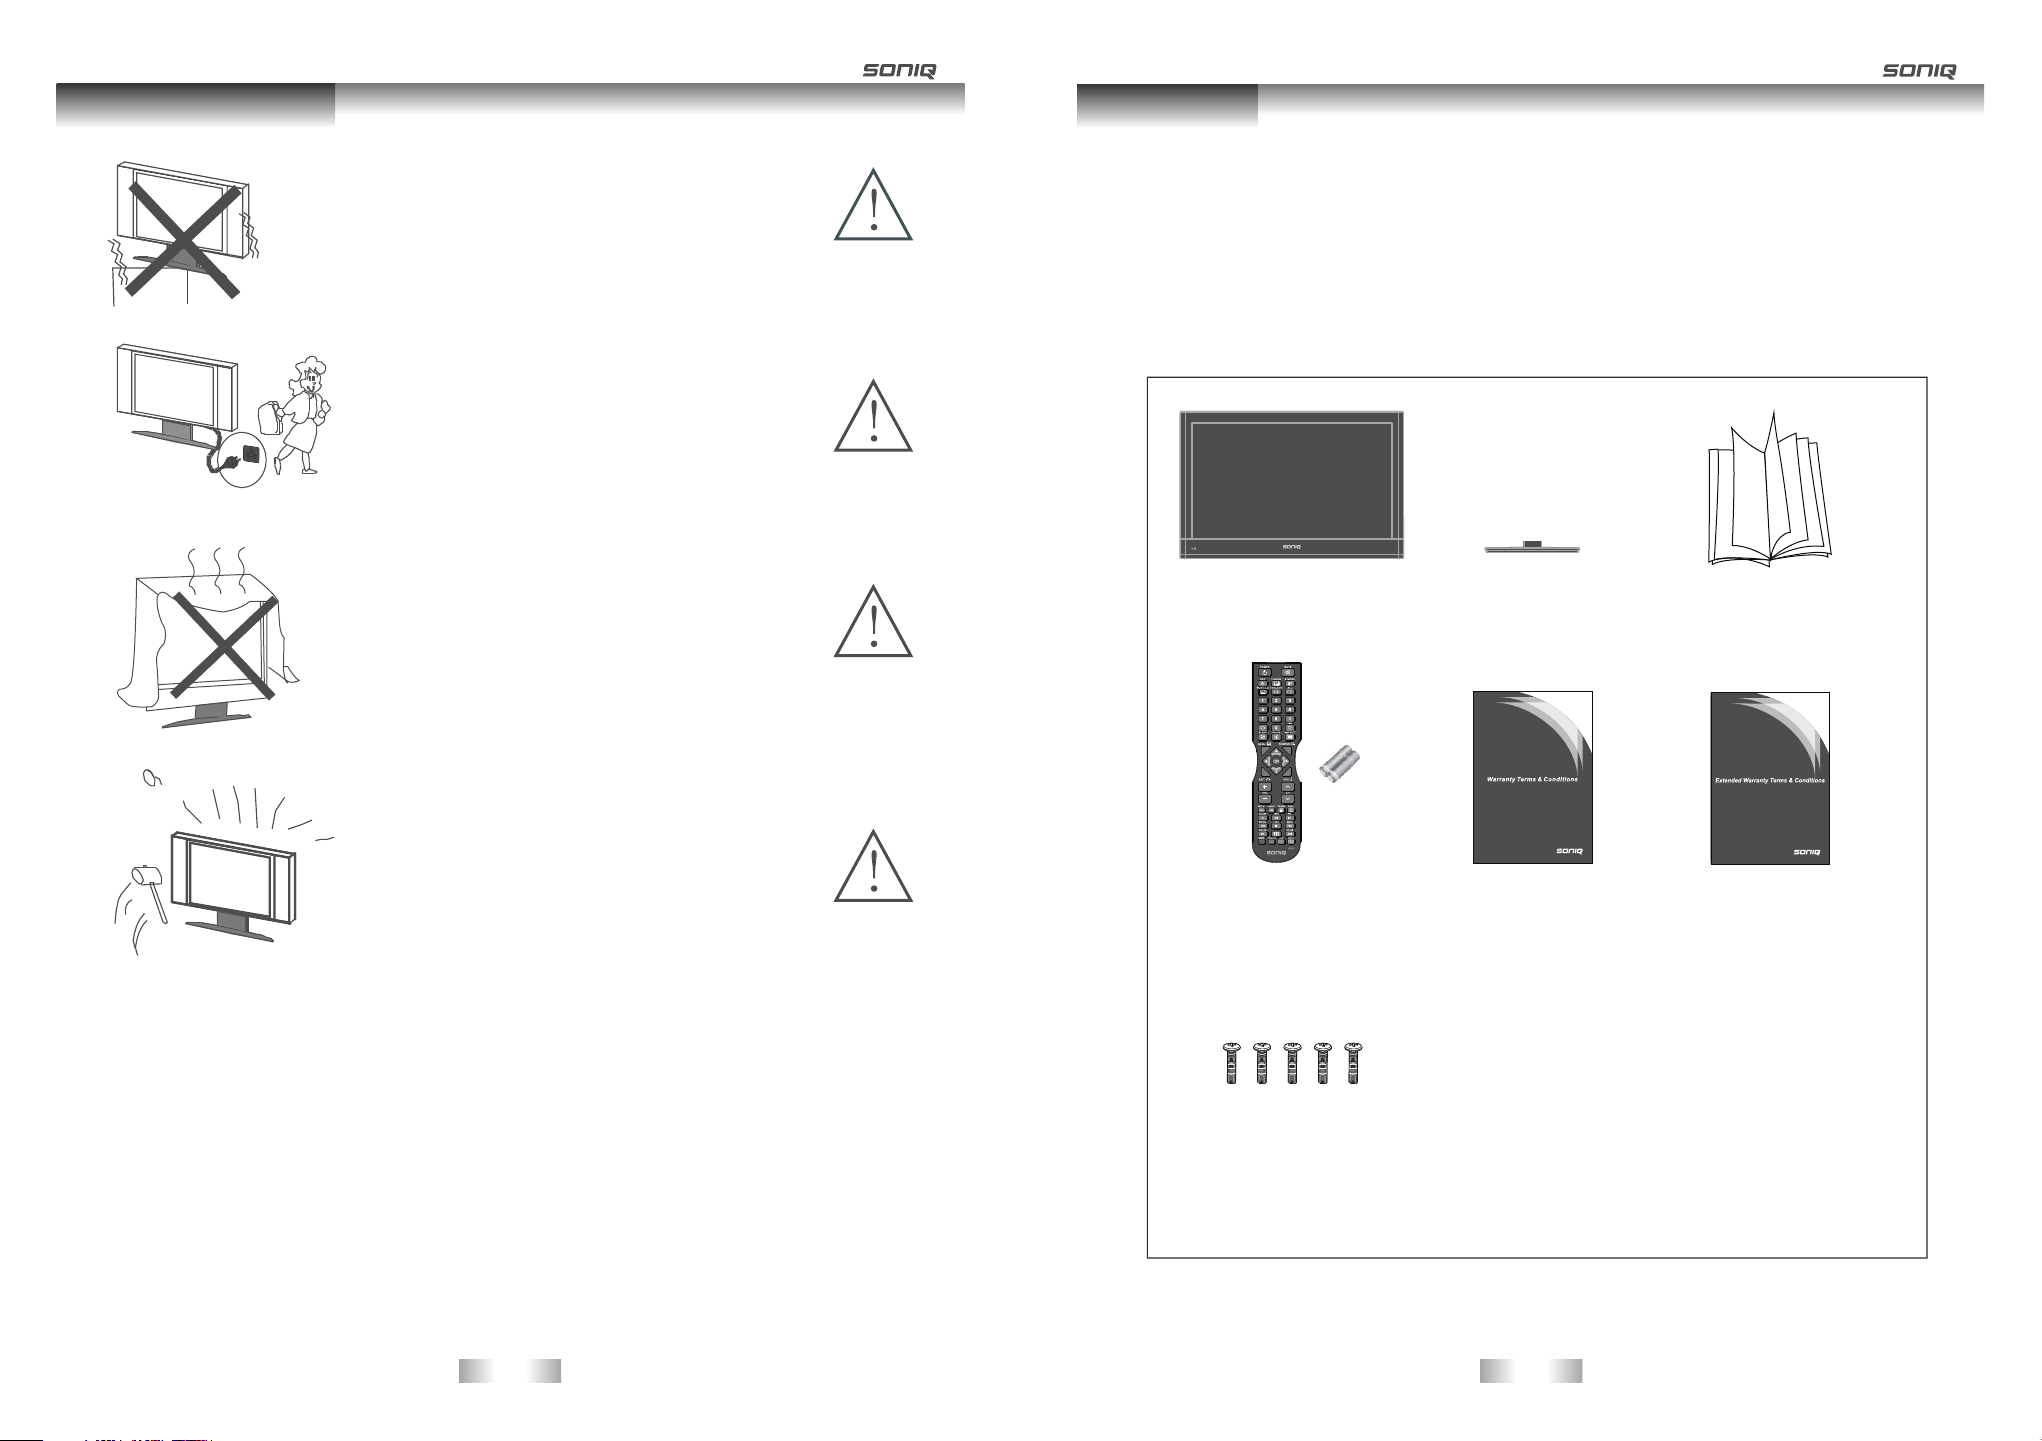
Caution
Do not place the main unit on an unstable cart stand,
sheif or table.
Serious injury to an individual, and damage to the
television, may result should it fall.
Caution
When the product is not used for an extended period
of time, it is advisable to disconnect the AC power
cord from the AC outlet.
Caution
Avoid exposing the main unit to direct sunlight and
other sources of heat. Do not position television
receiver directly on other products which give off heat.
e.g. video cassette players, audio amplifiers. Do not
block the ventilation holes in the back cover.
Ventilation is essential to prevent electrical failure.
Do not squash power supply cord under the main unit.
Instruction
Introduction
Thank you for purchasing the unit. Your unit will bring you years of high-quality viewing enjoyment. The television
is easy to operate and provides exceptionally high quality image. The manual will explain the operation of the unit,
including its functions, features and other important features. Before installing or operating your unit, please take
the time to thoroughly read this manual, particularly the sections on safety.
Package Contents
Main U ni t
Stan d
Inst ru ct ion Manua l
Caution
The panel used in this product is made of glass.
It can break if the product is dropped or if force is
applied to the panel. Individuals should execute caution
when dealing with broken glass should the panel break.
Exem pt io ns
• SONI Q is n ot l iable for a ny d am age cause d by f ir es, natur al d is aster (su ch a s th underst or ms ,
eart hq ua ke, etc.) , ac ts b y the third p ar ti es, accid en ts , owner ’s m isuse or us e in o th er
impr op er conditio ns .
• SONI Q is n ot l iable for i nc id ental dam ag es (such as pro fi t lo ss or inter ru pt ion in busi ne ss,
modi fi ca tion or era su re o f record da ta , et c.) cause d by u se o r inabili ty t o us e of produc t.
• SONI Q is n ot l iable for a ny d am age cause d by n eglect of the i ns tr uctions d es cr ibed in the
owne r’s manua l.
• SONI Q is n ot l iable for a ny d am age cause d by m is use or malf un ct ion throu gh s imultaneo us
use of t hi s pr oduct and t he c on nected eq ui pment.
-5-
Remo te C ontrol
AAA Bat te ri es(x2)
Scre ws : M 4x 12 (x5, Bla ck )
War ra nty Card 2War ra nty Card 1
-6-
Page 5

Main Unit Control
Main Unit Control
Front Panel
21
No.
Name Desc ri ption
Powe r In dicator
Remo te C ontrol
Sens or W in dow
VOL+ /-
Flashes re d wh en t he u ni t is p ow ered on;
Lights up red wh en t he u ni t is i n st an dby mode.
Receives the sig nal from the remote con trol. Do not put any
objects in front of the wi ndow in order not to hinder the
reception of sig nals.
Press VOL+ to incr ea se v ol ume, or VOL - to decrease.
At the OSD menu, pre ss t he se b ut to ns to move the selection
focus left and rig ht t o ch an ge s ettings.
Rear Panel
5
3
4
5
6
7
1 2 3 4
1
2
USB( RE C)
HDMI 1/ HD MI2
3
4
5
VGA
AUDI O IN
YPbP r
Connect for media files playback and program recording.
Conn ec t th e HDMI sign al .
Conn ec t th e PC VGA signa l ou tput of your pe rs on al comput er.
DVI or P C VG A aud io input.
Conn ec t th e compone nt v ideo signal .
6
7
CH+/ -
SOUR CE
MENU
STANDBY
Press th es e bu ttons to sequen ti al ly select chann el s.
When the O SD m en u is on, press these bu tt on s to move the
select io n fo cus up or down to cha ng e se tt ings.
Pre ss to display all possible input signal sources.
Pre ss to cycle through various sources.
Pre ss th is button to display the OSD menu.
Whe n the OSD menu is on, press this butt on to exit the menu.
Pr es s this bu tton to t ur n the u ni t on when i t is in sta ndby mo de .
Pr es s this bu tton on ce m ore to pu t it to s ta ndby mo de .
-7-
6
7
AV IN
ANT IN
Co nnect t he audi o and vid eo outp ut of you r AV e quipm ent t o th e
un it usin g the AV cabl e.
Conn ec t to e xternal a nt enna.
-8-
Page 6
Connection and setup
Connecting the Power Cord
Conn ec t th e power cor d di rectly to the w al l outlet.
Wal l out le t
Power c or d
The product must be operated only from the type of power source indicated on the marking label (220-240 ~ 50Hz).
Connection and setup
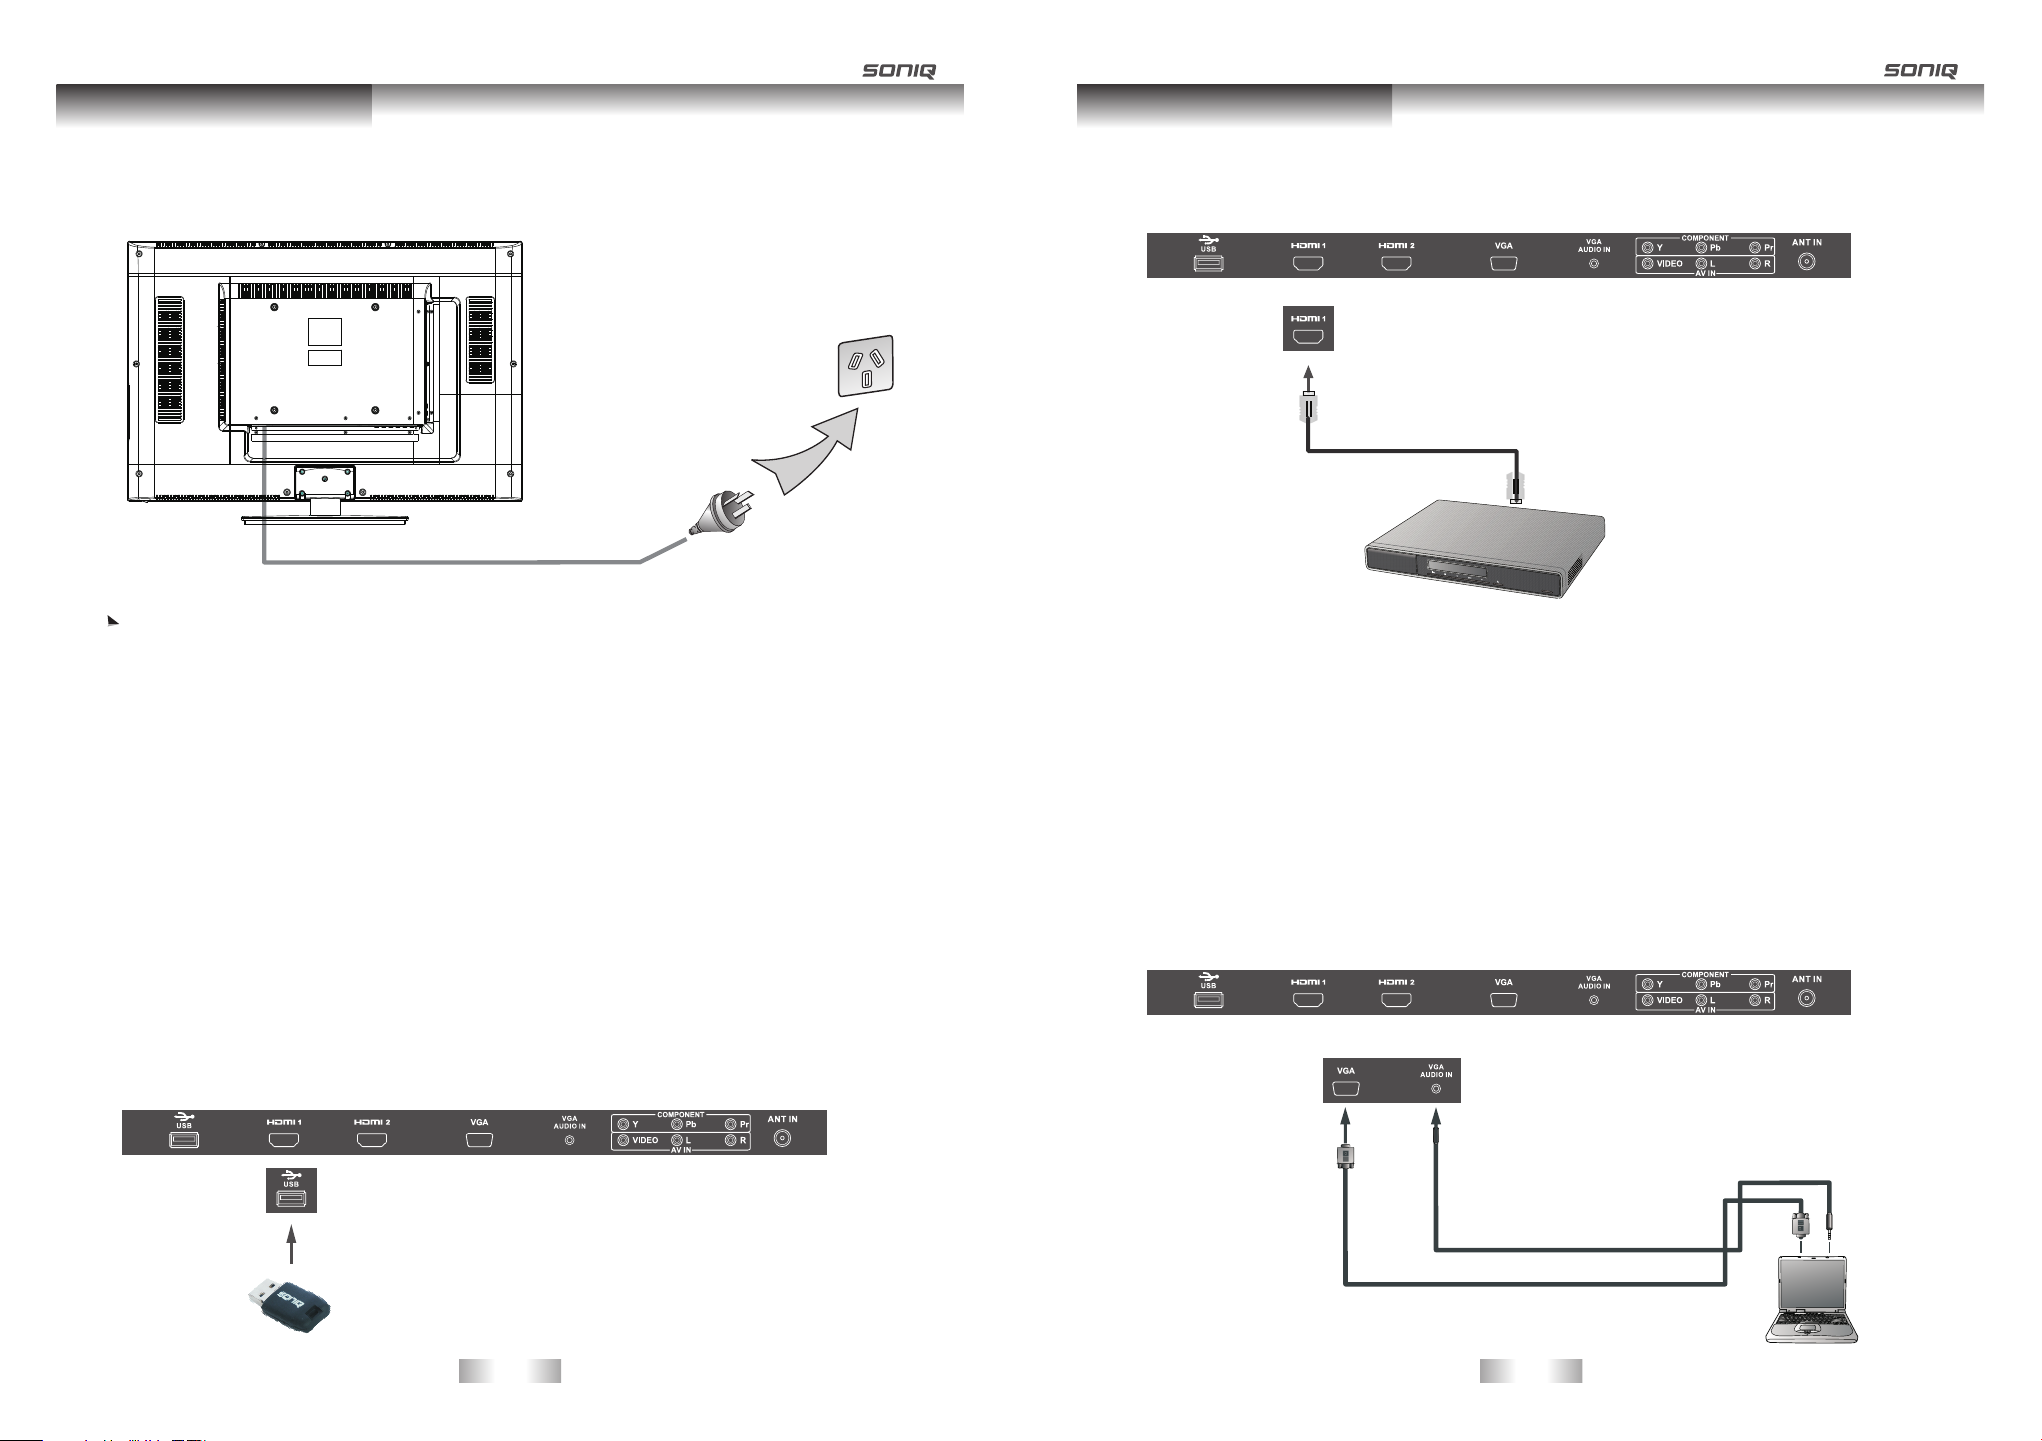
Connecting with an HDMI to HDMI cable
Conn ec t th e HDMI outp ut t er minal of yo ur H DM I device to t he H DM I input ter mi na l on the unit u si ng a n
HDMI c ab le.
HDMI c ab le
If the unit will not be used for a long period of time, it should be unplugged from the wall outlet.
Connecting the USB Device
In s ert USB de v ice dir e ctly to th e u n it.
1. Please do not turn off the TV or unplug the USB device when the connected USB storage device is
working. When such device is suddenly separated or unplugged, the stored files or the USB storage
device may be damaged.
2. Please use only a USB storage device which was fo rmatted as a FAT32 file system, NTFS file system
provided with the Windows operating system. In case of a storage de vice formatted as a different utility
programmer which is not supported by Windows, it may not be recognized.
3. Please connect po wer to a USB storage device(over 500mA ) which requires an externa lpower supply.
If not, the device may not be recognized.
4. If the USB HDD does not have an extern al power source, th e USB device may noy be detected.
So be sure to connect the external power source.
5. The recommended capacity is 1TB or less for a USB external hard disk and 32GB or less
for USB memory.
6. Only English is supported in USB mode. Other languages such as Chinese, Japanese, etc.
will not be displayed or display an error.
Connecting VGA Signal
Conn ec t PC video outp ut t o th e VGA IN input t er mi nal using M in i D-SUB 15-Pi n ca ble.
Conn ec t th e audio out pu t of your PC to the u ni t VG A AUDIO IN inpu t te rm inal usin g an a pp ropriat e ca ble.
1. If th e in pu t signal re so lu tion is hig he r th an the defa ul t display res ol ution, the sc re en may be unabl e to
disp la y im age detai ls c learly.
2. Cer ta in P C models ca nn ot be connect ed t o th e unit.
3. The compu te r in the illust ra tion is shown o nl y for referen ce ; yo ur equipm en t may vary.
4. Addi ti onal equipm en t shown in the il lu stration is n ot p rovided.
5. Do no t se t th e compute r’s horiz on tal and verti ca l scanning fr eq uencies les s th en or greater t ha n the
freq ue nc y range of th e un it . (refer to s up po rted PC Inp ut S ig nal)
6. If yo u re qu ire more in fo rm ation on ho w to c on nect your e qu ip ment, ple as e re fer to the ma nu al f or
the pi ec e of e quipmen t yo u wi sh to attac h.
Aud io cabl e
USB De vi ce
-9-
D-SUB 1 5-pin c ab le
(VG A cab le)
PC
-10-
Page 7

Connection and setup
Connection and setup
Connecting Component Video Signais
1. Con ne ct the compon en t vi deo outpu t of y ou r AV equ ipment to the u ni t CO MPONENT YPbPr
term in al s using a Com po nent video ca bl e. (green, bl ue , red cable)
2. Con ne ct the audio ou tp ut of your AV equipment t o th e un it AUDIO L/R i np ut t erminal s us in g the
AV cable or equi va lent.
1. Ens ur e th e connect or c ol ors match , fa il ure to conn ec t th e colors of the c ab les to the
corr es po nding col or ed t erminal s wi ll result in an i nc orrectly co lo r image or badl y di storted ima ge .
2.VI DE O an d Ypb pr signal sha re t he same audio i np ut. you are req ui red to use it ind iv idually at an y
time .
Connecting Composite Video Signal
• Conn ec t th e Composi te ( AV) o ut pu t of your AV equipmen t to t he C omposit e VI DE O signal te rm in al on
the un it u si ng a Compos it e (AV ) vi de o cable (RC A con nector) as il lu strated.
• Befo re c on necting a ny c omponent, p le ase familia ri ze yourself w it h the locatio n an d type of each in pu t.
• If inc or re ct connec ti on s are made, p ic tu re or color q ua li ty may be adv er se ly aff ected. Pl ea se e nsure
that a ll c on nectors a re f ir mly seate d.
Befo re c on necting , tu rn o ff t he p ower to the e xt er nal devic es f or s afety.
Composite vid eo i np ut i s th e mo st commonly use d si gn al i np ut . However, this type o f in pu t al so p rv ides a less
optimal image q ua li ty. Many video sou rc es c an o nl y ou tput Composit e vi de o si gn al s, for example,VC Rs , ca mc or de rs
and Vid eo g am e.
Composite (AV)
video cable
Yello w
Whi te
Red
Connecting Antenna
Wall
Ant enna
Soc ket
Out door
Ant enna
(VH F, UHF )
Mul ti-fa mily Dw ellin gs/Ap artme nts
(Co nnect t o wall an tenna s ocket )
RF Co axial W ire (75 o hm)
Sin gle-f amily D welli ngs/H ouses
Vid eo g am e
White
Red
-11-
-12-
Page 8

Remote Control
Remote Control
Remote Control Key Functions
Power button
Toggles the unit between standby and on.
Numerical buttons
Press 0-9 to select a TV channel directly when
watching TV. The channel changes after 2
seconds or press “OK” button to change
immediately.
Press to return to previous channel.
FAV button
In TV mode, press FAV button to display your
favorite programs.
SLEEP button
Press to activate sleep timer.
PAUSE button
Press to pause the current picture, press again
to resume.
ASPECT button
Press to change the aspect ratio of the TV
display.
MENU button
Press to display the main menu.
SOURCE button
Press to display the main menu.
EXIT button
Exit most menu to default status directly.
Press to quit all menu.
EPG button
Open or close EPG menu.
Navigation keys ( OK)
Allows you to navigate the on-screen menus
and adjust the system settings to your
preference.
Press OK in DTV mode to display channel list.
REC/SETUP button
Press to record program to memory storage.
Press to open the setup window of DVD.
REPEAT/TSR button
In media source, press to repeat 1 / All or off.
Has the function of timeshift under DTV mode.
TSR
Press to delay the process of program
broadcasting.
T / R button
In DTV mode, press to switch between radio
and DTV channels.
D.DIS button
Press to display the DVD information under
DVD mode.
A-B button
Enables you to repeat a selected section from
the disc.
GOTO button
Set the play time during DVD playback.
MUTE button
Press to mute the sound. Press again or press
VOL+/- to resume.
P.MODE button
Press to select preset picture mode.
S.MODE button
Press to select preset sound mode.
SUBTITLE button
In DTV mode, press to change subtitle on / off.
I-II / AUDIO button
Press to select sound output mode.
INFO button
Press to display the information of current
system programme.
VOL+/-
Press to increase / decrease the sound level.
CH
Selects a programme in DTV / ATV mode.
PBC/TITLE button
Press to go back to the main menu during disk
playback.
PVR.L
Press to display the recorded program list.
CANCEL button
Only available in interactive application, TEXT
menu and Music source.
To eject the disk under DVD mode.
TEXT button
On / Off the teletext.
button
Press to playback or pause the program.
D / A button
Switch directly between ATV and DTV.
Slow playing the disk under DVD.
REVEAL
Display hidden Text characters.
button
Press to fast reverse playback.
SUB. PAGE
Prompt the user to enter a subcode for the Text
page.
button
Press to fast forward playback.
HOLD button
Stop refurbish Text current page.
button
Press to stop media play.
INDEX button
Teletext index page.
button
Press to return to previous chapter or track.
TXT. Size
Toggles the text size display between half top
page, half bottom page and normal.
button
Press to skip to next chapter or track.
Using the Remote control
When using the remote control, aim it at remote control sensor window with the unit. If there is an
object between the remote control and the signal remote control sensor window on the unit, the
remote may not operate.
When using the remote control, please note:
Do not strike or drop the remote. Do not expose the remote control to liquids and do not place it in
humid environments.
Do not install or place the remote control in direct sunlight, the heat may damage the remote
control.
If the remote control sensor window on the unit is in direct sunlight or strong light, the remote
control may not operate normally. In this situation, change the light source or read just the angle of
your unit, or operate the remote control from a location closer to the remote controlsensor window
on the display.
Batteries
Your will need to install the supplied batteries into the remote control to make it operate following the instructions
below.
1. Open the lid of the remote control battery
compartment.
2. Insert two size-AAA batteries.
Ensure that the batteries are inserted with the
positive and negative terminals in the correct
direction corresponding to the (+) and (-) marks
in the battery compartment.
3. Close th e lid of th e remot e control ba ttery c ompartme nt.
Notes on Using Batteries
The use of the wrong type of batteries may cause chemical leaks and/or explosion. Please note the
following:
Always ensure that the batteries are inserted with the positive and negative terminals in the corrcet
direction as shown in the battery compartment.
Different types of batteries have different characteristics. Do not mix different types.
Do not mix old and new batteries. Mixing old and new batteries will shorten battery life and/or cause
chemical leaks from the old batteries.
When batteries fail to function, replace them immediately.
Chemicals which leak from batteries may cause skin irritation. If any chemical matter seeps out of the
batteries, wipe it away immediately using a dry cloth.
Due to varying storage conditions, the battery life for the batteries included with your unit may be
shortened. If the remote control is not used for a long period of time, remove the batteries.
Note:
USB/ SD /3 D/DVD/T IT LE /PBC/SE TU P/ D.DIS/ / are in va lid.
*
-13-
-14-
Page 9

Menu Operation Guide
Menu Operation Guide
Source Selection
Input Soure
DTV
ATV
AV
YPbPr
VGA
1. Press SOURCE bu tton to d isplay the s ource l ist.
2. Press / button to s elect t he input sou rce you w ant to.
3. Press OK button t o enter t he input sou rce.
4. Press EXIT button t o quit.
HDMI 1
HDMI 2
MEDIA
OK
Sel ect
EPG: It is only available in DTV mode.
PROGRAMME GUIDE TIME
800 SZTVM01 No Information
801 SZTVM02 No Information
802 SZTVM03 No Information
803 SZTVM04 No Information
Record INFO Schedule Remind Index
31 Mav 2011 14:34
Up/Down Select
Schedule: Press yellow key to browse the program information saved in the schedule list, and
press yellow key or exit to return.
Schedule List 09:33 25th Dec Delete
Time Date Programme Title Channel Name
10:00 Sun, 25 Dec SP-THE SINGING CHRISTMAS TREE 7 7 Digital
INFO: Press green key to view the details of the focused channel.
25 Dec 2005 09:00- 10:00
A religiou s progr am.ws
Remind: Press blue key to add a program needs to be reminded, and it will be switched on time.
Index: Press index key on the remote control to view the program list in 7 days.
Remi nd er setting
800 SZ TV M0 1
44 Minute
14 Hour
May Month
31 Date
Once Moe
OK
Selec t
Back
This function can be used only when the EPG information is broadcasted by digital broadcasting
companies. The EPG displays the programme details for nest 8 days.
Press / / / button to move the cursor, press OK button to switch to current channel.
Record: Press red key to display a Recorder window, from which you can set the time you want for
recording. (refer to the below picture)
RECORDER
800 SZTVM01
Sta rt Ti me
42 Minu t
14 Hour
May Mon th
31 Date
End Time
12 Minu te
15 Hour
May Mon th
31 Date
Mode AUTO
OK
Selec t
Back
-15-
Vol+/vol- (Volume control)
Note: Volume adjusting will exit the “MUTE” status.
Menu operation
You can operate all function by remote control and maybe partial function by the key on panel.
The main menu can be operated by “MENU”, “OK” and “EXIT” button.
“MENU” button can open the menu or exit to the upper level menu. There are six main menu
pages in the system: PICTURE, SOUND, CHANNEL, TIME, LOCK, OPTION.
Press / / / button to select any item or adjust some settings.
Press “OK” button to confirm a selection.
Press “EXIT” button to exit the main menu.
-16-
Page 10

Menu Operation Guide
CHANNEL MENU
Pres s ME NU b utton to en te r th e CHANNEL pa ge as follo ws :
CHA NNEL
CHANN EL
Auto Tuning
DTV Manual Tuning
ATV Manual Tuning
Programme Edit
Signal Information
A. Au to Tu ni ng
1. A ut o Tun ing will be h ig hl ighted up on d is playing t hi s me nu. Press “ OK ” bu tton to ent er.
2. Pre ss t o se lect coun tr y, Pres s “O K” button to en te r the next step .
3. Pre ss t o se lect your l oc at ion, then p re ss “ OK” button to e nt er, and then u se t o ch oose the
tuning ty pe
4. Pre ss “ OK ” to start au to s ea rch.
Count ry S el ectio n
Plea se sele ct your c ountr y
Cou ntry
B.DT V Ma nu al
Bad Nor m al Go od
Bac k Sel ect
Austr alia
NewZe aland
OK
Back
Sele ct
DTV Ma nu al Tu ni ng
UHF CH 52
0--.--- Mhz
Press O K to sear c h
Tim e Zone Se le ct ion
Plea se choo se your s tate or t errit ory
Time Zo ne
Wester n Austra lia
North ern Territ ory
South Aus trali a
New Sou th Wales /ACT
Victor ia
Queens land
Tasmania
OK
Back
Sele ct
1. Pre ss t o hi ghlight D TV M an ual Tuning , Pr es s “OK” butt on
to ent er s ub -menu.
2. Users can select channel number by pressing , and set
frequency number by pressing numeric buttons.
3. Pre ss “ OK ” to start.
CHA NNEL
CHANN EL
Auto Tuning
DTV Manual Tuning
ATV Manual Tuning
Programme Edit
Signal Information
Bac k Sel ect
Chann el Tu ni ng
Plea se choo se your c hanne l tunin g mode
Scan Ch annel
DTV+ATV
DTV
ATV
OK
Back
Sele ct
Menu Operation Guide
Programm e Edi t
Pres s bu tt on to selec t Pr og ramme Edi t, t he n press “OK” bu tt on to enter sub -m enu.
Programme E di t
7 7Digi ta l
70 7 HD Dig it al
71 7 Digi ta l 1
72 7 Digi ta l 2
73 7 Digi ta l 3
77 7 Gu id e
1 C-02
2 C-04
3 S-04
4 C-08
Dele te Rena me
OK
Sele ct
Move
Signal Inform ation
Pres s bu tt on to selec t Si gn al Inform at io n, then pre ss O K bu tton to dis pl ay s ignal det ai ls , includi ng
Chan ne l number, Netw or k name, Modul at ion model, Si gn al quality an d Si gnal streng th .
Sign al I nformatio n
Chan ne l 30
Netw or k Se ven Netwo rk
Modu l at ion 64QAM
Qual it y 99
Stre ng th 5 4
Skip
1. Pre ss R ed b utton to de le te t he curren t ch an nel.
2. Pre ss Yel low button to c ha nge program o rd er. Selected
chan nn el c an be moved b y us ing , then pres s“ OK ”
for co nf ir m.
3. Pre ss B lu e button to s ki p th e selecte d ch an nel.
4. Pre ss FAV but to n on y our remot e co nt rol to add a
chan ne l to F avorite L is t.
5. Pre ss G re en button t o re na me the curr en t ch annel.
(onl y av ai lable in ATV mode)
FAV
Favo rite
Menu
C. ATV Man ua l Tun in g
ATV Manual Tuning
Storage To 1
System BG
Current C H 1
Search
Fine-Tune
Freque nc y 861.8 0MHz
Save
Menu
Pres s bu tt on to highl ig ht
1.
ATV Manual Tuni ng , then Press
“OK” bu tt on to enter s ub -m enu.
2.
All th e it ems in this dis pl ayed menu can b e ad justed,
afte r al l th e setting b ei ng done, pres s to h ig hlight
“Sea rc h”, then Pres s to s ta rt.
-17-
-18-
Page 11

Menu Operation Guide
Menu Operation Guide
PICTURE MENU
1. Pre ss M EN U button to b ri ng u p the main me nu .
2. Then pres s to e nt er PICTUR E pa ge , it will hig hl ig ht the firs t op ti on, press “ OK ” bu tton to enter.
3. Pic tu re M ode: Pres s bu tt on to adjus t th e Mo de by Standar d, D ynamic, Mil d, U ser. Contras t,
Bright ne ss, Color, Sha rp ness can be adj us ted only unde r us er mode, pres s “M enu” button
to retur n to t he main menu.
4. Col or Temp er at ure: Pres s bu tt on to select Co ol, Standar d, Warm and Us er. y ou can adjust t he R ed,
Green an d Bl ue in User mode .
5. Asp ec t Ra tio: will b e av ai lable und er D TV, and you c an c hoose Full, 4 :3 , Auto,
6. Scr ee n: c an be avail ab le under PC mod e.
7. Ene rg y Sa ving: You can c ho ose Middle, H ig h, Low, Standa rd i n this sectio n.
8. Noi se R ed uction: C an b e ad justed am on g Mi ddle, Hig h, O ff , Lo w.
PICTURE
PICT UR E
Pict ure mod e Stand ard
Col or Tempera ture
Asp ect Rati o
Scre en
Ene rgy Sav ing
Bac k Sel ect
PICTURE
PICT UR E
Col or Tempera ture
Asp ect Rati o
Scre en
Ene rgy Sav ing
Noi se Redu ction M iddle
Bac k Sel ect
SOUND MENU
1. Pre ss M EN U button to d is pl ay the main m en u.
2. Sou nd M od e: The n press to en te r SO UND page, i t wi ll h ighligh t th e fi rst optio n, t he n press “OK”
butt on t o en ter sub-m en u. P ress to adj us t So und Mode. You c an c ha nge the val ue o f
Tre bl e and Bass un de r us er mode.
3. Bal an ce : Press to se le ct B alance, t he n pr ess “OK” bu tt on t o enter sub-m en u. Press to adj us t.
4. Aut o Volum e: P re ss to select Aut o Vol ume, then p re ss “ OK” button to s el ect On or Off.
5. SPD IF M od e: Press to sel ec t SPDIF Mode, t he n press “OK” bu tt on to enter sub -m enu, press to
select P CM , Auto and Off.
6. Pow er O n Mu sic: Pres s to s el ect Power On Mu si c, then press “ OK ” button to sel ec t On or Off.
TIME MENU
Pres s ME NU t o display t he m ai n menu.
Use to e nt er T IM E pa ge, it will h ig hl ight the fi rs t op tion.
TIM E
TIM E
Off Time O ff
On Time
Colc k 06/Oct 1 4:56
Time Zo ne
Auto Sl eep
Bac k S elect
1. Off Time
TIM E
TIM E
2. On Time
TIM E
TIM E
Off Time Su nday
Hour 0
Minut e 0
Bac k S elect
Pres s “O K” t o enter sub -m en u.
Pres s bu tt on to adjus t.
3. Time Zone :
Press to select Tim e Zone, t hen press “O K” butt on to enter Sub-men u.
Tim e Zone Se le ct ion
Plea se choo se your s tate or t errit ory
Time Zo ne
Wester n Austra lia
North ern Territ ory
South Aus trali a
New Sou th Wales /ACT
Victor ia
Queens land
Tasmania
OK
Back
Sele ct
Mode Se lect On ce
Hour1 2
Minut e 1
Sourc e AV
Volume 3 0
Bac k S elect
Pres s to s el ect On Time, t he n pr ess “OK” butt on
to ent er t he s ub-menu . Us e bu tton to adj us t.
Cloc k: D isplay the cu rr ent system ti me . It ’s n ot
avai la ble.
SOUND
SOUN D
Sound Mode Standard
Balance
Auto Volume
SPDIF Mode
Power On Music
OK
Bac k Sel ect
-19-
SOUND
SOUN D
Sound Mode Standard
Balance
Auto Volume
SPDIF Mode
Power On Music
OK
Bac k Sel ect
4. Au to S leep:
5. Sle ep Tim er :
TIM E
TIM E
Sleep Timer Of f
Press to select Aut o Sleep , then press “ OK” but ton to select On or Off.
Press to select Sl eep Time r, then press “ OK” but ton to enter sub -men u,
and then, press bu tton to a djust.
Bac k S elect
-20-
Page 12

Menu Operation Guide
Menu Operation Guide
OPTION MENU
Pres s ME NU b utton to di sp la y the main me nu .
Pres s to e nt er OPTION p ag e, i t will high li gh t the first o pt io n.
OPTIO N
Bac k
OPTION
OSD La nguag e Engli sh
PVR Fi le Syst em
OSD Tim e Out
OSD Tra nspar ency
Rest ore Def ault
Bac k Sel ect
OPTIO N
Bac k
OPTION
OSD Tim e Out
OSD Tra nspar ency
Rest ore Def ault
Versi on Info
Blue S creen
Bac k Sel ect
1. OSD L an gu age: Only E ng li sh canbe se le ct ed in the fun ct io n.
2. PVR F il e Sy stem: Pre ss “ OK ” button to e nt er t he PVR File S ys te m, Users can ch ec k the informa ti on of
the USB de vi ce, or format t he U SB device.
3. OSD Time Ou t: S et O SD time out .
4. OSD Tr an sp arency: P re ss b utton to ad ju st t he transp ar en cy from off to 100% .
5. Res to re D efault: H ig hl ight this i te m, a nd then pre ss “O K”butto n to c he ck out the ve rs io n informa ti on
of the sys te m.
6. Vers io n In fo: Opera te t hi s item to res um e al l the initi al s et ting.
7. Blu e Sc re en: Press “ OK ”t o select On o r Off.
LOCK MENU
Pres s ME NU t o bring up th e OS D me nu. (This f un ct ion is only a va il able unde r DT V mo de.)
Use bu tt on t o LOCK page , it w il l highlig ht t he f irst opti on , th en press “O K” b ut ton to enter th e su b-menu.
LOCK
Bac k
LOCK
Lock System
Set Password
Block Program
Parental Guidance No Block
LOCK
Bac k
LOCK
Lock System
Set Password
Block Program
Parental Guidance No Block
PVR File System
PVR fu nc ti on is only av ai lable for DTV, includes Re co rd, Timeshif t an d Playback fu nc tions. Reco rd
incl ud es in time reco rd a nd preserve r ec ord. In time re co rd can be worde d th rough REC key
imme di ately, and preserv e re cord needs to p re serve befor eh and.
Reco rd a nd Playback c an b e done at the sam e ti me. Timeshif t is a nother func ti on for both rec or di ng
and pl ay ing.The fol lo wing will exp la in in details .
Ente r PV R fr om OPTION m en u, a s follows :
OPTIO N
Bac k
OPTION
OSD La nguag e Engli sh
PVR Fi le Syst em
OSD Tim e Out
OSD Tra nspar ency
Rest ore Def ault
Bac k Sel ect
Select Disk C:
Check PVR File System Start
USB Disk
Format(Hard Disk Recommended)
Time Shift Size
Speed
Free Record Limit 6 Hr.
OK
Select
Select Disk
Choo se t he disk to stor e wh atever cont en t re cording , no rm ally defa ul t as C:
Pres s bu tt on to selec t St ar t, then Pre ss O K bu tton to enter t he s ub-menu.
Select Disk C:
Check PVR File System Checking
USB Disk Pass
Format(Hard Disk Recommended) Pass
Time Shift Size 512MB
Speed 12970 KB/sFull HD Support
Free Record Limit 6 Hr.
OK
Select
Menu
Menu
Bac k Selec t
Bac k Selec t
Please enter old password
Please enter password
You are required to input
the password (default as 0000)
CancelClear
Lock S ys te m:
1. Pres s “O K” b utton and e nt er a p assword d ia lo g page, all t he i te m are brigh t af te r inputti ng
r ig ht p assord. ( 00 00 )
2. Set P as sw ord: User c an c ha nge the pas sw or d, and must r em em ber the new p as so rd.
3. Blo ck P ro gram: Use r ca n lo ck some cha nn el b y this func ti on , and when lo ck ed c hannel, n ee d to e nter
password.
4. Par en t Gu idance: P ar en t can set age l im it l evel by thi s fu nc tion.
CancelClear
-21-
USB Disk
If not i ns er ting USB eq ui pm ent, it sho ws N o De vice conn ec ti on; If USB eq ui pm ent is inse rt ed , it shows
PVR in it ializing.
Time Shift Capacity
The op ti on can not be exe cu ted directl y.
Tim e sh ift space c an o nl y be used aft er y ou f ormat the m em or y in put sour ce .
Speed
Can’ t be c hosen. After C he ck PVR File Sye te m, i t shows the a va il able spee d of U SB .
If ins pe ct ion faile d, i t sh ows FAIL, bu t if i t is n ormal, it s ho ws S UCCESS
Select Disk C:
Check PVR File System SUCCESS
USB Disk Pass
Format Pass
Time Shift Size All
Speed 12906 KB/s
Free Record Limit 6 Hr.
OK
Select
Menu
OK
File System Size
PVR File System Type Hi Speed FS
PVR File System Size All
SD 13041 Min
HD 3726 Mins
Select
Menu
-22-
Page 13

Menu Operation Guide
Menu Operation Guide
Then P re ss O K button to s ta rt f ormat the d is k, t hen a warni ng w it h All da ta w ill be lost” wi ll b e displayed t o
“
remi nd t he user to choo se S ta rt or EXIT.
Pres s bu tt on to start , bu tt on to exit.
Format disk
Warning! All data will be lost.
Start
EXIT
In Time Record Operation
Pres s RE C bu tton on the r em ot e control t o st ar t recordi ng t he c urrent pr og ra mme, the re co rd ing windo w wi ll
be dis ap peared afte r fe w seconds and a r ed t ransparen t ic on with REC cha ra cters will be d is played at the
righ t si de of the scree n. P re ss HOLD but to n fo r stop. it is a va il able for re co rd ing when th e un it i s in
Stan db y mo de.
REC
[00 :0 0:36]
Recording
800 SZTVM01
The S id es how w it h Pau l Mc Der mo tt (0000320MB)
09:20
PVR.L Operation
Pres s PV R. L butto n to d is play the re co rd ed progra m li st , select an y of t he i tems for wa tc hi ng.
Recorded List Program
DISNEY ADVENTURES
DISNEY ADVENTURES
DISNEY ADVENTURES
DISNEY ADVENTURES
GOOD CHEF BAO CHFF
GOOD CHEF BAO CHFF
GOOD CHEF BAO CHFF
GOOD CHEF BAO CHFF
GOOD CHEF BAO CHFF
George And Martha
Delete
OK
Select
INFO
Index
Menu
Dele te : Pr ess red but to n to d elete foc us ed p rogram.
INFO : Pr es s green but to n to p op out prog ra mm e informa ti on .
Inde x: P re ss to switc h re co rding pro gr am o rders.
OK: Pl ay f oc used prog ra m.
Up/D ow n: P ress butt on t o se lect prog ra m.
Preserve Record Operation
Pres s EP G di rectly to d is pl ay the PROG RA MM E GUIDE win do w, fo cus on your f av or ite chann el t ha t you
want t o re co rd then pre ss R EC b utton at th e re mo te contro l to e nt er into the R EC OR DER menu, a nd t he n
you ar e re quired to set t he r ec ording ti me t he re, Press O K fo r co nfirm.
RECORDER
800 SZTVM01
- +
Start Time
42 Minut
14 Hour
May Month
31 Date
End Time
12 Minute
15 Hour
May Month
31 Date
Mode AUTO
Select
Back
PVR Recorder Schedule
Pres s ye llow button o n th e remote cont ro l to d isplay sc he dule list.
Schedule List 09:33 25th Dec Delete
Time Date Programme Title Channel Name
10:00 Sun, 25 Dec SP-THE SINGING CHRISTMAS TREE 7 7 Digital
Timeshift
Pres s TSR bu tt on t o delay the p ro ce ss of progr am b ro adcasti ng i n DT V mode.
20:13
[00:00:03/00:00:00]
A B
Time Shift
Media Menu
Note : Be fo re operat in g ME DIA menu, pl ug i n USB device, t he n press SOURC E bu tt on to set the I np ut
Sour ce .
Pres s bu tt on to selec t ME DI A in the Sourc e me nu , then pres s OK b ut ton to enter.
Input Soure
DTV
ATV
AV
YPbPr
VGA
HDMI 1
HDMI 2
MEDIA
OK
Sel ect
Pres s bu tt on to selec t PH OT O in t he m ain menu, t he n pr ess OK button t o en ter.
Pres s EX IT b ut to n to quit the m en u.
USB D evice
PHO TO
Pres s bu tt on to selec t dr iv e disk, the n pr es s OK button to en te r.
Pres s bu tt on to selec t Re tu rn option t o go b ac k to previo us m en u.
1 : 1
C:\MEDIA
C
Return Up Folder movie music
Photo Text
Sub Menu Select/Unselect All
1/1
-23-
-24-
Page 14

OSD Menu Operation
Menu Operation Guide
Menu Operation Guide
When highlighting the option you select, picture can be previewed and information of the picture will appear.
Press ◄/► button to select the file you want in the file selecting menu, then press button to display the picture.
1/11MEDIA\Photo\JPEG
Return Up Folder QXQ music
000111.jpg 06.mp3 10024616c.mp3
0521hangmu09.jpg 0521hangmul3.jpg 0521hangmu15.jpg 08_gC1WIvNHu1UZ_0..
Press ◄/► button,OK button to select several files(pressing the blue button underneath will select
0494 .jpg
Sub Menu Select/Unselect All
press it again if you do not want to select all).Then press button,pictures will display one by one.
C:\MEDIA\Photo\BMP 1/2
Return Up Folder 1024x768_bmp.bmp 1440x900.bmp
1600x1200b.mp 21312.bmp DTVLOGO_NESX.bmp GRAY1.bmp
GRAY2.bmp untitled.bmp untitled1.bmp untitled123.bmp
Sub Menu Select/Unselect All
Resolution: 1280x800
Size: 199 KBytes
Date: ---- / -- / --
Time: -- : -- : --
all pictures,
Press ▲/▼ button to enlarge or contract the image,◄/►button rotate the image.
MUSIC Menu
Press ◄/► button to select MUSIC in the main menu, then press OK button to enter.
Press EXIT button to quit the menu.
USB Dev ic e
MUSIC
X MUT E
Press ◄/► button to select drive disk, then press OK button to enter.
Press ◄/► button to select Return option to go back to the previous menu.
When highlighting the option you selected, music can be previewed and information of the music.
C:\EDIA \ Music \ MP3
Return Up Folder QXQ music
03.mp3 06.mp3 10024616c.mp3
1139153940.mp3 1174270662.mp3 1177515282805.mp3 136erqianyy.mp3
Sub Menu Select/Unselect All
Press button for playing music.Press GOTO button to set the time,and then it will play the music
from that point.
1/15
Album:
Title:
Blt Rate: 128K
Artist:
Sampling: 44K
Year:
Slze: 3924 KBytes
Pau se
Press◄/►button to select the file you want to delete, then press the red button on remote control to delete
Copy and Paste can be operated under this interface.
MEDIA Photo BMP 1/2
Return Up Folder 1024x768_bmp.bmp 1440x900.bmp
1600x1200.bmp 21312.bmp DTVLOGO_NESX.bmp GRAY1.bmp
GRAY2.bmp untitled.bmp untitled1.bmp untitled123.bmp
Delete Copy Paste
Press EXIT button to quit the menu.
-25-
the file.
MUSIC
You alw ays on my m ind.m p3
Next: Nemo.mp3
00:13:35 03:20:27
1. You alw ays on my m ind.m p3
2. Nemo .mp3
3. abcd 0 3.mp3
Album:
《ANG5.0》
4. abcd 0 4.mp3
2003
5. abcd 0 5.mp3
Artist:
Zhang Sha ohan
6. abcd 0 6.mp3
Taiwan Chi na
7. abcd 0 7.mp3
Genre:
8. abcd 0 8.mp3
Pop / popul ar
MUSIC
《ANG5.0》
Artist:
Zhang Sha ohan
Taiwan Chi na
Genre:
Pop / popul ar
Press CANCEL button,music will play in Energy Saving Mode.
MUSIC
You al wa ys on my mind .m p3
Next: Nemo
00:13:35 03:20:27
Press anyone button to quit the menu.
-26-
You alw ays on my m ind.m p3
Next: Nemo.mp3
00:13:35 03:20:27
1. You alw ays on my m ind.m p3
Inpu t Searc h Time
2. Nemo .mp3
: :
0 0 0 0 0 0
3. abcd 0 3.mp3
Album:
4. abcd 0 4.mp3
2003
5. abcd 0 5.mp3
6. abcd 0 6.mp3
7. abcd 0 7.mp3
8. abcd 0 8.mp3
OK
Page 15

OSD Menu Operation
Menu Operation Guide
Menu Operation Guide
Menu Operation Guide
MOVIE Menu
Press / button to select MOVIE in the main menu, then press OK button to enter.
Press EXIT button to quit the menu.
USB D evice
MOV IE
X MUTE
Press / button to select the drive disk you want, then press OK button to enter.
Press / button to select Return option to go back to previous menu.
When highlighting the option you selected, movie can be previewed and information will appear.
C:\MEDIA\Movie\mkv
Return
720p_chd-mr&mrs-smi_
BigBuckBunny_108-[Divx7]_AAC5.1_A_
Paranormal_Activity_[- Samsung.Demo.Oceani_ Shutter_Island_[Divx_-[MV].Hotcha-.PartyGi -
Sub Menu Select/Unselect All
Press button to play the selected movie.
Press button, button button, button
the last or next chapter.
Press / button to contract or enlarge the image.
1/2
Resolution: 1920 x 1080
Audio Track: 1/2
Subtitle: OFF
Program: -/0
Size: 519585 KBytes
to fast backward or fast forward playback. to play
TEXT Menu
Press / button to select TEXT in the main menu, then press OK button to enter.
Press EXIT button to quit the menu.
USB D evice
TEX T
X MUTE
Press / button to select the drive disk you want, then press OK button to enter.
Press / button to select Return option to go back to previous menu.
When highlighting the option you selected, text can be previewed and information will appear.
Press button to view the selected text.
MEDIA\Text
This book by the www.wmtxt.com(unkno
Return
wn txt novel download site) for you to or
ganize production
Download free novels more exciting,more
complete version of the nover e-book dow
nload please visit www.wmtxt.com
chinese txt.txt
chapter
English txt.txt
Sub Menu Select/Unselect All
Press / button to turn pages, / button move to last or next Text file.
Setting Background Music When Watching Pictures and Text.
1. Select a music file or more in MUSIC menu by pressing OK button, then exit the MUSIC menu.
2. Enter the PHOTO or TEXT menu and display the photo or text you want, and then press the
yellow button on the remote control to play the music. Press it again when you want to stop the
music.
Size: 35KBytes
1/1
1.Read these instructions.
2.Keep these instructions.
3.Heed all warnings.
4.follow all instructions.
5.Do not use this apparatus near water.
6.Clean only with dry cloth.
1 /2
If you want to watch footage in movie repeatedly, press A-B button at the time it starts and press the
button again at the time it ends.
AB
A-s et
AB
AB- set
Press Exit button to quit the menu.
-31-
- -27
-32-
-28-
Page 16

OSD Menu Operation
Troubleshooting and Advice
Troubleshooting and Advice
Before calling a service center, Try the following steps to diagnose the problem.
TV unit
Problem
There is no power.
There is no picture
or sound.
There are spots on
the screen.
Degraded colors
or tints.
Improper screen
position or size.
The image appears
distorted.
The image appears
too bright, and there
is a loss of definition
in the brightest
areas of the image.
The image appears
too washed out, or
the darkest areas of
the image appear
too bright.
Remote control
does not function
properly.
There is no picture
or sound, just noise.
Picture is not clear.
No sound.
Ensure the power plug is securely inserted into the unit and wall outlet.
• Try a different input source to check whether the source is at fault.
• Check for mis-connection of cables or for wrong input source.
Your unit is being affected by interference from automobiles, trains, high-voltage
transmission lines, neon signs or another sources of interference. Try redirecting or
relocating your antenna to reduce the affects of the interference.
Check whether all the picture adjustments have been properly performed.
Try selecting a different aspect ratio by pressing the ASPECT button on
the remote control.
Ensure the display aspect ratio is correctly set to suit the program source.
• Reduce the contrast setting.
• The AV video signal has not been terminated properly somewhere in the external AV
equipment.
Reduce the brightness level till the black areas of the picture appear as black.
• Chec k fo r in correct b at te ry orient at io n.
• Chec k fo r de ad batter ie s.
• Chec ek y our distanc e an d angle from th e di splay.
• Chec k wh ether remot e co ntrol is plin ti ng at sensor wi nd ow.
• Chec k fo r an y obstacl e be tw een the rem ot e co ntrol and t he r em ote
cont ro l se nsor wind ow.
• Chec k th at the remote c on tr ol sensor w in do w is not unde r st ro ng
fluo re sc ent light in g.
• Chec k fo r an y devices ( PC o r pe rsonal di gi tal assista nt , PD A)nearb y th at
tran sm it i nfrared s ig na l which may c au se i nterfer en ce t o signal
tran sm is sion betw ee n th e remote co nt ro l and the uni t. Tu rn o ff t he i nfrared
func ti on o f these dev ic es .
• Make sure the antenna cable is properly connected.
• Change channels to confirm if the symptom is still present.
• Make sure the antenna cable is properly connected.
Change channels to confirm if the symptom is still present.
• If PC (VGA) is selected as the input signal source, use the Auto Sync
Function in the Set Up Menu (In VGA Mode) to let the display adjust
picture automatically.
• Check whether you have selected the Mute function.
• Make sure the volume is not set to minimum.
• Check the AV cables for disconnection.
Suggested Action
Antenna
Problem
The picture is not sharp or
the picture moves contains
image movement.
The picture is doubled or
tripled.
The picture is spotted.
There are stripes on the
screen or colors fade.
The panel uses a panel consisting of sub pixels which require sophisticated technology to produce. However,
there may be few bright or dark pixels on the screen. These pixels will have no impact on the performance of
the TV.
• The reception may be weak.
• Change channels to confirm if the symptom is still present.
• Make sure the outside antenna is not disconnected.
• Make sure the antenna is facing the right direction.
• Make sure the antenna is facing the right direction.
• Picture ghosting is caused by reflections from buildings, large metal structures and
mountains. Carefully realign your antenna to minimize the ghost images. Ultimately
a higher quality antenna professionally installed may be necessary to reduce the
ghosting.
• There may be interference from automobiles, trains, high voltage lines, neon
lights, etc.
• There may be interference between the antenna cable and power cable, try
positioning them further apart.
• Is the television receiving interference from other devices? Transmission
antennas of radio broadcasting stations and transmission antennas of amateur
radios and cellular phones may also cause interference.
• Use the television as far away as possible from devices that may cause possible
interference.
Suggested Action
Supported PC Input Signal
Your unit can use as PC monitor, it supports below RGB-PC, HDMI mode INPUT.
RGB-PC, HDMI mode INPUT SPEC
VGA / HDMI 1/2 Input
Vertical frequency
(HZ)
60
72.809
75
70
60
72.19
75
75
60
75
75
59.8
60
60
59.79
60
VGA
VESA
VESA
VGA-T
VESA Guidelines
VESA
VESA
Mac
VESA Guidelines
VESA
Mac
VESA
VESA
VESA
VESA
INPUT
FORMAT
Resolution
640x480
640x480
640x480
720x400
800x600
800x600
800x600
832x624
1024x768
1024x768
1152x870
1280x800
1280x960
1360x768
1366X768
1280x1024
Horizontal frequency
(KHz)
31.5
37.861
37.5
31.5
37.9
48.077
46.9
49.7
48.4
60
68.68
47.8
60.0
47.7
47.712
63.595
Standard
-31-
-29-
Sub Menu Select/Unselect All
Sub Menu Select/Unselect All
-32-
-30-
Page 17

Specification
Specification
Operating Voltage
Power Consumption
Video Format Supporting
Digital TV
Analog TV
Panel Spec
~100-240V AC, 50/60Hz
116 (Max), < 1W (Standby)
COMPONENT
HDMI
Input Frequency
Channel Bandwidth
Video Decode
Audio
TV System
NICAM
Active Area
Pixel Format
Luminance White
Contrast Ratio
Color Depth
Expected Life Time
ANT IN
480i, 480p, 576i, 576p, 720p (50Hz/60Hz),
1080i (50Hz/60Hz), 1080p (50Hz/60Hz).
480p, 576p, 720p (50Hz/60Hz),
1080i (50Hz/60Hz), 1080p (50Hz/60Hz).
Australia
VHF-H: 177.5 t o 226.5MHz
UHF: 522.5MHz to 816.5MHz
7MHZ
1080i, 720p, 576p, 576i
MP EG AC 3;
PAL B/G; D/K; I
NICAM
Stereo
697.7mmx39 2.3mm(V)
31.5 inches (8 00.4mm) diago nal
1366 horiz. by 768 vert. pixels RGB
horizontal stripe arrangement
350cd/㎡(Center 1 point) (Typ.)
1 00 (Typ.)2
8bit, 16,7M colors
about 50,000 hours
RF X 1
HDMI input
Connection
Interface
Audio Power
Unit Dimension
Weight
Design an d speci fications are sub ject to c hange with out pri or notice.
USB input
YPbPr input
VGA input
VIDEO input
8W+8W
954(L) x 160(W) x 585(H)mm
Net: 8.1kgs; Gross: 10.0kgs
HDMI X 2
USB X 1
YPbPr X 1
VGA X 1
VIDEO X 1
-31-
 Loading...