

Page 1
Web: www.soniqav.com
Customer Hotline: 1300 765 663
Page 2
OTHERS
IMPORTANT SAFETY INSTRUCTION
WARNING: DO NOT EXPOSE THIS APPLIANCE TO RAIN OR
MOISTURE, DUE TO THE HIGH RISK OF FIRE OR ELECTRIC
SHOCK, DO NOT OPENT HE CABINET. DANGEROUS HIGH VOLTAGES
ARE PRESENT INSIDE THE ENCLOSURE. ONLY QUALIFIED SERVICE
PERSONNEL SHOULD A TTEMPT T HIS.
F
U
N
C
T
I
O
N
M
E
N
P
P
U
U
S
S
H
H
O
O
P
P
E
E
N
N
_
V E
O
L
U
U
R
E
TU
R
N
O
K
M
+
3.Generall y, after t he ba ttery pack is rec har ged, its
continuous ly wo rking time is as fo llo ws. For example:
Operati ng st atus Continuo usl y pla ying time
Play DVD, TFT on about 2 hour s
Play DVD, TFT off a bout 3hours
4.Conditio ns an d attention:
While using th e bat tery pack, the en vir onment temperatu re
should be 0-35 C .
A newly bought ba tte ry pack can only be u sed a fter being
recharged.
To undertake the l ong est service lif e of th e battery pack,
charge it unde r or cl ose to indoor-t emp erature.
Never dispos e of in f ire, water or hea t up.
Do not use in high t emp erature or near h eat s ources.
Never connec t the p ositive and neg ati ve poles with metal.
Do not open the ba tte ry, refe r servicing onl y to qu alified
service pers onn el.
Do not charge an d dis charge the batt ery a t the same time.
CAUTION: T O PREVENT ELECTRIC SHOCK, MATCH WIDE BLADE
OF PLUG T O WIDE SLOT, A ND FULLY INSIDE.
ATTENTION: POUR EVITER LES CHOCS ELECTRIQUE, INTRODUIRE
LA LAME LA PLUSLARGE DE LA FICHE DANS LA
BORNE CORRESPONDANTE DE LA PRISE ET
POUSSER JUSQU A U FOUD.
CAUTION: TO ENSURE PROPER USE OF THIS PRODUCT,
PLEASE READ THIS OWNER'S MANUAL
CAREFULLY AND RETAIN FOR FUTURE REFERENCE.
SHO ULD THE UNIT REQUIRE MAINTENANCE,
CONTACTA NA UTHORIZED SERVICE LOCATION. ONLY
QUALIFIED SERVICE PERSONNEL SHOULD
REMOVE T HIS COVER.
FCC NOTICE: THIS EQUIPMENT HAS BEEN TESTED A ND FOUND
TO COMPLY WITH THE LIMITS FOR A CLASS B
DIGITAL DEVICE. PURSUANT WITH T HE FCC RULES,
PART 15. THESE LIMITS ARE DESIGNED TO PROVIDE
REASONABLE PROTECTION AGAINST HARMFUL
INTERFERENCE IN A RESIDENTIAL INSTALLATION.
WARNING: C HANGE OR MODIFICATIONS MADE TO THIS
EQUIPMENT, NOT EXPRESSLY A PPROVED BY
PARTIES A UTHORIZED WILL VOID A LL THE
MANUFACTURE WARRANTIES.
Please carefully study this manual and always keep it available.
There are however, some installation and operation
precautions, which you should be aware of.
(1) Read these instructions.
(2) Keep these instructions.
(3) Heed all warnings.
44
(4) Follow all instructions.
1
Page 3
IMPOR TANT SAFETY INST RUCT ION
OTHERS
5 Do not u se t his app aratus ne ar water.
6 Clea n on ly with d ry cloth.
7 Do not b lo ck any ve ntilati on openin gs. Insta ll in
acco rdance wi th the manu facture 's instru ction.
8 Do not i ns tall ne ar any heat s ources su ch as
radi ators, he at regist ers, stov es, or othe r apparat us
(inc luding am plifier s) that pro duce heat .
9 Do not d ef eat the s af ety pur pose of the p olarize d of
grou nding-t ype plug. A pol arized pl ug has tw o bl ades
with o ne wider th an the othe r. A grounding t ype plug
has tw o blades an d a third gro unding pr ong. The wide
blad e or the thir d prong are p rovided f or your saf ety.
If the p ro vided p lug does no t fit into yo ur outlet ,
cons ult an elec trician f or replac ement of th is outlet .
10 Pro te ct the po wer cord fr om being wa lked on or
pinc hed parti cularly a t plugs, co nvenien ce rece pt acles ,
and th e point whe re they exi t from the ap paratus .
11 Only use a tt achme nt s/acc es sorie s sp ecifi ed b y the
manu facture r.
12 Use o nl y with th e cart, sta nd, tripo d, bracke t, or table
spec ified by th e manufac turer, or so ld with the
appa ratus. Wh en a cart is us ed, use cau tion when
movi ng the cart /appara tus combi nation to a void in ju ry
from t ip-over.
Recharg eab le ba tt ery pack is sui ta b le for vari ous of port abl e DVD
player. It is con ven ient fo r you to enj oy su per fu ncti ons o f DVD
player out of do ors .
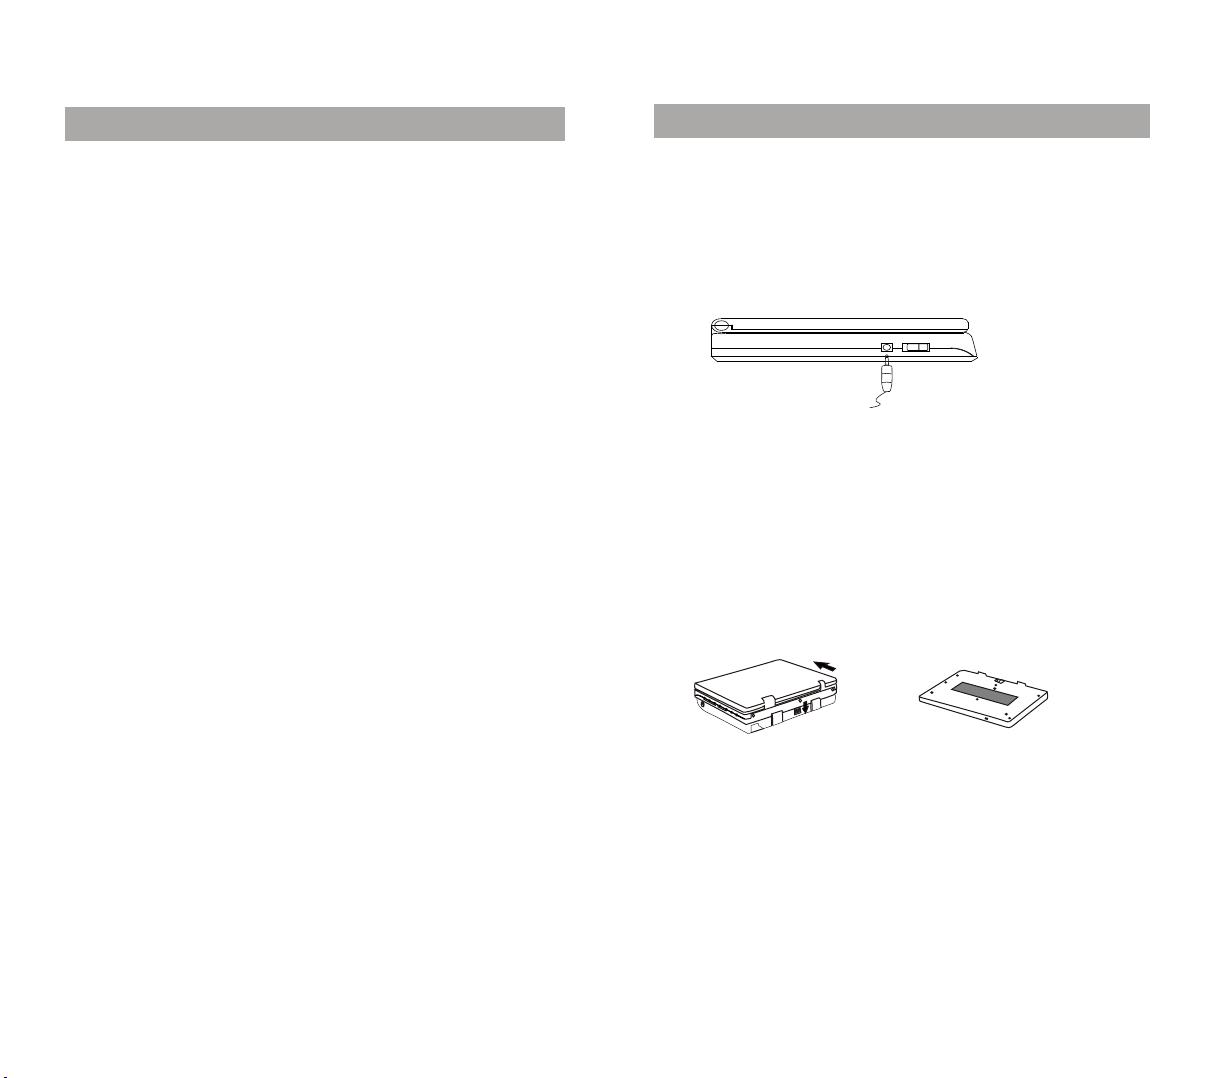
1. Don not re mov e th e b attery pack fr o m th e D VD player ,
you can use the AC ad apto r connect to AC soc ket d irectly.
When DVD pla ye r is OFF, the batte ry only c an be e le ctrif ied
at th is ti m e. Wh en the batte ry ele ctrif ied, the ch arg in g
indicator is li ght.
ON POWER OFF
DC IN 9V
Note:(1) The input voltage of the charger is: DC9V. 2A;
(2) Generally, the battery pack can be charged and
discharged for about 500 times;
(3) The ma rking voltage of the battery pack is 7.4V,
and especial protecting IC is inside to prevent the
deformation caused by overcharging and over discharging.
(4) The DC car Adaptor can not to be used to charge
the battery pack.
2. It takes about 4 hour s t o ful ly char ge the bat tery pack, the
char ging indi cat or goes out and t he char ging is over .
VIE
VIE
DO
DO
S
S
V O
V OI
I
DE
DE
S/CBE
S/CBE
U
U
N
N
S
L/
L/
S
S
R
RS
LI
LI
N
N
E
E
F/F
F/F
L
L
R
R
C
OAXI
OAXI
AL
ALC
H H
H H
E
E
A
A
D
D
P
P
O
O
NE
NE
13 Unp lug this ap paratus d uring lig htning st orms or whe n
unus ed for long p eriods of t ime.
14 Ref er a ll serv icing to qu alified s ervice pe rsonnel .
Serv icing is re quired wh en the appa ratus has b een
dama ged in any wa y, su ch a s power -s upply c or d or
plug i s damaged , liquid ha s been spil led or obje cts
have f allen int o the appar atus, the a pparatu s has
been e xposed to r ain or mois ture, doe s not opera te
norm ally, or has bee n dr opped .
2
Note s:(1 )A fu ll-c harg ed batt e ry pa ck will discharge au to m atically
in a month , i f it is n ot used tempora ri l y.
(2)If th e b att ery pack is not used fo r a l ong p eriod of ti me,
discharg e it a nd sto re it in a plac e th a t is cool, dry and
dark .
43
Page 4
OTHERS
IMPORTAN T SAFE TY INSTR UCTION
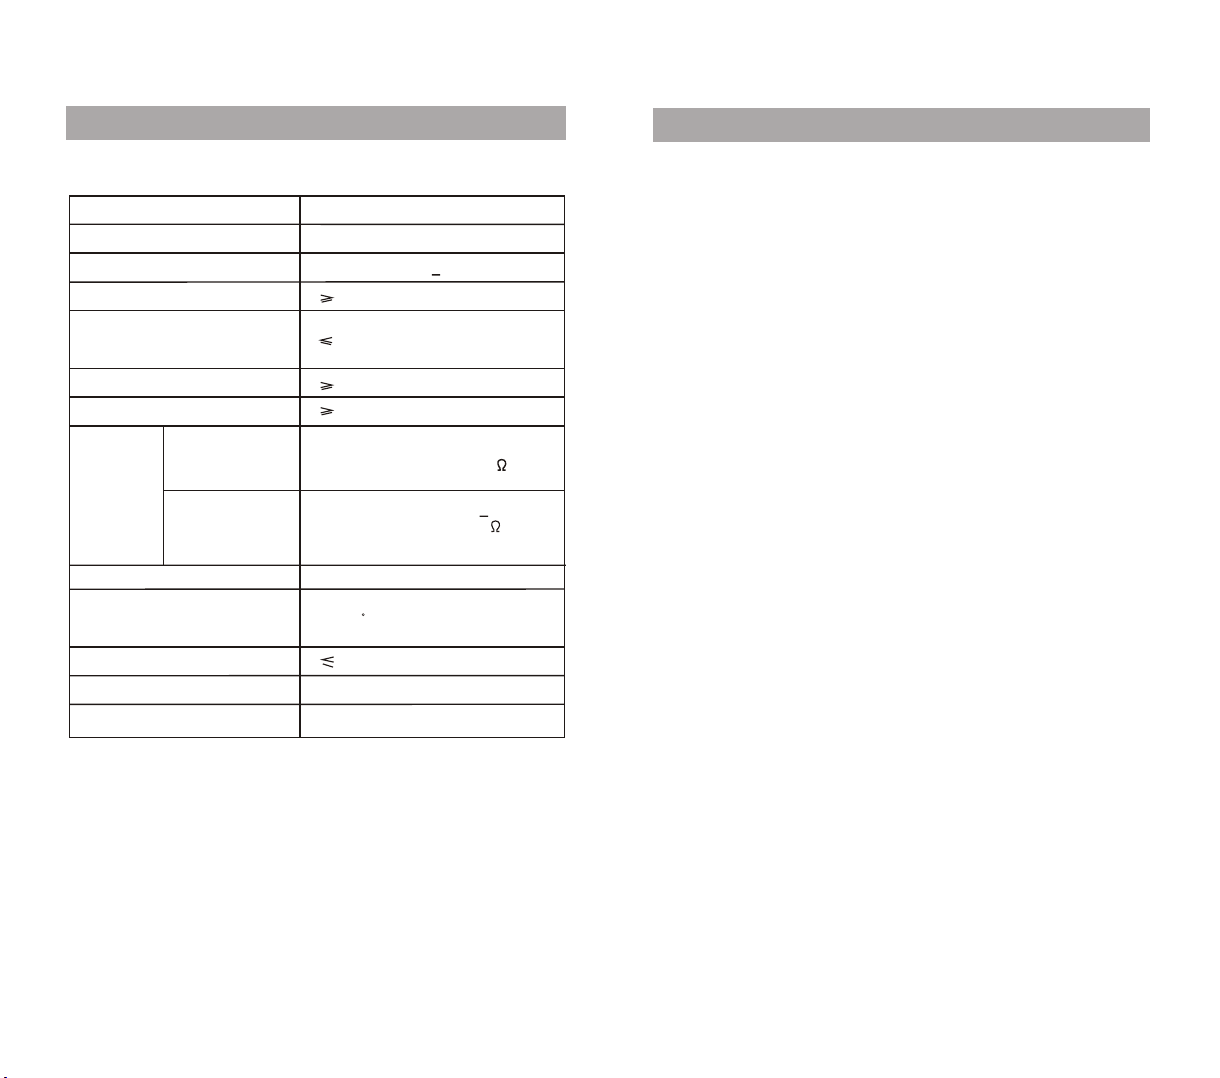
TECHNICAL SPECIFICATIONS
Laser
Vide o system
Frequency re spo nse
Signal/noi se ra tio
Audio distor tio n+
noise
Channel sepa rat ion
Dynamic rang e
Audio out
(analog
audio)
Output
Vide o out
Power supply
Allowable mo tio n
temperatur e
Power Consum pti on
Dimensions
Weig ht
This manual is o nly f or your referen ce, a nd any change to
the design and s pec ifications wi ll no t be ad vised.
Wav ele ngt h 650nm/780nm
PAL/NTSC/AUTO
20Hz-20KHz +1d B
90dB
-65dB(1KHz )
80dB(1KHz)
80dB
Output level :1V- 2 V
load impedan ce: 10k
Output level :1V p-p+20%
Load impedan ce: 75
imbalance, n ega tive polarity
DC 9V 2A
5-35 C
10W
190X142X29 mm
825g
15 £Po wer Sourc es .This pr oduct sho uld be oper ated only
from t he t ype of po wer sourc e indicat ed on the
mark ing label . If you are no t sure of the t ype of
powe r supply to y our home, c onsult yo ur produc t
deal er or local p ower comp any. Fo r produ cts inten ded
to ope rate from b attery po wer, or othe r sources , refer
to the o pe ratin g instruc tions.
16 Pow er-Cord P rotecti on -Power - s upply cor ds should b e
rout ed so that th ey are not li kely to be wa lked on or
pinc hed by item s placed up on or again st them,
payi ng partic ular atte ntion to co rds at plug s,
conv enience r eceptac les, and th e point whe re they
exit f rom the pro duct.
17 Pro te ctive At tachmen t Plug. The pro du ct is equ ipped
with a n attachm ent plug ha ving over load prot ective.
This i s a sa fety fe ature. Se e Instruc tion Manu al for
repl acement o r resetti ng of prote ctive dev ice. If
repl acement o f the plug is r equired , be sure the
serv ice techn ician has u sed a repla cement pl ug
spec ified by th e manufac turer tha t has the sam e
over load prot ection as t he origin al plug.
18 Pow er Lines . An ou tside ant enna syst em should n ot
be loc ated in the v icinity o f overhea d power lin es or
othe r electri c light or po wer circu its, or whe re it can
fall i nto such po wer lines o r circuit s. When in st alling
an out side ante nna syste m, extrem e care shou ld be
take n to keep fro m touchin g such powe r lines or
circ uits as con tact with t hem might b e fatal.
19 Ove rl oadin g. Do not ove rload wal l outlets , extensi on
cord s, or integ ral conve nience re ceptacl es as thi s ca n
resu lt in a risk of f ire or elec tric shoc k.
20 Ser vi cing . Do n ot attemp t to servic e this prod uct
your self as ope ning or rem oving cov ers may exp ose
you to d angerou s voltage o r other haz ards. Ref ers all
serv icing to qu alified s ervice pe rsonnel .
42
3
Page 5

IMPORTANT SAFETY INSTRUCTION
OTHERS
(21) Damages R equir in g Servi ce U nplug t hi s produ ct from
the wa ll outlet a nd refer se rvicing t o qualifi ed servic e
pers onnel und er the foll owing con ditions .
a. Whe n the power - supply co rd or plug is d amaged.
b. If li quid has be en spille d, or objec ts have fal len into
the pr oduct.
c. If th e pr oduct h as been exp osed to rai n or water.
d. If th e pr oduct d oes not ope rate norm ally by
foll owing the o peratin g instruc tions. Adj ust onl y
thos e control s that are co vered by th e operati ng
inst ruction s as an impro per adjus tment of ot her
cont rols may re sult in dam age and wil l often req uire
exte nsive wor k by a qualif ied techn ician to re store
the pr oduct to it s normal op eration .
e. If th e pr oduct h as been dro pped or dam aged in
any wa y.
f. Whe n th e produ ct exhibi ts a distin ct change i n
perf ormance , this indi cates a nee d for servi ce.
(22) R eplacem ent parts . When repl acement p arts are
requ ired, be su re the serv ice techn ician has u sed
repl acement p arts spec ified by th e manufac ture or
have t he same cha racteri stics as th e origina l part.
Unau thorize d substit utions ma y result in f ire, elec tric
shoc k or other ha zards.
(23) Safet y Ch eck Upo n co mplet io n of any se rv ice or
repa ir to this pr oduct, as k the servi ce techni cian to
perf orm safet y checks to d etermin e that the pr oduct is
in pro per opera ting cond ition.
ACCESSORIES
Check if you hav e all t he accessorie s aft er the carton is
opened.
Audio cable
Vide o cable
S-video cabl e
Coaxial cabl e
Remote contr ol
User manual
Rechargeab le ba ttery pack
AC Adaptor
DC Car Adaptor
This product i nco rporates copy rig ht protection tech nol ogy
that is protec ted b y method claims o f cer tain U.S. Paten ts
and other inte lle ctual propert y rig hts owned by Macrovi sio n
Corporatio n and o ther rights own ers . Use of the copyright
protection t ech nology must be au tho rized by Macrovisi on
Corporatio n, an d is intended for h ome a nd other limited
viewing uses o nly u nless otherwi se au thorized by
Macrovisio n Cor poration. Rev ers e engineering or
disassembl y is pr ohibited.
1
1
1
1
1
1
1
1
1
4
41
Page 6
OTHERS
NOTES ON DISCS
Trouble shooting guide
Sympto m
No pow er
No pic ture
No sou nd
Pict ure rolls
and no c olour
Dis c s can
not be
pla y ed
Remo te
cont rol does
not work
Blac k & white
pict ure
appe ars when
chan ge NTSC
syst em to PAL
Conn ect the pow er plug int o the wall ou tlet secu rely.
Check if the video cable into the jacks secur ely.
Make sure yo u set the color system correctly.
Check if the audi o cabl es into the jacks secur el y.
Check if the vol ume of the head phon e is set to MIN when
usi ng head phon es.
Make s ure you hav e selecte d DVD playe r positio n on
the amp lifier.
The co lour syst ems of the un it do not ma t ch with tha t of
TV, Pl ease sele ct the co rr ect TV TYP E until TV sh ows
norma l colour.
There is no di sc in the unit.
Put th e disc on the d isc tray pr operly wi th the labe l
side u p.
Clean the di sc.
Mois ture has co ndensed i n the unit. R emove the d isc
and le ave the uni t on for abou t one hour.
Disc s with poor q uality.
Rem ove barr iers bet w een the rem ot e cont rol and the uni t.
Poin t the remot e control a t the remot e control s ensor
of the u nit.
Repl ace the bat teries wi th new ones .
When N TSC syste m is change d to PAL system , the
colo urful pic ture on LCD d isplay wi ll beco me
a blac k/white p icture ra ndomly an d it will ret urn
quic kly to colo urful pic tures aut omatica lly.
Correctio n
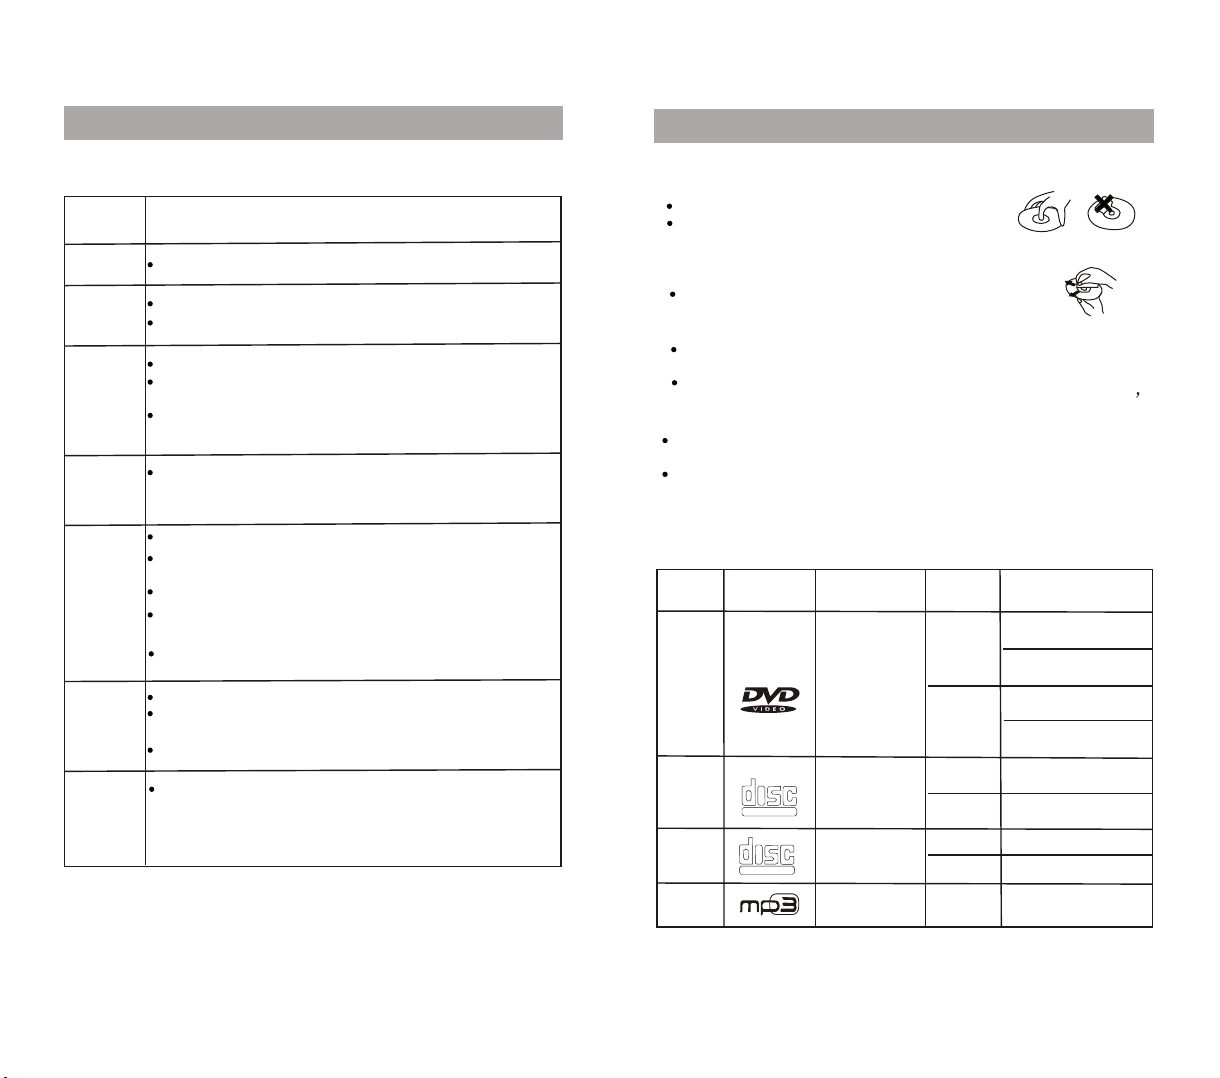
HOW TO HAN DLE , CLEAN, AND STORE DISCS.
HANDLING DIS CS
Do not touch the p lay back side of the di sc
Do not attach pa per o r tape to disc.
Note: We shall not be re s pon sible for any dam age t hat m ay occur
to a disc fro m bei ng op erated in the pla yer .
CLEANING DIS CS
Fing erpr int s and di rt on t he disc cau se pi ct ure
and sou nd deteri orat ion , wipe the di sc fr om the
cen tre ou tward wi th a sof t clot h. Alw ays kee p the di sc cl ean.
If you can no t wi pe the di rt off , wipe the di sc li gh t ly with a
slightly moi st en ed sof t clot h and fini sh wit h a dry cl oth.
Do no t use an y type of sol ven ts such as thi nner, be nzi ne,
commerc ia ll y av ailable clean ers o r anti-s tatic spray fo r vin yl LP S.
STORI NG DIS CS
Do not sto re dis cs in p la ces subject to dir ect sunlig ht or near heat
sources.
Do not sto re dis cs in p la ces subject to mois ture and dust.
Sto re dis cs ve rtic ally in a case. Sta ck in g or placing ob je c ts on dis cs
outs id e of th e ir ca se may cause warp in g .
PLAYABL E DISCS
This DVD playe r can p lay back the foll owi ng di scs.
TYPE
DVD
VCD
CD
MP3
DISC
LOGO
COM PACTCOM PACT
DIGI TAL VIDEODIGI TAL VIDEO
COM PACTCOM PACT
DIGI TAL AUDIODIGITAL AU DIO
CONTENT
Audi o+
vide o
(mot ion
pict ure)
Audi o+
vide o
(mot ion
pict ure)
Audi o
Audi o
SIZE
12cm
8cm
12cm
abou t 20mins
8cm
12cm
abou t 74mins
8cm
abou t 20mins
abou t 600mins
12cm
PLAYING TIME
abou t 2hrs
(sin gle-sid e disc)
abou t 4h rs
(dou ble-sid e disc)
abou t 80 mins
(sin gle-sid e disc)
abou t 160mins
(dou ble-sid e disc)
abou t 74mins
40
5
Page 7

TABLE OF CONTENTS
MP3 OPERATION
1. ....... ... ........... ... .1IMPORTANT SAFE TY INST RUC TION
2. NOTES ON DISC S
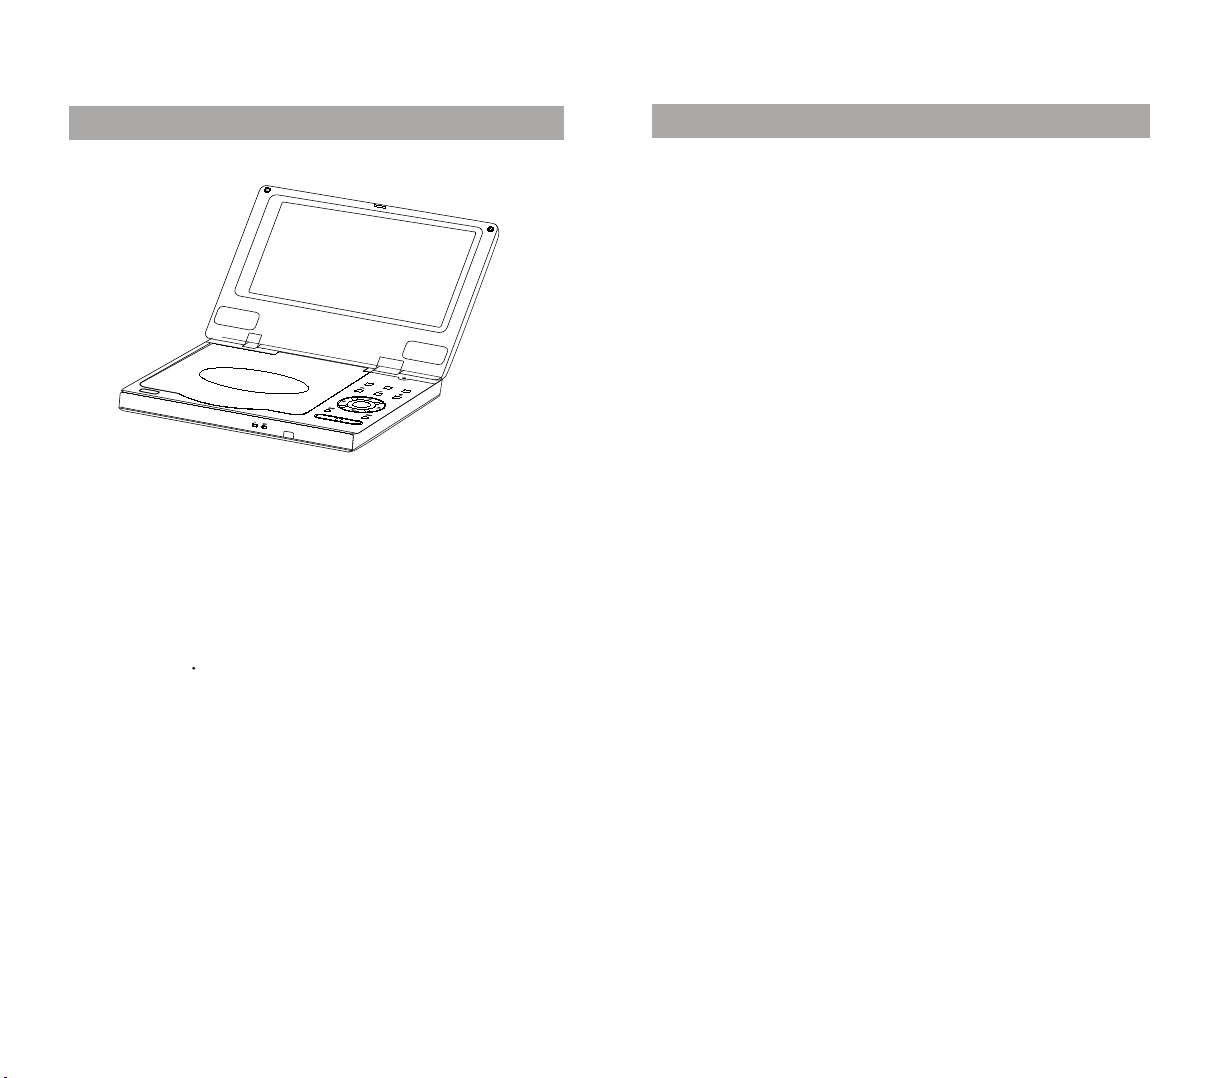
3. MAIN OF PARTS
MAIN UNIT
REMOTE CONTR OL
4. CONNECTIO NS
....... ... ........... ... ........... ... ........... ... .5
....... ... ........... ... ........... ... ........... ... ....8
....... ... ........... ... ........... ... ........... ... ....8-9
....... ... ........... ... ........... ... .10-11
....... ... ........... ... ........... ... ........... .12 -15
5. PREPARATIO NS BEFORE OPERATION
USE REMOTE CON TRO L
USING ADAPTOR
6. BASIC OPERATION
....... ... ........... ... ........... ... .....17-18
....... ... ........... ... ........... ... ........... 19
TFT PICTURE ADJUSTME NT
SYSTEM SETTI NG
FUNCTION SHI FT
PLAYB ACK DISCS
PAUSE
BOOKMARK
DVD MENU PLAY
PBC PLAYBACK
....... ... ........... ... ........... ... ........... ... ........... .22
...... ...... ...... ...... ...... ...... ...... ...... ...... ...... .....2 2
....... ... ........... ... ........... ... ........... 22
....... ... ........... ... ........... ... ........... .23
....... ... ........... ... ........... ... .....20-21
....... ... ........... ... ........... .16
....... ... ........... ... .......19
....... ... ........... ... ........... ... ........20
....... ... ........... ... ........... ... ........22
SELECT TRAC KS WITH NUMBER BU TTONS
7. FUNCTION SE TTI NG
MENU SETTING
....... ... ........... ... ........... ... ........24
....... ... ........... ... ........... ... .......24-2 7
....... ... .........16
....... ..2 3
SEL ECT TRA CKS WITH MENU
1. Insert a disc , and t he unit will search di sc inform atio n. The TV
scree n di sp l ays m ain menus. Pres s the direc t but ton ( ) t o
select so ng fo lde r from 1, pres s En ter b utton start s playing .
2.P ress , butt on to select Pre v iou s or Ne xt songs.
3.T he cursors dis played on th e tra cks onl y a sig n used fo r bro wsing
the other tra c ks, when select tra c ks wi th numeri c butt ons ,
the curs o r doe s not a ccord with the cu rre nt tra c ks in playing
mode.
DISC:\MP3
1.MP3
2.MP3
3.MP3
4.MP3
5.MP3
6.MP3
7.MP3
DISP LAY Mp3 AN D JPE G
PLAY MODE NOR MAL
00:0 0/ 00:00
03
ENT ER
NOTE: Whe n pla y a Mp3 d isc ,the volume o nly c an use the
VOL+ or VOL- but ton t o changed.Dir ect b utton can be oper ate d
at the time of tha t you s top to play a Mp3 dis c and o nly can be use to
select the dis c pla y system.
OTHER FUNCTI ONS
Dur ing pl ayba ck Mp3 di scs, the uni t feat ur es m ut e, vol um e
cont rol, repe at pl ay and et c, ope rating ar e the sam e as C D.
Note: For som e Mp3 with mul ti- cont ent s, you can press TI TL E
but ton to ret ur n to m ai n menu , af ter r ead ing the di sc, the syst em
displ ay file m enu by def aul t .
6
39
Page 8

TABLE OF CONTENTS
PLAY DISCS IN VARIOUS WAYS
■VCD、CD
1、Press PROGRAM button.The screen shows:
2. Enter the track number, Example: 4,7,9. The screen
shows:
3、Press the direction button 、 to select the wrong number
you entered, press CANCEL button to delete it.
4、Press the direction to select program play after the
number is entered, then Enter button starts to play the track
according to the programmed order.
5、Press PROGRAM one time to cancel the program play.
Entering the program state, pressing the direction button to
cancel the unwanted item, the unit starts playing from the
beginning of the disc by the Play/pause button is pressed.
PROGR AM
TR AC K CH OI CE
TRACK C HO IC E
001 01- 15
00 1 01
TRACK T RA CK
TR AC K TR AC K
01 _ _ _ 06 _ _ _
01 _ _ _ 0 6 _ _ _
02 _ _ _ 07 _ _ _
02 _ _ _ 0 7 _ _ _
03 _ _ _ 08 _ _ _
03 _ _ _ 0 8 _ _ _
04 _ _ _ 09 _ _ _
04 _ _ _ 0 9 _ _ _
05 _ _ _ 10 _ _ _
05 _ _ _ 1 0 _ _ _
PROGRAM
TR AC K CH OI CE
TRACK CHOIC E
001 01-15
00 1 01
TRACK TRACK
TR AC K TR AC K
01 004 06 _ _ _
01 _ _ _ 0 6 _ _ _
02 007 07 _ _ _
02 _ _ _ 0 7 _ _ _
03 009 08 _ _ _
03 _ _ _ 0 8 _ _ _
04 _ _ _ 09 _ _ _
04 _ _ _ 0 9 _ _ _
05 _ _ _ 10 _ _ _
05 _ _ _ 1 0 _ _ _
38
8. PLAY DIS CS IN VARI OUS WAY S
AUDIO MODE
FAST PL AY
SLOW PLAY
REPEAT PL AY
SELECT SUBTITLES
SELECT ANGLES
TIME SEARCH
ZOOM PLAY
MEMORY PLAY
PROGRAM PLAY
MP3 OPERATION
9. OTHERS
TROUBLESHO OTI NG
ACCESSORIE S
....... ... ........... ... ........... ... ........... ... ..........4 0
....... ... ........... ... ........... ... ........... .28
....... ... ........... ... ........... ... ........... ... ...29
....... ... ........... ... ........... ... ........... ... ...29
....... ... ........... ... ........... ... .......30-3 1
....... ... ........... ... ........... ... ..32
....... ... ........... ... ........... ... .......33
....... ... ........... ... ........... ... ......33-35
....... ... ........... ... ........... ... ........... ... 36
....... ... ........... ... ........... ... .....36
....... ... ........... ... ........... ... ...37-38
....... ... ........... ... ........... ... .......39
....... ... ........... ... ........... ... .40
....... ... ........... ... ........... ... ..........4 1
TECHNICAL SPECIFICATIONS
CHARGING
....... ... ........... ... ........... ... ........... 43- 44
7
....... ... ........... ... ......28
....... ... ........... ... .42
Page 9

MAIN OF PARTS
PLAY DISCS IN VARIOUS WAYS
PROGRAME
■DVD
1、1.Press PROGRAM button,
The screen shows:
2、Use the number button to enter the title (and chapter)
Example: Enter5、1、4、1、3、1、2、1、1、1 to program play
the first chapter under title 5-1.
The screen shows:
3、 Press the direction to select program play after the
number is entered, then Enter button starts to play the track
according to the programmed order.
4、Press PROGRAM one time to cancel the program play.
To enter into the program state, pressing the direction buttons
to cancel the unwanted item, the unit starts playing from the
beginning of the disc by the Play/pause button is pressed.
MAIN UNIT
1
2
3
4
8
AUDIO MEN U RETURN
19
SETUP
18
17
ZOOM
MUTE
16
15
VOLUMEVOLUME
14
13
12
11
10
PRO GRAM
TIT LE CHAP T CHO ICE
01 00 0 1
TIT LE CHAP TI TLE CHA P
01 _ _ _ _ _ 06 _ _ _ _ _
02 _ _ _ _ _ 07 _ _ _ _ _
03 _ _ _ _ _ 08 _ _ _ _ _
04 _ _ _ _ _ 09 _ _ _ _ _
05 _ _ _ _ _ 10 _ _ _ _ _
PRO GRAM
TIT LE CHAP T CHO ICE
01 00 0 1
TIT LE CHAP TI TLE CHA P
01 5 _ 1 _ _ 06 _ _ _ _ _
02 4 _ 1 _ _ 07 _ _ _ _ _
03 3 _ 1 _ _ 08 _ _ _ _ _
04 2 _ 1 _ _ 09 _ _ _ _ _
05 1 _ 1 _ _ 10 _ _ _ _ _
9
8
7
6
5
37
Page 10

PLAY DISCS IN VARIOUS WAYS
ZOOM PLAY
This functio n can b e used to watch a mot ion o r motionless
picture.
1. Press ZOOM bu tto n during the play bac k, the picture wi ll be
enlarged acc ord ing to the size tha t dis played on the
screen.
2. Press the dir ect ion button to mov e the
enlarged pic tur e. You can
at the time t hat t he zo om picture disp lay ed on the screen.
3. To resu me the picture, p res s the ZOOM until th e pic ture
is in normal siz e.
MEMORY PLAY
Press STOP bu tton once and the d isp lay wi ll show Pr e ss
1. "
play key to last p lay " .The unit wi ll st art p laying from the
stop point wh e n the PL AY/PAUSE b utt on is pressed.
If you press the STOP button twi ce, t he unit will stop . If
2.
you press PLAY button, the unit wi ll s tart playing fr om th e
beginning of t he di sc.
NOT E:
If you want to hav e the f unction of memo ry pl ay, plea se
setting t he me mo ry function on.
, ,,
move the enlar ged p icture only
MAIN OF PARTS
20 21
SUB/CEN
23 24 25 26 27 28 29
(1) LOCK
(2) TFT LC D
(3) SPEAK ER
(4) PUSH OP EN
(5)
(6)
(7)
(8)
(9)
(10)
(11)
(12)
(13)
VOLUME
ZOOM
DIRECTION BU TTON
FAST FORWARD
OK BUTTON
PREVIOUS
STOP
PLAY/PAU SE
RETURN
(14) MENU
(15)
(16)
MUTE
NEXT
Note: The direction b utt on on the main unit ( )
also can be used c orr espondingly a s PRE V, NEXT,
FAST FO RWARD, FAST REWIND butto n.
SL/SR FL/FR
LINE
22
HEADPHONE
COAXIALVIDEO SVIDEO
DC IN 9V
ON POWER OFF
31
30
(17) FAST REWI ND
(18)
SETUP
(19)
AUDIO
(20)
POWE R INDICATO R
(21)
BATTERY INDICATO R
(22)
REMOTE SENSO R
(23) VIDEO OUT /IN
(24) S-VIDEO O UT
(25) SUB/CEN O UT
(26) SL/SR OUT
(27) FL/FR/ OU T
(28) COAXIAL OUT
(29) HEADPHO NES J ACK
(30) DC IN
(31) ON POWER OF F
, ,, ,
36
9
Page 11

NAME OF PARTS
REMOTE CONTROL
30
PLAY DISCS IN VARIOUS WAYS
PLAY VCD CD,
Example: sea rch t rack 4, and 00:01 :45 o f disc.
1. Press SEARC H but ton, the screen s how t he picture
5
10
11
12
13
1
TIT LE
DIS PLAY
BOO KMARK
2
3
SEA RCH
ZOO M
4
AUD IO
SLO W
6
7
3
7
+10+10
DVD /AV
SET UP
RET URN
4
8
PRO GRAM
REP EAT
8
9
MEN U/PBC
CAN CEL
1
5
99
ANG LE
ENTER
2
6
00
SUB TITLE
14
15
16
17
18
19
20
21
22
23
24
25
26
27
28
29
2. Press SEARC H but ton again, the sc ree n show
the picture :
T 01/20 T 01/20
3. Press butto n 4, th e unit starts pla yba ck track4:
T 04/20 T 04/20
4. Press SEARC H but ton until the scr een s hows:
_ _:_ _:_ _
5. Press numbe r 0.0 .0.1.4.5 ente r tim e.
The screen shows :
00:01:45
The un it plays from 00: 01: 45 of the disc.
Note: during t he op eration, plea se pr ess CANCLE button
to cancel the se tti ng that you press ed by a ccident.
10
35
Page 12

PLAY DISCS IN VARIOUS WAYS
NAME OF PARTS
Press SEARCH b utt on again, then us e dir ection buttons
and move the cur sor t o highlight the t itl e number(T),
press 4 to selec t the t itle.
The screen sho ws:
T 04/20 C 01/32T 04/20 C 01/32
Press , dir ect ion b utton and move th e cur sor to
highlight th e cha pter number(C ), pr ess 2.
The screen sho ws:
T 04/20 C 02/32T 04/20 C 02/32
Press SEARCH b utt on again the scre en sh ow
the picture:
Press number b utt on to enter the hou r, min ute and
second.
Example: Ent er 0. 0.0.1.4.5 aft er se ttingPLAY/ENTER,
the unit will pl ay th e disc from 00:01 :45
(1) POWER
TITLE
(2)
DISPLAY
(3)
(4) SEARCH
ZOOM
(5)
(6) AUDIO
(7) SLOW
MENU/ PBC
(8)
(9) VOL- /L EFT
(10) CANCEL
NUMBER BUTTON
(11)
(12) ANGLE
(13) SUBTITL E
(14) PLAY/PAU SE
(15) STOP
(16) BOOKMAR K
NEXT
(17)
PREV
(18)
FAST FORWARD
(19)
FAST RE WIND
(20)
SETUP
(21)
(22) UP
(23) VOL+/RI GHT
(24) ENTER
RETURN
(25)
(26) DOWN
(27) PROGRAM
(28) REPEAT
(29) DVD/AV
(30) REMOTE TRANSMI TTE R
00:01:45
34
11
Page 13

CONNECTIONS
PLAY DISCS IN VARIOUS WAYS
A
DC IN 9V
ON POWER OFF
B
SL/SR FL/FR
SUB/CEN
LINE
CONNECT TO POWE R A
Connect the AC ad apt or (or a car power co nne cto r ) to:
1.DC IN jack on th e lef t side of the unit.
2.The AC power ou tle t (or DC Car Adaptor ).
Note: before u sin g a car power conne cto r, ins ert one
end into DC IN 9V so cke t, and the other on e int o the
car power outl et.
USE HEADPHON ES B
Insert headp hon es into the headp hon es ja ck of the unit.
Tur n off the powe r whe n insert or unplu g the h ead phones.
CONNECT TO OUTE R EQU IPMENTS
You can con nec t the unit to the out er eq uipment such as TV
or amplifier t o enj oy the action mov ies o r karaoke disc.
BEFORE CONNE CTI ONS
Cut off the power of the un it an d the outer equip men ts.
Insert the plu g ful ly.
Hold the plug to d isc onnect the cord , do no t pull the cord.
HEADPHONE
COAXIALVIDEO SVIDEO
ANGLES SELECT
Some discs hav e ima ges with different vie win g ang les, and
you can select a mon g them. For examp le, w hen you watch
a running trai n, yo u may watch it from t he fr ont, the
left window or t he ri ght window with out s topping it.
Example: A DVD has f our v iewing angles a t you r opt ion.
1. Press ANGLE to s ele ct ANGLE1
ANGLE
The screen sho ws:
1/4
2. Press ANGLE to s ele ct other angles , the s creen shows
respective ly:
2/4
3/4
4/4
3. To resu me a normal playb ack , press ANGLE to sel ect
original ang les .
SEARCH
You may dir ect ly enter a time, ti tle o r chapter number to
search fast on a d isc , the unit plays fr om th at point.
PLAY DVD
Example: Sea rch c hapter 2 of title 4 .an d 00:01:45 of disc
Press SEARCH b utt on ,the TFT show s:
(Select ANGLE 2)
(Select ANGLE 3)
(Select ANGLE 4)
12
33
Page 14

PLAY DISCS IN VARIOUS WAYS
Manufactured under license from Dolby Laboratories. Dolby
Pro Logic and the double- D symbol are trademarks of Dolby
Laboratories. Confidential Unpublished works. 1992-1997
Dolby Laboratories, Inc. All rights reserved. DTS and DTS
Digital Out are trademarks of Digital Theater Systems, Inc.
CONNECTIONS
SELECT SUBTITLES
This operati on wo rks only with dis cs on w hich multiple
subtitle lan gua ge are recorded .
DV D
1. Press SUBTI TLE r epeatedly unt il de sired language is
selected.
SUBTITLE
The screen sho ws:
1/2
SUBTITLE:ENG
2. To canc el the subtitle
Pres s SUBTITL E until the s creen sho ws " OFF"
OFF
NOTE :
For so me d iscs, t he s ubtit le can not be c ancelle d.
Differ en t discs d iffe r in the la ng uage of t he s ubtit le .
If the s ub title o f di scs can n ot be selec ted, pres s SUBTITL E
butt on , the scr ee n shows " "
CONNECT TO TV
SL/SR FL/FR
SUB/CEN
LINE
The AV cor ds are connecte d acc ording to the dia gra m.
1. Vid eo Mini-plug: c onn ect to the VIDEO ja ck of t he unit.
2. Yellow plug: co nne ct to the VIDEO IN ja ck of t he TV.
3. Audio Mini-p lug : connect to the FL /FR j ack of the unit.
4. Red-plug: c onn ect to the AUDIO IN R ja ck of t he TV.
5. White-plu g: co nnect to the AUDIO I N L jack of the TV.
COAXIALVIDEO SVIDEO
AUDIO IN R
AUDIO IN L
VIDEO IN
SVIDEO IN
HEADPHONE
32
C
“
”
13
Page 15

CONNECTIONS
PLAY DISCS IN VARIOUS WAYS
CONNECT TO TV AND AMPLIFIER
R
L
FRONT SUR ROUND
SUBWW OOFER
CENTE R
COAXI AL
OPTIC AL
VCD
You can single track o r a dis c according to
the followin g ste ps. E and VCD2.0,
repeat a
xcept VCD1.0 ,
other versio ns sh ould be operate d in PB C OFF mode
TURN PBC FUNCTION OFF
In stop mode, pr ess t he number butto n to se lect the track.
In playback mo de, p ress numb er but ton t o select the trac k,
then press the E nte r button starts t o pla y.
1.Repea t a track
Press REP EAT ,and the s creen
shows " TRACK"
REPEAT
The unit play s the c urrent tra ck.
REPEAT
2.Repea t disc
Press REP EAT ,and the s creen
shows DISC "."RE PEAT
3. Press RE PEAT ,and th e screen sho ws " RANDO M PLAY"
(FOR CD DIS CS ONLY)
4. To canc el repeat funct ion , press REPEAT bu tton the
screen shows“N ORM AL PLAY”.
REPEAT TRA CK
REPEAT DIS C
NOR MAL PLAY
RAN DOM PLAYRAN DOM PLAY
NORMAL PL AY
VCD/ CD
14
MP3
1. Press RE PEAT, and th e screen sho ws " REPEAT DI R".
2. Press RE PEAT again , and the scre en
shows " REP EAT ONE".
3. Press RE PEAT again , and the scre en
shows "RE PEAT DISC" .
4. Press RE PEAT again , and the scre en
shows "NO RMAL"
31
30
Page 16

The AV cords are connected as follow:
1.Video Mini-plug: connect to the VIDEO jack of the unit.
Yellow plug: connect to the VIDEO IN jack of the TV.
2.Audio Mini-plug: connect to the FL/FR jack of the unit.
Red-plug: connect to the FRONT R IN jack of the amplifier
White-plug: connect to the FRONT L IN jack of the amplifier
3.Audio Mini-plug: connect to the SL/SR jack of the unit.
Red-plug: connect to the SR IN jack of the amplifier
White-plug: connect to the SL IN jack of the amplifier.
4.Audio Mini-plug: connect to the SUB/CEN jack of the unit.
Red-plug: connect to the SUB IN jack of the amplifier
White-plug: connect to the CEN IN jack of the amplifier.
5.Coaxial-plug: connect to the COAXIAL jack of the unit.
Black -plug: connect to the COAXIAL IN jack of the amplifier
PLAY DISCS IN VARIOUS WAYS
REPEAT PLAY
This functio n can b e used to repeate dly p lay a title, chapter,
track, disc, o r som e part on a disc.
PLAYING A DISC REP EATEDLY
DVD
You may rep eat a t itle or chapter
1.Repea t a chapter
Press REP EAT ,and the s creen
shows " CHAPTE R"
The unit play s the c urrent tra ck.
CONNECTIONS
The scree n shows :
2.Repea t TI TLE
Press REP EAT ,and the s creen show s TITLE ""
3.Press R EPEAT agai n ,and the scr een
shows " Nor mal PLAY "
30
15
Page 17

PREPARATIONS BEFORE OPERATION
USE REMOTE CONTROL
1.Refer to the diagram, open the battery compartment of the
remote control, insert batteries, then close the compartment.
Note: Pulling the barrier film that used for protecting the
battery against consumption when the remote control is
used at the first time.
2.To use the remote control, point it at the remote sensor of
the
unit, operating in the range of more than 3 meters and 60°.
3.Generally, batteries last for about one year, replace the
batteries if the remote control does not work.
4.Remove the batteries if remote control is not used for a long
time.
DC 3V CR 2025
LITH IUM BATTE RY
16
DC 3V CR 2025
LITH IUM BATTE RY
PLAY DISCS IN VARIOUS WAYS
FAST PLAY
When playing a disc, you can play it forwa rd fast or rever se
fast to find what you want. Th is unit has five fast play mo des.
Press to pl ay fo rwa rd fast, the scre en sh ows orderly:
11
2
22
4
33
8
44
55
Press to pl ay re ver se the disc fast, t he sc reen shows
orderly:
11
22
33
44
55
Press PLAY/Pause to sw itc h to normal play.
SLOW PLAY
PLAY DVD
Pres s SLOW butt on to
enjo y slow moti on.
SLOW
This unit has fi ve sl ow play modes.
Note: when it pl ay DV D disc have the slo w pla y function
Press PLAY/Pause to sw itc h to normal play.
29
16
32
2
4
8
16
32
11
1/2
22
1/4
33
1/8
1/16
44
55
1/32
Page 18

PLAY DISCS IN VARIOUS WAYS
PREPARATIONS BEFORE OPERATION
AUDIO MODE
You may sel ect a n eeded languag e fro m a mul ti-language
DVD.
WHEN PLAYING DVD
Press AUDIO, th e scr een shows order ly:
AUDIO
1/2
VOICE: CHI AC-3
Diff erent discs differ in la ngu ages.
Press AUDIO but ton t o shift the sound .
WHEN PLAYING VCD
Press AUDIO and t he sc reen shows chan nel s tereo.
You can cha nge c urrent channe ls to l eft ,right, stereo
by pressing AUD IO bu tton.
Notes:
Different discs differ in la ngu ages.
The Aud io button is avai lab le when during play, you can
select mo nop hon ic output(lef t or ri ght) or mixed output .
In AUDIO set tin g men us, when the anal ogy o utputs of
items
are set to 5.1ch , you c annot to shift th e L/R t rack by
pressing AUDI O but ton when the VCD di sc is p layed.
other
USING ADAPTOR
A
B
DC IN 9V
ON POWER OFF
ON PO WER OFF
AUDIO MENU RETURN
SETUP
MUTE
ZOOM
28
VOLUM E
OPE N
17
Page 19

FUNCTION SETTING
PASSWORD SETUP
The se tting str ucture is a s follow:
PASSWOR D SE TTING PAGE
AUDIO ENGLISH
SUBTITLE ENGLISH
PARE NTA L CON TR 8 .A UD LT
NEW PASS WO RD _ _ _ _ _
TO CHANGE THE PASSWORD
You ca n se t t he pas swor d to set a par ent al co nt rol of di sc s
read able on thi s play er. When you first use thi s func tion, you
can ke y in number s to set up t hep asswor d. If yo u later want
to se tup a new pas swor d, pl eas e ent er the ol d pas swor d, then
you ca n ke y in the number t o se t up a new one
the uni ve rsa l pas swor d of pl ay er is 335 1.
DISCS AUDIO AND SUBTITLE SELECTION
If a language me nti oned above is rec ord ed on the disc,
you can select s oun ds, subtitles o r dis c menu languages.
If not, the l ang uag e recorded on the d isc i s shown.
PARENTAL LOCK
When playing a d isc t hat with parent al lo ck function, you
can select an ag e con trol grade acco rdi ng to your
requiremen t.
1.KID SAFE is th e hig hest level lock ;
8.AUDLT is the l owest level loc k.
Page 20

←
→
↑
↓
The amplifier must be compatible with DTS to decode the signals
when DTS disc is played. Due to the various DTS encoding
systems, it is possible that some discs cannot be decoded.
Select Bitstream when this player is connected to a power
amplifier through coaxial or optical output. The power amplifier
must be able to decode Dolby Digital.
Select PCM when this player is connected to 2-channel digital
mode or stereo amplifier.
FUNCTION SETTING
If you feel the brightness , color or contrast ratio need
adjustment during playback, press SETUP button. The picture
freezes and the TFT-LCD SETUP menu appears. Select
brightness,color or contrast ratio adjustment (navigating
with and buttons) and then press or buttons until
the desired brightness,color or contrast ratio is obtained.
Finally press PLAY key to resume playback mode.
Notes on the display:
1. Do not heat or scratch the display screen.
2. During playback, few bright or dark flecks may appear on
the TFT LCD, which is a normal phenomenon in active
matrix display technology, but not a malfunction.
3. Do not to set the unit in too bright a mode or play back the
disc with too bright images for a long time. This may cause
flecks to appear on the video.
Note : The available pixels of the TFT display up to a
99.99% level.
BASIC OPERATIONS
AUDIO SETTING
The se tting st r uc ture is as follows :
AUDI O SETTING PAGE
Press the SETU P but ton twi ce to ent er int o Menu (whi le in st op
mode ), SYSTEM pag e icon is hi ghl ight ed. Th en pr ess the or
direct ion but ton to sel ect AUDIO pag e icon. The scr een
show s as fol low :
CHA NNEL 2C H DOW NM IX
DIG ITAL OUTP UT S ET
Press but ton to sel ect DIGITAL OUTP UT, Then pr essE NTE R
but ton to mor e aud io set ti ng. Th e scr een show s as fol low :
DOLB Y BITS TR EAM
DTS B IT ST REA M
MPE G LP CM
PCM LP CM 48K Hz
AUDIO DIGITAL OUTPUT
DIG ITAL OUTP UT O N
BAC K EX IT
26
TFT PICTURE ADJUSTMENT
SETU P
19
SE LE CT MO VE
Page 21

BASIC OPERATIONS
←
→
FUNCTION SHIFT
FUNCTION SETTING
VIDEO SETTIN G
The setting st ruc ture is as follow s:
Press the SETU P butto n twi ce to enter into Me nu (w hile
in stop mode), S YST EM page icon is hig hli ghted. The n
press the or dir ect ion button to sel ect V IDEO page
icon. The screen show s as fo llow:
VIDE O
TV OU TPUT AUTO
ASPE CT RATIO 16:9
TV OUT PUT SET TING
Using the dir ection key s an d , mo ve t o the TV
OUTPUT l ine so as to high lig ht the current setting
(in th e ab ove exampl e and by d efa ult : AUTO). Onc e
this p osition reached, use dir ection key s , in ord er t o
select the de sired TV sysytem for t he On Screen Display.
Confirm your selection by p res sing EN TER (or OK).
You can th en exit the TVO UTPUT SETTIN G PAGE, s imply
by pre ssing t he SETU P button.
20
For th e sa me ,you can s elect t he desi red ASPECT R ATI O
f or the On Scr een Dis play.
25
Page 22

←
→
↑
↓
FUNCTION SETTING
BASIC OPERATIONS
Not e: The fol lowi ng se tt ings must be ope r at ed in STOP mode .
SYSTEM SETTING-LANGUAGE SETTING
1. Press SETUP button t wic e in order to enter i nto s ystem
setting. The screen s how s the SYSTEM sett ing p age.
SETUP
LANGUAGE SETTING
Using the dir ection key s an d , mo ve t o theOS D
LANGUAGE line so as to highlight the cur rent se tti ng
(in th e ab ove exampl e and by d efa ult : ENGLISH) . Once
this p osition reached, use dir ection key s , in ord er t o
select the de sired l ang uage fo r the On S creen D isp lay.
Confirm your selection by p res sing EN TER (or OK).
You can th en exit the SYSTEM S ETTING PAG E, simp ly
by pre ssing t he SETU P button
OSD LA N G U A G E E n g l i s h
SCRE E N S A V E R O F F
AUTO S T A N B Y O F F
MEMO R Y O F F
LOAD S E T U P D E F O K
OSD LANG UA GE E ng li sh
SCREEN S AVER OFF
AUTO STANB Y OF F
MEMORY OF F
LOAD SET UP DEF OK
1. Thi s unit can works wi th th e outer equipme nts s uch a s
video record er, DV D player and game m ach ine, etc.
2. Press DVD/AV Button o n the r emote control w hen
the unit se t in Po wer o n mode, the outer s ign al can be
received aft er a bl ack screen appe ars .
3. The AV cord s are c onnected as fol low s:
a. Mini-plug : con nect to the VIDEO j ack o f the unit.
b. Orange plug : con nect to the VIDEO O UT jack o f
Video Recorder, o r DVD p layer or
Game Mach ine e tc.
c. Mini-plug : con nect to the FL/FR j ack o f the unit.
d. Red-plug: c onn ect to the LINE OUT R jack of Video
Recorde r, or DV D Player or Game
Machine e tc.
e. White- plu g: co nnect to the LINE O UT L jac k of
Video Recorder, o r DVD P layer or
Game Mach ine e tc.
LOAD SE TUP DE FAULT
In the SY ST EM me n u page, use t he dire cti on b utt ons to
select LOA D SE TUP DEF.line. On ce the cur sor is on "OK",
use th e or direct ion key to lo ad the default setting. At
this t ime, yo u have loaded the se tup def ault (t hat cor res ponds
t o facto ry defa ult settin g, incl udi ng ENGL ISH langua ge
s ele ction f or the On-Scre en- Di splay).
24
21
Page 23

BASIC OPERATIONS
BASIC OPERATIONS
PLAY DISCS
Press
1.When the pic tur es of DVD or VCD is pla yed , you can
press Play/p aus e button one time t o pau se the playback
and resume to pl ay by p ressing the but ton o nce again.
2.Press play /Pa use to stop the pla yba ck when the CD
disc is playin g. Pr ess play/paus e to re sume the playback.
PAUSE
Press
1.When the pictures o f DVD o r VCD is playe d, yo u ca n p ress
Play/pa use button o ne ti me to pause the pla yb a ck and resu me
to play by press ing t he button once ag ain .
2.Press play/P ause to stop the playb ack w hen t he CD disc is
playing. Pre ss pl ay/pa use to resu me the p layb ack .
BOOKMARK
1.Press BOOK MAR K button to disap pea r the sound
The screen shows:
BOOKMARK
----
At this time, you can pre ss ent er button to memory the
playing poin t. Ne xt time you only ne ed pr ess the bookmark
button to select the play poi nt an d press pla y butto n to
enter it, you can go o n en joy the film or music last time.
If you w ant to ca nce l this th e book mar k,you can us e
the CANCEL butto n to cancel the memory points ,th en
press BOOKMA RK bu tton to normal pl ay.
Bookmark
DVD MENU PLAY
Some D VDs have ti tle menus a nd chapte r menus.
Pres s MENU butt on, the scr een shows t he menu for s electin g.
Pres s , to s kip the n ext or prev ious page , then pres s ENTER
butt on to confi rm.
Exam ple: sele ct track1 3
1.Pr ess the dir ection an d move the cu rsor to tra ck13 afte r the
titl e appears o n the scree n.
2. Pre ss ENTER bu tton to sta rts playi ng track 13 .
3. Pre ss MENU but ton to retu rn to the roo t menu.
4. Pre ss TIT LE butt on t o retur n to t he titl e pl aybac k.
PBC PLAYBACK
During VCD2.0 discs pla yback w ith PBC functi on , y ou
can en joy PBC intera cti ve f unc tion .
TURN PBC FUNCTION ON
When you press M ENU /PCB button , the s cre en shows
PBC ON
When you press M ENU /PCB button aga in, t he
screen shows
PBC OFF
SELECT TRACKS WITH
NUM BER BUTTON
Insert a disc, p res s digital butto n 1~1 0 to select track s,
the unit start s pla ying after the En ter b utton is presse d.
22
23
 Loading...