

Page 1

SonicWALL VPN Client Configuration
A T ech Note prepared by SonicWALL, Inc.
SonicWALL, Inc.
1160 Bordeaux Drive
Sunnyvale, CA 94089-1209
1-888-557-6642
http://www.sonicwall.com
Page 2
Introduction
SonicWALL VPN includes one VPN Client for W indows (95, 98 or NT) license for secure remote management of the
SonicWALL Internet Security Appliance.
Quick Configuration
Setting up your SonicWALL Internet Security Appliance
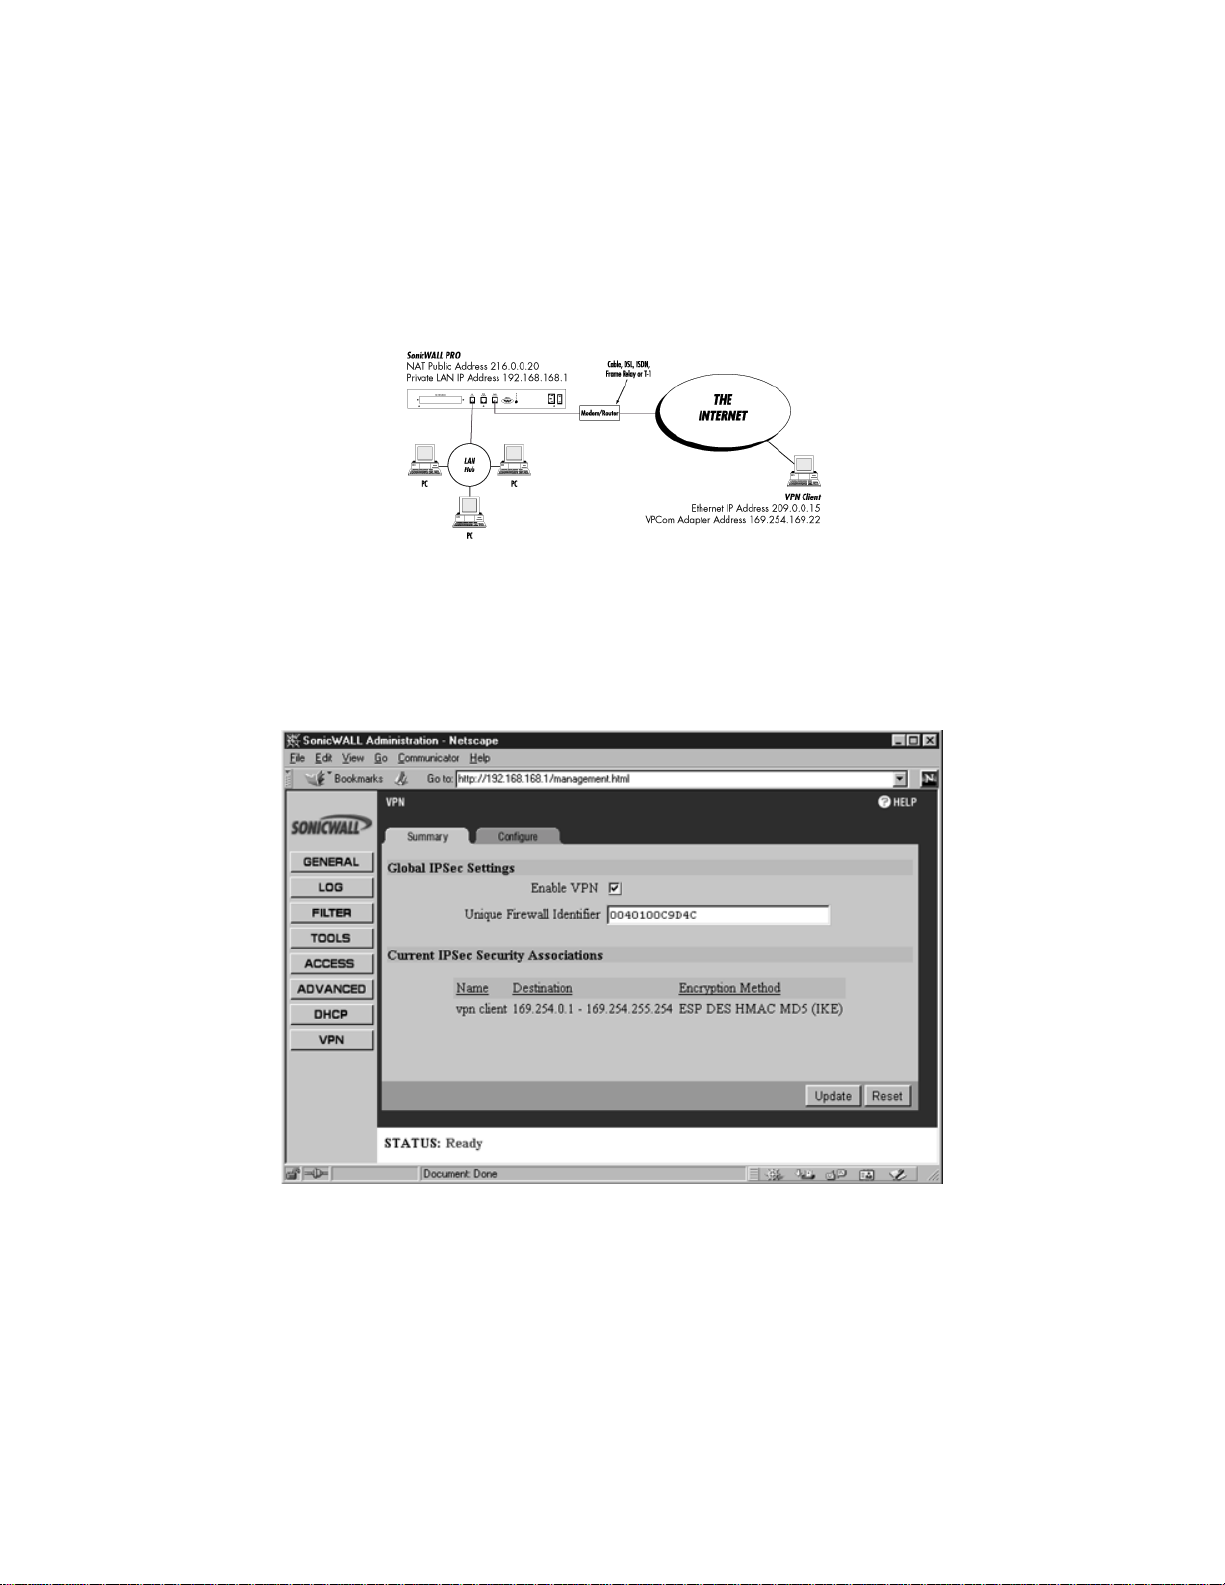
1. Click the button labeled VPN on the left side of the browser window and then clic k the tab labeled Summary
at the top of the window. A window similar to the following will be displayed
2. Check the Enable VPN checkbox and assign an alphanumeric name for the SonicWALL in the Unique
Firewall Identifier field. The Unique Firewall Identifier may range from 4 to 32 characters in length.
Click the Update button. The operation will take a few seconds to complete. Once completed, a message confirming
SonicWALL VPN Client Tech Note - Page 1
Page 3
the update will be displayed at the bottom of the Web browser window.
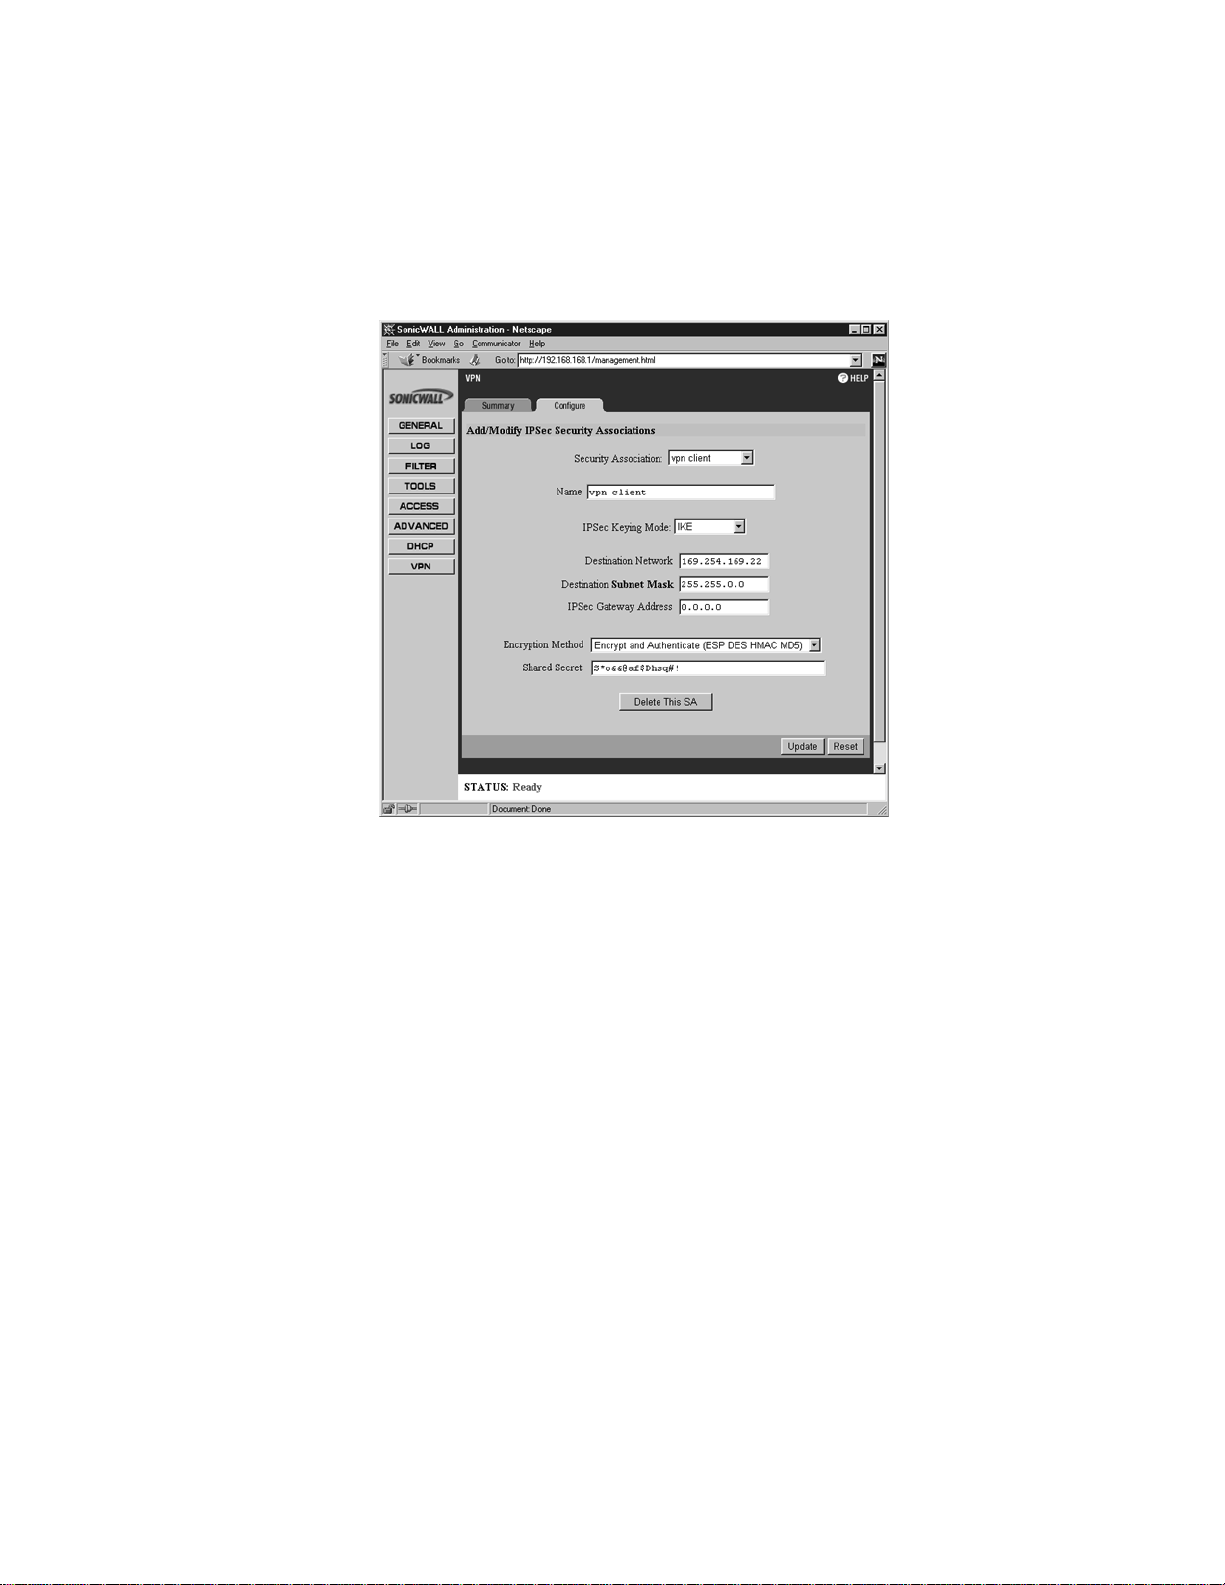
3. Click the Configure tab at the top of your screen. A window similar to the following will be displayed.
4. On the Configure page, create a new Security Association by selecting Add New SA from the Security
Association menu.
5. Select IKE from the IPSec Keying Mode menu.
6. Enter a descriptive name that identifies the VPN client in the Name field, such as the client’s location or
name.
7. Leave the Destination Network, Destination Subnet Mask, and IPSec Gateway Addr ess fields blank.
8. Select Encrypt and Authenticate (ESP DES HMA C MD5) from the Encryption Method drop do wn menu.
9. Define a shared secret in the Shared Secret f ield. The alphanumeric shared secret must match the VPN client’ s
Shared Key and may contain up to 128 characters. Create a Shared Secret that can not be guessed by
Page 2 - SonicWALL VPN Client Tech Note
Page 4
someone else. Avoid using names of friends, family, pets or places. Instead, enter a combination of letters,
numbers and symbols, such as "Aa8*^Hjj@e$FF#," for greater security .
Once all fields are completed, click the Update button. The operation will take a few seconds to complete. Once
completed, a message confirming the update will be displayed at the bottom of the Web browser windo w. Restart the
SonicWALL for changes to take effect.
Installing the VPN Client Software
1. When the SonicWALL product is registered at http://register.sonicwall.com, a unique VPN client serial
number is returned, as well as a link to download the VPN client installer.
2. Double-click the installer and follow the VPN client setup program’ s step by step instructions. Enter the VPN
client’s serial number w hen prompted.
3. After the VPN client setup program has f inished copying files to your computer, it will prompt you to restart
your computer. Select No, I will restart my computer later and continue with the next section.
Configuring VPCom Adapter’s TCP/IP Settings
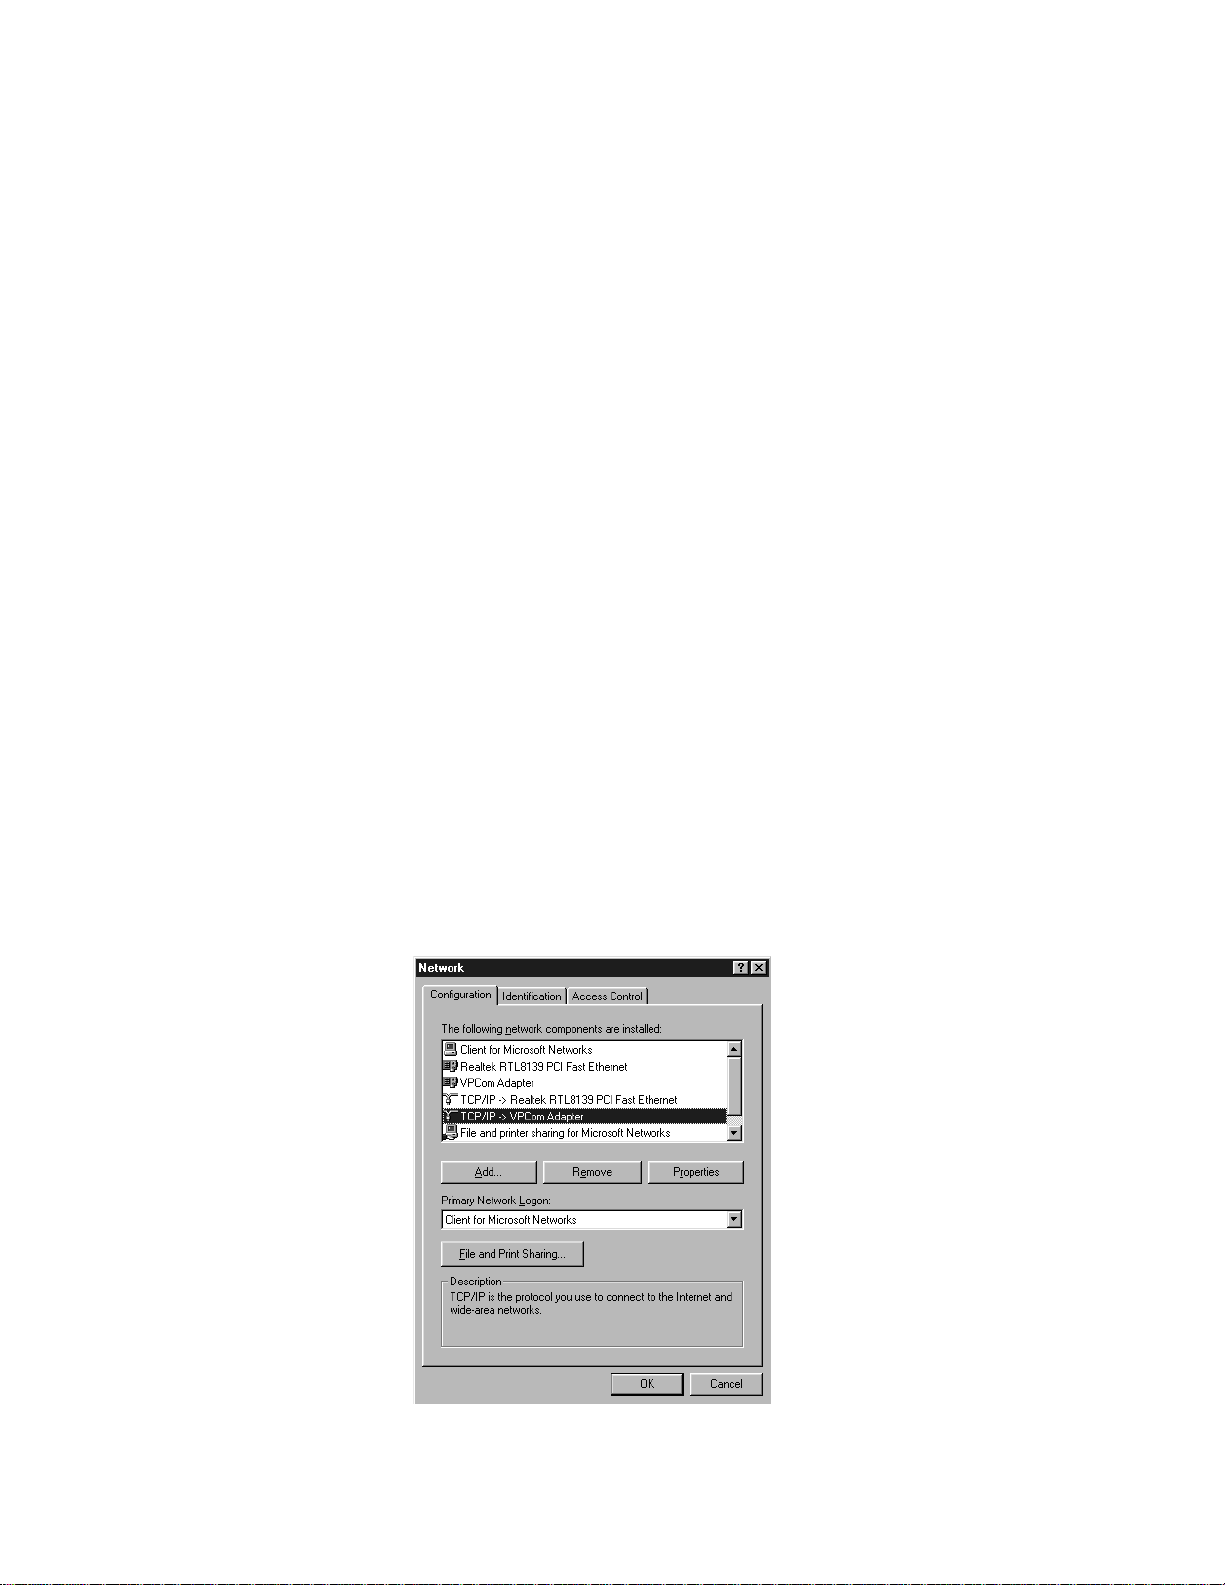
1. Open the Network Control Panel. A window similar to the following will be displayed.
SonicWALL VPN Client Tech Note - Page 3
Page 5
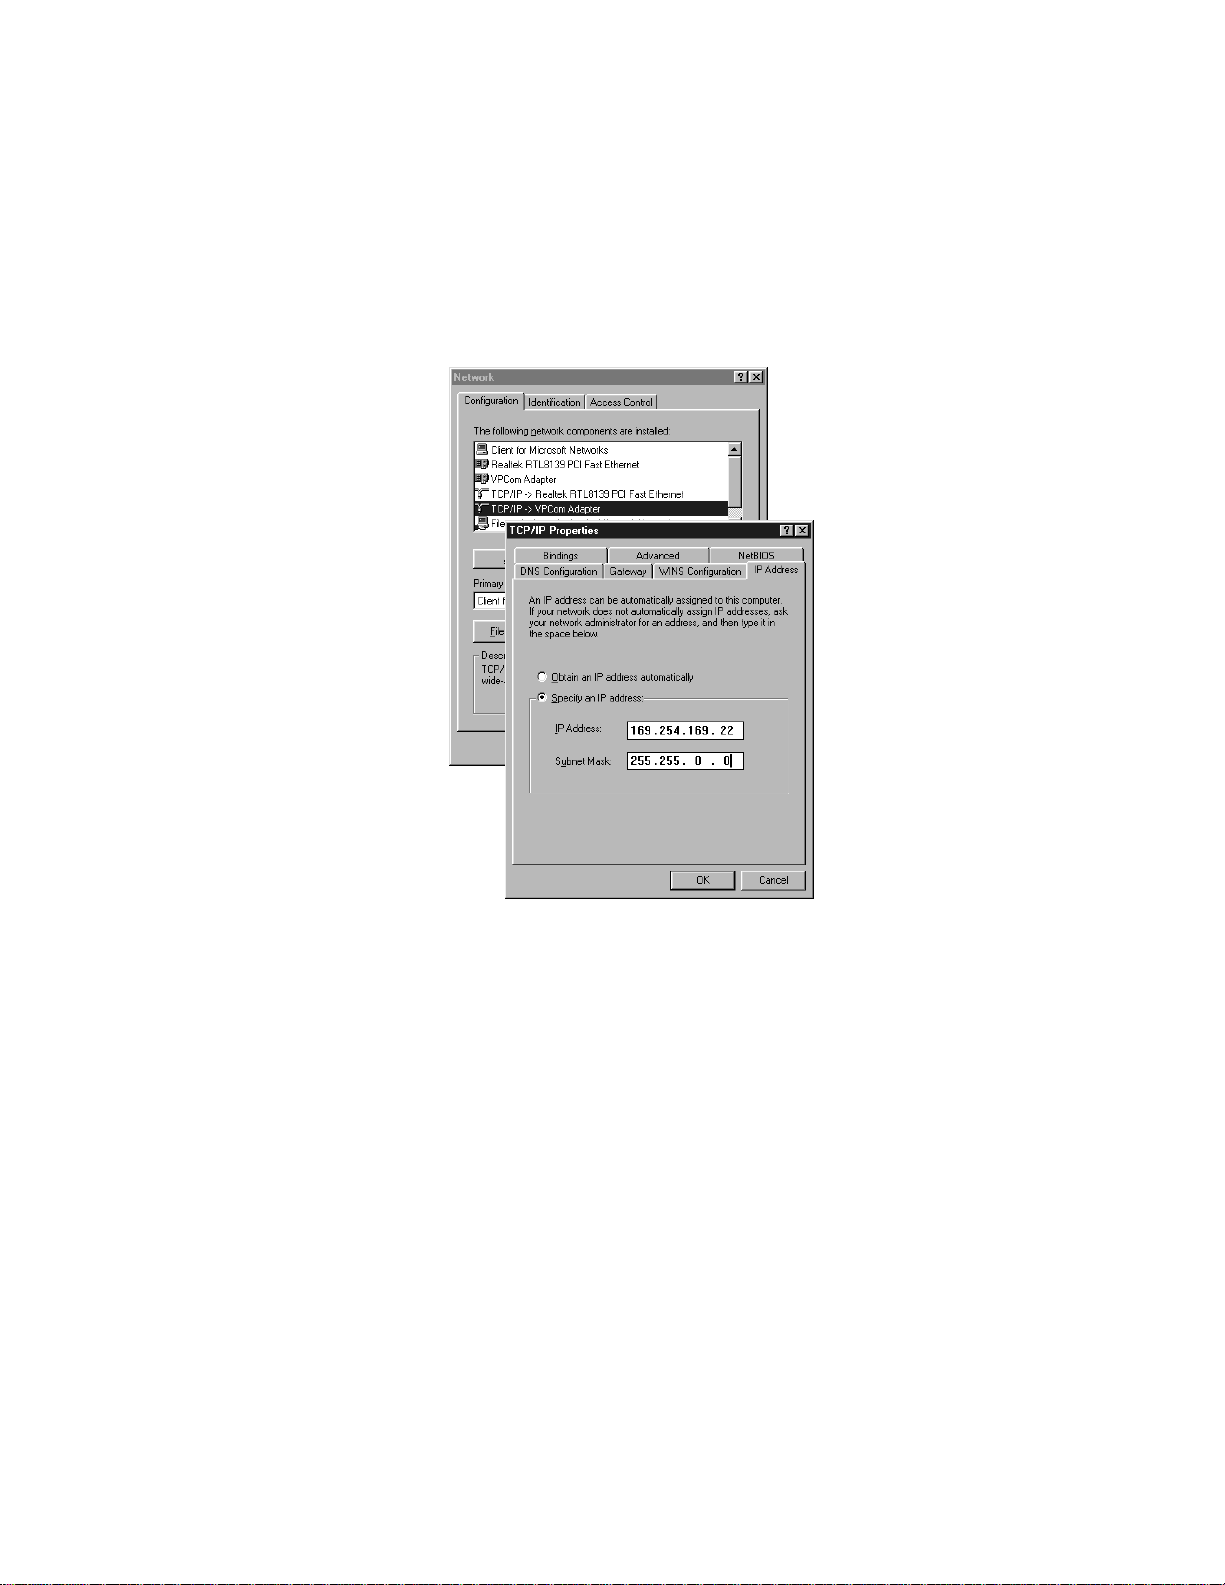
2. Double click the TCP/IP VPCom Adapter option in the network configuration window. A windo w similar
to the following will be displayed.
3. Assign the VPCom adapter a pri vate IP address. The IP address must be different from the SonicWALL's LAN
subnet. Examples of private IP addresses are 10.0.0.0--10.255.255.255, 172.16.0.0--172.31.255.255,
169.254.0.0--169.254.255.255, and 192.168.0.0--192.168.255.255.
4. Assign the VPCom Adapter a subnet mask in the Subnet Mask f ield.
5. Click OK in both the TCP/IP Properties and Network windows and then restart the computer .
Configuring the VPN Client
T o launch the VPCom Security Agent, select the pro gram from the Windows Start menu, or double-click the VPCom
Security Agent icon in the Windows Task Bar. A window similar to the following will be displayed.
Page 4 - SonicWALL VPN Client Tech Note
Page 6
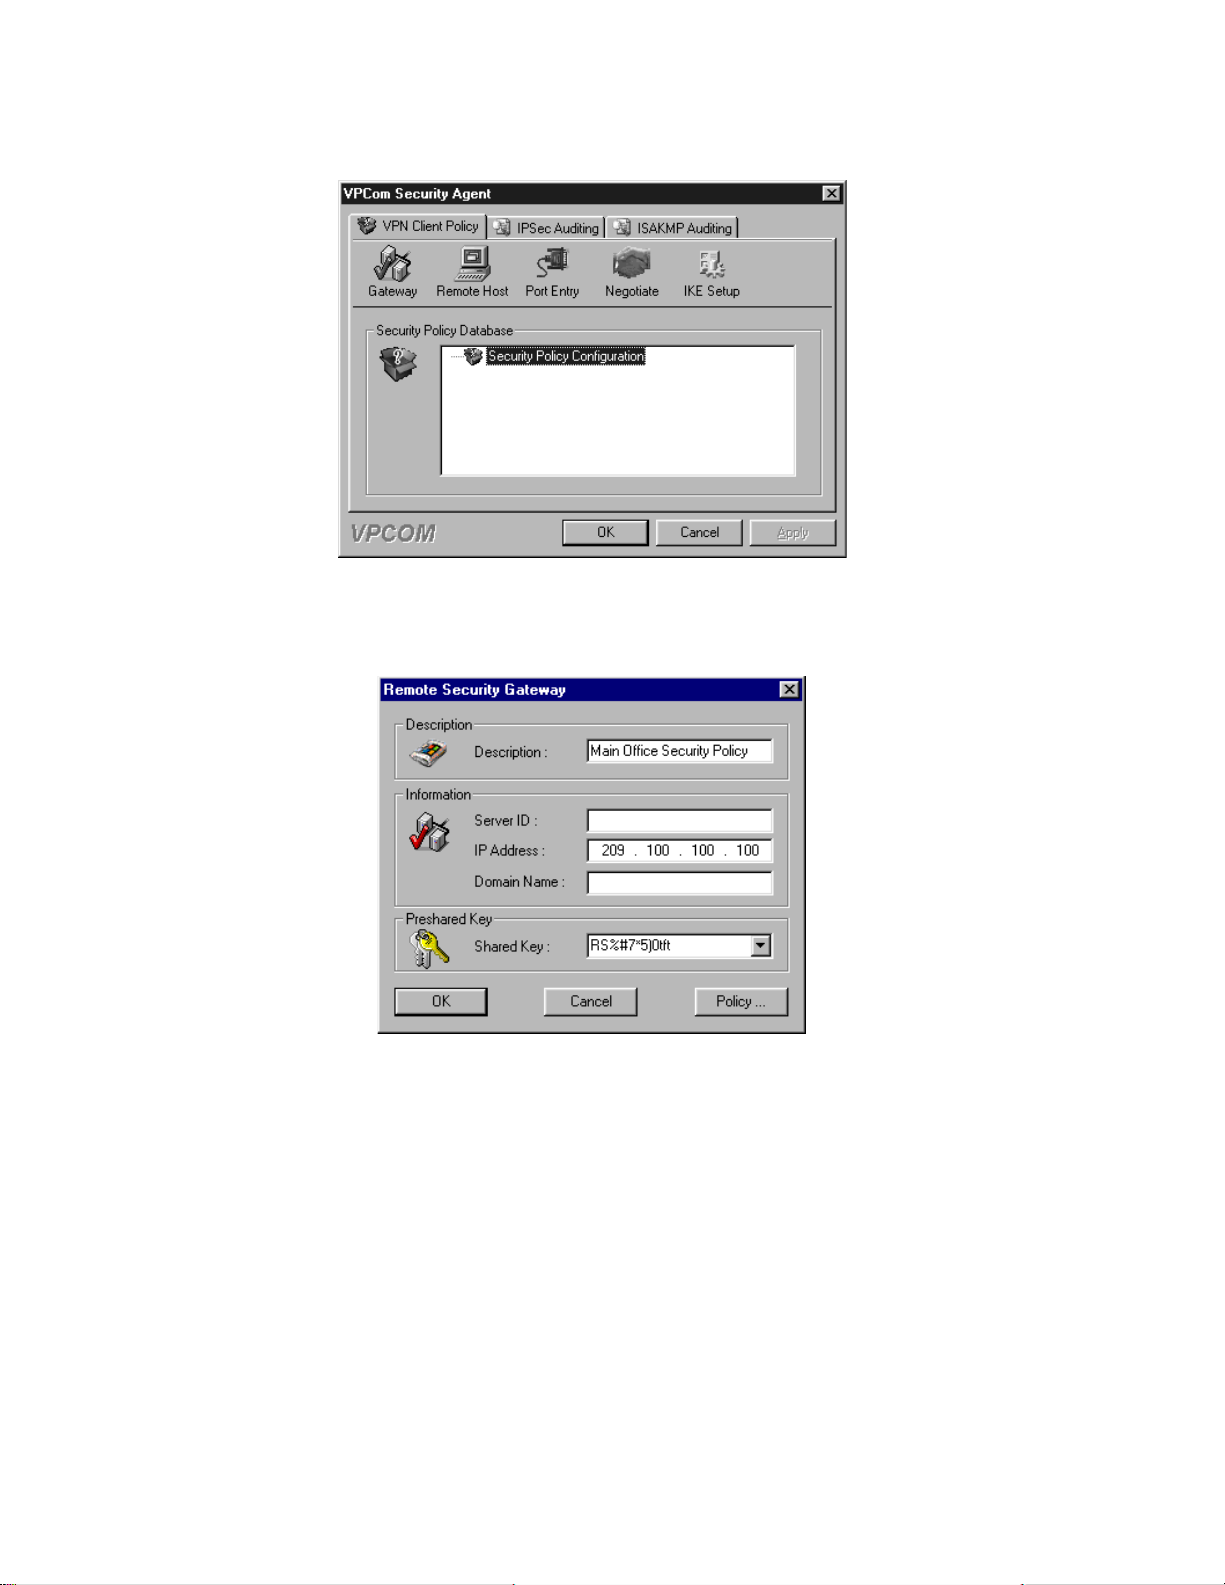
1. In the VPCom Security Agent windo w , highlight the Security Policy Configur ation and click the Gateway
button. A Remote Security Gateway windo w, similar to the following, will be displaye d.
2. Assign a name for this Security Policy, such as “Main Off ice Secur ity Polic y, ” in the Description f ield .
3. Leave the Server ID field blank.
4. Type the IP address of the SonicWALL in the IP Address field. If Network Address Translation has been
enabled on SonicWALL, then enter the NAT Public Addr ess.
5. You may leave the Domain Name field blank.
SonicWALL VPN Client Tech Note - Page 5
Page 7

6. Enter the SonicW ALL’ s Shared Secret in the Shar ed Key f ield. Click OK.
7. Highlight the newly created Security Policy (in this case "Main Office Security Policy") below the Security
Policy Configuration and click the Remote Host button. A Remote Host windo w , similar to the following,
will be displayed.
8. Enter any descriptive name in the Description field.
9. You may skip the Host Name entry field.
10. Enter the SonicW ALL ’ s LAN IP Address in the IP Address f ield.
11. T ype the SonicWALL ’ s LAN Subnet Mask in the Subnet Mask field.
12. You may skip the Domain Name entry field. Click OK.
Negotiating a VPN Session Between VPN Client and the SonicWALL
Restart your computer. The VPN client will automatically establish a VPN tunnel if your computer has an active
Internet connection when it is restarted. If it does not, you can manually negotiate a VPN tunnel by follo wing the steps
listed below:
1. To complete the first phase of VPN negotiation, highlight the Security Policy (in our example " Main Office
Security Policy") below the Security Policy Configuration and click the Negotiate button. This operation
Page 6 - SonicWALL VPN Client Tech Note
Page 8

will take a few seconds to complete
2. To complete the second phase of VPN negotiation, expand everything below the Security Policy Configu-
ration by clicking the + symbols preceding each entry . A windo w similar to the follo wing will be displayed.
3. Highlight Wildcard Connections and click the Negotiate button. This operation will take a few seconds to
complete.
After successfully negotiating the VPN session, the administrator will be able to securely manage the remote SonicW ALL
by entering its LAN IP address in a browser on the computer running the VPN client softw are.
SonicWALL VPN Client Tech Note - Page 7
 Loading...