

Page 1

PROTECTION AT THE SPEED OF BUSINESS™
UMA EM5000 Getting Started Guide
Page 2

SonicWALL UMA EM5000Getting Started Guide Page i
SonicWALL UMA EM5000
Getting Started Guide
This Getting Started Guide contains inst allation
procedures and configuration guidelines for deploying the
SonicWALL Universal Management Appliance EM5000
(SonicWALL UMA EM5000) in your network. The
SonicWALL UMA EM5000 runs SonicWALL Global
Management System, which is a Web-based application
that can configure, manage, and monitor the status of
thousands of SonicWALL Internet security appliances
and non-SonicWALL appliances from a central location.
The SonicWALL UMA EM5000 provides these benefits:
• Centralized security and network management
• Sophisticated VPN deployment and configuration
• Active device monitoring and alerts
• Intelligent reporting and activity visualization
• Centralized logging and offline management
Note: For complete documentation, refer to the SonicWALL
GMS Administrator’s Guide. This and other documentation
are available at: http://www.sonicwall.com/us/Support.html. For
the latest SonicWALL UMA EM5000 firmware version
downloads and documentation, login to the MySonicWALL
website at http://www.mysonicwall.com.
Page 3

Page ii Document Contents
Document Contents
This document contains the following sections:
Before You Begin - page1
Connecting and Initializing the UMA EM5000 - page 9
Registering Your Appliance - page 19
Configuring the Role of Your Appliance - page 23
Using the SonicWALL GMS Management Interface - page 41
Managing SonicWALL Appliances - page 49
Reporting - page 57
Monitoring - page 63
Front Panel LCD Controls - page 73
Support and Training Options - page 77
Product Safety and Regulatory Information - page 85
1
62
73
94
5
66
77
98
9
10
11
Page 4

Page 1
Before You Begin
In this Section:
This section provides pre-configuration information before setting up your SonicWALL UMA EM5000.
• Checking Package Contents - page 2
• Overview of the SonicWALL UMA EM5000 - page 3
• System Requirements - page 5
• Recording Configuration Information - page 8
1
Page 5

Page 2 Checking Package Contents
Checking Package Contents
Before setting up your SonicWALL UMA EM5000, verify that
your package contains the following parts:
SonicWALL UMA EM5000
Getting Started Guide
Crossover Cable
Ethernet Cable
1
2
3
4
Standard Power Cord*
Front Bezel Keys
Rack Mounting Kit (not pictured)
5
6
7
Any Items Missing?
If any items are missing from your package,
please contact SonicW ALL support.
A listing of the most current support documents are available online
at:
http://www.sonicwall.com/us/Support.html
*The included power cord is intended for use in North America only.
For European Union (EU) customers, a power cord is not included.
Getting Star ted Guide
SonicWALL NetworkSecurity Appliances
1
3 4
2
5
Universal Management Appliance
UMA EM5000
6
Page 6

Page 3 Overview of the SonicWALL UMA EM5000
Overview of the SonicWALL UMA EM5000
Front Panel
• Pressing the reset button for several seconds will result in a reboot of the SonicWALL UMA EM5000.
• Do not plug devices into any ports (other than those indicated) unless explicitly instructed to do so by a SonicWALL technical
support representative; doing so may void your warranty.
Universal Management Appliance
UMA EM5000
LED Indicators
Reset Button
Reboots the SonicWALL appliance
Power Switch
Allows the SonicWALL appliance to be
powered on or off
D-Pad Controls
Provides up, left, right, and down buttons to
navigate the LCD menu:
Up/Down: Navigate lists
Left: Cancel changes / return to previous
Right: Accept changes
Provides the following system status indications:
ALARM: Thermal or other alert condition*
ETH0/ETH1: Ethernet link (solid), activity (blinking)
HDD: Hard disk activity (blinking)
PWR: The appliance is powered (off/on)
*For a full list of alerts, refer to the SonicWALL LED Alerts technote document.
LCD Display
Provides access to basic system
information, settings, and features using
the D-Pad controls
Front Bezel Release
Allows access to drive bays under the
front bezel for addition/replacement of
hard disks (requires use of included key)
Page 7

Page 4 Overview of the SonicWALL UMA EM5000
Rear Panel
For future use
USB Ports (2)
Power Supply
Provides power connection
using the supplied power
cables
Ethernet Port 0 (Management/LAN)
Provides configurable Gigabit-capable
Ethernet connection to your local network
Provides access to a command line interface
(CLI) for SonicWALL technical support use
Serial Port
Not authorized for use unless explicitly instructed
by a SonicWALL technical support representative
VGA Port
For future use
eSATA Port (1)
Ethernet Port 1
Not authorized for use
Page 8

SonicWALL UMA EM5000 Getting Started Guide Page 5
System Requirements
The SonicWALL UMA EM5000 comes with a default license to
manage 10 nodes. You can purchase additional licenses on
MySonicWALL. For more information on licensing additional
nodes, visit:
http://www.sonicwall.com/us/Products_Solutions.html
Database Requirements
The SonicWALL UMA EM5000 comes installed with a built-in
MySQL 5.0 database and supports the following databases on
external systems:
• On external SonicWALL UMA EM5000 appliances:
• MySQL 5.0
• On Windows Server 2008, Windows Server 2003 (SP1),
or Windows Server 2000 (SP4):
• Microsoft SQL Server 2005 (SP2)
• Microsoft SQL Server 2000 (SP4)
• MySQL 5.0 as bundled with SonicWALL Universal
Management Suite
Java Requirements
Java Plug-in version 1.5 or higher is required on client
machines when accessing the SonicWALL UMA EM5000 or the
SonicWALL GMS application. SonicWALL Universal
Management Suite (UMS) automatically downloads the Java
Plug-in 1.5. SonicWALL UMS services use JRE 1.5.0_06. For
Microsoft SQL Server installations, SonicWALL UMS uses
Tomcat 5.5.26.
Browser Requirements
The following browser requirements apply to client machines
when accessing the SonicWALL UMA EM5000 or the
SonicWALL GMS application:
• Microsoft Internet Explorer 6.0 or higher
• Mozilla Firefox 2.0 or higher
• Pop-up blocker disabled
The SonicWALL UMA EM5000 supports SSL 3.0/TLS 1.0 for
HTTPS management of SonicWALL appliances, and for direct
login to the managed unit from the SonicWALL UMA EM5000.
For enhanced security across a managed network in
installations that must comply with stringent regulatory
compliance and account management controls as found in such
standards as PCI, SOX, or HIPAA, the following browsers have
SSL 3.0/TLS 1.0 as standard encryption protocols:
• Microsoft Internet Explorer 7.0 or higher
• Mozilla Firefox 2.0 or higher
You can set other browsers to use these protocols in the Tools
> Options page on the Advanced or Encryption tab.
Note: On Windows Server 2008, Internet Explorer 7 requires
that the URL for the SonicWALL UMA EM5000 is
added to your trusted sites before it will display the
appliance login page. The Trusted Sites list is
available in Tools > Internet Options > Security.
Page 9

Page 6 System Requirements
SonicWALL Platform and Firmware Support
Legacy or older-generation models are not supported, such as,
SonicWALL XPRS/XPRS2, SonicW ALL SOHO2, SonicWALL
Tele2, and SonicWALL PRO-VX.
For the most recent platform support and firmware version
information, refer to the latest SonicWALL UMA EM5000
Getting Started Guide available at:
http://www.sonicwall.com/us/Support.html
Non-SonicWALL Appliance Support
The SonicWALL UMA EM5000 provides monitoring support for
non-SonicWALL TCP/IP and SNMP-enabled devices and
applications.
Network Requirements
To complete the SonicWALL UMA EM5000 deployment
process, the following network requirements must be met:
• Access to the Internet
• A static IP address
• Network connection must be able to accommodate
1 KB/s for each device under management. For example,
if the SonicWALL UMA EM5000 is monitoring 100
SonicWALL appliances, the connection must support at
least 100 KB/s.
Depending on the configuration of SonicWALL log settings and
the amount of traffic handled by each device, the network traffic
can vary dramatically. The 1KB/s for each device is a general
recommendation. Your installation requirements may vary.
SonicWALL
Platforms
SonicWALL Firmware Version
Firewall / UTM / VPN
TZ Series
NSA Series
PRO Series
SonicOS Enhanced 3.2 or newer
SonicOS Standard 3.1or newer
SonicWALL CSM
Series
SonicOS CF 2.0 or newer
Secure Remote Access
SonicWALL SMB
SSL-VPN Series
SonicOS SSL-VPN 2.0 or newer
SonicWALL Aventail
Series
Aventail 9.0 or newer
Backup and Recovery
SonicWALL CDP
Series
SonicWALL CDP 2.3 or newer
Page 10

SonicWALL UMA EM5000 Getting Started Guide Page 7
GMS Gateway Recommendations
A GMS gateway is a SonicWALL UTM appliance that allows for
secure communication between the SonicWALL UMA EM5000
and managed appliance(s) using VPN tunnels. A GMS gateway
is not required in all deployment scenarios, as described in this
section.
When deployed, the GMS gateway must be a SonicWALL VPNbased network security appliance running SonicOS Enhanced
firmware or another VPN device that is interoperable with
SonicWALL VPN. SonicWALL strongly recommends that the
GMS gateway be, at minimum, a SonicWALL NSA 2400
network security appliance with SonicOS Enhanced 5.1 or
higher firmware.The GMS gateway provides a VPN
management tunnel for each managed appliance. The number
of management tunnels depends on the number of VPNs
supported by the GMS gateway appliance and may be a limiting
factor.
There are three SonicWALL appliance management methods
with varying GMS gateway requirements. When using HTTPS
as the management method, it is optional to have a GMS
gateway between each SonicWALL UMA EM5000 agent server
and the managed SonicWALL appliance(s). If you select
Existing VPN tunnel as the management method, a gateway is
optional. If you select Management VPN tunnel, you must have
a GMS gateway between the SonicWALL UMA EM5000 agent
appliance and the managed SonicWALL appliance(s) to allow
each SonicWALL UMA EM5000 agent to securely communicate
with its managed appliance(s). The following list provides more
detail on SonicWALL appliance management methods and
gateway requirements:
• Management VPN tunnel – A GMS gateway is required.
Each SonicWALL UMA EM5000 agent must have a
dedicated gateway. The security association (SA) for this
type of VPN tunnel is created when the appliance is
configured for SonicWALL GMS management using the
Management Tunnel method.
• The SonicWALL UMA EM5000 automatically creates the
SA in the gateway. For this configuration, the gateway must
be a SonicWALL VPN-based appliance. The gateway can
be configured in NAT-Enabled or transparent mode.
• Existing VPN tunnel – A GMS gateway is optional. The
SonicWALL UMA EM5000 can use VPN tunnels that
already exist in the network to communicate with the
managed appliance(s). The GMS gateway can be a
SonicWALL VPN-based appliance or another VPN device
that is interoperable with SonicWALL VPN.
• HTTPS – A GMS gateway is optional. The SonicWALL
UMA EM5000 can use HTTPS management instead of a
VPN tunnel to communicate with the managed
appliance(s).
Note: A management VPN tunnel is only supported for
SonicWALL UTM appliances, but is not supported for
SonicWALL CDP or SonicWALL SSL-VPN appliances.
Page 11

Page 8 Recording Configuration Information
Recording Configuration Information
Before deploying the SonicWALL UMA EM5000, record the following configuration information for your reference.
SMTP Server Address:
The IP address or host name of your Simple Mail Transfer Protocol
(SMTP) server. For example, mail.emailprovider.com.
HTTP Web Server Port:
The number of your Web server port if customized.
The default port is 80.
HTTPS Web Server Port:
The number of your secure (SSL) Web server port if customized.
The default port is 443.
UMA EM5000 Administrator Email:
The email address of a SonicWALL UMA EM5000 administrator who
will receive email notifications from the SonicWALL UMA EM5000.
Sender Email Address:
The email address from which the email notifications will be sent by
the SonicWALL UMA EM5000.
GMS Gateway IP:
The IP address of the GMS gateway between the SonicWALL UMA
EM5000 agent and the network. This optional field is only applicable
if you have a GMS gateway.
GMS Gateway Password:
The password for the GMS gateway. This optional field is only
applicable if you have a GMS gateway between the SonicWALL UMA
EM5000 and the network.
Database V end or:
Your database vendor if you are using a SQL Server database.
Database Host IP:
The IP address of the database host. This is not required when using
the bundled MySQL database on this appliance.
Database User:
The MySQL user name for the database administrator. This is not
required when using the bundled MySQL database on this appliance.
Database Password:
The MySQL password for the database administrator. This is not
required when using the bundled MySQL database on this appliance.
Page 12

SonicWALL UMA EM5000 Getting Started Guide Page 9
Connecting and Initializing the UMA EM5000
In this Section:
This section provides instructions for powering on your SonicWALL UMA EM5000, logging into the appliance management interface,
running the Host Configuration Tool, and then connecting the appliance to your local network.
• Powering On Your Appliance - page 10
• Restarting Your Appliance - page 10
• Powering Off Your Appliance - page 10
• Logging into the Appliance Management Interface - page 10
• Using the Host Configuration Tool - page 12
• Connecting the SonicWALL UMA EM5000 to Your Network - page 15
• Configuring a Static IP Address on Your Management Computer - page 17
2
Page 13

Page 10 Powering On Your Appliance
Powering On Your Appliance
Perform the following steps to turn on your SonicWALL UMA
EM5000 appliance:
1. Plug the supplied power cable into the back of the
SonicWALL UMA EM5000.
2. Plug the other end of the power cable into an AC socket.
The SonicWALL UMA EM5000 automatically powers on
and begins the initial boot process.
The boot process may take several minutes to complete
when powering on the SonicWALL UMA EM5000 for the
first time.
Restarting Your Appliance
Perform the following steps to restart your SonicWALL UMA
EM5000 appliance from the appliance management interface:
1. Navigate to the System > Restart page.
2. Click the Restart button.
3. In the confirmation dialog box, click OK.
The system will take approximately 3 minutes to restart.
To restart your appliance by using the D-Pad controls on the
front panel, see Using the Restart Option - page 76.
Powering Off Your Appliance
To power off your SonicWALL UMA EM5000 appliance, press
and then quickly release the power button on the upper-right
corner of the appliance front bezel.
Tip: Do not hold down the power button to shutdown.
To power off your appliance by using the D-Pad controls on the
front panel, see Using the Shutdown Option - page 76.
Logging into the Appliance Management
Interface
To connect a management computer to your SonicWALL UMA
EM5000 and log in to the appliance management interface for
the first time, perform the following steps:
1. Using the supplied cross-over cable and the computer you
are using to administer the SonicWALL UMA EM5000,
connect the LAN port of the computer to the Ethernet port
(eth0) on the back of your SonicWALL UMA EM5000.
2. Set your management computer to have a static IP
address on the 192.168.168.0/24 subnet, such as
192.168.168.50. For help with setting up a static IP
address on your computer, refer to Configuring a Static IP
Address on Y our Management Computer - page 17.
Page 14

SonicWALL UMA EM5000 Getting Started Guide Page 11
3. Open a Web browser on your management computer.
4. Enter http://192.168.168.169/appliance/ (the default IP
address of the SonicWALL UMA EM5000) in the Location
or Address bar. The SonicWALLUMA EM5000 appliance
management login screen displays.
Note: One or more security warnings may display while
connecting to the appliance management interface.
Choose to accept the certificates in order to log in to the
SonicWALL UMA EM5000.
5. Log in to the appliance management interface using the
default credentials:
• User name – admin
• Password – password
6. The first time you log in to the appliance, you must change
the password. The login page re-displays with the default
login credentials prepopulated. Enter a new password for
the administrator account in the New Password field, and
enter it again in the Confirm New Password field.
Click Submit.
Note: The new password must be at least 7 characters.
The Host Configuration Tool wizard starts automatically. See
Using the Host Configuration Tool - page 12.
Ethernet Port
(in the rear)
Management
Station
Page 15

Page 12 Using the Host Configuration Tool
Using the Host Configuration Tool
The Host Configuration Tool is a wizard that takes you through
several basic steps to get your SonicWALL UMA EM5000
configured for your network.
The wizard starts automatically after you log in for the first time
and change the admin password. You can cancel the wizard at
this time, which leaves the default configuration on the
appliance and prevents the wizard from automatically starting
again.
Note: If you log out of the appliance management interface
without actually cancelling the wizard, it will start
automatically on your next login.
You can manually start the wizard at any time by
clicking the Wizards button at the top-right corner of
the page.
To use the Host Configuration Tool, perform the following steps:
1. If the Host Configuration Tool has started automatically,
skip to step 2. If you are starting the Host Configuration
Tool manually, click the Wizards button in the top right
corner.
2. In the Introduction screen, click Next.
Page 16

SonicWALL UMA EM5000 Getting Started Guide Page 13
3. In the Network Settings screen, configure the network
settings for the SonicWALL UMA EM5000, and then click
Next. Enter network settings values for the following fields:
• Hostname – A descriptive name for this appliance
• Domain – In the form of “sonicwall.com”; this domain
is not used for authentication
• IP Address – The static IP address for the eth0
interface of the appliance
• Subnet Mask – In the form of “255.255.255.0”
• Default Gateway – The IP address of the network
gateway – this is the default gateway and is required
for networking purposes. This is not the GMS Gateway
explained earlier in this guide.
• DNS Server 1 – The IP address of the primary DNS
server
• DNS Server 2 (Optional) – The IP address of the
secondary DNS server
4. In the Time Settings screen, select values for the following
system settings on the appliance, and click Next:
• Time (hh:mm:ss) – Hours, minutes, and seconds of
current time
• Date – Month, day, and year of current date
• TimeZone – Select from the drop-down list
• Automatically adjust clock for daylight saving time
– Select this checkbox for automatic adjust ment
between standard time and daylight savings time
Page 17

Page 14 Using the Host Configuration Tool
5. In the Summary screen, verify the settings. Click Back to
make changes on a previous screen, or click Apply to
accept the settings.
6. Wait for the settings to be applied, possibly for a few
minutes. The screen displays a progress bar until it
finishes, and then displays the status.
Note: If you modified the DNS settings, the services on the
appliance will restart when the changes are applied,
causing a momentary connectivity loss to the Web
server. Your browser will be redirected to the appliance
management interface login page.
7. If you have modified the appliance IP address, you will lose
contact with the appliance when the changes are applied.
To connect the appliance to your network and access the
appliance management interface from a computer on your
LAN, see Connecting the SonicWALL UMA EM5000 to
Your Network - page 15.
Page 18

SonicWALL UMA EM5000 Getting Started Guide Page 15
Connecting the SonicWALL UMA EM5000
to Your Network
To connect the SonicWALL UMA EM5000 to your network and
access the appliance management interface from a
management computer on your LAN, perform the following
steps:
1. If you are using the same management computer that you
used for initial configuration, unplug the crossover cable
from the management computer and from the
SonicWALL UMA EM5000.
2. Plug one end of the provided Ethernet cable (not the
crossover cable) into the eth0 port on the back of your
SonicWALL UMA EM5000.
3. Plug the other end of the Ethernet cable into an open port
on your local network hub or switch.
4. Adjust your management computer to its previous settings
prior to assigning it a static IP address on the default
appliance subnet.
5. Connect your management computer to your local network.
6. On the management computer, point a browser to the new
appliance IP address in the form:
http://<IP address>:<port>/appliance/
It is not necessary to provide the port in the URL if you kept
the default port.
Page 19

Page 16 Connecting the SonicWALL UMA EM5000 to Your Network
The following network diagram illustrates how the SonicWALL UMA EM5000 connects to an example network:
San Jose, USA
Management
Console
UMA Appliance / Database
X0 X1 X2 X3 X4 X5 X6
link/spd
X0 X1 X2 X3 X4 X5 X6
activity
TZ 210
X0 X1 X2 X3 X4 X5 X6
Universal Management Appliance
UMA EM5000
Page 20

SonicWALL UMA EM5000 Getting Started Guide Page 17
Configuring a Static IP Address on Your
Management Computer
This section is provided for your reference when preparing to
log in for the first time to your SonicWALL UMA EM5000.
Complete the following steps to configure your management
computer with a static IP address:
Windows Vista
1. On the Windows Start menu, right-click Network and
select Properties.
2. In the Tasks menu, click Manage networ k co nnections.
The Network Connections window displays.
3. Right-click on your Local Area Connection and select
Properties.
4. In the list, double-click Internet Protocol Version 4 (TCP/
IP).
5. Select Use the following IP address and type
192.168.168.50 in the IP address field.
6. Type 255.255.255.0 in the Subnet Mask field.
7. Click OK, and then click OK again for the settings to take
effect.
Windows XP
1. On the Windows Start menu, highlight Connect To and
then select Show All Connections.
2. Open the Local Area Connection Properties window.
3. Highlight Internet Protocol (TCP/IP), and then click
Properties.
4. Select Use the following IP address and type
192.168.168.50 in the IP address field.
5. Type 255.255.255.0 in the Subnet Mask field.
6. Click OK for the settings to take effect.
Windows 2000
1. On the Windows Start menu, select Settings.
2. Open Network and Dial-up Connections.
3. Click Properties.
4. Highlight Internet Protocol (TCP/IP) and click Properties.
5. Select Use the following IP address and type
192.168.168.50 in the IP address field.
6. Type 255.255.255.0 in the Subnet Mask field.
7. Click OK for the settings to take effect.
Windows NT
1. On the Windows Start menu, highlight Settings, and then
select Control Panel.
2. Open Network.
3. Double-click TCP/IP in the TCP/IP Properties window.
4. Select Specify an I P A d dres s and type 192.168.168.50 in
the IP address field.
5. Type 255.255.255.0 in the Subnet Mask field.
6. Click OK, and then click OK again.
7. Restart the computer for changes to take effect.
Page 21

Page 18
Page 22

SonicWALL UMA EM5000 Getting Started Guide Page 19
Registering Your Appliance
In this Section:
This section provides instructions for registering your SonicWALL UMA EM5000 appliance.
• Creating a MySonicWALL Account - page 20
• Registering Your Appliance - page 20
• Registering as an Associated Component - page 22
3
Page 23

Page 20 Creating a MySonicWALL Account
Creating a MySonicWALL Account
A MySonicWALL account is required for product registration. If
you already have an account, continue to the Registering Your
Appliance section. Perform the following steps to create a
MySonicWALL account:
1. In your browser, navigate to www.mysonicwall.com.
2. In the login screen, click the Not a registered user?
link.
3. Complete the Registration form and then click Register.
4. Verify that the information is correct and click Submit.
5. In the screen confirming that your account was created,
click Continue.
MySonicWALL registration information is not sold or
shared with any other company.
Registering Your Appliance
You must register your SonicWALL UMA EM5000 on
MySonicWALL before you can run SonicWALL GMS on it.
Registration is performed using the appliance management
interface. When registration is completed, SonicWALL GMS will
be licensed on your appliance.
When you log in to the SonicWALL UMA EM5000
after running the Host Configuration Tool, the
Register button is displayed in the top right corner of
the page. The registration process requires that the
SonicWALL UMA EM5000 have access to the Internet.
To register your SonicWALL UMA EM5000, perform the
following steps:
1. In a browser, log in to the appliance management interface
and click the Register button.
2. In the License Management page, type your
MySonicWALL user name and password and click Submit.
Page 24

SonicWALL UMA EM5000 Getting Started Guide Page 21
3. Type a descriptive name for the appliance into the
Friendly Name field and then click Submit.
The Serial Number field is automatically populated.
Note: If this is the first SonicWALL UMA EM5000 that you
have registered, the Friendly Name for this appliance
will also be used as the name for the distributed
deployment. As you register more UMA EM5000
appliances or instances of SonicWALL GMS on
Windows Server systems, you will have the option of
adding them to this deployment.
4. Select the Create New Deployment as radio button and
then click Submit.
5. Click Continue.
6. On the License Summary page, verify that SonicWALL
GMS is now licensed on your appliance.
Page 25

Page 22 Registering as an Associated Component
Registering as an Associated Component
When you have a distributed SonicWALL GMS deployment
involving more than one appliance or software instance of
SonicWALL GMS, you can associate these components on
MySonicWALL.
Note: The default 10-node management license is not
automatically increased when additional components
are associated with an existing SonicWALL GMS
deployment. Contact SonicWALL Technical Support to
add the node licenses to the deployment.
To register a SonicWALL UMA EM5000 as an associated
component of an existing SonicWALL GMS deployment,
perform the following steps:
1. In a browser, log in to the appliance management interface
and click the Register button.
2. Enter your MySonicWALL user name and password in the
appropriate fields and then click Submit.
3. Type a descriptive name for the appliance into the
Friendly Name field and then click Submit.
The Serial Number field is automatically populated.
4. The next registration page prompts you to associate this
SonicWALL GMS component with an existing deployment,
or create a new GMS deployment instance. Select the
Select from existing Deployments radio button.
5. Select the desired deployment for the association from the
drop-down list and then click Submit.
6. Click Continue.
Page 26

SonicWALL UMA EM5000 Getting Started Guide Page 23
Configuring the Role of Your Appliance
In this Section:
This section provides information about configuring the role for your SonicWALL UMA EM5000, as well as information about deployment
settings and services.
• Overview of SonicWALL UMA EM5000 Roles - page 24
• Using the Role Configuration Tool - page 25
• Manually Configuring the System Role - page 31
• Configuring Deployment Settings - page 38
• Starting and Stopping Host Services - page 39
4
Page 27

Page 24 Overview of SonicWALL UMA EM5000 Roles
Overview of SonicWALL UMA EM5000
Roles
The role that you assign to your SonicWALL UMA EM5000
defines the SonicWALL Universal Management Suite services
that it will provide. SonicWALL GMS uses these services to
perform management, monitoring, and reporting tasks.
Your SonicWALL UMA EM5000 can be deployed in any of the
following roles:
• All In One
• Agent
• Console
• Database Only
•Monitor
• Syslog Collector
In the appliance management interface, clicking Details in the
same row as a role provides a list of the servic es th at run on a
system in that role, and information about using the role.
As the number of managed appliances increases, a more
distributed deployment provides better performance. To
manage large numbers of SonicWALL appliances, you can use
several SonicWALL UMA EM5000 appliances operating in
different roles in a distributed deployment. You can also use
Windows Server machines running SonicWALL GMS in any of
the roles.
You can include the MySQL database installation with any role.
The All In One or Database Only roles automatically include the
MySQL database.
You can scale your deployment to handle more units and more
reporting by adding more systems in the Agent role. Agents
provide built-in redundancy capability, meaning that if an Agent
goes down, other Agents can perform the configuration tasks
and other tasks of the Agent that went down.
Note: When configuring the role for the first appliance in a
distributed deployment, you should either include the
database or be prepared to provide the IP address of
an existing database server.
You can meet this database objective in one of the following
ways:
• By selecting a role that includes the database
automatically, such as All In One or Database Only
• By selecting the Include Database (MYSQL) checkbox if
configuring the appliance with any other role
• By setting up a compatible database on another machine
and providing that IP address when prompted
Page 28

SonicWALL UMA EM5000 Getting Started Guide Page 25
The initial Deployment > Role page is shown below:
Using the Role Configuration Tool
The Role Configuration T ool is a wizard that guides you through
the process of defining the deployment role for your SonicWALL
UMA EM5000 appliance. Your system must be registered and
licensed for SonicWALL GMS to run the Role Configuration
Tool.
There are two ways to access the Role Configuration Tool:
• After the appliance is registered and licensed for
SonicWALL GMS, the System > Status page of the
appliance management interface provides a link to the
wizard.
Page 29

Page 26 Using the Role Configuration Tool
•The Wizards button in the top right corner of the page
provides access to the Role Configuration Tool.
To use the Role Configuration Tool, perform the following steps:
1. Log in to the appliance management interface and
navigate to the System > Status page.
2. Click the Click here link at the top of the page.
3. In the Introduction page of the Role Configuration Tool,
click Next.
Page 30

SonicWALL UMA EM5000 Getting Started Guide Page 27
4. In the Setup Type page, select Yes if you are adding this
system to an existing SonicWALL GMS deployment on one
or more systems. Selecting Y es indicates to the wizard that
there is an existing SonicWALL GMS database on another
server. Select No if this appliance is part of a new
SonicWALL GMS deployment or is the only system in your
GMS deployment. Click Next.
Note: If you selected Yes, skip step 5 and proceed to step 6.
5. In the Deployment Type page, select Yes if this system will
be the only SonicWALL GMS server in the deployment, or
select No if there will be multiple GMS servers. Click Next.
6. In the Role Configuration page, select the desired role for
this system and select the Include Database (MYSQL)
checkbox if you want to configure a SonicWALL GMS
database on this system. Click Next.
The list of roles on this page will vary depending on your
previous selections such as whether this system is part of
an existing SonicWALL GMS deployment and if it is a
single-server or part of a multi-server deployment. Neither
the Database Only nor the Include Database (MYSQL)
options are available if this system is part of an existing
deployment.
Page 31
Page 28 Using the Role Configuration Tool
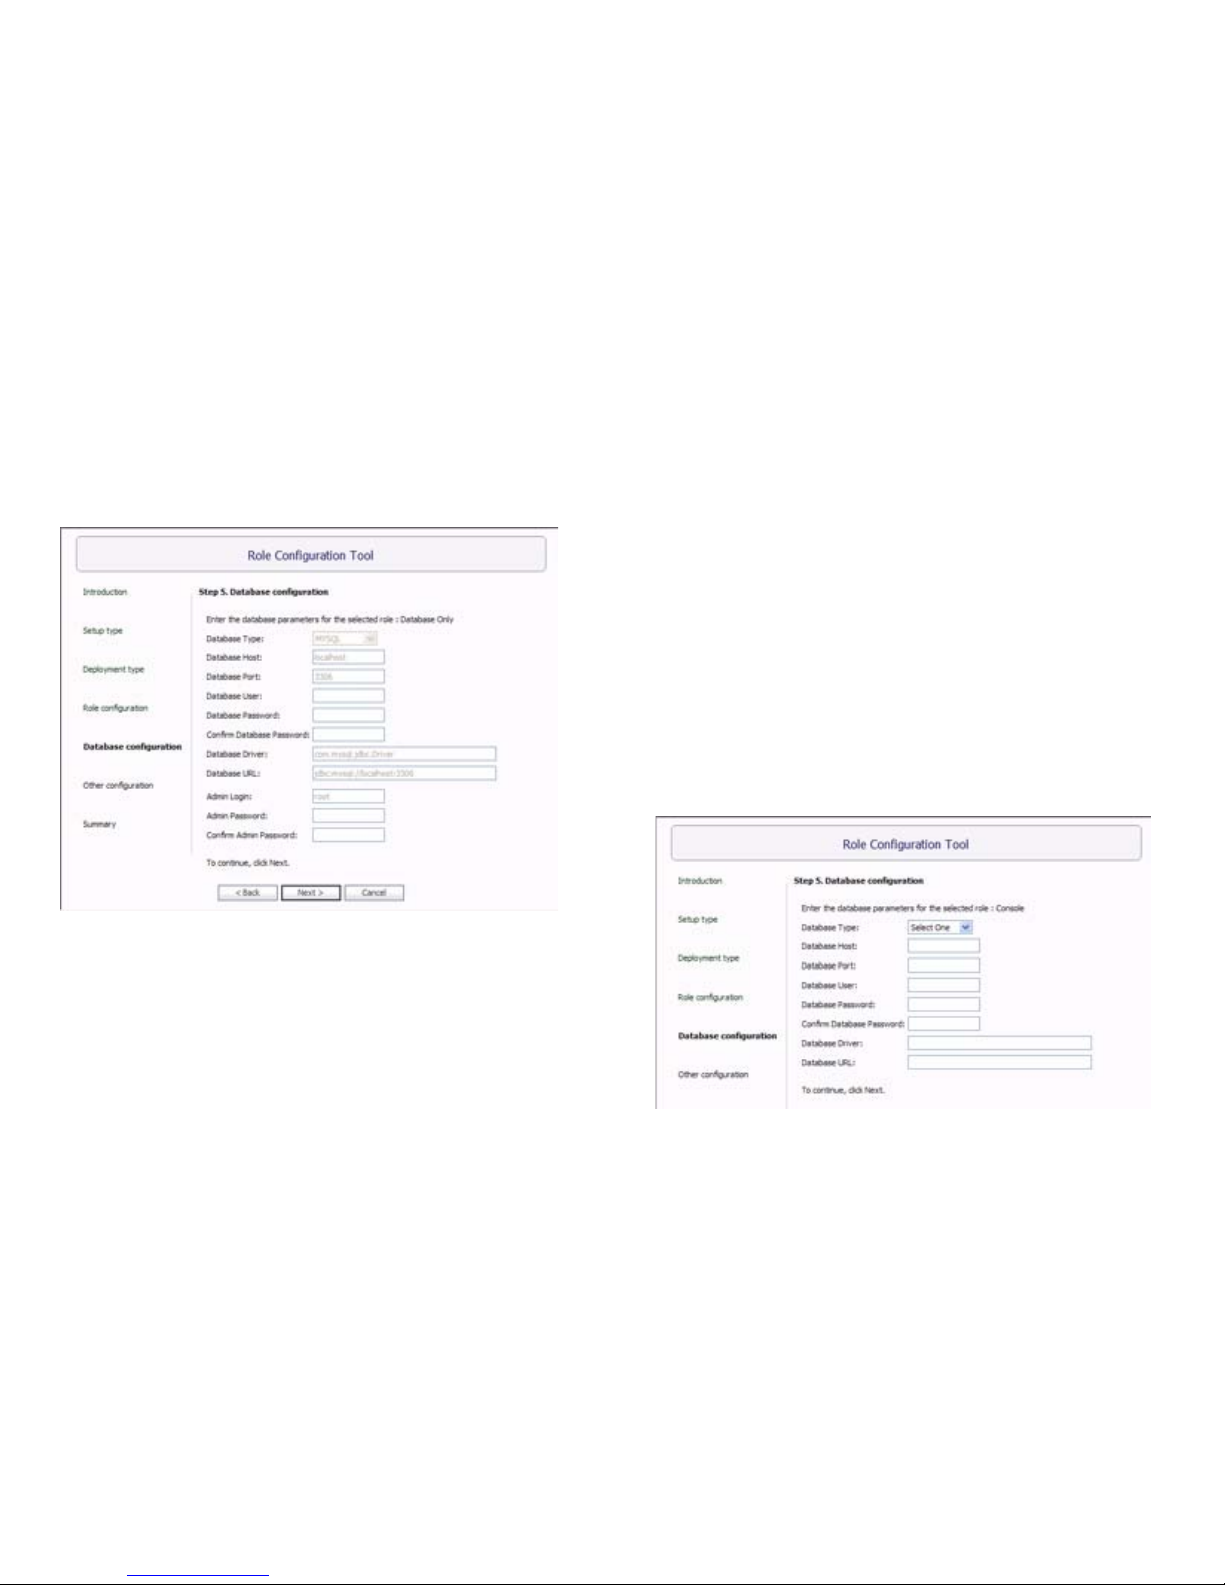
7. In the Database Configuration page, enter the database
parameters that are required for the selected role. The
database fields will vary depending on your previous
selections.
Certain fields will be prepopulated if you made a choice of
role that automatically includes the MySQL database or if
you chose Include Database (MYSQL).
For a MySQL instance, additional fields are available for
configuring the database administrator credentials. The
Administrator Credentials fields are only displayed and
editable in the following circumstances:
• The Database Type is MySQL
• The Include Database (MYSQL) checkbox is
selected either manually or automatically for the
chosen role
• The Database Host field is set to localhost and is not
editable
When these conditions are met, the administrator
password is required to create a regular access user
account for the SonicWALL GMS application.
If you selected a role that does not include the MySQL
database, you have the option of configuring the use of a
SQL Server database in this screen.
Page 32

SonicWALL UMA EM5000 Getting Started Guide Page 29
8. When finished entering the database parameters, click
Next.
9. In the Other Configuration page, the fields vary depending
on the selected role, as follows:
• Gateway Parameters – Required for All in One,
Console, and Agent roles
• Syslog Server Parameters - Required for All in One,
Console, Agent, and Syslog Collector roles
• SMTP Parameters - Required for All in One and
Console roles
Enter the GMS Gateway IP address and connection
password, if you are using a GMS gateway. Leave these
fields empty if you are using HTTP/HTTPS to connect to
the managed appliances.
10. In the Syslog Server Port field, type in the port used for
receiving syslog messages or accept the default of 514.
11. For access to email on this system, including the ability to
send email alerts, type the mail server IP address into the
SMTP Server field and enter valid email addresses for the
Sender Address and Administrator Address.
12. Click Next.
13. In the Summary page, verify that all parameters are
correct. Click Back to make changes on a previous screen,
or click Apply to accept the settings.
Page 33

Page 30 Using the Role Configuration Tool
14. Wait for the settings to be applied. The screen displays a
progress bar until it finishes, and then displays the status.
This phase can take up to 10 minutes, especially if the
database was included in the deployment.
15. Click Close to exit the Role Configuration Tool.
Page 34

SonicWALL UMA EM5000 Getting Started Guide Page 31
Manually Configuring the System Role
You can configure the role of the SonicWALL UMA EM5000
appliance without using the Role Configuration Tool.
All role configuration is performed in the appliance management
interface, available at the URL:
http://<IP address>:<port>/appliance/
Refer to the following sections for instructions on manually
configuring the system role:
• Configuring the All In One Role - page 3 1
• Configuring the Database Only Role - page 32
• Configuring the Console Role - page 33
• Configuring the Agent Role - page 34
• Configuring the Monitor Role - page 35
• Configuring the Syslog Collector Role - page 35
• Configuring Database Settings - page 36
• Configuring Deployment Settings - page 38
Configuring the All In One Role
All In One deployments are ideal for managing a small number
of SonicWALL appliances or for test environments. However,
SonicWALL recommends that you use a multi-system,
distributed deployment in production environments, with the
database on a dedicated server and the other services on one
or more systems. When only one other system is deployed, the
Console role should be assigned to it.
The All In One role provides all nine services utilized by
SonicWALL GMS:
• Syslog Collector
• Reports Scheduler
• Update Manager
• Reports Summarizer
• SNMP Manager
• Scheduler
• Monitoring Manager
•Web Server
• Database
Page 35

Page 32 Manually Configuring the System Role
T o deploy your SonicWALL UMA EM5000 in the All In One role,
perform the following steps in the appliance management
interface:
1. Navigate to the Deployment > Role page. Under Host
Role Configuration, select the All In One radio button.
2. If this SonicWALL UMA EM5000 will connect to managed
appliances through a GMS gateway, type the gateway IP
address into the GMS Gateway IP field.
To determine if a GMS gateway is required, see the GMS
Gateway Recommendations section, on page 7.
3. If a GMS gateway will be used, type the password into both
the GMS Gateway Password and Confirm GMS
Gateway Password fields.
4. If this SonicWALL UMA EM5000 listens for syslog
messages on a non-standard port, type the port number
into the Syslog Server Port field. The default port is 514.
5. Configure the database settings as described in the
Configuring Database Settings section, on page 36.
6. Configure the Web port settings as described in the
Configuring Web Port Settings section, on page 38.
7. To apply your changes, click Update. To change the
settings on this page back to the defaults, click Reset.
Configuring the Database Only Role
The Database Only role is used in a multi-server SonicWALL
GMS deployment. In this role, the server is configured to run
only the database service. SonicWALL recommends that one of
the servers in a multi-server SonicWALL GMS deployment is
assigned a Database Only role.
Only the SonicWALL Universal Management Suite Database
service runs on a Database Only system.
The MySQL database engine is pre-installed on the SonicWALL
UMA EM5000. SonicWALL GMS can also use a MySQL
database or a Microsoft SQL Server database installed on a
server. Only the MySQL database included in the installer is
supported. On the Deployment > Role page in the
SonicWALL UMA EM5000 appliance management interface,
you can configure your SonicWALL GMS systems to use either
a MySQL or a SQL Server database.
T o deploy your SonicW ALL UMA EM5000 in the Database Only
role, perform the steps described in the Configuring Database
Settings section, on page 36.
Page 36

SonicWALL UMA EM5000 Getting Started Guide Page 33
Configuring the Console Role
The Console role is used in a multi-server, distributed
SonicWALL GMS deployment. In this role, the SonicWALL UMA
EM5000 will run all SonicWALL Universal Management Suite
services except for the Database service. In this scenario, the
Database role is assigned to a separate appliance or server.
In the Console role, the SonicWALL UMA EM5000 behaves as
an Agent, and also provides the following functions:
• Provides Web user interface for the SonicWALL GMS
application
• Emails Scheduled Reports
• Performs Event Management tasks
• Performs various periodic checks, such as checking for
new appliances that can be managed, checking for new
firmware versions of managed appliances, and similar
functions
To deploy your SonicWALL UMA EM5000 in the Console role,
perform the following steps in the appliance management
interface:
1. Navigate to the Deployment > Role page. Under Host
Role Configuration, select the Console radio button.
2. If this SonicWALL UMA EM5000 will connect to managed
appliances through a GMS gateway, type the gateway IP
address into the GMS Gateway IP field.
To determine if a GMS gateway is required, see the GMS
Gateway Recommendations section, on page 7.
3. If a GMS gateway will be used, type the password into both
the GMS Gateway Password and Confirm GMS
Gateway Password fields.
4. If this SonicWALL UMA EM5000 listens for syslog
messages on a non-standard port, type the port number
into the Syslog Server Port field. The default port is 514.
5. To use a MySQL or Microsoft SQL Server database on
another system, do not select the Include Database
(MYSQL) checkbox. To include the MySQL database on
this system (not recommended), select this checkbox (for
this configuration, select the All In One role instead of the
Console role).
6. Configure the database settings as described in the
Configuring Database Settings section, on page 36.
7. Configure the Web port settings as described in the
Configuring Web Port Settings section, on page 38.
8. To apply your changes, click Update.
To change the settings on this page back to the defaults,
click Reset.
Page 37

Page 34 Manually Configuring the System Role
Configuring the Agent Role
The Agent role can be used in a distributed deployment of
SonicWALL GMS. The primary functions of this role include the
following:
• Manages units by acquiring them, pushing configuration
tasks to the units and tracking their up/down status
• Performs monitoring based on ICMP probes, TCP probes,
and SNMP OID retrievals
• Collects and stores syslog messages
• Performs report summarization
The following SonicWALL Universal Management Suite
services run on an Agent system:
• Syslog Collector
• Reports Summarizer
• SNMP Manager
• Scheduler
• Monitoring Manager
To deploy your SonicWALL UMA EM5000 in the Agent role,
perform the following steps in the appliance management
interface:
1. Navigate to the Deployment > Role page. Under Host
Role Configuration, select the Agent radio button.
2. If this SonicWALL UMA EM5000 will connect to managed
appliances through a GMS gateway, type the gateway IP
address into the GMS Gateway IP field.
To determine if a GMS gateway is required, see the GMS
Gateway Recommendations section, on page 7.
3. If a GMS gateway will be used, type the password into both
the GMS Gateway Password and Confirm GMS
Gateway Password fields.
4. If this SonicWALL UMA EM5000 listens for syslog
messages on a non-standard port, type the port number
into the Syslog Server Port field. The default port is 514.
5. To include the MySQL database on this system, select the
Include Database (MYSQL) checkbox. To use a MySQL
or Microsoft SQL Server database on another system, do
not select this checkbox.
6. Configure the database settings as described in the
Configuring Database Settings section, on page 36.
7. Configure the Web port settings as described in the
Configuring Web Port Settings section, on page 38.
8. To apply your changes, click Update.
To change the settings on this page back to the defaults,
click Reset.
Page 38

SonicWALL UMA EM5000 Getting Started Guide Page 35
Configuring the Monitor Role
The Monitor role is used to dedicate the SonicWALL UMA
EM5000 to monitoring appliances and applications in a multiserver SonicWALL GMS deployment. The monitoring is based
on ICMP probes, TCP probes, and SNMP OID retrievals.
Only the SonicWALL Universal Management Suite Monitoring
Manager service runs on a Monitor system.
To deploy your SonicWALL UMA EM5000 in the Monitor role,
perform the following steps in the appliance management
interface:
1. Navigate to the Deployment > Role page. Under Host
Role Configuration, select the Monitor radio button.
2. To include the MySQL database on this system, select the
Include Database (MYSQL) checkbox. T o use a MySQL or
Microsoft SQL Server database on another system, do not
select this checkbox.
3. Configure the database settings as described in the
Configuring Database Settings section, on page 36.
4. Configure the Web port settings as described in the
Configuring Web Port Settings section, on page 38.
5. To apply your changes, click Update.
To change the settings on this page back to the defaults,
click Reset.
Configuring the Syslog Collector Role
The Syslog Collector role can be assigned to a SonicWALL
UMA EM5000 in a multi-server deployment of SonicWALL
GMS. In this role, the SonicWALL UMA EM5000 is dedicated to
collecting syslog messages on the configured port (by default,
port 514). The syslog messages are stored in the SonicWALL
UMA EM5000 file system.
The syslog messages are used by the Reports Summarizer
service running on another SonicWALL GMS server or
SonicWALL UMA EM5000 in the distributed deployment. The
folder where the Syslog Collector service stores the syslog
messages must be accessible by the server running the
Reports Summarizer service.
Only the SonicWALL Universal Management Suite Syslog
Collector service runs on a Syslog Collector system.
Page 39

Page 36 Manually Configuring the System Role
To deploy your SonicWALL UMA EM5000 in the Syslog
Collector role, perform the following steps in the appliance
management interface:
1. Navigate to the Deployment > Role page. Under Host
Role Configuration, select the Syslog Collector radio
button.
2. If this SonicWALL UMA EM5000 listens for syslog
messages on a non-standard port, type the port number
into the Syslog Server Port field. The default port is 514.
3. To include the MySQL database on this system, select the
Include Database (MYSQL) checkbox. To use a MySQL
or Microsoft SQL Server database on another system, do
not select this checkbox.
4. Configure the database settings as described in the
Configuring Database Settings section, on page 36.
5. Configure the Web port settings as described in the
Configuring Web Port Settings section, on page 38.
6. To apply your changes, click Update.
To change the settings on this page back to the defaults,
click Reset.
Configuring Database Settings
Database settings configuration is largely the same for any role
when you choose to include the database on that appliance.
For roles that automatically include the default MySQL
database, such as All In One or Database Only, the Database
Type, Database Host, and Database Port fields are not editable.
This is also the case for any role when the Include Database
(MYSQL) checkbox is selected. The Administrator Credentials
fields are displayed only if the role has been defined to include
the installation of the MySQL database. These are not available
when a SQL Server database is selected.
This section describes the options for configuring the database
settings for either the MySQL database or the Microsoft SQL
Server database. The SonicWALL UMA EM5000 can run the
MySQL database, but SonicWALL GMS can also use either a
MySQL or a SQL Server database running on a Windows
Server machine in a multi-system deployment.
Note: If this appliance will connect to a SQL Server system
with a non-default instance name, then the entries will
be different than described in this section. Refer to the
SonicWALL GMS Administrator's Guide for
configuration instructions.
Page 40
SonicWALL UMA EM5000 Getting Started Guide Page 37
To configure the database settings for any role, perform the
following steps in the appliance management interface:
1. Navigate to the Deployment > Role page and select the
role for this appliance.
2. To run the MySQL database on this SonicWALL UMA
EM5000, select the Include Database (MYSQL)
checkbox. To use a MySQL or Microsoft SQL Server
database on another system, do not
select this checkbox.
3. Under Database Configuration, if Include Database
(MYSQL) was not selected in the previous step, select
either MYSQL or SQL Server from the Database Type
drop-down list. This field is not editable if you previously
selected Include Database (MYSQL) or if the selected role
is All In One or Database Only.
4. In the Database Host field, type in the IP address of the
database server or accept the default, localhost, if this
SonicWALL UMA EM5000 includes the database. This
field is not editable if you previously selected Include
Database (MYSQL) or if the selected role is All In One or
Database Only .
5. To use a different user name when SonicWALL GMS
accesses the database, type the user name into the
Database User field. The default user name is “sa”.
6. Type the password that SonicWALL GMS will use to
access the database into both the Database Password
and Confirm Database Password fields.
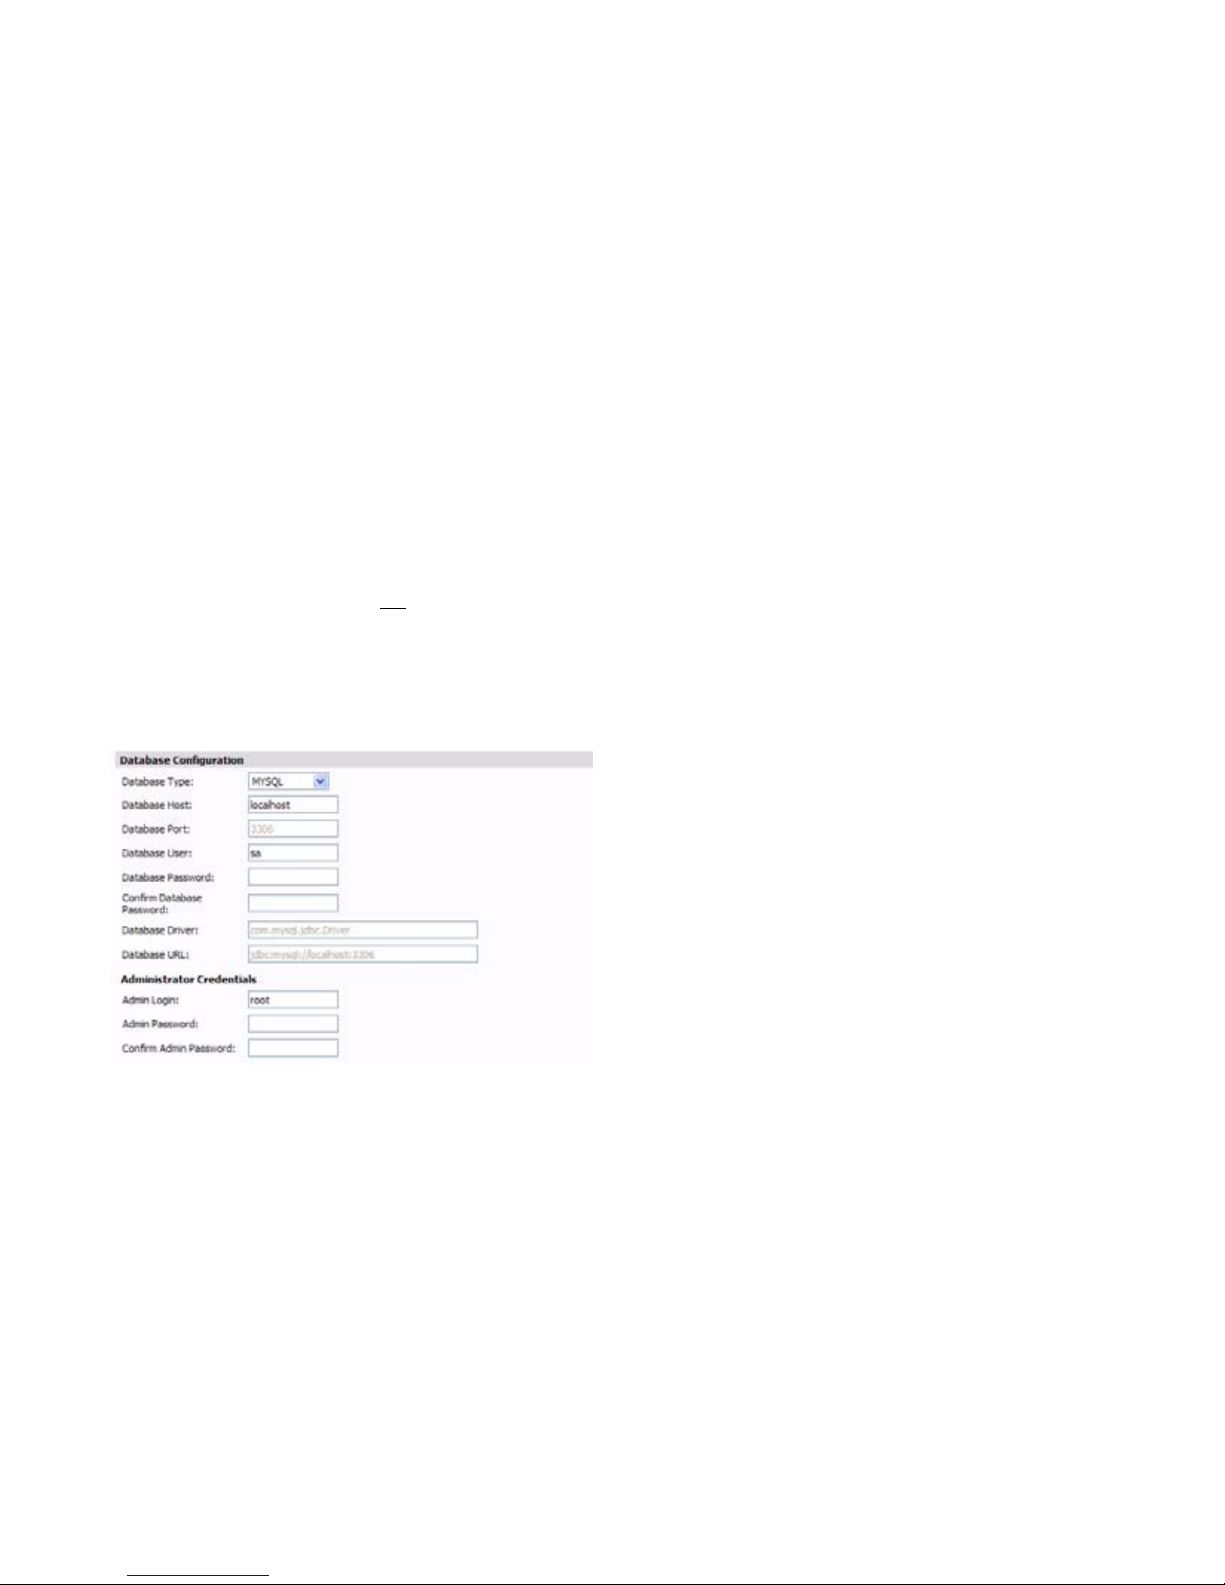
7. Under Administrator Credentials, type the password for
the administrator (root) account into both the Admin
Password and Confirm Admin Password fields.
Note that the Administrator Credentials fields are only
displayed and editable in the following circumstances:
•The Database Type is MySQL
•The Include Database (MYSQL) checkbox is selected
either manually or automatically for the chosen role
•The Database Host field is set to localhost and is not
editable
When these conditions are met, the administrator
password is required to create a regular access user
account for the SonicWALL GMS application.
Page 41

Page 38 Configuring Deployment Settings
Configuring Deployment Settings
This section describes the settings available on the
Deployment > Settings page of the appliance management
interface.
Configuring Web Port Settings
To change the Web port settings, perform the following steps:
1. On the Deployment > Settings page under Web Port
Configuration, to use a different port for HTTP access to
the SonicWALL UMA EM5000, type the port number into
the HTTP Port field. The default port is 80.
2. To use a different port for HTTPS access to the
SonicWALL UMA EM5000, type the port number into the
HTTPS Port field. The default port is 443.
3. Click Update to apply the Web port settings.
Note: Changing the Web port settings will cause the
appliance to restart.
4. After the appliance restarts, use the new port to access the
appliance management interface. For example:
• If you changed the HTTP port to 8080, use the URL:
http://<IP Address>:8080/appliance/
• If you changed the HTTPS port to 4430, use the URL:
http://<IP Address>:4430/appliance/
Configuring SMTP Settings
The SMTP settings are used for sending email alerts to the
SonicWALL UMA EM5000 administrator. To configure the
SMTP settings, perform the following steps:
1. On the Deployment > Settings page under SMTP
Configuration, enter the IP address of the SMTP server
into the SMTP server field.
2. In the Sender address field, enter the email address that
will appear as the ‘From’ address when email alerts are
sent to the administrator.
3. In the Administrator address field, enter a valid email
address for the administrator who will receive email alerts.
4. Click Update to apply the SMTP settings.
Page 42
SonicWALL UMA EM5000 Getting Started Guide Page 39
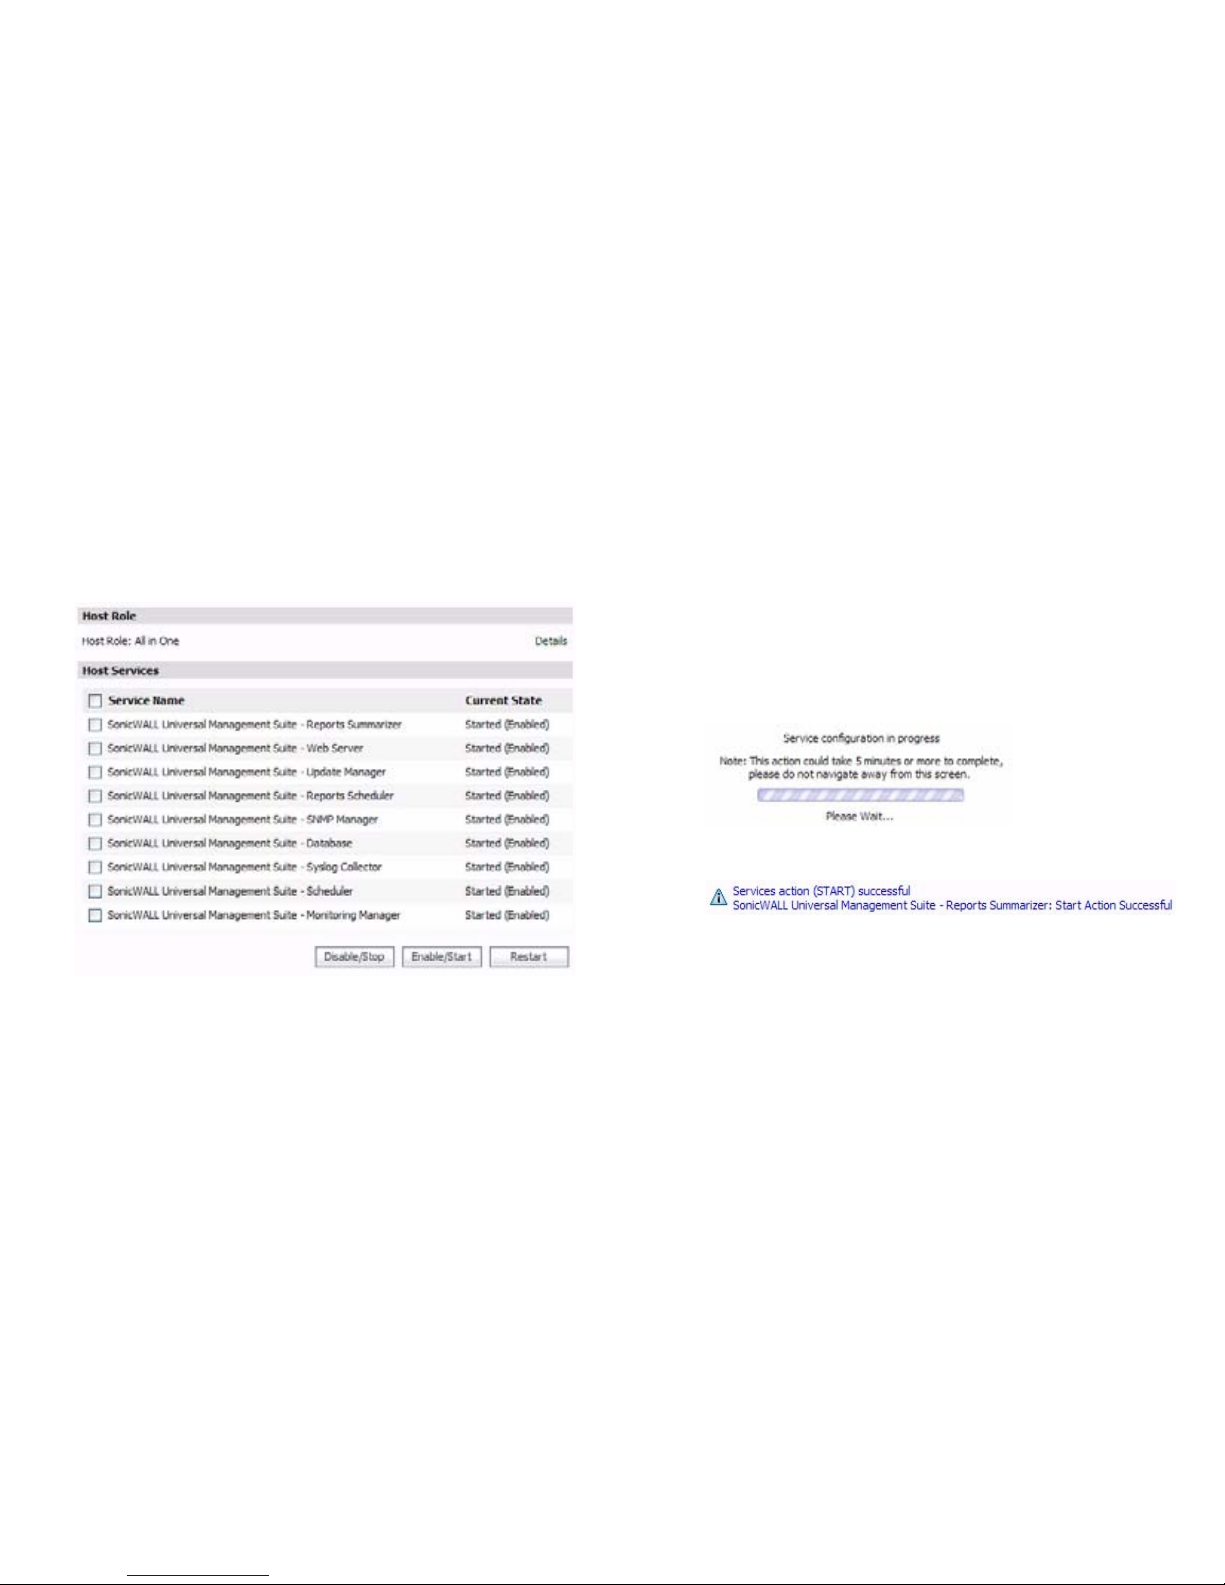
Starting and Stopping Host Services
You can stop, start, or restart any of the SonicWALL UMS
services on the Deployment > Services page of the appliance
management interface. The page displays different services
depending on the role of the appliance. The image below shows
all nine services running on an All In One system:
To change the current state of a service, perform the following
steps:
1. On the Deployment > Services page, select the checkbox
next to the service whose state you want to change and
then do one of the following:
• To stop the service, click the Disable/Stop button.
• To start a stopped service, click the Enable/Start
button.
• To restart the service, click the Restart button. This
option stops and then starts the service.
2. A progress bar is displayed. Wait for the desired action to
complete before navigating away from the page.
The status of the action is displayed at the top of the page.
Page 43

Page 40 Starting and Stopping Host Services
Page 44

SonicWALL UMA EM5000 Getting Started Guide Page 41
Using the SonicWALL GMS Management Interface
In this Section:
This section provides information about the SonicWALL GMS management interface. The SonicWALL GMS application runs on the
SonicWALL UMA EM5000.
• Accessing the Correct Management Interface - page 42
• SonicWALL GMS Management Interface Introduction - page 43
• SonicWALL GMS Login Screen - page 44
• SonicWALL GMS Navigation Tabs - page 44
• Left Pane Overview - page 45
• Center Pane Overview - page 45
• Right Pane Overview - page 46
• Description of Managed Appliance States - page 46
5
Page 45

Page 42 Accessing the Correct Management Interface
Accessing the Correct Management
Interface
The SonicWALL UMA EM5000 comes installed with two
separate management interfaces:
• SonicWALL UMA Appliance Management Interface –
Used for system management of the appliance, including
registration and licensing, setting the admin password,
creating backups, restarting the appliance, configuring
network settings, selecting the deployment role, and
configuring other system settings.
Access the appliance management interface with the URL:
http://<IP address>:<port>/appliance/
If you are using the standard HTTP port, 80, it is not
necessary to append the port number to the IP address.
• SonicWALL GMS Management Interface – Used to
access the SonicWALL GMS application that runs on the
SonicWALL UMA EM5000. This interface is used to
configure GMS management of SonicWALL appliances,
including creating policies, viewing reports, and monitoring
networks, and for configuring GMS administrative settings.
The GMS management interface is only available on
appliances deployed in a role that runs the Web Server
service, such as the All In One or Console roles.
Access the GMS management interface with the URL:
http://<IP address>:<port>/sgms/
Page 46
SonicWALL UMA EM5000 Getting Started Guide Page 43
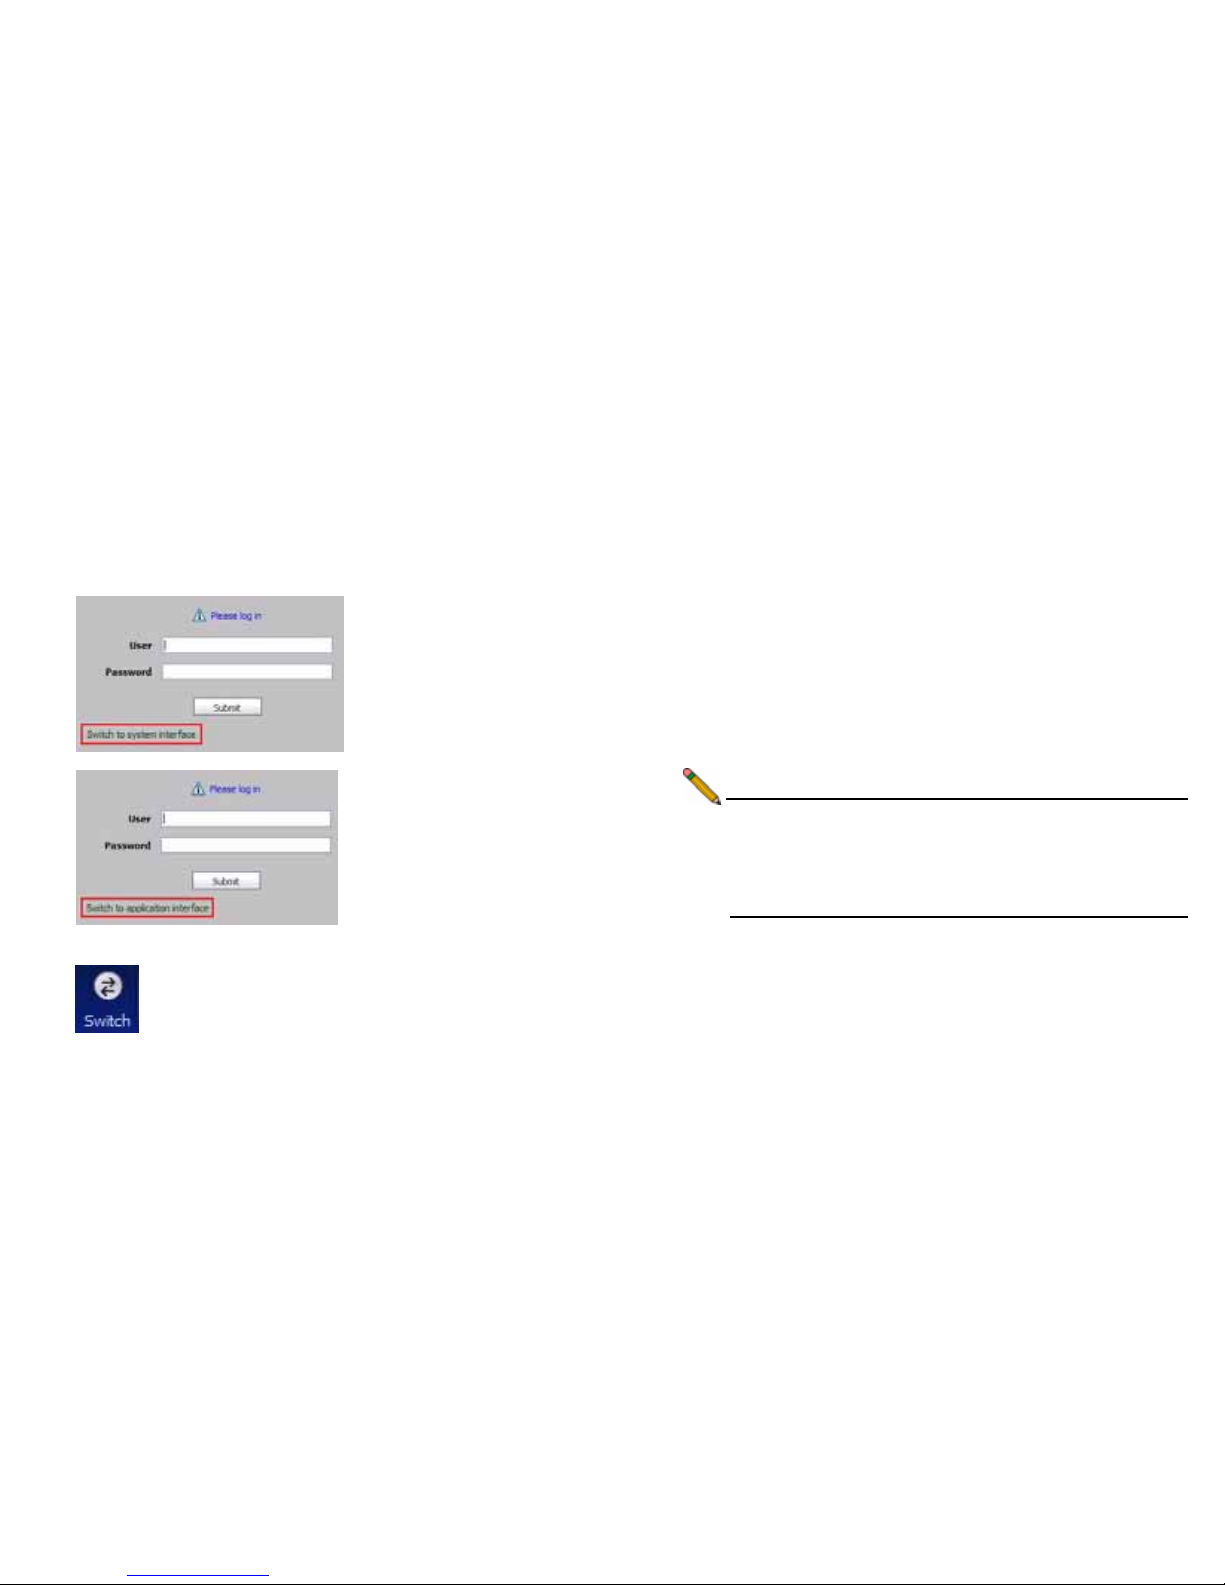
Switching Between Management Interfaces
On appliances deployed in the All In One or Console role, you
can easily switch between the appliance management interface
and the SonicWALL GMS management interface. The login
page of each interface provides a link to the login page of the
other interface.
When logged in to either interface, you can switch to
the login page of the other interface by clicking the
Switch button in the top right corner of the page.
SonicWALL GMS Management Interface
Introduction
SonicWALL GMS is a Web-based application that runs on the
SonicWALL UMA EM5000. SonicWALL GMS is used for
configuring, managing, monitoring and gathering reports from
thousands of SonicWALL Internet security appliances and nonSonicWALL appliances, as well as for configuring SonicWALL
GMS administrative settings. This section provides an
introduction to the main elements of the SonicWALL GMS
management interface.
Access the SonicWALL GMS management interface with the
URL:
http://<IP address>:<port>/sgms/
Note: The SonicWALL GMS management interface is
separate from the appliance management interface
used to configure appliance settings, and can have
different login credentials. See Logging into the
Appliance Management Interface - page 10.
Page 47
Page 44 SonicWALL GMS Login Screen
SonicWALL GMS Login Screen
The SonicWALL GMS management interface login screen
allows you to securely login to SonicWALL GMS using your
User ID and Password. After you have registered your
SonicWALL UMA EM5000 and it is licensed for SonicWALL
GMS, the SonicWALL GMS login screen is the first screen that
displays each time you access the SonicWALL GMS
management interface using a Web browser on your
management computer.
SonicWALL GMS Navigation Tabs
The SonicWALL GMS management interface navigation tabs
are located at the top of the management interface.
The six navigation tabs are SonicToday, Firewall, SSL-VPN,
CDP, Monitor, and Console.
The Monitor tab provides real-time monitoring at the global,
group or appliance level. The Console tab provides tools to
customize options found in the other SonicWALL GMS tabs and
to manage SonicWALL GMS settings and settings that affect
the environment globally.
Page 48

SonicWALL UMA EM5000 Getting Started Guide Page 45
Left Pane Overview
The left pane of the SonicWALL
GMS management interface
provides a tree control that
displays the current view and a
list of managed appliances within
the current tab. The left pane is
only displayed for the three
appliance tabs: Firewalls,
SSL-VPNs and CDPs. The
current category and view are indicated by a blue highlighting.
The left pane tree control provides the ability to switch between
views and displays the current state of each appliance under
management. A single box in the tree control indicates a node
at appliance or unit level. Two boxes in the tree control indicates
a node at a group level. A global node at the top of the tree
control is indicated by a three-box icon. The color of these icons
provides useful status information. For detailed information
about appliance states, refer to Description of Managed
Appliance States - page 46.
Note: If there is only one appliance visible in the Left Pane,
then the Left Pane will automatically collapse to present
a larger screen for the rest of the management
interface.
Center Pane Overview
The center pane displays for the three
appliance tabs: Firewalls, SSL-VPNs
and CDPs. A navigational tree control that
provides access to the configuration
options available based on navigational
tab and left pane selections. At the top of
the Center pane there are two sub-tabs,
Policies and Reports. The Policies subtab provides policy configuration options
for managed appliances. The Reports
sub-tab provides reporting on the global,
group, or appliance level, and is only
available for Firewalls and SSL-VPNs.
The current selection in the center pane is
indicated by the highlighted item. For
example, the figure to the left displays the
current selection Log > Log Settings.
The center pane options change based
on the navigational tab and left pane
selections, and selections in the center pane modify the display
in the right pane. For example, the figure in the next section
illustrates the contents of the right pane when the global view is
selected in the left pane and System > Status is selected on
the Policies tab in the center pane.
Page 49
Page 46 Right Pane Overview
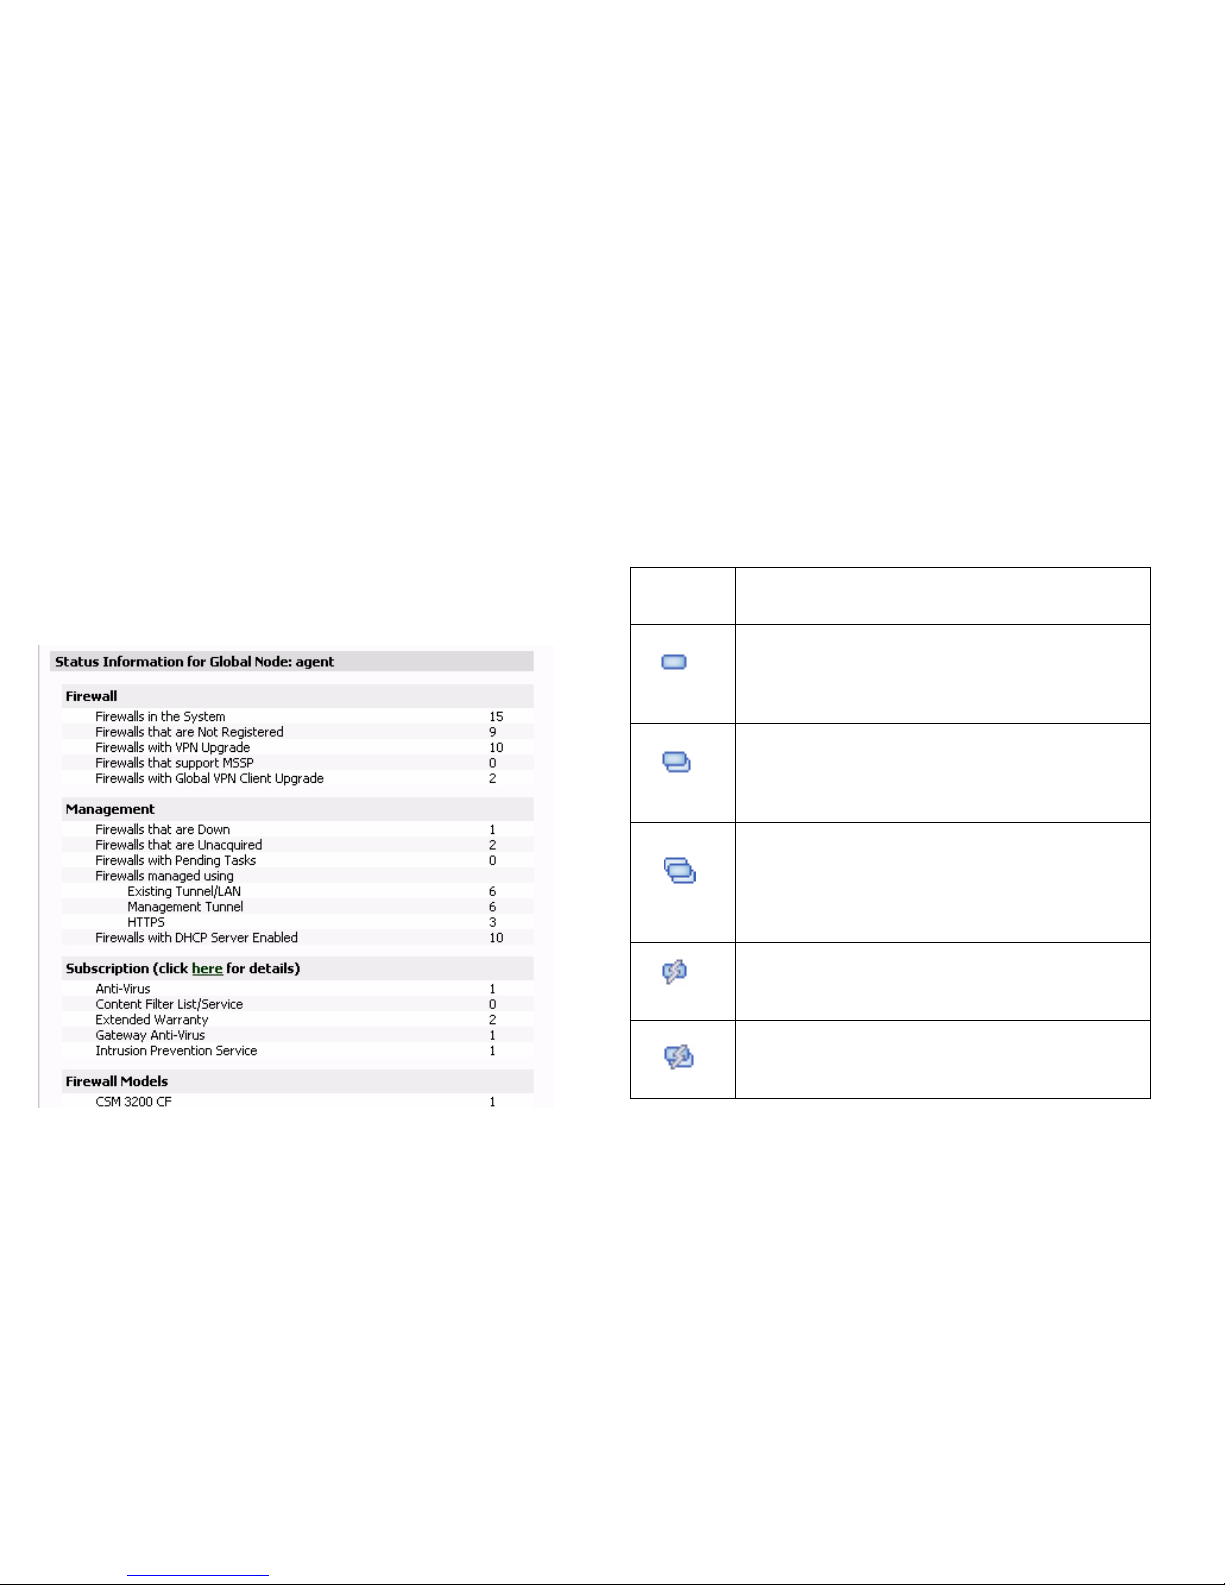
Right Pane Overview
The right pane displays the available status or tasks based on
the current selection of navigational tab, left pane and center
pane options. Configurations performed in the right pane modify
global, group or appliance settings. For example, the right pane
image below displays the status and tasks available for the
Policies navigation tab, left pane selection GlobalView, and
center pane selection System > Status.
Description of Managed Appliance States
This section describes the meaning of icons that appear next to
managed appliances listed in the left pane of the SonicWALL
GMS management interface.
Appliance
Status
Description
One blue box indicates that the appliance is operating
normally. The appliance is accessible from
SonicWALL GMS, and no tasks are pending or
scheduled.
Two blue boxes indicate that appliances in a group
are operating normally. All appliances in the group
are accessible from SonicWALL GMS and no tasks
are pending or scheduled.
Three blue boxes indicate that all appliances in the
global group of this type (Firewall/SSL-VPN/CDP) are
operating normally. All appliances of this type are
accessible from SonicWALL GMS and no tasks are
pending or scheduled.
One blue box with a lightning flash indicates that one
or more tasks are pending or running on the
appliance.
Two blue boxes with a lightning flash indicate that
tasks are currently pending or running on one or more
appliances within the group.
Page 50

SonicWALL UMA EM5000 Getting Started Guide Page 47
Two blue boxes with a clock indicate that tasks are
currently scheduled to execute at a future time on one
or more appliances within the group.
One blue box with a clock indicates that one or more
tasks are scheduled on the appliance.
One yellow box indicates that the appliance has been
added to SonicWALL GMS management
(provisioned), but not yet acquired.
Two yellow boxes indicate that one or more
appliances in the group have been added to
SonicWALL GMS management, but not acquired.
Three yellow boxes indicate that one or more of the
global group of appliances of this type (Firewall/
SSL-VPN/CDP) have been added to SonicWALL
GMS management, but not acquired.
One yellow box with a lightning flash indicates that
one or more tasks are pending on the provisioned
appliance.
Two yellow boxes with a lightning flash indicates that
tasks are pending on one or more provisioned
appliances within the group.
One red box indicates that the appliance is no longer
sending heartbeats to SonicWALL GMS.
Two red boxes indicate that one or more appliance in
the group is no longer sending heartbeats to
SonicWALL GMS.
Three red boxes indicate that one or more of the
global group of appliances of this type (Firewall/
SSL-VPN/CDP) is no longer sending heartbeats to
SonicWALL GMS.
Two red boxes with a lightning flash indicate that one
or more appliance in the group is no longer sending
heartbeats to SonicWALL GMS and has one or more
tasks pending.
One red box with a lightning flash indicates that the
appliance is no longer sending heartbeats to
SonicWALL GMS and has one or more tasks
pending.
Page 51

Page 48 Description of Managed Appliance States
Page 52

SonicWALL UMA EM5000 Getting Started Guide Page 49
Managing SonicWALL Appliances
In this Section:
SonicWALL appliances must be running supported firmware to be managed using SonicWALL GMS. For information about configuring
other SonicWALL appliances for management, see the SonicWALL GMS Administrator’s Guide. This section provides instructions for the
following example configurations:
• Configuring a SonicWALL NSA 2400 for Management - page 50
• Configuring a SonicWALL SSL-VPN 2000 for Management - page 54
6
Page 53
Page 50 Configuring a SonicWALL NSA 2400 for Management
Configuring a SonicWALL NSA 2400 for
Management
The SonicWALL gateway security (firewall) appliance under
management by SonicWALL GMS must be running SonicOS
Standard or Enhanced 2.0 or later. To configure a SonicWALL
appliance for SonicWALL GMS management, perform the
following steps:
• Configuring a SonicWALL NSA 2400 - page 50
• Adding a SonicWALL NSA 2400 to SonicWALL GMS page 53
Configuring a SonicWALL NSA 2400
To configure a SonicWALL NSA 2400 for SonicWALL GMS
management, perform the following steps:
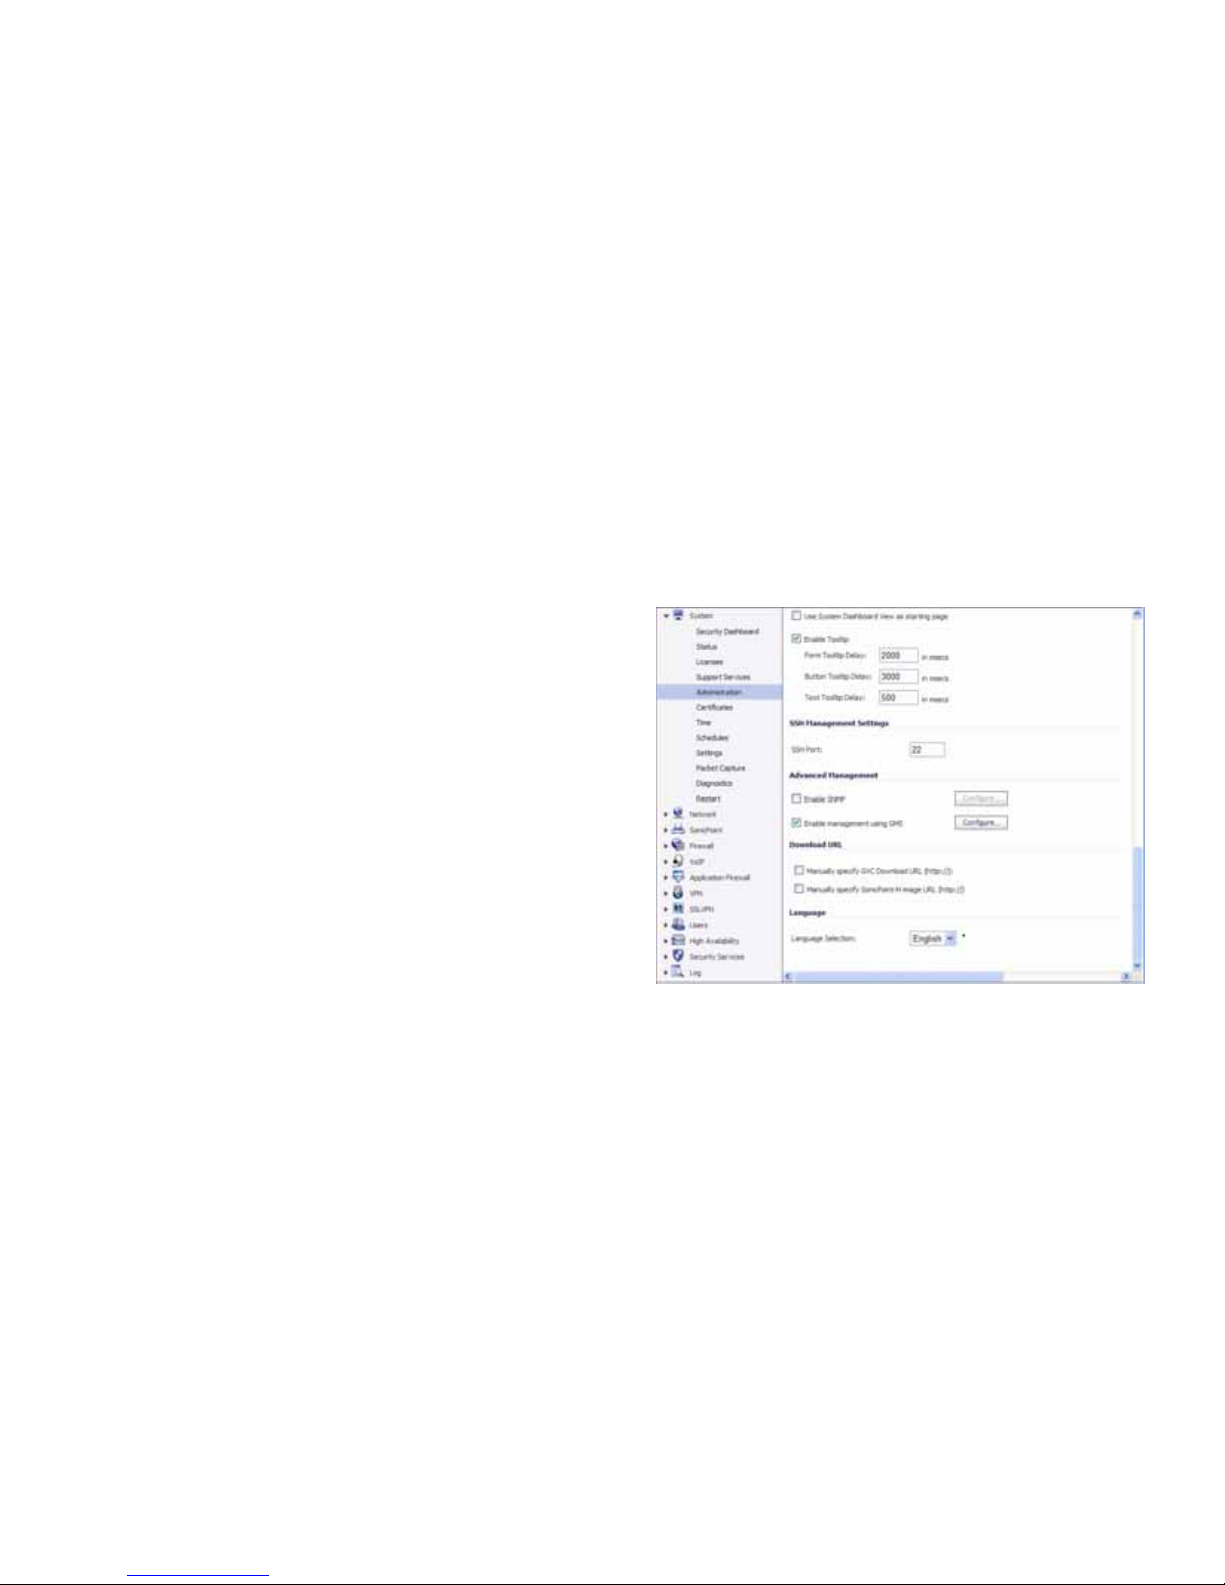
1. Log in to your SonicWALL NSA 2400. Navigate to
System > Administration. and scroll down to the
Advanced Management section.
2. Select the Enable management using GMS checkbox.
Click Configure.
3. Type the SonicWALL UMA EM5000 host name or IP
address in the GMS Host Name or IP Address field.
Page 54

SonicWALL UMA EM5000 Getting Started Guide Page 51
4. Type the SonicWALL GMS syslog server port in the GMS
Syslog Server Port field. The default port is 514.
5. Leave the box next to Send Heartbeat Status Messages
Only unchecked, unless you don’t want to receive reports
for this managed appliance.
6. If your SonicWALL UMA EM5000 appliance is directly
accessible from the SonicWALL NSA 2400 appliance,
leave the checkbox next to GMS behind a NAT Device
unchecked. If your SonicWALL UMA EM5000 appliance is
not directly accessible from the SonicWALL NSA 2400
appliance, select the GMS behind NAT Device checkbox
and type the WAN IP address of the gateway device in the
NAT Device IP Address field. Refer to the SonicWALL
GMS Administrator’s Guide for detailed information on
configuring your SonicWALL UMA EM5000 behind a NAT
device.
Tip: If your gateway controller is running in transparent
mode, the WAN IP is the same as the LAN IP.
7. From the Management Mode drop-down box, select one
of the following methods of management: IPSEC
Management Tunnel, Existing Tunnel, or HTTPS. For
information on selecting a management method, refer to
GMS Gateway Recommendations - page 7.
• If the SonicWALL appliance will be managed through a
VPN management tunnel (default), select IPSEC
Management Tunnel. The Inbound/Outbound SPI,
Encryption Algorithms, Encryption Key, and
Authentication Key fields will appear, and each will
be populated. Alternatively, you can create your own
keys. The Encryption Key must be 16 characters long,
and the Authentication Key must be 32 characters
long.
Note: Record your Encryption Key and Authentication Key.
You will need both keys when you add your appliance
for management using SonicWALL GMS.
Page 55

Page 52 Configuring a SonicWALL NSA 2400 for Management
• If the SonicWALL appliance will be managed through
an existing tunnel or is on the same network as the
SonicWALL UMA EM5000 appliance, select Existing
Tunnel. Verify that a tunnel has been created between
the SonicWALL UMA EM5000 subnet and the
appliance.
• If the SonicWALL appliance will be managed using
HTTPS, select HTTPS. If the SonicWALL UMA
EM5000 appliance role includes the GMS Reporting
service, do not select the Send Syslog Messages to
a Distributed GMS Reporting Server checkbox. If
you have a distributed SonicWALL GMS deployment
with a different Reporting server, select the Send
Syslog Messages to a Distributed GMS Reporting
Server checkbox and type the IP address and port of
the Reporting server into the respective fields.
Note: If HTTPS management mode is specified, ensure that
the SonicWALL UMA EM5000 can receive syslog data
from the managed appliance by allowing traffic over
port 514, or a custom port if you specified one, to pass
through the firewall in front of the SonicWALL UMA
EM5000.
8. When you are finished, click OK.
Page 56

SonicWALL UMA EM5000 Getting Started Guide Page 53
Adding a SonicWALL NSA 2400 to SonicWALL GMS
To add your appliance to SonicWALL GMS, perform the
following steps:
1. Log in to the SonicWALL GMS management interface.
2. Expand the SonicWALL GMS tree and select the group to
which you will add the SonicWALL appliance. Then, rightclick the group and select Add Unit from the pop-up menu.
To add the appliance independently from any group, rightclick an open area in the left pane and select Add Unit.
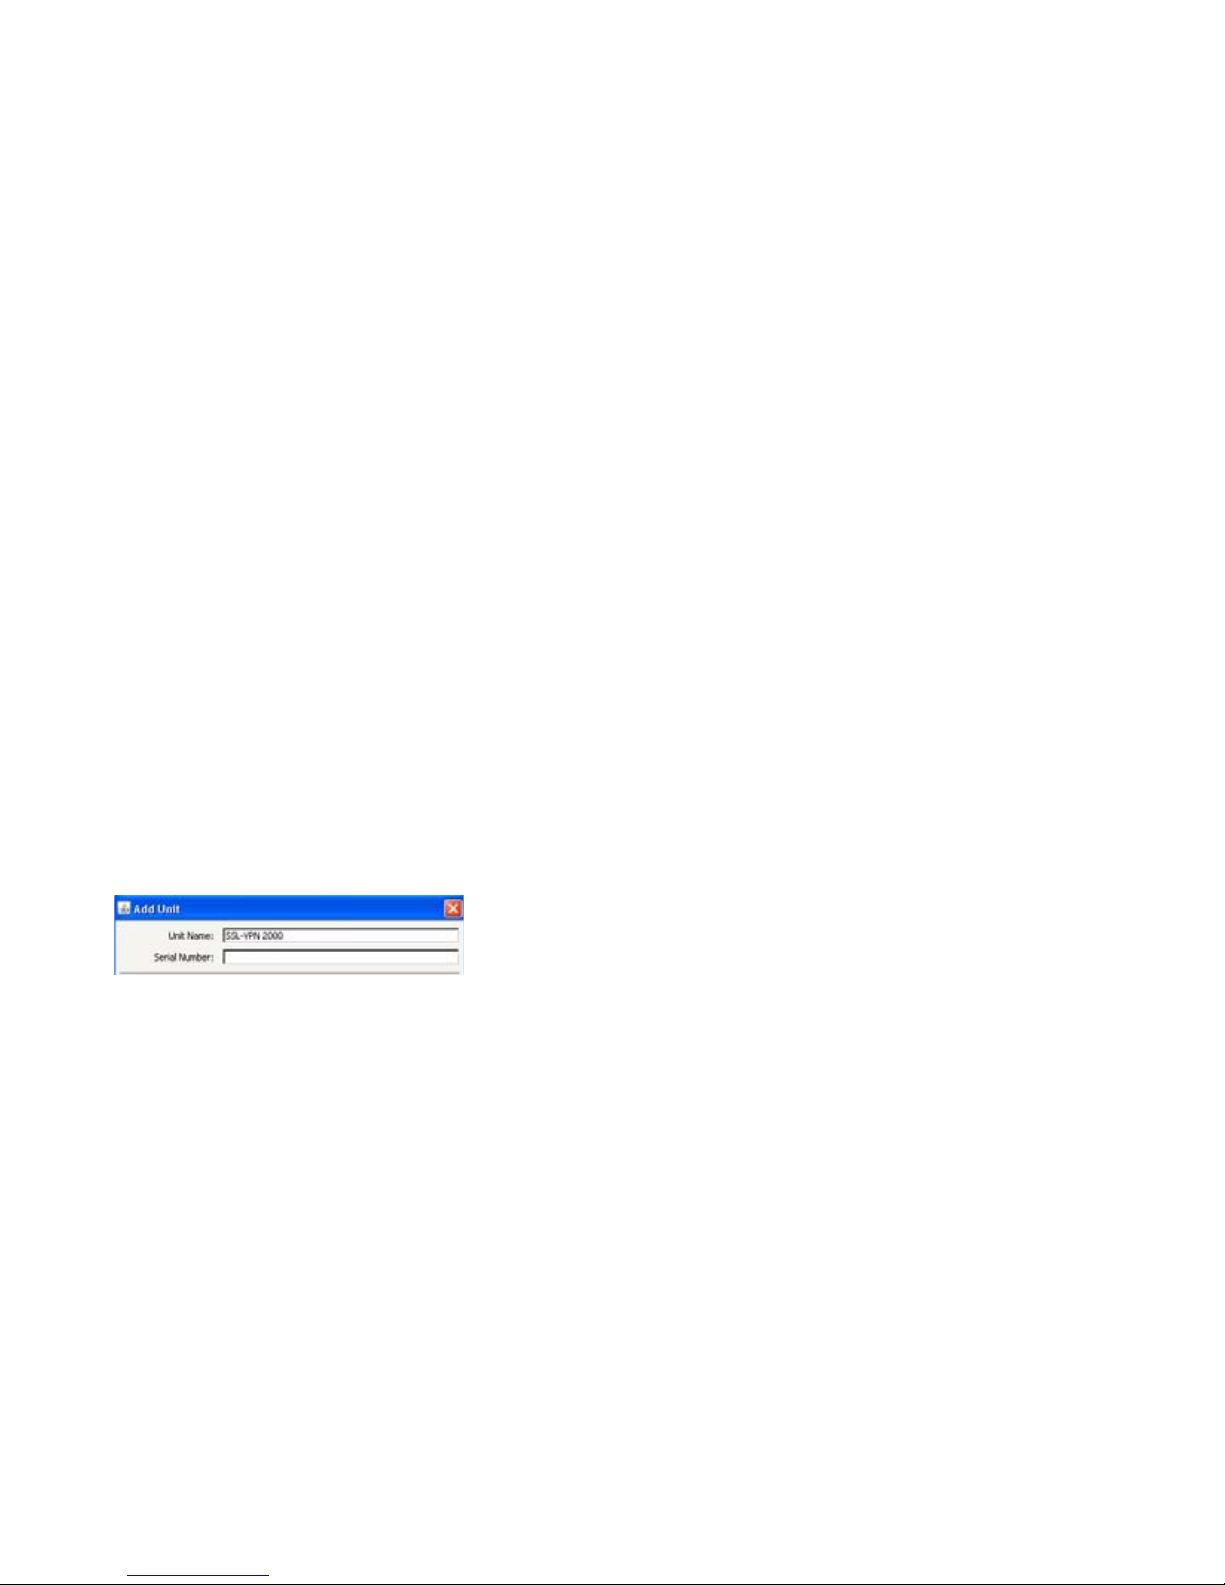
The Add Unit dialog box appears.
3. Enter a descriptive name for the managed appliance in the
Unit Name field.
4. Enter the managed appliance serial number in the Serial
Number field. The serial number can be found in the
appliance management interface under System > Status.
5. To specify the IP address of the SonicWALL NSA
appliance, select the Specify manually radio button for
Managed Address, and type the IP address into the field.
6. Enter the managed appliance administrator login name in
the Login Name field. The default is admin.
7. Enter the managed appliance administrator password in
the Password field.
8. Select the radio button next to the management mode that
is the same as the mode you selected in the SonicWALL
NSA 2400 management interface in Configuring a
SonicWALL NSA 2400 - page 50: Select Using Existing
T unnel or LAN, Using Management VPN Tunnel, or
Using HTTPS.
• If you choose Using Existing Tunnel or LAN, the
HTTP port will be populated with the default value, 80.
• If you choose Using Management VPN Tunnel, the
HTTP port will be populated with the default value, 80.
Provide the SA encryption key and SA authentication
key in the SA Encryption Key and SA
Authentication Key fields. These fields must exactly
match the values in the SonicWALL NSA 2400
configuration.
• If you choose Using HTTPS, the HTTPS Port field is
populated with the default value, 443.
9. If a different SonicWALL UMA EM5000 appliance or host
server will be the Agent for managing the SonicWALL NSA
appliance, select the IP address of that system from the
Agent IP Address drop-down list.
10. If your deployment includes a Standby Agent, select its IP
address from the Standby Agent IP drop-down list.
11. To add this SonicWALL NSA appliance to SonicWALL
GMS monitoring, select the Add this unit to Net Monitor
checkbox.
12. Click OK. It may take up to a minute for the data to load.
Page 57
Page 54 Configuring a SonicWALL SSL-VPN 2000 for Management
The new SonicWALL appliance displays in the left pane of the
SonicWALL GMS interface as a yellow icon, which means the
unit has not been acquired by SonicWALL GMS. After the
appliance has been acquired, the icon will either turn red,
indicating that the appliance status is down, or blue, indicating
that the appliance status is up. You can view the status of the
acquisition process in the System > Status screen of the
managed appliance available in the center pane of the
SonicWALL GMS management interface. You will need to
refresh the screen by clicking the Status link in the center pane.
For detailed managed appliance icon descriptions, refer to the
table in the Description of Managed Appliance States section,
on page 46.
It may take up to five minutes for SonicWALL GMS to establish
a management VPN tunnel, set up an HTTPS connection, or
use the existing site-to-site VPN tunnel to access the managed
appliance and acquire it for management. For SonicWALL GMS
appliance acquisition troubleshooting, refer to the SonicWALL
GMS Administrator’s Guide.
When the appliance has been acquired, the configuration
settings will be displayed at the unit level, and the settings will
be saved to the database.
Your SonicWALL NSA 2400 is now ready for management
using SonicWALL GMS.
Configuring a SonicWALL SSL-VPN 2000
for Management
SonicWALL SSL-VPN 2000 appliances must be running
SonicOS SSL-VPN 2.0 or higher. To configure a SonicWALL
SSL-VPN 2000 for SonicWALL GMS management, perform the
following tasks:
• Configuring a SonicWALL SSL-VPN 2000 - page 54
• Adding a SonicWALL SSL-VPN 2000 to SonicWALL GMS page 55
Configuring a SonicWALL SSL-VPN 2000
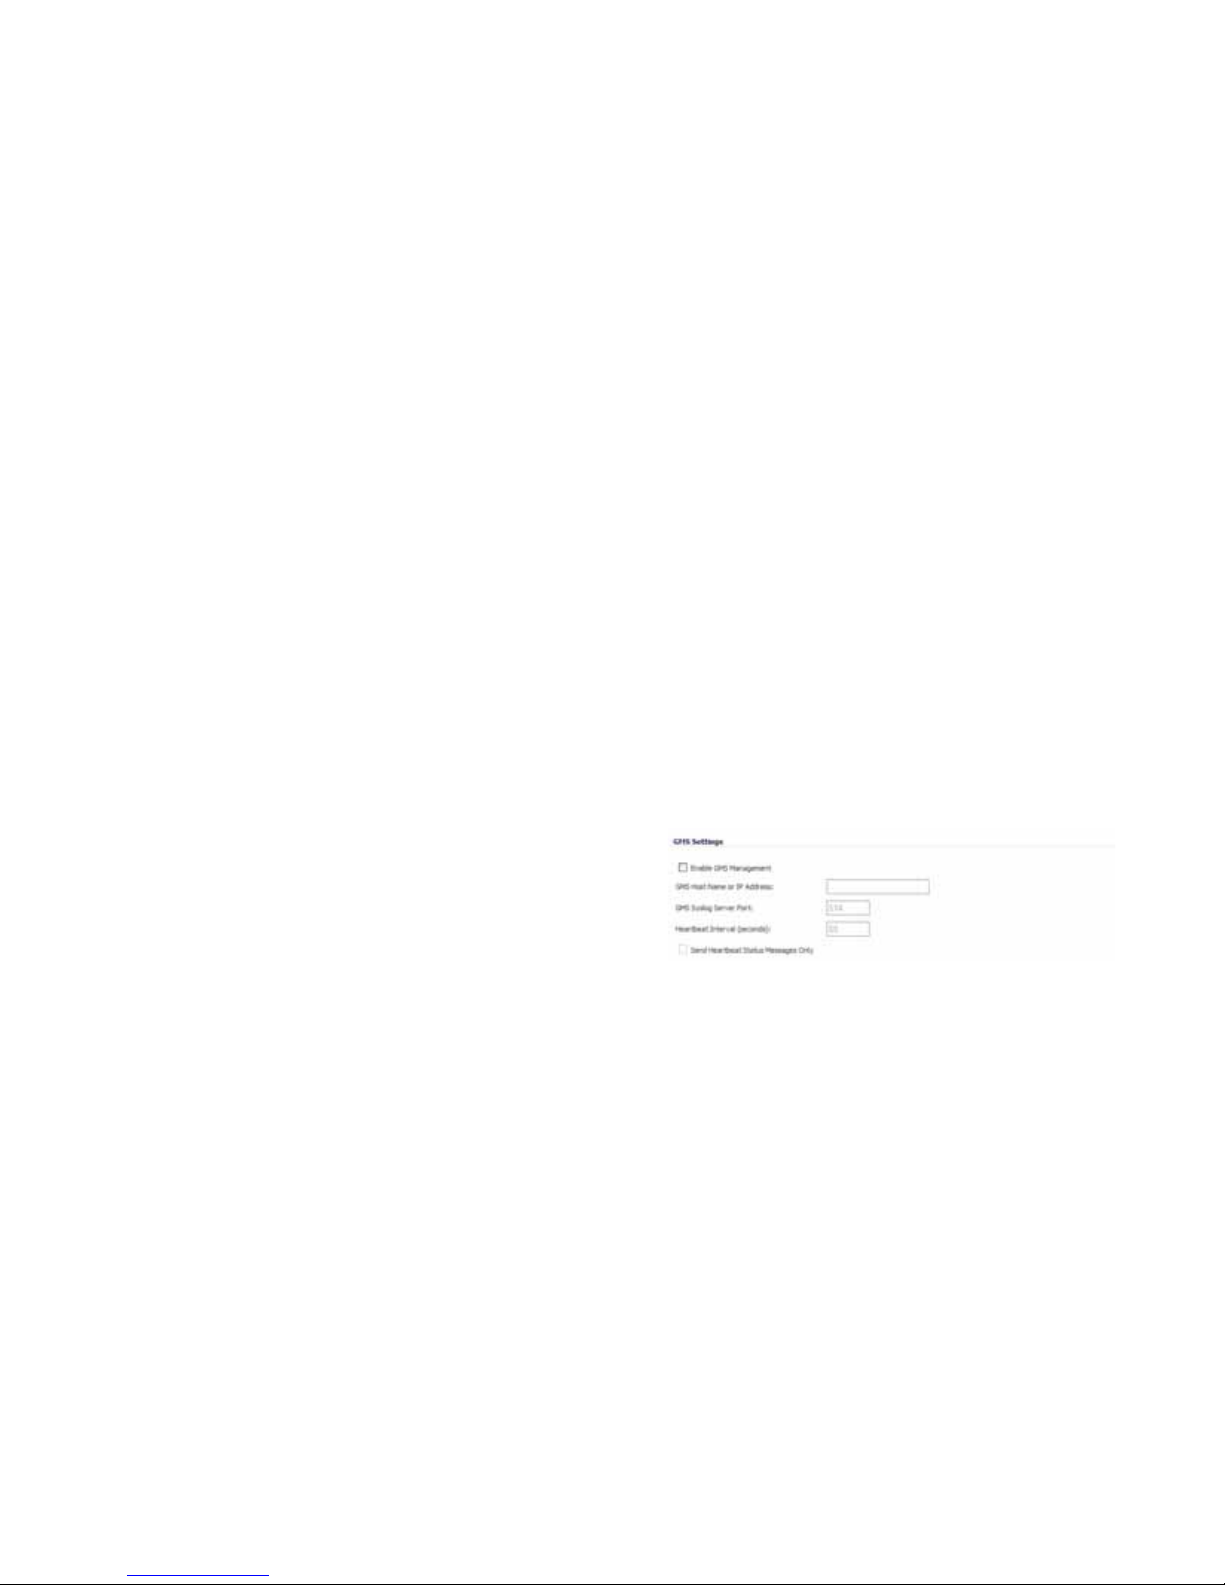
1. Log in to your SonicWALL SSL-VPN 2000.
2. Navigate to System > Administration.
3. Under GMS settings, select the Enable GMS
Management checkbox.
4. Type the SonicWALL UMA EM5000 host name or IP
address in the GMS Host Name or IP Address field.
5. Type the SonicWALL GMS syslog server port in the
Syslog Server Port field. The default port is 514.
Page 58
SonicWALL UMA EM5000 Getting Started Guide Page 55
6. Enter the desired interval for sending heartbeats to the
SonicWALL GMS server, in seconds, in the Heartbeat
Interval (seconds) field. The maximum heartbeat interval
is 86400 (24 hours).
7. Click Accept.
Adding a SonicWALL SSL-VPN 2000 to SonicWALL
GMS
To add your appliance to the SonicWALL GMS system, perform
the following steps:
1. Log in to the SonicWALL GMS management interface.
2. Click the SSL-VPN tab at the top of the management
interface.
3. Expand the SonicWALL GMS tree and select the group to
which you will add the SonicWALL appliance. Then, rightclick the group and select Add Unit from the pop-up menu.
To add the appliance independently from any group, rightclick an open area in the left pane and select Add Unit.
The Add Unit dialog box appears.
4. Enter a descriptive name for the SonicWALL SSL-VPN
appliance in the Unit Name field.
5. Enter the SonicWALL SSL-VPN appliance serial number in
the Serial Number field. The serial number can be found in
the SonicWALL SSL-VPN management interface under
System > Status.
6. To specify the IP address of the SonicWALL SSL-VPN
appliance, select the Specify manually radio button for
Managed Address, and type the IP address into the field.
7. Enter the SonicWALL SSL-VPN appliance administrator
login name in the Login Name field.
8. Enter the appliance administrator password in the
Password field.
9. The radio button next to Using HTTPS is automatically
selected.
10. If the SonicWALL UMA EM5000 uses a custom HTTPS
port number, type it into the HTTPS Port field.
11. If a different SonicWALL UMA EM5000 appliance or host
server will be the Agent for managing the SonicWALL
SSL-VPN, type the IP address of that system into the
Agent IP Address field.
12. If your deployment includes a Standby Agent, type its IP
address into the Standby Agent IP field.
13. To add this SonicWALL SSL-VPN appliance to SonicWALL
GMS monitoring, select the Add this unit to Net Monitor
checkbox.
14. Click OK.
It may take up to a minute for the data to load.
Page 59

Page 56 Configuring a SonicWALL SSL-VPN 2000 for Management
The new SonicWALL SSL-VPN appliance displays in the left
pane of the SonicWALL GMS interface as a yellow icon, which
means the unit has not been acquired by SonicWALL GMS.
After the appliance has been acquired, the icon will either turn
red, indicating that the appliance status is down, or blue,
indicating that the appliance status is up. You can view the
status of the acquisition process in the System > Status screen
of the managed appliance available in the center pane of the
SonicWALL GMS management interface. You will need to
refresh the screen by clicking the Status link in the center pane.
For detailed appliance icon descriptions, refer to the table in the
Description of Managed Appliance States section, on page 46.
It may take up to five minutes for SonicWALL GMS to establish
an HTTPS connection and acquire the appliance for
management. For SonicWALL GMS appliance acquisition
troubleshooting, refer to the SonicWALL GMS Administrator’s
Guide.
Your SonicWALL SSL-VPN appliance is now ready for
management using SonicWALL GMS.
Page 60

SonicWALL UMA EM5000 Getting Started Guide Page 57
Reporting
In This Section:
This section contains information about SonicWALL Universal Management reporting.
• Overview of SonicWALL GMS Reporting - page 58
• Using the SonicWALL GMS Summarize Now Feature - page 61
7
Page 61
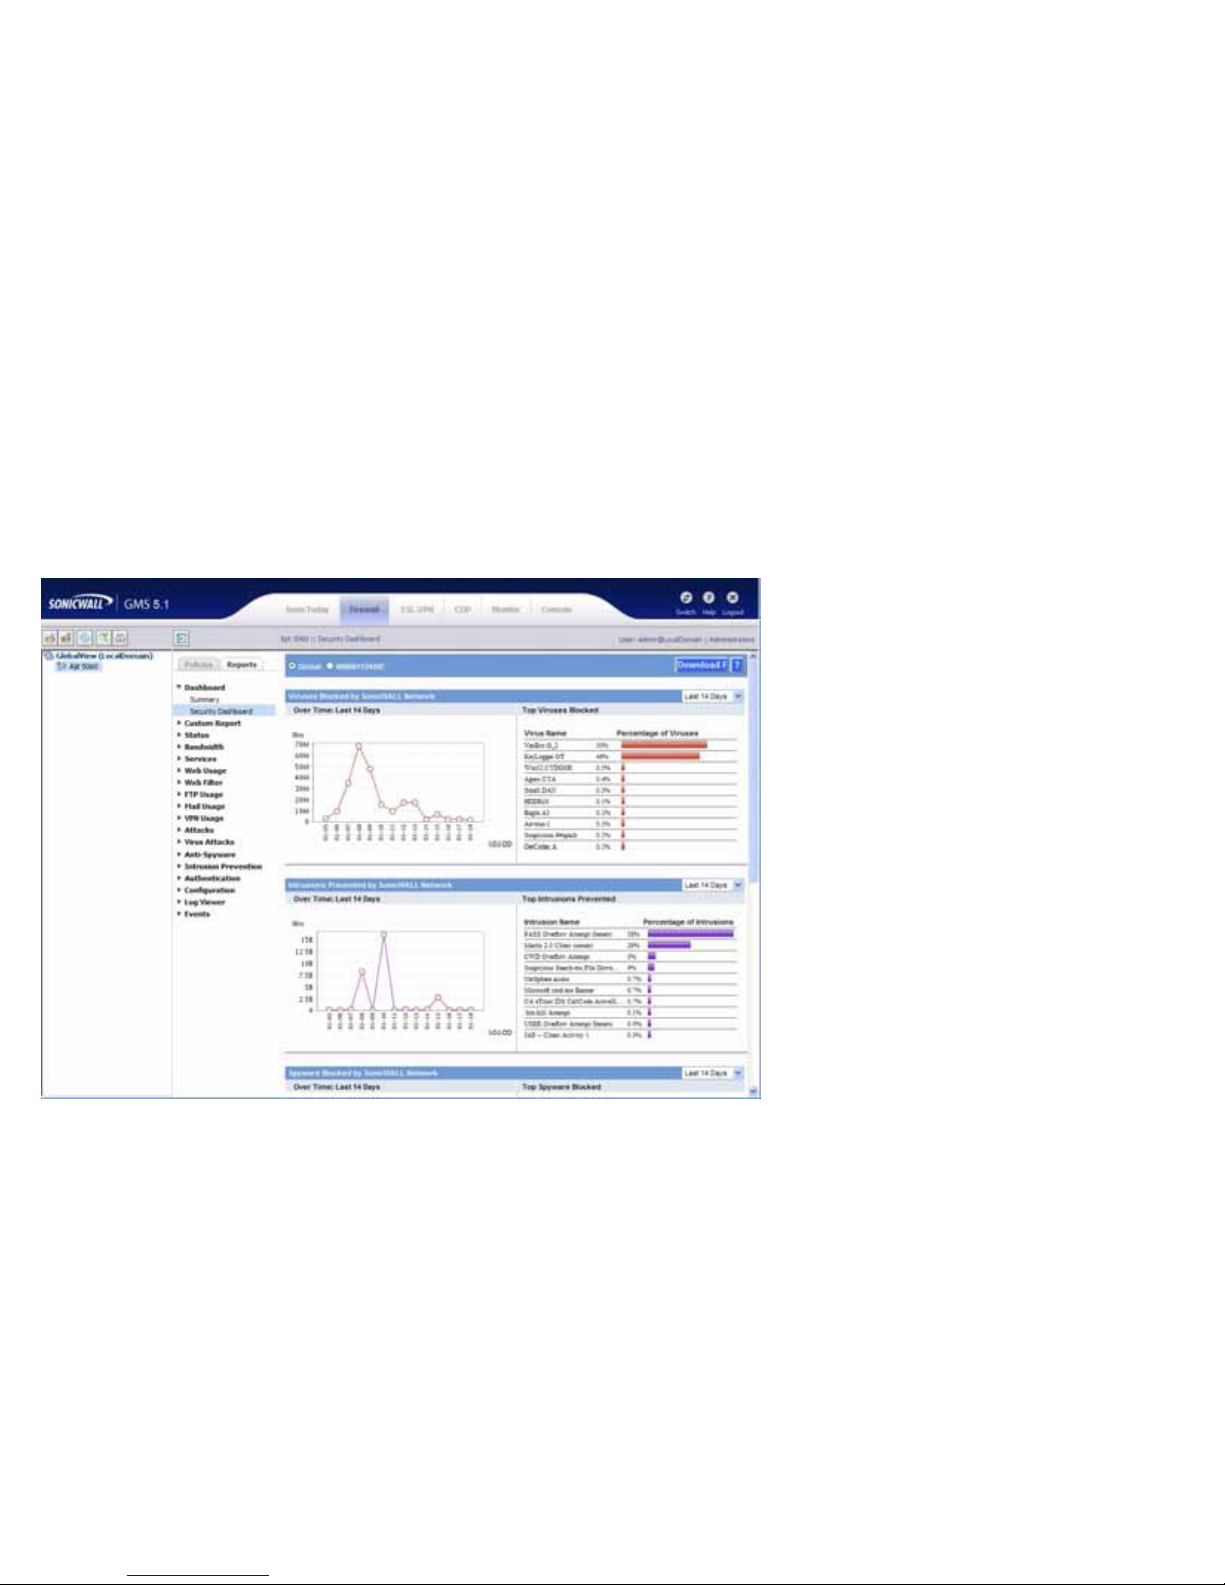
Page 58 Overview of SonicWALL GMS Reporting
Overview of SonicWALL GMS Reporting
SonicWALL GMS reporting complements SonicWALL GMS monitoring and other SonicWALL Internet security offerings by providing
detailed and comprehensive reports of network activity. SonicWALL GMS reporting allows you to review network access, enhance
security, and anticipate future bandwidth needs. SonicWALL GMS reporting is available for appliances on the Firewall and SSL-VPN
tabs, using the Reports tab in the center pane of the SonicWALL GMS management interface.
Page 62

SonicWALL UMA EM5000 Getting Started Guide Page 59
The SonicWALL GMS reporting feature receives its information
from the stream of syslog data sent by each SonicWALL
appliance, processes the data, and stores it. SonicWALL GMS
Reporting can be enabled or disabled. The SonicWALL GMS
reporting module provides the following information:
• Custom reports on Internet activity
• Bandwidth use by IP address and service
• Inappropriate Web usage
• Detailed reports of attacks
• System and network errors
• VPN events and problems
• Web usage
• Firewall event logs
The SonicWALL GMS reporting feature provides the following
configurable reports:
Dashboard A high-level activity summary of
bandwidth, uptime, intrusions,
attacks, and alerts for managed
SonicWALL UTM appliances.
Custom Report Granular details from raw syslog
data using your customized filtering.
Can provide date and time down to
the second of all Internet activity
passing through a monitored
SonicWALL security appliance.
Status The number of hours that managed
SonicWALL appliances were online
and functional during the time
period.
Bandwidth The amount of data transferred
through selected managed
appliances, including the cost of
consumed network bandwidth per
100 MB transferred.
Services* The amount of data transmitted
through the selected appliance by
each service protocol.
*Services reporting is only available
at the unit level.
Web Usage Web bandwidth usage per
appliance over time, top Web
bandwidth users, most visited sites,
and amount of time consumed
browsing the Internet through the
selected appliances.
Web Filter The number of attempts that users
made to access blocked Web sites
through the selected appliances,
the users that most frequently
attempt to access blocked sites,
and the most popular blocked sites.
Page 63

Page 60 Overview of SonicWALL GMS Reporting
FTP Usage The amount of FTP usage that
occurs through the selected
appliances.
Mail Usage The amount of mail usage that
occurs through the selected
SonicWALL appliances.
VPN Usage The amount of VPN usage that
occurs through the selected
SonicWALL appliances.
Attacks The number of attacks that were
directed at or through the selected
appliances, including denial of
service attacks, intrusions, probes,
and other malicious activity directed
at the appliance or computers on
the LAN or DMZ.
Virus Attacks The number of virus attacks that
were directed at or through the
selected appliances. The selected
appliances must be licensed for
SonicWALL Gateway Anti-Virus.
Anti-Spyware The number of spyware attacks that
were directed at or through the
selected appliances. The selected
appliances must be licensed for
SonicWALL Anti-Spyware.
Intrusion
Prevention
The number of attempted intrusions
that were directed at or through the
selected appliances. The selected
appliances must be licensed for
SonicWALL Intrusion Prevention
Service.
Authentication* The successful and failed login
attempts for users and
administrators.
*Authentication reports are
available at the unit level.
Page 64

SonicWALL UMA EM5000 Getting Started Guide Page 61
Using the SonicWALL GMS Summarize
Now Feature
The Summarize Now feature allows the administrator to force
the summarizer to process all data received since the last
summarization. This can be done in order to display report data
that has not yet been processed.
The SonicWALL GMS Summarize Now feature is located in the
Console tab under Reports > Summarizer. The SonicWALL
GMS Summarizer creates summary reports by default every 8
hours. Summary reports can be configured by the administrator
to occur every 1 to every 24 hours. For more information about
the Summarizer feature of SonicWALL GMS, refer to the
SonicWALL GMS Administrator’s Guide.
To use the Summa r ize Now feature, perform the following
steps:
1. Click the Console tab at the top of the screen.
2. In the left pane, navigate to Reports > Summarizer and
click Summarize Now.
3. You will see a pop-up window verifying that you want to
summarize the data now. Summarizing data using
Summarize Now is a one-time action and will not affect the
scheduled summary. Click OK to continue.
Page 65

Page 62 Using the SonicWALL GMS Summarize Now Feature
4. Navigate to Log > View Logs. Search for the message
Report Data Summarized to verify that the Summarize
Now action has completed.
5. When Summarize Now has completed, navigate to the
Firewall or SSL-VPN tab at the top of the screen. In the
left-most pane, click GlobalView or click a managed
appliance.
6. Click the Reports tab in the center pane.
Alert: You may see incomplete data if you view the Summary
section of a selected report before the Summarize
Now process is complete. Wait for the Report Data
Summarized message to be displayed in Log > View
Logs.
7. In the center pane, click a report to expand it, then
click the Summary option underneath it. For
example, click Bandwidth, then click Summary to
review the summarized bandwidth usage data.
Navigate to the Summary section of other reports in
the center pane to see other summarized data.
Page 66

SonicWALL UMA EM5000 Getting Started Guide Page 63
Monitoring
In this Section:
This section contains information about SonicWALL Universal Management monitoring.
• Overview of SonicWALL GMS Monitoring - page 64
• Monitoring a SonicWALL NSA 2400 Using SNMP - page 65
• Monitoring an FTP Server Using Ping - page 71
8
Page 67

Page 64 Overview of SonicWALL GMS Monitoring
Overview of SonicWALL GMS Monitoring
The SonicWALL GMS monito ring fe ature is used for re al-time monitoring of SonicWALL appliances, VPN tunnels, network
devices, and syslog information. Monitoring critical network event s and activity, such as secu rity threats, inappr opriate Web
use, and bandwidth levels, is an essential comp one nt of ne twork security. SonicWALL GMS can monitor WAN traffic using
physical and logical monitoring, enabling it to detect physical issues, for example, if a link is unplugged or disconnected,
and higher level traffic, for example, upstream connectivity interruptions. The SonicWALL GMS monitoring feature is
accessible using the Monitor tab at the top of the management interface.
Page 68

SonicWALL UMA EM5000 Getting Started Guide Page 65
The SonicWALL monitoring feature provides the following
configurable monitors:
Monitoring a SonicWALL NSA 2400 Using
SNMP
SonicWALL GMS can monitor Simple Network Management
Protocol (SNMP)-capable SonicWALL and non-SonicWALL
devices.
To monitor a SonicWALL NSA 2400 using SNMP, perform the
following steps:
1. Add the appliance to SonicWALL GMS management by
following the procedure in Configuring a SonicWALL NSA
2400 for Management - page 50.
2. Perform the steps described in Enabling SNMP on the
Target Appliance - page 66.
3. Perform the steps described in Enabling SNMP Monitoring
in SonicWALL GMS - page 67.
Note: SNMP must be able to reach the target appliance. For
detailed information about monitoring appliances with
SNMP, refer to the SonicWALL GMS Administrator’s
Guide.
GMS
Navigation
Provides a detailed, graphical map of
the SonicWALL GMS security
management deployment, including
the GMS database, GMS console,
GMS agents, remotely managed
SonicWALL appliances and the
primary and back-up management
tunnels.
VPN Monitor Provides a graphical view of the
interconnected VPN tunnels within an
organization, and displays VPN tunnel
up and down status.
Net Monitor Provides TCP/IP device status and
provides SNMP-based detailed
statistics.
Real-Time
Syslog
Provides real-time syslog data
monitoring.
Page 69

Page 66 Monitoring a SonicWALL NSA 2400 Using SNMP
Enabling SNMP on the Target Appliance
1. Log in to the SonicWALL NSA 2400.
2. Navigate to System > Administration and select the
Enable SNMP checkbox.
SNMP is now configured.
Note: If a SonicWALL appliance is already under SonicWALL
GMS management, you can select the Enable SNMP
checkbox and not provide the host information in the
SNMP Settings page displayed by clicking Configure.
3. To configure custom SNMP settings, click the Configure
button next to Enable SNMP. Custom settings are optional.
To use the default sett i ng s, do not click Configure.
4. Type the host name of the SonicWALL security appliance
in the System Name field
5. Type the network administrator’s name in the System
Contact field.
6. Type an email address, telephone number, or pager
number in the System Location field.
7. Type a name for a group or community of administrators
who can view SNMP data in the Get Community Name
field.
8. Click OK. It is not necessary to fill in the Host fields when
SonicWALL GMS management is enabled.
Note: For information about advanced SNMP configuration,
including SNMP trap settings, refer to the SonicWALL
GMS Administrator’s Guide.
Page 70

SonicWALL UMA EM5000 Getting Started Guide Page 67
Enabling SNMP Monitoring in SonicWALL GMS
Tip: You can also add appliances to Net Monitor when you
add the appliance by clicking the checkbox next to Add
this unit to Net Monitor. Alternatively, if an appliance
is already added to SonicWALL GMS, you can right
click the appliance and select Add to Net Monitor.
To add an appliance that will use SNMP monitoring in
SonicWALL GMS, perform the following steps:
1. Log in to the SonicWALL GMS management interface.
2. Click the Monitor tab at the top of the page and navigate to
Tools > Net Monitor.
3. Click the Add button and select Add GMS Device.
The Add GMS Device Wizard displays.
Page 71

Page 68 Monitoring a SonicWALL NSA 2400 Using SNMP
4. In the All Devices by Views column, select the Sonicwall
appliance and click the right arrow to add the device to the
Selected GMS Devices column.
5. Click Next. The Add GMS Device Wizard Monitor
Information page displays.
Page 72

SonicWALL UMA EM5000 Getting Started Guide Page 69
6. Select the Add a New Category radio button and type in a
category name, for example, Firewalls.
7. Select the priority of the SonicWALL appliance(s) from the
Category Priority list box, either High, Medium, or Low.
8. From the Monitoring Type drop-down, select SNMP. Enter
a Monitor Port. The default monitor port is 161.
9. Click the Advanced button to configure the following
SNMP fields:
Community Enter the community name.
Retry Enter the time to retry, in seconds.
Timeout Enter the timeout length, in
seconds.
Page 73

Page 70 Monitoring a SonicWALL NSA 2400 Using SNMP
10. Press the OK button to save the SNMP advanced settings.
11. Specify how often, in seconds, the appliance will be tested
in the Polling interval (in secs.) field. The default polling
interval is 60 seconds.
12. Specify the ideal response time of the appliance, in
milliseconds, in the Ideal Response Time (in msecs.)
field. The default ideal response time is 1,000 msecs.
Note: Appliances that take between 1 and 1.5 times the ideal
response time will be labeled slow, and appliances that
take between 1.5 and 2 times the ideal response time
will be labeled very slow.
13. Specify the number of missed probes allowed in the
Missed Probes Threshold field. The default number of
missed probes allowed is 1.
14. Select the agent that will perform the monitoring from the
Assign to Monitor drop-down menu.
15. Do not check the Disable checkbox unless you want to
disable monitoring for this appliance.
16. To optionally change the icon image that will represent the
appliance, click the button next to Click to specify an
image icon and choose an image. Click OK.
17. Click Finish.
18. When your appliance has been added, a confirmation popup will display. Click OK.
19. Click the button of the category you created, for example,
Firewalls. Your appliance will appear under the priority
level you assigned to the appliance.
SNMP Version Select the version of SNMP to be
used, either v1, v2c, or v3.
MIB(s) Select the MIB(s) you wish to use
for polling information.
User Name Enter a user name
(for SNMP v3 only).
Authentication
Protocol
Select an authentication protocol
form the pull-down menu, either
SHA or MD5 (SNMP v3 only).
Authentication
Password
Enter an authentication password
(SNMP v3 only).
Privacy
Password
Enter a privacy password
(SNMP v3 only).
Context ID En t er a co nt ext ID
(SNMP v3 only).
Context Name Enter a context name
(SNMP v3 only).
Page 74
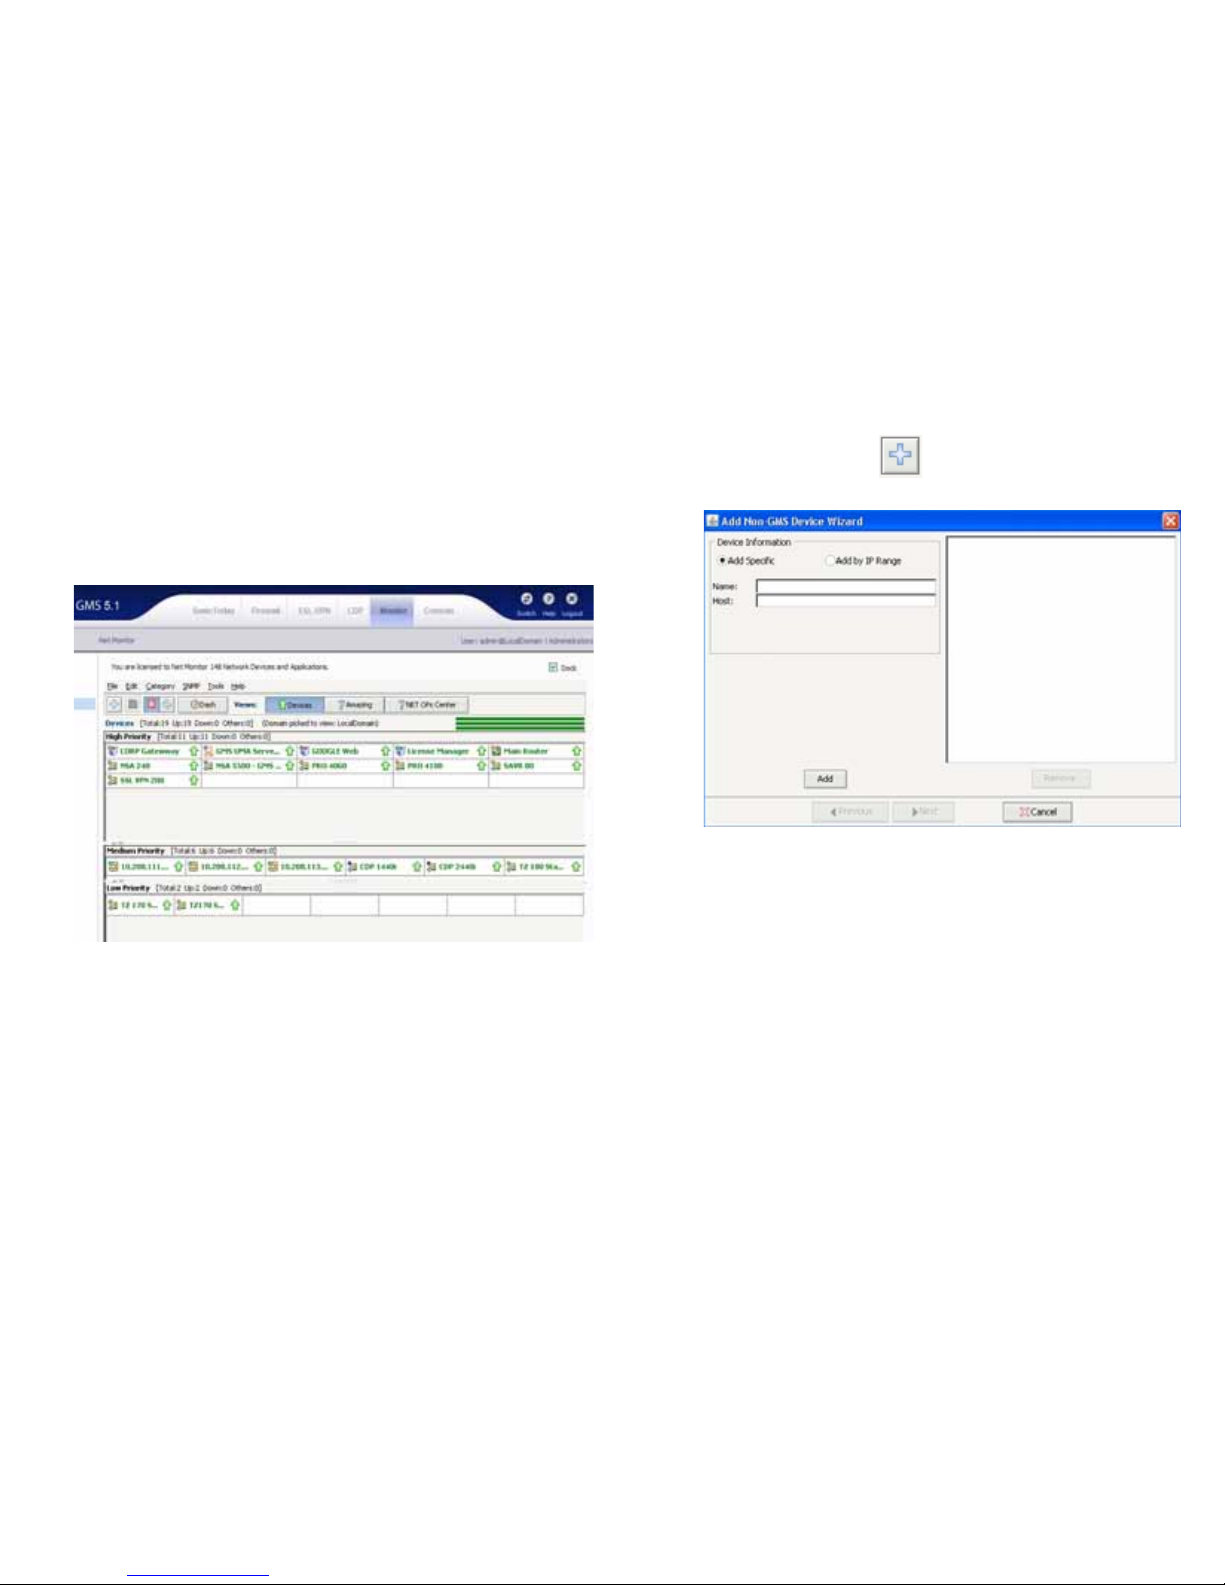
SonicWALL UMA EM5000 Getting Started Guide Page 71
Monitoring an FTP Server Using Ping
To monitor an FTP server using Ping, add the appliance to
SonicWALL GMS, then perform the following tasks:
1. Click the Monitor tab at the top of the screen.
2. In the center pane, navigate to Tools > Net Monitor.
3. Click the Add button and select Add Non-GMS
Device. The Add Non-GMS Device Wizard displays.
4. Select the radio button next to Add Specific to add by the
FTP server using its name and host.
5. Type the FTP server name in the Name field and the FTP
server IP address or host name in the Host field. Click
Add.
6. Highlight the device in the right-hand window.
Page 75

Page 72 Monitoring an FTP Server Using Ping
7. Click Next. The Add Non-GMS Device Wizard Monitor
Information page displays.
8. Select the radio button next to Add a New Category and
type in a category name, for example, FTP.
9. Select the priority of the FTP server from the Category
Priority list box, either High, Medium, or Low.
10. From the Monitoring Type drop-down, select Ping.
11. Specify how often, in seconds, the FTP server will be
tested in the Polling interval (in secs.) field. The default
polling interval is 60 seconds.
12. Specify the ideal response time of the FTP server, in
milliseconds, in the Ideal Response Time (in msecs.)
field. The default ideal response time is 500 msecs.
Note: Appliances that take between 1 and 1.5 times the ideal
response time will be labeled slow, and appliances that
take between 1.5 and 2 times the ideal response time
will be labeled very slow.
13. Specify the number of missed probes allowed in the
Missed Probes Threshold field. The default number of
missed probes allowed is 1.
14. Select the agent that will perform the monitoring from the
Assign to Monitor drop-down menu.
15. Do not check the Disable checkbox unless you want to
disable monitoring for this appliance.
16. To optionally change the icon image that will represent the
FTP server, click the button next to Click to specify an
image icon and choose an image. Click OK.
17. Click Finish.
18. When your appliance has been added, a confirmation popup will display. Click OK.
19. Click the button of the category you created, for example,
FTP. Your appliance will appear under the priority level you
assigned to the appliance.
Page 76

SonicWALL UMA EM5000 Getting Started Guide Page 73
Front Panel LCD Controls
In this Section:
This section provides information about using the LCD controls on the front panel of the SonicWALL UMA EM5000.
• Front Panel Control Features - page 74
• Using the Main Menu - page 74
• About the Status Menu - page75
• Using the Configure Menu - page 75
• Using the Restart Option - page 76
• Using the Shutdown Option - page 76
9
Page 77
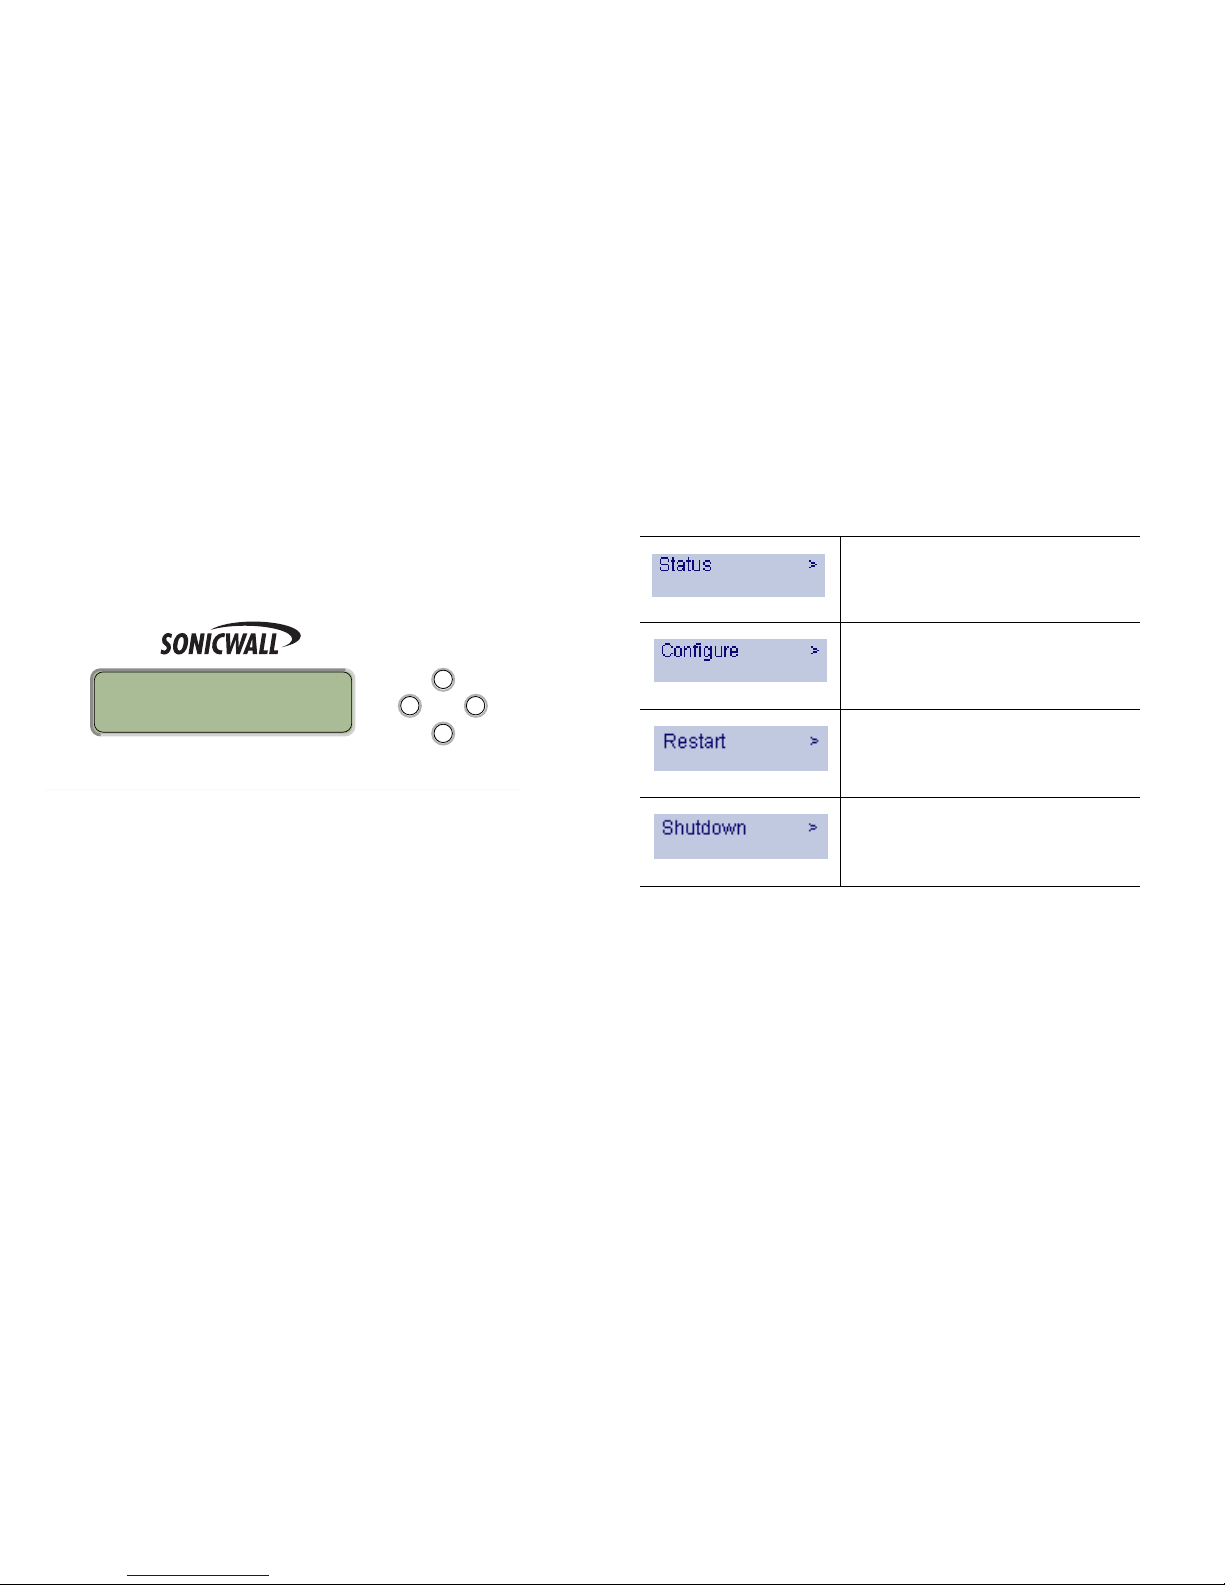
Page 74 Front Panel Control Features
Front Panel Control Features
The SonicWALL UMA EM5000 appliance is equipped with a
front panel interface that allows an administrator to customize
certain aspects of the appliance or simply monitor its status
without having to log into it through a separate terminal.
By default, the LCD display cycles through the Status values in
screen-saver mode. The display returns to screen-saver mode
after 6 seconds of no activity on the 4-way D-pad or after
pressing the Left button from the Main Menu.
Using the Main Menu
Upon booting, the LCD display will initially show the Main Menu.
The menu is made up of four options:
The Status and Configure options are menus that contain
multiple selections. The Restart and Shutdown options provide
confirmation screens when selected.
Use the Up and Down buttons to navigate to the option or
menu that you wish to enter. Click the Right button to select the
option or enter the menu and view its selections.
Universal Management Appliance
Contains basic status values including
system resources, connections, and
port configuration values.
Allows configuration of basic LAN port
settings. Requires system pin for
access, default: 76642.
Allows the appliance to be restarted.
Allows the appliance to be shut down
and powered off.
Page 78
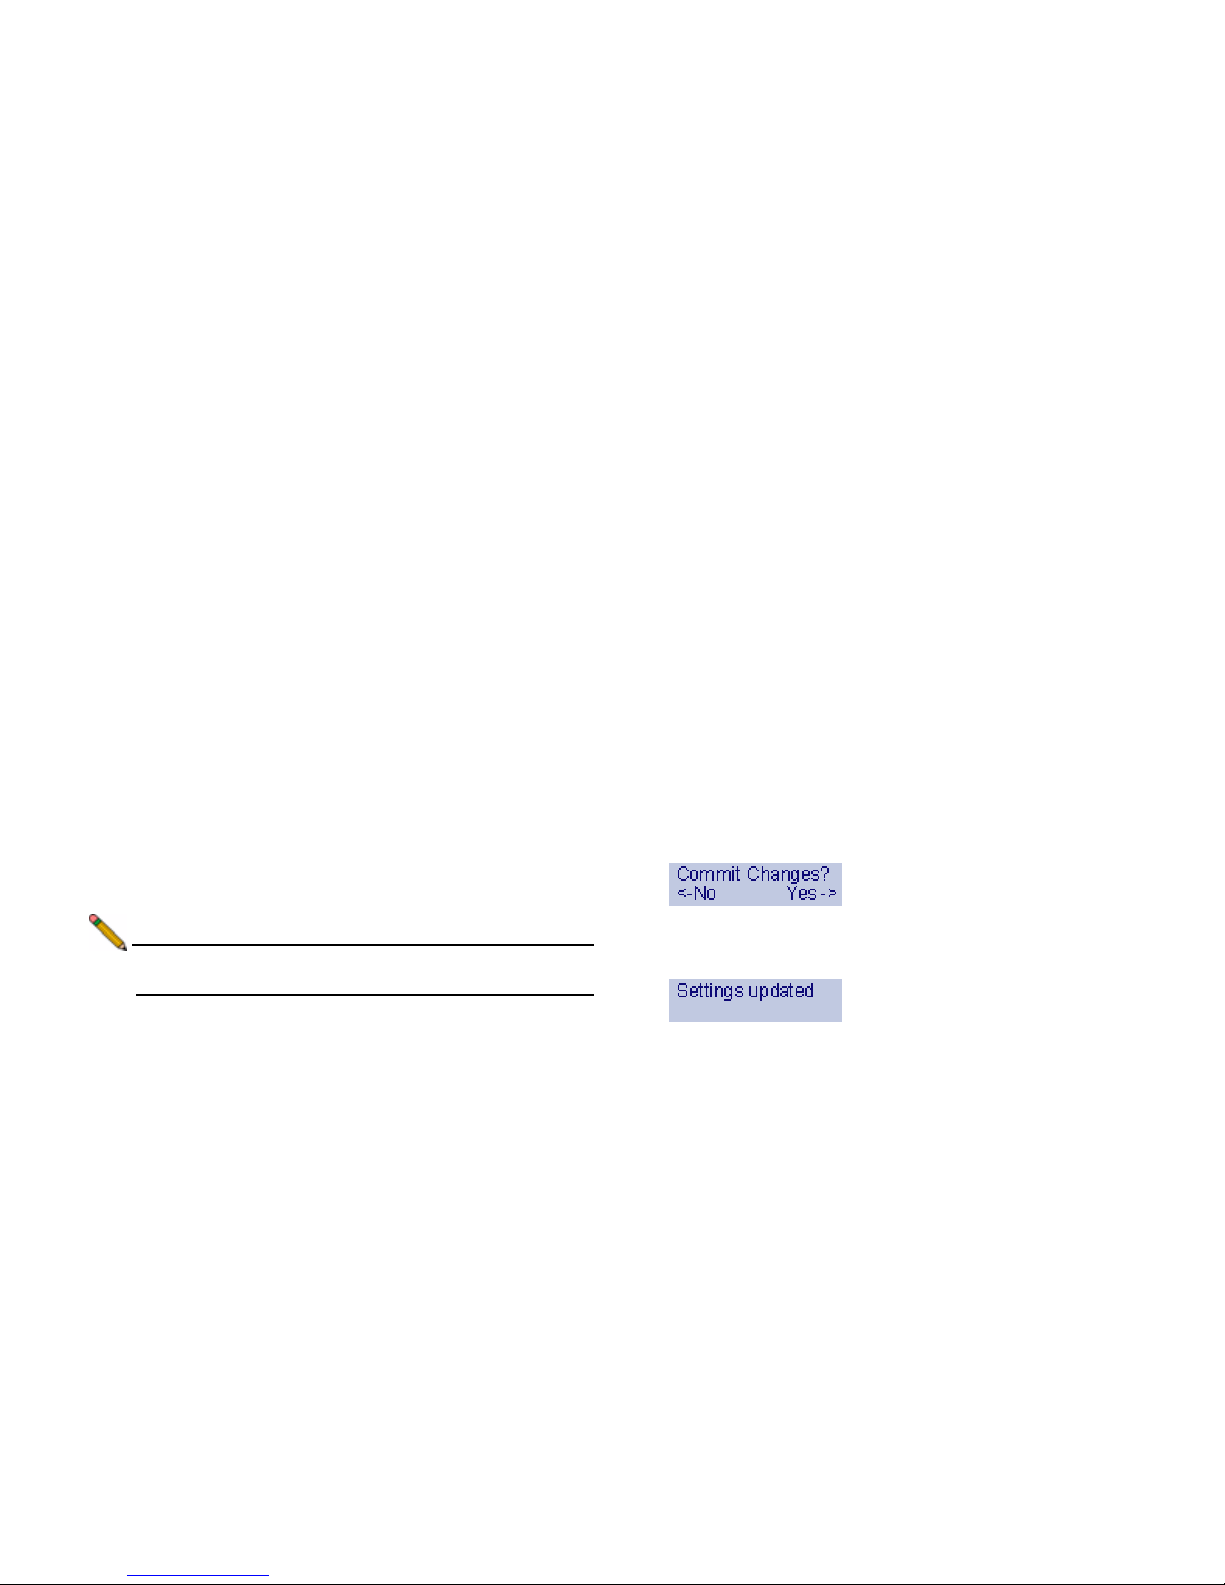
SonicWALL UMA EM5000 Getting Started Guide Page 75
About the Status Menu
The Status menu allows you to view specific aspects of the
appliance. The LCD cycles through the Status list by default
when no other menu is in use. You can also navigate the list
using the Up and Down buttons. Status values in the list include
the following:
• Appliance name
• Software version
•Date
•Time
•Uptime
• Management URL
• Interface eth0 IP (default LAN)
• Interface eth0 subnet mask
Using the Configure Menu
The Configure menu allows you to configure specific aspects of
the appliance. When the Configure menu is selected, the LCD
will display a PIN request.
Note: The Default PIN is 76642. This number spells SONIC
on a phone keypad.
All numbers are entered using the 4 buttons on the D-pad.
To enter the PIN, use th e buttons as follows:
1. Select the desired number using the Up and Down
buttons. Digits increase incrementally from 0 to 9.
2. To move to the next digit field, press the Right button.
3. To move back to a previous digit field, press the Left
button.
4. When you are finished entering the PIN, press the Right
button to confirm your PIN and enter the Configure Menu.
The appliance allows the user to navigate in and out of the
Configure menu without having to re-enter the PIN. However,
once the appliance enters screen-saver mode, whether from
the 6 second time out or from pressing the Left button while in
the Main Menu, the PIN number must be re-entered to access
the Configure menu.
After entering a new value for a setting in the Configure menu,
you are asked if you want to commit changes. Using the 4-way
D-pad, press the Right button for yes or the Left button for no.
If you choose yes, the screen notifies you that the settings are
updated.
Page 79
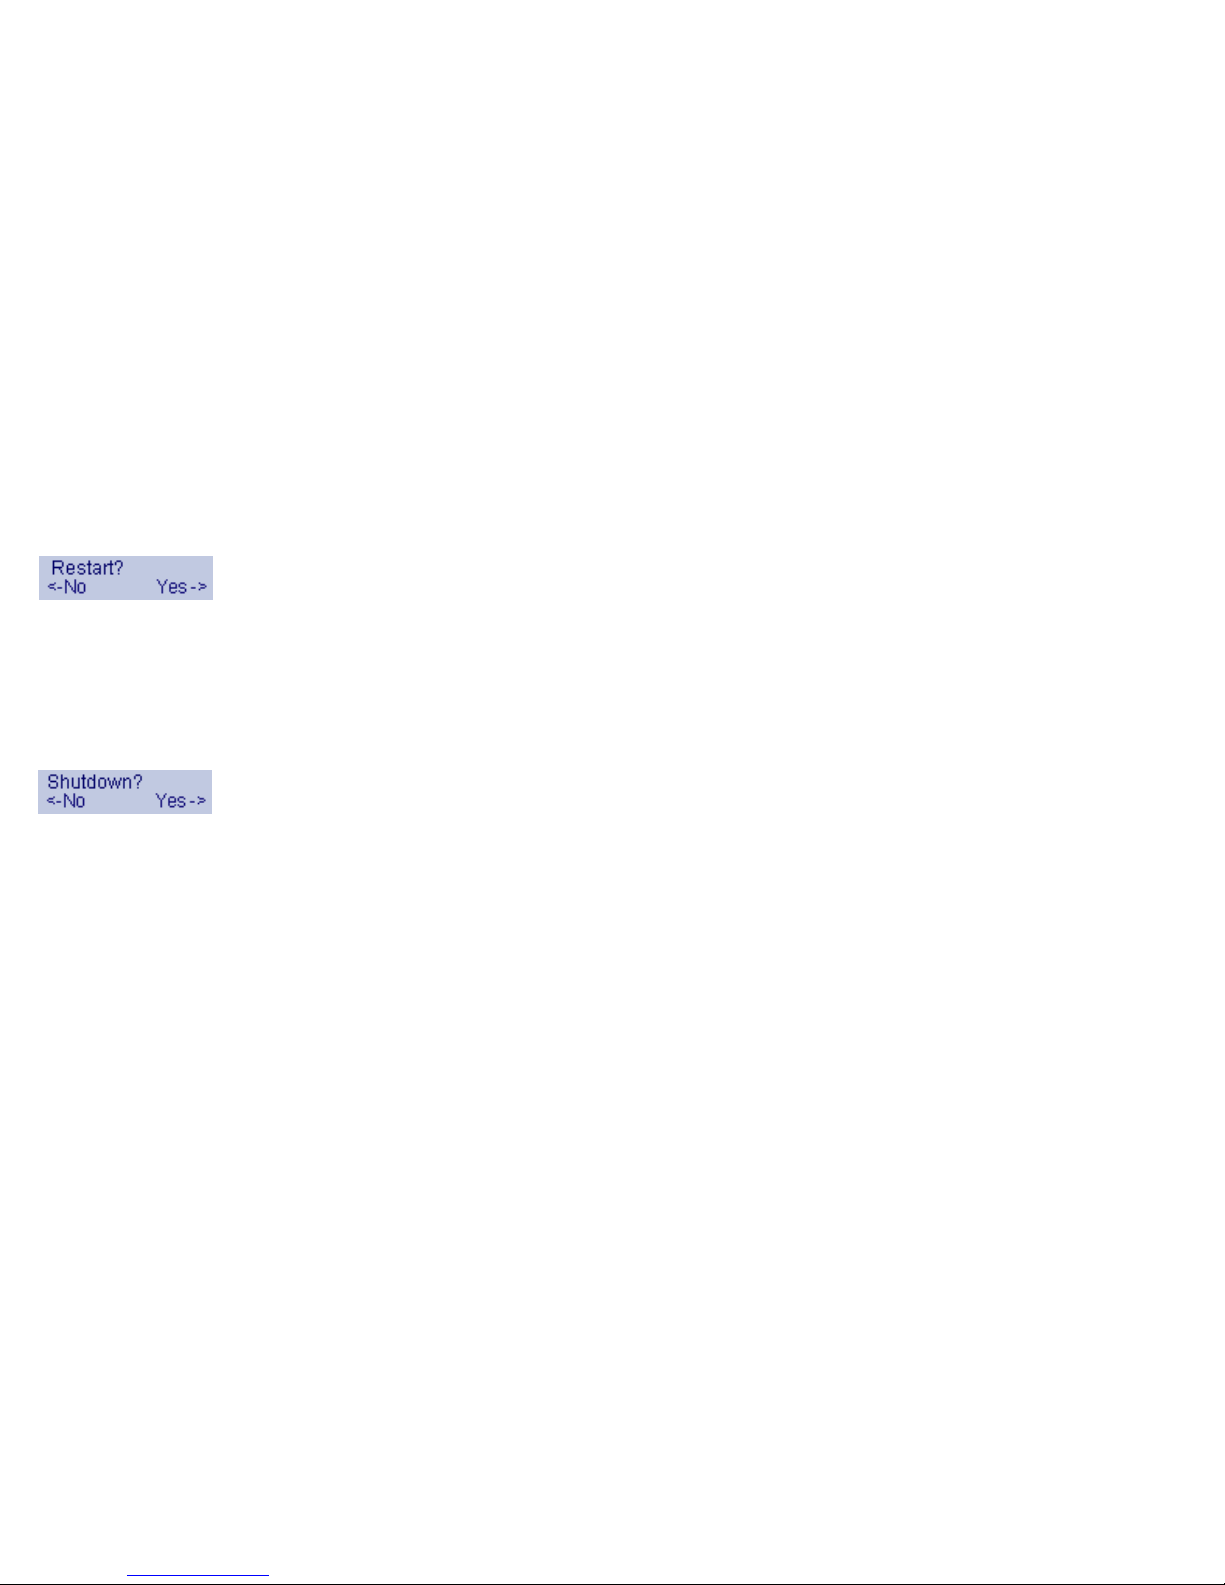
Page 76 Using the Restart Option
Using the Restart Option
When you select Restart from the Main Menu, you are asked to
confirm the appliance restart. Press the Right button for yes or
the Left button for no.
Using the Shutdown Option
When you select Shutdown from the Main Me nu , yo u are
asked to confirm the appliance shutdown. Press the Right
button for yes or the Left button for no.
Page 80

SonicWALL UMA EM5000 Getting Started Guide Page 77
1
0
Support and Training Options
In this Section:
This section provides SonicWALL support and training information.
• Customer Support - page 78
• Knowledge Portal - page 78
• SonicWALL Live Product Demos - page 79
• User Forums - page 80
• Training - page 81
• Related Technical Documentation - page 82
• SonicWALL Secure Wireless Network Integrated Solutions Guide - page 83
10
Page 81

Page 78 Customer Support
Customer Support
SonicWALL offers Web-based and telephone support to
customers who have a valid Warranty or who purchased a
Support Contract. Please review our Warranty Support Policy
for product coverage. SonicWALL also offers a full range of
consulting services to meet your needs, from our innovative
implementation services to traditional statement of work-based
services.
For further information, visit:
http://www.sonicwall.com/us/support/contact.html
Knowledge Portal
The Knowledge Portal allows users to search for SonicWALL
documents based on the following types of search tools:
•Browse
• Search for keywords
• Full-text search
For further information, navigate to the Support > Knowledge
Portal page at:
http://www.mysonicwall.com/
Page 82

SonicWALL UMA EM5000 Getting Started Guide Page 79
SonicWALL Live Product Demos
The SonicWALL Live Demo Site provides free test drives of
SonicWALL security products and services through interactive
live product installations:
• SonicWALL GMS and ViewPoint
• Unified Threat Management Platform
• Secure Cellular Wireless
• Continuous Data Protection
• SSL VPN Secure Remote Access
• Content Filtering
• Secure Wireless Solutions
• Email Security
For further information, visit:
http://livedemo.sonicwall.com/
Page 83

Page 80 User Forums
User Forums
The SonicWALL User Forums is a resource that provides users
the ability to communicate and discuss a variety of security and
appliance subject matters. In this forum, the following
categories are available for users:
• Content Security Manager topics
• Continuous Data Protection topics
• Email Security topics
• Firewall topics
• Network Anti-Virus topics
• Security Services and Content Filtering topics
• SonicWALL GMS and Viewpoint topics
• SonicPoint and Wireless topics
• SSL VPN topics
• SonicWALL TZ 210 / Wireless WAN - 3G Capability topics
• VPN Client topics
• VPN site-to-site and interoperability topics
For further information, visit:
https://forum.sonicwall.com/
Page 84

SonicWALL UMA EM5000 Getting Started Guide Page 81
Training
SonicWALL offers an extensive sales and technical training
curriculum for Network Administrators, Security Experts and
SonicWALL Medallion Partners who need to enhance their
knowledge and maximize their investment in SonicWALL
Products and Security Applications. SonicWALL Training
provides the following resources for its customers:
• E-Training
• Instructor-Led Training
• Custom Training
• Technical Certification
• Authorized Training Partners
For further information, visit:
http://www.sonicwall.com/us/training.html
Page 85

Page 82 Related Technical Documentation
Related Technical Documentation
SonicWALL user guide reference documentation is available at
the SonicWALL Technical Documentation Online Library:
http://www.sonicwall.com/us/Support.html
The SonicWALL Universal Management Appliance
documentation set includes the following reference guides:
• SonicWALL UMA EM5000 Getting Started Guide
• SonicWALL GMS Release Notes
• SonicWALL GMS Administrator’s Guide
• Stand-alone SonicWALL GMS feature module guides:
• SonicToday
• Custom Reports
• Enhanced User Management
• Third Party Authentication
• Installing MySQL
• Granular Event Management
• SonicOS SSL-VPN Reporting & Enhancements
• SonicWALL CDP Appliance Management
• SonicWALL SMB SSL-VPN Appliance Management
• SonicWALL Aventail EX-Series Appliance
Management
For more advanced deployment examples or interoperability
solutions, refer to SonicWALL deployment technotes.
Page 86

SonicWALL UMA EM5000 Getting Started Guide Page 83
SonicWALL Secure Wireless Network
Integrated Solutions Guide
The Official Guide to SonicWALL’s market-leading wireless
networking and security devices.
This 512 page book is available in hardcopy. Order the book
directly from Elsevier Publishing at:
http://www.sonicwall.com/us/products/resources/11427.html
Page 87

Page 84 SonicWALL Secure Wireless Network Integrated Solutions Guide
Page 88

SonicWALL UMA EM5000 Getting Started Guide Page 85
11
Product Safety and Regulatory Information
In this Section:
This section provides safety, regulatory, trademark, and copyright information.
• Mounting the SonicWALL UMA EM5000 - page 86
• Montage-Anweisungen auf Deutsch - page 86
• Replacing a Single Hard Drive - page 87
• Safety and Regulatory Information - page 89
• FCC Part 15 Class A Notice - page 90
• Lithium Battery Warning - page92
• Gesetzlich und Sicherheits Anweisungen auf Deutsch - page 92
• Copyright Notice - page 93
• Trademarks - page 93
11
Page 89

Page 86 Mounting the SonicWALL UMA EM5000
Mounting the SonicWALL UMA EM5000
When mounting your SonicWALL UMA EM5000:
• Use the mounting hardware recommended by the rack manufacturer and
ensure that the rack is adequate for the application.
• Four mounting screws, compatible with the rack design, must be used and
hand tightened to ensure secure installation. Choose a mounting location
where all four mounting holes line up with those of the mounting bars of the
19-inch rack mount cabinet.
• Mount in a location away from direct sunlight and sources of heat. A
maximum ambient temperature of 104º F (40º C) is recommended.
• Route cables away from power lines, fluorescent lighting fixtures, and
sources of noise such as radios, transmitters, and broadband amplifiers.
• The included power cord is intended for use in North America only. For
European Union (EU) customers, a power cord is not included.
• Ensure that no water or excessive moisture can enter the unit.
• Allow unrestricted airflow around the unit and through the vents on the side
of the unit. A minimum of 1 inch (25.44mm) clearance is recommended.
• If installed in a closed or multi-unit rack assembly, the operating ambient
temperature of the rack environment may be greater than room ambient.
Therefore, consideration should be given to installing the equipment in an
environment compatible with the maximum recommended ambient
temperature shown above.
• Mount the SonicWALL appliances evenly in the rack in order to prevent a
hazardous condition caused by uneven mechanical loading.
• Consideration must be given to the connection of the equi pment to the supply
circuit and the effect that overloading of circuits might have on overcorrect
protection and supply wiring. Appropriate consideration of equipment
nameplate ratings must be used when addressing this concern.
• Reliable grounding of rack-mounted equipment must be maintained.
Particular attention must be given to power supply connections other than
direct connections to the branch circuits, such as power strips.
• The power cord must be removed to disconnect power.
Montage-Anweisungen auf Deutsch
Weitere Hinweise zur Montage der Modell:
• Vergewissern Sie sich, dass das Rack für dieses Gerät geeignet ist und
verwenden Sie das vom Rack-Hersteller empfohlene Montagezubehör.
• Verwenden Sie für eine sichere Montage vier passende
Befestigungsschrauben, und ziehen Sie diese mit der Hand an.
• Wählen Sie für die Montage einen Ort, der keinem direkten Sonnenlicht
ausgesetzt ist und sich nicht in der Nähe von Wärmequellen befindet. Die
Umgebungstemperatur darf nicht mehr als 40 °C betragen.
• Achten Sie darauf, das sich die Netzwerkkabel nicht in der unmittelbaren
Nähe von Stromleitungen, Leuchtstoffröhren und Störquellen wie
Funksendern oder Breitbandverstärkern befinden.
• Das beigefügte Netzkabel ist nur für den Gebrauch in Nordamerikas
Vorgesehen. Für Kunden in der Europaïschen Union (EU) ist ein Netzkabel
nicht im Lieferumfang enthalten.
• Stellen Sie sicher, dass das Gerät vor Wasser und hoher Luftfeuchtigkeit
geschützt ist.
• Stellen Sie sicher, dass die Luft um das Gerät herum zirkulieren kann und die
Lüftungsschlitze an der Seite des Gehäuses frei sind. Hier ist ein
Belüftungsabstand von mindestens 26 mm einzuhalten.
• Wenn das Gerät in einem geschlossenen 19"-Gehäuse oder mit mehreren
anderen Geräten eingesetzt ist, wird die Temperatur in der Gehäuse höher
sein als die Umgebungstemperatur. Achten Sie daraf, daß die
Umgebungstemperatur nicht mehr als 40° C beträgt.
• Bringen Sie die SonicWALL waagerecht im Rack an, um mögliche Gefahren
durch ungleiche mechanische Belastung zu vermeiden.
• Prüfen Sie den Anschluss des Geräts an die Stromversorgung, damit der
Überstromschutz sowie die elektrische Leitung nicht von einer eventuellen
Überlastung der Stromversorgung beeinflusst werden. Prüfen Sie dabei
sorgfältig die Angaben auf dem Aufkleber des Geräts.
• Vergewissern Sie sich, dass das Gerät sicher im Rack befestigt ist.
Insbesondere muss auf nicht direkte Anschlüsse an Stromquellen geachtet
werden wie z. B. bei Verwendung von Mehrfachsteckdosen.
• Das Netzanschlusskabel muss entfernt werden, um Energie zu trennen.
Page 90
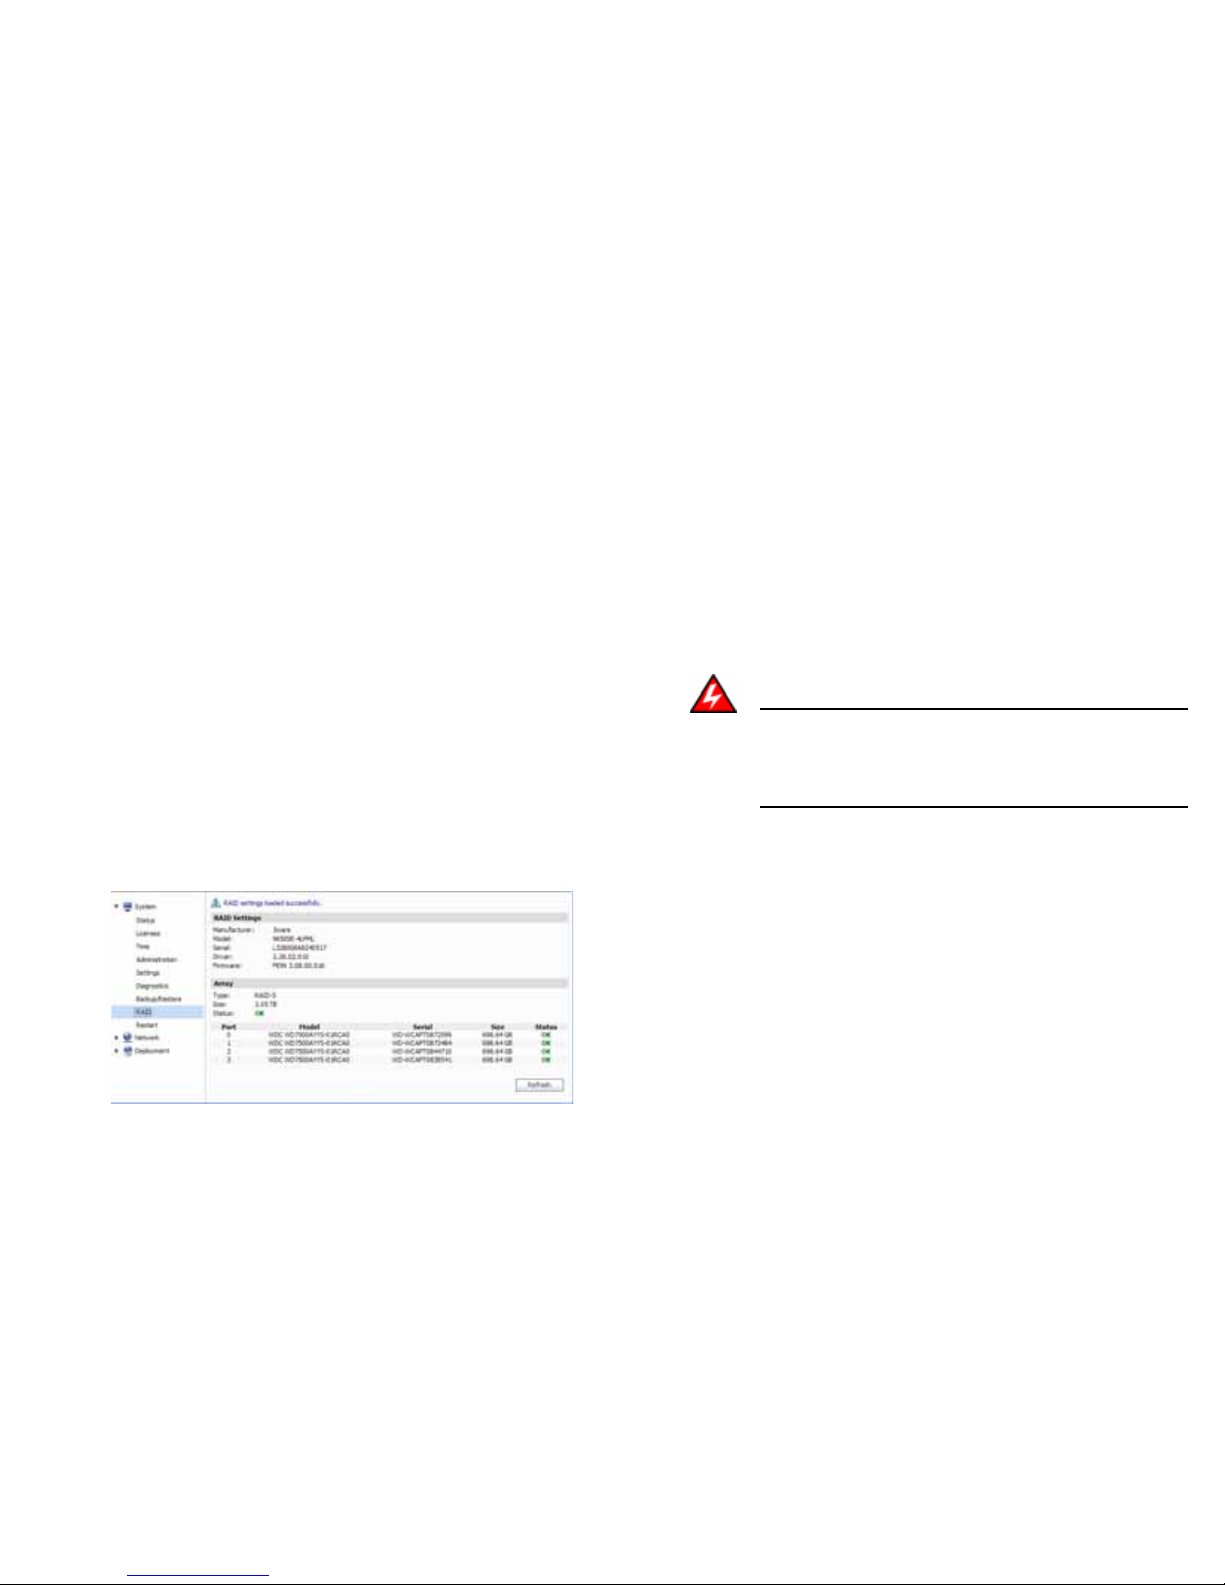
SonicWALL UMA EM5000 Getting Started Guide Page 87
Replacing a Single Hard Drive
You can order a replacement hard drive from SonicWALL for
your SonicWALL UMA EM5000. The 750GB replacement hard
drive can be inserted into any drive slot on your SonicWALL
UMA EM5000. You can insert the drive while the appliance is
powered on.
The front bezel on the SonicWALL UMA EM5000 covers the
drive slots. The bezel can be unlocked with the front bezel
security key supplied with the appliance.
Removing the Defective Hard Drive
To remove the defective drive from the SonicWALL UMA
EM5000, perform the following steps:
1. On your SonicWALL UMA EM5000, use the front bezel key
to unlock the front bezel, then remove the front bezel to
expose the hard drive array.
2. In the appliance Web interface, navigate to the System >
RAID page.
The defective drive is indicated by a drive status box
displaying a status such as:
• UNKNOWN
• NOT SUPPORTED
• NOT PRESENT
You might see a different status than those listed,
depending on the condition of the drive as interpreted by
the RAID controller.
3. On the appliance, press the square button on the right side
of the defective drive to pop out the drive handle.
Warning: Be careful to remove only the defective drive from
the drive array while the appliance is powered on.
Removing more than one drive from an active
array will cause loss of data.
4. Grasp the drive handle and pull the drive straight out to
remove it from the slot.
5. Click Refresh on the System > RAID page and confirm that
the status of the correct (defective) drive is the only
change. The status should be NOT PRESENT.
If you removed the wrong drive, reinsert it and allow the
RAID controller to rebuild the array before proceeding.
See Inserting the Replacement Drive into the SonicWALL
UMA EM5000 - page 88.
Page 91

Page 88 Replacing a Single Hard Drive
Inserting the Replacement Drive into the SonicWALL
UMA EM5000
Warning: Do not insert anything other than the SonicWALL
approved hard drive into the SonicWALL UMA
EM5000.
To view the hard drive array and insert the replacement drive
into the SonicWALL UMA EM5000, perform the following steps:
1. Remove the hard drive and the drive number stickers from
the replacement drive shipping carton.
2. Depending on which drive you are replacing, apply the
appropriate sticker to the drive handle. While holding the
drive with the label side up, place the sticker near the edge
of the handle next to the square button.
3. In the appliance Web interface, navigate to the System >
RAID page.
4. Pop open the drive handle on the new hard drive by
pressing the square button.
5. Insert the drive into the empty slot, label side up with the
handle sticking out.
6. Press the drive firmly into place to seat the connectors, and
then close the handle.
7. Click Refresh on the System > RAID page. You will see
the drive slot status change to DEGRADED, and the Array
Status change to REBUILD-PAUSED.
The DEGRADED drive status indicates that the RAID
controller senses that data is missing from the drive. The
Array Status will change to REBUILDING within a few
minutes.
8. You may continue to use your SonicWALL UMA EM5000
while the RAID controller rebuilds the array with the new
drive. The rebuilding process requires at least three hours.
When finished rebuilding, the status for both the drive and
the array changes to OK on the System > RAID page.
9. Re-install the front bezel, being sure to properly line up the
LCD connectors. The best practice is to align and seat the
right side of the bezel (as you are facing the front of the
SonicWALL UMA EM5000), then view the connectors from
above as you carefully press the left side of the bezel into
place.
10. Lock the bezel with the front bezel security key.
Page 92
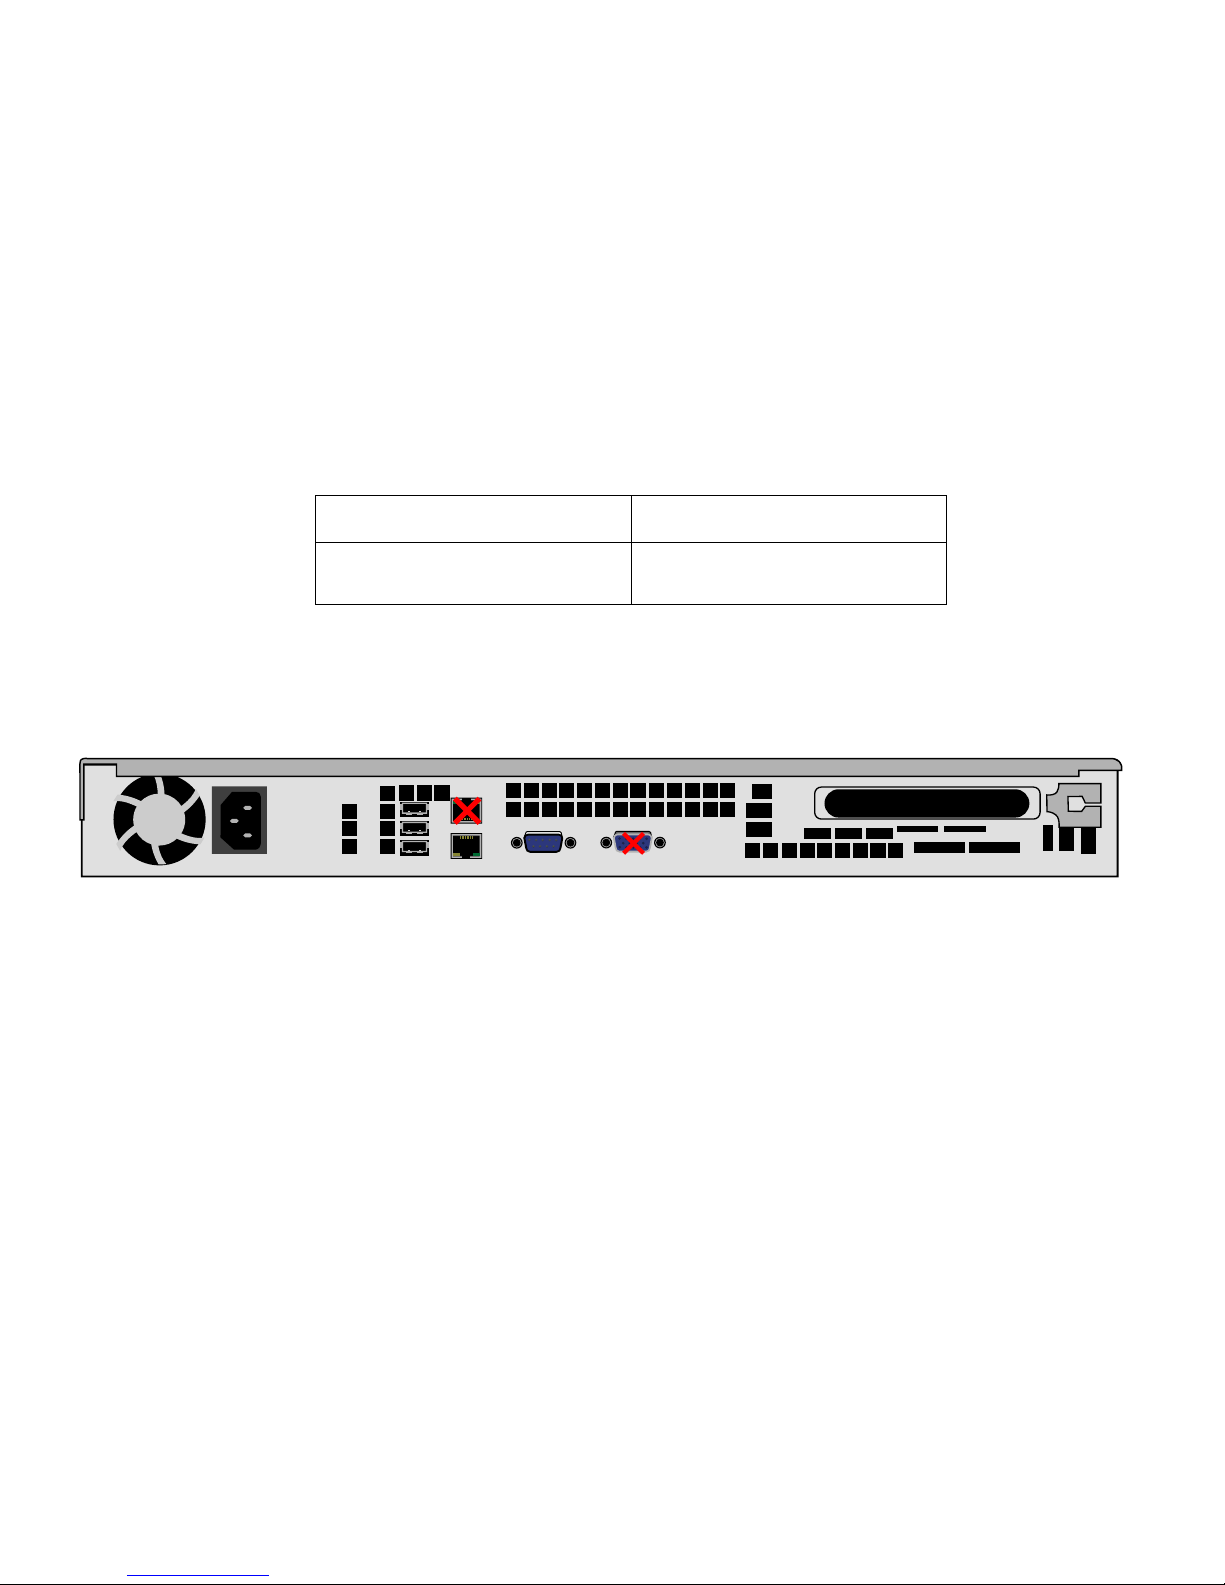
SonicWALL UMA EM5000 Getting Started Guide Page 89
Safety and Regulatory Information
Unauthorized Ports
Do not plug devices into any ports (other than those indicated) unless explicitly instructed to do so by a SonicWALL technical support
representative. Doing so may void your warranty.
Regulatory Model/Type Product Name
1RK19-066 UMA EM5000
Page 93
Page 90 FCC Part 15 Class A Notice
FCC Part 15 Class A Notice
This equipment was tested and found to comply with the limits
for a Class A digital device, pursuant to Part 15 of the FCC
Rules. These limits are designed to provide reasonable
protection against harmful interference when the equipment is
operated in a commercial environment. This equipment
generates, uses, and can radiate radio frequency energy. And if
not installed and used in accordance with the instruction
manual, the device may cause harmful interference to radio
communications. Operation of this equipment in a residential
area is likely to cause harmful interference in which case the
user is required to correct the interference at his own expense.
Notice About Modifying Equipment
Caution: Modifying this equipment or using this
equipment for purposes not shown in this manual without
the written consent of SonicWALL, Inc. could void the
user’s authority to operate this equipment.
BMSI Statement
VCCI Statement
Canadian Radio Frequency Emissions Statement
This Class A digital apparatus complies with Canadian
ICES-003.
Cet appareil numérique de la classe A est conforme à la norme
NMB-003 du Canada.
Page 94
SonicWALL UMA EM5000 Getting Started Guide Page 91
CISPR 22 (EN 55022) Class A
Complies with EN 55022 Class A and CISPR22 Class A. This is
a class A product. In a domestic environment, this product may
cause radio interference in which case the user may be
required to take adequate measures.
Regulatory Information for Korea
All products with country code “” (blank) and “A” are made in the
USA.All products with country code “B” are made in China.
All products with country code “C” or “D” are made in Taiwan
R.O.C.
Declaration of Conformity
Application of council
Directive
2004/108/EC (EMC) and 2006/95/
EC (LVD)
Standards to which
conformity is declared
EN 55022 (2006) Class A
EN 55024 (1998) +A2
EN 61000-3-2 (2006)
EN 61000-3-3 (1995) + A2
EN 60950-1 (2001) +A11
National Deviations: AR, AT,
AU, BE, CA, CH, CN, CZ, DE,
DK, FI, FR, GB, GR, HU, IL, IN,
IT , JP, KE, KR, MY , NL, NO, PL,
SE, SG, SI, SK, US
Page 95

Page 92 Lithium Battery Warning
Lithium Battery Warning
The Lithium Battery used in the SonicWALL Internet security
appliance may not be replaced by the user. The SonicWALL
must be returned to a SonicWALL authorized service center for
replacement with the same or equivalent type recommended by
the manufacturer. If, for any reason, the battery or SonicWALL
Internet security appliance must be disposed of, do so following
the battery manufacturer's instructions.
Cable Connections
All Ethernet cables are designed for intra-building connection to
other equipment. Do not connect these ports directly to
communication wiring or other wiring that exits the building
where the SonicWALL is located.
Gesetzlich und Sicherheits Anweisungen
auf Deutsch
Hinweis zur Lithiumbatterie
Die in der Internet Security appliance von SonicWALL
verwendete Lithiumbatterie darf nicht vom Benutzer
ausgetauscht werden. Zum Austauschen der Batterie muss die
SonicWALL in ein von SonicWALL autorisiertes Service-Center
gebracht werden. Dort wird die Batterie durch denselben oder
entsprechenden, vom Hersteller empfohlenen Batterietyp
ersetzt. Beachten Sie bei einer Entsorgung der Batterie oder
der SonicWALL Internet Security appliance die diesbezüglichen
Anweisungen des Herstellers.
Kabelverbindungen
Alle Ethernet-Kabel eignen sich für die Verbindung von Geräten
in Innenräumen. Schließen Sie an die Anschlüsse der
SonicWALL keine Kabel an, die aus dem Gebäude
herausgeführt werden, in dem sich das Gerät befindet.
Page 96

SonicWALL UMA EM5000 Getting Started Guide Page 93
Copyright Notice
© 2009 SonicWALL, Inc.
All rights reserved.
Under the copyright laws, this manual or the software described
within, can not be copied, in whole or part, without the written
consent of the manufacturer, except in the normal use of the
software to make a backup copy. The same proprietary and
copyright notices must be affixed to any permitted copies as
were affixed to the original. This exception does not allow
copies to be made for others, whether or not sold, but all of the
material purchased (with all backup copies) can be sold, given,
or loaned to another person. Under the law, copying includes
translating into another language or format.
Specifications and descriptions subject to change without
notice.
Trademarks
SonicWALL is a registered trademark of SonicWALL, Inc.
Microsoft Windows Vista, Windows XP, Windows Server 2000,
Windows Server 2003, Internet Explorer, and Active Directory
are trademarks or registered trademarks of Microsoft
Corporation.
Other product and company names mentioned herein may be
trademarks and/or registered trademarks of their respective
companies and are the sole property of their respective
manufacturers.
Page 97

Page 94 Trademarks
Page 98

SonicWALL, Inc.
1143 Borregas Avenue T +1 408.745.9600 www.sonicwall.com
Sunnyvale CA 94089-1306 F +1 408.745.9300
©2009 So nicWALL, Inc. is a r egistere d tradem ark of So nicWALL, Inc. Oth er produ ct name s mention ed herei n may be tr ademar ks and/or register ed trad emarks o f their r espect ive compa nies. Sp ecicat ions
and descrip tions subject to chang e without notice.
PROTECTION AT THE SPEED OF BUSINESS™
PN 23 2-001638 -50
Rev A 2/09
 Loading...