

Page 1

| 0
10.5.2 Installation and Administration GuideSonicWALL / Aventail Secure Remote Access
Page 2

Page 3

SonicWALL Aventail E-Class SRA Installation and Administration Guide | i
Table of Contents
Chapter 1
Introduction . . . . . . . . . . . . . . . . . . . . . . . . . . . . . . . . . . . . . . . . . . . . . . . . . . . . . . . . . . . . . . . . . . . . . . . . . . . . . . 1
Features of Your SonicWALL Aventail Appliance . . . . . . . . . . . . . . . . . . . . . . . . . . . . . . . . . . . . . . . . . . . . . . . . . . . . . .2
SonicWALL Aventail E-Class SRA Appliance Models . . . . . . . . . . . . . . . . . . . . . . . . . . . . . . . . . . . . . . . . . . . . . . . .2
Administrator Components . . . . . . . . . . . . . . . . . . . . . . . . . . . . . . . . . . . . . . . . . . . . . . . . . . . . . . . . . . . . . . . . .2
User Access Components . . . . . . . . . . . . . . . . . . . . . . . . . . . . . . . . . . . . . . . . . . . . . . . . . . . . . . . . . . . . . . . . . .3
What’s New in This Release . . . . . . . . . . . . . . . . . . . . . . . . . . . . . . . . . . . . . . . . . . . . . . . . . . . . . . . . . . . . . . . . . . . .5
System Requirements. . . . . . . . . . . . . . . . . . . . . . . . . . . . . . . . . . . . . . . . . . . . . . . . . . . . . . . . . . . . . . . . . . . . . . . .7
Server Components . . . . . . . . . . . . . . . . . . . . . . . . . . . . . . . . . . . . . . . . . . . . . . . . . . . . . . . . . . . . . . . . . . . . . .7
Client Components. . . . . . . . . . . . . . . . . . . . . . . . . . . . . . . . . . . . . . . . . . . . . . . . . . . . . . . . . . . . . . . . . . . . . . .9
About the Documentation . . . . . . . . . . . . . . . . . . . . . . . . . . . . . . . . . . . . . . . . . . . . . . . . . . . . . . . . . . . . . . . . . . . .15
Document Conventions. . . . . . . . . . . . . . . . . . . . . . . . . . . . . . . . . . . . . . . . . . . . . . . . . . . . . . . . . . . . . . . . . . .15
Chapter 2
Installation and Initial Setup. . . . . . . . . . . . . . . . . . . . . . . . . . . . . . . . . . . . . . . . . . . . . . . . . . . . . . . . . . . . . . . . 17
Network Architecture . . . . . . . . . . . . . . . . . . . . . . . . . . . . . . . . . . . . . . . . . . . . . . . . . . . . . . . . . . . . . . . . . . . . . . .17
Preparing for the Installation . . . . . . . . . . . . . . . . . . . . . . . . . . . . . . . . . . . . . . . . . . . . . . . . . . . . . . . . . . . . . . . . . .18
Gathering Information . . . . . . . . . . . . . . . . . . . . . . . . . . . . . . . . . . . . . . . . . . . . . . . . . . . . . . . . . . . . . . . . . . .19
Verifying Your Firewall Policies. . . . . . . . . . . . . . . . . . . . . . . . . . . . . . . . . . . . . . . . . . . . . . . . . . . . . . . . . . . . . .19
Helpful Management Tools . . . . . . . . . . . . . . . . . . . . . . . . . . . . . . . . . . . . . . . . . . . . . . . . . . . . . . . . . . . . . . . . 20
Installation and Deployment Process . . . . . . . . . . . . . . . . . . . . . . . . . . . . . . . . . . . . . . . . . . . . . . . . . . . . . . . . . . . .21
Specifications and Rack Installation . . . . . . . . . . . . . . . . . . . . . . . . . . . . . . . . . . . . . . . . . . . . . . . . . . . . . . . . . .22
Front Panel Controls and Indicators . . . . . . . . . . . . . . . . . . . . . . . . . . . . . . . . . . . . . . . . . . . . . . . . . . . . . . . . . .23
Connecting the Appliance . . . . . . . . . . . . . . . . . . . . . . . . . . . . . . . . . . . . . . . . . . . . . . . . . . . . . . . . . . . . . . . . .29
Powering Up and Configuring Basic Network Settings. . . . . . . . . . . . . . . . . . . . . . . . . . . . . . . . . . . . . . . . . . . . . .31
Web-Based Configuration Using Setup Wizard. . . . . . . . . . . . . . . . . . . . . . . . . . . . . . . . . . . . . . . . . . . . . . . . . . .32
Configuring the Appliance Using the Management Console . . . . . . . . . . . . . . . . . . . . . . . . . . . . . . . . . . . . . . . . . .33
Moving the Appliance into Production. . . . . . . . . . . . . . . . . . . . . . . . . . . . . . . . . . . . . . . . . . . . . . . . . . . . . . . . .35
Powering Down and Restarting the Appliance . . . . . . . . . . . . . . . . . . . . . . . . . . . . . . . . . . . . . . . . . . . . . . . . . . .35
Next Steps . . . . . . . . . . . . . . . . . . . . . . . . . . . . . . . . . . . . . . . . . . . . . . . . . . . . . . . . . . . . . . . . . . . . . . . . . . . . . .36
Chapter 3
Working with AMC . . . . . . . . . . . . . . . . . . . . . . . . . . . . . . . . . . . . . . . . . . . . . . . . . . . . . . . . . . . . . . . . . . . . . . . . 37
Accessing AMC. . . . . . . . . . . . . . . . . . . . . . . . . . . . . . . . . . . . . . . . . . . . . . . . . . . . . . . . . . . . . . . . . . . . . . . . . . . .37
Logging In to AMC . . . . . . . . . . . . . . . . . . . . . . . . . . . . . . . . . . . . . . . . . . . . . . . . . . . . . . . . . . . . . . . . . . . . . .37
Logging Out . . . . . . . . . . . . . . . . . . . . . . . . . . . . . . . . . . . . . . . . . . . . . . . . . . . . . . . . . . . . . . . . . . . . . . . . . .38
AMC Basics . . . . . . . . . . . . . . . . . . . . . . . . . . . . . . . . . . . . . . . . . . . . . . . . . . . . . . . . . . . . . . . . . . . . . . . . . . . . . .38
A Quick Tour of the AMC Interface. . . . . . . . . . . . . . . . . . . . . . . . . . . . . . . . . . . . . . . . . . . . . . . . . . . . . . . . . . .38
Adding, Editing, Copying, and Deleting Object s in AMC. . . . . . . . . . . . . . . . . . . . . . . . . . . . . . . . . . . . . . . . . . . . .43
Getting Help . . . . . . . . . . . . . . . . . . . . . . . . . . . . . . . . . . . . . . . . . . . . . . . . . . . . . . . . . . . . . . . . . . . . . . . . . . 45
Administrator Accounts. . . . . . . . . . . . . . . . . . . . . . . . . . . . . . . . . . . . . . . . . . . . . . . . . . . . . . . . . . . . . . . . . . . . . .46
Managing Administrator Accounts and Roles . . . . . . . . . . . . . . . . . . . . . . . . . . . . . . . . . . . . . . . . . . . . . . . . . . . .46
Avoiding Configuration File Conflicts with Multiple Administrators . . . . . . . . . . . . . . . . . . . . . . . . . . . . . . . . . . . . .49
Managing Multiple SonicWALL Devices . . . . . . . . . . . . . . . . . . . . . . . . . . . . . . . . . . . . . . . . . . . . . . . . . . . . . . . . . . .50
Configuring an Appliance for GMS . . . . . . . . . . . . . . . . . . . . . . . . . . . . . . . . . . . . . . . . . . . . . . . . . . . . . . . . . . .51
Configuring an Appliance for ViewPoint. . . . . . . . . . . . . . . . . . . . . . . . . . . . . . . . . . . . . . . . . . . . . . . . . . . . . . . .51
Working with Configuration Data . . . . . . . . . . . . . . . . . . . . . . . . . . . . . . . . . . . . . . . . . . . . . . . . . . . . . . . . . . . . . . .52
Saving Configuration Changes to Disk . . . . . . . . . . . . . . . . . . . . . . . . . . . . . . . . . . . . . . . . . . . . . . . . . . . . . . . .52
Applying Configuration Changes . . . . . . . . . . . . . . . . . . . . . . . . . . . . . . . . . . . . . . . . . . . . . . . . . . . . . . . . . . . .52
Discarding Pending Configuration Changes . . . . . . . . . . . . . . . . . . . . . . . . . . . . . . . . . . . . . . . . . . . . . . . . . . . . .53
Deleting Referenced Objects . . . . . . . . . . . . . . . . . . . . . . . . . . . . . . . . . . . . . . . . . . . . . . . . . . . . . . . . . . . . . . . . . .54
Chapter 4
Network and Authentication Configuration . . . . . . . . . . . . . . . . . . . . . . . . . . . . . . . . . . . . . . . . . . . . . . . . . . . . . 55
Configuring Basic Network Settings . . . . . . . . . . . . . . . . . . . . . . . . . . . . . . . . . . . . . . . . . . . . . . . . . . . . . . . . . . . . .56
Specifying System Identity . . . . . . . . . . . . . . . . . . . . . . . . . . . . . . . . . . . . . . . . . . . . . . . . . . . . . . . . . . . . . . . .56
Configuring Network Interfaces . . . . . . . . . . . . . . . . . . . . . . . . . . . . . . . . . . . . . . . . . . . . . . . . . . . . . . . . . . . . .57
Configuring ICMP. . . . . . . . . . . . . . . . . . . . . . . . . . . . . . . . . . . . . . . . . . . . . . . . . . . . . . . . . . . . . . . . . . . . . . .57
Page 4

ii | Table of Contents
Viewing Fully Qualified Domain Names and Custom Ports . . . . . . . . . . . . . . . . . . . . . . . . . . . . . . . . . . . . . . . . . . .58
Configuring Fallback Servers for Connect Tunnel . . . . . . . . . . . . . . . . . . . . . . . . . . . . . . . . . . . . . . . . . . . . . . . . .58
Configuring Routing . . . . . . . . . . . . . . . . . . . . . . . . . . . . . . . . . . . . . . . . . . . . . . . . . . . . . . . . . . . . . . . . . . . . . . . .59
Configuring Network Gateways . . . . . . . . . . . . . . . . . . . . . . . . . . . . . . . . . . . . . . . . . . . . . . . . . . . . . . . . . . . . .60
Choosing a Network Gateway Option . . . . . . . . . . . . . . . . . . . . . . . . . . . . . . . . . . . . . . . . . . . . . . . . . . . . . . . . .60
Configuring Network Gateways in a Dual-Homed Environment . . . . . . . . . . . . . . . . . . . . . . . . . . . . . . . . . . . . . . .62
Configuring Network Gateways in a Single-Homed Environment . . . . . . . . . . . . . . . . . . . . . . . . . . . . . . . . . . . . . .63
Enabling a Route to the Internet . . . . . . . . . . . . . . . . . . . . . . . . . . . . . . . . . . . . . . . . . . . . . . . . . . . . . . . . . . . .64
Configuring Static Routes . . . . . . . . . . . . . . . . . . . . . . . . . . . . . . . . . . . . . . . . . . . . . . . . . . . . . . . . . . . . . . . . .64
Configuring Name Resolution. . . . . . . . . . . . . . . . . . . . . . . . . . . . . . . . . . . . . . . . . . . . . . . . . . . . . . . . . . . . . . . . . .65
Configuring Domain Name Service. . . . . . . . . . . . . . . . . . . . . . . . . . . . . . . . . . . . . . . . . . . . . . . . . . . . . . . . . . .65
Configuring Windows Network Name Resolution . . . . . . . . . . . . . . . . . . . . . . . . . . . . . . . . . . . . . . . . . . . . . . . . .66
Certificates . . . . . . . . . . . . . . . . . . . . . . . . . . . . . . . . . . . . . . . . . . . . . . . . . . . . . . . . . . . . . . . . . . . . . . . . . . . . . .66
Server Certificates . . . . . . . . . . . . . . . . . . . . . . . . . . . . . . . . . . . . . . . . . . . . . . . . . . . . . . . . . . . . . . . . . . . . . . 67
CA Certificates. . . . . . . . . . . . . . . . . . . . . . . . . . . . . . . . . . . . . . . . . . . . . . . . . . . . . . . . . . . . . . . . . . . . . . . . .74
Certificate FAQ . . . . . . . . . . . . . . . . . . . . . . . . . . . . . . . . . . . . . . . . . . . . . . . . . . . . . . . . . . . . . . . . . . . . . . . . 79
Managing User Authentication . . . . . . . . . . . . . . . . . . . . . . . . . . . . . . . . . . . . . . . . . . . . . . . . . . . . . . . . . . . . . . . . .80
About Intermediate Certificates. . . . . . . . . . . . . . . . . . . . . . . . . . . . . . . . . . . . . . . . . . . . . . . . . . . . . . . . . . . . .80
Configuring Authentication Servers . . . . . . . . . . . . . . . . . . . . . . . . . . . . . . . . . . . . . . . . . . . . . . . . . . . . . . . . . .81
Configuring Microsoft Active Directory Servers . . . . . . . . . . . . . . . . . . . . . . . . . . . . . . . . . . . . . . . . . . . . . . . . . .83
Configuring LDAP and LDAPS Authentication. . . . . . . . . . . . . . . . . . . . . . . . . . . . . . . . . . . . . . . . . . . . . . . . . . . .94
Configuring RADIUS Authentication . . . . . . . . . . . . . . . . . . . . . . . . . . . . . . . . . . . . . . . . . . . . . . . . . . . . . . . . . .99
Configuring RSA Server Authentication. . . . . . . . . . . . . . . . . . . . . . . . . . . . . . . . . . . . . . . . . . . . . . . . . . . . . . .102
Configuring a PKI Authentication Server . . . . . . . . . . . . . . . . . . . . . . . . . . . . . . . . . . . . . . . . . . . . . . . . . . . . . . 103
Configuring a Single Sign-On Authentication Server. . . . . . . . . . . . . . . . . . . . . . . . . . . . . . . . . . . . . . . . . . . . . . 104
Using RSA ClearTrust Authentication . . . . . . . . . . . . . . . . . . . . . . . . . . . . . . . . . . . . . . . . . . . . . . . . . . . . . . . .106
Configuring Local User Storage . . . . . . . . . . . . . . . . . . . . . . . . . . . . . . . . . . . . . . . . . . . . . . . . . . . . . . . . . . . . 107
Testing LDAP and AD Authentication Configurations. . . . . . . . . . . . . . . . . . . . . . . . . . . . . . . . . . . . . . . . . . . . . .108
Configuring Chained Authentication . . . . . . . . . . . . . . . . . . . . . . . . . . . . . . . . . . . . . . . . . . . . . . . . . . . . . . . . . 109
Enabling Group Affinity Checking in a Realm . . . . . . . . . . . . . . . . . . . . . . . . . . . . . . . . . . . . . . . . . . . . . . . . . . .112
Using One-Time Passwords for Added Security . . . . . . . . . . . . . . . . . . . . . . . . . . . . . . . . . . . . . . . . . . . . . . . . .112
Next Steps . . . . . . . . . . . . . . . . . . . . . . . . . . . . . . . . . . . . . . . . . . . . . . . . . . . . . . . . . . . . . . . . . . . . . . . . . . . . .114
Chapter 5
Security Administration . . . . . . . . . . . . . . . . . . . . . . . . . . . . . . . . . . . . . . . . . . . . . . . . . . . . . . . . . . . . . . . . . . . 115
Creating and Managing Resources . . . . . . . . . . . . . . . . . . . . . . . . . . . . . . . . . . . . . . . . . . . . . . . . . . . . . . . . . . . . .115
Resource Types . . . . . . . . . . . . . . . . . . . . . . . . . . . . . . . . . . . . . . . . . . . . . . . . . . . . . . . . . . . . . . . . . . . . . . . 115
Resources and Resource Groups . . . . . . . . . . . . . . . . . . . . . . . . . . . . . . . . . . . . . . . . . . . . . . . . . . . . . . . . . . .117
Using Variables in Resource and WorkPlace Shortcut Definitions . . . . . . . . . . . . . . . . . . . . . . . . . . . . . . . . . . . . . 130
Creating and Managing Resource Groups . . . . . . . . . . . . . . . . . . . . . . . . . . . . . . . . . . . . . . . . . . . . . . . . . . . . .137
Web Application Profiles . . . . . . . . . . . . . . . . . . . . . . . . . . . . . . . . . . . . . . . . . . . . . . . . . . . . . . . . . . . . . . . . . 139
Creating Forms-Based Single Sign-On Profiles . . . . . . . . . . . . . . . . . . . . . . . . . . . . . . . . . . . . . . . . . . . . . . . . . . 143
Access Control Rules. . . . . . . . . . . . . . . . . . . . . . . . . . . . . . . . . . . . . . . . . . . . . . . . . . . . . . . . . . . . . . . . . . . . . . .144
Configuring Access Control Rules. . . . . . . . . . . . . . . . . . . . . . . . . . . . . . . . . . . . . . . . . . . . . . . . . . . . . . . . . . .145
Resolving Deny Rule Incompatibilities . . . . . . . . . . . . . . . . . . . . . . . . . . . . . . . . . . . . . . . . . . . . . . . . . . . . . . . 157
Resolving Invalid Destination Resources . . . . . . . . . . . . . . . . . . . . . . . . . . . . . . . . . . . . . . . . . . . . . . . . . . . . . . 157
Chapter 6
User Management . . . . . . . . . . . . . . . . . . . . . . . . . . . . . . . . . . . . . . . . . . . . . . . . . . . . . . . . . . . . . . . . . . . . . . . 159
Overview: Users, Groups, Communities, and Realms . . . . . . . . . . . . . . . . . . . . . . . . . . . . . . . . . . . . . . . . . . . . . . . .159
Using Realms and Communities . . . . . . . . . . . . . . . . . . . . . . . . . . . . . . . . . . . . . . . . . . . . . . . . . . . . . . . . . . . . . . .160
Viewing Realms . . . . . . . . . . . . . . . . . . . . . . . . . . . . . . . . . . . . . . . . . . . . . . . . . . . . . . . . . . . . . . . . . . . . . . . 160
Default, Visible, and Hidden Realms. . . . . . . . . . . . . . . . . . . . . . . . . . . . . . . . . . . . . . . . . . . . . .
Specifying the Default Realm. . . . . . . . . . . . . . . . . . . . . . . . . . . . . . . . . . . . . . . . . . . . . . . . . . . . . . . . . . . . . .162
Enabling and Disabling Realms . . . . . . . . . . . . . . . . . . . . . . . . . . . . . . . . . . . . . . . . . . . . . . . . . . . . . . . . . . . .163
Best Practices for Defining Realms. . . . . . . . . . . . . . . . . . . . . . . . . . . . . . . . . . . . . . . . . . . . . . . . . . . . . . . . . .163
Configuring Realms and Communities. . . . . . . . . . . . . . . . . . . . . . . . . . . . . . . . . . . . . . . . . . . . . . . . . . . . . . . . . . . 163
Creating Realms . . . . . . . . . . . . . . . . . . . . . . . . . . . . . . . . . . . . . . . . . . . . . . . . . . . . . . . . . . . . . . . . . . . . . .163
Adding Communities to a Realm . . . . . . . . . . . . . . . . . . . . . . . . . . . . . . . . . . . . . . . . . . . . . . . . . . . . . . . . . . .165
Creating and Configuring Communities. . . . . . . . . . . . . . . . . . . . . . . . . . . . . . . . . . . . . . . . . . . . . . . . . . . . . . .166
Network Tunnel Client Configuration . . . . . . . . . . . . . . . . . . . . . . . . . . . . . . . . . . . . . . . . . . . . . . . . . . . . . . . .170
Using the Default Community . . . . . . . . . . . . . . . . . . . . . . . . . . . . . . . . . . . . . . . . . . . . . . . . . . . . . . . . . . . . . 179
. . . . . . . . . . . 161
Page 5

SonicWALL Aventail E-Class SRA Installation and Administration Guide | iii
Changing the Order of Communities Listed in a Realm . . . . . . . . . . . . . . . . . . . . . . . . . . . . . . . . . . . . . . . . . . . .179
Configuring RADIUS Accounting in a Realm. . . . . . . . . . . . . . . . . . . . . . . . . . . . . . . . . . . . . . . . . . . . . . . . . . . . 180
Editing, Copying and Deleting Communities . . . . . . . . . . . . . . . . . . . . . . . . . . . . . . . . . . . . . . . . . . . . . . . . . . .181
Managing Users and Groups . . . . . . . . . . . . . . . . . . . . . . . . . . . . . . . . . . . . . . . . . . . . . . . . . . . . . . . . . . . . . . . . .181
Viewing Users and Groups . . . . . . . . . . . . . . . . . . . . . . . . . . . . . . . . . . . . . . . . . . . . . . . . . . . . . . . . . . . . . . . 181
Managing Users and Groups Mapped to External Repositories . . . . . . . . . . . . . . . . . . . . . . . . . . . . . . . . . . . . . . . 182
Managing Local User Accounts. . . . . . . . . . . . . . . . . . . . . . . . . . . . . . . . . . . . . . . . . . . . . . . . . . . . . . . . . . . . . 191
Chapter 7
System Administration. . . . . . . . . . . . . . . . . . . . . . . . . . . . . . . . . . . . . . . . . . . . . . . . . . . . . . . . . . . . . . . . . . . . 193
Optional Network Configuration . . . . . . . . . . . . . . . . . . . . . . . . . . . . . . . . . . . . . . . . . . . . . . . . . . . . . . . . . . . . . . .193
Enabling SSH Access from Remote Hosts . . . . . . . . . . . . . . . . . . . . . . . . . . . . . . . . . . . . . . . . . . . . . . . . . . . . .193
Enabling ICMP . . . . . . . . . . . . . . . . . . . . . . . . . . . . . . . . . . . . . . . . . . . . . . . . . . . . . . . . . . . . . . . . . . . . . . . . 194
Configuring Time Settings. . . . . . . . . . . . . . . . . . . . . . . . . . . . . . . . . . . . . . . . . . . . . . . . . . . . . . . . . . . . . . . .195
System Logging and Monitoring . . . . . . . . . . . . . . . . . . . . . . . . . . . . . . . . . . . . . . . . . . . . . . . . . . . . . . . . . . . . . . . 196
Overview: System Logging and Monitoring . . . . . . . . . . . . . . . . . . . . . . . . . . . . . . . . . . . . . . . . . . . . . . . . . . . . 196
Log Files . . . . . . . . . . . . . . . . . . . . . . . . . . . . . . . . . . . . . . . . . . . . . . . . . . . . . . . . . . . . . . . . . . . . . . . . . . . . 196
Monitoring the Appliance. . . . . . . . . . . . . . . . . . . . . . . . . . . . . . . . . . . . . . . . . . . . . . . . . . . . . . . . . . . . . . . . .206
SNMP Configuration . . . . . . . . . . . . . . . . . . . . . . . . . . . . . . . . . . . . . . . . . . . . . . . . . . . . . . . . . . . . . . . . . . . .214
Managing Configuration Data . . . . . . . . . . . . . . . . . . . . . . . . . . . . . . . . . . . . . . . . . . . . . . . . . . . . . . . . . . . . . . . .224
Exporting the Current Configuration to a Local Machine . . . . . . . . . . . . . . . . . . . . . . . . . . . . . . . . . . . . . . . . . . .224
Saving the Current Configuration on the Appliance . . . . . . . . . . . . . . . . . . . . . . . . . . . . . . . . . . . . . . . . . . . . . .225
Importing Configuration Data . . . . . . . . . . . . . . . . . . . . . . . . . . . . . . . . . . . . . . . . . . . . . . . . . . . . . . . . . . . . .226
Restoring or Exporting Configuration Data Stored on the Appliance . . . . . . . . . . . . . . . . . . . . . . . . . . . . . . . . . . . 226
Replicating Configuration Data. . . . . . . . . . . . . . . . . . . . . . . . . . . . . . . . . . . . . . . . . . . . . . . . . . . . . . . . . . . . . . . .227
Requirements for Replication. . . . . . . . . . . . . . . . . . . . . . . . . . . . . . . . . . . . . . . . . . . . . . . . . . . . . . . . . . . . . .2 27
Getting Started . . . . . . . . . . . . . . . . . . . . . . . . . . . . . . . . . . . . . . . . . . . . . . . . . . . . . . . . . . . . . . . . . . . . . . . 229
Defining a Collection of Appliances to Receive Configuration Data . . . . . . . . . . . . . . . . . . . . . . . . . . . . . . . . . . . .230
Beginning Replication . . . . . . . . . . . . . . . . . . . . . . . . . . . . . . . . . . . . . . . . . . . . . . . . . . . . . . . . . . . . . . . . . . .231
Viewing Configuration Data Recipients . . . . . . . . . . . . . . . . . . . . . . . . . . . . . . . . . . . . . . . . . . . . . . . . . . . . . . .233
Upgrading, Rolling Back, or Resetting the System . . . . . . . . . . . . . . . . . . . . . . . . . . . . . . . . . . . . . . . . . . . . . . . . . . 233
Updating the System . . . . . . . . . . . . . . . . . . . . . . . . . . . . . . . . . . . . . . . . . . . . . . . . . . . . . . . . . . . . . . . . . . .234
Rolling Back to a Previous Version . . . . . . . . . . . . . . . . . . . . . . . . . . . . . . . . . . . . . . . . . . . . . . . . . . . . . . . . . . 237
Resetting the Appliance . . . . . . . . . . . . . . . . . . . . . . . . . . . . . . . . . . . . . . . . . . . . . . . . . . . . . . . . . . . . . . . . .237
SSL Encryption . . . . . . . . . . . . . . . . . . . . . . . . . . . . . . . . . . . . . . . . . . . . . . . . . . . . . . . . . . . . . . . . . . . . . . . . . .238
Configuring SSL Encryption. . . . . . . . . . . . . . . . . . . . . . . . . . . . . . . . . . . . . . . . . . . . . . . . . . . . . . . . . . . . . . .2 38
FIPS Certification . . . . . . . . . . . . . . . . . . . . . . . . . . . . . . . . . . . . . . . . . . . . . . . . . . . . . . . . . . . . . . . . . . . . . . . . 240
Requirements for FIPS . . . . . . . . . . . . . . . . . . . . . . . . . . . . . . . . . . . . . . . . . . . . . . . . . . . . . . . . . . . . . . . . . . 240
Managing FIPS-Compliant Certificates . . . . . . . . . . . . . . . . . . . . . . . . . . . . . . . . . . . . . . . . . . . . . . . . . . . . . . .241
FIPS Violations . . . . . . . . . . . . . . . . . . . . . . . . . . . . . . . . . . . . . . . . . . . . . . . . . . . . . . . . . . . . . . . . . . . . . . . 241
Enabling FIPS . . . . . . . . . . . . . . . . . . . . . . . . . . . . . . . . . . . . . . . . . . . . . . . . . . . . . . . . . . . . . . . . . . . . . . . . 241
Exporting and Importing FIPS-Compliant Certificates . . . . . . . . . . . . . . . . . . . . . . . . . . . . . . . . . . . . . . . . . . . . .242
Disabling FIPS. . . . . . . . . . . . . . . . . . . . . . . . . . . . . . . . . . . . . . . . . . . . . . . . . . . . . . . . . . . . . . . . . . . . . . . . 243
Zeroization . . . . . . . . . . . . . . . . . . . . . . . . . . . . . . . . . . . . . . . . . . . . . . . . . . . . . . . . . . . . . . . . . . . . . . . . . . 243
Software Licenses . . . . . . . . . . . . . . . . . . . . . . . . . . . . . . . . . . . . . . . . . . . . . . . . . . . . . . . . . . . . . . . . . . . . . . . . 243
How Licenses Are Calculated . . . . . . . . . . . . . . . . . . . . . . . . . . . . . . . . . . . . . . . . . . . . . . . . . . . . . . . . . . . . . .244
Viewing License Details. . . . . . . . . . . . . . . . . . . . . . . . . . . . . . . . . . . . . . . . . . . . . . . . . . . . . . . . . . . . . . . . . . 245
Managing Licenses . . . . . . . . . . . . . . . . . . . . . . . . . . . . . . . . . . . . . . . . . . . . . . . . . . . . . . . . . . . . . . . . . . . . .246
Chapter 8
End Point Control . . . . . . . . . . . . . . . . . . . . . . . . . . . . . . . . . . . . . . . . . . . . . . . . . . . . . . . . . . . . . . . . . . . . . . . . 249
Overview: End Point Control . . . . . . . . . . . . . . . . . . . . . . . . . . . . . . . . . . . . . . . . . . . . . . . . . . . . . . . . . . . . . . . . .249
How the Appliance Uses Zones and Device Profiles for End Point Control . . . . . . . . . . . . . . . . . . . . . . . . . . . . . . . 250
End Point Control Scenarios . . . . . . . . . . . . . . . . . . . . . . . . . . . . . . . . . . . . . . . . . . . . . . . . . . . . . . . . . . . . . . 251
Managing EPC with Zones and Device Profiles . . . . . . . . . . . . . . . . . . . . . . . . . . . . . . . . . . . . . . . . . . . . . . . . . . . . .256
Enabling and Disabling End Point Control . . . . . . . . . . . . . . . . . . . . . . . . . . . . . . . . . . . . . . . . . . . . . . . . . . . . .257
Zones and Device Profiles . . . . . . . . . . . . . . . . . . . . . . . . . . . . . . . . . . . . . . . . . . . . . . . . . . . . . . . . . . . . . . . .257
Creating Zones for Special Situations . . . . . . . . . . . . . . . . . . . . . . . . . . . . . . . . . . . . . . . . . . . . . . . . . . . . . . . . 276
Using the Virtual Keyboard to Enter Credentials. . . . . . . . . . . . . . . . . . . . . . . . . . . . . . . . . . . . . . . . . . . . . . . . .281
Configuring Data Protection . . . . . . . . . . . . . . . . . . . . . . . . . . . . . . . . . . . . . . . . . . . . . . . . . . . . . . . . . . . . . .282
Page 6

iv | Table of Contents
Chapter 9
The Aventail WorkPlace Portal. . . . . . . . . . . . . . . . . . . . . . . . . . . . . . . . . . . . . . . . . . . . . . . . . . . . . . . . . . . . . . 285
A Quick Tour of Aventail WorkPlace . . . . . . . . . . . . . . . . . . . . . . . . . . . . . . . . . . . . . . . . . . . . . . . . . . . . . . . . . . . . 285
Home Page . . . . . . . . . . . . . . . . . . . . . . . . . . . . . . . . . . . . . . . . . . . . . . . . . . . . . . . . . . . . . . . . . . . . . . . . . .286
Intranet Address Box . . . . . . . . . . . . . . . . . . . . . . . . . . . . . . . . . . . . . . . . . . . . . . . . . . . . . . . . . . . . . . . . . . .289
Bookmarks . . . . . . . . . . . . . . . . . . . . . . . . . . . . . . . . . . . . . . . . . . . . . . . . . . . . . . . . . . . . . . . . . . . . . . . . . .289
Network Explorer Page . . . . . . . . . . . . . . . . . . . . . . . . . . . . . . . . . . . . . . . . . . . . . . . . . . . . . . . . . . . . . . . . . .290
Web Shortcut Access . . . . . . . . . . . . . . . . . . . . . . . . . . . . . . . . . . . . . . . . . . . . . . . . . . . . . . . . . . . . . . . . . . . . . . 291
Configuring WorkPlace General Settings . . . . . . . . . . . . . . . . . . . . . . . . . . . . . . . . . . . . . . . . . . . . . . . . . . . . . . . . .291
Working with WorkPlace Shortcuts . . . . . . . . . . . . . . . . . . . . . . . . . . . . . . . . . . . . . . . . . . . . . . . . . . . . . . . . . .292
Viewing Shortcuts . . . . . . . . . . . . . . . . . . . . . . . . . . . . . . . . . . . . . . . . . . . . . . . . . . . . . . . . . . . . . . . . . . . . . 292
Adding Web Shortcuts . . . . . . . . . . . . . . . . . . . . . . . . . . . . . . . . . . . . . . . . . . . . . . . . . . . . . . . . . . . . . . . . . . 294
Creating a Group of Shortcuts. . . . . . . . . . . . . . . . . . . . . . . . . . . . . . . . . . . . . . . . . . . . . . . . . . . . . . . . . . . . . 296
Adding Network Shortcuts. . . . . . . . . . . . . . . . . . . . . . . . . . . . . . . . . . . . . . . . . . . . . . . . . . . . . . . . . . . . . . . .297
Editing Shortcuts . . . . . . . . . . . . . . . . . . . . . . . . . . . . . . . . . . . . . . . . . . . . . . . . . . . . . . . . . . . . . . . . . . . . . . 297
WorkPlace Sites . . . . . . . . . . . . . . . . . . . . . . . . . . . . . . . . . . . . . . . . . . . . . . . . . . . . . . . . . . . . . . . . . . . . . . . . . . 298
Adding WorkPlace Sites . . . . . . . . . . . . . . . . . . . . . . . . . . . . . . . . . . . . . . . . . . . . . . . . . . . . . . . . . . . . . . . . .299
Modifying the Appearance of WorkPlace . . . . . . . . . . . . . . . . . . . . . . . . . . . . . . . . . . . . . . . . . . . . . . . . . . . . . .302
WorkPlace and Small Form Factor Devices . . . . . . . . . . . . . . . . . . . . . . . . . . . . . . . . . . . . . . . . . . . . . . . . . . . . 305
Fully Customizing WorkPlace Pages . . . . . . . . . . . . . . . . . . . . . . . . . . . . . . . . . . . . . . . . . . . . . . . . . . . . . . . . . . . . 310
WorkPlace Style Customization: Manual Edits . . . . . . . . . . . . . . . . . . . . . . . . . . . . . . . . . . . . . . . . . . . . . . . . . . 310
Overview: Custom WorkPlace Templates . . . . . . . . . . . . . . . . . . . . . . . . . . . . . . . . . . . . . . . . . . . . . . . . . . . . .311
How Template Files are Matched . . . . . . . . . . . . . . . . . . . . . . . . . . . . . . . . . . . . . . . . . . . . . . . . . . . . . . . . . . .311
Customizing WorkPlace Templates. . . . . . . . . . . . . . . . . . . . . . . . . . . . . . . . . . . . . . . . . . . . . . . . . . . . . . . . . .313
Giving Users Access to Aventail WorkPlace . . . . . . . . . . . . . . . . . . . . . . . . . . . . . . . . . . . . . . . . . . . . . . . . . . . . . . . 313
End Point Control and the User Experience . . . . . . . . . . . . . . . . . . . . . . . . . . . . . . . . . . . . . . . . . . . . . . . . . . . . . . . 314
How OPSWAT Secure Desktop Emulator Works . . . . . . . . . . . . . . . . . . . . . . . . . . . . . . . . . . . . . . . . . . . . . . . . .314
How Cache Cleaner Works . . . . . . . . . . . . . . . . . . . . . . . . . . . . . . . . . . . . . . . . . . . . . . . . . . . . . . . . . . . . . . . 315
Chapter 10
User Access Components and Services . . . . . . . . . . . . . . . . . . . . . . . . . . . . . . . . . . . . . . . . . . . . . . . . . . . . . . . 317
User Access Agents . . . . . . . . . . . . . . . . . . . . . . . . . . . . . . . . . . . . . . . . . . . . . . . . . . . . . . . . . . . . . . . . . . . . . . . 317
Client and Agent Provisioning (Windows) . . . . . . . . . . . . . . . . . . . . . . . . . . . . . . . . . . . . . . . . . . . . . . . . . . . . .319
Aventail WorkPlace. . . . . . . . . . . . . . . . . . . . . . . . . . . . . . . . . . . . . . . . . . . . . . . . . . . . . . . . . . . . . . . . . . . . .321
The Tunnel Clients . . . . . . . . . . . . . . . . . . . . . . . . . . . . . . . . . . . . . . . . . . . . . . . . . . . . . . . . . . . . . . . . . . . . .322
The Proxy Clients. . . . . . . . . . . . . . . . . . . . . . . . . . . . . . . . . . . . . . . . . . . . . . . . . . . . . . . . . . . . . . . . . . . . . .323
Web Access. . . . . . . . . . . . . . . . . . . . . . . . . . . . . . . . . . . . . . . . . . . . . . . . . . . . . . . . . . . . . . . . . . . . . . . . . .323
Client Installation Packages . . . . . . . . . . . . . . . . . . . . . . . . . . . . . . . . . . . . . . . . . . . . . . . . . . . . . . . . . . . . . . . . . . 326
Downloading the SonicWALL Client Installation Pac kages . . . . . . . . . . . . . . . . . . . . . . . . . . . . . . . . . . . . . . . . . . 326
Customizing the Configuration for the Connect Tunnel Client. . . . . . . . . . . . . . . . . . . . . . . . . . . . . . . . . . . . . . . . 328
Command Line Access to Connect Tunnel with NGDIAL . . . . . . . . . . . . . . . . . . . . . . . . . . . . . . . . . . . . . . . . . . .330
Command Syntax . . . . . . . . . . . . . . . . . . . . . . . . . . . . . . . . . . . . . . . . . . . . . . . . . . . . . . . . . . . . . . . . . . . . .331
Customizing the Configuration for the Connect Mobile Client . . . . . . . . . . . . . . . . . . . . . . . . . . . . . . . . . . . . . . . . 333
Running Connect as a Service . . . . . . . . . . . . . . . . . . . . . . . . . . . . . . . . . . . . . . . . . . . . . . . . . . . . . . . . . . . . .335
Distributing SonicWALL Client Setup Packages. . . . . . . . . . . . . . . . . . . . . . . . . . . . . . . . . . . . . . . . . . . . . . . . . . 338
The OnDemand Proxy Agent . . . . . . . . . . . . . . . . . . . . . . . . . . . . . . . . . . . . . . . . . . . . . . . . . . . . . . . . . . . . . . . . . 339
Overview: OnDemand Proxy . . . . . . . . . . . . . . . . . . . . . . . . . . . . . . . . . . . . . . . . . . . . . . . . . . . . . . . . . . . . . . 340
How OnDemand Redirects Network Traffic . . . . . . . . . . . . . . . . . . . . . . . . . . . . . . . . . . . . . . . . . . . . . . . . . . . . 341
Configuring OnDemand to Access Specific Applications. . . . . . . . . . . . . . . . . . . . . . . . . . . . . . . . . . . . . . . . . . . .342
Configuring Advanced OnDemand Options . . . . . . . . . . . . . . . . . . . . . . . . . . . . . . . . . . . . . . . . . . . . . . . . . . . .344
Client Configuration . . . . . . . . . . . . . . . . . . . . . . . . . . . . . . . . . . . . . . . . . . . . . . . . . . . . . . . . . . . . . . . . . . . .345
Managing the SonicWALL Access Services. . . . . . . . . . . . . . . . . . . . . . . . . . . . . . . . . . . . . . . . . . . . . . . . . . . . . . . . 346
Overview: Access Services . . . . . . . . . . . . . . . . . . . . . . . . . . . . . . . . . . . . . . . . . . . . . . . . . . . . . . . . . . . . . . .346
Stopping and Starting the SonicWALL Access Services . . . . . . . . . . . . . . . . . . . . . . . . . . . . . . . . . . . . . . . . . . . .348
Configuring the Network Tunnel Service . . . . . . . . . . . . . . . . . . . . . . . . . . . . . . . . . . . . . . . . . . . . . . . . . . . . . .348
Configuring IP Address Pools. . . . . . . . . . . . . . . . . . . . . . . . . . . . . . . . . . . . . . . . . . . . . . . . . . . . . . . . . . . . . . 349
Configuring Web Resource Filtering . . . . . . . . . . . . . . . . . . . . . . . . . . . . . . . . . . . . . . . . . . . . . . . . . . . . . . . . .355
Configuring Fallback Servers. . . . . . . . . . . . . . . . . . . . . . . . . . . . . . . . . . . . . . . . . . . . . . . . . . . . . . . . . . . . . . 356
Configuring the Web Proxy Service . . . . . . . . . . . . . . . . . . . . . . . . . . . . . . . . . . . . . . . . . . . . . . . . . . . . . . . . . 356
Terminal Server Access. . . . . . . . . . . . . . . . . . . . . . . . . . . . . . . . . . . . . . . . . . . . . . . . . . . . . . . . . . . . . . . . . . . . . 357
Providing Access to Terminal Server Resources . . . . . . . . . . . . . . . . . . . . . . . . . . . . . . . . . . . . . . . . . . . . . . . . .357
Citrix Server Resources . . . . . . . . . . . . . . . . . . . . . . . . . . . . . . . . . . . . . . . . . . . . . . . . . . . . . . . . . . . . . . . . .358
Page 7

SonicWALL Aventail E-Class SRA Installation and Administration Guide | v
Defining an Access Control Rule and Resource for Terminal Server Access . . . . . . . . . . . . . . . . . . . . . . . . . . . . . . 360
Managing Graphical Terminal Agents . . . . . . . . . . . . . . . . . . . . . . . . . . . . . . . . . . . . . . . . . . . . . . . . . . . . . . . . 361
Graphical Terminal Shortcuts . . . . . . . . . . . . . . . . . . . . . . . . . . . . . . . . . . . . . . . . . . . . . . . . . . . . . . . . . . . . . 362
Chapter 11
Virtual Assist . . . . . . . . . . . . . . . . . . . . . . . . . . . . . . . . . . . . . . . . . . . . . . . . . . . . . . . . . . . . . . . . . . . . . . . . . . . 369
What is Virtual Assist? . . . . . . . . . . . . . . . . . . . . . . . . . . . . . . . . . . . . . . . . . . . . . . . . . . . . . . . . . . . . . . . . . . 369
How Does Virtual Assist Work? . . . . . . . . . . . . . . . . . . . . . . . . . . . . . . . . . . . . . . . . . . . . . . . . . . . . . . . . . . . .369
Configuring Virtual Assist . . . . . . . . . . . . . . . . . . . . . . . . . . . . . . . . . . . . . . . . . . . . . . . . . . . . . . . . . . . . . . . . . . .370
Enabling Virtual Assist Service. . . . . . . . . . . . . . . . . . . . . . . . . . . . . . . . . . . . . . . . . . . . . . . . . . . . . . . . . . . . .370
Configuring Virtual Assist Ticket Queue. . . . . . . . . . . . . . . . . . . . . . . . . . . . . . . . . . . . . . . . . . . . . . . . . . . . . . . 370
Configuring Virtual Assist Requests . . . . . . . . . . . . . . . . . . . . . . . . . . . . . . . . . . . . . . . . . . . . . . . . . . . . . . . . . 371
Enabling Virtual Assist on a Layout. . . . . . . . . . . . . . . . . . . . . . . . . . . . . . . . . . . . . . . . . . . . . . . . . . . . . . . . . . 371
Configuring Virtual Assist Invitations . . . . . . . . . . . . . . . . . . . . . . . . . . . . . . . . . . . . . . . . . . . . . . . . . . . . . . . .373
Using the Virtual Assist Ticket Queue . . . . . . . . . . . . . . . . . . . . . . . . . . . . . . . . . . . . . . . . . . . . . . . . . . . . . . . .373
Using Virtual Assist from the Technician View . . . . . . . . . . . . . . . . . . . . . . . . . . . . . . . . . . . . . . . . . . . . . . . . . . . . . 374
Installing the Virtual Assist Technician Console . . . . . . . . . . . . . . . . . . . . . . . . . . . . . . . . . . . . . . . . . . . . . . . . .374
Managing the Virtual Assist Queue. . . . . . . . . . . . . . . . . . . . . . . . . . . . . . . . . . . . . . . . . . . . . . . . . . . . . . . . . . 376
Emailing an Invitation to a Client. . . . . . . . . . . . . . . . . . . . . . . . . . . . . . . . . . . . . . . . . . . . . . . . . . . . . . . . . . .376
Assisting a Client . . . . . . . . . . . . . . . . . . . . . . . . . . . . . . . . . . . . . . . . . . . . . . . . . . . . . . . . . . . . . . . . . . . . . . 376
Virtual Assist Technician Console Tools. . . . . . . . . . . . . . . . . . . . . . . . . . . . . . . . . . . . . . . . . . . . . . . . . . . . . . . 377
Using Chat in Virtual Assist . . . . . . . . . . . . . . . . . . . . . . . . . . . . . . . . . . . . . . . . . . . . . . . . . . . . . . . . . . . . . . .379
Using Virtual Assist from the Customer View . . . . . . . . . . . . . . . . . . . . . . . . . . . . . . . . . . . . . . . . . . . . . . . . . . . . . . 380
Using Virtual Assist from the Customer View (Windows). . . . . . . . . . . . . . . . . . . . . . . . . . . . . . . . . . . . . . . . . . . 380
Using Virtual Assist from the Customer View (Mac) . . . . . . . . . . . . . . . . . . . . . . . . . . . . . . . . . . . . . . . . . . . . . .382
Chapter 12
Administering a High-Availability Cluster . . . . . . . . . . . . . . . . . . . . . . . . . . . . . . . . . . . . . . . . . . . . . . . . . . . . . 387
Overview: High-Availability Cluster. . . . . . . . . . . . . . . . . . . . . . . . . . . . . . . . . . . . . . . . . . . . . . . . . . . . . . . . . . . . .387
Cluster Architecture . . . . . . . . . . . . . . . . . . . . . . . . . . . . . . . . . . . . . . . . . . . . . . . . . . . . . . . . . . . . . . . . . . . . 387
The Load Balancing Service. . . . . . . . . . . . . . . . . . . . . . . . . . . . . . . . . . . . . . . . . . . . . . . . . . . . . . . . . . . . . . . 388
Stateful Failover . . . . . . . . . . . . . . . . . . . . . . . . . . . . . . . . . . . . . . . . . . . . . . . . . . . . . . . . . . . . . . . . . . . . . .389
Synchronized Cluster Administration . . . . . . . . . . . . . . . . . . . . . . . . . . . . . . . . . . . . . . . . . . . . . . . . . . . . . . . . 389
Installing and Configuring a Cluster . . . . . . . . . . . . . . . . . . . . . . . . . . . . . . . . . . . . . . . . . . . . . . . . . . . . . . . . . . . . 390
Step 1: Connect the Cluster Network . . . . . . . . . . . . . . . . . . . . . . . . . . . . . . . . . . . . . . . . . . . . . . . . . . . . . . . . 391
Step 2: Run Setup Tool on All Nodes of the Cluster . . . . . . . . . . . . . . . . . . . . . . . . . . . . . . . . . . . . . . . . . . . . . . 391
Step 3: Configure the Cluster’s External Virtual IP Address . . . . . . . . . . . . . . . . . . . . . . . . . . . . . . . . . . . . . . . . .392
Final Steps: Network Configuration and Licensing . . . . . . . . . . . . . . . . . . . . . . . . . . . . . . . . . . . . . . . . . . . . . . .392
Managing the Cluster . . . . . . . . . . . . . . . . . . . . . . . . . . . . . . . . . . . . . . . . . . . . . . . . . . . . . . . . . . . . . . . . . . . . . .393
Viewing and Configuring Network Information for Each Node . . . . . . . . . . . . . . . . . . . . . . . . . . . . . . . . . . . . . . . 393
Powering up a Cluster. . . . . . . . . . . . . . . . . . . . . . . . . . . . . . . . . . . . . . . . . . . . . . . . . . . . . . . . . . . . . . . . . . . 393
Starting and Stopping Services . . . . . . . . . . . . . . . . . . . . . . . . . . . . . . . . . . . . . . . . . . . . . . . . . . . . . . . . . . . . 393
Monitoring a Cluster. . . . . . . . . . . . . . . . . . . . . . . . . . . . . . . . . . . . . . . . . . . . . . . . . . . . . . . . . . . . . . . . . . . .394
Backing up a Cluster . . . . . . . . . . . . . . . . . . . . . . . . . . . . . . . . . . . . . . . . . . . . . . . . . . . . . . . . . . . . . . . . . . . 3 95
Performing Maintenance on a Cluster . . . . . . . . . . . . . . . . . . . . . . . . . . . . . . . . . . . . . . . . . . . . . . . . . . . . . . . . 395
Upgrading a Cluster . . . . . . . . . . . . . . . . . . . . . . . . . . . . . . . . . . . . . . . . . . . . . . . . . . . . . . . . . . . . . . . . . . . . 395
Upgrading a Single Appliance to a Cluster Configuration. . . . . . . . . . . . . . . . . . . . . . . . . . . . . . . . . . . . . . . . . . . 395
Troubleshooting a Cluster . . . . . . . . . . . . . . . . . . . . . . . . . . . . . . . . . . . . . . . . . . . . . . . . . . . . . . . . . . . . . . . .396
Cluster Scenarios. . . . . . . . . . . . . . . . . . . . . . . . . . . . . . . . . . . . . . . . . . . . . . . . . . . . . . . . . . . . . . . . . . . . . . . . . 396
Normal Flow of Traffic . . . . . . . . . . . . . . . . . . . . . . . . . . . . . . . . . . . . . . . . . . . . . . . . . . . . . . . . . . . . . . . . . .396
Node Failure . . . . . . . . . . . . . . . . . . . . . . . . . . . . . . . . . . . . . . . . . . . . . . . . . . . . . . . . . . . . . . . . . . . . . . . . . 397
Appendix A
Appliance Command-Line Tools . . . . . . . . . . . . . . . . . . . . . . . . . . . . . . . . . . . . . . . . . . . . . . . . . . . . . . . . . . . . . 399
Configuring a New Appliance Using Setup Tool. . . . . . . . . . . . . . . . . . . . . . . . . . . . . . . . . . . . . . . . . . . . . . . . . . . . .400
Tips for Working with Setup Tool . . . . . . . . . . . . . . . . . . . . . . . . . . . . . . . . . . . . . . . . . . . . . . . . . . . . . . . . . . .400
Using Setup Tool . . . . . . . . . . . . . . . . . . . . . . . . . . . . . . . . . . . . . . . . . . . . . . . . . . . . . . . . . . . . . . . . . . . . . . 400
Saving and Restoring Configuration Data . . . . . . . . . . . . . . . . . . . . . . . . . . . . . . . . . . . . . . . . . . . . . . . . . . . . . . . .401
Saving Configuration Data . . . . . . . . . . . . . . . . . . . . . . . . . . . . . . . . . . . . . . . . . . . . . . . . . . . . . . . . . . . . . . .401
Restoring Configuration Data. . . . . . . . . . . . . . . . . . . . . . . . . . . . . . . . . . . . . . . . . . . . . . . . . . . . . . . . . . . . . .402
Upgrading or Rolling Back System Software . . . . . . . . . . . . . . . . . . . . . . . . . . . . . . . . . . . . . . . . . . . . . . . . . . . . . . 403
Installing System Upgrades (Command Line Tool). . . . . . . . . . . . . . . . . . . . . . . . . . . . . . . . . . . . . . . . . . . . . . .404
Page 8

vi | Table of Contents
Reverting to a Previous Version. . . . . . . . . . . . . . . . . . . . . . . . . . . . . . . . . . . . . . . . . . . . . . . . . . . . . . . . . . . . 404
Performing a Factory Reset . . . . . . . . . . . . . . . . . . . . . . . . . . . . . . . . . . . . . . . . . . . . . . . . . . . . . . . . . . . . . . . 405
Validating Hosts. . . . . . . . . . . . . . . . . . . . . . . . . . . . . . . . . . . . . . . . . . . . . . . . . . . . . . . . . . . . . . . . . . . . . . . . . . 405
Appendix B
Troubleshooting . . . . . . . . . . . . . . . . . . . . . . . . . . . . . . . . . . . . . . . . . . . . . . . . . . . . . . . . . . . . . . . . . . . . . . . . . 407
General Networking Issues . . . . . . . . . . . . . . . . . . . . . . . . . . . . . . . . . . . . . . . . . . . . . . . . . . . . . . . . . . . . . . . . . .407
Verify a Downloaded Upgrade File . . . . . . . . . . . . . . . . . . . . . . . . . . . . . . . . . . . . . . . . . . . . . . . . . . . . . . . . . . . . . 409
Troubleshooting Agent Provisioning (Windows) . . . . . . . . . . . . . . . . . . . . . . . . . . . . . . . . . . . . . . . . . . . . . . . . . . . . 410
AMC Issues . . . . . . . . . . . . . . . . . . . . . . . . . . . . . . . . . . . . . . . . . . . . . . . . . . . . . . . . . . . . . . . . . . . . . . . . . . . . . 411
Authentication Issues . . . . . . . . . . . . . . . . . . . . . . . . . . . . . . . . . . . . . . . . . . . . . . . . . . . . . . . . . . . . . . . . . . . . . .412
Using Personal Firewalls with Aventail Agents . . . . . . . . . . . . . . . . . . . . . . . . . . . . . . . . . . . . . . . . . . . . . . . . . . . . .412
Aventail Services Issues . . . . . . . . . . . . . . . . . . . . . . . . . . . . . . . . . . . . . . . . . . . . . . . . . . . . . . . . . . . . . . . . . . . . 413
Tunnel Issues . . . . . . . . . . . . . . . . . . . . . . . . . . . . . . . . . . . . . . . . . . . . . . . . . . . . . . . . . . . . . . . . . . . . . . . . . . . 414
OnDemand Issues . . . . . . . . . . . . . . . . . . . . . . . . . . . . . . . . . . . . . . . . . . . . . . . . . . . . . . . . . . . . . . . . . . . . . . . . 419
General OnDemand Issues . . . . . . . . . . . . . . . . . . . . . . . . . . . . . . . . . . . . . . . . . . . . . . . . . . . . . . . . . . . . . . . 419
Specific OnDemand Issues . . . . . . . . . . . . . . . . . . . . . . . . . . . . . . . . . . . . . . . . . . . . . . . . . . . . . . . . . . . . . . . 420
Client Troubleshooting . . . . . . . . . . . . . . . . . . . . . . . . . . . . . . . . . . . . . . . . . . . . . . . . . . . . . . . . . . . . . . . . . . . . .421
Windows Client Troubleshooting . . . . . . . . . . . . . . . . . . . . . . . . . . . . . . . . . . . . . . . . . . . . . . . . . . . . . . . . . . .421
Macintosh and Linux Tunnel Client Troubleshooting . . . . . . . . . . . . . . . . . . . . . . . . . . . . . . . . . . . . . . . . . . . . . .423
Troubleshooting Tools in AMC . . . . . . . . . . . . . . . . . . . . . . . . . . . . . . . . . . . . . . . . . . . . . . . . . . . . . . . . . . . . . . . .425
Ping Command . . . . . . . . . . . . . . . . . . . . . . . . . . . . . . . . . . . . . . . . . . . . . . . . . . . . . . . . . . . . . . . . . . . . . . . 425
Traceroute Command. . . . . . . . . . . . . . . . . . . . . . . . . . . . . . . . . . . . . . . . . . . . . . . . . . . . . . . . . . . . . . . . . . .426
DNS Lookup . . . . . . . . . . . . . . . . . . . . . . . . . . . . . . . . . . . . . . . . . . . . . . . . . . . . . . . . . . . . . . . . . . . . . . . . . 426
Viewing the Current Routing Table. . . . . . . . . . . . . . . . . . . . . . . . . . . . . . . . . . . . . . . . . . . . . . . . . . . . . . . . . .427
Capturing Network Traffic . . . . . . . . . . . . . . . . . . . . . . . . . . . . . . . . . . . . . . . . . . . . . . . . . . . . . . . . . . . . . . . .427
Logging Tools for Network Tunnel Clients . . . . . . . . . . . . . . . . . . . . . . . . . . . . . . . . . . . . . . . . . . . . . . . . . . . . .429
Snapshot Tool . . . . . . . . . . . . . . . . . . . . . . . . . . . . . . . . . . . . . . . . . . . . . . . . . . . . . . . . . . . . . . . . . . . . . . . . 430
Appendix C
Best Practices for Securing the Appliance . . . . . . . . . . . . . . . . . . . . . . . . . . . . . . . . . . . . . . . . . . . . . . . . . . . . . 431
Network Configuration . . . . . . . . . . . . . . . . . . . . . . . . . . . . . . . . . . . . . . . . . . . . . . . . . . . . . . . . . . . . . . . . . . . . .431
Appliance Configuration . . . . . . . . . . . . . . . . . . . . . . . . . . . . . . . . . . . . . . . . . . . . . . . . . . . . . . . . . . . . . . . . . . . .432
Appliance Sessions. . . . . . . . . . . . . . . . . . . . . . . . . . . . . . . . . . . . . . . . . . . . . . . . . . . . . . . . . . . . . . . . . . . . . . . . 432
Administrator Accounts. . . . . . . . . . . . . . . . . . . . . . . . . . . . . . . . . . . . . . . . . . . . . . . . . . . . . . . . . . . . . . . . . . . . .432
Access Policy . . . . . . . . . . . . . . . . . . . . . . . . . . . . . . . . . . . . . . . . . . . . . . . . . . . . . . . . . . . . . . . . . . . . . . . . . . . . 433
Set Up Zones of Trust. . . . . . . . . . . . . . . . . . . . . . . . . . . . . . . . . . . . . . . . . . . . . . . . . . . . . . . . . . . . . . . . . . . . . . 4 33
SSL Ciphers. . . . . . . . . . . . . . . . . . . . . . . . . . . . . . . . . . . . . . . . . . . . . . . . . . . . . . . . . . . . . . . . . . . . . . . . . . . . . 434
Client Access . . . . . . . . . . . . . . . . . . . . . . . . . . . . . . . . . . . . . . . . . . . . . . . . . . . . . . . . . . . . . . . . . . . . . . . . . . . . 434
Appendix D
Log File Output Formats. . . . . . . . . . . . . . . . . . . . . . . . . . . . . . . . . . . . . . . . . . . . . . . . . . . . . . . . . . . . . . . . . . . 435
File Locations. . . . . . . . . . . . . . . . . . . . . . . . . . . . . . . . . . . . . . . . . . . . . . . . . . . . . . . . . . . . . . . . . . . . . . . . . . . . 435
System Message Log . . . . . . . . . . . . . . . . . . . . . . . . . . . . . . . . . . . . . . . . . . . . . . . . . . . . . . . . . . . . . . . . . . . . . . 436
Auditing Access Policy Decisions . . . . . . . . . . . . . . . . . . . . . . . . . . . . . . . . . . . . . . . . . . . . . . . . . . . . . . . . . . . 438
Viewing Client Certificate Errors in the Log . . . . . . . . . . . . . . . . . . . . . . . . . . . . . . . . . . . . . . . . . . . . . . . . . . . .439
End Point Control Interrogation . . . . . . . . . . . . . . . . . . . . . . . . . . . . . . . . . . . . . . . . . . . . . . . . . . . . . . . . . . . . 440
Unregistered Device Log Messages. . . . . . . . . . . . . . . . . . . . . . . . . . . . . . . . . . . . . . . . . . . . . . . . . . . . . . . . . . 440
Network Tunnel Audit Log . . . . . . . . . . . . . . . . . . . . . . . . . . . . . . . . . . . . . . . . . . . . . . . . . . . . . . . . . . . . . . . . . . .442
Auditing Connection Status Messages. . . . . . . . . . . . . . . . . . . . . . . . . . . . . . . . . . . . . . . . . . . . . . . . . . . . . . . .443
Web Proxy Audit Log . . . . . . . . . . . . . . . . . . . . . . . . . . . . . . . . . . . . . . . . . . . . . . . . . . . . . . . . . . . . . . . . . . . . . . 444
Management Console Audit Log . . . . . . . . . . . . . . . . . . . . . . . . . . . . . . . . . . . . . . . . . . . . . . . . . . . . . . . . . . . . . . .446
WorkPlace Logs . . . . . . . . . . . . . . . . . . . . . . . . . . . . . . . . . . . . . . . . . . . . . . . . . . . . . . . . . . . . . . . . . . . . . . . . . . 446
WorkPlace Shortcut Examples . . . . . . . . . . . . . . . . . . . . . . . . . . . . . . . . . . . . . . . . . . . . . . . . . . . . . . . . . . . . .446
Appendix E
Internationalization Support . . . . . . . . . . . . . . . . . . . . . . . . . . . . . . . . . . . . . . . . . . . . . . . . . . . . . . . . . . . . . . . 449
Support for Native Character Sets . . . . . . . . . . . . . . . . . . . . . . . . . . . . . . . . . . . . . . . . . . . . . . . . . . . . . . . . . . . . .449
RADIUS Policy Server Character Sets . . . . . . . . . . . . . . . . . . . . . . . . . . . . . . . . . . . . . . . . . . . . . . . . . . . . . . . . . . .449
Selected RADIUS Character Sets . . . . . . . . . . . . . . . . . . . . . . . . . . . . . . . . . . . . . . . . . . . . . . . . . . . . . . . . . . .450
Other Supported RADIUS Character Sets . . . . . . . . . . . . . . . . . . . . . . . . . . . . . . . . . . . . . . . . . . . . . . . . . . . . .451
Page 9

SonicWALL Aventail E-Class SRA Installation and Administration Guide | vii
Appendix F
Configuring a High-Capacity Cluster . . . . . . . . . . . . . . . . . . . . . . . . . . . . . . . . . . . . . . . . . . . . . . . . . . . . . . . . . 453
Overview of Clustering . . . . . . . . . . . . . . . . . . . . . . . . . . . . . . . . . . . . . . . . . . . . . . . . . . . . . . . . . . . . . . . . . . . . .453
Cluster Management. . . . . . . . . . . . . . . . . . . . . . . . . . . . . . . . . . . . . . . . . . . . . . . . . . . . . . . . . . . . . . . . . . . . . . . 453
Performing Initial Appliance Setup . . . . . . . . . . . . . . . . . . . . . . . . . . . . . . . . . . . . . . . . . . . . . . . . . . . . . . . . . . . . .453
Configuring the Appliance . . . . . . . . . . . . . . . . . . . . . . . . . . . . . . . . . . . . . . . . . . . . . . . . . . . . . . . . . . . . . . . . . . .454
Attaching the Appliance to the Switch. . . . . . . . . . . . . . . . . . . . . . . . . . . . . . . . . . . . . . . . . . . . . . . . . . . . . . . . . . . 454
Configuring the Load Balancer . . . . . . . . . . . . . . . . . . . . . . . . . . . . . . . . . . . . . . . . . . . . . . . . . . . . . . . . . . . . . . . .454
Index . . . . . . . . . . . . . . . . . . . . . . . . . . . . . . . . . . . . . . . . . . . . . . . . . . . . . . . . . . . . . . . . . . . . . . . . . . . . . . . . . 455
Page 10

viii | Table of Contents
Page 11
Chapter 1
Introduction
The SonicWALL SSL VPN appliance provides secure access—including clientless access to Web
applications, access to client/server applications, and file sharing—to employees, business
partners, and customers. All traffic is encrypted using Secure Sockets Layer (SSL) to protect it from
unauthorized users.
The appliance makes applications available from a range of acce ss meth ods—in cludi ng a standard
Web browser, a Windows client, or a mobile device—on a wide range of platforms including
Windows, Macintosh, and Linux.
SonicWALL Aventail E-Class SRA Installation and Administration Guide | 1
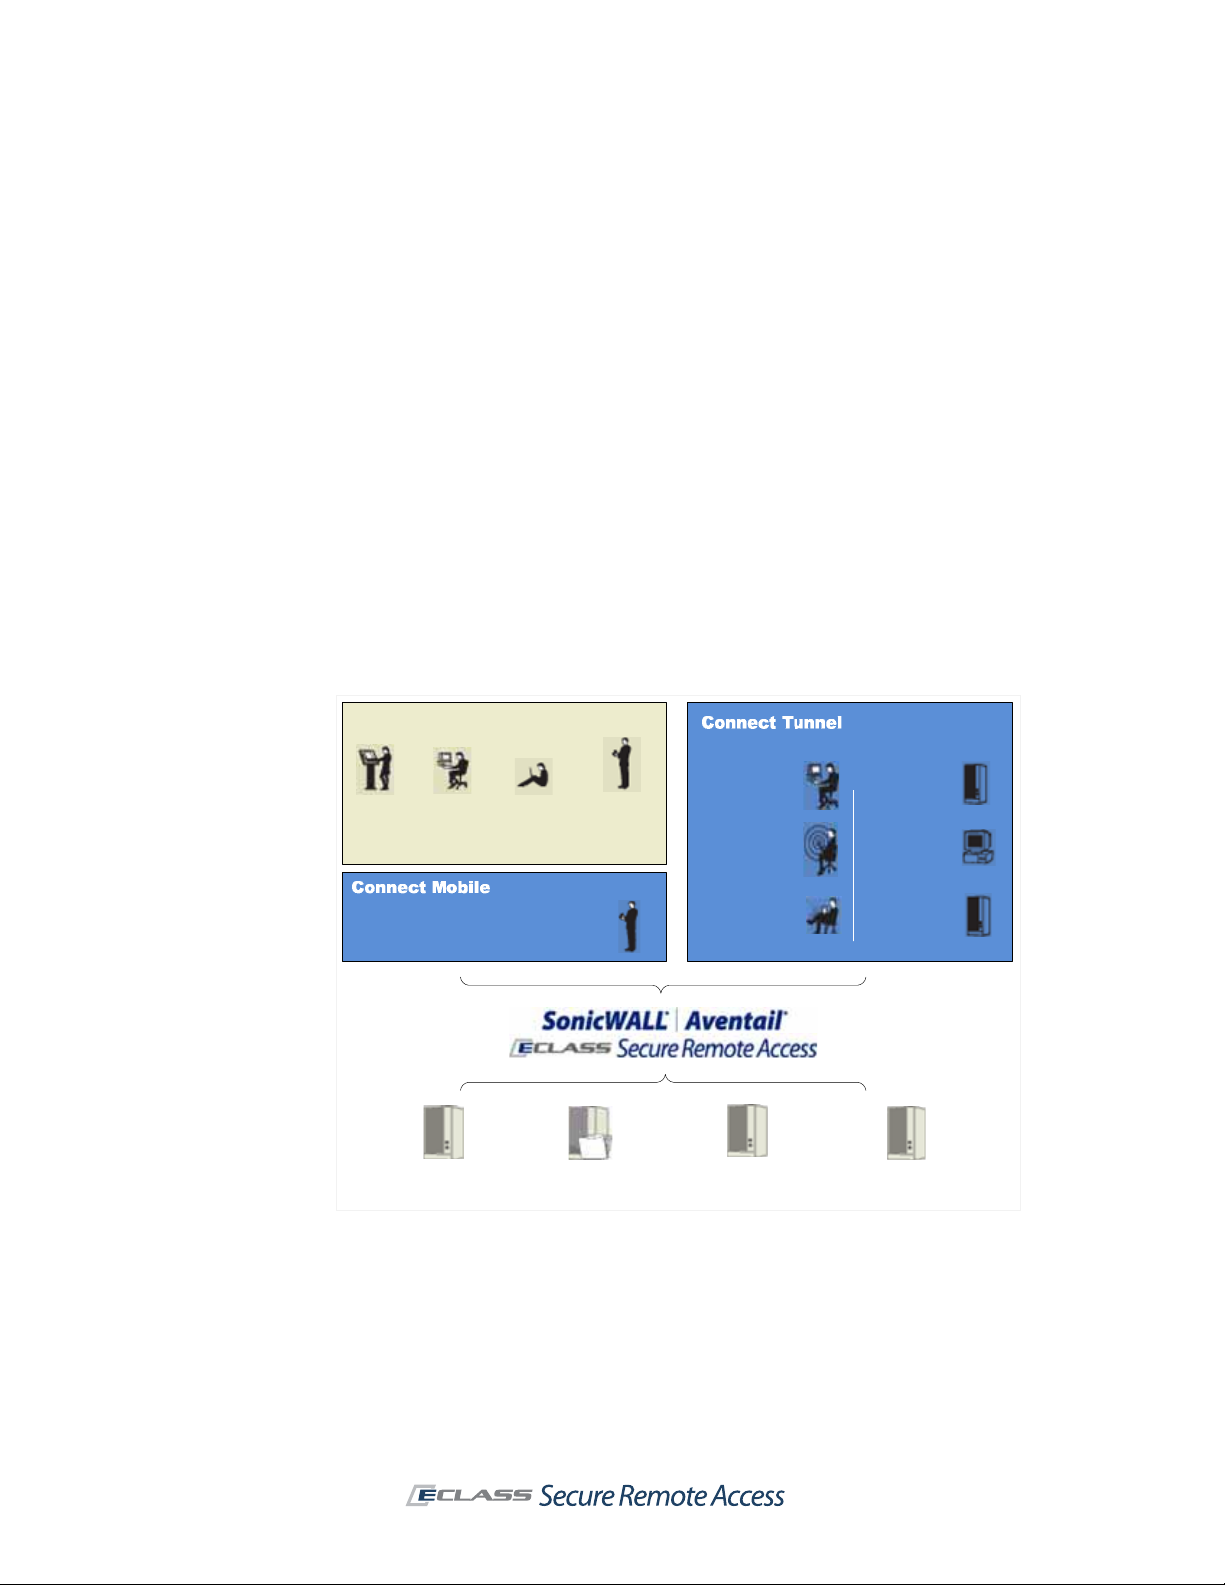
Aventail WorkPlace
Internal
Kiosk
users
Windows Mobile-powered devices
Business
partners
Teleworkers
Web-based
PDA
smartphone
users
File shares
applications
You might use the appliance to:
z
Create a remote access VPN that enables remote employees to securely access private company
applications such as email over the Internet.
z
Create a business partner VPN that provides designated suppliers with access to an internal
supply chain application over the Internet.
users
Wireless
LANs
IT-managed
devices
Thin client/server
applications
Windows
servers
Windows
desktops
Branch office
applications
Traditional client/
server applications
Page 12

2 | Chapter 1 - Introduction
The appliance’s granular access control lets you define policy and control access down to the user
and resource level. Managing policy and configuring the appliance is quick and easy with the Webbased management console.
For an overview of planning your SonicWALL SSL VPN appliance configuration and deployment, see
the Getting Started Guide.
Features of Your SonicWALL Aventail Appliance
This section highlights the key components provided with your appliance.
SonicWALL Aventail E-Class SRA Appliance Models
SonicWALL offers the following SSL VPN appliance models, all of which are documented in this
manual. Most of them can be clustered: a cluster of two appliances with internal load balancing is
intended for high availability (it provides system redundancy in case one of the nodes fails), and
clusters of up to eight can be used to increase capacity:
z
SonicWALL Aventail SRA E-Class EX7000 and EX-2500: Supports up to 2,000 concurrent
users, and provides for clustering two identical appliances behind one virtual IP address with
internal load balancing, or up to eight appliances using an external load balancer.
z
SonicWALL Aventail SRA E-Class EX6000 and EX-1600: Supports up to 250 concurrent
users and provides for clustering two identical appliances behind one virtual IP address with
internal load balancing, or up to eight appliances using an external load balancer.
z
SonicWALL Aventail SRA E-Class EX-750: Supports up to 50 concurrent users.
Administrator Components
These are the key components for managing the SonicWALL appliance and services:
z
Aventail Management Console (AMC) is a Web-based administrative tool used to manage
the appliance. It provides centralized access for managing security policies, configuring the
system (including networking and certificate configuration), and monitoring. AMC is accessible
from a Web browser.
z
The Web proxy service provides users with secure access to Web-based applications, Web
servers, and network file servers from a W eb brow ser. The Web proxy service is a secure HT TP
reverse proxy that brokers and encrypts access to Web-based resources. It also manages
TCP/IP connections for the Connect Mobile client.
z
The network tunnel service is a network routing technology that provides secure network
tunnel access to a wide range of applications, including those that use non-TCP protocols such
as Voice Over IP (VoIP) and ICMP, reverse-connection protocols, and bi-directional protocols
Page 13

SonicWALL Aventail E-Class SRA Installation and Administration Guide | 3
such as FTP. It works in conjunction with the Connect Tunnel client and t he OnD em and Tunnel
agent to provide authenticated and encrypted access. The network tunnel service can traverse
firewalls, NAT devices, and other proxy servers that can interfere with traditional VPN devices.
User Access Components
The appliance includes several components that provide users with access to resources on your
network.
Aventail WorkPlace
The WorkPlace portal provides users with quick access to resources on your network. It is accessible
from any Web browser that supports SSL and has Jav aScript enabled. WorkPlace provides a range
of access methods for you to choose from:
z
Basic Web (HTTP) resources are accessible using the Web translation engine, a reverse proxy
that provides single sign-on and fine-grained access control.
z
Web resources are also ac cessible through custom port mapped and custom FQDN mapped Web
access. This type of proxy handles Web programming technologies such as AJAX without the
limitations of URL rewriting used in translation.
z
File system resources are accessible from the Web-based Network Explorer that is integrated
in WorkPlace.
z
Client/server traffic (TCP/IP) is accessible using one of the network redirection clients,
OnDemand Tunnel. The client is automatically provisioned or activated when the user logs in to
WorkPlace.
Page 14
4 | Chapter 1 - Introduction
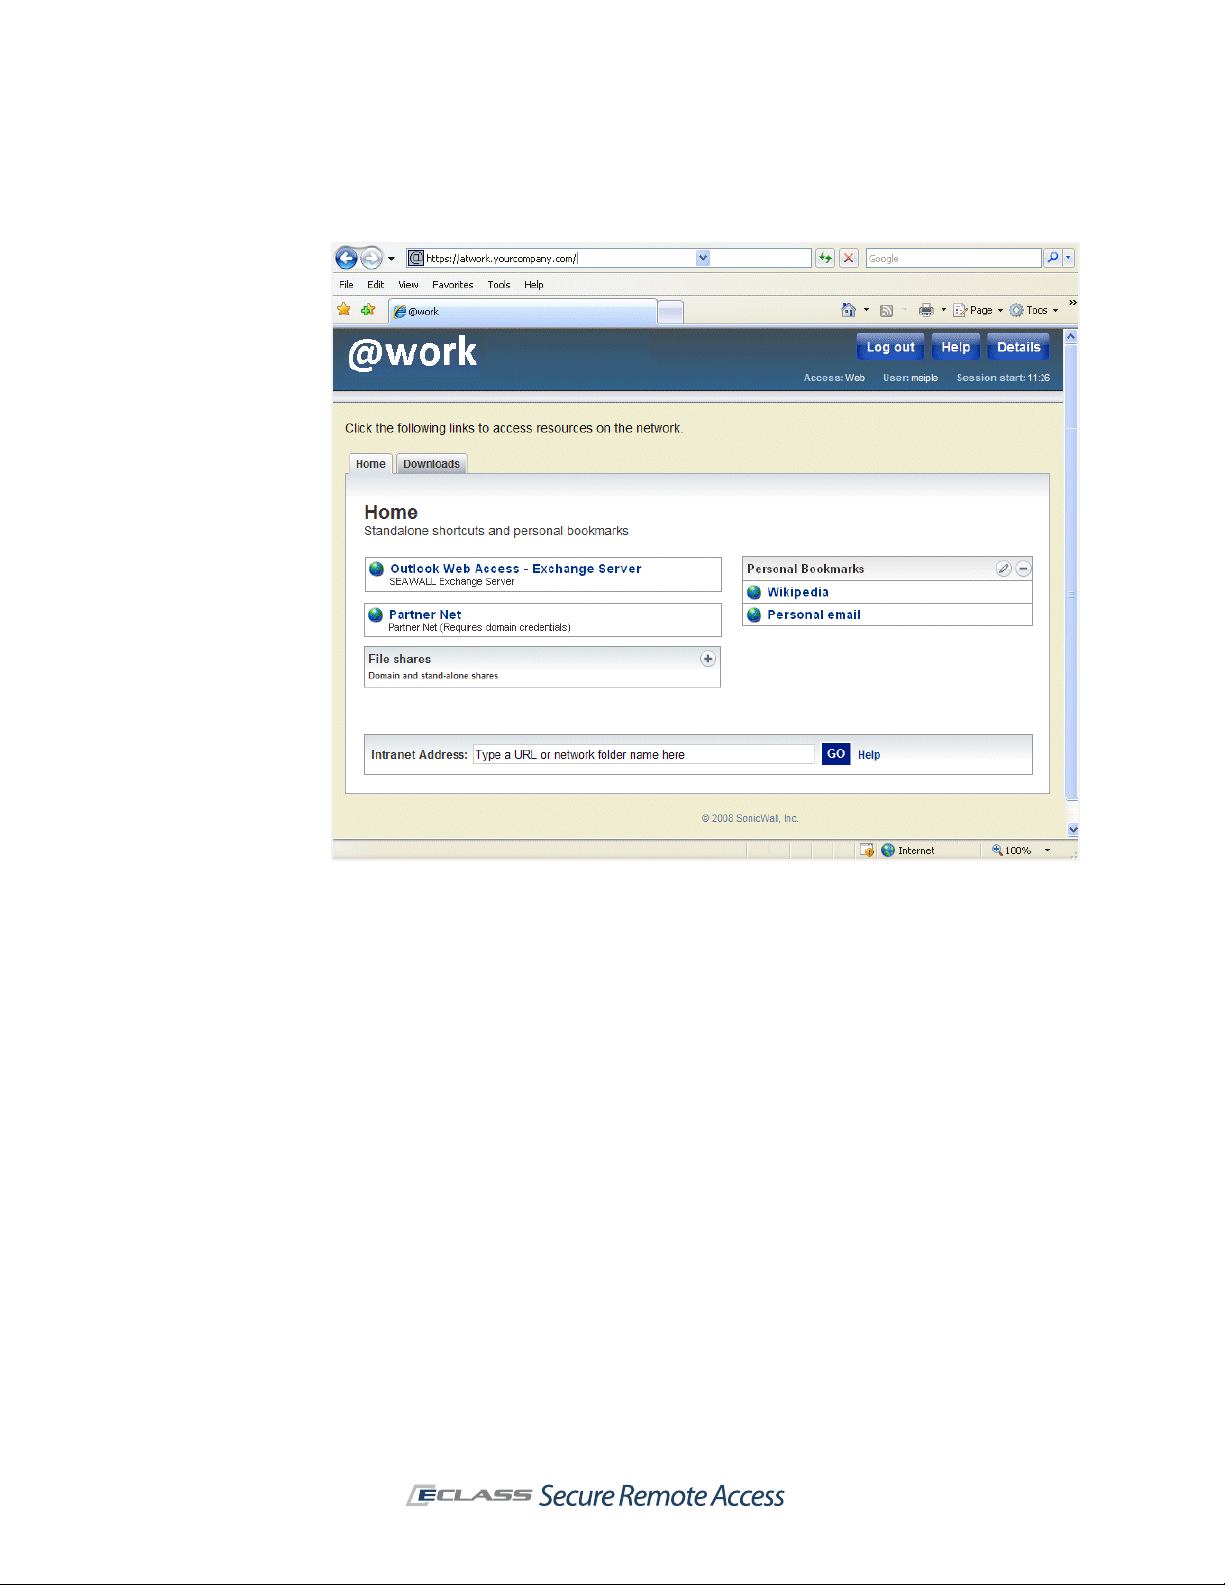
The access method you choose will be based on several factors, including the network protocols
used by your applications, your security requirements, end-user convenience, and the target
platforms. Here’s what your company’s WorkPlace portal might look like:
Connect and OnDemand Tunnel clients
T unnel clients provide network -level access to all resources, effectively making each user device a
virtual node on your network.
z
The Connect Tunnel client provides full network and application access from a Web-deployed
Windows client for computers running a Windows 7, Windows Vista, Windows XP, Macintosh, or
Linux operating system. The cl ient can be provisioned either transparently using a link from the
WorkPlace portal or through an executable installation package. The Connect Tunnel client
provides split-tunneling control, granular access controls, and automatic proxy detection and
authentication.
z
The OnDemand Tunnel agent provides the same features as the Connect T unnel, except that it
can’t be used as a dial-up adapter for domain logins, and is integrated into WorkPlace.
OnDemand can operate in either split-tunnel mode or redirect all traffic mode.
Connect Mobile client
Connect Mobile provides remote TCP/IP access to Windows Mobile-powered devices. The Connect
Mobile client is installed by a stand-alone installer package, and is managed by the Web proxy
service.
End Point Control (EPC)
EPC components ensure that your network is not compromised when a ccessed from PCs in
untrusted environments by enabling you to “interrogate” devices and determine whether they are
running the programs that you require. Advanced EPC simplifies granular end point protection by
allowing you to set up device profiles (for clients running on Microsoft Windows) using a
comprehensive predefined checklist that includes security solutions from leading vendors like
OPSWAT, McAfee, Computer Associates, Sophos, and Kaspersky. Advanced EPC is included wi th the
EX7000 and EX-2500 appliances and licensed separately for the other appliances in the EX-series.
Page 15

SonicWALL Aventail E-Class SRA Installation and Administration Guide | 5
Note
z
Prior to version 10 of the SonicWALL Aventail E-Class SRA EX-Series firmware, there was an
OnDemand proxy agent that provided access to resources protected by the Web proxy service.
This agent and its settings are still available to you if you are upgrading from a previous version
of the firmware; new customers will not ha ve this agent and will use OnDemand Tunnel instead.
What’s New in This Release
Version 10.5 of the Sonic W ALL E- Class Secure Remote Access software incl udes the fo llowing ne w
and enhanced features:
z
Firefox 3.5 Support—Full support for Mozilla Firefox 3.5.
z
Internet Explorer 8 Support—Full support for Microsoft Internet Explorer 8.
z
Safari 4.0 Support—Full support for Apple Safari 4.0.
z
Mac OS X Snow Leopard Support—Full support for Mac OS X Snow Leopard (10.6).
z
Windows 7 Support—Full support for Microsoft Windows 7.
z
Vista SP2 Support—Full support for Microsoft Vista SP2.
z
Vista 64-bit Support—Full support for Microsoft Vista 64-bit.
z
Virtual Assist Remote Helpdesk Support—Allows remote helpdesk technicians to see and
configure user’s desktops. SonicWALL Virtual Assist is a remote support tool that enables an
administrator or help desk technician to assume control of a user’s PC or laptop in order to
provide remote technical assistance. With the user’s permission, the technician gains instant
access to the computer using a Web browser and can then diagnose and fix a problem remotely .
See “Virtual Assist” on page 369 for more information.
z
Tunnel URL Filtering for Web Policy and SSO Tunnel Support—Enforces the URL-based
rules that administrators define for ExtraW eb within VPN tunnel sessions. This feature not only
provides more effective security, but also leverages single sign-on logic for Web applications.
See “Configuring Web Resource Filtering” on page 355
z
OPSWAT Cache Cleaner—Provides VPN administrators with an end-point data protection tool
to ensure data downloaded or accessed during a session is functionally wiped from the user ’s
system. This feature remove s Web browser information, such as cookies, browsing history, and
stored passwords upon termination of the session. The OPSWAT Cache Cleaner is supported on
Windows and Mac platforms.
z
OPSWAT Secure Desktop Emulator—Provides VPN administrators with an additional endpoint data protection tool that prevents end users from copying or moving data from an endpoint system to other locations that hav e not been qualified for security clear ance. When a client
device is classified into a zone that requires the desktop emulator, the emulator will
automatically deploy for the user. The secure desktop emulator is available for Windows
platforms.
See “How OPSWAT Secure Desktop Emulator Works” on page 314 and “Zones and Device
Profiles” on page 257.
z
Apple iPhone and Symbian Support with ActiveSync for Exchange—Extends SonicWALL ’s
clientless ActiveSync support for Exchange email to Apple iPhones, iPads, Google Android
mobile operating system, and devices running the popular Symbian operating system. Symbian
runs on many Nokia and Samsung devices that are popular choices for corporate mail. This
feature also leverages the device’s ID capability to link the device to a single user, providing a
first layer of end-point control.
See “End Point ControlIntegration with Third-Party Components” on page 12 for support
information, “Exchange ActiveSync Web Access” on page 324 for general information, and
“Example: Supporting Exchange on iPhones” on page 126 for an example configuration.
z
Password Management for Sun and Novell Directory Servers—Provides support to Novell
and Sun LDAP servers for improved password management. This new feature calls upon the
Policy server to probe and predetermine the directory server and the applicable version. End
users will be able to enter LDAP credentials and be notified through the appliance when their
password needs to be changed due to expiration or backend policies, and will then allow users
to change the password.
Page 16

6 | Chapter 1 - Introduction
z
Extension Configurations in Management UI—A new page has been added to the
Maintenance section of the AMC management interface to allow simple configurations to be
completed for extensions. This new feature assists administrators in making configuration
adjustments that appear in maintenance releases or hotfixe s, an d allows for the configura ti on
of arbitrary key-value pairs.
z
Zero-client Web Access Capabilities Extended—Custom port mapped and custom FQDN
mapped Web access support for modern Web applications such as AJAX without installation of
a client agent.
See “Web Access” on page 323 for more information.
z
Persistent Desktop Device Identity—Limits the set of devices that any giv en user ma y use
to access protected resources.
See “Collecting Equipment IDs from Unregistered Devices” on page 277 for more information.
z
UDP Tunnel Mode—Use of Encapsulating Security Payload (ESP) improves the performance of
UDP streaming applications like VoIP.
See “UDP Tunnel Mode” on page 172 for more information.
z
FIPS Certification—EX-Series 6000 and 7000 appliances are being certified as FIPScompliant.
See “FIPS Certification” on page 240 for more information.
z
Control Session Termination for Tunnel Clients—Improves security and license usage by
providing an option to terminate OnDemand Tunnel or Connect Tunnel sessions when the
credentials for the community expire.
See “Session Termination” on page 174.
z
Intermediate CA Support—Certificate authority management is now more flexible with
support for wildcard server and client certificate s signed by intermediate certificate authorities.
z
Option to Disable Authorization Checks—Prevents authorization check errors by providing
an option not to query directory servers for group information. Typically used for secondary
authentication servers, this option can also increase the speed of the authentication process for
users.
See “Disabling Authorization Checks” on page 83 for more information.
z
Enforce Single User Name in Chained Authentication—Improves security. The
administrator has the option of requiring that the same user identifier is used for each step of
chained authentication.
See “Configuring Chained Authentication” on page 109 for more information.
z
Enhance Terminal Services and Citrix Shortcut Configuration Options—New Web client
options for administrator include the ability to choose whether to allow copy and paste, user
screen size control, and other options during shortcut creation. A new check box for terminal
services shortcuts allows the option of automatically reconnecting when the session is
interrupted. Workplace users can control screen resolution when accessing shortcuts.
See “Adding Graphical Terminal Shortcuts to Individual Hosts” on page 362 for more
information.
z
AMC Navigation Improvements for Resources and Rules—Filtering drop boxes have been
added on a number of AMC pages to provide for more efficient searching.
See “Filters” on page 40 for more information.
z
Simplified OPSWAT Configuration in AMC—A new Any product from this vendor check
box is available for antivirus, antispyware, and personal firewall program vendors in Windows
device profiles during End Point Control configuration. Selecting this option allows the
administrator to create a pro file that do es n ot requ ire updat ing e ver ytime the v e ndor rele ases
a new version. When this option is selected, the administrator can still specify additional
criteria, such as signatures updated, file system scanned, and real-time protection enabled, as
long as all the versions of all the products in the list support that functionality.
See “Advanced EPC: Extended Lists of Security Programs” on page 272 for configuration
information.
z
Deployment of EPC Using Browser on Windows Mobile—End Point Control can be
performed on mobile devices without requiring Connect Mobile installation. The device must be
running Windows Mobile 6.5 or 6.1 with the corresponding version of Pocket Internet Explorer.
No configuration or separate device profile is necessary in the AMC. When logging into a
community that requires EPC, the user is prompted to install or upgrade the Aventail
Interrogator client. Interrogator communicates the EPC classification of the device to the
appliance.
Page 17

SonicWALL Aventail E-Class SRA Installation and Administration Guide | 7
z
Suspend and Resume a Spike License—Instead of having a fixed ex piration date once it is
activated, a Spike License can now be suspended and later resumed. Once it is activated, you
will see the total number of allowed users, the activation date, and the number of days
remaining on the license. A Spike License enables you to temporarily increase the number of
remote users you can support.
See “Managing a Spike License” on page 248 for more information.
System Requirements
This section describes the system requirements for the administrator (server) and client
components for the SonicWALL SSL VPN.
Server Components
The system requirements for the administ rator components and authen tication servers are listed in
the following tables.
System Administration
Operating system Browser
Aventail Management Console (AMC)
z
Windows Vista SP2
z
Windows Vista x64
z
Windows XP Professional SP3
z
Linux kernel 2.4.20 or later
z
Internet Explorer 8.0
z
Internet Explorer 7.0
z
Mozilla Firefox 3.0
z
Mozilla Firefox 3.0
Page 18

8 | Chapter 1 - Introduction
Authentication Servers
Operating system/Version Notes
Active Directory
Windows Server platform:
z
Windows 2008 Server
z
Windows 2003 Server
LDAP servers
z
LDAP version 3 compatible servers
z
IBM Directory Server, versions 5 and 6
RADIUS
z
Version 5.2
RSA
z
RSA Authentication Manager, version 7.1
z
RSA Authentication Manager, version 6.1
Single sign-on
z
RSA ClearTrust, version 4.6
z
General support, including password change
z
No LDAP password change support
z
LDAP password change supported on IDS
z
Supports IP address assignment
Citrix Server Farms
Servers Notes
z
Citrix XenApp 5.0
z
Citrix XenApp 4.5
z
Citrix Presentation Server 4
z
EOL has been announced for Citrix MetaFrame XP and
Citrix MetaFrame 1.8
Compatible Server Components
Server platforms, browsers, and third-party applications that are compatible with the appliance are
shown in the following table. There are no kno w n issues with compatible configurations, and we
continue to offer technical support for them, but they have not been specifically tested in the
current release and future product changes will not take them into account.
The following platforms and browsers remain compatible with this release, but will be deprecated
in a future release:
Operating Systems Authentication and Citrix Servers
z
Windows XP Professional SP2
z
Windows Vista (32-bit/64-bit) No
Service Pack
z
Windows Vista (32-bit/64-bit)
SP1
z
Windows 2000 Server
z
Active Directory on Windows 2000 Server
z
RADIUS v5.0
z
RSA Authentication Manager v5.2
z
Citrix MetaFrame XP
Citrix XML service must be running on the
MetaFrame server.
z
Citrix MetaFrame v1.8
MetaFrame 1.8 must have a license for Service Pack
2 and Feature Release 1 (SP2/FR1)
Page 19

SonicWALL Aventail E-Class SRA Installation and Administration Guide | 9
Client Components
The system requirements for client components are listed in the following tables:
z
“Tunnel Clients” on page 10
z
“Web-Based Clients” on page 10
z
“Proxy Clients” on page 12
z
“Virtual Assist Clients” on page 11
z
“End Point ControlIntegration with Third-Party Components” on page 12
z
“End Point ControlIntegration with Third-Party Components” on page 12
z
“Compatible Client Components” on page 14
Page 20

10 | Chapter 1 - Introduction
Tunnel Clients
Operating system Browser Notes
Connect Tunnel Client
z
Windows 7 (32-bit/64-bit)
z
Windows Vista SP2
(32-bit/64-bit)
z
Windows XP Pro, SP3
Windows Server platform:
z
Windows 2003 Server
z
Mac OS X 10.6
(32-bit/64-bit)
z
Mac OS X 10.5
z
Linux kernel 2.4.20 or later
(32-bit)
z
Linux kernel 2.6.0 or later
(64-bit)
Connect Tunnel Service
Windows Server platform:
z
Windows Server 2008 SP1
(32-bit/64-bit)
z
Windows Server 2003 SP2
OnDemand Tunnel Agent
z
Windows 7 (32-bit/64-bit)
z
Windows Vista SP2
(32-bit/64-bit)
z
Windows XP Pro, SP3
z
Mac OS X 10.6
z
Mac OS X 10.5
z
Linux kernel 2.4.20 or later
z
Linux kernel 2.6.0 or later
(64-bit)
z
n/a
z
n/a
z
Mozilla Firefox 3.5
z
n/a
z
Internet Explorer 8.0
(32-bit only)
z
Internet Explorer 7.0
(32-bit only)
z
Mozilla Firefox 3.5
z
Safari 4.0
z
Safari 3.0
z
Mozilla Firefox 3.5
z
ActiveX, or JRE 1.6.0
update 14 or later is
required
z
Administrator rights
required for installation
z
Administrator rights
required for installation
z
Administrator rights
required for installation
z
Browser required only for
proxy detection
z
No support for End Point
Control
z
ActiveX, or JRE 1.6.0
update 14 or later is
required
z
Administrator rights
required for installation
z
JRE 1.6.0 update 14 or
later
z
Administrator rights
required for installation
z
JRE 1.6.0 update 14 or
later
z
Administrator rights
required for installation
Web-Based Clients
Operating system Browser
WorkPlace Portal, Translated/Custom Port Mapped/Custom FQDN Mapped Web access
z
Windows 7 (32-bit/64-bit)
z
Windows Vista SP2
(32-bit/64-bit)
z
Windows XP Pro, SP3
z
Mac OS X 10.6
z
Mac OS X 10.5
z
Internet Explorer 8.0
(32-bit only)
z
Internet Explorer 7.0
(32-bit only)
z
Mozilla Firefox 3.5
z
Safari 4.0
z
Safari 3.0
Page 21

SonicWALL Aventail E-Class SRA Installation and Administration Guide | 11
Operating system Browser
z
Linux kernel 2.4.20 or later
z
Web-enabled mobile devices
z
Mozilla Firefox 3.5
z
The browser appropriate for your device
The following table shows W eb-based applications that are supported and tested for different types
of custom access:
Custom Access Type Supported and Tested Web Applications
z
Translation
z
Custom Port Mapped
z
Custom FQDN Mapped
z
Outlook Web Access 2003
z
Outlook Web Access 2007
z
Sharepoint 2003
z
Sharepoint 2007
z
Outlook Web Access 2003
z
Outlook Web Access 2007
z
Sharepoint 2003
z
Sharepoint 2007
z
Domino Web Access 8.0
z
Domino Web Access 8.5.x
Virtual Assist Clients
Operating system Browser Notes
Customer Application
z
Windows 7 (32-bit/64-bit)
z
Windows Vista SP2
(32-bit/64-bit)
z
Windows XP Pro, SP3
z
Mac OS X 10.6 (32-bit/64-bit)
z
Mac OS X 10.5
z
Internet Explorer 8.0
(32-bit only)
z
Internet Explorer 7.0
(32-bit only)
z
Mozilla Firefox 3.5
z
Safari 4.0
z
Safari 3.0
z
ActiveX, or JRE 1.6.0
update 14 or later is
required
z
JRE 1.6.0 update 14 or
later
Technician Application
z
Windows 7 (32-bit/64-bit)
z
Windows Vista SP2
z
Standalone application
(32-bit/64-bit)
z
Windows XP Pro, SP3
Page 22

12 | Chapter 1 - Introduction
Proxy Clients
Operating system Browser Notes
OnDemand Proxy Agent
z
Windows 7 (32-bit/64-bit)
z
Windows Vista SP2
(32-bit/64-bit)
z
Windows XP Pro, SP3
z
Mac OS X 10.6
(32-bit/64-bit)
z
Mac OS X 10.5
z
Linux kernel 2.4.20 or later
z
Linux kernel 2.6.0 or later
(64-bit)
Web Proxy Agent
z
Windows 7 (32-bit/64-bit)
z
Windows Vista SP2
(32-bit/64-bit)
z
Windows XP Pro, SP3
Connect Mobile Client
z
Windows Mobile 6.5
z
Windows Mobile 6.1
z
Internet Explorer 8.0
(32-bit only)
z
Internet Explorer 7.0
(32-bit only)
z
Mozilla Firefox 3.5
z
Safari 4.0
z
Safari 3.0
z
Mozilla Firefox 3.5
z
Internet Explorer 8.0
(32-bit only)
z
Internet Explorer 7.0
(32-bit only)
z
n/a
z
ActiveX, or JRE 1.6.0
update 14 or later is
required
z
Port-mapped mode
requires ActiveX or Java;
for users who can’t run
ActiveX, JRE is used.
z
64-bit support on Windows
7 and Windows Vista is
only supported for
OnDemand Mapped Mode
z
JRE 1.6.0 update 14 or
later
z
JRE 1.6.0 update 14 or
later
z
ActiveX, or JRE 1.6.0
update 14 or later is
required
z
Includes Mobile2Market
certification
z
Supports Pocket PC
devices and smartphones
z
Does not support some
legacy devices, such as
Audiovox SMT5600,
Motorola MPx200 and
MPx220, Sierra Wireless
Voq, Samsung i600, iMate
SP2, and so on.
End Point ControlIntegration with Third-Party Components
Operating system Browser Notes
Interrogator and Installer
z
Windows 7 (32-bit/64-bit)
z
Windows Vista SP2
(32-bit/64-bit)
z
Windows XP Pro, SP3
z
Internet Explorer 8.0
(32-bit only)
z
Internet Explorer 7.0
(32-bit only)
z
Mozilla Firefox 3.5
z
ActiveX, or JRE 1.6.0
update 14 or later is
required
Page 23

SonicWALL Aventail E-Class SRA Installation and Administration Guide | 13
Operating system Browser Notes
z
Windows Mobile 6.5
z
Windows Mobile 6.1
z
Pocket Internet Explorer
6.1
z
Pocket Internet Explorer
6.0
z
Interrogator only; both
Windows Mobile
Workplace (with Pocket
IE) and Connect Mobile
are supported, and can
coexist on the device
z
Windows Mobile 2003
z
n/a
z
Interrogator only;
Connect Mobile is
required
z
Mac OS X 10.6 (32-bit/64bit)
z
Mac OS X 10.5
z
Linux kernel 2.4.20 or later
z
Linux kernel 2.6.0 or later
z
Safari 4.0
z
Safari 3.0
z
Mozilla Firefox 3.5
z
JRE 1.6.0 update 14 or
later
z
JRE 1.6.0 update 14 or
later
(64-bit)
Cache Cleaner
z
Windows 7 SP1
(32-bit/64-bit)
z
Windows 7
z
Internet Explorer 8.0
z
Internet Explorer 7.0
z
Mozilla Firefox 3.5.x
(32-bit/64-bit)
z
Windows Vista SP2
(32-bit/64-bit)
z
Windows XP SP3
(32-bit)
z
Mac OS X 10.6.x
z
Mac OS X 10.5.x
z
Safari 5.0
z
Safari 4.0
Advanced EPC / Secure Desktop Emulator
z
Windows 7 SP1
(32-bit/64-bit)
z
Windows 7
z
Internet Explorer 8.0
z
Internet Explorer 7.0
z
Mozilla Firefox 3.5.x
(32-bit/64-bit)
z
Windows Vista SP2
(32-bit/64-bit)
z
Windows XP SP3
(32-bit)
ActiveSync
SonicWALL supports clientless ActiveSync support for Exchange email to Apple iPhones, iPads,
Google Android mobile operating system, and devices running the popular Symbian operating
system. Symbian runs on many Nokia and Samsung devices that are popular choices for corporate
mail. ActiveSync support also l everages the device’ s ID capability to link the device to a single user,
providing a first layer of end-point control.
ActiveSync - Certified With ActiveSync - Compatible With Mobile Operating System
z
Apple iPhone Google Android 2.x
Symbian Apple iPad (with valid
certificates)
Windows Mobile 6.5
z
Windows Mobile 6.1
Page 24

14 | Chapter 1 - Introduction
Terminal Services and Citrix
The SonicWALL appliance integrates with several popular security programs. In some cases, the
files necessary for integration are already on the appliance, and in other cases they must be copied
to the appliance.
Description Notes
Windows Terminal Services agent
Windows (ActiveX control)
Cross-platform (Java applet)
Citrix agent
Windows (ActiveX control)
Cross-platform (Java applet)
z
Version 6.0
z
Version 5.2
z
Version 8.6
z
Requires JRE 1.5 or later
z
Versions 9.x and 10.x. Version 11 is also
supported, but only if the agent is
downloaded separately and installed using
Microsoft Windows Installer (MSI).
z
Version 9.x and l ater
z
Requires JRE 1.5 or later
Compatible Client Components
Client platforms, browsers, and Java versions that are compatible with the appliance are shown in
the following table. There are no known issues with compatible components, and we continue to
offer technical support for them, but they have not been specifically tested in the current release
and future product changes will not take them into account.
The following platforms and browsers remain compatible with this release, but will be deprecated
in a future release:
Operating Systems Browsers Java Versions
z
Windows XP Professional SP2
z
Windows Vista (32-bit/64-bit)
No Service Pack
z
Windows Vista (32-bit/64-bit)
SP1
z
Windows 2000 Server, SP4
z
Mac OS X 10.4
z
Windows Mobile 6.0
z
Windows Mobile 5.0
The following browsers are deprecated in this release:
Browsers
z
Internet Explorer 6.0
z
Firefox 2.0 (Windows)
z
Firefox 2.0 (Linux)
z
Firefox 3.0 (Windows)
z
Firefox 3.0 (Linux)
z
Safari 2.0
z
JRE 1.6.0 updates previous
to 14
z
JRE 1.5.0
Page 25

SonicWALL Aventail E-Class SRA Installation and Administration Guide | 15
About the Docu m en ta tio n
This document contains detailed informat ion about installing, configuring, and maintaining the
appliance. Its contents are also available as context-sensitive Help from AMC; see “Getting Help”
on page 45 for more information.
Your SonicW ALL appliance also comes with a printed Getting Starte d Guide that explains important
VPN concepts and components and will aid in planning to deploy your VPN. For access to electronic
copies of all of the product documentation, log in to your mySonicWALL.com account and register
your appliance. See “Registering Your SonicWALL E-Class SRA Appliance” on page 247 for more
information.
Document Conventions
Throughout this document, “external” refers to the network interface connected to the Internet.
“Internal” refers to the network interface connected to your internal corporate network. This
document uses the following typographical conventions:
Typographical convention Usage
Bold User interface components (such as text boxes or buttons on a
Monospace font Information you are supposed to type.
Italic File names and directories, examples, and selections from drop-
commandname -x [-y] In command-line syntax, square brackets indicate optional
Web page).
down lists.
parameters.
Page 26

16 | Chapter 1 - Introduction
Page 27
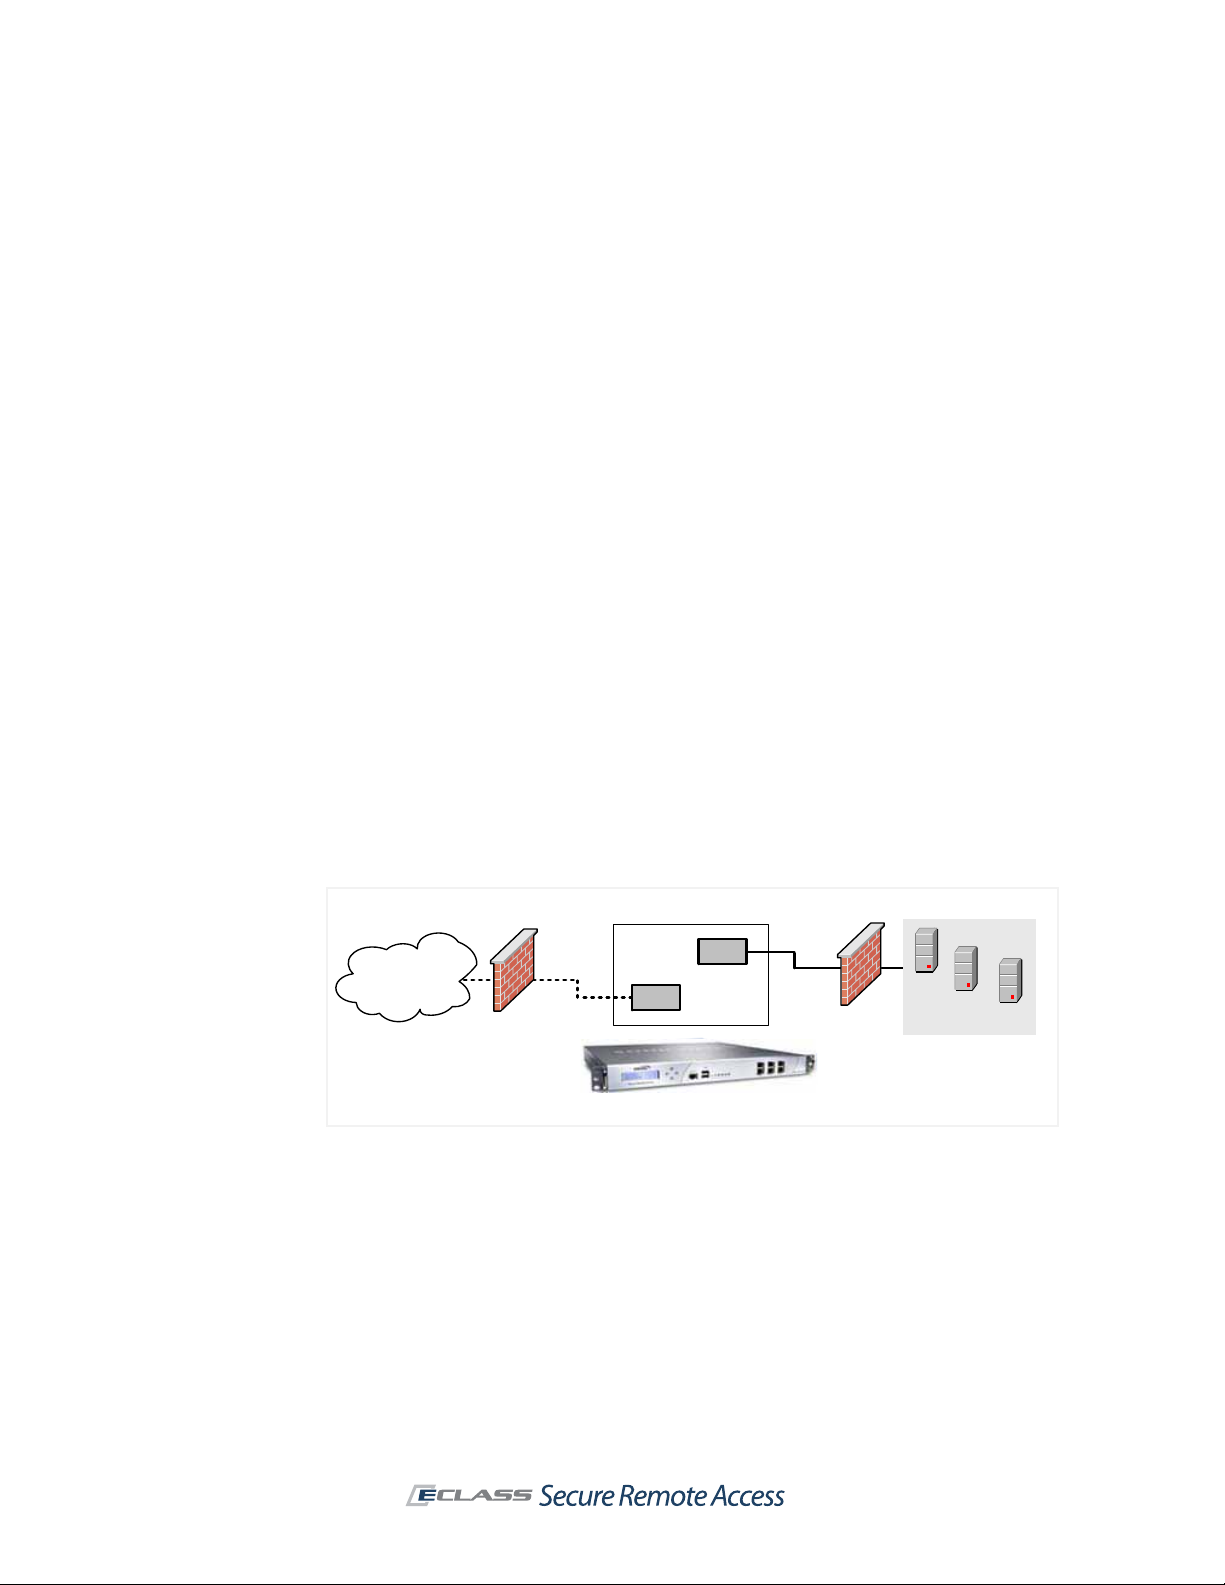
SonicWALL Aventail E-Class SRA Installation and Administration Guide | 17
Internal
interface
External
interface
SonicWALL Aventail Appliance
Firewall
Internet
Firewall
Corporate network
File
Server
Application
Server
Web
Server
Chapter 2
Installation and Initial Setup
This section shows where the appliance fits into your network environment, provides installatio n
and cabling instructions, and explains how to use the Web-based Setup Wizard (or alternatively use
the command-line Setup Tool) to perform basic network configuration.
Network Architecture
All of the SonicWALL appliances can be set up in either a dual interface or single interface
configuration, both of which are discussed in this section.
z
The EX7000, EX6000, EX-2500, and EX-1600 appliances include three physical network
interfaces and can be set up in a cluster for high availability (see “Installing and Configuring a
Cluster” on page 390 for more information), or one that uses an external load balancer (see
“Configuring a High-Capacity Cluster” on page 453).
z
The EX-750 appliance includes two physical network interfaces.
Dual-homed configuration (internal and external interfaces)
One network interface is used for external traffic (that is, to and from the Internet), and the other
interface is used for internal traffic (to and from your corporate network).
Page 28
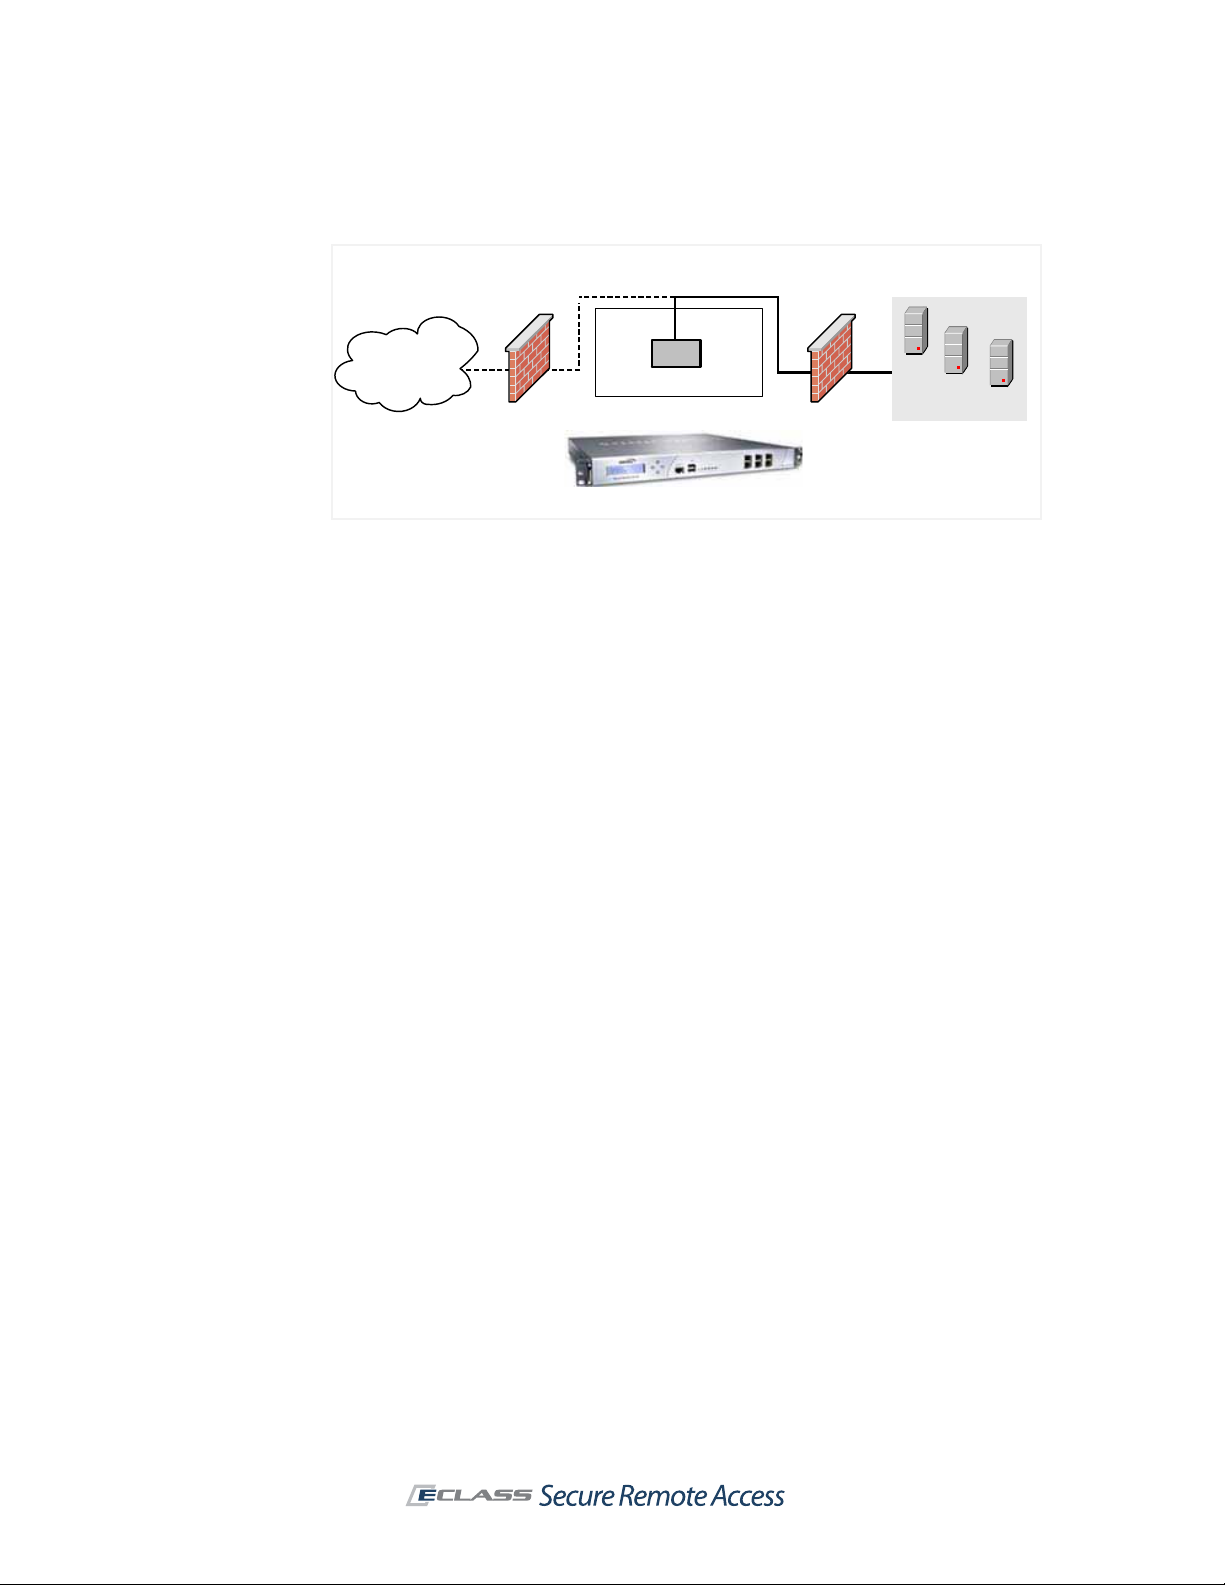
18 | Chapter 2 - Installation and Initial Setup
Single-homed interface configuration (internal interface)
A single network interface is used for both internal and external traffic. In this configuration, the
appliance is usually installed in the demili tarized zone (or DMZ, also known as a perimeter network).
Internet
Firewall
DMZ
Internal interface
Firewall
SonicWALL Aventail Appliance
Corporate network
File
Server
Application
Server
Web
Server
In both configurations, incoming requests to the SonicWALL services—including HTTP/S traffic for
the Web proxy service—are sent over port 80 (HTTP) and port 443 (HTTPS). Traffic from the
OnDemand agent is always sent over port 443. Because most networks are configured to enable
traffic over these ports, you shouldn’t need to reconfigure firewalls on your network.
You should install the appliance in a location where it can connect to resources on your network,
including:
z
Application servers and file servers, including Web servers, client/server applications, and
Windows file servers.
z
External authentication repositories (such as an LDAP, Microsoft Active Directory, or RADIUS
server).
z
One or more Domain Name System (DNS) servers.
z
Optionally, a Windows Internet Name Service (WINS) server. This is required for browsing
Windows networks using WorkPlace.
CAUTION The SonicWALL appliance does not provide full firewall capabilities and should be
!
secured behind a firewall. Running without a firewall makes the appliance vulnerable to
attacks that can compromise security and degrade performance.
Although not required, enabling the appliance to communicate with these additional resources
provides greater functionality and ease of use:
z
Network Time Protocol (NTP) server for synchronizing the time on the appliance.
z
External server for storing syslog output.
z
Administrator’s workstation for secure shell (SSH) access.
You can configure the appliance to use a self-signed server certificate, or, for enhanced security,
you can obtain a certificate from a commercial certificate authority (CA). For more information, see
“Obtaining a Certificate from a Commercial CA” on page 68.
Preparing for the Installation
Before beginning the installation, you need to gather information about your networking
environment and verify that your firewalls are properly configured to permit traffic to and from the
appliance.
Page 29

SonicWALL Aventail E-Class SRA Installation and Administration Guide | 19
Gathering Information
Before configuring the appliance, you need to gather the following information. You are prompted
for some of this information when running Setup Wizard (see “Web-Based Configuration Using
Setup Wizard” on page 32) or Setup Tool (see “Configuring a New Appliance Using Setup Tool” on
page 400), but most of it will be used when you configure the appliance in AMC (see “Network and
Authentication Configuration” on page 55).
If you are installing a cluster , you need some additional information. See “Installing and Configuring
a Cluster” on page 390 and “Configuring a High-Capacity Cluster” on page 453.
Settings required in order to start Aventail Management Console
z
The root password for administering the appliance
z
The name for the appliance (becaus e this n ame is used only in log files, you don’t need to add
it to DNS)
z
The internal IP address and, optionally, an external IP address
z
Select a routing mode and supply IP addresses for the network gateways to the Internet, and
your corporate network.
Certificate information
Several pieces of information are used to ge ne rate the server and AMC certificates:
z
A fully qualified domain name (FQDN) for the appliance and for any W orkPlace sites that use a
unique name. These names should be added to your public DNS; they are also visible to users
when they connect to Web-based resources.
z
A FQDN for the Aventail Management Console (AMC) server. The AMC server name is used to
access AMC, which is a Web-based tool for administering the appliance.
Name lookup information
z
Internal DNS domain name of the network to which the appliance is connected
z
Primary internal DNS server address (additional DNS servers are optional)
z
IP address for an internal WINS server and the name of your Windows domain (required to
browse files on a Windows network using WorkPlace, but are otherwise optional)
Authentication information
z
Server name and login information for your authentication servers (LDAP, Active Directory, or
RADIUS)
Virtual Address pool information
z
If you are planning to deploy either network tunnel client (Connect Tunnel or OnDemand
Tunnel), you must allocate IP addresses for on e or more address pools. F or m ore i nformation ,
see “Configuring IP Address Pools” on page 349.
Optional configuration information
z
To enable SSH access from a remote machine, you need to know the remote host’s IP address.
z
To synchronize with an NTP server, you need to know the IP addresses for one or more NTP
servers.
z
To send data to a syslog server, you need to know the IP address and port number for one or
more syslog servers.
Verifying Your Firewall Policies
For the appliance to function correctly, you must open ports on your external (Internet-facing) and
internal firewalls.
Page 30

20 | Chapter 2 - Installation and Initial Setup
External firewall
For secure access to the appliance from a Web browser or OnDemand, you must make sure that
ports 80 and 443 are open on firewalls at your site. Opening your firewall to permit SSH access is
optional, but can be useful for performing administrative tasks from a remote system.
Traffic type Port/protocol Usage Required?
HTTP 80/tcp Unencrypted network access x
HTTPS 443/tcp Encrypted network access x
SSH 22/tcp Adm inistrative access to the appliance
Internal firewall
If you have a firewall on the internal network, you may need to adjust its policy to open ports for
back-end applications with which the appliance must communicate. In addition to opening ports for
standard network services such as DNS and email, you may need to modify your firewall policy in
order for the appliance to access the following services.
Traffic type Port/protocol Usage
Microsoft networking
z
z
z
z
z
LDAP (unencrypted) 389/tcp Communicate with an LDAP directory or
LDAP over SSL
636/tcp Communicate with an LDAP directory or
(encrypted)
RADIUS 1645/udp or 1812/udp Communicate with a RADIUS
NTP 123/udp Synchronize the appliance clock with an
Syslog 514/tcp Send system log information to a syslog
SNMP 161/udp Monitor the appliance from an SNMP
138/tcp and 138/udp
137/tcp and 137/udp
139/udp
162/snmp
445/smb
Used by WorkPlace to perform WINS name
resolution, browse requests, and access
file shares
Microsoft Active Directory
Microsoft Active Directory over SSL
authentication server
NTP server
server
management tool
Helpful Management Tools
To manage the appliance from a remote system running Microsoft Windows, you may find the
following management tools useful. Both of these tools use encryption to protect information from
eavesdropping, unlike standard FTP or Telnet utilities:
z
A Secure Shell (SSH) client enables you to securely log in to the appliance and configure it
from the command line. This is useful for backing up the system, viewing log files, and
configuring advanced network settings. A popular SSH client for Windows is V anDyke Software’s
SecureCRT. A trial download is available at http://www.vandyke.com/products/securecrt/.
Another popular client is PuTTY, a free implementation of Telnet and SSH for Windows
platforms
To connect to the appliance using SSH, you type root as the username and type the password
you created using Setup Wizard.
z
A Secure Copy (scp) client makes it easy to securely transfer files from a PC running
Windows to the appliance. This is useful for copying certificates and other data to the appliance.
A popular Windows client is WinSCP, available at http://winscp.sourceforge.net/eng/.
. PuTTY is recommended by Cisco.
Page 31

SonicWALL Aventail E-Class SRA Installation and Administration Guide | 21
Most of the configuration management tasks that you need to perform—backing up and restoring
your appliance configuration, applying upgrades, and so on—can be done on the Maintenance
page in AMC, as described in “Managing Configuration Data” on page 224. If you prefer to handle
these tasks on the command line, see “Appliance Command-Line Tools” on page 399.
Installation and Deployment Process
This section outlines the process of installing, configuring, and testing the appliance, and then
deploying it in a production environment. Here’s an overview of the steps:
Installation step Description
Make a note of your appliance serial
number and authentication code
Rack-mount the appliance and connect the
cables
Turn on the appliance and begin
configuration
Run Setup Wizard The wizard guides you through the process of initial
Register your appliance on MySonicWALL Register your appliance on MySonicWALL. Product
You’ll need this information when you register your
product on MySonicWALL. It is displayed in one or
two places, depending on your appliance model:
z
EX7000 and EX6000: The serial number and
authentication code are printed on your appliance
label; they are also displayed on the General
Settings page in AMC.
z
EX-2500, EX-1600 and EX-750: The serial
number is printed on your appliance label; the
General Settings page in AMC displays both the
serial number and authentication code.
See “Specifications and Rack Installation” on
page 22 and “Connecting the Appliance” on page 29.
To connect to your appliance on your internal
network you must specify an internal IP address, the
subnet mask, and indicate whether your appliance is
part of a cluster. How you do this depends on your
appliance model:
z
For all appliance models except the EX-750: Use
the controls on the front of the appliance. See
“Powering Up and Configuring Basic Network
Settings” on page 31.
z
EX-750: Use a command-line tool on the
appliance; see “Configuring a New Appliance
Using Setup Tool” on page 400.
setup for your SonicWALL SRA appliance. See “WebBased Configuration Using Setup Wizard” on
page 32.
registration gives you access to essential resources,
such as your license file and updates. In order to
register, you ne ed both the serial number for your
appliance and its authentication code.
Page 32

22 | Chapter 2 - Installation and Initial Setup
The SonicWALL appliance uses a few different types of licenses. All license files must be retrieved
from www.mysonicwall.com and imported to the appl iance, as described in “Software Licenses” on
page 243:
z
Administration test license: To begin setting up your SonicWALL appliance, log in to
MySonicWALL to retrieve your initial user license , which is valid for one user (the administrator
plus one end user) for an unlimited number of days. To become familiar with the Aventail
Management Console (AMC) and test it in your environment with additional users, either
retrieve an appliance license, or request a lab license to add a few more users.
z
Appliance licenses: The number of concurrent users supported with the appliance license
varies, depending on the appliance model you have:
{
EX7000 or EX-2500: up to 2,000 users
{
EX6000 or EX-1600: up to 250 users
{
EX-750: up to 50 users
z
Component licenses: If the license for an appliance component (such as OnDemand) has
expired, users attempting to use that component see an error message in Av entail WorkPlace.
In the case of a Spike License, the date on which it was activated and how many days still
remain is displayed in AMC.
If a license is about to expire, th e Aventail Management Console (AMC) displays a license warning
message in the status area that links to the Licensing page.
Notes
z
Both Setup Wizard and Aventail Management Console (AMC) are Web-based applications for
configuring the appliance. PCs running these applications must have JavaScript enabled.
JavaScript must also be enabled on the browsers used for accessing WorkPlace.
z
If you are installing a cluster, see “Installin g and Configuring a Cluster” on page 390 and
“Overview of Clustering” on page 453.
Specifications and Rack Installation
After you’ve unpacked the box, you’re ready to install the appliance on your network and prepare
for the configuration process. The appliances are designed to fit on a standard, 19-inch telecom
rack. Before connecting the appliance, make sure that you have sufficient space and adequate
power. The specificat ions for each appliance model are listed below.
SRA E-Class SRA EX-Series Hardware
The SRA E-Class EX7000 and EX6000 include the following:
z
Rails (in kit, not attached)
z
Standard IEC 60320 C13 to NEMA 15 USA only power cords
z
Crossover cable (a network cable that crosses the transmit and receive lines)
z
1 GB Ethernet ports
z
2 USB ports
z
80 GB SATA hard drive
z
Serial connection to appliance (115,200 baud)
The models differ from each other most in terms of processor power, RAM, network ports, and
power supply:
SRA EX7000 SRA EX6000
Regulatory Model/Type 1RK15-059 1RK20-05A
Intel processor Core2 Duo 2.1GHz CPU Celeron 2.0GHz CPU
RAM 2Gig DDR533 1Gig DDR533
PCIe Gig network ports 6 (5 + 1 HA) 4 (3 + 1 HA)
Power supply Dual hot swappable Fixed
Page 33

SonicWALL Aventail E-Class SRA Installation and Administration Guide | 23
SRA EX7000 SRA EX6000
Front panel (illustration) See “EX7000 Appliance Front
Panel Controls” on page 24
See “EX6000 Appliance Front
Panel Controls” on page 25
Aventail EX-Series
The Aventail EX-2500, EX-1600, and EX-750 differ from each other as follows:
EX-2500 EX-1600 EX-750
AC power supply 300W PFC 185W PFC 200W PFC
AC voltage 6 amp at 120 V, or
3 amp at 240 V
Front panel
(illustration)
See “EX-2500 Appliance
Front Panel Controls” on
page 26
4 amp at 120 V, or
2 amp at 240 V
See “EX-1600
Appliance Front Panel
Controls” on page 27
5 amp at 100 V, or
3 amp at 240 V
See “EX-750
Appliance Front Panel
Controls” on page 28
Best Practices for Rack Installation of the Appliance
To mount the appliance in an equipment rack, you must install the rack hardware. The product
packaging for all models of the appliance contains a slide rail kit for mounting the appliance in a
four-post cabinet.
z
Avoid elevated operating ambient temperature: If installed in a closed or multi-unit rack
assembly, the operating ambient temperature of the rack environment may be greater than
room ambient. Therefore, consideration should be given to installing the equipment in an
environment compatible with the maximum ambient temperature (Tma) specified by the
manufacturer.
z
Avoid reduced air flow: Installation of the equipment in a rack should be such that the
amount of air flow required for safe operation of the equipment is not compromised.
z
Provide even mechanical loading: Mounting of th e equipment in the rack should be such
that a hazardous condition is not achieved due to uneven mechanical loading.
z
Avoid circuit overloading: Consideration should be given to the connection of the equipment
to the supply circuit and the effect that overloading of the circuits might have on overcurrent
protection and supply wiring. Appropriate consideration of equipment nameplate ratings should
be used when addressing this concern.
z
Maintain reliable earthing: Reliable earthing of rack-mounted equipment should be
maintained. Particular attention should be given to supply connections other than direct
connections to the branch circuit (for example, use of power strips).
Front Panel Controls and Indicators
Before powering up the appliance, you should familiarize yourself with the front panel controls.
Page 34

24 | Chapter 2 - Installation and Initial Setup
EX7000 Appliance Front Panel Controls
This section describes the front panel controls for the EX7000 appliance. The power switch is located
on the rear panel.
LCD
controls
Console
The following table describes the controls and indicators on the front panel.
Item Description
LCD display screen
and controls
Console Connects the appliance to a personal computer with a
USB ports There are two USB ports.
LED indicators From left to right, the LED indicators are:
X0: Internal network Connects the appliance to your internal network.
X1: External network Connects the appliance to your external network.
X2: Cluster interface Connect the appliance to another appliance in a high-availability
X3-X5 Not used.
PW1
PW2
X1
X3
X5
X0
USB
ports
X4
X2
HD
Alarm
Test
Displays status and configuration about the appliance. Keypad
buttons are used to display appliance status and configure initial
settings:
z
For more information on displaying appliance status and using
the keypad to shut down or reboot the appliance, see “LCD
Controls for the EX7000, EX6000, EX-2500 and EX-1600” on
page 28.
z
For information on using the LCD controls during initial
configuration (so that you can run Setup Wizard), see
“Configuring an EX7000, EX6000, EX-2500, or EX-1600
Appliance” on page 32.
DB-9 serial cable.
z
Power 1 and 2
z
Test
z
Alarm
z
Hard disk drive—red indicates disk activity.
cluster.
Page 35

SonicWALL Aventail E-Class SRA Installation and Administration Guide | 25
EX6000 Appliance Front Panel Controls
This section describes the front panel controls for the EX6000 appliance. The power switch is located
on the rear panel.
PWR
X1
X3
LCD
controls
Console
USB
ports
HD
Alarm
X2
X0
Test
The following table describes the controls and indicators on the front panel.
Item Description
LCD display screen
and controls
Displays status and configuration about the appliance. Keypad
buttons are used to display appliance status and configure initial
settings:
z
For more information on displaying appliance status and using
the keypad to shut down or reboot the appliance, see “LCD
Controls for the EX7000, EX6000, EX-2500 and EX-1600” on
page 28.
z
For information on using the LCD controls during initial
configuration (so that you can run Setup Wizard), see
“Configuring an EX7000, EX6000, EX-2500, or EX-1600
Appliance” on page 32.
Console Connects the appliance to a personal computer with a
DB-9 serial cable.
USB ports There are two USB ports.
LED indicators From left to right, the LED indicators are:
z
Power
z
Test
z
Alarm
z
Hard disk drive
X0: Internal network Connects the appliance to your internal network.
X1: External network Connects the appliance to your external network.
X2: Cluster interface Connect the appliance to another appliance in a high-availability
cluster.
X3 Not used.
Page 36

26 | Chapter 2 - Installation and Initial Setup
EX-2500 Appliance Front Panel Controls
This section describes the front panel controls for the EX-2500 appliance. The power switch is
located on the rear panel.
The following table describes the controls and indicators on the front panel.
Letter Item Description
A and E LCD display screen
and controls
B Console serial port Connects the appliance to a personal computer with a
C USB port There is one USB port.
D LED indicators From left to right, the LED indicators are:
F Internal network Connects the appliance to your internal network.
G External network Connects the appliance to your external network.
H Reserved connectors The first three Ethernet connectors are not used by the
I Cluster interface Connect the appliance to another appliance in a high-
Displays status and configuration about the appliance.
Keypad buttons are used to display appliance status and
configure initial settings:
z
For more information on displaying appliance status
and using the keypad to shut down or reboot the
appliance, see “LCD Controls for the EX7000,
EX6000, EX-2500 and EX-1600” on page 28.
z
For information on using the LCD controls during
initial configuration (so that you can run Setup
Wizard), see “Configuring an EX7000, EX6000, EX2500, or EX-1600 Appliance” on page 32.
DB-9 serial cable.
z
Status (not used by this appliance)
z
Hard disk drive—red indicates disk activity.
z
Power LED—green indicates power is on.
appliance.
availability cluster.
Page 37

SonicWALL Aventail E-Class SRA Installation and Administration Guide | 27
EX-1600 Appliance Front Panel Controls
This section describes the front panel controls for the EX-1600 appliance. The power switch is
located on the rear panel.
This section describes the front panel controls for the EX-1600 appliance. The power switch is
located on the rear panel.
The following table describes the controls and indicators on the front panel.
Letter Item Description
A and B LCD display screen
and controls
C Power Green LED indicates that the power is on.
D LED indicators From left to right, these three LED indicators show the
E Console serial port Connects the appliance to a personal computer over a
F USB ports There are two USB ports.
G Internal network Connects the appliance to your internal network.
H External network Connects the appliance to your external network.
I Cluster interface Connects the appliance to another appliance in a high-
Displays status and configuration about the appliance.
Keypad buttons are used to display appliance status and
configure initial settings:
z
For more information on displaying appliance status
and using the keypad to shut down or reboot the
appliance, see “LCD Controls for the EX7000,
EX6000, EX-2500 and EX-1600” on page 28.
z
For information on using the LCD controls during
initial configuration (so that you can run Setup
Wizard), see “Configuring an EX7000, EX6000, EX2500, or EX-1600 Appliance” on page 32.
status for the following:
z
Internal network
z
External network
z
High availability cluster
DB-9 serial cable.
availability cluster.
Page 38

28 | Chapter 2 - Installation and Initial Setup
EX-750 Appliance Front Panel Controls
This section describes the front panel controls for the EX-750 appliance.
The following table describes the controls and indicators on the front panel of the EX -750 appliance.
Letter Item Description
A Reset button Reboots the system.
B Power button Toggles the system power on/off.
LCD Controls for the EX7000, EX6000, EX-2500 and EX-1600
The four-button keypad to the right of the LCD display on the E-Class SRA EX-Series appliances
(with the exception of the EX-750) can be used to display status and configuration information
about the appliance, and to shut down or reboot the appliance.
CAUTION — EX7000 and EX6000 appliances: Remove any USB devices from the
!
appliance before you reboot it. If a USB device is plugged in to your appliance when it is
rebooted, the appliance tries to use it as a boot device. As a result, the boot information stored
in the BIOS on the appliance is overwritten, and the EX7000 or EX6000 becomes unusable.
The following table describes the keypad functions:
Keypad Function Description
Left button Press the Left button once to reboot the appliance. The following
prompt is displayed:
Restart appliance?
<Yes No>
Press the Left button again to reboot the appliance, or press the
Right button to cancel the reboot.
Page 39

SonicWALL Aventail E-Class SRA Installation and Administration Guide | 29
Keypad Function Description
Up button Press the Up button once to display the configuration of the
Right button Press the Right button once to shut down the appliance. The
Down button To return to the default view at any time, or to refresh the
appliance’s network settings. Each time you press it, the displa y
shows another network setting:
z
Internal address
z
External address
z
Default gateway
z
Host name
z
Domain name
z
IP address
z
Netmask
following prompt is displayed:
Shut down now?
<Yes No>
Press the Left button again to shut down the appliance, or press
the Right button to cancel the shutdown.
display, press the Down button once.
Connecting the Appliance
Follow the appropriate instructions for your appliance model to connect the appliance to your
network.
Connecting the EX7000 Appliance
For a diagram of the appliance, see “EX7000 Appliance Front Panel Controls” on page 24.
X To connect the EX7000 appliance
1. Connect a network cable from your internal network to the internal interface on the appliance
(X0).
2. Optionally, connect a cable from your external network to the external interface on the
appliance (X1).
3. If you are setting up a cluster, connect one end of the supplied network crossover cable to the
cluster interface adapter (X2). Connect the other end to the X2 port on the other appliance in
the cluster.
4. Connect a standard AC power cord to the power supply.
Connecting the EX6000 Appliance
For a diagram of the appliance, see “EX6000 Appliance Front Panel Controls” on page 25.
X To connect the EX6000 appliance
1. Connect a network cable from your internal network to the internal interface on the appliance
(X0).
2. Optionally, connect a cable from your external network to the external interface on the
appliance (X1).
3. If you are setting up a cluster, connect one end of the supplied network crossover cable to the
cluster interface adapter (X2). Connect the other end to the X2 port on the other appliance in
the cluster.
4. Connect a standard AC power cord to the power supply.
Page 40

30 | Chapter 2 - Installation and Initial Setup
Connecting the EX-2500 Appliance
The EX-2500 appliance uses up to five connections, as shown in the following illustration.
X To connect the EX-2500 appliance
1. Connect a network cable from your internal netwo rk into the Ethernet adapter labeled “1” in
the illustration.
2. Optionally, connect a cable from your external network into the Ethernet adapter labeled “2”.
3. If you are setting up a cluster, conne ct one end of the supplied network crossover cable into
the cluster interface adapter. Connect the other end to the cluster interface adapter on the
other appliance in the cluster.
4. Connect a standard AC power cord to the power supply.
Connecting the EX-1600 Appliance
The EX-1600 appliance uses up to five connections, as shown in the following illustration.
X To connect the EX-1600 appliance
1. Connect a network cable from your internal netwo rk into the Ethernet adapter labeled “1” in
the illustration.
2. Optionally, connect a cable from your external network into the Ethernet adapter labeled “2”.
3. If you are setting up a cluster, conne ct one end of the supplied network crossover cable into
the cluster interface adapter. Connect the other end to the cluster interface adapter on the
other appliance in the cluster.
4. Connect a standard AC power cord to the power supply.
Page 41

SonicWALL Aventail E-Class SRA Installation and Administration Guide | 31
Connecting the EX-750 Appliance
The EX-750 appliance uses up to three connections, as shown in the following illustration.
X To connect the EX-750 appliance
1. Connect a network cable from your internal network into the internal Ethernet adapter
(marked INT 2) and labeled “1” in the illustration.
2. Optionally, connect a cable from your external network into the external Ethernet adapter
(marked EXT 1) and labeled “2”.
3. Connect the supplied DB9 cable from a laptop computer or terminal to the rear serial port. This
provides full console access to the appliance; see “Powering Up and Configuring Basic Network
Settings” on page 31 for more information.
4. Connect a standard AC power cord to the power supply.
Powering Up and Configuring Basic Network Settings
After you’ve connected the appliance, you’re ready to power up for the first time and begin the
configuration process. You’ll use a W eb-based Setup Wizard to configure the settings needed to get
the appliance up and running quickly, but in order to start the wizard you must first enter
information that will enable a Web browser to connect to your appliance.
Once your appliance is configured you can control its configuration and operation from AMC, the
Aventail Management Console. On the LCD screen of the appliance (which is present on all of the
appliance models except for the EX -750) you can also see basic inform ation about the appliance (its
name and internal address, for example) or restart it, which is useful if your appli ance is not in the
same area as the browser you use to run AMC.
Notes
z
You cannot run Setup Wizard on an appliance that has already been configured unless you first
restore the appliance’s factory default configuration settings. This applies whether you initially
configured the appliance using Setup Wizard, or by running setup_tool from the command
line. See “Re-Running Setup Wizard” on page 33.
Configuring Basic Network Settings
In order to start Setup Wizard you must first enter information that will enable a Web browser to
connect to your appliance. There are a couple of ways to do this, depending on your appliance
model:
z
EX7000, EX6000, EX-2500, and EX-1600: The recommended procedure for initial setup is to
use the LCD controls (to the right of the LCD screen on the front of your appliance) to enter
minimal settings and then run Setup Wizard. Alternatively, you have the option of using Setup
Tool on the command-line. Both procedures are outlined below.
z
EX-750: You must establish a serial connection to the appliance using a laptop computer or
terminal and then use Setup Tool before you can run Setup Wizard, explained below.
Once your basic settings are ente red you’ll be able to run the Web-based Setup Wizard, as described
in “Web-Based Configuration Using Setup Wizard” on page 32.
Page 42

32 | Chapter 2 - Installation and Initial Setup
Configuring an EX7000, EX6000, EX-2500, or EX-1600 Appliance
To the right of the LCD screen on the front of your appliance are four buttons you'll use to enter
your settings.
X Configuring basic network settings using the LCD controls
1. Press the Up and Down controls to read the welcome screen, and press Right to continue past
it.
2. Set the IP address for your internal interface: To change the IP address that appears, use the
Left and Right buttons to position your cursor over the number you want to change, and then
use Up and Down to change the number. Press Right to continue to the next screen.
3. Enter your subnet mask: Again, use the four buttons to change the IP address displayed on
the LCD screen. Press Right to continue to the next screen.
4. Cluster configuration: Specify whether the appliance you are configuring will be part of a
cluster (a high-availability pair of appliances), and which node it is (the master is “1” and the
slave node is “2”). Press Right to continue to the next screen.
5. Confirm your settings: Review your settings and confirm them. In a few moments your
settings are saved and you’ll see instructions on browsing to a URL on your deskto p computer.
This is the URL for continuing your appliance configuration with Setup Wizard. For instance,
the LCD display might read as follows:
Please browse to: https://172.31.0.140:8443
For a description of configuring your appliance using Setup Wizard, see “Web-Based Configuration
Using Setup Wizard” on page 32.
Configuring an Appliance Using Setup Tool on the Command Line
To set the minimum configur ati on i tems nece ssar y for runn ing S etu p Wiz ard , you mu st u se Se tup
Tool. Below is an overview of your steps; see “Configuring a New Appliance Using Setup Tool” on
page 400 for detailed instructions.
X Overvi ew of configuring basic network settings using Setup Tool
1. Use a terminal emulation program to establish a serial connection with the appliance from a
laptop computer or terminal.
2. Turn the appliance on. The first time you start the system from a serial connection, Setup Tool
automatically runs. When prompted to log in, type root for the username.
3. To configure the appliance, you are prompted to provide the following information:
{
IP address and subnet mask for the internal interface
{
Default gateway used to access the internal interface (optional)
{
In the case of a cluster, identify whether the appliance is the master node (1) or slave
node (2); a clustered deployment is possible on all appliances except the EX-750
For a description of configuring your appliance using Setup Wizard, see “Web-Based Configuration
Using Setup Wizard” on page 32.
Web-Based Configuration Using Setup Wizard
Setup Wizard guides you through a series of required and optional steps for configuring the
appliance. The AMC home page includes a Setup Checklist that indicates which items you have
completed.
Running Setup Wizard requires the same system configuration as AMC (see “System Requirements”
on page 7 for details); in addition, JavaScript must be enabled in the browser.
1. License agreement: Read the terms of the End User License Agreement.
2. Basic Settings:
{
Specify the password you'll use to access the Aventail Management Console (AMC). Your
password must be at least eight characters long, but no longer than 20 characters.
Page 43

SonicWALL Aventail E-Class SRA Installation and Administration Guide | 33
{
(Optional) Select a time zone, and then click Change to set the current time. If you wish
to synchronize the time with an NTP server, that can be configured later in the AMC; for
more information, see “Configuring Time Settings” on page 195. It’s important to ensure
that the appliance’s date and time settings are correct for your time zone before you
import your license file.
3. Network Settings:
{
Enter a name for the appliance (the default is AventailSSLVPN). Because this name will be
used only in log files, you don’t need to add it to DNS.
{
The IP address and subnet mask for the internal interface (connected to your private
network) is shown here. For a dual-homed configuration, enter the IP address and subnet
mask for the external interface.
4. Routing: To leverage an existing router, select the dual gateway option to reach your
resources. To restrict incoming appliance traffic to just a few routes or subnets, select a single
gateway option and enter the routes or subnets as static routes later in the AMC.
If the appliance is on a different network than the computer you will use to access AMC, you
must set up routing in order to maintain access to AMC.
5. Name Resolution: The appliance must be able to perform name resolution in order to reach
resources on your internal network. Enter a default domain, which is the domain in which the
appliance is located (such as yourcompany.com).
6. User access: You can give users full network access by provisioning the OnDemand Tunnel
access agent. If you do, you’ll also need to specify the Source NAT address that will appear to
back-end servers as the source of client traffic. This must be an IP address that is on the same
subnet as the internal interface, and is not in use elsewhere.
Decide on an initial access policy for users (you can refine it later in AMC). This can be
completely permissive (granting access to the entire network protected by the SSL VPN), very
strict (deny all access), or in-between (give users access to all resources as you define them in
AMC).
At the end of the Setup Wizard process you’ll see your settings and then proceed to AMC, the
management console, for the last steps in the configuration process. See “Configuring the Appliance
Using the Management Console” on page 33 for details.
Re-Running Setup Wizard
After you run Setup Wizard to initially configure the appliance, you can’t re-run it unless you first
restore the appliance to its factory default configuration settings. Before you can re-run Setup
Wizard, you must run Config Reset Tool from the command line; this will delete all of your existing
system configuration data. For more information, see “Restoring Factory Default Configuration
Settings” on page 403.
Configuring the Appliance Using the Management Console
The final installation and deployment settings are done in AMC. The following is a checklist of
configuration items and pointers to detailed information.
1. Log in to AMC.
Log in to AMC, the Web-based application used to administer the appliance, and look at the
setup checklist on the right.
2. Register the appliance on MySonicWALL and retrieve your license file.
When you register your appliance on www.mysonicwall.com, you must enter both your serial
number and your authentication code, which is the hardware identifier for the appliance you
purchased:
{
The serial number is printed on a label on the outside of your appliance.
{
The authentication code is displayed in AMC: click General Settings from the main
navigation menu, and then look in the Licensing area.
When you receive your SonicWALL appliance there is a single user license on it, valid for an
unlimited number of days. To become familiar with the Aventail Management Console (AMC)
and test it in your environment with additional users, request a lab license. After initial setup
Page 44

34 | Chapter 2 - Installation and Initial Setup
and testing, download your license file from www.mysonicwall.com and then import it to the
appliance.
See “Managing Licenses” on page 246.
3. Define one or more authentication servers.
Authentication is used to verify the identity of users. When configuring an authentication
server, you are prompted to specify a directory type (LDAP, Microsoft Active Directory,
RADIUS, or local users) and a credential type (username/password, token, or digital
certificate).
See “Managing User Authentication” on page 80.
4. Configure a server certificate.
The appliance encrypts information using the Secure Sockets Layer (SSL) protocol. You can
create a self-signed certificate us ing AMC, or optionally obtain a certificate from a commercial
certificate authority (CA).
See “Certificates” on page 66.
5. Define application resources and groups.
Application resources include TCP/IP-based resources (such as client/server applications, file
servers, or databases), Web-based resources (including Web applications or Web sites) that
run over HTTP, and Windows network share resources (to be accessed in WorkPlace). Resource
definitions can include variables, so that a single resource can, for example, that derive its
network name or address based on each user.
See “Creating and Managing Resources” on page 115.
6. Define users and groups.
User and group definitions are used in access control rules to cont rol access to application
resources.
See “Managing Users and Groups” on page 181.
7. Define realms and communities.
Realms enable the appliance to directly integrate with authenticat ion servers, eliminating the
need to create and manage accounts for each user who needs access to your network.
Communities aggregate users with similar access needs and End Point Control requirements.
See “Managing User Authentication” on page 80.
8. Create access control rules.
Access control rules determine what resources are available to users and groups.
See “Access Control Rules” on page 144.
9. Configure shortcuts for WorkPlace.
To provide your users with easy access to a Web, file system, or graphical terminal resource
from within WorkPlace, you may want to create shortcuts in WorkPlace.
See “Working with WorkPlace Shortcuts” on page 292.
10.(Optional) Configure the network tunnel service.
If you plan to deploy the network tunnel clients, you must configure the n etwork tunnel
service and allocate IP address pools for the clients.
See “Configuring the Network Tunnel Service” on page 348.
11.(Optional) Enable and configure End Point Control.
End Point Control optionally deploys data protection components designed to safeguard
sensitive data and ensure that your network is not compromised when accessed from PCs in
untrusted environments. End Point Control is deployed through communities.
See “End Point Control” on page 249 and “Using End Point Control Restrictions in a
Community” on page 168.
12. Apply your changes.
To activate your configuration changes, you must apply them.
See “Applying Configuration Changes” on page 52.
13. Test system accessibility.
Now you can verify that the appliance can access your external user repositories, and make
sure that the resources on your network are accessible.
Page 45

SonicWALL Aventail E-Class SRA Installation and Administration Guide | 35
See “Troubleshooting” on page 407.
Moving the Appliance into Production
After you have tested the appliance sufficiently in your network environment and determined how
you want it to work, you’re ready to move it into its permanen t home. This secti on describes ste ps
you may need to perform when moving the appliance into production.
1. Reconfigure the appliance with new address information.
If the network environment changed when you moved the appliance into production, you must
reconfigure the basic network settings and adjust any of the following values if they have
changed:
{
IP addresses for the internal and external interfaces
{
Default gateway IP addresses
{
Static routes
{
Default DNS domain and DNS server IP address
If you have a large number of configuration changes to make, you may find it convenient to
restore the appliance to its default settings and start over from scratch. This can be done using
Config Reset Tool; see “Restoring Factory Default Configuration Settings” on page 403 for
more information.
2. Register the appliance with DNS.
If you haven’t already registered the appliance with your company’s DNS, do this now. This
ensures that external users can access your network resources using a fully qualified domain
name instead of an IP address. Edit your DNS server’s database to include the fully qualified
domain name contained in the appliance’s certificate, and any WorkPlace sites.
3. Obtain a commercial SSL certificate.
You may want to obtain a commercial certificate for the appliance to assure users of its
identity. (Generally, a self-signed certificate is adequate for AMC.) For more information on
generating server certificates, see “Obtaining a Certificate from a Commercial CA ” on page 68.
4. Adjust your firewall policies.
If you have an Internet-facing firewall, you may need to adjust its policy to open ports
required by the appliance. By default, the Web pro xy service communicates using port 443/tcp
(it uses port 443/tcp for HTTPS and port 80/tcp for HTTP). If you want to use SSH to connect
to the appliance from outside the network, you'll need to open port 22/tcp.
If you have a firewall that faces the internal network, you may need to adjust the policy for
that firewall to open ports for any back-end applications with which the appliance must
communicate (if these ports are not already open). For instance, if you use an LDAP or
Microsoft Active Directory server for authentication, you must open port 389/tcp on your
internal firewall. For RADIUS, open ports 1645/ucp and 1812/udp.
If you’re using WorkPlace to access Windows network shares, you must also open internal
ports on your internal firewall so that WorkPlace can perform name resolution, make browse
requests, and connect to file shares. For more information, see “Gathering Information” on
page 19.
5. Create shortcuts and deploy WorkPlace.
If you use WorkPlace as an interface to Web-based resources and to provide Web-based
access to Windows network share and graphical terminal resources, you must create shortcuts
(see “Working with W orkPlace Short cuts” on page 292). You should also publish the WorkPlace
URLs so your users know how to access resources through your VPN.
You may want to customize the appearance of WorkPlace for your environment. See
“Configuring WorkPlace General Settings” on page 291 for more information.
Powering Down and Restarting the Appliance
When it’s time to power down or restart the appliance, be sure to follow the proper procedure. The
appliance stores important data in memory while it is running, and that data must be written to the
hard disk before you turn off the power.
Page 46

36 | Chapter 2 - Installation and Initial Setup
CAUTION Powering down the appliance improperly can result in loss of data and leave the
!
system’s files in an inconsistent state. EX7000 and EX6000 appliances: Remove any USB
devices from the appliance before you reboot it. If a USB device is plugged in to your appliance
when it is rebooted, the appliance tries to use it as a boot device. As a result, the boot
information stored in the BIOS on the appliance is overwritten, and the EX7000 or EX6000
becomes unusable.
X To power down or restart the appliance in AMC
1. From the main navigation menu, click Maintenance.
2. On the Maintenance page, click the appropriate button:
{
To restart the appliance, click Restart. AMC stops responding. After the appliance
restarts, you can log in to AMC again.
{
To shut down the appliance, click Shutdown. AMC stops responding and the appliance
automatically powers down. You do not need to press the power button on the front panel.
Notes
z
All appliance models, with the exception of the EX- 750, s can be shut down or restarted at the
appliance:
a. On the front of the appliance, press the Down button on the four-button keypad to get to
the main LCD menu.
b. Scroll down until you reach the option you want, Restart or Shutdown.
c. Both options display a confirmation message; press the Left button to continue.
The results are the same as restarting or shutting down in AMC:
{
AMC stops responding; after the appliance restarts, you can log in to AMC again.
{
AMC stops responding and the appliance automatically powers down. You do not need to
press the power button on the front panel.
Next Steps
After you have completed the initial network setup, use AMC to continue configuring the appliance.
AMC is accessible using a Web browser:
z
If you’re new to AMC, you might want to read “Working with AMC” on page 37.
z
If you’re ready to continue configuring the appliance, see “Network and Authentication
Configuration” on page 55.
Page 47

SonicWALL Aventail E-Class SRA Installation and Administration Guide | 37
Chapter 3
Working with AMC
This section introduces the Aventail Management Console (AMC) , a Web-based interface for
managing the appliance.
Accessing AMC
This section explains how to access AMC using your Web browser and how to log out.
Logging In to AMC
Before logging in to AMC, you need the host name or IP address you typed for the internal interface
during the initial setup with Setup Tool.
X To log in t o AMC
1. Start your Web browser and type the URL https://<ipaddress>:8443/console, where
<ipaddress> matches the address you specified for the internal interface w hen you ran Set up
Tool or Setup Wizard. Press Enter.
2. On the login screen, type admin in the Username box.
3. In the Password box, type the root password you created using Setup Tool.
4. Click Login. The AMC home page appears.
5. There’s a Setup Checklist in the lower-right corner of the home page to help guide you
through initial configuration:
{
{
{
Click each link and perform the required configuration.
When you return to the AMC home page, the item is checked off the list and you’re ready
for the next one.
Click Help on any page for more information.
Page 48

38 | Chapter 3 - Working with AMC
For information on changing the AMC password, see “Editing Administrator Accounts” on page 47.
Notes
z
You should avoid having multiple administrators making changes to AMC at the same time. For
more information, see “Avoiding Configuration File Conflicts with Multiple Administrators” on
page 49.
Logging Out
It is important to preserve the security of your AMC administrator account. When you’re finished
working in AMC, click Log out in the upper-right portion of the screen. If you terminate a session
by simply closing your W eb browser, your session remains active until it times out (after 15 minutes
of inactivity). There is an exception to this rule that you should be aware of; see “Appli a nce
Sessions” on page 432 for details.
AMC Basics
This section describes the basics of working with AMC. All configuration data is encrypted using S SL
as it’s transferred between AMC and your browser, ensuring that it remains secure. To increase
security, AMC should be used within a trusted network (on an internal network that is behind a
firewall). See “Certificate FAQ” on page 79 for more details.
A Quick Tour of the AMC Interface
The AMC interface will be familiar to anyone who has worked with similar Web-based security
management applications. Here are some basic notes about working with AMC.
Summary pages
Several top-level pages in AMC are summary pages that provide quick access to subordinate
configuration pages and display summaries of key configuration settings and other status
information. These summary pages are:
z
Agent Configuration
z
General Settings
z
Network Settings
z
SSL Settings
z
Authentication Servers
z
Services
Page 49

SonicWALL Aventail E-Class SRA Installation and Administration Guide | 39
For example, the Agent Configuration page provides links to pages for configuring End Point Control,
Aventail access, and other agents. Y ou can see right away on this summary page whether a specific
agent is enabled or disabled.
Tables and tabs
Many AMC pages use a tabular layout to present the objects you’ll be ma naging. The ta bles include
scroll bars, which make it easier for you to keep the main elements on the page (including the
navigation bar, header , and footer) in view when working with long lists. Y ou can also sort the data
displayed in some tables by clicking the underlined column headings.
Page 50

40 | Chapter 3 - Working with AMC
In some cases, you’ll use tabs to switch between modes. For example, you’ll use tabs to swit ch
between managing resources, groups of resources, and variables used in defining resources.
Filters
On pages in AMC that contain a list of items that can grow to many pages in a large configuration,
filtering is available to make it easier for you to find what you are looking for. Filters are available
on the following pages in AMC:
z
Resources
z
Reso urce Groups
z
Access Control
z
Users
z
Groups
z
Shortcuts
z
Shortcut Groups
z
Browse for Users (creating an access rule)
z
Browse for Resources (creating an access rule)
The exact filters vary slightly with each page, but the following functionality is consistent across all
pages:
z
There is a reset link that resets the filter fields to their default values.
z
There is a red active indicator that indicates that the page was loaded using filters, meaning
that the list may not be displaying all the configured items.
z
There is a Refresh button that reloads the page with the specified filters applied.
z
The filters are stored so that the next tim e you loads the page, it uses the same fil ters that were
last applied. The filters are stored across sessions, so even if you log out and log back in, the
same filters will be used.
Page 51

SonicWALL Aventail E-Class SRA Installation and Administration Guide | 41
z
There is a footer at the bottom of the list that shows the number of items displayed and the
total number of items in the list. If filtering is active, there is a (filtered) indicator and a Show
all link that will reset the filters to the defaults and refresh the page to display all items in the
list.
In general, the available filters map to the displayed columns in the list. In some cases, such as
Resource Groups or Shortcut Groups, you can filter the list based on the members of the group,
which is not a column in the list. As another example, on the Resources page you could filter the
list based on something in the Value attribute, which is not a column but is visible when an item
in the list is expanded.
One way that you could use this feature for custom filtering is to create your own “tags” by adding
a custom string to the Description field of related items. For example, if a certain set of resources
are all used by one department or for one customer, you could add a keyword or tag to the
description of those resources, and then use the filtering capability to quickly display only the
resources that contain the special keyword or tag.
Page links
T o save space, some AMC pages use a multi-page format with links at the top of the pages to access
the related configuration settings. The Configure Community page is an example of this:
Editing an object
In most of the tables used to display lists of objects, notice that the name field (or in the case of
the Access Control page, the rule number) is hyperlinked. To edit an object, click its hyperlink.
Page 52

42 | Chapter 3 - Working with AMC
Changing the page view
Some of the longer , more complex pages in AMC hide the edit controls used to configure advanced
features. This makes it easier for you to focus on the most important configur ation options. To view
hidden options, click the down arrow button (click the up arrow to hide them again):
Expanded view of list details
AMC pages that display lists of objects, such as the Access Control page, let you view details about
an object by clicking the plus sign (+) to the left of it. To return to the one-line view, click the minus
sign (-).
Required fields and errors
Required fields are indicated in AMC with an asterisk. If you omit a value for a required field and
click Save, a red message appears beneath the field indicating that it is required. A red message
is also used to indicate an error (for example, if you type an invalid value).
Assigning names and descriptions
Most of your time in AMC will be spent managing three types of objects:
z
Access control rules
z
Resources
z
Users and groups
When you create these object s, AMC requi res t hat y ou t ype a na me. AMC also has a spac e for y ou
to type an optional description.
Although not required, meaningful descriptions can help you remember critical details about the
objects you’re managing, such as the purpose of an access rule or what resources are in a subnet
range. A good description is especially helpful when managing a group of objects; when you return
to AMC later to manage a large group of network resources, for example, you’ll be glad to have a
description reminding you of what’s in the group.
Saving changes on a page
On some AMC pages you can Save or Cancel the changes you make. If you click Cancel, or use
the Back button in your browser, your changes are not saved.
Page 53

SonicWALL Aventail E-Class SRA Installation and Administration Guide | 43
The AMC status area
A status area just beneath the AMC header displays important information:
Status area link Description
If your appliance license or a component license has expired, click License
warning to review and manage software licenses.
If more than one administrator is logged into AMC, click Multiple
administrators and check the list on the Administrator Sessions page.
If this appliance is configured to receive policy updates, click
Configuration recipient to see the appliances with which it will be
synchronized.
If you’ve made configuration changes but have not applied them, click
Pending changes. On the Apply Changes page you can activate or
discard the pending changes.
The SonicWALL version number and product serial number
The version of the current system software and the product serial number are displayed at the
bottom of the left-hand navigation bar on every page in AMC. If the appliance is configured to send
or receive configuration data, its replicati on name is shown here.
In addition to the version number, the System Status and Maintenance pages display a list of
any hotfixes that have been applied. The version number and hotfix information is useful for
planning system updates, and you need to have it when contacting SonicWALL Technical Support.
Adding, Editing, Copying, and Deleting Objects in AMC
AMC features a standardized user interface for managing most objects, such as resources, access
control rules, users, communities, End Point Control zones and device profiles, and other items used
to organize and operate your VPN.
Following are the basic procedures for adding, editing, copying, and deleting objects in AMC,
although there may be some minor variations depending on the object and AMC page you’re
working on. The examples provided here use the End Point Control Zones page.
X To add a new object in AMC
1. On the page listing the type of object you want to create, click New.
Page 54

44 | Chapter 3 - Working with AMC
2. Complete the relevant information for the object, and then click Save.
X To edit an object in AMC
1. On the page that lists the object you want to edit, click the link for the name (or in some
cases, the number) of the object you want to mo dify. For a quick description of the object, an
expand (+) button is available on most lists.
2. Make any changes to the information for the object, and then click Save.
Page 55

Getting Help
SonicWALL Aventail E-Class SRA Installation and Administration Guide | 45
X To copy an object in AMC
1. On the page that lists the object you want to copy, select the check box to the left of the
object, and then click Copy.
2. Make any changes to the information about the source object, and be certain to assign the
object a new name, and then click Save.
X To delete an object in AMC
z
On the page that lists the object you want to delete, select the check box to the left of the
object, and then click Delete.
Notes
z
You cannot delete an object that is still associated with other objects. For information, see
“Deleting Referenced Objects” on page 54.
Every AMC page includes a Help button (in the upper right portion of the screen) that displays
context-sensitive online Help.
Help appears in a new browser window; its navigation bar includes the following buttons:
Button Description
Displays the Help navigation pane, containing Contents, Index, and Search
buttons. (This button appears when the Help navigation pane is closed.)
Synchronizes the table of contents to display the current topic. (This button
appears when the Help navigation pane is in view.)
Displays the next or previous Help topic.
Displays a list of related Help topics.
Page 56

46 | Chapter 3 - Working with AMC
Button Description
The Help navigation includes the following tabs, which change the content in the left frame:
z
Contents displays a hierarchical list of Help topics.
z
Index displays an alphabetical list of keywords in Help.
z
Search displays a full text search engine for Help. Type a word or short phrase in the box, click
Go!, and then choose a topic from the list of results.
z
Favorites allows you to create a custom list of help topics to which you frequently refer.
Administrator Accounts
This section describes how to manage AMC administrator accounts and how to avoid problems if
more than one administrator is managing the appliance.
Managing Administrator Accounts and Roles
AMC enables you to create multiple administrator accounts, each with a separate username and
password. You can then assign roles to administrators, specifying which features in AMC they can
use, and their levels of access.
By default, AMC is configured with a primary administrator role that has full access to all areas of
AMC. Only the primary administrator can add, edit, or delete other administrator accounts.
Prints the current Help topic.
Adding Administrator Accounts
You can create additional administrator accounts if more than one person is responsible for
managing policy and you want each person to have individual login credentials. Only the “primary”
administrator—whose default name of admin cannot be changed—can create, modify, and delete
secondary administrator accounts.
X To add an administrator account
1. From the main navigation menu, click General Settings.
2. In the Administrator accounts area, click Edit. The Manage Administrator Accounts
page appears.
3. Click New. The Add/Edit Administrator page appears.
4. In the Username box, type the secondary administrator’s username.
5. In the Description box, type a descriptive comment about the administ rator (for example, his
full name or title). This field is optional, but a description can be helpful when viewing the list
of administrators later.
6. In the Password box, type a password for the administrator. Be sure to share the password
with the administrator. The administrator can change this password at any time.
{
Your password must contain at least eight characters, and is case-sensitive. A password
containing a combination of uppercase and lowercase letters and numbers is
recommended, and it should not consist of words found in a dictionary.
{
If the password for the primary administrator (whose username is admin) is changed, the
password for logging in to the appliance directly (as root) is also changed.
7. In the Confirm password box, type the password again to confirm it.
8. In the Role list, select a role for the secondary administrator. AMC provides the following
preconfigured roles, which are defined on the Add/Edit Administrator Role page. You can
Page 57

SonicWALL Aventail E-Class SRA Installation and Administration Guide | 47
modify these preconfigred roles, or create new roles (see “Defining Administrator Roles” on
page 47):
Preconfigured role Description
Super Admin Has read/write access to all pages in AMC
Security Admin Has read/write access to security administration
and monitoring pages in AMC, and view access
to system settings
System Admin Has read/write access to system and monitoring
pages, and view access to security pages
9. Click Save.
Notes
z
For information on deleting administrator accounts, see “ Adding, Editing, Copying, and Deleting
Objects in AMC” on page 43.
z
By default, the preconfigured roles include the ability to view all forms of session data and to
terminate sessions. See “Viewing User Sessions” on page 209 and “Ending User Sessions” on
page 211 for more information.
Editing Administrator Accounts
T o help keep your AMC password secure, y ou should change it from time to time. Each administrator
can edit his or her own account to change the password or update the description. The primary AMC
administrator (whose username is “admin”) can edit the account settings for any other
administrator.
Your password must contain between eight and 20 characters, and is case-sensitive. A “strong”
password—with a combination of uppercase and lowercase letters, and numbers—is recomme nded.
You should also avoid using words found in a dictionary.
After you change your password, record it somewhere and keep it secure. If you change a
secondary administrator’s password, be sure to share the password with the appropriate
administrator.
X To edit an administrator account
1. From the main navigation menu, click General Settings.
2. On the General Settings page, in the Administrator accounts area, click Edit.
3. In the Name column on the Manage Administrator Accounts page, click the name of the
administrator whose account you want to edit.
4. On the Add/Edit Administra to r page, change the textual description, login password, or
role.
Notes
z
The username and role of the primary administrator cannot be changed.
z
If the password for the primary administrator (whose username is “admin”) is changed, the
password for logging in to the appliance directly (as “root”) is also changed.
Defining Administrator Roles
AMC’s role-based administration enables the primary administrator to gr ant limited administrative
control to secondary AMC administrators.
Page 58

48 | Chapter 3 - Working with AMC
For defining administrator roles, AMC’ s features are grouped into four categories. For each category ,
you must specify the permissions you want to grant a role. The four categories of administrator
permissions in AMC are described in the following table:
Category Administrator permissions
Security administration Controls administrator access to pages for access co ntrol rules,
System configuration Cont r ols administrator access to pages for network settings,
System maintenance Controls administrator permission to shut down or restart the
System monitoring View access permits the administrator to view system logs and
The permission level for each category can be set as follows:
resources, users and groups, WorkPlace, OnDemand, and End
Point Control.
general appliance settings, SSL settings, access and network
services, authentication servers, and realms.
appliance, update or roll back the system software, and i mport
or export configuration data.
graphs, view active users, and run troubleshooting tools (such
as starting, stopping, downloading, and deleting network
traces). Modify provides additional permissions to terminate
user sessions and modify log settings.
Permission level Description
Modify Permits read/write access within a category.
View Provides read-only access within a category.
None Disables access to the relevant AMC pages within a category.
X To create an administrator role
1. From the main navigation menu, click General Settings.
2. On the General Settings page, click Edit in the Administrator roles area. The Manage
Administrator Roles page appears and displays an overview of administrators’ roles and
permission levels.
When you select None as the permission level for a category,
AMC will not display either the pages within that category, or
the main navigation menu commands that lead to those pages.
Page 59

SonicWALL Aventail E-Class SRA Installation and Administration Guide | 49
3. Click New. The Add Administrator Role page appears.
4. In the Name box, type a meaningful name for the administrator role.
5. In the Description box, type a descriptive comment about the role.
6. In the Administrator permissions area, select one or more categories of permissions that
will be granted to the role.
7. Click Save.
Editing Administrator Roles
The primary AMC administrator can modify any secondary administrator role to change permission
levels, and can also delete secondary roles. For more information, see “Defining Administrator
Roles” on page 47.
Avoiding Configuration File Conflicts with Multiple Administrators
If more than one administrator is managing your appliance, you should avoid working in AMC at the
same time. If multiple administr ators make changes to the same object, AMC sa ves the most recent
one. This can cause unintentional results, and potentially cause security problems if conflicting
changes are made to access control rules.
Page 60

50 | Chapter 3 - Working with AMC
If more than one administrator is logged into AMC, you are alerted by a link in the upper-right
corner of AMC:
T o see a list of the usernames and IP addresses of all administrators who are logged into AMC, click
this link: the Administrator Sessions page appears in a separate window. If an administrator has
multiple instances of the Web browser logged into AMC, the administrator’s user name and IP
address is listed more than once.
You should contact the other administrators and coordinate your activities to avoid configuration
file conflicts.
X To view the complete list of AMC administrators
1. Click General Settings in the main AMC navigation menu.
2. Click Edit in the Administrator accounts area. The Manage Administrator Accounts page
lists all of the administrators, and shows which ones are currently logged in.
Notes
z
The management console audit log tracks any AMC configuration changes made by
administrators. See “Management Audit Log” on page 202.
z
T o end an AMC session you must click Log Out; if you terminate a session by closing your Web
browser, the session appears in the list of active sessions until it times out (by default, in 15
minutes).
Managing Multiple SonicWALL Devices
You can configure a SonicWALL SRA EX-Series appliance to be managed by Global Management
System (GMS), to be included in ViewPoint reports, or both.
z
The Global Management System (GMS) gives you a single management interface for centrally
managing and deploying SonicWALL appliances and security policy configurations. GMS also
provides centralized real-time monitoring, and policy and compliance reporting.
z
The ViewPoint Reporting Module is a separate W eb-based reporting tool that gives you detailed
reports for individual SonicWALL appliances. You can tr ack network utilization, monitor critical
network events and activity—such as security threats, inappropriate Web use, and bandwidth
levels—using a customizable dashboard and a variety of historical reports.
T o configure ce ntralized ma nagement in AMC, you must specify the settings for these servers, such
as the server address and port, and supply a password that will be used by GMS and the ViewPoint
server to gain access to the SRA EX-Series appliance.
Page 61

SonicWALL Aventail E-Class SRA Installation and Administration Guide | 51
Configuring an Appliance for GMS
The Global Management System (GMS) gives you a single management interface for centrally
managing and deploying SonicWALL appliances and security policy configurations. GMS also
provides centralized real-time monitoring, and policy and compliance reporting. You can schedule
appliance reports to be automatically sent by email on a regular basis. These reports currently
contain the following:
z
User authentication-related events: The user login report shows the user name, source host IP
address, and time of login for users who have logged in to the appliance during the specified
day; the failed login report shows unsuccessful login attempts, which is useful for identifying
unauthorized access attempts and potentially malicious activity.
z
Status information: The GMS can log in to the Aventail appliance automatically and request its
up/down status and appliance details, such as its model and serial numbers, language, up-time,
and firmware version.
z
Resource access events: The aggregated data on GMS is summarized by access method and
user/realm name; you can also go into further detail and see individual access items. If a user
has logged in to WorkPlace, for example, and clicked on various links, that information is
relayed to GMS and can be viewed in summary or detailed reports.
You can also configure the SonicWALL appliance to be included in ViewPoint reporting.
X To configure your SRA EX-Series appliance for GMS or ViewPoint
1. Click General Settings in the main AMC navigation menu.
2. Click Edit in the Centralized management area.
3. Select the Enable GMS/ViewPoint check box, and then enter the host name or IP address of
the GMS or ViewPoint server, and its port number.
4. In the Heartbeat interval text box, set the interval (in seconds) at which the appliance
indicates its readiness to send a report on authentication-related events, in addition to status
information (status.xml). An interval of 60 seconds is typical.
5. Select Send only heartbeat status messages if you want to just manage the appliance, and
not generate any reports.
6. If needed, enable an addi tional server in the Additional ViewPoint server area.
7. In the GMS/ViewPoint credentials area, enter and confirm the password that will be used
to add the SRA E-Class appliance. On the GMS/ViewPoint Add Unit screen, you will add this
SonicWALL Aventail appliance by entering GMS as the login name and the credentials you
specified in the Password box.
8. Select Enable single sign-on for AMC configuration if you want to be able to open the
Aventail Management Console and make changes to its configuration from within GMS. If this
setting is cleared, you can still open AMC, but you must first enter your AMC login credentials;
this is less convenient, but more secure.
9. Click Save.
Notes
z
Refer to the documentation for the SonicWALL Global Management System on
www.mysonicwall.com for further information.
Configuring an Appliance for ViewPoint
The ViewPoint Reporting Module is a separate Web-based reporting tool that gives you detailed
reports for individual SonicWALL appliances. You can track ne twork utilization, monitor critical
network events and activity—such as security threats, inappropriate Web use, and bandwidth
levels—using a customizable dashboard and a variety of historical reports. Information is sent from
the appliance as a stream of syslog data and stored in the ViewPoint database or as files on the
hard disk.
X To configure your SRA EX-Series appliance for ViewPoint
1. Click General Settings in the main AMC navigation menu.
Page 62

52 | Chapter 3 - Working with AMC
2. Click Edit in the Centralized management area.
3. Select the Enable ViewPoint reporting check box, and then enter the host name or IP
address of the ViewPoint server, and its port number.
4. In the GMS/ViewPoint credentials area, enter and confirm the password that will be used
on the ViewPoint server to add the SRA E-Class appliance (the login name is GMS).
5. Select Enable single sign-on for AMC configuration if you want to be able to open the
Aventail Management Console and make changes to its configuration from the ViewPoint
server. If this setting is cleared, you can still open AMC, but you must first enter your AMC
login credentials; this is less convenient, but more secure.
6. Click Save.
Working with Configuration Data
This section explains how to save and activate configuration changes in AMC.
Saving Configuration Changes to Disk
When you’re finished making change s on a page in AMC and you click Save, your changes are sav ed
to disk. If you click Cancel or use the Back button in your browser, your changes are not saved.
X To save configuration changes to disk
1. Make any changes on a page in AMC.
2. Click Save at the bottom of the page.
Configuration changes are saved to disk, but are not applied to the active configuration. The status
area in AMC changes to indicate that you have pending changes that need to be applied to the
appliance.
See “Applying Configuration Changes” on page 52 for more information.
Notes
z
There are several options for managing configuration data—exporting it or saving it on the
appliance, or restoring it, for example. See “Managing Configuration Data” on page 224 for
more information.
Applying Configuration Changes
As you make configur ation changes to the a ppliance, they are saved to disk but are not immediately
applied. These changes can either be activated (described in this section) or discarded (see
“Discarding Pending Configuration Changes” on page 53 for more information).
To activate your changes, you must apply them. You can apply most changes without interrupting
service to users, and new connections will use the new configuration. Low-level configuration
changes (for example, an IP address change) are a bit more disruptive: network services are
automatically restarted and user connections are terminated, forcing users to reauthenticate. If
possible, you should apply these sorts of configuration changes during off-peak hours (perhaps
during a maintenance window) and notify your users beforehand.
If you need to restart services manually, see “Stopping and Starting the SonicWALL Access
Services” on page 348.
X To apply your changes
1. From the main navigation menu, click Maintenance.
Page 63

SonicWALL Aventail E-Class SRA Installation and Administration Guide | 53
2. On the Maintenance page, click Apply changes. ( You can also click the Pending changes
link in the upper-right corner of AMC.)
3. Assess the impact of applying your changes by looking at the message on the Apply Changes
page:
Warning message Description
z
Applying changes will restart all services
and terminate all user connections.
z
Applying changes will terminate existing
TCP/IP user connections.
z
Applying changes will terminate existing
Applying any of these changes terminates
existing user connections.
CAUTION: This requires users to
reauthenticate, and may cause them to lose
data.
HTTP user connections.
Your changes will require AMC to restart, which
will end your current administrative session.
When the request is complete, open a new
AMC will be unavailable after your current
session ends. Close your browser and then
log in to AMC again.
browser and log in to AMC again.
No authentication realms are enabled. This will
prevent users from accessing any resources.
At least one authentication realm must be
enabled for users to have access to
resources. Otherwise, users cannot
authenticate to the appliance.
4. Click Apply Changes to apply configuration changes.
Notes
z
When you apply configuration changes to WorkPlace, AMC performs a restart of the services.
Users do not need to reauthenticate to WorkPlace, but if they provided Windows login
credentials to access a network share, they are prompted to re-enter them when WorkPlace
restarts.
z
Any connections that exist when you apply changes continue to use the old configuration unt il
the connection terminates. Because Web conn ections are short-lived, most users accessing W eb
resources pick up configuration changes fairly quickly. On the other hand, client/server
connections can survive for a long period of time.
z
If the new configuration fails to load, existing connections remain in effect but new connection
attempts will fail. For details on what to do in this situation, see “AMC Issues” on page 411.
Discarding Pending Configuration Changes
Configuration changes you make in AMC are saved to disk, but they are not in effect until you apply
them, as described in “Applying Configuration Changes” on page 52. You can use the AMC log file
to find out what changes are pending, and go to the Apply changes page in AMC to discard them.
Pending changes can only be discarded as a group: you cannot discard them selectively.
X To discard pending changes
1. (Optional) You can review the list of pending changes in the management console audit log
file.
a. From the main navigation menu, click Logging, and then select Management Console
audit log in the Log file list.
Page 64

54 | Chapter 3 - Working with AMC
b. Any Info level item added since the last Applied configuratio n changes message appears is
a change that can be discarded.
See “Management Audit Log” on page 202 for more information.
2. From the main navigation menu, click Maintenance, and then click Apply changes.
3. On the Apply Change s pag e, click Discard. The time- and date-stamp of the configuration
that will be restored when you discard pending changes is displayed.
4. Click OK to confirm that you want to discard changes.
Deleting Referenced Objects
You cannot delete an object (such as a resource or a user) if it is still referenced by another object
(the check box next to it in AMC cannot be selected). In this example, the resource ahsiple cannot
be deleted:
In order to delete an object that is in use by anther object—such as a Web shortcut, a WorkPlace
layout, or an access rule—you must first out what objects are using it. To do this, expand the list
item by clicking on the plus (+) sign next to it. In this example the resource is used by a WorkPlace
shortcut named DFS; it can be deleted only after the WorkPl ace shortcut is removed. (The resource
is also part of a resource group named Default Resources, but it can be deleted if that is the only
reference.)
The following table lists the object types that cannot be deleted if they are referenced by other
objects.
This object type... Can be referenced by this object type
Resource Access control rules, resource groups, WorkPlace Web shortcuts
Resource groups Access control rules
Users Access control rules
User groups Access control rules
Realms Users, user groups
Authentication servers Realms
Communities Realms
Web application profiles Resources
End Point Control zones Access control rules, communities
Device profiles End Point Control zones
Page 65

SonicWALL Aventail E-Class SRA Installation and Administration Guide | 55
Chapter 4
Network and Authentication Configuration
This section provides information about essential network configuration tasks, including configuring
network interfaces, selecting a routing mode, configuring network gatew ays, defining static routes,
and name resolution. It also explains how to manage SSL and CA certificates, and configure user
authentication.
This is the minimal network configuration required to get the appliance up and running. For
information on configuring additional services—including NTP , SSH, ICMP, and syslog—see “System
Administration” on page 193.
Page 66

56 | Chapter 4 - Network and Authentication Configuration
Configuring Basic Network Settings
All basic network settings—including IP interfaces, routing, and name resolution—are configurable
in AMC. The starting point in AMC for configuring network options is the Network Settings page.
Specifying System Identity
You must name the appliance and specify the domain name in which it is located.
X To specify system identity
1. From the main navigation menu in AMC, click Network Settings.
2. In the Basic area, click Edit. The Configure Basic Network Settings page appears.
3. The Appliance name helps you differentiate appliances in several contexts (especially if more
than one appliance is running). The name is not visible to users:
{
It sets the command prompt for the SonicWALL appliance.
{
It is saved to a log file, so you can identify the appliance to which a particular log message
applies.
Page 67

SonicWALL Aventail E-Class SRA Installation and Administration Guide | 57
{
When you export a configuration file for the appliance (on the Maintenance page in
AMC), the Appliance name is prepended to the file name.
4. In the Default Domain box, type the name of the domain in which the appliance is located
(for example, yourcompany.com). This name defines the DNS namespace used to identify
hosts accessed by the appliance.
Configuring Network Interfaces
T o configure the network interfaces, specify the IP address, subnet mask, and interface speed. You
can run the appliance using both the internal and the external interfaces (a dual-homed
configuration), or optionally just the internal interface (a single-homed configuration). For more
information on the interface configuration options, see “Network Architecture” on page 17.
X To configure network interfaces
1. From the main navigation menu in AMC, click Network Settings.
2. In the Basic area, click Edit. The Configure Basic Network Settings page appears.
3. In the Network interfaces area, configure the settings for the internal interface connected to
your internal (or private) network. Click the link for Internal and then configure these
settings:
a. Type an Address and Netmask for the interface.
b. Select the appropriate interface Speed from the list (the default is Auto).
c. Click OK.
4. To configure the settings for the interface connected to the external network (or Internet) do
the following:
a. Click the link for External.
b. Select the Enabled check box.
c. Type the Address and Netmask settings used to access the SonicWALL appliance from
the Internet. The external IP address must be publicly accessible.
d. Select the appropriate interface Speed from the list (the default is Auto).
e. Click OK.
5. Click Save.
6. Click Pending changes and then apply the changes. (For more information, see “Applying
Configuration Changes” on page 52.)
Notes
z
If you configure the appliance to use both the internal and external interfaces, verify your
routing settings to make sure that you have a network route to the internal interface. If the
appliance is on a different network than the computer you’re using to access AMC, you must
set up routing (configure an internal default network gateway that will pass traffic to an internal
router, or define a static rout e to the network on which the appliance is installed) to maintain
access to AMC after you apply your network configuration changes. For mor e information, see
“Configuring Routing” on page 59.
Configuring ICMP
Enabling ICMP (Internet Control Messaging Protocol) will let you use the ping command to test
network connectivity on any interface.
To enable pings, select the Enable ICMP pings check box. To disable pings, clear the che ck box.
Page 68

58 | Chapter 4 - Network and Authentication Configuration
Viewing Fully Qualified Domain Names and Custom Ports
The Fully qualified domain names section of the page provides a table of the IP addresses,
FQDNs, and the WorkPlace sites and URL resources they are used by. You can sort the list forward
or backward by any column heading by clicking the column heading link. Under Used by, click a
WorkPlace site name or URL resource name that appears as a link to go to that page in AMC where
you can edit the settings for it.
The Custom ports sectio n provides a table showing the custom port number and the URL resource
that uses that port for all URL resources configured to use custom ports. Under Used by resource,
click a URL resource name that appears as a link to go to the Resources > Edit Resource page to
edit the resource settings.
Configuring Fallback Servers for Connect Tunnel
You can set up one or more fallback servers for Connect T unnel users in case their primary appliance
becomes unavailable due to a planned outage, for example, or a natural disaster. Users don’t need
to know the names of the fallback servers you set up: any time a client successfully connects to an
appliance that has any fallback servers specified, the list of fallback servers is transmitted to the
client and stored there.
Page 69

SonicWALL Aventail E-Class SRA Installation and Administration Guide | 59
X To specif y a fall back server for Connect Tunnel users
1. From the main navigation menu, click Network Settings.
2. In the Tunnel service area, click Edit. The Configure Network Tunnel Service page
appears.
3. In the Fallback servers area, click New.
4. Specify the fallback Server by host name or IP address.
5. In the Realm box you have two choices:
{
Leave it blank: Whatever realm the user was logged in to before the primary server
became unavailable is the same realm name that will be used on this particular fallback
server.
{
Specify a realm: Force users to log in to a particular realm when they connect to this
server.
Notes
z
Fallback server settings are not replicated as part of policy replication. In a group of servers
that have designated fallback servers, each appliance has a unique list that should not be
replicated on the other servers.
Fallback Servers and the User Experience
If an existing connection fails, the Connect T unnel client automatically attempts a connection to any
fallback servers that are specifie d. This fe ature is available to Connect Tunnel clients running on a
Windows, Macintosh, or Linux operating system. Users will not be aware that a fallback server is
being contacted, except for an initial pause of about 20 seconds as the connection is attempted,
and a status message indicating that a backup host is being contacted.
Session Limits
If the login credentials for users include a PIN or other parameter that is valid for only a limited
period of time, you should be aware of what your session limits are. For example, if Credential
lifetime is set to only 30 seconds and the client works through several fallback servers while
attempting to make a connection, the user’s PIN or other parameter may time out before the list of
possible servers is exhausted.
There are a few settings that govern how long a session can be resumed without requiring
reauthentication:
z
z
Notes
z
z
z
z
Configuring Routing
Credential lifetime is a global setting that is specified on the Configure General Appliance
Options page (click General Settings in the main navigation menu, and then click Edit in the
Appliance options area).
Limit session length to credential lifetime is a setting that is configured on a per-
community basis. When selected, tunnel client sessions in a given community terminate and
require reauthentication after the length of time specified by Credential lifetime.
If the client connects to a fallback server and the requested realm (as configured in AMC) is
unavailable, the connection fails with an authentication error.
Users connecting to a high-availability pair of appliances operate with the same fallback
information, regardless of which member of the pair they initially connect to.
Once a server has been contacted, fallback will not continue even if the login attempt fails.
If a user manually changes from one appliance that has a fallback list of servers to another, the
second server will display the last known realm the user selected for that host.
The SonicWALL SSL VPN appliance can be configured to route traffic using network gateways or
static routes. These routing methods can be used separately or in combination with each other.
Page 70

60 | Chapter 4 - Network and Authentication Configuration
Configuring Network Gateways
A network gateway is the address of a router that serves as point of access to another network.
Network gateway options are based on your network architecture and depend on whether you have
configured the appliance as dual-homed (both internal and external interfaces are enabled) or
single-homed (only the internal interface is enabled). See “Network Architecture” on page 17 for
more information.
Choosing a Network Gateway Option
When configuring network gateways in a dual-homed environment, you can choose among four
routing mode options:
z
Dual gateway
z
Single gateway, restricted
z
Single gateway, unrestricted
z
No gateway
Use the following scenarios to help you decide which option is best for your needs.
Scenario 1: Using an Internal and Internet Router
If you have an internal router as well as an Internet router, use the Dual gateway option. You can
leverage your internal router to access your internal resources.
Sample scenario—Company A has resources and a number of subnets on their internal network,
and they already have a robust routing system in place. With the dual gateway routing mode on
the appliance, client requests destined for internal resources on the corporate network can be
delivered to an internal router.
Scenario 2: Managing Client Requests with Static Routes
If you’re not using an internal router, or prefer managing routing on the appliance, use the Single
gateway, restricted option. In this scenario you must define static routes for all of your client
requests. Client requests without a static route will be discarded by the appliance. This option
requires more effort, but allows greater control over in-bound traffic.
Page 71

SonicWALL Aventail E-Class SRA Installation and Administration Guide | 61
Sample scenario—Company B does not use a lot of internal resources, and prefers to manage its
routing information on the appliance. They create a static route for each resource to which their
VPN users should have access. If a VPN user attempts to reach an address that is not defined within
the appliance’s routing table, then the traffic is discarded.
Scenario 3: Returning Client Requests to a Specified Gateway
With the Single gateway, unrestricted option, the appliance delivers all client requests that do not
match a static route to the gateway that you specify (on either the internal or external interface of
the appliance). This option is less secu re because it could allow traffic to pass to your Internet router
and out of your network, depending on the filtering and routing policies of your infrastructure. This
configuration is also more difficult to maintain.
Sample scenario—Like company B, compan y C pre f ers to manage its routing information on the
appliance and has created static routes for each resource to which VPN users need access. However,
some users in this organization also need access to Internet resources, and this traffic must be
redirected from the appliance. For example, a company’s users might need to access a public Web
server that requires pre-registered IP addresses. A user must first establish a VPN session with the
appliance; the request is then redirected to the external gateway of the appliance.
Page 72

62 | Chapter 4 - Network and Authentication Configuration
Scenario 4: Evaluating the Appliance in a Lab Setting
Use the No gateway option during evaluation if you will have the interfaces connected to your
testing networks without the need for routing.
Scenario 5: Deploying Network Tunnel Clients in “Redirect All” Mode
If you are planning to deploy network tunnel clients in “redirect all” mode, you may need to give
your network tunnel users access to both your internal network and the Internet (for more
information, see “Redirection Modes” on page 171). This can be accomplished by either of these
options:
z
Use the Dual gateway option, and make certain that your internal gateway router has been
configured with a route to the Internet.
z
Use the Single gateway, unrestricted option, and then configure the appliance to use a route to
the Internet; see “Enabling a Route to the Internet” on page 64.
Configuring Network Gateways in a Dual-Homed Environment
The following steps guide you through the setup of network gateways in a dual-homed
environment, where both the internal and external interfaces are enabled.
X To configure network gateways in a dual-homed environment
1. From the main navigation menu, click Network Settings.
Page 73

SonicWALL Aventail E-Class SRA Installation and Administration Guide | 63
2. In the Routing area, click Edit. The Configure Routing page appears.
3. To route traffic to your network gateways, select a routing mode from the following options:
{
Dual gateway—Specify an IP address for both the external and the internal gateways.
Network traffic generated in response to client requests will be sent to the external
gateway. All other traffic that does not have a static route defined will be sent to the
internal gateway.
{
Single gateway, restricted—Specify an IP address for just the external gateway. All other
traffic that does not have a static route defined will be discarded.
{
Single gateway, unrestricted—Specify an IP address to be used as both the external and
internal gateway. Network traffic not matching a static route will be sent to the external
gateway.
{
No gateway—Network traffic received by the appliance but not matching a static route is
discarded.
4. Click Save.
Notes
z
For users upgrading to version 8.9.0: If your previous configuration used the Enable route
to Internet setting, you can simplify your configuration in version 8.9.0 by specifying a dual
gateway system, where an internal gateway offers a path to the Internet for all access methods.
Configuring Network Gateways in a Single-Homed Environment
The following steps guide you through the setup of network gateways in a single-homed
environment, where only the internal interface is enabled. This configuration is less common than
one that is dual-homed.
X To configure a network gateway in a single-homed environment
1. From the main navigation menu in AMC, click Network Settings.
2. In the Routing area, click Edit. The Configure Routing page appears.
3. To route traffic to your network gateway, select one of these routing modes:
{
Default gateway—Specify an IP address for the default gateway. Network traffic received
by the appliance, but not matching a static route will be sent to this address.
{
No gateway—Network traffic received by the appliance, but not matching a static route is
discarded.
4. Click Save.
Page 74

64 | Chapter 4 - Network and Authentication Configuration
Enabling a Route to the Internet
If Routing mode is set to Single gateway, unrestricted you can still enable a route to the Internet
for your network tunnel clients, provided your appliance is dual-homed (both internal and external
interfaces are enabled). When Enable route to Internet is set, all tunnel traffic originating from
the client and destined for the Internet (running in “redirect all” mode) will be routed to the
specified IP address instead of being discarded.
X To enable a route to the Internet
1. From the main navigation menu in AMC, click Network Settings.
2. In the Routing area, click Edit. The Configure Routing page appears.
3. Expand the Advanced area. The Connect Tunnel area appears.
4. Select the Enable route to Internet check box, and then type the IP address of your
Internet router.
5. Click Save.
Configuring Static Routes
Static routes are added as entries to the routing table for networks reached from the internal
interface. Managing static route tables can be cumbersome, especially at a large site: you may want
to create and edit the routing information in a comma-separated value (CSV) text file outside of
AMC and then import it. Static route information that you impor t into AMC must be in an ASCII text
file, with each entry on a new line (separated from the previous entry by a CR/LF), and three values
separated by commas: IP address, netmask, and gateway. When you import a file, its contents
entirely replace any static routes currently specified in AMC.
X To configure static routing information
1. From the main navigation menu in AMC, click Network Settings.
2. In the Routing area, click Edit. The Configure Routing page appears.
3. In the Static routes area, you can add or modify list entries one by one or as a group:
{
Add a single entry by clicking New and then typing the route information in the IP
address, Netmask, and Gateway boxes. To modify a list entry, click its link, and then
make your changes. After you add or modify an entry, click OK.
Page 75

SonicWALL Aventail E-Class SRA Installation and Administration Guide | 65
{
Click Import to select the static route table you want to import. The static route
information must be in an ASCII text file in CSV format. Each entry must be on a new line
(separated from the previous entry by a CR/LF), and must have three values separated by
commas: IP address, netmask, and gateway. When you import a file, its contents entirely
replace any static routes currently specified in AMC.
{
In order to modify an existing list of routes, you must either click the list item that you
want to change, or export the entire list, modify its contents, and then import it.
4. Click Save when you are finished making changes.
X To delete a static route
1. On the Configure Routing page, select the check box to the left of any static routes you want
to remove, and then click Delete.
2. Click Save.
Notes
z
If you configure the appliance to use both the internal and external interfaces, verify the routing
settings to make sure that you have a network route to the internal interface. If the appliance
is on a different network than the comput er you’re using to access AMC , you must set up routing
(configure an internal default network gateway that will pass traffic to an internal router, or
define a static route to the network on wh ich the appliance is installed) to maintain access to
AMC after you apply your network configuration changes. For more information, see
“Configuring Routing” on page 59.
z
The routing information in AMC is sorted as follows:
{
The primary key is the Netmask, with entries sorted in descending order (from largest to
smallest)
{
The secondary key is IP address, with entries sorted in ascending order (from smallest to
largest)
z
If your internal network has a contiguous address space, you can combine multiple static routes
into one entry by specifying the proper subnet mask when you create the static route. The
following table provides two examples of using a subnet mask to route internal traffic to multiple
networks from a single static route entry:
To route traffic to these networks: Type this IP address Type this subnet mask
192.168.0.0
192.168.1.0
192.168.2.0
192.168.3.0
192.168.*.*
(all networks in 192.168 range)
If necessary, you can explicitly create additional static routes for other subnets; the routing
table searches netmasks from most to least specific.
Configuring Name Resolution
The appliance needs access to DNS servers to resolve host names to IP addresses. If you use
WorkPlace to browse Windows networks, you also need to sp ecify a WINS (Windows Int ernet Name
Service) server and Windows domain name.
Configuring Domain Name Service
Configuring a DNS server enables the appliance to correctly resolve host names. Properly
configuring DNS ensures that the appliance can provide access to your network resources.
X To configure DNS name resolution
1. From the main navigation menu in AMC, click Network Settings.
192.168.0.0 255.255.252.0
192.168.0.0 255.255.0.0
Page 76

66 | Chapter 4 - Network and Authentication Configuration
2. In the Name resolution area, click Edit. The Configure Name Resolution page appears.
Configuring Windows Network Name Resolution
Certificates
3. In the Search domains box, type the default DNS domain name for your company (such as
example.com). This domain name will be appended to unqualified host names to resolve
them. You can enter a maximum of six domain names, separated by semicolons.
4. In the DNS server boxes, type the IP addresses of your primary and (if applicable) two
backup DNS servers. The backup servers are used if the primary server is unavailable.
5. Click Save.
If you want to browse files on a Windows network using WorkPlace, you must specify a WINS
(Windows Internet Name Service) server and a Windows domain name. WorkPlace uses this
information to perform name resolution and build a list of resources for users to browse.
X To configure Windows network name resolution
1. From the main navigation menu in AMC, click Network Settings.
2. In the Name resolution area, click Edit. The Configure Name Resolution page appears.
3. In the Windows networking area, type:
{
The IP address of your primary and (if applicable) secondary WINS server.
{
Your Windows domain name using NetBIOS syntax (for example, mycompany).
4. Click Save.
The SonicWALL appliance uses SSL certificates to secure information that the client computer sends
to the server, and to validate the appliance’s identity to connecting users. It requires at least two
SSL certificates:
Page 77

SonicWALL Aventail E-Class SRA Installation and Administration Guide | 67
z
The SonicWALL services use a certificate to secure user traffic from a Web browser to
WorkPlace, and from the Connect clients to the appliance. (If you want to provide several
WorkPlace sites, you can use a wildcard certificate for multiple sites, or associate a different
certificate with each one. In either case, the sites can have differe n t h os t an d domai n n ame s;
for more information, see “Adding WorkPlace Sites” on page 299.)
z
AMC uses a separate certificate to secure management traffic. This is usually a self-signed
certificate.
CA certificates are also used for securing connections to back-end servers and authentication using
client certificates. See “Importing CA Certificates” on page 75 for more details.
Server Certificates
To manage the SSL server certificates used to access WorkPlace and AMC, click SSL Settings in
the main navigation menu in AMC. This is where you view, import, and delete SSL and CA
certificates.
Certificate Strategy
There are two types of certificates: commercial and self-signed.
z
A commercial CA verifies y our company’ s identity , v ouching for your identity by provi ding you
with a certificate that the CA signs. A CA need not be commercial or third-party—a company
can be its own CA. Commercial certificates are purchased from a CA such as VeriSign
(http://www.verisign.com), and are usually valid for one year.
z
With a self-signed SSL certificate, you are verifying your own identity. The associated private
key data is encrypted using a password. A self-signed certificate can also be a wildcard
certificate, allowing it to be used by multiple servers which share the same IP address and
certificate, but have different FQDNs. Although this kind of certificate is secure, a self-signed
certificate is not in the browser’s built-in list of CAs, so the user is prompted to accept it before
each connection. There are a few ways to avoid this prompting:
{
{
{
When deciding which type of certificate to use for the servers, consider who will be connecting to
the appliance and how they will use resources on your network:
z
If business partners are connecting to Web resources through the appliance, they will likely
want some assurance of your identity before performing a transaction or providing confidential
information. In this case, you would probably want to obtain a certificate from a commercial CA
for the appliance.
Configure the SonicWALL clients to use the certificate root file.
Add the self-signed certificate to the user’ s list of Trusted Root Certificate Authorities in the
Web browser.
Use a commercial CA, which is widely trusted by default.
Page 78

68 | Chapter 4 - Network and Authentication Configuration
On the other hand, employees connecting to Web resources may trust a self-signed certificate.
Even then, you may want to obtain a third-party certificate so that users are not prompted to
accept a self-signed certificate each time they connect.
z
To accommodate users who connect to the appliance from small form factor devices, configure
the appliance with a certificate from a leading CA (such as VeriSign), or import the root
certificate from your CA to your users’ small form factor devices.
CAUTION: When the appliance is configured with a cert ificate from a CA that is not well
!
known, or one that is self-signed, small form factor device users may see an error message
and be unable to log in. Windows Mobile-powered devices, for example, are configured with
the root files for only VersiSign, CyberTrust, Thawte, and Entrust. For more information on
small form factor devices, see “WorkPlace and Small Form Factor Devices” on page 305.
Obtaining a Certificate from a Comme r ci al CA
Obtaining a certificate from a commercial CA provides verification of your identity for people who
connect to your network through the appliance. You must perform several steps to obtain and
configure a certificate from a commercial CA:
Generate a CSR
Create a certificate
signing request (CSR)
Configure
Aventail clients
Configure Aventail Connect
client to use the trusted
root file
These six steps describe how to obtain a commercial certificate.
Submit the CSR
to a CA
Submit the CSR to a
commercial certificate
authority (CA)
Apply
your changes
This restarts the services to
activate the certificates
Add CA's root file
to CSR response
(Optional) If the CA didn't
include a trusted root file in
the CSR response, add it
Import the CSR
response
Import the CSR response into
AMC to create a certificate
Step 1: Generate a Certificate Signing Request
Using AMC, you can generate a certificate signing request (CSR). This process creates an RSA key
pair that will be used to secure server information, and a CSR containing your public key and
identity information. The information you provide is used by the commercial CA to generate your
certificate, and may be visible to users who connect to the appliance.
X To generate a CSR
1. From the main navigation menu in AMC, click SSL Settings.
2. In the SSL certificates area, click Edit.
Page 79

SonicWALL Aventail E-Class SRA Installation and Administration Guide | 69
3. In the Certificate signing requests list, click New. The Create Certificate Signing
Request page appears.
4. The Certificate information you fill out is stored in the CSR and used by the commercial CA
when generating your certificate; it may be visible to users who connect to the appliance.
a. In the Fully qualified domain name box, type the server name as you want it to appear
in the certificate. Also known as a “common name” (or CN), this is usually composed of a
host and a domain name; for example, you might type vpn.example.com.
Users with a Web-based client will use this name to access the appliance (in other words,
to access WorkPlace), so it’s best to use a name that is easily remembered. You’ll also
reference this name when configuring the Connect or OnDemand components to provide
access to TCP/IP resources. You must add this name to your external DNS to make the
appliance accessible to users.
b. In the Organizational unit box, type your division or department name (for example, IT
Department).
c. In the Organization box, type your company or organization name as you want it to
appear in your SSL certificate.
d. In the Locality box, type the name of your city or town. Spell out the name in full (don’t
use an abbreviation).
e. In the State box, type the name of your state or province. Spell out the name in full (don’t
use an abbreviation).
f. In the Country box, type the two-letter abbreviation for your country. For a list of valid
country codes, see the International Organiza tion for Standardization (ISO) Web site at
http://www.iso.org and search for ISO 3166-1.
g. In the Key length list, select the key length you want to use for the key: 512, 768, 1024
(the default), 1280, or 1536. Larger keys increase security, but make the appliance run
more slowly. A key length of 1024 or 1280 is recommended for most installations.
Page 80

70 | Chapter 4 - Network and Authentication Configuration
5. Review the information to verify that you’ve typed it correctly, and then click Save to generate
the CSR. The Create Certificate Signing Request page appears.
6. Copy the contents of the CSR text from AMC to the clipboard or into a text file, and the n click
OK.
Notes
z
Some commercial CAs may have problems reading CSRs that contain characters produced by
pressing the SHIFT key, such as “&” or “!”. For example, when specifying your company name
or other information, you may want to spell out “&” (if used) as “and”.
Step 2: Submit the CSR to a Commercial CA
The process of submitting a CSR will vary, depending on which commercial CA you choose. Ve riSign
is a popular commercial CA that provides SSL certificates through their Secure Site Services; for
information see http://www.verisign.com.
X To submit a CSR to a commercial CA
1. Copy the contents of your certificate signing request from the Create Certificate Signing
Request page in AMC.
2. Submit it to the CA using the method they request (usually you either copy and paste the CSR
text into a form on the CA’s Web site, or attach it to an email message).
Depending on what is specified by the CA, you may need to paste all the text, or only the text
between the BEGIN NEW CERTIFICATE REQUEST and END NEW CERTIFICATE REQUEST banners
(including the banners themselves). If you’re not sure, contact the CA.
3. Wait for the commercial CA to verify your identity. You may be asked to produce one or more
documents attesting to your corporate identity (such as a business license or article of
incorporation).
Notes
z
Submit your CSR only once; you may otherwise be billed twice by the CA. This would also
change the internal private key, making the response from the CA unusable.
Page 81

SonicWALL Aventail E-Class SRA Installation and Administration Guide | 71
Step 3: Review CSR Response and Add CA’s Root Certificate
After you’ve submitted your CSR, you must wait for the CA to verify your identity. After they
complete this process, the CA will send you the certificate reply . It is usually in one of two formats:
z
A file attached to an email message. In this case, you can save the file to your local file
system (the one from which you’ll access AMC) and then import it into AMC.
z
Text embedded within an email message. In this case, you copy the text and pas te it into
a text box provided in AMC. Be sure to include the BEGIN CERTIFICATE and END CERTIFICATE
banners.
If the CA does not provide a full certificate chain in the CSR response (a common practice), AMC
will try to complete the certificate chain when you import the CSR response. If it is unable to
complete the chain, AMC displays an error message. If this occurs, you must upload the CA’s root
certificate or any intermediary public certi ficates to the appliance. If you are acting as your own CA,
you will probably need to perform this step.
X To complete a certificate chain
1. Obtain the trusted root certificate or intermediary public certificate from the CA. Most external
commercial CAs provide the certifi cates on their Web site; if the CA is run by your company,
check with the server administrator.
2. From the main navigation menu in AMC, click SSL Settings.
3. In the SSL certificates area, click Edit.
4. In the Certificate signing requests list, click the Process CSR response link for the
appropriate certificate. The Import CSR Certificate page appears.
5. Upload the certificate:
{
If the certificate is in binary format, click Browse and then upload the certificate reply
from your local file system (that is, the computer from which you’ve logged in to AMC).
{
If the certificate is in base-64 encoded (PEM) text format, click Certificate text and then
paste the certificate into the text box. Be sure to include the BEGIN CERTIFICATE and END
CERTIFICATE banners.
6. Click Import to return to the CA Certificates page.
7. To verify that the certificate was properly uploaded, click CA Certificate. The new certificate
should appear on the CA Certificates page.
Step 4: Import the CSR Response Into AMC
To create a certificate, import the CSR response into AMC.
X To import a certificate reply
1. From the main navigation menu in AMC, click SSL Settings.
2. In the SSL certificates area, click Edit.
3. In the Certificate signing requests list, click the Process CSR response link for the
appropriate certificate.
4. Upload the certificate on the Import CSR Certificate page:
{
If the certificate is in binary format, click Browse and then upload the certificate reply
from your local file system (that is, the computer from which you have logged in to AMC).
{
If the certificate is in base-64 encoded (PEM) text format, select Certificate text and
paste the certificate into the text box. Be sure to include the BEGIN CERTIFICATE and END
CERTIFICATE banners.
5. In the Used by list, select AMC or WorkPlace/access methods (select None if you want to build
a list of certificates from which to choose later). If you defined additional WorkPlace sites (in
addition to the default WorkPlace site), their names are included in this list.
6. Click Save.
7. To verify that the certificate was properly uploaded, click the plus sign (+) next to it on the
SSL Certificates page.
Page 82

72 | Chapter 4 - Network and Authentication Configuration
Step 5: Apply Your Changes
To start using a new certificate, you need to apply your configuration changes. For more
information, see “Applying Configuration Changes” on page 52.
After applying the change, the appliance examines the new certificate and begins using it for all
new connections. If the appliance fails to correctly process the certificate, you see a failure message
and the event log records information about the failure. Typically, this occurs if there is no
certificate, the certificate has expired (or is not yet valid), or the cached password in the encr ypted
password file is incorrect.
Notes
z
If your users authenticate using digital certificates, you must configure a trusted root file on the
server as well as on the clients. See “Configuring Client Certificate Revocation” on page 76.
Creating a Self-Signed Certificate
If you plan to use a self-signed SSL certificate (instead of obtaining a certificate from a commercial
CA), you can create one using AMC. A host is not selected for the certificate, because there is no
one to one mapping of certificates to hosts. Wildcard certificates allow one certificate to map to
multiple hosts.
X To create a self-signed certificate
1. From the main navigation menu in AMC, click SSL Settings.
2. In the SSL certificates area, click Edit.
3. Click New and then select Create self-signed certificate from the menu.
4. In the Fully qualified domain name box, type a wildcard domain name such as
*.sonicwall.com, or type the indivi dual server nam e as you want it to appear in the certificate:
{
The main appliance certificate can be a wildcard certificate, or you might type something
like vpn.example.com. You must add this name to your external DNS to ma ke the
appliance accessible to users.
This is the name users will enter for access to Web-based resources on your network. For
a wildcard certificate, the “*” matches any string of characters up to the dot, such as
specific server names. You will also reference this name when configuring the Connect
clients to provide access to TCP/IP resources.
{
If this certificate will be used by AMC (as opposed to WorkPlace), you might type
something like amc.example.com. In most cases, you should add this name to your
internal DNS to simplify access to AMC.
5. In the Organization box, type the company or organization name as you want it to appear in
your SSL certificate.
6. In the Country box, type the two-letter abbreviation for your country. For a list of valid
country codes, go to the International Organization for Standardization (ISO) Web site at
http://www.iso.org and look for information on ISO 3166-1.
7. Click Save.
8. Click Pending changes and then apply the changes. (For more information, see “Applying
Configuration Changes” on page 52.)
Creating the Trusted Root File for a Self-Signed Ce rt if icate
If you use a self-signed certificate, you will probably want to provide your users with a trusted root
file (otherwise they will see a security prompt at every login).
X To create a trusted root file for a self-signed certificate
1. Log in to the appliance.
2. Make a copy of the server.cert file, which is located in /usr/local/extranet/etc.
Page 83

SonicWALL Aventail E-Class SRA Installation and Administration Guide | 73
3. Open the copied file in a text editor and remove everything except the root certificate. The file
will contain one or more certificates as well as the private key. The root certificate is the last
certificate block in the file, including the banners. In the following example, you would delete
the first certificate block and the private key block:
Certificate 1
Root certificate
Private key
The resulting file looks like this:
4. Distribute this file to your users. This increases security and prevents users from being
prompted to accept the SSL certificate each time they connect. See “Importing CA
Certificates” on page 75.
{
If you want increased security for your Web-based users, this file should be imported into
the browsers for these users.
Notes
z
Setup Tool creates a self-signed certificate for AMC. For most deployments, this self-signed
certificate is sufficient and there is no need to obtain a certificate from a commercial CA. It is
important, however, to use AMC within a trusted network. Self-signed certificates protect
against passive eavesdroppers but not against active attackers.
z
If you’re deploying OnDemand for Microsoft Internet Explorer users on Apple Macintosh
systems, you must obtain a commercial SSL certificate. A self-signed certificate will not work
because the Macintosh Java Virtual Machine (JVM) won’t accept a certificate signed from an
unknown CA.
Managing Server Certificates
This section describes tasks related to managing SSL certificates in AMC.
Importing an Existing Certificate from Another Computer
If you already have a certificate from a commercial CA, you may want to tran sfer it and its private
key to the appliance. After you import the certificate, it will be used by the servers to secure user
traffic on the appliance.
A host is not selected for the certificate, because there is no one to one mapping of certificates to
hosts. Wildcard certificates allow one certificate to map to multiple hosts .
The appliance stores certificates in the PKCS #12 format. If your certificate is stored in a different
format, convert it to PKCS #12 before importing. After performing the conv ersion, confirm that the
PKCS #12 file contains the complete certificate chain.
X To transfer an existing certificate to the appliance
1. From the main navigation menu in AMC, click SSL Settings.
2. In the SSL certificates area, click Edit.
Page 84

74 | Chapter 4 - Network and Authentication Configuration
3. Click New, and then select Import certificate from the menu.
4. On the Import Certificate page, click Browse and then upload the certificate from your local
file system (that is, the computer from which you have logged in to AMC).
5. In the Password box, type the password that was used to encrypt the private key.
6. Click Save.
The appliance uses the previous certificate until you apply your con f iguration change s.
Exporting an SSL Certificate
You can export the SSL certificate used to secure user traffic on the appliance. It will include the
private key and be saved in PKCS #12 format.
X To export the SSL certificate from the appliance
1. From the main navigation menu in AMC, click SSL Settings.
2. In the SSL certificates area, click Edit.
3. Select the check box next to the certificate you want to export, and then click Export. The
Export Certificate page appears.
4. In the Password box, type the password that you want to use to encrypt the private key.
5. Click Save, and then download the certificate file to your local file system (that is, the
computer from which you’ve logged into AMC).
6. Click OK.
CA Certificates
Every CA requires a certificate so that it can be “trusted” by entities that request digital certificates
from it. If a client trusts a CA certificate, it automatically trusts any other certificates that are issued
by that CA. CA certificates thus form one of the foundations of public key cryptography. The CA
certificate is either signed by the CA itself (a “root certificate”), or by a higher authority in a
hierarchy of CAs in a public key infrastructure (an “intermediate CA certificate”).
The appliance uses CA certificates to secure the following:
z
z
z
The appliance includes over 100 public root certificates from leading commercial CAs. If you’ve
obtained a certificate from a commercial CA, its root certificate o r intermediary public ce rtificate is
probably already installed on the appliance. However, if you are acting as your own CA you must
import a root or intermediary public certificate to the appliance. T o view the list of certificates, click
Edit in the CA Certificates area of the SSL Settings page. This is also where you delete CA
certificates.
Connections to a back-end LDAP or AD authentication server
Connections to a back-end HTTPS Web server
Device profiling (End Point Control), to verify the validity of certificates submitted b y users who
connect to the appliance. See Client certificate in “Device Profile Attributes” on page 267 for
more information.
Page 85

SonicWALL Aventail E-Class SRA Installation and Administration Guide | 75
Importing CA Certificates
If the appliance is not configured with the necessary CA certificate, you must obtain a copy and
import it to the appliance using AMC. The procedure is the same, whether the certificate will be used
to secure connections to back-end resources, or to authenticate users by means of a client
certificate.
X To import a CA certificate to the appliance
1. Obtain the trusted root certificate or intermediary public certificate from the CA. Most external
commercial CAs provide the certifi cates on their Web sites; if the CA is run by your company,
check with the server administrator.
2. From the main navigation menu in AMC, click SSL Settings.
3. In the CA Cert ificates area, click Edit.
4. Click New. The Import CA Certificate page appears.
5. Do one of the following:
{
If the certificate is in binary format, click Browse and then upload the certificate reply
from your local file system (that is, the computer from which you’ve logged in to AMC).
{
If the certificate is in base-64 encoded (PEM) text format, click Certificate text and then
paste the certificate into the text box. Be sure to include the BEGIN CERTIFICATE and END
CERTIFICATE banners.
6. Specify the connection types this certificate will be used to secure:
Connection type Description
Authentication server
connections (LDAPS)
Securing your LDAP or Active Directory (AD) connection with SSL
enhances security by preventing attempts to impersonate the LDAP
or AD server. To configure LDAP or AD over SSL, you must add the
root certificate for the CA that granted your LDAP or AD certificate
to the SSL trusted roots file.
Web server connections
(HTTPS)
If you have a back-end Web resource that is secured with SSL (that
is, it uses HTTPS instead of HTTP), configure the Web proxy service
to verify the root certificate presented by the back-end server. This
important security check will help ensure that you can trust the
identity of the back-end server. See “Configuring the Web Proxy
Service” on page 356 for details.
If the back-end server’s root certificate is not pre-installed on the
appliance, you must obtain a copy and import it in AMC.
Device profiling
(End Point Control)
EPC can be used to verify the validity of certificates submitted by
users who connect to the appliance. If a client certificate is used in
a device profile to classify users into an EPC zone, the appliance
must be configured with the root or intermediary certificates for the
CA that issued the client certificate to your users.
When the appliance interrogates the user’s computer to dete rmine
if the specified certificate is present, it can be configured to search
just the system store
(HKLM\SOFTWARE\Microsoft\SystemCertificates), or also include
the user store (HKCU\Software\Microsoft\SystemCertificates).
7. Click Import. The CA Certificates page appears and displays a confirmation message.
8. The new certificate appears in the alphabetical list on the CA Certificates page. When you
upload a CA certificate for use with client certificate authentication (and you apply the
change), network services are automatically restarted and user connections are terminated,
forcing users to reauthenticate. You may want to schedule the change during off-peak hours.
Page 86

76 | Chapter 4 - Network and Authentication Configuration
Notes
z
If the certificate is being used to secure authentication server connections, check to see that
the appropriate LDAP over SSL or Active Directory over SSL settings are enabled on the
Configure Authentication Server page in AMC.
z
By default, the Web proxy service is configured to verify the root certif icate presented by back end HTTPS Web servers. This important security check helps ensure that you can trust the
identity of the back-end server. See “Configuring the Web Proxy Service” on page 356.
z
If you do not want to trust a CA listed on the CA Certificates page, select the check box next
to it, and then click Delete.
z
When setting up devices profiles, avoid checking for client certificates within the same zone
more than three times. If there are multiple EPC checks for client certificates within the same
zone, users may see an error message (“An error was encountered encoding data to be sent to
the Logon Server”).
Configuring Client Certificate Revocation
Certificates installed on client devices can be used to authenticate users or devices, giving them
access to a particular realm. A certificate is usually valid until it expires, but it is possible for it to
be compromised before it expires. For example, a CA may decide th at a certificate was improperly
issued, or its private key may have been compromised. You can consult a certificate revocation list
(CRL) to check a certificate’s validity (its location—the CRL distribution point, or CDP—is typically
included in the X.509 certificate). If a certificate is no longer valid, the user is denied access.
Use the Manage CA Certificate page in AMC to configure certificate revocation checking for
individual certificates, and determine the connection types the certificate is us ed to secure.
X To veri fy th e va li di ty of a client certificate and configure certificate revoca tion
1. From the main navigation menu in AMC, click SSL Settings.
2. Under CA Certificates, click Edit.
3. To see details about a certificate, click the plus s ign (+) next to it in the Issued To li st. To edit
a certificate, click its link. For example, click the plus sign next to “Thawte Server CA” to see
details about this certificate from Thawte Consulting, and click the link to edit it.
4. In the Used for area, specify the connection types this certificate is used to secure.
{
Authentication server connections (LDAPS)—See “Configuring a PKI Authentication
Server” on page 103.
{
Web server connections (HTTPS)—See “CA Certificates” on page 74.
{
Device profiling (End Point Control)—See Client certificate in “Device Profile
Attributes” on page 267.
Page 87

SonicWALL Aventail E-Class SRA Installation and Administration Guide | 77
5. To specify CRL settings, click Certificate revocation list (CRL) in the Certificate
revocation checking area. The format for the CRL must be DER-based (.crl); the applian ce
cannot use a CRL that's been created in PEM format.
6. The appliance retrieves lists (using LDAP or HTTP) of revoked certificates from a CRL
distribution point (CDP). Specify the location of this CDP:
{
The CDP is usually specified in the c ertificate itself. In this case, click Use CDP from
client certificate.
{
Alternatively you can specify a URL for it. Click Use remote CDP; if a login is required for
it, type the credentials.
7. If Use remote CDP is selected, you can specify how often the CRL should be retrieved using
the Download CRL every <n> hours option. If you don’t specify a download interval, a new
CRL is retrieved when the old one expires. (CRLs are updated frequently so that when a
certificate is revoked, that information is distributed in a timely manner.)
8. The appliance checks client certificates against this list. To perform CRL checking for the entire
chain of certificates, starting with the CA root certificate, select the Validate the entire chain
check box.
9. Specify whether users should be allowed or denied access if the CDP is inaccessible by
selecting Allow user access or Block user access. The remote CDP you specified might be
offline, or it may not be indicated on the certificate. (It is an optional item for the X.509
standard, not a mandatory one.)
10. Click Save.
Managing CA Certificates
This section describes tasks related to managing certificates on the appliance; importing certificates
is described in “Importing CA Certificates” on page 75.
Viewing CA Certificate Details
You can view the details for the appliance certificate, such as the subject, issuer, start and end time,
serial number , and MD5 checksum. Details of a newly imported c ertificate are not available until you
have applied the configuration change.
Page 88

78 | Chapter 4 - Network and Authentication Configuration
X To view CA certificate details
1. From the main navigation menu in AMC, click SSL Settings.
2. In the CA Cert ificates area, click Edit.
3. Click the plus sign (+) to the left of the certificate you want to see details about.
Mapping Certificates to Hosts
Since multiple hosts on the appliance may use a single wildcard certificate, the Certificate usages
table provides a mapping of a single certificate to multiple sets of hosts. A set of hosts is defined
as one or more WorkPlace sites, Exchange ActiveSync sites, or custom FQDN mapped resources
that are on the same IP address. Any given set of hosts must use the same wildcard certificate and
therefore are treated as a single item for mapping certificates in the Certificate usages table.
AMC is treated as a separate host even if it is on the same IP address as other hosts on a singlehomed appliance.
X To map a new certificate to a host or set of hosts
1. From the main navigation menu in AMC, click SSL Settings.
2. In the SSL Certificates area, click Edit.
3. In the Certificates column of the Certificate usages table, click on the certifi cate to activate
an in-place editor with a drop-down certificate selector.
4. Select the certificate. For individual hosts, all certificates are available for selection. For a set
of multiple hosts, only wildcard certificates are available for selection.
5. Click OK.
Exporting CA Certificates
You can export a CA certificate and its private key to your local computer. The certificate is saved
in PKCS #12 format.
X To export a CA certif icate
1. From the main navigation menu in AMC, click SSL Settings.
2. In the CA Cert ificates area, click Edit.
3. Select the check box to the left of the certificate you want to export.
Page 89

4. Click Export.
5. In the Password text bo x , ty pe the password that will encrypt the private key.
6. Click Save. The certificate is saved (by default) to a file named server_cert.p12.
Deleting CA Certificates
To make the list of certificates more manageable, you might want to delete those that you know
you will never need.
X To delete a CA certificate
1. From the main navigation menu in AMC, click SSL Settings.
2. In the CA Cert ificates area, click Edit.
3. Select the check box to the left of any certificates you want to delete.
4. Click Delete.
Certificate FAQ
This section addresses frequently asked questions about working with certificates.
How do I obtain a certificate from a non-commercial CA?
The process is identical to the one for obtaining a certificate from a commercial CA, except that you
submit the CSR to a non-commercial CA (such as a Microsoft Self-Signed Certificate Authority). This
part of the process is outlined in “Step 2: Submit the CSR to a Commercial CA” on page 70.
When do certificates and CRLs expire?
Self-signed certificates are v alid for five years. The expiration date for third-party certificates varies,
depending on who issued the certificate; contact the CA for more information. A Certificate
Revocation List (CRL) is valid for a much shorter period of time: days, or even hours.
When using certificates and CRLs, it is important for the clock on the appliance to be accurate, since
it is used to determine when these items expire.
Are intermediate certificates supported for end user certificate verification?
Yes, intermediate certificates are supported for end user certificate verification. This covers PKI and
LDAP certificate methods. This allows an intermediate certifying authority to be imported to validate
a certificate chain, without requiring trust of the root certifying authority.
SonicWALL Aventail E-Class SRA Installation and Administration Guide | 79
What are the different CA certificates on the appliance and how are they used?
To see the list of CA certificates available on the appliance, click SSL Se ttings on the main
navigation menu, and then click Edit in the CA Certificates area. By default, any certificate in the
list can be used to secure up to three connection types (authentication server, secure Web server,
and client certificate). Click on a certificate to set the connection types you want it to secure.
How many CA certificates can be stored on the applian ce?
The roots file can contain as many certificates as you want to trust. For instructions on how to
import additional CA certificates, see “Importing CA Certificates” on page 75.
Can private keys or CSRs generated from other tools be imported to the appliance?
Private keys and CSRs must be generated on the appliance using Setup Tool or the certificate
generation tool. However, you can copy private keys and CSRs from one SonicWALL appliance to
another using the procedure described in “Managing Server Certificates” on page 73. Any copied
certificates are overwritten if you make changes to them in AMC.
Where is the AMC certificate stored?
AMC’s self-signed certificate is stored on the appliance in /usr/local/app/mgmtserver/sysconf/active/.
For AMC, a self-signed certificate is sufficient for most environments. It is important, however, to
use AMC within a trusted network. Self-signed certificates protect against passive eavesdroppers
but not against active attackers.
Page 90

80 | Chapter 4 - Network and Authentication Configuration
Should I keep all of the CA certificat es on the appliance, or just the ones I need?
For the sake of convenience, the appliance includes more than 100 CA certificates. To make your
deployment more secure, you may want to pare this list down so that it includes only the CA
certificates you need for client certificates, LDAPS, and HTTPS. A shorter list is also easier to
manage.
Managing User Authentication
Authentication is the process of v erifying a user’ s identity to ensure th at the individual really i s who
he or she claims to be. (Authentication differs from authorization: it verifies identity, while
authorization specifies access rights.) This section describes how to reference external
authentication servers.
To manage user authentication, you must first define one or more external authentication servers
in AMC, and then set up realms that reference those authentication servers. These are the realms
that users will log in to. For information on realms, see “Using Realms and Communities” on
page 160. You can also configure a local authentication repository on the appliance for te s ti ng, as
described in “Configuring Local User Storage” on page 107.
About Intermediate Certificates
You can configure an authentication server to trust intermediate CAs without verifying the entire
chain. This provides benefits, such as distributing certificate management among several signing
authorities, several of whom might be remote to the root CA server and therefore would otherwise
be unable to issue certificates, and adds security because the compromise of any single signing
authority does not compromise the entire network.
To configure trusted intermediate certificates, see “Configuring a PKI Authentication Server” on
page 103.
For example, you could create a root certificate signing authority on a system that is not connected
to the corporate network. You can then issue a set of trusted intermediate signing authority
certificates to be deployed in various sectors of the network (often by department or organizational
unit). For the VPN, this is most often done to distribute machine or personal certificates to client
systems.
The other alternative is to obtain a signing certificate from a certificate authority such as VeriSign
or Thawte. In this case, your main CA is actually an intermediate CA itself.
By SSL rules, the root CA certificate must be accessible in order to validate the entire chain.
However, the appliance makes no distinction between importing a CA certificate for trust and
importing a CA certificate to validate a certificate chai n for the intermediate CA that you want the
appliance to trust. If no options are selected when a CA certificate is imported, the CA will only be
used to validate certificate chains. (The options are the connection types the certificate is used to
secure: Authentication server connections (LDAPS), Web server connections (HTTPS), and Device
profiling (End Point Control)). Any CA certificate used onl y to validate certificate chains is not
offered as a trusted signer during client certificate authentication or EPC certificate enforcement.
When an end user presents a client certificate signed by an intermediate CA, assuming the
appliance trusts the signing authority, the user is allowed to authenticate and access resources
normally.
When an end user presents a client certificate issued by a root CA of the truste d i nt ermedi ate CA,
unless the administrator has also imported the root CA for trust purposes, the end user
authentication attempt fails due to lack of valid and trust ed certificate.
If a client presents a certificate that is signed by a CA that exists only for chain validation, the
certificate will be rejected. This results in an authentication failure or a failure for certificate
authentication and in a failure to match the device profile for certificate EPC.
Page 91

SonicWALL Aventail E-Class SRA Installation and Administration Guide | 81
Configuring Authentication Servers
Setting up authentication involves the following: a directory (such as LDAP or Microsoft Active
Directory), an authentication method (username/password, token or smart card, or digital
certificate), and other configuration items that make the authentication process unique (for
example, an LDAP search base, or adding custom prompts and messages). The SonicWALL
appliance supports the leading authentication directories and methods.
After you reference an authentication server in a realm and associate users with the realm, the
appliance checks users’ credentials against the credentials stored in the specified authentication
repository. You can also set up chained (two-factor) authentication; see “Configuring Chained
Authentication” on page 109 for details.
X To configure an authentication server
1. From the main navigation menu in AMC, click Authentication Servers, and then click New.
2. In the User store area, specify the directory type or authentication method you want to
configure:
Authentication directory Credential type For more information
Microsoft Active Directory
and
z
Username/password “Configuring Microsoft Active
Directory Servers” on page 83
Microsoft Active Directory Tree
LDAP
z
Username/password
z
Digital certificate
“Configuring LDAP and LDAPS
Authentication” on page 94
Page 92

82 | Chapter 4 - Network and Authentication Configuration
Authentication directory Credential type For more information
RADIUS
z
Username/password
z
Token-based
authentication (such as
SecurID or SoftID)
z
RSA Authentication Manager
Server
Token-based
authentication (such as
SecurID or SoftID)
Public key infrastructure
(PKI)
z
Digital certificate (with
optional certificate
revocation checking)
z
RSA ClearTrust
N/A “Configuring a Single Sign-On
(single sign-on)
z
Local users
(local user storage)
Username/password—
used primarily for
testing purposes and not
recommended in a
production environment
3. Select the Credential type of the authentication server (what types are available depends on
the User store you selected).
4. Click Continue. For information about the next step in the configuration process, follow the
link for the User store you selected in the previous step.
“Configuring RADIUS
Authentication” on page 99
“Configuring RSA Server
Authentication” on page 102
“Configuring a PKI
Authentication Server” on
page 103
Authentication Server” on
page 104
“Configuring Local User
Storage” on page 107
Defining Multiple Authentication Servers
The SonicWALL appliance supports the definition and use of multiple authenticatio n servers. A realm
references one or two authentication servers and determines which access agents are provisioned
to your users and what End Point Control restrictions (if any) are imposed. See “Overview: Users,
Groups, Communities, and Realms” on page 159 for more about realms.
Following are examples of using multiple authentication servers referenced by realms:
z
Chained authentication (two authentication servers)
Example: RADIUS with Token/SecurID and LDAP with username/password
Users logging in to a realm are authenticated against two servers. You can configure AMC so
that users see only one prompt. See “Configuring Chained Au thentication” on page 109 for
details.
z
Use different servers to handle authentication and authorization
Example: RADIUS with Token/SecurID and Active Directory (for group information)
The user authenticates against one repository, and then the user’s group information is passed
from a second one. For more information, see “Enabling Group Affinity Checking in a Realm”
on page 112.
z
Multiple credential types and a single authentication server
Example: RADIUS with username/password and RADIUS with Token/SecurID
Suppose your company employees log in with usernames and passwords, but the employees
of your call-center log in with SecurID tokens. You could create an employee realm and a
callcenter realm, each referencing the appropriate credential type and RADIUS server.
z
Multiple instances of the same directory/authentication method using different backend servers
Example: Two RADIUS/password instances using different RADIUS servers
In this case you would define two authentication servers, each with the appropriate server
information.
Page 93

SonicWALL Aventail E-Class SRA Installation and Administration Guide | 83
z
Multiple instances of the same directory/authentication method on the same server,
configured differently
Example: Two instances of LDAP with username/password on the same server but using
different search bases
In this case each realm would search a different subtree within the directory. For example,
suppose Partner A is in one LDAP subtree and Partner B is in another. You could define a
partnerA realm and a partnerB realm, each configured with the appropriate search base.
Disabling Authorization Checks
You can optionally disable the querying of group information used for authorization when
configuring an authentication server. A Use this authentication server to check group
membership check box is available for each server type that can contain group information used
for authorization, including Active Directory, Active Directory Tree, and LDAP servers.
Usually, when you use a directory server as part of authentication, you also want the group
information stored there to be used in policy authorization. However, in some cases a directory
server is used for secondary authentication and does not contain group information. In other cases,
the secondary authentication server does not use the same identifier for the user.
If a group query is made on both a primary and a secondary server , the authentication process takes
longer. However, if the user name is different on the two servers, a group query using the name
from the primary server will result in an error from the secon dary server. Since the appliance policy
always defaults to closed, such an error will result in any deny rule being applied to the end user.
By disabling group authorization checks on the secondary server, you can avoid these problems.
If group checking is disabled for an authentication server, the server will not be available in the list
of available affinity servers on the realm configuration page. Conversely , if an authentication server
is in use as an affinity server for any realm, group checking cannot be disabled for that
authentication server. See “Enabling Group Affinity Checking in a Realm” on page 112 for more
information.
Configuring Microsoft Active Directory Servers
The appliance can validate username/password credentials against Microsoft Active Directory (AD)
configured with either a single root domain, or one or more subordinate (child) domains. The
following illustration shows typical Active Directory configuration options:
Credentials
Username
Password
To specify a single root domain with one or more
subordinate (or “child”) child domains, select Microsoft
Active Directory Tree as the authentication directory.
The AD tree choice uses additional ports that facilitate
searching and logons:
You must modify y our firewall or router to allow the appliance to communicate with your AD server.
The appliance uses standard LDAP and LDAPS ports to communicate with Active Directory:
SSL (port 443)
Internet
Firewall
ł Global catalog (3268/tcp)
ł Global catalog, using SSL to secure the
directory server connection (3269/tcp)
ł Kerberos (88/tcp)
SonicWALL Aventail E-Class
SRA Appliance
Microsoft Active
Directory
Subordinate
or child domain
LDAP (port 389)
LDAPS (port 636)
Subordinate
or child domain
Page 94

84 | Chapter 4 - Network and Authentication Configuration
z
LDAP (389/tcp)
z
LDAP over SSL (636/tcp)
With Microsoft Active Directory Tree there are additional ports, which facilitate searches and logons:
z
Global catalog (3268/tcp)
z
Global catalog using SSL (3269/tcp)
z
Kerberos (88/tcp)
After configuring an AD server, you can validate the realm configuration settings by establishing a
test connection. For more information, see “Testing LDAP and AD Authentication Configurations” on
page 108.
Configuring Active Directory with Username and Password
Perform the following steps to configure an Active Directory authentication server with
username/password validation.
Notes
z
If you are using Active Directory with digital certificates, you must configure AD as an LDAP
realm. See “Configuring LDAP to Authenticate Against Active Directory” on page 92.
z
If your AD authentication server has subordinate (child) domains, see “Configuring Active
Directory with Subordinate Domains” on page 88 for more information.
X To configure Active Directory
1. From the main navigation menu in AMC, click Authentication Servers, and then click New.
2. Under User store, click Microsoft Active Directory.
Page 95

SonicWALL Aventail E-Class SRA Installation and Administration Guide | 85
3. The only Credential type that is available for AD is Username/Password. Click Continue.
The Configure Authentication Server page appears.
4. In the Name box, type a name for the authentication server.
5. In the Primary domain controller box, type the IP address or host name of the AD domain
controller. If you are using a failover server (optional), specify its address in the Secondary
domain controller box.
If the AD server is listening on a something other than the well-known port (389 for
unencrypted connections, or 636 for SSL connections), specify a port number as a colondelimited suffix (for example, ad.example.com:1300).
6. To specify a particular AD domain, type it in the Active Directory domain name box. This
should be the domain that you want to use as the search base (in other words, the domain
that contains the appropriate cn=users container). For example, if you want to search a single
domain such as marketing, type marketing.example.com. If you want to search your entire
company’s domain, type
the first available default naming context on the domain controller.
7. To perform AD searches, the appliance must log in to Active Directory (unless you have
configured AD to allow anonymous searches). In the Login name box, type the username or
sAMAccountname attribute used to log in to the Windows domain ( such as jdoe or
jdoe@example.com).
example.com
. If you do not specify a domain, the appliance searches
Page 96

86 | Chapter 4 - Network and Authentication Configuration
The login should be for a user who has privileges to perform searches and view user records,
such as the administrator on that domain controller. You may also specify a non-administrator
user who has these privileges.
If you specify an AD domain, the appliance searches that domain for users. If you do not
specify a domain, the appliance searches the first available default naming context on the
domain controller. If the user information is not stored in either of these locations, you need to
configure this realm as an LDAP realm. See “Configuring LDAP to Authenticate Against Active
Directory” on page 92.
8. Type the Password that corresponds to the Login name. After you’ve entered credentials,
you can click the Test button for each server you specified in order to test the connection.
9. Complete the information listed under Group lookup:
{
To enable group checking on this server, select the Use this authentication server to
check group membership check box. When this box is unchecked, the nested controls
are disabled because they apply only to group checking behavior. This check box, when
unselected, allows an authentication server for LDAP, AD, or AD-Tree to be configured
without enabling it for authorization checks. This improves efficiency by allowing better
stacked/affinity authentication support.
{
To specify the depth of the search (how many sub-groups to include in it), enter a number
in the Nested group lookup check box. Be aware that this type of search can take some
time because it requires searching the entire Active Directory tree; enabling Cache group
checking is highly recommended.
{
To reduce the load on your directory and get better performance, cache the attribute
group or static group search results. Select the Cache group checking check box and
then specify a Cache lifetime, in seconds. The default value is 1800 seconds (30
minutes).
10. To secure the AD connection with SSL, expand the Active Directory over SSL area, and the
configure the following settings:
a. Select the Use SSL to secure Active Directory connection check box.
b. To view your certificate details and to verify that the root certificate can be used by the
appliance, click the SSL Settings link. This list should show the name of the CA (or CAs)
that issued the client certificates and the SSL certificates. If your AD server’s CA is not
listed in the file, or if you use a self-signed certifi cate, you must add your cert ificate to this
file. See “Importing CA Certificates” on page 75 for details.
c. To have the appliance verify that the AD domain controller host name is the same as the
name in the certificate presented by the Active Directory server, select the Match
certificate CN against Active Directory domain controller check box. Typically, your
server name will match the name specified in its digital certificate. If this is the case with
your server, SonicWALL recommends enabling this option in a production environment.
This makes it more difficult for an unauthorized server to masquerade as your AD server if
your digital certificate or DNS server is compromised.
Page 97

SonicWALL Aventail E-Class SRA Installation and Administration Guide | 87
11. In the Advanced area, you can specify a username attribute, set up custom prompts, enable
users to be notified of expiring Active Directory passwords, configure NTLM authentication
forwarding options, and set up one-time passwords.
12. Type the Username attribute you want to use to match usernames. In most AD
implementations, sAMAccountName matches the user ID (for example, jdoe). You can use cn
instead, but that would require the user to authenticate with his full name (John Doe) instead
of his user ID (jdoe).
13. To change the prompts and other text that Windows users see when they log in to the
authentication server, select the Customize authentication server prompts check box. If
users should log in using an employee ID, for example, you could change the text for the
Identity prompt from Username: to Employee ID:. (If you plan to use chained authentication,
customized password prompts are especially useful so that users can differentiate between
them.)
Page 98

88 | Chapter 4 - Network and Authentication Configuration
14. If the connection between the appl iance and the authentication server is secured with SSL
(Use SSL to secure Active Directory connecti on is enabled), you can allow users to
change their passwords in WorkPlace by selecting Enable user-initiated password change.
15. To allow the Active Directory server to notify users that their passwords are going to expire,
select the Notify user before password expires check box. Indicate when the advance
notice should begin (the default is 14 days, and the maximum is 30 days). The password
prompt users see is controlled by the AD server.
To allow users to manage their own passwords, select the Allow user to change password
when notified check box. This setting can be changed only if the Use SSL to secure Active
Directory connection check box in the Active Directory over SSL area is selected.
Password management is available only to users with Web access and those who are using
Connect Tunnel.
16. To enable NTLM authentication forwarding, click one of the NTLM authentication
forwarding options. For more information, see “NTLM Authentication Forwarding” on
page 105.
17. To configure authentication that includes an OTP, enable Use one-time passwords with
this authentication server. You must also configure your mail server: if OTPs are going to
be delivered to external domains (for example, an SMS address or external webmail address),
you may have to configure the SMTP server to allow passwords to be sent from the appliance
to the external domain.
{
In the Primary email address attribute box, enter the directory attribute for the email
address to which one-time passwords will be sent. If the primary attribute exists on the
authentication server, it is used.
{
The Secondary email address attribute, if specified, is used if the primary email
address attribute cannot be found.
To have OTPs sent as a text message (instead of an email message), enter the corresponding
attribute name (for example, SMSphone instead of Mail). See “Configuring the AD or LDAP
Directory Server” on page 113 for more information.
18. Click Save.
Notes
z
The Login name and Password fields are not always required to connect to an Active
Directory server. However, if they are not provided (or you don’t specify a password) the
appliance will bind anonymously. In this case, if you have not configured Active Directory to
allow anonymous searches, the search will fail.
z
Users must have permission on the AD server to change their passwords during the password
notification period, and the administrator must have permission to change user passwords after
they expire. For security reasons, both of these operations replace passwords rather than reset
them.
z
If you define multiple Active Directory with SSL servers, you should specify the same Match
certificate CN against Active Directory domain controller setting for each server.
(SonicWALL recommends enabling this option for a production environment.) Although AMC
allows you to configure this setting on a per-realm basis, the appliance actually uses the setting
specified in the last loaded ADS realm. Fo r example, if you sel ect this check bo x for t hree ADS
realms, but clear it for a fourth, the functionality would be disabled for all four realms.
CAUTION If Active Directory over SSL is not enabled, passwords are transmitted in the
!
clear to the AD server. If the internal network is not trusted, you should en able SSL. Your AD
server must also be enabled to use SSL. See the Microsoft AD documentation for details.
Configuring Active Directory with Subordinate Domains
Perform the following steps to configure authentication settings for a Microsoft Active Directory
server that has a single root domain and one or more child domains in the AD tree. In a given
deployment, only one AD authentication server with subordinate domains can be specified. In
addition, a domain name server must be configured before the appliance can support an AD tree
authentication server; see “Configuring Domain Name Service” on page 65.
Page 99

SonicWALL Aventail E-Class SRA Installation and Administration Guide | 89
Notes
z
If you are using Active Directory with digital certificates, you must configure AD as an LDAP
realm. See “Configuring LDAP to Authenticate Against Active Directory” on page 92.
z
If your AD authentication server does not have any subordinate (child) domains, see
“Configuring Active Directory with Username and Password” on page 84 for information on
configuring it in AMC.
X To configure Active Directory Tree
1. From the main navigation menu in AMC, click Authentication Servers, and then click New.
2. Under User store, click Microsoft Active Directory Tree.
3. The only Credential type that is available for AD tree is Username/Password. Click
Continue. The Configure Authentication Server page appears.
4. In the Name box, type a name for the authentication server.
5. In the Root domain box, type the fully qualified name of the AD root domain. For example,
company.com.
Page 100

90 | Chapter 4 - Network and Authentication Configuration
6. In the Login name box, type a fully-qualified Windows domain username (for example,
vpn_admin@company.com). The login should be for a user who has read access to the entire
domain tree, such as the administrator on that domai n controll er. You may also spe cify a nonadministrator user who has these privileges.
7. Type the Password that corresponds to the Login name. After you’ve entered credentials,
you can click the Test button for the root domain controller to test the connection.
8. Specify a combination of user authentication options:
{
Users can enter a domain name
If this is the only option you specify, users must type a domain name during
authentication; for example, username@domain.
{
Specify a default domain
To allow users to log in without entering or specifying a domain, select this option. The
VPN will assume the domain you specify here and try to authenticate the user.
{
Users can choose from a list of domains
To display all of the domains that belong to this root domain, click Load all domains. You
can select all or some of the domains users will be able to choose from, and rearrange the
order of the list.
9. Complete the information listed under Group lookup:
{
To enable group checking on this server, select the Use this authentication server to
check group membership check box. When this box is unchecked, the nested controls
are disabled because they apply only to group checking behavior. This check box, when
unselected, allows an authentication server for LDAP, AD, or AD-Tree to be configured
without enabling it for authorization checks. This improves efficiency by allowing better
stacked/affinity authentication support.
{
To reduce the load on your directory and get better performance, cache the attribute
group or static group search results. Select the Cache group checking check box and
then specify a Cache lifetime, in seconds. The default value is 1800 seconds (30
minutes).
10. To secure the AD connection with SSL, expand the Active Directory over SSL area, and the
configure the following settings:
a. Select the Use SSL to secure Active Directory connection check box.
b. Every domain in the AD tree must have a certificate. To view your certificate details and to
verify that the root certificate can be used by the appliance, click the SSL Settings li nk.
This list should show the name of the CA (or CAs) that issued the client certificates and the
SSL certificates. If your AD server’s CA is not listed in the file, or if you use a self-signed
certificate, you must add your certificate to this file. See “Importing CA Certificates” on
page 75 for details.
c. To have the appliance verify that the AD domain controller host name is the same as the
name in the certificate presented by the Active Directory server, select the Match
certificate CN against Active Directory domain controller check box. Typically, your
server name will match the name specified in its digital certificate. If this is the case with
your server, SonicWALL recommends enabling this option in a production environment.
This makes it more difficult for an unauthorized server to masquerade as your AD server if
your digital certificate or DNS server is compromised.
 Loading...